September 2026 · Patch 7.2d
Marksman · DRAGON

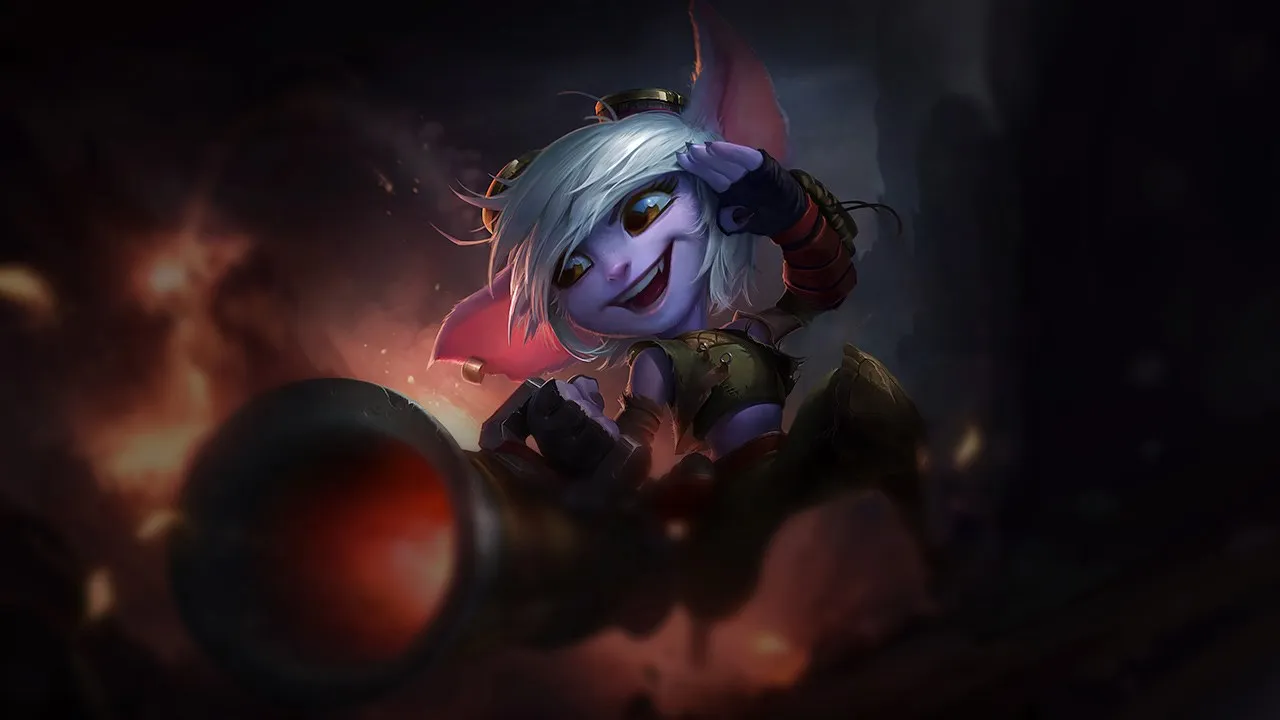
Panduan counter Tristana Wild Rift

Tristana sangat rentan di early game sebelum item pertamanya karena damage yang awalnya terbatas. Komposisi poke atau harassment terus-menerus mengurangi dampaknya sebelum power spike miliknya. Champion dengan CC instan dapat menginterupsinya saat menggunakan bombs dan leaps.

★ DRAGON Tier A
DMG
UTIL
TANK
DIFF
Win 47.8% #66 · ↓1pt
Pick 4.4% #14
Ban 0.1% #134

Panduan counter Tristana Wild Rift ★ Counter Sheet

Hard Counters

1

Champion ini punya build dan gaya bermain yang langsung mengungguli milikmu, sehingga mengontrol lane dan farming jadi sangat sulit. Kemampuan mereka bisa menetralkan kekuatan utamamu atau menghukummu begitu kamu mencoba menjalankan rencana permainan biasa. Di matchup seperti ini, tujuannya biasanya adalah meminimalkan kesalahan dan mencari cara menang di luar konfrontasi langsung.

Xayah

Xayah

disengage_punishspacing Xayah completely shuts down your offensive pressure because she can instantly nullify your main source of burst. The moment you commit with Explosive Charge, she can activate Featherstorm to become untargetable, causing your bomb to tick down uselessly. Worse, as she lands, she repositions her feathers to trigger Bladecaller, locking you down mid-air if you try to escape with Rocket Jump or simply rooting you for a deadly trade. Lihat detail
Xayah

Kenapa

Xayah completely shuts down your offensive pressure because she can instantly nullify your main source of burst. The moment you commit with Explosive Charge, she can activate Featherstorm to become untargetable, causing your bomb to tick down uselessly. Worse, as she lands, she repositions her feathers to trigger Bladecaller, locking you down mid-air if you try to escape with Rocket Jump or simply rooting you for a deadly trade.

Dampak di lane

This interaction forces you into a passive stance during laning. You cannot safely initiate with Rocket Jump because Xayah's Clean Cuts and Double Daggers constantly litter the lane with feathers, threatening a quick root if you push too far. Trading with Rapid Fire feels unrewarding when she can match your DPS with her own Deadly Plumage while keeping her defensive ultimate ready to negate your all-in.

Cara bermain

To survive, you must trick Xayah into wasting her ultimate. Bait her defensive reaction by poking with simple auto-attacks enhanced by Draw a Bead and Rapid Fire without committing your jump. Only apply Explosive Charge after she panics and triggers Featherstorm. If she holds it, use Buster Shot defensively to push her away when she activates Deadly Plumage, disengaging safely rather than trying to force a fight you cannot win.

Profil lengkap →

Tidak Menguntungkan

5

Champion ini punya tool yang umumnya memberi mereka keunggulan dalam pertarungan, tanpa membuat matchup-nya benar-benar mustahil. Mereka mungkin punya jarak lebih jauh, lebih tahan terhadap seranganmu, atau lebih banyak cara merespons engage-mu. Kamu perlu menyesuaikan pendekatan dan memilih dengan cermat kapan menerima pertarungan.

Varus

Varus

dodge_ccburst_clash Varus dominates the neutral game by wearing you down from afar with Piercing Arrow and Hail of Arrows. While your all-in with Explosive Charge and Rapid Fire has higher burst potential, it is entirely gatekept by Chain of Corruption. If you initiate and get rooted mid-combo, your DPS halts instantly, preventing you from detonating your bomb or securing the Rocket Jump reset, which leads to your swift demise. Lihat detail
Varus

Kenapa

Varus dominates the neutral game by wearing you down from afar with Piercing Arrow and Hail of Arrows. While your all-in with Explosive Charge and Rapid Fire has higher burst potential, it is entirely gatekept by Chain of Corruption. If you initiate and get rooted mid-combo, your DPS halts instantly, preventing you from detonating your bomb or securing the Rocket Jump reset, which leads to your swift demise.

Dampak di lane

Because of Hail of Arrows and Living Vengeance, Varus easily secures wave priority, forcing you to farm under turret. Every attempt to walk up for a last hit exposes you to high-damage Piercing Arrow snipes. Your health pool will constantly bleed, making safe recalls difficult and putting massive pressure on your tower. You cannot safely contest his push unless his main crowd control is down.

Cara bermain

To survive, adopt a highly defensive stance and focus on scaling via Draw a Bead. Never use Rocket Jump aggressively unless Varus has already missed Chain of Corruption. Instead, hold your jump strictly to reactively buffer or escape his ultimate's projectile. If he does snare you, immediately use Buster Shot to push him away, preventing him from detonating his Blighted Quiver stacks, and abort the trade until your cooldowns return.

Profil lengkap →
Draven

Draven

cc_interruptall_in This matchup is heavily dictated by Draven's ability to swat you out of the air. If you attempt an aggressive Rocket Jump, a skilled Draven will reactively cast Stand Aside mid-flight. This immediately cancels your leap's momentum, dropping you directly into his optimal range where his Spinning Axe and Blood Rush DPS will shred your health bar before you can stack Explosive Charge. Lihat detail
Draven

Kenapa

This matchup is heavily dictated by Draven's ability to swat you out of the air. If you attempt an aggressive Rocket Jump, a skilled Draven will reactively cast Stand Aside mid-flight. This immediately cancels your leap's momentum, dropping you directly into his optimal range where his Spinning Axe and Blood Rush DPS will shred your health bar before you can stack Explosive Charge.

Dampak di lane

Because of this airborne interruption, you cannot freely contest early waves. Draven easily secures lane priority with his high raw damage, forcing you to farm under turret. Any attempt to trade back with Rapid Fire feels underwhelming because you cannot commit to an all-in. If you get chunked while your escape is disabled, you will be forced into a bad recall, losing plates to his fast push.

Cara bermain

To survive, you must play defensively and strictly hold Rocket Jump as a reactive tool. Never initiate with it. Watch Draven's axes; if he drops a Spinning Axe or wastes Stand Aside trying to poke or push, you have a temporary window to retaliate. If he catches you with an aggressive engage, use Buster Shot to push him away instantly and disengage, relying on your passive Draw a Bead to safely farm from a distance as you scale.

Profil lengkap →
Yunara

Yunara

bait_shieldsburst_timing Yunara naturally out-dpses you in extended trades because of her passive Vow of the First Lands and the attack speed from Cultivation of Spirit. Your primary win condition is a burst all-in using Explosive Charge. However, Yunara can easily neutralize your Rocket Jump engage. She can activate Kanmei's Steps to quickly run out of your range, or use Untouchable Shadow to dash away, preventing you from stacking your bomb. Lihat detail
Yunara

Kenapa

Yunara naturally out-dpses you in extended trades because of her passive Vow of the First Lands and the attack speed from Cultivation of Spirit. Your primary win condition is a burst all-in using Explosive Charge. However, Yunara can easily neutralize your Rocket Jump engage. She can activate Kanmei's Steps to quickly run out of your range, or use Untouchable Shadow to dash away, preventing you from stacking your bomb.

Dampak di lane

Because your main offensive tool is so easily neutralized, you cannot safely push or force trades. If you waste Rocket Jump aggressively, you are left completely vulnerable to her Arc of Judgment slow and high sustained damage. You will often be forced to farm under tower, using Draw a Bead to safely secure last hits while Yunara controls the wave tempo and chips away at your tower plates.

Cara bermain

To survive, you must play defensively and focus on lane discipline. Never initiate with Rocket Jump unless you see Yunara waste Kanmei's Steps or her ultimate Transcend One's Self is on cooldown. Instead, poke safely using Rapid Fire when she steps up to farm. If she activates her transe and chases with Untouchable Shadow, immediately disengage using Buster Shot to push her away and reset the distance before she stacks her damage.

Profil lengkap →
Ezreal

Ezreal

disengageall_in_counter This matchup hinges entirely on how Ezreal's mobility neutralizes your aggressive burst. Whenever you try to initiate with Rocket Jump and attach Explosive Charge, Ezreal can buffer Arcane Shift to instantly blink away. Because his escape cast-time cannot be interrupted by your jump's landing impact, he leaves you stranded deep in the lane with an uncharged bomb, preventing you from getting the Rapid Fire attacks needed to trigger your reset. Lihat detail
Ezreal

Kenapa

This matchup hinges entirely on how Ezreal's mobility neutralizes your aggressive burst. Whenever you try to initiate with Rocket Jump and attach Explosive Charge, Ezreal can buffer Arcane Shift to instantly blink away. Because his escape cast-time cannot be interrupted by your jump's landing impact, he leaves you stranded deep in the lane with an uncharged bomb, preventing you from getting the Rapid Fire attacks needed to trigger your reset.

Dampak di lane

You cannot reliably force all-ins, which heavily stifles your early kill pressure. Ezreal safely farms and pokes you down from a distance using Mystic Shot and Essence Flux. Attempting to match his push with Explosive Charge on minions often leaves you overextended. If you fall behind in health, you will find yourself trapped under tower, constantly dodging Trueshot Barrage while unable to contest the wave.

Cara bermain

Never initiate with Rocket Jump unless you have seen Ezreal waste Arcane Shift. Instead, focus on farming with Draw a Bead and only trade with basic attacks and Rapid Fire when he steps up to shoot Mystic Shot. If he aggressively blinks forward, immediately cast Buster Shot to knock him back, neutralizing his Rising Spell Force stacks. Hold your jump as a defensive tool to reposition safely rather than an offensive trigger.

Profil lengkap →
Sivir

Sivir

spell_shield_timingall_in_defense This lane is heavily dictated by how Sivir uses her Spell Shield. If she reacts quickly enough to absorb the initial cast of your Explosive Charge, your entire trading pattern collapses. Not only do you lose your primary source of burst damage, but you also forfeit the ability to reset Rocket Jump. Without that explosive threat, Sivir can easily out-damage you over longer trades with Ricochet and Boomerang Blade. Lihat detail
Sivir

Kenapa

This lane is heavily dictated by how Sivir uses her Spell Shield. If she reacts quickly enough to absorb the initial cast of your Explosive Charge, your entire trading pattern collapses. Not only do you lose your primary source of burst damage, but you also forfeit the ability to reset Rocket Jump. Without that explosive threat, Sivir can easily out-damage you over longer trades with Ricochet and Boomerang Blade.

Dampak di lane

Sivir will relentlessly push the wave using Ricochet and Boomerang Blade, forcing you to farm under turret. Because you cannot safely threaten an all-in with Rocket Jump while her Spell Shield is active, you lose all lane priority. Any attempt to force a trade results in Sivir absorbing your damage, healing herself, and using Fleet of Foot to safely disengage while your support is left unable to follow up.

Cara bermain

To win this mental war, you must bait out Spell Shield before committing your primary cooldowns. Walk forward with Rapid Fire active to threaten auto-attacks, but hold your Explosive Charge. Often, Sivir will panic-shield anticipating the bomb. If she does, disengage immediately, wait out the brief shield duration, and then use Rocket Jump to engage during her long cooldown window. Never initiate with Rocket Jump while her defensive shield is ready.

Profil lengkap →

Skill Matchups

6

Matchup ini terutama soal duel eksekusi: kedua champion punya cara nyata untuk unggul. Satu skill penting yang di-dodge, engage yang diantisipasi dengan tepat, atau satu kesalahan positioning saja bisa menentukan siapa yang menang. Memahami matchup dan mengenali momen yang tepat untuk bertindak sangat penting di sini.

Caitlyn

Caitlyn

disengageearly_pressure This matchup is a pure test of reflexes centered on Tristana's forward dive. When you launch yourself forward with Rocket Jump to plant an Explosive Charge, Caitlyn must instantly fire 90 Caliber Net to escape your range. If she reacts in time, she negates your burst and retaliates with a Headshot. If you bait this net out first, her low mobility makes her an easy target. Lihat detail
Caitlyn

Kenapa

This matchup is a pure test of reflexes centered on Tristana's forward dive. When you launch yourself forward with Rocket Jump to plant an Explosive Charge, Caitlyn must instantly fire 90 Caliber Net to escape your range. If she reacts in time, she negates your burst and retaliates with a Headshot. If you bait this net out first, her low mobility makes her an easy target.

Dampak di lane

Caitlyn's superior range and Yordle Snap Trap pressure will force you under turret early, while she chips your health with Piltover Peacemaker. However, because the lane is so volatile, a single successful Rocket Jump that bypasses her 90 Caliber Net completely swings the wave priority. One clean engagement allows you to demolish her turret plates with Explosive Charge, instantly reversing the lane pressure.

Cara bermain

Never use Rocket Jump directly in a straight line toward Caitlyn while her defensive net is available. Instead, bait 90 Caliber Net by walking up aggressively, or angle your jump slightly to the side to make her aim harder. If she holds her net defensively, focus on farming with Rapid Fire. Once your passive Draw a Bead increases your range in the later levels, you can poke her down without needing to commit your jump.

Profil lengkap →
Akshan

Akshan

mobility_clashburst_trade This matchup is a pure battle of explosive windows, defined by how you handle Akshan's high mobility. While his Heroic Swing grants him devastating target-locking burst, you possess the perfect tools to disengage or match his aggression. If he swings in, a perfectly timed Buster Shot completely interrupts his trajectory. Alternatively, if he attempts to force an all-in with Dirty Fighting, you can reposition instantly with Rocket Jump. Lihat detail
Akshan

Kenapa

This matchup is a pure battle of explosive windows, defined by how you handle Akshan's high mobility. While his Heroic Swing grants him devastating target-locking burst, you possess the perfect tools to disengage or match his aggression. If he swings in, a perfectly timed Buster Shot completely interrupts his trajectory. Alternatively, if he attempts to force an all-in with Dirty Fighting, you can reposition instantly with Rocket Jump.

Dampak di lane

Trades are incredibly short and lethal, preventing long, passive farming phases. You must respect his poke from Avengerang, which can quickly chip you down. If Akshan misses his skillshot or wastes his shield, you gain a massive window to stack Explosive Charge with Rapid Fire. However, overextending without your defensive tools invites a deadly counter-engage, turning any mistimed dive into a double kill for him.

Cara bermain

Never initiate a jump forward unless Akshan's hook is on cooldown. Instead, hold Buster Shot exclusively to disrupt his Heroic Swing mid-flight, pushing him away into an awkward position. If you get caught off-guard or see him channeling Comeuppance, use Rocket Jump to break his line of sight behind your minions or a wall. When he plays passively, focus on shoving the wave with your passive Draw a Bead to limit his roaming potential.

Profil lengkap →
Vayne

Vayne

skill_matchupdisengage_check This skill matchup balances Vayne's late-game hyper-scaling against your explosive mid-game power spikes. The absolute core of this duel lies in your Rocket Jump trajectory. If you attempt to dive her, Vayne can reactively interrupt your flight with Condemn. This denial prevents you from fully stacking and detonating Explosive Charge, which completely ruins your cooldown reset and leaves you dangerously exposed to her Silver Bolts counter-attack. Lihat detail
Vayne

Kenapa

This skill matchup balances Vayne's late-game hyper-scaling against your explosive mid-game power spikes. The absolute core of this duel lies in your Rocket Jump trajectory. If you attempt to dive her, Vayne can reactively interrupt your flight with Condemn. This denial prevents you from fully stacking and detonating Explosive Charge, which completely ruins your cooldown reset and leaves you dangerously exposed to her Silver Bolts counter-attack.

Dampak di lane

This mechanical threat completely dictates how you manage the minion waves. You cannot afford mindless all-ins; instead, you must leverage the passive area damage from Draw a Bead to constantly shove waves. Forcing Vayne under her turret with Explosive Charge limits her ability to initiate trades. It prevents her from using Night Hunter to chase you down the long lane and minimizes her opportunities to land a stunning Condemn against the walls.

Cara bermain

To win this lane, play front-to-back and trade primarily with Rapid Fire and basic attacks. Never use Rocket Jump offensively unless Vayne has already wasted Condemn. If she activates Final Hour and uses Tumble to close the distance, immediately disengage using Buster Shot to knock her back and neutralize her ultimate's duration. Keep your distance, prioritize chipping her tower down, and only commit to a chase once her self-peel tool is completely offline.

Profil lengkap →

Matchup lainnya

Menguntungkan

10

Champion ini biasanya kesulitan merespons kekuatan utamamu, sehingga kamu bisa menghadapi pertarungan dengan lebih leluasa. Kamu sering punya banyak cara untuk menekan mereka dan memaksa trade yang menguntungkan. Manfaatkan keunggulan ini untuk mendikte tempo, bukan memberi mereka waktu untuk kembali nyaman.

Kog'Maw

Kog'Maw

all_inspacing Kog'Maw relies heavily on Bio-Arcane Barrage to poke you from a safe distance, but he lacks any hard self-peel. Tristana completely bypasses this ranged threat by using Rocket Jump to close the gap instantly. Once on top of him, triggering Rapid Fire allows you to rapidly stack Explosive Charge, bursting him down before his sustained magic damage can ramp up. Lihat detail
Kog'Maw

Kenapa

Kog'Maw relies heavily on Bio-Arcane Barrage to poke you from a safe distance, but he lacks any hard self-peel. Tristana completely bypasses this ranged threat by using Rocket Jump to close the gap instantly. Once on top of him, triggering Rapid Fire allows you to rapidly stack Explosive Charge, bursting him down before his sustained magic damage can ramp up.

Dampak di lane

This matchup dynamic forces Kog'Maw to play incredibly defensively, yielding early wave control to you. You can easily shove the lane to secure priority or freeze it to set up lethal zones. Any time Kog'Maw mispositions to last-hit, the threat of your all-in prevents him from contesting the wave, leading to massive gold leads and early tower plating pressure.

Cara bermain

Watch Kog'Maw's glowing spit to know when Bio-Arcane Barrage is active. Instead of trading autos during this buff, wait for it to expire, then immediately launch yourself forward with Rocket Jump. Plant Explosive Charge and activate Rapid Fire to secure the reset. If he tries to slow your retreat with Void Ooze, use Buster Shot to push him away or finish him off, then immediately walk out of his Icathian Surprise explosion radius.

Profil lengkap →
Ashe

Ashe

jump_engageburst_threat Tristana completely dominates Ashe because of her raw gap-close and explosive burst. Ashe relies on the constant slows from Frost Shot and poke from Volley to keep you at bay, but she lacks any natural mobility to escape a hard engage. By using Rocket Jump to leap straight onto her, you bypass her spacing tools entirely and can quickly stack Explosive Charge, threatening a lethal burst before she can even ramp up her Ranger's Focus. Lihat detail
Ashe

Kenapa

Tristana completely dominates Ashe because of her raw gap-close and explosive burst. Ashe relies on the constant slows from Frost Shot and poke from Volley to keep you at bay, but she lacks any natural mobility to escape a hard engage. By using Rocket Jump to leap straight onto her, you bypass her spacing tools entirely and can quickly stack Explosive Charge, threatening a lethal burst before she can even ramp up her Ranger's Focus.

Dampak di lane

This dynamic forces Ashe to play incredibly far back, conceding control of the minion waves. Since she cannot step up without risking a sudden Rocket Jump engage, you can freely slow-push waves or pressure her under tower. She is forced to use Volley defensively to clear minions rather than poke you. This pressure limits her ability to look for cross-map plays with Enchanted Crystal Arrow, keeping her pinned and vulnerable.

Cara bermain

To execute this perfectly, watch Ashe's positioning when she attempts to secure last hits. The moment she missteps or wastes Volley on the wave, immediately use Rocket Jump directly onto her. Apply Explosive Charge and activate Rapid Fire to instantly detonate the bomb, resetting your jump. If she tries to retaliate with Enchanted Crystal Arrow at close range, use Buster Shot to push her away or secure the final blow while denying her the stun duration.

Profil lengkap →
Jhin

Jhin

all_inburst Your massive burst threat dictates this matchup. By using Rocket Jump to leap directly onto Jhin, you bypass his range advantage and force a close-quarters duel. Once on top of him, activating Rapid Fire lets you fully stack and detonate Explosive Charge in seconds. Jhin's Whisper lock prevents him from matching this raw attack speed, ensuring you delete his health bar before he can even chamber his fourth critical shot. Lihat detail
Jhin

Kenapa

Your massive burst threat dictates this matchup. By using Rocket Jump to leap directly onto Jhin, you bypass his range advantage and force a close-quarters duel. Once on top of him, activating Rapid Fire lets you fully stack and detonate Explosive Charge in seconds. Jhin's Whisper lock prevents him from matching this raw attack speed, ensuring you delete his health bar before he can even chamber his fourth critical shot.

Dampak di lane

Jhin is forced into a defensive posture, unable to step up to use Dancing Grenade to clear waves without putting himself in your jump range. Your passive Draw a Bead automatically pushes the lane, giving you constant priority and allowing you to chip away at his tower. Since Jhin must conserve his Deadly Flourish to self-peel, he cannot safely trade health, leading to early recalls and massive gold leads for you.

Cara bermain

Monitor Jhin's Whisper ammo bar constantly. The moment he fires his fourth shot or starts reloading, immediately launch forward with Rocket Jump. Place your Explosive Charge and trigger Rapid Fire to burst him down. If he tries to retreat under his tower or if a fight goes sideways, use Buster Shot to safely disengage or push him back into your landing zone. Avoid jumping when he has his fourth shot ready to prevent receiving a massive critical blow mid-air.

Profil lengkap →
Corki

Corki

burst_trademobility_clash Tristana dominates this matchup by capitalizing on Corki's fragile escape option. While Corki relies on Valkyrie to disengage from trades, his long cooldown leaves him vulnerable. When Tristana attaches Explosive Charge and activates Rapid Fire, she quickly stacks the bomb. If Corki panics and slides away, Tristana can immediately match his flight with Rocket Jump, detonating the charges mid-air or upon landing to secure a lethal burst. Lihat detail
Corki

Kenapa

Tristana dominates this matchup by capitalizing on Corki's fragile escape option. While Corki relies on Valkyrie to disengage from trades, his long cooldown leaves him vulnerable. When Tristana attaches Explosive Charge and activates Rapid Fire, she quickly stacks the bomb. If Corki panics and slides away, Tristana can immediately match his flight with Rocket Jump, detonating the charges mid-air or upon landing to secure a lethal burst.

Dampak di lane

This interaction dictates a highly aggressive lane phase where Corki is forced to play defensively. Tristana's passive, Draw a Bead, paired with Explosive Charge passive explosions, naturally pushes the wave, forcing Corki under his turret where he struggles to farm without burning mana on Phosphorus Bomb. Tristana can easily chip away at the turret plates or dive Corki the moment his escape tool is down, securing early gold.

Cara bermain

To execute this, always wait for Corki to use Phosphorus Bomb to farm before stepping forward. Once he mispositions, jump in with Rocket Jump to slow him, immediately apply Explosive Charge, and activate Rapid Fire. Do not use your ultimate, Buster Shot, too early; hold it to execute or push him back into your wave if he tries to dodge with Valkyrie. If he has Special Delivery active, play back and avoid direct engagements until his fiery trail disappears.

Profil lengkap →
Kalista

Kalista

burst_survivalspacing Tristana dominates this lane because Kalista relies heavily on Martial Poise to hop around and dodge skillshots. However, point-and-click abilities bypass this mobility entirely. When you place Explosive Charge on Kalista, she cannot hop away from the guaranteed explosion. By activating Rapid Fire, you stack the bomb instantly, triggering an unavoidable burst of damage that completely outclasses her sustained Rend stacking in quick trades. Lihat detail
Kalista

Kenapa

Tristana dominates this lane because Kalista relies heavily on Martial Poise to hop around and dodge skillshots. However, point-and-click abilities bypass this mobility entirely. When you place Explosive Charge on Kalista, she cannot hop away from the guaranteed explosion. By activating Rapid Fire, you stack the bomb instantly, triggering an unavoidable burst of damage that completely outclasses her sustained Rend stacking in quick trades.

Dampak di lane

This interaction shifts the lane dynamic entirely in your favor, forcing Kalista to play defensively behind her minions. She cannot safely step up to use Pierce or stack Rend on you. Since her movement is restricted, you easily secure wave priority. You can safely shove waves under her tower using the passive area damage from Draw a Bead, chipping away at her turret plates while she struggles to farm under pressure.

Cara bermain

To execute this, wait for Kalista to commit her dash to farm, then jump forward with Rocket Jump directly onto her. Immediately apply Explosive Charge and trigger Rapid Fire to burst her down. If her support counter-attacks or uses Fate's Call to knock you up, immediately disengage using Buster Shot to push her away and walk back safely. Never commit to long, extended basic attack battles where her Rend can outdamage your cooldowns.

Profil lengkap →
Jinx

Jinx

disengagespacing Tristana dominates Jinx through pure explosive power, but the entire matchup hinges on Jinx's ability to disrupt your engage. While your Explosive Charge paired with Rapid Fire easily out-bursts her minigun or rockets, Jinx can completely shut down your aggression by throwing Flame Chompers! directly in your flight path. This interrupts Rocket Jump mid-air, trapping you in place and leaving you unable to secure the crucial jump reset. Lihat detail
Jinx

Kenapa

Tristana dominates Jinx through pure explosive power, but the entire matchup hinges on Jinx's ability to disrupt your engage. While your Explosive Charge paired with Rapid Fire easily out-bursts her minigun or rockets, Jinx can completely shut down your aggression by throwing Flame Chompers! directly in your flight path. This interrupts Rocket Jump mid-air, trapping you in place and leaving you unable to secure the crucial jump reset.

Dampak di lane

During the laning phase, this interaction dictates when you can safely play for the kill. Jinx will try to poke you down with the rocket form of Switcheroo! and slow you with Zap!. However, because her defensive traps have a massive cooldown, the moment Jinx wastes Flame Chompers! to zone you or miss-positions them, she is completely defenseless against your all-in, forcing her to play passively under her tower.

Cara bermain

To convert this favorable matchup, never initiate with Rocket Jump if Jinx still holds her traps. Instead, walk up to trade with Rapid Fire and Explosive Charge to force a reaction. If she drops Flame Chompers! defensively, step aside to avoid the root, wait for them to expire, and then jump forward. If you get caught mid-flight, immediately use Buster Shot to push Jinx away, preventing her from triggering Get Excited! off your mistake.

Profil lengkap →
Twitch

Twitch

early_snowballlane_dominance Twitch's early game is notoriously weak because his damage relies on stacking Deadly Venom slowly. You can bypass his scaling by initiating with Rocket Jump directly onto him. Since he lacks burst resistance, applying Explosive Charge and detonating it with Rapid Fire will instantly melt his health bar long before he can build up enough poison stacks to make Contaminate threatening. Lihat detail
Twitch

Kenapa

Twitch's early game is notoriously weak because his damage relies on stacking Deadly Venom slowly. You can bypass his scaling by initiating with Rocket Jump directly onto him. Since he lacks burst resistance, applying Explosive Charge and detonating it with Rapid Fire will instantly melt his health bar long before he can build up enough poison stacks to make Contaminate threatening.

Dampak di lane

This laning phase is dictated entirely by your kill pressure. Twitch is forced to play extremely defensively, often giving up early farm to avoid your jump range. You can easily crash waves to chip at his tower using the passive splash from Draw a Bead, or freeze the wave to zone him out completely. If he steps up to farm, a quick burst trade forces him to recall, yielding massive gold advantages.

Cara bermain

Keep a constant eye on Twitch's attempts to enter Ambush. The moment he goes invisible, step back slightly toward your minion wave to prevent a sneak attack. When he reveals himself to farm, immediately leap in with Rocket Jump, place Explosive Charge, and activate Rapid Fire to detonate it for a secure kill. If he retaliates with Spray and Pray, use Buster Shot to knock him back, neutralizing his ultimate's extended range.

Profil lengkap →
Zeri

Zeri

mobility_matchearly_lead Tristana dominates this lane because she can instantly neutralize Zeri's primary escape tool. When Zeri attempts to slide away or reposition using Spark Surge, Tristana can immediately match her distance using Rocket Jump. Combined with the massive attack speed steroid from Rapid Fire, Tristana easily stacks her Explosive Charge during these short, explosive trades, completely out-bursting Zeri's slower Electrocute! DPS before she can ramp up. Lihat detail
Zeri

Kenapa

Tristana dominates this lane because she can instantly neutralize Zeri's primary escape tool. When Zeri attempts to slide away or reposition using Spark Surge, Tristana can immediately match her distance using Rocket Jump. Combined with the massive attack speed steroid from Rapid Fire, Tristana easily stacks her Explosive Charge during these short, explosive trades, completely out-bursting Zeri's slower Electrocute! DPS before she can ramp up.

Dampak di lane

This matchup turns the lane into an aggressive hunting ground where Zeri is constantly forced to play defensively near her tower. Because Tristana's passive Draw a Bead explosion pushes waves automatically, Zeri is pinned under turret trying to last-hit with Electrocute!. This constant pressure allows Tristana to safely chip away at tower plates using Explosive Charge, securing an early gold lead while leaving Zeri with no room to setup long-lane chases.

Cara bermain

You must hold Rocket Jump until Zeri commits her Spark Surge. Once she uses it to dash or slide over a wall, immediately jump onto her to lock her down. Activate Rapid Fire and place Explosive Charge on her to force a quick, lethal burst trade. If she activates Lightning Crash, do not try to out-kite her; instead, use Buster Shot to knock her away, disengage, and wait out her ultimate's duration before re-engaging.

Profil lengkap →
Miss Fortune

Miss Fortune

gap_closeburst_threat Tristana holds a massive advantage because she can completely neutralize Miss Fortune's passive mobility. By launching yourself forward with Rocket Jump, you land directly on her, dealing damage that immediately disables her Strut movement speed. Once she is slowed and stripped of her extra swiftness, she cannot outrun your Explosive Charge, forcing her into an extremely unfavorable, stationary duel. Lihat detail
Miss Fortune

Kenapa

Tristana holds a massive advantage because she can completely neutralize Miss Fortune's passive mobility. By launching yourself forward with Rocket Jump, you land directly on her, dealing damage that immediately disables her Strut movement speed. Once she is slowed and stripped of her extra swiftness, she cannot outrun your Explosive Charge, forcing her into an extremely unfavorable, stationary duel.

Dampak di lane

This matchup dynamic forces Miss Fortune to play with extreme caution and concede lane control. She cannot safely position to bounce Double Up through dying minions without putting herself in range of your devastating Rocket Jump. Consequently, you dictate the wave's position, pushing her under turret where you can freely stack Explosive Charge on her tower structure under heavy pressure.

Cara bermain

To execute this plan flawlessly, stay highly alert to her Make It Rain. Never trigger your Rocket Jump while standing inside her slowing zone, as it ruins your landing momentum. Wait for her to waste this slow, then jump directly onto her to deactivate Strut. Immediately activate Rapid Fire to fully stack and detonate your Explosive Charge. If she attempts to retaliate by channeling Bullet Time, instantly cast Buster Shot to interrupt her.

Profil lengkap →

Matchup lainnya

Items to Counter Tristana

Buy these items to reduce this champion's effectiveness in your games.

Rappel mortel
Rappel mortel
Ange gardien
Ange gardien
Mâchoire de Malmortius
Enchantement Vif-Argent
Enchantement Stase
Enchantement Stase

Cara counter champion ini

Sudut counter

Melawan Tristana bukan hanya soal bertahan dari serangan habis-habisan miliknya. Ini lebih tentang mematahkan kemampuannya untuk mengonversi: menolak plat gratis, menginterupsi atau menghukum Rocket Jump ofensif, dan memaksanya menggunakan Rapid Fire atau Explosive Charge tanpa mendapatkan turret, kill, atau objektif. Para champion yang sudah ada dalam data menunjukkan berbagai bentuk tekanan: Draven dan Lucian bisa mengenainya sebelum dia nyaman, Caitlyn dan poke Varus bisa melemahkannya dari jarak jauh, sementara pertarungan yang lebih lambat justru memberinya waktu untuk scaling. Ide kuncinya sederhana: Tristana menjadi berbahaya ketika dia mengontrol tempo. Jika dia harus merespons, mundur, atau menggunakan Rocket Jump secara defensif sebelum objektif, dampaknya akan sangat berkurang.

Konteks Patch

Counter Tristana yang bagus menyerang salah satu dari tiga kondisi keberhasilannya: waktu untuk menumpuk Explosive Charge, keamanan Rocket Jump, atau kemampuannya untuk menghantam turret. Lane agresif mencegahnya scaling dengan nyaman; lane jarak jauh memaksanya kehilangan kesehatan sebelum dia bisa masuk jangkauan; support atau jungler dengan crowd control dapat menahan spell mereka untuk setelah lompatan. Tujuannya tidak selalu untuk membunuhnya di awal. Terkadang cukup untuk menolak turret pertama, karena Tristana tanpa keunggulan membutuhkan waktu lebih lama sebelum mengancam lini belakang.

Baca cepat

  • Menghukum Tristana tepat setelah Rocket Jump seringkali lebih kuat daripada poke dia sebelumnya: tanpa reset, dia tidak punya jalan keluar yang nyata.
  • Mencegahnya menempatkan Explosive Charge secara bebas di turret sangat memperlambat rencana permainannya.
  • Lane jarak jauh atau tekanan awal bekerja karena mereka memaksanya untuk bertahan alih-alih mengonversi.

Arketipe counter

Tekanan awal yang eksplosif

Profil ini bekerja karena menyerang Tristana sebelum jangkauan dan itemnya mengimbangi awal permainan rapuhnya. Draven dan Lucian dapat memperebutkan trade awal, mencegah gelombang masuk dengan bersih, dan membuat setiap upaya Explosive Charge menjadi lebih mahal. Tristana sering ingin menyiapkan lane untuk recall atau plat yang stabil; jika dia kehilangan terlalu banyak kesehatan sebelum saat itu, dia harus menyimpan Rocket Jump secara defensif dan melepaskan sebagian dari tekanan strukturalnya. Oleh karena itu, counter-nya bukan hanya soal duel, tetapi tentang memblokir konversi pertamanya.

Bagaimana champion beradaptasi. Tristana harus menerima bermain lebih lambat: last-hit dengan bersih, hindari kehilangan trade pendek, dan simpan Rocket Jump untuk mematahkan all-in musuh. Tujuannya bukan untuk memenangkan lane dengan segala cara, tetapi untuk mencapai item pertama tanpa memberikan kill yang mempercepat snowball musuh.

Jangkauan lane dan poke

Jangkauan dan poke mengganggu Tristana karena mereka memaksanya kehilangan kesehatan sebelum polanya sendiri dimulai. Dia ingin menempatkan Explosive Charge, mengaktifkan Rapid Fire, dan tetap dalam jangkauan cukup lama untuk menumpuk bom; melawan Caitlyn atau poke Varus, urutan itu menjadi sulit jika dia sudah mencapai wave dalam keadaan rusak. Poke juga memiliki konsekuensi objektif: Tristana yang kesehatannya rendah tidak dapat mengancam turret atau memulai dragon dengan percaya diri. Oleh karena itu, pertarungan ini adalah tentang melemahkannya sebelum jendela DPS-nya yang sebenarnya.

Bagaimana champion beradaptasi. Tristana harus menghindari menjawab setiap poke dengan trade paksa. Dia harus menjaga kesehatan, menggunakan recall yang bersih, dan menunggu kesalahan jangkauan nyata atau crowd control sekutu. Jika dia tetap cukup sehat, Explosive Charge-nya di turret atau objektif menjadi ancaman nyata lagi setelah pembelian pertama.

Pertarungan yang gagal menghukum di awal

Pertarungan ini menjadi menguntungkan bagi Tristana ketika mereka gagal mengubah kontrol atau poke mereka menjadi keunggulan nyata. Ziggs, Ashe, atau Jhin dapat mengganggu beberapa wave, tetapi jika Tristana menjaga kesehatannya cukup dan menemukan jendela turret, dia dengan cepat mengubah lane menjadi tekanan objektif. Mobilitasnya juga memungkinkannya menghukum target yang posisinya buruk jika kontrol musuh sudah digunakan. Bahaya bagi champion ini adalah memainkan lane yang secara statistik bagus sambil tetap membiarkan Tristana mengambil struktur pertama dan mempercepat seluruh peta.

Bagaimana champion beradaptasi. Tristana harus tetap disiplin: jangan melompat ke crowd control yang tersisa, tetapi cari momen ketika wave mencapai turret. Melawan profil ini, manajemen wave yang baik seringkali lebih berharga daripada all-in awal, karena turret pertama membuka rencana permainan aslinya.

Prioritas matchup

Draven

Draven layak diprioritaskan karena dia menghukum bagian rapuh yang tepat dari Tristana: trade awal sebelum jangkauan dan itemnya mengambil alih. Jika Tristana menerima duel terlalu dini, dia memberi Draven kesempatan untuk mengubah tekanan lane sederhana menjadi snowball. Pembacaan yang benar bukanlah mencoba mengalahkannya secara mekanis di level 2, tetapi membatasi kerugian, menghindari reset wave yang berbahaya, dan menunggu sampai support atau jungle menciptakan jendela di mana Explosive Charge dapat ditumpuk tanpa terkena burst penuhnya.

Caitlyn

Caitlyn layak mendapat fokus karena dia tidak melawan Tristana melalui all-in langsung, tetapi melalui kontrol jarak. Dia dapat mencegah Tristana mencapai wave dengan nyaman, membuat plat lebih sulit, dan memaksa recall defensif. Bagi Tristana, kuncinya bukanlah mengacaukan kesabaran dengan kepasifan: dia harus menerima kehilangan beberapa auto, tetapi mempersiapkan momen ketika Caitlyn menggunakan tekanannya terlalu jauh dari perlindungan. Satu jendela dengan Explosive Charge di turret dapat mengimbangi beberapa menit lane yang terkontrol.

Kesalahan umum melawannya

Kesalahan umum melawannya

  • Membiarkannya menempatkan Explosive Charge secara bebas di turret setelah recall atau gelombang masuk.
  • Menggunakan hard crowd control sebelum Rocket Jump-nya, lalu tidak punya jawaban ketika dia melompat secara agresif.
  • Memberinya poke tanpa mengubahnya menjadi keunggulan gelombang, memungkinkannya untuk pulih dan kembali dengan pembelian yang lebih baik.
  • Meremehkan kecepatannya pada dragon atau turret kapan pun Rapid Fire tersedia.
  • Mengejar dia terlalu jauh setelah lompatan roketnya di-reset, saat dia secara spesifik ingin mengubah kill pertama menjadi target kedua.

Catatan Pelatih

  • Melawan Tristana, selalu siapkan jawaban untuk setelah dia melompat. Hukuman yang paling dapat diandalkan seringkali datang setengah detik setelah dia menyerang, bukan sebelumnya.

  • Jika kamu tidak bisa membunuhnya, perlambat pengambilan turretnya. Menunda struktur pertamanya secara signifikan mengurangi kemampuannya untuk mengalihkan tekanan ke dragon dan mid lane.


FAQ

Bagaimana cara menghentikan Tristana agar tidak snowball di lane?

Kamu perlu menghentikan konversi pertama, bukan hanya mencari kill. Tristana snowball ketika gelombang yang terhancur menjadi plat, lalu turret, lalu rotasi dragon. Untuk memperlambatnya, perebutkan gelombang sebelum mencapai turretmu, siapkan jawaban untuk lompatan roketnya, dan hindari membuang crowd control pada support-nya jika dia kemudian bisa melompat dengan bebas. Bahkan tanpa membunuhnya, menolak plat dan tempo seringkali cukup untuk menunda dampak sebenarnya.

Haruskah kamu fokus pada Tristana dalam teamfight?

Ya, tapi tidak sembarangan. Jika kamu menyerangnya terlalu dini saat dia masih memiliki lompatan roket, ultimate, dan lini depan di depannya, kamu mungkin memberinya ruang yang dia butuhkan. Fokus terbaik terjadi ketika dia sudah menggunakan lompatan roketnya atau ketika dia maju untuk menumpuk Explosive Charge. Pada saat itu, crowd control yang keras atau burst yang terkoordinasi dapat menolak resetnya dan menghancurkan seluruh pertarungannya. Waktu lebih penting daripada niat untuk fokus padanya.

Mengapa support engage berbahaya dengan Tristana?

Karena mereka menyelesaikan masalah utamanya: menjaga target dalam jangkauannya cukup lama. Tristana membutuhkan beberapa serangan untuk memaksimalkan Explosive Charge, dan support engage dapat menciptakan jendela yang tepat. Jika kamu menghadapi duo ini, kamu harus menghormati saat crowd control musuh tersedia. Target yang tidak bisa bergerak dengan cepat menjadi target yang meledak, lalu reset lompatan roket, lalu aksi kedua. Bahaya datang dari rantai, bukan hanya crowd control pertama.

Apakah poke cukup untuk melawan Tristana?

Poke berguna, tetapi hanya jika menciptakan konsekuensi nyata: recall yang buruk, gelombang yang hilang, ketidakmampuan menyerang turret, atau dragon yang diperebutkan. Jika kamu mem-pokenya tanpa mengontrol gelombang, dia bisa pulih, kembali dengan pembelian yang layak, dan memanfaatkan jendela berikutnya dengan Explosive Charge. Melawan Tristana, poke harus menghalangi temponya, bukan hanya menurunkan bar kesehatannya. Jika tidak, dia sering menemukan satu jendela yang membayar seluruh lane.








































