Ağustos 2026 · Patch 7.2d
Marksman · DRAGON

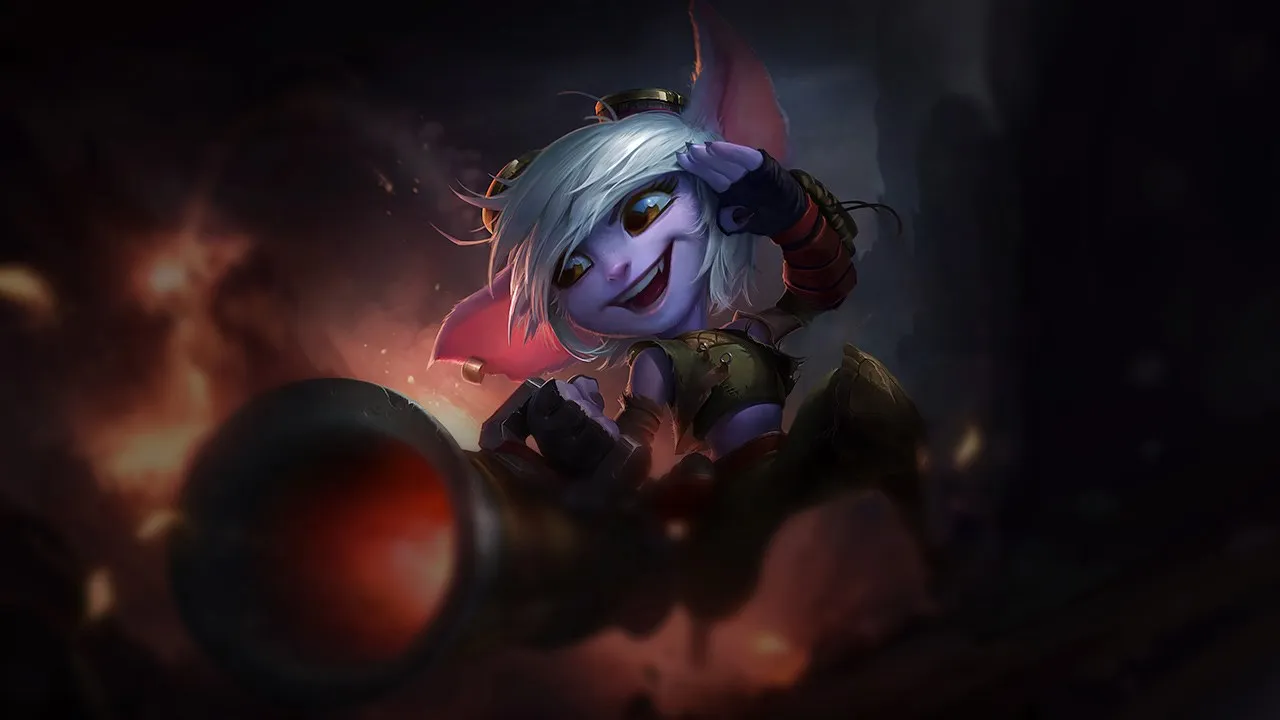
Tristana Wild Rift Counter Rehberi

Tristana, başlangıçta sınırlı hasarı nedeniyle ilk eşyasından önce early game aşamasında savunmasızdır. Poke veya sürekli harassment kompozisyonları, onun power spike öncesindeki etkisini azaltır. Anlık CC şampiyonları, bombs ve leaps sırasında onu böler.

★ DRAGON Tier A
HASAR
UTIL
TANK
DIFF
Win 47.9% #71 · ↓5pt
Pick 4.3% #14
Ban 0.1% #136

Tristana Wild Rift Counter Rehberi ★ Counter Sheet

Hard Counter

1

Bu şampiyonlar, seninkini doğrudan geride bırakan bir build ve oynanış tarzına sahip, bu da lane kontrolünü ve farmı son derece zorlaştırabilir. Yetenekleri temel güçlerini etkisiz hale getirebilir ya da her zamanki planını oynamaya çalıştığın anda seni cezalandırabilir. Bu matchuplarda amaç genellikle hataları en aza indirmek ve doğrudan çatışmanın dışında çözümler bulmaktır.

Xayah

Xayah

disengage_punishspacing Xayah completely shuts down your offensive pressure because she can instantly nullify your main source of burst. The moment you commit with Explosive Charge, she can activate Featherstorm to become untargetable, causing your bomb to tick down uselessly. Worse, as she lands, she repositions her feathers to trigger Bladecaller, locking you down mid-air if you try to escape with Rocket Jump or simply rooting you for a deadly trade. Detayları gör
Xayah

Neden

Xayah completely shuts down your offensive pressure because she can instantly nullify your main source of burst. The moment you commit with Explosive Charge, she can activate Featherstorm to become untargetable, causing your bomb to tick down uselessly. Worse, as she lands, she repositions her feathers to trigger Bladecaller, locking you down mid-air if you try to escape with Rocket Jump or simply rooting you for a deadly trade.

Lane etkisi

This interaction forces you into a passive stance during laning. You cannot safely initiate with Rocket Jump because Xayah's Clean Cuts and Double Daggers constantly litter the lane with feathers, threatening a quick root if you push too far. Trading with Rapid Fire feels unrewarding when she can match your DPS with her own Deadly Plumage while keeping her defensive ultimate ready to negate your all-in.

Nasıl oynanır

To survive, you must trick Xayah into wasting her ultimate. Bait her defensive reaction by poking with simple auto-attacks enhanced by Draw a Bead and Rapid Fire without committing your jump. Only apply Explosive Charge after she panics and triggers Featherstorm. If she holds it, use Buster Shot defensively to push her away when she activates Deadly Plumage, disengaging safely rather than trying to force a fight you cannot win.

Tam profil →

Dezavantajlı

5

Bu şampiyonlar, matchup'ı tamamen oynanmaz hale getirmeden genellikle çatışmada avantaj sağlayan araçlara sahiptir. Daha fazla menzilleri, senin saldırılarını daha iyi karşılama kapasiteleri veya engage'lerine karşılık verecek daha fazla yolları olabilir. Yaklaşımını buna göre uyarlaman ve dövüşü kabul edeceğin anları dikkatle seçmen gerekir.

Varus

Varus

dodge_ccburst_clash Varus dominates the neutral game by wearing you down from afar with Piercing Arrow and Hail of Arrows. While your all-in with Explosive Charge and Rapid Fire has higher burst potential, it is entirely gatekept by Chain of Corruption. If you initiate and get rooted mid-combo, your DPS halts instantly, preventing you from detonating your bomb or securing the Rocket Jump reset, which leads to your swift demise. Detayları gör
Varus

Neden

Varus dominates the neutral game by wearing you down from afar with Piercing Arrow and Hail of Arrows. While your all-in with Explosive Charge and Rapid Fire has higher burst potential, it is entirely gatekept by Chain of Corruption. If you initiate and get rooted mid-combo, your DPS halts instantly, preventing you from detonating your bomb or securing the Rocket Jump reset, which leads to your swift demise.

Lane etkisi

Because of Hail of Arrows and Living Vengeance, Varus easily secures wave priority, forcing you to farm under turret. Every attempt to walk up for a last hit exposes you to high-damage Piercing Arrow snipes. Your health pool will constantly bleed, making safe recalls difficult and putting massive pressure on your tower. You cannot safely contest his push unless his main crowd control is down.

Nasıl oynanır

To survive, adopt a highly defensive stance and focus on scaling via Draw a Bead. Never use Rocket Jump aggressively unless Varus has already missed Chain of Corruption. Instead, hold your jump strictly to reactively buffer or escape his ultimate's projectile. If he does snare you, immediately use Buster Shot to push him away, preventing him from detonating his Blighted Quiver stacks, and abort the trade until your cooldowns return.

Tam profil →
Draven

Draven

cc_interruptall_in This matchup is heavily dictated by Draven's ability to swat you out of the air. If you attempt an aggressive Rocket Jump, a skilled Draven will reactively cast Stand Aside mid-flight. This immediately cancels your leap's momentum, dropping you directly into his optimal range where his Spinning Axe and Blood Rush DPS will shred your health bar before you can stack Explosive Charge. Detayları gör
Draven

Neden

This matchup is heavily dictated by Draven's ability to swat you out of the air. If you attempt an aggressive Rocket Jump, a skilled Draven will reactively cast Stand Aside mid-flight. This immediately cancels your leap's momentum, dropping you directly into his optimal range where his Spinning Axe and Blood Rush DPS will shred your health bar before you can stack Explosive Charge.

Lane etkisi

Because of this airborne interruption, you cannot freely contest early waves. Draven easily secures lane priority with his high raw damage, forcing you to farm under turret. Any attempt to trade back with Rapid Fire feels underwhelming because you cannot commit to an all-in. If you get chunked while your escape is disabled, you will be forced into a bad recall, losing plates to his fast push.

Nasıl oynanır

To survive, you must play defensively and strictly hold Rocket Jump as a reactive tool. Never initiate with it. Watch Draven's axes; if he drops a Spinning Axe or wastes Stand Aside trying to poke or push, you have a temporary window to retaliate. If he catches you with an aggressive engage, use Buster Shot to push him away instantly and disengage, relying on your passive Draw a Bead to safely farm from a distance as you scale.

Tam profil →
Yunara

Yunara

bait_shieldsburst_timing Yunara naturally out-dpses you in extended trades because of her passive Vow of the First Lands and the attack speed from Cultivation of Spirit. Your primary win condition is a burst all-in using Explosive Charge. However, Yunara can easily neutralize your Rocket Jump engage. She can activate Kanmei's Steps to quickly run out of your range, or use Untouchable Shadow to dash away, preventing you from stacking your bomb. Detayları gör
Yunara

Neden

Yunara naturally out-dpses you in extended trades because of her passive Vow of the First Lands and the attack speed from Cultivation of Spirit. Your primary win condition is a burst all-in using Explosive Charge. However, Yunara can easily neutralize your Rocket Jump engage. She can activate Kanmei's Steps to quickly run out of your range, or use Untouchable Shadow to dash away, preventing you from stacking your bomb.

Lane etkisi

Because your main offensive tool is so easily neutralized, you cannot safely push or force trades. If you waste Rocket Jump aggressively, you are left completely vulnerable to her Arc of Judgment slow and high sustained damage. You will often be forced to farm under tower, using Draw a Bead to safely secure last hits while Yunara controls the wave tempo and chips away at your tower plates.

Nasıl oynanır

To survive, you must play defensively and focus on lane discipline. Never initiate with Rocket Jump unless you see Yunara waste Kanmei's Steps or her ultimate Transcend One's Self is on cooldown. Instead, poke safely using Rapid Fire when she steps up to farm. If she activates her transe and chases with Untouchable Shadow, immediately disengage using Buster Shot to push her away and reset the distance before she stacks her damage.

Tam profil →
Ezreal

Ezreal

disengageall_in_counter This matchup hinges entirely on how Ezreal's mobility neutralizes your aggressive burst. Whenever you try to initiate with Rocket Jump and attach Explosive Charge, Ezreal can buffer Arcane Shift to instantly blink away. Because his escape cast-time cannot be interrupted by your jump's landing impact, he leaves you stranded deep in the lane with an uncharged bomb, preventing you from getting the Rapid Fire attacks needed to trigger your reset. Detayları gör
Ezreal

Neden

This matchup hinges entirely on how Ezreal's mobility neutralizes your aggressive burst. Whenever you try to initiate with Rocket Jump and attach Explosive Charge, Ezreal can buffer Arcane Shift to instantly blink away. Because his escape cast-time cannot be interrupted by your jump's landing impact, he leaves you stranded deep in the lane with an uncharged bomb, preventing you from getting the Rapid Fire attacks needed to trigger your reset.

Lane etkisi

You cannot reliably force all-ins, which heavily stifles your early kill pressure. Ezreal safely farms and pokes you down from a distance using Mystic Shot and Essence Flux. Attempting to match his push with Explosive Charge on minions often leaves you overextended. If you fall behind in health, you will find yourself trapped under tower, constantly dodging Trueshot Barrage while unable to contest the wave.

Nasıl oynanır

Never initiate with Rocket Jump unless you have seen Ezreal waste Arcane Shift. Instead, focus on farming with Draw a Bead and only trade with basic attacks and Rapid Fire when he steps up to shoot Mystic Shot. If he aggressively blinks forward, immediately cast Buster Shot to knock him back, neutralizing his Rising Spell Force stacks. Hold your jump as a defensive tool to reposition safely rather than an offensive trigger.

Tam profil →
Sivir

Sivir

spell_shield_timingall_in_defense This lane is heavily dictated by how Sivir uses her Spell Shield. If she reacts quickly enough to absorb the initial cast of your Explosive Charge, your entire trading pattern collapses. Not only do you lose your primary source of burst damage, but you also forfeit the ability to reset Rocket Jump. Without that explosive threat, Sivir can easily out-damage you over longer trades with Ricochet and Boomerang Blade. Detayları gör
Sivir

Neden

This lane is heavily dictated by how Sivir uses her Spell Shield. If she reacts quickly enough to absorb the initial cast of your Explosive Charge, your entire trading pattern collapses. Not only do you lose your primary source of burst damage, but you also forfeit the ability to reset Rocket Jump. Without that explosive threat, Sivir can easily out-damage you over longer trades with Ricochet and Boomerang Blade.

Lane etkisi

Sivir will relentlessly push the wave using Ricochet and Boomerang Blade, forcing you to farm under turret. Because you cannot safely threaten an all-in with Rocket Jump while her Spell Shield is active, you lose all lane priority. Any attempt to force a trade results in Sivir absorbing your damage, healing herself, and using Fleet of Foot to safely disengage while your support is left unable to follow up.

Nasıl oynanır

To win this mental war, you must bait out Spell Shield before committing your primary cooldowns. Walk forward with Rapid Fire active to threaten auto-attacks, but hold your Explosive Charge. Often, Sivir will panic-shield anticipating the bomb. If she does, disengage immediately, wait out the brief shield duration, and then use Rocket Jump to engage during her long cooldown window. Never initiate with Rocket Jump while her defensive shield is ready.

Tam profil →

Skill Matchup

6

Bu eşleşmeler her şeyden önce yürütme düellosudur: her iki şampiyon da avantaj elde etmek için gerçek yollara sahiptir. Kaçırılan önemli bir yetenek, doğru öngörülen bir engage ya da tek bir pozisyon hatası düelloyu bir tarafa çevirebilir. Matchup'ı bilmek ve doğru anları tanımak burada özellikle önemlidir.

Caitlyn

Caitlyn

disengageearly_pressure This matchup is a pure test of reflexes centered on Tristana's forward dive. When you launch yourself forward with Rocket Jump to plant an Explosive Charge, Caitlyn must instantly fire 90 Caliber Net to escape your range. If she reacts in time, she negates your burst and retaliates with a Headshot. If you bait this net out first, her low mobility makes her an easy target. Detayları gör
Caitlyn

Neden

This matchup is a pure test of reflexes centered on Tristana's forward dive. When you launch yourself forward with Rocket Jump to plant an Explosive Charge, Caitlyn must instantly fire 90 Caliber Net to escape your range. If she reacts in time, she negates your burst and retaliates with a Headshot. If you bait this net out first, her low mobility makes her an easy target.

Lane etkisi

Caitlyn's superior range and Yordle Snap Trap pressure will force you under turret early, while she chips your health with Piltover Peacemaker. However, because the lane is so volatile, a single successful Rocket Jump that bypasses her 90 Caliber Net completely swings the wave priority. One clean engagement allows you to demolish her turret plates with Explosive Charge, instantly reversing the lane pressure.

Nasıl oynanır

Never use Rocket Jump directly in a straight line toward Caitlyn while her defensive net is available. Instead, bait 90 Caliber Net by walking up aggressively, or angle your jump slightly to the side to make her aim harder. If she holds her net defensively, focus on farming with Rapid Fire. Once your passive Draw a Bead increases your range in the later levels, you can poke her down without needing to commit your jump.

Tam profil →
Akshan

Akshan

mobility_clashburst_trade This matchup is a pure battle of explosive windows, defined by how you handle Akshan's high mobility. While his Heroic Swing grants him devastating target-locking burst, you possess the perfect tools to disengage or match his aggression. If he swings in, a perfectly timed Buster Shot completely interrupts his trajectory. Alternatively, if he attempts to force an all-in with Dirty Fighting, you can reposition instantly with Rocket Jump. Detayları gör
Akshan

Neden

This matchup is a pure battle of explosive windows, defined by how you handle Akshan's high mobility. While his Heroic Swing grants him devastating target-locking burst, you possess the perfect tools to disengage or match his aggression. If he swings in, a perfectly timed Buster Shot completely interrupts his trajectory. Alternatively, if he attempts to force an all-in with Dirty Fighting, you can reposition instantly with Rocket Jump.

Lane etkisi

Trades are incredibly short and lethal, preventing long, passive farming phases. You must respect his poke from Avengerang, which can quickly chip you down. If Akshan misses his skillshot or wastes his shield, you gain a massive window to stack Explosive Charge with Rapid Fire. However, overextending without your defensive tools invites a deadly counter-engage, turning any mistimed dive into a double kill for him.

Nasıl oynanır

Never initiate a jump forward unless Akshan's hook is on cooldown. Instead, hold Buster Shot exclusively to disrupt his Heroic Swing mid-flight, pushing him away into an awkward position. If you get caught off-guard or see him channeling Comeuppance, use Rocket Jump to break his line of sight behind your minions or a wall. When he plays passively, focus on shoving the wave with your passive Draw a Bead to limit his roaming potential.

Tam profil →
Vayne

Vayne

skill_matchupdisengage_check This skill matchup balances Vayne's late-game hyper-scaling against your explosive mid-game power spikes. The absolute core of this duel lies in your Rocket Jump trajectory. If you attempt to dive her, Vayne can reactively interrupt your flight with Condemn. This denial prevents you from fully stacking and detonating Explosive Charge, which completely ruins your cooldown reset and leaves you dangerously exposed to her Silver Bolts counter-attack. Detayları gör
Vayne

Neden

This skill matchup balances Vayne's late-game hyper-scaling against your explosive mid-game power spikes. The absolute core of this duel lies in your Rocket Jump trajectory. If you attempt to dive her, Vayne can reactively interrupt your flight with Condemn. This denial prevents you from fully stacking and detonating Explosive Charge, which completely ruins your cooldown reset and leaves you dangerously exposed to her Silver Bolts counter-attack.

Lane etkisi

This mechanical threat completely dictates how you manage the minion waves. You cannot afford mindless all-ins; instead, you must leverage the passive area damage from Draw a Bead to constantly shove waves. Forcing Vayne under her turret with Explosive Charge limits her ability to initiate trades. It prevents her from using Night Hunter to chase you down the long lane and minimizes her opportunities to land a stunning Condemn against the walls.

Nasıl oynanır

To win this lane, play front-to-back and trade primarily with Rapid Fire and basic attacks. Never use Rocket Jump offensively unless Vayne has already wasted Condemn. If she activates Final Hour and uses Tumble to close the distance, immediately disengage using Buster Shot to knock her back and neutralize her ultimate's duration. Keep your distance, prioritize chipping her tower down, and only commit to a chase once her self-peel tool is completely offline.

Tam profil →

Diğer eşleşmeler

Avantajlı

10

Bu şampiyonlar genellikle senin temel güçlerine etkili şekilde karşılık veremez, bu da çatışmaya daha fazla özgürlükle yaklaşmanı sağlar. Onları baskı altına almak ve lehine dönen trade'ler zorlamak için genellikle birden fazla yolun vardır. Onlara rahat bir pozisyona dönme fırsatı vermek yerine, bu avantajı kendi temponu dayatmak için kullan.

Kog'Maw

Kog'Maw

all_inspacing Kog'Maw relies heavily on Bio-Arcane Barrage to poke you from a safe distance, but he lacks any hard self-peel. Tristana completely bypasses this ranged threat by using Rocket Jump to close the gap instantly. Once on top of him, triggering Rapid Fire allows you to rapidly stack Explosive Charge, bursting him down before his sustained magic damage can ramp up. Detayları gör
Kog'Maw

Neden

Kog'Maw relies heavily on Bio-Arcane Barrage to poke you from a safe distance, but he lacks any hard self-peel. Tristana completely bypasses this ranged threat by using Rocket Jump to close the gap instantly. Once on top of him, triggering Rapid Fire allows you to rapidly stack Explosive Charge, bursting him down before his sustained magic damage can ramp up.

Lane etkisi

This matchup dynamic forces Kog'Maw to play incredibly defensively, yielding early wave control to you. You can easily shove the lane to secure priority or freeze it to set up lethal zones. Any time Kog'Maw mispositions to last-hit, the threat of your all-in prevents him from contesting the wave, leading to massive gold leads and early tower plating pressure.

Nasıl oynanır

Watch Kog'Maw's glowing spit to know when Bio-Arcane Barrage is active. Instead of trading autos during this buff, wait for it to expire, then immediately launch yourself forward with Rocket Jump. Plant Explosive Charge and activate Rapid Fire to secure the reset. If he tries to slow your retreat with Void Ooze, use Buster Shot to push him away or finish him off, then immediately walk out of his Icathian Surprise explosion radius.

Tam profil →
Ashe

Ashe

jump_engageburst_threat Tristana completely dominates Ashe because of her raw gap-close and explosive burst. Ashe relies on the constant slows from Frost Shot and poke from Volley to keep you at bay, but she lacks any natural mobility to escape a hard engage. By using Rocket Jump to leap straight onto her, you bypass her spacing tools entirely and can quickly stack Explosive Charge, threatening a lethal burst before she can even ramp up her Ranger's Focus. Detayları gör
Ashe

Neden

Tristana completely dominates Ashe because of her raw gap-close and explosive burst. Ashe relies on the constant slows from Frost Shot and poke from Volley to keep you at bay, but she lacks any natural mobility to escape a hard engage. By using Rocket Jump to leap straight onto her, you bypass her spacing tools entirely and can quickly stack Explosive Charge, threatening a lethal burst before she can even ramp up her Ranger's Focus.

Lane etkisi

This dynamic forces Ashe to play incredibly far back, conceding control of the minion waves. Since she cannot step up without risking a sudden Rocket Jump engage, you can freely slow-push waves or pressure her under tower. She is forced to use Volley defensively to clear minions rather than poke you. This pressure limits her ability to look for cross-map plays with Enchanted Crystal Arrow, keeping her pinned and vulnerable.

Nasıl oynanır

To execute this perfectly, watch Ashe's positioning when she attempts to secure last hits. The moment she missteps or wastes Volley on the wave, immediately use Rocket Jump directly onto her. Apply Explosive Charge and activate Rapid Fire to instantly detonate the bomb, resetting your jump. If she tries to retaliate with Enchanted Crystal Arrow at close range, use Buster Shot to push her away or secure the final blow while denying her the stun duration.

Tam profil →
Jhin

Jhin

all_inburst Your massive burst threat dictates this matchup. By using Rocket Jump to leap directly onto Jhin, you bypass his range advantage and force a close-quarters duel. Once on top of him, activating Rapid Fire lets you fully stack and detonate Explosive Charge in seconds. Jhin's Whisper lock prevents him from matching this raw attack speed, ensuring you delete his health bar before he can even chamber his fourth critical shot. Detayları gör
Jhin

Neden

Your massive burst threat dictates this matchup. By using Rocket Jump to leap directly onto Jhin, you bypass his range advantage and force a close-quarters duel. Once on top of him, activating Rapid Fire lets you fully stack and detonate Explosive Charge in seconds. Jhin's Whisper lock prevents him from matching this raw attack speed, ensuring you delete his health bar before he can even chamber his fourth critical shot.

Lane etkisi

Jhin is forced into a defensive posture, unable to step up to use Dancing Grenade to clear waves without putting himself in your jump range. Your passive Draw a Bead automatically pushes the lane, giving you constant priority and allowing you to chip away at his tower. Since Jhin must conserve his Deadly Flourish to self-peel, he cannot safely trade health, leading to early recalls and massive gold leads for you.

Nasıl oynanır

Monitor Jhin's Whisper ammo bar constantly. The moment he fires his fourth shot or starts reloading, immediately launch forward with Rocket Jump. Place your Explosive Charge and trigger Rapid Fire to burst him down. If he tries to retreat under his tower or if a fight goes sideways, use Buster Shot to safely disengage or push him back into your landing zone. Avoid jumping when he has his fourth shot ready to prevent receiving a massive critical blow mid-air.

Tam profil →
Corki

Corki

burst_trademobility_clash Tristana dominates this matchup by capitalizing on Corki's fragile escape option. While Corki relies on Valkyrie to disengage from trades, his long cooldown leaves him vulnerable. When Tristana attaches Explosive Charge and activates Rapid Fire, she quickly stacks the bomb. If Corki panics and slides away, Tristana can immediately match his flight with Rocket Jump, detonating the charges mid-air or upon landing to secure a lethal burst. Detayları gör
Corki

Neden

Tristana dominates this matchup by capitalizing on Corki's fragile escape option. While Corki relies on Valkyrie to disengage from trades, his long cooldown leaves him vulnerable. When Tristana attaches Explosive Charge and activates Rapid Fire, she quickly stacks the bomb. If Corki panics and slides away, Tristana can immediately match his flight with Rocket Jump, detonating the charges mid-air or upon landing to secure a lethal burst.

Lane etkisi

This interaction dictates a highly aggressive lane phase where Corki is forced to play defensively. Tristana's passive, Draw a Bead, paired with Explosive Charge passive explosions, naturally pushes the wave, forcing Corki under his turret where he struggles to farm without burning mana on Phosphorus Bomb. Tristana can easily chip away at the turret plates or dive Corki the moment his escape tool is down, securing early gold.

Nasıl oynanır

To execute this, always wait for Corki to use Phosphorus Bomb to farm before stepping forward. Once he mispositions, jump in with Rocket Jump to slow him, immediately apply Explosive Charge, and activate Rapid Fire. Do not use your ultimate, Buster Shot, too early; hold it to execute or push him back into your wave if he tries to dodge with Valkyrie. If he has Special Delivery active, play back and avoid direct engagements until his fiery trail disappears.

Tam profil →
Kalista

Kalista

burst_survivalspacing Tristana dominates this lane because Kalista relies heavily on Martial Poise to hop around and dodge skillshots. However, point-and-click abilities bypass this mobility entirely. When you place Explosive Charge on Kalista, she cannot hop away from the guaranteed explosion. By activating Rapid Fire, you stack the bomb instantly, triggering an unavoidable burst of damage that completely outclasses her sustained Rend stacking in quick trades. Detayları gör
Kalista

Neden

Tristana dominates this lane because Kalista relies heavily on Martial Poise to hop around and dodge skillshots. However, point-and-click abilities bypass this mobility entirely. When you place Explosive Charge on Kalista, she cannot hop away from the guaranteed explosion. By activating Rapid Fire, you stack the bomb instantly, triggering an unavoidable burst of damage that completely outclasses her sustained Rend stacking in quick trades.

Lane etkisi

This interaction shifts the lane dynamic entirely in your favor, forcing Kalista to play defensively behind her minions. She cannot safely step up to use Pierce or stack Rend on you. Since her movement is restricted, you easily secure wave priority. You can safely shove waves under her tower using the passive area damage from Draw a Bead, chipping away at her turret plates while she struggles to farm under pressure.

Nasıl oynanır

To execute this, wait for Kalista to commit her dash to farm, then jump forward with Rocket Jump directly onto her. Immediately apply Explosive Charge and trigger Rapid Fire to burst her down. If her support counter-attacks or uses Fate's Call to knock you up, immediately disengage using Buster Shot to push her away and walk back safely. Never commit to long, extended basic attack battles where her Rend can outdamage your cooldowns.

Tam profil →
Jinx

Jinx

disengagespacing Tristana dominates Jinx through pure explosive power, but the entire matchup hinges on Jinx's ability to disrupt your engage. While your Explosive Charge paired with Rapid Fire easily out-bursts her minigun or rockets, Jinx can completely shut down your aggression by throwing Flame Chompers! directly in your flight path. This interrupts Rocket Jump mid-air, trapping you in place and leaving you unable to secure the crucial jump reset. Detayları gör
Jinx

Neden

Tristana dominates Jinx through pure explosive power, but the entire matchup hinges on Jinx's ability to disrupt your engage. While your Explosive Charge paired with Rapid Fire easily out-bursts her minigun or rockets, Jinx can completely shut down your aggression by throwing Flame Chompers! directly in your flight path. This interrupts Rocket Jump mid-air, trapping you in place and leaving you unable to secure the crucial jump reset.

Lane etkisi

During the laning phase, this interaction dictates when you can safely play for the kill. Jinx will try to poke you down with the rocket form of Switcheroo! and slow you with Zap!. However, because her defensive traps have a massive cooldown, the moment Jinx wastes Flame Chompers! to zone you or miss-positions them, she is completely defenseless against your all-in, forcing her to play passively under her tower.

Nasıl oynanır

To convert this favorable matchup, never initiate with Rocket Jump if Jinx still holds her traps. Instead, walk up to trade with Rapid Fire and Explosive Charge to force a reaction. If she drops Flame Chompers! defensively, step aside to avoid the root, wait for them to expire, and then jump forward. If you get caught mid-flight, immediately use Buster Shot to push Jinx away, preventing her from triggering Get Excited! off your mistake.

Tam profil →
Twitch

Twitch

early_snowballlane_dominance Twitch's early game is notoriously weak because his damage relies on stacking Deadly Venom slowly. You can bypass his scaling by initiating with Rocket Jump directly onto him. Since he lacks burst resistance, applying Explosive Charge and detonating it with Rapid Fire will instantly melt his health bar long before he can build up enough poison stacks to make Contaminate threatening. Detayları gör
Twitch

Neden

Twitch's early game is notoriously weak because his damage relies on stacking Deadly Venom slowly. You can bypass his scaling by initiating with Rocket Jump directly onto him. Since he lacks burst resistance, applying Explosive Charge and detonating it with Rapid Fire will instantly melt his health bar long before he can build up enough poison stacks to make Contaminate threatening.

Lane etkisi

This laning phase is dictated entirely by your kill pressure. Twitch is forced to play extremely defensively, often giving up early farm to avoid your jump range. You can easily crash waves to chip at his tower using the passive splash from Draw a Bead, or freeze the wave to zone him out completely. If he steps up to farm, a quick burst trade forces him to recall, yielding massive gold advantages.

Nasıl oynanır

Keep a constant eye on Twitch's attempts to enter Ambush. The moment he goes invisible, step back slightly toward your minion wave to prevent a sneak attack. When he reveals himself to farm, immediately leap in with Rocket Jump, place Explosive Charge, and activate Rapid Fire to detonate it for a secure kill. If he retaliates with Spray and Pray, use Buster Shot to knock him back, neutralizing his ultimate's extended range.

Tam profil →
Zeri

Zeri

mobility_matchearly_lead Tristana dominates this lane because she can instantly neutralize Zeri's primary escape tool. When Zeri attempts to slide away or reposition using Spark Surge, Tristana can immediately match her distance using Rocket Jump. Combined with the massive attack speed steroid from Rapid Fire, Tristana easily stacks her Explosive Charge during these short, explosive trades, completely out-bursting Zeri's slower Electrocute! DPS before she can ramp up. Detayları gör
Zeri

Neden

Tristana dominates this lane because she can instantly neutralize Zeri's primary escape tool. When Zeri attempts to slide away or reposition using Spark Surge, Tristana can immediately match her distance using Rocket Jump. Combined with the massive attack speed steroid from Rapid Fire, Tristana easily stacks her Explosive Charge during these short, explosive trades, completely out-bursting Zeri's slower Electrocute! DPS before she can ramp up.

Lane etkisi

This matchup turns the lane into an aggressive hunting ground where Zeri is constantly forced to play defensively near her tower. Because Tristana's passive Draw a Bead explosion pushes waves automatically, Zeri is pinned under turret trying to last-hit with Electrocute!. This constant pressure allows Tristana to safely chip away at tower plates using Explosive Charge, securing an early gold lead while leaving Zeri with no room to setup long-lane chases.

Nasıl oynanır

You must hold Rocket Jump until Zeri commits her Spark Surge. Once she uses it to dash or slide over a wall, immediately jump onto her to lock her down. Activate Rapid Fire and place Explosive Charge on her to force a quick, lethal burst trade. If she activates Lightning Crash, do not try to out-kite her; instead, use Buster Shot to knock her away, disengage, and wait out her ultimate's duration before re-engaging.

Tam profil →
Miss Fortune

Miss Fortune

gap_closeburst_threat Tristana holds a massive advantage because she can completely neutralize Miss Fortune's passive mobility. By launching yourself forward with Rocket Jump, you land directly on her, dealing damage that immediately disables her Strut movement speed. Once she is slowed and stripped of her extra swiftness, she cannot outrun your Explosive Charge, forcing her into an extremely unfavorable, stationary duel. Detayları gör
Miss Fortune

Neden

Tristana holds a massive advantage because she can completely neutralize Miss Fortune's passive mobility. By launching yourself forward with Rocket Jump, you land directly on her, dealing damage that immediately disables her Strut movement speed. Once she is slowed and stripped of her extra swiftness, she cannot outrun your Explosive Charge, forcing her into an extremely unfavorable, stationary duel.

Lane etkisi

This matchup dynamic forces Miss Fortune to play with extreme caution and concede lane control. She cannot safely position to bounce Double Up through dying minions without putting herself in range of your devastating Rocket Jump. Consequently, you dictate the wave's position, pushing her under turret where you can freely stack Explosive Charge on her tower structure under heavy pressure.

Nasıl oynanır

To execute this plan flawlessly, stay highly alert to her Make It Rain. Never trigger your Rocket Jump while standing inside her slowing zone, as it ruins your landing momentum. Wait for her to waste this slow, then jump directly onto her to deactivate Strut. Immediately activate Rapid Fire to fully stack and detonate your Explosive Charge. If she attempts to retaliate by channeling Bullet Time, instantly cast Buster Shot to interrupt her.

Tam profil →

Diğer eşleşmeler

Items to Counter Tristana

Buy these items to reduce this champion's effectiveness in your games.

Rappel mortel
Rappel mortel
Ange gardien
Ange gardien
Mâchoire de Malmortius
Enchantement Vif-Argent
Enchantement Stase
Enchantement Stase

Bu şampiyon nasıl counterlanır

Counter açısı

Tristana’e karşı koymak, sadece onun all-in’inden kurtulmakla ilgili değildir. Esas olarak, onun dönüşüm yeteneğini bozmakla ilgilidir: bedava plakaları engellemek, saldırı amaçlı Roket Sıçramalarını kesintiye uğratmak veya cezalandırmak ve onu, bir kule, öldürme ya da hedef elde edemeden Hızlı Ateş veya Patlayıcı Yük kullanmaya zorlamak. Verilerde yer alan şampiyonlar çeşitli baskı yöntemleri sergiliyor: Draven ve Lucian, o rahatlamadan önce ona vurabilir; Caitlyn ve uzaktan saldırı yapan Varus ise onu menzilden yıpratabilir; buna karşılık daha yavaş eşleşmeler ise ona güçlenmek için zaman tanır. Ana fikir basit: Tristana, tempoyu kontrol ettiğinde tehlikeli hale gelir. Hedeflere ulaşmadan önce tepki vermek, geri çekilmek veya savunma amaçlı Roket Sıçraması harcamak zorunda kalırsa, etkisi büyük ölçüde azalır.

Patch bağlamı

İyi bir Tristana karşı stratejisi, onun üç başarı koşulundan birine engel olur: Patlayıcı Yük’ü biriktirme süresi, Roket Sıçrama’nın güvenliği ya da kulelere isabet etme yeteneği. Agresif koridorlar, onun rahatça güçlenmesini engeller; uzun menzilli koridorlar ise menzile girmeden önce can kaybetmesine neden olur; kitle kontrolü yeteneğine sahip destekler veya ormancılar, zıplamadan sonraya yeteneklerini saklayabilir. Amaç her zaman onu erken öldürmek değildir. Bazen ilk kuleyi engellemek yeterlidir, çünkü avantaj elde edememiş bir Tristana, arka hattı tehdit edebilmek için çok daha uzun süreye ihtiyaç duyar.

Hızlı okuma

  • Rocket Jump’tan hemen sonra Tristana ile saldırmak, genellikle bu hamleden önce ona hafif vuruşlar yapmaktan daha etkilidir: sıfırlama olmazsa, onun gerçek bir kaçış yolu kalmaz.
  • Onun taretlere istediği gibi Patlayıcı Yük yerleştirmesini engellemek, oyun planını büyük ölçüde yavaşlatır.
  • Menzil veya erken baskı durumları işe yarar, çünkü bu durumlar onu sayı yapmak yerine savunmaya zorlar.

Counter arketipleri

Maçın başlarında yoğun baskı

Bu profil, Tristana’e menzilinin ve eşyalarının oyun başındaki kırılganlığını telafi etmeden önce saldırdığı için işe yarıyor. Draven ve Lucian, erken aşamadaki takaslarda üstünlük sağlayabilir, dalgaların sorunsuzca kırılmasını engelleyebilir ve her Patlayıcı Yük denemesini daha pahalı hale getirebilir. Tristana genellikle istikrarlı bir geri dönüş ya da zırh satın almak için koridorunu hazırlamak ister; o ana kadar çok fazla can kaybederse, Rocket Jump'ı savunma amaçlı saklamak ve yapısal baskısının bir kısmından vazgeçmek zorunda kalır. Dolayısıyla bu karşı strateji sadece düelloyla ilgili değil, aynı zamanda onun ilk dönüşümünü engellemekle de ilgilidir.

Şampiyon nasıl uyum sağlamalı. Tristana, daha yavaş oynamayı kabullenmelidir: son vuruşları temiz yapmalı, kısa çatışmalarda yenilgiden kaçınmalı ve düşmanın all-in hamlesini bozmak için Roket Sıçramasını saklamalıdır. Amacı, ne pahasına olursa olsun koridoru kazanmak değil, düşmanın kar topu etkisini hızlandıracak bir öldürme vermeden ilk eşyasına ulaşmaktır.

Şerit aralığı ve dürtme

Menzil ve poke, Tristana’i zorlar çünkü kendi saldırı düzeni başlamadan önce can kaybetmesine neden olur. O, Patlayıcı Yük’ü yerleştirmek, Hızlı Ateş’i etkinleştirmek ve bombayı biriktirebilecek kadar uzun süre menzil içinde kalmak ister; Caitlyn’e karşı oynarken ya da Varus’e poke yaparken, dalgaya zaten hasar görmüş halde ulaşırsa bu akış zorlaşır. Poke’un objektif bir sonucu da vardır: canı düşük olan bir Tristana, kuleyi tehdit edemez veya dragon’i kendinden emin bir şekilde başlatamaz. Bu nedenle bu eşleşmede asıl amaç, onun gerçek DPS penceresine girmeden önce onu yıpratmaktır.

Şampiyon nasıl uyum sağlamalı. Tristana, her saldırıya zorla takas yaparak karşılık vermekten kaçınmalıdır. Canını korumalı, akıllı geri çekilmeler yapmalı ve rakibin menzil hatası ya da takım arkadaşlarının kitle kontrolü fırsatlarını beklemelidir. Yeterince canını koruyabilirse, ilk satın alma sonrasında kule veya hedef üzerindeki Patlayıcı Yükü yeniden ciddi bir tehdit haline gelir.

Erken dönemde rakibi cezalandıramayan eşleşmeler

Bu eşleşmeler, rakiplerin kontrol üstünlüğünü veya baskılarını gerçek bir avantaja dönüştürememesi durumunda Tristana için avantajlı hale gelir. Ziggs, Ashe veya Jhin bazı dalgaları bozabilir, ancak Tristana yeterli canını korur ve kule yıkma fırsatı bulursa, koridoru hızla hedef baskısına dönüştürür. Hareket kabiliyeti sayesinde, düşmanın kontrol yeteneği zaten kullanılmışsa, konumunu kötü seçmiş bir hedefi cezalandırabilir. Bu şampiyonlar için tehlike, istatistiksel olarak iyi bir koridor oyunu sergilemelerine rağmen, Tristana’in ilk yapıyı almasına ve tüm haritayı hızlandırmasına izin vermeleridir.

Şampiyon nasıl uyum sağlamalı. Tristana disiplinli kalmalı: kalan kitle kontrolüne hemen atlamamalı, dalganın kuleye ulaştığı anları kollamalı. Bu tür rakiplere karşı, iyi bir dalga yönetimi genellikle erken bir all-in’den daha değerlidir; çünkü ilk kule, onun gerçek oyun planını ortaya çıkarır.

Öncelikli matchuplar

Draven

Draven öncelikli olarak ele alınmalıdır, çünkü Tristana’in en kırılgan noktasını, yani menzili ve eşyaları devreye girmeden önceki erken aşamadaki çatışmaları cezalandırır. Eğer Tristana düelloyu çok erken kabul ederse, Draven’e basit bir koridor baskısını kar topu etkisine dönüştürme şansı verir. Doğru strateji, 2. seviyede onu mekanik olarak yenmeye çalışmak değil, kayıpları sınırlamak, tehlikeli dalga sıfırlamalarından kaçınmak ve support veya jungle’in, tam patlama gücünü yutmadan “Explosive Charge”ı biriktirebileceği bir fırsat yaratmasını beklemektir.

Caitlyn

Caitlyn, Tristana’e doğrudan “all-in” ile değil, mesafe kontrolü yoluyla karşı koyduğu için dikkat çekiyor. Tristana’in dalgaya rahatça ulaşmasını engelleyebilir, plakaları zorlaştırabilir ve savunma amaçlı geri çekilmelere zorlayabilir. Tristana için anahtar nokta, sabrı pasiflikle karıştırmamaktır: Bazı otomatik saldırıları kaybetmeyi kabul etmeli, ancak Caitlyn'in koruma alanından çok uzakta baskı kurduğu anlara hazırlıklı olmalıdır. Kule üzerinde Patlayıcı Yük'ün bulunduğu tek bir fırsat, birkaç dakikalık kontrollü koridor oyununu telafi edebilir.


Ona karşı yaygın hatalar

Ona karşı yaygın hatalar

  • Geri dönüş ya da dalga çarpışmasından sonra bir kuleye ücretsiz olarak Patlayıcı Yük yerleştirmesine izin vermek.

  • Rocket Jump yapmadan önce sert bir kalabalık kontrolü uygulamak, ardından agresif bir şekilde zıpladığında buna karşı bir çözüm bulamamak.
  • Onu dürtmekle dalga avantajı elde edememek, onun toparlanmasına ve daha sağlam bir dayanakla karşılık vermesine izin vermek.
  • dragon’de ya da Rapid Fire özelliği kullanılabilir olduğunda taretlerde onun hızını hafife almak.
  • Rocket Jump sıfırlamasından sonra, o özellikle ilk öldürmeyi ikinci bir hedefe dönüştürmek isterken, onu çok uzağa kadar kovalamak.

Koç notları

  • Tristana’e karşı, atlamadan sonra vereceğiniz cevabı her zaman hazır bulundurun. En güvenilir ceza genellikle onun saldırıya geçmesinden yarım saniye sonra gelir, ondan önce değil.
  • Onu öldüremezseniz, kule ele geçirme hızını yavaşlatın. İlk yapısını ele geçirmesini geciktirmek, dragon ve mid lane’e doğru baskı oluşturma yeteneğini büyük ölçüde azaltır.

FAQ

Tristana’in koridorda giderek artmasını nasıl önleyebilirsiniz?

Sadece öldürmeye odaklanmak yerine, ilk dönüşümü durdurman gerekiyor. Tristana, çöken bir dalga önce plakaya, sonra kuleye, ardından da dragon rotasyonuna dönüştüğünde çığ gibi büyür. Onu yavaşlatmak için, dalga kulenize ulaşmadan önce mücadele edin, Roket Sıçramasına karşı bir önlem hazırlayın ve eğer daha sonra serbestçe zıplayabiliyorsa, support'ine kitle kontrolü yeteneklerinizi boşa harcamayın. Onu öldürmeseniz bile, plakaları ve temposunu engellemek genellikle gerçek etkisini geciktirmek için yeterlidir.

Takım savaşlarında Tristana’e odaklanmalı mısınız?

Evet, ama rastgele değil. O, Roket Sıçrama, ultisi ve ön safları hâlâ elindeyken ona çok erken saldırırsan, ona ihtiyaç duyduğu alanı verebilirsin. Onu odaklamanın en iyi zamanı, Roket Sıçramasını çoktan kullanmış olduğu ya da Patlayıcı Yükü biriktirmek için öne çıktığı andır. O anda, sert kitle kontrolü ya da koordineli bir patlama, onun sıfırlanmasını engelleyebilir ve tüm dövüşünü bozabilir. Zamanlama, onu odaklama niyetinden daha önemlidir.

Tristana ile birlikte “engage” destekleri neden tehlikelidir?

Çünkü bunlar, onun en büyük sorununu çözüyor: bir hedefi yeterince uzun süre menzilinde tutmak. Tristana, Patlayıcı Yük’ü en üst düzeye çıkarmak için birkaç saldırıya ihtiyaç duyar ve bir support saldırısı tam da bu fırsat penceresini yaratabilir. Bu ikiliyle karşı karşıya kalırsanız, düşmanın kitle kontrolünün kullanılabilir olduğu anı ciddiye almalısınız. Hareket kabiliyeti kısıtlanmış bir hedef hızla patlatılan bir hedef haline gelir, ardından Rocket Jump sıfırlanır ve ikinci bir eylem gerçekleştirilir. Tehlike, sadece ilk kitle kontrolünden değil, bu zincirleme etkiden kaynaklanır.

Poke, Tristana’e karşı koymak için yeterli mi?

Poke yararlıdır, ancak yalnızca gerçek bir sonuç doğuruyorsa: kötü geri dönüş, dalganın kaybedilmesi, kuleye isabet ettirememe ya da dragon’in ele geçirilmesi. Dalgayı kontrol etmeden ona poke yaparsanız, toparlanabilir, iyi bir satın alma ile geri dönebilir ve bir sonraki fırsat penceresini Explosive Charge ile değerlendirir. Tristana’e karşı poke, sadece can çubuğunu düşürmekle kalmamalı, aynı zamanda rakibin temposunu da kesmelidir. Aksi takdirde, genellikle tüm koridoru telafi edecek bir fırsat bulur.








































