August 2026 · Patch 7.2d
Marksman · DRAGON

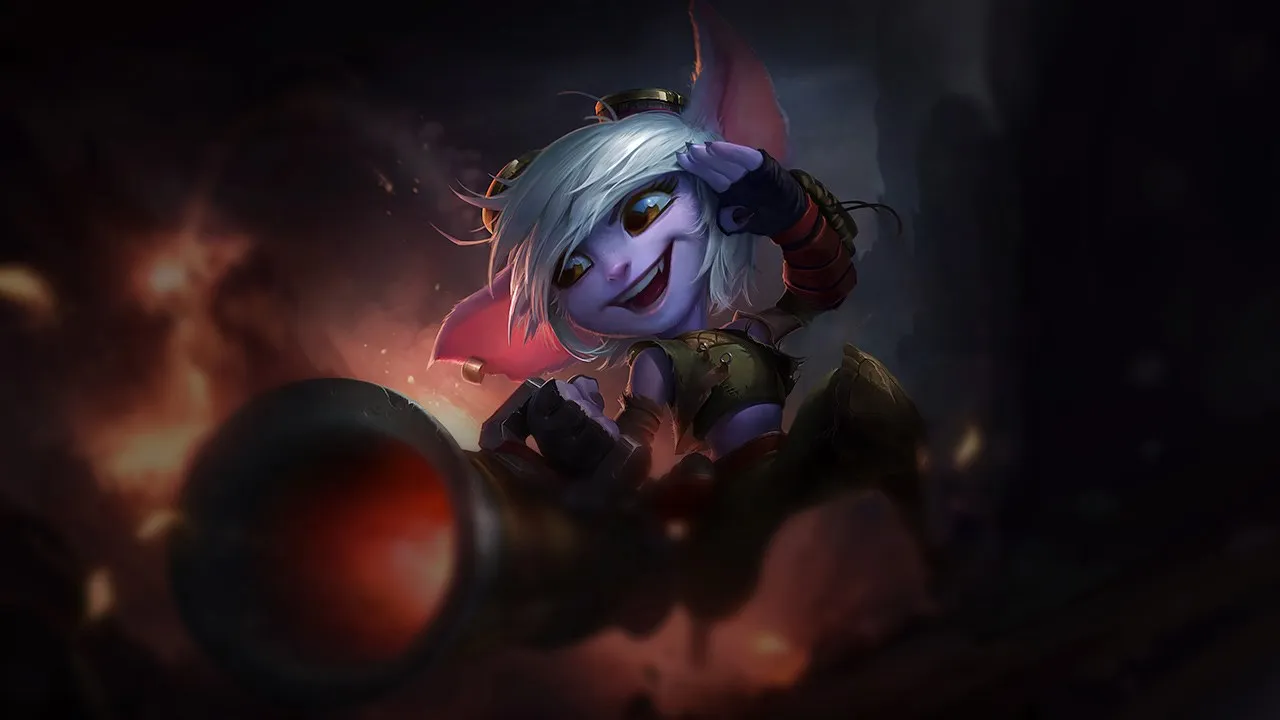
Tristana Wild Rift Counter-Guide

Tristana ist im Early Game vor ihrem ersten Item anfällig, da ihr Schaden anfangs begrenzt ist. Poke- oder konstante Harassment-Compositions verringern ihren Impact vor ihrem Power Spike. Champions mit sofortigem CC unterbrechen sie während ihrer Bomben und Sprünge.

★ DRAGON Tier A
SCHADEN
UTIL
TANK
DIFF
Win 47.9% #71 · ↓5pt
Pick 4.3% #14
Ban 0.1% #136

Tristana Wild Rift Counter-Guide ★ Counter Sheet

Hard Counters

1

Diese Champions haben ein Build und einen Spielstil, der deinen direkt überlegen ist, was die Kontrolle der Lane und das Farmen extrem schwierig machen kann. Ihr Kit kann deine Kernstärken neutralisieren oder dich bestrafen, sobald du versuchst, deinen gewohnten Spielplan umzusetzen. In diesen Matchups geht es oft darum, Fehler zu minimieren und nach Wegen zu suchen, außerhalb der direkten Konfrontation zu gewinnen.

Xayah

Xayah

disengage_punishspacing Xayah completely shuts down your offensive pressure because she can instantly nullify your main source of burst. The moment you commit with Explosive Charge, she can activate Featherstorm to become untargetable, causing your bomb to tick down uselessly. Worse, as she lands, she repositions her feathers to trigger Bladecaller, locking you down mid-air if you try to escape with Rocket Jump or simply rooting you for a deadly trade. Details ansehen
Xayah

Warum

Xayah completely shuts down your offensive pressure because she can instantly nullify your main source of burst. The moment you commit with Explosive Charge, she can activate Featherstorm to become untargetable, causing your bomb to tick down uselessly. Worse, as she lands, she repositions her feathers to trigger Bladecaller, locking you down mid-air if you try to escape with Rocket Jump or simply rooting you for a deadly trade.

Lane-Einfluss

This interaction forces you into a passive stance during laning. You cannot safely initiate with Rocket Jump because Xayah's Clean Cuts and Double Daggers constantly litter the lane with feathers, threatening a quick root if you push too far. Trading with Rapid Fire feels unrewarding when she can match your DPS with her own Deadly Plumage while keeping her defensive ultimate ready to negate your all-in.

Wie man spielt

To survive, you must trick Xayah into wasting her ultimate. Bait her defensive reaction by poking with simple auto-attacks enhanced by Draw a Bead and Rapid Fire without committing your jump. Only apply Explosive Charge after she panics and triggers Featherstorm. If she holds it, use Buster Shot defensively to push her away when she activates Deadly Plumage, disengaging safely rather than trying to force a fight you cannot win.

Vollständiges Profil →

Ungünstig

5

Diese Champions haben Werkzeuge, die ihnen im Kampf meist einen Vorteil verschaffen, ohne das Matchup unspielbar zu machen. Sie haben vielleicht mehr Reichweite, können deine Offensive besser abfangen oder haben mehr Möglichkeiten, auf deine Engages zu reagieren. Du musst deine Herangehensweise anpassen und sorgfältig die Momente wählen, in denen du den Kampf annimmst.

Varus

Varus

dodge_ccburst_clash Varus dominates the neutral game by wearing you down from afar with Piercing Arrow and Hail of Arrows. While your all-in with Explosive Charge and Rapid Fire has higher burst potential, it is entirely gatekept by Chain of Corruption. If you initiate and get rooted mid-combo, your DPS halts instantly, preventing you from detonating your bomb or securing the Rocket Jump reset, which leads to your swift demise. Details ansehen
Varus

Warum

Varus dominates the neutral game by wearing you down from afar with Piercing Arrow and Hail of Arrows. While your all-in with Explosive Charge and Rapid Fire has higher burst potential, it is entirely gatekept by Chain of Corruption. If you initiate and get rooted mid-combo, your DPS halts instantly, preventing you from detonating your bomb or securing the Rocket Jump reset, which leads to your swift demise.

Lane-Einfluss

Because of Hail of Arrows and Living Vengeance, Varus easily secures wave priority, forcing you to farm under turret. Every attempt to walk up for a last hit exposes you to high-damage Piercing Arrow snipes. Your health pool will constantly bleed, making safe recalls difficult and putting massive pressure on your tower. You cannot safely contest his push unless his main crowd control is down.

Wie man spielt

To survive, adopt a highly defensive stance and focus on scaling via Draw a Bead. Never use Rocket Jump aggressively unless Varus has already missed Chain of Corruption. Instead, hold your jump strictly to reactively buffer or escape his ultimate's projectile. If he does snare you, immediately use Buster Shot to push him away, preventing him from detonating his Blighted Quiver stacks, and abort the trade until your cooldowns return.

Vollständiges Profil →
Draven

Draven

cc_interruptall_in This matchup is heavily dictated by Draven's ability to swat you out of the air. If you attempt an aggressive Rocket Jump, a skilled Draven will reactively cast Stand Aside mid-flight. This immediately cancels your leap's momentum, dropping you directly into his optimal range where his Spinning Axe and Blood Rush DPS will shred your health bar before you can stack Explosive Charge. Details ansehen
Draven

Warum

This matchup is heavily dictated by Draven's ability to swat you out of the air. If you attempt an aggressive Rocket Jump, a skilled Draven will reactively cast Stand Aside mid-flight. This immediately cancels your leap's momentum, dropping you directly into his optimal range where his Spinning Axe and Blood Rush DPS will shred your health bar before you can stack Explosive Charge.

Lane-Einfluss

Because of this airborne interruption, you cannot freely contest early waves. Draven easily secures lane priority with his high raw damage, forcing you to farm under turret. Any attempt to trade back with Rapid Fire feels underwhelming because you cannot commit to an all-in. If you get chunked while your escape is disabled, you will be forced into a bad recall, losing plates to his fast push.

Wie man spielt

To survive, you must play defensively and strictly hold Rocket Jump as a reactive tool. Never initiate with it. Watch Draven's axes; if he drops a Spinning Axe or wastes Stand Aside trying to poke or push, you have a temporary window to retaliate. If he catches you with an aggressive engage, use Buster Shot to push him away instantly and disengage, relying on your passive Draw a Bead to safely farm from a distance as you scale.

Vollständiges Profil →
Yunara

Yunara

bait_shieldsburst_timing Yunara naturally out-dpses you in extended trades because of her passive Vow of the First Lands and the attack speed from Cultivation of Spirit. Your primary win condition is a burst all-in using Explosive Charge. However, Yunara can easily neutralize your Rocket Jump engage. She can activate Kanmei's Steps to quickly run out of your range, or use Untouchable Shadow to dash away, preventing you from stacking your bomb. Details ansehen
Yunara

Warum

Yunara naturally out-dpses you in extended trades because of her passive Vow of the First Lands and the attack speed from Cultivation of Spirit. Your primary win condition is a burst all-in using Explosive Charge. However, Yunara can easily neutralize your Rocket Jump engage. She can activate Kanmei's Steps to quickly run out of your range, or use Untouchable Shadow to dash away, preventing you from stacking your bomb.

Lane-Einfluss

Because your main offensive tool is so easily neutralized, you cannot safely push or force trades. If you waste Rocket Jump aggressively, you are left completely vulnerable to her Arc of Judgment slow and high sustained damage. You will often be forced to farm under tower, using Draw a Bead to safely secure last hits while Yunara controls the wave tempo and chips away at your tower plates.

Wie man spielt

To survive, you must play defensively and focus on lane discipline. Never initiate with Rocket Jump unless you see Yunara waste Kanmei's Steps or her ultimate Transcend One's Self is on cooldown. Instead, poke safely using Rapid Fire when she steps up to farm. If she activates her transe and chases with Untouchable Shadow, immediately disengage using Buster Shot to push her away and reset the distance before she stacks her damage.

Vollständiges Profil →
Ezreal

Ezreal

disengageall_in_counter This matchup hinges entirely on how Ezreal's mobility neutralizes your aggressive burst. Whenever you try to initiate with Rocket Jump and attach Explosive Charge, Ezreal can buffer Arcane Shift to instantly blink away. Because his escape cast-time cannot be interrupted by your jump's landing impact, he leaves you stranded deep in the lane with an uncharged bomb, preventing you from getting the Rapid Fire attacks needed to trigger your reset. Details ansehen
Ezreal

Warum

This matchup hinges entirely on how Ezreal's mobility neutralizes your aggressive burst. Whenever you try to initiate with Rocket Jump and attach Explosive Charge, Ezreal can buffer Arcane Shift to instantly blink away. Because his escape cast-time cannot be interrupted by your jump's landing impact, he leaves you stranded deep in the lane with an uncharged bomb, preventing you from getting the Rapid Fire attacks needed to trigger your reset.

Lane-Einfluss

You cannot reliably force all-ins, which heavily stifles your early kill pressure. Ezreal safely farms and pokes you down from a distance using Mystic Shot and Essence Flux. Attempting to match his push with Explosive Charge on minions often leaves you overextended. If you fall behind in health, you will find yourself trapped under tower, constantly dodging Trueshot Barrage while unable to contest the wave.

Wie man spielt

Never initiate with Rocket Jump unless you have seen Ezreal waste Arcane Shift. Instead, focus on farming with Draw a Bead and only trade with basic attacks and Rapid Fire when he steps up to shoot Mystic Shot. If he aggressively blinks forward, immediately cast Buster Shot to knock him back, neutralizing his Rising Spell Force stacks. Hold your jump as a defensive tool to reposition safely rather than an offensive trigger.

Vollständiges Profil →
Sivir

Sivir

spell_shield_timingall_in_defense This lane is heavily dictated by how Sivir uses her Spell Shield. If she reacts quickly enough to absorb the initial cast of your Explosive Charge, your entire trading pattern collapses. Not only do you lose your primary source of burst damage, but you also forfeit the ability to reset Rocket Jump. Without that explosive threat, Sivir can easily out-damage you over longer trades with Ricochet and Boomerang Blade. Details ansehen
Sivir

Warum

This lane is heavily dictated by how Sivir uses her Spell Shield. If she reacts quickly enough to absorb the initial cast of your Explosive Charge, your entire trading pattern collapses. Not only do you lose your primary source of burst damage, but you also forfeit the ability to reset Rocket Jump. Without that explosive threat, Sivir can easily out-damage you over longer trades with Ricochet and Boomerang Blade.

Lane-Einfluss

Sivir will relentlessly push the wave using Ricochet and Boomerang Blade, forcing you to farm under turret. Because you cannot safely threaten an all-in with Rocket Jump while her Spell Shield is active, you lose all lane priority. Any attempt to force a trade results in Sivir absorbing your damage, healing herself, and using Fleet of Foot to safely disengage while your support is left unable to follow up.

Wie man spielt

To win this mental war, you must bait out Spell Shield before committing your primary cooldowns. Walk forward with Rapid Fire active to threaten auto-attacks, but hold your Explosive Charge. Often, Sivir will panic-shield anticipating the bomb. If she does, disengage immediately, wait out the brief shield duration, and then use Rocket Jump to engage during her long cooldown window. Never initiate with Rocket Jump while her defensive shield is ready.

Vollständiges Profil →

Skill Matchups

6

Diese Matchups sind vor allem Duelle der Ausführung: Beide Champions haben glaubwürdige Wege, die Oberhand zu gewinnen. Eine wichtige ausgewichene Fähigkeit, ein richtig antizipierter Engage oder ein einziger Positionierungsfehler können reichen, um das Duell zu entscheiden. Das Matchup zu kennen und die richtigen Fenster zum Handeln zu erkennen, ist hier besonders wichtig.

Caitlyn

Caitlyn

disengageearly_pressure This matchup is a pure test of reflexes centered on Tristana's forward dive. When you launch yourself forward with Rocket Jump to plant an Explosive Charge, Caitlyn must instantly fire 90 Caliber Net to escape your range. If she reacts in time, she negates your burst and retaliates with a Headshot. If you bait this net out first, her low mobility makes her an easy target. Details ansehen
Caitlyn

Warum

This matchup is a pure test of reflexes centered on Tristana's forward dive. When you launch yourself forward with Rocket Jump to plant an Explosive Charge, Caitlyn must instantly fire 90 Caliber Net to escape your range. If she reacts in time, she negates your burst and retaliates with a Headshot. If you bait this net out first, her low mobility makes her an easy target.

Lane-Einfluss

Caitlyn's superior range and Yordle Snap Trap pressure will force you under turret early, while she chips your health with Piltover Peacemaker. However, because the lane is so volatile, a single successful Rocket Jump that bypasses her 90 Caliber Net completely swings the wave priority. One clean engagement allows you to demolish her turret plates with Explosive Charge, instantly reversing the lane pressure.

Wie man spielt

Never use Rocket Jump directly in a straight line toward Caitlyn while her defensive net is available. Instead, bait 90 Caliber Net by walking up aggressively, or angle your jump slightly to the side to make her aim harder. If she holds her net defensively, focus on farming with Rapid Fire. Once your passive Draw a Bead increases your range in the later levels, you can poke her down without needing to commit your jump.

Vollständiges Profil →
Akshan

Akshan

mobility_clashburst_trade This matchup is a pure battle of explosive windows, defined by how you handle Akshan's high mobility. While his Heroic Swing grants him devastating target-locking burst, you possess the perfect tools to disengage or match his aggression. If he swings in, a perfectly timed Buster Shot completely interrupts his trajectory. Alternatively, if he attempts to force an all-in with Dirty Fighting, you can reposition instantly with Rocket Jump. Details ansehen
Akshan

Warum

This matchup is a pure battle of explosive windows, defined by how you handle Akshan's high mobility. While his Heroic Swing grants him devastating target-locking burst, you possess the perfect tools to disengage or match his aggression. If he swings in, a perfectly timed Buster Shot completely interrupts his trajectory. Alternatively, if he attempts to force an all-in with Dirty Fighting, you can reposition instantly with Rocket Jump.

Lane-Einfluss

Trades are incredibly short and lethal, preventing long, passive farming phases. You must respect his poke from Avengerang, which can quickly chip you down. If Akshan misses his skillshot or wastes his shield, you gain a massive window to stack Explosive Charge with Rapid Fire. However, overextending without your defensive tools invites a deadly counter-engage, turning any mistimed dive into a double kill for him.

Wie man spielt

Never initiate a jump forward unless Akshan's hook is on cooldown. Instead, hold Buster Shot exclusively to disrupt his Heroic Swing mid-flight, pushing him away into an awkward position. If you get caught off-guard or see him channeling Comeuppance, use Rocket Jump to break his line of sight behind your minions or a wall. When he plays passively, focus on shoving the wave with your passive Draw a Bead to limit his roaming potential.

Vollständiges Profil →
Vayne

Vayne

skill_matchupdisengage_check This skill matchup balances Vayne's late-game hyper-scaling against your explosive mid-game power spikes. The absolute core of this duel lies in your Rocket Jump trajectory. If you attempt to dive her, Vayne can reactively interrupt your flight with Condemn. This denial prevents you from fully stacking and detonating Explosive Charge, which completely ruins your cooldown reset and leaves you dangerously exposed to her Silver Bolts counter-attack. Details ansehen
Vayne

Warum

This skill matchup balances Vayne's late-game hyper-scaling against your explosive mid-game power spikes. The absolute core of this duel lies in your Rocket Jump trajectory. If you attempt to dive her, Vayne can reactively interrupt your flight with Condemn. This denial prevents you from fully stacking and detonating Explosive Charge, which completely ruins your cooldown reset and leaves you dangerously exposed to her Silver Bolts counter-attack.

Lane-Einfluss

This mechanical threat completely dictates how you manage the minion waves. You cannot afford mindless all-ins; instead, you must leverage the passive area damage from Draw a Bead to constantly shove waves. Forcing Vayne under her turret with Explosive Charge limits her ability to initiate trades. It prevents her from using Night Hunter to chase you down the long lane and minimizes her opportunities to land a stunning Condemn against the walls.

Wie man spielt

To win this lane, play front-to-back and trade primarily with Rapid Fire and basic attacks. Never use Rocket Jump offensively unless Vayne has already wasted Condemn. If she activates Final Hour and uses Tumble to close the distance, immediately disengage using Buster Shot to knock her back and neutralize her ultimate's duration. Keep your distance, prioritize chipping her tower down, and only commit to a chase once her self-peel tool is completely offline.

Vollständiges Profil →

Andere Matchups

Günstig

10

Diese Champions tun sich meist schwer, auf deine Hauptstärken zu reagieren, was dir mehr Freiheit im Matchup gibt. Du hast oft mehrere Möglichkeiten, sie unter Druck zu setzen und Trades zu deinen Gunsten zu erzwingen. Nutze diesen Vorteil, um das Tempo zu bestimmen, statt ihnen Zeit zu geben, wieder in eine komfortable Position zu kommen.

Kog'Maw

Kog'Maw

all_inspacing Kog'Maw relies heavily on Bio-Arcane Barrage to poke you from a safe distance, but he lacks any hard self-peel. Tristana completely bypasses this ranged threat by using Rocket Jump to close the gap instantly. Once on top of him, triggering Rapid Fire allows you to rapidly stack Explosive Charge, bursting him down before his sustained magic damage can ramp up. Details ansehen
Kog'Maw

Warum

Kog'Maw relies heavily on Bio-Arcane Barrage to poke you from a safe distance, but he lacks any hard self-peel. Tristana completely bypasses this ranged threat by using Rocket Jump to close the gap instantly. Once on top of him, triggering Rapid Fire allows you to rapidly stack Explosive Charge, bursting him down before his sustained magic damage can ramp up.

Lane-Einfluss

This matchup dynamic forces Kog'Maw to play incredibly defensively, yielding early wave control to you. You can easily shove the lane to secure priority or freeze it to set up lethal zones. Any time Kog'Maw mispositions to last-hit, the threat of your all-in prevents him from contesting the wave, leading to massive gold leads and early tower plating pressure.

Wie man spielt

Watch Kog'Maw's glowing spit to know when Bio-Arcane Barrage is active. Instead of trading autos during this buff, wait for it to expire, then immediately launch yourself forward with Rocket Jump. Plant Explosive Charge and activate Rapid Fire to secure the reset. If he tries to slow your retreat with Void Ooze, use Buster Shot to push him away or finish him off, then immediately walk out of his Icathian Surprise explosion radius.

Vollständiges Profil →
Ashe

Ashe

jump_engageburst_threat Tristana completely dominates Ashe because of her raw gap-close and explosive burst. Ashe relies on the constant slows from Frost Shot and poke from Volley to keep you at bay, but she lacks any natural mobility to escape a hard engage. By using Rocket Jump to leap straight onto her, you bypass her spacing tools entirely and can quickly stack Explosive Charge, threatening a lethal burst before she can even ramp up her Ranger's Focus. Details ansehen
Ashe

Warum

Tristana completely dominates Ashe because of her raw gap-close and explosive burst. Ashe relies on the constant slows from Frost Shot and poke from Volley to keep you at bay, but she lacks any natural mobility to escape a hard engage. By using Rocket Jump to leap straight onto her, you bypass her spacing tools entirely and can quickly stack Explosive Charge, threatening a lethal burst before she can even ramp up her Ranger's Focus.

Lane-Einfluss

This dynamic forces Ashe to play incredibly far back, conceding control of the minion waves. Since she cannot step up without risking a sudden Rocket Jump engage, you can freely slow-push waves or pressure her under tower. She is forced to use Volley defensively to clear minions rather than poke you. This pressure limits her ability to look for cross-map plays with Enchanted Crystal Arrow, keeping her pinned and vulnerable.

Wie man spielt

To execute this perfectly, watch Ashe's positioning when she attempts to secure last hits. The moment she missteps or wastes Volley on the wave, immediately use Rocket Jump directly onto her. Apply Explosive Charge and activate Rapid Fire to instantly detonate the bomb, resetting your jump. If she tries to retaliate with Enchanted Crystal Arrow at close range, use Buster Shot to push her away or secure the final blow while denying her the stun duration.

Vollständiges Profil →
Jhin

Jhin

all_inburst Your massive burst threat dictates this matchup. By using Rocket Jump to leap directly onto Jhin, you bypass his range advantage and force a close-quarters duel. Once on top of him, activating Rapid Fire lets you fully stack and detonate Explosive Charge in seconds. Jhin's Whisper lock prevents him from matching this raw attack speed, ensuring you delete his health bar before he can even chamber his fourth critical shot. Details ansehen
Jhin

Warum

Your massive burst threat dictates this matchup. By using Rocket Jump to leap directly onto Jhin, you bypass his range advantage and force a close-quarters duel. Once on top of him, activating Rapid Fire lets you fully stack and detonate Explosive Charge in seconds. Jhin's Whisper lock prevents him from matching this raw attack speed, ensuring you delete his health bar before he can even chamber his fourth critical shot.

Lane-Einfluss

Jhin is forced into a defensive posture, unable to step up to use Dancing Grenade to clear waves without putting himself in your jump range. Your passive Draw a Bead automatically pushes the lane, giving you constant priority and allowing you to chip away at his tower. Since Jhin must conserve his Deadly Flourish to self-peel, he cannot safely trade health, leading to early recalls and massive gold leads for you.

Wie man spielt

Monitor Jhin's Whisper ammo bar constantly. The moment he fires his fourth shot or starts reloading, immediately launch forward with Rocket Jump. Place your Explosive Charge and trigger Rapid Fire to burst him down. If he tries to retreat under his tower or if a fight goes sideways, use Buster Shot to safely disengage or push him back into your landing zone. Avoid jumping when he has his fourth shot ready to prevent receiving a massive critical blow mid-air.

Vollständiges Profil →
Corki

Corki

burst_trademobility_clash Tristana dominates this matchup by capitalizing on Corki's fragile escape option. While Corki relies on Valkyrie to disengage from trades, his long cooldown leaves him vulnerable. When Tristana attaches Explosive Charge and activates Rapid Fire, she quickly stacks the bomb. If Corki panics and slides away, Tristana can immediately match his flight with Rocket Jump, detonating the charges mid-air or upon landing to secure a lethal burst. Details ansehen
Corki

Warum

Tristana dominates this matchup by capitalizing on Corki's fragile escape option. While Corki relies on Valkyrie to disengage from trades, his long cooldown leaves him vulnerable. When Tristana attaches Explosive Charge and activates Rapid Fire, she quickly stacks the bomb. If Corki panics and slides away, Tristana can immediately match his flight with Rocket Jump, detonating the charges mid-air or upon landing to secure a lethal burst.

Lane-Einfluss

This interaction dictates a highly aggressive lane phase where Corki is forced to play defensively. Tristana's passive, Draw a Bead, paired with Explosive Charge passive explosions, naturally pushes the wave, forcing Corki under his turret where he struggles to farm without burning mana on Phosphorus Bomb. Tristana can easily chip away at the turret plates or dive Corki the moment his escape tool is down, securing early gold.

Wie man spielt

To execute this, always wait for Corki to use Phosphorus Bomb to farm before stepping forward. Once he mispositions, jump in with Rocket Jump to slow him, immediately apply Explosive Charge, and activate Rapid Fire. Do not use your ultimate, Buster Shot, too early; hold it to execute or push him back into your wave if he tries to dodge with Valkyrie. If he has Special Delivery active, play back and avoid direct engagements until his fiery trail disappears.

Vollständiges Profil →
Kalista

Kalista

burst_survivalspacing Tristana dominates this lane because Kalista relies heavily on Martial Poise to hop around and dodge skillshots. However, point-and-click abilities bypass this mobility entirely. When you place Explosive Charge on Kalista, she cannot hop away from the guaranteed explosion. By activating Rapid Fire, you stack the bomb instantly, triggering an unavoidable burst of damage that completely outclasses her sustained Rend stacking in quick trades. Details ansehen
Kalista

Warum

Tristana dominates this lane because Kalista relies heavily on Martial Poise to hop around and dodge skillshots. However, point-and-click abilities bypass this mobility entirely. When you place Explosive Charge on Kalista, she cannot hop away from the guaranteed explosion. By activating Rapid Fire, you stack the bomb instantly, triggering an unavoidable burst of damage that completely outclasses her sustained Rend stacking in quick trades.

Lane-Einfluss

This interaction shifts the lane dynamic entirely in your favor, forcing Kalista to play defensively behind her minions. She cannot safely step up to use Pierce or stack Rend on you. Since her movement is restricted, you easily secure wave priority. You can safely shove waves under her tower using the passive area damage from Draw a Bead, chipping away at her turret plates while she struggles to farm under pressure.

Wie man spielt

To execute this, wait for Kalista to commit her dash to farm, then jump forward with Rocket Jump directly onto her. Immediately apply Explosive Charge and trigger Rapid Fire to burst her down. If her support counter-attacks or uses Fate's Call to knock you up, immediately disengage using Buster Shot to push her away and walk back safely. Never commit to long, extended basic attack battles where her Rend can outdamage your cooldowns.

Vollständiges Profil →
Jinx

Jinx

disengagespacing Tristana dominates Jinx through pure explosive power, but the entire matchup hinges on Jinx's ability to disrupt your engage. While your Explosive Charge paired with Rapid Fire easily out-bursts her minigun or rockets, Jinx can completely shut down your aggression by throwing Flame Chompers! directly in your flight path. This interrupts Rocket Jump mid-air, trapping you in place and leaving you unable to secure the crucial jump reset. Details ansehen
Jinx

Warum

Tristana dominates Jinx through pure explosive power, but the entire matchup hinges on Jinx's ability to disrupt your engage. While your Explosive Charge paired with Rapid Fire easily out-bursts her minigun or rockets, Jinx can completely shut down your aggression by throwing Flame Chompers! directly in your flight path. This interrupts Rocket Jump mid-air, trapping you in place and leaving you unable to secure the crucial jump reset.

Lane-Einfluss

During the laning phase, this interaction dictates when you can safely play for the kill. Jinx will try to poke you down with the rocket form of Switcheroo! and slow you with Zap!. However, because her defensive traps have a massive cooldown, the moment Jinx wastes Flame Chompers! to zone you or miss-positions them, she is completely defenseless against your all-in, forcing her to play passively under her tower.

Wie man spielt

To convert this favorable matchup, never initiate with Rocket Jump if Jinx still holds her traps. Instead, walk up to trade with Rapid Fire and Explosive Charge to force a reaction. If she drops Flame Chompers! defensively, step aside to avoid the root, wait for them to expire, and then jump forward. If you get caught mid-flight, immediately use Buster Shot to push Jinx away, preventing her from triggering Get Excited! off your mistake.

Vollständiges Profil →
Twitch

Twitch

early_snowballlane_dominance Twitch's early game is notoriously weak because his damage relies on stacking Deadly Venom slowly. You can bypass his scaling by initiating with Rocket Jump directly onto him. Since he lacks burst resistance, applying Explosive Charge and detonating it with Rapid Fire will instantly melt his health bar long before he can build up enough poison stacks to make Contaminate threatening. Details ansehen
Twitch

Warum

Twitch's early game is notoriously weak because his damage relies on stacking Deadly Venom slowly. You can bypass his scaling by initiating with Rocket Jump directly onto him. Since he lacks burst resistance, applying Explosive Charge and detonating it with Rapid Fire will instantly melt his health bar long before he can build up enough poison stacks to make Contaminate threatening.

Lane-Einfluss

This laning phase is dictated entirely by your kill pressure. Twitch is forced to play extremely defensively, often giving up early farm to avoid your jump range. You can easily crash waves to chip at his tower using the passive splash from Draw a Bead, or freeze the wave to zone him out completely. If he steps up to farm, a quick burst trade forces him to recall, yielding massive gold advantages.

Wie man spielt

Keep a constant eye on Twitch's attempts to enter Ambush. The moment he goes invisible, step back slightly toward your minion wave to prevent a sneak attack. When he reveals himself to farm, immediately leap in with Rocket Jump, place Explosive Charge, and activate Rapid Fire to detonate it for a secure kill. If he retaliates with Spray and Pray, use Buster Shot to knock him back, neutralizing his ultimate's extended range.

Vollständiges Profil →
Zeri

Zeri

mobility_matchearly_lead Tristana dominates this lane because she can instantly neutralize Zeri's primary escape tool. When Zeri attempts to slide away or reposition using Spark Surge, Tristana can immediately match her distance using Rocket Jump. Combined with the massive attack speed steroid from Rapid Fire, Tristana easily stacks her Explosive Charge during these short, explosive trades, completely out-bursting Zeri's slower Electrocute! DPS before she can ramp up. Details ansehen
Zeri

Warum

Tristana dominates this lane because she can instantly neutralize Zeri's primary escape tool. When Zeri attempts to slide away or reposition using Spark Surge, Tristana can immediately match her distance using Rocket Jump. Combined with the massive attack speed steroid from Rapid Fire, Tristana easily stacks her Explosive Charge during these short, explosive trades, completely out-bursting Zeri's slower Electrocute! DPS before she can ramp up.

Lane-Einfluss

This matchup turns the lane into an aggressive hunting ground where Zeri is constantly forced to play defensively near her tower. Because Tristana's passive Draw a Bead explosion pushes waves automatically, Zeri is pinned under turret trying to last-hit with Electrocute!. This constant pressure allows Tristana to safely chip away at tower plates using Explosive Charge, securing an early gold lead while leaving Zeri with no room to setup long-lane chases.

Wie man spielt

You must hold Rocket Jump until Zeri commits her Spark Surge. Once she uses it to dash or slide over a wall, immediately jump onto her to lock her down. Activate Rapid Fire and place Explosive Charge on her to force a quick, lethal burst trade. If she activates Lightning Crash, do not try to out-kite her; instead, use Buster Shot to knock her away, disengage, and wait out her ultimate's duration before re-engaging.

Vollständiges Profil →
Miss Fortune

Miss Fortune

gap_closeburst_threat Tristana holds a massive advantage because she can completely neutralize Miss Fortune's passive mobility. By launching yourself forward with Rocket Jump, you land directly on her, dealing damage that immediately disables her Strut movement speed. Once she is slowed and stripped of her extra swiftness, she cannot outrun your Explosive Charge, forcing her into an extremely unfavorable, stationary duel. Details ansehen
Miss Fortune

Warum

Tristana holds a massive advantage because she can completely neutralize Miss Fortune's passive mobility. By launching yourself forward with Rocket Jump, you land directly on her, dealing damage that immediately disables her Strut movement speed. Once she is slowed and stripped of her extra swiftness, she cannot outrun your Explosive Charge, forcing her into an extremely unfavorable, stationary duel.

Lane-Einfluss

This matchup dynamic forces Miss Fortune to play with extreme caution and concede lane control. She cannot safely position to bounce Double Up through dying minions without putting herself in range of your devastating Rocket Jump. Consequently, you dictate the wave's position, pushing her under turret where you can freely stack Explosive Charge on her tower structure under heavy pressure.

Wie man spielt

To execute this plan flawlessly, stay highly alert to her Make It Rain. Never trigger your Rocket Jump while standing inside her slowing zone, as it ruins your landing momentum. Wait for her to waste this slow, then jump directly onto her to deactivate Strut. Immediately activate Rapid Fire to fully stack and detonate your Explosive Charge. If she attempts to retaliate by channeling Bullet Time, instantly cast Buster Shot to interrupt her.

Vollständiges Profil →

Andere Matchups

Items to Counter Tristana

Buy these items to reduce this champion's effectiveness in your games.

Rappel mortel
Rappel mortel
Ange gardien
Ange gardien
Mâchoire de Malmortius
Enchantement Vif-Argent
Enchantement Stase
Enchantement Stase

Wie man diesen Champion kontert

Konter-Winkel

Tristana zu kontern, heißt nicht nur, ihren All-In zu überleben. Es geht vor allem darum, ihre Fähigkeit zur Konvertierung zu brechen: ihr kostenlose Platten zu verweigern, offensive Raketensprünge zu unterbrechen oder zu bestrafen und sie zu zwingen, Schnellfeuer oder Explosivladung zu nutzen, ohne einen Turm, Kill oder ein Ziel zu bekommen. Die bereits im Datensatz vorhandenen Champions zeigen verschiedene Formen des Drucks: Draven und Lucian können sie treffen, bevor sie sich wohlfühlt, Caitlyn und Poke Varus können sie aus der Ferne zermürben, während langsamere Matchups ihr Zeit zum Skalieren geben. Die Schlüsselidee ist einfach: Tristana wird gefährlich, wenn sie das Tempo kontrolliert. Wenn sie reagieren, zurückweichen oder Raketensprung defensiv vor Zielen einsetzen muss, sinkt ihr Einfluss stark.

Patch-Kontext

Gute Tristana-Konter zielen auf eine ihrer drei Erfolgsbedingungen ab: die Zeit zum Stapeln von Explosivladung, die Sicherheit von Raketensprung oder ihre Fähigkeit, Türme zu treffen. Aggressive Lanes hindern sie am komfortablen Skalieren; Lanes mit großer Reichweite zwingen sie, Gesundheit zu verlieren, bevor sie in Reichweite kommen kann; Supports oder Jungler mit Crowd Control können ihre Zauber für nach dem Sprung aufheben. Das Ziel ist nicht immer, sie früh zu töten. Manchmal reicht es aus, den ersten Turm zu verweigern, denn eine Tristana ohne Vorsprung braucht viel länger, bevor sie die Backline bedroht.

Schnell gelesen

  • Tristana direkt nach Raketensprung zu bestrafen, ist oft stärker, als sie davor zu poken: Ohne Reset hat sie keinen echten Ausweg.
  • Sie davon abzuhalten, Explosivladung frei auf Türmen zu platzieren, verlangsamt ihren Spielplan massiv.
  • Reichweiten- oder frühe Druck-Matchups funktionieren, weil sie sie zwingen, zu verteidigen, anstatt zu konvertieren.

Konter-Archetypen

Explosiver früher Druck

Dieses Profil funktioniert, weil es Tristana angreift, bevor ihre Reichweite und Items ihren fragilen frühen Spielverlauf ausgleichen. Draven und Lucian können frühe Trades bestreiten, saubere Wellencrashes verhindern und jeden Explosivladung-Versuch teurer machen. Tristana möchte oft die Lane für einen stabilen Rückruf oder eine Platte vorbereiten; wenn sie vorher zu viel Gesundheit verliert, muss sie Raketensprung defensiv einsetzen und einen Teil ihres strukturellen Drucks aufgeben. Der Konter zielt daher nicht nur auf das Duell ab, sondern darauf, ihre erste Konvertierung zu blockieren.

Wie sich der Champion anpasst. Tristana muss akzeptieren, langsamer zu spielen: sauber last-hitten, kurze Trades vermeiden und Raketensprung behalten, um den gegnerischen All-In zu brechen. Ihr Ziel ist es nicht, die Lane um jeden Preis zu gewinnen, sondern den ersten Gegenstand zu erreichen, ohne einen Kill zu geben, der den gegnerischen Snowball beschleunigt.

Lane-Reichweite und Poke

Reichweite und Poke stören Tristana, weil sie sie zwingen, Gesundheit zu verlieren, bevor ihr eigenes Muster überhaupt beginnt. Sie möchte Explosivladung platzieren, Schnellfeuer aktivieren und lange genug in Reichweite bleiben, um die Bombe zu stapeln; gegen Caitlyn oder Poke Varus wird diese Sequenz schwierig, wenn sie bereits geschwächt die Welle erreicht. Poke hat auch eine Zielkonsequenz: eine Tristana mit wenig Gesundheit kann keinen Turm bedrohen oder dragon zuversichtlich starten. Das Matchup dreht sich daher darum, sie zu zermürben, bevor ihr echtes DPS-Fenster beginnt.

Wie sich der Champion anpasst. Tristana muss vermeiden, auf jeden Poke mit einem erzwungenen Trade zu antworten. Sie sollte Gesundheit schonen, saubere Rückrufe nutzen und auf einen echten Reichweitenfehler oder verbündetes Crowd Control warten. Wenn sie gesund genug bleibt, wird ihre Explosivladung auf Türmen oder Zielen nach dem ersten Kauf wieder zu einer echten Bedrohung.

Matchups, die früh nicht bestrafen

Diese Matchups werden für Tristana günstig, wenn sie es versäumen, ihre Kontrolle oder ihren Poke in einen echten Vorteil umzuwandeln. Ziggs, Ashe oder Jhin können einige Wellen stören, aber wenn Tristana genug Gesundheit behält und ein Turm-Fenster findet, verwandelt sie die Lane schnell in Ziel-Druck. Ihre Mobilität erlaubt es ihr auch, ein schlecht positioniertes Ziel zu bestrafen, wenn das gegnerische Crowd Control bereits verbraucht ist. Die Gefahr für diese Champions besteht darin, eine statistisch gute Lane zu spielen und trotzdem zuzulassen, dass Tristana die erste Struktur nimmt und die ganze Karte beschleunigt.

Wie sich der Champion anpasst. Tristana muss diszipliniert bleiben: Nicht in verbleibendes Crowd Control springen, sondern nach Momenten suchen, in denen die Welle den Turm erreicht. Gegen diese Profile ist gutes Wellenmanagement oft mehr wert als ein früher All-In, denn der erste Turm eröffnet ihren echten Spielplan.

Prioritäts-Matchups

Draven

Draven verdient Priorität, weil er den exakten fragilen Teil von Tristana bestraft: frühe Trades, bevor ihre Reichweite und Items die Oberhand gewinnen. Wenn Tristana das Duell zu früh annimmt, gibt sie Draven die Chance, einfachen Lane-Druck in einen Snowball zu verwandeln. Die richtige Einschätzung ist nicht, zu versuchen, ihn auf Level 2 mechanisch zu schlagen, sondern Verluste zu begrenzen, gefährliche Wellen-Resets zu vermeiden und zu warten, bis support oder jungle ein Fenster schafft, in dem Explosivladung gestapelt werden kann, ohne ihren vollen Burst abzubekommen.


Caitlyn

Caitlyn verdient Fokus, weil sie Tristana nicht durch direkten All-In kontert, sondern durch Distanzkontrolle. Sie kann Tristana daran hindern, die Welle bequem zu erreichen, Platten erschweren und defensive Rückrufe erzwingen. Für Tristana ist der Schlüssel nicht, Geduld mit Passivität zu verwechseln: Sie muss akzeptieren, einige Auto-Attacks zu verlieren, aber die Momente vorbereiten, in denen Caitlyn ihren Druck zu weit von der Sicherheit entfernt einsetzt. Ein Fenster mit Explosivladung auf einem Turm kann mehrere Minuten kontrollierter Lane ausgleichen.

Häufige Fehler gegen ihn

Häufige Fehler gegen ihn

  • Ihr erlauben, Explosivladung nach einem Recall oder Wave Crash kostenlos auf einem Turm zu platzieren.
  • Hartes Crowd Control vor ihrem Raketensprung einsetzen und dann keine Antwort haben, wenn sie aggressiv springt.
  • Sie anpoken, ohne daraus einen Wellenvorteil zu ziehen, was ihr erlaubt, sich zu erholen und mit einem besseren Kauf zurückzukehren.
  • Ihre Geschwindigkeit auf dragon oder Turm unterschätzen, wann immer Schnellfeuer verfügbar ist.
  • Wenn du ihr zu weit nach einem Rocket Jump Reset nachjagst, besonders wenn sie den ersten Kill in ein zweites Ziel verwandeln will.

Coach-Notizen

  • Gegen Tristana solltest du immer eine Antwort für nach dem Sprung bereithalten. Die zuverlässigste Bestrafung kommt oft eine halbe Sekunde nach ihrem Angriff, nicht davor.
  • Wenn du sie nicht töten kannst, verlangsame ihr Turmbauen. Das Verzögern ihrer ersten Struktur reduziert ihre Fähigkeit, Druck in Richtung dragon und mid lane zu verlagern, erheblich.

FAQ

Wie verhinderst du, dass Tristana in der Lane snowballt?

Du musst die erste Umwandlung stoppen, nicht nur auf den Kill aus sein. Tristana snowballt, wenn eine geknackte Welle zu einer Platte, dann einem Turm und dann einer dragon-Rotation wird. Um sie zu verlangsamen, bekämpfe die Welle, bevor sie deinen Turm erreicht, halte eine Antwort für ihren Rocket Jump bereit und vermeide es, Crowd Control auf ihren support zu verschwenden, wenn sie dann frei springen kann. Selbst ohne sie zu töten, reicht es oft aus, Platten und Tempo zu verweigern, um ihre tatsächliche Wirkung zu verzögern.

Solltest du dich in Teamfights auf Tristana konzentrieren?

Ja, aber nicht zufällig. Wenn du sie zu früh angreifst, während sie noch Rocket Jump, Ultimate und eine Frontline vor sich hat, gibst du ihr vielleicht den Raum, den sie braucht. Der beste Fokus geschieht, wenn sie Rocket Jump bereits benutzt hat oder wenn sie vortritt, um Explosive Charge zu stapeln. In diesem Moment kann harter Crowd Control oder koordinierter Burst ihren Reset verweigern und ihren gesamten Kampf brechen. Das Timing ist wichtiger als die Absicht, sie zu fokussieren.

Warum sind Engage-Supports mit Tristana gefährlich?

Weil sie ihr Hauptproblem lösen: ein Ziel lange genug in Reichweite zu halten. Tristana braucht mehrere Angriffe, um Explosive Charge zu maximieren, und ein Engage-support kann genau dieses Fenster schaffen. Wenn du diesem Duo gegenüberstehst, musst du den Moment respektieren, in dem feindlicher Crowd Control verfügbar ist. Ein immobilisiertes Ziel wird schnell zu einem explodierten Ziel, dann zu einem Rocket Jump Reset und dann zu einer zweiten Aktion. Die Gefahr geht von der Kette aus, nicht nur vom ersten Crowd Control.

Reicht Poke aus, um Tristana zu kontern?

Poke ist nützlich, aber nur, wenn er eine echte Konsequenz hat: schlechten Recall, verlorene Welle, Unfähigkeit, den Turm anzugreifen, oder einen umkämpften dragon. Wenn du sie anpokst, ohne die Welle zu kontrollieren, kann sie sich erholen, mit einem ordentlichen Kauf zurückkehren und das nächste Fenster mit Explosive Charge nutzen. Gegen Tristana muss Poke ihr Tempo blockieren, nicht nur ihre Lebensleiste senken. Andernfalls findet sie oft ein Fenster, das die gesamte Lane zurückzahlt.










































