September 2026 · Patch 7.2d
Assassin · MID

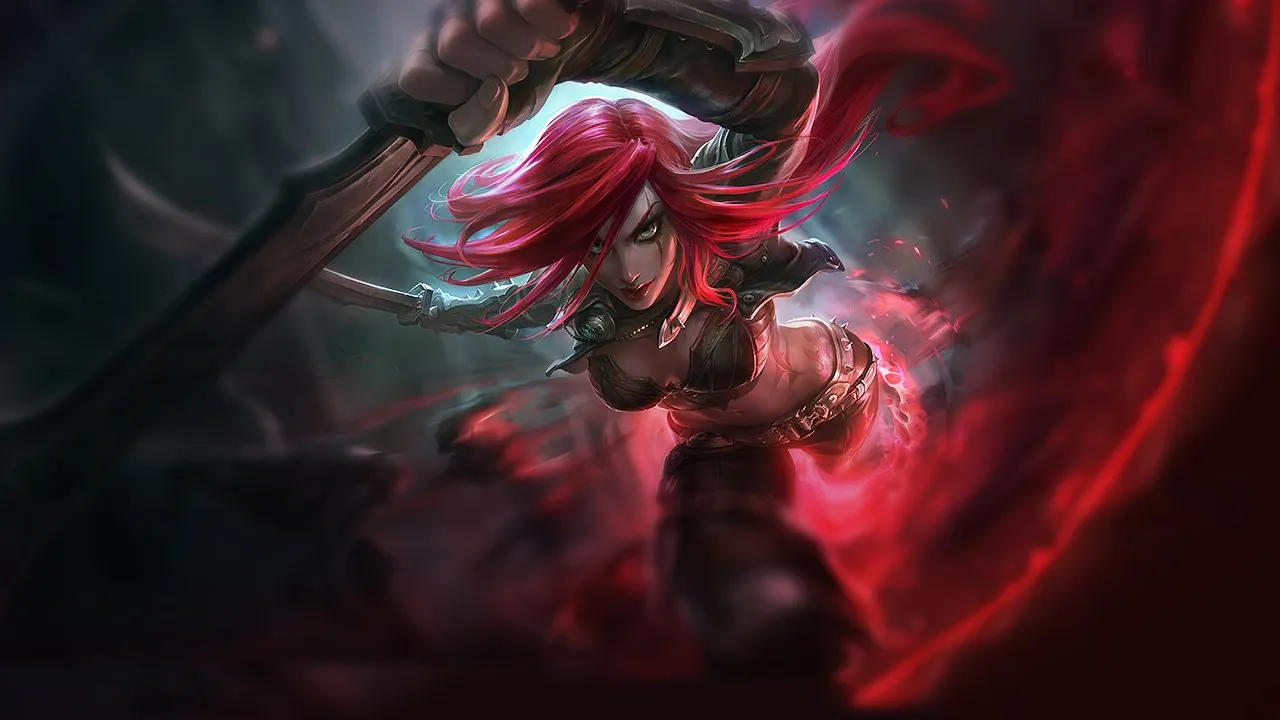
Panduan counter Katarina Wild Rift

Katarina mengandalkan reset skill selama pertarungan. Komposisi dengan crowd control yang berat atau alat yang dapat menghentikan engage miliknya akan sangat mengurangi dampaknya. Tanpa peluang reset, potensi pembersihan dalam teamfight miliknya akan menurun drastis.

★ MID Tier A
DMG
UTIL
TANK
DIFF
Win 47.0% #91 · ↓2pt
Pick 1.7% #31
Ban 0.4% #115

Panduan counter Katarina Wild Rift ★ Counter Sheet

Hard Counters

10

Champion ini punya build dan gaya bermain yang langsung mengungguli milikmu, sehingga mengontrol lane dan farming jadi sangat sulit. Kemampuan mereka bisa menetralkan kekuatan utamamu atau menghukummu begitu kamu mencoba menjalankan rencana permainan biasa. Di matchup seperti ini, tujuannya biasanya adalah meminimalkan kesalahan dan mencari cara menang di luar konfrontasi langsung.

Annie

Annie

hard_counterlockdown The core of this matchup revolves around Annie's passive stun. Your entire damage output relies on channeling Death Lotus, but Annie can hold Pyromania indefinitely. If you jump in with Shunpo, she can instantly drop Incinerate or Summon: Tibbers to stun you mid-spin, completely canceling your ultimate and leaving you stationary and defenseless in close range. Lihat detail
Annie

Kenapa

The core of this matchup revolves around Annie's passive stun. Your entire damage output relies on channeling Death Lotus, but Annie can hold Pyromania indefinitely. If you jump in with Shunpo, she can instantly drop Incinerate or Summon: Tibbers to stun you mid-spin, completely canceling your ultimate and leaving you stationary and defenseless in close range.

Dampak di lane

Annie dictates the lane's pace because she can farm safely from range with Disintegrate. You cannot safely trade with Bouncing Blade setups because stepping up to collect a dague invites a Pyromania-charged Incinerate. This forces you to drop farm under tower, allowing Annie to keep healthy, maintain priority, and easily deploy Summon: Tibbers to dive you or secure objectives while you are pinned down.

Cara bermain

You must play a patient waiting game centered around Annie's Pyromania counter. Never initiate with Shunpo while her stun is active. Instead, wait for her to waste the charge on Disintegrate to secure a minion, or bait her Molten Shield before looking for a quick Bouncing Blade and Preparation trade. If she holds her stun, ignore the lane entirely and look for Voracity resets in chaotic river skirmishes where she cannot easily target you.

Profil lengkap →
Galio

Galio

cc_lockdownult_interrupt Galio is designed to shut down AP assassins like Katarina, making this matchup incredibly punishing. Your main damage source, Death Lotus, is completely neutralized by his basic kit. The moment you channel your ultimate, Galio can instantly cancel it using either the taunt from Shield of Durand or the knock-up from Justice Punch. Since you must jump into melee range to execute your combos, you place yourself directly in range of his crowd control. Lihat detail
Galio

Kenapa

Galio is designed to shut down AP assassins like Katarina, making this matchup incredibly punishing. Your main damage source, Death Lotus, is completely neutralized by his basic kit. The moment you channel your ultimate, Galio can instantly cancel it using either the taunt from Shield of Durand or the knock-up from Justice Punch. Since you must jump into melee range to execute your combos, you place yourself directly in range of his crowd control.

Dampak di lane

You cannot pressure the wave without getting punished. Galio clears waves effortlessly using Winds of War and Colossal Smash, forcing you under turret. If you try to trade using Bouncing Blade and Shunpo, his passive magic shield absorbs your initial burst while he retaliates with Justice Punch. This constant pressure limits your roam potential, allowing Galio to safely use Hero's Entrance to impact other lanes while you are stuck clearing minions.

Cara bermain

Patience is your only tool. Never initiate a fight with Shunpo unless you have seen Galio waste both Shield of Durand and Justice Punch on your allies or to clear waves. When skirmishing, drop Preparation to bait his charge, using the speed boost to dodge Winds of War. If he holds his crowd control, focus entirely on farming safely with Bouncing Blade and look to follow his Hero's Entrance with a late teleport or lateral roam once his local presence is established.

Profil lengkap →
Kassadin

Kassadin

silencemobility Kassadin acts as a hard wall to your burst because his *Null Sphere* instantly cancels your *Death Lotus* channel. Additionally, his passive *Void Stone* grants him a magic shield whenever you try to poke or trade near him, while his *Force Pulse* charges up rapidly from your constant spellcasting. This means your primary high-damage tool is entirely neutralized on reaction, while your general ability rotations actively empower his defensive and offensive capabilities. Lihat detail
Kassadin

Kenapa

Kassadin acts as a hard wall to your burst because his *Null Sphere* instantly cancels your *Death Lotus* channel. Additionally, his passive *Void Stone* grants him a magic shield whenever you try to poke or trade near him, while his *Force Pulse* charges up rapidly from your constant spellcasting. This means your primary high-damage tool is entirely neutralized on reaction, while your general ability rotations actively empower his defensive and offensive capabilities.

Dampak di lane

Trading with *Bouncing Blade* and *Shunpo* feels unrewarding as *Void Stone* absorbs your magic damage, and Kassadin retaliates hard with *Nether Blade* auto-resets. Once he unlocks *Riftwalk*, he easily blinks out of your daggers. You cannot pressure his tower or establish lane priority, leaving you trapped under your turret while he scales freely or follows your roams with superior mobility, starving your side lanes of map pressure.

Cara bermain

Never initiate with *Death Lotus* while Kassadin holds *Null Sphere*. You must bait it out using a quick *Bouncing Blade* and *Shunpo* onto a dagger from *Preparation*, then immediately disengage. Only spin when you see him waste the silence on a minion or to trade. If he holds it indefinitely, abandon the lane to seek skirmishes in the river where you can secure resets on his weaker allies before he can arrive with *Riftwalk*.

Profil lengkap →
Diana

Diana

cc_interruptburst Diana represents a structural nightmare for you because your ultimate tool for teamfights and skirmishes, Death Lotus, is completely shut down by her kit. Whenever you jump in with Shunpo to channel your ultimate, Diana simply presses Moonfall to instantly pull you out of it, cancelling your main source of burst damage. Furthermore, her Pale Cascade shield absorbs your trade attempts using Bouncing Blade and Preparation daggers. Lihat detail
Diana

Kenapa

Diana represents a structural nightmare for you because your ultimate tool for teamfights and skirmishes, Death Lotus, is completely shut down by her kit. Whenever you jump in with Shunpo to channel your ultimate, Diana simply presses Moonfall to instantly pull you out of it, cancelling your main source of burst damage. Furthermore, her Pale Cascade shield absorbs your trade attempts using Bouncing Blade and Preparation daggers.

Dampak di lane

This interaction forces you into a passive posture. You cannot safely contest waves because Diana can fish for Crescent Strike marks to engage with Lunar Rush. If she hits you, trading back is impossible since her Pale Cascade mitigates your daggers. You will constantly be pushed under tower, losing priority for early skirmishes, and risking massive health deficits if you step up to collect minions.

Cara bermain

To survive, you must play around Diana's cooldowns. Never initiate with Shunpo and Death Lotus while her Moonfall is available; instead, wait for your allies to force her ultimate out, or bait it during chaotic skirmishes. Focus on farming safely using Bouncing Blade from a distance. If she wastes Pale Cascade or misses Crescent Strike, you have a tiny window to use Preparation and trade, but prioritize roaming to collect resets via Voracity.

Profil lengkap →
Vex

Vex

anti_mobilityhard_cc Your entire kit relies on blinking onto daggers, but Vex is designed to shut down high-mobility champions. Whenever you try to initiate with Shunpo, Vex’s passive Doom 'n Gloom immediately charges up, allowing her to interrupt your engage with an instant fear. If she reacts quickly with Personal Space or a direct Mistral Bolt, your combo is aborted before you can even drop a dagger or spin. Lihat detail
Vex

Kenapa

Your entire kit relies on blinking onto daggers, but Vex is designed to shut down high-mobility champions. Whenever you try to initiate with Shunpo, Vex’s passive Doom 'n Gloom immediately charges up, allowing her to interrupt your engage with an instant fear. If she reacts quickly with Personal Space or a direct Mistral Bolt, your combo is aborted before you can even drop a dagger or spin.

Dampak di lane

This interaction strips away any pressure you have in lane. You cannot step up to clear minions with Bouncing Blade without Vex zoning you with Looming Darkness. If you attempt to farm under tower, she will poke you down safely, forcing early recalls that bleed gold. Trading is a losing battle because her shield absorbs your initial damage, leaving you stuck in her wave while feared and taking heavy minion aggro.

Cara bermain

To survive, you must play around Vex's passive bar. Watch her resource indicator; when her fear is down, use Preparation to secure safe farm. However, your main win condition is to abandon the lane. Look at the map constantly and use Shunpo to clear waves rapidly once she wastes her spells, then immediately roam to the side lanes. A skirmish in the river lets you pick up resets through Voracity without Vex's constant disruption.

Profil lengkap →
Lissandra

Lissandra

hard_ccanti_dive Your entire kill pressure relies on channel time, but Lissandra is your ultimate counter-engage. The moment you use Shunpo to get in and trigger Death Lotus, she can instantly shut you down. Her Ring of Frost roots you mid-spin without requiring any aim, and once she reaches level five, Frozen Tomb offers her a point-and-click suppression that completely cancels your main damage source while leaving you defenseless. Lihat detail
Lissandra

Kenapa

Your entire kill pressure relies on channel time, but Lissandra is your ultimate counter-engage. The moment you use Shunpo to get in and trigger Death Lotus, she can instantly shut you down. Her Ring of Frost roots you mid-spin without requiring any aim, and once she reaches level five, Frozen Tomb offers her a point-and-click suppression that completely cancels your main damage source while leaving you defenseless.

Dampak di lane

Because you cannot fight her directly, Lissandra controls the wave pace. She safely shoves you under turret with Ice Shard from range. Trading with Bouncing Blade and Preparation is highly risky because if you jump to a dagger, she punishes you with Ring of Frost. This constant pressure denies you priority, forcing you to bleed gold under tower or risk losing half your health bar just to secure a minion.

Cara bermain

To survive, you must abandon any hope of solo killing her and focus entirely on roaming. Sacrifice some cs, let her push, and wait for her to waste Glacial Path to clear waves before you attempt to move. When skirmishes break out in the river, do not enter the fight until you see Lissandra commit Frozen Tomb on a teammate. Only then can you jump in with Shunpo and spin safely to trigger Voracity resets.

Profil lengkap →
Irelia

Irelia

cc_interruptburst_mitigation This matchup is heavily dictated by Irelia holding Flawless Duet specifically to cancel your Death Lotus. Because your ultimate requires you to stand still, you become an incredibly easy target for her dual-blade stun. Furthermore, her constant mobility with Bladesurge allows her to effortlessly dance around your Bouncing Blade and Preparation daggers, while Defiant Dance mitigates your burst when you try to commit with Shunpo. Lihat detail
Irelia

Kenapa

This matchup is heavily dictated by Irelia holding Flawless Duet specifically to cancel your Death Lotus. Because your ultimate requires you to stand still, you become an incredibly easy target for her dual-blade stun. Furthermore, her constant mobility with Bladesurge allows her to effortlessly dance around your Bouncing Blade and Preparation daggers, while Defiant Dance mitigates your burst when you try to commit with Shunpo.

Dampak di lane

Laning feels oppressive because Irelia quickly builds Ionian Fervor stacks using Bladesurge on minions, gaining massive auto-attack damage that out-trades your short-burst patterns. You cannot contest the wave, forcing you to farm passively from range. If you jump forward with Shunpo to grab a minion, she will instantly punish you with Flawless Duet, forcing you out of lane or leading to an early death under your tower.

Cara bermain

Survival demands absolute discipline with your ultimate. You must never initiate with Death Lotus while Irelia still holds Flawless Duet; instead, wait in the wings during skirmishes and only commit after she uses her stun on your allies. Use your Bouncing Blade to farm from safety, and keep Shunpo ready as an escape tool toward your own minions rather than an offensive engage. If she misses her stun, you have a brief window to trade using Preparation before backing off.

Profil lengkap →

Matchup lainnya

Tidak Menguntungkan

19

Champion ini punya tool yang umumnya memberi mereka keunggulan dalam pertarungan, tanpa membuat matchup-nya benar-benar mustahil. Mereka mungkin punya jarak lebih jauh, lebih tahan terhadap seranganmu, atau lebih banyak cara merespons engage-mu. Kamu perlu menyesuaikan pendekatan dan memilih dengan cermat kapan menerima pertarungan.

Ahri

Ahri

skirmishcc_timing Ahri's ability to effortlessly shut down your entire damage profile lies in her Charm. Because Death Lotus requires you to remain stationary, a disciplined Ahri will never throw her heart proactively during a fight. She will simply hold it until you commit with Shunpo, instantly canceling your ultimate mid-channel while amplifying her own Orb of Deception and Fox-Fire burst to turn your engage into a swift death. Lihat detail
Ahri

Kenapa

Ahri's ability to effortlessly shut down your entire damage profile lies in her Charm. Because Death Lotus requires you to remain stationary, a disciplined Ahri will never throw her heart proactively during a fight. She will simply hold it until you commit with Shunpo, instantly canceling your ultimate mid-channel while amplifying her own Orb of Deception and Fox-Fire burst to turn your engage into a swift death.

Dampak di lane

In lane, Ahri abuses this threat to deny you farm. She pushes constantly with Orb of Deception, relying on Essence Theft to heal any chip damage you manage to land. You cannot easily contest the wave because stepping up makes you an easy target for Charm. This forces you under tower, bleeding priority and leaving you unable to secure clean resets or assist your jungler without risking a massive health deficit.

Cara bermain

To survive, you must bait out her crowd control before committing. Use Bouncing Blade to set up daggers, then pretend to engage with Preparation and a quick Shunpo to a safe dagger to trigger her panic reflexes. Never channel Death Lotus until her pink projectile is visible and missed. If she refuses to throw Charm, focus on roaming after she wastes Orb of Deception on the wave, using your mobility to find skirmishes where she cannot easily follow without using Spirit Rush.

Profil lengkap →
Akali

Akali

shroud_playcc_timing Akali commands this matchup because her first cast of Perfect Execution features a micro-stun that instantly shuts down your Death Lotus, neutralizing your main teamfight threat. Furthermore, when you drop daggers with Bouncing Blade or Preparation, Akali can easily deploy Twilight Shroud, making her untargetable and rendering your Shunpo resets useless since you cannot target her within the smoke while she retaliates with Five Point Strike. Lihat detail
Akali

Kenapa

Akali commands this matchup because her first cast of Perfect Execution features a micro-stun that instantly shuts down your Death Lotus, neutralizing your main teamfight threat. Furthermore, when you drop daggers with Bouncing Blade or Preparation, Akali can easily deploy Twilight Shroud, making her untargetable and rendering your Shunpo resets useless since you cannot target her within the smoke while she retaliates with Five Point Strike.

Dampak di lane

Laning requires extreme patience as trading is heavily skewed. If you attempt to farm with Bouncing Blade, Akali will punish you with Five Point Strike and trigger Assassin's Mark. This forces you under tower, where securing minions with Shunpo becomes dangerous. The lane is decided by who gets the first kill post-level five, as an ahead Akali completely locks you out of the wave and pressures your tower.

Cara bermain

You must bait out Twilight Shroud before committing to any extended trade. Never channel Death Lotus while Akali still holds the first dash of Perfect Execution; instead, wait for her to initiate with it or force her to use it defensively. If she misses Shuriken Flip, you have a brief window to use Shunpo onto a dagger from Preparation to trade quickly and retreat before her energy pooling allows another Five Point Strike.

Profil lengkap →
Corki

Corki

roaminglane_pressure Surviving early against Corki is incredibly difficult because his Gatling Gun constantly shreds your resistances and punishes you whenever you step up to use Bouncing Blade. Even if you find a roam window to utilize Voracity in side lanes, Corki's passive Special Delivery grants him unparalleled map-wide mobility, allowing him to fly across the river, intercept your plays, and burn your pathing options. Lihat detail
Corki

Kenapa

Surviving early against Corki is incredibly difficult because his Gatling Gun constantly shreds your resistances and punishes you whenever you step up to use Bouncing Blade. Even if you find a roam window to utilize Voracity in side lanes, Corki's passive Special Delivery grants him unparalleled map-wide mobility, allowing him to fly across the river, intercept your plays, and burn your pathing options.

Dampak di lane

Because of Gatling Gun, you are forced to concede early priority and farm under turret using Bouncing Blade. Corki will continuously poke you with Phosphorus Bomb to chunk your health bar, forcing awkward recall timings. If you leave the lane without securing a kill, his rapid wave-clear will cost you your mid tower plates, while his package delivery lets him shadow your movements without losing any experience.

Cara bermain

Watch Corki’s base timers for his package spawn. When he has Special Delivery, do not attempt long river roams; instead, bait his Valkyrie in lane by placing a defensive Preparation dagger to jump back to with Shunpo. If he wastes his dash forward, you can immediately commit with Death Lotus. If he plays safely, wait for him to burn his package defensively before starting any teamfights.

Profil lengkap →
Akshan

Akshan

early_pressureroam_match Akshan dominates this lane because your waveclear depends on dropping daggers via Bouncing Blade and Preparation. To trigger Voracity, you must step near those daggers, making your movement incredibly predictable. Akshan easily punishes this by lining up Avengerang to pierce both you and the wave, or by using Heroic Swing to dive onto your dagger locations, trading heavily with his Dirty Fighting shield before you can react. Lihat detail
Akshan

Kenapa

Akshan dominates this lane because your waveclear depends on dropping daggers via Bouncing Blade and Preparation. To trigger Voracity, you must step near those daggers, making your movement incredibly predictable. Akshan easily punishes this by lining up Avengerang to pierce both you and the wave, or by using Heroic Swing to dive onto your dagger locations, trading heavily with his Dirty Fighting shield before you can react.

Dampak di lane

You will find yourself pinned under turret, bleeding health whenever you try to secure minions. Akshan's superior range and double-attacks make direct trades suicidal. This constant pressure prevents you from securing mid priority. If you greed for a dagger pickup, Heroic Swing will chunk you to lethal range, forcing an early recall and allowing Akshan to disappear into the river with Going Rogue to hunt your jungler.

Cara bermain

Accept losing early minions and only use Bouncing Blade from maximum range to farm. Never use Shunpo onto a dagger if Akshan still has Heroic Swing available. Instead, wait for him to throw Avengerang to clear the wave, then instantly drop Preparation, collect the gold, and Shunpo back to safety. Your main win condition is to find roam timings on the side lanes; use Death Lotus in skirmishes to get resets rather than forcing 1v1 fights in mid.

Profil lengkap →
Ekko

Ekko

cc_interruptburst This matchup hinges on the ultimate standoff during skirmishes. When you channel Death Lotus, you become a stationary target, making you incredibly vulnerable. Ekko can immediately drop Parallel Convergence right on top of your channeling location. This forces a terrible choice: you must either cancel your ultimate instantly to Shunpo away, or remain stationary and suffer his massive shield and subsequent stun, completely neutralizing your damage output. Lihat detail
Ekko

Kenapa

This matchup hinges on the ultimate standoff during skirmishes. When you channel Death Lotus, you become a stationary target, making you incredibly vulnerable. Ekko can immediately drop Parallel Convergence right on top of your channeling location. This forces a terrible choice: you must either cancel your ultimate instantly to Shunpo away, or remain stationary and suffer his massive shield and subsequent stun, completely neutralizing your damage output.

Dampak di lane

Trading in lane is highly volatile. If you jump in with Bouncing Blade and Shunpo, Ekko can easily trade back with Phase Dive and Timewinder to proc Z-Drive Resonance, winning the short burst trade and running away. Because he can waveclear faster, you are constantly pressured under turret, delaying your roam timings. If you cannot find clean skirmishes before his Chronobreak is unlocked, you lose the map pressure entirely.

Cara bermain

Never initiate with Death Lotus while Ekko has Parallel Convergence available. Instead, bait his Phase Dive by using Preparation for a movement speed boost, allowing you to dodge his returning Timewinder. Only commit your full combo once you see him use his stun zone defensively or when he is already locked in another animation. If he casts Chronobreak, immediately use Shunpo to reset your position on a safe Bouncing Blade dagger rather than chasing his ghost.

Profil lengkap →
Heimerdinger

Heimerdinger

assassinpunish This matchup is dictated by how easily Heimerdinger can punish your movement. Whenever you set up your daggers with Bouncing Blade or Preparation, you create a highly visible beacon on the ground. The moment you use Shunpo to blink onto these daggers, Heimerdinger has an incredibly easy time aiming his CH-2 Electron Storm Grenade at your exact landing spot, leaving you stunned and exposed. Lihat detail
Heimerdinger

Kenapa

This matchup is dictated by how easily Heimerdinger can punish your movement. Whenever you set up your daggers with Bouncing Blade or Preparation, you create a highly visible beacon on the ground. The moment you use Shunpo to blink onto these daggers, Heimerdinger has an incredibly easy time aiming his CH-2 Electron Storm Grenade at your exact landing spot, leaving you stunned and exposed.

Dampak di lane

Heimerdinger's H-28G Evolution Turret setup constantly shoves the wave under your turret, chipping away at your health while you struggle to last-hit. If you attempt to thin the wave or initiate a trade, jumping in blindly will result in a quick stun followed by a devastating barrage of Hextech Micro-Rockets. This constant pressure limits your health pool, making roaming risky without sacrificing multiple waves.

Cara bermain

To survive and find openings, you must play a psychological game with your daggers. Instead of instantly triggering Voracity by jumping on every Bouncing Blade drop, use your movement to bait out his CH-2 Electron Storm Grenade. Walk towards a dagger, but use Shunpo onto a nearby minion instead to dodge the projectile. Once his grenade is on cooldown, you can aggressively initiate with Preparation and Death Lotus before he can safely deploy an UPGRADE!!! empowered response.

Profil lengkap →
Aurora

Aurora

mobilityburst This matchup is highly unfavorable for Katarina because Aurora has the perfect tools to shut down your engage. While you rely on dropping Bouncing Blade or Preparation to jump in with Shunpo, Aurora can easily react. Her Spirit Abjuration makes short trades dangerous, but the ultimate hurdle is The Weirding. The moment you channel Death Lotus, Aurora can cast The Weirding to push herself out of range while slowing you, effectively ruining your ultimate's damage. Lihat detail
Aurora

Kenapa

This matchup is highly unfavorable for Katarina because Aurora has the perfect tools to shut down your engage. While you rely on dropping Bouncing Blade or Preparation to jump in with Shunpo, Aurora can easily react. Her Spirit Abjuration makes short trades dangerous, but the ultimate hurdle is The Weirding. The moment you channel Death Lotus, Aurora can cast The Weirding to push herself out of range while slowing you, effectively ruining your ultimate's damage.

Dampak di lane

During the laning phase, Aurora's ranged advantage with Twofold Hex forces you to play defensively under your turret. If you try to farm with Bouncing Blade, she will punish you by proc'ing Spirit Abjuration. Your Shunpo initiates are highly telegraphed; she can simply slip into stealth with Across the Veil or reposition. This constant harassment prevents you from securing priority, delaying your Voracity resets and forcing you to lose gold.

Cara bermain

To survive, you must bait out Aurora's defensive spells before committing your full combo. Never initiate with Death Lotus while her The Weirding is available. Instead, throw Bouncing Blade to farm safely, and only use Shunpo to blink onto a dagger if she wastes Twofold Hex or Across the Veil. If she traps you inside Between Worlds, do not panic-cast your ultimate; instead, use the movement speed from Preparation to dodge her skillshots until her zone fades, then look for a skirmish.

Profil lengkap →
Fizz

Fizz

all_ininterrupt This matchup is dictated by Fizz's ability to completely negate your main damage sources. His Playful allows him to hop over the daggers you drop with Bouncing Blade or Preparation, rendering your Voracity passive resets useless. Furthermore, you cannot channel Death Lotus safely because the knockup from Chum the Waters will instantly cancel your ultimate, leaving you vulnerable in close-range combat. Lihat detail
Fizz

Kenapa

This matchup is dictated by Fizz's ability to completely negate your main damage sources. His Playful allows him to hop over the daggers you drop with Bouncing Blade or Preparation, rendering your Voracity passive resets useless. Furthermore, you cannot channel Death Lotus safely because the knockup from Chum the Waters will instantly cancel your ultimate, leaving you vulnerable in close-range combat.

Dampak di lane

In practice, you cannot safely trade with Shunpo when his cooldowns are up. If you aggressively throw a Bouncing Blade, Fizz will initiate with Urchin Strike and Rending Wave, forcing you to retreat or take massive damage. This limits your wave control, forcing you to farm under turret. If he lands Chum the Waters, you are forced to retreat or risk dying before you can roam.

Cara bermain

To survive, you must bait out Playful before committing. Lasthit with Bouncing Blade from a distance and hold Shunpo as an escape tool to blink back to your own minions when he dashes. Never activate Death Lotus until you see him waste his shark or his trickster jump. If he freezes the wave, abandon the farm and look for skirmishes in the river where your Voracity resets can clean up chaotic fights.

Profil lengkap →
Jayce

Jayce

cc_interruptlane_bully The core of this matchup revolves around your ultimate. Jayce holds all the cards in direct skirmishes because he can instantly shut down your Death Lotus channel. The moment you blink in, he can swap to hammer form using Transform Mercury Cannon and knock you away with Thundering Blow. This immediate disengage completely cancels your main source of burst damage, leaving you stranded in melee range without your primary threat. Lihat detail
Jayce

Kenapa

The core of this matchup revolves around your ultimate. Jayce holds all the cards in direct skirmishes because he can instantly shut down your Death Lotus channel. The moment you blink in, he can swap to hammer form using Transform Mercury Cannon and knock you away with Thundering Blow. This immediate disengage completely cancels your main source of burst damage, leaving you stranded in melee range without your primary threat.

Dampak di lane

Because of this interaction, you cannot freely trade with Bouncing Blade and Shunpo daggers. Jayce will punish your farming attempts with his ranged To the Skies! and Lightning Field poke. If you try to engage to relieve pressure, he simply knocks you back, forcing you to take unfavorable trades. This pushes you under turret, losing mid priority and preventing you from roaming to secure early skirmishes.

Cara bermain

To survive, you must play a game of patience. Never initiate with Death Lotus while Jayce is in hammer form with Thundering Blow available. Instead, use Bouncing Blade to farm from a distance and prepare daggers with Preparation. Wait for him to waste his knockback on a minion or during a chaotic skirmish. If he swaps to cannon form using Transform Mercury Cannon to poke, you have a brief window to strike before his hammer form cooldown returns.

Profil lengkap →
Kai'Sa

Kai'Sa

mobilitydps Katarina relies on setting up daggers with Bouncing Blade and Preparation to burst targets, but Kai'Sa possesses the ultimate tool to negate this setup. When you trigger Death Lotus, Kai'Sa can instantly cast Killer Instinct to dash out of your ultimate's area of effect. Not only does this move her far away from your landed daggers, but the shield from Killer Instinct absorbs your residual damage, leaving you vulnerable with on-cooldown abilities. Lihat detail
Kai'Sa

Kenapa

Katarina relies on setting up daggers with Bouncing Blade and Preparation to burst targets, but Kai'Sa possesses the ultimate tool to negate this setup. When you trigger Death Lotus, Kai'Sa can instantly cast Killer Instinct to dash out of your ultimate's area of effect. Not only does this move her far away from your landed daggers, but the shield from Killer Instinct absorbs your residual damage, leaving you vulnerable with on-cooldown abilities.

Dampak di lane

In the mid lane, Kai'Sa uses Icathian Rain to match your wave clear, forcing you to use Bouncing Blade defensively. If you try to engage with Shunpo, she can retaliate with Void Seeker to stack Second Skin and trade heavily. Because her Killer Instinct completely neutralizes your all-in threat, you cannot easily force solo kills, meaning you often lose mid priority and are forced to farm under tower, delaying your Voracity resets in early skirmishes.

Cara bermain

To win this matchup, you must bait out her defensive tools before committing your ultimate. Poke with Bouncing Blade and use Shunpo to jump on a dagger, but immediately use Preparation to gain movement speed and dodge her Void Seeker. Only channel Death Lotus after she has used Killer Instinct to escape a previous skirmish or when she is CC'd. If she uses Supercharge to flee, do not chase blindly; wait for your cooldowns to return while staying near your daggers.

Profil lengkap →
Karma

Karma

anti_assassinanti_mobility Karma dictates this lane because her Focused Resolve acts as a direct counter-measure to your mobility. Whenever you use Shunpo to engage on a dagger, she can immediately attach her tether. This forces a terrible dilemma: you must either cancel Death Lotus instantly to run away and break the link, or remain stationary to channel your ultimate and guarantee you get rooted and blasted by her Inner Flame. Lihat detail
Karma

Kenapa

Karma dictates this lane because her Focused Resolve acts as a direct counter-measure to your mobility. Whenever you use Shunpo to engage on a dagger, she can immediately attach her tether. This forces a terrible dilemma: you must either cancel Death Lotus instantly to run away and break the link, or remain stationary to channel your ultimate and guarantee you get rooted and blasted by her Inner Flame.

Dampak di lane

You will constantly find yourself pushed under turret, using Bouncing Blade just to secure last hits. Because attempting to trade triggers her Inspire shield and speed boost, you cannot easily whittle her health down. If you get caught by Focused Resolve while trying to clear, she will easily land an empowered Inner Flame, forcing early recalls that cost you precious gold and mid-lane priority.

Cara bermain

Patience is your only tool here. Never lead an exchange with Shunpo while Karma has her cooldowns ready. Instead, throw Bouncing Blade to farm from afar and use the movement speed from Preparation to bait out her Inner Flame. Only commit your full Death Lotus after she wastes Focused Resolve, or when you can follow up on a teammate's crowd control. If tethered, immediately blink away to a safe dagger to break the link before the root triggers.

Profil lengkap →
Yasuo

Yasuo

projectile_blocksustained_dps This matchup is dictated by how Yasuo uses his Wind Wall to shut down your setup. A reactive Wind Wall completely disintegrates your Bouncing Blade in mid-air, denying the dagger drop you need for Shunpo. Furthermore, if you attempt to channel Death Lotus while his barrier is up, it absorbs every single blade, instantly neutralizing your burst and preventing the Voracity resets you rely on to survive skirmishes. Lihat detail
Yasuo

Kenapa

This matchup is dictated by how Yasuo uses his Wind Wall to shut down your setup. A reactive Wind Wall completely disintegrates your Bouncing Blade in mid-air, denying the dagger drop you need for Shunpo. Furthermore, if you attempt to channel Death Lotus while his barrier is up, it absorbs every single blade, instantly neutralizing your burst and preventing the Voracity resets you rely on to survive skirmishes.

Dampak di lane

Yasuo constantly dictates the wave's tempo. By utilizing Sweeping Blade through your minions, he can close the distance to deliver rapid Steel Tempest strikes while absorbing your retaliation with his Way of the Wanderer shield. If he blocks your Bouncing Blade, you are forced to farm under tower, giving him free priority to roam or secure vision while your health bar is slowly chipped away.

Cara bermain

To survive, trigger his Way of the Wanderer shield with a safe basic attack or a max-range Bouncing Blade, then immediately disengage until it expires. Never initiate with Bouncing Blade if his Wind Wall is off cooldown; instead, use Preparation on top of yourself to gain movement speed and bait his Sweeping Blade. If he wastes his wall or misses his third Steel Tempest tornado, jump in with Shunpo for a quick trade, but immediately retreat to safety.

Profil lengkap →
Ryze

Ryze

wave_pressureroam_punish Ryze dominates this matchup because his point-and-click Rune Prison completely shuts down your mobility. The moment you use Shunpo to engage on a Bouncing Blade or Preparation dagger, he can instantly root you. This immediate lockdown prevents you from spinning with Death Lotus and leaves you completely vulnerable to his Spell Flux and Overload burst before you can trigger Voracity resets. Lihat detail
Ryze

Kenapa

Ryze dominates this matchup because his point-and-click Rune Prison completely shuts down your mobility. The moment you use Shunpo to engage on a Bouncing Blade or Preparation dagger, he can instantly root you. This immediate lockdown prevents you from spinning with Death Lotus and leaves you completely vulnerable to his Spell Flux and Overload burst before you can trigger Voracity resets.

Dampak di lane

You cannot contest early waves. Ryze will constantly shove you under tower using Spell Flux to spread marks and Overload to clear. Any attempt to step up for a Bouncing Blade trade results in a quick Rune Prison counter-attack, chunking your health bar. This pressure forces you to farm defensively, forfeiting mid priority and delaying your skirmishing power while he scales through Arcane Mastery.

Cara bermain

Never initiate with Shunpo while Ryze has Rune Prison available. Instead, bait this ability by walking near your Preparation daggers without committing to them. Once his root is on cooldown, you have a brief window to strike. If he holds it, focus on catching waves under your turret and look for roaming opportunities using Realm Warp's long channel time or predictable rotations to clean up fights elsewhere.

Profil lengkap →
Morgana

Morgana

spell_shieldhard_cc This matchup is dictated by how Morgana reacts to your daggers. Whenever you use Bouncing Blade or Preparation to set up a trade, your landing spot for Shunpo becomes highly predictable. A skilled Morgana will instantly throw her Dark Binding at that exact spot, rooting you in place while turning on Tormented Shadow. Additionally, her Black Shield easily absorbs your AP burst, neutralizing your assassination attempts during Death Lotus. Lihat detail
Morgana

Kenapa

This matchup is dictated by how Morgana reacts to your daggers. Whenever you use Bouncing Blade or Preparation to set up a trade, your landing spot for Shunpo becomes highly predictable. A skilled Morgana will instantly throw her Dark Binding at that exact spot, rooting you in place while turning on Tormented Shadow. Additionally, her Black Shield easily absorbs your AP burst, neutralizing your assassination attempts during Death Lotus.

Dampak di lane

Consequently, you cannot easily contest the wave. Morgana will constantly shove with Tormented Shadow while staying safely out of your melee range. If you jump in mindlessly, you risk taking massive damage under her tower or getting locked down. This constant pressure forces you to farm under turret, draining your health and preventing you from roaming to get your passive Voracity resets in early skirmishes.

Cara bermain

To survive, you must play a game of patience and baiting. Never use Shunpo directly onto a dagger if her Dark Binding is available. Instead, walk up to farm or use Preparation to gain movement speed, trying to bait her binding. Once she wastes her crowd control, you have a brief window to strike. If she activates her Black Shield to counter your engage, disengage immediately and wait for the shield to expire before committing your Death Lotus.

Profil lengkap →
Viktor

Viktor

channel_interruptshield_negation Viktor controls the pace because his Arcane Storm instantly cancels your Death Lotus channel, shutting down your main damage source while melting your health bar. Before that, his Siphon Power absorbs your short Shunpo trades with its shield, while Gravity Field zones you away from your dropped daggers, making direct, aggressive engages highly risky. Lihat detail
Viktor

Kenapa

Viktor controls the pace because his Arcane Storm instantly cancels your Death Lotus channel, shutting down your main damage source while melting your health bar. Before that, his Siphon Power absorbs your short Shunpo trades with its shield, while Gravity Field zones you away from your dropped daggers, making direct, aggressive engages highly risky.

Dampak di lane

You are constantly forced under turret because Viktor uses Hextech Ray to shove waves effortlessly from safety. Trading health becomes a losing battle; if you step up to collect CS, he pokes you down, threatening a dive once he unlocks his ultimate. This pressure prevents you from roaming to side lanes, trapping you in mid.

Cara bermain

To survive, let the wave crash and farm safely under turret using Bouncing Blade. Never initiate an all-in with Shunpo while Viktor has his ultimate ready. Instead, bait out his Arcane Storm by using Preparation to fake an engage before disengaging instantly. If you get too low, sacrifice minion waves to recall rather than risking death.

Profil lengkap →
Syndra

Syndra

disengageburst_trade This matchup is defined by how easily Syndra can shut down your offensive pressure. Whenever you try to commit with Shunpo onto a dagger from Bouncing Blade or Preparation, she can instantly disengage. The biggest hurdle is Scatter the Weak, which completely cancels your Death Lotus from a safe distance, leaving you stranded in the middle of her minion wave without your primary source of damage. Lihat detail
Syndra

Kenapa

This matchup is defined by how easily Syndra can shut down your offensive pressure. Whenever you try to commit with Shunpo onto a dagger from Bouncing Blade or Preparation, she can instantly disengage. The biggest hurdle is Scatter the Weak, which completely cancels your Death Lotus from a safe distance, leaving you stranded in the middle of her minion wave without your primary source of damage.

Dampak di lane

You will constantly dodge Dark Sphere and Force of Will while trying to secure last hits. Because she can hold Scatter the Weak to threaten your engage, you cannot safely step forward to collect daggers. This forces you to give up early priority, bleed some gold under your turret, and rely on your passive Voracity resets in skirmishes rather than looking for solo kills in this lane.

Cara bermain

Never start a full fight with Death Lotus while her knockback is active. Instead, throw a Bouncing Blade and use Shunpo to bait her. If she panics and casts Scatter the Weak, you can use the movement speed from Preparation to dodge the incoming spheres, then immediately blink back in for the kill. If she refuses to waste it, focus on farming safely and wait for your team to force her defensive spell first.

Profil lengkap →
Kennen

Kennen

aoe_teamfighthard_cc Kennen dominates this matchup because his entire kit functions as a direct shutdown to your ultimate. Whenever you commit to a fight and channel Death Lotus, Kennen can instantly activate Slicing Maelstrom. The rapid hits from his ultimate apply multiple stacks of Mark of the Storm within fractions of a second, triggering an inevitable stun that immediately cancels your channel and leaves you completely vulnerable in close range. Lihat detail
Kennen

Kenapa

Kennen dominates this matchup because his entire kit functions as a direct shutdown to your ultimate. Whenever you commit to a fight and channel Death Lotus, Kennen can instantly activate Slicing Maelstrom. The rapid hits from his ultimate apply multiple stacks of Mark of the Storm within fractions of a second, triggering an inevitable stun that immediately cancels your channel and leaves you completely vulnerable in close range.

Dampak di lane

In the early levels, Kennen uses Thundering Shuriken and the passive of Electrical Surge to harass you while you attempt to farm with Bouncing Blade. You cannot easily trade with Shunpo because he can escape or counter-engage using Lightning Rush. Once both of you unlock your ultimates, you lose the ability to threaten solo kills, forcing you to play defensively under tower or bleed health for minion gold.

Cara bermain

Never initiate with Shunpo while Kennen has Slicing Maelstrom available. Instead, throw Bouncing Blade to farm from afar and wait for chaotic skirmishes where Kennen has already used his ultimate on your teammates. If he tries to dive you, drop Preparation for the movement speed, then use Shunpo to escape to a safe minion. Only channel Death Lotus after his stun passive has been triggered on someone else.

Profil lengkap →

Matchup lainnya

Skill Matchups

8

Matchup ini terutama soal duel eksekusi: kedua champion punya cara nyata untuk unggul. Satu skill penting yang di-dodge, engage yang diantisipasi dengan tepat, atau satu kesalahan positioning saja bisa menentukan siapa yang menang. Memahami matchup dan mengenali momen yang tepat untuk bertindak sangat penting di sini.

Brand

Brand

spacingcc_timing This matchup is a pure battle of nerves centered around the interaction between your Death Lotus and his Sear. Because Brand's passive Blaze allows his Sear to stun you, he can instantly shut down your ultimate's channel. Since your primary damage relies on spinning through Death Lotus, you cannot blindly jump in. You both possess the raw damage to delete each other, making the lane entirely dependent on who forces the other's key ability first. Lihat detail
Brand

Kenapa

This matchup is a pure battle of nerves centered around the interaction between your Death Lotus and his Sear. Because Brand's passive Blaze allows his Sear to stun you, he can instantly shut down your ultimate's channel. Since your primary damage relies on spinning through Death Lotus, you cannot blindly jump in. You both possess the raw damage to delete each other, making the lane entirely dependent on who forces the other's key ability first.

Dampak di lane

During the early levels, Brand will attempt to zone you with Pillar of Flame and bounce Blaze through your minions using Conflagration. This forces you to concede early priority and farm from a distance with Bouncing Blade. Trades are explosive but rare; if you Shunpo onto a dagger too early, you risk catching a full combo. The lane is decided by mid-game skirmishes where a mistimed engage costs your team the map pressure.

Cara bermain

To win this, you must bait out Sear before committing. Use your Shunpo to jump to a Bouncing Blade dagger slightly to his side, rather than directly on top of him, to make his linear skillshot easy to dodge. Alternatively, drop Preparation for a quick movement speed burst to bait his Pillar of Flame. Never channel Death Lotus until you see Sear fly wide or hit a minion; if he holds it forever, focus on quick Shunpo and Voracity reset trades to wear him down.

Profil lengkap →
Mel

Mel

dodge_skillshotsburst_trade Mel wants to keep Katarina at bay with her linear skillshots and build her passive stacks. Katarina, however, has the perfect tool to counter this. By using Shunpo, Katarina can instantly blink behind Mel's linear skillshots, completely dodging her main damage source while setting up a deadly Voracity dagger combo. This turns Mel's range advantage into a vulnerability, preventing her from stacking her passive before dying to Death Lotus. Lihat detail
Mel

Kenapa

Mel wants to keep Katarina at bay with her linear skillshots and build her passive stacks. Katarina, however, has the perfect tool to counter this. By using Shunpo, Katarina can instantly blink behind Mel's linear skillshots, completely dodging her main damage source while setting up a deadly Voracity dagger combo. This turns Mel's range advantage into a vulnerability, preventing her from stacking her passive before dying to Death Lotus.

Dampak di lane

This mechanical interaction makes the mid lane a tense game of chicken. Mel will try to freeze the wave and poke you down, knowing that if she misses a single skillshot, she is dead. You cannot mindlessly push with Bouncing Blade, as standing still to collect daggers leaves you open. Instead, the lane is decided by who controls the space; if Mel misses, you instantly jump in.

Cara bermain

To win this duel, you must bait Mel's linear skillshots by walking in and out of her range. The moment her cast animation begins, press Shunpo directly onto her or a Bouncing Blade dagger placed behind her to bypass the spell entirely. Immediately follow up with Preparation and Death Lotus to burst her down before she can stack her passive. If you get hit, quickly use the movement speed from Preparation to retreat.

Profil lengkap →
Swain

Swain

healing_reductionextended_trades This matchup revolves entirely around how you handle Swain's ultimate. When Swain activates Demonic Ascension, he relies on massive drain-healing to survive. However, your Death Lotus directly counters this by applying a massive healing reduction. This turns what would be an easy sustain battle for him into a lethal trap, provided you do not get interrupted by his Nevermove claw. Lihat detail
Swain

Kenapa

This matchup revolves entirely around how you handle Swain's ultimate. When Swain activates Demonic Ascension, he relies on massive drain-healing to survive. However, your Death Lotus directly counters this by applying a massive healing reduction. This turns what would be an easy sustain battle for him into a lethal trap, provided you do not get interrupted by his Nevermove claw.

Dampak di lane

Early on, Swain will use Death's Hand to push you under tower and fish for Nevermove roots. You cannot trade mindlessly because his passive Ravenous Flock keeps his health high. The lane truly begins at level five; whoever manages their ultimate timing better dictates the mid-game skirmishes. If you force his Demonic Ascension without committing your own cooldowns, you gain absolute control over the map.

Cara bermain

Never initiate with Death Lotus while Swain has Nevermove available, as the root will immediately cancel your channel. Instead, throw a Bouncing Blade to set up a dagger, then use Shunpo laterally to bait out his claw. Once his crowd control is wasted, jump in with Preparation and immediately unleash Death Lotus to slash his Demonic Ascension healing. If he roots you first, disengage instantly using Shunpo to a safe retreat dagger.

Profil lengkap →
Zed

Zed

mobility_battleoutplay_potential This matchup is a high-speed lethal dance determined by ultimate timings and blink reactions. Zed holds the advantage when initiating with Death Mark, which completely negates your Death Lotus channel by making him untargetable. However, you can turn the tide using Shunpo to instantly teleport away from his Razor Shuriken trajectory right as he reappears, leaving him without his primary burst damage. Lihat detail
Zed

Kenapa

This matchup is a high-speed lethal dance determined by ultimate timings and blink reactions. Zed holds the advantage when initiating with Death Mark, which completely negates your Death Lotus channel by making him untargetable. However, you can turn the tide using Shunpo to instantly teleport away from his Razor Shuriken trajectory right as he reappears, leaving him without his primary burst damage.

Dampak di lane

Early levels are quiet as you both farm with Bouncing Blade and Razor Shuriken. The pressure spikes massively at level 5. An aggressive trade using Living Shadow can force you out of lane, but if Zed misses his shurikens, you gain immediate priority to shove and roam. One misplay with your blink or his shadow swap results in an instant solo kill, completely locking the loser out of the mid lane.

Cara bermain

Never channel Death Lotus while Zed has Death Mark available; he will easily dodge your daggers. Instead, bait his ultimate by dropping a Preparation dagger under yourself. When he marks you and reappears behind you, immediately use Shunpo to blink to a pre-placed Bouncing Blade dagger or a minion, forcing his Razor Shuriken to miss entirely. Only after he has landed and wasted his skillshots should you commit your full ultimate.

Profil lengkap →
Talon

Talon

roam_battleburst_trade Both champions want to shove and roam, but the skirmish dynamics are dictated by mobility. While you can blink instantly with Shunpo onto a Bouncing Blade or Preparation dagger, Talon can instantly hop over walls using Assassin's Path. If you unleash Death Lotus too early, he simply vaults over a nearby wall, completely wasting your ultimate's massive damage potential while leaving you vulnerable. Lihat detail
Talon

Kenapa

Both champions want to shove and roam, but the skirmish dynamics are dictated by mobility. While you can blink instantly with Shunpo onto a Bouncing Blade or Preparation dagger, Talon can instantly hop over walls using Assassin's Path. If you unleash Death Lotus too early, he simply vaults over a nearby wall, completely wasting your ultimate's massive damage potential while leaving you vulnerable.

Dampak di lane

Mid lane becomes a high-speed clearing race. You cannot easily pin Talon down under his tower because of Assassin's Path, and his Rake clears waves fast enough to threaten your turret. If you fail to match his push, he will disappear into the river, forcing your sidelanes to play in fear. Health trades are lethal; one misstep against his Noxian Diplomacy and Blade's End bleed will force you back.

Cara bermain

To win this, you must manipulate the wave near your tower, forcing Talon to walk up without an easy wall to jump over. Never engage with Shunpo until he has used Assassin's Path to enter the fight or clear. If he disappears from the map, quickly use Bouncing Blade and Preparation to clear the wave, then follow his path. If you cannot catch up, pivot to pressure his mid turret immediately.

Profil lengkap →
Vladimir

Vladimir

healing_reductionuntargetable_dodge This matchup revolves around how you deploy your ultimate against Vladimir's primary defense. While he can easily sink into Sanguine Pool to nullify the massive burst of your Death Lotus, the healing reduction from your daggers remains active. This directly cripples his survivability from Transfusion during his pool duration, turning a potential full reset into a vulnerable, low-health window where you can execute him. Lihat detail
Vladimir

Kenapa

This matchup revolves around how you deploy your ultimate against Vladimir's primary defense. While he can easily sink into Sanguine Pool to nullify the massive burst of your Death Lotus, the healing reduction from your daggers remains active. This directly cripples his survivability from Transfusion during his pool duration, turning a potential full reset into a vulnerable, low-health window where you can execute him.

Dampak di lane

During the early levels, Vladimir will constantly try to poke you down with his empowered Transfusion. Because he possesses infinite sustain, you cannot win a slow war of attrition. The lane rhythm is dictated by the massive cooldown of Sanguine Pool. When he wastes this defensive tool to escape a basic Bouncing Blade and Shunpo trade, a massive window opens where your next engage guarantees a kill.

Cara bermain

To win this duel, never initiate with your ultimate. Instead, force his hand by throwing Bouncing Blade and jumping in with Shunpo followed by Preparation to threaten a reset. Once he panics and triggers Sanguine Pool, retreat slightly using your movement speed boost. As soon as he resurfaces, immediately unleash Death Lotus to cut his healing from Transfusion in half and secure the kill before he can recover his health.

Profil lengkap →
Yone

Yone

dodge_skillshotsmobility_battle This high-octane duel of reaction times holds no natural advantage for either assassin. Yone relies on trading safely with Soul Unbound, aiming to lock you down using his third Mortal Steel or his ultimate Fate Sealed. Because your damage requires standing near daggers dropped by Bouncing Blade, you are vulnerable. However, using the instant blink of Shunpo to dodge his knockups completely turns his offensive windows into your perfect counter-all-in. Lihat detail
Yone

Kenapa

This high-octane duel of reaction times holds no natural advantage for either assassin. Yone relies on trading safely with Soul Unbound, aiming to lock you down using his third Mortal Steel or his ultimate Fate Sealed. Because your damage requires standing near daggers dropped by Bouncing Blade, you are vulnerable. However, using the instant blink of Shunpo to dodge his knockups completely turns his offensive windows into your perfect counter-all-in.

Dampak di lane

Yone enjoys superior early wave clear and trading shields from Spirit Cleave, allowing him to shove you under turret. You must respect his zoning whenever his Mortal Steel is fully charged. This constant threat forces you to trade health for farm unless you bait his dash. If he misses his crowd control, the lane dynamic instantly flips, forcing him to play defensively under tower and giving you roaming priority to help your jungler.

Cara bermain

Never initiate with Shunpo if Yone has his third Mortal Steel ready or Fate Sealed off cooldown. Instead, throw Bouncing Blade to create an escape route. Stand slightly offset from your daggers to bait his knockup, then instantly blink to your dagger or a minion to make him waste his crowd control. If he initiates with Soul Unbound, wait out his shield from Spirit Cleave before unleashing Death Lotus, ensuring your healing reduction counters his lifesteal.

Profil lengkap →

Matchup lainnya

Menguntungkan

13

Champion ini biasanya kesulitan merespons kekuatan utamamu, sehingga kamu bisa menghadapi pertarungan dengan lebih leluasa. Kamu sering punya banyak cara untuk menekan mereka dan memaksa trade yang menguntungkan. Manfaatkan keunggulan ini untuk mendikte tempo, bukan memberi mereka waktu untuk kembali nyaman.

Aurelion Sol

Aurelion Sol

blink_dodgeroam_race Aurelion Sol relies heavily on channeling Breath of Light in a fixed direction and trapping you inside Singularity. Because Shunpo is an instant blink rather than a dash, you can teleport directly behind him the moment he begins his channel. This completely negates his primary source of damage while effortlessly escaping the gravitational pull of his zone, leaving him utterly defenseless against your daggers. Lihat detail
Aurelion Sol

Kenapa

Aurelion Sol relies heavily on channeling Breath of Light in a fixed direction and trapping you inside Singularity. Because Shunpo is an instant blink rather than a dash, you can teleport directly behind him the moment he begins his channel. This completely negates his primary source of damage while effortlessly escaping the gravitational pull of his zone, leaving him utterly defenseless against your daggers.

Dampak di lane

This threat paralyzes Aurelion Sol's laning phase. He cannot safely use Breath of Light to clear waves without exposing himself to an immediate, lethal trade. Consequently, you easily secure mid priority. Since he cannot match your skirmishing power or follow you safely through the river, every wave you push under his tower converts into a massive roaming window to snowball your sidelanes.

Cara bermain

Force the issue by baiting his defensive spells. Drop a dagger with Bouncing Blade to threaten him, but hold Shunpo until he commits to channeling Breath of Light or drops Singularity. Instantly blink behind him to unleash your full combo, using Preparation for extra movement speed to chase if he attempts to escape with Astral Flight. If he plays too far back, shove the wave aggressively and immediately roam to secure kills on vulnerable sidelanes.

Profil lengkap →
Orianna

Orianna

dodge_skillshotsall_in Orianna relies entirely on controlling space with her ball. When she projects it forward using Command: Attack, she commits her main threat zone to a static location. Because Shunpo is an instantaneous blink rather than a dash, you can teleport directly past the path of Command: Attack, letting you ignore her zoning attempt entirely. This leap allows you to effortlessly dodge her ultimate Command: Shockwave setup while unleashing your own burst. Lihat detail
Orianna

Kenapa

Orianna relies entirely on controlling space with her ball. When she projects it forward using Command: Attack, she commits her main threat zone to a static location. Because Shunpo is an instantaneous blink rather than a dash, you can teleport directly past the path of Command: Attack, letting you ignore her zoning attempt entirely. This leap allows you to effortlessly dodge her ultimate Command: Shockwave setup while unleashing your own burst.

Dampak di lane

Her range advantage is completely neutralized once you threaten an all-in. Orianna cannot safely step up to abuse her Clockwork Windup passive with auto-attacks, as doing so puts her in range of your daggers. Consequently, she must constantly hold Command: Protect defensively, reducing her wave clear speed. This gives you easy control over the wave pace, allowing you to crash minions and look for roams.

Cara bermain

Position yourself diagonally from the minion wave to force Orianna to choose between pushing with Command: Attack or targeting you. The moment she sends the ball toward your previous position, immediately cast Shunpo to a Bouncing Blade dagger placed behind her. If she reacts with Command: Shockwave, use the movement speed from Preparation to step out of the pull radius before channeling Death Lotus to guarantee the kill.

Profil lengkap →
Lux

Lux

dodge_skillshotspunish_cooldowns This matchup is defined by Lux's total reliance on her single root to keep you at bay. The moment she casts Light Binding, her safety vanishes. Using Shunpo allows you to instantly blink past the projectile, placing you right next to her. Without her primary crowd control to stop your momentum, her Prismatic Barrier cannot absorb the massive damage of your full combo, making her incredibly vulnerable. Lihat detail
Lux

Kenapa

This matchup is defined by Lux's total reliance on her single root to keep you at bay. The moment she casts Light Binding, her safety vanishes. Using Shunpo allows you to instantly blink past the projectile, placing you right next to her. Without her primary crowd control to stop your momentum, her Prismatic Barrier cannot absorb the massive damage of your full combo, making her incredibly vulnerable.

Dampak di lane

Because of this constant threat, Lux is forced to play extremely passively, often sacrificing minions or using Lucent Singularity just to farm safely from afar. This allows you to dictate the wave's position. You can easily trade health by dropping Bouncing Blade to create escape routes, keeping Lux pinned under her turret. This pressure translates into free roam windows, forcing her to watch you disappear into the river.

Cara bermain

Stand slightly outside your own minion wave to force Lux to choose between targeting you or pushing with Lucent Singularity. Never initiate with Shunpo blindly; instead, bait her Light Binding by walking forward, then instantly blink behind her the split second she starts the cast animation. Once behind her, immediately drop Preparation and channel Death Lotus to melt her health bar. If she retreats under turret, use your daggers to safely disengage.

Profil lengkap →
Ziggs

Ziggs

all_indodge_skillshots Ziggs wants to keep you at a distance by spamming Bouncing Bomb, but his safety entirely hinges on Satchel Charge. Because Shunpo provides an instantaneous blink directly onto him, you can bypass his Hexplosive Minefield slow zones entirely. The moment he uses his explosive charge offensively or misses its knockback, he becomes a defenseless target with zero mobility to escape your Death Lotus. Lihat detail
Ziggs

Kenapa

Ziggs wants to keep you at a distance by spamming Bouncing Bomb, but his safety entirely hinges on Satchel Charge. Because Shunpo provides an instantaneous blink directly onto him, you can bypass his Hexplosive Minefield slow zones entirely. The moment he uses his explosive charge offensively or misses its knockback, he becomes a defenseless target with zero mobility to escape your Death Lotus.

Dampak di lane

This dynamic forces Ziggs to think twice before using Bouncing Bomb to shove waves. If you pull the minions close to your turret, he must step up to trigger Short Fuse on your tower. This overextension leaves him exposed in a long lane where he cannot run away from your engage. You will easily control the tempo, sacrificing early health to secure a devastating lane-phase kill.

Cara bermain

Start by throwing Bouncing Blade behind him to threaten a retreat path. Walk forward to bait his Satchel Charge; you can use the movement speed from Preparation to dodge it. Once his explosive charge is gone, immediately trigger Shunpo to your dagger, reset your auto-attack, and channel Death Lotus. If he plays too safely, simply crash the wave and roam, as his Mega Inferno Bomb cannot match your physical roaming presence.

Profil lengkap →
Veigar

Veigar

blink_advantageburst_trade This matchup heavily favors you because Veigar relies entirely on Event Horizon to self-peel and set up Dark Matter. Since Shunpo is an instantaneous blink rather than a dash, you can teleport directly inside or outside his cage without touching the perimeter, completely negating his stun. Once you bypass his sole defensive tool, his low mobility makes him an easy target for a full Death Lotus channel. Lihat detail
Veigar

Kenapa

This matchup heavily favors you because Veigar relies entirely on Event Horizon to self-peel and set up Dark Matter. Since Shunpo is an instantaneous blink rather than a dash, you can teleport directly inside or outside his cage without touching the perimeter, completely negating his stun. Once you bypass his sole defensive tool, his low mobility makes him an easy target for a full Death Lotus channel.

Dampak di lane

From the very first waves, Veigar is forced to play extremely defensively, using Baleful Strike from maximum range to farm. You dictate the wave's positioning because any attempt he makes to harass you with Dark Matter leaves him wide open. You can freeze near your turret to force him walk up, or shove him under tower, knowing he cannot safely trap you with his cage if you decide to dive.

Cara bermain

Constantly position yourself slightly to the side of your minion wave to force Veigar to choose between farming with Baleful Strike or poking you. When he drops Event Horizon to zone you, do not panic or run away. Instead, immediately cast Shunpo onto a Bouncing Blade dagger or directly onto him inside the ring. Follow up with Preparation for the movement speed boost and unleash Death Lotus to execute him before his Primordial Burst can threaten you.

Profil lengkap →
Taliyah

Taliyah

blink_advantageall_in Taliyah relies heavily on her Unraveled Earth to deter any champions who try to jump on her. However, because your Shunpo is classified as an instantaneous blink rather than a standard dash, it completely bypasses the explosive stun mechanism of her stone field. This unique mechanical interaction strips Taliyah of her primary defensive tool against your engage, turning her zone-control advantage into a false sense of security. Lihat detail
Taliyah

Kenapa

Taliyah relies heavily on her Unraveled Earth to deter any champions who try to jump on her. However, because your Shunpo is classified as an instantaneous blink rather than a standard dash, it completely bypasses the explosive stun mechanism of her stone field. This unique mechanical interaction strips Taliyah of her primary defensive tool against your engage, turning her zone-control advantage into a false sense of security.

Dampak di lane

This interaction completely shifts the dynamic of range denial in your favor. Instead of being forced to cower behind your minions to avoid her Threaded Volley, you can position aggressively to deny her space. Taliyah must play incredibly passively, knowing that any forward movement to poke you leaves her vulnerable. She cannot easily shove the wave without exposing herself to a sudden, unpunishable gap-close that leads to a massive health disadvantage.

Cara bermain

To execute this perfectly, constantly throw your Bouncing Blade to place daggers near her while maintaining a diagonal positioning to avoid getting hit by Threaded Volley. Walk up as if to collect a dagger with Preparation, baiting out her Seismic Shove. The moment she misses her knock-back, ignore her Unraveled Earth entirely and use Shunpo directly onto her. Follow up immediately with Death Lotus to shred her health bar while she is completely defenseless.

Profil lengkap →
Twisted Fate

Twisted Fate

all_inroam_map_pressure Twisted Fate struggles to survive your burst because his only defensive tool is the gold card from Pick a Card. Whenever he wastes this card to secure minions or restore mana, he loses all self-peel. This allows you to aggressively jump in with Shunpo, drop Preparation, and spin with Death Lotus without fear of being interrupted, completely turning his ranged advantage against him. Lihat detail
Twisted Fate

Kenapa

Twisted Fate struggles to survive your burst because his only defensive tool is the gold card from Pick a Card. Whenever he wastes this card to secure minions or restore mana, he loses all self-peel. This allows you to aggressively jump in with Shunpo, drop Preparation, and spin with Death Lotus without fear of being interrupted, completely turning his ranged advantage against him.

Dampak di lane

The lane revolves around Twisted Fate trying to shove waves with Wild Cards to setup a Destiny roam. Because you threaten a lethal all-in the moment Pick a Card is down, he is forced to play incredibly passive or risk dying under his own turret. This pressure prevents him from freely assisting his side lanes, neutralizing his global map pressure.

Cara bermain

Watch his head closely for the cycling colors of Pick a Card. The split second you see a blue or red card locked, immediately trigger Shunpo onto a dagger from Bouncing Blade to close the gap, follow up with Preparation, and unleash Death Lotus. If he holds his gold card defensively, content yourself with zoning him off the wave, using Bouncing Blade to poke while keeping your health bar pristine for the next skirmish.

Profil lengkap →
Zoe

Zoe

dodge_skillshotspunish_cooldowns This matchup favors you because Zoe relies entirely on landing linear crowd control to set up her damage. The moment she casts Sleepy Trouble Bubble, its travel time gives you a massive window to react. By instantly activating Shunpo, you blink directly behind her, completely dodging the projectile while closing the gap. Without her sleep, Zoe cannot guarantee Paddle Star! hits you, leaving her fragile body completely exposed to your burst. Lihat detail
Zoe

Kenapa

This matchup favors you because Zoe relies entirely on landing linear crowd control to set up her damage. The moment she casts Sleepy Trouble Bubble, its travel time gives you a massive window to react. By instantly activating Shunpo, you blink directly behind her, completely dodging the projectile while closing the gap. Without her sleep, Zoe cannot guarantee Paddle Star! hits you, leaving her fragile body completely exposed to your burst.

Dampak di lane

Zoe is forced to play with extreme caution, preventing her from aggressively using More Sparkles! to poke you down. She cannot safely step up to clear waves with Paddle Star! when Shunpo is off cooldown. This constant threat grants you control over the lane's pace. You can easily trade health favorably, force her to recall at awkward times, and eventually snowball the lane by diving her or roaming with priority.

Cara bermain

Never initiate with Shunpo unless Zoe has already wasted her crowd control. Instead, walk forward threateningly or throw Bouncing Blade to bait her. The moment you see the animation of Sleepy Trouble Bubble, press Shunpo to blink behind her, drop Preparation for the movement speed, and unleash Death Lotus. If she attempts to escape or poke using Portal Jump, simply track her return anchor and place your daggers there to trigger Voracity upon her reappearance.

Profil lengkap →
Kayle

Kayle

early_snowballall_in Kayle starts the game as an incredibly weak melee unit, giving you total freedom. Before her Divine Ascent transforms her into a ranged threat, she cannot contest your wave positioning. If she tries to last-hit with Starfire Spellblade or slow you with Radiant Blast, she lacks the burst to trade back when you jump in. You can easily set up daggers with Bouncing Blade and jump on her without fearing any real punishment. Lihat detail
Kayle

Kenapa

Kayle starts the game as an incredibly weak melee unit, giving you total freedom. Before her Divine Ascent transforms her into a ranged threat, she cannot contest your wave positioning. If she tries to last-hit with Starfire Spellblade or slow you with Radiant Blast, she lacks the burst to trade back when you jump in. You can easily set up daggers with Bouncing Blade and jump on her without fearing any real punishment.

Dampak di lane

You dictate the minion wave's rhythm from the first minute. By slow-pushing the early waves, you force Kayle under her turret where her weak waveclear makes her lose gold. This constant pressure allows you to chunk her health safely. Because she is pinned down trying to farm, you gain uncontested roam timers to help your jungler, while Kayle is completely locked in mid, unable to rotate or assist her team.

Cara bermain

Use Bouncing Blade to chip her down while preparing daggers near her caster minions. Once she wastes Celestial Blessing for speed or healing, trigger your Preparation and Shunpo directly onto her. If she reaches level five, do not blindly channel Death Lotus; wait out her Divine Judgment invulnerability first. If she plays extremely safe under turret, crash the wave and dive her with your jungler or immediately pressure the side lanes.

Profil lengkap →

Matchup lainnya

Items to Counter Katarina

Buy these items to reduce this champion's effectiveness in your games.

Stasis Enchant
Stasis Enchant
Hexdrinker/Maw of Malmortius
Guardian Angel
Guardian Angel
Oblivion Orb → Morellonomicon

Cara counter champion ini

Sudut counter

Katarina tidak hanya kalah dari champion, dia kalah dari mekanik spesifik: crowd control instan, penolakan ultimate, dan kemampuan untuk mencegah reset pertamanya. Counter bukan hanya matchup yang sulit, mereka adalah profil yang menghentikan gameplay intinya. Memahami ini membantu membaca draft: jika Katarina tidak bisa mendapatkan kill pertama dengan cepat, dia tidak bisa merangkai reset. Counter terbaik adalah yang memblokir masuknya dia atau menghukumnya secara instan saat dia berkomitmen.

Konteks Patch

Meta membuat Katarina rentan terhadap champion yang dapat mengontrolnya secara instan atau bertahan dari burst awalnya. Alat seperti stun instan atau zona anti-mobilitas sepenuhnya merusak polanya. Dia bergantung pada jendela waktu yang singkat untuk bertindak, dan champion yang menutupnya membuat keputusannya sangat berisiko. Ini bukan hanya tentang lane: bahkan dalam teamfight, profil ini membatasi dampaknya dengan menolak masuk.

Baca cepat

  • Dia kalah melawan crowd control instan.
  • Tanpa reset cepat, dia menjadi tidak relevan.
  • Champion yang bertahan dari burst-nya menetralkannya.

Arketipe counter

Crowd control instan yang ditargetkan

Champion-champion ini tidak memerlukan prediksi atau setup yang rumit untuk menghentikan Katarina. Crowd control mereka cepat, seringkali ditargetkan, dan langsung menginterupsi ultimate atau masuknya dia. Ini mencegah upaya reset apa pun, karena dia dihentikan sebelum memberikan damage berarti. Dalam teamfight, mereka bisa menunggu dia engage dan langsung menghukumnya.

Bagaimana champion beradaptasi. Tunggu sampai kemampuan ini digunakan pada sekutu lain sebelum masuk, atau paksa mereka keluar melalui tekanan.

Assassin burst lebih cepat

Assassin ini dapat membunuh Katarina sebelum dia punya waktu untuk menyelesaikan kombo-nya. Burst mereka seringkali lebih cepat atau lebih aman, membuat trade sangat berisiko. Bahkan jika dia bertahan, dia tidak punya waktu untuk mendapatkan reset, sepenuhnya merusak potensi snowball-nya.

Bagaimana champion beradaptasi. Hindari trade langsung dan mainkan di sekitar roam dan pertarungan yang tidak seimbang.

Kontrol zona dan anti-engage

Champion-champion ini menciptakan zona yang tidak dapat dimasuki Katarina dengan aman. Dengan crowd control, knock-up, atau zona damage, dia kekurangan jalur aman untuk mencapai target. Bahkan jika dia engage, dia langsung didorong kembali atau dikontrol, mencegah kelanjutan kombo apa pun.

Bagaimana champion beradaptasi. Hindari pertarungan front-to-back dan cari flank atau pick terisolasi.

Prioritas matchup

Lissandra

Lissandra adalah salah satu matchup terburuk Katarina karena dia menggabungkan crowd control instan dengan keamanan. Dia dapat engage, melindungi dirinya sendiri, atau menetralkan Katarina sesuka hati. Bahkan jika Katarina memasuki pertarungan, dia seringkali akan langsung dikontrol atau dipaksa keluar. Matchup ini memaksa Katarina ke gaya bermain yang sangat pasif, bergantung pada peluang di luar lane.


Annie

Annie secara langsung menghukum pola Katarina dengan burst dan stun instan. Katarina tidak dapat engage saat stun tersedia, menciptakan tekanan konstan di mana Annie mengontrol tempo. Dalam teamfight, Annie dapat menunggu Katarina dan langsung menghentikannya.

Kesalahan umum melawannya

Kesalahan umum melawannya

  • Engage tanpa melacak crowd control musuh.
  • Memaksa trade melawan champion burst yang lebih cepat.
  • Mengabaikan kontrol zona musuh.
  • Memasuki pertarungan secara frontal tanpa sudut.
  • Mencoba memaksakan reset yang mustahil.

Catatan Pelatih

  • Kamu harus selalu tahu siapa yang bisa menghentikanmu sebelum masuk.
  • Jika tidak bisa reset, jangan bertarung.

FAQ

Mengapa beberapa champion membuat Katarina tidak bisa dimainkan?

Karena mereka langsung menghentikan gameplay intinya. Katarina butuh reset cepat untuk berfungsi dalam pertarungan. Champion dengan CC instan atau burst cepat merusaknya dengan menghentikannya sebelum dia bisa melakukan kill beruntun. Tanpa reset, dia tidak bisa melanjutkan dampaknya.

Haruskah saya menghindari pertarungan melawan counter ini?

Tidak selalu, tapi kamu harus mengubah caramu bermain. Melawan champion ini, kamu harus menunggu kesalahan atau celah tertentu. Memaksakan pertarungan standar jarang efektif. Cari pick terisolasi atau situasi di mana tool mereka tidak tersedia.

Bisakah Katarina memenangkan matchup ini?

Ya, tapi jarang melalui laning langsung. Dia menang dengan memainkan map, roaming, dan memanfaatkan kesalahan. Bahkan melawan counter, dia bisa berdampak pada permainan dengan menemukan pertarungan yang tidak seimbang atau snowballing di tempat lain.

Apa jenis counter terburuk untuk Katarina?

Crowd control instan yang ditargetkan adalah yang paling berbahaya, karena tidak menyisakan ruang untuk kesalahan. Berbeda dengan skillshot, ini menjamin interupsi combo-nya dan mencegah reset apa pun. Counter jenis ini secara drastis mengurangi pilihannya dalam pertarungan.























































