
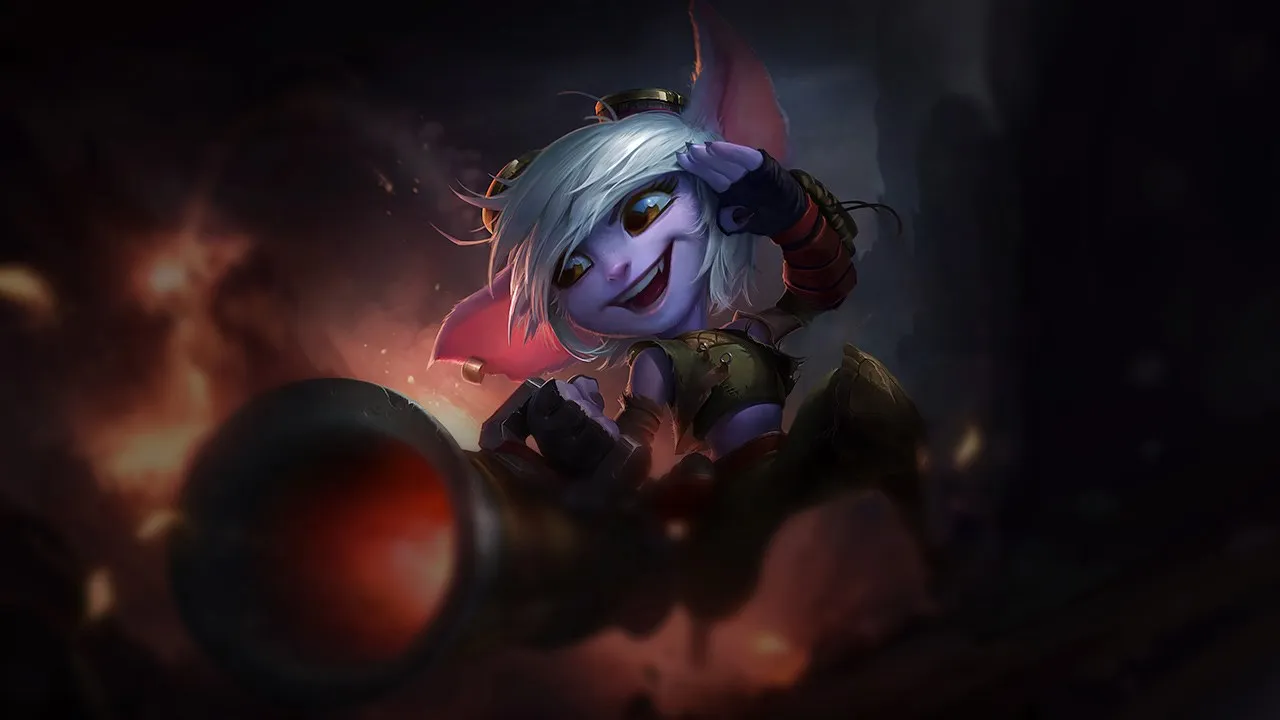
Tristana ADC Wild Rift: Mastering the Explosive Trigger

 Rocket Jump as a free engage button. This is a fundamental mistake. Her game plan requires to farm safe early, respect enemy engages, and save W to escape. If you lose your trade, it's not bad luck. It's often a mis-timed offensive jump or poor wave management that puts you in a position where your strengths (mobility via W reset, range scaling) cannot be expressed. Her winrate of 48.35% in Master+ (patch 20260910, Nexus Core data) is a clear signal: her kit is powerful, but execution is demanding. You need to know when to be aggressive and when to back off to reach her devastating power spikes.
Tristana's Identity: The Mobile Sniper with Explosive Burst
Tristana is a Specialist Marksman, excelling in the late game thanks to her progressive range and burst potential, combining high mobility with kill resets to dominate fights and objectives.Tristana embodies the Marksman Specialist archetype, an agile marksman whose potential explodes in the late game. Her ratings place her with exceptional damage strength (4/5) and scaling (5/5 in late), but very low durability (1/5) and utility (1/5). This fragility is compensated by a kit that rewards calculated aggression. Her unique Draw a Bead is the cornerstone of her identity: an attack range that extends with each level, transforming her into a true sniper in the late game.
  Explosive Charge is her burst (5/5) engine and her major asset for objective taking (4/5), capable of demolishing turrets and isolated targets. But it's Rocket Jump, with its reset on elimination or E explosion, that defines her aggressive and mobile playstyle (mobility 2/5). This mechanic allows her to chain kills and reposition quickly. Her difficulty of 3/5 reflects the need to master these resets and her positioning. In short, Tristana is designed to convert kills into objectives and dictate the pace of fights through her burst and ability to constantly reposition.
Mastering Explosive Jumps: Tristana's Combos
Mastering Tristana's combos means knowing how to alternate between safe poke, explosive all-ins with resets, and optimizingExplosive Charge, using each spell to maximize damage and mobility.Tristana's combos are dynamic sequences that exploit the reset of her Rocket Jump and the burst of her Explosive Charge. The goal is to maximize E stacks for a quick and devastating detonation. For optimal burst, always make sure to place Explosive Charge on your target before activating  Rapid Fire, which will accelerate the auto-attacks needed for detonation and increase your chances of Rocket Jump reset. Key Combos:
 - Early Game (Level 2): Explosive Charge → AA → Rocket Jump → AA → AA. Ideal for a quick aggressive trade, using the jump to close the distance and ensure detonation.
- Devastating All-in (Level 5): Rapid Fire → Rocket Jump (on target or behind) → Explosive Charge (mid-air) → AA →
 Buster Shot → AA → Rocket Jump (reset). This sequence maximizes burst in record time, using the ultimate to push back or finish, and the jump reset for safety or another kill.
 - Safe Poke: Explosive Charge → AA → AA → AA → AA. Place your bomb and stack it from a distance with auto-attacks without exposing yourself with Rocket Jump.
- Rocket Jump resets not only on a kill, but also on an assist or the maximum explosion of Explosive Charge. This is vital in teamfights to maintain constant mobility.
- Placing Explosive Charge during the Rocket Jump animation allows you to gain a crucial fraction of a second for burst.
- Your Buster Shot can be used to knock an enemy into a wall for a stun, or send them back to your allies for focus.
- Never use Rocket Jump for non-committal poke without guaranteed reset, you would deprive yourself of your only escape tool.
- A mis-timed Buster Shot can save an enemy by pushing them out of your team's reach.
- Don't underestimate your increasing range: in late game, use it to DPS safely, don't stick to enemies.
Build & Skill Order: Optimizing DPS and Pressure
Tristana's build maximizes her critical DPS and objective-demolishing capabilities, prioritizing attack speed and damage, while the skill order optimizes her burst and lane pressure from the start.The skill order for Tristana is strategic:E > Q > W. Maxing Explosive Charge first maximizes your poke potential, burst, and most importantly, rapid objective taking. Rapid Fire comes next for attack speed, essential for stacking E and increasing your DPS. Rocket Jump is maxed last, as its primary utility is mobility and reset, not raw damage. Always adapt your build based on the enemy composition and the needs of the game, prioritizing either pure DPS, penetration against tanks, or survival against burst, to maximize the effectiveness of your power spikes. Key Builds: - Standard — Critical DPS: Phantom Dancer (AS, crit, survival shield), Infinity Edge (massive crit damage), Lord Dominik's Regards (essential armor penetration), Bloodthirster (vital sustain), Kraken Slayer (additional burst). This is your path to pure carry.
- Anti-tank — penetration: (raw damage), Blade of the Ruined King (against HP stackers, slow), (penetration), (crit), (AS, survival). To melt frontlines.
- Safety — kite & survival: (shield), (sustain, kite), (damage), (massive sustain), Galeforce (escape/repositioning dash). If you are the primary target.




 Lethal Tempo (keystone for prolonged AS),
  Brutal (damage),
  Giant Slayer (against tanks),
  Legend: Alacrity (AS),
  Bone Plating (lane survival). Situational Items:
 - Mortal Reminder: Indispensable against champions with high healing.
- Guardian Angel: A second chance against AD assassins.
- Serylda's Grudge: For slow and penetration against very mobile targets.


 ››
››
››
››
Tristana's Power Spikes: When to Hit Hard
Tristana's power spikes are marked by the acquisition of her key items and the increase in her range, progressively transforming her burst and objective-taking potential, with notable peaks at levels 6, 9, and 11.Understanding Tristana's power spikes is crucial to knowing when to go on the offensive and dictate the game. Her power curve is exponential in the late game, but key moments allow you to gain an advantage earlier. Each power spike represents a strategic opportunity to force fights, secure objectives, or take plates, transforming a simple item gain into global pressure on the map. Level 6:- This is your first big peak. gives you attack speed, crit, and most importantly, a lifesaving shield. This allows you to be more aggressive in lane, take riskier trades, and look for 2v2s with your support, as your survival is increased.
- The acquisition of multiplies your critical damage, making your auto-attacks and Explosive Charge explosions devastating. Your Buster Shot at rank 2 gains power, offering a more reliable burst or peel tool. You become a serious threat in skirmishes and on objectives.
- Against teams with tanks or resilient champions, is a massive spike. It grants you the armor penetration needed to maintain high DPS. This is when you can melt frontlines and your presence in teamfights becomes essential.
- Your Draw a Bead continuously increases your range, transforming you into a true hypercarry. With 3-4 items, you can position safely while dealing colossal damage, cleaning up teamfights thanks to Rocket Jump resets.
Macro & Lane: Dictating the Pace of the Rift
To dominate with Tristana, you need to adopt a disciplined macro approach, focused on lane management, converting kills into objectives, and strategic positioning in teamfights, while leveraging synergies with your support.Macro play with Tristana is a delicate balance between patience and calculated aggression. Your role is to dictate the pace of the botlane in early game, convert every advantage into an objective in mid-game, and play from a distance in late-game to maximize your DPS while staying safe. Early Game: Focus on safe farm and short trades aroundExplosive Charge + 2-3 auto-attacks. Keep Rocket Jump for escape, especially if vision is limited. Prioritize wave management for clean recalls and item advantages. Mid Game: Your 2-item spikes are the signal to look for 2v2s with an engaging support. Convert these eliminations into dragons or turret plates thanks to the speed of Explosive Charge on structures. Play from a distance, as your range increases, to harass without exposing yourself. Late Game: Adopt a disciplined front-to-back style. Position yourself behind your frontline. Every offensive Rocket Jump must be calculated for a probable reset. Save Buster Shot to finish a target and guarantee a W reset, or defensively to eject an overzealous assassin. Support Synergies:





Matchups & Counters: Navigating Botlane Threats
To counter Tristana, you need to identify unfavorable matchups like Draven or Caitlyn who punish her early game and mobility, and adapt your build with defensive or anti-healing items to survive her burst.Knowing your matchups is key to surviving and exploiting your power windows. A good Blade knows when they can afford to be aggressive and when they need to play patiently. Adapt your playstyle and item choices based on the opponent's strengths and weaknesses to turn a difficult matchup into an opportunity to demonstrate your mastery. Hard Counters:

- Draven: His early DPS is too high. Play from a distance and farm safe.
- Caitlyn: Her range and traps zone you. Save
 Rocket Jump for escape.
 - Lucian: Wins short trades. Refuse his engage angles.
- Kalista: Her incessant kite makes it difficult to stick
 Explosive Charge. Your all-in requires allied CC.
 - Varus: His poke and root punish your jump. Play behind minions.



- Jinx: Scales just as hard. Don't give her easy resets.
- Xayah: Her self-peel makes your engage difficult. Your jump must be a finisher.
- Ashe: Her slows and ult punish your repositioning. Play "vision-first".



- Kai'Sa: Duel of windows. Watch her stacks.
- Ezreal: Poke and escape. Maintain your HP.
- Samira: Wants a chaotic fight. Keep your distance.



- Vayne: Your range and push advantage is huge. Punish her last-hits.
- Kog'Maw: His lack of mobility is a target. Force objectives early.


- : Indispensable anti-healing against high sustain.
- : Safety against assassins and dives.
- : Cleanses heavy CC.
- : Panic button vs dives/one-shots.

Tactical Scenario: The Calculated Mid-Game All-in
Imagine the classic mid-game situation, around 10 minutes into the game. The first Dragon has been secured by your team, and you've just completed your second item, probably . You are with your support, and the enemy team is trying to contest the middle turret. Your jungler is ganking top, and the enemy midlaner is under their turret.
Your team is grouped mid, but the enemy ADC (say, a Jinx) is well-positioned behind their tank. The enemy support (Leona) just missed her  Zenith Blade on your tank. This is your window. You see that Jinx has used her traps to zone your midlaner and her support is on cooldown.
Your action:
You activate  Rapid Fire. You jump with
  Rocket Jump, not onto Jinx, but onto the flank of the enemy tank, just close enough to be able to place your
  Explosive Charge on Jinx mid-jump. You chain auto-attacks on Jinx, who is surprised by your angle. Your support follows with CC. Jinx, with no escape, is forced to flash. You finish her with a final auto or your
  Buster Shot if necessary, securing the kill. Thanks to your Rocket Jump reset, you can immediately reposition safely behind your frontline, or even jump onto the turret to finish it off with Explosive Charge and Rapid Fire. This immediate conversion of the kill into an objective is the mark of a mastered Tristana.
To master Tristana and dominate the Rift, follow these fundamental principles:
- Manage your lane phase by prioritizing farm and saving Rocket Jump for escape, especially against unfavorable matchups.
- Identify your power spikes (, ) and use them to seek skirmishes and objectives, not just random trades.
- Optimize your combos by placing Explosive Charge before Rapid Fire and aiming for Rocket Jump resets for continuous mobility and burst.
- Adapt your build and boot enchantments to enemy threats (anti-healing, anti-burst, anti-CC) to maximize your survival and impact.
- Convert every kill and every advantage into an objective (turrets, dragons) thanks to your Explosive Charge on structures.
- Position yourself intelligently in teamfights, leveraging your increasing range in the late game and using Buster Shot for peel or finish.
"If you lose your trade, it's not bad luck."
Frequently asked questions
How does Tristana deal with tanks in the late game?
Tristana deals with tanks in the late game thanks to her crit and penetration-oriented build. Items like and allow her to cut through armor and deal massive damage. Her high attack speed, boosted by Lethal Tempo and Rapid Fire, ensures sustained DPS against the most resilient targets.
What is Tristana's main role in teamfights?
In teamfights, Tristana's main role is to deal maximum damage to priority targets while exploiting her Rocket Jump resets to reposition or finish off enemies. She must play behind her frontline, use her increasing range to stay safe, and be prepared to jump aggressively if a kill is guaranteed to initiate a snowball.
How can Tristana survive assassins?
To survive assassins, Tristana must adapt her build with defensive items like against AD burst or to time damage. Her Rocket Jump must be saved as an escape tool. Good positioning and her support's peel are also crucial to avoid being an easy target.
When should Rocket Jump be used offensively?
Rocket Jump should only be used offensively when you are certain to secure a kill, which will trigger its reset. This includes situations where the target is low HP, under crowd control from your support, or when you can finish an enemy and immediately reposition. Using it without a guaranteed reset is a major mistake that leaves you vulnerable.
Is Tristana strong in the early game?
Tristana is relatively weak in the early game compared to other more aggressive ADCs like Draven or Lucian. She lacks range and burst before her first key items and levels. Her lane phase must be played safely, focusing on farm and avoiding prolonged trades where she is at a disadvantage. Her potential explodes from the mid-game onwards.
How to maximize objective taking with Tristana?
To maximize objective taking, Tristana must abuse her Explosive Charge on turrets. Combined with Rapid Fire and her auto-attacks, she can demolish structures at an impressive speed. After securing a kill or forcing an enemy recall, it is essential to convert this advantage into turret plates or dragon/Baron takes.