
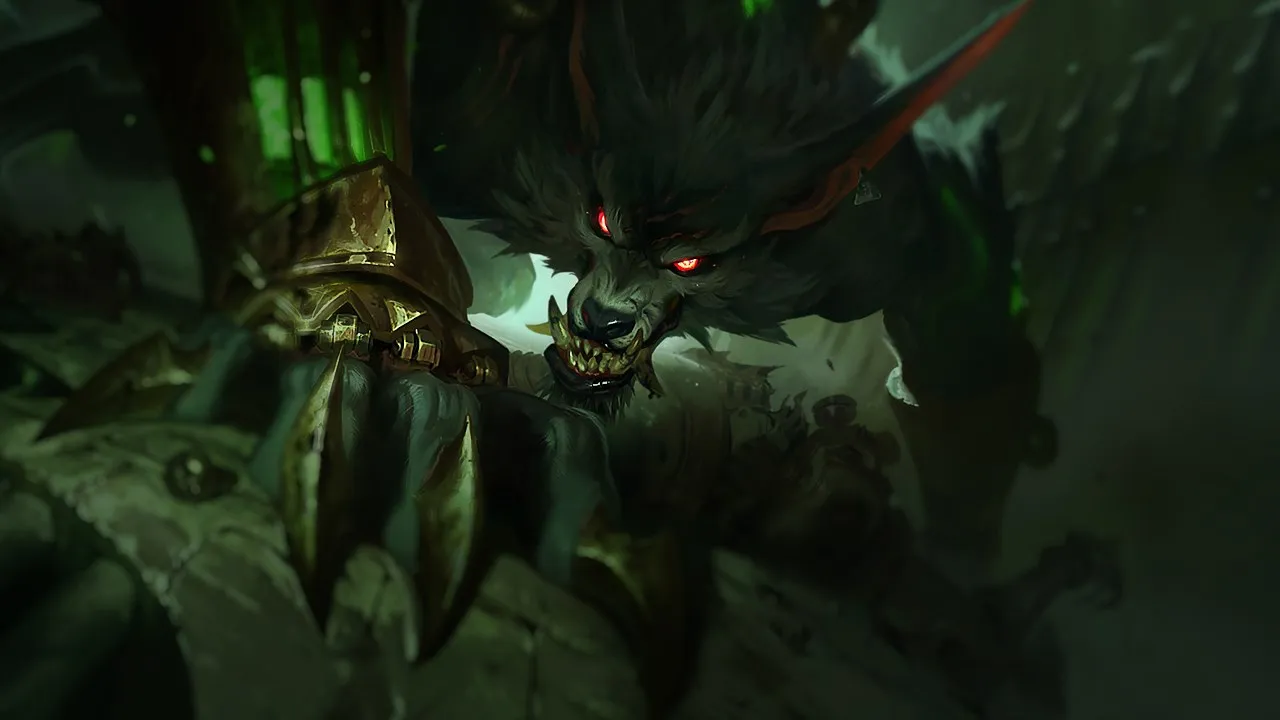
Warwick Jungle Guide: Dominate the Rift with the Unstoppable Beast

 Infinite Duress is a powerful initiation tool, but if poorly timed against a

 Eternal Hunger,
  Jaws of the Beast) is his strength, but it is annihilated by anti-heal. Players must learn to temporize, to force enemy defensive tools before fully committing, and to use his
  Primal Howl to absorb initial burst before fearing at the right moment. Without this discipline, Warwick is easily countered, losing his early game advantage and his ability to snowball the game.
Warwick's Identity: The Relentless Hunter
Warwick is the embodiment of the Diver: a melee fighter whose identity relies on his ability to isolate and eliminate a key enemy target with unwavering aggression. His strength lies in his exceptional sustain (5/5) and his reliable engage (5/5), allowing him to dive deep into enemy lines and emerge victorious. His relatively low difficulty (2/5) makes him accessible, but mastering him requires a keen understanding of timings. His kit is centered on hunting: Blood Hunt reveals weakened enemies and grants him colossal movement and attack speed, turning every injured enemy into an irresistible prey. His uniqueness lies in his ability to turn a duel in his favor thanks to amplified lifesteal at low HP, making him formidable in prolonged fights. Unlike other junglers, Warwick does not have exceptional waveclear (2/5), meaning he must focus on ganks and objectives rather than pure farming. His Hard CC (5/5) via his ultimate is a major asset for picks and teamfights, but it is crucial not to waste it on secondary targets. In short, Warwick is a predator who excels at punishing positional errors and capitalizing on the chaos of combat.
Warwick's Devastating Combos
Mastering Warwick's Combos: The Perfect Hunt
To maximize Warwick's impact, it is essential to master his combos which capitalize on his ability to track and lock down his prey. Each ability has a specific synergy to ensure a kill or optimal control.
Main Combos
- Best combo for a decisive engage: Blood Hunt (2) →
 Primal Howl (3) → Flash →
  Jaws of the Beast (1) → Primal Howl (3 recast) → AA → Infinite Duress (Ult). This combo uses Blood Hunt for the speed and attack bonus, Primal Howl for damage reduction before engagement, then a Flash to close the distance, Jaws of the Beast for the lunge and sustain, the Howl recast for the counter-attack fear, followed by basic attacks and finally Infinite Duress for the final suppression and burst.
 - Simple and effective gank combo: Blood Hunt (2) → Primal Howl (3) → Infinite Duress (Ult). This is a shortened version, ideal for quick ganks where the target is already overextended or has no escape.
- Combo for tower dive or prolonged DPS: Blood Hunt (2) → Primal Howl (3) → Infinite Duress (Ult) → AA → Jaws of the Beast (1) → AA. Engage with the ult for suppression, chain basic attacks while the target is immobilized, then use Jaws of the Beast for the heal and to maintain DPS.
Advanced Mechanical Tips
- The triple bonus of Blood Hunt (2): This ability only reveals low-health enemies; it offers AS/MS bonuses that are tripled when the target falls below 20% HP. Activate it and never let up the pressure on an injured target.
- The on-hit effects of Infinite Duress (Ult): Your ultimate applies on-hit effects multiple times during suppression. With items like Blade of the Ruined King, the damage and heal from your ultimate become massive, maximizing your survival and burst.
- The recast of Primal Howl (3): Use the first phase to reduce incoming damage for 3 seconds, then recast to fear enemies around you. This is perfect for fearing the enemy backline after an engage or to peel for your carries.
- The life drain of
 Eternal Hunger (passive): Your basic attacks heal you. In the jungle, this ensures a healthy clear. In combat, stay close to maximize this passive sustain and surprise your opponents with your resilience.

Common Mistakes to Avoid
- Using the ultimate on the wrong target: Infinite Duress is a long suppression. Never waste it on an enemy tank. Always aim for the carry or a high-value target to maximize your impact.
- Forgetting to activate Blood Hunt: Not activating Blood Hunt before a hunt deprives you of crucial speed and attack bonuses. Always activate it to track effectively.
- Mismanaging Jaws of the Beast: Holding the Q button changes the angle of your lunge. In most situations, release it immediately for a direct and quick lunge.
Notable Interactions
- The fear from Primal Howl can interrupt channels like Nunu's or Katarina's ultimate, if enemies are in range during the recast.
- Warwick synergizes perfectly with and Black Cleaver for massive on-hit damage and armor reduction during the ultimate's suppression.
- Blood Hunt reveals invisible enemies at low health, a valuable tool against champions like Evelynn or Twitch.

Optimal Build and Skill Order
To optimize Warwick, you need a build that amplifies his sustain, burst, and ability to stick to targets. Skill order is also crucial to maximize his early game impact. The skill order prioritizesJaws of the Beast for its sustain and mobility, then Blood Hunt for map pressure, and finally Primal Howl for damage reduction and fear.Skill Order
Priority is given to Q for its lifesteal and ability to follow targets, then W for movement and attack speed, and finally E for survival and control.
- Level 1: Q
- Level 2: W
- Level 3: E
- Level 4: Q
- Level 5: R
- Level 6: Q
- Level 7: W
- Level 8: Q
- Level 9: R
- Level 10: W
- Level 11: W
- Level 12: E
- Level 13: R
- Level 14: E
- Level 15: E
Item Builds
Item choices must adapt to the enemy composition, but the core build remains focused on amplifying on-hit damage and sustain.
Boots: Gluttonous Greaves are the default choice for their sustain and ability to transform into a utility enchantment.

Runes: The keystone  Empowerment is essential for burst and sustain in early combat. For minor runes,
  Brutal offers additional damage,
  Giant Slayer against tanks,
  Legend: Alacrity for attack speed, and
  Overgrowth for durability.
Build Variants:
| Type | Items | Explanation |
|---|---|---|
| Standard — Bruiser | , Trinity Force, Wit's End, Death's Dance, Spear of Shojin | This build maximizes your sustain and DPS. is a huge early game power spike, offering lifesteal and on-hit damage. provides burst and mobility. is excellent against AP teams, while offers survival against AD burst and reduces your cooldowns for more aggression. |
| Anti-tank — Shred | , Divine Sunderer, , Eclipse, | Against very tanky compositions, this build prioritizes armor penetration. and reduce enemy armor, allowing your damage and your team's to pierce through frontlines. provides a shield and additional burst. |
| Sustain — Brawler | Goredrinker, , , Titanic Hydra, Maw of Malmortius | If you need to be more resilient and sustain fights longer, this build is ideal. offers area heal and durability, complemented by for damage and sustain. and are key defensive options against AD and AP burst respectively, while increases your clear and area damage. |




Situational Items
- Against enemy healing (Soraka, Aatrox, lifesteal): Chempunk Chainsword is indispensable for applying Grievous Wounds and drastically reducing their sustain.
- Against 2+ tanks or HP stackers: is your best friend for shredding their maximum health and armor.
- Against AD burst (assassins, Zed, Rengar): allows you to smooth out damage and heal on takedowns.
- Against AP burst (Syndra, Fizz, Evelynn): offers a lifesaving shield and additional damage.
- Against excessive mobility: Stridebreaker can help stick to elusive targets with its active slow.

 ››
››
››
››
Warwick's Power Spikes: When to Strike Hard
Understanding Warwick's power spikes is essential to dictate the pace of the game and know when to take risks. His power curve is heavily oriented towards the early and mid-game, where he excels at punishing mistakes. Warwick's first major power spike occurs as soon as he obtains , transforming his duels and ganks into lethal threats.Power Curve (relative)
Warwick is a champion who particularly shines in the early and mid-game. His strength is maximal at level 5, then stabilizes before rising sharply at levels 9 and 13, which correspond to ultimate upgrades and key item purchases.
Levels 1-4: Clear phase and opportunistic ganks. Your sustain is already good, but burst and lockdown are limited.
Level 5: Your first big spike with access to Infinite Duress. This is the time to aggressively seek Herald or Dragon, or force ganks on overextended lanes.
Level 6 (with ): Acquiring this item gives you a significant boost in damage, lifesteal, and ability to slow enemies, making your duels almost unbeatable. This is your window to dominate the jungle and skirmishes.
Level 9 (with + Ultimate Rank 2): The second rank of your ultimate reduces its cooldown and increases its damage, while adds burst and mobility. You are then able to pick-off targets with great efficiency.
Level 13 (with + Ultimate Rank 3): Your ultimate reaches its full potential, and makes you incredibly difficult to kill, especially against AD teams. You can then initiate major fights and frontline effectively.
Late game: Although still relevant, Warwick's role evolves. He transitions from an aggressive initiator to a counter-engage or peel for his carries, especially if enemies have a lot of CC or anti-heal.
Macro and Synergies: The Predator's Strategy
Warwick's jungle macro-management is that of a predator who capitalizes on aggression and early game snowball. Your primary objective is to create constant pressure on the map and convert every advantage into an objective. Your game plan should be centered on seeking opportunistic picks and securing major objectives, exploiting the power of yourInfinite Duress.Early Game Plan
Start with a simple and efficient clear. Your sustain allows you to stay healthy. Look for counter-ganks or picks on lanes that lack mobility or Flash. Your level 5 spike with Infinite Duress is crucial for forcing Herald or Dragon. Don't hesitate to gank very early (level 3) if an opportunity arises, but always prioritize reaching level 5.
Mid Game Plan
Maintain constant pressure on the map. Use (if chosen) and Infinite Duress to chain picks, especially in the fog of war where your ultimate is harder to anticipate. Every Flash forced on a lane must be converted into an objective: a dive under tower, a Dragon, or a Herald. Play around vision and narrow corridors where your R is easier to land. Never force an engage without clear information; Warwick excels at counter-ganks and timed objectives.

Late Game Plan
In the late game, your role can evolve. You remain a powerful initiator, but you must be more cautious against mass CC and enemy anti-heal. Look to catch the enemy carry without a dash with your R, then use E to tank the burst and reset with your sustain. Do not commit your R without vision of enemy peel or anti-heal sources. Your ability to peel for your carries with E and Q also becomes very important.
Synergies with Allies
Warwick particularly shines with champions who can amplify his engagement or protect him while he dives:
- Orianna: You are an excellent ball carrier for her ultimate. Your +
 R into the heart of the team, followed by her Shockwave, guarantees a devastating wombo combo.
 - Galio: His global ultimate covers your deep engagements. You suppress a target, and he locks down the area to prevent enemy peel.
- Lulu: Her shields and
 Polymorph help you survive initial burst and stick to your target, ideal if you lack safe access to the backline.
 - Shen: His
 Taunt and global ultimate secure your dives and picks. You play perfectly around objectives.
 - Ashe: Her
 Enchanted Crystal Arrow can force a Flash or initiate a fight, allowing you to follow up with your R and
  Q for an easy pick.





Matchups and Counter-Strategies: Hunter or Prey?
Against Warwick, certain champions and items can turn your hunt into a deadly trap. It is imperative to know these matchups and adapt your strategy to avoid being surprised. Against opponents capable of neutralizing your suppression or effectively kiteing you, your success will depend on your ability to temporize and choose your targets with surgical precision.Difficult Matchups (Hard Counters)
| Champion | Key Reason | Adaptation |
|---|---|---|
| Olaf | His  Ragnarok cancels your R and he wins prolonged duels. Ragnarok cancels your R and he wins prolonged duels. | Avoid direct duels when his ultimate is available. Cross-map to take an objective elsewhere. |
| Morgana | Her  Black Shield neutralizes your Black Shield neutralizes your  R and her R and her  Dark Binding punishes you. Dark Binding punishes you. | Force the use of her Black Shield before committing your R. |
| Lee Sin | He dominates the early game with aggressive invades and can ruin your engage with his  Dragon's Rage. Dragon's Rage. | Prepare an anti-invade plan with wards and lane priority. |
| Kindred | She kites you and her  Lamb's Respite cancels your finishes. Lamb's Respite cancels your finishes. | Do not chase her in open field. Save your R for after her ultimate. |
| Jarvan IV | He forces dictated fights and can trap you with his  Cataclysm. Cataclysm. | Play for counter-engage. Use your R to peel or punish an isolated target. |



Unfavorable Matchups
| Champion | Key Reason | Adaptation |
|---|---|---|
| Graves | He kites you with his range and  Smoke Screen, controlling duels. Smoke Screen, controlling duels. | Avoid "blind hunting". Gank a lane with CC to force a Flash. |
| Lillia | She kites you and puts you to sleep, turning your chase into a weakness. | Fight her in narrow corridors. Save your  R for after her mobility. R for after her mobility. |
| Rammus | His  Taunt and damage reflection punish your prolonged DPS. Taunt and damage reflection punish your prolonged DPS. | Don't focus on him. Cross-map or gank a lane without Taunt. |



Skill Matchups
| Champion | Key Reason | Adaptation |
|---|---|---|
| Kha'Zix | He relies on isolation and burst. The duel depends on your survival of his initial burst. | Avoid isolated routes without vision. Force him into a fight where you have an ally. |
| Vi | A "who engages on whom" duel. She has reliable lockdown, but you can turn the fight around. | Read her gank angles. Save your  R to lock Vi or her follow-up. R to lock Vi or her follow-up. |
| Xin Zhao | His early is very strong. The matchup is about distance management and burst. | Avoid low HP encounters. Disengage with  E if you are at a disadvantage. E if you are at a disadvantage. |



Favorable Matchups
| Champion | Key Reason | Adaptation |
|---|---|---|
| Master Yi | He is linear, and you have fear and suppression to break his DPS and resets. | Track his spikes and force plays before he gets too strong. |
| Amumu | You win small duels and can catch him in transit before his ultimate. | Force trades before he regroups. Use your  R to prevent his ultimate. R to prevent his ultimate. |
| Shyvana | She wants to farm and scale. You can contest her early and take objectives. | Play aggressively before her level 5 and key items. Invade and force dragons. |



Items to Counter Warwick
The following items are relevant defensive choices for enemy champions looking to reduce Warwick's effectiveness or for yourself to better manage certain matchups:
- Against champions who rely on sustain: Thornmail is an excellent choice for applying anti-heal via your attacks and your R.
- To increase your own sustain: Spirit Visage significantly amplifies your passive healing (Eternal Hunger, Jaws of the Beast, Infinite Duress) and makes you very difficult to take down.
- To smooth out burst and heal on takedowns: is perfect for prolonged skirmishes.
- For movement speed and gank angles: Dead Man's Plate offers mobility for cleaner engages and better objective rotation.
- Against AD carries and bruisers in the side lane: Randuin's Omen reduces critical damage and attack speed, making you more resilient in duels.



Concrete Scenario: Securing the First Dragon
Imagine you are at level 6, you've just bought your , and the first Dragon appears in 30 seconds. Your midlaner has priority, but your botlane is under their tower and the enemy is pushing. The enemy jungler, a Lee Sin, was seen top ganking. In this scenario, your goal is to capitalize on the enemy jungler's absence and your midlaner's priority to secure the first Dragon with minimal risk.Action: You must quickly clear your gromp or your wolves to reach the Dragon in time. Activate your  Blood Hunt to check if any enemies are near the Dragon or the river. If the path is clear, ping your midlaner to join you and start the Dragon. If Lee Sin returns, your Infinite Duress and your
  Primal Howl, combined with your , give you a significant advantage in a duel. You can lock him down or fear him to secure the objective or kill him. If the enemy botlane pushes too far to contest, use your W to track them and punish them. Don't forget to use E before engaging the Dragon or a fight to reduce incoming damage.
- Prioritize Level 5: Quickly reach level 5 to unlock Infinite Duress and start taking major objectives like Herald or Dragon.
- Choose your targets carefully: Use Infinite Duress on enemy carries or isolated targets, never on a tank without compelling reason.
- Manage your Primal Howl: Activate E before engaging to reduce damage, then recast at the right moment to fear and control enemies.
- Adapt your build: Don't follow a build strictly. Choose situational items like against anti-heal or against AP burst.
- Maintain pressure: Use Blood Hunt to constantly track weakened enemies and turn every forced Flash into an objective.
- Master matchups: Know the strengths and weaknesses of each enemy jungler. Avoid losing duels and cross-map if necessary.
If you lose your trade, it's not bad luck.
Frequently asked questions
What is the best build for Warwick Jungle on Wild Rift?
The standard build for Warwick Jungle consists of , , , and , with boots. This build maximizes his sustain, DPS and ability to stick to targets, while offering good resilience.
How can Warwick counter highly mobile champions or those with a lot of CC?
Against mobile champions, can be an excellent addition for its active slow. Against CC, the is vital to cancel controls and ensure your engage or escape. It is crucial to time your R after enemy CC tools have been expended.

What are Warwick's key power spikes in the jungle?
Warwick's power spikes are mainly at level 5 with access to Infinite Duress, then at level 6 with the purchase of . Another important spike occurs at level 9 with the second rank of his ultimate and the acquisition of , significantly increasing his burst and mobility for mid-game picks.
How to manage difficult matchups like Olaf or Morgana with Warwick?
Against Olaf, avoid direct duels when his Ragnarok is active and play cross-map. Against Morgana, time your R and force the use of her Black Shield with poke or a light engage before committing. Adaptation and knowledge of enemy cooldowns are crucial in these matchups.
What is the best gank strategy for Warwick?
The best gank strategy for Warwick is to exploit Blood Hunt to track weakened or overextended enemies. Approach with W, activate Primal Howl to reduce damage, then use Infinite Duress to lock down the target. Follow up with Jaws of the Beast and the recast of E for the fear and remaining damage. Diagonal ganks from the fog of war are often the most effective.