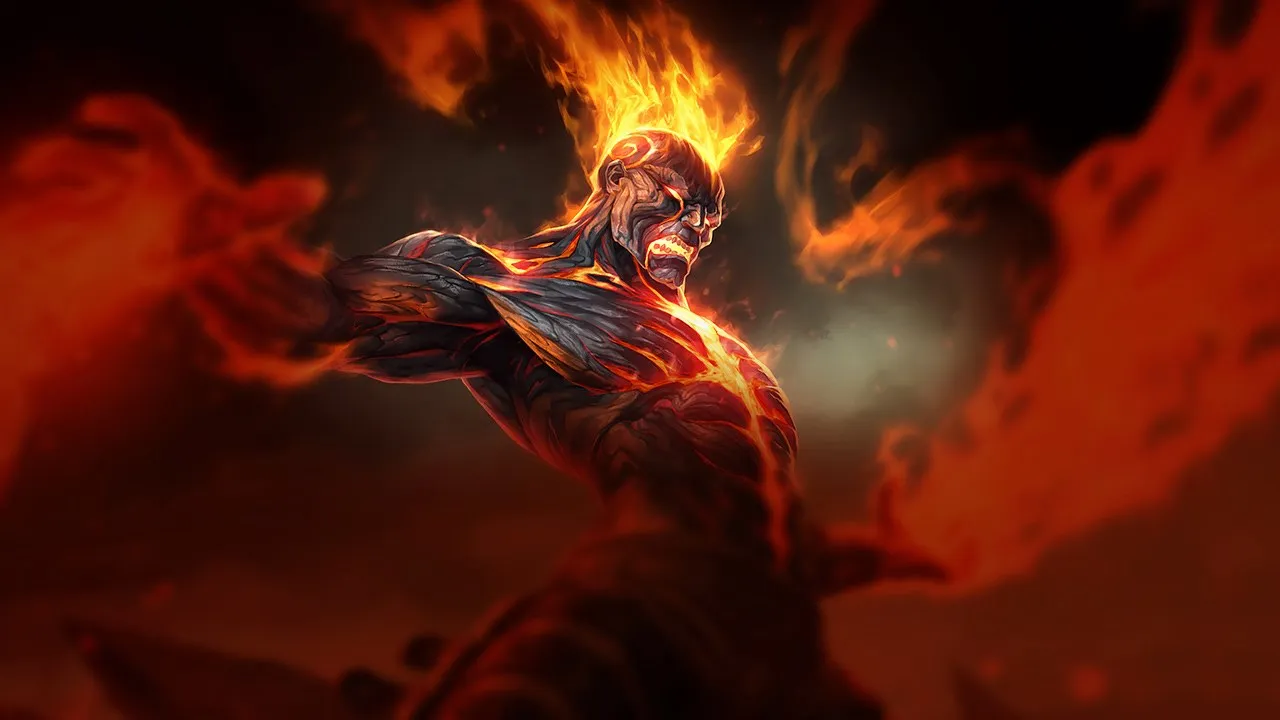
Brand kesulitan melawan komposisi yang dapat melakukan burst padanya dengan cepat atau memperpendek jarak sebelum dia menyelesaikan kombo skill penuhnya. Poke jarak jauh, mobility tinggi, dan kemampuan disengage yang kuat sangat mengurangi dampak dari kit damage-over-time miliknya. Ketergantungannya pada eksekusi rantai abilities dan positioning menentukan kelemahan strukturalnya.
★ MID · SUPPORTTier B
DMG
UTIL
TANK
DIFF
Win52.1%#26 · ↓2pt
Pick10.4%#2
Ban8.8%#22
Panduan counter Brand Wild Rift
Hard Counters
2
Champion ini punya build dan gaya bermain yang langsung mengungguli milikmu, sehingga mengontrol lane dan farming jadi sangat sulit. Kemampuan mereka bisa menetralkan kekuatan utamamu atau menghukummu begitu kamu mencoba menjalankan rencana permainan biasa. Di matchup seperti ini, tujuannya biasanya adalah meminimalkan kesalahan dan mencari cara menang di luar konfrontasi langsung.
EngageTankCrowd controlDredge Line brings Nautilus and Brand together, then Staggering Blow and Depth Charge extend the lockdown. Brand needs to ignite a target before Sear can stun it; when crowd control starts the exchange, he lacks the time required to sequence Blaze, Sear, and Pillar of Flame.Build Nautilus →Lihat detail
Nautilus
Kenapa
Dredge Line brings Nautilus and Brand together, then Staggering Blow and Depth Charge extend the lockdown. Brand needs to ignite a target before Sear can stun it; when crowd control starts the exchange, he lacks the time required to sequence Blaze, Sear, and Pillar of Flame.
Dampak di lane
The anchor threat reduces your poke angles and forces you to keep minions between Nautilus and yourself. One catch can cost enough health to surrender the wave and then brush control. Titan's Wrath also lets him absorb part of your first damage sequence.
Cara bermain
Play behind the wave without lining up beside your carry, so Dredge Line cannot create two easy targets. Keep Sear until Blaze is applied and Nautilus walks forward; the stun should interrupt his pursuit, not provide casual poke. After a missed anchor, use Pillar of Flame and leave before Depth Charge can start another sequence.
Crowd controlPick-offMobilitasRocket Grab pulls Brand into melee range, where Power Fist can knock him up and Static Field can silence him. Because Brand has no movement ability, a catch often prevents the sequence that enables Sear's stun. Blitzcrank turns one bad firing angle into a decisive exchange.Build Blitzcrank →Lihat detail
Blitzcrank
Kenapa
Rocket Grab pulls Brand into melee range, where Power Fist can knock him up and Static Field can silence him. Because Brand has no movement ability, a catch often prevents the sequence that enables Sear's stun. Blitzcrank turns one bad firing angle into a decisive exchange.
Dampak di lane
While Rocket Grab is available, the sides of the wave and nearby brushes become difficult to occupy. Retreating too far gives up Pillar of Flame poke and minion pressure; stepping out without a screen offers the grab. That tension decides wave control and river access.
Cara bermain
Keep a living minion on Rocket Grab's path and switch sides as the wave thins. Do not spend Sear casually: Blaze into Sear can stop Blitzcrank after he approaches. When Rocket Grab misses, step forward for Pillar of Flame and Conflagration, then reset your position before his next attempt.
Champion ini punya tool yang umumnya memberi mereka keunggulan dalam pertarungan, tanpa membuat matchup-nya benar-benar mustahil. Mereka mungkin punya jarak lebih jauh, lebih tahan terhadap seranganmu, atau lebih banyak cara merespons engage-mu. Kamu perlu menyesuaikan pendekatan dan memilih dengan cermat kapan menerima pertarungan.
PerisaiKebal CCMekanikBlack Shield absorbs magic damage and blocks crowd control while it holds, which can cancel Sear's stun. Dark Binding roots Brand long enough for Tormented Shadow to deal persistent damage. Morgana can therefore protect one target from your opening while punishing your own positioning.Build Morgana →Lihat detail
Morgana
Kenapa
Black Shield absorbs magic damage and blocks crowd control while it holds, which can cancel Sear's stun. Dark Binding roots Brand long enough for Tormented Shadow to deal persistent damage. Morgana can therefore protect one target from your opening while punishing your own positioning.
Dampak di lane
If you engage directly into Black Shield, you spend Blaze and Sear without gaining the expected stop, then Morgana takes initiative. Standing on Dark Binding's line also reduces your Pillar of Flame windows. The lane becomes a resource sequence: force shield, avoid root, and only then commit the full trade.
Cara bermain
Use Pillar of Flame or Conflagration to weaken Black Shield before committing Sear, and keep a minion between Dark Binding and you. If the shield remains intact, do not force the control; change targets or wait. Once it disappears, apply Blaze and aim Sear before Morgana rebuilds her protection.
JangkauanScalingPokeSenna gains range and damage by collecting Mist, while Piercing Darkness can damage enemies and heal allies along the same line. Brand must approach farther to apply Blaze. A passive lane therefore lets Senna improve the exact range advantage that makes your openings increasingly difficult.Build Senna →Lihat detail
Senna
Kenapa
Senna gains range and damage by collecting Mist, while Piercing Darkness can damage enemies and heal allies along the same line. Brand must approach farther to apply Blaze. A passive lane therefore lets Senna improve the exact range advantage that makes your openings increasingly difficult.
Dampak di lane
Each uncontested soul increases Senna's future pressure, but walking forward in a straight line offers Piercing Darkness or Last Embrace. After several lost trades, her healing gradually erases your poke and forces you off the wave. Your cleanest moment comes when she stops for a soul or spends her rooting projectile.
Cara bermain
Place Pillar of Flame where Senna must stop to collect a soul without chasing beyond your wave. Keep a minion between Last Embrace and you. After that projectile is spent, apply Blaze and Sear for one short exchange; if Piercing Darkness immediately heals the damage, leave instead of feeding her preferred rhythm.
PerisaiBlok proyektilPeelUnbreakable blocks the first projectile and reduces following damage from the same direction. It can remove Sear or Pyroclasm's first bounce, then protect Braum's carry. Winter's Bite also applies the first Concussive Blows stack, making an extended exchange dangerous for an immobile Brand.Build Braum →Lihat detail
Braum
Kenapa
Unbreakable blocks the first projectile and reduces following damage from the same direction. It can remove Sear or Pyroclasm's first bounce, then protect Braum's carry. Winter's Bite also applies the first Concussive Blows stack, making an extended exchange dangerous for an immobile Brand.
Dampak di lane
Casting the whole sequence into the shield deals little and lets Braum walk forward while your abilities recover. If Winter's Bite lands, his duo's attacks then threaten the stun and push you away from the wave. Side angles matter more here than the number of spells you cast.
Cara bermain
First force Unbreakable's facing with Pillar of Flame or Conflagration, then change angle before sending Sear. Do not launch Pyroclasm into the shield's front. If Winter's Bite hits, leave before Concussive Blows stacks; when it misses, reclaim an angle and apply Blaze to the carry rather than Braum.
Light Binding and Lucent Singularity reach Brand before he can easily apply Blaze, while Prismatic Barrier protects Lux on both passes. She can test your health from a space where Sear requires more risk. A successful root also prepares Final Spark before you can reposition.Build Lux →Lihat detail
Lux
Kenapa
Light Binding and Lucent Singularity reach Brand before he can easily apply Blaze, while Prismatic Barrier protects Lux on both passes. She can test your health from a space where Sear requires more risk. A successful root also prepares Final Spark before you can reposition.
Dampak di lane
Standing in line with too few minions lets Light Binding control the lane, while Lucent Singularity closes narrow paths. If you step up to answer every poke, Lux's shield makes the health exchange inefficient. Pressure swings when both zoning spells are unavailable and the wave still gives you a screen.
Cara bermain
Move laterally around the wave and do not remain inside Lucent Singularity while preparing Sear. After Light Binding is spent, step far enough to land Pillar of Flame and apply Blaze, then threaten the stun without chasing through Prismatic Barrier. While the root remains available, keep distance and preserve health first.
Matchup ini terutama soal duel eksekusi: kedua champion punya cara nyata untuk unggul. Satu skill penting yang di-dodge, engage yang diantisipasi dengan tepat, atau satu kesalahan positioning saja bisa menentukan siapa yang menang. Memahami matchup dan mengenali momen yang tepat untuk bertindak sangat penting di sini.
PosisiVisionThis matchup demands Brand's precise ability execution to punish Pyke's cooldowns. Pyke, conversely, exploits any Brand misstep or wasted spell for a decisive winning trade.Build Pyke →Lihat detail
Pyke
Kenapa
This matchup demands Brand's precise ability execution to punish Pyke's cooldowns. Pyke, conversely, exploits any Brand misstep or wasted spell for a decisive winning trade.
Dampak di lane
Pyke's hook threat and stealth dives force Brand to maintain impeccable spacing and vigilant vision. Neglecting these quickly concedes wave priority and exposes Brand to lethal all-in attempts.
Cara bermain
Brand should prioritize consistent, well-executed poke and vigilant spacing. Proactive vision denies Pyke's flanks, allowing Brand to patiently capitalize on Pyke's cooldowns or any misstep.
PokeKontrol areaVisionZyra's seeds become plants when hit by Deadly Spines or Grasping Roots. Those units add poke and can occupy Sear's path. Brand has more immediate area damage through Pillar of Flame and Conflagration, but loses the exchange when his projectile is spent on a plant.Build Zyra →Lihat detail
Zyra
Kenapa
Zyra's seeds become plants when hit by Deadly Spines or Grasping Roots. Those units add poke and can occupy Sear's path. Brand has more immediate area damage through Pillar of Flame and Conflagration, but loses the exchange when his projectile is spent on a plant.
Dampak di lane
Each seed near the wave changes your stun angle and lets Zyra push without exposing herself directly. If Grasping Roots lands, plants extend the pressure while you are rooted. Once the seeds are consumed and the root is spent, you can instead reclaim brush control and force Zyra back.
Cara bermain
Only send Sear through a clear path and use Pillar of Flame to reach Zyra without relying on a blockable projectile. Avoid Grasping Roots' line, then step forward after it passes to apply Blaze and threaten the stun. Against Stranglethorns, leave the zone before the knock-up instead of finishing your sequence in place.
PosisiVisionThresh consistently exploits Brand's abilities on cooldown, turning minor missteps into significant lane advantages. For Brand, mastering the delicate dance of engagement patterns is key to victory.Build Thresh →Lihat detail
Thresh
Kenapa
Thresh consistently exploits Brand's abilities on cooldown, turning minor missteps into significant lane advantages. For Brand, mastering the delicate dance of engagement patterns is key to victory.
Dampak di lane
Failure to respect Thresh's threat and his capacity to initiate can quickly shift lane control, forcing Brand into a defensive posture. This directly impacts Brand's ability to establish vision and effectively influence objective timings.
Cara bermain
This matchup demands Brand players exhibit precise execution, using meticulous spacing to evade Thresh's hooks and committing abilities only within clear windows. Secure damage then disengage swiftly, patiently waiting for the next favorable opportunity instead of forcing risky engagements.
Grand Entrance requires Rakan to land inside your duo to knock targets up, then Battle Dance returns him to an ally. That entry gives Brand a nearby target for Blaze and Pillar of Flame, but the initial control can interrupt your setup. The matchup therefore depends on keeping Sear for the landing.Build Rakan →Lihat detail
Rakan
Kenapa
Grand Entrance requires Rakan to land inside your duo to knock targets up, then Battle Dance returns him to an ally. That entry gives Brand a nearby target for Blaze and Pillar of Flame, but the initial control can interrupt your setup. The matchup therefore depends on keeping Sear for the landing.
Dampak di lane
If you spend Sear on poke, Rakan can use Grand Entrance during its cooldown and leave with Battle Dance. If you hold it, he must respect the area around your carry and the lane stays steadier. A successful knock-up restores his brush control; a stopped entry gives you wave priority.
Cara bermain
Hold Sear until Rakan starts Grand Entrance and apply Blaze with Conflagration or Pillar of Flame on his landing area. Aim the stun after he arrives, then stand between him and your carry without chasing Battle Dance. While The Quickness is active, separate your duo so only one player can be charmed.
Champion ini biasanya kesulitan merespons kekuatan utamamu, sehingga kamu bisa menghadapi pertarungan dengan lebih leluasa. Kamu sering punya banyak cara untuk menekan mereka dan memaksa trade yang menguntungkan. Manfaatkan keunggulan ini untuk mendikte tempo, bukan memberi mereka waktu untuk kembali nyaman.
Pick-offBurstSnowballSona must remain near her ally to share Hymn of Valor and Aria of Perseverance auras. That grouping gives Conflagration nearby targets and Pyroclasm short bounce paths. Her heal can erase isolated poke, but struggles more when Blaze and your area damage reach both players.Build Sona →Lihat detail
Sona
Kenapa
Sona must remain near her ally to share Hymn of Valor and Aria of Perseverance auras. That grouping gives Conflagration nearby targets and Pyroclasm short bounce paths. Her heal can erase isolated poke, but struggles more when Blaze and your area damage reach both players.
Dampak di lane
Sona wants repeated small trades followed by healing, while Brand wants one sequence that reaches the duo. If you keep the wave neutral enough to threaten both positions, she cannot step up freely for Hymn of Valor. A good area hit costs health, healing mana, and often brush control.
Cara bermain
Wait for Sona to approach her carry before using Pillar of Flame or spreading Blaze through Conflagration. Do not spend the full sequence on poke that Aria of Perseverance can heal alone. Once both targets are burning, Sear threatens the stun and Pyroclasm gains the bounces that actually convert your advantage.
Pick-offTeamfightTekanan awalYou and Me! makes Yuumi untargetable but fixes her to her ally's position. Brand can therefore predict where Pillar of Flame and Conflagration need to land, then use Pyroclasm against a grouped duo. Zoomies heals and accelerates without separating the two bodies that feed your area damage.Build Yuumi →Lihat detail
Yuumi
Kenapa
You and Me! makes Yuumi untargetable but fixes her to her ally's position. Brand can therefore predict where Pillar of Flame and Conflagration need to land, then use Pyroclasm against a grouped duo. Zoomies heals and accelerates without separating the two bodies that feed your area damage.
Dampak di lane
Yuumi's carry must expose themselves alone for each last hit, simplifying your zoning. When poke lands once, Zoomies repairs it; when Blaze spreads and both targets receive area damage, their sustain is taxed much harder. Pressure depends on the quality rather than the volume of your spells.
Cara bermain
Aim Pillar of Flame at the attached ally's last-hit path instead of casting blindly. When Yuumi detaches for Bop 'n' Block, Sear can punish her after Blaze is applied. Keep Pyroclasm for a moment when both champions remain close, and retreat if Final Chapter begins stacking its rooting waves.
Nami must step forward to bounce Ebb and Flow between allies and enemies. That path brings her into Pillar of Flame range, after which Blaze enables Sear's stun. Aqua Prison remains her answer: if Brand stands still during the sequence, the bubble can interrupt his advantage before Pyroclasm.Build Nami →Lihat detail
Nami
Kenapa
Nami must step forward to bounce Ebb and Flow between allies and enemies. That path brings her into Pillar of Flame range, after which Blaze enables Sear's stun. Aqua Prison remains her answer: if Brand stands still during the sequence, the bubble can interrupt his advantage before Pyroclasm.
Dampak di lane
Each offensive heal briefly exposes Nami, but Ebb and Flow can also repair poorly converted poke. Punishing that step lowers her health and brush access; missing it spends two spells into one healing bounce. The lane rewards clear windows rather than constant casting.
Cara bermain
Move laterally during Aqua Prison and do not line up beside your carry against Tidal Wave. When Nami walks forward for Ebb and Flow, place Pillar of Flame, apply Blaze, and aim Sear at her exit. If the bubble remains available, leave after the first spell; if it misses, complete with Conflagration or Pyroclasm.
Champion ini punya build dan gaya bermain yang langsung mengungguli milikmu, sehingga mengontrol lane dan farming jadi sangat sulit. Kemampuan mereka bisa menetralkan kekuatan utamamu atau menghukummu begitu kamu mencoba menjalankan rencana permainan biasa. Di matchup seperti ini, tujuannya biasanya adalah meminimalkan kesalahan dan mencari cara menang di luar konfrontasi langsung.
Bertahan hidupPosisiYasuo represents a direct counter to your entire burst sequence because of Wind Wall. This single ability can delete your Pyroclasm mid-air and completely block your Sear stun, instantly halting your ability to defend yourself or trigger Blaze explosions. Since he can dash through minions using Sweeping Blade to close the gap, losing your main self-peel projectile to his barrier leaves you entirely vulnerable to his relentless physical damage.Build Yasuo →Lihat detail
Yasuo
Kenapa
Yasuo represents a direct counter to your entire burst sequence because of Wind Wall. This single ability can delete your Pyroclasm mid-air and completely block your Sear stun, instantly halting your ability to defend yourself or trigger Blaze explosions. Since he can dash through minions using Sweeping Blade to close the gap, losing your main self-peel projectile to his barrier leaves you entirely vulnerable to his relentless physical damage.
Dampak di lane
You cannot safely hold the middle of the lane, as Yasuo will constantly threaten you with Steel Tempest tornadoes. Every time you step up to use Pillar of Flame to secure farm, you risk getting dashed on and knocked up into Last Breath. This forces you under your own turret, sacrificing wave control and letting him roam freely to help his jungler while you struggle to clear safely.
Cara bermain
To survive, you must bait out Wind Wall before committing any major resources. Pop his Way of the Wanderer shield with a basic attack, then use Pillar of Flame to poke without throwing straight-line projectiles. Keep your Sear held as a deterrent; as long as you do not throw it, he must respect the potential stun. If he wastes his wall, you have a brief twenty-second opening where you can aggressively look for a Conflagration and Pyroclasm chain.
Tekanan petaKassadin is your worst nightmare because he is built to absorb magic damage and dodge skillshots. Every time you try to poke him, his Null Sphere generates a magic shield that nullifies your Pillar of Flame damage, while his Void Stone grants him additional shielding just for you casting spells. Once he unlocks Riftwalk, he can effortlessly blink over your Sear and Pillar of Flame, rendering your entire burst combo useless.Build Kassadin →Lihat detail
Kassadin
Kenapa
Kassadin is your worst nightmare because he is built to absorb magic damage and dodge skillshots. Every time you try to poke him, his Null Sphere generates a magic shield that nullifies your Pillar of Flame damage, while his Void Stone grants him additional shielding just for you casting spells. Once he unlocks Riftwalk, he can effortlessly blink over your Sear and Pillar of Flame, rendering your entire burst combo useless.
Dampak di lane
This matchup severely limits your early pressure. You cannot safely trade health because Kassadin sustains through your poke, meaning you cannot easily force him out of lane. After level five, the threat of Riftwalk into Force Pulse means you cannot overextend past the river. You are forced to play back, which concedes mid priority and lets him freely scale into an unstoppable late-game monster.
Cara bermain
To survive, you must focus entirely on controlling the minion wave near your turret. Never blindly push with Pillar of Flame. Instead, use Conflagration to safely thin the wave while keeping the minions on your side of the lane. Keep your Sear ready to deter his aggressive jumps; never throw it proactively while his Riftwalk is off cooldown. If he does engage with Riftwalk, immediately drop Pyroclasm and Conflagration on him to punish his dive.
PosisiBertahan hidupYone holds a massive advantage because his Soul Unbound allows him to effortlessly dodge your Pillar of Flame and Sear skillshots while surging forward. By bypassing your zoning tools, he completely negates your defensive stun setup. Once he closes the gap with this spirit form, he can easily chain Mortal Steel knockups directly into Fate Sealed, bursting you down before your passive Blaze can even ramp up.Build Yone →Lihat detail
Yone
Kenapa
Yone holds a massive advantage because his Soul Unbound allows him to effortlessly dodge your Pillar of Flame and Sear skillshots while surging forward. By bypassing your zoning tools, he completely negates your defensive stun setup. Once he closes the gap with this spirit form, he can easily chain Mortal Steel knockups directly into Fate Sealed, bursting you down before your passive Blaze can even ramp up.
Dampak di lane
This threat forces you into a highly defensive posture, conceding early wave control. You cannot safely step up to use Conflagration on the minions without risking a sudden engagement. Every time Yone has his Mortal Steel tornado ready, you must retreat to your tower. This constant pressure limits your recall windows, chips away at your health, and prevents you from helping your jungler secure nearby objectives.
Cara bermain
Never throw your Sear reactively when Yone charges in his spirit form. Instead, stand near your turret and aim your Pillar of Flame at his physical body's return anchor. Watch his projection closely; the moment Soul Unbound ends and he snaps back, cast Conflagration and Pyroclasm to punish his retreat. If he manages to land Fate Sealed on you under your tower, immediately flash away rather than trying to trade back.
Bertahan hidupMekanikThis matchup is incredibly oppressive because Fizz possesses the perfect tool to nullify your entire threat. Whenever you attempt to lock him down with your Sear stun or bounce your Pyroclasm, he can simply activate Playful to dodge the spell entirely. Without these defensive tools, you are completely defenseless against his follow-up, allowing him to dash in with Urchin Strike and burst you down.Build Fizz →Lihat detail
Fizz
Kenapa
This matchup is incredibly oppressive because Fizz possesses the perfect tool to nullify your entire threat. Whenever you attempt to lock him down with your Sear stun or bounce your Pyroclasm, he can simply activate Playful to dodge the spell entirely. Without these defensive tools, you are completely defenseless against his follow-up, allowing him to dash in with Urchin Strike and burst you down.
Dampak di lane
You are forced into a defensive posture from the very first waves. Poking with Pillar of Flame or spreading Blaze with Conflagration becomes extremely risky, as stepping up past your caster minions invites a deadly Chum the Waters initiation. If you push the wave too far, Fizz will freeze, forcing you to step up and face an inevitable all-in dive where your tower cannot save you.
Cara bermain
Your survival depends entirely on holding Sear. Never throw it proactively; you must keep it loaded as a threat to deter Fizz from using Urchin Strike. Focus solely on using Pillar of Flame from maximum range to thin the wave. If he wastes Playful to clear minions, you have a brief twelve-second opening to play aggressively. If Chum the Waters attaches to you, prepare to flash the incoming knock-up immediately.
Bertahan hidupPosisiIrelia completely dictates the pace of this lane because of how Bladesurge interacts with your skillshots. Whenever you try to hurl Pillar of Flame or setup a stun with Sear, she can instantly dash through a low-health minion to side-step them. By using your own wave as a runway, she closes the distance effortlessly, rendering your ranged advantage useless and forcing a lethal close-quarters fight where her Ionian Fervor shreds you.Build Irelia →Lihat detail
Irelia
Kenapa
Irelia completely dictates the pace of this lane because of how Bladesurge interacts with your skillshots. Whenever you try to hurl Pillar of Flame or setup a stun with Sear, she can instantly dash through a low-health minion to side-step them. By using your own wave as a runway, she closes the distance effortlessly, rendering your ranged advantage useless and forcing a lethal close-quarters fight where her Ionian Fervor shreds you.
Dampak di lane
You cannot contest the wave or push for priority without risking sudden death. The moment a minion's health drops, you must retreat, sacrificing early gold and tower pressure. If she freezes the lane near her turret, you are entirely zoned out, as stepping up to break it makes you an easy target for Flawless Duet. This loss of mid priority leaves your jungler without backup during early river skirmishes.
Cara bermain
To survive, never cast Pillar of Flame on the wave when Irelia has low-health minions nearby to dash to. Instead, hold Sear and Conflagration strictly for self-defense; only fire your stun when she commits her Bladesurge directly onto you, making her trajectory predictable. If she lands Flawless Duet or initiates with Vanguard's Edge, drop Pyroclasm immediately and retreat toward your turret. Accept losing some gold to keep your health high enough to prevent dives.
Bertahan hidupZed completely neutralizes your defensive tools because Death Mark makes him untargetable, allowing him to easily bypass your Sear stun. If you try to trigger Blaze and throw Sear to peel yourself, he simply ults to dodge it. Without any mobility, Brand cannot escape the subsequent burst from Razor Shuriken and Shadow Slash, leaving you completely defenseless once your crowd control is wasted.Build Zed →Lihat detail
Zed
Kenapa
Zed completely neutralizes your defensive tools because Death Mark makes him untargetable, allowing him to easily bypass your Sear stun. If you try to trigger Blaze and throw Sear to peel yourself, he simply ults to dodge it. Without any mobility, Brand cannot escape the subsequent burst from Razor Shuriken and Shadow Slash, leaving you completely defenseless once your crowd control is wasted.
Dampak di lane
Once Zed unlocks Death Mark, you lose all offensive agency in the mid lane. You are forced to farm from extreme range with Pillar of Flame, as stepping forward invites a Living Shadow and Shadow Slash slow, setting up an easy dive. If he pokes you below half health, his Contempt for the Weak ensures a swift execution under your own turret, forcing poor recalls and letting him roam freely.
Cara bermain
You must hold Sear as an absolute deterrent. Never cast it proactively to trade. When Zed initiates with Death Mark, wait for the exact moment he reappears behind you. Instantly tag him with Conflagration and aim Sear directly behind your own model to secure the stun. This is your only window to survive; if you land it, follow up with Pillar of Flame and Pyroclasm to force a trade-kill before his mark detonates.
Champion ini punya tool yang umumnya memberi mereka keunggulan dalam pertarungan, tanpa membuat matchup-nya benar-benar mustahil. Mereka mungkin punya jarak lebih jauh, lebih tahan terhadap seranganmu, atau lebih banyak cara merespons engage-mu. Kamu perlu menyesuaikan pendekatan dan memilih dengan cermat kapan menerima pertarungan.
BurstEngageGalio's threat lies in using his Justice Punch to slip right out of your Pillar of Flame circle. Because the windup of your primary area spell is predictable, a reactive Galio will bypass the blast, crash directly into you, and chain into Shield of Durand. This rapid gap-close denies you the crucial spacing needed to land Sear and trigger Blaze, turning your poke into a deadly lockdown.Build Galio →Lihat detail
Galio
Kenapa
Galio's threat lies in using his Justice Punch to slip right out of your Pillar of Flame circle. Because the windup of your primary area spell is predictable, a reactive Galio will bypass the blast, crash directly into you, and chain into Shield of Durand. This rapid gap-close denies you the crucial spacing needed to land Sear and trigger Blaze, turning your poke into a deadly lockdown.
Dampak di lane
You cannot mindlessly shove the wave because overextending makes you a prime target for Justice Punch. If Galio freezes near his turret, his Winds of War will chip your health while you try to crash the minions. This constant threat of a forward dash forces you to play defensively under your own tower, sacrificing early priority and letting him roam freely with Hero's Entrance.
Cara bermain
To survive, never cast Pillar of Flame aggressively unless Galio has already wasted Justice Punch to clear minions. Keep your distance and focus on spreading Blaze using Conflagration on nearby minions instead. If he charges forward anyway, quickly throw Sear directly into his incoming path to stun him mid-dash before his Shield of Durand taunt can channel. If you get caught, save Pyroclasm for the moment he groups with his allies.
MenghindarCooldownAkali's high mobility completely neutralizes your skillshots. Because your primary burst relies on landing Pillar of Flame and securing the stun with Sear, her ability to effortlessly dodge both using Shuriken Flip or the dash from Perfect Execution makes trading extremely dangerous. Once she bypasses your initial zoning tool and triggers Assassin's Mark, your lack of mobility leaves you completely exposed to her full execution combo.Build Akali →Lihat detail
Akali
Kenapa
Akali's high mobility completely neutralizes your skillshots. Because your primary burst relies on landing Pillar of Flame and securing the stun with Sear, her ability to effortlessly dodge both using Shuriken Flip or the dash from Perfect Execution makes trading extremely dangerous. Once she bypasses your initial zoning tool and triggers Assassin's Mark, your lack of mobility leaves you completely exposed to her full execution combo.
Dampak di lane
You cannot safely step past your side of the river to push, as any overextended position lets Akali land Shuriken Flip to force a lethal all-in. This restriction forces you to play defensively under tower, yielding priority and allowing her to roam freely. Your health pool will constantly be threatened if you step up to apply Blaze, meaning you will often be forced into bad recall timings.
Cara bermain
To survive, you must hold Sear as a defensive deterrent rather than using it to poke. Never throw Pillar of Flame unless Akali has already wasted Shuriken Flip or is locked in her animation. Stay hugging your turret's safety, using Conflagration on minions to spread Blaze passively for wave clear. If she deploys Twilight Shroud, immediately retreat and prepare to throw Pyroclasm if she commits her ultimate.
Pertarungan kecilTradeThis matchup is highly unfavorable for Brand because of how Akshan's mobility counters your self-defense. When you attempt to defend yourself, Akshan uses Heroic Swing to orbit around you. This rapid circular movement makes it incredibly easy for him to dodge your linear Sear skillshot, preventing you from triggering your stun, while his physical damage rapidly shreds your squishy health bar.Build Akshan →Lihat detail
Akshan
Kenapa
This matchup is highly unfavorable for Brand because of how Akshan's mobility counters your self-defense. When you attempt to defend yourself, Akshan uses Heroic Swing to orbit around you. This rapid circular movement makes it incredibly easy for him to dodge your linear Sear skillshot, preventing you from triggering your stun, while his physical damage rapidly shreds your squishy health bar.
Dampak di lane
Akshan's constant threat of a physical burst trade forces you to play defensively under or near your turret. You cannot easily contest his push, as using Pillar of Flame on the minion wave leaves you completely vulnerable. He will easily clear waves with Avengerang, gain lane priority, and use Going Rogue to roam toward side lanes undetected, putting immense pressure on your entire map while you are stuck clearing.
Cara bermain
To survive, never cast Sear preemptively. You must hold this ability until Akshan actually commits to his Heroic Swing. Aim your stun directly at his anchor point or wait until he collides with you or a minion to guarantee the hit. Position yourself strictly behind your minion wave or near terrain corners to block his swing path. If he catches you in the open, immediately drop Conflagration and Pillar of Flame at your own feet to force a trade via Blaze as he closes the distance.
BurstMenghindarAnnie counters your poke pattern because the instant movement speed from her Molten Shield allows her to easily sidestep your Pillar of Flame. The moment you miss this crucial spell, she can aggressively close the gap. With her Pyromania passive fully charged, she will immediately lock you down with Disintegrate or Incinerate, leaving you completely vulnerable to her full burst combo without any way to fight back.Build Annie →Lihat detail
Annie
Kenapa
Annie counters your poke pattern because the instant movement speed from her Molten Shield allows her to easily sidestep your Pillar of Flame. The moment you miss this crucial spell, she can aggressively close the gap. With her Pyromania passive fully charged, she will immediately lock you down with Disintegrate or Incinerate, leaving you completely vulnerable to her full burst combo without any way to fight back.
Dampak di lane
This reaction speed difference forces you into a defensive posture, surrendering mid-lane priority. Annie can safely farm and manage the wave using Disintegrate while holding her stun threat. If you step up too far to clear minions with Conflagration, she can instantly drop Summon: Tibbers to delete your health bar, forcing you to recall prematurely or lose massive chunks of tower plating.
Cara bermain
To survive, you must play with extreme patience. Never lead a trade with Pillar of Flame; instead, wait for Annie to waste Molten Shield before throwing it, or cast it exactly when she locks herself in her Disintegrate animation. Keep a constant eye on her Pyromania tracker. If she activates her stun and rushes you, prepare a defensive Conflagration into Sear combination to stun her mid-stride and disengage immediately.
PosisiPokeOrianna completely dictates this lane by keeping her Ball positioned ahead of your range. She repeatedly harasses you with Command: Attack from a distance where your Pillar of Flame cannot reach her. Even if you step forward to trade, she immediately negates your retaliation with Command: Protect, using the shield to absorb your Blaze passive burn while you take free damage from her zone.Build Orianna →Lihat detail
Orianna
Kenapa
Orianna completely dictates this lane by keeping her Ball positioned ahead of your range. She repeatedly harasses you with Command: Attack from a distance where your Pillar of Flame cannot reach her. Even if you step forward to trade, she immediately negates your retaliation with Command: Protect, using the shield to absorb your Blaze passive burn while you take free damage from her zone.
Dampak di lane
This constant outranging forces you to yield wave priority. You will find yourself constantly farming under tower, struggling to land Conflagration to spread your passive through the wave without getting caught by Command: Dissonance. Your health bar will slowly dwindle, forcing early recalls and leaving you unable to assist your jungler, while Orianna remains safe and healthy behind her protective ball.
Cara bermain
To survive, never stand inside your own minion wave; make her choose between poking you with Command: Attack or pushing the wave. If she steps too far forward to place her ball, wait for her to waste Command: Protect before attempting to land your Pillar of Flame and Sear combo. If she misses her skillshots, look to spread Blaze through the minions to force her to retreat, saving your Pyroclasm for when she commits her Command: Shockwave.
MenghindarBurstAurora's mobility completely disrupts your standard trading pattern. The moment you cast Pillar of Flame, she can instantly react with Across the Veil to leap away, turn invisible, and render your primary source of damage entirely useless. Once your key spell is wasted, she can safely close the gap to land Twofold Hex and trigger Spirit Abjuration, leaving you with no reliable way to trade back.Build Aurora →Lihat detail
Aurora
Kenapa
Aurora's mobility completely disrupts your standard trading pattern. The moment you cast Pillar of Flame, she can instantly react with Across the Veil to leap away, turn invisible, and render your primary source of damage entirely useless. Once your key spell is wasted, she can safely close the gap to land Twofold Hex and trigger Spirit Abjuration, leaving you with no reliable way to trade back.
Dampak di lane
Because you cannot throw Pillar of Flame blindly, you lose control of the minion waves. If you use it to clear, Aurora will immediately punish you with Twofold Hex. This constant threat of her Across the Veil forces you to play defensively near your turret. You will struggle to secure mid priority, meaning you cannot assist your jungler, while Aurora can comfortably roam using her high mobility.
Cara bermain
To survive, you must hold Pillar of Flame as a deterrent rather than an initiation tool. Start your trades by spreading Blaze with Conflagration to threaten a stun. If Aurora aggressively jumps forward with Across the Veil, wait out her brief invisibility before throwing Sear to stun her. Once she is locked down, you can safely unleash Pillar of Flame and Pyroclasm to turn the trade in your favor.
MekanikPosisiThis matchup is heavily dictated by how Morgana uses Black Shield to shut down your offensive pressure. To execute your burst, you must land Sear on a target already afflicted by Blaze. However, Black Shield absorbs the magic damage and entirely negates the stun component of Sear. Without this crowd control, you cannot guarantee your full combo, leaving you highly vulnerable to her Dark Binding and Tormented Shadow retaliation.Build Morgana →Lihat detail
Morgana
Kenapa
This matchup is heavily dictated by how Morgana uses Black Shield to shut down your offensive pressure. To execute your burst, you must land Sear on a target already afflicted by Blaze. However, Black Shield absorbs the magic damage and entirely negates the stun component of Sear. Without this crowd control, you cannot guarantee your full combo, leaving you highly vulnerable to her Dark Binding and Tormented Shadow retaliation.
Dampak di lane
Morgana easily neutralizes your wave pressure by dropping Tormented Shadow on the minions, forcing you to use Pillar of Flame and Conflagration defensively just to keep up. Because she can ignore your stun threat, she will confidently step forward to fish for Dark Binding. Getting hit by her root under her Tormented Shadow chunking your health bar means losing mid priority, ultimately forcing early recalls and leaving your jungler without backup.
Cara bermain
Your success relies entirely on baiting her defensive cooldown. Cast Pillar of Flame to threaten a trade, but hold Sear until you see her waste Black Shield. Since her shield's cooldown is exceptionally long, you have a solid fifteen-second window to strike. If she holds her shield, focus on farming with Conflagration. When she advances to cast Soul Shackles, do not panic-throw Sear into her shield; instead, walk backward to break the tether and wait for the shield to expire before counter-attacking.
MenghindarPosisiLux commands this matchup because her Light Binding allows her to fish for roots from a safe distance well outside your spell range. Even if you manage to trade back with Pillar of Flame, her Prismatic Barrier excels at absorbing the ticking damage from your Blaze passive. This neutralizes your main damage-over-time pressure while keeping her entirely out of reach of your Sear stun.Build Lux →Lihat detail
Lux
Kenapa
Lux commands this matchup because her Light Binding allows her to fish for roots from a safe distance well outside your spell range. Even if you manage to trade back with Pillar of Flame, her Prismatic Barrier excels at absorbing the ticking damage from your Blaze passive. This neutralizes your main damage-over-time pressure while keeping her entirely out of reach of your Sear stun.
Dampak di lane
You will find yourself constantly pushed under turret as Lux safely clears waves with Lucent Singularity. Stepping up to contest the wave risks getting hit by Light Binding, which immediately setups her high-damage Final Spark combo. This constant threat forces you into a defensive posture, bleeding priority and limiting your ability to spread Conflagration through the minion wave to pressure her.
Cara bermain
To survive, stand behind your minion wave to block Light Binding, but remain mindful that it can pierce one target. Bait her snare by moving laterally, then immediately capitalize on its long cooldown to step forward and clear with Pillar of Flame. If she shields her minions with Prismatic Barrier, do not force trades; instead, use Conflagration on low-health minions to bounce Blaze to her safely without stepping into her laser threat zone.
Wave clearTekanan petaTalon dictates the map's tempo because his Rake instantly clears your waves from safety, immediately allowing him to vault over river walls using Assassin's Path. As a slow-moving mage, Brand cannot match this hyper-mobility through the jungle. If you try to follow him blindly, you risk walking into a bush where Noxian Diplomacy and Blade's End can burst you down before you can even land Sear.Build Talon →Lihat detail
Talon
Kenapa
Talon dictates the map's tempo because his Rake instantly clears your waves from safety, immediately allowing him to vault over river walls using Assassin's Path. As a slow-moving mage, Brand cannot match this hyper-mobility through the jungle. If you try to follow him blindly, you risk walking into a bush where Noxian Diplomacy and Blade's End can burst you down before you can even land Sear.
Dampak di lane
You will constantly find yourself under your own tower, using Pillar of Flame and Conflagration just to keep up with his shove. This constant pressure limits your recall windows and prevents you from helping your jungler. Every time Talon disappears over a wall, your side lanes must retreat, bleeding gold and experience, while you are forced to choose between taking tower plates or risking a dangerous rotation.
Cara bermain
Never chase Talon through the jungle when he roams; instead, immediately ping his missing status and use Conflagration followed by Pillar of Flame to hard-shove your wave into his tower. Always hold your Sear when he approaches, as threatening the stun is your only deterrent against his Noxian Diplomacy engage. If he jumps on you with Shadow Assault, drop Pyroclasm immediately to bounce between both of you, forcing him to retreat or trade his life.
MenghindarPosisiZiggs holds a massive range advantage that dictates this lane. His Bouncing Bomb can harass you from safety, long before you can step up to cast Pillar of Flame or Conflagration. To apply Blaze or set up a Sear stun, you are forced to walk directly into his trajectory, taking unavoidable poke just to close the gap.Build Ziggs →Lihat detail
Ziggs
Kenapa
Ziggs holds a massive range advantage that dictates this lane. His Bouncing Bomb can harass you from safety, long before you can step up to cast Pillar of Flame or Conflagration. To apply Blaze or set up a Sear stun, you are forced to walk directly into his trajectory, taking unavoidable poke just to close the gap.
Dampak di lane
You will constantly find yourself pinned under turret, struggling to match his clear. Because Bouncing Bomb keeps your health low, you cannot contest his push without risking death. This allows Ziggs to freely chip away at your plates using Short Fuse and quickly execute your tower with Satchel Charge, while his Hexplosive Minefield denies your roam attempts.
Cara bermain
To survive, never stand directly inside your minion wave. This forces Ziggs to choose between using Bouncing Bomb to clear minions or to poke you. If he missteps forward to land Short Fuse, immediately punish him with Pillar of Flame followed by Sear. If you get low, do not greedily defend plates; give up turret priority rather than dying to Mega Inferno Bomb while trying to clear.
PosisiMenghindarThis matchup is dictated by raw reach and burst speed. Syndra outranges you because her Scatter the Weak can launch a Dark Sphere from well outside your spellcasting perimeter. Because your Conflagration and Pillar of Flame require you to step forward, she can easily intercept your approach, stun you instantly, and follow up with Force of Will and Unleashed Power before you can even apply your Blaze passive.Build Syndra →Lihat detail
Syndra
Kenapa
This matchup is dictated by raw reach and burst speed. Syndra outranges you because her Scatter the Weak can launch a Dark Sphere from well outside your spellcasting perimeter. Because your Conflagration and Pillar of Flame require you to step forward, she can easily intercept your approach, stun you instantly, and follow up with Force of Will and Unleashed Power before you can even apply your Blaze passive.
Dampak di lane
You cannot step up to contest the wave safely. Every time you attempt to clear minions with Pillar of Flame, you risk walking into her sphere placement line. This forces you to concede early priority, letting her stack her Transcendent passive passively. If you get chunked by a projected sphere, you are forced into a premature recall, giving her free roam opportunities while you struggle.
Cara bermain
To survive, you must anchor yourself behind your own caster minions and focus on farming with the outer edge of Pillar of Flame. Never walk in a straight line when her Dark Sphere is already on the ground. If she wastes Scatter the Weak and misses, you have a brief window to step up, use Conflagration to spread Blaze, and threaten a Sear stun. If she holds her stun, match her patience and farm safely.
PosisiBertahan hidupThis matchup is dictated by Ekko's mobility advantage over your slow cast times. Whenever you attempt to harass him or clear waves with Pillar of Flame, he can easily react with Phase Dive to blink out of the blast zone. This dash immediately closes the distance, allowing him to quickly trigger Z-Drive Resonance with an auto-attack and Timewinder, chunking your health bar while leaving you unable to retaliate.Build Ekko →Lihat detail
Ekko
Kenapa
This matchup is dictated by Ekko's mobility advantage over your slow cast times. Whenever you attempt to harass him or clear waves with Pillar of Flame, he can easily react with Phase Dive to blink out of the blast zone. This dash immediately closes the distance, allowing him to quickly trigger Z-Drive Resonance with an auto-attack and Timewinder, chunking your health bar while leaving you unable to retaliate.
Dampak di lane
Because of this constant threat, you cannot safely step past the midpoint of the lane. If you use Pillar of Flame aggressively and miss, Ekko immediately dictates the wave state, freezing it or forcing you back with a heavy trade. You are forced to play defensively, sacrificing early priority and letting him roam, as pushing too hard exposes you to a lethal dive under tower using Parallel Convergence.
Cara bermain
To survive, you must play a patient waiting game. Never open a trade with Pillar of Flame; instead, hold it and use Conflagration to spread Blaze for safer farming from a distance. If Ekko aggressively uses Phase Dive forward, that is your cue. Throw your Sear to intercept his landing trajectory, stun him, and only then drop your full combo, including Pyroclasm if he lacks Chronobreak to undo the burst.
Bertahan hidupPosisiDiana's threat lies entirely in landing Crescent Strike to apply her passive mark. Once you are marked, she can execute a double Lunar Rush to gap-close instantly, pulling you into Moonfall's heavy burst. As an immobile mage, Brand cannot escape this engagement raw. Your survival hinges on reacting instantly with Sear to stun her mid-dive, which requires her to already be ablaze from another spell.Build Diana →Lihat detail
Diana
Kenapa
Diana's threat lies entirely in landing Crescent Strike to apply her passive mark. Once you are marked, she can execute a double Lunar Rush to gap-close instantly, pulling you into Moonfall's heavy burst. As an immobile mage, Brand cannot escape this engagement raw. Your survival hinges on reacting instantly with Sear to stun her mid-dive, which requires her to already be ablaze from another spell.
Dampak di lane
This matchup forces you into a highly defensive posture where pushing waves is dangerous. Attempting to poke her with Pillar of Flame often puts you within her dash range, making every trade a massive risk. If she successfully chunks your health, she will freeze the wave or dive you, driving you off the farm and preventing you from assisting with river skirmishes while she roams freely.
Cara bermain
Position yourself on the opposite side of Crescent Strike’s curved trajectory to make it easier to sidestep. You must hold Sear religiously; never throw it out to poke. When she commits with Lunar Rush, immediately use Conflagration followed by Sear for an instant, point-blank stun. If she activates Pale Cascade to absorb your retaliatory damage, hold Pyroclasm for a brief second until her shield dissipates before unleashing your full explosive sequence.
Matchup ini terutama soal duel eksekusi: kedua champion punya cara nyata untuk unggul. Satu skill penting yang di-dodge, engage yang diantisipasi dengan tepat, atau satu kesalahan positioning saja bisa menentukan siapa yang menang. Memahami matchup dan mengenali momen yang tepat untuk bertindak sangat penting di sini.
MenghindarPosisiThis matchup is defined by how you exploit Aurelion Sol's self-lock. To channel Breath of Light, he must stand completely still, which completely neutralizes his ability to dodge. This stationary window makes him an incredibly easy target for your Sear projectile. By priming him first with Conflagration or a quick Pillar of Flame, you can instantly trigger your Blaze stun, interrupting his main damage source and winning the burst trade.Build Aurelion Sol →Lihat detail
Aurelion Sol
Kenapa
This matchup is defined by how you exploit Aurelion Sol's self-lock. To channel Breath of Light, he must stand completely still, which completely neutralizes his ability to dodge. This stationary window makes him an incredibly easy target for your Sear projectile. By priming him first with Conflagration or a quick Pillar of Flame, you can instantly trigger your Blaze stun, interrupting his main damage source and winning the burst trade.
Dampak di lane
During the laning phase, Aurelion Sol will constantly try to drop Singularity to collect Cosmic Creator stacks from minions. If he steps up to execute them with Breath of Light, your threat of a sudden Sear stun forces him to cancel his channel or take massive damage. This prevents him from shoving you under tower easily, keeping the lane neutral and forcing both of you to trade health heavily whenever cooldowns are up.
Cara bermain
Never throw your Sear blindly while he is actively moving. Instead, patiently wait for the exact moment he activates Breath of Light to lock himself in place, or when he flies in a predictable straight line with Astral Flight. Instantly tag him with Conflagration to apply Blaze, then throw your stun. If you miss this combo, immediately retreat behind your minions to avoid his Singularity pull, waiting out your cooldowns before stepping up again.
PosisiSustainThis matchup is a direct clash between Vladimir's constant healing from Transfusion and the persistent damage of your Blaze. While Vladimir's Crimson Pact naturally increases his health pool as he builds power, this extra health actually works against him by amplifying your Blaze passive burn. However, his ability to slip away using Sanguine Pool can completely negate your Pyroclasm bounces or disjoint your crucial Sear stun, resetting the fight's momentum.Build Vladimir →Lihat detail
Vladimir
Kenapa
This matchup is a direct clash between Vladimir's constant healing from Transfusion and the persistent damage of your Blaze. While Vladimir's Crimson Pact naturally increases his health pool as he builds power, this extra health actually works against him by amplifying your Blaze passive burn. However, his ability to slip away using Sanguine Pool can completely negate your Pyroclasm bounces or disjoint your crucial Sear stun, resetting the fight's momentum.
Dampak di lane
Laning is dictated by Vladimir's crimson resource bar; when it fills for an empowered Transfusion, you must retreat to prevent him from erasing your trade damage. Because he uses Tides of Blood at the cost of his own health to clear waves, you can easily trap him under turret. However, forcing an all-in before he wastes Sanguine Pool is a trap, as he will safely absorb your burst while his Hemoplague ticks down to heal him.
Cara bermain
To win this execution battle, never launch Pyroclasm or commit Sear while Vladimir has Sanguine Pool available. Instead, poke him from a distance using Conflagration spread onto minions, forcing him to prematurely deploy his pool defensively. Once he liquefies, count the seconds of his cooldown, then immediately go aggressive with Pillar of Flame and your full combo. If he locks you down with Hemoplague, walk backward to prevent him from landing a fully charged Tides of Blood while you wait for your burn to tick.
PosisiCrowd controlThis matchup is a high-stakes duel of reaction times. Katarina relies on Voracity and Shunpo to dance around your skillshots, but she must stand still to channel Death Lotus. This channel is your golden opportunity. The entire dynamic revolves around whether you have Sear ready to stun her the moment she spins, or if she baits it out to assassinate you safely.Build Katarina →Lihat detail
Katarina
Kenapa
This matchup is a high-stakes duel of reaction times. Katarina relies on Voracity and Shunpo to dance around your skillshots, but she must stand still to channel Death Lotus. This channel is your golden opportunity. The entire dynamic revolves around whether you have Sear ready to stun her the moment she spins, or if she baits it out to assassinate you safely.
Dampak di lane
Because of this threat, lane pressure swings wildly. If you waste Sear trying to poke, Katarina will immediately engage with Bouncing Blade and Shunpo to chunk your health bar. However, if you keep her wave pushed using Pillar of Flame and Conflagration, she is forced to use her daggers to farm under turret. This prevents her from roaming to secure kills and snowballing the map.
Cara bermain
Never cast Sear proactively unless Katarina has already jumped and you have a guaranteed Blaze stack applied via Conflagration. During skirmishes, position yourself near your own minions to track her Bouncing Blade drops. If she engages with Preparation, back off and wait for her daggers to disappear. The moment she channels Death Lotus, immediately hit your Conflagration and Sear combo to shut down her ultimate instantly. If you miss, retreat to your turret immediately.
Champion ini biasanya kesulitan merespons kekuatan utamamu, sehingga kamu bisa menghadapi pertarungan dengan lebih leluasa. Kamu sering punya banyak cara untuk menekan mereka dan memaksa trade yang menguntungkan. Manfaatkan keunggulan ini untuk mendikte tempo, bukan memberi mereka waktu untuk kembali nyaman.
PokePosisiRyze must get relatively close to the minion wave to mark it with Spell Flux before spreading his damage. Since his range is limited, this predictable movement gives you a massive window to drop Pillar of Flame directly on him. Because Ryze lacks mobility spells to dodge, he has to choose between taking heavy damage or giving up his wave clear, allowing your passive Blaze to easily chip away his health.Build Ryze →Lihat detail
Ryze
Kenapa
Ryze must get relatively close to the minion wave to mark it with Spell Flux before spreading his damage. Since his range is limited, this predictable movement gives you a massive window to drop Pillar of Flame directly on him. Because Ryze lacks mobility spells to dodge, he has to choose between taking heavy damage or giving up his wave clear, allowing your passive Blaze to easily chip away his health.
Dampak di lane
This dynamic gives you total control over the wave state. Ryze cannot safely match your wave clear without eating constant poke, forcing him to farm under tower where his Overload resets are harder to use for trades. By keeping him pressured and low on health, you delay his scaling from Arcane Mastery and prevent him from using Realm Warp to impact other lanes, keeping him trapped in mid.
Cara bermain
Stand just out of range of his Rune Prison and watch your own low-health minions. The moment Ryze steps forward to cast Spell Flux, immediately place Pillar of Flame where he stands. If he gets aggressive and tries to close the gap, hit him with Sear to trigger the stun on your pre-existing Blaze stacks, then follow up with Conflagration and Pyroclasm if he tries to fight back inside his own minion wave.
PokeBurstThis matchup is heavily in your favor because Veigar must constantly pause his movement to cast Baleful Strike for his Phenomenal Evil Power stacks. This brief self-root is the perfect window to place Pillar of Flame right under his feet. Since his early waveclear is slow and predictable, you can easily force him to choose between losing gold or taking massive magic damage from your passive, Blaze.Build Veigar →Lihat detail
Veigar
Kenapa
This matchup is heavily in your favor because Veigar must constantly pause his movement to cast Baleful Strike for his Phenomenal Evil Power stacks. This brief self-root is the perfect window to place Pillar of Flame right under his feet. Since his early waveclear is slow and predictable, you can easily force him to choose between losing gold or taking massive magic damage from your passive, Blaze.
Dampak di lane
Your ability to punish his last-hitting gives you absolute control over the minion waves. By constantly shoving him under turret with Conflagration and Pillar of Flame, you force him to burn mana farming instead of stacking. He will be too low on health to step up and trap you with Event Horizon, rendering him useless for his jungler and giving you free roam priority.
Cara bermain
Watch your own low-health minions closely. The exact millisecond Veigar steps forward and faces a minion to cast Baleful Strike, immediately drop Pillar of Flame on him. If he attempts to retaliate by trapping you inside Event Horizon, do not panic and run into the stun wall. Stand your ground inside the cage, dodge his delayed Dark Matter, and prepare to fire Sear to stun him the moment he tries to close the distance for a Primordial Burst.
SustainKitingSwain relies on his Demonic Ascension to gain massive health and drain your team, but this transformation makes him the perfect target for your kit. His increased size and desire to stay close ensure he cannot dodge your skills, allowing your Blaze passive to shred his inflated health pool. Furthermore, when he closes in, your Pyroclasm will bounce relentlessly between him and his minions, turning his ultimate into his own trap.Build Swain →Lihat detail
Swain
Kenapa
Swain relies on his Demonic Ascension to gain massive health and drain your team, but this transformation makes him the perfect target for your kit. His increased size and desire to stay close ensure he cannot dodge your skills, allowing your Blaze passive to shred his inflated health pool. Furthermore, when he closes in, your Pyroclasm will bounce relentlessly between him and his minions, turning his ultimate into his own trap.
Dampak di lane
During the laning phase, you hold complete control over the wave state. By using Pillar of Flame and Conflagration, you can constantly push Swain under his tower, forcing him to waste Death's Hand on farming rather than trading. Because Swain has to step forward to land Nevermove for his Ravenous Flock passive, you can easily predict his movement to punish him, creating massive health discrepancies that delay his first recall.
Cara bermain
Always maintain maximum casting range to neutralise his Nevermove. Never step into the path of his returning claw. When Swain inevitably activates Demonic Ascension and tries to run you down, do not panic; hold Sear until you have applied Blaze with Conflagration or Pillar of Flame to guarantee an instant stun. If you miss your stun, immediately use Pyroclasm to force him to retreat or die from the bouncing damage while you kite backwards.
PosisiKebal CCLissandra's threat relies entirely on closing the gap to trigger Ring of Frost. However, her predictable approach, whether walking up or using Glacial Path, plays directly into your hands. Because she must enter your effective range to deal meaningful damage, she exposes herself to an easy Blaze setup. You can easily tag her with Conflagration and stop her mid-advance with a guaranteed Sear stun, completely neutralizing her aggression.Build Lissandra →Lihat detail
Lissandra
Kenapa
Lissandra's threat relies entirely on closing the gap to trigger Ring of Frost. However, her predictable approach, whether walking up or using Glacial Path, plays directly into your hands. Because she must enter your effective range to deal meaningful damage, she exposes herself to an easy Blaze setup. You can easily tag her with Conflagration and stop her mid-advance with a guaranteed Sear stun, completely neutralizing her aggression.
Dampak di lane
This dynamic forces Lissandra to play defensively, using Ice Shard to secure minions from a distance, which naturally pushes the wave toward your side. You dictate the pace of the lane. Every time her Glacial Path is on cooldown, she loses all safety, allowing you to aggressively zone her out or trap her under turret with Pillar of Flame, creating a massive CS lead without risking your life.
Cara bermain
Always hold your Sear until Lissandra commits. When she projects Glacial Path, position yourself slightly behind her path's end point. The moment she teleports, immediately use Conflagration followed by Sear to stun her before she can react with Ring of Frost. If she saves herself using Frozen Tomb, do not panic; simply pre-cast Pillar of Flame and unleash Pyroclasm right as her stasis ends to instantly burst her down.
PokeBurstMel's stationary casting animations make her extremely vulnerable to your primary burst sequence. Whenever she stops to channel her spells, her lack of mobility turns her into a sitting duck. This allows you to easily place a maximum-damage Pillar of Flame, initiating a quick blaze-triggering chain. Since both of you rely on high-damage rotations, this immobile window gives you a decisive head start in trading potential.Build Mel →Lihat detail
Mel
Kenapa
Mel's stationary casting animations make her extremely vulnerable to your primary burst sequence. Whenever she stops to channel her spells, her lack of mobility turns her into a sitting duck. This allows you to easily place a maximum-damage Pillar of Flame, initiating a quick blaze-triggering chain. Since both of you rely on high-damage rotations, this immobile window gives you a decisive head start in trading potential.
Dampak di lane
This vulnerability forces Mel to play defensively, giving you total control over the minion waves. You can easily crash waves with Conflagration and Pillar of Flame to secure deep vision or roam. Because Mel cannot easily dodge your skillshots during her spellcasts, she will constantly bleed health, forcing her into premature recalls or leaving her exposed to a lethal dive using Pyroclasm under her own tower.
Cara bermain
Maintain a diagonal position just outside Mel's threat range, tracking her cast indicators. The moment she starts her channel animation, immediately drop Pillar of Flame directly on her feet, then follow up with Sear to stun her while she is stuck in place. If you miss this initial skillshot, immediately retreat behind your minions to avoid her counter-burst, holding Conflagration as a deterrent to stop her from chasing you down.
Wave clearPokeHeimerdinger's entire lane presence relies on nesting inside his H-28G Evolution Turret setup. However, this plays directly into your hands. By applying Blaze to his stationary turrets, you can cast Conflagration to effortlessly spread the fire directly to Heimerdinger when he stands near them. His own constructs become static beacons that extend your reach, allowing you to trigger Blaze explosions and land easy Pillar of Flame strikes.Build Heimerdinger →Lihat detail
Heimerdinger
Kenapa
Heimerdinger's entire lane presence relies on nesting inside his H-28G Evolution Turret setup. However, this plays directly into your hands. By applying Blaze to his stationary turrets, you can cast Conflagration to effortlessly spread the fire directly to Heimerdinger when he stands near them. His own constructs become static beacons that extend your reach, allowing you to trigger Blaze explosions and land easy Pillar of Flame strikes.
Dampak di lane
This interaction completely strips Heimerdinger of his usual push advantage. Instead of trapping you under tower, his H-28G Evolution Turret placements allow you to decimate entire minion waves instantly while simultaneously chipping away his health pool. You will constantly dictate the wave's pace, forcing him to choose between letting his turrets die or taking heavy burn damage, effectively neutralizing his pressure.
Cara bermain
Position yourself safely behind your own minions to avoid his CH-2 Electron Storm Grenade. When he places a H-28G Evolution Turret near the wave, prime it with a basic attack or a spell, then use Conflagration to bounce Blaze onto him. If he steps up to defend his nest, immediately follow up with Sear to stun him, then drop Pillar of Flame. If he attempts to drop a giant turret with UPGRADE!!!, simply retreat and melt it from afar.
PokeTwisted Fate's laning relies on locking in his colored cards with Pick a Card. However, this telegraphs his movement and briefly locks him into a predictable path. Since he lacks mobility, Brand can easily capitalize on this window. The moment he steps forward to choose his card, you can drop Pillar of Flame directly under him, setting up Conflagration and an easy Sear stun to unleash the full burn of Blaze.Build Twisted Fate →Lihat detail
Twisted Fate
Kenapa
Twisted Fate's laning relies on locking in his colored cards with Pick a Card. However, this telegraphs his movement and briefly locks him into a predictable path. Since he lacks mobility, Brand can easily capitalize on this window. The moment he steps forward to choose his card, you can drop Pillar of Flame directly under him, setting up Conflagration and an easy Sear stun to unleash the full burn of Blaze.
Dampak di lane
By maintaining constant wave pressure, you prevent Twisted Fate from using Wild Cards to clear safely. Forcing him to choose between matching your push or using Pick a Card to farm under turret keeps him trapped. If he attempts to step past his caster minions to trade, your burst threat forces him to back off. This completely neutralizes his map pressure, keeping him too low on health to safely channel Destiny.
Cara bermain
Do not throw your abilities randomly. Wait for the overhead card cycle of Pick a Card to begin. If he locks a gold card, he must walk directly toward you to throw it; use this linear path to land Conflagration followed by an immediate Sear to stun him before his gold card lands. If you see him channel Destiny nearby, immediately unleash Pyroclasm and Pillar of Flame to punish his static channel, converting his roam attempt into a grey screen.
Keunggulan: vonis kanonis Wild Rift Core (−3 hingga +3), dilihat dari sudut pandang champion yang disebut di baris tersebut. Win rate dan pick rate: angka milik lawan sendiri di role ini — Wild Rift CN · Challenger, Patch 7.3b. Bukan win rate head-to-head.
Keunggulan: vonis kanonis Wild Rift Core (−3 hingga +3), dilihat dari sudut pandang champion yang disebut di baris tersebut. Win rate dan pick rate: angka milik lawan sendiri di role ini — Wild Rift CN · Challenger, Patch 7.3b. Bukan win rate head-to-head.
Cara counter champion ini
Sudut counter
Brand sangat bergantung pada positioning dan tempo pertarungan. Counter yang efektif bukan hanya soal damage, tapi soal mengganggu setup-nya sebelum dia bisa beraksi. Ini termasuk champion yang bisa menutup jarak dengan cepat, menghindari zona-zonanya, atau memaksa pertarungan singkat. Memahami profil ini adalah kunci untuk mengantisipasi batasannya.
Konteks Patch
Champion yang meng-counter Brand mengeksploitasi kurangnya mobilitas dan kebutuhannya akan waktu untuk memberikan damage. Assassin dan champion mobile memperkecil jendela dampaknya dengan melakukan engage dengan cepat. Selain itu, komposisi yang tersebar mencegah efeknya menyebar, secara drastis mengurangi efektivitasnya.
Baca cepat
Lemah terhadap assassin cepat.
Bergantung pada pertarungan bergerombol.
Bisa dihukum sebelum setup.
Arketipe counter
Assassin mobile
Champion ini dapat menutup jarak dengan cepat dan menghabisi Brand sebelum dia merapal mantra. Mobilitas mereka juga memungkinkan mereka menghindari mantra kunci, mencegah aplikasi Blaze dan sangat mengurangi DPS-nya. Brand menjadi tidak mampu memenuhi perannya dalam pertarungan.
Bagaimana champion beradaptasi. Bermainlah di belakang, antisipasi engage, dan simpan stun untuk bertahan daripada memulai.
Komposisi tersebar
Ketika musuh tetap tersebar, Brand kehilangan banyak nilainya. Ultimate-nya memantul lebih sedikit dan AoE-nya mengenai lebih sedikit target. Ini secara drastis mengurangi dampak keseluruhannya dan mengubah kit-nya menjadi poke sederhana tanpa ancaman nyata.
Bagaimana champion beradaptasi. Cari angle poke terisolasi dan tunggu kesalahan grouping.
Engage cepat
Champion dengan engage instan memaksa Brand bereaksi di bawah tekanan. Dia tidak punya waktu untuk menerapkan stack atau memposisikan diri dengan benar. Ini mengurangi kontribusinya menjadi hampir nol jika engage dieksekusi dengan baik.
Zed adalah salah satu matchup terburuk untuk Brand karena dia menggabungkan burst dan mobilitas. Dia bisa menunggu Brand menggunakan mantra sebelum melakukan all-in dengan aman. Matchup ini berkisar pada manajemen cooldown dan kemampuan Brand untuk tetap berada di luar jangkauan sambil menjaga stun tetap siap.
Fizz meniadakan banyak kit Brand dengan invulnerability-nya. Dia bisa menghindari mantra kunci dan engage dengan bebas. Brand harus bermain sangat aman dan menghindari trade yang panjang.
Kesalahan umum melawannya
Kesalahan umum melawannya
Meremehkan kecepatan engage musuh.
Menggunakan mantra tanpa vision.
Memposisikan diri terlalu dekat ke depan.
Melakukan trade panjang melawan assassin.
Mengabaikan waktu cooldown musuh.
Catatan Pelatih
Melawan Brand, kuncinya adalah mengurangi waktu dampaknya.
Jangan pernah biarkan dia melakukan setup sepenuhnya.
FAQ
Mengapa Brand kesulitan melawan Zed?
Zed bisa menunggu spell Brand sebelum menyerang, sepenuhnya meniadakan setup-nya. Begitu menyerang, Brand tidak punya mobilitas atau pertahanan untuk bertahan. Pertandingan ini berkisar pada disiplin dan manajemen cooldown.
Bagaimana cara bermain melawan Fizz?
Fizz bisa menghindari spell kunci Brand, membuat pertukaran menjadi berisiko. Bermain aman, jaga jarak, dan jangan pernah menyerang tanpa penglihatan atau cooldown yang siap.
Bisakah Brand mengalahkan counter-nya?
Ya, tapi itu tergantung pada positioning dan kesalahan musuh. Jika Brand tetap berada di luar jangkauan dan memaksa pertarungan kelompok, dia dapat mengimbangi kelemahannya.
Apa ancaman terbesar Brand?
Ancaman terbesar adalah ketidakmampuan menggunakan kit-nya. Apa pun yang mengurangi waktu aktifnya atau kemampuannya mengenai banyak target secara drastis membatasi dampaknya.