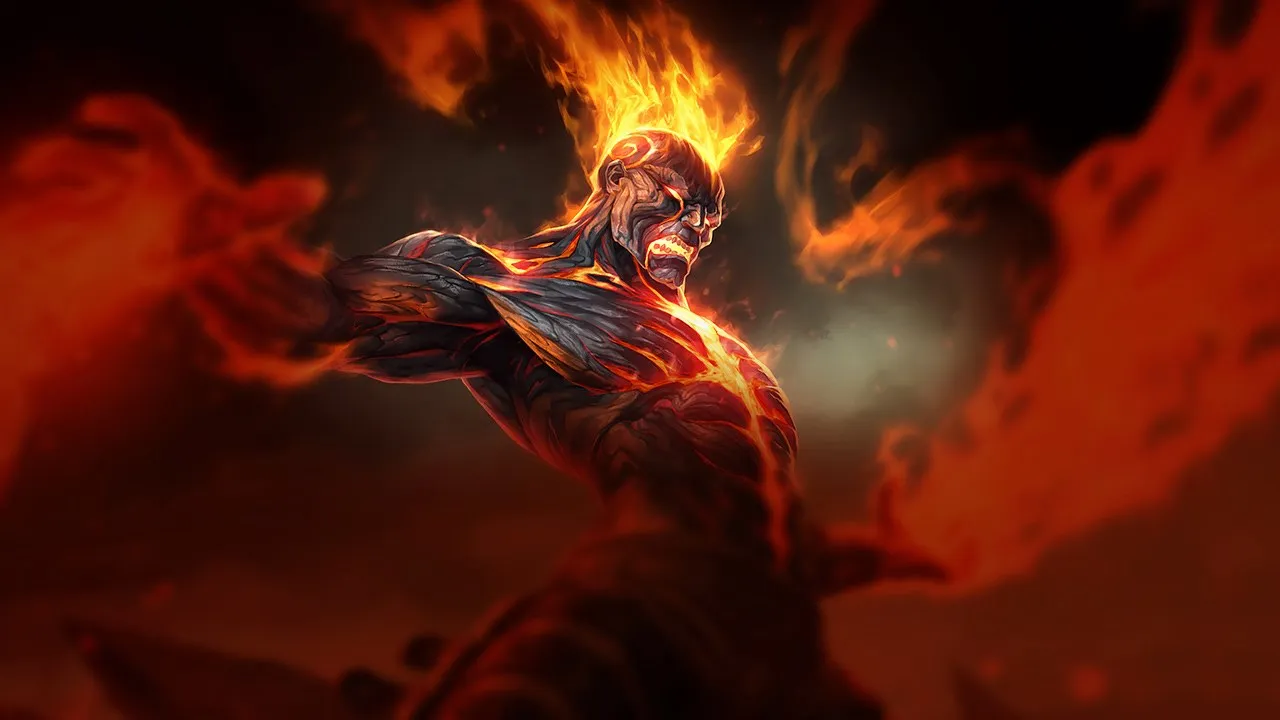
Brand sufre contra composiciones capaces de aplicarle burst rápidamente o de recortar distancias antes de que complete su spell combo entero. El poke de largo alcance, la alta mobility y las herramientas potentes de disengage reducen enormemente el impacto de su kit de daño en el tiempo. Su dependencia de encadenar abilities y su posicionamiento definen sus debilidades estructurales.
★ MID · SUPPORTTier B
DAÑO
UTIL
TANK
DIFF
Win51.7%#23 · ↓4pt
Pick10.3%#2
Ban9.2%#22
Guía de counters de Brand Wild Rift
Contras Difíciles
2
Estos campeones tienen una build y un estilo de juego que superan directamente al tuyo, lo que puede hacer que controlar la línea y farmear sea extremadamente difícil. Sus habilidades pueden neutralizar tus principales fortalezas o castigarte en cuanto intentas jugar tu plan habitual. En estos matchups, el objetivo suele ser minimizar errores y buscar soluciones fuera del enfrentamiento directo.
IniciaciónTanquesControl de masasDredge Line junta a Nautilus y a Brand, y luego Staggering Blow y Depth Charge extienden el control. Brand necesita prender fuego a un objetivo antes de que Sear pueda aturdirlo; cuando el CC inicia el intercambio, no tiene el tiempo necesario para encadenar Blaze, Sear y Pillar of Flame.Build de Nautilus →Ver detalles
Nautilus
Por qué
Dredge Line junta a Nautilus y a Brand, y luego Staggering Blow y Depth Charge extienden el control. Brand necesita prender fuego a un objetivo antes de que Sear pueda aturdirlo; cuando el CC inicia el intercambio, no tiene el tiempo necesario para encadenar Blaze, Sear y Pillar of Flame.
Impacto en la línea
La amenaza del ancla reduce tus ángulos de poke y te obliga a mantener minions entre Nautilus y tú. Un solo catch puede costarte la vida suficiente para ceder la wave y después el control de los arbustos. Además, Titan's Wrath le permite absorber parte de tu primera secuencia de daño.
Cómo jugar
Juega detrás de la wave sin alinearte junto a tu carry, para que Dredge Line no pueda crear dos objetivos fáciles. Guarda Sear hasta que se aplique Blaze y Nautilus avance; el aturdimiento debería interrumpir su persecución, no servir de poke casual. Tras un ancla fallada, usa Pillar of Flame y retírate antes de que Depth Charge pueda iniciar otra secuencia.
Control de masasPicksMovilidadRocket Grab arrastra a Brand al alcance cuerpo a cuerpo, donde Power Fist puede hacerle knock-up y Static Field puede silenciarlo. Como Brand no tiene ninguna habilidad de movimiento, un catch suele impedir la secuencia que habilita el aturdimiento de Sear. Blitzcrank convierte un mal ángulo de disparo en un intercambio decisivo.Build de Blitzcrank →Ver detalles
Blitzcrank
Por qué
Rocket Grab arrastra a Brand al alcance cuerpo a cuerpo, donde Power Fist puede hacerle knock-up y Static Field puede silenciarlo. Como Brand no tiene ninguna habilidad de movimiento, un catch suele impedir la secuencia que habilita el aturdimiento de Sear. Blitzcrank convierte un mal ángulo de disparo en un intercambio decisivo.
Impacto en la línea
Mientras Rocket Grab esté disponible, los lados de la wave y los arbustos cercanos se vuelven difíciles de ocupar. Retroceder demasiado cede el poke de Pillar of Flame y la presión sobre los minions; avanzar sin cobertura ofrece el grab. Esa tensión decide el control de la wave y el acceso al río.
Cómo jugar
Mantén un minion vivo en la trayectoria de Rocket Grab y cambia de lado a medida que la wave se reduzca. No gastes Sear a la ligera: Blaze seguido de Sear puede detener a Blitzcrank cuando se acerca. Cuando Rocket Grab falle, avanza para lanzar Pillar of Flame y Conflagration, y luego reajusta tu posición antes de su siguiente intento.
Estos campeones tienen herramientas que generalmente les dan ventaja en el enfrentamiento, sin llegar a hacer el matchup injugable. Pueden tener más alcance, mejor capacidad para aguantar tu ofensiva o más formas de responder a tus engagements. Tendrás que adaptar tu enfoque y elegir con cuidado los momentos en los que aceptas el combate.
EscudosInmunidad a CCMecánicasBlack Shield absorbe daño mágico y bloquea el CC mientras aguanta, lo que puede cancelar el aturdimiento de Sear. Dark Binding inmoviliza a Brand el tiempo suficiente para que Tormented Shadow inflija daño persistente. Por tanto, Morgana puede proteger a un objetivo de tu apertura y a la vez castigar tu propio posicionamiento.Build de Morgana →Ver detalles
Morgana
Por qué
Black Shield absorbe daño mágico y bloquea el CC mientras aguanta, lo que puede cancelar el aturdimiento de Sear. Dark Binding inmoviliza a Brand el tiempo suficiente para que Tormented Shadow inflija daño persistente. Por tanto, Morgana puede proteger a un objetivo de tu apertura y a la vez castigar tu propio posicionamiento.
Impacto en la línea
Si haces engage directamente contra Black Shield, gastas Blaze y Sear sin conseguir la parada esperada, y entonces Morgana toma la iniciativa. Colocarte en la línea de Dark Binding también reduce tus ventanas de Pillar of Flame. La lane se convierte en una secuencia de recursos: forzar el escudo, evitar la raíz y solo entonces comprometerte con el trade completo.
Cómo jugar
Usa Pillar of Flame o Conflagration para debilitar Black Shield antes de lanzar Sear, y mantén un minion entre Dark Binding y tú. Si el escudo sigue intacto, no fuerces el control; cambia de objetivo o espera. Cuando desaparezca, aplica Blaze y apunta Sear antes de que Morgana reconstruya su protección.
AlcanceEscaladoPokeSenna gana alcance y daño al recoger Mist, mientras que Piercing Darkness puede dañar a los enemigos y curar a los aliados a lo largo de la misma línea. Brand debe acercarse más para aplicar Blaze. Por eso una lane pasiva permite a Senna mejorar justo la ventaja de alcance que hace tus aperturas cada vez más difíciles.Build de Senna →Ver detalles
Senna
Por qué
Senna gana alcance y daño al recoger Mist, mientras que Piercing Darkness puede dañar a los enemigos y curar a los aliados a lo largo de la misma línea. Brand debe acercarse más para aplicar Blaze. Por eso una lane pasiva permite a Senna mejorar justo la ventaja de alcance que hace tus aperturas cada vez más difíciles.
Impacto en la línea
Cada alma sin disputar aumenta la presión futura de Senna, pero avanzar en línea recta ofrece Piercing Darkness o Last Embrace. Tras varios trades perdidos, su curación borra poco a poco tu poke y te saca de la wave. Tu mejor momento llega cuando ella se detiene a por un alma o gasta su proyectil de inmovilización.
Cómo jugar
Coloca Pillar of Flame donde Senna deba detenerse a recoger un alma, sin perseguirla más allá de tu wave. Mantén un minion entre Last Embrace y tú. Una vez gastado ese proyectil, aplica Blaze y Sear para un intercambio corto; si Piercing Darkness cura el daño de inmediato, retírate en lugar de darle el ritmo que ella prefiere.
EscudosBloqueo de proyectilesProtecciónUnbreakable bloquea el primer proyectil y reduce el daño siguiente desde la misma dirección. Puede anular Sear o el primer rebote de Pyroclasm, y luego proteger al carry de Braum. Además, Winter's Bite aplica la primera acumulación de Concussive Blows, lo que hace peligroso un intercambio prolongado para un Brand sin movilidad.Build de Braum →Ver detalles
Braum
Por qué
Unbreakable bloquea el primer proyectil y reduce el daño siguiente desde la misma dirección. Puede anular Sear o el primer rebote de Pyroclasm, y luego proteger al carry de Braum. Además, Winter's Bite aplica la primera acumulación de Concussive Blows, lo que hace peligroso un intercambio prolongado para un Brand sin movilidad.
Impacto en la línea
Lanzar toda la secuencia contra el escudo causa poco daño y deja que Braum avance mientras tus habilidades se recargan. Si Winter's Bite conecta, los ataques de su dúo amenazan entonces el aturdimiento y te alejan de la wave. Aquí importan más los ángulos laterales que el número de hechizos que lances.
Cómo jugar
Primero fuerza la orientación de Unbreakable con Pillar of Flame o Conflagration, y luego cambia de ángulo antes de enviar Sear. No lances Pyroclasm contra el frente del escudo. Si Winter's Bite impacta, retírate antes de que Concussive Blows se acumule; cuando falle, recupera un ángulo y aplica Blaze al carry en lugar de a Braum.
Light Binding y Lucent Singularity alcanzan a Brand antes de que pueda aplicar Blaze con facilidad, mientras que Prismatic Barrier protege a Lux en ambas pasadas. Ella puede medir tu vida desde un espacio donde Sear exige más riesgo. Además, una inmovilización exitosa prepara Final Spark antes de que puedas reposicionarte.Build de Lux →Ver detalles
Lux
Por qué
Light Binding y Lucent Singularity alcanzan a Brand antes de que pueda aplicar Blaze con facilidad, mientras que Prismatic Barrier protege a Lux en ambas pasadas. Ella puede medir tu vida desde un espacio donde Sear exige más riesgo. Además, una inmovilización exitosa prepara Final Spark antes de que puedas reposicionarte.
Impacto en la línea
Si te colocas en línea con muy pocos minions, Light Binding controla la lane, y Lucent Singularity cierra los caminos estrechos. Si avanzas para responder a cada poke, el escudo de Lux hace ineficiente el intercambio de vida. La presión cambia cuando ambos hechizos de zoneo no están disponibles y la wave aún te da cobertura.
Cómo jugar
Muévete lateralmente alrededor de la wave y no permanezcas dentro de Lucent Singularity mientras preparas Sear. Cuando Light Binding se haya gastado, avanza lo suficiente para acertar Pillar of Flame y aplicar Blaze, y entonces amenaza con el aturdimiento sin perseguirla a través de Prismatic Barrier. Mientras la inmovilización siga disponible, mantén la distancia y prioriza conservar tu vida.
Estos enfrentamientos son sobre todo duelos de ejecución: ambos campeones tienen formas reales de tomar la ventaja. Esquivar una habilidad clave, anticipar bien un engagement o un simple error de posicionamiento puede inclinar el duelo hacia un lado. Conocer el matchup y reconocer las ventanas de acción correctas es especialmente importante aquí.
PosicionamientoVisiónEste matchup exige la ejecución precisa de las habilidades de Brand para castigar los cooldowns de Pyke. Pyke, en cambio, aprovecha cualquier error de Brand o hechizo desperdiciado para lograr un trade decisivo.Build de Pyke →Ver detalles
Pyke
Por qué
Este matchup exige la ejecución precisa de las habilidades de Brand para castigar los cooldowns de Pyke. Pyke, en cambio, aprovecha cualquier error de Brand o hechizo desperdiciado para lograr un trade decisivo.
Impacto en la línea
La amenaza del gancho de Pyke y sus dives con sigilo obligan a Brand a mantener un espaciado impecable y una visión vigilante. Descuidar esto cede rápidamente la prioridad de la wave y expone a Brand a intentos letales de all-in.
Cómo jugar
Brand debería priorizar un poke constante y bien ejecutado, y un espaciado vigilante. La visión proactiva niega los flancos de Pyke, permitiendo a Brand aprovechar con paciencia los cooldowns de Pyke o cualquier error.
PokeControl de zonaVisiónLas semillas de Zyra se convierten en plantas cuando las golpean Deadly Spines o Grasping Roots. Esas unidades añaden poke y pueden ocupar la trayectoria de Sear. Brand tiene daño en área más inmediato con Pillar of Flame y Conflagration, pero pierde el intercambio cuando su proyectil se gasta en una planta.Build de Zyra →Ver detalles
Zyra
Por qué
Las semillas de Zyra se convierten en plantas cuando las golpean Deadly Spines o Grasping Roots. Esas unidades añaden poke y pueden ocupar la trayectoria de Sear. Brand tiene daño en área más inmediato con Pillar of Flame y Conflagration, pero pierde el intercambio cuando su proyectil se gasta en una planta.
Impacto en la línea
Cada semilla cerca de la wave cambia tu ángulo de aturdimiento y permite a Zyra empujar sin exponerse directamente. Si Grasping Roots acierta, las plantas prolongan la presión mientras estás inmovilizado. En cambio, una vez consumidas las semillas y gastada la inmovilización, puedes recuperar el control de los arbustos y obligar a Zyra a retroceder.
Cómo jugar
Lanza Sear solo por un camino despejado y usa Pillar of Flame para alcanzar a Zyra sin depender de un proyectil bloqueable. Evita la línea de Grasping Roots y luego avanza una vez que haya pasado para aplicar Blaze y amenazar con el aturdimiento. Contra Stranglethorns, abandona la zona antes del knock-up en lugar de terminar tu secuencia en el sitio.
PosicionamientoVisiónThresh aprovecha de forma constante las habilidades de Brand en cooldown, convirtiendo pequeños errores en ventajas importantes de lane. Para Brand, dominar la delicada danza de los patrones de engage es la clave de la victoria.Build de Thresh →Ver detalles
Thresh
Por qué
Thresh aprovecha de forma constante las habilidades de Brand en cooldown, convirtiendo pequeños errores en ventajas importantes de lane. Para Brand, dominar la delicada danza de los patrones de engage es la clave de la victoria.
Impacto en la línea
No respetar la amenaza de Thresh y su capacidad de iniciar puede cambiar rápidamente el control de la lane, obligando a Brand a adoptar una postura defensiva. Esto afecta directamente a la capacidad de Brand para establecer visión e influir de forma efectiva en las peleas por objetivos.
Cómo jugar
Este matchup exige que los jugadores de Brand ejecuten con precisión, usando un espaciado meticuloso para evitar los hooks de Thresh y comprometiendo habilidades solo dentro de ventanas claras. Consigue daño y luego retírate con rapidez, esperando con paciencia la siguiente oportunidad favorable en lugar de forzar engages arriesgados.
Grand Entrance requiere que Rakan aterrice dentro de tu dúo para hacer knock-up a los objetivos, y luego Battle Dance lo devuelve junto a un aliado. Esa entrada le da a Brand un objetivo cercano para Blaze y Pillar of Flame, pero el control inicial puede interrumpir tu preparación. Por eso el matchup depende de guardar Sear para el aterrizaje.Build de Rakan →Ver detalles
Rakan
Por qué
Grand Entrance requiere que Rakan aterrice dentro de tu dúo para hacer knock-up a los objetivos, y luego Battle Dance lo devuelve junto a un aliado. Esa entrada le da a Brand un objetivo cercano para Blaze y Pillar of Flame, pero el control inicial puede interrumpir tu preparación. Por eso el matchup depende de guardar Sear para el aterrizaje.
Impacto en la línea
Si gastas Sear en poke, Rakan puede usar Grand Entrance durante su cooldown y marcharse con Battle Dance. Si lo guardas, debe respetar el área alrededor de tu carry y la lane se mantiene más estable. Un knock-up exitoso le devuelve el control de los arbustos; una entrada detenida te da la prioridad de la wave.
Cómo jugar
Guarda Sear hasta que Rakan empiece Grand Entrance y aplica Blaze con Conflagration o Pillar of Flame sobre su zona de aterrizaje. Apunta el aturdimiento después de que llegue, y colócate entre él y tu carry sin perseguir Battle Dance. Mientras The Quickness esté activo, separa a tu dúo para que solo un jugador pueda ser hechizado.
Estos campeones suelen tener problemas para responder a tus principales fortalezas, lo que te permite afrontar el enfrentamiento con más libertad. Normalmente tienes varias formas de presionarlos y forzar intercambios a tu favor. Aprovecha esta ventaja para imponer tu ritmo en lugar de darles tiempo para volver a una posición cómoda.
PicksDaño explosivoBola de nieveSona debe permanecer cerca de su aliado para compartir las auras de Hymn of Valor y Aria of Perseverance. Esa cercanía da a Conflagration objetivos próximos y a Pyroclasm rutas cortas de rebote. Su curación puede borrar un poke aislado, pero le cuesta más cuando Blaze y tu daño en área alcanzan a ambos jugadores.Build de Sona →Ver detalles
Sona
Por qué
Sona debe permanecer cerca de su aliado para compartir las auras de Hymn of Valor y Aria of Perseverance. Esa cercanía da a Conflagration objetivos próximos y a Pyroclasm rutas cortas de rebote. Su curación puede borrar un poke aislado, pero le cuesta más cuando Blaze y tu daño en área alcanzan a ambos jugadores.
Impacto en la línea
Sona quiere trades pequeños y repetidos seguidos de curación, mientras que Brand quiere una secuencia que alcance al dúo. Si mantienes la wave lo bastante neutral para amenazar ambas posiciones, ella no puede avanzar libremente para Hymn of Valor. Un buen impacto en área cuesta vida, maná y, a menudo, el control de los arbustos.
Cómo jugar
Espera a que Sona se acerque a su carry antes de usar Pillar of Flame o extender Blaze con Conflagration. No gastes la secuencia completa en un poke que Aria of Perseverance puede curar por sí sola. Cuando ambos objetivos estén ardiendo, Sear amenaza con el aturdimiento y Pyroclasm obtiene los rebotes que realmente convierten tu ventaja.
PicksPeleas en equipoPresión tempranaYou and Me! hace a Yuumi no seleccionable pero la fija a la posición de su aliado. Por tanto, Brand puede predecir dónde deben caer Pillar of Flame y Conflagration, y luego usar Pyroclasm contra un dúo agrupado. Zoomies cura y acelera sin separar a los dos cuerpos que alimentan tu daño en área.Build de Yuumi →Ver detalles
Yuumi
Por qué
You and Me! hace a Yuumi no seleccionable pero la fija a la posición de su aliado. Por tanto, Brand puede predecir dónde deben caer Pillar of Flame y Conflagration, y luego usar Pyroclasm contra un dúo agrupado. Zoomies cura y acelera sin separar a los dos cuerpos que alimentan tu daño en área.
Impacto en la línea
El carry de Yuumi debe exponerse solo para cada last hit, lo que simplifica tu zoneo. Cuando el poke acierta una vez, Zoomies lo repara; cuando Blaze se extiende y ambos objetivos reciben daño en área, su sustain se ve mucho más castigado. La presión depende de la calidad, no del volumen de tus hechizos.
Cómo jugar
Apunta Pillar of Flame a la ruta de last hit del aliado al que está unida, en lugar de lanzarlo a ciegas. Cuando Yuumi se separa para Bop 'n' Block, Sear puede castigarla tras aplicar Blaze. Guarda Pyroclasm para un momento en que ambos campeones sigan cerca, y retírate si Final Chapter empieza a acumular sus oleadas de inmovilización.
Nami debe avanzar para hacer rebotar Ebb and Flow entre aliados y enemigos. Ese recorrido la lleva al alcance de Pillar of Flame, tras lo cual Blaze habilita el aturdimiento de Sear. Aqua Prison sigue siendo su respuesta: si Brand se queda quieto durante la secuencia, la burbuja puede interrumpir su ventaja antes de Pyroclasm.Build de Nami →Ver detalles
Nami
Por qué
Nami debe avanzar para hacer rebotar Ebb and Flow entre aliados y enemigos. Ese recorrido la lleva al alcance de Pillar of Flame, tras lo cual Blaze habilita el aturdimiento de Sear. Aqua Prison sigue siendo su respuesta: si Brand se queda quieto durante la secuencia, la burbuja puede interrumpir su ventaja antes de Pyroclasm.
Impacto en la línea
Cada curación ofensiva expone brevemente a Nami, pero Ebb and Flow también puede reparar un poke mal convertido. Castigar ese paso reduce su vida y su acceso a los arbustos; fallarlo gasta dos hechizos contra un solo rebote de curación. La lane premia las ventanas claras en lugar de lanzar hechizos constantemente.
Cómo jugar
Muévete lateralmente durante Aqua Prison y no te alinees junto a tu carry contra Tidal Wave. Cuando Nami avance para Ebb and Flow, coloca Pillar of Flame, aplica Blaze y apunta Sear a su salida. Si la burbuja sigue disponible, retírate tras el primer hechizo; si falla, completa con Conflagration o Pyroclasm.
Estos campeones tienen una build y un estilo de juego que superan directamente al tuyo, lo que puede hacer que controlar la línea y farmear sea extremadamente difícil. Sus habilidades pueden neutralizar tus principales fortalezas o castigarte en cuanto intentas jugar tu plan habitual. En estos matchups, el objetivo suele ser minimizar errores y buscar soluciones fuera del enfrentamiento directo.
SupervivenciaPosicionamientoYasuo es un counter directo a toda tu secuencia de burst por culpa de Wind Wall. Esta única habilidad puede eliminar tu Pyroclasm en pleno vuelo y bloquear por completo tu stun de Sear, deteniendo al instante tu capacidad de defenderte o de activar las explosiones de Blaze. Como él puede atravesar minions con Sweeping Blade para cerrar la distancia, perder tu principal proyectil de peel contra su barrera te deja totalmente vulnerable a su implacable daño físico.Build de Yasuo →Ver detalles
Yasuo
Por qué
Yasuo es un counter directo a toda tu secuencia de burst por culpa de Wind Wall. Esta única habilidad puede eliminar tu Pyroclasm en pleno vuelo y bloquear por completo tu stun de Sear, deteniendo al instante tu capacidad de defenderte o de activar las explosiones de Blaze. Como él puede atravesar minions con Sweeping Blade para cerrar la distancia, perder tu principal proyectil de peel contra su barrera te deja totalmente vulnerable a su implacable daño físico.
Impacto en la línea
No puedes mantener con seguridad el centro de la lane, ya que Yasuo te amenazará constantemente con los tornados de Steel Tempest. Cada vez que te adelantas para usar Pillar of Flame y asegurar el farmeo, corres el riesgo de que te haga dash encima y te lance por los aires hacia Last Breath. Esto te obliga a quedarte bajo tu propia torre, sacrificando el control de la wave y dejándolo hacer roam libremente para ayudar a su jungler mientras tú te esfuerzas por limpiar con seguridad.
Cómo jugar
Para sobrevivir, debes forzar a que gaste Wind Wall antes de comprometer recursos importantes. Rompe el escudo de Way of the Wanderer con un ataque básico y luego usa Pillar of Flame para hacer poke sin lanzar proyectiles en línea recta. Mantén Sear guardado como elemento disuasorio; mientras no lo lances, él tiene que respetar el posible stun. Si malgasta su muro, tienes una breve ventana de veinte segundos en la que puedes buscar con agresividad una cadena de Conflagration y Pyroclasm.
Presión en el mapaKassadin es tu peor pesadilla porque está hecho para absorber daño mágico y esquivar skillshots. Cada vez que intentas hacerle poke, su Null Sphere genera un escudo mágico que anula el daño de tu Pillar of Flame, mientras que su Void Stone le da escudo adicional solo porque lanzas hechizos. Una vez que desbloquea Riftwalk, puede hacer blink sin esfuerzo por encima de tu Sear y de Pillar of Flame, dejando inútil todo tu combo de burst.Build de Kassadin →Ver detalles
Kassadin
Por qué
Kassadin es tu peor pesadilla porque está hecho para absorber daño mágico y esquivar skillshots. Cada vez que intentas hacerle poke, su Null Sphere genera un escudo mágico que anula el daño de tu Pillar of Flame, mientras que su Void Stone le da escudo adicional solo porque lanzas hechizos. Una vez que desbloquea Riftwalk, puede hacer blink sin esfuerzo por encima de tu Sear y de Pillar of Flame, dejando inútil todo tu combo de burst.
Impacto en la línea
Este matchup limita mucho tu presión temprana. No puedes hacer trade de vida con seguridad porque Kassadin se sostiene (sustain) a través de tu poke, así que no puedes sacarlo fácilmente de la lane. Después del nivel cinco, la amenaza de Riftwalk hacia Force Pulse significa que no puedes avanzar demasiado más allá del río. Te ves obligado a jugar hacia atrás, cediendo la prioridad de mid y dejando que escale libremente hasta convertirse en un monstruo imparable en late game.
Cómo jugar
Para sobrevivir, debes centrarte por completo en controlar la wave de minions cerca de tu torre. Nunca empujes a ciegas con Pillar of Flame. En su lugar, usa Conflagration para reducir la wave con seguridad manteniendo los minions de tu lado de la lane. Mantén Sear listo para disuadir sus saltos agresivos; nunca lo lances de forma proactiva mientras su Riftwalk esté fuera de cooldown. Si hace engage con Riftwalk, suelta Pyroclasm y Conflagration sobre él de inmediato para castigar su lanzamiento.
PosicionamientoSupervivenciaYone tiene una ventaja enorme porque su Soul Unbound le permite esquivar sin esfuerzo tus skillshots de Pillar of Flame y Sear mientras avanza. Al saltarse tus herramientas de zoneo, anula por completo tu preparación de stun defensivo. Una vez que cierra la distancia con esta forma espiritual, puede encadenar fácilmente los knockups de Mortal Steel directamente hacia Fate Sealed y hacerte burst antes de que tu pasiva Blaze siquiera llegue a acumularse.Build de Yone →Ver detalles
Yone
Por qué
Yone tiene una ventaja enorme porque su Soul Unbound le permite esquivar sin esfuerzo tus skillshots de Pillar of Flame y Sear mientras avanza. Al saltarse tus herramientas de zoneo, anula por completo tu preparación de stun defensivo. Una vez que cierra la distancia con esta forma espiritual, puede encadenar fácilmente los knockups de Mortal Steel directamente hacia Fate Sealed y hacerte burst antes de que tu pasiva Blaze siquiera llegue a acumularse.
Impacto en la línea
Esta amenaza te obliga a adoptar una postura muy defensiva, cediendo el control temprano de la wave. No puedes adelantarte con seguridad para usar Conflagration sobre los minions sin arriesgarte a un engage repentino. Cada vez que Yone tiene listo su tornado de Mortal Steel, debes retroceder hacia tu torre. Esta presión constante limita tus ventanas de recall, te va quitando vida y te impide ayudar a tu jungler a asegurar los objetivos cercanos.
Cómo jugar
Nunca lances tu Sear de forma reactiva cuando Yone carga en su forma espiritual. En su lugar, quédate cerca de tu torre y apunta tu Pillar of Flame al ancla de retorno de su cuerpo físico. Vigila de cerca su proyección; en el momento en que Soul Unbound termina y él vuelve de golpe, lanza Conflagration y Pyroclasm para castigar su retirada. Si consigue acertarte Fate Sealed bajo tu torre, haz flash para alejarte de inmediato en lugar de intentar devolver el trade.
SupervivenciaMecánicasEste matchup es increíblemente opresivo porque Fizz posee la herramienta perfecta para anular toda tu amenaza. Cada vez que intentas inmovilizarlo con tu stun de Sear o hacer rebotar tu Pyroclasm, él simplemente puede activar Playful para esquivar el hechizo por completo. Sin estas herramientas defensivas, quedas totalmente indefenso ante su seguimiento, y él puede hacer dash con Urchin Strike y hacerte burst.Build de Fizz →Ver detalles
Fizz
Por qué
Este matchup es increíblemente opresivo porque Fizz posee la herramienta perfecta para anular toda tu amenaza. Cada vez que intentas inmovilizarlo con tu stun de Sear o hacer rebotar tu Pyroclasm, él simplemente puede activar Playful para esquivar el hechizo por completo. Sin estas herramientas defensivas, quedas totalmente indefenso ante su seguimiento, y él puede hacer dash con Urchin Strike y hacerte burst.
Impacto en la línea
Te ves obligado a una postura defensiva desde las primeras waves. Hacer poke con Pillar of Flame o extender Blaze con Conflagration se vuelve muy arriesgado, ya que adelantarte más allá de tus minions de caster invita a una letal iniciación con Chum the Waters. Si empujas demasiado la wave, Fizz hará freeze, obligándote a adelantarte y a enfrentar un inevitable all-in en el que tu torre no puede salvarte.
Cómo jugar
Tu supervivencia depende por completo de mantener Sear guardado. Nunca lo lances de forma proactiva; debes tenerlo cargado como amenaza para disuadir a Fizz de usar Urchin Strike. Concéntrate únicamente en usar Pillar of Flame desde el máximo alcance para reducir la wave. Si desperdicia Playful para limpiar minions, tienes una breve ventana de doce segundos para jugar con agresividad. Si Chum the Waters se te engancha, prepárate para hacer flash al knock-up entrante de inmediato.
SupervivenciaPosicionamientoIrelia dicta por completo el ritmo de esta lane por cómo interactúa Bladesurge con tus skillshots. Cada vez que intentas lanzar Pillar of Flame o preparar un stun con Sear, ella puede hacer dash al instante a través de un minion con poca vida para esquivarlos. Al usar tu propia wave como pista, cierra la distancia sin esfuerzo, dejando inútil tu ventaja de rango y forzando una pelea letal a corta distancia donde su Ionian Fervor te destroza.Build de Irelia →Ver detalles
Irelia
Por qué
Irelia dicta por completo el ritmo de esta lane por cómo interactúa Bladesurge con tus skillshots. Cada vez que intentas lanzar Pillar of Flame o preparar un stun con Sear, ella puede hacer dash al instante a través de un minion con poca vida para esquivarlos. Al usar tu propia wave como pista, cierra la distancia sin esfuerzo, dejando inútil tu ventaja de rango y forzando una pelea letal a corta distancia donde su Ionian Fervor te destroza.
Impacto en la línea
No puedes disputar la wave ni empujar para ganar prioridad sin arriesgarte a una muerte repentina. En cuanto baja la vida de un minion, debes retroceder, sacrificando oro temprano y presión sobre la torre. Si ella hace freeze de la lane cerca de su torre, quedas completamente zoneado, ya que adelantarte para romperlo te convierte en un blanco fácil para Flawless Duet. Esta pérdida de prioridad en mid deja a tu jungler sin apoyo en las escaramuzas tempranas del río.
Cómo jugar
Para sobrevivir, nunca lances Pillar of Flame sobre la wave cuando Irelia tenga cerca minions con poca vida a los que hacer dash. En su lugar, guarda Sear y Conflagration estrictamente para defenderte; lanza tu stun solo cuando ella use Bladesurge directamente sobre ti, lo que hace predecible su trayectoria. Si acierta Flawless Duet o inicia con Vanguard's Edge, suelta Pyroclasm de inmediato y retrocede hacia tu torre. Acepta perder algo de oro para mantener tu vida lo bastante alta como para evitar dives.
SupervivenciaZed neutraliza por completo tus herramientas defensivas porque Death Mark lo vuelve no seleccionable, lo que le permite esquivar fácilmente tu stun de Sear. Si intentas activar Blaze y lanzar Sear para hacerte peel a ti mismo, él simplemente usa su definitiva para esquivarlo. Sin ninguna movilidad, Brand no puede escapar del burst posterior de Razor Shuriken y Shadow Slash, y te quedas completamente indefenso una vez que has malgastado tu CC.Build de Zed →Ver detalles
Zed
Por qué
Zed neutraliza por completo tus herramientas defensivas porque Death Mark lo vuelve no seleccionable, lo que le permite esquivar fácilmente tu stun de Sear. Si intentas activar Blaze y lanzar Sear para hacerte peel a ti mismo, él simplemente usa su definitiva para esquivarlo. Sin ninguna movilidad, Brand no puede escapar del burst posterior de Razor Shuriken y Shadow Slash, y te quedas completamente indefenso una vez que has malgastado tu CC.
Impacto en la línea
Una vez que Zed desbloquea Death Mark, pierdes toda iniciativa ofensiva en la mid lane. Te ves obligado a farmear desde un rango extremo con Pillar of Flame, ya que adelantarte invita a Living Shadow y a la ralentización de Shadow Slash, preparando un dive fácil. Si te baja de la mitad de la vida con poke, su Contempt for the Weak asegura una rápida ejecución bajo tu propia torre, forzando recalls malos y dejándolo hacer roam libremente.
Cómo jugar
Debes mantener Sear como un elemento disuasorio absoluto. Nunca lo lances de forma proactiva para hacer trade. Cuando Zed inicie con Death Mark, espera al momento exacto en que reaparezca detrás de ti. Márcalo al instante con Conflagration y apunta Sear justo detrás de tu propio modelo para asegurar el stun. Esta es tu única ventana para sobrevivir; si lo aciertas, sigue con Pillar of Flame y Pyroclasm para forzar un trade con kill antes de que su marca detone.
Estos campeones tienen herramientas que generalmente les dan ventaja en el enfrentamiento, sin llegar a hacer el matchup injugable. Pueden tener más alcance, mejor capacidad para aguantar tu ofensiva o más formas de responder a tus engagements. Tendrás que adaptar tu enfoque y elegir con cuidado los momentos en los que aceptas el combate.
Daño explosivoIniciaciónLa amenaza de Galio está en usar su Justice Punch para escapar justo del círculo de tu Pillar of Flame. Como el tiempo de preparación de tu principal hechizo de área es predecible, un Galio que reaccione eludirá la explosión, se estrellará directamente contra ti y encadenará con Shield of Durand. Este cierre de distancia tan rápido te niega el espaciado crucial para acertar Sear y activar Blaze, convirtiendo tu poke en un letal bloqueo.Build de Galio →Ver detalles
Galio
Por qué
La amenaza de Galio está en usar su Justice Punch para escapar justo del círculo de tu Pillar of Flame. Como el tiempo de preparación de tu principal hechizo de área es predecible, un Galio que reaccione eludirá la explosión, se estrellará directamente contra ti y encadenará con Shield of Durand. Este cierre de distancia tan rápido te niega el espaciado crucial para acertar Sear y activar Blaze, convirtiendo tu poke en un letal bloqueo.
Impacto en la línea
No puedes empujar la wave sin pensar, porque extenderte demasiado te convierte en un blanco prioritario para Justice Punch. Si Galio hace freeze cerca de su torre, su Winds of War te irá quitando vida mientras intentas hacer crash de los minions. Esta amenaza constante de un dash hacia delante te obliga a jugar a la defensiva bajo tu propia torre, sacrificando la prioridad temprana y dejándolo hacer roam libremente con Hero's Entrance.
Cómo jugar
Para sobrevivir, nunca lances Pillar of Flame de forma agresiva a menos que Galio ya haya desperdiciado Justice Punch para limpiar minions. Mantén la distancia y céntrate en extender Blaze con Conflagration sobre los minions cercanos. Si aun así carga hacia delante, lanza rápidamente Sear directamente en su trayectoria para aturdirlo en pleno dash antes de que su taunt de Shield of Durand pueda canalizarse. Si te atrapa, guarda Pyroclasm para el momento en que se agrupe con sus aliados.
EsquivaEnfriamientosLa gran movilidad de Akali neutraliza por completo tus skillshots. Como tu burst principal depende de acertar Pillar of Flame y asegurar el stun con Sear, su capacidad de esquivar ambos sin esfuerzo con Shuriken Flip o con el dash de Perfect Execution hace que el trade sea extremadamente peligroso. Una vez que se salta tu herramienta inicial de zoneo y activa Assassin's Mark, tu falta de movilidad te deja totalmente expuesto a todo su combo de ejecución.Build de Akali →Ver detalles
Akali
Por qué
La gran movilidad de Akali neutraliza por completo tus skillshots. Como tu burst principal depende de acertar Pillar of Flame y asegurar el stun con Sear, su capacidad de esquivar ambos sin esfuerzo con Shuriken Flip o con el dash de Perfect Execution hace que el trade sea extremadamente peligroso. Una vez que se salta tu herramienta inicial de zoneo y activa Assassin's Mark, tu falta de movilidad te deja totalmente expuesto a todo su combo de ejecución.
Impacto en la línea
No puedes cruzar con seguridad tu lado del río para empujar, ya que cualquier posición demasiado adelantada permite a Akali acertar Shuriken Flip para forzar un all-in letal. Esta restricción te obliga a jugar a la defensiva bajo la torre, cediendo prioridad y permitiéndole hacer roam libremente. Tu barra de vida estará constantemente amenazada si te adelantas para aplicar Blaze, lo que a menudo te forzará a hacer recall en mal momento.
Cómo jugar
Para sobrevivir, debes mantener Sear como un elemento disuasorio defensivo en lugar de usarlo para hacer poke. Nunca lances Pillar of Flame a menos que Akali ya haya malgastado Shuriken Flip o esté bloqueada en su animación. Quédate pegado a la seguridad de tu torre, usando Conflagration sobre los minions para extender Blaze de forma pasiva y hacer waveclear. Si despliega Twilight Shroud, retrocede de inmediato y prepárate para lanzar Pyroclasm si se compromete con su definitiva.
EscaramuzasIntercambiosEste matchup es muy desfavorable para Brand por cómo la movilidad de Akshan contrarresta tu autodefensa. Cuando intentas defenderte, Akshan usa Heroic Swing para orbitar a tu alrededor. Este movimiento circular rápido le hace muy fácil esquivar tu skillshot lineal de Sear, impidiéndote activar tu stun, mientras que su daño físico destroza rápidamente tu frágil barra de vida.Build de Akshan →Ver detalles
Akshan
Por qué
Este matchup es muy desfavorable para Brand por cómo la movilidad de Akshan contrarresta tu autodefensa. Cuando intentas defenderte, Akshan usa Heroic Swing para orbitar a tu alrededor. Este movimiento circular rápido le hace muy fácil esquivar tu skillshot lineal de Sear, impidiéndote activar tu stun, mientras que su daño físico destroza rápidamente tu frágil barra de vida.
Impacto en la línea
La amenaza constante de Akshan de hacer un trade con burst físico te obliga a jugar a la defensiva bajo tu torre o cerca de ella. No puedes disputar fácilmente su empuje, ya que usar Pillar of Flame sobre la wave de minions te deja completamente vulnerable. Él limpiará las waves con facilidad con Avengerang, ganará prioridad de lane y usará Going Rogue para hacer roam hacia las side lanes sin ser detectado, poniendo una enorme presión sobre todo tu mapa mientras tú estás atascado limpiando.
Cómo jugar
Para sobrevivir, nunca lances Sear de forma preventiva. Debes guardar esta habilidad hasta que Akshan se comprometa realmente con su Heroic Swing. Apunta tu stun directamente a su punto de anclaje o espera a que choque contigo o con un minion para garantizar el acierto. Colócate estrictamente detrás de tu wave de minions o cerca de las esquinas del terreno para bloquear la trayectoria de su balanceo. Si te atrapa a campo abierto, suelta de inmediato Conflagration y Pillar of Flame a tus pies para forzar un trade mediante Blaze mientras él cierra la distancia.
Daño explosivoEsquivaAnnie contrarresta tu patrón de poke porque la velocidad de movimiento instantánea de su Molten Shield le permite esquivar con facilidad tu Pillar of Flame. En cuanto fallas este hechizo crucial, ella puede cerrar la distancia con agresividad. Con su pasiva Pyromania totalmente cargada, te bloqueará de inmediato con Disintegrate o Incinerate, dejándote completamente vulnerable a todo su combo de burst sin forma de defenderte.Build de Annie →Ver detalles
Annie
Por qué
Annie contrarresta tu patrón de poke porque la velocidad de movimiento instantánea de su Molten Shield le permite esquivar con facilidad tu Pillar of Flame. En cuanto fallas este hechizo crucial, ella puede cerrar la distancia con agresividad. Con su pasiva Pyromania totalmente cargada, te bloqueará de inmediato con Disintegrate o Incinerate, dejándote completamente vulnerable a todo su combo de burst sin forma de defenderte.
Impacto en la línea
Esta diferencia en la velocidad de reacción te obliga a una postura defensiva, cediendo la prioridad de la mid lane. Annie puede farmear y gestionar la wave con seguridad usando Disintegrate mientras mantiene la amenaza de su stun. Si te adelantas demasiado para limpiar minions con Conflagration, ella puede soltar al instante Summon: Tibbers para borrar tu barra de vida, obligándote a hacer recall prematuramente o a perder grandes trozos del tower plating.
Cómo jugar
Para sobrevivir, debes jugar con extrema paciencia. Nunca inicies un trade con Pillar of Flame; en su lugar, espera a que Annie malgaste Molten Shield antes de lanzarlo, o lánzalo justo cuando ella se bloquee en la animación de Disintegrate. Vigila constantemente su indicador de Pyromania. Si activa su stun y se lanza hacia ti, prepara una combinación defensiva de Conflagration y Sear para aturdirla en plena carrera y retirarte de inmediato.
PosicionamientoPokeOrianna dicta por completo esta lane al mantener su Ball posicionada por delante de tu rango. Te hostiga repetidamente con Command: Attack desde una distancia a la que tu Pillar of Flame no puede alcanzarla. Aunque te adelantes para hacer trade, ella anula de inmediato tu represalia con Command: Protect, usando el escudo para absorber el daño continuo de tu pasiva Blaze mientras tú recibes daño gratis de su zona.Build de Orianna →Ver detalles
Orianna
Por qué
Orianna dicta por completo esta lane al mantener su Ball posicionada por delante de tu rango. Te hostiga repetidamente con Command: Attack desde una distancia a la que tu Pillar of Flame no puede alcanzarla. Aunque te adelantes para hacer trade, ella anula de inmediato tu represalia con Command: Protect, usando el escudo para absorber el daño continuo de tu pasiva Blaze mientras tú recibes daño gratis de su zona.
Impacto en la línea
Esta superioridad constante de rango te obliga a ceder la prioridad de la wave. Te encontrarás farmeando constantemente bajo la torre, con dificultades para acertar Conflagration y extender tu pasiva por la wave sin que te atrape Command: Dissonance. Tu barra de vida irá menguando poco a poco, forzando recalls tempranos y dejándote sin poder ayudar a tu jungler, mientras Orianna permanece a salvo y sana tras su esfera protectora.
Cómo jugar
Para sobrevivir, nunca te quedes dentro de tu propia wave de minions; haz que ella elija entre hacerte poke con Command: Attack o empujar la wave. Si se adelanta demasiado para colocar su ball, espera a que malgaste Command: Protect antes de intentar acertar tu combo de Pillar of Flame y Sear. Si falla sus skillshots, busca extender Blaze por los minions para forzarla a retirarse, guardando tu Pyroclasm para cuando ella se comprometa con su Command: Shockwave.
EsquivaDaño explosivoLa movilidad de Aurora altera por completo tu patrón de trade habitual. En cuanto lanzas Pillar of Flame, ella puede reaccionar al instante con Across the Veil para saltar lejos, volverse invisible y dejar totalmente inútil tu principal fuente de daño. Una vez que has malgastado tu hechizo clave, puede cerrar la distancia con seguridad para acertar Twofold Hex y activar Spirit Abjuration, dejándote sin una forma fiable de devolver el trade.Build de Aurora →Ver detalles
Aurora
Por qué
La movilidad de Aurora altera por completo tu patrón de trade habitual. En cuanto lanzas Pillar of Flame, ella puede reaccionar al instante con Across the Veil para saltar lejos, volverse invisible y dejar totalmente inútil tu principal fuente de daño. Una vez que has malgastado tu hechizo clave, puede cerrar la distancia con seguridad para acertar Twofold Hex y activar Spirit Abjuration, dejándote sin una forma fiable de devolver el trade.
Impacto en la línea
Como no puedes lanzar Pillar of Flame a ciegas, pierdes el control de las waves de minions. Si lo usas para limpiar, Aurora te castigará de inmediato con Twofold Hex. Esta amenaza constante de su Across the Veil te obliga a jugar a la defensiva cerca de tu torre. Te costará asegurar la prioridad de mid, lo que significa que no podrás ayudar a tu jungler, mientras Aurora puede hacer roam con comodidad gracias a su gran movilidad.
Cómo jugar
Para sobrevivir, debes mantener Pillar of Flame como elemento disuasorio en lugar de como herramienta de iniciación. Empieza tus trades extendiendo Blaze con Conflagration para amenazar con un stun. Si Aurora salta con agresividad con Across the Veil, espera a que termine su breve invisibilidad antes de lanzar Sear para aturdirla. Una vez que esté bloqueada, puedes soltar con seguridad Pillar of Flame y Pyroclasm para inclinar el trade a tu favor.
MecánicasPosicionamientoEste matchup depende en gran medida de cómo Morgana usa Black Shield para frenar tu presión ofensiva. Para ejecutar tu burst, debes acertar Sear sobre un objetivo ya afectado por Blaze. Sin embargo, Black Shield absorbe el daño mágico y anula por completo el componente de stun de Sear. Sin este CC, no puedes garantizar tu combo completo, lo que te deja muy vulnerable a la represalia de su Dark Binding y Tormented Shadow.Build de Morgana →Ver detalles
Morgana
Por qué
Este matchup depende en gran medida de cómo Morgana usa Black Shield para frenar tu presión ofensiva. Para ejecutar tu burst, debes acertar Sear sobre un objetivo ya afectado por Blaze. Sin embargo, Black Shield absorbe el daño mágico y anula por completo el componente de stun de Sear. Sin este CC, no puedes garantizar tu combo completo, lo que te deja muy vulnerable a la represalia de su Dark Binding y Tormented Shadow.
Impacto en la línea
Morgana neutraliza fácilmente tu presión sobre la wave soltando Tormented Shadow sobre los minions, obligándote a usar Pillar of Flame y Conflagration de forma defensiva solo para mantenerte a su nivel. Como puede ignorar tu amenaza de stun, se adelantará con confianza para buscar Dark Binding. Que te acierte su root bajo su Tormented Shadow, que te va quitando la barra de vida, significa perder la prioridad de mid, forzando recalls tempranos y dejando a tu jungler sin apoyo.
Cómo jugar
Tu éxito depende por completo de hacerle gastar su cooldown defensivo. Lanza Pillar of Flame para amenazar con un trade, pero guarda Sear hasta que veas que malgasta Black Shield. Como el cooldown de su escudo es excepcionalmente largo, tienes una sólida ventana de quince segundos para atacar. Si guarda su escudo, céntrate en farmear con Conflagration. Cuando avance para lanzar Soul Shackles, no lances Sear por pánico contra su escudo; en su lugar, camina hacia atrás para romper el vínculo y espera a que el escudo expire antes de contraatacar.
EsquivaPosicionamientoLux domina este matchup porque su Light Binding le permite buscar roots desde una distancia segura, muy fuera del alcance de tus hechizos. Aunque consigas devolver el trade con Pillar of Flame, su Prismatic Barrier es excelente para absorber el daño continuo de tu pasiva Blaze. Esto neutraliza tu principal presión de daño con el tiempo y la mantiene completamente fuera del alcance de tu stun de Sear.Build de Lux →Ver detalles
Lux
Por qué
Lux domina este matchup porque su Light Binding le permite buscar roots desde una distancia segura, muy fuera del alcance de tus hechizos. Aunque consigas devolver el trade con Pillar of Flame, su Prismatic Barrier es excelente para absorber el daño continuo de tu pasiva Blaze. Esto neutraliza tu principal presión de daño con el tiempo y la mantiene completamente fuera del alcance de tu stun de Sear.
Impacto en la línea
Te verás empujado constantemente bajo la torre mientras Lux limpia las waves con seguridad con Lucent Singularity. Adelantarte para disputar la wave te arriesga a que te acierte Light Binding, lo que prepara de inmediato su combo de Final Spark de alto daño. Esta amenaza constante te obliga a una postura defensiva, perdiendo prioridad y limitando tu capacidad de extender Conflagration por la wave de minions para presionarla.
Cómo jugar
Para sobrevivir, colócate detrás de tu wave de minions para bloquear Light Binding, pero ten presente que puede atravesar a un objetivo. Haz que gaste su snare moviéndote lateralmente y aprovecha enseguida su largo cooldown para adelantarte y limpiar con Pillar of Flame. Si protege a sus minions con Prismatic Barrier, no fuerces trades; en su lugar, usa Conflagration sobre minions con poca vida para hacer rebotar Blaze hasta ella con seguridad, sin adentrarte en su zona de amenaza del láser.
Limpieza de oleadasPresión en el mapaTalon marca el ritmo del mapa porque su Rake limpia tus waves al instante desde una posición segura, lo que le permite saltar de inmediato los muros del río con Assassin's Path. Como mago lento, Brand no puede igualar esta hipermovilidad por la jungla. Si intentas seguirlo a ciegas, te arriesgas a entrar en un arbusto donde Noxian Diplomacy y Blade's End pueden hacerte burst antes de que siquiera puedas acertar Sear.Build de Talon →Ver detalles
Talon
Por qué
Talon marca el ritmo del mapa porque su Rake limpia tus waves al instante desde una posición segura, lo que le permite saltar de inmediato los muros del río con Assassin's Path. Como mago lento, Brand no puede igualar esta hipermovilidad por la jungla. Si intentas seguirlo a ciegas, te arriesgas a entrar en un arbusto donde Noxian Diplomacy y Blade's End pueden hacerte burst antes de que siquiera puedas acertar Sear.
Impacto en la línea
Te encontrarás constantemente bajo tu propia torre, usando Pillar of Flame y Conflagration solo para aguantar su empuje. Esta presión constante limita tus ventanas de recall y te impide ayudar a tu jungler. Cada vez que Talon desaparece tras un muro, tus side lanes deben retroceder, perdiendo oro y experiencia, mientras tú te ves obligado a elegir entre tomar tower plates o arriesgarte a una rotación peligrosa.
Cómo jugar
Nunca persigas a Talon por la jungla cuando haga roam; en su lugar, avisa de inmediato con un ping de que ha desaparecido y usa Conflagration seguido de Pillar of Flame para empujar con fuerza tu wave hacia su torre. Mantén siempre guardado Sear cuando se acerque, ya que amenazar con el stun es tu única forma de disuadir su engage con Noxian Diplomacy. Si salta sobre ti con Shadow Assault, suelta Pyroclasm de inmediato para que rebote entre los dos, forzándolo a retirarse o a jugarse la vida en el trade.
EsquivaPosicionamientoZiggs tiene una enorme ventaja de rango que dicta esta lane. Su Bouncing Bomb puede hostigarte desde un lugar seguro, mucho antes de que puedas adelantarte para lanzar Pillar of Flame o Conflagration. Para aplicar Blaze o preparar un stun con Sear, te ves obligado a caminar directamente hacia su trayectoria, recibiendo poke inevitable solo para cerrar la distancia.Build de Ziggs →Ver detalles
Ziggs
Por qué
Ziggs tiene una enorme ventaja de rango que dicta esta lane. Su Bouncing Bomb puede hostigarte desde un lugar seguro, mucho antes de que puedas adelantarte para lanzar Pillar of Flame o Conflagration. Para aplicar Blaze o preparar un stun con Sear, te ves obligado a caminar directamente hacia su trayectoria, recibiendo poke inevitable solo para cerrar la distancia.
Impacto en la línea
Te encontrarás constantemente acorralado bajo la torre, con dificultades para igualar su waveclear. Como Bouncing Bomb mantiene tu vida baja, no puedes disputar su empuje sin arriesgarte a morir. Esto permite a Ziggs ir quitándote tower plates con Short Fuse y ejecutar rápidamente tu torre con Satchel Charge, mientras su Hexplosive Minefield te niega los intentos de hacer roam.
Cómo jugar
Para sobrevivir, nunca te quedes justo dentro de tu wave de minions. Esto obliga a Ziggs a elegir entre usar Bouncing Bomb para limpiar minions o para hacerte poke. Si se adelanta por error para acertar Short Fuse, castígalo de inmediato con Pillar of Flame seguido de Sear. Si te quedas con poca vida, no defiendas los plates con codicia; cede la prioridad de la torre antes que morir por Mega Inferno Bomb mientras intentas limpiar.
PosicionamientoEsquivaEste matchup lo dictan el alcance puro y la velocidad de burst. Syndra te supera en rango porque su Scatter the Weak puede lanzar una Dark Sphere desde muy fuera de tu perímetro de lanzamiento. Como tu Conflagration y tu Pillar of Flame requieren que te adelantes, ella puede interceptar fácilmente tu aproximación, aturdirte al instante y seguir con Force of Will y Unleashed Power antes de que siquiera puedas aplicar tu pasiva Blaze.Build de Syndra →Ver detalles
Syndra
Por qué
Este matchup lo dictan el alcance puro y la velocidad de burst. Syndra te supera en rango porque su Scatter the Weak puede lanzar una Dark Sphere desde muy fuera de tu perímetro de lanzamiento. Como tu Conflagration y tu Pillar of Flame requieren que te adelantes, ella puede interceptar fácilmente tu aproximación, aturdirte al instante y seguir con Force of Will y Unleashed Power antes de que siquiera puedas aplicar tu pasiva Blaze.
Impacto en la línea
No puedes adelantarte con seguridad para disputar la wave. Cada vez que intentas limpiar minions con Pillar of Flame, te arriesgas a entrar en la línea de colocación de sus esferas. Esto te obliga a ceder la prioridad temprana, dejando que acumule su pasiva Transcendent sin esfuerzo. Si te quita vida con una esfera proyectada, te ves forzado a un recall prematuro, dándole oportunidades gratis de roam mientras tú te esfuerzas.
Cómo jugar
Para sobrevivir, debes anclarte detrás de tus propios minions de caster y centrarte en farmear con el borde exterior de Pillar of Flame. Nunca camines en línea recta cuando su Dark Sphere ya esté en el suelo. Si malgasta Scatter the Weak y falla, tienes una breve ventana para adelantarte, usar Conflagration para extender Blaze y amenazar con un stun de Sear. Si guarda su stun, iguala su paciencia y farmea con seguridad.
PosicionamientoSupervivenciaEste matchup lo dicta la ventaja de movilidad de Ekko frente a tus lentos tiempos de lanzamiento. Cada vez que intentas hostigarlo o limpiar waves con Pillar of Flame, él puede reaccionar fácilmente con Phase Dive para hacer blink fuera de la zona de explosión. Este dash cierra la distancia de inmediato, permitiéndole activar rápidamente Z-Drive Resonance con un auto-ataque y Timewinder, quitándote vida mientras te deja sin poder responder.Build de Ekko →Ver detalles
Ekko
Por qué
Este matchup lo dicta la ventaja de movilidad de Ekko frente a tus lentos tiempos de lanzamiento. Cada vez que intentas hostigarlo o limpiar waves con Pillar of Flame, él puede reaccionar fácilmente con Phase Dive para hacer blink fuera de la zona de explosión. Este dash cierra la distancia de inmediato, permitiéndole activar rápidamente Z-Drive Resonance con un auto-ataque y Timewinder, quitándote vida mientras te deja sin poder responder.
Impacto en la línea
Por esta amenaza constante, no puedes pasar con seguridad del punto medio de la lane. Si usas Pillar of Flame con agresividad y fallas, Ekko dicta de inmediato el estado de la wave, haciendo freeze o forzándote a retroceder con un trade fuerte. Te ves obligado a jugar a la defensiva, sacrificando prioridad temprana y dejándolo hacer roam, ya que empujar demasiado te expone a un dive letal bajo la torre usando Parallel Convergence.
Cómo jugar
Para sobrevivir, debes jugar un paciente juego de espera. Nunca abras un trade con Pillar of Flame; en su lugar, guárdalo y usa Conflagration para extender Blaze y farmear con más seguridad desde la distancia. Si Ekko usa Phase Dive hacia delante con agresividad, esa es tu señal. Lanza tu Sear para interceptar su trayectoria de aterrizaje, aturdirlo y solo entonces soltar tu combo completo, incluido Pyroclasm si le falta Chronobreak para deshacer el burst.
SupervivenciaPosicionamientoLa amenaza de Diana reside por completo en acertar Crescent Strike para aplicar la marca de su pasiva. Una vez que estás marcado, puede ejecutar un doble Lunar Rush para cerrar la distancia al instante, arrastrándote al fuerte burst de Moonfall. Como mago inmóvil, Brand no puede escapar de este engage por sí solo. Tu supervivencia depende de reaccionar al instante con Sear para aturdirla en pleno dive, lo cual requiere que ella ya esté ardiendo por otro hechizo.Build de Diana →Ver detalles
Diana
Por qué
La amenaza de Diana reside por completo en acertar Crescent Strike para aplicar la marca de su pasiva. Una vez que estás marcado, puede ejecutar un doble Lunar Rush para cerrar la distancia al instante, arrastrándote al fuerte burst de Moonfall. Como mago inmóvil, Brand no puede escapar de este engage por sí solo. Tu supervivencia depende de reaccionar al instante con Sear para aturdirla en pleno dive, lo cual requiere que ella ya esté ardiendo por otro hechizo.
Impacto en la línea
Este matchup te obliga a una postura muy defensiva en la que empujar las waves es peligroso. Intentar hacerle poke con Pillar of Flame suele ponerte dentro de su rango de dash, haciendo que cada trade sea un riesgo enorme. Si consigue quitarte vida, hará freeze de la wave o se lanzará sobre ti, apartándote del farmeo e impidiéndote ayudar en las escaramuzas del río mientras ella hace roam libremente.
Cómo jugar
Colócate en el lado opuesto de la trayectoria curva de Crescent Strike para que te sea más fácil esquivarlo. Debes guardar Sear religiosamente; nunca lo lances para hacer poke. Cuando se comprometa con Lunar Rush, usa de inmediato Conflagration seguido de Sear para un stun instantáneo a quemarropa. Si activa Pale Cascade para absorber tu daño de represalia, guarda Pyroclasm un breve instante hasta que su escudo se disipe antes de soltar toda tu secuencia explosiva.
Estos enfrentamientos son sobre todo duelos de ejecución: ambos campeones tienen formas reales de tomar la ventaja. Esquivar una habilidad clave, anticipar bien un engagement o un simple error de posicionamiento puede inclinar el duelo hacia un lado. Conocer el matchup y reconocer las ventanas de acción correctas es especialmente importante aquí.
EsquivaPosicionamientoEste matchup se define por cómo aprovechas el autobloqueo de Aurelion Sol. Para canalizar Breath of Light, debe quedarse completamente quieto, lo que anula por completo su capacidad de esquivar. Esta ventana estacionaria lo convierte en un blanco facilísimo para tu proyectil de Sear. Al prepararlo primero con Conflagration o con un rápido Pillar of Flame, puedes activar al instante tu stun de Blaze, interrumpiendo su principal fuente de daño y ganando el trade de burst.Build de Aurelion Sol →Ver detalles
Aurelion Sol
Por qué
Este matchup se define por cómo aprovechas el autobloqueo de Aurelion Sol. Para canalizar Breath of Light, debe quedarse completamente quieto, lo que anula por completo su capacidad de esquivar. Esta ventana estacionaria lo convierte en un blanco facilísimo para tu proyectil de Sear. Al prepararlo primero con Conflagration o con un rápido Pillar of Flame, puedes activar al instante tu stun de Blaze, interrumpiendo su principal fuente de daño y ganando el trade de burst.
Impacto en la línea
Durante la fase de lane, Aurelion Sol intentará constantemente soltar Singularity para recoger stacks de Cosmic Creator de los minions. Si se adelanta para ejecutarlos con Breath of Light, tu amenaza de un stun repentino de Sear lo obliga a cancelar su canalización o a recibir un daño enorme. Esto le impide empujarte bajo la torre con facilidad, manteniendo la lane neutral y forzando a ambos a hacerse trade de vida con intensidad siempre que haya cooldowns disponibles.
Cómo jugar
Nunca lances tu Sear a ciegas mientras él se está moviendo. En su lugar, espera con paciencia al momento exacto en que active Breath of Light para quedarse fijo en el sitio, o cuando vuele en una línea recta predecible con Astral Flight. Márcalo al instante con Conflagration para aplicar Blaze y luego lanza tu stun. Si fallas este combo, retrocede de inmediato tras tus minions para evitar el tirón de su Singularity, esperando a que se recuperen tus cooldowns antes de adelantarte de nuevo.
PosicionamientoSustentoEste matchup es un choque directo entre la curación constante de Vladimir con Transfusion y el daño persistente de tu Blaze. Aunque Crimson Pact aumenta de forma natural la reserva de vida de Vladimir a medida que gana poder, esa vida extra en realidad juega en su contra al amplificar el daño de tu pasiva Blaze. Sin embargo, su capacidad de escabullirse con Sanguine Pool puede anular por completo los rebotes de tu Pyroclasm o hacer que tu crucial stun de Sear falle, reiniciando el impulso de la pelea.Build de Vladimir →Ver detalles
Vladimir
Por qué
Este matchup es un choque directo entre la curación constante de Vladimir con Transfusion y el daño persistente de tu Blaze. Aunque Crimson Pact aumenta de forma natural la reserva de vida de Vladimir a medida que gana poder, esa vida extra en realidad juega en su contra al amplificar el daño de tu pasiva Blaze. Sin embargo, su capacidad de escabullirse con Sanguine Pool puede anular por completo los rebotes de tu Pyroclasm o hacer que tu crucial stun de Sear falle, reiniciando el impulso de la pelea.
Impacto en la línea
La lane la dicta la barra de recurso carmesí de Vladimir; cuando se llena para una Transfusion potenciada, debes retroceder para evitar que borre el daño de tu trade. Como usa Tides of Blood a costa de su propia vida para limpiar waves, puedes acorralarlo fácilmente bajo su torre. Sin embargo, forzar un all-in antes de que gaste Sanguine Pool es una trampa, ya que absorberá tu burst con seguridad mientras su Hemoplague va haciendo tick para curarlo.
Cómo jugar
Para ganar esta batalla de ejecución, nunca lances Pyroclasm ni te comprometas con Sear mientras Vladimir tenga Sanguine Pool disponible. En su lugar, hazle poke desde la distancia usando Conflagration extendido a los minions, forzándolo a desplegar su pool de forma defensiva antes de tiempo. Una vez que se licúe, cuenta los segundos de su cooldown y luego pasa a la ofensiva de inmediato con Pillar of Flame y tu combo completo. Si te bloquea con Hemoplague, camina hacia atrás para evitar que acierte un Tides of Blood totalmente cargado mientras esperas a que tu quemadura haga tick.
PosicionamientoControl de masasEste matchup es un duelo de tiempos de reacción donde se juega mucho. Katarina depende de Voracity y Shunpo para bailar alrededor de tus skillshots, pero debe quedarse quieta para canalizar Death Lotus. Esa canalización es tu oportunidad de oro. Toda la dinámica gira en torno a si tienes Sear listo para aturdirla en el momento en que empieza a girar, o si ella te lo hace gastar con una finta para asesinarte con seguridad.Build de Katarina →Ver detalles
Katarina
Por qué
Este matchup es un duelo de tiempos de reacción donde se juega mucho. Katarina depende de Voracity y Shunpo para bailar alrededor de tus skillshots, pero debe quedarse quieta para canalizar Death Lotus. Esa canalización es tu oportunidad de oro. Toda la dinámica gira en torno a si tienes Sear listo para aturdirla en el momento en que empieza a girar, o si ella te lo hace gastar con una finta para asesinarte con seguridad.
Impacto en la línea
Por esta amenaza, la presión de la lane oscila de forma salvaje. Si malgastas Sear intentando hacer poke, Katarina hará engage de inmediato con Bouncing Blade y Shunpo para quitarte vida. Sin embargo, si mantienes su wave empujada usando Pillar of Flame y Conflagration, se ve obligada a usar sus dagas para farmear bajo la torre. Esto le impide hacer roam para asegurar kills y hacer snowball en el mapa.
Cómo jugar
Nunca lances Sear de forma proactiva a menos que Katarina ya haya saltado y tengas un stack de Blaze garantizado aplicado con Conflagration. Durante las escaramuzas, colócate cerca de tus propios minions para seguir las dagas de Bouncing Blade que suelta. Si hace engage con Preparation, retrocede y espera a que desaparezcan sus dagas. En el momento en que canalice Death Lotus, acierta de inmediato tu combo de Conflagration y Sear para cancelar su definitiva al instante. Si fallas, retrocede de inmediato hacia tu torre.
Estos campeones suelen tener problemas para responder a tus principales fortalezas, lo que te permite afrontar el enfrentamiento con más libertad. Normalmente tienes varias formas de presionarlos y forzar intercambios a tu favor. Aprovecha esta ventaja para imponer tu ritmo en lugar de darles tiempo para volver a una posición cómoda.
PokePosicionamientoRyze debe acercarse bastante a la wave de minions para marcarla con Spell Flux antes de extender su daño. Como su rango es limitado, este movimiento predecible te da una enorme ventana para soltar Pillar of Flame directamente sobre él. Como Ryze carece de hechizos de movilidad para esquivar, tiene que elegir entre recibir mucho daño o renunciar a su waveclear, lo que permite que tu pasiva Blaze le vaya quitando vida con facilidad.Build de Ryze →Ver detalles
Ryze
Por qué
Ryze debe acercarse bastante a la wave de minions para marcarla con Spell Flux antes de extender su daño. Como su rango es limitado, este movimiento predecible te da una enorme ventana para soltar Pillar of Flame directamente sobre él. Como Ryze carece de hechizos de movilidad para esquivar, tiene que elegir entre recibir mucho daño o renunciar a su waveclear, lo que permite que tu pasiva Blaze le vaya quitando vida con facilidad.
Impacto en la línea
Esta dinámica te da un control total sobre el estado de la wave. Ryze no puede igualar tu waveclear con seguridad sin recibir poke constante, lo que lo obliga a farmear bajo la torre, donde los reinicios de su Overload son más difíciles de usar para hacer trades. Al mantenerlo presionado y con poca vida, retrasas su escalado con Arcane Mastery y evitas que use Realm Warp para influir en otras lanes, manteniéndolo atrapado en mid.
Cómo jugar
Colócate justo fuera del alcance de su Rune Prison y vigila tus propios minions con poca vida. En el momento en que Ryze se adelante para lanzar Spell Flux, coloca de inmediato Pillar of Flame donde esté parado. Si se pone agresivo e intenta cerrar la distancia, acértale con Sear para activar el stun sobre tus stacks de Blaze ya existentes, y luego sigue con Conflagration y Pyroclasm si intenta contraatacar dentro de su propia wave de minions.
PokeDaño explosivoEste matchup te favorece mucho porque Veigar debe detener constantemente su movimiento para lanzar Baleful Strike y conseguir sus stacks de Phenomenal Evil Power. Este breve auto-root es la ventana perfecta para colocar Pillar of Flame justo bajo sus pies. Como su waveclear temprano es lento y predecible, puedes obligarlo fácilmente a elegir entre perder oro o recibir un daño mágico enorme de tu pasiva, Blaze.Build de Veigar →Ver detalles
Veigar
Por qué
Este matchup te favorece mucho porque Veigar debe detener constantemente su movimiento para lanzar Baleful Strike y conseguir sus stacks de Phenomenal Evil Power. Este breve auto-root es la ventana perfecta para colocar Pillar of Flame justo bajo sus pies. Como su waveclear temprano es lento y predecible, puedes obligarlo fácilmente a elegir entre perder oro o recibir un daño mágico enorme de tu pasiva, Blaze.
Impacto en la línea
Tu capacidad de castigar su last-hit te da un control absoluto sobre las waves de minions. Al empujarlo constantemente bajo la torre con Conflagration y Pillar of Flame, lo obligas a gastar maná farmeando en lugar de acumular stacks. Estará demasiado bajo de vida como para adelantarse y atraparte con Event Horizon, lo que lo deja inútil para su jungler y te da prioridad de roam gratis.
Cómo jugar
Vigila de cerca tus propios minions con poca vida. En el mismo instante en que Veigar se adelante y se oriente hacia un minion para lanzar Baleful Strike, suelta de inmediato Pillar of Flame sobre él. Si intenta tomar represalias atrapándote dentro de Event Horizon, no entres en pánico ni corras contra la pared de stun. Mantente firme dentro de la jaula, esquiva su Dark Matter retardado y prepárate para lanzar Sear y aturdirlo en el momento en que intente cerrar la distancia para un Primordial Burst.
SustentoKiteoSwain confía en su Demonic Ascension para ganar muchísima vida y drenar a tu equipo, pero esta transformación lo convierte en el objetivo perfecto para tu kit. Su mayor tamaño y su necesidad de mantenerse cerca hacen que no pueda esquivar tus habilidades, lo que permite que tu pasiva Blaze destroce su enorme reserva de vida. Además, cuando se acerca, tu Pyroclasm rebotará sin parar entre él y sus minions, convirtiendo su definitiva en su propia trampa.Build de Swain →Ver detalles
Swain
Por qué
Swain confía en su Demonic Ascension para ganar muchísima vida y drenar a tu equipo, pero esta transformación lo convierte en el objetivo perfecto para tu kit. Su mayor tamaño y su necesidad de mantenerse cerca hacen que no pueda esquivar tus habilidades, lo que permite que tu pasiva Blaze destroce su enorme reserva de vida. Además, cuando se acerca, tu Pyroclasm rebotará sin parar entre él y sus minions, convirtiendo su definitiva en su propia trampa.
Impacto en la línea
Durante la fase de lane tienes control total del estado de la wave. Con Pillar of Flame y Conflagration puedes empujar a Swain constantemente bajo su torre, obligándolo a gastar Death's Hand en farmear en lugar de hacer trades. Como Swain tiene que adelantarse para acertar Nevermove y activar su pasiva Ravenous Flock, puedes predecir fácilmente su movimiento para castigarlo, creando enormes diferencias de vida que retrasan su primer recall.
Cómo jugar
Mantén siempre el alcance máximo de lanzamiento para neutralizar su Nevermove. Nunca te coloques en la trayectoria de la garra cuando regresa. Cuando Swain active inevitablemente Demonic Ascension e intente perseguirte, no entres en pánico: guarda Sear hasta haber aplicado Blaze con Conflagration o Pillar of Flame para garantizar un stun instantáneo. Si fallas el stun, usa Pyroclasm de inmediato para obligarlo a retirarse o a morir por el daño de los rebotes mientras tú te alejas haciendo kite hacia atrás.
PosicionamientoInmunidad a CCLa amenaza de Lissandra depende por completo de cerrar la distancia para activar Ring of Frost. Sin embargo, su aproximación predecible, ya sea caminando o con Glacial Path, juega directamente a tu favor. Como debe entrar en tu rango efectivo para hacer un daño significativo, se expone a que prepares Blaze con facilidad. Puedes marcarla con Conflagration y detenerla en pleno avance con un stun de Sear garantizado, neutralizando por completo su agresividad.Build de Lissandra →Ver detalles
Lissandra
Por qué
La amenaza de Lissandra depende por completo de cerrar la distancia para activar Ring of Frost. Sin embargo, su aproximación predecible, ya sea caminando o con Glacial Path, juega directamente a tu favor. Como debe entrar en tu rango efectivo para hacer un daño significativo, se expone a que prepares Blaze con facilidad. Puedes marcarla con Conflagration y detenerla en pleno avance con un stun de Sear garantizado, neutralizando por completo su agresividad.
Impacto en la línea
Esta dinámica obliga a Lissandra a jugar a la defensiva, usando Ice Shard para asegurar minions desde la distancia, lo que empuja la wave de forma natural hacia tu lado. Tú marcas el ritmo de la lane. Cada vez que su Glacial Path está en cooldown, pierde toda seguridad, lo que te permite alejarla agresivamente o atraparla bajo su torre con Pillar of Flame, consiguiendo una gran ventaja de CS sin arriesgar tu vida.
Cómo jugar
Guarda siempre tu Sear hasta que Lissandra se comprometa. Cuando proyecte Glacial Path, colócate un poco por detrás del punto final de su trayectoria. En el momento en que se teletransporte, usa de inmediato Conflagration seguido de Sear para aturdirla antes de que pueda reaccionar con Ring of Frost. Si se salva con Frozen Tomb, no entres en pánico: lanza antes Pillar of Flame y suelta Pyroclasm justo cuando termine su estasis para eliminarla al instante con burst.
PokeDaño explosivoLas animaciones de lanzamiento estáticas de Mel la hacen extremadamente vulnerable a tu secuencia principal de burst. Cada vez que se detiene a canalizar sus hechizos, su falta de movilidad la convierte en un blanco fácil. Esto te permite colocar con facilidad un Pillar of Flame de daño máximo, iniciando una rápida cadena que activa Blaze. Como los dos dependen de rotaciones de mucho daño, esta ventana de inmovilidad te da una ventaja decisiva en el potencial de trade.Build de Mel →Ver detalles
Mel
Por qué
Las animaciones de lanzamiento estáticas de Mel la hacen extremadamente vulnerable a tu secuencia principal de burst. Cada vez que se detiene a canalizar sus hechizos, su falta de movilidad la convierte en un blanco fácil. Esto te permite colocar con facilidad un Pillar of Flame de daño máximo, iniciando una rápida cadena que activa Blaze. Como los dos dependen de rotaciones de mucho daño, esta ventana de inmovilidad te da una ventaja decisiva en el potencial de trade.
Impacto en la línea
Esta vulnerabilidad obliga a Mel a jugar a la defensiva y te da control total sobre las waves de minions. Puedes hacer crash de las waves fácilmente con Conflagration y Pillar of Flame para asegurar visión profunda o hacer roam. Como Mel no puede esquivar con facilidad tus skillshots durante sus lanzamientos, perderá vida constantemente, lo que la obliga a hacer recalls prematuros o la deja expuesta a un dive letal con Pyroclasm bajo su propia torre.
Cómo jugar
Mantén una posición diagonal justo fuera del rango de amenaza de Mel, siguiendo sus indicadores de lanzamiento. En cuanto empiece su animación de canalización, suelta Pillar of Flame directamente sobre sus pies y remata con Sear para aturdirla mientras está clavada en el sitio. Si fallas este skillshot inicial, retírate de inmediato detrás de tus minions para evitar su contra-burst, guardando Conflagration como elemento disuasorio para que no te persiga.
Limpieza de oleadasPokeToda la presencia de Heimerdinger en la lane depende de refugiarse en su configuración de H-28G Evolution Turret. Sin embargo, esto juega directamente a tu favor. Al aplicar Blaze a sus torretas estáticas, puedes lanzar Conflagration para propagar el fuego sin esfuerzo hasta Heimerdinger cuando está cerca de ellas. Sus propias construcciones se convierten en balizas estáticas que amplían tu alcance, permitiéndote activar explosiones de Blaze y acertar fácilmente Pillar of Flame.Build de Heimerdinger →Ver detalles
Heimerdinger
Por qué
Toda la presencia de Heimerdinger en la lane depende de refugiarse en su configuración de H-28G Evolution Turret. Sin embargo, esto juega directamente a tu favor. Al aplicar Blaze a sus torretas estáticas, puedes lanzar Conflagration para propagar el fuego sin esfuerzo hasta Heimerdinger cuando está cerca de ellas. Sus propias construcciones se convierten en balizas estáticas que amplían tu alcance, permitiéndote activar explosiones de Blaze y acertar fácilmente Pillar of Flame.
Impacto en la línea
Esta interacción le quita a Heimerdinger su ventaja habitual de push. En lugar de atraparte bajo la torre, sus colocaciones de H-28G Evolution Turret te permiten destruir waves enteras de minions al instante mientras vas reduciendo su reserva de vida. Marcarás constantemente el ritmo de la wave y lo obligarás a elegir entre dejar que sus torretas mueran o recibir mucho daño por quemadura, neutralizando de forma efectiva su presión.
Cómo jugar
Colócate a salvo detrás de tus propios minions para evitar su CH-2 Electron Storm Grenade. Cuando coloque una H-28G Evolution Turret cerca de la wave, prepárala con un ataque básico o un hechizo y luego usa Conflagration para hacer rebotar Blaze hacia él. Si se adelanta para defender su nido, remata de inmediato con Sear para aturdirlo y suelta Pillar of Flame. Si intenta colocar una torreta gigante con UPGRADE!!!, simplemente retírate y derrítela desde lejos.
PokeLa lane de Twisted Fate depende de fijar sus cartas de colores con Pick a Card. Sin embargo, esto anuncia su movimiento y lo bloquea brevemente en una trayectoria predecible. Como carece de movilidad, Brand puede aprovechar fácilmente esta ventana. En cuanto da un paso adelante para elegir su carta, puedes soltar Pillar of Flame justo debajo de él, preparando Conflagration y un stun fácil de Sear para desatar todo el daño de quemadura de Blaze.Build de Twisted Fate →Ver detalles
Twisted Fate
Por qué
La lane de Twisted Fate depende de fijar sus cartas de colores con Pick a Card. Sin embargo, esto anuncia su movimiento y lo bloquea brevemente en una trayectoria predecible. Como carece de movilidad, Brand puede aprovechar fácilmente esta ventana. En cuanto da un paso adelante para elegir su carta, puedes soltar Pillar of Flame justo debajo de él, preparando Conflagration y un stun fácil de Sear para desatar todo el daño de quemadura de Blaze.
Impacto en la línea
Al mantener presión constante sobre la wave, impides que Twisted Fate use Wild Cards para limpiar con seguridad. Obligarlo a elegir entre igualar tu push o usar Pick a Card para farmear bajo la torre lo mantiene atrapado. Si intenta pasar por delante de sus minions de caster para hacer trade, tu amenaza de burst lo obliga a retroceder. Esto neutraliza por completo su presión en el mapa y lo deja con muy poca vida para canalizar Destiny con seguridad.
Cómo jugar
No lances tus habilidades al azar. Espera a que comience el ciclo de cartas sobre su cabeza de Pick a Card. Si fija una carta dorada, debe caminar directamente hacia ti para lanzarla; aprovecha esta trayectoria lineal para acertar Conflagration seguido de un Sear inmediato que lo aturda antes de que llegue su carta dorada. Si lo ves canalizar Destiny cerca, suelta de inmediato Pyroclasm y Pillar of Flame para castigar su canalización estática y convertir su intento de roam en una pantalla gris.
Ventaja: veredicto canónico de Wild Rift Core (−3 a +3), desde el punto de vista del campeón nombrado en la fila. Tasa de victorias y de selección: las del propio rival en este rol — Wild Rift CN · Challenger, Patch 7.3b. No es la tasa de victorias del enfrentamiento directo.
Ventaja: veredicto canónico de Wild Rift Core (−3 a +3), desde el punto de vista del campeón nombrado en la fila. Tasa de victorias y de selección: las del propio rival en este rol — Wild Rift CN · Challenger, Patch 7.3b. No es la tasa de victorias del enfrentamiento directo.
Cómo contrarrestar a este campeón
Ángulo de contra
Brand depende en gran medida del posicionamiento y del tempo de la pelea. Los counters eficaces no solo consisten en daño, sino en desbaratar su setup antes de que pueda actuar. Esto incluye campeones que pueden acortar distancias rápidamente, evitar sus zonas o forzar peleas cortas. Comprender estos perfiles es clave para anticipar sus límites.
Contexto del parche
Los campeones que hacen counter a Brand explotan su falta de movilidad y su necesidad de tiempo para infligir daño. Los asesinos y campeones móviles reducen su ventana de impacto al hacer engage rápidamente. Además, las composiciones dispersas evitan que sus efectos se propaguen, reduciendo drásticamente su efectividad.
Lectura rápida
Débil contra asesinos rápidos.
Depende de peleas agrupadas.
Castigable antes del setup.
Arquetipos de contra
Asesinos móviles
Estos campeones pueden acortar distancias rápidamente y aplicar burst a Brand antes de que lance sus hechizos. Su movilidad también les permite esquivar habilidades clave, evitando la aplicación de Blaze y reduciendo enormemente su DPS. Brand se vuelve incapaz de cumplir su rol en las peleas.
Cómo se adapta el campeón. Juega muy atrás, anticipa los engages y guarda el stun para defenderte en lugar de para iniciar.
Composiciones dispersas
Cuando los enemigos se mantienen separados, Brand pierde gran parte de su valor. Su ultimate rebota menos y su AoE golpea a menos objetivos. Esto reduce drásticamente su impacto general y convierte su kit en un simple poke sin amenaza real.
Cómo se adapta el campeón. Busca ángulos de poke aislados y espera a que cometan errores de agrupación.
Engage rápido
Los campeones con engage instantáneo obligan a Brand a reaccionar bajo presión. No tiene tiempo para aplicar acumulaciones ni para posicionarse correctamente. Esto reduce su contribución a casi cero si el engage se ejecuta bien.
Zed es uno de los peores matchups para Brand, ya que combina burst y movilidad. Puede esperar a que Brand use sus hechizos antes de hacer un all-in seguro. El matchup gira en torno a la gestión de cooldowns y a la capacidad de Brand para mantenerse fuera de rango mientras mantiene su stun listo.
Fizz anula gran parte del kit de Brand con su invulnerabilidad. Puede esquivar hechizos clave y hacer engage libremente. Brand debe jugar de forma extremadamente segura y evitar trades largos.
Errores comunes en su contra
Errores comunes en su contra
Subestimar la velocidad de engage del enemigo.
Usar hechizos sin visión.
Posicionarse demasiado cerca de la línea frontal.
Realizar trades largos contra asesinos.
Ignorar los tiempos de cooldown del enemigo.
Notas del coach
Contra Brand, la clave es reducir su tiempo de impacto.
Nunca le dejes prepararse por completo.
FAQ
¿Por qué sufre Brand contra Zed?
Zed puede esperar a los hechizos de Brand antes de hacer engage, anulando por completo su preparación. Una vez que hace engage, Brand no tiene movilidad ni defensa para sobrevivir. El matchup gira en torno a la disciplina y la gestión de cooldowns.
¿Cómo jugar contra Fizz?
Fizz puede esquivar los hechizos clave de Brand, haciendo que los trades sean arriesgados. Juega seguro, mantén la distancia y nunca hagas engage sin visión o sin tener los cooldowns listos.
¿Puede Brand vencer a sus counters?
Sí, pero depende del posicionamiento y de los errores del enemigo. Si Brand se mantiene fuera de rango y fuerza peleas agrupadas, puede compensar sus debilidades.
¿Cuál es la mayor amenaza de Brand?
La mayor amenaza es no poder usar su kit. Cualquier cosa que reduzca su tiempo de actividad o su capacidad para golpear a múltiples objetivos limita drásticamente su impacto.