septiembre de 2026 · Patch 7.2d
Marksman · TOP · MID

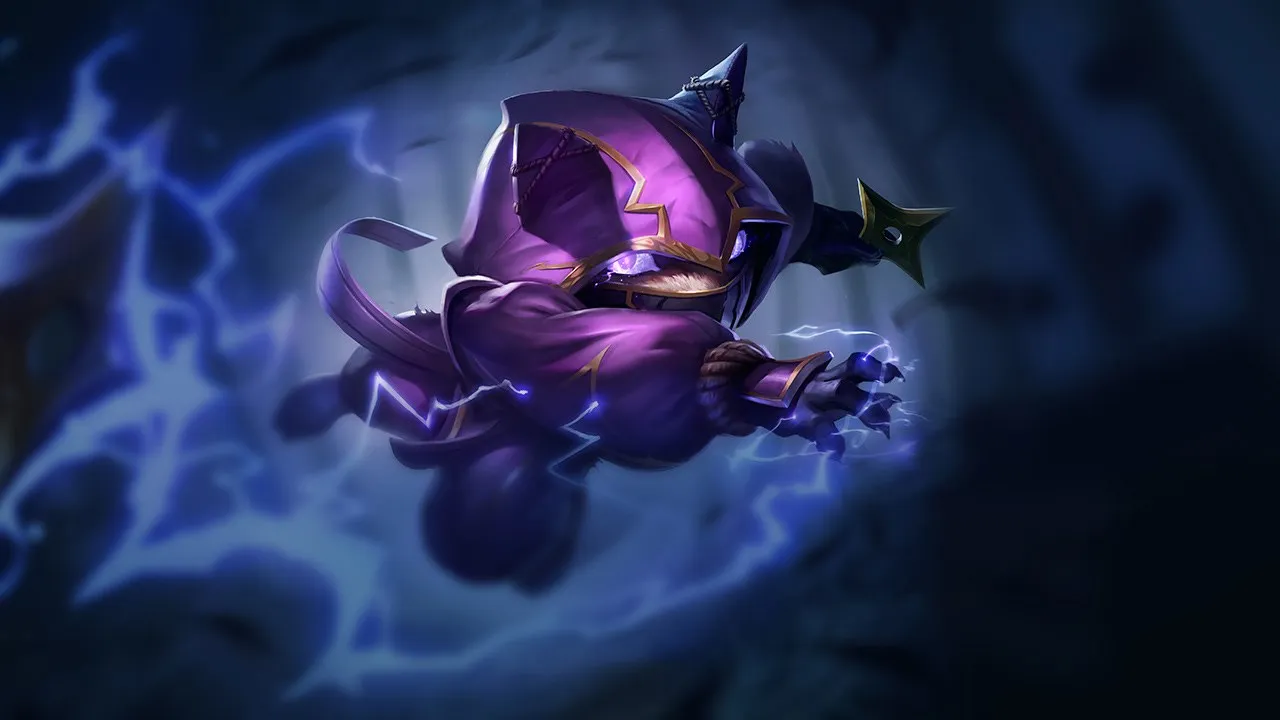
Guía de counters de Kennen Wild Rift

Kennen encuentra su counter en campeones que le hacen engage antes de que coloque sus marcas o que resisten su AoE mediante resistencia mágica. Las composiciones con CC instantáneo lo neutralizan antes de su definitiva. Su rango más corto en comparación con otros magos lo obliga a tomar posiciones arriesgadas.

★ TOP · MID Tier A
DAÑO
UTIL
TANK
DIFF
Win 50.1% #51 · ↑11pt
Pick 1.4% #37
Ban 0.3% #118

Guía de counters de Kennen Wild Rift ★ Counter Sheet

Tabla de emparejamientos
Emparejamiento Veredicto Ventaja Tasa de victorias Tasa de selección
Malphite Contras Difíciles +2 52.1% 5.5%
Olaf Contras Difíciles +2 51.7% 1.1%
Vayne Desfavorables +1 53.4% 2.1%
Yone Desfavorables +1 51.8% 6.9%
Gwen Desfavorables +1 51.3% 3.2%
Dr. Mundo Desfavorables +1 50.6% 5.8%
Irelia Desfavorables +1 50.6% 1.9%
Nasus Desfavorables +1 48.6% 6.0%
Vladimir Desfavorables +1 48.2% 1.1%
Yasuo Desfavorables +1 46.4% 2.9%
Pantheon Desfavorables +1
Ryze Desfavorables +1
Smolder Matchups de Habilidad ±0 52.1% 1.6%
Wukong Matchups de Habilidad ±0 51.5% 2.2%
Gnar Matchups de Habilidad ±0 51.1% 3.5%
Kayle Matchups de Habilidad ±0 51.0% 1.8%
Cho'Gath Matchups de Habilidad ±0 50.8% 12.5%
Poppy Matchups de Habilidad ±0 50.5% 2.3%
Teemo Matchups de Habilidad ±0 50.4% 3.1%
Rumble Matchups de Habilidad ±0 49.1% 2.2%
Ambessa Matchups de Habilidad ±0 49.0% 1.9%
Jayce Matchups de Habilidad ±0 48.0% 2.6%
Fiora Matchups de Habilidad ±0 47.7% 4.9%
Riven Matchups de Habilidad ±0 46.7% 1.2%
Gragas Matchups de Habilidad ±0
Heimerdinger Matchups de Habilidad ±0
Jarvan IV Matchups de Habilidad ±0
Maokai Matchups de Habilidad ±0
Swain Matchups de Habilidad ±0
Shen Favorables −1 53.3% 1.6%
Mordekaiser Favorables −1 51.2% 12.3%
Volibear Favorables −1 51.0% 6.7%
Ornn Favorables −1 51.0% 1.9%
Camille Favorables −1 49.8% 3.4%
Garen Favorables −1 49.7% 14.9%
Tryndamere Favorables −1 49.6% 2.1%
Sett Favorables −1 49.6% 11.2%
Aatrox Favorables −1 49.4% 6.1%
Urgot Favorables −1 49.3% 3.8%
K'Santé Favorables −1 48.8% 5.9%
Renekton Favorables −1 48.5% 4.1%
Skarner Favorables −1 47.8% 1.4%
Akali Favorables −1
Graves Favorables −1
Warwick Favorables −1
Jax Favorables −2 51.7% 3.8%
Singed Favorables −2 51.3% 1.5%
Darius Favorables −2 50.0% 15.8%
Sion Favorables −2 50.0% 4.1%

Edge: Wild Rift Core canonical verdict (−3 to +3), shown from the point of view of the champion named in the row. Win rate and pick rate: the opponent's own rate in this role — Wild Rift CN · Challenger, Patch 7.2d. Not a head-to-head win rate.

Contras Difíciles

2

Estos campeones tienen una build y un estilo de juego que superan directamente al tuyo, lo que puede hacer que controlar la línea y farmear sea extremadamente difícil. Sus habilidades pueden neutralizar tus principales fortalezas o castigarte en cuanto intentas jugar tu plan habitual. En estos matchups, el objetivo suele ser minimizar errores y buscar soluciones fuera del enfrentamiento directo.

Olaf

Olaf+2

hard countercc immunity This matchup is dictated by Olaf's ultimate ability. Normally, Kennen relies on stacking three marks via Mark of the Storm to stun and peel aggressive melee champions. However, once Olaf activates Ragnarok, he becomes completely immune to these stuns. This nullifies Kennen's entire defensive kit, leaving him vulnerable to being run down by Olaf's slowing Undertow axes and raw true damage from Reckless Swing. Ver detalles
Olaf

Por qué

This matchup is dictated by Olaf's ultimate ability. Normally, Kennen relies on stacking three marks via Mark of the Storm to stun and peel aggressive melee champions. However, once Olaf activates Ragnarok, he becomes completely immune to these stuns. This nullifies Kennen's entire defensive kit, leaving him vulnerable to being run down by Olaf's slowing Undertow axes and raw true damage from Reckless Swing.

Impacto en la línea

Early on, you can poke with Thundering Shuriken, but once Olaf unlocks Ragnarok, the lane dynamic flips dangerously. You can no longer step past the midpoint of the lane. If Olaf hits a single Undertow axe while you are extended, he will pop his ultimate, ignore your passive stuns, and chase you to your tower. This forces you to concede wave priority and farm passively under turret.

Cómo jugar

To survive, you must absolutely hug your turret and never use Lightning Rush offensively. Save this mobility tool solely to escape when Olaf launches Undertow. If he activates Ragnarok and charges, immediately use Lightning Rush to retreat deep under your tower's protection where he cannot easily dive you. If you get caught in the open, do not waste Slicing Maelstrom trying to stun him; instead, accept the loss, flash away early, and focus on farming safely with Thundering Shuriken.

Ficha completa →
Malphite

Malphite+2

hard counterburst engage Malphite's Seismic Shard deals heavy magic damage that out-pokes Kennen's Thundering Shuriken while stealing his movement speed, making it impossible to trade back effectively. When Kennen tries to engage or escape using Lightning Rush, Malphite can reactively interrupt the momentum with Unstoppable Force. Furthermore, Unstoppable Force completely shuts down any offensive Slicing Maelstrom setups, knocking Kennen up and leaving him vulnerable before he can apply his stun. Ver detalles
Malphite

Por qué

Malphite's Seismic Shard deals heavy magic damage that out-pokes Kennen's Thundering Shuriken while stealing his movement speed, making it impossible to trade back effectively. When Kennen tries to engage or escape using Lightning Rush, Malphite can reactively interrupt the momentum with Unstoppable Force. Furthermore, Unstoppable Force completely shuts down any offensive Slicing Maelstrom setups, knocking Kennen up and leaving him vulnerable before he can apply his stun.

Impacto en la línea

You are forced to play defensively, sacrificing early wave control as Seismic Shard repeatedly chips away your health pool under your own tower. Since Malphite gains speed while slowing you, he dictates every trade, forcing early recalls and depriving you of gold. Once he unlocks Unstoppable Force, you cannot safely push past the river, and your inability to pressure him allows him to freely roam, punishing your allies.

Cómo jugar

Shift your build away from pure offensive power toward magic resistance and sustain to survive the Seismic Shard spam. Max Thundering Shuriken first to farm from maximum range and avoid trading auto-attacks. Never activate Lightning Rush aggressively if Malphite has Unstoppable Force ready; keep it strictly to escape after his knock-up. In teamfights, delay your Slicing Maelstrom until after he commits his ultimate on someone else, ensuring your ultimate isn't canceled mid-air.

Ficha completa →

Desfavorables

10

Estos campeones tienen herramientas que generalmente les dan ventaja en el enfrentamiento, sin llegar a hacer el matchup injugable. Pueden tener más alcance, mejor capacidad para aguantar tu ofensiva o más formas de responder a tus engagements. Tendrás que adaptar tu enfoque y elegir con cuidado los momentos en los que aceptas el combate.

Yone

Yone+1

gap closeburst threat Yone naturally bypasses Kennen's ranged superiority by pairing the dash of Soul Unbound with his stacked Mortal Steel tornado. This double gap-closer covers too much ground for Kennen to safely poke with Thundering Shuriken or basic attacks. To avoid being knocked up and taking a heavy trade, Kennen is forced to burn Lightning Rush defensively, losing his only escape tool and initiative. Ver detalles
Yone

Por qué

Yone naturally bypasses Kennen's ranged superiority by pairing the dash of Soul Unbound with his stacked Mortal Steel tornado. This double gap-closer covers too much ground for Kennen to safely poke with Thundering Shuriken or basic attacks. To avoid being knocked up and taking a heavy trade, Kennen is forced to burn Lightning Rush defensively, losing his only escape tool and initiative.

Impacto en la línea

Because Kennen must constantly respect Yone's loaded Mortal Steel queue, he cannot easily freeze the wave or step up to pressure him under tower. Every time Kennen uses Lightning Rush to escape Soul Unbound, he becomes vulnerable to a dive or deep freeze. This forces Kennen into a passive farm lane, relying heavily on Thundering Shuriken to secure last hits from maximum distance while slowly falling behind in early lane priority.

Cómo jugar

To survive this matchup, you must track Yone's Mortal Steel stacks closely. Never step forward for a passive mark from Electrical Surge when his sword glows with wind. If Yone activates Soul Unbound, immediately activate Lightning Rush to run diagonally, dodging the tornado. If you get caught without your movement speed boost, prepare to retaliate with a quick stun using Thundering Shuriken and Electrical Surge to halt his return attack before he snaps back to his body.

Ficha completa →
Ryze

Ryze+1

point and click ccwaveclear gap This matchup is dictated by how Ryze's Rune Prison completely shuts down your main mobility tool. Whenever you try to initiate or escape using Lightning Rush, Ryze can instantly lock you in place with his point-and-click root without needing to aim. This immediate disruption cancels your momentum and leaves you completely exposed to a devastating follow-up combo of Spell Flux and Overload while you are unable to retreat. Ver detalles
Ryze

Por qué

This matchup is dictated by how Ryze's Rune Prison completely shuts down your main mobility tool. Whenever you try to initiate or escape using Lightning Rush, Ryze can instantly lock you in place with his point-and-click root without needing to aim. This immediate disruption cancels your momentum and leaves you completely exposed to a devastating follow-up combo of Spell Flux and Overload while you are unable to retreat.

Impacto en la línea

Because you cannot safely use Lightning Rush to clear waves or trade, Ryze easily dictates the lane's tempo. He will constantly push you under turret using Spell Flux bounces to spread damage. If you step up to contest the wave, he threatens to freeze and punish you. Any attempt to force a trade results in you taking heavy damage without being able to retreat, slowly bleeding your health bar.

Cómo jugar

To survive, farm from a safe distance using Thundering Shuriken and only walk up to poke when your Electrical Surge passive attack is ready. Never initiate with Lightning Rush; hold this ability exclusively as a defensive tool to escape if he catches you out of position or to dodge his incoming Overload skillshots. Accept giving up some early priority, keep the wave close to your tower, and wait for teamfights where your Slicing Maelstrom will have a far greater impact.

Ficha completa →
Vayne

Vayne+1

ranged tradedisengage knockback This matchup is dictated by how easily Vayne can shut down your offensive pressure. Whenever you try to initiate a trade or go for an all-in using Lightning Rush or Slicing Maelstrom, Vayne can instantly cast Condemn to blow you away. This completely neutralizes your ultimate's stun potential, leaving you stranded and vulnerable to her subsequent Silver Bolts procs while your key cooldowns are wasted. Ver detalles
Vayne

Por qué

This matchup is dictated by how easily Vayne can shut down your offensive pressure. Whenever you try to initiate a trade or go for an all-in using Lightning Rush or Slicing Maelstrom, Vayne can instantly cast Condemn to blow you away. This completely neutralizes your ultimate's stun potential, leaving you stranded and vulnerable to her subsequent Silver Bolts procs while your key cooldowns are wasted.

Impacto en la línea

Because of this constant threat, you cannot freely contest the wave with basic attacks. Vayne will use Tumble to dodge your Thundering Shuriken and punish you with Silver Bolts if you overextend. You are forced to farm under tower, losing priority and allowing her to scale safely. This passivity prevents you from securing early roam opportunities, forcing your team to play map objectives without your typical teamfight presence.

Cómo jugar

To survive, you must play around her cooldowns and prioritize safe farming. Keep your distance and use Thundering Shuriken to secure last hits. Never activate Slicing Maelstrom proactively unless you see her waste Condemn on a wall-stun attempt or another target. If she activates Final Hour, immediately retreat using Lightning Rush to escape her increased movement speed, and wait for her ultimate duration to expire before attempting any counter-attack.

Ficha completa →
Yasuo

Yasuo+1

wind wallgap close This matchup is dictated by Yasuo's ability to completely neutralize your offensive threat with Wind Wall. When you attempt to poke or stack Mark of the Storm, his barrier deletes your Thundering Shuriken mid-air, halting your stun progression. Simultaneously, his Sweeping Blade allows him to dash through your minion wave, instantly closing the distance to bypass your ranged advantage and force melee trades where his physical damage outclasses you. Ver detalles
Yasuo

Por qué

This matchup is dictated by Yasuo's ability to completely neutralize your offensive threat with Wind Wall. When you attempt to poke or stack Mark of the Storm, his barrier deletes your Thundering Shuriken mid-air, halting your stun progression. Simultaneously, his Sweeping Blade allows him to dash through your minion wave, instantly closing the distance to bypass your ranged advantage and force melee trades where his physical damage outclasses you.

Impacto en la línea

Because Sweeping Blade requires minions, a chaotic, pushing wave is highly dangerous for you. Yasuo can easily bounce between your minions to land a knockup with Steel Tempest, followed by Last Breath. This restricts your ability to safely harass him, forcing you to play under your turret. If you lose control of the wave, you will find yourself zoned out of gold, bleeding health, and unable to roam.

Cómo jugar

To survive, maintain the minion wave close to your turret where Yasuo cannot safely utilize Sweeping Blade. Pop his passive shield with a basic attack before committing any energy. Hold your Lightning Rush exclusively as an escape tool for when he dashes forward. Only activate Electrical Surge or Slicing Maelstrom once his Wind Wall is on its long cooldown, ensuring your stuns can actually land to turn the duel in your favor.

Ficha completa →
Nasus

Nasus+1

sustain scalingmovement slow Even though your ranged basic attacks and Thundering Shuriken should bully a melee champion, Nasus easily shrugs off early poke through his passive Soul Eater lifesteal. The lane becomes dangerous because of Wither. This crippling slow completely shuts down your spacing, forcing you to immediately waste Lightning Rush defensively. If you get caught without your escape tool, Nasus can activate Fury of the Sands and run you down with Siphoning Strike. Ver detalles
Nasus

Por qué

Even though your ranged basic attacks and Thundering Shuriken should bully a melee champion, Nasus easily shrugs off early poke through his passive Soul Eater lifesteal. The lane becomes dangerous because of Wither. This crippling slow completely shuts down your spacing, forcing you to immediately waste Lightning Rush defensively. If you get caught without your escape tool, Nasus can activate Fury of the Sands and run you down with Siphoning Strike.

Impacto en la línea

Because of Nasus's endless Soul Eater sustain, your poke fails to force him out of lane. Pushing the wave blindly is disastrous; he will freeze it near his turret to stack Siphoning Strike safely. This positioning forces you to overextend, exposing you to Wither. If you get frozen out, you cannot safely crash the wave, giving Nasus free scaling while neutralizing your early-game map pressure.

Cómo jugar

To survive, you must maintain the minion wave close to your turret. Never use Lightning Rush offensively to apply Mark of the Storm. You must hold this ability strictly to react to Wither. The moment Nasus targets you with his slow, immediately activate Lightning Rush to retreat to safety before he can close the gap. If he commits Fury of the Sands, do not fight back; run away until his transformation ends.

Ficha completa →

Otros emparejamientos

Matchups de Habilidad

17

Estos enfrentamientos son sobre todo duelos de ejecución: ambos campeones tienen formas reales de tomar la ventaja. Esquivar una habilidad clave, anticipar bien un engagement o un simple error de posicionamiento puede inclinar el duelo hacia un lado. Conocer el matchup y reconocer las ventanas de acción correctas es especialmente importante aquí.

Rumble

Rumble±0

ranged pokespacing This matchup is a direct DPS race decided by how you manage the gap. Rumble relies on maintaining close-range flame pressure to melt your health bar, while you must abuse your ranged advantage. Everything revolves around your reaction time: you must activate Lightning Rush to instantly escape his close-range fire, while constantly landing Thundering Shuriken from a safe distance to wear him down before he can overheat you. Ver detalles
Rumble

Por qué

This matchup is a direct DPS race decided by how you manage the gap. Rumble relies on maintaining close-range flame pressure to melt your health bar, while you must abuse your ranged advantage. Everything revolves around your reaction time: you must activate Lightning Rush to instantly escape his close-range fire, while constantly landing Thundering Shuriken from a safe distance to wear him down before he can overheat you.

Impacto en la línea

Every trade dictates wave control and your safety under tower. If you fail to react to his approach and take full flame damage, you will be forced into an early recall, losing valuable gold and letting him pressure your turret. Conversely, successfully kiting his advances keeps his health low enough to prevent him from freely pushing, turning the lane into a tense battle of attrition where one positioning error costs total lane priority.

Cómo jugar

Never waste Lightning Rush to clear minions or initiate trades; keep this defensive tool ready for the exact moment Rumble steps forward with his flames. Maximize your safety by throwing Thundering Shuriken from behind your minions to chip his health. If he manages to close the gap, immediately activate Lightning Rush to retreat, then turn back to trigger Electrical Surge once he backs off. If he overextends under your tower, counter with Slicing Maelstrom to lock him down.

Ficha completa →
Riven

Riven±0

gap closedisengage This matchup is a pure test of reflexes and spacing. Riven relies on her high mobility from Broken Wings and Valor to close the gap and lock you down with Ki Burst. Because you are ranged, you have the initial advantage, but if she catches you without Lightning Rush active, her Runic Blade empowered attacks will shred your health bar. Your survival hinges entirely on using your movement speed to bait and evade her third dash. Ver detalles
Riven

Por qué

This matchup is a pure test of reflexes and spacing. Riven relies on her high mobility from Broken Wings and Valor to close the gap and lock you down with Ki Burst. Because you are ranged, you have the initial advantage, but if she catches you without Lightning Rush active, her Runic Blade empowered attacks will shred your health bar. Your survival hinges entirely on using your movement speed to bait and evade her third dash.

Impacto en la línea

Lane control fluctuates based on who controls the minion wave's position. If Riven pushes using Broken Wings, she becomes vulnerable to Thundering Shuriken poke. However, if she freezes near her tower, you cannot safely step up to trigger Electrical Surge passive marks. A single mistimed trade can force an early recall, costing you plate pressure or leaving you vulnerable to a dive when she activates Blade of the Exile.

Cómo jugar

Never initiate a trade with Lightning Rush; always save this ability specifically to outrun the knock-up of her third Broken Wings or to escape the stun of Ki Burst. Stand just at the maximum range of your basic attacks, poking with Thundering Shuriken. If she wastes her dashes to close the distance, immediately activate Lightning Rush to retreat, then turn back instantly to trigger Electrical Surge and Mark of the Storm stun while her defensive tools are on cooldown.

Ficha completa →
Poppy

Poppy±0

dash blockwall stun This matchup is a tense test of spacing. As a ranged yordle, you easily poke Poppy down, but her anti-dash barrier completely neutralizes your safety net, Lightning Rush. If she activates her protective zone while you try to escape, you get knocked back and grounded. This vulnerability is magnified near the terrain, where her tackle can pin you for a massive wall-stun before you can trigger Mark of the Storm. Ver detalles
Poppy

Por qué

This matchup is a tense test of spacing. As a ranged yordle, you easily poke Poppy down, but her anti-dash barrier completely neutralizes your safety net, Lightning Rush. If she activates her protective zone while you try to escape, you get knocked back and grounded. This vulnerability is magnified near the terrain, where her tackle can pin you for a massive wall-stun before you can trigger Mark of the Storm.

Impacto en la línea

You cannot mindlessly push the wave toward her tower because walking along the upper or lower lane walls is an invitation to get slammed. Trades are decided by baiting. If she blocks your Lightning Rush, you lose all lane pressure and are forced to farm from deep with Thundering Shuriken. Conversely, if you force her barrier out without dashing, you control the lane rhythm completely.

Cómo jugar

Anchor yourself strictly in the dead center of the lane, keeping an equal distance from the alcove and river walls. Never initiate trades with Lightning Rush; instead, poke her constantly using basic attacks enhanced by Electrical Surge and snipe with Thundering Shuriken. If she charges forward, run backward normally to bait her barrier. Only activate your speed dash once her golden aura vanishes, or chain Slicing Maelstrom immediately to stun her if she commits under your tower.

Ficha completa →
Wukong

Wukong±0

decoy blockburst engage This skill-based matchup revolves around the interactions of Wukong's decoy. Warrior Trickster is a direct counter to your combo because his clone can easily intercept your Thundering Shuriken or absorb the Mark of the Storm stacks you need to trigger a stun. Since Wukong relies on this bait to negate your self-peel, the lane remains entirely even, decided by who mismanages their defensive cooldown first. Ver detalles
Wukong

Por qué

This skill-based matchup revolves around the interactions of Wukong's decoy. Warrior Trickster is a direct counter to your combo because his clone can easily intercept your Thundering Shuriken or absorb the Mark of the Storm stacks you need to trigger a stun. Since Wukong relies on this bait to negate your self-peel, the lane remains entirely even, decided by who mismanages their defensive cooldown first.

Impacto en la línea

During the laning phase, this interaction dictates every trade. If Wukong successfully absorbs your poke with his clone, he will immediately use Nimbus Strike to close the gap and shred your armor with Golden Staff. This threat forces you to play conservatively, limiting your ability to zone him with basic attacks or safely push the wave. A single misstep can lead to a deadly Cyclone chain under your own turret.

Cómo jugar

To win this, never throw Thundering Shuriken directly when Wukong moves aggressively toward you. Instead, use your ranged advantage to land basic attacks and prime the passive of Electrical Surge. Force him to waste Warrior Trickster defensively. Once his clone disappears, you have a brief window to activate Lightning Rush to reposition or commit with Slicing Maelstrom. If he catches you with his ultimate before you can stun him, immediately retreat toward your tower.

Ficha completa →
Teemo

Teemo±0

ranged tradeblind interaction This matchup is a delicate balance of range and timing. Teemo neutralizes your trading power early because his Blinding Dart completely blocks your enhanced auto-attacks, preventing you from stacking Mark of the Storm via the passive of Electrical Surge. However, this lane completely swings at level six; Teemo's squishy nature makes him incredibly vulnerable to your full all-in combo once you unlock Slicing Maelstrom. Ver detalles
Teemo

Por qué

This matchup is a delicate balance of range and timing. Teemo neutralizes your trading power early because his Blinding Dart completely blocks your enhanced auto-attacks, preventing you from stacking Mark of the Storm via the passive of Electrical Surge. However, this lane completely swings at level six; Teemo's squishy nature makes him incredibly vulnerable to your full all-in combo once you unlock Slicing Maelstrom.

Impacto en la línea

Before reaching level six, you will constantly absorb pressure and poison damage from Toxic Shot. If you try to trade with auto-attacks, Teemo will blind you and run you down with Move Quick. This forces you to play defensively under your turret, using Thundering Shuriken to secure minions. The dynamic shifts instantly at level six, where one successful catch means a guaranteed kill, preventing Teemo from safely controlling the lane with Noxious Trap.

Cómo jugar

To survive the early levels, focus on farming from a distance. If Teemo uses Blinding Dart on a minion or to poke you, do not immediately retaliate with autos; instead, throw Thundering Shuriken and wait out the blind duration before using your active Electrical Surge. Once you reach level six, bait him away from his Noxious Trap minefields, then activate Lightning Rush to close the gap and immediately trigger Slicing Maelstrom to burst him down before he can retreat.

Ficha completa →

Otros emparejamientos

Favorables

20

Estos campeones suelen tener problemas para responder a tus principales fortalezas, lo que te permite afrontar el enfrentamiento con más libertad. Normalmente tienes varias formas de presionarlos y forzar intercambios a tu favor. Aprovecha esta ventaja para imponer tu ritmo en lugar de darles tiempo para volver a una posición cómoda.

Mordekaiser

Mordekaiser−1

ranged pokeskillshot dodge Your mobility completely neutralizes Mordekaiser's only tool to force a fight. Whenever he casts Death's Grasp to pull you in, the instant movement speed from Lightning Rush allows you to zip out of its path effortlessly. Because he cannot close the gap or trigger Darkness Rise without landing his pull, you can constantly chip away at his health bar using Thundering Shuriken from total safety. Ver detalles
Mordekaiser

Por qué

Your mobility completely neutralizes Mordekaiser's only tool to force a fight. Whenever he casts Death's Grasp to pull you in, the instant movement speed from Lightning Rush allows you to zip out of its path effortlessly. Because he cannot close the gap or trigger Darkness Rise without landing his pull, you can constantly chip away at his health bar using Thundering Shuriken from total safety.

Impacto en la línea

This matchup forces Mordekaiser into a miserable loop of wasted cooldowns. Since he cannot pull you, he must use Obliterate to clear minions rather than poke you. You can freeze the wave near your tower and harass him every time he steps up to farm. He will be forced to consume his Indestructible shield for healing rather than mitigation, slowly bleeding his sustain and keeping him pinned under his own turret.

Cómo jugar

Never initiate trades with Lightning Rush; always hold it as a reactive escape tool. Stand slightly off-center from your minion wave to force him to choose between pushing with Obliterate or trying to catch you. If he misses Death's Grasp, immediately move forward to land a passive attack from Electrical Surge followed by Thundering Shuriken. If you do get caught, immediately use Slicing Maelstrom to stun him and disengage before his Darkness Rise aura can activate.

Ficha completa →
Sett

Sett−1

ranged pokedisengage Kennen dominates this matchup by exploiting his ranged advantage to constantly harass Sett with basic attacks and Thundering Shuriken. Sett struggles to close the distance without exposing himself. Even if Sett tries to initiate with Knuckle Down to run you down or pull you in with Facebreaker, you can instantly activate Lightning Rush to retreat safely, nullifying his engage while applying a stack of Mark of the Storm. Ver detalles
Sett

Por qué

Kennen dominates this matchup by exploiting his ranged advantage to constantly harass Sett with basic attacks and Thundering Shuriken. Sett struggles to close the distance without exposing himself. Even if Sett tries to initiate with Knuckle Down to run you down or pull you in with Facebreaker, you can instantly activate Lightning Rush to retreat safely, nullifying his engage while applying a stack of Mark of the Storm.

Impacto en la línea

Because Sett cannot easily touch you, you dictate the minion wave's tempo. You can slow push waves to force him under his turret, where he must choose between taking damage from Electrical Surge or losing gold. Sett will be forced to use Haymaker defensively just to absorb your poke, wasting his shield and leaving him vulnerable. This constant pressure chip-damages his health bar, forcing premature recalls and securing early plates.

Cómo jugar

Always maintain a maximum auto-attack distance and hold Lightning Rush strictly as a counter to Facebreaker. If Sett charges at you with Knuckle Down, step back immediately; only use your escape if he actually attempts his pull. Should he manage to grab you and use The Show Stopper, do not panic. Immediately activate Slicing Maelstrom and Electrical Surge to stun him with Mark of the Storm, turning his aggressive dive into a lethal counter-offensive.

Ficha completa →
Volibear

Volibear−1

ranged pokestun lock Volibear relies entirely on the movement speed from Thundering Smash to close the gap and lock you down. However, Kennen’s kit is perfectly suited to halt this advance. By combining Thundering Shuriken, an empowered auto-attack from Electrical Surge, and the active trigger of Electrical Surge, you can easily apply three stacks of Mark of the Storm. This stuns Volibear mid-sprint, leaving him helpless and unable to reach you. Ver detalles
Volibear

Por qué

Volibear relies entirely on the movement speed from Thundering Smash to close the gap and lock you down. However, Kennen’s kit is perfectly suited to halt this advance. By combining Thundering Shuriken, an empowered auto-attack from Electrical Surge, and the active trigger of Electrical Surge, you can easily apply three stacks of Mark of the Storm. This stuns Volibear mid-sprint, leaving him helpless and unable to reach you.

Impacto en la línea

This interaction strips Volibear of any offensive pressure, forcing him to play defensively. He must rely on Sky Splitter just to secure minion last-hits or shield himself from your constant basic attacks. You command total control over the minion wave, allowing you to slow-push and harass him under his own turret. Volibear cannot contest your freeze without risking a massive, one-sided trade that forces an early recall.

Cómo jugar

Keep a safe distance and never waste Lightning Rush offensively; save this movement tool strictly to reposition if Volibear attempts to catch you off guard or to escape the slow zone of his Sky Splitter. When he activates Thundering Smash, immediately throw Thundering Shuriken and hit him with your passive-enhanced attack from Electrical Surge, then activate the active portion of Electrical Surge. This guarantees a defensive stun, allowing you to walk away or punish his retreat.

Ficha completa →
K'Santé

K'Santé−1

magic damagecc buffer Your ranged advantage as Kennen lets you bully K'Santé constantly using Thundering Shuriken and passive Electrical Surge auto-attacks. While you easily deny him farm, the matchup hinges on his defensive tool. K'Santé can channel Path Maker to shrug off the stun and damage of your Slicing Maelstrom, meaning you cannot simply dive him or wipe his team if his damage-reduction charge is ready to absorb your lightning. Ver detalles
K'Santé

Por qué

Your ranged advantage as Kennen lets you bully K'Santé constantly using Thundering Shuriken and passive Electrical Surge auto-attacks. While you easily deny him farm, the matchup hinges on his defensive tool. K'Santé can channel Path Maker to shrug off the stun and damage of your Slicing Maelstrom, meaning you cannot simply dive him or wipe his team if his damage-reduction charge is ready to absorb your lightning.

Impacto en la línea

K'Santé is forced to give up early priority, taking heavy poke whenever he tries to stack Ntofo Strikes on the wave. He will use Footwork to shield your harassment, but you can easily freeze and chip his health down. However, because his Path Maker neutralizes your dive potential, you cannot easily execute him under tower, forcing you to focus on a slow, relentless gold lead rather than explosive solo kills.

Cómo jugar

Since K'Santé will rush magic resistance to survive your poke, pivot your build path early toward heavy magic penetration rather than flat burst. During skirmishes, never initiate with Slicing Maelstrom while his Path Maker is available; instead, bait it out using Lightning Rush to threaten an engage, then disengage. If he uses All Out to drag you over a wall, immediately activate Electrical Surge to trigger Mark of the Storm and stun his squishier form before he can execute you.

Ficha completa →
Ornn

Ornn−1

ranged pokedisengage This favorable matchup hinges on your ability to completely shut down Ornn's engage potential. While your ranged basic attacks constantly chip away at his health, his only real threat is the knockup from Searing Charge. Because you have Lightning Rush, you can instantly react whenever he spawns a pillar with Volcanic Rupture. The rapid movement speed allows you to effortlessly zip out of his crash zone, leaving him completely vulnerable. Ver detalles
Ornn

Por qué

This favorable matchup hinges on your ability to completely shut down Ornn's engage potential. While your ranged basic attacks constantly chip away at his health, his only real threat is the knockup from Searing Charge. Because you have Lightning Rush, you can instantly react whenever he spawns a pillar with Volcanic Rupture. The rapid movement speed allows you to effortlessly zip out of his crash zone, leaving him completely vulnerable.

Impacto en la línea

Consequently, you dictate the minion wave's position at all times. Since Ornn cannot risk missing his knockup without taking massive damage, he must play passively under his turret. This allows you to slow push waves, harass him with Thundering Shuriken while he tries to last-hit, and stack Electrical Surge marks. You will easily secure a massive gold lead and keep him trapped in lane while your team plays with top-lane priority.

Cómo jugar

To execute this flawlessly, never use Lightning Rush offensively unless Ornn has already missed his Searing Charge. Always stand near his Volcanic Rupture pillar to bait his charge, then activate your escape speed to dodge the knockup. Once he misses, immediately retaliate with basic attacks, activate Electrical Surge to consume your passive mark, and throw a guaranteed Thundering Shuriken. If he attempts to breathe fire with Bellows Breath, retreat backward to avoid the brittle application.

Ficha completa →
Tryndamere

Tryndamere−1

kite defensestun lock Kennen dominates Tryndamere because his ranged kit completely neutralizes Tryndamere's melee threat. When Tryndamere engages with Spinning Slash, Kennen can instantly disengage using Lightning Rush while applying Mark of the Storm. If Tryndamere activates Undying Rage, Kennen's ability to chain stuns via his passive and poke from distance with Thundering Shuriken and Electrical Surge means he can waste the entire duration of the ultimate without letting Tryndamere land a single critical auto-attack. Ver detalles
Tryndamere

Por qué

Kennen dominates Tryndamere because his ranged kit completely neutralizes Tryndamere's melee threat. When Tryndamere engages with Spinning Slash, Kennen can instantly disengage using Lightning Rush while applying Mark of the Storm. If Tryndamere activates Undying Rage, Kennen's ability to chain stuns via his passive and poke from distance with Thundering Shuriken and Electrical Surge means he can waste the entire duration of the ultimate without letting Tryndamere land a single critical auto-attack.

Impacto en la línea

This matchup forces Tryndamere into a defensive posture where he must constantly consume his fury via Bloodlust just to sustain through your ranged auto-attacks. You dictate the wave's position; he cannot walk up to build Battle Fury without taking heavy poke from Thundering Shuriken. Tryndamere is forced to farm under tower, preventing him from roaming or invading your jungle, while you freely scale toward teamfights.

Cómo jugar

Always hold Lightning Rush specifically for when Tryndamere uses Spinning Slash to close the gap. When he spins forward, activate your speed boost to stay out of his melee range, and immediately hit him with Thundering Shuriken followed by an Electrical Surge empowered auto-attack to trigger Mark of the Storm. Once he pops Undying Rage, circle him using your passive stuns to freeze him in place, letting his ultimate safely expire before landing the final blow.

Ficha completa →
Urgot

Urgot−1

ranged pokeskillshot dodge Your ranged advantage makes this matchup highly favorable, but the real key lies in baiting Urgot's primary engage. Whenever Urgot winds up his Disdain dash to catch you, you can instantly react by activating Lightning Rush. The explosive surge of movement speed allows you to easily sidestep his flip, leaving him completely overextended, out of position, and unable to trigger his passive Echoing Flames. Ver detalles
Urgot

Por qué

Your ranged advantage makes this matchup highly favorable, but the real key lies in baiting Urgot's primary engage. Whenever Urgot winds up his Disdain dash to catch you, you can instantly react by activating Lightning Rush. The explosive surge of movement speed allows you to easily sidestep his flip, leaving him completely overextended, out of position, and unable to trigger his passive Echoing Flames.

Impacto en la línea

Because Urgot cannot reliably lock you down with Disdain, he is forced to play defensively or waste Corrosive Charge trying to slow you from afar. This allows you to safely poke him down with Thundering Shuriken and stack Mark of the Storm. You dictate the wave's tempo, easily forcing him under tower where his bulky hitbox makes him an easy target for repeated Electrical Surge procs.

Cómo jugar

Never initiate a trade using Lightning Rush; always hold this crucial tool to react to his Disdain. Position yourself just outside his Corrosive Charge range, baiting him to charge forward. Once you use your speed to dodge his dash, immediately turn back to retaliate. Land a basic attack to apply the passive mark from Electrical Surge, follow up with Thundering Shuriken, and activate Electrical Surge to trigger the stun, ensuring he cannot retaliate with Purge.

Ficha completa →
Singed

Singed−2

easy lanekite defense Singed relies entirely on running you down to fling you into his poison, but your ranged profile completely shuts this down. Whenever he attempts to approach with his passive speed, you can easily poke him from a distance with Thundering Shuriken. If he manages to bypass your spacing or attempts a desperate sprint, you can instantly activate Lightning Rush to outrun him, preventing him from ever getting into range to use Fling. Ver detalles
Singed

Por qué

Singed relies entirely on running you down to fling you into his poison, but your ranged profile completely shuts this down. Whenever he attempts to approach with his passive speed, you can easily poke him from a distance with Thundering Shuriken. If he manages to bypass your spacing or attempts a desperate sprint, you can instantly activate Lightning Rush to outrun him, preventing him from ever getting into range to use Fling.

Impacto en la línea

This range advantage gives you total control over the minion waves. Singed cannot easily activate Poison Trail to clear minions without taking heavy damage from your basic attacks and Electrical Surge. You can easily freeze the wave near your turret, forcing him into a terrible position where he must bleed health for every single last hit, eventually forcing him to recall or die under his own tower.

Cómo jugar

Never use Lightning Rush offensively unless Singed is already low and stunned. Always hold this ability to escape his engage, especially if he drops Mega Adhesive to ground you. Keep your distance and focus on charging the passive of Electrical Surge on minions, then unleash the empowered attack on Singed followed by Thundering Shuriken to constantly stack Mark of the Storm. If he triggers his Insanity Potion, simply retreat and wait out its duration.

Ficha completa →
Sion

Sion−2

easy lanekite defense This matchup is heavily in your favor because Sion relies on charging Decimating Smash to threaten you or clear waves. Since you are ranged, you can easily poke him down with auto-attacks. If he attempts to charge his Q, your Lightning Rush provides instant movement speed to zip straight behind his cone of attack or completely out of its range, rendering his main threat useless. Ver detalles
Sion

Por qué

This matchup is heavily in your favor because Sion relies on charging Decimating Smash to threaten you or clear waves. Since you are ranged, you can easily poke him down with auto-attacks. If he attempts to charge his Q, your Lightning Rush provides instant movement speed to zip straight behind his cone of attack or completely out of its range, rendering his main threat useless.

Impacto en la línea

By neutralizing his primary zone tool, you dictate the wave's tempo. You can freeze the minions near your turret, forcing Sion to walk up and expose himself to constant basic attacks and Electrical Surge passive procs. Because he cannot safely charge Decimating Smash without getting punished, his shield from Soul Furnace will be broken by your AP poke before it can explode, starving his health pool.

Cómo jugar

Never use Lightning Rush aggressively unless Sion has already wasted Decimating Smash or Roar of the Slayer. Always stand slightly off-center from your minion wave to force him to choose between aiming at you or the wave. If he charges his Q, activate your E to speed behind him, then immediately follow up with auto-attacks, Thundering Shuriken, and Electrical Surge to trigger Mark of the Storm, preventing him from escaping with Unstoppable Onslaught.

Ficha completa →
Shen

Shen−1

ranged pokeskillshot dodge This matchup is highly favorable due to your natural ranged advantage. You can relentlessly harass Shen using Thundering Shuriken from a safe distance, punishing him whenever he tries to last-hit. His only tool to close the gap and threaten you is Shadow Dash. As long as you react quickly with Lightning Rush, you can effortlessly dodge his taunt, leaving him completely vulnerable and unable to trade back. Ver detalles
Shen

Por qué

This matchup is highly favorable due to your natural ranged advantage. You can relentlessly harass Shen using Thundering Shuriken from a safe distance, punishing him whenever he tries to last-hit. His only tool to close the gap and threaten you is Shadow Dash. As long as you react quickly with Lightning Rush, you can effortlessly dodge his taunt, leaving him completely vulnerable and unable to trade back.

Impacto en la línea

In practice, this dynamic allows you to dictate the wave's tempo, forcing Shen to bleed health under his turret. Since he cannot easily approach the wave without taking free damage, you establish massive lane priority. When Shen looks to impact the map with Stand United, he faces a terrible dilemma: leaving you to demolish his turret or losing his teleportation window entirely if you disrupt his channel.

Cómo jugar

Position yourself outside his dash range and never use Lightning Rush offensively while his Shadow Dash is up. Focus on chipping away his health with Thundering Shuriken and passive procs from Electrical Surge. If you get caught by his taunt, immediately retreat once it ends to avoid his empowered attacks from Twilight Assault. When he channels his ultimate, quickly shove the minion wave and rotate to match his map pressure.

Ficha completa →
Jax

Jax−2

magic pokedisengage threat This matchup is heavily in your favor because Jax lacks the tools to stick to you. Whenever he attempts to close the gap with Leap Strike, you can immediately activate Lightning Rush to outrun his advance and completely avoid the stun from Counter Strike. This safe disengage allows you to freely harass him with Thundering Shuriken and auto-attacks, exploiting his melee nature without taking any return damage. Ver detalles
Jax

Por qué

This matchup is heavily in your favor because Jax lacks the tools to stick to you. Whenever he attempts to close the gap with Leap Strike, you can immediately activate Lightning Rush to outrun his advance and completely avoid the stun from Counter Strike. This safe disengage allows you to freely harass him with Thundering Shuriken and auto-attacks, exploiting his melee nature without taking any return damage.

Impacto en la línea

Jax is forced into a defensive posture, bleeding minion gold under his turret. Because he cannot engage without losing the trade, you dictate the wave tempo. You can safely stack Mark of the Storm using the passive of Electrical Surge, threatening a stun every time he approaches to last hit. This constant threat of magic damage keeps his health low, preventing him from ever roaming to assist his jungler.

Cómo jugar

To secure this lead, never use Lightning Rush offensively unless Jax has already wasted Leap Strike. Always hold this movement tool as your safety net. Additionally, pivot your build strategy away from basic attack speed, which is easily blocked by Counter Strike, and shift toward raw ability power and magic penetration. This ensures that your Slicing Maelstrom and Electrical Surge burst right through the bonus resistances granted by his Grandmaster-at-Arms active.

Ficha completa →
Renekton

Renekton−1

disengagespacing Kennen dominates because his ranged attacks naturally bully Renekton, but the match hinges on neutralizing the crocodile's double dash. Since Renekton relies on Slice and Dice to close the gap and land Ruthless Predator, Kennen's Lightning Rush acts as the ultimate counter-mobility tool. Instantly matching Renekton's forward movement completely denies his stun setup, leaving him stranded, overextended, and vulnerable to a massive counter-offensive. Ver detalles
Renekton

Por qué

Kennen dominates because his ranged attacks naturally bully Renekton, but the match hinges on neutralizing the crocodile's double dash. Since Renekton relies on Slice and Dice to close the gap and land Ruthless Predator, Kennen's Lightning Rush acts as the ultimate counter-mobility tool. Instantly matching Renekton's forward movement completely denies his stun setup, leaving him stranded, overextended, and vulnerable to a massive counter-offensive.

Impacto en la línea

This dynamic dictates a heavily one-sided laning phase. Because Renekton cannot reliably lock you down, you can freely control the minion waves, slow-pushing to deny him easy fury generation from Cull the Meek. If he attempts an aggressive dash, your immediate disengage forces him to tank minion aggro while retreating. This relentless pressure chips his health pool down, neutralizing his dive threat and forcing him to waste Dominus purely to survive.

Cómo jugar

To secure this lead, you must adopt a strict discipline: hold Lightning Rush strictly for defense. Never use it to clear waves or to aggressively apply passive marks. Stand at the edge of your basic attack range, baiting his forward movement. The millisecond you see the animation of Slice and Dice, activate Lightning Rush to retreat. Once his dash ends and his stun window expires, immediately turn back with Thundering Shuriken and Electrical Surge to punish his retreat.

Ficha completa →

Otros emparejamientos

Items to Counter Kennen

Buy these items to reduce this champion's effectiveness in your games.

Stasis Enchant
Stasis Enchant
Morellonomicon
Morellonomicon
Plated Steelcaps
Plated Steelcaps

Cómo contrarrestar a este campeón

Ángulo de contra

Kennen no pierde los matchups puramente por estadísticas o trades, sino porque ciertos campeones interrumpen su plan de juego general. Su objetivo no es ganar la lane, sino alcanzar sus spikes y encontrar ángulos en las teamfights. Los counters más efectivos son aquellos que evitan que llegue a esa fase de forma segura o que interrumpen la ejecución de su engage. Esto incluye campeones que lo castigan antes del nivel 5, bloquean sus entradas o sobreviven a su burst inicial. Entender a sus counters no es solo cuestión de dominar la lane, sino de limitar su impacto en las teamfights.

Contexto del parche

Los counters de Kennen explotan tres debilidades clave: su fragilidad en el early game, su dependencia de la definitiva y su necesidad de lanzarse hacia el equipo enemigo. Los campeones que pueden aplicarle burst rápidamente, meterle CC durante el engage o denegar el acceso a la backline reducen drásticamente su valor. Además, algunos bruisers pueden sobrevivir a su combo inicial y forzar trades largos que él no puede ganar.

Lectura rápida

  • Campeones agresivos en el early game interrumpen su escalado.
  • El CC durante su engage anula su impacto.
  • Los tanques duraderos pueden absorber su burst.

Arquetipos de contra

Bruisers agresivos de early game

Estos campeones castigan a Kennen antes de que alcance sus spikes clave. Pueden forzar trades constantes, limitar su posicionamiento y amenazar con conseguir kills si se acerca demasiado. Kennen depende de una fase de líneas estable, pero contra estos perfiles, se ve obligado a jugar a la defensiva, retrasando su impacto general.

Cómo se adapta el campeón. Juega seguro, prioriza botas defensivas y evita trades largos. El objetivo es sobrevivir hasta las peleas por objetivos.

Campeones de engage directo y CC

Estos campeones pueden interrumpir a Kennen antes o durante su engage. Dado que debe lanzarse hacia el equipo enemigo, cualquier CC instantáneo o burst reduce su capacidad para acumular marcas y aprovechar al máximo su definitiva. Convierten su fuerza en una debilidad.

Cómo se adapta el campeón. Espera a que el enemigo gaste sus cooldowns, prioriza los flanqueos y evita los engages frontales.

Duelistas resistentes

Estos campeones pueden sobrevivir al burst inicial de Kennen y forzarlo a intercambios largos. Como Kennen carece de un sustain real, pierde estos duelos con el tiempo. También limitan su presión en las side lanes, reduciendo sus opciones estratégicas.

Cómo se adapta el campeón. Evita duelos largos y juega para las rotaciones y las teamfights.

Emparejamientos prioritarios

Renekton

Renekton es un ejemplo clásico de un matchup que impide a Kennen hacer su juego. Su presión en el early game obliga a Kennen a retroceder constantemente, retrasando sus objetos y reduciendo sus picos de poder. Además, su burst rápido castiga cualquier error de posicionamiento. Contra él, Kennen debe abandonar la agresividad y centrarse únicamente en sobrevivir y escalar para las teamfights.

Errores comunes en su contra

Errores comunes en su contra

  • Subestimar el daño de los bruisers en el early game.
  • Hacer engage sin comprobar el CC enemigo.
  • Forzar intercambios largos en fase de líneas.

  • Ignorar los tiempos de cooldown del enemigo.

  • No adaptar la build de forma defensiva.

Notas del coach

  • Tu objetivo no es ganar la línea, sino no perderla.
  • Cada engage fallido contra un counter es extremadamente costoso.

FAQ

¿Cuál es el peor tipo de matchup para Kennen?

Los matchups más difíciles son aquellos que combinan presión en el early game con la capacidad de castigar rápidamente. Kennen necesita tiempo para alcanzar sus power spikes, por lo que los campeones que lo someten a una presión temprana reducen drásticamente su impacto general.

¿Cómo se debe jugar contra sus counters?

Debes adaptar tu plan de juego: juega de forma más defensiva en línea, prioriza la supervivencia y evita intercambios innecesarios. Tu objetivo es llegar a las teamfights con tus recursos clave. Incluso en malos matchups, Kennen puede seguir siendo útil si ejecuta un buen engage.

¿Por qué pierdo los duelos incluso yendo por delante?

Porque Kennen no está diseñado para duelos largos. Incluso con ventaja, algunos campeones pueden absorber tu burst y ganarte con el tiempo. Tu ventaja debe usarse para impactar en el mapa, no para forzar 1v1s.

¿Debería hacer roam en matchups difíciles?

Sí, pero con cuidado. Si no puedes ganar tu línea, busca influir en los objectives o en las peleas de mid. Sin embargo, debes gestionar bien tu oleada para evitar perder demasiados recursos al salir de la línea.