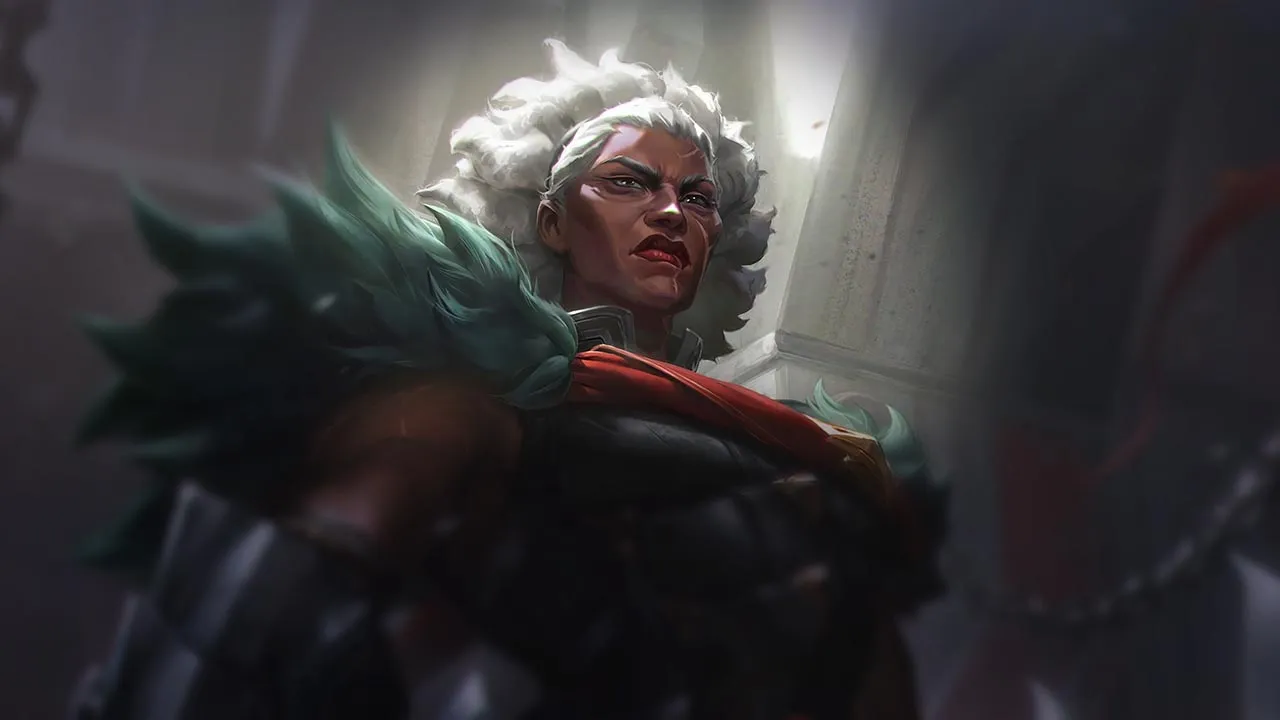
Ambessa, una luchadora de Baron Lane / Jungle, depende de la movilidad y de mantenerse a corta distancia para infligir daño sostenido. Las composiciones con un fuerte kite, crowd control o un burst rápido pueden limitar su efectividad. Si no puede mantener la presión en combate cuerpo a cuerpo, su impacto disminuye considerablemente.
★ TOP · JUNGLETier S
DAÑO
UTIL
TANK
DIFF
Win52.2%#22 · ↑1pt
Pick1.7%#33
Ban0.9%#78
Guía de counters de Ambessa Wild Rift
Contras Difíciles
4
Estos campeones tienen una build y un estilo de juego que superan directamente al tuyo, lo que puede hacer que controlar la línea y farmear sea extremadamente difícil. Sus habilidades pueden neutralizar tus principales fortalezas o castigarte en cuanto intentas jugar tu plan habitual. En estos matchups, el objetivo suele ser minimizar errores y buscar soluciones fuera del enfrentamiento directo.
Counter duroDesengancheTodo tu ciclo de combate depende de encadenar los dashes de Drakehound's Step después de lanzar Cunning Sweep o Lacerate. Sin embargo, Poppy lo anula por completo con Steadfast Presence. En cuanto ella la activa, cualquier intento de desplazarte o reposicionarte con tu pasiva activa su barrera, te deja sin movimiento, te hace daño y detiene tus ataques potenciados por la pasiva. Sin tu movilidad, pierdes toda amenaza y no puedes bailar alrededor de su martillo.Build de Poppy →Ver detalles
Poppy
Por qué
Todo tu ciclo de combate depende de encadenar los dashes de Drakehound's Step después de lanzar Cunning Sweep o Lacerate. Sin embargo, Poppy lo anula por completo con Steadfast Presence. En cuanto ella la activa, cualquier intento de desplazarte o reposicionarte con tu pasiva activa su barrera, te deja sin movimiento, te hace daño y detiene tus ataques potenciados por la pasiva. Sin tu movilidad, pierdes toda amenaza y no puedes bailar alrededor de su martillo.
Impacto en la línea
Esta interacción te obliga a una postura muy defensiva. No puedes disputar la wave de minions con seguridad porque ella puede activar su barrera de forma reactiva para cancelar el seguimiento de tu Cunning Sweep o el doble giro de Lacerate. Si te atrapa cerca de una pared, te estampará, y sin los dashes de tu pasiva no puedes escapar. Esta pérdida de prioridad de lane significa que ella escala con seguridad y puede hacer roam libremente para molestar a tu jungler.
Cómo jugar
Para sobrevivir, tienes que obligarla a gastar su Steadfast Presence antes de comprometerte con cualquier trade serio. Usa Cunning Sweep para farmear desde una distancia segura sin activar el dash. Si ella desperdicia su anillo defensivo, tienes una breve ventana para golpear con Lacerate y Public Execution. Si no, guarda Repudiation para absorber el daño de su golpe contra la pared y bloquear su CC, y luego retírate de inmediato hacia tu torre cuando se acabe tu escudo.
DesengancheDefinitivaOlaf domina este matchup al anular por completo tu herramienta de ejecución. En cuanto activa Ragnarok, obtiene inmunidad total a la supresión y al desplazamiento de tu Public Execution, y tu ultimate se convierte en un dash suicida. Sin el crowd control de tu ultimate, te ves obligada a un brawl puro contra su Berserker Rage y Vicious Strikes, una prueba de estadísticas que el patrón de ejecución a poca vida de Ambessa no puede superar matemáticamente.Build de Olaf →Ver detalles
Olaf
Por qué
Olaf domina este matchup al anular por completo tu herramienta de ejecución. En cuanto activa Ragnarok, obtiene inmunidad total a la supresión y al desplazamiento de tu Public Execution, y tu ultimate se convierte en un dash suicida. Sin el crowd control de tu ultimate, te ves obligada a un brawl puro contra su Berserker Rage y Vicious Strikes, una prueba de estadísticas que el patrón de ejecución a poca vida de Ambessa no puede superar matemáticamente.
Impacto en la línea
Pierdes toda la prioridad de lane cuando Olaf llega al nivel cinco. Si intentas hacer poke con Cunning Sweep, te responderá con Undertow, ralentizándote y persiguiéndote por toda la lane. No puedes disputar las waves con seguridad porque cualquier trade largo le permite activar Vicious Strikes y curarse. Esto te obliga a ceder el farm bajo la torre, perdiendo oro mientras arriesgas setups de dive.
Cómo jugar
Trata tu Public Execution estrictamente como una herramienta de movilidad o como un finisher después de que Ragnarok expire. Cuando Olaf se lance sobre ti, usa Drakehound's Step para hacer dash en perpendicular y esquivar las hachas de Undertow, reduciendo su potencial de persecución. Guarda Repudiation específicamente para absorber el daño verdadero de Reckless Swing y no un poke cualquiera. Si activa su ultimate, retírate de inmediato con la ralentización de Lacerate junto con un Drakehound's Step hacia atrás, y solo vuelve a engage cuando su inmunidad se desvanezca.
DesengancheMecánicasJax contrarresta por completo tu patrón de trade porque Counter Strike bloquea cada uno de tus ataques básicos potenciados por Drakehound's Step. Como todo tu ciclo de daño y tu recuperación de energía dependen de conectar esos golpes mejorados tras lanzar Cunning Sweep o Lacerate, Jax solo tiene que activar su giro de helicóptero para anular tu burst mientras acumula la velocidad de ataque de su Relentless Assault.Build de Jax →Ver detalles
Jax
Por qué
Jax contrarresta por completo tu patrón de trade porque Counter Strike bloquea cada uno de tus ataques básicos potenciados por Drakehound's Step. Como todo tu ciclo de daño y tu recuperación de energía dependen de conectar esos golpes mejorados tras lanzar Cunning Sweep o Lacerate, Jax solo tiene que activar su giro de helicóptero para anular tu burst mientras acumula la velocidad de ataque de su Relentless Assault.
Impacto en la línea
Esta interacción te quita la prioridad temprana, obligándote a ceder el control de la wave. Si intentas adelgazar la wave con Cunning Sweep, Jax puede engage al instante con Leap Strike y Empower, sabiendo que no puedes devolver el golpe a través de su esquiva. Te ves obligada a usar Drakehound's Step de forma defensiva para escapar, perdiendo oro de minions bajo tu torre mientras Jax escala con seguridad hacia sus picos de poder de Grandmaster-at-Arms.
Cómo jugar
Para sobrevivir, debes hacer que gaste Counter Strike sin comprometer tu daño principal. Cuando Jax inicie su giro, usa de inmediato el dash de Drakehound's Step o de Lacerate para retirarte y hacer kite hacia atrás. Guarda Repudiation para absorber el burst y bloquear el aturdimiento si te alcanza con Leap Strike. Solo cuando su ventana de esquiva esté completamente cerrada puedes buscar una breve represalia con Cunning Sweep y Public Execution.
DesengancheDueloVolibear anula por completo tus escaramuzas largas porque Frenzied Maul lo cura y le da más daño que tus combos. Aunque Cunning Sweep y Lacerate te permiten hacer poke, quedarte en su rango melé le permite marcarte y morder de nuevo para curarse enormemente. Para sobrevivir, debes apoyarte en el dash de Drakehound's Step justo después de usar Lacerate para retirarte antes de que sus garras golpeen dos veces.Build de Volibear →Ver detalles
Volibear
Por qué
Volibear anula por completo tus escaramuzas largas porque Frenzied Maul lo cura y le da más daño que tus combos. Aunque Cunning Sweep y Lacerate te permiten hacer poke, quedarte en su rango melé le permite marcarte y morder de nuevo para curarse enormemente. Para sobrevivir, debes apoyarte en el dash de Drakehound's Step justo después de usar Lacerate para retirarte antes de que sus garras golpeen dos veces.
Impacto en la línea
La pasiva de Volibear, The Relentless Storm, empuja la wave de forma natural, mientras que Sky Splitter lo protege con un escudo durante los trades. Como no puedes ganar una guerra de desgaste directa, te ves obligada a hacer freeze de la wave cerca de tu torre. Si le dejas hacer crash de waves enormes, usará Stormbringer para desactivar tu torre y hacerte dive con facilidad, arruinando tus tiempos de recall y encerrándote en tu lane.
Cómo jugar
Nunca hagas engage cuando Volibear tenga Thundering Smash activo; en su lugar, guarda Repudiation para bloquear su aturdimiento entrante y absorber el daño inicial. Haz trade solo cuando Lacerate esté disponible, usando el Drakehound's Step activado para hacer dash hacia atrás y romper su persecución. Si hace freeze de la wave cerca de su torre, no te acerques a farmear con ataques básicos; usa el borde exterior de Cunning Sweep para asegurar los minions desde una distancia segura.
Estos campeones tienen herramientas que generalmente les dan ventaja en el enfrentamiento, sin llegar a hacer el matchup injugable. Pueden tener más alcance, mejor capacidad para aguantar tu ofensiva o más formas de responder a tus engagements. Tendrás que adaptar tu enfoque y elegir con cuidado los momentos en los que aceptas el combate.
EsquivaIntercambiosDarius domina los trades largos gracias a Hemorrhage, lo que hace que los brawls a lo bruto sean fatales para Ambessa. Todo el matchup depende de cómo respondas a Decimate. Si Darius acierta con la hoja exterior, se cura y acumula su pasiva. Sin embargo, Ambessa puede usar Drakehound's Step después de lanzar Cunning Sweep o Lacerate para hacer dash directamente hacia el mango interior de Darius, neutralizando por completo su curación y minimizando su daño.Build de Darius →Ver detalles
Darius
Por qué
Darius domina los trades largos gracias a Hemorrhage, lo que hace que los brawls a lo bruto sean fatales para Ambessa. Todo el matchup depende de cómo respondas a Decimate. Si Darius acierta con la hoja exterior, se cura y acumula su pasiva. Sin embargo, Ambessa puede usar Drakehound's Step después de lanzar Cunning Sweep o Lacerate para hacer dash directamente hacia el mango interior de Darius, neutralizando por completo su curación y minimizando su daño.
Impacto en la línea
No puedes empujar la wave sin pensar porque Apprehend puede arrastrarte a una persecución larga y letal por la lane. Haz trade cerca de tu torre, donde Darius no puede acumular Hemorrhage al máximo con facilidad. Un solo paso en falso que le permita conectar un Decimate completo te obliga a un recall temprano, dejando que Darius haga freeze de la wave o amenace con un dive fácil con Noxian Guillotine una vez que estés con poca vida.
Cómo jugar
Nunca inicies con tu dash hacia delante. En su lugar, acércate caminando para atraer su Decimate, y luego activa de inmediato Drakehound's Step lanzando Lacerate para deslizarte dentro de su círculo interior. Si Darius logra arrastrarte primero con Apprehend, lanza rápidamente Repudiation para absorber su Crippling Strike y bloquear la ralentización, lo que te permite retirarte con seguridad. Si te atrapa con cuatro acumulaciones de Hemorrhage, usa Public Execution de forma defensiva para suprimirlo y ganar tiempo para que tus cooldowns te permitan escapar.
EsquivaEscudosSett se crece en los brawls prolongados porque tus combos de golpes rápidos con Cunning Sweep y Lacerate cargan rápidamente su barra de grit. Cuando intentas hacerle burst, la regeneración de vida de Pit Grit y el enorme escudo de Haymaker anulan tu ventaja inicial. El matchup es desfavorable porque Sett puede absorber con facilidad tu daño frontal y responder con un devastador daño verdadero si no logras escapar de su golpe central.Build de Sett →Ver detalles
Sett
Por qué
Sett se crece en los brawls prolongados porque tus combos de golpes rápidos con Cunning Sweep y Lacerate cargan rápidamente su barra de grit. Cuando intentas hacerle burst, la regeneración de vida de Pit Grit y el enorme escudo de Haymaker anulan tu ventaja inicial. El matchup es desfavorable porque Sett puede absorber con facilidad tu daño frontal y responder con un devastador daño verdadero si no logras escapar de su golpe central.
Impacto en la línea
No puedes disputar la wave a ciegas, ya que Facebreaker de Sett puede arrastrarte cada vez que te adelantas para usar Cunning Sweep. Esta amenaza te obliga a jugar a la defensiva bajo tu torre, sacrificando el control temprano de la wave. Si Sett te atrapa sin tu dash, su Knuckle Down le permite perseguirte, creando una enorme presión de lane que obliga a tu jungler a ignorar top o a arriesgarse a un double kill con The Show Stopper.
Cómo jugar
Para sobrevivir a los all-ins, debes guardar sí o sí una carga de Drakehound's Step. Nunca agotes los dashes de tu pasiva durante un trade; en su lugar, espera a que Sett lance Haymaker. En cuanto veas su barra de grit llena y su escudo desplegado, usa el dash de Drakehound's Step en lateral para salir del centro del daño verdadero. Si te arrastra con Facebreaker, haz buffer de Repudiation de inmediato para absorber el aturdimiento, y luego retírate hasta que su escudo decaiga.
RalentizacionesPokeEste matchup lo dicta cómo el Ground Slam de Malphite contrarresta directamente el ciclo de tu pasiva. Cada vez que lanzas Cunning Sweep o Lacerate, dependes de Drakehound's Step para hacer dash rápidamente y soltar ataques básicos potenciados y veloces. Sin embargo, la enorme reducción de velocidad de ataque de Ground Slam congela por completo la velocidad de tus animaciones. Esto te impide recuperar energía con rapidez, dejándote lenta e incapaz de ejecutar tus combos de asesina de ritmo rápido.Build de Malphite →Ver detalles
Malphite
Por qué
Este matchup lo dicta cómo el Ground Slam de Malphite contrarresta directamente el ciclo de tu pasiva. Cada vez que lanzas Cunning Sweep o Lacerate, dependes de Drakehound's Step para hacer dash rápidamente y soltar ataques básicos potenciados y veloces. Sin embargo, la enorme reducción de velocidad de ataque de Ground Slam congela por completo la velocidad de tus animaciones. Esto te impide recuperar energía con rapidez, dejándote lenta e incapaz de ejecutar tus combos de asesina de ritmo rápido.
Impacto en la línea
No puedes jugar esto como una lane de burst estándar. Malphite te irá quitando vida constantemente con Seismic Shard mientras absorbe tu respuesta con Granite Shield. Como Ground Slam te impide ganar trades rápidos, pierdes la capacidad de hacer crash de waves a voluntad. Esto convierte la lane en una agotadora guerra de desgaste donde asegurar recalls limpios se vuelve difícil, y su Unstoppable Force amenaza constantemente con dives si bajas demasiado de vida.
Cómo jugar
Para sobrevivir a esta guerra de desgaste, abandona tu rush de letalidad pura y reorienta tu build hacia resistencia mágica temprana y regeneración de vida. En la lane, busca absorber el daño con seguimiento de Seismic Shard con un escudo de Repudiation bien cronometrado. Nunca te comprometas con tus ataques de Drakehound's Step mientras su Ground Slam esté disponible. Si lo desperdicia en minions, usa de inmediato Lacerate para ralentizarlo y ejecuta tu combo completo.
EscudosIntercambiosRenekton domina las escaramuzas tempranas porque su Ruthless Predator potenciado por furia destroza tu barra de vida y te inmoviliza al instante. Como tu poder de trade depende de encadenar Cunning Sweep y Drakehound's Step, el que te aturdan en pleno dash arruina tu ritmo. Todo el matchup depende de si logras cronometrar Repudiation para absorber y bloquear su aturdimiento, ya que de lo contrario su burst bruto supera con facilidad tus estadísticas defensivas básicas.Build de Renekton →Ver detalles
Renekton
Por qué
Renekton domina las escaramuzas tempranas porque su Ruthless Predator potenciado por furia destroza tu barra de vida y te inmoviliza al instante. Como tu poder de trade depende de encadenar Cunning Sweep y Drakehound's Step, el que te aturdan en pleno dash arruina tu ritmo. Todo el matchup depende de si logras cronometrar Repudiation para absorber y bloquear su aturdimiento, ya que de lo contrario su burst bruto supera con facilidad tus estadísticas defensivas básicas.
Impacto en la línea
No puedes disputar las waves a la ligera cuando su barra de furia está en rojo. Si Renekton se guarda el aturdimiento, te obliga a farmear bajo la torre, quitándote vida con Cull the Meek cada vez que te adelantas. Si no bloqueas Ruthless Predator, te ves forzada a un recall temprano, perdiendo oro valioso y dejando que él haga crash de waves enormes, lo que le da prioridad total para hacer dive o roam.
Cómo jugar
Nunca inicies con Cunning Sweep cuando Renekton tenga mucha furia y su Slice and Dice esté disponible. En su lugar, atrae su dash y, en el instante en que su arma brille para Ruthless Predator, activa Repudiation para bloquear el aturdimiento. Si tu escudo está en cooldown, juega con seguridad fuera de su rango de doble dash. Si te aturde sin tener tu escudo, retírate de inmediato usando Lacerate y un Drakehound's Step hacia atrás en lugar de intentar salvar el trade.
EscudosIntercambiosIrelia se crece bailando por tu wave con Bladesurge, generando acumulaciones de Ionian Fervor para superarte en DPS. Esta lane gira por completo en torno a su Flawless Duet. Si te aturde, obtiene un reset de Bladesurge gratis y gana con facilidad el duelo largo. Sin embargo, Ambessa puede dar la vuelta a este choque de movilidad usando Repudiation para absorber el aturdimiento, dejando a Irelia vulnerable sin su reset una vez que sus habilidades estén en cooldown.Build de Irelia →Ver detalles
Irelia
Por qué
Irelia se crece bailando por tu wave con Bladesurge, generando acumulaciones de Ionian Fervor para superarte en DPS. Esta lane gira por completo en torno a su Flawless Duet. Si te aturde, obtiene un reset de Bladesurge gratis y gana con facilidad el duelo largo. Sin embargo, Ambessa puede dar la vuelta a este choque de movilidad usando Repudiation para absorber el aturdimiento, dejando a Irelia vulnerable sin su reset una vez que sus habilidades estén en cooldown.
Impacto en la línea
Cuando Irelia tiene minions sobre los que resetear Bladesurge, no puedes disputar la wave. Estará buscando constantemente Flawless Duet. Fallar el momento de tu escudo de Repudiation significa recibir un daño físico enorme bajo la torre o verte forzada a un recall temprano. Si logras bloquear su aturdimiento, su postura agresiva se derrumba, lo que te permite limpiar con seguridad con Cunning Sweep y Lacerate sin arriesgarte a un dive letal.
Cómo jugar
Nunca inicies con Public Execution ni saltes hacia delante con Drakehound's Step cuando su Flawless Duet esté activo. Mantén la distancia y vigila las acumulaciones de su pasiva. Cuando despliegue su primera hoja, ten el dedo listo sobre Repudiation. Lánzalo en el momento en que vuele la segunda hoja para anular el aturdimiento. Si fallas el momento y te marca, usa de inmediato Lacerate para ralentizarla y alejarte con un dash a un lugar seguro, cediendo la wave en lugar de regalarle una kill.
MecánicasEsquivaFiora tiene una clara ventaja porque su Riposte puede neutralizar por completo tu principal crowd control. Si lanzas Public Execution o el segundo golpe de Cunning Sweep de forma predecible, desviará tu aturdimiento y te devolverá el suyo, dejándote indefensa ante sus vitales de Duelist's Dance. Como tu movilidad depende de Drakehound's Step, su ralentización de Bladework también puede perjudicar gravemente tu posicionamiento durante los trades.Build de Fiora →Ver detalles
Fiora
Por qué
Fiora tiene una clara ventaja porque su Riposte puede neutralizar por completo tu principal crowd control. Si lanzas Public Execution o el segundo golpe de Cunning Sweep de forma predecible, desviará tu aturdimiento y te devolverá el suyo, dejándote indefensa ante sus vitales de Duelist's Dance. Como tu movilidad depende de Drakehound's Step, su ralentización de Bladework también puede perjudicar gravemente tu posicionamiento durante los trades.
Impacto en la línea
Este matchup te fuerza a la defensiva, donde empujar la wave demasiado lejos te expone a persecuciones mortales. Fiora usará constantemente Lunge para hacer poke a tus vitales, amenazando con trades de vida enormes cada vez que te adelantes para golpear minions. Si hace freeze cerca de su torre, no puedes romperlo con seguridad porque lanzar Cunning Sweep te deja muy vulnerable a un contra-all-in de Riposte, dándole prioridad total de lane.
Cómo jugar
Para sobrevivir, debes pegarte a las paredes para ocultar tus vitales de Duelist's Dance, haciendo más difícil que Fiora los active con Lunge. Nunca inicies con Public Execution; en su lugar, usa los dashes de Drakehound's Step para bailar a su alrededor, atrayendo su Riposte con la amenaza de tu Slam de Cunning Sweep. Si no pica, guarda Repudiation para absorber su burst de Bladework y retírate de inmediato usando Lacerate para ralentizar su persecución.
Estos enfrentamientos son sobre todo duelos de ejecución: ambos campeones tienen formas reales de tomar la ventaja. Esquivar una habilidad clave, anticipar bien un engagement o un simple error de posicionamiento puede inclinar el duelo hacia un lado. Conocer el matchup y reconocer las ventanas de acción correctas es especialmente importante aquí.
EsquivaMecánicasEste matchup es un duelo de movilidad a alta velocidad, que depende de cómo gestiones tu respuesta defensiva al tercer lanzamiento de su Mortal Steel. Aunque Yone depende de Soul Unbound para iniciar trades con su tornado, tu capacidad de anular su setup determina al ganador. Bloquear su knockup con Repudiation le niega por completo el impulso del trade, dejándolo vulnerable a una rápida contraofensiva de Cunning Sweep antes de que se recuperen sus cooldowns.Build de Yone →Ver detalles
Yone
Por qué
Este matchup es un duelo de movilidad a alta velocidad, que depende de cómo gestiones tu respuesta defensiva al tercer lanzamiento de su Mortal Steel. Aunque Yone depende de Soul Unbound para iniciar trades con su tornado, tu capacidad de anular su setup determina al ganador. Bloquear su knockup con Repudiation le niega por completo el impulso del trade, dejándolo vulnerable a una rápida contraofensiva de Cunning Sweep antes de que se recuperen sus cooldowns.
Impacto en la línea
La prioridad de trade oscila enormemente según quién farolea con éxito. Cuando Yone tiene su tornado listo, debes ceder algo de presión de wave para poder reaccionar. Si absorbes su crowd control, puedes obligarlo a volver a su cuerpo espiritual inicial con poca vida, ganando control inmediato de la wave de minions y creando una enorme ventaja de vida que le impide farmear con comodidad.
Cómo jugar
Nunca desperdicies Repudiation mientras solo farmeas. Guarda este escudo específicamente para el momento en que Yone avance con dash con el knockup de su Mortal Steel. Cuando active Soul Unbound, sigue la dirección de su movimiento y ten el dedo listo en el botón; cuando vuele el tornado, activa tu escudo para absorber el impacto y luego avanza de inmediato con Drakehound's Step para ejecutar un combo completo de Cunning Sweep y Lacerate. Si fallas el momento del escudo, retírate de inmediato y usa Public Execution de forma defensiva.
EsquivaEscudosEste duelo lo dicta por completo cómo navegas la zona de amenaza lineal de Mordekaiser. Como su daño bruto se dispara cuando Obliterate golpea a un objetivo aislado, tu supervivencia depende de la movilidad. Al activar Drakehound's Step para deslizarte en lateral, anulas por completo su burst principal. Si te golpea, se activa su pasiva Darkness Rise, que derrite tu reserva de vida y vuelve este matchup de habilidad completamente a su favor.Build de Mordekaiser →Ver detalles
Mordekaiser
Por qué
Este duelo lo dicta por completo cómo navegas la zona de amenaza lineal de Mordekaiser. Como su daño bruto se dispara cuando Obliterate golpea a un objetivo aislado, tu supervivencia depende de la movilidad. Al activar Drakehound's Step para deslizarte en lateral, anulas por completo su burst principal. Si te golpea, se activa su pasiva Darkness Rise, que derrite tu reserva de vida y vuelve este matchup de habilidad completamente a su favor.
Impacto en la línea
Los slams fallados de Mordekaiser cambian por completo el control de la wave. Cuando logras atraer y esquivar Obliterate, su presión de lane desaparece, lo que te permite hacer crash de waves o forzar trades con Cunning Sweep. Sin embargo, si te arrastra con Death's Grasp mientras tu dash está en cooldown, te ves obligada a retirarte o a gastar Repudiation de forma defensiva, sacrificando tu turno para disputar los minions y cediendo prioridad de torre crucial.
Cómo jugar
Colócate siempre cerca de tus propios minions para evitar el daño aislado de Obliterate, pero mantente lista para moverte. Usa el borde exterior de Cunning Sweep para hacer poke, y activa de inmediato Drakehound's Step hacia un lado en el instante en que levante su maza. Ten Repudiation listo específicamente para absorber el arrastre de su Death's Grasp. Si te atrapa en Realm of Death, concéntrate únicamente en esquivar sus skillshots en lugar de huir, esperando a que termine la duración con tu movilidad.
EsquivaIntercambiosEste matchup es un duelo puro de micro-posicionamiento centrado en el Snip Snip! de Gwen. Como Gwen depende en gran medida del daño verdadero de la línea central de sus tijeras para ganar trades cortos, la movilidad de Ambessa es su mayor baza. Al enlazar Cunning Sweep o Lacerate para activar Drakehound's Step, puedes hacer dash al instante en lateral o por detrás de Gwen en cuanto corte, anulando por completo su principal fuente de burst y curación.Build de Gwen →Ver detalles
Gwen
Por qué
Este matchup es un duelo puro de micro-posicionamiento centrado en el Snip Snip! de Gwen. Como Gwen depende en gran medida del daño verdadero de la línea central de sus tijeras para ganar trades cortos, la movilidad de Ambessa es su mayor baza. Al enlazar Cunning Sweep o Lacerate para activar Drakehound's Step, puedes hacer dash al instante en lateral o por detrás de Gwen en cuanto corte, anulando por completo su principal fuente de burst y curación.
Impacto en la línea
No esquivar el centro de las tijeras de Gwen traslada todo el control de la wave a ella. Un golpe exitoso permite a Gwen empujar con facilidad usando Hallowed Mist para estar a salvo, forzándote bajo tu torre. En cambio, cuando te deslizas por detrás de ella durante Snip Snip!, su poder de trade se evapora. Esto te permite hacer freeze de la wave, quitarle vida y presionarla para que haga recalls arriesgados antes de que pueda escalar.
Cómo jugar
Para ganar, nunca inicies con tu dash. Acércate caminando para atraer a Gwen a que empiece la animación de su Snip Snip!. En el momento en que corte, lanza Cunning Sweep y usa el dash de Drakehound's Step para deslizarte a través de su modelo. Guarda Repudiation para absorber el daño de sus ataques potenciados de Skip 'n Slash o para bloquear la ralentización de Needlework si se compromete con su ultimate. Si fallas el momento de tu dash, retírate de inmediato.
EscudosMovilidadEste matchup es un duelo de reflejos de alto riesgo centrado en el Hookshot de Camille. Cuando se lanza desde la pared, toda su presión ofensiva depende de conectar ese aturdimiento para activar con seguridad Precision Protocol. Ambessa tiene la respuesta perfecta en Repudiation, que puede bloquear el crowd control por completo. Si anulas este aturdimiento, Camille queda vulnerable sin escapatoria, lo que te permite contraatacar de inmediato con Cunning Sweep.Build de Camille →Ver detalles
Camille
Por qué
Este matchup es un duelo de reflejos de alto riesgo centrado en el Hookshot de Camille. Cuando se lanza desde la pared, toda su presión ofensiva depende de conectar ese aturdimiento para activar con seguridad Precision Protocol. Ambessa tiene la respuesta perfecta en Repudiation, que puede bloquear el crowd control por completo. Si anulas este aturdimiento, Camille queda vulnerable sin escapatoria, lo que te permite contraatacar de inmediato con Cunning Sweep.
Impacto en la línea
Quien use mal su herramienta defensiva pierde el control del espacio físico de la lane. Un bloqueo exitoso con Repudiation deja a Camille expuesta en lo más profundo de tu wave de minions, obligándola a recibir mucho daño de Lacerate mientras se retira. En cambio, si desperdicias tu escudo prematuramente, Camille puede buscar libremente las ralentizaciones de Tactical Sweep para preparar un dive letal con Hookshot, dejándote bloqueada para su jungler.
Cómo jugar
Nunca lances Repudiation para absorber un simple poke de Tactical Sweep; en su lugar, usa los dashes de Drakehound's Step para colarte dentro o fuera del cono exterior de Camille. Guarda tu escudo exclusivamente para el momento en que se aferre a una pared y se lance hacia ti. Si te hace gastar el escudo sin comprometerse, retrocede de inmediato y juega a la defensiva hasta que vuelva su cooldown, ya que no puedes sobrevivir a un engage puro de The Hextech Ultimatum sin tu bloqueo de CC activo.
MovilidadEsquivaEste matchup es una danza volátil de negación de rango y movilidad reactiva. Jayce quiere desgastarte con su cañón To the Skies! antes de cambiar con Transform Mercury Cannon para hacerte burst. Sin embargo, Ambessa puede neutralizar por completo este poke usando Drakehound's Step para hacer dash fuera de la trayectoria de su skillshot. Cuando Jayce intente retirarse usando el empuje de Thundering Blow, tus dashes de bajo cooldown te permiten volver a engage de inmediato y castigar sus largos cooldowns.Build de Jayce →Ver detalles
Jayce
Por qué
Este matchup es una danza volátil de negación de rango y movilidad reactiva. Jayce quiere desgastarte con su cañón To the Skies! antes de cambiar con Transform Mercury Cannon para hacerte burst. Sin embargo, Ambessa puede neutralizar por completo este poke usando Drakehound's Step para hacer dash fuera de la trayectoria de su skillshot. Cuando Jayce intente retirarse usando el empuje de Thundering Blow, tus dashes de bajo cooldown te permiten volver a engage de inmediato y castigar sus largos cooldowns.
Impacto en la línea
Posicionarte cerca del arbusto es vital para romper la visión de Jayce y obligarlo a malgastar su maná en disparos a ciegas de To the Skies!. Si no esquivas su explosión inicial, te empujarán bajo la torre, perdiendo vida mientras él controla la wave. En cambio, las esquivas exitosas te permiten hacer freeze de la wave cerca de tu torre, dejándolo sin oro y forzándolo a rangos melé arriesgados donde Cunning Sweep destaca.
Cómo jugar
Atrae siempre el poke a distancia de Jayce saliendo de tu wave de minions, usando el dash de Drakehound's Step activado por Lacerate para esquivar To the Skies! de lado. Si entra en pánico y usa Thundering Blow para apartarte, sigue de inmediato con Public Execution u otro dash para cerrar la distancia antes de que se reinicien los cooldowns de su forma de martillo. Si te quitan vida pronto, guarda Repudiation para bloquear el daño de su Lightning Field mientras te retiras a un lugar seguro.
EscudosIntercambiosEste matchup se define por lo bien que neutralices el silencio de Garen para mantener tu encadenado de hechizos. Garen depende de su Decisive Strike para anular tu movilidad e impedir que actives Drakehound's Step. Al cronometrar Repudiation para bloquear su silencio, absorbes su burst y ganas la ventana para responder con Cunning Sweep, convirtiendo su carga agresiva en un trade favorable.Build de Garen →Ver detalles
Garen
Por qué
Este matchup se define por lo bien que neutralices el silencio de Garen para mantener tu encadenado de hechizos. Garen depende de su Decisive Strike para anular tu movilidad e impedir que actives Drakehound's Step. Al cronometrar Repudiation para bloquear su silencio, absorbes su burst y ganas la ventana para responder con Cunning Sweep, convirtiendo su carga agresiva en un trade favorable.
Impacto en la línea
Tu éxito en estas interacciones dicta directamente el control de la wave y la presión. Cuando bloqueas su silencio, obligas a Garen a jugar a la defensiva, neutralizando su pasiva Perseverance. Sin embargo, si te hace gastar el escudo, su Judgment destrozará tu armadura mientras estás silenciada, dejándote vulnerable a una ejecución de Demacian Justice y forzando una retirada costosa que cede la prioridad de torre.
Cómo jugar
Vigila de cerca el movimiento de Garen; cuando active Decisive Strike, mantén tu posición en lugar de huir. Activa Repudiation justo cuando empiece la animación de su golpe para absorberlo. Sigue de inmediato con el borde exterior de Cunning Sweep, usando Drakehound's Step para reposicionarte. Si te silencia primero, retírate usando Lacerate para ralentizar su persecución, y retrasa tu Public Execution hasta que terminen su escudo de Courage y su reducción de daño.
MecánicasEscudosEste matchup es un duelo de movimiento puro a alta velocidad. Mientras Yasuo depende de Sweeping Blade para bailar entre minions, tu Drakehound's Step te permite igualar sus dashes paso a paso. Lo más importante es que su Wind Wall es completamente inútil contra ti. Como todas tus herramientas de daño principales, Cunning Sweep y Lacerate, son golpes melé y no proyectiles, puedes ignorar por completo su barrera defensiva y abatirlo atravesándola.Build de Yasuo →Ver detalles
Yasuo
Por qué
Este matchup es un duelo de movimiento puro a alta velocidad. Mientras Yasuo depende de Sweeping Blade para bailar entre minions, tu Drakehound's Step te permite igualar sus dashes paso a paso. Lo más importante es que su Wind Wall es completamente inútil contra ti. Como todas tus herramientas de daño principales, Cunning Sweep y Lacerate, son golpes melé y no proyectiles, puedes ignorar por completo su barrera defensiva y abatirlo atravesándola.
Impacto en la línea
Yasuo intentará constantemente cargar Steel Tempest en la wave para amenazarte con un tornado. Cuando tiene listo su tercer golpe, su zona de amenaza se amplía, obligándote a usar Drakehound's Step de forma defensiva. Sin embargo, como su Wind Wall no puede mitigar Lacerate ni Cunning Sweep, no puede retirarse ni hacer freeze de la wave con facilidad contra ti, convirtiendo cada wave de minions en una zona volátil donde un solo error lleva a trades letales.
Cómo jugar
Colócate lejos de tus propios minions con poca vida para limitar las rutas de escape de Sweeping Blade de Yasuo, obligándolo a pelear contigo directamente. Guarda siempre Repudiation para absorber su tercer tornado de Steel Tempest o su ultimate, Last Breath, anulando su crowd control. Si logra hacerte poke desde lejos, usa los dashes de Drakehound's Step para colarte en el arbusto y romper su visión, y luego cierra la distancia con Public Execution para acabar con él.
MecánicasEscudosEsta lane es una prueba pura de reflejos, que enfrenta los dashes rápidos de Riven contra tus dashes de Drakehound's Step. Riven depende de encadenar Broken Wings y Ki Burst para inmovilizarte mientras acumula Runic Blade. Sin embargo, tu Repudiation es el aguafiestas definitivo. Al cronometrar este escudo para absorber su burst principal y bloquear su CC, das la vuelta por completo a una escaramuza igualada a tu favor.Build de Riven →Ver detalles
Riven
Por qué
Esta lane es una prueba pura de reflejos, que enfrenta los dashes rápidos de Riven contra tus dashes de Drakehound's Step. Riven depende de encadenar Broken Wings y Ki Burst para inmovilizarte mientras acumula Runic Blade. Sin embargo, tu Repudiation es el aguafiestas definitivo. Al cronometrar este escudo para absorber su burst principal y bloquear su CC, das la vuelta por completo a una escaramuza igualada a tu favor.
Impacto en la línea
Espera trades implacables y a alta velocidad donde ninguna de las dos puede hacer freeze de la wave con facilidad. Si desperdicias Repudiation pronto, Riven forzará de inmediato un trade con Blade of the Exile, empujándote fuera de la wave y asegurando la prioridad. En cambio, parar con éxito su knockup te permite perseguirla con Cunning Sweep, obligándola a usar Valor de forma defensiva y dándote control total de los tiempos de recall.
Cómo jugar
Nunca inicies trades con Repudiation; en su lugar, abre con Cunning Sweep y usa Drakehound's Step para igualar su posicionamiento. Vigila de cerca sus lanzamientos de Q. Cuando prepare el tercer golpe de Broken Wings, o entre en dash de cerca para Ki Burst, activa de inmediato tu escudo. Si te hace gastar el escudo con Valor, retírate de inmediato con Lacerate para ralentizarla y espera a que vuelvan tus cooldowns antes de adelantarte de nuevo.
Estos campeones suelen tener problemas para responder a tus principales fortalezas, lo que te permite afrontar el enfrentamiento con más libertad. Normalmente tienes varias formas de presionarlos y forzar intercambios a tu favor. Aprovecha esta ventaja para imponer tu ritmo en lugar de darles tiempo para volver a una posición cómoda.
Presión tempranaLimpieza de oleadasAmbessa domina por completo el early game porque el sustain de Soul Eater de Nasus no puede igualar su trading agresivo. Al hostigarlo con el borde exterior de Cunning Sweep, lo obliga a jugar a la defensiva. Cuando Nasus intenta retirarse con Wither, Ambessa puede eludir por completo la reducción de velocidad de movimiento porque Drakehound's Step le da dashes que ignoran las penalizaciones de ralentización, lo que le permite mantenerse encima de él.Build de Nasus →Ver detalles
Nasus
Por qué
Ambessa domina por completo el early game porque el sustain de Soul Eater de Nasus no puede igualar su trading agresivo. Al hostigarlo con el borde exterior de Cunning Sweep, lo obliga a jugar a la defensiva. Cuando Nasus intenta retirarse con Wither, Ambessa puede eludir por completo la reducción de velocidad de movimiento porque Drakehound's Step le da dashes que ignoran las penalizaciones de ralentización, lo que le permite mantenerse encima de él.
Impacto en la línea
Esta dinámica dicta un control estricto de la wave. Puedes hacer slow push de las primeras waves para hacer crash de una wave enorme bajo su torre, y luego usar Cunning Sweep y Lacerate para hacerle poke mientras intenta hacer last hit para las acumulaciones de Siphoning Strike. Negarle esas acumulaciones pronto retrasa su pico de escalado, manteniéndolo atrapado bajo su torre y dándote libertad total.
Cómo jugar
Mantén la wave en freeze cerca de tu torre al principio para obligar a Nasus a acercarse al rango de Spirit Fire. Si se adelanta para acumular Siphoning Strike, golpéalo de inmediato con Cunning Sweep y activa Drakehound's Step para hacer dash hacia delante. Guarda Repudiation para absorber su golpe de represalia o para bloquear Wither. Si Nasus activa Fury of the Sands, no te comprometas con un duelo largo; en su lugar, usa Public Execution para suprimirlo, reposiciónate y retírate hasta que expire su ultimate.
MovilidadPosicionamientoEsquivaAmbessa domina por completo este matchup porque su pasiva, Drakehound's Step, le da dashes cortos y frecuentes que contrarrestan a la perfección el golpe telegrafiado de Aatrox, The Darkin Blade. Cada vez que Aatrox intenta alinear sus sweetspots, Ambessa puede activar un reposicionamiento rápido lanzando Cunning Sweep o Lacerate, deslizándose completamente fuera de sus zonas de knockup mientras mantiene una alta presión ofensiva. Aatrox simplemente no tiene la velocidad para fijarla.Build de Aatrox →Ver detalles
Aatrox
Por qué
Ambessa domina por completo este matchup porque su pasiva, Drakehound's Step, le da dashes cortos y frecuentes que contrarrestan a la perfección el golpe telegrafiado de Aatrox, The Darkin Blade. Cada vez que Aatrox intenta alinear sus sweetspots, Ambessa puede activar un reposicionamiento rápido lanzando Cunning Sweep o Lacerate, deslizándose completamente fuera de sus zonas de knockup mientras mantiene una alta presión ofensiva. Aatrox simplemente no tiene la velocidad para fijarla.
Impacto en la línea
Esta ventaja de movilidad dicta cada trade de vida. Aatrox no puede hacer crash de waves ni zonearte con facilidad, ya que fallar sus dos primeros sweetspots de The Darkin Blade lo deja increíblemente vulnerable a un all-in. Puedes adelgazar la wave constantemente y forzarlo bajo su torre, amenazando con un dive una vez que gaste su Infernal Chains. Su sustain de Deathbringer Stance no puede compensar el volumen de daño que recibe.
Cómo jugar
Para ejecutar esta lane a la perfección, nunca inicies con tu dash; en su lugar, acércate caminando para atraer su primer The Darkin Blade. Usa Drakehound's Step de forma reactiva para esquivar hacia un lado, y luego responde con Cunning Sweep. Guarda Repudiation específicamente para bloquear el arrastre de Infernal Chains si te atrapa. Cuando Aatrox active World Ender, no te retires en pánico; usa tu movilidad para zigzaguear entre sus golpes, retrasando tu Public Execution para ejecutarlo.
MovilidadEnfriamientosAmbessa domina este matchup porque Mini Gnar no puede mantener su espaciado contra su movilidad implacable. Cada vez que lanzas Cunning Sweep o Lacerate, Drakehound's Step te da un dash veloz que elude por completo la ralentización de su Boomerang Throw y la retirada de Hop. Esto te permite pegarte rápidamente a él y agotar su frágil reserva de vida antes de que su Rage Gene pueda transformarlo en la resistente forma Mega Gnar.Build de Gnar →Ver detalles
Gnar
Por qué
Ambessa domina este matchup porque Mini Gnar no puede mantener su espaciado contra su movilidad implacable. Cada vez que lanzas Cunning Sweep o Lacerate, Drakehound's Step te da un dash veloz que elude por completo la ralentización de su Boomerang Throw y la retirada de Hop. Esto te permite pegarte rápidamente a él y agotar su frágil reserva de vida antes de que su Rage Gene pueda transformarlo en la resistente forma Mega Gnar.
Impacto en la línea
Esta dinámica le quita a Gnar su ventaja habitual de hostigamiento a distancia. Se ve obligado a respetar tu rango de dash, lo que significa que puedes controlar con facilidad el estado de la wave. Si se adelanta para acumular Hyper en los minions, puedes iniciar un trade al instante. Conseguirás ventajas de vida tempranas que lo fuerzan a malos tiempos de recall, neutralizando su presión de torre e impidiéndole farmear con seguridad en su vulnerable estado Mini.
Cómo jugar
Haz tu engage cuando la barra de rabia de Gnar esté baja, asegurándote de que no pueda transformarse en mitad de la pelea. Empieza con Cunning Sweep, usando el dash de Drakehound's Step para cerrar la distancia y activar el seguimiento de Slam. Guarda Repudiation específicamente para bloquear la ralentización de su Boomerang Throw o para absorber el aturdimiento de Boulder Toss si logra transformarse. Si intenta escapar con Hop, iguálalo de inmediato con Public Execution para inmovilizarlo y acabar con él.
EscudosEsquivaEste matchup gira en torno al intento de Urgot de ejecutar su trade usando Disdain. Cuando avanza con dash para darte la vuelta, tu Repudiation actúa como la contramedida definitiva. Al cronometrarlo para absorber el impacto, bloqueas el desplazamiento y el aturdimiento, niegas la creación de su escudo y respondes de inmediato. Sin su voltereta, Urgot no puede activar con facilidad múltiples pasivas de Echoing Flames, lo que permite que tu Cunning Sweep destroce su barra de vida mientras está inmovilizado.Build de Urgot →Ver detalles
Urgot
Por qué
Este matchup gira en torno al intento de Urgot de ejecutar su trade usando Disdain. Cuando avanza con dash para darte la vuelta, tu Repudiation actúa como la contramedida definitiva. Al cronometrarlo para absorber el impacto, bloqueas el desplazamiento y el aturdimiento, niegas la creación de su escudo y respondes de inmediato. Sin su voltereta, Urgot no puede activar con facilidad múltiples pasivas de Echoing Flames, lo que permite que tu Cunning Sweep destroce su barra de vida mientras está inmovilizado.
Impacto en la línea
El dominio de lane de Urgot se derrumba cuando ya no puede amenazarte con su voltereta. Como ganas trades de forma constante al bloquear Disdain, tú dictas la posición de la wave, obligándolo a farmear a distancia con Purge. Esto crea enormes diferencias de vida, lo que te permite hacer crash de waves grandes de minions y asegurar tiempos de recall gratis. Urgot se ve forzado a jugar a la defensiva bajo la torre, perdiendo oro y la capacidad de ayudar a su jungler.
Cómo jugar
Colócate constantemente cerca del arco frontal de Urgot para atraer su dash, pero nunca gastes tus propios dashes sin pensar. Ten Repudiation listo específicamente para cuando veas empezar su animación de carga. Si intenta ralentizarte primero con Corrosive Charge, usa Lacerate para reposicionarte y mantener tu ángulo sin desperdiciar tu escudo defensivo. Si fallas el momento de tu bloqueo y te dan la vuelta, activa de inmediato Public Execution para cambiar el rumbo de la pelea y ejecutarlo antes de que su Purge te desgaste.
MovilidadAll-inTeemo depende de Toxic Shot para hostigarte desde lejos y usa Blinding Dart para anular tus ataques potenciados de la pasiva. Sin embargo, su falta de escape duro lo hace muy vulnerable. Al encadenar Cunning Sweep y Lacerate, activas múltiples dashes de Drakehound's Step para superar con facilidad su alcance. Incluso si estás cegada, tu movilidad garantiza que te mantengas pegada a él hasta que puedas soltar Public Execution para rematarlo.Build de Teemo →Ver detalles
Teemo
Por qué
Teemo depende de Toxic Shot para hostigarte desde lejos y usa Blinding Dart para anular tus ataques potenciados de la pasiva. Sin embargo, su falta de escape duro lo hace muy vulnerable. Al encadenar Cunning Sweep y Lacerate, activas múltiples dashes de Drakehound's Step para superar con facilidad su alcance. Incluso si estás cegada, tu movilidad garantiza que te mantengas pegada a él hasta que puedas soltar Public Execution para rematarlo.
Impacto en la línea
Al principio, Teemo intentará zonearte con veneno, obligándote a usar Repudiation para absorber daño mientras recoges minions. Pero en cuanto desbloqueas Public Execution, la dinámica de la lane se invierte. Tu amenaza de cerrar la distancia de golpe restringe su capacidad de colocar Noxious Trap con seguridad o de hostigarte, atrapando al explorador bajo su propia torre y neutralizando su presión en el mapa.
Cómo jugar
Al hacer trade, no entres en pánico si Teemo te acierta con Blinding Dart. En lugar de desperdiciar tus ataques potenciados de Drakehound's Step contra su ceguera, usa el dash para posicionar Cunning Sweep y Lacerate y causar el máximo daño. Guarda Repudiation para absorber los ticks de su veneno mientras esperas a que se acabe el debuff. Cuando se te despeje la visión, suelta tus golpes de pasiva acumulados y asegura la kill con Public Execution antes de que pueda huir con Move Quick.
EsquivaEscudosAmbessa domina este matchup porque su gran movilidad elude los patrones predecibles de Ornn. Mientras Ornn depende de acertar Searing Charge contra el terreno o de cronometrar su Call of the Forge God para inmovilizarte, tu Repudiation actúa como un counter perfecto. Al absorber sus knockups y proteger de su burst, le quitas al tanque su crowd control, dejándolo vulnerable a trades largos donde Drakehound's Step supera en espaciado a sus cooldowns lentos.Build de Ornn →Ver detalles
Ornn
Por qué
Ambessa domina este matchup porque su gran movilidad elude los patrones predecibles de Ornn. Mientras Ornn depende de acertar Searing Charge contra el terreno o de cronometrar su Call of the Forge God para inmovilizarte, tu Repudiation actúa como un counter perfecto. Al absorber sus knockups y proteger de su burst, le quitas al tanque su crowd control, dejándolo vulnerable a trades largos donde Drakehound's Step supera en espaciado a sus cooldowns lentos.
Impacto en la línea
Esta interacción obliga a Ornn a un estado de lane defensivo y pasivo. No puede disputar la wave con seguridad con Volcanic Rupture ni hacer trade con Bellows Breath porque cualquier movimiento hacia delante te permite hacer dash sobre él. Cuando bloqueas su crucial knockup de Searing Charge, se queda sin escape, lo que te permite hacer freeze de la wave a voluntad o hacer crash de waves gigantes para quitar placas a su torre mientras él se queda indefenso bajo la torre.
Cómo jugar
Para ejecutar este plan, nunca gastes Repudiation de forma agresiva; guárdalo estrictamente para su crowd control. Cuando Ornn lance Call of the Forge God, espera a que el carnero de vuelta golpee antes de activar tu escudo, o actívalo en el momento en que cargue contra una pared con Searing Charge. Usa Cunning Sweep para hacerle poke, y haz siempre dash en diagonal con Drakehound's Step para evitar el aliento de Bellows Breath. Si intenta escapar, asegura la kill con Public Execution.
Presión tempranaDiveLa vulnerabilidad temprana de Kayle proviene de su débil estado melé antes de que Divine Ascent evolucione. Depende de Radiant Blast y Celestial Blessing para hacer kite, pero no puede escapar de tu movilidad implacable. Al encadenar Cunning Sweep y Lacerate, activas dashes sucesivos de Drakehound's Step que cierran la distancia con facilidad. Kayle simplemente carece de las estadísticas defensivas brutas y de las herramientas tempranas para sobrevivir a esta agresión pegajosa constante antes de desbloquear su rango.Build de Kayle →Ver detalles
Kayle
Por qué
La vulnerabilidad temprana de Kayle proviene de su débil estado melé antes de que Divine Ascent evolucione. Depende de Radiant Blast y Celestial Blessing para hacer kite, pero no puede escapar de tu movilidad implacable. Al encadenar Cunning Sweep y Lacerate, activas dashes sucesivos de Drakehound's Step que cierran la distancia con facilidad. Kayle simplemente carece de las estadísticas defensivas brutas y de las herramientas tempranas para sobrevivir a esta agresión pegajosa constante antes de desbloquear su rango.
Impacto en la línea
Este desajuste de movilidad te da un dominio absoluto de las waves de minions. Puedes establecer con facilidad un slow push, obligando a Kayle a mirar impotente o a arriesgarse a morir ante un engage rápido de Cunning Sweep. Se ve forzada a desperdiciar Starfire Spellblade solo para asegurar migajas bajo su torre. Esta amenaza constante de dive o de zoneo intenso la deja sin oro ni experiencia, retrasando sus cruciales umbrales de ascensión mientras te asegura una ventaja temprana.
Cómo jugar
Colócate de forma agresiva entre los minions lanzadores enemigos y Kayle para negarle experiencia. Cuando intente retirarse con Radiant Blast, activa de inmediato Repudiation para bloquear el proyectil ralentizador y absorber su contra-poke. Guarda Public Execution para el momento en que expire su Divine Judgment lanzado sobre sí misma, asegurándote de suprimirla justo después de que se desvanezca su invulnerabilidad. Si empujas demasiado rápido por accidente, haz freeze de la siguiente wave cerca de tu torre para forzarla a territorio profundo y letal.
EsquivaDaño verdaderoAmbessa domina este matchup porque su movilidad neutraliza por completo la principal amenaza de Sion. En cuanto Sion empieza a canalizar Decimating Smash, puedes activar Drakehound's Step tras lanzar Cunning Sweep o Lacerate para salir sin esfuerzo de la zona de peligro. Al esquivar su pesado knockup, le quitas su principal crowd control y daño, dejándolo totalmente indefenso ante tu implacable contra-engage.Build de Sion →Ver detalles
Sion
Por qué
Ambessa domina este matchup porque su movilidad neutraliza por completo la principal amenaza de Sion. En cuanto Sion empieza a canalizar Decimating Smash, puedes activar Drakehound's Step tras lanzar Cunning Sweep o Lacerate para salir sin esfuerzo de la zona de peligro. Al esquivar su pesado knockup, le quitas su principal crowd control y daño, dejándolo totalmente indefenso ante tu implacable contra-engage.
Impacto en la línea
Esta interacción te da una autoridad completa sobre los estados de la wave y el ritmo de los trades. Sion no puede canalizar Decimating Smash con seguridad para limpiar minions sin recibir un castigo severo. Puedes establecer con facilidad un slow push y hacer dive o presionar su torre, ya que sus desesperados intentos de absorber tus burst con Soul Furnace agotarán rápidamente su reserva de maná, forzándolo a malos tiempos de recall y a la pérdida de placas de torre.
Cómo jugar
Para ejecutar esto a la perfección, mantente siempre dentro del rango de Sion y guarda Cunning Sweep o Lacerate. Evita gastar todas tus habilidades a la vez; en su lugar, espera a que empiece a anclar su golpe pesado antes de activar Drakehound's Step para deslizarte fuera de su trayectoria. Si intenta escapar o hacer engage con Unstoppable Onslaught, cronometra tu escudo de Repudiation para absorber el impacto y sigue de inmediato con Public Execution para asegurar la kill.
Estos campeones tienen una build y un estilo de juego que superan directamente al tuyo, lo que puede hacer que controlar la línea y farmear sea extremadamente difícil. Sus habilidades pueden neutralizar tus principales fortalezas o castigarte en cuanto intentas jugar tu plan habitual. En estos matchups, el objetivo suele ser minimizar errores y buscar soluciones fuera del enfrentamiento directo.
SustentoDesengancheAmbessa depende de encadenar Cunning Sweep y Lacerate junto con los dashes de Drakehound's Step para eliminar objetivos con burst. Sin embargo, Warwick anula por completo este patrón de burst. Su Primal Howl otorga una inmensa reducción de daño que absorbe tu combo inicial, mientras que la curación de Eternal Hunger aumenta a medida que baja su vida, permitiéndole superar fácilmente en sustain tus altos costos de energía en cualquier duelo directo.Build de Warwick →Ver detalles
Warwick
Por qué
Ambessa depende de encadenar Cunning Sweep y Lacerate junto con los dashes de Drakehound's Step para eliminar objetivos con burst. Sin embargo, Warwick anula por completo este patrón de burst. Su Primal Howl otorga una inmensa reducción de daño que absorbe tu combo inicial, mientras que la curación de Eternal Hunger aumenta a medida que baja su vida, permitiéndole superar fácilmente en sustain tus altos costos de energía en cualquier duelo directo.
Impacto en la línea
Esta desventaja estructural te cierra por completo la posibilidad de disputar los Scuttle Crabs tempranos o invadir su territorio de jungla. Si te topas con Warwick en el río, su Blood Hunt hace extremadamente difícil huir si estás desgastada, y su Jaws of the Beast se aferrará a tus dashes de Drakehound's Step, dejando tu movilidad inútil y costándote prioridad de mapa.
Cómo jugar
Nunca inicies una escaramuza 1v1 en el río. Si Warwick salta sobre ti con Infinite Duress, ten Repudiation lista para lanzarla de inmediato y absorber el impacto inicial de la supresión y obtener el escudo. Guarda tu Public Execution estrictamente como herramienta para escapar por encima de las paredes o para ejecutarlo solo si un aliado ya ha aplicado CC fuerte, concentrándote en cambio en limpiar campamentos rápidamente.
Inmunidad a CCDaño verdaderoOlaf neutraliza por completo la utilidad de tu ultimate. Cuando activa Ragnarok, su inmunidad a CC te impide inmovilizarlo con Public Execution, y no se ve afectado por el knock-up del segundo lanzamiento de Cunning Sweep. Como tu kit depende de estos desplazamientos para espaciar y hacer burst, su ultimate convierte tus herramientas principales en animaciones inútiles, permitiéndole cerrar la distancia sin esfuerzo con el slow de Undertow.Build de Olaf →Ver detalles
Olaf
Por qué
Olaf neutraliza por completo la utilidad de tu ultimate. Cuando activa Ragnarok, su inmunidad a CC te impide inmovilizarlo con Public Execution, y no se ve afectado por el knock-up del segundo lanzamiento de Cunning Sweep. Como tu kit depende de estos desplazamientos para espaciar y hacer burst, su ultimate convierte tus herramientas principales en animaciones inútiles, permitiéndole cerrar la distancia sin esfuerzo con el slow de Undertow.
Impacto en la línea
No puedes disputarle nada a Olaf en escaramuzas 1v1 directas en el río o en tu propia jungla. Si te lo encuentras en Scuttle Crab, debes ceder. Intentar pelear contra él por objetivos tempranos hará que active Vicious Strikes para superar tu daño en sustain. Su presión implacable hacia adelante te fuerza a un estado reactivo, cediendo prioridad neutral temprana y dejando a tus laners vulnerables a sus ganks imparables.
Cómo jugar
Nunca inicies con Public Execution cuando Ragnarok esté disponible. En su lugar, usa Lacerate combinado con Drakehound's Step para hacer dash hacia atrás por encima de paredes delgadas cuando avance. Guarda Repudiation específicamente para absorber el daño verdadero de su Reckless Swing o el slow inicial del hacha de Undertow. Si activa su ultimate, aborta la pelea de inmediato, usando los dashes de tu pasiva para hacer kite hasta que su inmunidad a CC expire antes de siquiera considerar un reengage.
Control de masasRammus es tu peor pesadilla absoluta en la jungla porque su Defensive Ball Curl vuelve en tu contra tu pasiva de alta frecuencia, Drakehound's Step. Cada vez que haces dash y golpeas con tus autoataques potenciados, derrites tu propia barra de vida contra su armadura. Para empeorar las cosas, su Frenzying Taunt te obliga a atacarlo durante este estado defensivo, anulando por completo tu capacidad de maniobrar con Cunning Sweep o escapar.Build de Rammus →Ver detalles
Rammus
Por qué
Rammus es tu peor pesadilla absoluta en la jungla porque su Defensive Ball Curl vuelve en tu contra tu pasiva de alta frecuencia, Drakehound's Step. Cada vez que haces dash y golpeas con tus autoataques potenciados, derrites tu propia barra de vida contra su armadura. Para empeorar las cosas, su Frenzying Taunt te obliga a atacarlo durante este estado defensivo, anulando por completo tu capacidad de maniobrar con Cunning Sweep o escapar.
Impacto en la línea
Este matchup arruina tu tempo temprano de jungla y las disputas de objetivos neutrales. Al disputar el Scuttle Crab, Rammus puede interrumpir fácilmente las animaciones de lanzamiento de tu Cunning Sweep o Lacerate usando Powerball. Si intentas hacer counter-jungle, sus rápidas rotaciones por el mapa significan que puede fijarte delante de tus propias narices. No puedes duelear con seguridad contra él en ninguna fase, lo que significa que tus lanes pierden presión crucial de jungla temprana mientras él escala su armadura con seguridad.
Cómo jugar
Tu prioridad absoluta es guardar Repudiation para absorber su Frenzying Taunt o detener el impulso de Powerball. Nunca inicies con Drakehound's Step si su Defensive Ball Curl está activa; en su lugar, aléjate caminando o usa Lacerate desde la distancia para frenarlo. Si hace engage sobre tus aliados, espera a que pase su pico defensivo antes de comprometer tu Public Execution. Si te atrapa, prioriza construir objetos de penetración de armadura en lugar de velocidad de ataque pura para sobrevivir a su reflejo pasivo.
InterrupciónAnti-desplazamientoTodo tu flujo ofensivo depende de activar Drakehound's Step después de lanzar Cunning Sweep o Lacerate. Sin embargo, Poppy neutraliza por completo esta movilidad con Steadfast Presence. En el momento en que intentas cualquier dash pasivo dentro de su barrera, te derriban al instante, quedas grounded y recibes mucho daño. Esta única interacción te quita tus combos fluidos, dejándote completamente vulnerable e incapaz de reposicionarte o pegarte a tu objetivo.Build de Poppy →Ver detalles
Poppy
Por qué
Todo tu flujo ofensivo depende de activar Drakehound's Step después de lanzar Cunning Sweep o Lacerate. Sin embargo, Poppy neutraliza por completo esta movilidad con Steadfast Presence. En el momento en que intentas cualquier dash pasivo dentro de su barrera, te derriban al instante, quedas grounded y recibes mucho daño. Esta única interacción te quita tus combos fluidos, dejándote completamente vulnerable e incapaz de reposicionarte o pegarte a tu objetivo.
Impacto en la línea
En la jungla, este matchup arruina tu potencial de escaramuza. No puedes disputar los Rift Scuttlers ni los objetivos neutrales de frente, ya que Poppy puede invadir tus campamentos con impunidad. Intentar escapar o iniciar con Drakehound's Step solo resulta en un stun autoinfligido si su barrera está activa. Esto te obliga a ceder el control del río, sacrificando directamente presión de mapa temprana y dejando a tus laners expuestos a sus ganks.
Cómo jugar
Para sobrevivir, debes tratar a Poppy como una zona de peligro móvil. Nunca inicies con Cunning Sweep si tiene lista su barrera defensiva; en su lugar, retrasa los activadores de tu Drakehound's Step caminando en vez de hacer dash. Guarda Repudiation para absorber el daño de su knockback, y compromete tu Public Execution solo después de haber hecho que gaste Steadfast Presence. Si la activa, deja de lanzar habilidades de inmediato y apóyate en el pathing de caminar básico para retirarte.
Estos campeones tienen herramientas que generalmente les dan ventaja en el enfrentamiento, sin llegar a hacer el matchup injugable. Pueden tener más alcance, mejor capacidad para aguantar tu ofensiva o más formas de responder a tus engagements. Tendrás que adaptar tu enfoque y elegir con cuidado los momentos en los que aceptas el combate.
ArmaduraGraves tiene una clara ventaja porque su Quickdraw le permite salir con dash sin esfuerzo del punto óptimo de tu Cunning Sweep. Al hacerlo, no solo evita el devastador golpe secundario, sino que además acumula armadura de True Grit, mitigando tu burst físico. Sus ataques básicos a distancia de New Destiny le permiten hacerte kite con facilidad mientras te cuesta pegarte a él sin los dashes de tu pasiva.Build de Graves →Ver detalles
Graves
Por qué
Graves tiene una clara ventaja porque su Quickdraw le permite salir con dash sin esfuerzo del punto óptimo de tu Cunning Sweep. Al hacerlo, no solo evita el devastador golpe secundario, sino que además acumula armadura de True Grit, mitigando tu burst físico. Sus ataques básicos a distancia de New Destiny le permiten hacerte kite con facilidad mientras te cuesta pegarte a él sin los dashes de tu pasiva.
Impacto en la línea
Esta dinámica hace que las escaramuzas tempranas en la jungla sean muy peligrosas para ti, especialmente alrededor de los Scuttle Crabs. Si Graves intercepta tu limpieza, puede usar Smoke Screen para interrumpir el apuntado de tu Drakehound's Step. Te irá desgastando la vida poco a poco, forzándote a ceder prioridad de campamentos o arriesgarte a un duelo fatal donde su Collateral Damage te ejecuta después de que hayas gastado tus gap-closers.
Cómo jugar
Para sobrevivir y cambiar el rumbo, nunca inicies con Cunning Sweep. En su lugar, acércate caminando o usa Lacerate para obligarlo a lanzar Quickdraw primero por pánico. Mantén Repudiation activa para absorber su burst de alto impacto de End of the Line o el efecto cegador de Smoke Screen. Si peleas cerca de paredes, colócate de modo que su barril de pólvora de vuelta no detone al instante, y luego inmovilízalo con Public Execution solo después de que se disipen sus stacks de armadura.
DefinitivaMovilidadTryndamere domina los duelos directos y prolongados en la jungla por el daño crítico bruto de Battle Fury. Si intentas una pelea frontal, sus constantes autoataques te harán gastar rápidamente tus opciones defensivas. Incluso si le quitas un buen trozo de vida, Undying Rage anula por completo tu daño de ejecución de Public Execution. Tu única salvación es usar Lacerate y Drakehound's Step para superarlo en maniobra durante su ultimate.Build de Tryndamere →Ver detalles
Tryndamere
Por qué
Tryndamere domina los duelos directos y prolongados en la jungla por el daño crítico bruto de Battle Fury. Si intentas una pelea frontal, sus constantes autoataques te harán gastar rápidamente tus opciones defensivas. Incluso si le quitas un buen trozo de vida, Undying Rage anula por completo tu daño de ejecución de Public Execution. Tu única salvación es usar Lacerate y Drakehound's Step para superarlo en maniobra durante su ultimate.
Impacto en la línea
Como no puedes igualar su DPS bruto, pierdes la libertad de disputar scuttle crabs o invadir sus campamentos al inicio. Si te atrapa con mucha furia, su Spinning Slash le permite pegarse a ti, forzando un Repudiation defensivo. Esta postura pasiva significa que a menudo tendrás que ceder presión de jungla temprana, obligando a tus lanes a jugar más seguras mientras te centras en limpiar con seguridad.
Cómo jugar
Cuando Tryndamere inicie con Spinning Slash, no uses de inmediato Public Execution. En su lugar, activa Lacerate para frenarlo, seguido de un dash de Drakehound's Step para crear distancia. Guarda Repudiation para absorber su burst inicial de críticos o bloquear el slow de Mocking Shout si estás de espaldas. Una vez que active Undying Rage, sigue haciendo dash para alejarte usando tus golpes potenciados por la pasiva sobre monstruos de la jungla o minions para agotar sus cinco segundos de inmortalidad.
MovilidadInmunidad a CCLillia domina este duelo de jungla porque la velocidad de movimiento extra que gana al acumular Blooming Blows le permite bailar sin esfuerzo alrededor del borde exterior de tu Cunning Sweep, lo que hace que tu daño principal y tu lanzamiento al aire sean muy poco fiables. Aunque tienes herramientas para mitigar su preparación de sueño ajustando a la perfección el momento de Repudiation contra Lilting Lullaby, su constante movilidad hace que conectar toda tu rotación ofensiva sea una batalla cuesta arriba.Build de Lillia →Ver detalles
Lillia
Por qué
Lillia domina este duelo de jungla porque la velocidad de movimiento extra que gana al acumular Blooming Blows le permite bailar sin esfuerzo alrededor del borde exterior de tu Cunning Sweep, lo que hace que tu daño principal y tu lanzamiento al aire sean muy poco fiables. Aunque tienes herramientas para mitigar su preparación de sueño ajustando a la perfección el momento de Repudiation contra Lilting Lullaby, su constante movilidad hace que conectar toda tu rotación ofensiva sea una batalla cuesta arriba.
Impacto en la línea
Esta dinámica te obliga a un patrón defensivo de farmeo, ya que Lillia puede hacerte kite con facilidad en las escaramuzas abiertas del río. Si conecta Swirlseed desde lejos, puede activar con seguridad Lilting Lullaby para forzar tu Repudiation o asegurar una kill. Tendrás dificultades constantes para disputar objetivos neutrales directamente, y perderás la prioridad del cangrejo temprano a menos que tus lanes se derrumben para dejarla inmovilizada.
Cómo jugar
Para sobrevivir y ganar, nunca inicies con Public Execution mientras ella tenga el máximo de acumulaciones de Blooming Blows. En su lugar, espera en el arbusto para emboscarla, usando Lacerate para aplicar una ralentización fuerte. Guarda Repudiation estrictamente para el momento exacto en que el indicador de somnolencia de Lilting Lullaby esté a punto de convertirse en sueño. Si logra hacerte kite en tu Cunning Sweep inicial, usa de inmediato Drakehound's Step para hacer dash hacia atrás y retirarte en lugar de perseguirla.
IntercambiosEsquivaDarius domina de forma natural este matchup de jungla porque sus acumulaciones de Hemorrhage castigan los duelos prolongados, mientras que Decimate le da un sustain enorme. Como Ambessa carece de curación innata, no puede ganar una guerra de desgaste. El duelo depende por completo de tu tiempo de reacción: debes usar Drakehound's Step para hacer dash directamente hacia su anillo interior cuando él golpee, negándole tanto la curación como su umbral máximo de daño.Build de Darius →Ver detalles
Darius
Por qué
Darius domina de forma natural este matchup de jungla porque sus acumulaciones de Hemorrhage castigan los duelos prolongados, mientras que Decimate le da un sustain enorme. Como Ambessa carece de curación innata, no puede ganar una guerra de desgaste. El duelo depende por completo de tu tiempo de reacción: debes usar Drakehound's Step para hacer dash directamente hacia su anillo interior cuando él golpee, negándole tanto la curación como su umbral máximo de daño.
Impacto en la línea
En la jungla, esta dinámica de poder hace que las disputas tempranas del scuttle y las invasiones sean muy arriesgadas para ti. Si Darius te atrapa con Apprehend, puede acumular Hemorrhage con facilidad y forzar tu flash. Un trade fallido significa ceder la prioridad de objetivos o verte forzada a hacer un recall temprano, lo que ralentiza tu limpieza y deja a tus laners vulnerables a sus ganks de mucho daño.
Cómo jugar
Nunca inicies con tu dash. En su lugar, empieza las escaramuzas con Lacerate para ralentizarlo, obligándolo a preparar Decimate. En el momento en que su hacha gire, activa Drakehound's Step para hacer dash cerca de su modelo. Usa Repudiation para absorber el daño de Crippling Strike o bloquear el desplazamiento de Apprehend. Si llega con éxito a cinco acumulaciones, retírate de inmediato, usando Public Execution de forma defensiva si es necesario para escapar por encima de un muro.
KiteoEjecuciónLa ventaja de alcance de Kindred con Dance of Arrows y Wolf's Frenzy hace extremadamente difícil conectar Cunning Sweep. Sin embargo, el matchup lo define la interacción de la ultimate. Ambessa depende de Public Execution como un finalizador de mucho daño basado en la vida que le falta al objetivo. Si te comprometes con esta ejecución demasiado pronto, Kindred simplemente suelta Lamb's Respite, dejando tu ultimate completamente inútil y a ti atrapada dentro de su zona que desafía a la muerte, sin escapatoria.Build de Kindred →Ver detalles
Kindred
Por qué
La ventaja de alcance de Kindred con Dance of Arrows y Wolf's Frenzy hace extremadamente difícil conectar Cunning Sweep. Sin embargo, el matchup lo define la interacción de la ultimate. Ambessa depende de Public Execution como un finalizador de mucho daño basado en la vida que le falta al objetivo. Si te comprometes con esta ejecución demasiado pronto, Kindred simplemente suelta Lamb's Respite, dejando tu ultimate completamente inútil y a ti atrapada dentro de su zona que desafía a la muerte, sin escapatoria.
Impacto en la línea
Kindred abusará constantemente de su alcance para hacerte kite fuera de tus campamentos, usando Wolf's Frenzy para dominar las escaramuzas tempranas por las marcas. No puedes aceptar peleas directas 1v1 en el río porque Mounting Dread te destrozará antes de que puedas acumular Drakehound's Step. Esto te obliga a ceder los Scuttle Crabs tempranos, lo que ralentiza tu pico de nivel 5 y le da a Kindred control del mapa y marcas gratis.
Cómo jugar
Nunca inicies escaramuzas con Public Execution. En su lugar, haz que gasten Lamb's Respite usando Lacerate y Cunning Sweep para ir restándoles vida. Cuando lancen su ultimate presas del pánico, usa el dash de Drakehound's Step para salir del círculo, o ajusta el momento de Repudiation para absorber el burst cuando termine la fase de curación. Si se niegan a soltar su ultimate, guarda la tuya para asegurar la kill en el milisegundo exacto en que desaparezca su zona.
Daño verdaderoPresión en el mapaGwen te supera de forma natural en el escalado porque su Hallowed Mist la hace inmune al punto óptimo del borde exterior de tu Cunning Sweep si la coloca bien. En duelos de jungla directos y prolongados, su Snip Snip! continuo combinado con la curación por porcentaje de vida de A Thousand Cuts simplemente derrite tu barra de vida más rápido de lo que puedes hacerle burst, sobre todo cuando consigue acceso a Needlework.Build de Gwen →Ver detalles
Gwen
Por qué
Gwen te supera de forma natural en el escalado porque su Hallowed Mist la hace inmune al punto óptimo del borde exterior de tu Cunning Sweep si la coloca bien. En duelos de jungla directos y prolongados, su Snip Snip! continuo combinado con la curación por porcentaje de vida de A Thousand Cuts simplemente derrite tu barra de vida más rápido de lo que puedes hacerle burst, sobre todo cuando consigue acceso a Needlework.
Impacto en la línea
Esta dinámica de matchup te obliga a asegurar ventajas tempranas antes de que Gwen te supere en limpieza y escalado. No puedes disputar con seguridad Scuttle Crabs aislados si ella tiene sus acumulaciones listas, ya que su Skip 'n Slash le permite esquivar con facilidad tu Public Execution o reposicionarse dentro de su niebla. Perder la presión temprana en la jungla significa que ella asegurará los objetivos neutrales más rápido, dejando tus lanes vulnerables a su amenaza de escalado.
Cómo jugar
Para ganar, debes forzar escaramuzas tempranas durante su primera limpieza, cuando es vulnerable. Nunca inicies con Public Execution mientras su Hallowed Mist esté activa; en su lugar, entra caminando en su zona o haz que la gaste primero. Guarda Repudiation específicamente para absorber el tijeretazo final y pesado de su Snip Snip! o las agujas ralentizadoras de Needlework. Si una escaramuza sale mal, usa Drakehound's Step combinado con Lacerate para alejarte rápidamente con un dash por encima del terreno.
EsquivaEscaladoEste matchup depende de cómo el Counter Strike de Jax anula por completo Drakehound's Step. Todo el ciclo de combate de Ambessa se basa en conectar sus ataques básicos potenciados por la pasiva para hacer burst y recuperar energía vital. Cuando Jax activa su evasión, tus golpes potenciados de Cunning Sweep y Lacerate no hacen ningún daño y no restauran tu energía, dejándote totalmente sin recursos y expuesta a su aturdimiento.Build de Jax →Ver detalles
Jax
Por qué
Este matchup depende de cómo el Counter Strike de Jax anula por completo Drakehound's Step. Todo el ciclo de combate de Ambessa se basa en conectar sus ataques básicos potenciados por la pasiva para hacer burst y recuperar energía vital. Cuando Jax activa su evasión, tus golpes potenciados de Cunning Sweep y Lacerate no hacen ningún daño y no restauran tu energía, dejándote totalmente sin recursos y expuesta a su aturdimiento.
Impacto en la línea
En la jungla, esta interacción hace que las escaramuzas tempranas del río y los campamentos neutrales sean muy peligrosos. Jax puede invadir tu territorio con agresividad, usando Leap Strike para cerrar la distancia y obligarte a retroceder. Si intentas disputarle, un Counter Strike bien sincronizado anula tu represalia, dejándote con la energía agotada y forzándote a ceder los cangrejos scuttle o a renunciar a la presión en las lanes adyacentes.
Cómo jugar
Para sobrevivir a sus invasiones, debes disciplinar el uso de tu pasiva. Cuando Jax haga engage con Leap Strike, usa de inmediato el dash de Drakehound's Step para hacer kite hacia atrás o hacia los lados, negándote a atacar mientras Counter Strike esté activo. Guarda Repudiation para absorber el daño de su aturdimiento y bloquear el CC. Cuando termine su giro de helicóptero, tienes una breve ventana para contraatacar con Cunning Sweep y Lacerate, usando Public Execution para rematarlo solo después de que se haya gastado su cooldown defensivo.
PicksEscudosMordekaiser domina este matchup de jungla en cuanto desbloquea Realm of Death. Dentro de su dimensión de bolsillo, el espacio confinado le hace muy fácil activar y mantener Darkness Rise. El daño de aura y el bonus de velocidad de movimiento de la pasiva anulan por completo tu capacidad de hacerle kite con Drakehound's Step. Te gana con facilidad en el chequeo de estadísticas, castigando cualquier intento de enfrentarlo en un duelo directo y aislado.Build de Mordekaiser →Ver detalles
Mordekaiser
Por qué
Mordekaiser domina este matchup de jungla en cuanto desbloquea Realm of Death. Dentro de su dimensión de bolsillo, el espacio confinado le hace muy fácil activar y mantener Darkness Rise. El daño de aura y el bonus de velocidad de movimiento de la pasiva anulan por completo tu capacidad de hacerle kite con Drakehound's Step. Te gana con facilidad en el chequeo de estadísticas, castigando cualquier intento de enfrentarlo en un duelo directo y aislado.
Impacto en la línea
Esta dinámica limita seriamente tu libertad de escaramuza en el río y alrededor de los objetivos. No puedes disputar con seguridad campamentos neutrales ni asegurar Scuttle Crabs si él está cerca, ya que un solo Death's Grasp puede arrastrarte a un enfrentamiento letal. Si intercepta tus ganks, puede aislarte a ti o a tu laner, frenando tu presión en el mapa y forzándote a un patrón defensivo de farmeo.
Cómo jugar
Para sobrevivir, debes dominar tu espaciado. Nunca inicies con Drakehound's Step; guarda estos dashes para esquivar Obliterate. Guarda Repudiation específicamente para absorber su daño aislado o bloquear el arrastre de Death's Grasp. Si te arrastra a Realm of Death, usa de inmediato Lacerate para ralentizarlo y luego usa tu dash para hacer kite alrededor del límite. Haz poke con el borde exterior de Cunning Sweep y aguanta hasta que se desvanezca la arena.
Estos enfrentamientos son sobre todo duelos de ejecución: ambos campeones tienen formas reales de tomar la ventaja. Esquivar una habilidad clave, anticipar bien un engagement o un simple error de posicionamiento puede inclinar el duelo hacia un lado. Conocer el matchup y reconocer las ventanas de acción correctas es especialmente importante aquí.
Inmunidad a CCDueloEste duelo de jungla depende por completo de una única ventana de reacción. Vi se apoya en la carga de su Vault Breaker para iniciar las peleas, quitarte armadura con Denting Blows e inmovilizarte. Sin embargo, Ambessa posee la herramienta perfecta para contrarrestarlo con Repudiation. Si lo ajustas bien, tu escudo absorbe el impacto y anula por completo el empuje, convirtiendo su principal herramienta de engage en una explosión de represalia enorme que decide la escaramuza al instante.Build de Vi →Ver detalles
Vi
Por qué
Este duelo de jungla depende por completo de una única ventana de reacción. Vi se apoya en la carga de su Vault Breaker para iniciar las peleas, quitarte armadura con Denting Blows e inmovilizarte. Sin embargo, Ambessa posee la herramienta perfecta para contrarrestarlo con Repudiation. Si lo ajustas bien, tu escudo absorbe el impacto y anula por completo el empuje, convirtiendo su principal herramienta de engage en una explosión de represalia enorme que decide la escaramuza al instante.
Impacto en la línea
Como ambas limpian los campamentos a un ritmo similar, las escaramuzas tempranas en el río por el Scuttle Crab o las invasiones profundas de la jungla son increíblemente volátiles. Si Vi falla o le paran su Vault Breaker, no puede activar con facilidad Denting Blows ni acumular Blast Shield. Esto la obliga a jugar a la defensiva o a depender de su ultimate, Cease and Desist, que también puedes superar con una Public Execution bien sincronizada para darle la vuelta a la pelea.
Cómo jugar
No malgastes Repudiation para bloquear simples pokes de Relentless Force; guárdalo exclusivamente para el momento en que Vi suelte su Vault Breaker. Si intenta engañar a tu escudo manteniendo su carga, usa Drakehound's Step para hacer dash lateral fuera de su trayectoria. Cuando llegue al nivel cinco, espera que haga engage con Cease and Desist; responde de inmediato lanzando Public Execution para igualar su estado imparable y aplastarla durante su animación de recuperación.
EscaramuzasPresión en el mapaEste matchup de jungla es un duelo de movilidad de altísima intensidad en el que ningún asesino tiene una ventaja inherente. Toda la dinámica gira en torno a la necesidad de Kayn de recoger energía pasiva con Blade's Reach. Al usar Drakehound's Step para hacer dash fuera de su tajo lineal, Ambessa anula por completo su principal fuente de poke seguro a distancia, dejándolo sin puntos de transformación e impidiéndole activar su devastador Umbral Trespass.Build de Kayn →Ver detalles
Kayn
Por qué
Este matchup de jungla es un duelo de movilidad de altísima intensidad en el que ningún asesino tiene una ventaja inherente. Toda la dinámica gira en torno a la necesidad de Kayn de recoger energía pasiva con Blade's Reach. Al usar Drakehound's Step para hacer dash fuera de su tajo lineal, Ambessa anula por completo su principal fuente de poke seguro a distancia, dejándolo sin puntos de transformación e impidiéndole activar su devastador Umbral Trespass.
Impacto en la línea
En las escaramuzas tempranas de la jungla, no esquivar Blade's Reach permite a Kayn acumular con seguridad su pasiva y transformarse pronto en Rhaast o Shadow Assassin, cambiando al instante la presión en el mapa. Sin embargo, cuando Ambessa consigue hacerle gastar sus habilidades, Kayn se ve obligado a usar Shadow Step de forma defensiva para escapar atravesando muros en lugar de buscar ángulos agresivos. Este retraso en conseguir su forma debilita seriamente su contribución en las teamfights de mid game.
Cómo jugar
Al disputar campamentos, guarda siempre Cunning Sweep o Lacerate para activar Drakehound's Step en el momento exacto en que Kayn prepare Blade's Reach. Nunca inicies con tu dash; espera a su señal previa. Si Kayn consigue entrar en un muro con Shadow Step, colócate cerca del centro del camino para forzarlo a una salida más larga, y usa Repudiation de inmediato para absorber el burst de Reaping Slash si intenta girarse y pelear.
Control de masasVisiónEste matchup de jungla se centra en un tenso juego mental de defensas reactivas. El resultado de cualquier duelo depende de cómo gestiones el Shroud of Darkness de Nocturne. Si él absorbe tu contundente Public Execution con su escudo de hechizos, pierdes tu principal fuente de daño de ejecución y el reinicio de energía. A la inversa, tu Repudiation es una respuesta directa a su Unspeakable Horror, permitiéndote anular su CC de miedo.Build de Nocturne →Ver detalles
Nocturne
Por qué
Este matchup de jungla se centra en un tenso juego mental de defensas reactivas. El resultado de cualquier duelo depende de cómo gestiones el Shroud of Darkness de Nocturne. Si él absorbe tu contundente Public Execution con su escudo de hechizos, pierdes tu principal fuente de daño de ejecución y el reinicio de energía. A la inversa, tu Repudiation es una respuesta directa a su Unspeakable Horror, permitiéndote anular su CC de miedo.
Impacto en la línea
Las escaramuzas en el río y los campamentos de la jungla se convierten en duelos de miradas muy volátiles. Malgastar Repudiation demasiado pronto invita a Nocturne a perseguirte libremente con Duskbringer y completar su enlace. Si él guarda Shroud of Darkness, no puedes asegurar con fiabilidad el Cangrejo ni ejecutar counter-ganks. La presión en la jungla recae por completo en quien fuerce primero la herramienta defensiva del otro, convirtiendo las peleas por objetivos en batallas psicológicas de alto riesgo.
Cómo jugar
Cuando Nocturne active Unspeakable Horror, resiste el impulso de huir en pánico con un dash. En su lugar, quédate a su alcance y ajusta tu Repudiation justo antes de que se complete el enlace para absorber el miedo y liberar la onda expansiva. Nunca inicies un duelo con Public Execution. Fuerza primero su Shroud of Darkness usando el borde exterior de Cunning Sweep o un doble Lacerate. Libera tu ultimate solo cuando su escudo morado se haya disuelto.
Peleas en equipoInmunidad a CCEste duelo depende de cómo combines tu reacción defensiva con el crowd control de la momia. Tu Repudiation puede absorber y anular a la perfección un Bandage Toss entrante, quitándole su principal herramienta para cerrar distancia y su aturdimiento. Sin embargo, no tienes ninguna herramienta natural para eludir o escapar del enorme radio instantáneo de Curse of the Sad Mummy, lo que te deja muy vulnerable a su daño continuo de Despair y Tantrum si te atrapa.Build de Amumu →Ver detalles
Amumu
Por qué
Este duelo depende de cómo combines tu reacción defensiva con el crowd control de la momia. Tu Repudiation puede absorber y anular a la perfección un Bandage Toss entrante, quitándole su principal herramienta para cerrar distancia y su aturdimiento. Sin embargo, no tienes ninguna herramienta natural para eludir o escapar del enorme radio instantáneo de Curse of the Sad Mummy, lo que te deja muy vulnerable a su daño continuo de Despair y Tantrum si te atrapa.
Impacto en la línea
En el río y durante las escaramuzas, esta interacción dicta quién controla el ritmo. Si calculas mal el momento de tu escudo y te atrapa un Bandage Toss, la momia te arrastrará fácilmente hacia su equipo para soltar Curse of the Sad Mummy. Esto te obliga a jugar a la defensiva alrededor de los spawns neutrales, ya que un engage prematuro significa quedar inmovilizada, mientras que un bloqueo exitoso te permite hacer counter-engage con Public Execution.
Cómo jugar
Para ganar las escaramuzas, nunca inicies con Public Execution mientras su ultimate esté disponible. En su lugar, usa Drakehound's Step para bailar alrededor de su rango melé, haciendo que lance Bandage Toss para activar tu bloqueo de Repudiation. Una vez que Curse of the Sad Mummy se haya gastado en tu frontline, inmovilízalo de inmediato con Cunning Sweep y remátalo con Lacerate mientras te mantienes separada de tus aliados.
DueloInmunidad a CCEste matchup de jungla es un duelo de movilidad a alta velocidad dictado por completo por reacciones en una fracción de segundo. Lee Sin depende de conectar Sonic Wave para iniciar o ejecutar, pero el factor decisivo es cómo ajustes el momento de Repudiation. Si anticipas su Dragon's Rage, puedes absorber por completo el desplazamiento de su patada, dejándolo vulnerable a corta distancia, donde tus dashes de Drakehound's Step pueden superar con facilidad sus intentos de escapar con Safeguard.Build de Lee Sin →Ver detalles
Lee Sin
Por qué
Este matchup de jungla es un duelo de movilidad a alta velocidad dictado por completo por reacciones en una fracción de segundo. Lee Sin depende de conectar Sonic Wave para iniciar o ejecutar, pero el factor decisivo es cómo ajustes el momento de Repudiation. Si anticipas su Dragon's Rage, puedes absorber por completo el desplazamiento de su patada, dejándolo vulnerable a corta distancia, donde tus dashes de Drakehound's Step pueden superar con facilidad sus intentos de escapar con Safeguard.
Impacto en la línea
En la jungla, este bloqueo mecánico impide que cualquiera de los dos fuerce invasiones temerarias. Las escaramuzas alrededor del cangrejo del río o las escaramuzas tempranas son increíblemente tensas; quien falle primero su hechizo clave pierde presión. Si calculas mal Repudiation contra su Dragon's Rage, Lee Sin te lanzará lejos, asegurará el objetivo y escapará. A la inversa, bloquear su patada detiene su impulso, cambiando el rumbo de las escaramuzas 2v2 y asegurando el control de los monstruos neutrales.
Cómo jugar
Al duelear contra Lee Sin, nunca malgastes Repudiation pronto para bloquear su Sonic Wave o el daño de Tempest. En su lugar, usa Drakehound's Step y Lacerate para bailar alrededor de sus skillshots, guardando tu escudo específicamente para la animación de Dragon's Rage. Si intenta alejarse con un dash usando Safeguard, inmovilízalo de inmediato con Public Execution para cerrarle las rutas de escape. Si fallas tu timing, retírate al instante y espera a que se recuperen tus cooldowns antes de disputar.
EscudosDueloEste duelo de jungla de early game gira por completo en torno a reaccionar al crowd control de Xin Zhao. Cuando hace engage con Audacious Charge, empieza de inmediato a preparar Three Talon Strike. Si encadenas Cunning Sweep y Lacerate a ciegas, su tercer golpe con lanzamiento al aire interrumpirá los dashes de tu pasiva. Sin embargo, usar Repudiation para absorber y bloquear ese tercer golpe exacto neutraliza por completo su potencial de duelo, convirtiendo su principal herramienta ofensiva en tu escudo y tu daño de contraataque.Build de Xin Zhao →Ver detalles
Xin Zhao
Por qué
Este duelo de jungla de early game gira por completo en torno a reaccionar al crowd control de Xin Zhao. Cuando hace engage con Audacious Charge, empieza de inmediato a preparar Three Talon Strike. Si encadenas Cunning Sweep y Lacerate a ciegas, su tercer golpe con lanzamiento al aire interrumpirá los dashes de tu pasiva. Sin embargo, usar Repudiation para absorber y bloquear ese tercer golpe exacto neutraliza por completo su potencial de duelo, convirtiendo su principal herramienta ofensiva en tu escudo y tu daño de contraataque.
Impacto en la línea
Como los dos quieren dominar el río pronto, los recorridos de ambos chocarán inevitablemente en el primer Scuttle Crab o durante el counter-jungling temprano. Si no bloqueas su lanzamiento al aire, Xin Zhao se hace con la ventaja, forzando tu Flash o matándote directamente, lo que le da presión de mapa sin oposición. A la inversa, ganar este intercambio mecánico te permite asegurar los campamentos neutrales e invadir libremente los suyos mientras se recuperan sus habilidades de cooldown alto.
Cómo jugar
Sigue los ataques básicos de Xin Zhao durante el combate. Una vez que active Three Talon Strike, cuenta sus dos primeros golpes mientras haces kite con Drakehound's Step y Lacerate. Guarda Repudiation específicamente para su tercer golpe. Si retrasa sus ataques para engañar a tu escudo, usa el borde exterior de Cunning Sweep para mantener la distancia hasta que expire su buff. Si calculas mal tu escudo y te lanzan por los aires, usa de inmediato Public Execution para suprimirlo y reiniciar los cooldowns de tus ataques básicos para sobrevivir.
Estos campeones suelen tener problemas para responder a tus principales fortalezas, lo que te permite afrontar el enfrentamiento con más libertad. Normalmente tienes varias formas de presionarlos y forzar intercambios a tu favor. Aprovecha esta ventaja para imponer tu ritmo en lugar de darles tiempo para volver a una posición cómoda.
Inmunidad a CCPresión tempranaEste matchup de jungla depende de tu capacidad de reaccionar a la preparación inicial de burst de Pantheon. Cuando intenta iniciar con Shield Vault, un Repudiation bien sincronizado absorbe por completo el aturdimiento y protege del daño de su seguimiento. Al anular esta iniciación, le impides acumular o ejecutar con facilidad su combo potenciado de Mortal Will, convirtiendo su dive agresivo en una ventana muy vulnerable en la que su daño cae drásticamente.Build de Pantheon →Ver detalles
Pantheon
Por qué
Este matchup de jungla depende de tu capacidad de reaccionar a la preparación inicial de burst de Pantheon. Cuando intenta iniciar con Shield Vault, un Repudiation bien sincronizado absorbe por completo el aturdimiento y protege del daño de su seguimiento. Al anular esta iniciación, le impides acumular o ejecutar con facilidad su combo potenciado de Mortal Will, convirtiendo su dive agresivo en una ventana muy vulnerable en la que su daño cae drásticamente.
Impacto en la línea
Como tienes las herramientas para anular su principal crowd control, puedes disputar con agresividad los Scuttle Crabs e invadir sus campamentos de jungla sin miedo. Pantheon no puede asegurar objetivos con seguridad ni ganar escaramuzas aisladas si rondas cerca. Incluso cuando intenta influir en otras lanes con Grand Starfall, tu superior poder de duelo te permite hacer counter-gank con eficacia, convirtiendo sus rotaciones por todo el mapa en pérdidas directas.
Cómo jugar
Nunca malgastes Repudiation para bloquear su poke de Comet Spear; mantén el dedo en este escudo exclusivamente para la animación de salto de Shield Vault. Si entra en pánico y despliega Aegis Assault para bloquear tu daño frontal, activa de inmediato Drakehound's Step después de lanzar Lacerate o Cunning Sweep para hacer dash directamente detrás de su escudo. Esto te permite eludir su defensa direccional y destrozar su barra de vida mientras él está bloqueado en su canalización.
Presión en el mapaControl de zonaTu duelo de jungla temprano supera por completo a Shyvana. Antes de que consiga Dragon's Descent, su limpieza es predecible y su potencial de combate es bajo. Al encadenar Cunning Sweep con los dashes de Drakehound's Step, puedes bailar con facilidad alrededor de su Flame Breath y de la zona de Burnout, castigando su débil escaramuza temprana antes de que pueda acumular una sola carga de Fury of the Dragonborn.Build de Shyvana →Ver detalles
Shyvana
Por qué
Tu duelo de jungla temprano supera por completo a Shyvana. Antes de que consiga Dragon's Descent, su limpieza es predecible y su potencial de combate es bajo. Al encadenar Cunning Sweep con los dashes de Drakehound's Step, puedes bailar con facilidad alrededor de su Flame Breath y de la zona de Burnout, castigando su débil escaramuza temprana antes de que pueda acumular una sola carga de Fury of the Dragonborn.
Impacto en la línea
Como dominas el 1v1 temprano, puedes invadir con agresividad sus campamentos para retrasar su acumulación de Fury of the Dragonborn. Shyvana se ve forzada a ceder cangrejos scuttle y prioridad de campamentos, lo que significa que no puede farmear su jungla con seguridad. Esta presión limita su capacidad de generar furia pasiva, retrasando mucho sus picos de ultimate y dejando sus lanes totalmente vulnerables a tus ganks tempranos.
Cómo jugar
Invade activamente su buff rojo o azul durante la primera rotación. Si intenta defenderse, usa Cunning Sweep para iniciar y luego aprovecha la movilidad de Drakehound's Step para esquivar el proyectil de su Flame Breath. Guarda Repudiation específicamente para bloquear el burst de su Twin Bite potenciado. Si consigue activar Dragon's Descent para escapar o girarse, haz counter-engage de inmediato con Public Execution para suprimirla en pleno vuelo y asegurar la kill.
MovilidadInmunidad a CCAmbessa domina este matchup de jungla al contrarrestar de forma directa la principal preparación de Ekko. Cuando Ekko intenta activar su aturdimiento de Parallel Convergence, tu Repudiation absorbe el burst y anula por completo el crowd control. Además, su Public Execution proporciona una supresión fiable que lo inmoviliza, impidiéndole activar Chronobreak para escapar o curarse, y convirtiendo sus previsibles intentos de asesinato en trampas letales.Build de Ekko →Ver detalles
Ekko
Por qué
Ambessa domina este matchup de jungla al contrarrestar de forma directa la principal preparación de Ekko. Cuando Ekko intenta activar su aturdimiento de Parallel Convergence, tu Repudiation absorbe el burst y anula por completo el crowd control. Además, su Public Execution proporciona una supresión fiable que lo inmoviliza, impidiéndole activar Chronobreak para escapar o curarse, y convirtiendo sus previsibles intentos de asesinato en trampas letales.
Impacto en la línea
En la jungla, esta ventaja se traduce en un dominio total del río. Ekko no puede disputar con seguridad los objetivos neutrales ni pelear por los Scuttle Crabs, ya que no puede ganar duelos aislados contra tu kit. Puedes invadir con agresividad sus campamentos, sabiendo que cualquier Parallel Convergence defensivo que suelte se volverá en su contra. Esta presión lo obliga a ceder farmeo, manteniéndolo permanentemente por detrás e incapaz de presionar tus lanes.
Cómo jugar
Al pelear contra Ekko, nunca malgastes Repudiation pronto; guárdalo específicamente para el momento en que su burbuja de Parallel Convergence se active sobre ti, para absorber la rotura del escudo y el aturdimiento. Sigue constantemente la posición de su holograma. Cuando su vida baje de la mitad, libera de inmediato Public Execution para suprimirlo. Esto le impide usar Chronobreak por completo, asegurando una ejecución limpia antes de que pueda reiniciar la pelea.
SupervivenciaInmunidad a CCAmbessa tiene una ventaja enorme porque Jarvan IV depende de confinar a los objetivos dentro de Cataclysm para ganar las peleas. Como Drakehound's Step te concede un dash después de cada habilidad, saltas sin esfuerzo por encima de los muros de su arena. Usar Cunning Sweep o Lacerate activa al instante este salto pasivo, dejándolo atrapado dentro de su propia ultimate mientras tú te reposicionas con facilidad para destrozarlo desde un lugar seguro.Build de Jarvan IV →Ver detalles
Jarvan IV
Por qué
Ambessa tiene una ventaja enorme porque Jarvan IV depende de confinar a los objetivos dentro de Cataclysm para ganar las peleas. Como Drakehound's Step te concede un dash después de cada habilidad, saltas sin esfuerzo por encima de los muros de su arena. Usar Cunning Sweep o Lacerate activa al instante este salto pasivo, dejándolo atrapado dentro de su propia ultimate mientras tú te reposicionas con facilidad para destrozarlo desde un lugar seguro.
Impacto en la línea
Esta interacción devalúa por completo la presión de Jarvan IV durante las escaramuzas por objetivos y las peleas en el río. No puede inmovilizarte, lo que le impide asegurar un control de terreno favorable o ejecutar ganks limpios cuando haces counter-gank. Como su principal herramienta de engage queda neutralizada, tu equipo puede disputar cada Scuttle Crab y cada monstruo épico con confianza. Se ve obligado a guardar su ultimate o a arriesgarse a desperdiciarla por completo, arruinando su tempo.
Cómo jugar
Al invadir o disputar objetivos, no entres en pánico cuando Jarvan IV inicie con Demacian Standard y Dragon Strike. Guarda Repudiation para absorber su burst inicial y bloquear cualquier crowd control secundario, y lanza de inmediato Lacerate o Cunning Sweep. Esto te garantiza tener Drakehound's Step listo en el milisegundo exacto en que suelte Cataclysm. Sal del anillo con un dash de inmediato, y luego da la vuelta a la pelea liberando Public Execution sobre él o su backline mientras está atrapado en su propia barrera.
InalcanzableControl de masasAmbessa domina este duelo porque sus dashes de alto tempo de Drakehound's Step obligan a Master Yi a tomar una decisión. Quiere esquivar tu daño con Alpha Strike, pero puedes hacerle gastar esa habilidad con facilidad. En cuanto vuelve a ser seleccionable, no tiene escapatoria, lo que te permite suprimirlo al instante con Public Execution antes de que pueda acumular Double Strike o perseguirte con Highlander.Build de Master Yi →Ver detalles
Master Yi
Por qué
Ambessa domina este duelo porque sus dashes de alto tempo de Drakehound's Step obligan a Master Yi a tomar una decisión. Quiere esquivar tu daño con Alpha Strike, pero puedes hacerle gastar esa habilidad con facilidad. En cuanto vuelve a ser seleccionable, no tiene escapatoria, lo que te permite suprimirlo al instante con Public Execution antes de que pueda acumular Double Strike o perseguirte con Highlander.
Impacto en la línea
En la jungla, esta presión desbarata por completo la velocidad de farmeo de Master Yi. Puedes invadir con agresividad sus campamentos, ya que no puede pelear con seguridad cerca de los muros, donde Drakehound's Step brilla. Al negarle campamentos limpios, retrasas su pico de poder de Highlander. Se ve forzado a jugar a la defensiva, cediendo los objetivos neutrales tempranos y el control del río porque corre el riesgo de que lo atrapen y lo ejecuten cada vez que intenta disputar.
Cómo jugar
Al iniciar una escaramuza, empieza con Cunning Sweep y Lacerate para ir bajándole la vida. No te comprometas pronto con tu ultimate. En su lugar, observa de cerca su modelo de personaje; en el instante en que active Alpha Strike para esquivar tu golpe del borde exterior, coloca el cursor sobre su lugar de aterrizaje. En cuanto reaparezca, lanza de inmediato Public Execution para inmovilizarlo. Si intenta mitigar el daño con Meditate, tu supresión interrumpirá su canalización al instante.
DueloEjecuciónEl poder de duelo de Viego depende de conectar Spectral Maw para inmovilizar a los objetivos y acumular Blade of the Ruined King. Ambessa neutraliza esta iniciación por completo usando Repudiation para bloquear el aturdimiento entrante y absorber el daño inicial. Sin su crowd control, Viego no puede hacer trade con seguridad, lo que permite a Ambessa tomar rápidamente la ventaja con Cunning Sweep y los dashes de su pasiva.Build de Viego →Ver detalles
Viego
Por qué
El poder de duelo de Viego depende de conectar Spectral Maw para inmovilizar a los objetivos y acumular Blade of the Ruined King. Ambessa neutraliza esta iniciación por completo usando Repudiation para bloquear el aturdimiento entrante y absorber el daño inicial. Sin su crowd control, Viego no puede hacer trade con seguridad, lo que permite a Ambessa tomar rápidamente la ventaja con Cunning Sweep y los dashes de su pasiva.
Impacto en la línea
Esta dinámica de matchup asegura a Ambessa la prioridad absoluta durante las escaramuzas del río y las invasiones de jungla. Viego se ve forzado a jugar a la defensiva, incapaz de disputar los campamentos directamente porque la amenaza de tu bloqueo lo hace vulnerable. Puedes dictar el ritmo del early game, asegurando los Scuttle Crabs y obligándolo a malgastar Harrowed Path para escapar, lo que lo deja sin oro y limita su presión en el mapa.
Cómo jugar
Para dominar estos encuentros, debes guardar Repudiation específicamente para el aturdimiento de Viego. Fíjate en la animación de carga de Spectral Maw y activa tu escudo justo cuando él lo suelte. Si Viego intenta esconderse o escapar con Harrowed Path, barre la zona con Lacerate para ralentizarlo y localizarlo, y luego persíguelo con Cunning Sweep y Drakehound's Step. Si intenta escapar con Heartbreaker, ejecútalo al instante con Public Execution.
Ventaja: veredicto canónico de Wild Rift Core (−3 a +3), desde el punto de vista del campeón nombrado en la fila. Tasa de victorias y de selección: las del propio rival en este rol — Wild Rift CN · Challenger, Patch 7.3b. No es la tasa de victorias del enfrentamiento directo.
Ventaja: veredicto canónico de Wild Rift Core (−3 a +3), desde el punto de vista del campeón nombrado en la fila. Tasa de victorias y de selección: las del propio rival en este rol — Wild Rift CN · Challenger, Patch 7.3b. No es la tasa de victorias del enfrentamiento directo.
Cómo contrarrestar a este campeón
Ángulo de contra
Jugar contra Ambessa no consiste solo en vencerla mecánicamente, sino en romper la lógica de su pelea. Su kit gira en torno a un momento específico: entrar, aislar y crear un desequilibrio inmediato. Si ese momento falla, se vuelve vulnerable. Los mejores counters no son necesariamente los que dominan la línea, sino los que le impiden ejecutar su plan. Entender cómo denegar su engage es más importante que intentar matarla.
Contexto del parche
Los counters eficaces contra Ambessa explotan dos ángulos: o bien negarle el acceso a los objetivos (kite, poke, control), o bien sobrevivir a su engage inicial (stasis, sustain, tankiness). Los campeones que la castigan después de que se comprometa son especialmente peligrosos, ya que no tiene una vía de escape fiable. El parche refuerza estos perfiles con herramientas defensivas accesibles.
Lectura rápida
Pierde si su engage no crea una ventaja inmediata.
Las herramientas defensivas reducen enormemente su impacto.
El kiting y el control rompen su plan de juego.
Arquetipos de contra
Kite y poke
Estos perfiles evitan que Ambessa alcance a su objetivo en condiciones óptimas. Al mantenerla a distancia y desgastar sus recursos, la fuerzan a realizar engages subóptimos. Cuando finalmente se lanza, llega debilitada y sin margen de error. Esto interrumpe por completo su tempo basado en la ejecución.
Cómo se adapta el campeón. Busca ángulos de engage inesperados en lugar de forzar de frente.
Duelistas explosivos
Estos campeones castigan directamente el engage de Ambessa. Su burst y movilidad les permiten dar la vuelta a la pelea al instante. Si Ambessa no mata de inmediato, termina en una pelea que no puede sostener con sustain. Esto hace que cada engage sea arriesgado y limita sus opciones tanto en lane como en las teamfights.
Cómo se adapta el campeón. Evita duelos prolongados y juega alrededor del timing de la ultimate.
Tank y sustain
Estos perfiles absorben el engage inicial y reducen el valor de su all-in. Su capacidad de supervivencia y de ganar tiempo evitan que Ambessa cree una ventaja rápida. Una vez que gasta su burst, pierde presión, cambiando por completo la balanza de poder.
Riven convierte cada engage de Ambessa en un duelo inmediato. Su movilidad y burst le permiten responder al instante, a menudo antes de que se complete el aislamiento. Esto obliga a Ambessa a jugar con mucha más cautela y a evitar trades directos.
Errores comunes en su contra
Errores comunes en su contra
Subestimar su burst inicial.
Dispersarse y ofrecer un objetivo aislado.
Usar el CC demasiado pronto.
Ignorar los timings de su ultimate.
No comprar objetos defensivos.
Notas del coach
Tu prioridad es sobrevivir a su engage.
Una Ambessa inútil después de su R es una Ambessa derrotada.
FAQ
¿Cuál es la mejor manera de hacerle counter?
La mejor manera es reducir el valor de su engage. Esto implica kite, CC y herramientas defensivas. Si no puede aislar a un objetivo o si ese objetivo sobrevive, pierde impacto al instante. El objetivo no es necesariamente matarla, sino hacer que su all-in sea inútil.