agosto de 2026 · Patch 7.2d
Assassin · TOP · JUNGLE

Guia de counters de Ambessa Wild Rift

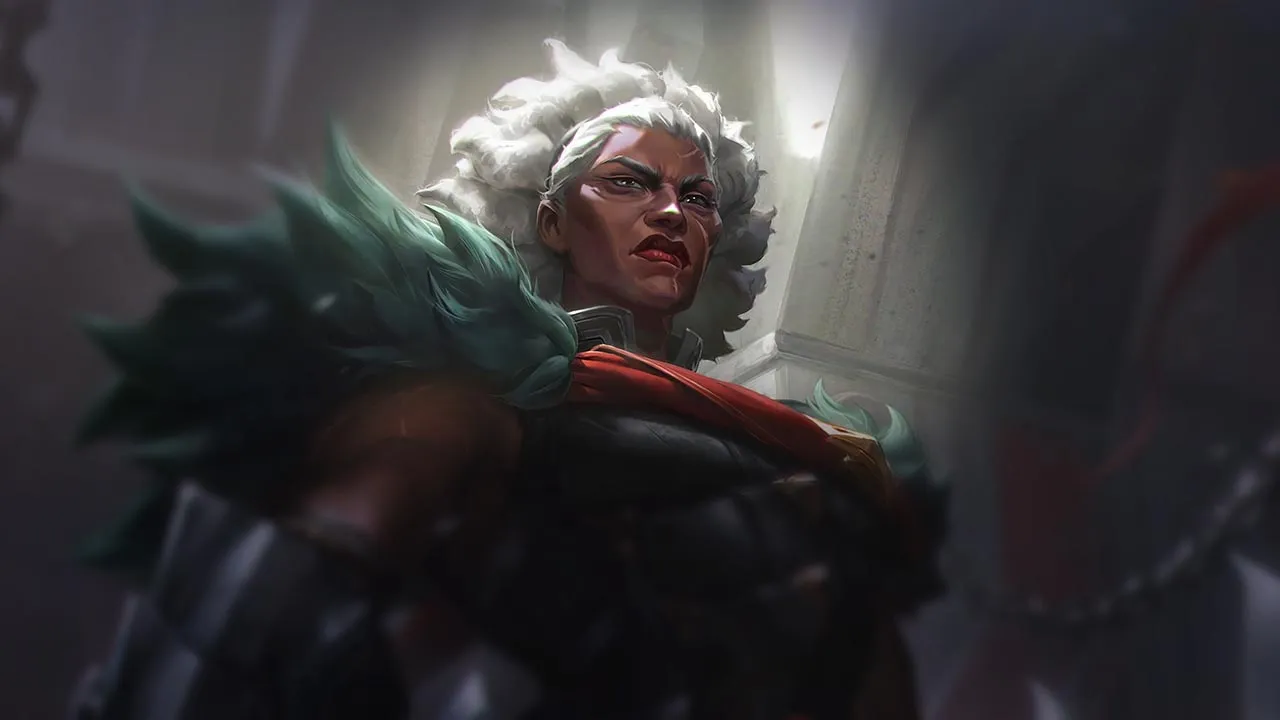
Ambessa, uma lutadora da Baron Lane / Jungle, depende de mobilidade e de se manter no corpo a corpo para causar dano sustentado. Composições com forte kite, controle de grupo ou burst rápido podem limitar sua eficácia. Se ela não conseguir manter a pressão no combate corpo a corpo, seu impacto cai consideravelmente.

★ TOP · JUNGLE Tier S
DANO
UTIL
TANK
DIFF
Win 49.0% #75 · ↓16pt
Pick 2.0% #28
Ban 1.3% #79

Guia de counters de Ambessa Wild Rift ★ Counter Sheet

Hard Counters

4

Esses campeões têm uma build e um estilo de jogo que superam diretamente o seu, o que pode tornar o controle da lane e o farm extremamente difíceis. As habilidades deles podem neutralizar seus principais pontos fortes ou te punir assim que você tenta jogar do seu jeito de sempre. Nesses matchups, o objetivo costuma ser reduzir os erros e buscar soluções fora do confronto direto.

Poppy

Poppy

hard_counterdisengage_focus Your entire combat loop relies on chaining Drakehound's Step dashes after casting Cunning Sweep or Lacerate. However, Poppy completely shuts this down with Steadfast Presence. The moment she activates it, any attempt to drift or reposition via your passive triggers her barrier, grounding you, dealing damage, and stopping your passive-empowered attacks. Without your mobility, you lose all threat and can't dance around her hammer. Ver detalhes
Poppy

Por quê

Your entire combat loop relies on chaining Drakehound's Step dashes after casting Cunning Sweep or Lacerate. However, Poppy completely shuts this down with Steadfast Presence. The moment she activates it, any attempt to drift or reposition via your passive triggers her barrier, grounding you, dealing damage, and stopping your passive-empowered attacks. Without your mobility, you lose all threat and can't dance around her hammer.

Impacto na lane

This interaction forces you into a highly defensive posture. You cannot safely contest the minion wave because she can reactively pop her barrier to cancel your Cunning Sweep follow-up or Lacerate double-spin. If you get caught near a wall, she will slam you, and without your passive dashes, you cannot escape. This loss of lane priority means she safely scales and can freely roam to disrupt your jungler.

Como jogar

To survive, you must bait out her Steadfast Presence before committing to any real trade. Use Cunning Sweep to farm from a safe distance without triggering the dash. If she wastes her defensive ring, you have a brief window to strike with Lacerate and Public Execution. Otherwise, hold Repudiation to absorb her wall-slam damage and block her crowd control, then immediately retreat toward your turret when your shield expires.

Ficha completa →
Olaf

Olaf

disengage_focusult_interaction Olaf dominates this matchup by completely shutting down your execution tool. The moment he activates Ragnarok, he gains total immunity to the suppression and displacement of your Public Execution, turning your ultimate into a suicidal dash. Without your ultimate's crowd control, you are forced into a pure brawl against his Berserker Rage and Vicious Strikes, a stat check that Ambessa's low-health execution pattern cannot mathematically survive. Ver detalhes
Olaf

Por quê

Olaf dominates this matchup by completely shutting down your execution tool. The moment he activates Ragnarok, he gains total immunity to the suppression and displacement of your Public Execution, turning your ultimate into a suicidal dash. Without your ultimate's crowd control, you are forced into a pure brawl against his Berserker Rage and Vicious Strikes, a stat check that Ambessa's low-health execution pattern cannot mathematically survive.

Impacto na lane

You lose all lane priority once Olaf reaches level five. If you attempt to poke with Cunning Sweep, he will retaliate with Undertow, slowing you down and running you down the long lane. You cannot safely contest waves because any extended trade allows him to trigger Vicious Strikes and heal back up. This forces you to drop farm under tower, bleeding gold while risking dive setups.

Como jogar

Treat your Public Execution strictly as a mobility tool or a finisher after Ragnarok expires. When Olaf rushes you, use Drakehound's Step to dash perpendicular to dodge Undertow axes, cutting his chase potential. Save Repudiation specifically to absorb the true damage of Reckless Swing rather than random poke. If he pops his ultimate, immediately disengage using Lacerate's slow paired with a backward Drakehound's Step, and only re-engage once his immunity fades.

Ficha completa →
Jax

Jax

disengage_focusbait_tactics Jax completely counters your trading pattern because Counter Strike blocks every single one of your Drakehound's Step empowered basic attacks. Since your entire damage loop and energy restoration rely on landing these enhanced strikes after casting Cunning Sweep or Lacerate, Jax can simply activate his helicopter spin to nullify your burst while ramping up his own Relentless Assault attack speed. Ver detalhes
Jax

Por quê

Jax completely counters your trading pattern because Counter Strike blocks every single one of your Drakehound's Step empowered basic attacks. Since your entire damage loop and energy restoration rely on landing these enhanced strikes after casting Cunning Sweep or Lacerate, Jax can simply activate his helicopter spin to nullify your burst while ramping up his own Relentless Assault attack speed.

Impacto na lane

This interaction strips away your early priority, forcing you to surrender wave control. If you attempt to thin the wave with Cunning Sweep, Jax can instantly engage with Leap Strike and Empower, knowing you cannot fight back through his dodge. You are forced to utilize Drakehound's Step defensively to escape, bleeding minion gold under your turret while Jax scales safely into his Grandmaster-at-Arms power spikes.

Como jogar

To survive, you must bait out Counter Strike without committing your main damage. When Jax initiates his spin, immediately use the dash from Drakehound's Step or Lacerate to disengage and kite backwards. Hold Repudiation to absorb the burst and block the stun if he catches you with Leap Strike. Only when his dodge window is completely closed can you look for a short retaliation using Cunning Sweep and Public Execution.

Ficha completa →
Volibear

Volibear

disengage_focusstat_check Volibear completely shuts down your extended skirmishes because Frenzied Maul heals him and out-damages your combos. While Cunning Sweep and Lacerate allow you to poke, staying in his melee range lets him mark you and bite again for massive healing. To survive, you must rely on the dash from Drakehound's Step immediately after using Lacerate to disengage before his claws can strike twice. Ver detalhes
Volibear

Por quê

Volibear completely shuts down your extended skirmishes because Frenzied Maul heals him and out-damages your combos. While Cunning Sweep and Lacerate allow you to poke, staying in his melee range lets him mark you and bite again for massive healing. To survive, you must rely on the dash from Drakehound's Step immediately after using Lacerate to disengage before his claws can strike twice.

Impacto na lane

Volibear's passive The Relentless Storm naturally pushes the wave while Sky Splitter shields him during trades. Since you cannot win a direct war of attrition, you are forced to freeze the wave near your turret. If you let him crash massive waves, he will use Stormbringer to disable your tower and dive you easily, ruining your recall timings and locking you in your lane.

Como jogar

Never engage when Volibear has Thundering Smash active; instead, hold Repudiation to block his incoming stun and absorb the initial damage. Only trade when Lacerate is available, using the triggered Drakehound's Step to dash backward and break his pursuit. If he freezes the wave near his tower, do not walk up to farm with basic attacks; use the outer edge of Cunning Sweep to secure minions from a safe distance.

Ficha completa →

Desfavoráveis

10

Esses campeões têm ferramentas que geralmente dão a eles vantagem no confronto, sem tornar o matchup impossível de jogar. Eles podem ter mais alcance, mais capacidade de aguentar sua ofensiva ou mais formas de responder aos seus engajamentos. Você vai precisar adaptar sua abordagem e escolher com cuidado os momentos em que aceita a luta.

Darius

Darius

dodge_relianceextended_trades Darius dominates extended trades due to Hemorrhage, making raw brawls fatal for Ambessa. The entire matchup hinges on how you respond to Decimate. If Darius lands the outer blade, he heals and stacks his passive. However, Ambessa can use Drakehound's Step after casting Cunning Sweep or Lacerate to dash directly into Darius's inner handle, completely neutralizing his healing and minimizing his damage. Ver detalhes
Darius

Por quê

Darius dominates extended trades due to Hemorrhage, making raw brawls fatal for Ambessa. The entire matchup hinges on how you respond to Decimate. If Darius lands the outer blade, he heals and stacks his passive. However, Ambessa can use Drakehound's Step after casting Cunning Sweep or Lacerate to dash directly into Darius's inner handle, completely neutralizing his healing and minimizing his damage.

Impacto na lane

You cannot mindlessly shove the wave because Apprehend can pull you into a long, lethal chase down the lane. Trade near your tower where Darius cannot easily stack Hemorrhage to maximum. A single misstep that lets him land a full Decimate forces an early recall, letting Darius freeze the wave or threaten an easy dive with Noxian Guillotine once you are chunked.

Como jogar

Never initiate with your dash forward. Instead, walk up to bait his Decimate, then immediately trigger Drakehound's Step by casting Lacerate to slide inside his inner circle. If Darius manages to pull you with Apprehend first, quickly cast Repudiation to absorb his Crippling Strike and block the slow, allowing you to safely disengage. If you get caught with four Hemorrhage stacks, use Public Execution defensively to suppress him and buy time for your cooldowns to escape.

Ficha completa →
Sett

Sett

dodge_relianceshield_baiting Sett thrives in prolonged brawls because your quick-strike combos with Cunning Sweep and Lacerate rapidly charge his grit bar. When you attempt to burst him down, his Pit Grit health regeneration and the massive shield from Haymaker negate your initial advantage. The matchup is unfavorable because Sett can easily absorb your front-loaded damage and retaliate with devastating true damage if you cannot escape his central strike. Ver detalhes
Sett

Por quê

Sett thrives in prolonged brawls because your quick-strike combos with Cunning Sweep and Lacerate rapidly charge his grit bar. When you attempt to burst him down, his Pit Grit health regeneration and the massive shield from Haymaker negate your initial advantage. The matchup is unfavorable because Sett can easily absorb your front-loaded damage and retaliate with devastating true damage if you cannot escape his central strike.

Impacto na lane

You cannot contest the wave blindly, as Sett's Facebreaker can pull you in whenever you step up to use Cunning Sweep. This threat forces you to play defensively under your turret, sacrificing early wave control. If Sett catches you without your dash, his Knuckle Down allows him to run you down, creating immense lane pressure that forces your jungler to ignore top or risk a double kill to The Show Stopper.

Como jogar

To survive all-ins, you must absolutely hold one charge of Drakehound's Step. Never deplete your passive dashes during a trade; instead, wait for Sett to cast Haymaker. The moment you see his grit bar full and his shield deploy, use your Drakehound's Step dash laterally to slide out of the true damage center. If he pulls you with Facebreaker, immediately buffer Repudiation to absorb the stun, then disengage until his shield decays.

Ficha completa →
Malphite

Malphite

attack_speed_slowpoke_survival This matchup is dictated by how Malphite's Ground Slam directly counters your passive loop. Every time you cast Cunning Sweep or Lacerate, you rely on Drakehound's Step to quickly dash and unleash rapid, empowered basic attacks. However, Ground Slam's massive attack speed reduction completely freezes your animation speed. This prevents you from quickly reclaiming energy, leaving you sluggish and unable to execute your fast-paced assassin combos. Ver detalhes
Malphite

Por quê

This matchup is dictated by how Malphite's Ground Slam directly counters your passive loop. Every time you cast Cunning Sweep or Lacerate, you rely on Drakehound's Step to quickly dash and unleash rapid, empowered basic attacks. However, Ground Slam's massive attack speed reduction completely freezes your animation speed. This prevents you from quickly reclaiming energy, leaving you sluggish and unable to execute your fast-paced assassin combos.

Impacto na lane

You cannot play this as a standard burst lane. Malphite will constantly chip away at your health using Seismic Shard while absorbing your retaliation with Granite Shield. Because Ground Slam prevents you from winning quick trades, you lose the power to crash waves at will. This turns the lane into a grueling war of attrition where securing clean recalls becomes difficult, and his Unstoppable Force constantly threatens dives if you drop too low.

Como jogar

To survive this war of attrition, abandon your pure lethality rush and pivot your build toward early magic resistance and health regeneration. In lane, look to absorb the tracking damage of Seismic Shard with a well-timed Repudiation shield. Never commit your Drakehound's Step attacks while his Ground Slam is available. If he wastes it on minions, immediately use Lacerate to slow him and execute your full combo.

Ficha completa →
Renekton

Renekton

shield_timingshort_trades Renekton dominates early skirmishes because his fury-infused Ruthless Predator shreds your health bar and locks you down instantly. Since your trading power relies on chaining Cunning Sweep and Drakehound's Step, getting stunned mid-dash ruins your rhythm. The entire matchup hinges on whether you can time Repudiation to absorb and block his stun, as his raw burst otherwise easily overwhelms your basic defensive stats. Ver detalhes
Renekton

Por quê

Renekton dominates early skirmishes because his fury-infused Ruthless Predator shreds your health bar and locks you down instantly. Since your trading power relies on chaining Cunning Sweep and Drakehound's Step, getting stunned mid-dash ruins your rhythm. The entire matchup hinges on whether you can time Repudiation to absorb and block his stun, as his raw burst otherwise easily overwhelms your basic defensive stats.

Impacto na lane

You cannot contest waves carelessly when his fury bar is red. If Renekton holds his stun, he forces you to farm under tower, chipping away your health with Cull the Meek whenever you step up. If you fail to block Ruthless Predator, you are forced into an early recall, losing valuable gold and letting him crash massive waves, which gives him total priority to dive or roam.

Como jogar

Never initiate with Cunning Sweep when Renekton has high fury and his Slice and Dice is available. Instead, bait his dash, and the millisecond his weapon glows for Ruthless Predator, activate Repudiation to block the stun. If your shield is on cooldown, play safely out of his double-dash range. If you get stunned without your shield, disengage immediately using Lacerate and a Drakehound's Step backward rather than trying to salvage the trade.

Ficha completa →
Irelia

Irelia

shield_timingextended_trades Irelia thrives on dancing through your wave with Bladesurge, generating Ionian Fervor stacks to out-dps you. This lane revolves entirely around her Flawless Duet. If she stuns you, she gets a free Bladesurge reset and easily wins the extended duel. However, Ambessa can turn this mobility clash around by using Repudiation to absorb the stun, leaving Irelia vulnerable without her reset once her abilities are on cooldown. Ver detalhes
Irelia

Por quê

Irelia thrives on dancing through your wave with Bladesurge, generating Ionian Fervor stacks to out-dps you. This lane revolves entirely around her Flawless Duet. If she stuns you, she gets a free Bladesurge reset and easily wins the extended duel. However, Ambessa can turn this mobility clash around by using Repudiation to absorb the stun, leaving Irelia vulnerable without her reset once her abilities are on cooldown.

Impacto na lane

When Irelia has minions to reset Bladesurge on, you cannot contest the wave. She will constantly fish for Flawless Duet. Missing your Repudiation shield timing means taking massive physical damage under tower or being forced into an early recall. If you successfully block her stun, her aggressive posture collapses, allowing you to safely clear with Cunning Sweep and Lacerate without risking a lethal dive.

Como jogar

Never initiate with Public Execution or jump forward with Drakehound's Step when her Flawless Duet is active. Keep your distance and monitor her passive stacks. When she deploys her first blade, hover your finger over Repudiation. Cast it the moment the second blade flies to negate the stun. If you misstime this and get marked, immediately use Lacerate to slow her and dash away to safety, giving up the wave rather than giving her a kill.

Ficha completa →
Fiora

Fiora

bait_tacticsdodge_reliance Fiora holds a distinct advantage because her Riposte can completely neutralize your primary crowd control. If you cast Public Execution or the second strike of Cunning Sweep in a predictable manner, she will deflect your stun and return her own, leaving you helpless against her Duelist's Dance vitals. Since your mobility relies on Drakehound's Step, her Bladework slow can also severely cripple your positioning during trades. Ver detalhes
Fiora

Por quê

Fiora holds a distinct advantage because her Riposte can completely neutralize your primary crowd control. If you cast Public Execution or the second strike of Cunning Sweep in a predictable manner, she will deflect your stun and return her own, leaving you helpless against her Duelist's Dance vitals. Since your mobility relies on Drakehound's Step, her Bladework slow can also severely cripple your positioning during trades.

Impacto na lane

This matchup forces you onto the defensive, where pushing the wave too far exposes you to deadly run-downs. Fiora will constantly use Lunge to poke your vitals, threatening massive health trades whenever you step forward to hit minions. If she freezes near her tower, you cannot safely break it because casting Cunning Sweep leaves you highly vulnerable to a Riposte counter-all-in, giving her total lane priority.

Como jogar

To survive, you must hug the walls to conceal your Duelist's Dance vitals, making it harder for Fiora to trigger them with Lunge. Never initiate with Public Execution; instead, use Drakehound's Step dashes to dance around her, baiting her Riposte with the threat of your Cunning Sweep Slam. If she refuses to bite, hold Repudiation to absorb her Bladework burst and disengage immediately using Lacerate to slow her pursuit.

Ficha completa →

Outros matchups

Skill Matchups

17

Esses confrontos são, acima de tudo, duelos de execução: os dois campeões têm formas reais de levar vantagem. Uma habilidade importante esquivada, um engajamento bem antecipado ou um erro de posicionamento podem ser suficientes para decidir o duelo. Conhecer o matchup e reconhecer as janelas de ação certas faz toda a diferença.

Yone

Yone

dodge_relianceskill_matchup This matchup is a high-speed duel of mobility, dictated by how you manage your defensive response to his third cast of Mortal Steel. While Yone relies on Soul Unbound to initiate trades with his tornado, your ability to negate his setup determines the winner. Blocking his knockup with Repudiation completely denies his trade momentum, leaving him vulnerable to a swift Cunning Sweep counter-offensive before his cooldowns recover. Ver detalhes
Yone

Por quê

This matchup is a high-speed duel of mobility, dictated by how you manage your defensive response to his third cast of Mortal Steel. While Yone relies on Soul Unbound to initiate trades with his tornado, your ability to negate his setup determines the winner. Blocking his knockup with Repudiation completely denies his trade momentum, leaving him vulnerable to a swift Cunning Sweep counter-offensive before his cooldowns recover.

Impacto na lane

Trade priority swings wildly depending on who bluffs successfully. When Yone has his tornado ready, you must concede minor wave pressure to ensure you can react. If you absorb his crowd control, you can force him back to his starting spirit body with low health, gaining immediate control over the minion wave and creating a massive health lead that prevents him from farming comfortably.

Como jogar

Never waste Repudiation during simple farming. Hold this shield specifically for the moment Yone dashes forward with his Mortal Steel knockup. When he activates Soul Unbound, track his movement direction and prepare your finger on the button; as the tornado flies, trigger your shield to absorb the impact, then instantly dash forward with Drakehound's Step to execute a full Cunning Sweep and Lacerate combo. If you miss-time the shield, retreat immediately and use Public Execution defensively.

Ficha completa →
Mordekaiser

Mordekaiser

dodge_relianceshield_timing This duel is entirely dictated by how you navigate Mordekaiser's linear threat zone. Since his raw damage spikes dramatically when Obliterate strikes an isolated target, your survivability relies on mobility. By triggering Drakehound's Step to slide laterally, you completely negate his primary burst. If you get hit, his passive Darkness Rise activates, melting your health pool and turning this skill matchup entirely in his favor. Ver detalhes
Mordekaiser

Por quê

This duel is entirely dictated by how you navigate Mordekaiser's linear threat zone. Since his raw damage spikes dramatically when Obliterate strikes an isolated target, your survivability relies on mobility. By triggering Drakehound's Step to slide laterally, you completely negate his primary burst. If you get hit, his passive Darkness Rise activates, melting your health pool and turning this skill matchup entirely in his favor.

Impacto na lane

Missed slams from Mordekaiser completely shift wave control. When you successfully bait and dodge Obliterate, his lane pressure vanishes, allowing you to crash waves or force trades with Cunning Sweep. However, if he pulls you in with Death's Grasp while your dash is down, you are forced to retreat or burn Repudiation defensively, sacrificing your turn to contest minions and yielding crucial tower priority.

Como jogar

Always stand near your own minions to avoid isolated Obliterate damage, but remain ready to move. Use the outer edge of Cunning Sweep to poke, then instantly trigger Drakehound's Step sideways the moment he raises his mace. Keep Repudiation ready specifically to absorb his Death's Grasp pull. If he traps you in Realm of Death, focus purely on dodging his skillshots rather than running away, waiting out the duration with your mobility.

Ficha completa →
Gwen

Gwen

dodge_relianceextended_trades This matchup is a pure duel of micro-positioning centered on Gwen's Snip Snip!. Since Gwen relies heavily on the center-line true damage of her scissors to win short trades, Ambessa's mobility is her greatest asset. By linking Cunning Sweep or Lacerate to activate Drakehound's Step, you can instantly dash laterally or behind Gwen as soon as she snips, completely neutralizing her main source of burst and healing. Ver detalhes
Gwen

Por quê

This matchup is a pure duel of micro-positioning centered on Gwen's Snip Snip!. Since Gwen relies heavily on the center-line true damage of her scissors to win short trades, Ambessa's mobility is her greatest asset. By linking Cunning Sweep or Lacerate to activate Drakehound's Step, you can instantly dash laterally or behind Gwen as soon as she snips, completely neutralizing her main source of burst and healing.

Impacto na lane

Failing to dodge the center of Gwen's scissors shifts wave control entirely to her. A successful hit lets Gwen push easily using Hallowed Mist for safety, forcing you under your turret. Conversely, when you slip behind her during Snip Snip!, her trade power evaporates. This allows you to freeze the wave, chunk her health bar, and pressure her into taking risky recalls before she can scale.

Como jogar

To win, never initiate with your dash. Walk up to bait Gwen into starting her Snip Snip! animation. The moment she clips, cast Cunning Sweep and use the Drakehound's Step dash to slide through her model. Hold Repudiation to absorb the damage of her Skip 'n Slash empowered attacks or to block the slow from Needlework if she commits her ultimate. If you miss your dash timing, disengage immediately.

Ficha completa →
Camille

Camille

shield_timingmobility_clash This matchup is a high-stakes duel of reflexes centered on Camille's Hookshot. When she launches herself off the wall, her entire offensive pressure relies on landing that stun to safely prime Precision Protocol. Ambessa has the perfect answer in Repudiation, which can block the crowd control entirely. If you negate this stun, Camille is left vulnerable without an escape, allowing you to counter-attack immediately with Cunning Sweep. Ver detalhes
Camille

Por quê

This matchup is a high-stakes duel of reflexes centered on Camille's Hookshot. When she launches herself off the wall, her entire offensive pressure relies on landing that stun to safely prime Precision Protocol. Ambessa has the perfect answer in Repudiation, which can block the crowd control entirely. If you negate this stun, Camille is left vulnerable without an escape, allowing you to counter-attack immediately with Cunning Sweep.

Impacto na lane

Whichever fighter misuses their defensive tool loses control over the lane's physical space. A successful block with Repudiation leaves Camille exposed deep in your minion wave, forcing her to take heavy damage from Lacerate while retreating. Conversely, if you waste your shield prematurely, Camille can freely fish for Tactical Sweep slows to setup a lethal Hookshot dive, locking you down for her jungler.

Como jogar

Never cast Repudiation to absorb simple poke from Tactical Sweep; instead, use Drakehound's Step dashes to slip inside or outside of Camille's outer cone. Hold your shield exclusively for the moment she clings to a wall and launches toward you. If she baits your shield without committing, immediately back off and play defensively until its cooldown returns, as you cannot survive a raw The Hextech Ultimatum engage without your crowd control block active.

Ficha completa →
Jayce

Jayce

gap_closedodge_reliance This matchup is a volatile dance of range denial and reactive mobility. Jayce wants to whittle you down with his cannon-form To the Skies! before switching with Transform Mercury Cannon to burst you. However, Ambessa can completely neutralize this poke by using Drakehound's Step to dash out of his skillshot path. Once Jayce attempts to disengage using the knockback from Thundering Blow, your low-cooldown dashes allow you to immediately re-engage and punish his long cooldowns. Ver detalhes
Jayce

Por quê

This matchup is a volatile dance of range denial and reactive mobility. Jayce wants to whittle you down with his cannon-form To the Skies! before switching with Transform Mercury Cannon to burst you. However, Ambessa can completely neutralize this poke by using Drakehound's Step to dash out of his skillshot path. Once Jayce attempts to disengage using the knockback from Thundering Blow, your low-cooldown dashes allow you to immediately re-engage and punish his long cooldowns.

Impacto na lane

Positioning near the brush is vital to break Jayce's vision and force him to waste his mana on blind To the Skies! shots. If you fail to dodge his initial blast, you will be shoved under tower, bleeding health while he controls the wave. Conversely, successful dodges allow you to freeze the wave near your turret, starving him of gold and forcing him into risky melee ranges where your Cunning Sweep excels.

Como jogar

Always bait Jayce's ranged poke by stepping out of your minion wave, using the dash from Drakehound's Step triggered by Lacerate to side-step To the Skies!. If he panics and uses Thundering Blow to push you away, immediately follow up with Public Execution or another dash to close the gap before his hammer form cooldowns reset. If you get chunked early, hold Repudiation to block his Lightning Field damage while retreating to safety.

Ficha completa →
Garen

Garen

shield_timingshort_trades This matchup is defined by how effectively you neutralize Garen's silence to maintain your spell-weaving. Garen relies on his Decisive Strike to shut down your mobility and prevent you from triggering Drakehound's Step. By timing Repudiation to block his silence, you absorb his burst and gain the window to retaliate with Cunning Sweep, turning his aggressive charge into a favorable trade. Ver detalhes
Garen

Por quê

This matchup is defined by how effectively you neutralize Garen's silence to maintain your spell-weaving. Garen relies on his Decisive Strike to shut down your mobility and prevent you from triggering Drakehound's Step. By timing Repudiation to block his silence, you absorb his burst and gain the window to retaliate with Cunning Sweep, turning his aggressive charge into a favorable trade.

Impacto na lane

Your success in these interactions directly dictates wave control and pressure. When you block his silence, you force Garen to play defensively, neutralizing his passive Perseverance. However, if he baits your shield, his Judgment will shred your armor while you are silenced, leaving you vulnerable to an execution by Demacian Justice and forcing a costly retreat that surrenders tower priority.

Como jogar

Watch Garen's movement closely; when he activates Decisive Strike, hold your ground instead of fleeing. Trigger Repudiation right as his strike animation begins to absorb the blow. Immediately follow up with the outer edge of Cunning Sweep, using Drakehound's Step to reposition. If you get silenced first, disengage using Lacerate to slow his pursuit, and delay your Public Execution until his Courage shield and damage reduction end.

Ficha completa →
Yasuo

Yasuo

skill_matchupshield_baiting This matchup is a high-speed duel of pure movement. While Yasuo relies on Sweeping Blade to dance through minions, your Drakehound's Step allows you to match his dashes step for step. Crucially, his Wind Wall is completely useless against you. Because all your primary damage tools—Cunning Sweep and Lacerate—are melee strikes rather than projectiles, you can ignore his defensive barrier entirely and strike him down right through it. Ver detalhes
Yasuo

Por quê

This matchup is a high-speed duel of pure movement. While Yasuo relies on Sweeping Blade to dance through minions, your Drakehound's Step allows you to match his dashes step for step. Crucially, his Wind Wall is completely useless against you. Because all your primary damage tools—Cunning Sweep and Lacerate—are melee strikes rather than projectiles, you can ignore his defensive barrier entirely and strike him down right through it.

Impacto na lane

Yasuo will constantly try to charge Steel Tempest on the wave to threaten you with a tornado. When he has his third strike ready, his threat zone expands, forcing you to use Drakehound's Step defensively. However, because his Wind Wall cannot mitigate Lacerate or Cunning Sweep, he cannot easily disengage or freeze the wave against you, turning every minion wave into a volatile zone where single missteps lead to lethal trades.

Como jogar

Position yourself away from your own low-health minions to limit Yasuo's Sweeping Blade escape routes, forcing him to fight you directly. Always hold Repudiation to absorb his third Steel Tempest tornado or his ultimate, Last Breath, negating his crowd control. If he manages to poke you down from a distance, use your Drakehound's Step dashes to slip into the brush to break his vision, then close the gap with Public Execution to finish him.

Ficha completa →
Riven

Riven

skill_matchupshield_timing This lane is a pure test of reflexes, pitting Riven's rapid dashes against your Drakehound's Step dashes. Riven relies on chaining Broken Wings and Ki Burst to lock you down while stacking Runic Blade. However, your Repudiation is the ultimate spoiler. By timing this shield to absorb her main burst and block her crowd control, you turn an even skirmish completely in your favor. Ver detalhes
Riven

Por quê

This lane is a pure test of reflexes, pitting Riven's rapid dashes against your Drakehound's Step dashes. Riven relies on chaining Broken Wings and Ki Burst to lock you down while stacking Runic Blade. However, your Repudiation is the ultimate spoiler. By timing this shield to absorb her main burst and block her crowd control, you turn an even skirmish completely in your favor.

Impacto na lane

Expect relentless, high-speed trading where neither of you can easily freeze the wave. If you waste Repudiation early, Riven will immediately force a trade with Blade of the Exile, pushing you off the wave and securing priority. Conversely, successfully parrying her knockup lets you chase her down with Cunning Sweep, forcing her to use Valor defensively and giving you complete control over recall timings.

Como jogar

Never initiate trades with Repudiation; instead, lead with Cunning Sweep and use Drakehound's Step to match her positioning. Watch her Q casts closely. When she prepares the third strike of Broken Wings, or dashes in close for Ki Burst, immediately activate your shield. If she baits your shield out with Valor, immediately retreat with Lacerate to slow her and wait for your cooldowns to return before stepping up again.

Ficha completa →

Outros matchups

Favoráveis

15

Esses campeões geralmente têm dificuldade para responder às suas principais forças, o que te dá mais liberdade para abordar o confronto. Você costuma ter várias formas de pressioná-los e forçar trocas a seu favor. Aproveite essa vantagem para impor seu ritmo, em vez de dar tempo para eles se estabilizarem.

Nasus

Nasus

early_aggressionfreeze_strategy Ambessa completely dominates the early game because Nasus's Soul Eater sustain cannot match her aggressive trading. By harassing him with the outer edge of Cunning Sweep, she forces him to play defensively. When Nasus tries to disengage using Wither, Ambessa can bypass the movement speed cripple entirely because Drakehound's Step provides dashes that ignore slow penalties, allowing her to stay on top of him. Ver detalhes
Nasus

Por quê

Ambessa completely dominates the early game because Nasus's Soul Eater sustain cannot match her aggressive trading. By harassing him with the outer edge of Cunning Sweep, she forces him to play defensively. When Nasus tries to disengage using Wither, Ambessa can bypass the movement speed cripple entirely because Drakehound's Step provides dashes that ignore slow penalties, allowing her to stay on top of him.

Impacto na lane

This dynamic dictates strict wave control. You can slow push the early waves to crash a massive wave under his turret, then use Cunning Sweep and Lacerate to poke him while he tries to last-hit for Siphoning Strike stacks. Denying him these stacks early delays his scaling spike, keeping him trapped under his tower and giving you total freedom.

Como jogar

Keep the wave frozen near your turret early on to force Nasus to walk up into Spirit Fire range. If he steps forward to stack Siphoning Strike, immediately strike him with Cunning Sweep and activate Drakehound's Step to dash forward. Save Repudiation to absorb his retaliatory strike or to block Wither. If Nasus activates Fury of the Sands, do not commit to a long duel; instead, use Public Execution to suppress him, reposition, and disengage until his ultimate expires.

Ficha completa →
Aatrox

Aatrox

mobilityspacingdodge Ambessa completely dominates this matchup because her passive, Drakehound's Step, provides short, frequent dashes that perfectly counter Aatrox's telegraphed strike, The Darkin Blade. Every time Aatrox attempts to line up his sweetspots, Ambessa can trigger a quick reposition by casting Cunning Sweep or Lacerate, sliding completely out of his knockup zones while maintaining high offensive pressure. Aatrox simply lacks the speed to pin her down. Ver detalhes
Aatrox

Por quê

Ambessa completely dominates this matchup because her passive, Drakehound's Step, provides short, frequent dashes that perfectly counter Aatrox's telegraphed strike, The Darkin Blade. Every time Aatrox attempts to line up his sweetspots, Ambessa can trigger a quick reposition by casting Cunning Sweep or Lacerate, sliding completely out of his knockup zones while maintaining high offensive pressure. Aatrox simply lacks the speed to pin her down.

Impacto na lane

This mobility advantage dictates every single health trade. Aatrox cannot easily crash waves or zone you, as missing his first two sweetspots of The Darkin Blade leaves him incredibly vulnerable to an all-in. You can constantly thin the wave and force him under his turret, threatening a dive once his Infernal Chains is wasted. His sustain from Deathbringer Stance cannot offset the sheer volume of damage he takes.

Como jogar

To execute this lane flawlessly, never initiate with your dash; instead, walk up to bait his first The Darkin Blade. Use Drakehound's Step reactively to dodge sideways, then respond with Cunning Sweep. Save Repudiation specifically to block the pull from Infernal Chains if you get caught. When Aatrox activates World Ender, do not panic-retreat; use your mobility to weave around his strikes, delaying your Public Execution to execute him.

Ficha completa →
Gnar

Gnar

gap_closerage_management Ambessa dominates this matchup because Mini Gnar cannot maintain his spacing against her relentless mobility. Every time you cast Cunning Sweep or Lacerate, Drakehound's Step provides a swift dash that completely bypasses his Boomerang Throw slow and Hop retreat. This allows you to rapidly stick to him and deplete his fragile health pool before his Rage Gene can transition him into the tanky Mega Gnar form. Ver detalhes
Gnar

Por quê

Ambessa dominates this matchup because Mini Gnar cannot maintain his spacing against her relentless mobility. Every time you cast Cunning Sweep or Lacerate, Drakehound's Step provides a swift dash that completely bypasses his Boomerang Throw slow and Hop retreat. This allows you to rapidly stick to him and deplete his fragile health pool before his Rage Gene can transition him into the tanky Mega Gnar form.

Impacto na lane

This dynamic strips Gnar of his usual ranged harassment advantage. He is forced to respect your dash range, meaning you can easily control the wave state. If he steps up to stack Hyper on minions, you can instantly initiate a trade. You will secure early health leads that force him into terrible recall timings, neutralizing his tower pressure and preventing him from ever safely farming in his vulnerable Mini state.

Como jogar

Trigger your engage when Gnar's rage bar is low, ensuring he cannot transform mid-fight. Start with Cunning Sweep, using the Drakehound's Step dash to close the gap and trigger the Slam follow-up. Save Repudiation specifically to block his Boomerang Throw slow or to absorb the stun from Boulder Toss if he manages to transform. If he attempts to escape with Hop, immediately match it with Public Execution to lock him down and finish him off.

Ficha completa →
Urgot

Urgot

shield_timingdodge_reliance This matchup revolves around Urgot's attempt to execute his trade using Disdain. When he dashes forward to flip you, your Repudiation acts as the ultimate counter-measure. By timing it to absorb the impact, you block the displacement and stun, negate his shield creation, and immediately retaliate. Without his flip, Urgot cannot easily trigger multiple Echoing Flames passives, allowing your Cunning Sweep to shred his health bar while he is stuck in place. Ver detalhes
Urgot

Por quê

This matchup revolves around Urgot's attempt to execute his trade using Disdain. When he dashes forward to flip you, your Repudiation acts as the ultimate counter-measure. By timing it to absorb the impact, you block the displacement and stun, negate his shield creation, and immediately retaliate. Without his flip, Urgot cannot easily trigger multiple Echoing Flames passives, allowing your Cunning Sweep to shred his health bar while he is stuck in place.

Impacto na lane

Urgot's lane dominance collapses once he cannot threaten you with his flip. Because you consistently win trades by blocking Disdain, you dictate wave placement, forcing him to farm from a distance with Purge. This creates massive health differentials, allowing you to crash large minion waves and secure free recall timings. Urgot is forced to play defensively under tower, bleeding gold and losing the ability to assist his jungler.

Como jogar

Position yourself constantly near Urgot’s front arc to bait his dash, but never commit your own dashes mindlessly. Keep Repudiation ready specifically for when you see his charge animation begin. If he tries to slow you with Corrosive Charge first, use Lacerate to reposition and maintain your angle without wasting your defensive shield. Should you mistime your block and get flipped, immediately activate Public Execution to turn the battle around and execute him before his Purge wears you down.

Ficha completa →
Teemo

Teemo

gap_closeall_in_burst Teemo relies on Toxic Shot to harass you from afar and uses Blinding Dart to nullify your empowered passive attacks. However, his lack of hard escape makes him highly vulnerable. By chaining Cunning Sweep and Lacerate, you trigger multiple Drakehound's Step dashes to easily bypass his range. Even if you are blinded, your mobility ensures you stay glued to him until you can unleash Public Execution for the finish. Ver detalhes
Teemo

Por quê

Teemo relies on Toxic Shot to harass you from afar and uses Blinding Dart to nullify your empowered passive attacks. However, his lack of hard escape makes him highly vulnerable. By chaining Cunning Sweep and Lacerate, you trigger multiple Drakehound's Step dashes to easily bypass his range. Even if you are blinded, your mobility ensures you stay glued to him until you can unleash Public Execution for the finish.

Impacto na lane

Early on, Teemo will try to zone you with poison, forcing you to use Repudiation to absorb damage while collecting minions. But the moment you unlock Public Execution, the lane dynamic flips. Your threat of a sudden gap-close restricts his ability to safely plant Noxious Trap or harass you, trapping the scout under his own turret and neutralizing his map pressure.

Como jogar

When trading, do not panic if Teemo hits you with Blinding Dart. Instead of wasting your empowered Drakehound's Step attacks into his blind, use the dash to position Cunning Sweep and Lacerate for maximum damage. Hold Repudiation to absorb his poison ticks while waiting out the debuff. Once your vision clears, unleash your accumulated passive strikes and secure the kill with Public Execution before he can run away with Move Quick.

Ficha completa →
Ornn

Ornn

dodge_relianceshield_timing Ambessa dominates this matchup because her high mobility bypasses Ornn's predictable patterns. While Ornn relies on hitting Searing Charge against terrain or timing his Call of the Forge God to lock you down, your Repudiation acts as a perfect counter. By absorbing his knockups and shielding his burst, you strip the tank of his crowd control, leaving him vulnerable to extended trades where Drakehound's Step out-spaces his slow cooldowns. Ver detalhes
Ornn

Por quê

Ambessa dominates this matchup because her high mobility bypasses Ornn's predictable patterns. While Ornn relies on hitting Searing Charge against terrain or timing his Call of the Forge God to lock you down, your Repudiation acts as a perfect counter. By absorbing his knockups and shielding his burst, you strip the tank of his crowd control, leaving him vulnerable to extended trades where Drakehound's Step out-spaces his slow cooldowns.

Impacto na lane

This interaction forces Ornn into a defensive, passive lane state. He cannot safely contest the wave with Volcanic Rupture or trade with Bellows Breath because any forward movement allows you to dash in. When you block his crucial Searing Charge knockup, he is left without escape, allowing you to freeze the wave at will or crash giant waves to chip his turret plates while he sits helplessly under tower.

Como jogar

To execute this plan, never waste Repudiation aggressively; hold it strictly for his crowd control. When Ornn casts Call of the Forge God, wait for the return ram to strike before activating your shield, or trigger it the moment he charges a wall with Searing Charge. Use Cunning Sweep to poke him down, and always dash diagonally with Drakehound's Step to avoid the breath from Bellows Breath. If he attempts to escape, secure the kill with Public Execution.

Ficha completa →
Kayle

Kayle

early_aggressiondive_potential Kayle's early vulnerability stems from her weak melee state before Divine Ascent evolves. She relies on Radiant Blast and Celestial Blessing to kite, but she cannot escape your relentless mobility. By chaining Cunning Sweep and Lacerate, you trigger successive Drakehound's Step dashes that easily close the gap. Kayle simply lacks the raw defensive stats and early tools to survive this constant sticky aggression before she unlocks her range. Ver detalhes
Kayle

Por quê

Kayle's early vulnerability stems from her weak melee state before Divine Ascent evolves. She relies on Radiant Blast and Celestial Blessing to kite, but she cannot escape your relentless mobility. By chaining Cunning Sweep and Lacerate, you trigger successive Drakehound's Step dashes that easily close the gap. Kayle simply lacks the raw defensive stats and early tools to survive this constant sticky aggression before she unlocks her range.

Impacto na lane

This mobility mismatch gives you absolute dominion over the minion waves. You can easily establish a slow push, forcing Kayle to watch helplessly or risk dying to a rapid Cunning Sweep engagement. She is forced to waste Starfire Spellblade just to secure scraps under her turret. This constant threat of dive or heavy zoning completely starves her of gold and experience, delaying her crucial ascension thresholds while securing you an early lead.

Como jogar

Position yourself aggressively between the enemy caster minions and Kayle to deny her experience. When she tries to disengage with Radiant Blast, immediately activate Repudiation to block the slowing projectile and absorb her counter-poke. Save Public Execution for the moment her self-cast Divine Judgment expires, ensuring you suppress her immediately after her invulnerability fades. If you accidentally push too fast, freeze the next wave near your turret to force her into deep, lethal territory.

Ficha completa →
Sion

Sion

easy_dodgeshred_potential Ambessa dominates this matchup because her mobility completely neutralizes Sion's primary threat. The moment Sion begins channeling Decimating Smash, you can activate Drakehound's Step after casting Cunning Sweep or Lacerate to effortlessly dash out of the danger zone. By dodging his heavy knock-up, you strip him of his main crowd control and damage, leaving him entirely defenseless against your relentless counter-engage. Ver detalhes
Sion

Por quê

Ambessa dominates this matchup because her mobility completely neutralizes Sion's primary threat. The moment Sion begins channeling Decimating Smash, you can activate Drakehound's Step after casting Cunning Sweep or Lacerate to effortlessly dash out of the danger zone. By dodging his heavy knock-up, you strip him of his main crowd control and damage, leaving him entirely defenseless against your relentless counter-engage.

Impacto na lane

This interaction grants you complete authority over wave states and trade pacing. Sion cannot safely channel Decimating Smash to clear minions without being severely punished. You can easily establish a slow push and dive or pressure his turret, as his desperate attempts to absorb your bursts with Soul Furnace will quickly deplete his mana pool, forcing him into terrible recall timings and loss of tower plates.

Como jogar

To execute this perfectly, always hover within Sion's range and hold onto either Cunning Sweep or Lacerate. Avoid burning all your abilities at once; instead, wait for him to start anchoring his heavy strike before triggering Drakehound's Step to slide out of his path. If he attempts to escape or engage with Unstoppable Onslaught, time your Repudiation shield to absorb the impact, then immediately follow up with Public Execution to secure the kill.

Ficha completa →

Outros matchups

Items to Counter Ambessa

Buy these items to reduce this champion's effectiveness in your games.

Plated Steelcaps
Plated Steelcaps
Randuin's Omen
Randuin's Omen
Thornmail
Thornmail
Frozen Heart
Frozen Heart
Guardian Angel
Guardian Angel

Como counterar este campeão

Ângulo de counter

Jogar contra a Ambessa não se resume apenas a derrotá-la mecanicamente, mas sim a quebrar sua lógica de combate. Seu kit gira em torno de um momento específico: entrar na luta, isolar o adversário e criar um desequilíbrio imediato. Se esse momento falhar, ela fica vulnerável. Os melhores contra-ataques não são necessariamente aqueles que dominam a rota, mas aqueles que a impedem de executar seu plano. Entender como impedir que ela inicie o combate é mais importante do que tentar matá-la.

Contexto do patch

As estratégias eficazes contra a Ambessa exploram dois aspectos: impedir que ela tenha acesso aos alvos (kite, poke, controle) ou sobreviver ao seu ataque inicial (estase, resistência, resistência física). Campeões que a punem depois que ela se compromete são particularmente perigosos, já que ela não possui uma fuga confiável. A atualização reforça esses perfis com ferramentas defensivas acessíveis.

Leitura rápida

  • Ela perde se seu ataque inicial não gerar uma vantagem imediata.
  • As ferramentas defensivas reduzem significativamente o impacto dela.
  • O kiting e o controle atrapalham o plano de jogo dela.

Arquétipos de counter

Kite e poke

Esses perfis impedem que Ambessa alcance seu alvo em condições ideais. Ao mantê-la à distância e esgotar seus recursos, eles a forçam a entrar em confrontos subótimos. Quando ela finalmente se compromete, chega enfraquecida e sem margem para erros. Isso perturba completamente seu ritmo de jogo, baseado na execução.

Como o campeão deve se adaptar. Procure ângulos de abordagem inesperados, em vez de forçar uma abordagem frontal.

Duelistas explosivos

Esses campeões punem diretamente a iniciativa de ataque da Ambessa. Seu dano explosivo e sua mobilidade permitem que eles mudem o rumo da luta instantaneamente. Se a Ambessa não conseguir matar imediatamente, ela acaba em uma luta que não consegue sustentar. Isso torna cada iniciativa de ataque arriscada e limita suas opções tanto na rota quanto nas lutas em equipe.

Como o campeão deve se adaptar. Evite duelos prolongados e aproveite o momento certo para usar suas habilidades definitivas.

Tanque e sustentação

Esses perfis absorvem o ataque inicial e reduzem o valor do all-in dela. Sua capacidade de sobrevivência e de ganhar tempo impedem que Ambessa consiga uma vantagem rápida. Assim que seu burst se esgota, ela perde pressão, alterando completamente o equilíbrio de forças.

Como o campeão deve se adaptar. Ataca os inimigos mais frágeis, em vez de se concentrar nos tanques.

Matchups prioritários

Riven

O Riven transforma cada ativação do Ambessa em um duelo imediato. Sua mobilidade e poder de dano repentino permitem que ela reaja instantaneamente, muitas vezes antes mesmo que o isolamento seja concluído. Isso obriga o Ambessa a jogar com muito mais cautela e a evitar trocas diretas.

Erros comuns contra ele

Erros comuns contra ele

  • Subestimando seu impulso inicial.

  • Espalhar-se e oferecer um alvo isolado.
  • Usar medidas de controle de multidões muito cedo.
  • Ignorando os tempos de suas habilidades definitivas.
  • Não comprar itens defensivos.

Notas do coach

  • Sua prioridade é sobreviver ao ataque dela.
  • Um Ambessa inútil após o R dela é um Ambessa perdedor.

FAQ

Qual é a melhor maneira de enfrentá-la?

A melhor maneira é diminuir o impacto do seu ataque inicial. Isso envolve manobras de kiting, controle de grupo e ferramentas defensivas. Se ela não conseguir isolar um alvo ou se esse alvo sobreviver, ela perde impacto instantaneamente. O objetivo não é necessariamente matá-la, mas tornar inútil o seu ataque total.













































































