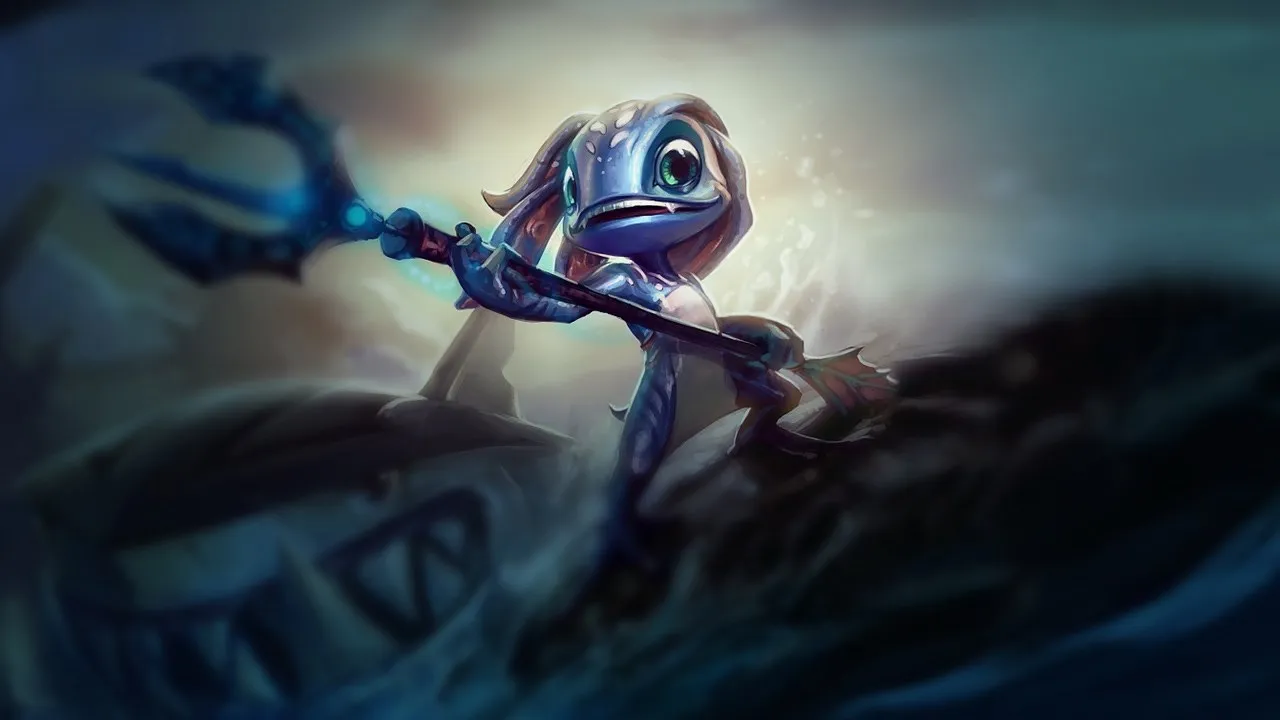
Fizz, um AP assassin na Mid Lane, sofre contra composições que restringem sua mobilidade. Estratégias baseadas em crowd control, poke de longo alcance ou burst defensivo limitam sua capacidade de dar engage. Sua necessidade de dar dive e recuar rapidamente torna erros de posicionamento extremamente punitivos.
★ MIDTier B
DANO
UTIL
TANK
DIFF
Win48.8%#82 · ↓0pt
Pick2.2%#29
Ban1.9%#56
Guia de counters de Fizz Wild Rift
Hard Counters
3
Esses campeões têm uma build e um estilo de jogo que superam diretamente o seu, o que pode tornar o controle da lane e o farm extremamente difíceis. As habilidades deles podem neutralizar seus principais pontos fortes ou te punir assim que você tenta jogar do seu jeito de sempre. Nesses matchups, o objetivo costuma ser reduzir os erros e buscar soluções fora do confronto direto.
Anti-avançoControle de grupoVex funciona como um hard counter para seu kit móvel por causa de Doom 'n Gloom. Toda vez que você tenta fechar a distância usando Urchin Strike ou escapar com Playful, você ativa a marca da passiva dela. Vex pode facilmente consumir essa marca com Mistral Bolt ou Personal Space para causar dano bônus massivo, ou simplesmente guardar a barra carregada para te causar medo durante o dash, neutralizando completamente seu potencial de burst.Build de Vex →Ver detalhes
Vex
Por quê
Vex funciona como um hard counter para seu kit móvel por causa de Doom 'n Gloom. Toda vez que você tenta fechar a distância usando Urchin Strike ou escapar com Playful, você ativa a marca da passiva dela. Vex pode facilmente consumir essa marca com Mistral Bolt ou Personal Space para causar dano bônus massivo, ou simplesmente guardar a barra carregada para te causar medo durante o dash, neutralizando completamente seu potencial de burst.
Impacto na lane
Essa interação te força a uma postura altamente defensiva já na primeira wave. Você não pode contestar o push com segurança, já que Vex vai usar Looming Darkness para te zonear enquanto mantém o medo dela pronto. Engajar diretamente é suicídio, deixando você perdendo vida e preso sob a torre. Consequentemente, você perde toda a prioridade da lane do meio, permitindo que Vex garanta visão facilmente e pressione seu jungler.
Como jogar
Para sobreviver, você precisa jogar em torno da barra de recurso de Vex. Só tente garantir minions quando o Doom 'n Gloom dela estiver descarregado. Em vez de tentar matá-la, foque em sobreviver até o nível cinco. Use Playful apenas para limpar rapidamente waves que colidiram sob sua torre, e então busque imediatamente oportunidades de roam. Observe as lanes laterais e aproveite as jogadas do seu jungler, usando Chum the Waters para garantir abates em outros lugares em vez de desperdiçá-lo no escudo dela.
Controle de grupoContra-iniciaçãoLissandra neutraliza completamente suas tentativas de assassinato ao punir sua mobilidade. Sempre que você faz um dash com Urchin Strike ou tenta acertar Playful, ela pode reagir instantaneamente com Ring of Frost para te enraizar antes que você consiga ativar Rending Wave. Depois do nível cinco, Frozen Tomb dela age como um counter absoluto, te travando no meio do ar ou neutralizando Chum the Waters ao lançá-la em si mesma.Build de Lissandra →Ver detalhes
Lissandra
Por quê
Lissandra neutraliza completamente suas tentativas de assassinato ao punir sua mobilidade. Sempre que você faz um dash com Urchin Strike ou tenta acertar Playful, ela pode reagir instantaneamente com Ring of Frost para te enraizar antes que você consiga ativar Rending Wave. Depois do nível cinco, Frozen Tomb dela age como um counter absoluto, te travando no meio do ar ou neutralizando Chum the Waters ao lançá-la em si mesma.
Impacto na lane
Esse matchup retira sua pressão ofensiva, forçando você a uma postura totalmente defensiva. Lissandra empurra constantemente a wave usando Ice Shard, forçando você a farmar sob a torre, onde ela pode te dar poke com segurança. Se você tentar reduzir os minions usando Playful, você fica completamente vulnerável a um lockdown fatal de Ring of Frost, o que significa que você vai perder consistentemente a prioridade da lane do meio e ficar atrás em ouro.
Como jogar
Desista de tentar matar Lissandra em situações de 1v1. Em vez disso, foque em usar Rending Wave para garantir last hits sob sua torre e preserve Playful exclusivamente como mecanismo de escape para contornar as configurações de gank de Glacial Path dela. Depois de conseguir Chum the Waters, procure janelas de roam. Quando ela te empurrar para dentro, use esse tempo para correr para as lanes laterais, onde seu burst pode realmente garantir abates contra alvos menos defensivos.
TanquesDano explosivoMalphite neutraliza completamente sua ameaça de assassinato. O Granite Shield dele absorve sua trade inicial de Urchin Strike ou Rending Wave, deixando a barra de vida dele intacta. Como vocês dois são corpo a corpo, você precisa se aproximar para farmar, o que permite que ele te alveje repetidamente com Seismic Shard. Esse poke de alvo direto drena sua vida enquanto rouba sua velocidade de movimento, impedindo que você retalie e forçando você a uma postura totalmente defensiva.Build de Malphite →Ver detalhes
Malphite
Por quê
Malphite neutraliza completamente sua ameaça de assassinato. O Granite Shield dele absorve sua trade inicial de Urchin Strike ou Rending Wave, deixando a barra de vida dele intacta. Como vocês dois são corpo a corpo, você precisa se aproximar para farmar, o que permite que ele te alveje repetidamente com Seismic Shard. Esse poke de alvo direto drena sua vida enquanto rouba sua velocidade de movimento, impedindo que você retalie e forçando você a uma postura totalmente defensiva.
Impacto na lane
Você vai se encontrar constantemente empurrado sob a torre, perdendo ouro e vida. Toda tentativa de contestar a wave é respondida com Seismic Shard, forçando você a absorver o dano ou desperdiçar Playful para contorná-lo, o que esgota rapidamente sua reserva de mana. Essa falta de prioridade significa que Malphite controla o ritmo da lane, forçando você a recalls em momentos desfavoráveis e dando controle de mapa para o time dele.
Como jogar
Pare de tentar matar Malphite; em vez disso, trate essa lane como uma prioridade de roam. Deixe a wave colidir, use Rending Wave para garantir cs sob a torre e espere ele desperdiçar mana. No momento em que você vir uma abertura, use Playful para limpar rapidamente a wave que está chegando e procure imediatamente oportunidades de gank nas lanes laterais. Seu Chum the Waters é inútil contra a resistência dele, mas continua sendo uma ferramenta letal para garantir abates em alvos mais frágeis em outros lugares.
Esses campeões têm ferramentas que geralmente dão a eles vantagem no confronto, sem tornar o matchup impossível de jogar. Eles podem ter mais alcance, mais capacidade de aguentar sua ofensiva ou mais formas de responder aos seus engajamentos. Você vai precisar adaptar sua abordagem e escolher com cuidado os momentos em que aceita a luta.
InalvejávelSustentaçãoVladimir neutraliza completamente sua pressão de abate porque Sanguine Pool permite que ele contorne sem esforço a explosão de Chum the Waters. Sem o dano e o knock-up da sua ultimate, você não consegue bursá-lo. Enquanto isso, Transfusion dele cura lentamente qualquer trade curta que você tentar com Urchin Strike e Rending Wave, transformando essa lane em uma exaustiva batalha de desgaste que favorece o scaling dele.Build de Vladimir →Ver detalhes
Vladimir
Por quê
Vladimir neutraliza completamente sua pressão de abate porque Sanguine Pool permite que ele contorne sem esforço a explosão de Chum the Waters. Sem o dano e o knock-up da sua ultimate, você não consegue bursá-lo. Enquanto isso, Transfusion dele cura lentamente qualquer trade curta que você tentar com Urchin Strike e Rending Wave, transformando essa lane em uma exaustiva batalha de desgaste que favorece o scaling dele.
Impacto na lane
Você não consegue forçar Vladimir a sair da lane por causa da recuperação de vida infinita dele. Tentar dar poke nele com Playful te expõe a Hemoplague e a uma retaliação pesada de Tides of Blood. Essa falta de ameaça de abate solo permite que ele faça scale livremente sob a torre dele. Eventualmente, você será empurrado sob sua própria torre, perdendo ouro enquanto ele domina o estado da wave e te trava no lugar.
Como jogar
Para vencer esse impasse, foque sua atenção nas lanes laterais. Use Playful para limpar rapidamente os minions que chegam e desapareça imediatamente no fog of war. Você precisa procurar oportunidades de gank quando seus aliados tiverem CC, usando Chum the Waters em alvos que não possuam Sanguine Pool. Se Vladimir fizer freeze na wave perto da torre dele, não se estenda demais; em vez disso, entre no rio para garantir visão ou flanquear o jungler inimigo.
Dano explosivoSustentaçãoSwain é uma muralha absoluta para Fizz assim que ele acessa Demonic Ascension. Enquanto seu Urchin Strike e Rending Wave conseguem reduzir a vida base dele no início, o dreno contínuo de vida da ultimate dele anula completamente sua janela de burst. Se você tentar se comprometer com um all-in, a passiva Ravenous Flock dele combinada com Demonic Ascension transforma seu dano em cura para ele, especialmente se ele acertar Nevermove.Build de Swain →Ver detalhes
Swain
Por quê
Swain é uma muralha absoluta para Fizz assim que ele acessa Demonic Ascension. Enquanto seu Urchin Strike e Rending Wave conseguem reduzir a vida base dele no início, o dreno contínuo de vida da ultimate dele anula completamente sua janela de burst. Se você tentar se comprometer com um all-in, a passiva Ravenous Flock dele combinada com Demonic Ascension transforma seu dano em cura para ele, especialmente se ele acertar Nevermove.
Impacto na lane
Você não consegue ameaçar abates solo em circunstâncias normais, transformando a lane do meio em uma batalha de desgaste que você vai perder. Swain vai te empurrar constantemente usando Death's Hand e Vision of Empire. Se você usar Playful para limpar waves, você se expõe ao puxão de Nevermove dele. Consequentemente, você é forçado a abrir mão da prioridade do meio, perdendo farm sob a torre.
Como jogar
Não desperdice seu Chum the Waters em um Swain com vida cheia quando a ultimate dele estiver disponível. Em vez disso, use Urchin Strike através de um minion para escapar do Nevermove dele, e guarde Playful exclusivamente para contornar o puxão dele ou evitar dano pesado. Seu objetivo principal é encontrar janelas de roam; empurre a wave somente quando o Death's Hand dele estiver em cooldown, e então desapareça imediatamente para impactar as lanes laterais, onde alvos mais frágeis podem realmente ser burstados.
Imunidade a CCEscudosMorgana dita completamente seu potencial de assassinato porque o Black Shield dela funciona como uma parada total para toda sua janela de burst. No momento em que você lança Chum the Waters, ela pode reativamente lançar o escudo de feitiço dela para absorver o dano mágico e negar completamente o knock-up do tubarão. Essa interação te priva da sua principal ferramenta de prender o alvo, deixando você vulnerável a um contra-engajamento com Dark Binding e Soul Shackles enquanto sua principal fonte de dano é desperdiçada.Build de Morgana →Ver detalhes
Morgana
Por quê
Morgana dita completamente seu potencial de assassinato porque o Black Shield dela funciona como uma parada total para toda sua janela de burst. No momento em que você lança Chum the Waters, ela pode reativamente lançar o escudo de feitiço dela para absorver o dano mágico e negar completamente o knock-up do tubarão. Essa interação te priva da sua principal ferramenta de prender o alvo, deixando você vulnerável a um contra-engajamento com Dark Binding e Soul Shackles enquanto sua principal fonte de dano é desperdiçada.
Impacto na lane
Durante a fase de lane, Morgana vai te empurrar constantemente sob a torre usando Tormented Shadow, forçando você a usar Seastone Trident para farmar sob pressão. Se você tentar fechar a distância com Urchin Strike, ela facilmente lança Dark Binding de forma reativa para te enraizar no meio do dash. Isso impede trades, deixa ela recuperar qualquer dano de desgaste via Soul Siphon, e te nega qualquer prioridade para roam enquanto você luta para limpar as waves.
Como jogar
Para sobreviver e vencer, você precisa provocar os cooldowns defensivos dela antes de se comprometer com sua ultimate. Inicie trades curtas usando Urchin Strike combinado com Rending Wave, e então use Playful imediatamente para saltar para longe, contornando o Dark Binding reativo dela e forçando-a a desperdiçar Black Shield. Uma vez que esse escudo estiver em cooldown, você tem uma breve janela para atacar. Se ela te acorrentar com Soul Shackles, use a intangibilidade de Playful para atrasar o gatilho do stun e escapar da zona dela.
Dano explosivoControle de grupoGalio neutraliza naturalmente as tentativas de assassinato de Fizz porque Shield of Durand fornece uma redução massiva de dano mágico que absorve completamente o impacto de Chum the Waters. Quando você tenta executar seu burst completo, ele pode simplesmente canalizar o taunt dele para mitigar o dano inicial do tubarão e então te taunta imediatamente no momento em que você aterrissa de Playful, deixando você vulnerável a um contra-engajamento rápido com Justice Punch.Build de Galio →Ver detalhes
Galio
Por quê
Galio neutraliza naturalmente as tentativas de assassinato de Fizz porque Shield of Durand fornece uma redução massiva de dano mágico que absorve completamente o impacto de Chum the Waters. Quando você tenta executar seu burst completo, ele pode simplesmente canalizar o taunt dele para mitigar o dano inicial do tubarão e então te taunta imediatamente no momento em que você aterrissa de Playful, deixando você vulnerável a um contra-engajamento rápido com Justice Punch.
Impacto na lane
Você é constantemente forçado a ficar sob a torre porque Galio empurra facilmente as waves usando Winds of War combinado com Colossal Smash. Se você tentar reduzir a wave com Playful, você se expõe a uma troca pesada. Isso significa que você vai passar a maior parte do início do jogo farmando sob pressão, perdendo sua prioridade de roam enquanto Galio busca impactar o mapa com Hero's Entrance.
Como jogar
Para sobreviver e encontrar aberturas, nunca inicie com Chum the Waters enquanto Galio tiver Shield of Durand disponível. Em vez disso, provoque Winds of War dele primeiro, depois use Urchin Strike e Rending Wave para trades curtas e rápidas, mantendo Playful estritamente como ferramenta defensiva para escapar do Justice Punch dele. Se ele desperdiçar o taunt de forma defensiva, esse é o sinal exato para você soltar seu combo completo de ultimate antes que os cooldowns dele se recuperem.
SobrevivênciaContra-iniciaçãoA ultimate de Zilean, Chronoshift, age como um counter direto para toda a sua identidade como assassino de AP. Quando você se compromete com o combo completo de burst usando Chum the Waters para isolar e eliminar um alvo, Zilean pode simplesmente lançar Chronoshift nele, revertendo completamente a execução. Como seu kit depende de janelas de all-in com cooldown alto para garantir abates, a capacidade dele de trapacear a morte torna os abates solo padrão na lane quase impossíveis.Build de Zilean →Ver detalhes
Zilean
Por quê
A ultimate de Zilean, Chronoshift, age como um counter direto para toda a sua identidade como assassino de AP. Quando você se compromete com o combo completo de burst usando Chum the Waters para isolar e eliminar um alvo, Zilean pode simplesmente lançar Chronoshift nele, revertendo completamente a execução. Como seu kit depende de janelas de all-in com cooldown alto para garantir abates, a capacidade dele de trapacear a morte torna os abates solo padrão na lane quase impossíveis.
Impacto na lane
Na lane, Zilean vai limpar waves com segurança a distância usando Time Bomb, muitas vezes te zoneando com stuns de bomba dupla via Twisted Timeflow. Como tentativas de dive são inúteis contra Chronoshift, você não consegue forçá-lo a sair da lane facilmente. Isso neutraliza sua pressão de abate precoce, deixando você preso sob a torre enquanto ele faz scale, o que significa que você perde a prioridade natural necessária para ajudar seu jungler a garantir confrontos próximos.
Como jogar
Para vencer esse matchup, desvie seu foco da lane do meio. Use Playful para limpar rapidamente as waves que chegam e desapareça imediatamente no fog of war. O timing dos seus roams é crítico; espere até Zilean estar travado sob a própria torre limpando minions antes de se mover para as lanes laterais. Se ele tentar te seguir, abuse da sua mobilidade superior com Urchin Strike no rio para emboscá-lo antes que ele consiga alcançar os aliados dele com segurança.
Anti-avançoControle de áreaTaliyah tem uma vantagem imensa porque Unraveled Earth dela neutraliza diretamente todo o seu kit de mobilidade. Se você tentar fechar a distância usando Urchin Strike ou escapar usando Playful, passar pelo campo minado dela ativa imediatamente um stun e dano mágico pesado. Essa interação neutraliza completamente seu potencial de assassinato, forçando você a jogar de forma passiva enquanto ela te dá poke com segurança a distância.Build de Taliyah →Ver detalhes
Taliyah
Por quê
Taliyah tem uma vantagem imensa porque Unraveled Earth dela neutraliza diretamente todo o seu kit de mobilidade. Se você tentar fechar a distância usando Urchin Strike ou escapar usando Playful, passar pelo campo minado dela ativa imediatamente um stun e dano mágico pesado. Essa interação neutraliza completamente seu potencial de assassinato, forçando você a jogar de forma passiva enquanto ela te dá poke com segurança a distância.
Impacto na lane
Como você não pode engajar livremente, Taliyah dita o estado da wave. Ela vai te empurrar constantemente sob a torre usando Threaded Volley, desgastando sua barra de vida sempre que você tentar dar last hit. Se você for empurrado para dentro, ela facilmente utiliza Rock Surfing para fazer roam até as lanes laterais, enquanto você fica preso limpando waves lentamente, perdendo pressão no mapa e ficando atrás em ouro.
Como jogar
Para sobreviver, você precisa fazer freeze na wave de minions bem fora do alcance da sua torre para negar a ela o espaço para te zonear. Nunca use Urchin Strike de forma ofensiva, a menos que o Unraveled Earth dela esteja em cooldown. Se ela se posicionar mal e lançar Seismic Shove, use Playful lateralmente para contornar o knockback em vez de saltar para frente. Se você for empurrado para fora, se coordene com seu jungler, deixando-o provocar o campo minado antes de você se comprometer com seu burst.
Esses confrontos são, acima de tudo, duelos de execução: os dois campeões têm formas reais de levar vantagem. Uma habilidade importante esquivada, um engajamento bem antecipado ou um erro de posicionamento podem ser suficientes para decidir o duelo. Conhecer o matchup e reconhecer as janelas de ação certas faz toda a diferença.
InalvejávelDano explosivoEsse matchup é um puro teste de reflexos centrado nas habilidades ultimate de ambos. A lane permanece estritamente equilibrada porque, embora seu burst consiga deletá-lo, Ekko possui a ferramenta de counter definitiva: Chronobreak. Se ele cronometrar o recall perfeitamente, ele pode negar inteiramente a detonação massiva e o knockup do seu Chum the Waters, deixando você vulnerável sem sua principal fonte de dano.Build de Ekko →Ver detalhes
Ekko
Por quê
Esse matchup é um puro teste de reflexos centrado nas habilidades ultimate de ambos. A lane permanece estritamente equilibrada porque, embora seu burst consiga deletá-lo, Ekko possui a ferramenta de counter definitiva: Chronobreak. Se ele cronometrar o recall perfeitamente, ele pode negar inteiramente a detonação massiva e o knockup do seu Chum the Waters, deixando você vulnerável sem sua principal fonte de dano.
Impacto na lane
Antes do nível cinco, as trades são extremamente voláteis. Você precisa usar Playful para contornar o retorno de Timewinder dele ou para evitar o stun de Parallel Convergence dele. Se você for pego pelo proc de Z-Drive Resonance dele, ele vai te ultrapassar em velocidade. Depois que ambos desbloquearem as ultimates, a pressão na lane congela; nenhum dos assassinos pode dar dive no outro com segurança, porque Chronobreak e Playful tornam os dives na torre incrivelmente arriscados.
Como jogar
Para vencer esse jogo mental, nunca inicie com Chum the Waters a distância. Em vez disso, force a mão de Ekko engajando com Urchin Strike e Rending Wave para desgastar a vida dele. Guarde Playful para reagir à zona de escudo de Parallel Convergence dele. Só solte Chum the Waters quando ele for forçado a usar Chronobreak defensivamente para sobreviver às suas habilidades básicas, ou lance a partir do fog of war para que ele não tenha tempo de reagir.
Imunidade a CCTrocasEsse matchup é uma batalha pura de tempos de reação e provocação de cooldowns. Yone depende do terceiro tornado de Mortal Steel ou do engajamento pesado de Fate Sealed para te travar. Como Fizz, toda a sua lane gira em torno de Playful. Se você cronometrar essa habilidade para contornar completamente as configurações aéreas dele, você contorna o principal CC dele e o deixa extremamente vulnerável a uma trade devastadora de counter-burst.Build de Yone →Ver detalhes
Yone
Por quê
Esse matchup é uma batalha pura de tempos de reação e provocação de cooldowns. Yone depende do terceiro tornado de Mortal Steel ou do engajamento pesado de Fate Sealed para te travar. Como Fizz, toda a sua lane gira em torno de Playful. Se você cronometrar essa habilidade para contornar completamente as configurações aéreas dele, você contorna o principal CC dele e o deixa extremamente vulnerável a uma trade devastadora de counter-burst.
Impacto na lane
O ritmo da lane muda constantemente com base nas stacks de vento de Yone. Quando o tornado dele estiver pronto, você precisa ceder a prioridade da wave e recuar para evitar ser pokado. Quando ele desperdiça o terceiro Mortal Steel ou é forçado a usar Spirit Cleave só para farmar, você ganha uma janela enorme para trade. Deixar de contornar os knock-ups dele resulta em perdas pesadas nas trades, forçando recalls precoces que sangram a pressão na lane do meio.
Como jogar
Nunca inicie uma trade com Playful, a menos que Yone já tenha desperdiçado o knock-up dele. Em vez disso, use Urchin Strike para fechar a distância e ative Rending Wave para trades rápidas. Guarde Playful exclusivamente para contornar reativamente o terceiro Mortal Steel dele ou o Fate Sealed dele. Se ele usar Soul Unbound para te dar dive, recue imediatamente; espere o espírito dele voltar antes de usar Chum the Waters para pegá-lo no ponto de ancoragem dele.
MecânicaFurtividadeEsse matchup é um duelo de assassinos de altíssima intensidade, dictado inteiramente pelo timing da sua principal ferramenta defensiva contra as principais ameaças de engajamento dela. Como ambos dependem de dano de burst, a lane depende da interação entre Playful e o kit ofensivo de Akali. Contornar a marca de Shuriken Flip ou absorver completamente o dano massivo de execução do segundo golpe de Perfect Execution muda o momentum instantaneamente, deixando Akali vulnerável e sem energia.Build de Akali →Ver detalhes
Akali
Por quê
Esse matchup é um duelo de assassinos de altíssima intensidade, dictado inteiramente pelo timing da sua principal ferramenta defensiva contra as principais ameaças de engajamento dela. Como ambos dependem de dano de burst, a lane depende da interação entre Playful e o kit ofensivo de Akali. Contornar a marca de Shuriken Flip ou absorver completamente o dano massivo de execução do segundo golpe de Perfect Execution muda o momentum instantaneamente, deixando Akali vulnerável e sem energia.
Impacto na lane
As trades na lane do meio são breves, mas incrivelmente letais. Você não consegue empurrar as waves facilmente no início porque Five Point Strike pune o farm corpo a corpo, enquanto Seastone Trident ajuda você a dar last hit sob a torre. Quando ambos alcançarem o nível cinco, a lane se torna um impasse psicológico. Nenhum dos assassinos pode dar dive ou roam de forma cega sem abrir mão de uma oportunidade enorme de abate, o que significa que um único erro no seu salto convida imediatamente um dive letal de Perfect Execution.
Como jogar
Nunca inicie uma trade com Playful. Em vez disso, use Urchin Strike e Rending Wave para trades rápidas, e então guarde seu salto para contornar reativamente o Shuriken Flip retaliatório dela. Se ela conseguir te marcar, ative Playful imediatamente no momento em que ela tentar o recast do dash. Ao lutar depois do nível cinco, mantenha os olhos no movimento dela; guarde seu salto especificamente para reagir ao segundo dash de Perfect Execution dela, neutralizando o dano de execução da ultimate dela e virando o duelo a seu favor.
Bloqueio de projéteisMobilidadeEsse matchup é um duelo puramente mecânico centrado em negação de projéteis e evasão. Yasuo depende de Wind Wall para negar completamente seu principal engajamento, Chum the Waters. Enquanto isso, o escudo da passiva Way of the Wanderer dele absorve seu burst inicial. No entanto, você pode usar a intangibilidade de Playful para contornar completamente o terceiro tornado de Steel Tempest dele, impedindo que ele ative Last Breath em você.Build de Yasuo →Ver detalhes
Yasuo
Por quê
Esse matchup é um duelo puramente mecânico centrado em negação de projéteis e evasão. Yasuo depende de Wind Wall para negar completamente seu principal engajamento, Chum the Waters. Enquanto isso, o escudo da passiva Way of the Wanderer dele absorve seu burst inicial. No entanto, você pode usar a intangibilidade de Playful para contornar completamente o terceiro tornado de Steel Tempest dele, impedindo que ele ative Last Breath em você.
Impacto na lane
Yasuo pressiona constantemente a wave usando Sweeping Blade para deslizar pelos seus minions e acertar pokes de Steel Tempest. Sua passiva Seastone Trident ajuda a mitigar o aggro dos minions durante trades rápidas, mas você não pode se comprometer com all-ins enquanto o Wind Wall dele estiver disponível. Se ele bloquear seu tubarão com sucesso, ele ganha prioridade de lane imediatamente, forçando você a farmar sob a torre e dando a ele roam livre.
Como jogar
Para vencer, você precisa primeiro estourar o escudo de Way of the Wanderer dele com um auto-attack rápido ou Urchin Strike antes de se comprometer. Para contornar Wind Wall, nunca jogue Chum the Waters de alcance máximo. Em vez disso, ative sua ultimate à queima-roupa no meio do dash durante Urchin Strike, não dando a ele nenhum tempo de reação para bloqueá-la. Se ele guardar a parede dele, use Rending Wave para vencer trades curtas e guarde Playful exclusivamente para contornar o terceiro tornado de Steel Tempest dele.
Pressão no mapaDano explosivoEsse matchup é um duelo puro de assassinos na lane do meio, no qual sua sobrevivência depende de reagir ao padrão característico de Talon. Quando Talon joga Rake, o dano de retorno e o slow são o que habilitam o burst da passiva Blade's End dele. Ao cronometrar Playful para saltar sobre as lâminas no retorno ou para negar completamente o dash de Noxian Diplomacy dele, você anula todo o poder de trade dele, transformando uma trade mortal em um contra-engajamento vencedor.Build de Talon →Ver detalhes
Talon
Por quê
Esse matchup é um duelo puro de assassinos na lane do meio, no qual sua sobrevivência depende de reagir ao padrão característico de Talon. Quando Talon joga Rake, o dano de retorno e o slow são o que habilitam o burst da passiva Blade's End dele. Ao cronometrar Playful para saltar sobre as lâminas no retorno ou para negar completamente o dash de Noxian Diplomacy dele, você anula todo o poder de trade dele, transformando uma trade mortal em um contra-engajamento vencedor.
Impacto na lane
A lane é um impasse tenso de controle de wave e trades rápidas. Se Talon não conseguir acertar o Rake completo em você, ele não consegue derrubar waves facilmente para fazer roam com Assassin's Path. No entanto, se você desperdiçar Playful precocemente, Talon vai capitalizar instantaneamente, reduzindo sua barra de vida e forçando você a recall. Isso dá a ele a liberdade de saltar paredes e terrorizar as lanes laterais enquanto você fica preso limpando sob a torre.
Como jogar
Nunca inicie trades com Playful. Em vez disso, se aproxime usando Seastone Trident e Urchin Strike para farmar ou dar poke, e guarde seu salto estritamente para quando Talon se comprometer com Noxian Diplomacy ou quando as lâminas de Rake dele estiverem retornando. Se ele desaparecer do mapa usando Assassin's Path, não siga cegamente a rota de saltos de parede dele; use sua prioridade de wave para empurrar forte ou tente um Chum the Waters de longo alcance para pegá-lo antes que ele escape.
InalvejávelMecânicaEsse duelo de assassinos é inteiramente decidido por quem recua primeiro com suas ferramentas de intangibilidade. Zed pode usar Death Mark para contornar seu Chum the Waters de forma limpa, mas você tem o counter-play definitivo. Ao guardar Playful, você pode contornar completamente o dano do burst de Razor Shuriken e Shadow Slash dele, fazendo com que o Death Mark dele estoure com dano zero.Build de Zed →Ver detalhes
Zed
Por quê
Esse duelo de assassinos é inteiramente decidido por quem recua primeiro com suas ferramentas de intangibilidade. Zed pode usar Death Mark para contornar seu Chum the Waters de forma limpa, mas você tem o counter-play definitivo. Ao guardar Playful, você pode contornar completamente o dano do burst de Razor Shuriken e Shadow Slash dele, fazendo com que o Death Mark dele estoure com dano zero.
Impacto na lane
No início, Zed usa Living Shadow para te dar poke com Razor Shuriken com segurança. Você precisa utilizar Seastone Trident para farmar com segurança sob a torre. Depois que ambos desbloquearem as ultimates, a lane se torna um impasse de alta tensão. Nenhum dos dois pode fazer roam ou push livremente, porque no momento em que um sai, o outro força uma luta.
Como jogar
Nunca inicie com Chum the Waters quando Zed tiver todos os cooldowns disponíveis. Em vez disso, provoque o combo de Living Shadow dele, e então avance com Urchin Strike e ative Rending Wave para trades rápidas e favoráveis. Se ele finalmente se comprometer com Death Mark, não entre em pânico. Espere até ele reaparecer atrás de você, e então use Playful para ficar suspenso no ar com segurança, negando completamente o follow-up triplo de Razor Shuriken dele.
Esses campeões geralmente têm dificuldade para responder às suas principais forças, o que te dá mais liberdade para abordar o confronto. Você costuma ter várias formas de pressioná-los e forçar trocas a seu favor. Aproveite essa vantagem para impor seu ritmo, em vez de dar tempo para eles se estabilizarem.
MecânicaDano explosivoFizz tem uma vantagem enorme nesse matchup porque Playful anula completamente a principal ameaça de Annie. Annie depende de carregar Pyromania para acertar um stun devastador via Summon: Tibbers ou Disintegrate. Ao cronometrar Playful para ficar intangível quando ela lançar o stun dela, você desperdiça completamente a carga da passiva e a ultimate dela. Sem esse burst e esse CC, Annie fica indefesa contra seu dano base alto.Build de Annie →Ver detalhes
Annie
Por quê
Fizz tem uma vantagem enorme nesse matchup porque Playful anula completamente a principal ameaça de Annie. Annie depende de carregar Pyromania para acertar um stun devastador via Summon: Tibbers ou Disintegrate. Ao cronometrar Playful para ficar intangível quando ela lançar o stun dela, você desperdiça completamente a carga da passiva e a ultimate dela. Sem esse burst e esse CC, Annie fica indefesa contra seu dano base alto.
Impacto na lane
Essa interação força Annie a jogar defensivamente, retirando o domínio de lane a distância dela. Ela não pode te atacar livremente com Incinerate ou Disintegrate enquanto seu Playful estiver fora de cooldown. Se ela tentar fazer freeze ou empurrar agressivamente, você pode zoneá-la para fora da wave. A ameaça do seu dive a força a ceder o controle da wave, permitindo que você derrube minions facilmente e faça roam.
Como jogar
Nunca inicie uma trade usando Playful como seu gap-closer. Em vez disso, se aproxime ou use Urchin Strike para fechar a distância, ativando Rending Wave para trades rápidas. Fique de olho na aura giratória de Pyromania dela. No momento em que ela lançar Summon: Tibbers ou tentar um stun, ative Playful para contornar o impacto, e então caia em cima dela. Se ela guardar o stun, simplesmente se desengaje com sua velocidade de movimento e espere ela desperdiçá-lo.
AssassinoEsquivaFizz domina esse matchup porque sua principal ferramenta defensiva, Playful, neutraliza perfeitamente o CC de Ahri. Quando Ahri tenta fazer peel em você ou iniciar com Charm, ativar Playful anula completamente o projétil. Isso a deixa altamente vulnerável, já que ela não pode amplificar o dano dela com Charm nem impedir seu follow-up com Urchin Strike e Rending Wave enquanto a habilidade defensiva principal dela está recarregando.Build de Ahri →Ver detalhes
Ahri
Por quê
Fizz domina esse matchup porque sua principal ferramenta defensiva, Playful, neutraliza perfeitamente o CC de Ahri. Quando Ahri tenta fazer peel em você ou iniciar com Charm, ativar Playful anula completamente o projétil. Isso a deixa altamente vulnerável, já que ela não pode amplificar o dano dela com Charm nem impedir seu follow-up com Urchin Strike e Rending Wave enquanto a habilidade defensiva principal dela está recarregando.
Impacto na lane
Ahri é forçada a jogar passivamente e usar Orb of Deception principalmente para waveclear a distância em vez de te dar poke. Ela não pode se aproximar com segurança para usar Fox-Fire sem arriscar uma troca letal súbita. Essa restrição permite que você dite a posição da wave. Quando você a ameaçar com Chum the Waters, ela precisa gastar Spirit Rush para escapar ou enfrentar uma tela cinza inevitável.
Como jogar
Nunca inicie com Playful. Em vez disso, se aproxime ou use Urchin Strike para fechar a distância, forçando Ahri a lançar Charm em pânico. Lance-se reativamente no ar com Playful para contornar o coração dela, e então caia diretamente em cima dela para soltar Rending Wave. Se ela se antecipar e der um dash para longe usando Spirit Rush, guarde seu Chum the Waters até o terceiro dash dela terminar para garantir que seu tubarão acerte e garanta o abate.
AssassinoInalvejávelAurora depende muito de acertar Twofold Hex para ativar Spirit Abjuration e causar dano consistente. No entanto, Fizz pode anular toda essa sequência sem esforço. Ao usar Playful, você pode contornar completamente o dano de retorno de Twofold Hex ou simplesmente saltar sobre os limites da ultimate Between Worlds dela. Quando Aurora desperdiçar essas ferramentas, a falta de dano sustentado dela a deixa indefesa contra seu burst.Build de Aurora →Ver detalhes
Aurora
Por quê
Aurora depende muito de acertar Twofold Hex para ativar Spirit Abjuration e causar dano consistente. No entanto, Fizz pode anular toda essa sequência sem esforço. Ao usar Playful, você pode contornar completamente o dano de retorno de Twofold Hex ou simplesmente saltar sobre os limites da ultimate Between Worlds dela. Quando Aurora desperdiçar essas ferramentas, a falta de dano sustentado dela a deixa indefesa contra seu burst.
Impacto na lane
Essa interação força Aurora a jogar de forma incrivelmente passiva, abrindo mão do controle das waves de minions. Como você consegue dar trade com segurança guardando Playful para se desengajar, o poke dela se torna ineficaz. Você pode reduzir facilmente a barra de vida dela sob a própria torre ou forçá-la a gastar Across the Veil de forma defensiva. Essa ameaça constante de dive letal a impede de fazer roam para apoiar o jungler dela.
Como jogar
Não use Playful para limpar minions; sempre guarde até Aurora se comprometer com o primeiro lançamento de Twofold Hex. Quando ela tentar relançá-lo para o dano de execução, ative seu salto para negar o burst, e então caia em cima dela com Urchin Strike e Rending Wave. Se ela recuar usando The Weirding, jogue Chum the Waters imediatamente para travá-la e finalizar o abate antes que ela consiga escapar.
Pressão no inícioAll-inEsse matchup pende fortemente a seu favor porque Playful neutraliza completamente as ameaças de alto dano de Akshan. Quando Akshan canaliza Comeuppance, um único toque de Playful te torna intangível, desperdiçando inteiramente a ultimate dele. Além disso, ativar Playful durante o Heroic Swing dele quebra o bloqueio de alvo dele, forçando-o a parar de balançar ou errar os tiros dele, deixando-o vulnerável com sua principal ferramenta de mobilidade em um cooldown longo.Build de Akshan →Ver detalhes
Akshan
Por quê
Esse matchup pende fortemente a seu favor porque Playful neutraliza completamente as ameaças de alto dano de Akshan. Quando Akshan canaliza Comeuppance, um único toque de Playful te torna intangível, desperdiçando inteiramente a ultimate dele. Além disso, ativar Playful durante o Heroic Swing dele quebra o bloqueio de alvo dele, forçando-o a parar de balançar ou errar os tiros dele, deixando-o vulnerável com sua principal ferramenta de mobilidade em um cooldown longo.
Impacto na lane
A vantagem de alcance inicial de Akshan e o escudo de Dirty Fighting permitem que ele te intimide antes do nível três, mas a dinâmica se inverte quando você tem acesso ao seu kit completo. Ele não pode usar Heroic Swing agressivamente com segurança porque você pode guardar Playful para interromper o momentum dele e fazer um contra-engajamento. Esse medo o força a jogar defensivamente, dando a você controle sobre os estados da wave e permitindo configurações fáceis de dive com Chum the Waters.
Como jogar
Deixe ele empurrar no início, conservando sua barra de vida enquanto farma sob a torre usando Seastone Trident e Urchin Strike. Quando você desbloquear Chum the Waters, provoque o Avengerang dele, e então procure imediatamente um all-in. Lance Chum the Waters de alcance máximo; se ele tentar fugir com Heroic Swing, use Urchin Strike para fechar a distância e guarde Playful exclusivamente para contornar Comeuppance ou interromper a trajetória do gancho dele.
Dano explosivoInalvejávelFizz domina completamente Corki devido à mobilidade e evasão superiores dele. Quando Corki tenta dar poke de longe com Missile Barrage, Fizz pode facilmente negar o dano usando Playful. Esse salto não só anula a principal ferramenta de poke de Corki, como também posiciona Fizz perfeitamente para executar um Urchin Strike rápido, fechando a distância instantaneamente e forçando Corki a um engajamento letal e corpo a corpo onde os status frágeis dele não conseguem sobreviver.Build de Corki →Ver detalhes
Corki
Por quê
Fizz domina completamente Corki devido à mobilidade e evasão superiores dele. Quando Corki tenta dar poke de longe com Missile Barrage, Fizz pode facilmente negar o dano usando Playful. Esse salto não só anula a principal ferramenta de poke de Corki, como também posiciona Fizz perfeitamente para executar um Urchin Strike rápido, fechando a distância instantaneamente e forçando Corki a um engajamento letal e corpo a corpo onde os status frágeis dele não conseguem sobreviver.
Impacto na lane
A dinâmica desse matchup retira a segurança de Corki, forçando-o a jogar de forma extremamente defensiva sob a própria torre. Como Phosphorus Bomb e Gatling Gun dele empurram a wave naturalmente, Fizz pode fazer freeze na lane perto da torre dele. Toda vez que Corki se aproxima para coletar ouro, ele arrisca uma trade fatal. Essa pressão nega a Corki recalls fáceis e atrasa a aquisição do Package dele, deixando-o vulnerável e isolado na lane do meio.
Como jogar
Para executar isso perfeitamente, sempre guarde Playful até Corki disparar o primeiro Missile Barrage dele ou se comprometer com Valkyrie. Inicie as trades ativando Rending Wave, e então deslizando por um minion ou diretamente em Corki com Urchin Strike. Se Corki tentar escapar usando Valkyrie, esse é o seu sinal para acertar Chum the Waters. Se você errar o timing do seu salto, recue imediatamente usando a ignorância de colisão de minions de Seastone Trident para passar com segurança pela wave.
All-inImunidade a CCRyze depende de escalar sua mana com Arcane Mastery e usar Rune Prison para travar alvos para seus combos de Spell Flux e Overload. No entanto, Fizz invalida completamente essa defesa. Ao cronometrar Playful para contornar Rune Prison, Fizz anula o único self-peel confiável de Ryze. Sem essa raiz, Ryze é um mago frágil e imóvel que não consegue escapar do burst explosivo de Fizz.Build de Ryze →Ver detalhes
Ryze
Por quê
Ryze depende de escalar sua mana com Arcane Mastery e usar Rune Prison para travar alvos para seus combos de Spell Flux e Overload. No entanto, Fizz invalida completamente essa defesa. Ao cronometrar Playful para contornar Rune Prison, Fizz anula o único self-peel confiável de Ryze. Sem essa raiz, Ryze é um mago frágil e imóvel que não consegue escapar do burst explosivo de Fizz.
Impacto na lane
No início, Ryze tenta empurrar com Spell Flux e Overload para manter Fizz sob a torre. Quando Fizz tem acesso a Urchin Strike e Playful, a dinâmica se inverte. Ryze precisa jogar de forma extremamente segura, cedendo a prioridade. Toda vez que Ryze se aproxima para lançar Rune Prison, ele arrisca uma trade fatal. Essa pressão permite que Fizz dite o estado da wave, forçando Ryze a escolher entre perder ouro ou arriscar a morte.
Como jogar
Não inicie com Playful de forma cega. Em vez disso, comece sua trade equiparando o alcance dele, usando Urchin Strike para fechar a distância e Rending Wave para atacar. Force Ryze a lançar Rune Prison em pânico. No momento em que você ver a animação de lançamento da raiz dele, ative Playful para contorná-la completamente, aterrissando nele para aplicar o slow. Se ele jogar de forma excessivamente segura sob a torre, use Chum the Waters a partir do fog of war para dar slow nele.
MergulhoTempo de recargaMel depende de manter você a distância com a magia à distância dela, mas sua mobilidade anula completamente essa segurança. Ao usar Urchin Strike, você pode contornar instantaneamente as ferramentas de zoneamento dela para fechar a distância. Se ela tentar fazer peel em você com as habilidades defensivas dela, um Playful bem cronometrado permite que você salte sobre a retaliação dela completamente, aterrissando bem em cima da barra de vida frágil dela para bursá-la.Build de Mel →Ver detalhes
Mel
Por quê
Mel depende de manter você a distância com a magia à distância dela, mas sua mobilidade anula completamente essa segurança. Ao usar Urchin Strike, você pode contornar instantaneamente as ferramentas de zoneamento dela para fechar a distância. Se ela tentar fazer peel em você com as habilidades defensivas dela, um Playful bem cronometrado permite que você salte sobre a retaliação dela completamente, aterrissando bem em cima da barra de vida frágil dela para bursá-la.
Impacto na lane
Mel é forçada a uma postura altamente defensiva, com medo de passar pela entrada do rio dela. Você pode ignorar confortavelmente o dano inicial de minions graças a Seastone Trident enquanto procura trades. Quando você chega ao nível três, ela não pode contestar a wave sem arriscar um dive letal. Essa pressão permite que você faça slow-push, derrube waves massivas e a force a gastar mana farmando sob a torre enquanto você faz roam livremente.
Como jogar
Capitalize nos seus picos de poder do nível três e do nível cinco. Aproxime-se de forma ameaçadora para provocar o self-peel de Mel; nunca inicie com Playful. Em vez disso, avance usando Urchin Strike, ative Rending Wave para trades imediatas de alto dano, e guarde Playful tanto para contornar o counter-disengage dela quanto para escapar de tiros da torre se você se comprometer. Se ela jogar de forma extremamente segura sob a torre dela, use Chum the Waters a partir do fog of war para travá-la antes que ela consiga reagir.
MecânicaDano explosivoFizz tem a vantagem nesse confronto de assassinos de AP porque Playful neutraliza completamente a sequência ofensiva de Diana. Ao usar Playful para contornar Crescent Strike, você impede Diana de aplicar Moonlight, retirando os resets de Lunar Rush dela. Alternativamente, cronometrar sua intangibilidade para saltar sobre o puxão explosivo de Moonfall a deixa completamente vulnerável, permitindo que você retalie com Urchin Strike e Rending Wave durante os longos tempos de recarga dela.Build de Diana →Ver detalhes
Diana
Por quê
Fizz tem a vantagem nesse confronto de assassinos de AP porque Playful neutraliza completamente a sequência ofensiva de Diana. Ao usar Playful para contornar Crescent Strike, você impede Diana de aplicar Moonlight, retirando os resets de Lunar Rush dela. Alternativamente, cronometrar sua intangibilidade para saltar sobre o puxão explosivo de Moonfall a deixa completamente vulnerável, permitindo que você retalie com Urchin Strike e Rending Wave durante os longos tempos de recarga dela.
Impacto na lane
Essa dinâmica força Diana a jogar defensivamente, já que errar o arco crescente dela a deixa exposta a trades mortais. Você pode controlar facilmente o estado da wave porque ela não pode se aproximar com segurança para ativar Moonsilver Blade ou se proteger com Pale Cascade sem temer seu contra-engajamento. Quando você chega ao nível seis, sua pressão de abate com Chum the Waters é imensa, forçando-a a ficar sob a torre ou arriscar ser burstada instantaneamente.
Como jogar
Nunca inicie trades com Playful, a menos que Diana já tenha desperdiçado Crescent Strike. Em vez disso, se aproxime ou use Urchin Strike combinado com Rending Wave para provocar o Pale Cascade defensivo dela. Quando ela tentar virar a luta com a ultimate dela, ative Playful para flutuar acima da onda de choque de Moonfall, e então caia para garantir o abate. Se você errar o timing e for puxado, se desengaje imediatamente usando sua passiva Seastone Trident para escapar por entre os minions.
Imunidade a CCAll-inToda a rede de segurança de Veigar depende de Event Horizon para te zonear e preparar Dark Matter. No entanto, seu Playful permite que você salte diretamente sobre a parede perimetral sem ativar o stun. Isso quebra completamente o fluxo defensivo dele, deixando o yordle frágil exposto ao seu dano de burst bruto enquanto o principal self-peel dele está em um cooldown longo.Build de Veigar →Ver detalhes
Veigar
Por quê
Toda a rede de segurança de Veigar depende de Event Horizon para te zonear e preparar Dark Matter. No entanto, seu Playful permite que você salte diretamente sobre a parede perimetral sem ativar o stun. Isso quebra completamente o fluxo defensivo dele, deixando o yordle frágil exposto ao seu dano de burst bruto enquanto o principal self-peel dele está em um cooldown longo.
Impacto na lane
Como você pode ignorar a gaiola dele, Veigar é forçado a jogar de forma extremamente passiva sob a torre dele, limitando a capacidade dele de farmar stacks com Baleful Strike. Qualquer tentativa dele de se aproximar e usar Dark Matter na wave convida um dive imediato. Você dita o ritmo da lane, forçando-o a abrir mão da prioridade de minions e perder ouro.
Como jogar
Não desperdice Playful para iniciar trades de longe. Em vez disso, se aproxime ou use Urchin Strike para fechar a distância e provocar o Event Horizon dele. No momento em que ele soltar a gaiola, ative Playful para saltar sobre o limite, aterrissando diretamente nele para dar slow nele, e então siga com ataques básicos empoderados por Rending Wave. Se ele jogar muito recuado, trave-o a distância usando Chum the Waters para forçar uma gaiola em pânico.
EsquivaAll-inOrianna vai te pressionar constantemente com a vantagem de alcance dela usando Clockwork Windup e Command: Attack. No entanto, esse matchup pende fortemente a seu favor porque seu potencial de burst pode apagar a barra de vida dela rapidamente. O ponto de virada definitivo depende inteiramente do seu Playful. Ao guardar essa habilidade para contornar completamente Command: Shockwave, você retira instantaneamente de Orianna sua principal ferramenta defensiva e ofensiva, deixando-a vulnerável ao seu follow-up.Build de Orianna →Ver detalhes
Orianna
Por quê
Orianna vai te pressionar constantemente com a vantagem de alcance dela usando Clockwork Windup e Command: Attack. No entanto, esse matchup pende fortemente a seu favor porque seu potencial de burst pode apagar a barra de vida dela rapidamente. O ponto de virada definitivo depende inteiramente do seu Playful. Ao guardar essa habilidade para contornar completamente Command: Shockwave, você retira instantaneamente de Orianna sua principal ferramenta defensiva e ofensiva, deixando-a vulnerável ao seu follow-up.
Impacto na lane
No início, Orianna tenta empurrar as waves com Command: Dissonance para te forçar sob a torre e te desgastar com poke. Se você gerenciar a wave corretamente, mantendo-a bem fora do alcance da sua torre, você nega as zonas seguras de farm dela. Quando você ameaçar um all-in, ela precisa jogar de forma extremamente defensiva. Contornar a pressão de wave dela permite que você reduza a vida dela, forçando-a a um recall precoce e te dando prioridade livre de roam.
Como jogar
Deixe Orianna empurrar no início enquanto preserva sua reserva de vida, usando Seastone Trident para garantir minions sob a torre. Quando você desbloquear sua ultimate, inicie trades com Urchin Strike e Rending Wave, mas nunca se comprometa com Playful precocemente. Você precisa provocar o Command: Shockwave dela e saltar reativamente para ficar intangível. Se ela guardar a ultimate dela, se desengaje com sua velocidade de movimento ou use Chum the Waters a distância para forçar a mão dela primeiro.
Imunidade a CCAll-inFizz domina esse matchup porque sua principal ferramenta defensiva, Playful, anula completamente o único self-peel de Syndra, Scatter the Weak. Como Syndra depende de acertar a Dark Sphere dela e empurrá-la com o knockback dela para manter ameaças corpo a corpo afastadas, Fizz pode contornar facilmente as defesas dela. Uma vez que Scatter the Weak é provocado ou contornado, Syndra fica completamente vulnerável a uma execução completa com Urchin Strike e Chum the Waters.Build de Syndra →Ver detalhes
Syndra
Por quê
Fizz domina esse matchup porque sua principal ferramenta defensiva, Playful, anula completamente o único self-peel de Syndra, Scatter the Weak. Como Syndra depende de acertar a Dark Sphere dela e empurrá-la com o knockback dela para manter ameaças corpo a corpo afastadas, Fizz pode contornar facilmente as defesas dela. Uma vez que Scatter the Weak é provocado ou contornado, Syndra fica completamente vulnerável a uma execução completa com Urchin Strike e Chum the Waters.
Impacto na lane
Syndra é forçada a jogar de forma extremamente defensiva, abrindo mão do controle da wave de minions. Ela não pode usar Force of Will ou Dark Sphere com segurança para dar poke em Fizz sem arriscar um contra-engajamento imediato. Isso permite que Fizz mantenha a vida alta, garanta timings fáceis de recall e exerça pressão massiva no mapa enquanto Syndra permanece presa sob a torre dela, incapaz de contestar.
Como jogar
Posicione-se bem atrás dos seus minions corpo a corpo, tentando Syndra a lançar Dark Sphere. Nunca inicie com Playful; em vez disso, use Urchin Strike para fechar a distância e forçá-la a lançar Scatter the Weak em pânico. No momento em que você ver a animação de lançamento dela, ative Playful para saltar sobre as esferas dela. Se ela guardar o stun dela, se desengaje com ataques empoderados por Rending Wave e espere outra abertura.
DueloPressão no inícioAntes de Kassadin destravar sua Riftwalk no nível 6, ele não tem uma fuga confiável para evitar sua pressão de curto alcance. Embora sua Void Stone lhe conceda um escudo mágico quando você conjura habilidades, isso faz pouco contra o dano físico e mágico sustentado dos seus ataques básicos potencializados por Rending Wave. Ao fechar a distância com Urchin Strike, você pode forçar trocas prolongadas nas quais seu dano contínuo on-hit supera completamente as fracas respostas iniciais dele com Nether Blade.Build de Kassadin →Ver detalhes
Kassadin
Por quê
Antes de Kassadin destravar sua Riftwalk no nível 6, ele não tem uma fuga confiável para evitar sua pressão de curto alcance. Embora sua Void Stone lhe conceda um escudo mágico quando você conjura habilidades, isso faz pouco contra o dano físico e mágico sustentado dos seus ataques básicos potencializados por Rending Wave. Ao fechar a distância com Urchin Strike, você pode forçar trocas prolongadas nas quais seu dano contínuo on-hit supera completamente as fracas respostas iniciais dele com Nether Blade.
Impacto na lane
Este matchup é decidido nos primeiros quatro níveis. Ao usar Seastone Trident para ignorar a colisão com unidades, você pode se posicionar agressivamente dentro da wave de minions para impedir que Kassadin consiga os last hits. Empurrar lentamente as primeiras waves permite que você estoure waves grandes, forçando-o a gastar Null Sphere para farmar sob a torre em vez de te dar poke, o que prejudica permanentemente o income de gold dele e atrasa sua ameaça no late game.
Como jogar
Comece deixando a primeira wave empurrar lentamente até você, depois congele-a bem na frente da sua torre. Quando Kassadin se adiantar para pegar o last hit, deslize por um minion usando Urchin Strike, reinicie imediatamente seu timer de ataque com Rending Wave e cole nele com ataques básicos. Guarde Playful estritamente para desviar do slow de Force Pulse dele ou para se desengajar com segurança dos tiros da torre. Se ele chegar ao nível 6, provoque a primeira Riftwalk dele antes de jogar Chum the Waters.
InalvejávelMergulhoAurelion Sol depende de te prender com Falling Star ou de te armadilhar com Singularity para canalizar Breath of Light. Porém, sua Playful anula completamente o controle de grupo da ultimate dele. Ao se tornar não-alvejável, você contorna o principal gatilho defensivo dele, conseguindo atravessar a zona cósmica, cair diretamente sobre o corpo frágil dele e explodi-lo antes que Astral Flight possa levá-lo para a segurança.Build de Aurelion Sol →Ver detalhes
Aurelion Sol
Por quê
Aurelion Sol depende de te prender com Falling Star ou de te armadilhar com Singularity para canalizar Breath of Light. Porém, sua Playful anula completamente o controle de grupo da ultimate dele. Ao se tornar não-alvejável, você contorna o principal gatilho defensivo dele, conseguindo atravessar a zona cósmica, cair diretamente sobre o corpo frágil dele e explodi-lo antes que Astral Flight possa levá-lo para a segurança.
Impacto na lane
A execução inicial de Aurelion Sol com Singularity e o clear de wave com Breath of Light vão te empurrar para sob a torre no começo. Porém, quando você chega ao nível cinco, a pressão da lane se inverte. Qualquer tentativa dele de farmar agressivamente com Astral Flight o deixa completamente vulnerável. Sua ameaça de all-in o força a jogar extremamente recuado, sacrificando os stacks de Cosmic Creator dele e te dando liberdade para impactar as lanes laterais.
Como jogar
Nunca inicie com Playful; guarde essa ferramenta para reagir a Falling Star dele ou para escapar do puxão de Singularity. Em vez disso, feche a distância usando Urchin Strike em um minion morrendo ou diretamente nele, ative Rending Wave para trocas rápidas e arrisque com Chum the Waters. Se ele tentar escapar via Astral Flight, espere a trajetória em linha reta antes de jogar seu tubarão, garantindo um knock-up certeiro que interrompe o voo dele instantaneamente.
MergulhoTempo de recargaViktor depende do poke de Hextech Ray para te manter à distância, mas ele não consegue impedir seu dive. Sua única defesa, Gravity Field, tem um delay de ativação lento. Quando você se engaja com Urchin Strike, Viktor vai soltar a armadilha dele para te zonear. Você pode facilmente contornar toda essa área de stun usando Playful para saltar sobre ela, caindo diretamente sobre ele para garantir um burst kill fácil com Rending Wave e Chum the Waters.Build de Viktor →Ver detalhes
Viktor
Por quê
Viktor depende do poke de Hextech Ray para te manter à distância, mas ele não consegue impedir seu dive. Sua única defesa, Gravity Field, tem um delay de ativação lento. Quando você se engaja com Urchin Strike, Viktor vai soltar a armadilha dele para te zonear. Você pode facilmente contornar toda essa área de stun usando Playful para saltar sobre ela, caindo diretamente sobre ele para garantir um burst kill fácil com Rending Wave e Chum the Waters.
Impacto na lane
No começo, Viktor usa Hextech Ray e Siphon Power para pressionar sua vida enquanto empurra a wave. Porém, quando você chega ao nível três, a ameaça do seu all-in muda completamente o comportamento dele. Ele precisa jogar extremamente seguro, cedendo a prioridade de wave e a pressão de torre. Você pode facilmente congelar a wave perto da sua torre, forçando-o a se superextender, onde um único jump garante a morte dele ou força um recall ruim.
Como jogar
Não deixe Viktor te desgastar com trocas usando o escudo de Siphon Power no começo. Deixe-o empurrar, use Seastone Trident para absorver o aggro dos minions e espere até que ele use Hextech Ray para limpar os minions. No momento em que ele se adiantar, avance com Urchin Strike. Guarde Playful especificamente para reagir ao posicionamento de Gravity Field dele. Se ele guardar a armadilha, simplesmente avance sobre ele com ataques básicos de Rending Wave até que seja forçado a soltá-la, depois salte sobre ela para finalizá-lo com Chum the Waters.
All-inInterrupçãoFizz domina esse duelo de assassinos porque o kit dele anula diretamente as principais fontes de dano de Katarina. Usando Playful, você pode desviar completamente do dano das adagas geradas por Bouncing Blade ou Preparation dela. Além disso, a ultimate canalizada de Katarina, Death Lotus, é facilmente cancelada pelo knockup do seu Chum the Waters, retirando dela toda a pressão de abate nas lutas 1x1.Build de Katarina →Ver detalhes
Katarina
Por quê
Fizz domina esse duelo de assassinos porque o kit dele anula diretamente as principais fontes de dano de Katarina. Usando Playful, você pode desviar completamente do dano das adagas geradas por Bouncing Blade ou Preparation dela. Além disso, a ultimate canalizada de Katarina, Death Lotus, é facilmente cancelada pelo knockup do seu Chum the Waters, retirando dela toda a pressão de abate nas lutas 1x1.
Impacto na lane
Esse matchup se transforma em uma lane de zoneamento. Katarina não consegue se adiantar para dar waveclear com Bouncing Blade sem arriscar uma troca letal. Você pode facilmente congelar a wave ou empurrá-la lentamente. Se ela tentar roam para compensar o déficit de lane, seu waveclear rápido com Urchin Strike e Rending Wave permite que você a empurre para sob a torre rapidamente, forçando-a a perder uma quantidade imensa de gold e experiência.
Como jogar
Sempre guarde Playful durante trocas curtas; use apenas quando ela se comprometer a saltar em uma adaga. Se Katarina iniciar com Shunpo ou soltar uma adaga com Preparation, prepare seu contra-engajamento. Quando você chegar ao nível 5, não inicie com Chum the Waters imediatamente. Mantenha-o pronto para interromper Death Lotus no momento em que ela começar a girar. Se ela jogar de forma passiva, zoneie-a com Urchin Strike e Rending Wave.
SobrevivênciaMecânicaEsse matchup favorece muito você porque Brand depende inteiramente de acertar uma combinação previsível de skillshots para sobreviver ao seu burst. O único self-peel dele, Sear, exige que você esteja pré-incendiado por Blaze. Usando Playful para desviar do projétil dele ou do Pyroclasm saltitante, você elimina completamente as opções defensivas dele. Sem o stun dele, Brand se torna um alvo imóvel, sem nenhuma ferramenta de escape contra seu Urchin Strike e Rending Wave.Build de Brand →Ver detalhes
Brand
Por quê
Esse matchup favorece muito você porque Brand depende inteiramente de acertar uma combinação previsível de skillshots para sobreviver ao seu burst. O único self-peel dele, Sear, exige que você esteja pré-incendiado por Blaze. Usando Playful para desviar do projétil dele ou do Pyroclasm saltitante, você elimina completamente as opções defensivas dele. Sem o stun dele, Brand se torna um alvo imóvel, sem nenhuma ferramenta de escape contra seu Urchin Strike e Rending Wave.
Impacto na lane
No começo, você precisa tolerar algum poke de Pillar of Flame enquanto usa Seastone Trident para minimizar o dano dos minions. Porém, a dinâmica de poder muda drasticamente quando você destrava seu kit completo. Brand é forçado a jogar excepcionalmente passivo, com medo de se adiantar para dar clear nas waves com Conflagration. Qualquer tentativa dele de te hostilizar perto da sua torre o expõe a uma perseguição letal pela lane, arruinando os timings de recall dele.
Como jogar
Nunca use Playful para dar clear nas waves de minions; guarde-a estritamente como sua arma de contra-engajamento. Avance agressivamente ou inicie com Urchin Strike para provocar o Sear dele. Espere o sinal visual exato do projétil dele antes de ativar Playful para saltar sobre ele. Depois de aterrissar, ative imediatamente Rending Wave para trocas rápidas. Se ele já tiver destravado Pyroclasm, guarde seu salto para absorver o primeiro salto da ultimate, depois prenda-o com Chum the Waters.
Imunidade a CCAll-inEsse matchup é fortemente favorável a Fizz porque toda a sobrevivência de Zoe depende de Sleepy Trouble Bubble. Quando ela tenta se self-peelar, Fizz pode usar Playful para saltar sobre o projétil ou evitar completamente o estado de sono. Sem o crowd control dela para preparar um Paddle Star! de longo alcance, Zoe não consegue impedir que Fizz feche a distância e a elimine com uma combinação rápida de burst.Build de Zoe →Ver detalhes
Zoe
Por quê
Esse matchup é fortemente favorável a Fizz porque toda a sobrevivência de Zoe depende de Sleepy Trouble Bubble. Quando ela tenta se self-peelar, Fizz pode usar Playful para saltar sobre o projétil ou evitar completamente o estado de sono. Sem o crowd control dela para preparar um Paddle Star! de longo alcance, Zoe não consegue impedir que Fizz feche a distância e a elimine com uma combinação rápida de burst.
Impacto na lane
Zoe é forçada a uma postura altamente defensiva, incapaz de usar Paddle Star! para empurrar a wave sem se expor. Isso permite que Fizz controle o ritmo da lane, garantindo farm fácil sob a torre ou zoneando-a para longe dos minions. Se Zoe avançar além do meio da lane, a ameaça de um all-in começando com Chum the Waters a força a ceder prioridade, perdendo gold e pressão na lane do meio.
Como jogar
Posicione-se agressivamente perto da wave de minions para provocar a Sleepy Trouble Bubble dela. Nunca inicie um engajamento com Playful; em vez disso, use Urchin Strike e Rending Wave para iniciar as trocas, guardando seu salto apenas para reagir à bolha dela. Se ela tentar escapar ou dar poke usando Portal Jump, acerte o portal de retorno dela com Chum the Waters para um knock-up certeiro que garante um abate.
Pressão no inícioInalvejávelFizz domina os estágios iniciais porque Kayle é incrivelmente fraca antes de destravar sua forma à distância via Divine Ascent. Você pode facilmente tirar uma boa parte da vida dela com Urchin Strike seguido de Rending Wave. Porém, quando ela chega ao nível seis, Divine Judgment se torna um obstáculo enorme, permitindo que ela absorva completamente o burst explosivo do seu Chum the Waters se bem cronometrado. Você precisa construir uma vantagem antes que ela ganhe essa rede de segurança da ultimate.Build de Kayle →Ver detalhes
Kayle
Por quê
Fizz domina os estágios iniciais porque Kayle é incrivelmente fraca antes de destravar sua forma à distância via Divine Ascent. Você pode facilmente tirar uma boa parte da vida dela com Urchin Strike seguido de Rending Wave. Porém, quando ela chega ao nível seis, Divine Judgment se torna um obstáculo enorme, permitindo que ela absorva completamente o burst explosivo do seu Chum the Waters se bem cronometrado. Você precisa construir uma vantagem antes que ela ganhe essa rede de segurança da ultimate.
Impacto na lane
A lane inteira é uma corrida contra o tempo. Antes do nível seis, Kayle vai tentar desesperadamente farmar com segurança usando Starfire Spellblade e Radiant Blast. Isso permite que você empurre lentamente as primeiras waves, congele perto da sua torre e a force a posições perigosas. Negar o gold dela no início atrasa o scaling dela, impedindo-a de rotacionar para ajudar o time ou garantir a prioridade do meio quando as lutas neutras começarem.
Como jogar
Abuse do seu power spike de nível três. Dive nela com Urchin Strike e ative Rending Wave para trocas rápidas, guardando Playful para escapar do slow de Radiant Blast dela ou soltar o aggro dos minions. Quando ambos chegarem ao nível seis, nunca inicie com Chum the Waters. Em vez disso, force-a a conjurar Divine Judgment em pânico usando sua combinação básica de troca, depois solte seu tubarão no segundo em que o escudo de invulnerabilidade dela expirar.
PicksMergulhoA segurança de Ziggs depende inteiramente de Satchel Charge para se desengajar, mas o kit de Fizz contraria isso perfeitamente. Quando Fizz inicia, ele pode usar Playful para saltar completamente sobre a explosão de Satchel Charge ou evitar o slow de Hexplosive Minefield. Sem esse self-peel, a vida frágil de Ziggs derrete instantaneamente sob o burst de AP bruto de Fizz, deixando-o sem nenhuma resposta defensiva.Build de Ziggs →Ver detalhes
Ziggs
Por quê
A segurança de Ziggs depende inteiramente de Satchel Charge para se desengajar, mas o kit de Fizz contraria isso perfeitamente. Quando Fizz inicia, ele pode usar Playful para saltar completamente sobre a explosão de Satchel Charge ou evitar o slow de Hexplosive Minefield. Sem esse self-peel, a vida frágil de Ziggs derrete instantaneamente sob o burst de AP bruto de Fizz, deixando-o sem nenhuma resposta defensiva.
Impacto na lane
No começo, Ziggs vai usar Bouncing Bomb e Short Fuse para te dar poke e empurrar a wave. Porém, quando você chega ao nível 3, a dinâmica da lane se inverte. Ziggs precisa jogar extremamente recuado, com medo de se adiantar para dar clear nas waves. Se ele se posicionar mal, um Urchin Strike rápido seguido de Rending Wave o força a jogar seu deslocamento em pânico, te dando uma janela imediata para o abate.
Como jogar
Use Seastone Trident para minimizar o dano dos minions enquanto deixa Ziggs empurrar as primeiras waves. Não gaste Playful para farmar. Em vez disso, avance ou use Urchin Strike para se engajar. Guarde Playful especificamente para reagir ao Satchel Charge dele. Se ele tentar escapar ou te empurrar para trás, ative Playful para desviar da explosão, caia sobre ele e o execute com Chum the Waters para garantir uma vantagem fácil.
PicksAll-inLux depende de manter distância, mas sua segurança entra em colapso completo por causa de como Playful interage com Light Binding. Quando Lux tenta te enraizar, ativar Playful te torna completamente intangível enquanto você fecha a distância. Isso a deixa totalmente indefesa, já que Prismatic Barrier dela não consegue absorver o dano de burst do seu Urchin Strike seguido de Rending Wave, transformando a vantagem de longo alcance dela em uma armadilha mortal.Build de Lux →Ver detalhes
Lux
Por quê
Lux depende de manter distância, mas sua segurança entra em colapso completo por causa de como Playful interage com Light Binding. Quando Lux tenta te enraizar, ativar Playful te torna completamente intangível enquanto você fecha a distância. Isso a deixa totalmente indefesa, já que Prismatic Barrier dela não consegue absorver o dano de burst do seu Urchin Strike seguido de Rending Wave, transformando a vantagem de longo alcance dela em uma armadilha mortal.
Impacto na lane
No começo, você precisa suportar o poke de Lucent Singularity dela, mas a dinâmica se inverte instantaneamente quando você tem seu kit básico completo. Lux é forçada a jogar extremamente recuada, com medo de jogar Light Binding. Ela não consegue se adiantar com segurança para ativar Illumination com ataques básicos. Essa pressão a força a gastar Prismatic Barrier defensivamente, perdendo mana, enquanto você dita livremente o estado da wave e ameaça um dive com Chum the Waters.
Como jogar
Posicione-se ligeiramente ao lado dos seus minions para tentar Lux a jogar um Light Binding sem suporte. Nunca inicie uma troca com Playful; em vez disso, avance ou use Urchin Strike para pressioná-la até o pânico. No momento em que você vir a animação do snare dela, ative Playful para evitá-lo, caindo diretamente sobre ela para soltar Rending Wave. Se ela se recusar a conjurar o snare, simplesmente negue o farm dela ficando entre ela e os minions.
PicksImunidade a CCFizz domina esse matchup porque ele consegue anular completamente o único self-peel de Twisted Fate. Quando Twisted Fate trava a carta dourada usando Pick a Card, Fizz pode simplesmente ativar Playful enquanto o projétil voa. Esse desvio desperdiça o stun e o mana de Twisted Fate, deixando o mago frágil de longo alcance totalmente exposto a um burst imediato de seguida.Build de Twisted Fate →Ver detalhes
Twisted Fate
Por quê
Fizz domina esse matchup porque ele consegue anular completamente o único self-peel de Twisted Fate. Quando Twisted Fate trava a carta dourada usando Pick a Card, Fizz pode simplesmente ativar Playful enquanto o projétil voa. Esse desvio desperdiça o stun e o mana de Twisted Fate, deixando o mago frágil de longo alcance totalmente exposto a um burst imediato de seguida.
Impacto na lane
Essa interação paralisa a capacidade de Twisted Fate de trocar ou pressionar a wave. Ele não consegue se adiantar para usar Wild Cards ou Stacked Deck nos minions sem arriscar um dive letal. Quando Fizz chega ao nível três, Twisted Fate é forçado a jogar extremamente recuado, cedendo a prioridade de lane e impedindo-o de encontrar facilmente ângulos para fazer roam com Destiny.
Como jogar
Avance agressivamente para provocar Twisted Fate a ativar Pick a Card. Não inicie com Playful; em vez disso, use Urchin Strike para fechar a distância e comece a acertá-lo com Rending Wave. Guarde Playful estritamente para o momento em que ele jogar a carta dourada. Se ele entrar em pânico e guardar a carta, simplesmente avance sobre ele com ataques básicos. Quando você tiver Chum the Waters, arrisque ultimates de alcance máximo para forçar os feitiços de invocador dele antes de dar dive.
Vantagem: veredito canônico do Wild Rift Core (−3 a +3), do ponto de vista do campeão citado na linha. Taxa de vitória e taxa de escolha: as do próprio adversário nessa função — Wild Rift CN · Challenger, Patch 7.3b. Não é uma taxa de vitória do confronto direto.
Como counterar este campeão
Ângulo de counter
O Fizz não é neutralizado por dano puro, mas por estratégias que atrapalham ou punem seu timing. Os campeões que o incomodam nem sempre são os que dominam a rota, mas aqueles que neutralizam seu “all-in” ou impedem o acesso à retaguarda. Entender seus contra-ataques significa entender o que quebra seu padrão: controle direcionado, capacidade de sobrevivência instantânea ou punir o uso de seu E.
Contexto do patch
Nesta atualização, a estratégia do Fizz gira em torno de sobreviver ao seu ataque inicial. Se sua habilidade definitiva não resultar em uma morte, ele perde muita pressão. Formações com proteção, controle de grupo direcionado ou capacidade de sobrevivência instantânea reduzem drasticamente seu impacto. Não se trata de estatísticas, mas da estrutura da luta: o Fizz precisa de acesso rápido e execução imediata.
Leitura rápida
Castigar o E dele = castigar o Fizz.
Sobreviver à primeira rajada muda tudo.
A falta de ângulos o torna inútil.
Arquétipos de counter
Controle instantâneo e direcionado
O Fizz depende de iniciar o combate e se reposicionar com o E. Os CCs direcionados e instantâneos quebram esse padrão, impedindo sua fuga ou punindo sua entrada na luta. Ao contrário dos skillshots, eles não podem ser esquivados de forma reativa. Isso força o Fizz a adotar um estilo de jogo muito mais passivo e reduz drasticamente suas oportunidades de iniciar o combate.
Como o campeão deve se adaptar. Aguarde o término dos tempos de recarga das habilidades e só entre em combate quando houver uma oportunidade confirmada.
Capacidade de sobrevivência e proteção contra explosões
Esses campeões absorvem ou anulam o ataque inicial do Fizz, eliminando sua principal condição de vitória. Assim que seu combo é usado, o Fizz fica vulnerável e perde a pressão imediata. Isso inverte completamente o ritmo da luta e permite que o adversário o castigue.
Como o campeão deve se adaptar. Ataca outros inimigos ou espera que eles cometam erros de posicionamento.
Pressão constante mid
Esses campeões impedem que o Fizz tenha um início de jogo tranquilo. Eles exercem pressão constante, forçam o uso defensivo da E e limitam suas oportunidades de roaming. Sem uma vantagem, o Fizz se torna muito menos ameaçador para o mid.
Lissandra neutraliza quase completamente Fizz nas lutas. Seu controle de grupo direcionado e sua invulnerabilidade fazem com que o ataque “all-in” dele seja ineficaz. Fizz deve evitar enfrentá-la diretamente e procurar outros alvos.
Erros comuns contra ele
Erros comuns contra ele
Subestimar suas janelas de engajamento.
Usar habilidades defensivas de recarga muito cedo.
Não punir o E dele.
Apenas posicionamento, sem visão.
Ignorando o dano causado pelo Lich Bane.
Notas do coach
O Fizz só vence se você cometer um erro. Jogue sem erros.
Tenha sempre uma resposta para a habilidade definitiva dele.
FAQ
Como você consegue sobreviver ao Fizz na rota?
Tenha cuidado com o pico de dano do nível 5 e do Lich Bane dele. Sempre mantenha uma opção defensiva para o all-in dele. Forçar o uso do E dele costuma ser mais importante do que causar dano. Assim que o E dele estiver esgotado, você pode jogar de forma agressiva.
Por que é difícil punir o Fizz?
Sua habilidade E lhe confere invulnerabilidade e uma capacidade única de reposicionamento. Enquanto estiver disponível, ele pode evitar muitas situações perigosas. Para puni-lo, é preciso forçá-lo a usar essa habilidade antes de agir.
O Fizz é fraco nas lutas em equipe?
Não necessariamente, mas ele depende muito do contexto. Ele se destaca nas laterais e nas jogadas de pick-off, mas tem dificuldades em confrontos estruturados com muita proteção. Seu valor depende de conseguir atingir um alvo-chave.
Qual é a maior fraqueza dele?
Sua dependência dos tempos de recarga. Sem o E ou o R, ele perde quase toda a sua capacidade de causar ameaça. Jogadores que entendem esses tempos de recarga conseguem neutralizá-lo com eficácia.