setembro de 2026 · Patch 7.2d
Mage · TOP · MID

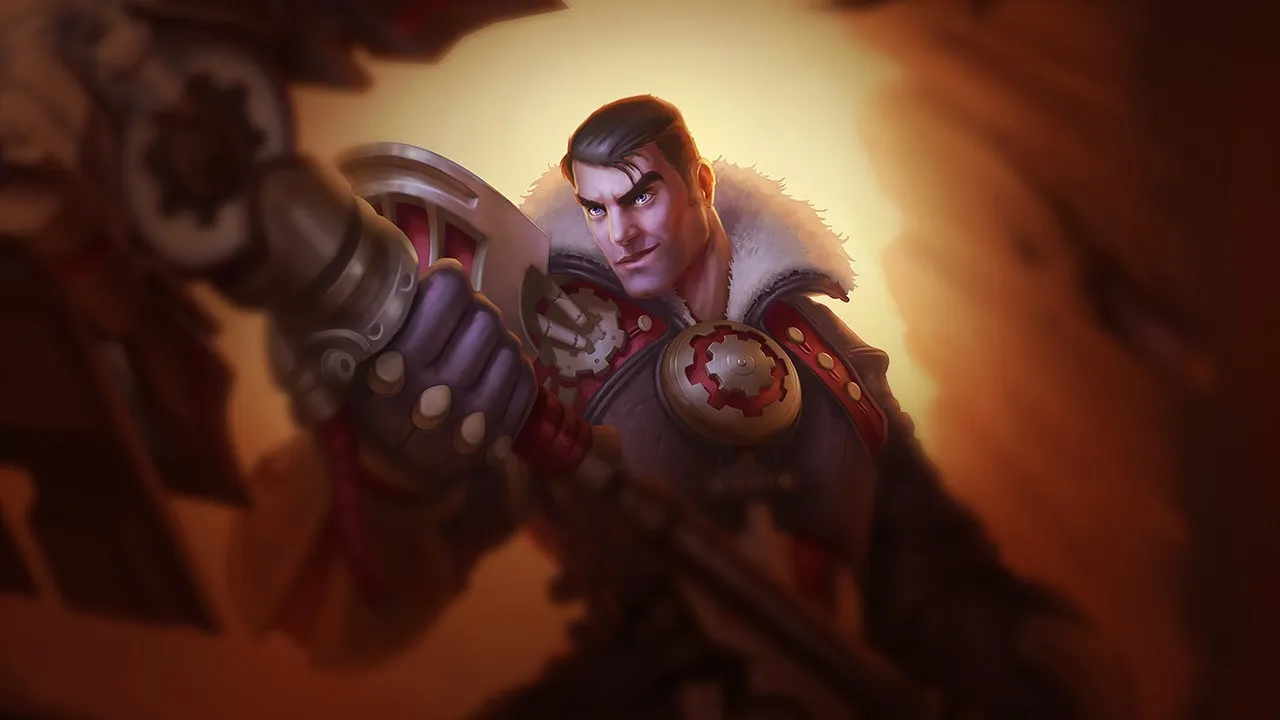
Guia de counters de Jayce Wild Rift

O Jayce depende de um poke preciso e de uma forte dominância no early game. Composições que conseguem absorver a pressão à distância através de sustain ou forçar engages rápidos reduzem drasticamente seu impacto. Sem controle de grupo confiável ou durabilidade, ele fica vulnerável em lutas prolongadas e contra ameaças que conseguem encurtar a distância rapidamente.

★ TOP · MID Tier S
DANO
UTIL
TANK
DIFF
Win 49.0% #67 · ↓1pt
Pick 2.6% #23
Ban 1.8% #70

Guia de counters de Jayce Wild Rift ★ Counter Sheet

Hard Counters

1

Esses campeões têm uma build e um estilo de jogo que superam diretamente o seu, o que pode tornar o controle da lane e o farm extremamente difíceis. As habilidades deles podem neutralizar seus principais pontos fortes ou te punir assim que você tenta jogar do seu jeito de sempre. Nesses matchups, o objetivo costuma ser reduzir os erros e buscar soluções fora do confronto direto.

Malphite

Malphite

armor_stackpoke_war Malphite is a natural counter because his *Granite Shield* combined with his high armor scaling completely shrugs off your physical poke from *Transform Mercury Cannon*. Every attempt to harass him is absorbed by his shield. Worse, his *Seismic Shard* steals your movement speed, preventing you from kiting effectively and easily setting up his devastating *Unstoppable Force* engage. Ver detalhes
Malphite

Por quê

Malphite is a natural counter because his *Granite Shield* combined with his high armor scaling completely shrugs off your physical poke from *Transform Mercury Cannon*. Every attempt to harass him is absorbed by his shield. Worse, his *Seismic Shard* steals your movement speed, preventing you from kiting effectively and easily setting up his devastating *Unstoppable Force* engage.

Impacto na lane

You cannot maintain wave control once Malphite builds defensive stats. Any trade attempting *To the Skies!* into *Lightning Field* is immediately answered by *Ground Slam*, which cripples your attack speed and ruins your trade potential. You will find yourself constantly pushed under turret, threatened by dive setups using *Unstoppable Force*.

Como jogar

To survive, shift your build priority toward early armor penetration. In lane, always hold *Thundering Blow* in hammer form; never use it for damage, but save it to knock Malphite away the moment he approaches with *Thunderclap*. If he lands *Unstoppable Force*, use the movement speed boost from *Hextech Capacitor* to disengage safely toward your tower instead of trying to fight back.

Ficha completa →

Desfavoráveis

13

Esses campeões têm ferramentas que geralmente dão a eles vantagem no confronto, sem tornar o matchup impossível de jogar. Eles podem ter mais alcance, mais capacidade de aguentar sua ofensiva ou mais formas de responder aos seus engajamentos. Você vai precisar adaptar sua abordagem e escolher com cuidado os momentos em que aceita a luta.

Dr. Mundo

Dr. Mundo

poke_sustaincc_negation This matchup hinges on Dr. Mundo's ability to ignore your primary defensive tool. When Mundo rushes you down with Maximum Dosage, you naturally want to use Thundering Blow to knock him away and disengage. However, his passive Goes Where He Pleases completely negates this knockback, leaving you vulnerable to his massive movement speed. Without your hammer-form self-peel, Mundo can easily stick to you and chop you down. Ver detalhes
Dr. Mundo

Por quê

This matchup hinges on Dr. Mundo's ability to ignore your primary defensive tool. When Mundo rushes you down with Maximum Dosage, you naturally want to use Thundering Blow to knock him away and disengage. However, his passive Goes Where He Pleases completely negates this knockback, leaving you vulnerable to his massive movement speed. Without your hammer-form self-peel, Mundo can easily stick to you and chop you down.

Impacto na lane

Because you cannot reliably disengage, allowing the minion wave to push past the river's midpoint is extremely dangerous. Dr. Mundo will look to freeze the wave near his turret, forcing you to step up. Once you are overextended, he can activate Maximum Dosage and run you down the long lane. You will find yourself unable to trade aggressively with To the Skies! because you risk being counter-engaged without your knockback.

Como jogar

To survive, you must maintain strict control of the wave, keeping it frozen on your side of the lane. Use your ranged basic attacks in Mercury Cannon form to pop his passive Goes Where He Pleases before he can engage, and immediately destroy the canister he drops. Only attempt short trades with To the Skies! and Lightning Field if his passive is on cooldown, and always keep your distance to dodge Infected Bonesaw behind your own minions.

Ficha completa →
Wukong

Wukong

bait_clonesspacing This matchup is dictated by how Wukong negates your ranged threat. Whenever you attempt to poke with To the Skies!, Wukong can reactively deploy Warrior Trickster, letting his decoy absorb the projectile entirely. With your main damaging tool on cooldown, he immediately retaliates by closing the gap with Nimbus Strike, using the attack speed buff and Golden Staff to win short trades against your lower armor. Ver detalhes
Wukong

Por quê

This matchup is dictated by how Wukong negates your ranged threat. Whenever you attempt to poke with To the Skies!, Wukong can reactively deploy Warrior Trickster, letting his decoy absorb the projectile entirely. With your main damaging tool on cooldown, he immediately retaliates by closing the gap with Nimbus Strike, using the attack speed buff and Golden Staff to win short trades against your lower armor.

Impacto na lane

You cannot safely establish early lane dominance or freely harass Wukong near his tower. Because a single missed projectile can lead to a deadly counter-engage, you are forced to play defensively, giving Wukong control over the wave state. If he freezes near his turret, walking up to break it exposes you to a full Nimbus Strike and Cyclone ultimate combo, forcing early recalls and losing map pressure.

Como jogar

To survive, you must hold To the Skies! until Wukong wastes Warrior Trickster or you have a clear, unblockable angle. If he initiates with Nimbus Strike, do not panic-fire your blast. Instead, swap with Transform Mercury Cannon and use Thundering Blow to immediately knock him away, neutralizing his attack speed window. Only after he has wasted his clone should you commit to an aggressive hammer-form dive to retaliate while his defensive tool is down.

Ficha completa →
Gwen

Gwen

poke_negationspacing_control This matchup is heavily dictated by Gwen's ability to nullify your ranged threat. Whenever you attempt to poke her down using your cannon-form To the Skies!, she can reactively deploy Hallowed Mist. This makes her entirely immune to your ranged projectiles from outside her zone while boosting her armor and magic resist. Because your primary trading tool is negated, you cannot easily chip away at her health before committing to melee fights. Ver detalhes
Gwen

Por quê

This matchup is heavily dictated by Gwen's ability to nullify your ranged threat. Whenever you attempt to poke her down using your cannon-form To the Skies!, she can reactively deploy Hallowed Mist. This makes her entirely immune to your ranged projectiles from outside her zone while boosting her armor and magic resist. Because your primary trading tool is negated, you cannot easily chip away at her health before committing to melee fights.

Impacto na lane

Consequently, you cannot establish early wave control or force Gwen under her tower. She can safely farm, knowing she has a safety net against your burst. If you step up too aggressively without your ranged poke securing an advantage, she will dash forward with Skip 'n Slash and shred you with Snip Snip!. This forces you to concede priority, delaying your item spikes and limiting your map pressure.

Como jogar

To survive, you must bait out Hallowed Mist using basic attacks rather than wasting To the Skies!. Once she deploys her zone, immediately disengage and wait out its duration. If she attempts to force an all-in using Needlework, instantly swap to hammer form and use Thundering Blow to knock her away, denying her the ability to land her Snip Snip! stacks. Only commit your full hammer combo when her mist is on its long cooldown.

Ficha completa →
Yone

Yone

spacingdodge_skillshots This matchup hinges on how Yone uses Soul Unbound to nullify your ranged threat. The moment you cast To the Skies! in Cannon form, Yone can activate his spirit form to effortlessly sidestep the projectile, close the distance, and initiate an extended trade. Once on top of you, his constant Mortal Steel strikes and Way of the Hunter passive damage will heavily out-trade your hybrid kit. Ver detalhes
Yone

Por quê

This matchup hinges on how Yone uses Soul Unbound to nullify your ranged threat. The moment you cast To the Skies! in Cannon form, Yone can activate his spirit form to effortlessly sidestep the projectile, close the distance, and initiate an extended trade. Once on top of you, his constant Mortal Steel strikes and Way of the Hunter passive damage will heavily out-trade your hybrid kit.

Impacto na lane

You are constantly forced onto the defensive, unable to establish slow pushes or safely crash waves. Whenever Yone accumulates two stacks of Mortal Steel, his potential Soul Unbound forward dash threatens an instant knockup. This threat denies you the freedom to harass him under his turret, forcing you to farm passively near your own tower and sacrifice early lane priority to avoid deadly, long-range engagements.

Como jogar

To survive, never fire a raw To the Skies! when Yone has Soul Unbound available. Instead, bait his forward dash by positioning near your caster minions, and immediately swap to Hammer form. Keep Thundering Blow specifically to knock him back the millisecond he attempts to strike you, neutralizing his trade. Only use Lightning Field to thin the wave when he recalls to his physical body, ensuring you never get trapped in an extended duel.

Ficha completa →
Poppy

Poppy

anti_dashtank_matchup Jayce struggles here because his offensive transitions are heavily gated by Poppy's protective aura. Whenever you attempt to close the distance using the hammer form of To the Skies!, her anti-dash zone immediately cancels your leap. This leaves you stranded in melee range without the impact damage of your primary engagement tool, completely neutralizing your Transform Mercury Cannon burst combos. Ver detalhes
Poppy

Por quê

Jayce struggles here because his offensive transitions are heavily gated by Poppy's protective aura. Whenever you attempt to close the distance using the hammer form of To the Skies!, her anti-dash zone immediately cancels your leap. This leaves you stranded in melee range without the impact damage of your primary engagement tool, completely neutralizing your Transform Mercury Cannon burst combos.

Impacto na lane

This interaction strips away your lane dominance, forcing you into a passive farming style. You cannot safely contest waves with your hammer form, meaning Poppy can slow-push and pressure your tower with relative impunity. Since your short-trade burst is neutralized, your kill pressure is non-existent, allowing her to stack armor safely while you are locked in your lane.

Como jogar

To survive this matchup, you must adopt a strictly ranged posture. Rely almost exclusively on Transform Mercury Cannon to poke from afar, and never initiate with To the Skies! unless her anti-dash ability is on cooldown. If she manages to close the distance, immediately use Thundering Blow to knock her back and disengage. Maintain a safe distance from walls to prevent her from pinning you, farming patiently until her defensive tools are wasted.

Ficha completa →
Yasuo

Yasuo

wind_wallspacing Yasuo naturally counters your ranged harassment because Wind Wall completely deletes the projectile from To the Skies! even when accelerated by Thundering Blow. Because of Way of the Wanderer, any chip damage you do manage to land is often absorbed by his passive shield. This leaves you unable to safely whittle him down from afar, forcing dangerous melee interactions where his Steel Tempest excels. Ver detalhes
Yasuo

Por quê

Yasuo naturally counters your ranged harassment because Wind Wall completely deletes the projectile from To the Skies! even when accelerated by Thundering Blow. Because of Way of the Wanderer, any chip damage you do manage to land is often absorbed by his passive shield. This leaves you unable to safely whittle him down from afar, forcing dangerous melee interactions where his Steel Tempest excels.

Impacto na lane

Without your signature ranged poke to keep him honest, Yasuo can freely use Sweeping Blade through the minion wave to close the gap and force extended trades. You are constantly pressured under your own turret, struggling to secure last hits without taking free damage. If he blocks your heavy cannon burst, you lose all lane priority, leaving you vulnerable to dives whenever he charges his tornado.

Como jogar

To survive, trigger his Way of the Wanderer shield with a single basic attack before using any abilities. Bait out Wind Wall by walking forward threateningly, but hold To the Skies! until his barrier dissolves. If he dashes onto you with Sweeping Blade, instantly swap with Transform Mercury Cannon and use Thundering Blow in hammer form to knock him away, preventing him from landing a knockup for Last Breath.

Ficha completa →
Irelia

Irelia

gap_closeburst_trade This matchup is dictated by Irelia's ability to completely bypass your ranged poke using Bladesurge. If she marks you with Flawless Duet or Vanguard's Edge, her mobility becomes oppressive. The fatal trap occurs when she baits your defensive Thundering Blow to knock her away, only to immediately re-engage with her remaining Bladesurge reset. Ver detalhes
Irelia

Por quê

This matchup is dictated by Irelia's ability to completely bypass your ranged poke using Bladesurge. If she marks you with Flawless Duet or Vanguard's Edge, her mobility becomes oppressive. The fatal trap occurs when she baits your defensive Thundering Blow to knock her away, only to immediately re-engage with her remaining Bladesurge reset.

Impacto na lane

You cannot safely harass with Transform Mercury Cannon when the wave is near her tower, as she will use low-health minions to stack Ionian Fervor and dash to you. Missing a single shock blast combo means she can freeze the wave and zone you completely. At level five, her Vanguard's Edge gives her lethal dive threat, forcing you to play under your turret and lose priority.

Como jogar

To survive, never use Thundering Blow preemptively. You must hold this knockback until she has exhausted her marked Bladesurge dashes, or use it only when you are certain she cannot reset her cooldown. Watch your own minion health; when they are low, retreat out of her dash range to deny her Ionian Fervor stacks. If she misses Flawless Duet, immediately retaliate in melee form with To the Skies! and Lightning Field.

Ficha completa →
Olaf

Olaf

cc_immunityspacing The core of this matchup lies in Olaf's ultimate ability. Once Olaf activates Ragnarok, he gains complete crowd control immunity, which directly neutralizes your main self-peel tool, Thundering Blow. Normally, you would use this knockback to disengage when Olaf jumps on you. Without that defensive tool, Olaf can continuously slow you with chained Undertow axes, using his increased movement speed to run you down and shred you with Reckless Swing. Ver detalhes
Olaf

Por quê

The core of this matchup lies in Olaf's ultimate ability. Once Olaf activates Ragnarok, he gains complete crowd control immunity, which directly neutralizes your main self-peel tool, Thundering Blow. Normally, you would use this knockback to disengage when Olaf jumps on you. Without that defensive tool, Olaf can continuously slow you with chained Undertow axes, using his increased movement speed to run you down and shred you with Reckless Swing.

Impacto na lane

This interaction forces you into a highly defensive posture once Olaf reaches level five. You cannot safely contest deep waves or crash them without major risk. If you step past the river, a single landed Undertow under Ragnarok means certain death. You will often have to surrender lane priority, farm from afar using To the Skies! in cannon form, and accept being pushed under your tower to survive his aggressive dives.

Como jogar

To survive, your positioning is absolute. Never switch to hammer form for To the Skies! unless Olaf has already missed his Undertow. Keep your distance and abuse Transform Mercury Cannon to gain movement speed via Hextech Capacitor when escaping. If Olaf activates Ragnarok, do not try to fight or use Thundering Blow; instead, drop your acceleration gate from Thundering Blow to sprint away immediately. Only engage with Lightning Field and quick auto-attacks when his ultimate is on cooldown.

Ficha completa →
Vayne

Vayne

dodge_skillshotsspacing Vayne neutralizes your entire offensive loop. Your main long-range threat, Shock Blast, is easily anticipated and dodged by her quick Tumble. If you get frustrated and try to close the distance in hammer stance with To the Skies!, she will immediately shut down your leap with Condemn, pushing you back before you land any damage while stacking Silver Bolts on your retreat. Ver detalhes
Vayne

Por quê

Vayne neutralizes your entire offensive loop. Your main long-range threat, Shock Blast, is easily anticipated and dodged by her quick Tumble. If you get frustrated and try to close the distance in hammer stance with To the Skies!, she will immediately shut down your leap with Condemn, pushing you back before you land any damage while stacking Silver Bolts on your retreat.

Impacto na lane

This interaction forces you into a defensive posture. You cannot safely contest the wave with basic attacks, as her Silver Bolts will shred your health if you linger. Because your Shock Blast poke is unreliable, Vayne freely controls the wave tempo, slow-pushing to crash massive waves. This denies you early tower plates and forces you to farm under turret while bleeding mana trying to clear.

Como jogar

To survive, you must play a patient spacing game. Never use To the Skies! aggressively unless you have seen her burn Condemn first. Instead, stand near the bushes to drop minion aggro and fire Shock Blast from out of vision, forcing her to guess the trajectory. If she uses Tumble forward to poke you, use Thundering Blow in hammer form to knock her away immediately, denying her the third Silver Bolts stack.

Ficha completa →
Pantheon

Pantheon

shield_blockearly_pressure This lane is dictated by Pantheon's ability to nullify your primary poke. When you launch a Shock Blast, he can reactively cast Aegis Assault to negate the damage entirely. Before you can swap forms with Transform Mercury Cannon, he will close the distance and lock you down with Shield Vault. This immediate retaliation turns your long-range harassment into a disastrous, one-sided burst trade. Ver detalhes
Pantheon

Por quê

This lane is dictated by Pantheon's ability to nullify your primary poke. When you launch a Shock Blast, he can reactively cast Aegis Assault to negate the damage entirely. Before you can swap forms with Transform Mercury Cannon, he will close the distance and lock you down with Shield Vault. This immediate retaliation turns your long-range harassment into a disastrous, one-sided burst trade.

Impacto na lane

Because of this threat, you cannot freely crash waves or poke Pantheon under his turret. If you step up to use your ranged autos, a quick Shield Vault leaves you vulnerable to a full Mortal Will empowered combo. This forces you to play defensively, conceding early wave control and leaving you susceptible to getting dove once he reaches Grand Starfall and crashes a massive wave.

Como jogar

Your survival hinges on keeping your Hammer form ready. Never initiate with To the Skies! unless Pantheon's Shield Vault is on cooldown. Instead, bait out his Aegis Assault with basic attacks, then disengage. If he jumps on you with his stun, immediately swap and use Thundering Blow to knock him away mid-air or right after the stun ends, preventing his follow-up spears. Only use your accelerated Shock Blast when his defensive shield is down.

Ficha completa →

Outros matchups

Skill Matchups

14

Esses confrontos são, acima de tudo, duelos de execução: os dois campeões têm formas reais de levar vantagem. Uma habilidade importante esquivada, um engajamento bem antecipado ou um erro de posicionamento podem ser suficientes para decidir o duelo. Conhecer o matchup e reconhecer as janelas de ação certas faz toda a diferença.

Camille

Camille

all_inpoke_war This matchup revolves around a high-stakes standoff between your hammer's knockback and her mobility. Camille wants to dive you with Hookshot, but as long as you hold Thundering Blow, you can cancel her dash mid-air and disengage. If you waste Thundering Blow offensively or to farm, she gains a massive window to trigger Adaptive Defenses and run you down with Precision Protocol. Ver detalhes
Camille

Por quê

This matchup revolves around a high-stakes standoff between your hammer's knockback and her mobility. Camille wants to dive you with Hookshot, but as long as you hold Thundering Blow, you can cancel her dash mid-air and disengage. If you waste Thundering Blow offensively or to farm, she gains a massive window to trigger Adaptive Defenses and run you down with Precision Protocol.

Impacto na lane

Because Camille can punish any overstep with Hookshot from the walls, you cannot mindlessly push with Lightning Field. You must constantly position away from the terrain to give yourself time to react. If you get caught near a wall, her Tactical Sweep slow will force you into The Hextech Ultimatum post-level 5, making the lane incredibly tense where any misstep leads to a deadly dive.

Como jogar

Always stay in the middle of the lane, away from the alcove and river walls to maximize your reaction time against Hookshot. Never swap to hammer form to use To the Skies! unless her hook is on cooldown. If she misses Hookshot or you successfully repel her with Thundering Blow, immediately swap with Transform Mercury Cannon to poke her down with Lightning Field while she lacks her primary escape.

Ficha completa →
Ambessa

Ambessa

gap_closedodge_reliance This lane is a pure contest of spacing. Ambessa relies on Drakehound's Step to dodge your Shock Blast, neutralizing your ranged poke. If she successfully evades your projectile, she can close the gap using Cunning Sweep. Once in melee range, even if you try to disengage using Thundering Blow, her high mobility allows her to quickly re-engage and stick to your Mercury Cannon form. Ver detalhes
Ambessa

Por quê

This lane is a pure contest of spacing. Ambessa relies on Drakehound's Step to dodge your Shock Blast, neutralizing your ranged poke. If she successfully evades your projectile, she can close the gap using Cunning Sweep. Once in melee range, even if you try to disengage using Thundering Blow, her high mobility allows her to quickly re-engage and stick to your Mercury Cannon form.

Impacto na lane

Missing your ranged skillshots completely forfeits your lane priority. If Ambessa successfully baits your Shock Blast, she will aggressively push the wave with Lacerate, forcing you under turret. Trading health becomes extremely risky; one wrong step allows her to use Public Execution to dive you. Conversely, if you force her to use Repudiation defensively, you can control the wave tempo and prevent her from roaming.

Como jogar

Never fire Shock Blast blindly when her Drakehound's Step is available. Instead, bait her movement by using Lightning Field to clear minions while staying mobile with Hextech Capacitor. Hold your Thundering Blow defensively; do not use it to trade unless she has already exhausted Cunning Sweep and her passive dashes. If she jumps on you with Public Execution, immediately transform to hammer form to benefit from the defensive stats and knock her away.

Ficha completa →
Akali

Akali

shroud_playall_in_burst This matchup is a pure test of spacing and reaction times. While you can harass Akali with your ranged attacks via Transform Mercury Cannon, her high mobility threatens to negate this advantage. The critical interaction centers on Shuriken Flip. If Akali marks you with this shuriken, she can recast it to dash directly to you, completely bypassing and neutralizing the knockback from your hammer-form Thundering Blow. Ver detalhes
Akali

Por quê

This matchup is a pure test of spacing and reaction times. While you can harass Akali with your ranged attacks via Transform Mercury Cannon, her high mobility threatens to negate this advantage. The critical interaction centers on Shuriken Flip. If Akali marks you with this shuriken, she can recast it to dash directly to you, completely bypassing and neutralizing the knockback from your hammer-form Thundering Blow.

Impacto na lane

Consequently, trading becomes a high-stakes guessing game. You cannot mindlessly poke with To the Skies! because stepping past your minion wave exposes you to her mark. If she lands Shuriken Flip, she will force you under turret or secure a kill with Perfect Execution. This constant threat limits your ability to pressure her, turning what should be a dominant ranged lane into a tense, defensive waiting game.

Como jogar

To survive and win, your positioning relative to your minion wave is paramount. Always keep minions between you and Akali to block Shuriken Flip. Never swap to hammer form to engage with To the Skies! unless her shuriken is on cooldown. If she does hit you, do not panic and pre-emptively cast Thundering Blow; instead, wait for her to complete the second dash of Shuriken Flip before knocking her away, preventing her from sticking to you.

Ficha completa →
Mordekaiser

Mordekaiser

dodge_skillshotskite This matchup is a pure test of your reaction times and spacing. Mordekaiser wants to pull you in with Death's Grasp to trigger Darkness Rise and crush you with isolated Obliterate strikes. However, Jayce holds the perfect counter-tool: by activating Transform Mercury Cannon, you trigger Hextech Capacitor. This burst of movement speed gives you the velocity needed to easily sidestep his claw and keep him at bay. Ver detalhes
Mordekaiser

Por quê

This matchup is a pure test of your reaction times and spacing. Mordekaiser wants to pull you in with Death's Grasp to trigger Darkness Rise and crush you with isolated Obliterate strikes. However, Jayce holds the perfect counter-tool: by activating Transform Mercury Cannon, you trigger Hextech Capacitor. This burst of movement speed gives you the velocity needed to easily sidestep his claw and keep him at bay.

Impacto na lane

When you successfully bait and dodge Death's Grasp, Mordekaiser becomes highly vulnerable to your ranged poke. You can safely whittle down his health bar with To the Skies! and Lightning Field from afar, forcing him to waste his shield on Indestructible just to sustain. Miss the dodge, however, and you are forced to use Thundering Blow defensively, losing all offensive lane pressure and wave control.

Como jogar

Never transform mindlessly. Keep Transform Mercury Cannon ready for the exact moment Mordekaiser steps forward and begins his Death's Grasp animation. Swap forms immediately, use the Hextech Capacitor speed boost to walk laterally, and punish him. If he manages to trap you in Realm of Death, do not panic: hold Thundering Blow to knock him away as soon as he approaches, stalling out his ultimate's duration while staying out of his aura's reach.

Ficha completa →
Jarvan IV

Jarvan IV

ranged_adpoke_war This matchup is a pure test of reflexes centered on Jarvan IV's signature engage. His burst relies on landing the *Demacian Standard* into *Dragon Strike* combo to shred your armor and trigger *Martial Cadence*. However, because Jayce can switch forms with *Transform Mercury Cannon*, you possess the ultimate disengage tool: casting *Thundering Blow* to knock him away mid-dash, completely nullifying his knockup and leaving him vulnerable. Ver detalhes
Jarvan IV

Por quê

This matchup is a pure test of reflexes centered on Jarvan IV's signature engage. His burst relies on landing the *Demacian Standard* into *Dragon Strike* combo to shred your armor and trigger *Martial Cadence*. However, because Jayce can switch forms with *Transform Mercury Cannon*, you possess the ultimate disengage tool: casting *Thundering Blow* to knock him away mid-dash, completely nullifying his knockup and leaving him vulnerable.

Impacto na lane

When you successfully interrupt his dash, Jarvan IV is stranded deep in the lane without his main escape, allowing you to retaliate with *Lightning Field* and quick ranged autos. Conversely, failing this reaction means taking heavy damage and being trapped inside *Cataclysm* later on. This constant threat forces a tense neutral game where a misplaced *Demacian Standard* or a wasted *Thundering Blow* instantly hands over wave control.

Como jogar

To win these trades, you must hover in Hammer Form whenever Jarvan IV walks forward aggressively, keeping your finger ready on *Thundering Blow*. Never use this ability to farm. If he misses his *Dragon Strike* or you knock him away, immediately swap using *Transform Mercury Cannon* to drop a gate with *Thundering Blow* and fire *To the Skies!* for a devastating counter-burst. If he traps you with *Cataclysm*, use *Thundering Blow* to push him out of his own arena.

Ficha completa →
Riven

Riven

disengageskill_matchup This matchup is a pure test of spacing and cooldown tracking, decided by how you handle Riven's mobility. Her threat relies entirely on chaining Broken Wings and Valor to close the gap. Because Jayce can swap forms using Transform Mercury Cannon, you possess the range advantage, but you are highly vulnerable if she reaches melee range. The entire lane hinges on using Thundering Blow to cancel her third Broken Wings jump, denying her knock-up and disengaging her burst. Ver detalhes
Riven

Por quê

This matchup is a pure test of spacing and cooldown tracking, decided by how you handle Riven's mobility. Her threat relies entirely on chaining Broken Wings and Valor to close the gap. Because Jayce can swap forms using Transform Mercury Cannon, you possess the range advantage, but you are highly vulnerable if she reaches melee range. The entire lane hinges on using Thundering Blow to cancel her third Broken Wings jump, denying her knock-up and disengaging her burst.

Impacto na lane

During wave skirmishes, Riven will attempt to bait your ranged poke using the shield from Valor. If you waste your Hammer form's Thundering Blow, she will immediately exploit this massive cooldown window, using Broken Wings to force a lethal trade or freeze the wave. Conversely, successfully denying her engage lets you control the wave pace, allowing you to freely chip her down with To the Skies! and Lightning Field in Cannon form.

Como jogar

To win this matchup, never initiate with Hammer form's To the Skies! unless Riven's Ki Burst is on cooldown. Stand near your caster minions in Cannon form, forcing her to burn Valor just to reach you. Keep your finger ready to swap with Transform Mercury Cannon and buffer Thundering Blow directly onto her during her third Broken Wings animation. If you misstime this knockback, immediately activate Hextech Capacitor to run away and avoid her Blade of the Exile ultimate execute.

Ficha completa →
Volibear

Volibear

disengagesustain_clash This matchup is a pure contest of reaction times centered on Volibear's engage. When Volibear activates Thundering Smash to charge you down, your entire survival hinges on switching to hammer form and using Thundering Blow to knock him back mid-dash. Denying his stun stops him from dropping Sky Splitter on your head and chaining Frenzied Maul. If you mistime this knockback, his high base damage will overwhelm your squishy ranged form. Ver detalhes
Volibear

Por quê

This matchup is a pure contest of reaction times centered on Volibear's engage. When Volibear activates Thundering Smash to charge you down, your entire survival hinges on switching to hammer form and using Thundering Blow to knock him back mid-dash. Denying his stun stops him from dropping Sky Splitter on your head and chaining Frenzied Maul. If you mistime this knockback, his high base damage will overwhelm your squishy ranged form.

Impacto na lane

Every trade is dictated by the cooldown of Thundering Blow. When your knockback is available, you can safely harass with To the Skies! and Lightning Field from range, maintaining wave priority. However, if you waste your E, Volibear will immediately zone you off the wave, slow you with Sky Splitter, and force an unfavorable recall or dive you under tower using Stormbringer to disable your defenses.

Como jogar

Always hold Thundering Blow defensively during laning; never use it to execute minions or poke. When Volibear runs at you with Thundering Smash, wait for him to enter your melee range, press Transform Mercury Cannon to swap to hammer, and knock him back immediately. If he manages to stun you first, do not try to trade back; use Hextech Capacitor speed to run away and avoid letting him land a second Frenzied Maul which would heal him.

Ficha completa →
Ornn

Ornn

interrupttank_matchup This matchup is a delicate dance of execution centered on Jayce's melee tools. While Ornn attempts to lock you down using Volcanic Rupture to set up a devastating Searing Charge, your safety depends entirely on Thundering Blow. Denying his charge mid-flight or swinging your hammer to push him away during Bellows Breath prevents him from applying the Brittle mark, turning a potential burst into a failed initiation. Ver detalhes
Ornn

Por quê

This matchup is a delicate dance of execution centered on Jayce's melee tools. While Ornn attempts to lock you down using Volcanic Rupture to set up a devastating Searing Charge, your safety depends entirely on Thundering Blow. Denying his charge mid-flight or swinging your hammer to push him away during Bellows Breath prevents him from applying the Brittle mark, turning a potential burst into a failed initiation.

Impacto na lane

The momentum of the lane swings wildly based on these mechanical interactions. Successfully countering Ornn's advance allows you to dictate the wave's position using To the Skies! and Lightning Field to pressure him under turret. However, if you waste your knockback, Ornn will freeze, craft items with Living Forge, and threaten a dive with Call of the Forge God, forcing you into a defensive, low-priority posture.

Como jogar

To win this, you must play with disciplined restraint in your hammer stance. Never initiate with To the Skies! unless Ornn has already missed Searing Charge or finished Bellows Breath. Keep your cursor ready to fire Thundering Blow the instant he charges toward a pillar or wall. If he invokes Call of the Forge God, transition immediately using Transform Mercury Cannon to gain speed from Hextech Capacitor, allowing you to sidestep the returning ram.

Ficha completa →
K'Santé

K'Santé

tank_matchupspacing This lane is a pure test of spacing, pitting your ranged poke against his threat of displacement. While Transform Mercury Cannon allows you to chip away at his health using To the Skies!, K'Santé's kit is designed to survive your harassment. The matchup swings entirely on how close you stand to the walls, where his All Out can forcefully drag you through terrain, completely neutralizing your safety and turning your aggressive lead into a fatal trap. Ver detalhes
K'Santé

Por quê

This lane is a pure test of spacing, pitting your ranged poke against his threat of displacement. While Transform Mercury Cannon allows you to chip away at his health using To the Skies!, K'Santé's kit is designed to survive your harassment. The matchup swings entirely on how close you stand to the walls, where his All Out can forcefully drag you through terrain, completely neutralizing your safety and turning your aggressive lead into a fatal trap.

Impacto na lane

Your early ranged priority lets you dictate the wave state, keeping him pressured under tower. However, pushing too deep exposes you. If K'Santé connects with Ntofo Strikes to slow you, he can setup Path Maker to push you toward the wall. A single mistake in your positioning turns a dominant harass phase into a sudden death scenario, forcing you to play defensively and losing your lane pressure.

Como jogar

To win, you must constantly hug the middle of the lane, staying far from the alcove and river walls. Never commit to Hammer stance unless his Path Maker is on cooldown. If he dashes forward with Footwork, immediately prepare Thundering Blow to push him away before he can land the third strike of Ntofo Strikes. If he does manage to trigger All Out, use your Hextech Capacitor speed boost to immediately disengage and reset.

Ficha completa →
Renekton

Renekton

disengagespacing This matchup is a pure test of reflexes centered on Renekton's gap-closer. Renekton wants to use Slice and Dice to get close enough to lock you down with Ruthless Predator. To survive and win trades, you must buffer Thundering Blow in Hammer Form to knock him back mid-dash. If he completes the dash and stuns you, his high Fury Cull the Meek will shred your health bar. Ver detalhes
Renekton

Por quê

This matchup is a pure test of reflexes centered on Renekton's gap-closer. Renekton wants to use Slice and Dice to get close enough to lock you down with Ruthless Predator. To survive and win trades, you must buffer Thundering Blow in Hammer Form to knock him back mid-dash. If he completes the dash and stuns you, his high Fury Cull the Meek will shred your health bar.

Impacto na lane

This interaction dictates the entire wave state and health economy. Denying his engage allows you to safely harass him with To the Skies! in Cannon Form, forcing him to waste Fury on Cull the Meek just to sustain. However, if he lands his stun, he will chunk your health, crash the wave, and secure an easy recall, leaving you struggling under turret with massive pressure.

Como jogar

To execute this, stay in Cannon Form to farm and poke, but swap to Hammer Form using Transform Mercury Cannon the moment he approaches with high Fury. Hold Thundering Blow exclusively for his Slice and Dice animation. If you misplay and get stunned by Ruthless Predator, do not panic-fight; immediately activate Lightning Field to deal passive damage while retreating, then use the movement speed from Hextech Capacitor to safely reposition and farm from a distance.

Ficha completa →
Graves

Graves

armor_stackingrange_clash This lane is a constant tug-of-war of spacing. Your goal to chunk him down and execute with Hammer form's To the Skies! is countered by his Quickdraw. Every dash grants him True Grit armor, making him deceptively tanky against your physical burst. If you jump in mindlessly, his New Destiny shotgun blasts deal maximum damage at point-blank range, turning your dive into a deadly trap. Ver detalhes
Graves

Por quê

This lane is a constant tug-of-war of spacing. Your goal to chunk him down and execute with Hammer form's To the Skies! is countered by his Quickdraw. Every dash grants him True Grit armor, making him deceptively tanky against your physical burst. If you jump in mindlessly, his New Destiny shotgun blasts deal maximum damage at point-blank range, turning your dive into a deadly trap.

Impacto na lane

Graves naturally shoves waves using End of the Line and his AoE New Destiny pellets, forcing you to match his clear. Trades are highly volatile. Getting hit by Smoke Screen leaves you blind and vulnerable to his Collateral Damage. You cannot afford to lose the push, or he will trap you under tower, using his armor stacks to shrug off your counter-harass.

Como jogar

Prioritize poking from afar using Thundering Blow to accelerate your To the Skies! projectiles. Never use To the Skies! in Hammer form while his Quickdraw is available or while his True Grit stacks are high. If he attempts to close the distance with a dash, immediately swap with Transform Mercury Cannon and use your Hammer form's Thundering Blow to knock him away, neutralizing his high-damage New Destiny blasts and resetting the distance.

Ficha completa →
Vladimir

Vladimir

poke_warsustain_clash Jayce relies heavily on landing his long-range blast via To the Skies! coupled with Thundering Blow, but Vladimir holds a definitive answer. By activating Sanguine Pool, he easily melts away to dodge this heavy projectile burst. Once Jayce's ranged cooldowns are spent, Vladimir recovers any minor chip damage by casting Transfusion on the wave, nullifying Jayce's attempts to establish a health advantage. Ver detalhes
Vladimir

Por quê

Jayce relies heavily on landing his long-range blast via To the Skies! coupled with Thundering Blow, but Vladimir holds a definitive answer. By activating Sanguine Pool, he easily melts away to dodge this heavy projectile burst. Once Jayce's ranged cooldowns are spent, Vladimir recovers any minor chip damage by casting Transfusion on the wave, nullifying Jayce's attempts to establish a health advantage.

Impacto na lane

This creates a lane where passive farming favors the Crimson Reaper as he scales. Early on, Jayce must pressure the wave with Lightning Field and seek hammer-form trades. However, if you fail to force a recall before Vladimir secures his core levels, his enhanced Transfusion healing outpaces your mana pool. Missing a single combo means losing control over the lane's push, allowing him to freely scale under his turret.

Como jogar

To win this, bait out Sanguine Pool before committing your main burst. Walk forward in hammer form using Transform Mercury Cannon to threaten with To the Skies!, forcing him to pool defensively. Hold your Thundering Blow to push him back if he tries to retaliate with Tides of Blood. Only launch your full ranged blast once his pool is on its long cooldown, capitalizing on this brief power window to force him off the minion wave.

Ficha completa →

Outros matchups

Favoráveis

18

Esses campeões geralmente têm dificuldade para responder às suas principais forças, o que te dá mais liberdade para abordar o confronto. Você costuma ter várias formas de pressioná-los e forçar trocas a seu favor. Aproveite essa vantagem para impor seu ritmo, em vez de dar tempo para eles se estabilizarem.

Darius

Darius

kite_vs_catchpoke_survival Jayce dominates this matchup because his ranged Transform Mercury Cannon allows him to harass Darius safely, while his Hammer form provides an absolute safety net. Darius relies on Apprehend to pull you in and stack Hemorrhage, but as long as you hold Thundering Blow, you can instantly knock him away if he grabs you. This constant threat forces Darius to hold his pull, letting you control the distance. Ver detalhes
Darius

Por quê

Jayce dominates this matchup because his ranged Transform Mercury Cannon allows him to harass Darius safely, while his Hammer form provides an absolute safety net. Darius relies on Apprehend to pull you in and stack Hemorrhage, but as long as you hold Thundering Blow, you can instantly knock him away if he grabs you. This constant threat forces Darius to hold his pull, letting you control the distance.

Impacto na lane

This interaction gives you total wave control. You can slow-push waves while zoning Darius from the minions using To the Skies! and Lightning Field from range. If Darius steps up to heal with Decimate, you can step inside his handle or simply walk away. By denying him the ability to stack Hemorrhage, you secure a massive health lead, forcing him under tower where he loses gold.

Como jogar

Stay in Cannon form as your default stance, using Hextech Capacitor to space away from Darius. Only swap to Hammer form to execute a quick trade when Apprehend is on cooldown, or defensively to cast Thundering Blow immediately if he manages to pull you. If Darius attempts to heal with Decimate, use To the Skies! in Hammer form to leap inside the inner handle radius, neutralizing his healing, then quickly push him away and swap back to safety.

Ficha completa →
Aatrox

Aatrox

pokedisengagespacing This matchup is heavily skewed in your favor because you hold the ultimate tool to negate his aggression. Whenever Aatrox attempts to close the gap using *Umbral Dash* to land his sweetspots with *The Darkin Blade*, you can immediately swap to hammer form and use *Thundering Blow* to swat him away. This completely denies his combo, leaving him stranded without his primary damage tool while you safely harass him from range. Ver detalhes
Aatrox

Por quê

This matchup is heavily skewed in your favor because you hold the ultimate tool to negate his aggression. Whenever Aatrox attempts to close the gap using *Umbral Dash* to land his sweetspots with *The Darkin Blade*, you can immediately swap to hammer form and use *Thundering Blow* to swat him away. This completely denies his combo, leaving him stranded without his primary damage tool while you safely harass him from range.

Impacto na lane

By holding the threat of your hammer form, you dictate the wave's tempo. Aatrox cannot freely step up to auto-attack minions to trigger *Deathbringer Stance* for healing. You can constantly chip away at his health using your ranged *To the Skies!* through your gate, forcing him to play under tower. This pressure denies him early priority and forces him into a defensive, low-sustain laning phase.

Como jogar

Always default to your cannon form to poke with *To the Skies!* and *Lightning Field*. Never use *Thundering Blow* offensively unless you are certain his *Umbral Dash* is on cooldown or you are executing a kill. If you get caught by *Infernal Chains*, do not panic; quickly swap with *Transform Mercury Cannon*, jump in with *To the Skies!* if needed, and immediately use *Thundering Blow* to knock him back before the chain pulls you in.

Ficha completa →
Gragas

Gragas

sustaindodge_skillshots You hold the upper hand because your ranged basic attacks constantly chip away at Gragas, but you cannot mindlessly dive him. His passive Happy Hour provides consistent healing against your poke, and a reckless melee To the Skies! invites a direct counter-engage via his Body Slam. This interaction dictates the lane: you must abuse your dual forms through Transform Mercury Cannon while respecting his quick disruption tool. Ver detalhes
Gragas

Por quê

You hold the upper hand because your ranged basic attacks constantly chip away at Gragas, but you cannot mindlessly dive him. His passive Happy Hour provides consistent healing against your poke, and a reckless melee To the Skies! invites a direct counter-engage via his Body Slam. This interaction dictates the lane: you must abuse your dual forms through Transform Mercury Cannon while respecting his quick disruption tool.

Impacto na lane

Gragas is forced to use Barrel Roll to farm from afar, which inevitably pushes the minion wave toward your tower. This allows you to freeze the wave or slow-push to keep him trapped. However, staying near his tower is dangerous once he unlocks Explosive Cask, as he can easily displace you into his turret range if you overextend or misposition your cannon-form harass.

Como jogar

To secure your lead, always stand behind your minion wave to block his Body Slam pathing. Never initiate trades with hammer-form To the Skies! while his dash is available; instead, poke with cannon form, and if he charges you, immediately use Thundering Blow to knock him away and reset the distance. Actively bait his Barrel Roll by stepping forward and backward, then punish his cooldowns with a rapid Lightning Field burst.

Ficha completa →
Gnar

Gnar

spacingburst_defense You hold a clear advantage in this ranged duel by leveraging your superior burst transitions. While Rage Gene dictates Gnar's threat levels, his squishier Mini form is highly vulnerable to your poke. The matchup hinges on his mobility; if Gnar misuses Hop to play aggressively, you can instantly swap via Transform Mercury Cannon and gap-close with To the Skies!, punishing his lack of escape before he can transform. Ver detalhes
Gnar

Por quê

You hold a clear advantage in this ranged duel by leveraging your superior burst transitions. While Rage Gene dictates Gnar's threat levels, his squishier Mini form is highly vulnerable to your poke. The matchup hinges on his mobility; if Gnar misuses Hop to play aggressively, you can instantly swap via Transform Mercury Cannon and gap-close with To the Skies!, punishing his lack of escape before he can transform.

Impacto na lane

This interaction forces Gnar to play defensively, allowing you to establish early lane priority. By keeping him under constant threat, you can restrict his ability to safely catch his Boomerang Throw, stalling his wave clear and delaying his Mega transformation. This pressure translates into comfortable wave control, enabling you to crash big waves and secure easy recall timings while Gnar is stuck farming under turret.

Como jogar

Monitor Gnar's rage bar closely. When he is in Mini form, bait his Boomerang Throw and wait for him to waste Hop. The moment he does, activate Transform Mercury Cannon and dive in with To the Skies! followed by Lightning Field. If his rage spikes and he triggers Rage Gene to become Mega, immediately disengage using Thundering Blow to push him away, preventing him from landing Boulder Toss.

Ficha completa →
Fiora

Fiora

spacingearly_trade Jayce dictates this matchup through his ability to deny Fiora's physical approach. When Fiora attempts to strike a vital from Duelist's Dance, you can easily disengage. The core of this dynamic lies in Thundering Blow; when she tries to get close, this hammer strike bats her away. This forces Fiora to expend her Lunge just to get back into melee range, wasting her mobility and leaving her completely vulnerable to your ranged harass. Ver detalhes
Fiora

Por quê

Jayce dictates this matchup through his ability to deny Fiora's physical approach. When Fiora attempts to strike a vital from Duelist's Dance, you can easily disengage. The core of this dynamic lies in Thundering Blow; when she tries to get close, this hammer strike bats her away. This forces Fiora to expend her Lunge just to get back into melee range, wasting her mobility and leaving her completely vulnerable to your ranged harass.

Impacto na lane

This interaction allows you to safely freeze the minion wave and harass Fiora whenever she steps up to farm. Because her primary gap-closer is neutralized by your knockback, she cannot easily trigger Grand Challenge or sustain through Duelist's Dance. You will naturally secure a significant health advantage, forcing her to lose gold under turret or take unfavorable recall timings, which grants you free map priority.

Como jogar

Always stand behind your caster minions in ranged form using Transform Mercury Cannon to poke her down. Never initiate trades with To the Skies!. Instead, bait her forward, wait for her to use Lunge, and immediately use Thundering Blow to knock her away. Crucially, do not use Thundering Blow if her Riposte is active, or you will be stunned. If she parries nothing, swap forms and blow her up.

Ficha completa →
Garen

Garen

slow_cleansegap_close You hold all the cards in this matchup because Transform Mercury Cannon lets you harass Garen from afar while he tries to farm. His only way to close the gap is Decisive Strike, but you can immediately negate his engage with Thundering Blow. Garen must bait out your hammer's knockback before he can safely commit his silence and spin with Judgment, leaving him completely at your mercy if you hold your ground. Ver detalhes
Garen

Por quê

You hold all the cards in this matchup because Transform Mercury Cannon lets you harass Garen from afar while he tries to farm. His only way to close the gap is Decisive Strike, but you can immediately negate his engage with Thundering Blow. Garen must bait out your hammer's knockback before he can safely commit his silence and spin with Judgment, leaving him completely at your mercy if you hold your ground.

Impacto na lane

This interaction allows you to constantly deny Garen's Perseverance passive by poking him with To the Skies! and Lightning Field. You can freeze the wave easily, forcing Garen to choose between losing gold or taking massive damage. Because he cannot safely engage without his silence, he is forced to play under his turret, giving you total priority to help your jungler or secure plates.

Como jogar

Always remain in Cannon form to poke Garen down. When he activates Decisive Strike and runs at you, do not panic or use Thundering Blow too early. Wait for him to get close, switch to hammer form, and knock him away. If you waste your knockback, he will catch you, shred your armor with Judgment, and execute you with Demacian Justice. Hold your knockback as a counter-engage tool, then switch back using Transform Mercury Cannon to chase him down.

Ficha completa →
Heimerdinger

Heimerdinger

range_disadvantagepoke This matchup is dictated by your ability to dismantle Heimerdinger's setup before he can establish zone control. By firing *To the Skies!* through the gate created by *Thundering Blow*, you gain enough range and area damage to instantly vaporize his *H-28G Evolution Turret* from absolute safety. Without his turrets to hide behind, Heimerdinger loses his main source of consistent DPS and his passive *Hextech Affinity* movement speed, leaving him highly vulnerable. Ver detalhes
Heimerdinger

Por quê

This matchup is dictated by your ability to dismantle Heimerdinger's setup before he can establish zone control. By firing *To the Skies!* through the gate created by *Thundering Blow*, you gain enough range and area damage to instantly vaporize his *H-28G Evolution Turret* from absolute safety. Without his turrets to hide behind, Heimerdinger loses his main source of consistent DPS and his passive *Hextech Affinity* movement speed, leaving him highly vulnerable.

Impacto na lane

In practice, Heimerdinger cannot build a permanent wave-pushing engine. Since you easily clear his *H-28G Evolution Turret* from afar, you dictate the minion wave's state. He is forced to constantly spend mana replacing them, while you secure easy priority. This allows you to chip his health down with *Lightning Field* in hammer form for mana sustain, or pressure his tower, preventing him from ever locking you down under your own turret.

Como jogar

To execute this flawlessly, always stand diagonally to the minion wave. This positioning forces Heimerdinger to choose between aiming *Hextech Micro-Rockets* at you or the wave, while making it easier to dodge his slow *CH-2 Electron Storm Grenade*. If he activates *UPGRADE!!!* to drop a massive turret, immediately switch to hammer form with *Transform Mercury Cannon* and use *Thundering Blow* to knock it away, neutralizing his ultimate instantly.

Ficha completa →
Sett

Sett

disengagepoke_down Jayce controls this matchup by neutralizing Sett's main tool for closing distance. Whenever Sett activates Knuckle Down to gain movement speed and run you down, you can instantly respond with Thundering Blow to knock him back. This simple disengage completely denies Sett's ability to pull you in with Facebreaker or land the true damage sweet spot of Haymaker, forcing him to waste his mobility cooldowns for zero return. Ver detalhes
Sett

Por quê

Jayce controls this matchup by neutralizing Sett's main tool for closing distance. Whenever Sett activates Knuckle Down to gain movement speed and run you down, you can instantly respond with Thundering Blow to knock him back. This simple disengage completely denies Sett's ability to pull you in with Facebreaker or land the true damage sweet spot of Haymaker, forcing him to waste his mobility cooldowns for zero return.

Impacto na lane

This defensive safety net allows you to dictate the wave's positioning from range. Sett is forced to play defensively, taking relentless poke from To the Skies! and Lightning Field whenever he tries to secure minion gold. Since he cannot safely reach you, you can slow-push massive waves under his turret, chip away at his health bar, and create huge gold leads while denying him any opportunity to look for a game-changing The Show Stopper.

Como jogar

To execute this flawlessly, remain in Cannon form to poke Sett down, and only swap with Transform Mercury Cannon to punish him when his skills are down. Never use Thundering Blow aggressively unless Sett's Facebreaker is on cooldown. If he manages to catch you off guard, immediately trigger your hammer swing to push him away, then utilize the movement speed from Hextech Capacitor to safely retreat to a ranged spacing distance and resume your relentless harass.

Ficha completa →
Sion

Sion

interruptpoke_down Jayce holds a massive advantage because he can completely shut down Sion's primary tool, Decimating Smash. Whenever the giant tank begins charging his heavy axe swing, you can instantly respond by using Transform Mercury Cannon to swap to hammer form and casting Thundering Blow. This immediate knockback cancels the channel, leaving him vulnerable, wasting his main damage source, and turning his offensive stance into a defensive liability. Ver detalhes
Sion

Por quê

Jayce holds a massive advantage because he can completely shut down Sion's primary tool, Decimating Smash. Whenever the giant tank begins charging his heavy axe swing, you can instantly respond by using Transform Mercury Cannon to swap to hammer form and casting Thundering Blow. This immediate knockback cancels the channel, leaving him vulnerable, wasting his main damage source, and turning his offensive stance into a defensive liability.

Impacto na lane

Canceling that channel completely shifts the wave dynamic in your favor. Sion cannot rely on Decimating Smash to clear waves quickly, allowing you to maintain constant wave control. You can safely poke him down with To the Skies! and Lightning Field whenever his Soul Furnace shield is down. This denial forces him to bleed gold under his turret, giving you free reign to chip at tower plates.

Como jogar

Avoid standing directly behind your minion wave to prevent Sion from hitting you with Roar of the Slayer. You must actively hold your hammer form's Thundering Blow solely to counter his Decimating Smash channel. Once you knock him out of his swing, immediately use Transform Mercury Cannon to switch to ranged form and punish him with Lightning Field and To the Skies! while his defensive Soul Furnace is on cooldown.

Ficha completa →
Urgot

Urgot

poke_downspacing Jayce holds a massive advantage in this matchup due to his dual-form versatility via Transform Mercury Cannon. You can safely abuse your range to wear Urgot down. Whenever Urgot attempts to force an all-in by charging forward with Disdain, you can instantly respond by switching to Hammer form and casting Thundering Blow. This knocks him back mid-dash, completely neutralizing his only reliable gap-closer. Ver detalhes
Urgot

Por quê

Jayce holds a massive advantage in this matchup due to his dual-form versatility via Transform Mercury Cannon. You can safely abuse your range to wear Urgot down. Whenever Urgot attempts to force an all-in by charging forward with Disdain, you can instantly respond by switching to Hammer form and casting Thundering Blow. This knocks him back mid-dash, completely neutralizing his only reliable gap-closer.

Impacto na lane

This interaction completely dictates the early wave state. Since Urgot cannot land Disdain, he is forced to farm defensively under constant threat. Urgot's passive Echoing Flames naturally pushes the wave towards you when he tries to CS, allowing you to freeze it easily. This leaves him starved of gold and too low on health to ever threaten you with Fear Beyond Death.

Como jogar

Start the lane in Cannon form, harassing Urgot with To the Skies! and Lightning Field from maximum distance. Always hold Thundering Blow; never use it offensively in Hammer form unless Disdain is on cooldown. If Urgot lands Corrosive Charge to slow you, do not panic. Walk backwards, and the moment he starts his forward dash animation, swap forms and swat him away with Thundering Blow.

Ficha completa →
Nasus

Nasus

early_pressuredisengage Jayce dominates this matchup because he can completely negate Nasus's only tool for closing the gap. When Nasus attempts to slow you with Wither to setup a series of Siphoning Strike bonks, Jayce can immediately swap to hammer form and use Thundering Blow to knock him away. This reset prevents Nasus from capitalizing on his massive slow and leaves him vulnerable to ranged poke. Ver detalhes
Nasus

Por quê

Jayce dominates this matchup because he can completely negate Nasus's only tool for closing the gap. When Nasus attempts to slow you with Wither to setup a series of Siphoning Strike bonks, Jayce can immediately swap to hammer form and use Thundering Blow to knock him away. This reset prevents Nasus from capitalizing on his massive slow and leaves him vulnerable to ranged poke.

Impacto na lane

This interaction dictates a strict tempo race where you must control the minion waves. By denying Nasus easy access to the wave, you stunt his Siphoning Strike stacking speed. He is forced to drop Spirit Fire to farm from afar, which naturally pushes the wave toward your tower. This allows you to freeze the lane, crash massive waves, and chip away at his turret while his health is too low to contest.

Como jogar

Always hold Thundering Blow in hammer form as your primary defensive tool. Harass Nasus constantly with To the Skies! and Lightning Field from range. The moment you see the Wither animation, transform with Transform Mercury Cannon and use Thundering Blow to knock him back. If you mistakenly burn this knockback early and he activates Fury of the Sands, immediately place Thundering Blow in cannon form to gain movement speed and retreat safely.

Ficha completa →
Tryndamere

Tryndamere

disengagekite Jayce dominates this lane because he holds the ultimate disengage tool against Tryndamere's only gap-closer. Whenever Tryndamere initiates with Spinning Slash to force a melee trade, Jayce can immediately swap to hammer form and use Thundering Blow to swat him away. Since Spinning Slash has a long cooldown early on, this interaction completely neutralizes Tryndamere's ability to stick to Jayce and stack his Battle Fury. Ver detalhes
Tryndamere

Por quê

Jayce dominates this lane because he holds the ultimate disengage tool against Tryndamere's only gap-closer. Whenever Tryndamere initiates with Spinning Slash to force a melee trade, Jayce can immediately swap to hammer form and use Thundering Blow to swat him away. Since Spinning Slash has a long cooldown early on, this interaction completely neutralizes Tryndamere's ability to stick to Jayce and stack his Battle Fury.

Impacto na lane

Because Tryndamere cannot easily touch you, you dictate the wave's state. You can safely poke him down with To the Skies! and Lightning Field from range. This pressure forces him to consume his Battle Fury via Bloodlust just to sustain under tower, preventing him from building up critical strike chance. He is forced into defensive recalls, giving you plates and absolute priority.

Como jogar

Always hold Thundering Blow for the exact moment Tryndamere commits his Spinning Slash. Never use your hammer knockback offensively unless he has already wasted his dash. If he tries to run you down with Undying Rage, use Transform Mercury Cannon to gain movement speed via Hextech Capacitor and kite him out. If you misplay and get caught by Mocking Shout while facing away, immediately swap forms to disengage rather than fighting back.

Ficha completa →
Kayle

Kayle

early_pressurescaling_gap Kayle represents zero early threat before her Divine Ascent milestones kick in, giving you complete freedom to dictate the lane. By utilizing Transform Mercury Cannon, you can effortlessly zone her away from the wave. Use To the Skies! in hammer form to burst her down whenever she steps up to last hit with Starfire Spellblade. Her Radiant Blast cannot match your early burst potential, making her vulnerable to constant harassment. Ver detalhes
Kayle

Por quê

Kayle represents zero early threat before her Divine Ascent milestones kick in, giving you complete freedom to dictate the lane. By utilizing Transform Mercury Cannon, you can effortlessly zone her away from the wave. Use To the Skies! in hammer form to burst her down whenever she steps up to last hit with Starfire Spellblade. Her Radiant Blast cannot match your early burst potential, making her vulnerable to constant harassment.

Impacto na lane

You must slow push the initial waves to build a massive minion advantage, preventing Kayle from safely farming under her turret. This forced wave control denies her early gold and delays her crucial level milestones. If she tries to break the freeze using Radiant Blast, she leaves herself wide open to a lethal dive or a devastating trade, forcing her to rely on Celestial Blessing just to stay in experience range.

Como jogar

Stand aggressively past her melee minions to deny her Starfire Spellblade range. When trading in hammer form, always hold Thundering Blow to knock her back if she tries to turn with Celestial Blessing's speed boost. Once she reaches level five, do not blindly commit your full burst; bait out her Divine Judgment first using your ranged attacks before switching forms to execute her.

Ficha completa →
Teemo

Teemo

poke_warburst_down Although Teemo relies on Blinding Dart to shut down physical attackers, this blind is completely useless against your ranged poke. The explosive projectile from To the Skies! boosted by Thundering Blow deals its massive damage regardless of being blinded. Since Teemo is incredibly squishy, this combo allows you to chunk his health bar from outside his auto-attack range without ever triggering Toxic Shot. Ver detalhes
Teemo

Por quê

Although Teemo relies on Blinding Dart to shut down physical attackers, this blind is completely useless against your ranged poke. The explosive projectile from To the Skies! boosted by Thundering Blow deals its massive damage regardless of being blinded. Since Teemo is incredibly squishy, this combo allows you to chunk his health bar from outside his auto-attack range without ever triggering Toxic Shot.

Impacto na lane

This interaction shifts lane pressure entirely in your favor. You do not need to fight for wave control early; instead, let Teemo push with Toxic Shot while you setup safe angles. Once you land a single boosted To the Skies!, Teemo is forced to play defensively, abandoning his Guerrilla Warfare ambushes. This health deficit prevents him from safely placing Noxious Trap around the lane, giving you complete priority to crash waves and roam.

Como jogar

To execute this, stay in your ranged form and fish for boosted To the Skies! shots whenever Teemo steps up to last-hit. Only switch to melee form with Transform Mercury Cannon to commit for the kill once he is below half health and his Blinding Dart is on cooldown. If he hides in the brush with Guerrilla Warfare, fire your combo directly into the bushes to flush him out. Never jump in with To the Skies! in melee form while he still holds his blind.

Ficha completa →
Jax

Jax

gap_closespacing Jayce dictates this matchup because he can completely shut down Jax's primary gap-closer. Whenever Jax attempts to initiate a trade with Leap Strike, Jayce can immediately react with Thundering Blow in hammer form. This knocks Jax away mid-air, denying his damage and preventing him from landing Counter Strike. By neutralizing Jax's only tool to close the distance, Jayce maintains his ranged superiority using Transform Mercury Cannon to freely poke him down. Ver detalhes
Jax

Por quê

Jayce dictates this matchup because he can completely shut down Jax's primary gap-closer. Whenever Jax attempts to initiate a trade with Leap Strike, Jayce can immediately react with Thundering Blow in hammer form. This knocks Jax away mid-air, denying his damage and preventing him from landing Counter Strike. By neutralizing Jax's only tool to close the distance, Jayce maintains his ranged superiority using Transform Mercury Cannon to freely poke him down.

Impacto na lane

Because Jax cannot safely engage, you can constantly freeze the wave and harass him with To the Skies! and Lightning Field in cannon form. Jax is forced to yield minion priority, bleeding gold under his turret or risking his health bar to farm. This constant pressure allows you to secure early plates, obtain priority for Rift Herald, and force Jax into unfavorable recall timings that delay his crucial Grandmaster-at-Arms power spike.

Como jogar

To execute this perfectly, always remain in cannon form to farm and poke, but swap to hammer form the moment Jax steps forward to Leap Strike. Never use Thundering Blow offensively unless his jump is actively on cooldown. If you accidentally waste Thundering Blow, immediately retreat using the speed boost from Hextech Capacitor, as Jax will instantly punish your mistake by chasing you down with Counter Strike.

Ficha completa →

Outros matchups

Items to Counter Jayce

Buy these items to reduce this champion's effectiveness in your games.

Thornmail
Thornmail
Randuin's Omen
Randuin's Omen
Plated Steelcaps
Plated Steelcaps

Como counterar este campeão

Ângulo de counter

Entender os contra-ataques do Jayce não significa memorizar nomes — trata-se de compreender o que atrapalha seu plano de jogo. O Jayce se baseia em três pilares: ataques à distância, controle do ritmo e escolha de trocas. Campeões que o derrotam perturbam esses elementos. Alguns reduzem seu impacto com armadura ou sustain, outros o punem com jogadas all-in, e alguns invalidam seus skillshots por meio da mobilidade. Esta página ajuda você a entender essas dinâmicas, em vez de apenas memorizar matchups.

Contexto do patch

Nesta versão, o Jayce enfrenta dificuldades contra campeões que absorvem seus ataques à distância ou o forçam a sair de sua zona de conforto. Sua falta de sustentação e mobilidade o torna vulnerável a ataques all-in repetidos e trocas prolongadas. Campeões capazes de se esquivar ou iniciar o combate rapidamente também reduzem sua eficácia. Quando forçado a entrar no combate corpo a corpo sem ter se preparado, o Jayce se torna um alvo fácil. O problema não é apenas mecânico — é estrutural.

Leitura rápida

  • Os tanques que ignoram seus ataques de afastamento acabam com você.
  • Os campeões do celular reduzem seu impacto.
  • All-ins rápidos punem seus erros.

Arquétipos de counter

Tanques resistentes a perfurações

Esses campeões absorvem seus ataques sem perder a pressão. Seu EQ se torna ineficaz, já que eles acumulam armadura ou possuem ferramentas de redução de dano. Eles não precisam vencer a rota para serem úteis e podem aguardar oportunidades de engajamento, exercendo pressão constante sobre o Jayce.

Como o campeão deve se adaptar. Evite forçar jogadas. Brinque com o ritmo das ondas e cause impacto no mapa, em vez de tentar matá-los.

Campeões do “all-in” explosivo

Esses campeões punem qualquer erro de posicionamento. O Jayce precisa jogar à distância, mas, uma vez envolvido em combate, ele não tem como escapar de verdade. A mobilidade deles permite que se esquivem dos ataques à distância dele e forcem o combate corpo a corpo, onde o Jayce é muito mais fraco.

Como o campeão deve se adaptar. Respeite o ritmo deles e mantenha uma distância segura. Seu ataque deve dissuadi-los de entrar em combate.

Duelistas em escalonamento

Esses campeões superam o Jayce em duelos na partida do mid. Mesmo que o Jayce vença no início, ele não consegue manter a pressão indefinidamente. Assim que atingem o pico de itens, eles vencem as trocas prolongadas e forçam o Jayce a recuar.

Como o campeão deve se adaptar. Acelere o jogo e evite duelos prolongados após os spikes deles.

Matchups prioritários

Malphite

Malphite é um dos piores adversários para o Jayce, pois neutraliza completamente sua estratégia de ataques à distância. Sua armadura natural e suas configurações defensivas reduzem drasticamente o dano que você causa, e sua habilidade definitiva força confrontos que você não consegue controlar. Mesmo com uma vantagem inicial, um único ataque inicial bem executado pode virar o jogo.

Erros comuns contra ele

Erros comuns contra ele

  • Subestimar o ataque do inimigo.
  • Jogar de forma muito agressiva, sem ter uma visão geral da situação.
  • Forçar trocas contra tanques.

  • Ignorar os picos de poder do inimigo.

  • Ficar muito tempo no combate corpo a corpo.

Notas do coach

  • Se o seu golpe não surtir efeito, você precisa mudar de estratégia imediatamente.
  • O posicionamento é mais importante do que o DPS no Jayce.

FAQ

Por que os tanques são tão difíceis para o Jayce?

Como o Jayce depende de ataques rápidos e trocas curtas, os tanques reduzem seu impacto ao absorverem dano e sobreviverem até o início do confronto. Quando as lutas começam, o Jayce não consegue igualar a resistência nem a presença deles na linha de frente.

Como se joga contra campeões do celular?

Você precisa ajustar sua distância e seu tempo de ação. Seu golpe deve controlar a aproximação do adversário, não apenas causar dano. Errar os golpes direcionados abre oportunidades para que o adversário ataque.

É possível vencer um confronto difícil com o Jayce?

Sim, mas isso exige uma execução perfeita e um bom gerenciamento do ritmo. É preciso evitar erros, maximizar o poke e usar o mapa para compensar os pontos fracos do confronto.

É melhor evitar duelos prolongados?

Sim, especialmente contra campeões que ganham força com o tempo. O Jayce foi projetado para trocas rápidas e ataques à distância. Combates prolongados raramente são favoráveis para ele.