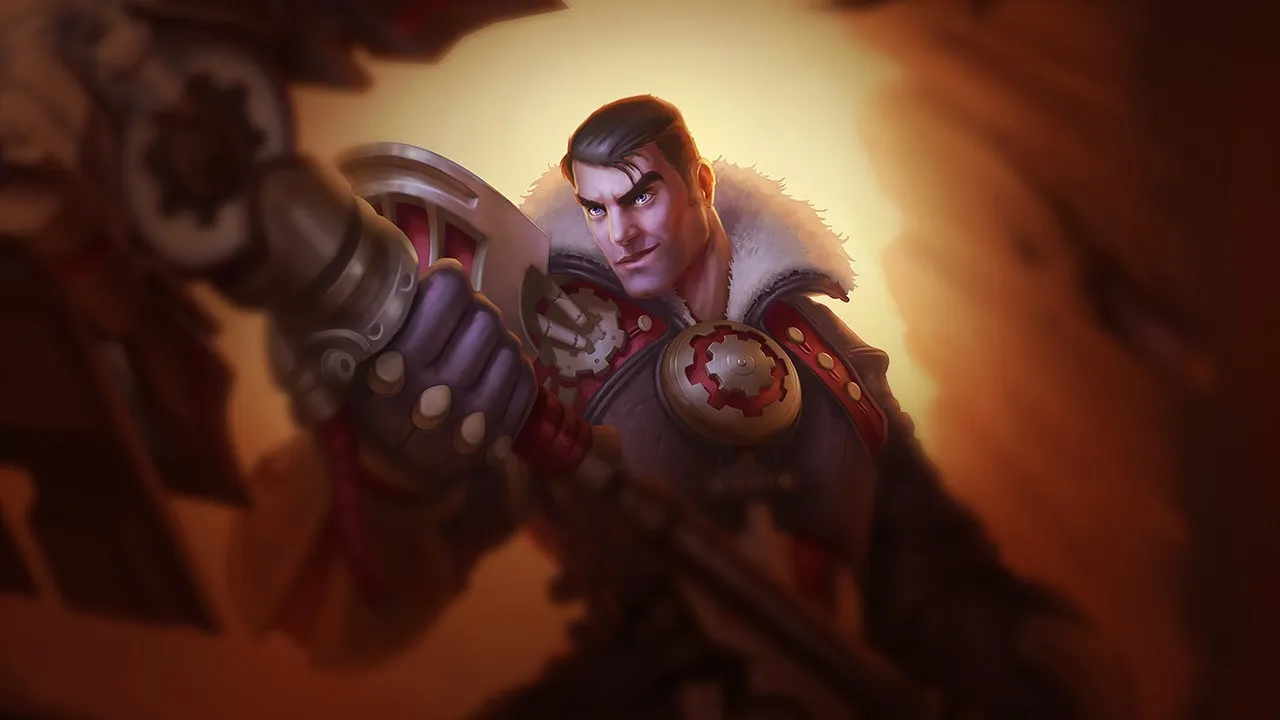
Jayce verlässt sich auf präzises poke und eine starke Dominanz im early game. Kompositionen, die den Fernkampfdruck durch sustain absorbieren oder schnelle engages erzwingen können, reduzieren seinen Einfluss drastisch. Ohne verlässliche Crowd Control oder Zähigkeit wird er in längeren Kämpfen und gegen Bedrohungen, die schnell die Lücke schließen können, anfällig.
★ TOP · MIDTier S
SCHADEN
UTIL
TANK
DIFF
Win50.7%#38 · ↓1pt
Pick4.1%#14
Ban2.2%#54
Jayce Wild Rift Counter-Guide
Hard Counters
1
Diese Champions haben ein Build und einen Spielstil, der deinen direkt überlegen ist, was die Kontrolle der Lane und das Farmen extrem schwierig machen kann. Ihr Kit kann deine Kernstärken neutralisieren oder dich bestrafen, sobald du versuchst, deinen gewohnten Spielplan umzusetzen. In diesen Matchups geht es oft darum, Fehler zu minimieren und nach Wegen zu suchen, außerhalb der direkten Konfrontation zu gewinnen.
RüstungPokeMalphite is a natural counter because his *Granite Shield* combined with his high armor scaling completely shrugs off your physical poke from *Transform Mercury Cannon*. Every attempt to harass him is absorbed by his shield. Worse, his *Seismic Shard* steals your movement speed, preventing you from kiting effectively and easily setting up his devastating *Unstoppable Force* engage.Malphite Build →Details ansehen
Malphite
Warum
Malphite is a natural counter because his *Granite Shield* combined with his high armor scaling completely shrugs off your physical poke from *Transform Mercury Cannon*. Every attempt to harass him is absorbed by his shield. Worse, his *Seismic Shard* steals your movement speed, preventing you from kiting effectively and easily setting up his devastating *Unstoppable Force* engage.
Lane-Einfluss
You cannot maintain wave control once Malphite builds defensive stats. Any trade attempting *To the Skies!* into *Lightning Field* is immediately answered by *Ground Slam*, which cripples your attack speed and ruins your trade potential. You will find yourself constantly pushed under turret, threatened by dive setups using *Unstoppable Force*.
Wie man spielt
To survive, shift your build priority toward early armor penetration. In lane, always hold *Thundering Blow* in hammer form; never use it for damage, but save it to knock Malphite away the moment he approaches with *Thunderclap*. If he lands *Unstoppable Force*, use the movement speed boost from *Hextech Capacitor* to disengage safely toward your tower instead of trying to fight back.
Diese Champions haben Werkzeuge, die ihnen im Kampf meist einen Vorteil verschaffen, ohne das Matchup unspielbar zu machen. Sie haben vielleicht mehr Reichweite, können deine Offensive besser abfangen oder haben mehr Möglichkeiten, auf deine Engages zu reagieren. Du musst deine Herangehensweise anpassen und sorgfältig die Momente wählen, in denen du den Kampf annimmst.
PokeCC-ImmunitätThis matchup hinges on Dr. Mundo's ability to ignore your primary defensive tool. When Mundo rushes you down with Maximum Dosage, you naturally want to use Thundering Blow to knock him away and disengage. However, his passive Goes Where He Pleases completely negates this knockback, leaving you vulnerable to his massive movement speed. Without your hammer-form self-peel, Mundo can easily stick to you and chop you down.Dr. Mundo Build →Details ansehen
Dr. Mundo
Warum
This matchup hinges on Dr. Mundo's ability to ignore your primary defensive tool. When Mundo rushes you down with Maximum Dosage, you naturally want to use Thundering Blow to knock him away and disengage. However, his passive Goes Where He Pleases completely negates this knockback, leaving you vulnerable to his massive movement speed. Without your hammer-form self-peel, Mundo can easily stick to you and chop you down.
Lane-Einfluss
Because you cannot reliably disengage, allowing the minion wave to push past the river's midpoint is extremely dangerous. Dr. Mundo will look to freeze the wave near his turret, forcing you to step up. Once you are overextended, he can activate Maximum Dosage and run you down the long lane. You will find yourself unable to trade aggressively with To the Skies! because you risk being counter-engaged without your knockback.
Wie man spielt
To survive, you must maintain strict control of the wave, keeping it frozen on your side of the lane. Use your ranged basic attacks in Mercury Cannon form to pop his passive Goes Where He Pleases before he can engage, and immediately destroy the canister he drops. Only attempt short trades with To the Skies! and Lightning Field if his passive is on cooldown, and always keep your distance to dodge Infected Bonesaw behind your own minions.
MechanikPositionierungThis matchup is dictated by how Wukong negates your ranged threat. Whenever you attempt to poke with To the Skies!, Wukong can reactively deploy Warrior Trickster, letting his decoy absorb the projectile entirely. With your main damaging tool on cooldown, he immediately retaliates by closing the gap with Nimbus Strike, using the attack speed buff and Golden Staff to win short trades against your lower armor.Wukong Build →Details ansehen
Wukong
Warum
This matchup is dictated by how Wukong negates your ranged threat. Whenever you attempt to poke with To the Skies!, Wukong can reactively deploy Warrior Trickster, letting his decoy absorb the projectile entirely. With your main damaging tool on cooldown, he immediately retaliates by closing the gap with Nimbus Strike, using the attack speed buff and Golden Staff to win short trades against your lower armor.
Lane-Einfluss
You cannot safely establish early lane dominance or freely harass Wukong near his tower. Because a single missed projectile can lead to a deadly counter-engage, you are forced to play defensively, giving Wukong control over the wave state. If he freezes near his turret, walking up to break it exposes you to a full Nimbus Strike and Cyclone ultimate combo, forcing early recalls and losing map pressure.
Wie man spielt
To survive, you must hold To the Skies! until Wukong wastes Warrior Trickster or you have a clear, unblockable angle. If he initiates with Nimbus Strike, do not panic-fire your blast. Instead, swap with Transform Mercury Cannon and use Thundering Blow to immediately knock him away, neutralizing his attack speed window. Only after he has wasted his clone should you commit to an aggressive hammer-form dive to retaliate while his defensive tool is down.
PokePositionierungThis matchup is heavily dictated by Gwen's ability to nullify your ranged threat. Whenever you attempt to poke her down using your cannon-form To the Skies!, she can reactively deploy Hallowed Mist. This makes her entirely immune to your ranged projectiles from outside her zone while boosting her armor and magic resist. Because your primary trading tool is negated, you cannot easily chip away at her health before committing to melee fights.Gwen Build →Details ansehen
Gwen
Warum
This matchup is heavily dictated by Gwen's ability to nullify your ranged threat. Whenever you attempt to poke her down using your cannon-form To the Skies!, she can reactively deploy Hallowed Mist. This makes her entirely immune to your ranged projectiles from outside her zone while boosting her armor and magic resist. Because your primary trading tool is negated, you cannot easily chip away at her health before committing to melee fights.
Lane-Einfluss
Consequently, you cannot establish early wave control or force Gwen under her tower. She can safely farm, knowing she has a safety net against your burst. If you step up too aggressively without your ranged poke securing an advantage, she will dash forward with Skip 'n Slash and shred you with Snip Snip!. This forces you to concede priority, delaying your item spikes and limiting your map pressure.
Wie man spielt
To survive, you must bait out Hallowed Mist using basic attacks rather than wasting To the Skies!. Once she deploys her zone, immediately disengage and wait out its duration. If she attempts to force an all-in using Needlework, instantly swap to hammer form and use Thundering Blow to knock her away, denying her the ability to land her Snip Snip! stacks. Only commit your full hammer combo when her mist is on its long cooldown.
PositionierungAusweichenThis matchup hinges on how Yone uses Soul Unbound to nullify your ranged threat. The moment you cast To the Skies! in Cannon form, Yone can activate his spirit form to effortlessly sidestep the projectile, close the distance, and initiate an extended trade. Once on top of you, his constant Mortal Steel strikes and Way of the Hunter passive damage will heavily out-trade your hybrid kit.Yone Build →Details ansehen
Yone
Warum
This matchup hinges on how Yone uses Soul Unbound to nullify your ranged threat. The moment you cast To the Skies! in Cannon form, Yone can activate his spirit form to effortlessly sidestep the projectile, close the distance, and initiate an extended trade. Once on top of you, his constant Mortal Steel strikes and Way of the Hunter passive damage will heavily out-trade your hybrid kit.
Lane-Einfluss
You are constantly forced onto the defensive, unable to establish slow pushes or safely crash waves. Whenever Yone accumulates two stacks of Mortal Steel, his potential Soul Unbound forward dash threatens an instant knockup. This threat denies you the freedom to harass him under his turret, forcing you to farm passively near your own tower and sacrifice early lane priority to avoid deadly, long-range engagements.
Wie man spielt
To survive, never fire a raw To the Skies! when Yone has Soul Unbound available. Instead, bait his forward dash by positioning near your caster minions, and immediately swap to Hammer form. Keep Thundering Blow specifically to knock him back the millisecond he attempts to strike you, neutralizing his trade. Only use Lightning Field to thin the wave when he recalls to his physical body, ensuring you never get trapped in an extended duel.
Anti-DashTanksJayce struggles here because his offensive transitions are heavily gated by Poppy's protective aura. Whenever you attempt to close the distance using the hammer form of To the Skies!, her anti-dash zone immediately cancels your leap. This leaves you stranded in melee range without the impact damage of your primary engagement tool, completely neutralizing your Transform Mercury Cannon burst combos.Poppy Build →Details ansehen
Poppy
Warum
Jayce struggles here because his offensive transitions are heavily gated by Poppy's protective aura. Whenever you attempt to close the distance using the hammer form of To the Skies!, her anti-dash zone immediately cancels your leap. This leaves you stranded in melee range without the impact damage of your primary engagement tool, completely neutralizing your Transform Mercury Cannon burst combos.
Lane-Einfluss
This interaction strips away your lane dominance, forcing you into a passive farming style. You cannot safely contest waves with your hammer form, meaning Poppy can slow-push and pressure your tower with relative impunity. Since your short-trade burst is neutralized, your kill pressure is non-existent, allowing her to stack armor safely while you are locked in your lane.
Wie man spielt
To survive this matchup, you must adopt a strictly ranged posture. Rely almost exclusively on Transform Mercury Cannon to poke from afar, and never initiate with To the Skies! unless her anti-dash ability is on cooldown. If she manages to close the distance, immediately use Thundering Blow to knock her back and disengage. Maintain a safe distance from walls to prevent her from pinning you, farming patiently until her defensive tools are wasted.
ProjektilblockPositionierungYasuo naturally counters your ranged harassment because Wind Wall completely deletes the projectile from To the Skies! even when accelerated by Thundering Blow. Because of Way of the Wanderer, any chip damage you do manage to land is often absorbed by his passive shield. This leaves you unable to safely whittle him down from afar, forcing dangerous melee interactions where his Steel Tempest excels.Yasuo Build →Details ansehen
Yasuo
Warum
Yasuo naturally counters your ranged harassment because Wind Wall completely deletes the projectile from To the Skies! even when accelerated by Thundering Blow. Because of Way of the Wanderer, any chip damage you do manage to land is often absorbed by his passive shield. This leaves you unable to safely whittle him down from afar, forcing dangerous melee interactions where his Steel Tempest excels.
Lane-Einfluss
Without your signature ranged poke to keep him honest, Yasuo can freely use Sweeping Blade through the minion wave to close the gap and force extended trades. You are constantly pressured under your own turret, struggling to secure last hits without taking free damage. If he blocks your heavy cannon burst, you lose all lane priority, leaving you vulnerable to dives whenever he charges his tornado.
Wie man spielt
To survive, trigger his Way of the Wanderer shield with a single basic attack before using any abilities. Bait out Wind Wall by walking forward threateningly, but hold To the Skies! until his barrier dissolves. If he dashes onto you with Sweeping Blade, instantly swap with Transform Mercury Cannon and use Thundering Blow in hammer form to knock him away, preventing him from landing a knockup for Last Breath.
MobilitätTradesThis matchup is dictated by Irelia's ability to completely bypass your ranged poke using Bladesurge. If she marks you with Flawless Duet or Vanguard's Edge, her mobility becomes oppressive. The fatal trap occurs when she baits your defensive Thundering Blow to knock her away, only to immediately re-engage with her remaining Bladesurge reset.Irelia Build →Details ansehen
Irelia
Warum
This matchup is dictated by Irelia's ability to completely bypass your ranged poke using Bladesurge. If she marks you with Flawless Duet or Vanguard's Edge, her mobility becomes oppressive. The fatal trap occurs when she baits your defensive Thundering Blow to knock her away, only to immediately re-engage with her remaining Bladesurge reset.
Lane-Einfluss
You cannot safely harass with Transform Mercury Cannon when the wave is near her tower, as she will use low-health minions to stack Ionian Fervor and dash to you. Missing a single shock blast combo means she can freeze the wave and zone you completely. At level five, her Vanguard's Edge gives her lethal dive threat, forcing you to play under your turret and lose priority.
Wie man spielt
To survive, never use Thundering Blow preemptively. You must hold this knockback until she has exhausted her marked Bladesurge dashes, or use it only when you are certain she cannot reset her cooldown. Watch your own minion health; when they are low, retreat out of her dash range to deny her Ionian Fervor stacks. If she misses Flawless Duet, immediately retaliate in melee form with To the Skies! and Lightning Field.
CC-ImmunitätPositionierungThe core of this matchup lies in Olaf's ultimate ability. Once Olaf activates Ragnarok, he gains complete crowd control immunity, which directly neutralizes your main self-peel tool, Thundering Blow. Normally, you would use this knockback to disengage when Olaf jumps on you. Without that defensive tool, Olaf can continuously slow you with chained Undertow axes, using his increased movement speed to run you down and shred you with Reckless Swing.Olaf Build →Details ansehen
Olaf
Warum
The core of this matchup lies in Olaf's ultimate ability. Once Olaf activates Ragnarok, he gains complete crowd control immunity, which directly neutralizes your main self-peel tool, Thundering Blow. Normally, you would use this knockback to disengage when Olaf jumps on you. Without that defensive tool, Olaf can continuously slow you with chained Undertow axes, using his increased movement speed to run you down and shred you with Reckless Swing.
Lane-Einfluss
This interaction forces you into a highly defensive posture once Olaf reaches level five. You cannot safely contest deep waves or crash them without major risk. If you step past the river, a single landed Undertow under Ragnarok means certain death. You will often have to surrender lane priority, farm from afar using To the Skies! in cannon form, and accept being pushed under your tower to survive his aggressive dives.
Wie man spielt
To survive, your positioning is absolute. Never switch to hammer form for To the Skies! unless Olaf has already missed his Undertow. Keep your distance and abuse Transform Mercury Cannon to gain movement speed via Hextech Capacitor when escaping. If Olaf activates Ragnarok, do not try to fight or use Thundering Blow; instead, drop your acceleration gate from Thundering Blow to sprint away immediately. Only engage with Lightning Field and quick auto-attacks when his ultimate is on cooldown.
AusweichenPositionierungVayne neutralizes your entire offensive loop. Your main long-range threat, Shock Blast, is easily anticipated and dodged by her quick Tumble. If you get frustrated and try to close the distance in hammer stance with To the Skies!, she will immediately shut down your leap with Condemn, pushing you back before you land any damage while stacking Silver Bolts on your retreat.Vayne Build →Details ansehen
Vayne
Warum
Vayne neutralizes your entire offensive loop. Your main long-range threat, Shock Blast, is easily anticipated and dodged by her quick Tumble. If you get frustrated and try to close the distance in hammer stance with To the Skies!, she will immediately shut down your leap with Condemn, pushing you back before you land any damage while stacking Silver Bolts on your retreat.
Lane-Einfluss
This interaction forces you into a defensive posture. You cannot safely contest the wave with basic attacks, as her Silver Bolts will shred your health if you linger. Because your Shock Blast poke is unreliable, Vayne freely controls the wave tempo, slow-pushing to crash massive waves. This denies you early tower plates and forces you to farm under turret while bleeding mana trying to clear.
Wie man spielt
To survive, you must play a patient spacing game. Never use To the Skies! aggressively unless you have seen her burn Condemn first. Instead, stand near the bushes to drop minion aggro and fire Shock Blast from out of vision, forcing her to guess the trajectory. If she uses Tumble forward to poke you, use Thundering Blow in hammer form to knock her away immediately, denying her the third Silver Bolts stack.
SchildeFrüher DruckThis lane is dictated by Pantheon's ability to nullify your primary poke. When you launch a Shock Blast, he can reactively cast Aegis Assault to negate the damage entirely. Before you can swap forms with Transform Mercury Cannon, he will close the distance and lock you down with Shield Vault. This immediate retaliation turns your long-range harassment into a disastrous, one-sided burst trade.Pantheon Build →Details ansehen
Pantheon
Warum
This lane is dictated by Pantheon's ability to nullify your primary poke. When you launch a Shock Blast, he can reactively cast Aegis Assault to negate the damage entirely. Before you can swap forms with Transform Mercury Cannon, he will close the distance and lock you down with Shield Vault. This immediate retaliation turns your long-range harassment into a disastrous, one-sided burst trade.
Lane-Einfluss
Because of this threat, you cannot freely crash waves or poke Pantheon under his turret. If you step up to use your ranged autos, a quick Shield Vault leaves you vulnerable to a full Mortal Will empowered combo. This forces you to play defensively, conceding early wave control and leaving you susceptible to getting dove once he reaches Grand Starfall and crashes a massive wave.
Wie man spielt
Your survival hinges on keeping your Hammer form ready. Never initiate with To the Skies! unless Pantheon's Shield Vault is on cooldown. Instead, bait out his Aegis Assault with basic attacks, then disengage. If he jumps on you with his stun, immediately swap and use Thundering Blow to knock him away mid-air or right after the stun ends, preventing his follow-up spears. Only use your accelerated Shock Blast when his defensive shield is down.
Diese Matchups sind vor allem Duelle der Ausführung: Beide Champions haben glaubwürdige Wege, die Oberhand zu gewinnen. Eine wichtige ausgewichene Fähigkeit, ein richtig antizipierter Engage oder ein einziger Positionierungsfehler können reichen, um das Duell zu entscheiden. Das Matchup zu kennen und die richtigen Fenster zum Handeln zu erkennen, ist hier besonders wichtig.
All-inPokeThis matchup revolves around a high-stakes standoff between your hammer's knockback and her mobility. Camille wants to dive you with Hookshot, but as long as you hold Thundering Blow, you can cancel her dash mid-air and disengage. If you waste Thundering Blow offensively or to farm, she gains a massive window to trigger Adaptive Defenses and run you down with Precision Protocol.Camille Build →Details ansehen
Camille
Warum
This matchup revolves around a high-stakes standoff between your hammer's knockback and her mobility. Camille wants to dive you with Hookshot, but as long as you hold Thundering Blow, you can cancel her dash mid-air and disengage. If you waste Thundering Blow offensively or to farm, she gains a massive window to trigger Adaptive Defenses and run you down with Precision Protocol.
Lane-Einfluss
Because Camille can punish any overstep with Hookshot from the walls, you cannot mindlessly push with Lightning Field. You must constantly position away from the terrain to give yourself time to react. If you get caught near a wall, her Tactical Sweep slow will force you into The Hextech Ultimatum post-level 5, making the lane incredibly tense where any misstep leads to a deadly dive.
Wie man spielt
Always stay in the middle of the lane, away from the alcove and river walls to maximize your reaction time against Hookshot. Never swap to hammer form to use To the Skies! unless her hook is on cooldown. If she misses Hookshot or you successfully repel her with Thundering Blow, immediately swap with Transform Mercury Cannon to poke her down with Lightning Field while she lacks her primary escape.
MobilitätAusweichenThis lane is a pure contest of spacing. Ambessa relies on Drakehound's Step to dodge your Shock Blast, neutralizing your ranged poke. If she successfully evades your projectile, she can close the gap using Cunning Sweep. Once in melee range, even if you try to disengage using Thundering Blow, her high mobility allows her to quickly re-engage and stick to your Mercury Cannon form.Ambessa Build →Details ansehen
Ambessa
Warum
This lane is a pure contest of spacing. Ambessa relies on Drakehound's Step to dodge your Shock Blast, neutralizing your ranged poke. If she successfully evades your projectile, she can close the gap using Cunning Sweep. Once in melee range, even if you try to disengage using Thundering Blow, her high mobility allows her to quickly re-engage and stick to your Mercury Cannon form.
Lane-Einfluss
Missing your ranged skillshots completely forfeits your lane priority. If Ambessa successfully baits your Shock Blast, she will aggressively push the wave with Lacerate, forcing you under turret. Trading health becomes extremely risky; one wrong step allows her to use Public Execution to dive you. Conversely, if you force her to use Repudiation defensively, you can control the wave tempo and prevent her from roaming.
Wie man spielt
Never fire Shock Blast blindly when her Drakehound's Step is available. Instead, bait her movement by using Lightning Field to clear minions while staying mobile with Hextech Capacitor. Hold your Thundering Blow defensively; do not use it to trade unless she has already exhausted Cunning Sweep and her passive dashes. If she jumps on you with Public Execution, immediately transform to hammer form to benefit from the defensive stats and knock her away.
TarnungAll-inThis matchup is a pure test of spacing and reaction times. While you can harass Akali with your ranged attacks via Transform Mercury Cannon, her high mobility threatens to negate this advantage. The critical interaction centers on Shuriken Flip. If Akali marks you with this shuriken, she can recast it to dash directly to you, completely bypassing and neutralizing the knockback from your hammer-form Thundering Blow.Akali Build →Details ansehen
Akali
Warum
This matchup is a pure test of spacing and reaction times. While you can harass Akali with your ranged attacks via Transform Mercury Cannon, her high mobility threatens to negate this advantage. The critical interaction centers on Shuriken Flip. If Akali marks you with this shuriken, she can recast it to dash directly to you, completely bypassing and neutralizing the knockback from your hammer-form Thundering Blow.
Lane-Einfluss
Consequently, trading becomes a high-stakes guessing game. You cannot mindlessly poke with To the Skies! because stepping past your minion wave exposes you to her mark. If she lands Shuriken Flip, she will force you under turret or secure a kill with Perfect Execution. This constant threat limits your ability to pressure her, turning what should be a dominant ranged lane into a tense, defensive waiting game.
Wie man spielt
To survive and win, your positioning relative to your minion wave is paramount. Always keep minions between you and Akali to block Shuriken Flip. Never swap to hammer form to engage with To the Skies! unless her shuriken is on cooldown. If she does hit you, do not panic and pre-emptively cast Thundering Blow; instead, wait for her to complete the second dash of Shuriken Flip before knocking her away, preventing her from sticking to you.
AusweichenKitenThis matchup is a pure test of your reaction times and spacing. Mordekaiser wants to pull you in with Death's Grasp to trigger Darkness Rise and crush you with isolated Obliterate strikes. However, Jayce holds the perfect counter-tool: by activating Transform Mercury Cannon, you trigger Hextech Capacitor. This burst of movement speed gives you the velocity needed to easily sidestep his claw and keep him at bay.Mordekaiser Build →Details ansehen
Mordekaiser
Warum
This matchup is a pure test of your reaction times and spacing. Mordekaiser wants to pull you in with Death's Grasp to trigger Darkness Rise and crush you with isolated Obliterate strikes. However, Jayce holds the perfect counter-tool: by activating Transform Mercury Cannon, you trigger Hextech Capacitor. This burst of movement speed gives you the velocity needed to easily sidestep his claw and keep him at bay.
Lane-Einfluss
When you successfully bait and dodge Death's Grasp, Mordekaiser becomes highly vulnerable to your ranged poke. You can safely whittle down his health bar with To the Skies! and Lightning Field from afar, forcing him to waste his shield on Indestructible just to sustain. Miss the dodge, however, and you are forced to use Thundering Blow defensively, losing all offensive lane pressure and wave control.
Wie man spielt
Never transform mindlessly. Keep Transform Mercury Cannon ready for the exact moment Mordekaiser steps forward and begins his Death's Grasp animation. Swap forms immediately, use the Hextech Capacitor speed boost to walk laterally, and punish him. If he manages to trap you in Realm of Death, do not panic: hold Thundering Blow to knock him away as soon as he approaches, stalling out his ultimate's duration while staying out of his aura's reach.
Normaler SchadenPokeThis matchup is a pure test of reflexes centered on Jarvan IV's signature engage. His burst relies on landing the *Demacian Standard* into *Dragon Strike* combo to shred your armor and trigger *Martial Cadence*. However, because Jayce can switch forms with *Transform Mercury Cannon*, you possess the ultimate disengage tool: casting *Thundering Blow* to knock him away mid-dash, completely nullifying his knockup and leaving him vulnerable.Jarvan IV Build →Details ansehen
Jarvan IV
Warum
This matchup is a pure test of reflexes centered on Jarvan IV's signature engage. His burst relies on landing the *Demacian Standard* into *Dragon Strike* combo to shred your armor and trigger *Martial Cadence*. However, because Jayce can switch forms with *Transform Mercury Cannon*, you possess the ultimate disengage tool: casting *Thundering Blow* to knock him away mid-dash, completely nullifying his knockup and leaving him vulnerable.
Lane-Einfluss
When you successfully interrupt his dash, Jarvan IV is stranded deep in the lane without his main escape, allowing you to retaliate with *Lightning Field* and quick ranged autos. Conversely, failing this reaction means taking heavy damage and being trapped inside *Cataclysm* later on. This constant threat forces a tense neutral game where a misplaced *Demacian Standard* or a wasted *Thundering Blow* instantly hands over wave control.
Wie man spielt
To win these trades, you must hover in Hammer Form whenever Jarvan IV walks forward aggressively, keeping your finger ready on *Thundering Blow*. Never use this ability to farm. If he misses his *Dragon Strike* or you knock him away, immediately swap using *Transform Mercury Cannon* to drop a gate with *Thundering Blow* and fire *To the Skies!* for a devastating counter-burst. If he traps you with *Cataclysm*, use *Thundering Blow* to push him out of his own arena.
RückzugMechanikThis matchup is a pure test of spacing and cooldown tracking, decided by how you handle Riven's mobility. Her threat relies entirely on chaining Broken Wings and Valor to close the gap. Because Jayce can swap forms using Transform Mercury Cannon, you possess the range advantage, but you are highly vulnerable if she reaches melee range. The entire lane hinges on using Thundering Blow to cancel her third Broken Wings jump, denying her knock-up and disengaging her burst.Riven Build →Details ansehen
Riven
Warum
This matchup is a pure test of spacing and cooldown tracking, decided by how you handle Riven's mobility. Her threat relies entirely on chaining Broken Wings and Valor to close the gap. Because Jayce can swap forms using Transform Mercury Cannon, you possess the range advantage, but you are highly vulnerable if she reaches melee range. The entire lane hinges on using Thundering Blow to cancel her third Broken Wings jump, denying her knock-up and disengaging her burst.
Lane-Einfluss
During wave skirmishes, Riven will attempt to bait your ranged poke using the shield from Valor. If you waste your Hammer form's Thundering Blow, she will immediately exploit this massive cooldown window, using Broken Wings to force a lethal trade or freeze the wave. Conversely, successfully denying her engage lets you control the wave pace, allowing you to freely chip her down with To the Skies! and Lightning Field in Cannon form.
Wie man spielt
To win this matchup, never initiate with Hammer form's To the Skies! unless Riven's Ki Burst is on cooldown. Stand near your caster minions in Cannon form, forcing her to burn Valor just to reach you. Keep your finger ready to swap with Transform Mercury Cannon and buffer Thundering Blow directly onto her during her third Broken Wings animation. If you misstime this knockback, immediately activate Hextech Capacitor to run away and avoid her Blade of the Exile ultimate execute.
RückzugRegenerationThis matchup is a pure contest of reaction times centered on Volibear's engage. When Volibear activates Thundering Smash to charge you down, your entire survival hinges on switching to hammer form and using Thundering Blow to knock him back mid-dash. Denying his stun stops him from dropping Sky Splitter on your head and chaining Frenzied Maul. If you mistime this knockback, his high base damage will overwhelm your squishy ranged form.Volibear Build →Details ansehen
Volibear
Warum
This matchup is a pure contest of reaction times centered on Volibear's engage. When Volibear activates Thundering Smash to charge you down, your entire survival hinges on switching to hammer form and using Thundering Blow to knock him back mid-dash. Denying his stun stops him from dropping Sky Splitter on your head and chaining Frenzied Maul. If you mistime this knockback, his high base damage will overwhelm your squishy ranged form.
Lane-Einfluss
Every trade is dictated by the cooldown of Thundering Blow. When your knockback is available, you can safely harass with To the Skies! and Lightning Field from range, maintaining wave priority. However, if you waste your E, Volibear will immediately zone you off the wave, slow you with Sky Splitter, and force an unfavorable recall or dive you under tower using Stormbringer to disable your defenses.
Wie man spielt
Always hold Thundering Blow defensively during laning; never use it to execute minions or poke. When Volibear runs at you with Thundering Smash, wait for him to enter your melee range, press Transform Mercury Cannon to swap to hammer, and knock him back immediately. If he manages to stun you first, do not try to trade back; use Hextech Capacitor speed to run away and avoid letting him land a second Frenzied Maul which would heal him.
UnterbrechungTanksThis matchup is a delicate dance of execution centered on Jayce's melee tools. While Ornn attempts to lock you down using Volcanic Rupture to set up a devastating Searing Charge, your safety depends entirely on Thundering Blow. Denying his charge mid-flight or swinging your hammer to push him away during Bellows Breath prevents him from applying the Brittle mark, turning a potential burst into a failed initiation.Ornn Build →Details ansehen
Ornn
Warum
This matchup is a delicate dance of execution centered on Jayce's melee tools. While Ornn attempts to lock you down using Volcanic Rupture to set up a devastating Searing Charge, your safety depends entirely on Thundering Blow. Denying his charge mid-flight or swinging your hammer to push him away during Bellows Breath prevents him from applying the Brittle mark, turning a potential burst into a failed initiation.
Lane-Einfluss
The momentum of the lane swings wildly based on these mechanical interactions. Successfully countering Ornn's advance allows you to dictate the wave's position using To the Skies! and Lightning Field to pressure him under turret. However, if you waste your knockback, Ornn will freeze, craft items with Living Forge, and threaten a dive with Call of the Forge God, forcing you into a defensive, low-priority posture.
Wie man spielt
To win this, you must play with disciplined restraint in your hammer stance. Never initiate with To the Skies! unless Ornn has already missed Searing Charge or finished Bellows Breath. Keep your cursor ready to fire Thundering Blow the instant he charges toward a pillar or wall. If he invokes Call of the Forge God, transition immediately using Transform Mercury Cannon to gain speed from Hextech Capacitor, allowing you to sidestep the returning ram.
TanksPositionierungThis lane is a pure test of spacing, pitting your ranged poke against his threat of displacement. While Transform Mercury Cannon allows you to chip away at his health using To the Skies!, K'Santé's kit is designed to survive your harassment. The matchup swings entirely on how close you stand to the walls, where his All Out can forcefully drag you through terrain, completely neutralizing your safety and turning your aggressive lead into a fatal trap.K'Santé Build →Details ansehen
K'Santé
Warum
This lane is a pure test of spacing, pitting your ranged poke against his threat of displacement. While Transform Mercury Cannon allows you to chip away at his health using To the Skies!, K'Santé's kit is designed to survive your harassment. The matchup swings entirely on how close you stand to the walls, where his All Out can forcefully drag you through terrain, completely neutralizing your safety and turning your aggressive lead into a fatal trap.
Lane-Einfluss
Your early ranged priority lets you dictate the wave state, keeping him pressured under tower. However, pushing too deep exposes you. If K'Santé connects with Ntofo Strikes to slow you, he can setup Path Maker to push you toward the wall. A single mistake in your positioning turns a dominant harass phase into a sudden death scenario, forcing you to play defensively and losing your lane pressure.
Wie man spielt
To win, you must constantly hug the middle of the lane, staying far from the alcove and river walls. Never commit to Hammer stance unless his Path Maker is on cooldown. If he dashes forward with Footwork, immediately prepare Thundering Blow to push him away before he can land the third strike of Ntofo Strikes. If he does manage to trigger All Out, use your Hextech Capacitor speed boost to immediately disengage and reset.
RückzugPositionierungThis matchup is a pure test of reflexes centered on Renekton's gap-closer. Renekton wants to use Slice and Dice to get close enough to lock you down with Ruthless Predator. To survive and win trades, you must buffer Thundering Blow in Hammer Form to knock him back mid-dash. If he completes the dash and stuns you, his high Fury Cull the Meek will shred your health bar.Renekton Build →Details ansehen
Renekton
Warum
This matchup is a pure test of reflexes centered on Renekton's gap-closer. Renekton wants to use Slice and Dice to get close enough to lock you down with Ruthless Predator. To survive and win trades, you must buffer Thundering Blow in Hammer Form to knock him back mid-dash. If he completes the dash and stuns you, his high Fury Cull the Meek will shred your health bar.
Lane-Einfluss
This interaction dictates the entire wave state and health economy. Denying his engage allows you to safely harass him with To the Skies! in Cannon Form, forcing him to waste Fury on Cull the Meek just to sustain. However, if he lands his stun, he will chunk your health, crash the wave, and secure an easy recall, leaving you struggling under turret with massive pressure.
Wie man spielt
To execute this, stay in Cannon Form to farm and poke, but swap to Hammer Form using Transform Mercury Cannon the moment he approaches with high Fury. Hold Thundering Blow exclusively for his Slice and Dice animation. If you misplay and get stunned by Ruthless Predator, do not panic-fight; immediately activate Lightning Field to deal passive damage while retreating, then use the movement speed from Hextech Capacitor to safely reposition and farm from a distance.
RüstungReichweiteThis lane is a constant tug-of-war of spacing. Your goal to chunk him down and execute with Hammer form's To the Skies! is countered by his Quickdraw. Every dash grants him True Grit armor, making him deceptively tanky against your physical burst. If you jump in mindlessly, his New Destiny shotgun blasts deal maximum damage at point-blank range, turning your dive into a deadly trap.Graves Build →Details ansehen
Graves
Warum
This lane is a constant tug-of-war of spacing. Your goal to chunk him down and execute with Hammer form's To the Skies! is countered by his Quickdraw. Every dash grants him True Grit armor, making him deceptively tanky against your physical burst. If you jump in mindlessly, his New Destiny shotgun blasts deal maximum damage at point-blank range, turning your dive into a deadly trap.
Lane-Einfluss
Graves naturally shoves waves using End of the Line and his AoE New Destiny pellets, forcing you to match his clear. Trades are highly volatile. Getting hit by Smoke Screen leaves you blind and vulnerable to his Collateral Damage. You cannot afford to lose the push, or he will trap you under tower, using his armor stacks to shrug off your counter-harass.
Wie man spielt
Prioritize poking from afar using Thundering Blow to accelerate your To the Skies! projectiles. Never use To the Skies! in Hammer form while his Quickdraw is available or while his True Grit stacks are high. If he attempts to close the distance with a dash, immediately swap with Transform Mercury Cannon and use your Hammer form's Thundering Blow to knock him away, neutralizing his high-damage New Destiny blasts and resetting the distance.
PokeRegenerationJayce relies heavily on landing his long-range blast via To the Skies! coupled with Thundering Blow, but Vladimir holds a definitive answer. By activating Sanguine Pool, he easily melts away to dodge this heavy projectile burst. Once Jayce's ranged cooldowns are spent, Vladimir recovers any minor chip damage by casting Transfusion on the wave, nullifying Jayce's attempts to establish a health advantage.Vladimir Build →Details ansehen
Vladimir
Warum
Jayce relies heavily on landing his long-range blast via To the Skies! coupled with Thundering Blow, but Vladimir holds a definitive answer. By activating Sanguine Pool, he easily melts away to dodge this heavy projectile burst. Once Jayce's ranged cooldowns are spent, Vladimir recovers any minor chip damage by casting Transfusion on the wave, nullifying Jayce's attempts to establish a health advantage.
Lane-Einfluss
This creates a lane where passive farming favors the Crimson Reaper as he scales. Early on, Jayce must pressure the wave with Lightning Field and seek hammer-form trades. However, if you fail to force a recall before Vladimir secures his core levels, his enhanced Transfusion healing outpaces your mana pool. Missing a single combo means losing control over the lane's push, allowing him to freely scale under his turret.
Wie man spielt
To win this, bait out Sanguine Pool before committing your main burst. Walk forward in hammer form using Transform Mercury Cannon to threaten with To the Skies!, forcing him to pool defensively. Hold your Thundering Blow to push him back if he tries to retaliate with Tides of Blood. Only launch your full ranged blast once his pool is on its long cooldown, capitalizing on this brief power window to force him off the minion wave.
Diese Champions tun sich meist schwer, auf deine Hauptstärken zu reagieren, was dir mehr Freiheit im Matchup gibt. Du hast oft mehrere Möglichkeiten, sie unter Druck zu setzen und Trades zu deinen Gunsten zu erzwingen. Nutze diesen Vorteil, um das Tempo zu bestimmen, statt ihnen Zeit zu geben, wieder in eine komfortable Position zu kommen.
PicksPokeJayce dominates this matchup because his ranged Transform Mercury Cannon allows him to harass Darius safely, while his Hammer form provides an absolute safety net. Darius relies on Apprehend to pull you in and stack Hemorrhage, but as long as you hold Thundering Blow, you can instantly knock him away if he grabs you. This constant threat forces Darius to hold his pull, letting you control the distance.Darius Build →Details ansehen
Darius
Warum
Jayce dominates this matchup because his ranged Transform Mercury Cannon allows him to harass Darius safely, while his Hammer form provides an absolute safety net. Darius relies on Apprehend to pull you in and stack Hemorrhage, but as long as you hold Thundering Blow, you can instantly knock him away if he grabs you. This constant threat forces Darius to hold his pull, letting you control the distance.
Lane-Einfluss
This interaction gives you total wave control. You can slow-push waves while zoning Darius from the minions using To the Skies! and Lightning Field from range. If Darius steps up to heal with Decimate, you can step inside his handle or simply walk away. By denying him the ability to stack Hemorrhage, you secure a massive health lead, forcing him under tower where he loses gold.
Wie man spielt
Stay in Cannon form as your default stance, using Hextech Capacitor to space away from Darius. Only swap to Hammer form to execute a quick trade when Apprehend is on cooldown, or defensively to cast Thundering Blow immediately if he manages to pull you. If Darius attempts to heal with Decimate, use To the Skies! in Hammer form to leap inside the inner handle radius, neutralizing his healing, then quickly push him away and swap back to safety.
PokeRückzugPositionierungThis matchup is heavily skewed in your favor because you hold the ultimate tool to negate his aggression. Whenever Aatrox attempts to close the gap using *Umbral Dash* to land his sweetspots with *The Darkin Blade*, you can immediately swap to hammer form and use *Thundering Blow* to swat him away. This completely denies his combo, leaving him stranded without his primary damage tool while you safely harass him from range.Aatrox Build →Details ansehen
Aatrox
Warum
This matchup is heavily skewed in your favor because you hold the ultimate tool to negate his aggression. Whenever Aatrox attempts to close the gap using *Umbral Dash* to land his sweetspots with *The Darkin Blade*, you can immediately swap to hammer form and use *Thundering Blow* to swat him away. This completely denies his combo, leaving him stranded without his primary damage tool while you safely harass him from range.
Lane-Einfluss
By holding the threat of your hammer form, you dictate the wave's tempo. Aatrox cannot freely step up to auto-attack minions to trigger *Deathbringer Stance* for healing. You can constantly chip away at his health using your ranged *To the Skies!* through your gate, forcing him to play under tower. This pressure denies him early priority and forces him into a defensive, low-sustain laning phase.
Wie man spielt
Always default to your cannon form to poke with *To the Skies!* and *Lightning Field*. Never use *Thundering Blow* offensively unless you are certain his *Umbral Dash* is on cooldown or you are executing a kill. If you get caught by *Infernal Chains*, do not panic; quickly swap with *Transform Mercury Cannon*, jump in with *To the Skies!* if needed, and immediately use *Thundering Blow* to knock him back before the chain pulls you in.
RegenerationAusweichenYou hold the upper hand because your ranged basic attacks constantly chip away at Gragas, but you cannot mindlessly dive him. His passive Happy Hour provides consistent healing against your poke, and a reckless melee To the Skies! invites a direct counter-engage via his Body Slam. This interaction dictates the lane: you must abuse your dual forms through Transform Mercury Cannon while respecting his quick disruption tool.Gragas Build →Details ansehen
Gragas
Warum
You hold the upper hand because your ranged basic attacks constantly chip away at Gragas, but you cannot mindlessly dive him. His passive Happy Hour provides consistent healing against your poke, and a reckless melee To the Skies! invites a direct counter-engage via his Body Slam. This interaction dictates the lane: you must abuse your dual forms through Transform Mercury Cannon while respecting his quick disruption tool.
Lane-Einfluss
Gragas is forced to use Barrel Roll to farm from afar, which inevitably pushes the minion wave toward your tower. This allows you to freeze the wave or slow-push to keep him trapped. However, staying near his tower is dangerous once he unlocks Explosive Cask, as he can easily displace you into his turret range if you overextend or misposition your cannon-form harass.
Wie man spielt
To secure your lead, always stand behind your minion wave to block his Body Slam pathing. Never initiate trades with hammer-form To the Skies! while his dash is available; instead, poke with cannon form, and if he charges you, immediately use Thundering Blow to knock him away and reset the distance. Actively bait his Barrel Roll by stepping forward and backward, then punish his cooldowns with a rapid Lightning Field burst.
PositionierungBurstYou hold a clear advantage in this ranged duel by leveraging your superior burst transitions. While Rage Gene dictates Gnar's threat levels, his squishier Mini form is highly vulnerable to your poke. The matchup hinges on his mobility; if Gnar misuses Hop to play aggressively, you can instantly swap via Transform Mercury Cannon and gap-close with To the Skies!, punishing his lack of escape before he can transform.Gnar Build →Details ansehen
Gnar
Warum
You hold a clear advantage in this ranged duel by leveraging your superior burst transitions. While Rage Gene dictates Gnar's threat levels, his squishier Mini form is highly vulnerable to your poke. The matchup hinges on his mobility; if Gnar misuses Hop to play aggressively, you can instantly swap via Transform Mercury Cannon and gap-close with To the Skies!, punishing his lack of escape before he can transform.
Lane-Einfluss
This interaction forces Gnar to play defensively, allowing you to establish early lane priority. By keeping him under constant threat, you can restrict his ability to safely catch his Boomerang Throw, stalling his wave clear and delaying his Mega transformation. This pressure translates into comfortable wave control, enabling you to crash big waves and secure easy recall timings while Gnar is stuck farming under turret.
Wie man spielt
Monitor Gnar's rage bar closely. When he is in Mini form, bait his Boomerang Throw and wait for him to waste Hop. The moment he does, activate Transform Mercury Cannon and dive in with To the Skies! followed by Lightning Field. If his rage spikes and he triggers Rage Gene to become Mega, immediately disengage using Thundering Blow to push him away, preventing him from landing Boulder Toss.
PositionierungFrüher DruckJayce dictates this matchup through his ability to deny Fiora's physical approach. When Fiora attempts to strike a vital from Duelist's Dance, you can easily disengage. The core of this dynamic lies in Thundering Blow; when she tries to get close, this hammer strike bats her away. This forces Fiora to expend her Lunge just to get back into melee range, wasting her mobility and leaving her completely vulnerable to your ranged harass.Fiora Build →Details ansehen
Fiora
Warum
Jayce dictates this matchup through his ability to deny Fiora's physical approach. When Fiora attempts to strike a vital from Duelist's Dance, you can easily disengage. The core of this dynamic lies in Thundering Blow; when she tries to get close, this hammer strike bats her away. This forces Fiora to expend her Lunge just to get back into melee range, wasting her mobility and leaving her completely vulnerable to your ranged harass.
Lane-Einfluss
This interaction allows you to safely freeze the minion wave and harass Fiora whenever she steps up to farm. Because her primary gap-closer is neutralized by your knockback, she cannot easily trigger Grand Challenge or sustain through Duelist's Dance. You will naturally secure a significant health advantage, forcing her to lose gold under turret or take unfavorable recall timings, which grants you free map priority.
Wie man spielt
Always stand behind your caster minions in ranged form using Transform Mercury Cannon to poke her down. Never initiate trades with To the Skies!. Instead, bait her forward, wait for her to use Lunge, and immediately use Thundering Blow to knock her away. Crucially, do not use Thundering Blow if her Riposte is active, or you will be stunned. If she parries nothing, swap forms and blow her up.
CC-ImmunitätMobilitätYou hold all the cards in this matchup because Transform Mercury Cannon lets you harass Garen from afar while he tries to farm. His only way to close the gap is Decisive Strike, but you can immediately negate his engage with Thundering Blow. Garen must bait out your hammer's knockback before he can safely commit his silence and spin with Judgment, leaving him completely at your mercy if you hold your ground.Garen Build →Details ansehen
Garen
Warum
You hold all the cards in this matchup because Transform Mercury Cannon lets you harass Garen from afar while he tries to farm. His only way to close the gap is Decisive Strike, but you can immediately negate his engage with Thundering Blow. Garen must bait out your hammer's knockback before he can safely commit his silence and spin with Judgment, leaving him completely at your mercy if you hold your ground.
Lane-Einfluss
This interaction allows you to constantly deny Garen's Perseverance passive by poking him with To the Skies! and Lightning Field. You can freeze the wave easily, forcing Garen to choose between losing gold or taking massive damage. Because he cannot safely engage without his silence, he is forced to play under his turret, giving you total priority to help your jungler or secure plates.
Wie man spielt
Always remain in Cannon form to poke Garen down. When he activates Decisive Strike and runs at you, do not panic or use Thundering Blow too early. Wait for him to get close, switch to hammer form, and knock him away. If you waste your knockback, he will catch you, shred your armor with Judgment, and execute you with Demacian Justice. Hold your knockback as a counter-engage tool, then switch back using Transform Mercury Cannon to chase him down.
ReichweitePokeThis matchup is dictated by your ability to dismantle Heimerdinger's setup before he can establish zone control. By firing *To the Skies!* through the gate created by *Thundering Blow*, you gain enough range and area damage to instantly vaporize his *H-28G Evolution Turret* from absolute safety. Without his turrets to hide behind, Heimerdinger loses his main source of consistent DPS and his passive *Hextech Affinity* movement speed, leaving him highly vulnerable.Heimerdinger Build →Details ansehen
Heimerdinger
Warum
This matchup is dictated by your ability to dismantle Heimerdinger's setup before he can establish zone control. By firing *To the Skies!* through the gate created by *Thundering Blow*, you gain enough range and area damage to instantly vaporize his *H-28G Evolution Turret* from absolute safety. Without his turrets to hide behind, Heimerdinger loses his main source of consistent DPS and his passive *Hextech Affinity* movement speed, leaving him highly vulnerable.
Lane-Einfluss
In practice, Heimerdinger cannot build a permanent wave-pushing engine. Since you easily clear his *H-28G Evolution Turret* from afar, you dictate the minion wave's state. He is forced to constantly spend mana replacing them, while you secure easy priority. This allows you to chip his health down with *Lightning Field* in hammer form for mana sustain, or pressure his tower, preventing him from ever locking you down under your own turret.
Wie man spielt
To execute this flawlessly, always stand diagonally to the minion wave. This positioning forces Heimerdinger to choose between aiming *Hextech Micro-Rockets* at you or the wave, while making it easier to dodge his slow *CH-2 Electron Storm Grenade*. If he activates *UPGRADE!!!* to drop a massive turret, immediately switch to hammer form with *Transform Mercury Cannon* and use *Thundering Blow* to knock it away, neutralizing his ultimate instantly.
RückzugPokeJayce controls this matchup by neutralizing Sett's main tool for closing distance. Whenever Sett activates Knuckle Down to gain movement speed and run you down, you can instantly respond with Thundering Blow to knock him back. This simple disengage completely denies Sett's ability to pull you in with Facebreaker or land the true damage sweet spot of Haymaker, forcing him to waste his mobility cooldowns for zero return.Sett Build →Details ansehen
Sett
Warum
Jayce controls this matchup by neutralizing Sett's main tool for closing distance. Whenever Sett activates Knuckle Down to gain movement speed and run you down, you can instantly respond with Thundering Blow to knock him back. This simple disengage completely denies Sett's ability to pull you in with Facebreaker or land the true damage sweet spot of Haymaker, forcing him to waste his mobility cooldowns for zero return.
Lane-Einfluss
This defensive safety net allows you to dictate the wave's positioning from range. Sett is forced to play defensively, taking relentless poke from To the Skies! and Lightning Field whenever he tries to secure minion gold. Since he cannot safely reach you, you can slow-push massive waves under his turret, chip away at his health bar, and create huge gold leads while denying him any opportunity to look for a game-changing The Show Stopper.
Wie man spielt
To execute this flawlessly, remain in Cannon form to poke Sett down, and only swap with Transform Mercury Cannon to punish him when his skills are down. Never use Thundering Blow aggressively unless Sett's Facebreaker is on cooldown. If he manages to catch you off guard, immediately trigger your hammer swing to push him away, then utilize the movement speed from Hextech Capacitor to safely retreat to a ranged spacing distance and resume your relentless harass.
UnterbrechungPokeJayce holds a massive advantage because he can completely shut down Sion's primary tool, Decimating Smash. Whenever the giant tank begins charging his heavy axe swing, you can instantly respond by using Transform Mercury Cannon to swap to hammer form and casting Thundering Blow. This immediate knockback cancels the channel, leaving him vulnerable, wasting his main damage source, and turning his offensive stance into a defensive liability.Sion Build →Details ansehen
Sion
Warum
Jayce holds a massive advantage because he can completely shut down Sion's primary tool, Decimating Smash. Whenever the giant tank begins charging his heavy axe swing, you can instantly respond by using Transform Mercury Cannon to swap to hammer form and casting Thundering Blow. This immediate knockback cancels the channel, leaving him vulnerable, wasting his main damage source, and turning his offensive stance into a defensive liability.
Lane-Einfluss
Canceling that channel completely shifts the wave dynamic in your favor. Sion cannot rely on Decimating Smash to clear waves quickly, allowing you to maintain constant wave control. You can safely poke him down with To the Skies! and Lightning Field whenever his Soul Furnace shield is down. This denial forces him to bleed gold under his turret, giving you free reign to chip at tower plates.
Wie man spielt
Avoid standing directly behind your minion wave to prevent Sion from hitting you with Roar of the Slayer. You must actively hold your hammer form's Thundering Blow solely to counter his Decimating Smash channel. Once you knock him out of his swing, immediately use Transform Mercury Cannon to switch to ranged form and punish him with Lightning Field and To the Skies! while his defensive Soul Furnace is on cooldown.
PokePositionierungJayce holds a massive advantage in this matchup due to his dual-form versatility via Transform Mercury Cannon. You can safely abuse your range to wear Urgot down. Whenever Urgot attempts to force an all-in by charging forward with Disdain, you can instantly respond by switching to Hammer form and casting Thundering Blow. This knocks him back mid-dash, completely neutralizing his only reliable gap-closer.Urgot Build →Details ansehen
Urgot
Warum
Jayce holds a massive advantage in this matchup due to his dual-form versatility via Transform Mercury Cannon. You can safely abuse your range to wear Urgot down. Whenever Urgot attempts to force an all-in by charging forward with Disdain, you can instantly respond by switching to Hammer form and casting Thundering Blow. This knocks him back mid-dash, completely neutralizing his only reliable gap-closer.
Lane-Einfluss
This interaction completely dictates the early wave state. Since Urgot cannot land Disdain, he is forced to farm defensively under constant threat. Urgot's passive Echoing Flames naturally pushes the wave towards you when he tries to CS, allowing you to freeze it easily. This leaves him starved of gold and too low on health to ever threaten you with Fear Beyond Death.
Wie man spielt
Start the lane in Cannon form, harassing Urgot with To the Skies! and Lightning Field from maximum distance. Always hold Thundering Blow; never use it offensively in Hammer form unless Disdain is on cooldown. If Urgot lands Corrosive Charge to slow you, do not panic. Walk backwards, and the moment he starts his forward dash animation, swap forms and swat him away with Thundering Blow.
Früher DruckRückzugJayce dominates this matchup because he can completely negate Nasus's only tool for closing the gap. When Nasus attempts to slow you with Wither to setup a series of Siphoning Strike bonks, Jayce can immediately swap to hammer form and use Thundering Blow to knock him away. This reset prevents Nasus from capitalizing on his massive slow and leaves him vulnerable to ranged poke.Nasus Build →Details ansehen
Nasus
Warum
Jayce dominates this matchup because he can completely negate Nasus's only tool for closing the gap. When Nasus attempts to slow you with Wither to setup a series of Siphoning Strike bonks, Jayce can immediately swap to hammer form and use Thundering Blow to knock him away. This reset prevents Nasus from capitalizing on his massive slow and leaves him vulnerable to ranged poke.
Lane-Einfluss
This interaction dictates a strict tempo race where you must control the minion waves. By denying Nasus easy access to the wave, you stunt his Siphoning Strike stacking speed. He is forced to drop Spirit Fire to farm from afar, which naturally pushes the wave toward your tower. This allows you to freeze the lane, crash massive waves, and chip away at his turret while his health is too low to contest.
Wie man spielt
Always hold Thundering Blow in hammer form as your primary defensive tool. Harass Nasus constantly with To the Skies! and Lightning Field from range. The moment you see the Wither animation, transform with Transform Mercury Cannon and use Thundering Blow to knock him back. If you mistakenly burn this knockback early and he activates Fury of the Sands, immediately place Thundering Blow in cannon form to gain movement speed and retreat safely.
RückzugKitenJayce dominates this lane because he holds the ultimate disengage tool against Tryndamere's only gap-closer. Whenever Tryndamere initiates with Spinning Slash to force a melee trade, Jayce can immediately swap to hammer form and use Thundering Blow to swat him away. Since Spinning Slash has a long cooldown early on, this interaction completely neutralizes Tryndamere's ability to stick to Jayce and stack his Battle Fury.Tryndamere Build →Details ansehen
Tryndamere
Warum
Jayce dominates this lane because he holds the ultimate disengage tool against Tryndamere's only gap-closer. Whenever Tryndamere initiates with Spinning Slash to force a melee trade, Jayce can immediately swap to hammer form and use Thundering Blow to swat him away. Since Spinning Slash has a long cooldown early on, this interaction completely neutralizes Tryndamere's ability to stick to Jayce and stack his Battle Fury.
Lane-Einfluss
Because Tryndamere cannot easily touch you, you dictate the wave's state. You can safely poke him down with To the Skies! and Lightning Field from range. This pressure forces him to consume his Battle Fury via Bloodlust just to sustain under tower, preventing him from building up critical strike chance. He is forced into defensive recalls, giving you plates and absolute priority.
Wie man spielt
Always hold Thundering Blow for the exact moment Tryndamere commits his Spinning Slash. Never use your hammer knockback offensively unless he has already wasted his dash. If he tries to run you down with Undying Rage, use Transform Mercury Cannon to gain movement speed via Hextech Capacitor and kite him out. If you misplay and get caught by Mocking Shout while facing away, immediately swap forms to disengage rather than fighting back.
Früher DruckSkalierungKayle represents zero early threat before her Divine Ascent milestones kick in, giving you complete freedom to dictate the lane. By utilizing Transform Mercury Cannon, you can effortlessly zone her away from the wave. Use To the Skies! in hammer form to burst her down whenever she steps up to last hit with Starfire Spellblade. Her Radiant Blast cannot match your early burst potential, making her vulnerable to constant harassment.Kayle Build →Details ansehen
Kayle
Warum
Kayle represents zero early threat before her Divine Ascent milestones kick in, giving you complete freedom to dictate the lane. By utilizing Transform Mercury Cannon, you can effortlessly zone her away from the wave. Use To the Skies! in hammer form to burst her down whenever she steps up to last hit with Starfire Spellblade. Her Radiant Blast cannot match your early burst potential, making her vulnerable to constant harassment.
Lane-Einfluss
You must slow push the initial waves to build a massive minion advantage, preventing Kayle from safely farming under her turret. This forced wave control denies her early gold and delays her crucial level milestones. If she tries to break the freeze using Radiant Blast, she leaves herself wide open to a lethal dive or a devastating trade, forcing her to rely on Celestial Blessing just to stay in experience range.
Wie man spielt
Stand aggressively past her melee minions to deny her Starfire Spellblade range. When trading in hammer form, always hold Thundering Blow to knock her back if she tries to turn with Celestial Blessing's speed boost. Once she reaches level five, do not blindly commit your full burst; bait out her Divine Judgment first using your ranged attacks before switching forms to execute her.
PokeBurstAlthough Teemo relies on Blinding Dart to shut down physical attackers, this blind is completely useless against your ranged poke. The explosive projectile from To the Skies! boosted by Thundering Blow deals its massive damage regardless of being blinded. Since Teemo is incredibly squishy, this combo allows you to chunk his health bar from outside his auto-attack range without ever triggering Toxic Shot.Teemo Build →Details ansehen
Teemo
Warum
Although Teemo relies on Blinding Dart to shut down physical attackers, this blind is completely useless against your ranged poke. The explosive projectile from To the Skies! boosted by Thundering Blow deals its massive damage regardless of being blinded. Since Teemo is incredibly squishy, this combo allows you to chunk his health bar from outside his auto-attack range without ever triggering Toxic Shot.
Lane-Einfluss
This interaction shifts lane pressure entirely in your favor. You do not need to fight for wave control early; instead, let Teemo push with Toxic Shot while you setup safe angles. Once you land a single boosted To the Skies!, Teemo is forced to play defensively, abandoning his Guerrilla Warfare ambushes. This health deficit prevents him from safely placing Noxious Trap around the lane, giving you complete priority to crash waves and roam.
Wie man spielt
To execute this, stay in your ranged form and fish for boosted To the Skies! shots whenever Teemo steps up to last-hit. Only switch to melee form with Transform Mercury Cannon to commit for the kill once he is below half health and his Blinding Dart is on cooldown. If he hides in the brush with Guerrilla Warfare, fire your combo directly into the bushes to flush him out. Never jump in with To the Skies! in melee form while he still holds his blind.
MobilitätPositionierungJayce dictates this matchup because he can completely shut down Jax's primary gap-closer. Whenever Jax attempts to initiate a trade with Leap Strike, Jayce can immediately react with Thundering Blow in hammer form. This knocks Jax away mid-air, denying his damage and preventing him from landing Counter Strike. By neutralizing Jax's only tool to close the distance, Jayce maintains his ranged superiority using Transform Mercury Cannon to freely poke him down.Jax Build →Details ansehen
Jax
Warum
Jayce dictates this matchup because he can completely shut down Jax's primary gap-closer. Whenever Jax attempts to initiate a trade with Leap Strike, Jayce can immediately react with Thundering Blow in hammer form. This knocks Jax away mid-air, denying his damage and preventing him from landing Counter Strike. By neutralizing Jax's only tool to close the distance, Jayce maintains his ranged superiority using Transform Mercury Cannon to freely poke him down.
Lane-Einfluss
Because Jax cannot safely engage, you can constantly freeze the wave and harass him with To the Skies! and Lightning Field in cannon form. Jax is forced to yield minion priority, bleeding gold under his turret or risking his health bar to farm. This constant pressure allows you to secure early plates, obtain priority for Rift Herald, and force Jax into unfavorable recall timings that delay his crucial Grandmaster-at-Arms power spike.
Wie man spielt
To execute this perfectly, always remain in cannon form to farm and poke, but swap to hammer form the moment Jax steps forward to Leap Strike. Never use Thundering Blow offensively unless his jump is actively on cooldown. If you accidentally waste Thundering Blow, immediately retreat using the speed boost from Hextech Capacitor, as Jax will instantly punish your mistake by chasing you down with Counter Strike.
Diese Champions haben ein Build und einen Spielstil, der deinen direkt überlegen ist, was die Kontrolle der Lane und das Farmen extrem schwierig machen kann. Ihr Kit kann deine Kernstärken neutralisieren oder dich bestrafen, sobald du versuchst, deinen gewohnten Spielplan umzusetzen. In diesen Matchups geht es oft darum, Fehler zu minimieren und nach Wegen zu suchen, außerhalb der direkten Konfrontation zu gewinnen.
RüstungÜberlebenMalphite is a structural nightmare for Jayce. His passive Granite Shield constantly regenerates to absorb your To the Skies! poke, while his massive armor scaling completely neutralizes your physical burst. You cannot realistically pressure his health bar. Compounding this, once Malphite unlocks Unstoppable Force, your lack of natural dashes leaves you incredibly vulnerable to any enemy jungle ganks, turning your mid lane into a constant death trap.Malphite Build →Details ansehen
Malphite
Warum
Malphite is a structural nightmare for Jayce. His passive Granite Shield constantly regenerates to absorb your To the Skies! poke, while his massive armor scaling completely neutralizes your physical burst. You cannot realistically pressure his health bar. Compounding this, once Malphite unlocks Unstoppable Force, your lack of natural dashes leaves you incredibly vulnerable to any enemy jungle ganks, turning your mid lane into a constant death trap.
Lane-Einfluss
This matchup ruins your lane dominance. Trading becomes a losing battle because Malphite will slow you with Seismic Shard and ruin your hammer-form counter-attacks with Ground Slam. You will quickly deplete your mana bar attempting to break his defenses. You must accept that you cannot secure a solo kill, meaning you will lose mid priority and must play back to avoid being dove under turret.
Wie man spielt
To survive, shift your focus entirely away from lane combat. Use Transform Mercury Cannon and activate Lightning Field to quickly clear incoming minion waves from a safe distance. The moment the wave is cleared, utilize the movement speed from Hextech Capacitor to roam to the side lanes where your physical burst actually threatens squishier targets. If Malphite approaches in hammer range, immediately use Thundering Blow to knock him away and preserve your health bar.
Diese Champions haben Werkzeuge, die ihnen im Kampf meist einen Vorteil verschaffen, ohne das Matchup unspielbar zu machen. Sie haben vielleicht mehr Reichweite, können deine Offensive besser abfangen oder haben mehr Möglichkeiten, auf deine Engages zu reagieren. Du musst deine Herangehensweise anpassen und sorgfältig die Momente wählen, in denen du den Kampf annimmst.
PokeMassenkontrolleOrianna dictates the distance in this matchup by positioning her ball with Command: Attack from the safety of her minion wave. This constant threat zone blocks Jayce from finding open trajectories for his cannon-form To the Skies!. Because she doesn't need to step past her minions to poke, Jayce struggles to trade back without taking damage from Command: Dissonance and her empowered basic attacks from Clockwork Windup.Orianna Build →Details ansehen
Orianna
Warum
Orianna dictates the distance in this matchup by positioning her ball with Command: Attack from the safety of her minion wave. This constant threat zone blocks Jayce from finding open trajectories for his cannon-form To the Skies!. Because she doesn't need to step past her minions to poke, Jayce struggles to trade back without taking damage from Command: Dissonance and her empowered basic attacks from Clockwork Windup.
Lane-Einfluss
This spacing disadvantage forces you under your turret, as Orianna can constantly thin the wave while chipping away at your health. You cannot easily contest her push because stepping forward invites a quick Command: Attack and Command: Dissonance combo. Consequently, your roam timings are severely delayed, forcing you to use Lightning Field defensively to secure farm rather than pressure other lanes.
Wie man spielt
To survive this lane, stand outside your own minion wave to force Orianna to choose between pushing with Command: Attack or targeting you. Never swap to hammer form with Transform Mercury Cannon to engage unless her Command: Protect shield is down. If she misses her ball placement, immediately use the movement speed from Hextech Capacitor to angle a fast To the Skies! past her minions, then disengage before she can pull back her ball.
CC-ImmunitätPokeInitiating in hammer form is highly risky because Lissandra reacts instantly to your leap. The moment you cast To the Skies! to close the distance, she can shut down your momentum mid-air with Ring of Frost, leaving you rooted under her terms. Post-level 5, attempting a melee burst is even more dangerous, as she can self-cast Frozen Tomb to completely negate your damage while stalling for her cooldowns.Lissandra Build →Details ansehen
Lissandra
Warum
Initiating in hammer form is highly risky because Lissandra reacts instantly to your leap. The moment you cast To the Skies! to close the distance, she can shut down your momentum mid-air with Ring of Frost, leaving you rooted under her terms. Post-level 5, attempting a melee burst is even more dangerous, as she can self-cast Frozen Tomb to completely negate your damage while stalling for her cooldowns.
Lane-Einfluss
This interaction severely limits your offensive pressure, forcing you to play passively in cannon form. You cannot reliably execute short trades, meaning she easily controls the wave pace with Ice Shard. If you get impatient and leap in, you will be chunked, lose priority, and be unable to assist your jungler, effectively giving up early mid-lane control to her superior roaming potential.
Wie man spielt
To survive this lane, play almost exclusively as a ranged threat using Transform Mercury Cannon. Use your ranged autos to wear her down. Only swap to hammer form for defensive utility, like using Thundering Blow to knock her away if she initiates with Glacial Path. If you must engage, wait until she wastes Ring of Frost on the minion wave; otherwise, keep your distance and focus on farming safely.
SchildePositionierungYasuo represents a structural counter to Jayce's ranged pressure because Wind Wall completely deletes any Shock Blast fired through a Thundering Blow acceleration gate. Since Jayce relies on this high-damage projectile combo to chip away at Yasuo's health before switching to hammer form for the kill, a well-timed wind barrier neutralizes Jayce's primary poke threat, while Way of the Wanderer passively absorbs smaller auto-attacks.Yasuo Build →Details ansehen
Yasuo
Warum
Yasuo represents a structural counter to Jayce's ranged pressure because Wind Wall completely deletes any Shock Blast fired through a Thundering Blow acceleration gate. Since Jayce relies on this high-damage projectile combo to chip away at Yasuo's health before switching to hammer form for the kill, a well-timed wind barrier neutralizes Jayce's primary poke threat, while Way of the Wanderer passively absorbs smaller auto-attacks.
Lane-Einfluss
This interaction severely limits Jayce's lane dominance, turning an aggressive matchup into a defensive waiting game. If you waste your Shock Blast into his Wind Wall, you lose priority and cannot safely contest the wave. Yasuo will use Sweeping Blade through your minions to close the gap, forcing you to use Thundering Blow in hammer form defensively rather than offensively to disengage his high-damage Steel Tempest trades.
Wie man spielt
To survive, you must manage the wave near your turret to deny Yasuo the minion runway he needs for Sweeping Blade. Pop his Way of the Wanderer shield with a simple auto-attack before committing any real resources. Bait his Wind Wall by walking forward aggressively in cannon form, but hold your Shock Blast. Once his wall is on cooldown, use Thundering Blow's gate to accelerate your poke, then transition to hammer form with To the Skies! to burst him down.
CC-ImmunitätThis lane is dictated by how Vex's Doom 'n Gloom passive completely shuts down your main engagement tool. If you attempt to leap forward with To the Skies! while her red bar is full, she will instantly interrupt your dash with a fear, leaving you helpless in melee range. This interaction prevents you from standard hammer-form bursts, forcing you to play a war of attrition.Vex Build →Details ansehen
Vex
Warum
This lane is dictated by how Vex's Doom 'n Gloom passive completely shuts down your main engagement tool. If you attempt to leap forward with To the Skies! while her red bar is full, she will instantly interrupt your dash with a fear, leaving you helpless in melee range. This interaction prevents you from standard hammer-form bursts, forcing you to play a war of attrition.
Lane-Einfluss
Because you cannot reliably trade in melee, Vex gains free lane priority. She can use Mistral Bolt and Looming Darkness to push you under tower, knowing you cannot punish her positioning. If you get chipped down, her Shadow Surge becomes a lethal threat that you cannot dodge easily if feared first. This forces you to surrender early wave control and play for farm.
Wie man spielt
To survive and win, you must monitor her passive bar constantly. Keep your distance using Transform Mercury Cannon and poke her from afar with To the Skies! enhanced by Thundering Blow. Only when she wastes her Doom 'n Gloom charge on clearing waves with Mistral Bolt or missing Looming Darkness should you swap forms to jump in. If she holds her fear indefinitely, maintain your range and focus purely on farming.
Diese Matchups sind vor allem Duelle der Ausführung: Beide Champions haben glaubwürdige Wege, die Oberhand zu gewinnen. Eine wichtige ausgewichene Fähigkeit, ein richtig antizipierter Engage oder ein einziger Positionierungsfehler können reichen, um das Duell zu entscheiden. Das Matchup zu kennen und die richtigen Fenster zum Handeln zu erkennen, ist hier besonders wichtig.
ScharmützelAusweichenThis matchup is a highly volatile skill-check centered on how you manage Yone's gap-closers. In early levels, your ranged auto-attacks from Transform Mercury Cannon can heavily punish Yone's weak start. However, once Yone activates Soul Unbound to trade, you must react instantly. Buffering Thundering Blow to knock him back during his forward dash completely neutralizes his burst potential, preventing him from stacking Mortal Steel on you.Yone Build →Details ansehen
Yone
Warum
This matchup is a highly volatile skill-check centered on how you manage Yone's gap-closers. In early levels, your ranged auto-attacks from Transform Mercury Cannon can heavily punish Yone's weak start. However, once Yone activates Soul Unbound to trade, you must react instantly. Buffering Thundering Blow to knock him back during his forward dash completely neutralizes his burst potential, preventing him from stacking Mortal Steel on you.
Lane-Einfluss
Your priority is establishing early wave dominance. By keeping the minion wave slow-pushing towards his tower, you force Yone to choose between taking damage from your ranged harass or losing gold. If you fail to maintain control of the wave, Yone can freeze and use Mortal Steel to set up easy ganks. A successful early siege secures your recall timing, while losing control means getting trapped under pressure.
Wie man spielt
Never throw out Thundering Blow offensively unless Yone's Soul Unbound is on cooldown. When farming, stand near your caster minions to give yourself running room. If Yone misses his knock-up, quickly activate Lightning Field to turn the trade in your favor before he snaps back. If you get caught without your knockback, swap forms with Transform Mercury Cannon to gain the movement speed from Hextech Capacitor and retreat safely.
PositionierungAusweichenMel wants to keep Jayce at bay with her ranged control spells, making this midlane matchup a pure test of long-range accuracy and evasion. Jayce's ability to constantly shift forms using Transform Mercury Cannon is his primary weapon here. By triggering Hextech Capacitor, Jayce gains the sudden burst of movement speed necessary to weave through Mel's skillshots, immediately setting up a devastating retaliatory strike with To the Skies! shot through a Thundering Blow gate.Mel Build →Details ansehen
Mel
Warum
Mel wants to keep Jayce at bay with her ranged control spells, making this midlane matchup a pure test of long-range accuracy and evasion. Jayce's ability to constantly shift forms using Transform Mercury Cannon is his primary weapon here. By triggering Hextech Capacitor, Jayce gains the sudden burst of movement speed necessary to weave through Mel's skillshots, immediately setting up a devastating retaliatory strike with To the Skies! shot through a Thundering Blow gate.
Lane-Einfluss
Missing a single accelerated blast or getting caught by Mel's crowd control completely shifts the lane priority. Safe wave clearance becomes a struggle, as Mel can easily pin Jayce under his tower if she maintains a health advantage. Successful trades, however, force Mel to deplete her mana pool defensively, allowing Jayce to crash waves and secure crucial roam timers into the river without falling behind in gold.
Wie man spielt
Stay constantly in motion just outside Mel's maximum threat range. When she initiates a spellcast, immediately cycle Transform Mercury Cannon to trigger Hextech Capacitor, using the sudden momentum to sidestep her area-of-effect zones. Once her primary projectile is wasted, drop Thundering Blow directly in front of Jayce and fire an accelerated To the Skies! to punish her stationary casting animation, only transitioning to hammer form for a melee burst with Lightning Field when her self-peel is down.
RückzugAll-inThis lane is a high-stakes spacing duel governed by the cooldown of your self-peel. While Transform Mercury Cannon lets you alternate between ranged pressure and melee trades, your primary defensive tool, Thundering Blow, is not a guaranteed safety net. If you knock Irelia back while she has you marked with Vanguard's Edge, she can instantly close the gap again using her Bladesurge reset, completely negating your disengage.Irelia Build →Details ansehen
Irelia
Warum
This lane is a high-stakes spacing duel governed by the cooldown of your self-peel. While Transform Mercury Cannon lets you alternate between ranged pressure and melee trades, your primary defensive tool, Thundering Blow, is not a guaranteed safety net. If you knock Irelia back while she has you marked with Vanguard's Edge, she can instantly close the gap again using her Bladesurge reset, completely negating your disengage.
Lane-Einfluss
Every wave becomes a battle of positioning. You must punish Irelia with To the Skies! and Lightning Field in cannon form while her Ionian Fervor stacks are empty. However, the moment she unlocks her ultimate, the lane dynamic shifts dramatically. Overextending near her tower is fatal; a single successful Flawless Duet or Vanguard's Edge allows her to dive you, turning any missed trade into a lethal chase down the mid lane.
Wie man spielt
To survive and win trades, never initiate with Thundering Blow in hammer form while Irelia has her ultimate available. Instead, bait out Flawless Duet by moving unpredictably, and only use Thundering Blow after she has already expended her Bladesurge resets. If she initiates with Vanguard's Edge, do not panic-cast your knockback immediately; wait for her to execute her first dash, step out of the blade wall, and only use your hammer peel when her marks are fully consumed.
RückzugTradesThis matchup is a high-octane duel decided entirely by how you manage your respective melee-to-ranged transitions. While Zed relies on his Living Shadow to project Razor Shuriken and Shadow Slash for safe poke, your safety hinges on holding Hammer form. The ultimate climax occurs when Zed initiates with Death Mark; if you time Thundering Blow perfectly, you will instantly fling him away as he emerges, neutralizing his burst potential.Zed Build →Details ansehen
Zed
Warum
This matchup is a high-octane duel decided entirely by how you manage your respective melee-to-ranged transitions. While Zed relies on his Living Shadow to project Razor Shuriken and Shadow Slash for safe poke, your safety hinges on holding Hammer form. The ultimate climax occurs when Zed initiates with Death Mark; if you time Thundering Blow perfectly, you will instantly fling him away as he emerges, neutralizing his burst potential.
Lane-Einfluss
The early levels are a battle for wave control, where you must abuse your ranged Cannon form to harass Zed while dodging his dual Razor Shuriken. Once Zed unlocks Death Mark, the lane becomes a high-stakes waiting game. If you waste your Hammer form's Thundering Blow to secure a minion or a greedy trade, you immediately lose priority and risk getting executed under your own tower.
Wie man spielt
To survive and win trades, always swap to Hammer form the moment you suspect Zed is looking to cast Death Mark. Keep your finger hovering over Thundering Blow and cast it behind you the instant his shadow animation finishes. If you accidentally misstime this or get caught in Cannon form, immediately activate Hextech Capacitor via Transform Mercury Cannon to gain movement speed and dodge the incoming Razor Shuriken and Shadow Slash skillshots.
PositionierungTradesYour signature Cannon burst via To the Skies! amplified by Thundering Blow loses its lethal threat against Viktor's quick Siphon Power shield. Because he can reactively absorb your ranged poke, you cannot simply bleed him out of lane. Instead, this matchup devolves into a heavy resource battle where your Lightning Field must match the wave-clear of his Hextech Ray to prevent being shoved under tower.Viktor Build →Details ansehen
Viktor
Warum
Your signature Cannon burst via To the Skies! amplified by Thundering Blow loses its lethal threat against Viktor's quick Siphon Power shield. Because he can reactively absorb your ranged poke, you cannot simply bleed him out of lane. Instead, this matchup devolves into a heavy resource battle where your Lightning Field must match the wave-clear of his Hextech Ray to prevent being shoved under tower.
Lane-Einfluss
The mid lane becomes a high-stakes tug-of-war for priority. If Viktor uses Hextech Ray to constantly crash waves, he safely stacks Glorious Evolution while keeping you trapped under turret. This prevents you from utilizing Transform Mercury Cannon to roam. Trading health is rare; instead, your mana pool is spent matching his push, meaning the first player to run out of resources loses control of river rotations.
Wie man spielt
To break the stalemate, bait Viktor's Siphon Power by stepping forward, then delay your To the Skies! until his shield decays. When he attempts to clear waves with Hextech Ray, immediately drop your Thundering Blow gate to fire an accelerated blast. If he drops Gravity Field to zone you, swap with Transform Mercury Cannon to utilize the melee stance's passive mana restore from Lightning Field, ensuring you outlast his mana pool.
AusweichenPositionierungThis matchup is a highly volatile poke war decided entirely by your positioning relative to the minion wave. Zoe relies on Sleepy Trouble Bubble to set up her devastating Paddle Star! damage. Since her bubble gets blocked by minions, you can safely negate her crowd control by keeping a wave between you. Meanwhile, you can abuse your superior range by firing To the Skies! through Thundering Blow to chunk her from afar.Zoe Build →Details ansehen
Zoe
Warum
This matchup is a highly volatile poke war decided entirely by your positioning relative to the minion wave. Zoe relies on Sleepy Trouble Bubble to set up her devastating Paddle Star! damage. Since her bubble gets blocked by minions, you can safely negate her crowd control by keeping a wave between you. Meanwhile, you can abuse your superior range by firing To the Skies! through Thundering Blow to chunk her from afar.
Lane-Einfluss
The state of the minion wave dictates who controls the lane's pressure. If you clear the wave too quickly, you lose your cover, making you vulnerable to Sleepy Trouble Bubble. Conversely, if Zoe pushes you under tower, she can use Portal Jump to find angles around your minions. Maintaining a thin minion shield allows you to safely trade with To the Skies! and force her to recall early.
Wie man spielt
Always position yourself directly behind your caster minions, mirroring Zoe's movements to keep a minion between you. When she uses Portal Jump forward, do not panic; instead, aim your To the Skies! through Thundering Blow at her return portal location for a guaranteed hit. If she does manage to sleep you, immediately switch to hammer form with Transform Mercury Cannon to gain resistance, and prepare to use Thundering Blow to push her away if she gets too close.
RückzugPositionierungThis midlane matchup is a delicate dance of spacing and reactions. Kennen relies on stacking Mark of the Storm using Thundering Shuriken and Electrical Surge to lock you down. His ultimate threat comes when he combines Lightning Rush with Slicing Maelstrom for a sudden burst. Jayce has the perfect tool to deny this: using the hammer form's Thundering Blow to immediately knock Kennen away, neutralizing his ultimate's stun potential.Kennen Build →Details ansehen
Kennen
Warum
This midlane matchup is a delicate dance of spacing and reactions. Kennen relies on stacking Mark of the Storm using Thundering Shuriken and Electrical Surge to lock you down. His ultimate threat comes when he combines Lightning Rush with Slicing Maelstrom for a sudden burst. Jayce has the perfect tool to deny this: using the hammer form's Thundering Blow to immediately knock Kennen away, neutralizing his ultimate's stun potential.
Lane-Einfluss
The threat of your disengage dictates the entire pace of mid lane. When you hold your knockback, Kennen cannot safely use Lightning Rush aggressively to clear waves, allowing you to match his push with Lightning Field and poke with To the Skies!. However, if you misplay or waste your hammer cooldowns, Kennen instantly gains lane priority, forcing you under turret or securing an easy recall window.
Wie man spielt
Always maintain a safe distance in cannon form, using To the Skies! through an accelerated gate to chip away at Kennen's health. The moment you see Kennen activate Lightning Rush and head toward you, trigger Transform Mercury Cannon to switch to hammer. Hold your Thundering Blow specifically for when he commits with Slicing Maelstrom. If you mistime this knockback, immediately use Hextech Capacitor's movement speed boost to run out of his storm's radius.
PokePositionierungThis lane is a pure race of explosive damage dictated by the presence of Syndra's defensive stun. While you possess superior ranged poke using To the Skies! and Thundering Blow to chip her down, she can easily zone you with Dark Sphere and Force of Will. The entire matchup hinges on Scatter the Weak; if she wastes this knockback, she loses her only tool to stop your Transform Mercury Cannon jump.Syndra Build →Details ansehen
Syndra
Warum
This lane is a pure race of explosive damage dictated by the presence of Syndra's defensive stun. While you possess superior ranged poke using To the Skies! and Thundering Blow to chip her down, she can easily zone you with Dark Sphere and Force of Will. The entire matchup hinges on Scatter the Weak; if she wastes this knockback, she loses her only tool to stop your Transform Mercury Cannon jump.
Lane-Einfluss
Wave control remains highly volatile because Syndra clears waves instantly with Dark Sphere, matching your own cannon form clean. Syndra will constantly drop Dark Sphere to secure minions while looking to shove you under turret. If she overextends to land Force of Will, your health bar will drop rapidly, forcing early recalls. However, the moment she mispositions her stun, the lane pressure completely flips, allowing you to freeze or force her back with a lethal trade.
Wie man spielt
To win, bait out Scatter the Weak by faking an aggressive forward movement while in cannon form. Once she misses that crucial knockback, immediately activate Lightning Field and Transform Mercury Cannon to close the distance. Use To the Skies! to leap onto her and unleash your melee rotation, finishing with Thundering Blow to knock her away before she can retaliate with Unleashed Power. If she holds her stun, focus on passive farming and matching her wave clear.
TradesWellenräumungThis matchup revolves around neutralizing Talon's map presence. While you can easily harass him with the ranged acceleration of To the Skies! passed through Thundering Blow, Talon wants to avoid direct trades. He will use Rake to shove the wave and immediately disappear into the jungle using Assassin's Path. You must balance poking him down with matching his fast waveclear to prevent him from getting free roams.Talon Build →Details ansehen
Talon
Warum
This matchup revolves around neutralizing Talon's map presence. While you can easily harass him with the ranged acceleration of To the Skies! passed through Thundering Blow, Talon wants to avoid direct trades. He will use Rake to shove the wave and immediately disappear into the jungle using Assassin's Path. You must balance poking him down with matching his fast waveclear to prevent him from getting free roams.
Lane-Einfluss
If you fail to match his waveclear, Talon will exploit Assassin's Path to dive your side laners, costing your team map control. However, if you keep him pressured under his turret using Lightning Field and ranged autos, he cannot roam without losing plates. The lane dynamic is a constant tug-of-war where neglecting the wave state instantly translates into deadly cross-map pressure from his Shadow Assault.
Wie man spielt
Focus on using your Cannon form's Lightning Field to match his Rake clear. If Talon attempts to jump on you with Noxian Diplomacy, immediately swap to Hammer form with Transform Mercury Cannon and use Thundering Blow to knock him away, preventing him from proccing Blade's End. Should he disappear into the fog of war, ward the river corridors immediately and spam danger pings rather than blindly chasing him through walls.
Diese Champions tun sich meist schwer, auf deine Hauptstärken zu reagieren, was dir mehr Freiheit im Matchup gibt. Du hast oft mehrere Möglichkeiten, sie unter Druck zu setzen und Trades zu deinen Gunsten zu erzwingen. Nutze diesen Vorteil, um das Tempo zu bestimmen, statt ihnen Zeit zu geben, wieder in eine komfortable Position zu kommen.
Normaler SchadenPokeYou hold a massive advantage because Galio's defensive kit is designed to absorb magic damage. Since your primary poke from To the Skies! deals physical damage, it completely bypasses Galio's passive magic shield. This leaves him incredibly vulnerable every time he steps up to farm, as his natural tankiness cannot mitigate your ranged physical burst, forcing him out of lane early.Galio Build →Details ansehen
Galio
Warum
You hold a massive advantage because Galio's defensive kit is designed to absorb magic damage. Since your primary poke from To the Skies! deals physical damage, it completely bypasses Galio's passive magic shield. This leaves him incredibly vulnerable every time he steps up to farm, as his natural tankiness cannot mitigate your ranged physical burst, forcing him out of lane early.
Lane-Einfluss
This interaction allows you to dictate the wave state from level one. By harassing Galio with physical poke, you force him to use Winds of War just to clear minions from a safe distance, destroying his wave control. You can easily crash large waves, secure deep vision, and chip away at his tower while he is trapped farming under turret, unable to use Hero's Entrance.
Wie man spielt
Abuse your range in cannon form to pressure him constantly, but always hold Thundering Blow when switching to hammer form. If Galio tries to retaliate by charging Justice Punch or channeling Shield of Durand, use Thundering Blow immediately to knock him away and cancel his engage. Only use Transform Mercury Cannon to swap and commit to a melee burst once his health is depleted.
PokeRückzugJayce dominates this matchup thanks to the range safety of Transform Mercury Cannon. You can consistently wear Ryze down from a distance where his Spell Flux cannot mark you. Even if Ryze aggressively steps forward to lock you down with Rune Prison, your hammer form's Thundering Blow serves as the ultimate disengage tool, completely neutralizing his short-range trading pattern before he can chain his Overload.Ryze Build →Details ansehen
Ryze
Warum
Jayce dominates this matchup thanks to the range safety of Transform Mercury Cannon. You can consistently wear Ryze down from a distance where his Spell Flux cannot mark you. Even if Ryze aggressively steps forward to lock you down with Rune Prison, your hammer form's Thundering Blow serves as the ultimate disengage tool, completely neutralizing his short-range trading pattern before he can chain his Overload.
Lane-Einfluss
This range dynamic forces Ryze to spend his mana clearing waves defensively under tower rather than trading. By keeping him low on health with constant cannon fire, you prevent him from safely securing priority. This health deficit makes it extremely risky for him to channel Realm Warp for map-wide plays, allowing you to dominate mid-lane pressure and secure uncontested roam timers.
Wie man spielt
Stay in cannon form as your default stance to chip away at Ryze's health bar. Only transform and commit with To the Skies! when Ryze has already wasted Overload on the wave. Keep Thundering Blow ready specifically for his forward movements; the moment you see the Rune Prison animation start, knock him away immediately. If you misplay the disengage, activate Lightning Field in hammer form to absorb some damage before retreating.
RückzugPokeThis matchup heavily favors you because you can completely shut down Diana's primary engagement tool. Whenever she attempts to trigger her moonlight reset by dashing with Lunar Rush after hitting Crescent Strike, you can swap with Transform Mercury Cannon and cast Thundering Blow. This knockback interrupts her dash mid-flight, preventing her from landing her Pale Cascade shield or pulling you in with Moonfall, rendering her engage useless.Diana Build →Details ansehen
Diana
Warum
This matchup heavily favors you because you can completely shut down Diana's primary engagement tool. Whenever she attempts to trigger her moonlight reset by dashing with Lunar Rush after hitting Crescent Strike, you can swap with Transform Mercury Cannon and cast Thundering Blow. This knockback interrupts her dash mid-flight, preventing her from landing her Pale Cascade shield or pulling you in with Moonfall, rendering her engage useless.
Lane-Einfluss
Because Diana fears your knockback, she is forced to play passively and use Crescent Strike just to secure minions from a distance. This gives you total control over wave positioning. You can easily build slow pushes or freeze the wave near your turret, forcing her to overextend where she is completely exposed to your long-range To the Skies! or lightning-fast trades using Lightning Field.
Wie man spielt
To execute this flawlessly, never waste Thundering Blow to farm or poke. Keep your finger ready to switch forms with Transform Mercury Cannon the moment you see her Crescent Strike curve toward you. If she misses her projectile, immediately abuse this window by swapping to ranged form to harass her with To the Skies! and Lightning Field. If she does dash, react instantly with your hammer's knockback to send her packing.
KitenRegenerationJayce dictates this matchup because he completely neutralizes Swain's primary win condition. While Swain wants to pull you in with Ravenous Flock and drain your health using Demonic Ascension, you possess the perfect tool to deny him. Whenever Swain attempts to commit with his ultimate, a swift Hammer-form Thundering Blow knocks him far outside his draining radius, leaving him vulnerable to your ranged poke.Swain Build →Details ansehen
Swain
Warum
Jayce dictates this matchup because he completely neutralizes Swain's primary win condition. While Swain wants to pull you in with Ravenous Flock and drain your health using Demonic Ascension, you possess the perfect tool to deny him. Whenever Swain attempts to commit with his ultimate, a swift Hammer-form Thundering Blow knocks him far outside his draining radius, leaving him vulnerable to your ranged poke.
Lane-Einfluss
During the laning phase, Swain's lack of mobility makes him an easy target for your To the Skies! and Thundering Blow cannon combos. He cannot safely step up to clear waves with Death's Hand without risking heavy damage. Once you both reach level five, the lane pressure swings heavily in your favor, as Swain's Demonic Ascension no longer grants him any threat or safety against your disengage.
Wie man spielt
Your primary rule is to hold your hammer form's Thundering Blow specifically for Swain's Demonic Ascension. Never waste it defensively on a standard trade. If Swain manages to root you with Nevermove, do not panic; wait for the root to expire, activate Transform Mercury Cannon to switch to hammer, and immediately knock him back. This completely wastes his ultimate's duration, allowing you to safely transition back to cannon form to finish him.
PokeBurstCorki lacks early-game durability and struggles to survive your aggressive trading before he acquires key items. You can easily dominate this matchup because your early *Shock Blast* combined with *To the Skies!* deals far more burst damage than his fragile health pool can handle. He cannot match this sudden damage with *Phosphorus Bomb* or the slow shred of *Gatling Gun*, leaving him defenseless against your quick dual-form rotations.Corki Build →Details ansehen
Corki
Warum
Corki lacks early-game durability and struggles to survive your aggressive trading before he acquires key items. You can easily dominate this matchup because your early *Shock Blast* combined with *To the Skies!* deals far more burst damage than his fragile health pool can handle. He cannot match this sudden damage with *Phosphorus Bomb* or the slow shred of *Gatling Gun*, leaving him defenseless against your quick dual-form rotations.
Lane-Einfluss
Your superior burst potential forces Corki to play extremely defensively, often wasting his *Valkyrie* to escape your hammer stance. This heavy resource cost ruins his wave control, trapping him under his turret while you build massive lane pressure. He will suffer from terrible recall timings and lose gold, as he cannot safely step up to use *Gatling Gun* on the minions without risking a lethal jump from you.
Wie man spielt
Position aggressively near his ranged minions to deny him farm and force him to use *Phosphorus Bomb* on waves instead of you. Always hold *Thundering Blow* to knock him back instantly if he attempts an aggressive dash or tries to fly in with a package-enhanced *Valkyrie*. If you miss your initial skillshots, use *Transform Mercury Cannon* to swap back, retreat safely, and wait for your cooldowns to reset.
Früher DruckPositionierungJayce dictates this matchup because his ranged Transform Mercury Cannon form allows him to harass Akali safely, but the true shutdown lies in his hammer form. When Akali lands her Shuriken Flip and attempts to dash in for her burst, Jayce can immediately deny her with Thundering Blow. This knockback completely cancels her gap-closer mid-flight, neutralizing her main engagement tool and leaving her vulnerable to a rapid counter-attack with To the Skies!.Akali Build →Details ansehen
Akali
Warum
Jayce dictates this matchup because his ranged Transform Mercury Cannon form allows him to harass Akali safely, but the true shutdown lies in his hammer form. When Akali lands her Shuriken Flip and attempts to dash in for her burst, Jayce can immediately deny her with Thundering Blow. This knockback completely cancels her gap-closer mid-flight, neutralizing her main engagement tool and leaving her vulnerable to a rapid counter-attack with To the Skies!.
Lane-Einfluss
This interaction forces Akali to play incredibly passively, giving you absolute control over the wave. You can easily slow-push waves to crash them under her turret, forcing her to choose between losing gold or taking heavy damage from Lightning Field and your ranged basic attacks. Since she cannot safely engage, you establish massive lane dominance, allowing you to secure deep vision or roam while she struggles to farm under tower.
Wie man spielt
Stay in your ranged Transform Mercury Cannon form to poke Akali with basic attacks whenever she approaches the wave. However, you must always keep your finger ready to swap to hammer form. The moment you get hit by Shuriken Flip, do not panic; walk backward slightly, switch forms, and hold Thundering Blow. Only release it the exact millisecond she reactivates her dash. If she hides in Twilight Shroud, retreat immediately to your wave and wait out her energy-restoring cloud before resuming your zone control.
PokeBurstJayce dominates because his long-range poke completely neutralizes Heimerdinger's setup. By combining Thundering Blow and To the Skies! in cannon form, Jayce fires an accelerated orb that instantly obliterates multiple H-28G Evolution Turret from absolute safety. Without his turrets to zone or charge lasers, Heimerdinger loses his primary defensive net and zone control, leaving him completely exposed to your follow-up physical burst.Heimerdinger Build →Details ansehen
Heimerdinger
Warum
Jayce dominates because his long-range poke completely neutralizes Heimerdinger's setup. By combining Thundering Blow and To the Skies! in cannon form, Jayce fires an accelerated orb that instantly obliterates multiple H-28G Evolution Turret from absolute safety. Without his turrets to zone or charge lasers, Heimerdinger loses his primary defensive net and zone control, leaving him completely exposed to your follow-up physical burst.
Lane-Einfluss
This interaction completely strips Heimerdinger of his usual lane priority and passive push. Instead of being trapped under tower dodging Hextech Micro-Rockets, you dictate the wave state by deleting his machinery instantly. This constant de-turreting forces him to waste mana rebuilding his setup, prevents him from safely farming, and opens up the lane for your aggressive roams, severely limiting his ability to protect his own mid tower.
Wie man spielt
Stand well back to keep his turrets at the edge of your screen, firing To the Skies! through Thundering Blow to clear his constructs before they can touch the wave. Once his zone is cleared, wait for him to step up to replace them, then immediately swap with Transform Mercury Cannon to leap in. If he activates UPGRADE!!!, immediately use Thundering Blow in hammer form to knock back his giant turret or disengage from his massive rockets.
ReichweiteDiveThis matchup is an aggressive poke war where your superior gap-close wins out. While Ziggs harasses from range with Bouncing Bomb and Short Fuse, his safety rests entirely on Satchel Charge. The moment he uses this explosive to clear waves or fails to self-peel, he is defenseless. You can instantly swap with Transform Mercury Cannon and lunge onto him using To the Skies! for a guaranteed burst kill.Ziggs Build →Details ansehen
Ziggs
Warum
This matchup is an aggressive poke war where your superior gap-close wins out. While Ziggs harasses from range with Bouncing Bomb and Short Fuse, his safety rests entirely on Satchel Charge. The moment he uses this explosive to clear waves or fails to self-peel, he is defenseless. You can instantly swap with Transform Mercury Cannon and lunge onto him using To the Skies! for a guaranteed burst kill.
Lane-Einfluss
Ziggs's constant desire to push the wave with Hexplosive Minefield and chip your turret using Short Fuse is heavily suppressed by your threat range. Because he must respect your leap, he is forced to drop his bombs from extreme distances, which drains his mana quickly. This gives you complete control over the wave state, letting you crash minions, roam freely, or lock him under his own tower.
Wie man spielt
Position yourself away from your own minions to force Ziggs to choose between hitting you or pushing the wave with Bouncing Bomb. If he throws Satchel Charge offensively or to clear, immediately activate Thundering Blow in cannon form to speed yourself up, fire a quick blast, then switch to hammer form to jump him with To the Skies!. If you get slowed by Hexplosive Minefield, use the displacement of Thundering Blow in melee to disengage.
AusweichenAll-inJayce controls this matchup because Lux relies entirely on landing her crowd control to survive. If she misses Light Binding, she has no way to stop your gap-closer. While she tries to poke with Lucent Singularity, her long cooldowns leave her completely defenseless. By transforming with Transform Mercury Cannon, you can instantly exploit her missed skillshot and unleash a devastating melee rotation before her Prismatic Barrier can mitigate the damage.Lux Build →Details ansehen
Lux
Warum
Jayce controls this matchup because Lux relies entirely on landing her crowd control to survive. If she misses Light Binding, she has no way to stop your gap-closer. While she tries to poke with Lucent Singularity, her long cooldowns leave her completely defenseless. By transforming with Transform Mercury Cannon, you can instantly exploit her missed skillshot and unleash a devastating melee rotation before her Prismatic Barrier can mitigate the damage.
Lane-Einfluss
Lux is forced to play extremely defensively, often using her Lucent Singularity just to clear minions from a safe distance. This concedes total wave control to you, allowing you to crash waves and look for roam opportunities. Whenever her Light Binding is down, she must retreat entirely under her tower, which lets you chip away at her plates or secure deep vision without fearing any retaliation or a lethal Final Spark combo.
Wie man spielt
Bait out Light Binding by moving aggressively behind your own minions, making it harder for her projectile to pierce through. Once she fires and misses, immediately activate Transform Mercury Cannon to switch to hammer form, leap in with To the Skies!, and activate Lightning Field for maximum damage. If she manages to shield herself with Prismatic Barrier, use Thundering Blow to knock her away and disengage safely before her cooldowns return.
AusweichenSchildeMorgana relies heavily on her Black Shield to block incoming magic burst and crowd control, but Jayce's primary damage is physical. When you dive her in hammer form, your physical burst from To the Skies! and the rapid strikes of Lightning Field bypass her magical barrier completely, leaving her fragile health pool exposed even if she shields herself.Morgana Build →Details ansehen
Morgana
Warum
Morgana relies heavily on her Black Shield to block incoming magic burst and crowd control, but Jayce's primary damage is physical. When you dive her in hammer form, your physical burst from To the Skies! and the rapid strikes of Lightning Field bypass her magical barrier completely, leaving her fragile health pool exposed even if she shields herself.
Lane-Einfluss
Because her main defensive tool is useless against your physical onslaught, Morgana cannot contest the wave with Tormented Shadow without risking a lethal jump. You can constantly shove her under tower, forcing her to choose between using Dark Binding to farm or saving it to prevent you from diving her. This keeps her pinned, preventing her from rotating with her jungler.
Wie man spielt
Bait out her Dark Binding by faking aggressive forward steps in cannon form, then immediately use Transform Mercury Cannon to swap to hammer form. Once her root is on cooldown, jump in with To the Skies! and activate Lightning Field to melt her. If she panic-casts Soul Shackles in response, immediately use Thundering Blow to knock her away, breaking the tether distance before the stun can trigger.
PokeCC-ImmunitätJayce dominates this lane because his combined To the Skies! and Thundering Blow in cannon form allow you to consistently blast Veigar from a distance where his Event Horizon cannot reach you. Since Veigar relies on landing Baleful Strike to stack Phenomenal Evil Power, your superior poke range forces him to choose between taking heavy damage or walking up to farm, rendering his scaling ineffective.Veigar Build →Details ansehen
Veigar
Warum
Jayce dominates this lane because his combined To the Skies! and Thundering Blow in cannon form allow you to consistently blast Veigar from a distance where his Event Horizon cannot reach you. Since Veigar relies on landing Baleful Strike to stack Phenomenal Evil Power, your superior poke range forces him to choose between taking heavy damage or walking up to farm, rendering his scaling ineffective.
Lane-Einfluss
This range disparity completely stifles Veigar's laning phase. He is forced to drop back and use Baleful Strike defensively just to secure minions under his turret, stripping him of any early lane priority. You can easily maintain a healthy health lead, allowing you to crash waves at will. This constant pressure prevents Veigar from safely casting Dark Matter on the wave, locking him in mid while you secure map control.
Wie man spielt
To exploit this, always position yourself just outside the maximum cast range of Event Horizon. Fire your To the Skies! through Thundering Blow whenever Veigar pauses to cast Baleful Strike on minion waves. If he steps too far forward to retaliate, immediately activate Transform Mercury Cannon, close the gap with To the Skies!, and use Thundering Blow to knock him back before he can trap you in his cage or burst you with Primordial Burst.
PokeAssassineZyra's lack of mobility makes her an easy target for your accelerated poke. Firing To the Skies! through the gate of Thundering Blow allows you to chunk her health bar from outside her spell range. While you hold the offensive advantage, jumping in with Transform Mercury Cannon is dangerous if she still has Grasping Roots available to stop you mid-air and set up Stranglethorns.Zyra Build →Details ansehen
Zyra
Warum
Zyra's lack of mobility makes her an easy target for your accelerated poke. Firing To the Skies! through the gate of Thundering Blow allows you to chunk her health bar from outside her spell range. While you hold the offensive advantage, jumping in with Transform Mercury Cannon is dangerous if she still has Grasping Roots available to stop you mid-air and set up Stranglethorns.
Lane-Einfluss
By establishing early health leads with your cannon poke, you force Zyra to retreat, neutralizing her Garden of Thorns passive. She cannot safely spawn seeds with Rampant Growth without risking massive damage. This grants you complete control over the wave state, allowing you to secure lane priority while easily dodging her slow-moving Deadly Spines.
Wie man spielt
Remain in cannon form and focus on landing To the Skies! through Thundering Blow to whittle her down. Never use Transform Mercury Cannon to engage in melee unless you see her misplay and waste Grasping Roots. If she misses this root, immediately jump on her with To the Skies! in hammer form, activate Lightning Field, and knock her back with Thundering Blow.
PokeMobilitätJayce dictates this lane through ranged superiority, but a major trap exists. If you attempt to leap with the hammer form of *To the Skies!*, Taliyah's *Unraveled Earth* will trigger, stunning you instantly and leaving you open to *Seismic Shove*. By staying in *Transform Mercury Cannon* and abusing long-range projectiles, you bypass her zone denial entirely while shredding her health bar.Taliyah Build →Details ansehen
Taliyah
Warum
Jayce dictates this lane through ranged superiority, but a major trap exists. If you attempt to leap with the hammer form of *To the Skies!*, Taliyah's *Unraveled Earth* will trigger, stunning you instantly and leaving you open to *Seismic Shove*. By staying in *Transform Mercury Cannon* and abusing long-range projectiles, you bypass her zone denial entirely while shredding her health bar.
Lane-Einfluss
This interaction forces Taliyah into a defensive posture, preventing her from stepping up to farm with *Threaded Volley*. Since she must hold *Unraveled Earth* to deter your leap, she loses control of the wave. You can easily secure mid priority, neutralizing her *Rock Surfing* passive and trapping her under tower, making her *Weaver's Wall* useless for roaming.
Wie man spielt
Play almost exclusively in Cannon form, firing accelerated *To the Skies!* blasts through your *Thundering Blow* gate. Never use the melee version of *To the Skies!* while her *Unraveled Earth* carpet is active on the ground. Only switch forms with *Transform Mercury Cannon* to commit for a kill once her stones have completely decayed or after dodging her *Seismic Shove*.
Früher DruckPokeYour early physical damage completely overpowers Vladimir before he can stack AP and health via Crimson Pact. By harassing him constantly using To the Skies! after utilizing Transform Mercury Cannon, you force him to make a miserable choice. He must either take your heavy physical burst or bleed out his own health pool by deploying Sanguine Pool defensively to dodge your Thundering Blow. This self-inflicted HP cost destroys his sustain loop.Vladimir Build →Details ansehen
Vladimir
Warum
Your early physical damage completely overpowers Vladimir before he can stack AP and health via Crimson Pact. By harassing him constantly using To the Skies! after utilizing Transform Mercury Cannon, you force him to make a miserable choice. He must either take your heavy physical burst or bleed out his own health pool by deploying Sanguine Pool defensively to dodge your Thundering Blow. This self-inflicted HP cost destroys his sustain loop.
Lane-Einfluss
Because Vladimir has to respect your physical burst, you dictate the minion wave's movement from level one. You can easily crash large waves while he struggles to clear with Tides of Blood without hurting himself. This constant priority allows you to chip away at his tower or secure comfortable recalls, while Vladimir is trapped under his turret, constantly monitoring his Transfusion cooldown just to secure low-health minions.
Wie man spielt
Never launch your full melee combo while Vladimir's Transfusion is fully charged with its crimson indicator active. Instead, bait this empowered state by hovering near your caster minions, then jump in with To the Skies! the moment his resource bar empties. If he panic-casts Sanguine Pool, immediately disengage, wait out the pool's duration, and immediately hammer him with Lightning Field and Thundering Blow before he can regenerate his lost health.
UnterbrechungFrüher DruckThis matchup heavily favors you because Katarina relies on channeling her ultimate to secure kills, which you can cancel instantly. Whenever she activates Death Lotus, you can immediately switch to hammer form using Transform Mercury Cannon and cast Thundering Blow to push her away and interrupt her. This interaction completely neutralizes her primary damage threat, leaving her vulnerable while her major cooldown is wasted.Katarina Build →Details ansehen
Katarina
Warum
This matchup heavily favors you because Katarina relies on channeling her ultimate to secure kills, which you can cancel instantly. Whenever she activates Death Lotus, you can immediately switch to hammer form using Transform Mercury Cannon and cast Thundering Blow to push her away and interrupt her. This interaction completely neutralizes her primary damage threat, leaving her vulnerable while her major cooldown is wasted.
Lane-Einfluss
Because she cannot channel her ultimate near you, Katarina is forced to play passively under her turret. You can easily control the wave with Lightning Field and harass her from range when she tries to collect daggers from Bouncing Blade. She cannot safely initiate trades with Shunpo without risking a heavy hammer counter-burst, which severely limits her roams and hurts her gold generation.
Wie man spielt
To execute this flawlessly, never use Thundering Blow offensively unless Katarina's ultimate is already on cooldown. Always stay positioned away from the daggers dropped by her Bouncing Blade or Preparation to avoid taking free damage from Shunpo. If she jumps on you, immediately switch to hammer with Transform Mercury Cannon, use To the Skies! for a quick trade, but keep your knockback ready in case she decides to spin.
PokeWellenräumungTwisted Fate relies on Pick a Card to zone you, but his short range makes him highly vulnerable to your range advantage. By switching with Transform Mercury Cannon, you can consistently out-poke him. When he throws Wild Cards to clear, he is left defenseless. You can instantly punish him by leaping in with To the Skies! and activating Lightning Field, forcing him to play defensively under his own turret.Twisted Fate Build →Details ansehen
Twisted Fate
Warum
Twisted Fate relies on Pick a Card to zone you, but his short range makes him highly vulnerable to your range advantage. By switching with Transform Mercury Cannon, you can consistently out-poke him. When he throws Wild Cards to clear, he is left defenseless. You can instantly punish him by leaping in with To the Skies! and activating Lightning Field, forcing him to play defensively under his own turret.
Lane-Einfluss
You will easily dictate the minion waves, pushing Twisted Fate under his tower where he must waste mana using Pick a Card to secure last hits. This relentless pressure denies him the passive gold from Loaded Dice. However, the true test begins when he unlocks Destiny. Your constant poke should force him to recall frequently, delaying his ultimate plays, but you must keep him pinned to prevent map-wide pressure.
Wie man spielt
Stand near your accelerated gate from Thundering Blow to dodge Wild Cards easily. Watch his head: the moment he locks a Blue or Red card with Pick a Card, he loses his stun. Immediately engage with To the Skies! and knock him back using Thundering Blow in hammer form. Most importantly, place deep wards in the river. If he disappears to channel Destiny, aggressively shove the wave to punish his tower.
Früher DruckFarmenKayle's absolute vulnerability before unlocking Divine Ascent's ranged forms allows Jayce to dictate the lane immediately. By abusing Transform Mercury Cannon to stay ranged, you can incessantly harass her with To the Skies! combined with Thundering Blow. Her weak early defense means Celestial Blessing cannot sustain your physical burst, and she lacks any real answer to your ranged poke before unlocking her ultimate, Divine Judgment, leaving her completely exposed to your early pressure.Kayle Build →Details ansehen
Kayle
Warum
Kayle's absolute vulnerability before unlocking Divine Ascent's ranged forms allows Jayce to dictate the lane immediately. By abusing Transform Mercury Cannon to stay ranged, you can incessantly harass her with To the Skies! combined with Thundering Blow. Her weak early defense means Celestial Blessing cannot sustain your physical burst, and she lacks any real answer to your ranged poke before unlocking her ultimate, Divine Judgment, leaving her completely exposed to your early pressure.
Lane-Einfluss
This matchup forces Kayle to surrender early wave control entirely. You can freeze the wave near your turret, zoning her from gold by threatening a sudden melee swap with Transform Mercury Cannon. She is forced to bleed mana using Radiant Blast and Starfire Spellblade just to secure occasional last hits. This creates massive health discrepancies, giving you easy priority to secure early mid-lane plates or roam while she is trapped farming under her tower.
Wie man spielt
Stand aggressively past her caster minions to deny her experience, keeping Thundering Blow ready to knock her back if she attempts a desperate trade. If she tries to farm with Starfire Spellblade, immediately punish her with a fast Lightning Field and To the Skies! trade. If she reaches level five and secures Divine Judgment, do not dive blindly; instead, bait her ultimate first with fake engages before committing to your full melee burst.
Normaler SchadenFrüher DruckKassadin is designed to survive mid lane by using Null Sphere to absorb incoming magic damage with its shield. However, because Jayce deals predominantly physical damage, this shield is entirely useless against your attacks. Pre-level 5, Kassadin has no mobility to escape your range. By switching with Transform Mercury Cannon, you can relentlessly abuse his weak melee phase before he unlocks Riftwalk, turning his primary defensive tool into a wasted cooldown.Kassadin Build →Details ansehen
Kassadin
Warum
Kassadin is designed to survive mid lane by using Null Sphere to absorb incoming magic damage with its shield. However, because Jayce deals predominantly physical damage, this shield is entirely useless against your attacks. Pre-level 5, Kassadin has no mobility to escape your range. By switching with Transform Mercury Cannon, you can relentlessly abuse his weak melee phase before he unlocks Riftwalk, turning his primary defensive tool into a wasted cooldown.
Lane-Einfluss
This absolute damage mismatch forces Kassadin to forfeit minion waves or bleed HP every time he steps up to last-hit with Nether Blade. You dictate the wave state entirely; slow-pushing the first three waves allows you to crash a massive wave under his turret. This heavy early pressure forces him into terrible recall timings, denying him gold and keeping him trapped under tower while you secure free map priority.
Wie man spielt
Position yourself aggressively near his melee minions to zone him out. When he attempts to farm, use Lightning Field for rapid attacks, then fire a projectile through Thundering Blow in cannon form. If he tries to jump on you after level 5 using Riftwalk, immediately switch to hammer form and use Thundering Blow to knock him away, neutralising his burst before chasing him down with To the Skies!.
Vorteil: kanonisches Urteil von Wild Rift Core (−3 bis +3), aus Sicht des in der Zeile genannten Champions. Siegrate und Pickrate: die eigenen Werte des Gegners in dieser Rolle — Wild Rift CN · Challenger, Patch 7.3b. Keine Siegrate im direkten Duell.
Vorteil: kanonisches Urteil von Wild Rift Core (−3 bis +3), aus Sicht des in der Zeile genannten Champions. Siegrate und Pickrate: die eigenen Werte des Gegners in dieser Rolle — Wild Rift CN · Challenger, Patch 7.3b. Keine Siegrate im direkten Duell.
Wie man diesen Champion kontert
Konter-Winkel
Jayce-Konter zu verstehen, bedeutet nicht, Namen auswendig zu lernen – es geht darum zu verstehen, was seinen Spielplan durchkreuzt. Jayce stützt sich auf drei Säulen: Fernkampf-Poke, Tempokontrolle und Wahl der Trades. Champions, die ihn schlagen, stören diese Elemente. Manche reduzieren seine Wirkung mit Rüstung oder Sustain, andere bestrafen ihn mit All-ins, und manche machen seine Skillshots durch Mobilität zunichte. Diese Seite hilft dir, diese Dynamiken zu lesen, anstatt Matchups auswendig zu lernen.
Patch-Kontext
In diesem Patch hat Jayce Schwierigkeiten gegen Champions, die seinen Poke absorbieren oder ihn aus seiner Komfortzone drängen. Sein Mangel an Sustain und Mobilität macht ihn anfällig für wiederholte All-ins und ausgedehnte Trades. Champions, die ausweichen oder schnell angreifen können, reduzieren ebenfalls seine Effektivität. Sobald er ohne Vorbereitung in den Nahkampf gezwungen wird, wird Jayce zu einem leichten Ziel. Das Problem ist nicht nur mechanisch – es ist strukturell.
Schnell gelesen
Tanks, die deinen Poke ignorieren, neutralisieren dich.
Mobile Champions reduzieren deine Wirkung.
Schnelle All-ins bestrafen deine Fehler.
Konter-Archetypen
Poke-resistente Tanks
Diese Champions absorbieren deinen Poke, ohne Druck zu verlieren. Dein EQ wird ineffektiv, da sie Rüstung stapeln oder Schadensreduktionstools haben. Sie müssen die Lane nicht gewinnen, um nützlich zu sein, und können auf Gelegenheiten zum Engagen warten, was Jayce konstant unter Druck setzt.
Wie sich der Champion anpasst. Vermeide es, Trades zu erzwingen. Spiele um das Wellentempo herum und beeinflusse die Karte, anstatt zu versuchen, sie zu töten.
Explosive All-in-Champions
Diese Champions bestrafen jeden Positionsfehler. Jayce muss aus der Ferne spielen, aber sobald er engagiert wird, fehlt ihm eine echte Fluchtmöglichkeit. Ihre Mobilität erlaubt es ihnen, seinen Poke auszuweichen und Nahkämpfe zu erzwingen, wo Jayce viel schwächer ist.
Wie sich der Champion anpasst. Respektiere ihre Timings und halte sicheren Abstand. Dein Poke sollte sie davon abhalten, anzugreifen.
Skalierende Duellanten
Diese Champions skalieren in Duellen besser als Jayce im Laufe des Spiels. Selbst wenn Jayce früh gewinnt, kann er den Druck nicht unbegrenzt aufrechterhalten. Sobald sie Item-Spikes erreichen, gewinnen sie ausgedehnte Trades und zwingen Jayce zurück.
Malphite ist einer der schlechtesten Matchups für Jayce, da er seinen Poke-Plan komplett zunichtemacht. Seine natürliche Rüstung und defensiven Builds reduzieren deinen Schaden drastisch, und sein Ultimate erzwingt Kämpfe, die du nicht kontrollieren kannst. Selbst mit einem frühen Vorsprung kann ein guter Engage das Spiel umdrehen.
Häufige Fehler gegen ihn
Häufige Fehler gegen ihn
Unterschätzen des gegnerischen Engages.
Zu aggressiv ohne Vision spielen.
Trades gegen Tanks erzwingen.
Ignorieren von gegnerischen Power Spikes.
Zu lange im Nahkampf bleiben.
Coach-Notizen
Wenn dein Poke nichts bringt, muss dein Plan sofort geändert werden.
Positionierung ist wichtiger als DPS auf Jayce.
FAQ
Warum sind Tanks so schwer für Jayce?
Weil Jayce auf Poke und kurze Trades angewiesen ist. Tanks reduzieren seinen Einfluss, indem sie Schaden absorbieren und bis zum Engage überleben. Sobald Kämpfe beginnen, kann Jayce nicht mit ihrer Heilung oder Frontline-Präsenz mithalten.
Wie spielt man gegen mobile Champions?
Du musst deinen Abstand und dein Timing anpassen. Dein Poke sollte ihren Ansturm kontrollieren, nicht nur Schaden verursachen. Verfehlte Skillshots schaffen Gelegenheiten für sie, um anzugreifen.
Kann man einen schwierigen Matchup mit Jayce gewinnen?
Ja, aber es erfordert perfekte Ausführung und Tempo-Management. Du musst Fehler vermeiden, den Poke maximieren und die Karte nutzen, um Matchup-Schwächen auszugleichen.
Solltest du lange Duelle vermeiden?
Ja, besonders gegen Scaling-Champions. Jayce ist für kurze Trades und Poke gebaut. Lange Kämpfe begünstigen ihn selten.