August 2026 · Patch 7.2d
Mage · MID · SUPPORT

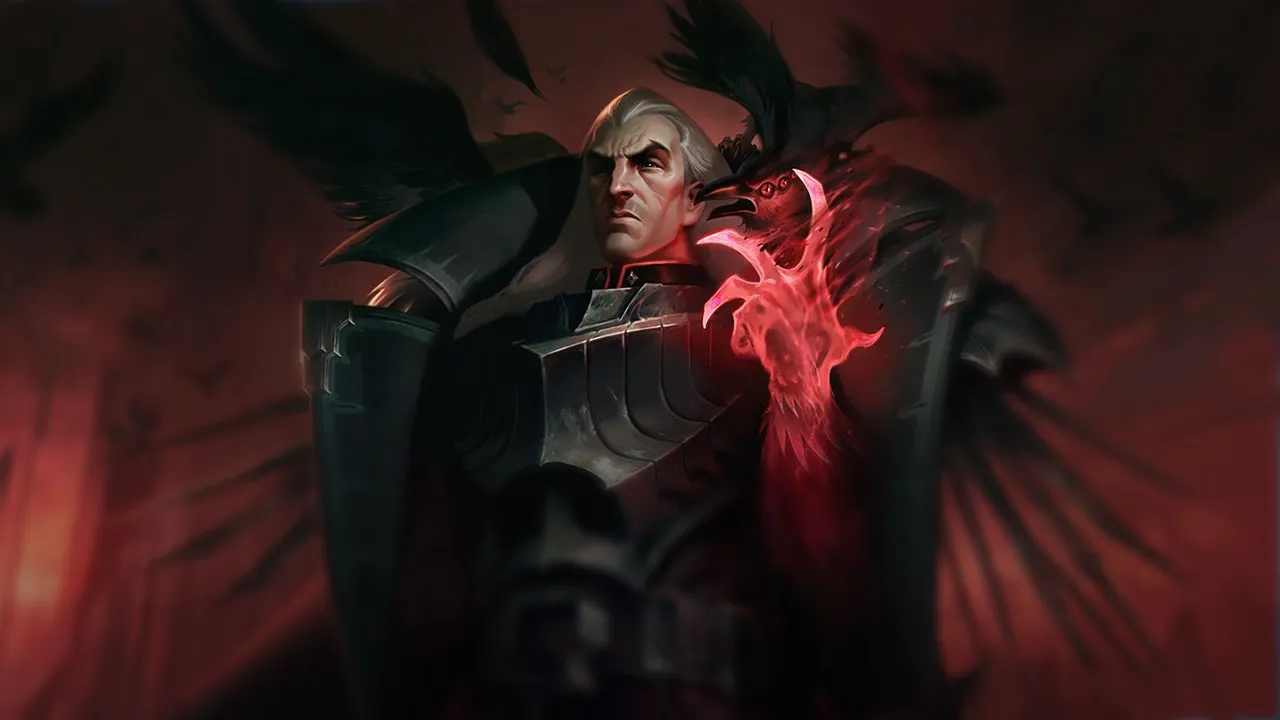
Swain Wild Rift Counter-Guide

Swain wird durch weitreichende poke-Kompositionen gekontert, die seinen tentacles und seiner drain-Zone ausweichen. Champions, die einen engage starten können, bevor er seine Ultimate aktiviert, oder die seinem sustain durch Anti-Heal widerstehen, verringern seine Effektivität. Seine Langsamkeit macht ihn anfällig für gegnerisches Repositionieren.

★ MID · SUPPORT Tier S
SCHADEN
UTIL
TANK
DIFF
Win 52.1% #22 · ↓4pt
Pick 4.7% #16
Ban 6.6% #38

Swain Wild Rift Counter-Guide ★ Counter Sheet

Ungünstig

12

Diese Champions haben Werkzeuge, die ihnen im Kampf meist einen Vorteil verschaffen, ohne das Matchup unspielbar zu machen. Sie haben vielleicht mehr Reichweite, können deine Offensive besser abfangen oder haben mehr Möglichkeiten, auf deine Engages zu reagieren. Du musst deine Herangehensweise anpassen und sorgfältig die Momente wählen, in denen du den Kampf annimmst.

Lux

Lux

spacingkiteanti_engage Lux dictates this matchup entirely through her superior range. Her Lucent Singularity and Light Binding allow her to harass you from a distance where your Nevermove simply cannot reach. Because you cannot reliably root her, you are starved of souls for your Ravenous Flock, preventing you from scaling your maximum health. This distance safety also means activating Demonic Ascension is useless, as she remains completely out of your draining aura. Details ansehen
Lux

Warum

Lux dictates this matchup entirely through her superior range. Her Lucent Singularity and Light Binding allow her to harass you from a distance where your Nevermove simply cannot reach. Because you cannot reliably root her, you are starved of souls for your Ravenous Flock, preventing you from scaling your maximum health. This distance safety also means activating Demonic Ascension is useless, as she remains completely out of your draining aura.

Lane-Einfluss

You will constantly find yourself pushed under turret. Lux can easily clear waves and poke you simultaneously using Lucent Singularity, forcing you to spend mana on Death's Hand just to secure last hits rather than trading. Your health pool will slowly dwindle under her constant Illumination procs, leading to forced, unfavorable recall timings. This constant mid-lane pressure denies you any map priority, locking you down while she threatens with Final Spark.

Wie man spielt

To survive this lane, you must adopt a strict lateral movement pattern to bait and dodge her Light Binding. Never walk directly toward her; instead, focus on farming and wait for her to waste her crowd control. If she misses her root, you have a brief window to step forward and place Vision of Empire to slow her, allowing you to close the gap. Keep your distance when her Prismatic Barrier is active, and only trigger Demonic Ascension if she makes the mistake of stepping too close.

Vollständiges Profil →
Ziggs

Ziggs

dodge_skillssustain_under_pressure Ziggs holds a massive range advantage that neutralizes your healing engine. By clearing waves from afar with Bouncing Bomb, he completely avoids the radius of Demonic Ascension. Since he never has to step into your drain zone to secure farm, you are starved of the passive healing that keeps you alive in skirmishes, turning this into a battle of attrition you cannot easily win. Details ansehen
Ziggs

Warum

Ziggs holds a massive range advantage that neutralizes your healing engine. By clearing waves from afar with Bouncing Bomb, he completely avoids the radius of Demonic Ascension. Since he never has to step into your drain zone to secure farm, you are starved of the passive healing that keeps you alive in skirmishes, turning this into a battle of attrition you cannot easily win.

Lane-Einfluss

Expect to spend the laning phase shoved under your turret. Ziggs will constantly spam Bouncing Bomb and Hexplosive Minefield to erase waves, leaving you struggling to match his push. If you attempt to roam or take a poorly timed recall, his Satchel Charge will quickly execute your tower plates, forcing you to play defensively and sacrificing your early map pressure.

Wie man spielt

Focus entirely on managing the wave near your tower without letting it crash fully. Use Nevermove to catch Ziggs only when he steps up to auto-attack with Short Fuse, following up with Vision of Empire to slow him for a gank. If he retreats, save Demonic Ascension; do not waste your ultimate trying to force a fight he can easily disengage from using Satchel Charge.

Vollständiges Profil →
Viktor

Viktor

spacingshove_pressure This matchup is dictated by Viktor's superior reach and zone control. While you want to close the distance, his Hextech Ray constantly pokes you from safety. More importantly, your ultimate, Demonic Ascension, is heavily countered by his Gravity Field. The moment you transform and try to run him down, he drops the zone in your path, forcing you to take a long detour and wasting your crucial drain uptime. Details ansehen
Viktor

Warum

This matchup is dictated by Viktor's superior reach and zone control. While you want to close the distance, his Hextech Ray constantly pokes you from safety. More importantly, your ultimate, Demonic Ascension, is heavily countered by his Gravity Field. The moment you transform and try to run him down, he drops the zone in your path, forcing you to take a long detour and wasting your crucial drain uptime.

Lane-Einfluss

Viktor's rapid waveclear with Hextech Ray forces you to spend most of the early game farming under your turret. Attempting to freeze or contest the wave dynamic is risky, as his Siphon Power shield negates your Death's Hand retaliation. This constant pressure limits your map rotations, forcing you to prioritize wave management over early skirmishes while slowly bleeding tower plates if you cannot match his push.

Wie man spielt

To survive this lane, prioritize lane discipline over aggressive trades. Use Death's Hand strictly to prevent the wave from crashing too fast, and conserve your mana. Never activate Demonic Ascension while Viktor still holds Gravity Field, as he will instantly neutralize your ultimate. Instead, fish for catches with Nevermove when he mispositions to use Siphon Power, and use Vision of Empire from afar to disrupt his recalls or assist your jungler without leaving your tower.

Vollständiges Profil →
Yone

Yone

spacingdodge_skills Yone's Soul Unbound completely neutralizes your primary self-defense, Nevermove. He can easily dodge the returning root or cleanse it entirely by snapping back to his body. Without the snare to trigger Ravenous Flock, you cannot keep him at bay. He will easily close the gap using the third strike of Mortal Steel and shred you with the mixed physical and magic damage of Way of the Hunter. Details ansehen
Yone

Warum

Yone's Soul Unbound completely neutralizes your primary self-defense, Nevermove. He can easily dodge the returning root or cleanse it entirely by snapping back to his body. Without the snare to trigger Ravenous Flock, you cannot keep him at bay. He will easily close the gap using the third strike of Mortal Steel and shred you with the mixed physical and magic damage of Way of the Hunter.

Lane-Einfluss

You cannot safely contest the wave near the center of the lane. Stepping up to clear minions with Death's Hand exposes you to sudden engages, especially since Yone can mitigate your counter-poke with his Spirit Cleave shield. This constant threat forces you under your turret, slowly chipping away at your health bar and leaving you unable to assist your jungler when Yone roams freely.

Wie man spielt

Never cast Nevermove proactively. Keep this crucial spell ready as a deterrent; Yone is much less likely to dive you if he has to fear a point-blank root. When he activates Soul Unbound, immediately drop Vision of Empire on his tethered physical body. This forces him to choose between taking heavy damage upon his return or cutting his engage short. If he uses Fate Sealed, activate Demonic Ascension immediately to survive his burst.

Vollständiges Profil →
Syndra

Syndra

spacingdodge_skills Your entire game plan revolves around draining enemies closely, but Syndra completely counters this with her defensive kit. The moment you activate Demonic Ascension to start healing and dealing sustained damage, she can immediately respond with Scatter the Weak. This pushes you far outside your ultimate's drain radius, effectively wasting its duration and leaving you extremely vulnerable once your transformation expires. Details ansehen
Syndra

Warum

Your entire game plan revolves around draining enemies closely, but Syndra completely counters this with her defensive kit. The moment you activate Demonic Ascension to start healing and dealing sustained damage, she can immediately respond with Scatter the Weak. This pushes you far outside your ultimate's drain radius, effectively wasting its duration and leaving you extremely vulnerable once your transformation expires.

Lane-Einfluss

Because she can effortlessly disengage your all-ins, Syndra dictates the lane tempo. She will constantly harass you with Dark Sphere and Force of Will while you try to farm with Death's Hand. You cannot easily contest her wave clear without taking heavy poke, forcing you into defensive recall timings. This keeps you pinned under your tower, unable to assist your jungler or secure priority.

Wie man spielt

To survive, you must bait out Scatter the Weak before committing your ultimate. Position yourself slightly off-center from her Dark Sphere placements to make her stun harder to land. Hold your Nevermove and only cast it when she walks forward to throw a Force of Will. If she wastes her knockback, that is your immediate green light to activate Demonic Ascension and force a close-quarters trade.

Vollständiges Profil →
Yasuo

Yasuo

spacingbait_shields Yasuo's Wind Wall completely shuts down your offensive threat by blocking both the initial and returning paths of Nevermove. Because your entire crowd control and soul-harvesting engine via Ravenous Flock relies on landing this claw, a single well-timed wall leaves you completely exposed. Without the threat of your root, Yasuo can easily bypass Death's Hand poke and dash directly onto you. Details ansehen
Yasuo

Warum

Yasuo's Wind Wall completely shuts down your offensive threat by blocking both the initial and returning paths of Nevermove. Because your entire crowd control and soul-harvesting engine via Ravenous Flock relies on landing this claw, a single well-timed wall leaves you completely exposed. Without the threat of your root, Yasuo can easily bypass Death's Hand poke and dash directly onto you.

Lane-Einfluss

This defensive barrier forces you into a passive posture where you cannot step up to contest waves. Yasuo will constantly dash through minions with Sweeping Blade to pop his Way of the Wanderer shield, knowing you cannot punish him if Nevermove is blocked. Missed roots mean fewer soul fragments, delaying your health scaling and leaving you vulnerable to a dive via Last Breath if you get chipped down.

Wie man spielt

To survive, you must hold Nevermove like a loaded weapon. Never throw it proactively unless Yasuo has already wasted his Wind Wall on a stray Death's Hand. If he dashes aggressively with Sweeping Blade, drop Vision of Empire directly on yourself to slow his retreat and force him to choose between taking damage or burning his wall. If he blocks your root, immediately retreat under your turret and wait out the long barrier cooldown before stepping up again.

Vollständiges Profil →
Aurelion Sol

Aurelion Sol

safe_farmoutscale Swain's complete lack of mobility makes him a sitting duck inside Aurelion Sol's Singularity. Whenever you try to force a fight with Demonic Ascension, the Star Forger can drop his gravitational black hole directly on you. Because you cannot quickly escape its pull, Aurelion Sol can channel Breath of Light with impunity, farming massive Stardust stacks off your ultimate’s duration while easily out-ranging your Death's Hand. Details ansehen
Aurelion Sol

Warum

Swain's complete lack of mobility makes him a sitting duck inside Aurelion Sol's Singularity. Whenever you try to force a fight with Demonic Ascension, the Star Forger can drop his gravitational black hole directly on you. Because you cannot quickly escape its pull, Aurelion Sol can channel Breath of Light with impunity, farming massive Stardust stacks off your ultimate’s duration while easily out-ranging your Death's Hand.

Lane-Einfluss

This dynamic neutralizes your early aggression. Aurelion Sol easily matches your wave clear by dropping Singularity on your minions, forcing you to use Death's Hand under pressure. Because Nevermove is too slow to stop his Astral Flight mid-flight, you cannot punish his roams or lock him down for trades. This turns the mid lane into a passive farming zone where his Stardust stacks grow unchecked while you struggle to crash waves.

Wie man spielt

To survive this scaling matchup, you must discipline your wave management. Never activate Demonic Ascension unless Aurelion Sol has already wasted Singularity on the wave. Instead, use Death's Hand solely to freeze the minions near your turret, forcing him to overextend to farm. If he attempts to channel Breath of Light on the wave, punish him with Nevermove. Use Vision of Empire to scout his Astral Flight roams and immediately hard-shove to punish his absence.

Vollständiges Profil →
Irelia

Irelia

dodge_skillshotsdps_race This matchup hinges on the interaction between your CC and her mobility. When Irelia uses a Bladesurge reset on a dying minion to dodge your Nevermove, she completely neutralizes your Ravenous Flock healing. Without that crucial burst of passive sustain, you are left defenseless at close range against her fully stacked Ionian Fervor basic attacks, which quickly shred your health pool. Details ansehen
Irelia

Warum

This matchup hinges on the interaction between your CC and her mobility. When Irelia uses a Bladesurge reset on a dying minion to dodge your Nevermove, she completely neutralizes your Ravenous Flock healing. Without that crucial burst of passive sustain, you are left defenseless at close range against her fully stacked Ionian Fervor basic attacks, which quickly shred your health pool.

Lane-Einfluss

Expect Irelia to constantly prep the minion wave to create jump points. If she baits out your Nevermove, she immediately gains complete wave control, forcing you under tower where she can dive you with Vanguard's Edge. Any trade where you miss your root means giving up mid-lane priority, forcing you to use Vision of Empire just to scout her roams rather than securing passive stacks.

Wie man spielt

You must never cast Nevermove proactively while Irelia has low-health minions nearby to dash to. Instead, hold the ability and punish her with Death's Hand when she approaches to last-hit. If she initiates with Flawless Duet or Vanguard's Edge, wait for her to finish her Bladesurge dash onto you before throwing your root point-blank. Once she is rooted, immediately back off to deny her sustained auto-attacks and use Demonic Ascension only to survive her burst under your turret.

Vollständiges Profil →

Andere Matchups

Skill Matchups

10

Diese Matchups sind vor allem Duelle der Ausführung: Beide Champions haben glaubwürdige Wege, die Oberhand zu gewinnen. Eine wichtige ausgewichene Fähigkeit, ein richtig antizipierter Engage oder ein einziger Positionierungsfehler können reichen, um das Duell zu entscheiden. Das Matchup zu kennen und die richtigen Fenster zum Handeln zu erkennen, ist hier besonders wichtig.

Ryze

Ryze

kitingsustained_dps This matchup revolves around a spacing battle during ultimate activations. While your Demonic Ascension provides immense health drain, Ryze combats this by cycling Spell Flux and Overload to trigger sudden bursts of movement speed. This allows him to dance just outside your ultimate's aura while continuously chipping away at your health bar, turning the fight into a pure test of micro-spacing and healing against his sustained magic damage. Details ansehen
Ryze

Warum

This matchup revolves around a spacing battle during ultimate activations. While your Demonic Ascension provides immense health drain, Ryze combats this by cycling Spell Flux and Overload to trigger sudden bursts of movement speed. This allows him to dance just outside your ultimate's aura while continuously chipping away at your health bar, turning the fight into a pure test of micro-spacing and healing against his sustained magic damage.

Lane-Einfluss

Trading in this lane is a battle of attrition. Ryze will constantly attempt to spread Spell Flux through your minions to poke you from safety, while you rely on Ravenous Flock pulls and Death's Hand to match his wave clear. Because both of you possess high sustain and wave pressure, neither champion can easily force a recall, meaning the lane often remains locked in Mid, delaying roam timers and keeping both junglers focused on breaking the stalemate.

Wie man spielt

To win this, you must hold Nevermove specifically for when Ryze advances to spread Spell Flux or when he triggers his Overload speed boost. Do not activate Demonic Ascension preemptively; wait until he commits his Rune Prison to root you, then immediately counter with your ultimate and use Vision of Empire behind him to slow his escape path. If he successfully kited your ultimate, immediately disengage and focus on clearing waves to rebuild your soul stacks.

Vollständiges Profil →
Veigar

Veigar

spacingcooldown_windows This matchup is a battle of spatial control. Swain wants to run down enemies with Demonic Ascension, but Veigar's Event Horizon completely negates this aggressive approach. If you get trapped inside the cage, you cannot close the distance to drain Veigar, leaving you vulnerable to Dark Matter and a devastating Primordial Burst. Your ability to sustain depends entirely on navigating around his cage. Details ansehen
Veigar

Warum

This matchup is a battle of spatial control. Swain wants to run down enemies with Demonic Ascension, but Veigar's Event Horizon completely negates this aggressive approach. If you get trapped inside the cage, you cannot close the distance to drain Veigar, leaving you vulnerable to Dark Matter and a devastating Primordial Burst. Your ability to sustain depends entirely on navigating around his cage.

Lane-Einfluss

Throughout the laning phase, Veigar aims to farm with Baleful Strike to stack Phenomenal Evil Power safely. You must use Nevermove to disrupt his rhythm, but missing it leaves you open to an immediate Event Horizon counter-attack. The lane remains neutral until one of you overextends; a trapped Swain is easily burst down, whereas a Veigar without his cage cannot stop your raw health drain.

Wie man spielt

To win this, never activate Demonic Ascension proactively unless Veigar has already wasted Event Horizon. Position yourself diagonally from him to make landing Nevermove easier while baiting out his cage. If you do get trapped inside the perimeter, do not panic-walk into the stun boundary; instead, use the internal space to dodge Dark Matter and cast Vision of Empire to slow his follow-up, waiting out the cage before re-engaging.

Vollständiges Profil →
Corki

Corki

sustainteamfights This matchup is a battle of attrition centered on Corki's mobility versus your ultimate's zone. While Swain relies on pulling Corki with Nevermove to trigger Ravenous Flock and sustain, Corki easily negates your ultimate pressure. The moment you activate Demonic Ascension, Corki can react with Valkyrie to dash out of your drain range, completely cutting off your health regeneration and leaving you vulnerable. Details ansehen
Corki

Warum

This matchup is a battle of attrition centered on Corki's mobility versus your ultimate's zone. While Swain relies on pulling Corki with Nevermove to trigger Ravenous Flock and sustain, Corki easily negates your ultimate pressure. The moment you activate Demonic Ascension, Corki can react with Valkyrie to dash out of your drain range, completely cutting off your health regeneration and leaving you vulnerable.

Lane-Einfluss

Laning revolves around managing the distance between Corki's long-range Phosphorus Bomb or Missile Barrage poke and your short-range Death's Hand. Because Corki matches your wave clear using Gatling Gun, you cannot easily force him under tower. The lane remains even until someone missteps; if you fail to pin him down before he acquires his Special Delivery package, he will easily out-roam you and pressure other lanes.

Wie man spielt

To win this duel, never initiate with Demonic Ascension while Corki has Valkyrie available. Instead, fish for trades using Nevermove to pull him in with Ravenous Flock, forcing him to panic-dash. Once his mobility is down, you can safely unleash your ultimate. When he retrieves his package, use Vision of Empire to scout his pathing and slow his Special Delivery approach, keeping yourself safe from the high-damage burning trail.

Vollständiges Profil →

Andere Matchups

Günstig

26

Diese Champions tun sich meist schwer, auf deine Hauptstärken zu reagieren, was dir mehr Freiheit im Matchup gibt. Du hast oft mehrere Möglichkeiten, sie unter Druck zu setzen und Trades zu deinen Gunsten zu erzwingen. Nutze diesen Vorteil, um das Tempo zu bestimmen, statt ihnen Zeit zu geben, wieder in eine komfortable Position zu kommen.

Ahri

Ahri

sustainteamfight This matchup is a battle of attrition where Swain holds the upper hand. While Ahri relies on Orb of Deception and Essence Theft to poke and sustain, she lacks the raw burst to pierce through Demonic Ascension. When you activate your ultimate, her entire offensive pressure evaporates; she cannot outdamage your constant draining and is forced to burn Spirit Rush charges defensively just to escape your zone of influence. Details ansehen
Ahri

Warum

This matchup is a battle of attrition where Swain holds the upper hand. While Ahri relies on Orb of Deception and Essence Theft to poke and sustain, she lacks the raw burst to pierce through Demonic Ascension. When you activate your ultimate, her entire offensive pressure evaporates; she cannot outdamage your constant draining and is forced to burn Spirit Rush charges defensively just to escape your zone of influence.

Lane-Einfluss

Because Ahri cannot easily kill you, the lane revolves around minion management. You can constantly shove her under turret with Death's Hand, neutralizing her roaming potential. Her Orb of Deception forces her to choose between matching your push or trading. If she tries to trade, your Ravenous Flock passive keeps your health pool too high for her to setup a dive, locking her in mid lane and protecting your side lanes.

Wie man spielt

Keep your distance to make dodging Charm easier, and always hold Nevermove until she commits to a forward movement or dashes. If she attempts to trade with Fox-Fire, pull her with Ravenous Flock to trigger your healing. Should she bait out your Demonic Ascension and escape with Spirit Rush, immediately back off to your turret and use Vision of Empire from safety to scout her potential roams until your ultimate is back online.

Vollständiges Profil →
Diana

Diana

sustainteamfight Diana relies on marking you with Crescent Strike to dive in with Lunar Rush and unleash Moonfall. However, her burst is entirely countered by Demonic Ascension, which instantly grants you bonus health to absorb her combo. Once her cooldowns are spent, Diana has no escape and cannot match your continuous healing from Ravenous Flock and close-range spam of Death's Hand during an extended duel. Details ansehen
Diana

Warum

Diana relies on marking you with Crescent Strike to dive in with Lunar Rush and unleash Moonfall. However, her burst is entirely countered by Demonic Ascension, which instantly grants you bonus health to absorb her combo. Once her cooldowns are spent, Diana has no escape and cannot match your continuous healing from Ravenous Flock and close-range spam of Death's Hand during an extended duel.

Lane-Einfluss

This matchup shifts the lane pressure entirely in your favor once you reach level five. Since Diana cannot burst you down, her aggressive trades backfire, forcing her to play defensively or risk dying. This gives you total control over the wave state. You can shove her under turret repeatedly, forcing her to waste mana on Pale Cascade to farm, while you look to impact the side lanes.

Wie man spielt

Position yourself slightly behind your minions to make her Crescent Strike predictable. Hold Nevermove until she commits with Lunar Rush; since she dashes directly to you, landing your root is guaranteed, letting you pull her with Ravenous Flock. If she roams to avoid your pressure, don't blindly follow her into unwarded areas. Instead, use Vision of Empire to scout her path or delay her, then hard-shove the wave to punish her tower.

Vollständiges Profil →
Zed

Zed

armor_rushultimate_timing Zed relies entirely on executing you with his Death Mark combo, but your ultimate completely shuts down his assassination window. Activating Demonic Ascension instantly inflates your health pool, and pulling him or his clones with Ravenous Flock provides continuous healing. Because Death Mark's pop damage scales off how much damage Zed inflicts during the mark, your massive health spike and constant healing easily nullify his burst. Details ansehen
Zed

Warum

Zed relies entirely on executing you with his Death Mark combo, but your ultimate completely shuts down his assassination window. Activating Demonic Ascension instantly inflates your health pool, and pulling him or his clones with Ravenous Flock provides continuous healing. Because Death Mark's pop damage scales off how much damage Zed inflicts during the mark, your massive health spike and constant healing easily nullify his burst.

Lane-Einfluss

Zed is forced into a defensive posture, unable to threaten you under your tower. Whenever he approaches the wave to trigger Contempt for the Weak on minions, you can punish him with a point-blank Death's Hand. This pressure forces him to burn Living Shadow just to escape or clear from range with Razor Shuriken, preventing him from roaming to side lanes and locking him in mid.

Wie man spielt

Never throw Nevermove blindly while Zed has Living Shadow available, as he will easily dodge it. Instead, hold your crowd control for his ultimate. When Zed casts Death Mark, he always reappears directly behind you. Cast Nevermove behind your own back the split second he lands to guarantee an instant root, then pull him with Ravenous Flock, activate Demonic Ascension, and blast him with Death's Hand to turn his dive into a self-trap.

Vollständiges Profil →
Pyke

Pyke

sustainexecution_denial Pyke relies entirely on bringing your health low enough to execute you with Death from Below. However, the moment he leaps to cast his ultimate, your activation of Demonic Ascension grants you an instantaneous health surge. This sudden burst of maximum and current health instantly pulls you out of his execution threshold, completely wasting his ultimate reset and leaving him vulnerable at close range. Details ansehen
Pyke

Warum

Pyke relies entirely on bringing your health low enough to execute you with Death from Below. However, the moment he leaps to cast his ultimate, your activation of Demonic Ascension grants you an instantaneous health surge. This sudden burst of maximum and current health instantly pulls you out of his execution threshold, completely wasting his ultimate reset and leaving him vulnerable at close range.

Lane-Einfluss

Before level five, Pyke attempts to fish for hooks with Bone Skewer or stun you with Phantom Undertow to set up trades. Because he lacks wave clear, you can easily shove him under turret. Once you both unlock your ultimates, Pyke loses all kill pressure in lane. He is forced to abandon the mid lane to roam with Ghostwater Dive, leaving you free to secure plates.

Wie man spielt

Always hold onto Nevermove when Pyke approaches. If he charges Bone Skewer, cast it directly in his path to interrupt him, then trigger Ravenous Flock to pull him. During all-ins, bait his Death from Below by letting your health drop slightly, then reactively activate Demonic Ascension to deny his reset. If he disappears with Ghostwater Dive, immediately alert your side lanes and use Vision of Empire to scout the river.

Vollständiges Profil →
Mel

Mel

outscalinghealth_advantage Mel's kit relies on zoning but lacks the explosive burst to delete you or the mobility to disengage once you close the gap. When you activate Demonic Ascension, she is trapped in your drain radius. This helplessness turns Mel into an easy target for Nevermove, letting you pull her with Ravenous Flock repeatedly to stack permanent health while healing back any poke she managed to land. Details ansehen
Mel

Warum

Mel's kit relies on zoning but lacks the explosive burst to delete you or the mobility to disengage once you close the gap. When you activate Demonic Ascension, she is trapped in your drain radius. This helplessness turns Mel into an easy target for Nevermove, letting you pull her with Ravenous Flock repeatedly to stack permanent health while healing back any poke she managed to land.

Lane-Einfluss

Because Mel cannot threaten your life bar quickly, you dictate the minion waves. By maintaining a slow push, you force her to use her spells on minions rather than poking you. When she steps up to clear, you can easily fish for Nevermove or scout her rotations with Vision of Empire. You will constantly hold mid priority, allowing you to sustain through her minor trades.

Wie man spielt

Slow-push the first three waves to build a minion cushion, then freeze near your turret to force Mel to overextend. Once she steps past the midway line, fish for Nevermove. If it lands, immediately deploy Vision of Empire behind her, activate Demonic Ascension, and run her down with Death's Hand. If she flashes away, do not chase blindly; simply reset the wave and repeat the freeze, knowing she has no tools to break it safely.

Vollständiges Profil →
Malphite

Malphite

sustain_heavyanti_engage Malphite relies on poking you down with Seismic Shard before executing a lethal burst with Unstoppable Force. However, Swain completely neutralizes this game plan. Whenever Malphite commits his full combo, activating Demonic Ascension instantly negates his burst by draining his health. Furthermore, you easily bypass his Granite Shield during trades, constantly generating soul fragments with Ravenous Flock and Nevermove to out-sustain him over any long engagement. Details ansehen
Malphite

Warum

Malphite relies on poking you down with Seismic Shard before executing a lethal burst with Unstoppable Force. However, Swain completely neutralizes this game plan. Whenever Malphite commits his full combo, activating Demonic Ascension instantly negates his burst by draining his health. Furthermore, you easily bypass his Granite Shield during trades, constantly generating soul fragments with Ravenous Flock and Nevermove to out-sustain him over any long engagement.

Lane-Einfluss

This matchup turns the mid lane into a slow squeeze. Malphite cannot match your wave clear once you use Death's Hand to shove, forcing him under turret where his Granite Shield is constantly broken by Vision of Empire. Since his mana pool drains quickly trying to poke you, his recall timings are terrible. You will secure early priority, letting you move first to skirmishes while he remains stuck clearing.

Wie man spielt

To secure this advantage, shift your early purchases toward heavy magic penetration and raw health rather than rushing traditional flat AP. In lane, always hold Nevermove until Malphite uses Seismic Shard; the movement speed steal makes him move in a predictable straight line to close the gap, making your root easy to land. If he plays passively, cast Vision of Empire deep in his jungle to steal camps or track his jungler while keeping him pinned.

Vollständiges Profil →
Teemo

Teemo

easy_ccburst_down Teemo's short auto-attack range is his downfall here. To apply his Toxic Shot poison, he is forced to step directly into the optimal range of your Nevermove. Since Swain relies entirely on spellcasting, Teemo's Blinding Dart is completely useless, failing to mitigate any damage from Death's Hand or your ultimate, Demonic Ascension. You hold all the cards in trades because his main defensive tool cannot stop your magic output. Details ansehen
Teemo

Warum

Teemo's short auto-attack range is his downfall here. To apply his Toxic Shot poison, he is forced to step directly into the optimal range of your Nevermove. Since Swain relies entirely on spellcasting, Teemo's Blinding Dart is completely useless, failing to mitigate any damage from Death's Hand or your ultimate, Demonic Ascension. You hold all the cards in trades because his main defensive tool cannot stop your magic output.

Lane-Einfluss

Because Teemo cannot safely blind your primary damage, you can easily zone him off the minion wave. Every time he steps up to farm, he risks getting pulled by Ravenous Flock. This constant threat restricts his Move Quick rotations, keeping him pinned under his turret. Consequently, Teemo loses the ability to safely place Noxious Trap around the river, securing your mid-lane priority and freeing you to assist your jungler.

Wie man spielt

Position yourself slightly behind your own melee minions to bait Teemo into stepping forward to poke you. Keep a constant eye out for his shimmer if he uses Guerrilla Warfare, and immediately throw Vision of Empire to reveal and slow him. Hold onto Nevermove until he commits to an auto-attack animation; his locked stance makes him an incredibly easy target to root, pull, and burst down with Demonic Ascension.

Vollständiges Profil →

Andere Matchups

Items to Counter Swain

Buy these items to reduce this champion's effectiveness in your games.

Morellonomicon
Morellonomicon
Bâton du vide
Bâton du vide
Coiffe de Rabadon
Coiffe de Rabadon
Étreinte démoniaque
Étreinte démoniaque

Wie man diesen Champion kontert

Konter-Winkel

Swain zu kontern, ist nicht nur eine Frage der Championwahl, die ihn schnell erledigt. Die eigentliche Logik besteht darin, die Dauer seines Kampfes zu brechen: hindere ihn daran, Ziele in seiner R zu halten, zwinge ihn, Stasis defensiv einzusetzen, und verlasse dann seine Zone, bevor er Q und E wieder einsetzen kann. Auf der Midlane können mobile Assassinen, die bereits in den Daten vorhanden sind, ihn vor seinen Items bestrafen, während einige Kontrollchampions ihn daran hindern können, eine neutrale Welle in eine Flussrotation zu verwandeln. Swain hat hauptsächlich Schwierigkeiten, wenn der Gegner den genauen Zeitpunkt des Trades bestimmt und lange Kämpfe ablehnt, bei denen sein Sustain wertvoll wird.

Patch-Kontext

Die besten Swain-Konter greifen eine seiner drei Abhängigkeiten an: Zugang zu Zielen, Dauer des Ultimativen oder Stabilität vor seinem ersten Item. Wenn er das zurückkehrende E verfehlt, fehlt ihm oft die Kontrolle, um nach vorne zu gehen. Wenn er R zu früh aktiviert und der Gegner entkommt, verliert er sein größtes Zeitfenster. Und wenn Assassinen oder Champions, die seinen Wellen-Clear unter Druck setzen können, ihn bedrängen, kommt er spät zu den Zielen, wo er normalerweise glänzen sollte.

Schnell gelesen

  • Zwinge seine R, zieh dich zurück und betrete dann erneut, wenn Stasis oder das Ultimate seinen Eintritt nicht mehr schützen können.
  • Bleibe nicht in jungle-Korridoren gruppiert: Swain gewinnt, wenn mehrere Ziele gleichzeitig verlangsamt oder ausgesaugt werden.
  • Sein Early Game zu bestrafen ist zuverlässiger, als zu versuchen, ihn während seines stärksten mid-Game-Timings zu töten.

Konter-Archetypen

Mobile Assassinen, die sein Timing brechen

Diese Matchups funktionieren gegen Swain, weil sie kurze Zeitfenster wählen, auf ihn zustürmen können, bevor sein R wertvoll wird, und dann vermeiden, in der Drain-Zone zu bleiben. Swain will, dass der Kampf weitergeht; diese Champions wollen eine schnelle Rotation erzeugen, Stasis oder Flash erzwingen und dann gehen oder zurücksetzen. Ihre Mobilität macht auch das zurückkehrende E schwerer zu landen: Wenn Swain diese Kontrolle verfehlt, verliert er oft die Erlaubnis, nach vorne zu gehen, und erleidet stattdessen die Welle oder einen Roam des Gegners.

Wie sich der Champion anpasst. Swain muss eine weniger ehrgeizige Lane akzeptieren, E für den echten Eintritt aufheben statt für Poke und frühzeitig Stasis kaufen. Sein Ziel ist es nicht, jeden Trade zu gewinnen, sondern das erste Ziel zu erreichen, ohne zu viel Tempo zu verlieren.

Duellanten und Mids, die seine Zonenkontrolle verweigern

Diese Champions kontern Swain nicht auf die gleiche Weise wie reine Assassinen. Sie machen ihm Probleme, weil sie Raum bestreiten können, anstatt einfach sein R zu erleiden. Yasuo kann den Wert bestimmter Zauberwinkel reduzieren und Swain in der Welle bedrohen, Diana kann brutal angreifen, wenn Swain E zu früh eingesetzt hat, und Lissandra kann den Kampf-Rhythmus mit ihrer Kontrolle brechen. In diesen Matchups verliert Swain, wenn er die Initiative abgibt, bevor er seine Zone etabliert hat.

Wie sich der Champion anpasst. Swain muss um Wellen herumspielen, vermeiden, E in leeren Raum zu verschwenden, und darauf warten, dass der Gegner zu tief eindringt. Je mehr er Zauber aufbewahrt, um auf Kontakt zu reagieren, desto schwerer wird es, sein R zu ignorieren.

Günstige Magier Swain muss immer noch sauber konvertieren

Diese Champions erscheinen günstig für Swain, da sie ihm oft eine besser lesbare Lane und weniger unmittelbare Ausführungsgefahr bieten. Aber der Fehler wäre zu denken, dass das Matchup von selbst gewinnt. Wenn sie Abstand halten, die Welle kontrollieren oder seine mangelnde Mobilität mit ihrem eigenen Setup bestrafen, kann Swain farmen, ohne zu konvertieren. Seine eigentliche Win-Condition ist es, Lane-Stabilität oder Priorität in Fluss-Skirmishes zu verwandeln, nicht einfach mid zu überleben.

Wie sich der Champion anpasst. Swain sollte nach dem Einsatz eines Zaubers nach E-Winkeln suchen und sich dann mit seinem Jungler zu Zielen bewegen. Das günstige Matchup zählt nur, wenn es eine Zonen- oder Tempo-Vorteil schafft.

Prioritäts-Matchups

Fizz

Fizz ist ein prioritäres Matchup zu erklären, weil er genau Swain MIDs Schwachpunkt angreift: das Timing vor R, Stasis und Items stabilisieren den Champion. Wenn Swain E für Poke verwendet oder ohne Seiten-Vision pusht, kann Fizz einen kurzen Trade erzwingen, die Drain-Zone verlassen und den Kill bedrohen, bevor der Kampf lang wird. Für Swain ist die Schlüsselentscheidung, unnötige Trades abzulehnen, Ressourcen für Fizzs echten Eintritt aufzuheben und nur mit verfügbarer Stasis oder Flash Ziele zu spielen.

Katarina

Katarina verdient eine gezielte Analyse, weil das Matchup nicht nur um die Lane geht. Swain kann bestimmte Wellen halten, aber wenn Katarina einen Reset im Fluss oder in der Botlane findet, übersteigt ihr Tempo schnell Swains Fähigkeit, das Zentrum zu kontrollieren. Swain muss W nutzen, um Rotationen zu lesen, frühzeitig zu pingen und E aufzuheben, um einen schlechten Eintritt zu unterbrechen oder zu bestrafen. Das Ziel ist nicht nur, mid zu überleben: Es ist, Katarina davon abzuhalten, die Karte zu verwandeln, bevor Swain sein mid-Spiel erreicht.


Häufige Fehler gegen ihn

Häufige Fehler gegen ihn

  • In seinem R zu bleiben, nachdem die Aktivierung erzwungen wurde, anstatt sich für ein paar Sekunden zurückzuziehen und sein gesamtes Zeitfenster zu brechen.
  • Sich in einem Zielkorridor ohne Vision zu gruppieren, was Swain ein einfaches E und mehrere Ziele zum Aussaugen gibt.
  • Swain angreifen, ohne einen Plan für seine Stasis zu haben: Wenn die gesamte Burst-Schadens vor dem Einsatz aufgebraucht ist, kehrt er oft mit genügend Zeit zurück, um den Kampf zu drehen.
  • Swain kostenlos Rylai erreichen zu lassen und dann Schwierigkeiten zu haben, seiner Zone danach zu entkommen.
  • Einen guten Matchup in ein gewonnenes Spiel zu verwandeln: Selbst ein Champion, der ihn in der Lane schlägt, kann verlieren, wenn er ihm lange Objective-Fights gibt.

Coach-Notizen

  • Die beste Antwort auf Swain ist oft zeitbasiert: zwinge seinen Ultimate, geh weg, komm dann zurück. Viele Spieler verlieren, weil sie seinen R als Herausforderung behandeln, die sie sofort gewinnen müssen.
  • Achte bei Swain vor allem auf den Raum. Wenn er dich in einem engen Bereich mit Stasis bereit bekämpft, spielst du sein Spiel. Wenn er sich auf offenem Gelände auf dich zubewegen muss, verliert er viel Bedrohung.

FAQ

Wie schlägt man Swain in der Midlane?

Um Swain mid zu schlagen, musst du vermeiden, ihm den langen Kampf zu geben, den er will. Bestrafe verpasste E-Casts, zwinge seinen R, ohne darin zu bleiben, und spiele um seine Stasis-Timings herum. Mobile Assassinen können ihn vor seinen Items angreifen, aber selbst mit einem guten Matchup musst du verhindern, dass Swain den Fluss umwandelt. Wenn er Dragon mit R und Stasis frei erreicht, kann eine gewonnene Lane schnell an Wert verlieren.

Warum sind Assassinen für Swain gefährlich?

Assassinen sind gefährlich, weil sie den Kampf auf ein kurzes Zeitfenster reduzieren. Swain will R aufbauen, mit Rylai verlangsamen, Q recyceln und Feinde zwingen, zu bleiben. Ein mobiler Assassine kann stattdessen eintreten, Flash oder Stasis erzwingen und dann gehen, bevor der Drain entscheidend wird. Der Matchup wird noch schwieriger, wenn Swain E für Poke verschwendet, weil er sein Hauptwerkzeug verliert, um auf den Eintritt zu antworten.

Sollte man Swain während seines Ultimates ignorieren?

Du solltest ihn nicht immer ignorieren, aber du musst vermeiden, ihm genau das zu geben, was er will. Wenn Swain R bereits aktiviert hat und dein Team sich zurückziehen kann, Rylais Verlangsamung verlässt oder auf Stasis wartet, ist das oft besser, als alles in seiner Zone zu investieren. Wenn er jedoch isoliert ist, keine Stasis hat oder zu weit vorne ist, kann koordinierter Burst ihn bestrafen, bevor er Wert aus der Ultimate-Dauer zieht.

Reichen günstige Matchups aus, um Swain zu neutralisieren?

Nein. Ein günstiger Matchup hilft, ihn zu verlangsamen, aber Swain kann nützlich bleiben, wenn das Spiel durch gruppierte Objectives entschieden wird. Das eigentliche Ziel ist es, sein Tempo zu verweigern: zwinge ihn, R abseits von Objectives zu benutzen, nimm Vision vor ihm ein und meide Korridore, in denen er mehrere Champions treffen kann. Wenn du die Lane gewinnst, ihm aber einen knappen Dragon-Kampf gibst, bringst du Swain zurück in sein bestes Szenario.