



















































































September 2026 · Patch 7.2d
Support · SUPPORT · JUNGLE

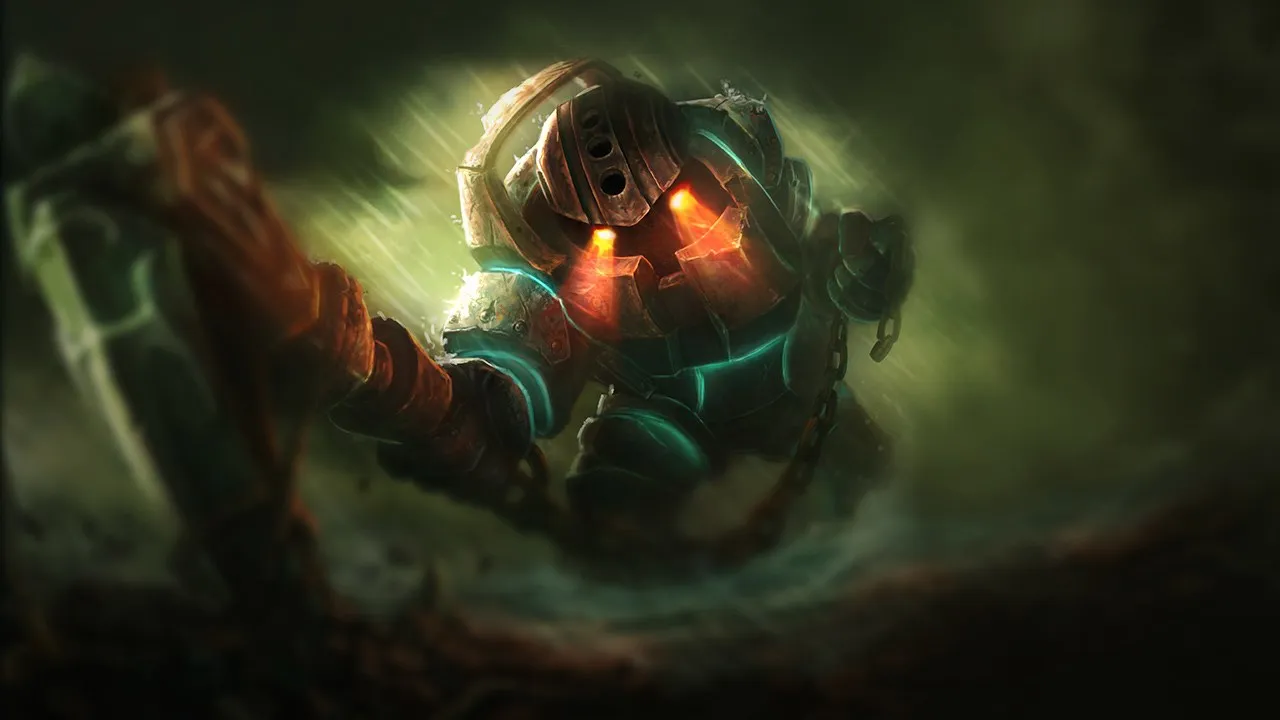
Nautilus Wild Rift Counter-Guide

Nautilus verliert an Effektivität gegen Disengage-Kompositionen, die seine Anker abwehren und Distanz halten. Champions mit Cleanse oder Dashes unterbrechen seine CC-Ketten. Poke-Kompositionen, die ihn auf Distanz halten, verringern seine Engage-Fähigkeit.

★ SUPPORT · JUNGLE Tier S+
SCHADEN
UTIL
TANK
DIFF
Win 48.3% #70 · ↓1pt
Pick 10.9% #4
Ban 2.7% #56

Nautilus Wild Rift Counter-Guide ★ Counter Sheet

Hard Counters

1

Diese Champions haben ein Build und einen Spielstil, der deinen direkt überlegen ist, was die Kontrolle der Lane und das Farmen extrem schwierig machen kann. Ihr Kit kann deine Kernstärken neutralisieren oder dich bestrafen, sobald du versuchst, deinen gewohnten Spielplan umzusetzen. In diesen Matchups geht es oft darum, Fehler zu minimieren und nach Wegen zu suchen, außerhalb der direkten Konfrontation zu gewinnen.

Morgana

Morgana

peelhard_counter This matchup is defined by how Black Shield shuts down your entire kit. Whenever you attempt to hook with Dredge Line or knock up a target using Depth Charge, Morgana can reactively cast her spell-shield on your target. This entirely absorbs your magic damage and negates the crowd control, preventing you from ever locking down her carry and turning your primary engage tools into wasted cooldowns. Details ansehen
Morgana

Warum

This matchup is defined by how Black Shield shuts down your entire kit. Whenever you attempt to hook with Dredge Line or knock up a target using Depth Charge, Morgana can reactively cast her spell-shield on your target. This entirely absorbs your magic damage and negates the crowd control, preventing you from ever locking down her carry and turning your primary engage tools into wasted cooldowns.

Lane-Einfluss

Because your hook threat is neutralized, Morgana's duo can safely control the wave. She will constantly harass you with Tormented Shadow to trigger Soul Siphon healing, while fishing for a Dark Binding. If you get rooted, you are forced to activate Titan's Wrath to survive the poke. This pressure keeps you pushed under your turret, bleeding health and unable to secure river vision.

Wie man spielt

To survive this lane, you must alter your positioning. Avoid standing in plain sight where she can easily predict your Dredge Line. Instead, use the lane brushes to mask your animations, forcing her to guess who to protect with Black Shield. If she wastes her shield on herself, immediately target her carry. Otherwise, hold your Depth Charge during skirmishes until her shield is on cooldown, relying on Riptide to peel rather than blindly engaging.

Vollständiges Profil →

Ungünstig

11

Diese Champions haben Werkzeuge, die ihnen im Kampf meist einen Vorteil verschaffen, ohne das Matchup unspielbar zu machen. Sie haben vielleicht mehr Reichweite, können deine Offensive besser abfangen oder haben mehr Möglichkeiten, auf deine Engages zu reagieren. Du musst deine Herangehensweise anpassen und sorgfältig die Momente wählen, in denen du den Kampf annimmst.

Lulu

Lulu

disengagepeel Lulu makes engaging incredibly difficult because her defensive toolkit directly counters your all-in. Whenever you land Dredge Line to start a trade, Lulu can instantly cast Wild Growth on your target. This not only grants them massive bonus health to survive your burst, but the resulting knock-up interrupts your Riptide or follow-up Staggering Blow, leaving you deep in enemy territory with your crowd control completely wasted. Details ansehen
Lulu

Warum

Lulu makes engaging incredibly difficult because her defensive toolkit directly counters your all-in. Whenever you land Dredge Line to start a trade, Lulu can instantly cast Wild Growth on your target. This not only grants them massive bonus health to survive your burst, but the resulting knock-up interrupts your Riptide or follow-up Staggering Blow, leaving you deep in enemy territory with your crowd control completely wasted.

Lane-Einfluss

This reaction potential forces a passive laning phase where you cannot freely fish for hooks. If you hook her ADC, Whimsy polymorphs you or speeds them away, while Glitterlance slows your retreat. You will find yourself poked down under your own tower, losing wave priority. Initiating without tracking her ultimate means losing half your health bar for no return, leading to forced early recalls and lost dragon pressure.

Wie man spielt

To survive, bait her defensive spells before committing your primary crowd control. Walk up aggressively with Titan's Wrath active to absorb Glitterlance poke and threaten with the mere threat of Dredge Line. Force her to panic-cast Whimsy on her ally or herself. Once her key defensive cooldowns are spent, you have a brief window to strike. If she holds her ultimate, redirect your Depth Charge to Lulu herself to prevent her from saving her marksman in time.

Vollständiges Profil →
Galio

Galio

tankcounter_engage Triggering Dredge Line against Galio's lane partner is a dangerous trap. The moment you pull yourself in, you put yourself in perfect range for Galio to charge Shield of Durand, taunting both you and your approaching ADC. This immediate counter-engage completely neutralizes Titan's Wrath, leaving you exposed to a quick Justice Punch knock-up and Colossal Smash burst, turning your offensive hook into a deadly trap. Details ansehen
Galio

Warum

Triggering Dredge Line against Galio's lane partner is a dangerous trap. The moment you pull yourself in, you put yourself in perfect range for Galio to charge Shield of Durand, taunting both you and your approaching ADC. This immediate counter-engage completely neutralizes Titan's Wrath, leaving you exposed to a quick Justice Punch knock-up and Colossal Smash burst, turning your offensive hook into a deadly trap.

Lane-Einfluss

You cannot fish for aggressive hooks, which forces you to play defensively under your turret. This passive stance allows Galio to safely poke with Winds of War and control the wave. If you try to force trades, his Hero's Entrance allows him to match your roam potential or turn skirmishes elsewhere. You lose priority, meaning your ADC must farm under pressure while you watch for his sudden Justice Punch engages.

Wie man spielt

Focus entirely on defending your ADC. Save Dredge Line exclusively to pull Galio away when he charges forward with Justice Punch, or use Staggering Blow to root him mid-dash. If he initiates with Shield of Durand, immediately activate Titan's Wrath to absorb the initial burst, then use Riptide to slow him down, allowing your ADC to disengage. Do not use Depth Charge to start fights; hold it to cancel his Hero's Entrance channel or peel his ultimate landing zone.

Vollständiges Profil →
Milio

Milio

anti_engagepeel_focus Your engage is heavily countered by Milio's defensive kit. Whenever you cast Dredge Line, Milio can reactively launch Ultra Mega Fire Kick to interrupt your dash mid-air. This knockback prevents you from getting close enough to trigger Staggering Blow, leaving you stranded without your passive root while his Cozy Campfire and Fired Up! allow his carry to safely turn the trade and poke you down. Details ansehen
Milio

Warum

Your engage is heavily countered by Milio's defensive kit. Whenever you cast Dredge Line, Milio can reactively launch Ultra Mega Fire Kick to interrupt your dash mid-air. This knockback prevents you from getting close enough to trigger Staggering Blow, leaving you stranded without your passive root while his Cozy Campfire and Fired Up! allow his carry to safely turn the trade and poke you down.

Lane-Einfluss

Because your primary hook is easily denied, you cannot freely contest space or secure brush control. Attempting to force an engage results in taking heavy damage from Milio's empowered attacks, forcing early recalls that cost your marksman minion XP. If you get poked low, Milio uses Warm Hugs to protect his ally while they push you under tower, neutralizing your lane pressure and delaying your level-six spike.

Wie man spielt

To bypass his disengage, stand parallel to your minion wave to bait out Ultra Mega Fire Kick before throwing Dredge Line. Never hook from maximum range where his reaction window is largest. Instead, walk up threateningly with Titan's Wrath active to absorb poke, forcing him to waste his defensive shield, Warm Hugs. Save Depth Charge specifically to lock Milio down directly, as he can cleanse his ADC with Breath of Life, but cannot easily escape if he is the primary target.

Vollständiges Profil →
Alistar

Alistar

tank_clashpeel_heavy This matchup is difficult because Alistar is the ultimate counter-engage tank. Whenever you attempt to catch the enemy ADC, Alistar can easily step in to block your Dredge Line with his body. Once hooked, he immediately uses Headbutt to fling you backward into your own minion wave, completely neutralizing your follow-up from Staggering Blow and preventing you from applying the slow of Riptide. Details ansehen
Alistar

Warum

This matchup is difficult because Alistar is the ultimate counter-engage tank. Whenever you attempt to catch the enemy ADC, Alistar can easily step in to block your Dredge Line with his body. Once hooked, he immediately uses Headbutt to fling you backward into your own minion wave, completely neutralizing your follow-up from Staggering Blow and preventing you from applying the slow of Riptide.

Lane-Einfluss

This interaction forces you into a highly defensive posture, stripping away your early-game pressure. You cannot fish for hooks because any failed engage near their tower results in Alistar using Pulverize and Trample to lock you down under threat, leading to terrible health trades. Consequently, you lose control of the wave state, forcing your carry to farm under tower while Alistar safely triggers Triumphant Roar to keep his lane sustained.

Wie man spielt

To survive, adopt a strict counter-engage positioning behind your minion line, matching Alistar's horizontal movements. Never lead with Dredge Line unless you see him waste Headbutt to peel or initiate. Instead, activate Titan's Wrath to absorb his displacement damage when he tries to engage. During skirmishes, wait for Alistar to activate Unbreakable Will before committing your ultimate, Depth Charge, on him; otherwise, redirect your ultimate straight onto the enemy ADC to bypass his massive damage reduction.

Vollständiges Profil →
Maokai

Maokai

counter_engagetank_clash Maokai neutralises your engage potential because of how he responds to your hook. The moment you land Dredge Line to close the distance, Maokai can immediately cast Bramble Smash to knock you back. This disruption completely prevents you from applying Staggering Blow to lock down your target, while rendering your Titan's Wrath shield wasted as you are forced away from the trade. Details ansehen
Maokai

Warum

Maokai neutralises your engage potential because of how he responds to your hook. The moment you land Dredge Line to close the distance, Maokai can immediately cast Bramble Smash to knock you back. This disruption completely prevents you from applying Staggering Blow to lock down your target, while rendering your Titan's Wrath shield wasted as you are forced away from the trade.

Lane-Einfluss

This interaction forces a highly defensive laning phase. Attempting aggressive Dredge Line hooks often backfires, leaving your ADC vulnerable while Maokai controls the lane bushes with Sapling Toss. You cannot pressure their tower effectively because Maokai uses Bramble Smash to disrupt any dives, while his passive Sap Magic easily sustains him through any residual magic damage you try to poke with using Riptide.

Wie man spielt

To survive this matchup, you must alter your positioning and hold your primary crowd control. Never initiate with Dredge Line unless Maokai has already wasted Bramble Smash. Instead, stand parallel to your carry to block and punish his Twisted Advance with Riptide. When you want to engage, initiate with Depth Charge first to knock him into the air, preventing him from reacting in time to interrupt your follow-up hook.

Vollständiges Profil →
Janna

Janna

disengagepeel_focushook_denial Janna is a premier counter because her *Howling Gale* completely neutralizes your main engage tool. Whenever you cast *Dredge Line*, a reactive tornado can interrupt your forward dash mid-air. This mid-flight knockup prevents you from ever closing the distance, completely denying your passive *Staggering Blow* root and leaving you stranded in the open while she cushions her ally with *Eye of the Storm*. Details ansehen
Janna

Warum

Janna is a premier counter because her *Howling Gale* completely neutralizes your main engage tool. Whenever you cast *Dredge Line*, a reactive tornado can interrupt your forward dash mid-air. This mid-flight knockup prevents you from ever closing the distance, completely denying your passive *Staggering Blow* root and leaving you stranded in the open while she cushions her ally with *Eye of the Storm*.

Lane-Einfluss

This denial severely cripples your lane presence, stripping away your threat of a sudden engage. Because your *Dredge Line* is so easily telegraphed and blocked, Janna's duo can safely control the minion waves. You are forced to absorb poke from *Zephyr* under your own turret, bleeding health while your ADC struggles to farm. This lack of priority prevents you from rotating to aid your jungler in the river.

Wie man spielt

To survive this matchup, you must alter your engage sequence entirely. Stop leading trades with *Dredge Line* from open ground. Instead, control the bushes to hide your hook's trajectory, or wait until you unlock *Depth Charge*. Your ultimate is point-and-click and cannot be interrupted by her tornado. Use *Depth Charge* first to knock her up, then immediately follow up with *Dredge Line* and *Staggering Blow* while she is disabled, forcing her to waste *Monsoon* defensively.

Vollständiges Profil →
Pyke

Pyke

mobility_counterexecute_threat Pyke holds a severe advantage because Death from Below completely ignores the defensive shield granted by Titan's Wrath. When you drop low, your usual survival tool is rendered useless, allowing him to execute you directly. Furthermore, Pyke can easily bait your Dredge Line using Ghostwater Dive's movement speed or escape your engage attempts entirely with Phantom Undertow, turning your massive hitbox into an easy target for his own hook. Details ansehen
Pyke

Warum

Pyke holds a severe advantage because Death from Below completely ignores the defensive shield granted by Titan's Wrath. When you drop low, your usual survival tool is rendered useless, allowing him to execute you directly. Furthermore, Pyke can easily bait your Dredge Line using Ghostwater Dive's movement speed or escape your engage attempts entirely with Phantom Undertow, turning your massive hitbox into an easy target for his own hook.

Lane-Einfluss

This dynamic forces a highly passive laning phase where you cannot safely trade health. Every hook battle is skewed: if Pyke lands Bone Skewer, his follow-up burst quickly puts you in execution range. You cannot comfortably crash waves to secure recalls because Ghostwater Dive lets him roam and return rapidly. If you attempt to pressure their tower, a quick Phantom Undertow behind you can easily set up a deadly counter-engage.

Wie man spielt

To survive, never initiate with Dredge Line unless Pyke has already wasted Phantom Undertow. Keep your distance and focus on peeling with Staggering Blow when he attempts to dive your carry. If Pyke channels Bone Skewer, position behind minions and prepare to counter-slow with Riptide. When his ultimate is available, use Depth Charge immediately on him the moment he targets a low-health ally to interrupt his casting animation and deny the reset.

Vollständiges Profil →
Zyra

Zyra

disengagezone_control Nautilus struggles because Zyra completely neutralizes your main engage tool, Dredge Line. Whenever you throw your anchor, she can instantly react by spawning a seed via Rampant Growth and growing it into a plant directly in its path. This blocks your pull entirely, leaving you exposed to her counter-poke while your primary crowd control is on cooldown. Details ansehen
Zyra

Warum

Nautilus struggles because Zyra completely neutralizes your main engage tool, Dredge Line. Whenever you throw your anchor, she can instantly react by spawning a seed via Rampant Growth and growing it into a plant directly in its path. This blocks your pull entirely, leaving you exposed to her counter-poke while your primary crowd control is on cooldown.

Lane-Einfluss

Because your hook threat is neutralized, Zyra freely dominates the lane with her Garden of Thorns passive. You are forced to cede bush control and play under your tower, taking constant chip damage from her ranged plants. This constant poke depletes your Titan's Wrath shield instantly, bleeding your health bar and forcing premature recalls that surrender early dragon priority.

Wie man spielt

To survive, you must bait out her Rampant Growth charges before attempting any engage. Stand near the alcove or behind minion waves to minimize plant poke, and save your Depth Charge to initiate directly, bypassing her plant blockers entirely. If she misses her Grasping Roots, immediately use Riptide to slow her down and walk up to apply Staggering Blow with a basic attack, rather than relying on a risky max-range Dredge Line.

Vollständiges Profil →
Thresh

Thresh

peel_wardisengage This matchup is determined by Thresh's ability to completely shut down your aggressive plays. Whenever you cast Dredge Line, a skilled Thresh will reactively use Flay to knock you out of your anchor's trajectory before you can trigger Staggering Blow. Because your primary engage gets neutralized mid-air, you lose the trade immediately while Thresh retains his Death Sentence to counter-attack or rescue his ally with Dark Passage. Details ansehen
Thresh

Warum

This matchup is determined by Thresh's ability to completely shut down your aggressive plays. Whenever you cast Dredge Line, a skilled Thresh will reactively use Flay to knock you out of your anchor's trajectory before you can trigger Staggering Blow. Because your primary engage gets neutralized mid-air, you lose the trade immediately while Thresh retains his Death Sentence to counter-attack or rescue his ally with Dark Passage.

Lane-Einfluss

This reaction dynamic forces you into a defensive posture during the laning phase. You cannot freely step forward to trade health, as missing or having Dredge Line canceled leaves you exposed to Death Sentence and the slow of Flay. Consequently, you will have to concede push priority, letting Thresh control the brush line. Any failed hook attempt results in high damage trades and forces early recalls under your turret.

Wie man spielt

To bypass his disruption, never lead with your hook. Instead, walk up with Titan's Wrath active to absorb initial poke, and use Riptide to slow Thresh. Force Thresh to use Flay defensively first. Once that skill is on cooldown, your Dredge Line is guaranteed to land. When your ultimate is unlocked, bypass his basic tools entirely by targeting his marksman with Depth Charge to setup a clean follow-up.

Vollständiges Profil →
Zilean

Zilean

revive_mechanicdisengage Nautilus struggles because Zilean's Chronoshift directly counters your primary engage tool, Dredge Line. Whenever you hook a priority target and commit with Depth Charge, Chronoshift completely absorbs your burst, turning a favorable skirmish into a wasted engage. Furthermore, Zilean's passive Time in a Bottle allows his lane partner to out-scale you rapidly, leaving you with a shrinking window of opportunity. Details ansehen
Zilean

Warum

Nautilus struggles because Zilean's Chronoshift directly counters your primary engage tool, Dredge Line. Whenever you hook a priority target and commit with Depth Charge, Chronoshift completely absorbs your burst, turning a favorable skirmish into a wasted engage. Furthermore, Zilean's passive Time in a Bottle allows his lane partner to out-scale you rapidly, leaving you with a shrinking window of opportunity.

Lane-Einfluss

Zilean's ability to poke with Time Bomb and speed up his carry with Temporal Mirage makes securing lane dominance exceptionally difficult. If you try to force trades, Twisted Timeflow allows him to quickly double-bomb and stun you, leaving you vulnerable. You cannot easily play aggressively once Zilean reaches level five, as Chronoshift nullifies your tower pressure and punishes deep hook commits.

Wie man spielt

To survive this match-up, adjust your target selection. Avoid throwing Dredge Line at the enemy marksman if Zilean has Chronoshift ready; instead, focus your initial engage on Zilean himself to force him to use the revive on himself, or bait the ultimate on his ally and immediately swap targets. Use Titan's Wrath to mitigate Time Bomb damage, and rely on Staggering Blow and Riptide to disengage safely.

Vollständiges Profil →
Braum

Braum

counter_engagetank_clash This matchup is unfavorable because your main engage tool is hard-countered by Braum's defensive mobility. Every time you throw out Dredge Line and hook his ADC, Braum instantly negates the threat by using Stand Behind Me to leap to his ally, shielding them and immediately stacking Concussive Blows on you. Since you are pulled right into their melee range, you quickly get stunned while trying to follow up with Staggering Blow. Details ansehen
Braum

Warum

This matchup is unfavorable because your main engage tool is hard-countered by Braum's defensive mobility. Every time you throw out Dredge Line and hook his ADC, Braum instantly negates the threat by using Stand Behind Me to leap to his ally, shielding them and immediately stacking Concussive Blows on you. Since you are pulled right into their melee range, you quickly get stunned while trying to follow up with Staggering Blow.

Lane-Einfluss

This interaction forces a highly defensive laning phase. You cannot fish for aggressive hooks because a successful Dredge Line often results in you taking heavy damage instead of securing a trade. Your ADC will constantly be zoned, and you will lose control over the wave state. If you get chunked trying to engage, you forfeit tower pressure and are forced into early, disadvantageous recalls that bleed gold.

Wie man spielt

To survive, hold Dredge Line as a peeling tool rather than an initiation. Position yourself parallel to your ADC, using Riptide to slow Braum down when he attempts to poke with Winter's Bite. Only commit with Depth Charge once Braum has already wasted Stand Behind Me or when his Unbreakable shield is facing the wrong direction, allowing you to bypass his protection. If he misses Winter's Bite, use that brief window to walk up and threaten with Staggering Blow instead of hooking.

Vollständiges Profil →

Skill Matchups

5

Diese Matchups sind vor allem Duelle der Ausführung: Beide Champions haben glaubwürdige Wege, die Oberhand zu gewinnen. Eine wichtige ausgewichene Fähigkeit, ein richtig antizipierter Engage oder ein einziger Positionierungsfehler können reichen, um das Duell zu entscheiden. Das Matchup zu kennen und die richtigen Fenster zum Handeln zu erkennen, ist hier besonders wichtig.

Karma

Karma

engagepeel This matchup is a pure test of reflexes centered around your Dredge Line. Karma relies heavily on the movement speed from Inspire to bait and dodge your hook. If she missteps or miscalculates her shield timing, a single successful hook pulls her into your crushing crowd control chain starting with Staggering Blow, leaving her highly vulnerable due to her naturally fragile pool of health. Details ansehen
Karma

Warum

This matchup is a pure test of reflexes centered around your Dredge Line. Karma relies heavily on the movement speed from Inspire to bait and dodge your hook. If she missteps or miscalculates her shield timing, a single successful hook pulls her into your crushing crowd control chain starting with Staggering Blow, leaving her highly vulnerable due to her naturally fragile pool of health.

Lane-Einfluss

The lane state constantly swings based on who commands the bushes. When Inspire is available, Karma will aggressively poke you down with Inner Flame, threatening your health pool and forcing you back. However, if she wastes her shield defensively or to speed up her ADC, the threat of your Dredge Line forces her to play extremely passive, completely yielding wave control and bush dominance to you.

Wie man spielt

To win this strategic dance, position yourself aggressively in the unwarded lane brushes to pressure her with the threat of Dredge Line without actually throwing it. Force her to panic-cast Inspire just from your forward movement. Once her shield is on cooldown, immediately engage with Depth Charge or Riptide to slow her down before throwing your hook. If you miss your hook, quickly activate Titan's Wrath to absorb her Inner Flame retaliation while retreating.

Vollständiges Profil →
Leona

Leona

tank_clashcounter_engage This matchup hinges on the interaction between your engage tools and her defensive steroid. When you hook with Dredge Line and root with Staggering Blow, Leona can instantly activate Eclipse to soak your initial damage. Once your crowd control ends, she is perfectly positioned to fire Zenith Blade through you and lock down your marksman with Shield of Daybreak while remaining incredibly tanky. Details ansehen
Leona

Warum

This matchup hinges on the interaction between your engage tools and her defensive steroid. When you hook with Dredge Line and root with Staggering Blow, Leona can instantly activate Eclipse to soak your initial damage. Once your crowd control ends, she is perfectly positioned to fire Zenith Blade through you and lock down your marksman with Shield of Daybreak while remaining incredibly tanky.

Lane-Einfluss

Blindly throwing Dredge Line creates a volatile lane where whoever initiates first often loses the trade. If you pull yourself into Leona, you hand her a free gap-closer to your backline, turning a potential offensive play into a disastrous counter-engage. Consequently, both duos play passively around the minion waves, waiting for the other support to step up too far and waste their primary defensive tool.

Wie man spielt

To win this, stand parallel to your carry to block Zenith Blade angles while holding Dredge Line as a disengage tool. If Leona initiates with Zenith Blade on your ally, do not hook her; instead, use Staggering Blow and Riptide to peel her off while casting Depth Charge on her follow-up target. Only engage with Dredge Line if her Eclipse is on cooldown, or if you can catch her ADC completely isolated.

Vollständiges Profil →
Senna

Senna

poke_vs_engagescaling_threat This lane is defined by a tense spacing battle. Senna relies on Piercing Darkness to poke you down from absolute safety while farming souls. However, her slow Basic Attack animation and cast times force her to stand still momentarily. If you strike with Dredge Line during this precise windup window, her lack of mobility makes her incredibly easy to lock down and burst before she can react. Details ansehen
Senna

Warum

This lane is defined by a tense spacing battle. Senna relies on Piercing Darkness to poke you down from absolute safety while farming souls. However, her slow Basic Attack animation and cast times force her to stand still momentarily. If you strike with Dredge Line during this precise windup window, her lack of mobility makes her incredibly easy to lock down and burst before she can react.

Lane-Einfluss

The pressure is constant from level one. If you allow Senna to freely land Piercing Darkness, you will be too chipped down to ever engage, forcing you under tower where she can freely harvest souls. Conversely, if you maintain a threatening parallel position, she must play defensively, giving your team control over the minion waves and preventing her from easily stacking her passive range.

Wie man spielt

Never throw Dredge Line randomly while she has space to dodge. Instead, position yourself parallel to your minion line, using bushes to hide your intent. Wait for her to step up to cast Piercing Darkness or collect a soul. The instant her attack animation begins, launch your anchor. If she retreats, use Depth Charge to force her flash, then follow up with Riptide and Titan's Wrath to guarantee the kill.

Vollständiges Profil →
Rakan

Rakan

mobilitycounter_engage This even matchup hinges entirely on your reaction time when Rakan initiates. While Rakan tries to disrupt your carry with Grand Entrance, your passive Staggering Blow is the ultimate counter. If you land a basic attack on him mid-dash, you root him instantly, completely canceling his knock-up animation. This interaction turns his primary playmaking tool into a self-inflicted trap before he can safely retreat with Battle Dance. Details ansehen
Rakan

Warum

This even matchup hinges entirely on your reaction time when Rakan initiates. While Rakan tries to disrupt your carry with Grand Entrance, your passive Staggering Blow is the ultimate counter. If you land a basic attack on him mid-dash, you root him instantly, completely canceling his knock-up animation. This interaction turns his primary playmaking tool into a self-inflicted trap before he can safely retreat with Battle Dance.

Lane-Einfluss

Because of this interaction, Rakan cannot blindly fish for engages, forcing him to rely on passive lane sustain via Gleaming Quill and Fey Feathers. However, if you waste your auto-attack root on a minion or miss Dredge Line, Rakan immediately gains the upper hand. He will safely dive your marksman, knowing you lack the immediate crowd control to prevent his quick Battle Dance escape, shifting lane pressure instantly.

Wie man spielt

Position yourself slightly ahead of your carry, holding your basic attack ready specifically for Rakan's jump. Do not throw Dredge Line randomly; use it only after he has exhausted Battle Dance to prevent him from dashing away. If he activates The Quickness to charm you, immediately counter with Depth Charge to point-and-click knock him up, neutralizing his ultimate's mobility and forcing him to absorb your Riptide waves.

Vollständiges Profil →

Andere Matchups

Günstig

10

Diese Champions tun sich meist schwer, auf deine Hauptstärken zu reagieren, was dir mehr Freiheit im Matchup gibt. Du hast oft mehrere Möglichkeiten, sie unter Druck zu setzen und Trades zu deinen Gunsten zu erzwingen. Nutze diesen Vorteil, um das Tempo zu bestimmen, statt ihnen Zeit zu geben, wieder in eine komfortable Position zu kommen.

Lux

Lux

spacingtethering This matchup tilts heavily in your favor once you unlock your ultimate. While Lux relies on hiding behind minions and using Light Binding to halt your standard engage, Depth Charge completely bypasses her root. Because Depth Charge is a point-and-click knock-up that cannot be blocked, Lux is forced to play exceptionally far back, neutralising her aggressive Lucent Singularity poke and rendering her vulnerable to your follow-up Dredge Line. Details ansehen
Lux

Warum

This matchup tilts heavily in your favor once you unlock your ultimate. While Lux relies on hiding behind minions and using Light Binding to halt your standard engage, Depth Charge completely bypasses her root. Because Depth Charge is a point-and-click knock-up that cannot be blocked, Lux is forced to play exceptionally far back, neutralising her aggressive Lucent Singularity poke and rendering her vulnerable to your follow-up Dredge Line.

Lane-Einfluss

This threat completely alters her positioning, stripping away her ability to step up and poke with Lucent Singularity or pop Illumination marks. She is forced to play defensively near her tower, which gives your duo total control over the lane bushes. You can easily zone her out of experience range, secure early dragon priority, or set up dive opportunities alongside your jungler.

Wie man spielt

Walk aggressively into the lane bushes to deny her vision and force her backwards. When initiating, do not lead with Dredge Line, as she can easily react with Light Binding. Instead, walk up with Titan's Wrath active to absorb poke, cast Depth Charge directly on her, and only throw your Dredge Line once she is knocked into the air. If she throws a desperate Light Binding and misses, immediately punish her with an aggressive flash-engage.

Vollständiges Profil →
Soraka

Soraka

burst_healfocus_fire Soraka relies on Astral Infusion to nullify trade damage, turning this lane into an exhausting war of attrition if you target her ADC. Nautilus holds the upper hand because he can bypass this healing entirely by using Dredge Line directly on Soraka. However, her Equinox poses a massive threat; if she drops its silence field under you mid-flight, she prevents you from chaining Staggering Blow or Titan's Wrath. Details ansehen
Soraka

Warum

Soraka relies on Astral Infusion to nullify trade damage, turning this lane into an exhausting war of attrition if you target her ADC. Nautilus holds the upper hand because he can bypass this healing entirely by using Dredge Line directly on Soraka. However, her Equinox poses a massive threat; if she drops its silence field under you mid-flight, she prevents you from chaining Staggering Blow or Titan's Wrath.

Lane-Einfluss

This dynamic forces Soraka to play extremely defensively, conceding brush control to avoid your hook. Because she must save Equinox to interrupt your engage, her ADC cannot step up to poke without risking a direct Dredge Line. Consequently, you can freeze the wave or force her to burn mana on Starcall to check bushes, slowly bleeding her resources before a lethal all-in.

Wie man spielt

To secure the kill, always aim your Dredge Line directly at Soraka rather than her partner, as her Astral Infusion cannot heal herself. If she preemptively places Equinox, step out of the circle immediately before trying to activate Titan's Wrath or Riptide. Alternatively, wait until she mispositions to harass with Starcall, then lock her down with Depth Charge to ensure she is knocked up before she can silence you.

Vollständiges Profil →
Bard

Bard

all_indisengage Nautilus dictates this lane because his aggressive Dredge Line completely punishes Bard's roaming tendencies. However, the matchup's core tension lies in the ultimate interaction. While Depth Charge offers a guaranteed knock-up, Bard can counter this threat using Tempered Fate to freeze your backline in place. This prevents your marksman from following up on your crowd control, neutralizing your primary engage tool. Details ansehen
Bard

Warum

Nautilus dictates this lane because his aggressive Dredge Line completely punishes Bard's roaming tendencies. However, the matchup's core tension lies in the ultimate interaction. While Depth Charge offers a guaranteed knock-up, Bard can counter this threat using Tempered Fate to freeze your backline in place. This prevents your marksman from following up on your crowd control, neutralizing your primary engage tool.

Lane-Einfluss

Because you hold the engage advantage, Bard is forced to play passively, relying on Caretaker's Shrine to sustain his carry while he collects chimes. This gives you absolute control over the wave. You can easily zone the enemy marksman or force fights when Bard leaves the lane. However, pushing too hard allows Bard to setup easy Cosmic Binding stuns against the turret wall.

Wie man spielt

To bypass his disruption, position yourself diagonally away from your marksman before launching Dredge Line. This distance prevents Bard from hitting both of you with a single Tempered Fate. If you see Bard holding his ultimate, delay your Depth Charge and use Staggering Blow and Riptide to peel or lock down targets first. Only unleash your ultimate once his stase is on cooldown, or when your carry is safely out of its target circle.

Vollständiges Profil →
Malphite

Malphite

tank_matchupcc_chain Nautilus dictates this matchup because Malphite lacks the tools to protect his marksman once skirmishes break out. When Malphite commits his ultimate, Unstoppable Force, to dive your backline, he leaves his lane partner completely exposed. By immediately targeting the enemy marksman with Depth Charge, you neutralize their follow-up damage, turning Malphite's aggressive engage into an isolated, easily collapsible dive. Details ansehen
Malphite

Warum

Nautilus dictates this matchup because Malphite lacks the tools to protect his marksman once skirmishes break out. When Malphite commits his ultimate, Unstoppable Force, to dive your backline, he leaves his lane partner completely exposed. By immediately targeting the enemy marksman with Depth Charge, you neutralize their follow-up damage, turning Malphite's aggressive engage into an isolated, easily collapsible dive.

Lane-Einfluss

During the laning phase, this dynamic forces the opposing duo into a highly defensive posture. Malphite's poke with Seismic Shard cannot overcome the shield from your Titan's Wrath, while your constant threat of Dredge Line denies them wave control. The threat of your crowd control forces their carry to concede farm, giving your lane dominant push and pressure under their turret.

Wie man spielt

To execute this plan, position yourself slightly behind your minions to avoid Seismic Shard poke, but keep a clear angle for Dredge Line. You must hold Depth Charge specifically for the enemy marksman; never waste it on Malphite. The moment Malphite launches forward with Unstoppable Force, immediately cast your ultimate on his ADC, then use Riptide to slow down the isolated Malphite and protect your carry.

Vollständiges Profil →
Sona

Sona

squishy_targetearly_pressure Sona's fragile defense and complete lack of escape tools make her incredibly vulnerable to your crowd control. While she tries to poke with Hymn of Valor, her slow base movement speed makes her an easy target. If you land Dredge Line, her low health pool ensures she cannot survive the burst from Staggering Blow and Riptide before she can sustain with Aria of Perseverance. Details ansehen
Sona

Warum

Sona's fragile defense and complete lack of escape tools make her incredibly vulnerable to your crowd control. While she tries to poke with Hymn of Valor, her slow base movement speed makes her an easy target. If you land Dredge Line, her low health pool ensures she cannot survive the burst from Staggering Blow and Riptide before she can sustain with Aria of Perseverance.

Lane-Einfluss

You dictate the entire pace of the lane by denying Sona the freedom to step up. She is forced to play extremely far back, meaning her ADC loses the offensive aura from Hymn of Valor. This massive pressure allows your duo to easily slow-push waves, secure early tower plates, and force Sona to burn through her mana using Aria of Perseverance defensively instead of poking.

Wie man spielt

Control the lane brushes to threaten Sona constantly, forcing her to choose between losing experience or walking into your hook range. Hold Dredge Line rather than throwing it randomly; the mere threat of it denies her Song of Celerity pokes. If she steps up to trigger Power Chord, immediately activate Titan's Wrath to shield her retaliatory damage, then hook her. If you miss, immediately back off into your minion wave.

Vollständiges Profil →
Nami

Nami

peeldisengage You hold the advantage because Nami is incredibly fragile, but her primary defense lies in turning your aggression against you. Landing Dredge Line puts you in a predictable path, allowing Nami to deploy Tidal Wave to disrupt your follow-up and protect her partner. Understanding this counter-engage dynamic is crucial, as her wave can negate your initial burst from Titan's Wrath before your ally can follow up. Details ansehen
Nami

Warum

You hold the advantage because Nami is incredibly fragile, but her primary defense lies in turning your aggression against you. Landing Dredge Line puts you in a predictable path, allowing Nami to deploy Tidal Wave to disrupt your follow-up and protect her partner. Understanding this counter-engage dynamic is crucial, as her wave can negate your initial burst from Titan's Wrath before your ally can follow up.

Lane-Einfluss

This dynamic forces Nami to play defensively, limiting her ability to safely trade with Ebb and Flow. If you maintain threat level, her ADC is forced to yield minion control. However, a missed Dredge Line shifts the pressure instantly, leaving you exposed to Aqua Prison and heavy slow-poking from Tidecaller's Blessing, which can quickly drain your health and force an early recall.

Wie man spielt

Position yourself parallel to Nami rather than her ADC, forcing her to choose between self-defense and peeling. Hold Depth Charge specifically to interrupt her Tidal Wave cast or target her directly if she steps up to poke. If she successfully casts her wave to counter-engage your Dredge Line, immediately use Riptide to slow her down, activate Titan's Wrath to absorb the incoming damage, and walk back instead of forcing a losing chase.

Vollständiges Profil →
Seraphine

Seraphine

dodge_skillshotsall_in Nautilus dominates this matchup because Seraphine relies on predictable positioning to line up her devastating Encore. By holding Depth Charge, you threaten her whenever she tries to step forward to charm your team. Because she lacks mobility, she cannot escape this point-and-click knockup. Once Depth Charge targets her, her Stage Presence and Surround Sound cannot save her from being easily pulled in by Dredge Line. Details ansehen
Seraphine

Warum

Nautilus dominates this matchup because Seraphine relies on predictable positioning to line up her devastating Encore. By holding Depth Charge, you threaten her whenever she tries to step forward to charm your team. Because she lacks mobility, she cannot escape this point-and-click knockup. Once Depth Charge targets her, her Stage Presence and Surround Sound cannot save her from being easily pulled in by Dredge Line.

Lane-Einfluss

During the laning phase, Seraphine will try to poke you down with High Note and Beat Drop to secure wave control. However, your threat of an engage forces her to play extremely far back, sacrificing her ability to harass. If she steps up to assist her carry with Surround Sound, a quick Dredge Line combined with Staggering Blow will immediately trigger a lethal trade, converting her squishiness into early tower pressure.

Wie man spielt

Position yourself parallel to her in the lane bushes, using the threat of Dredge Line to deny her space. Always save Depth Charge specifically for her the moment a skirmish breaks out; do not waste it on her frontline. If she manages to hit a lucky Beat Drop on your carry, immediately counter-engage on her with Titan's Wrath active to absorb her High Note while locking her down with Staggering Blow before she can cast Encore.

Vollständiges Profil →
Yuumi

Yuumi

hard_engagekill_lane When Yuumi uses You and Me! to attach, she ties her fate directly to her host. You bypass this protection entirely because your Depth Charge is a point-and-click projectile that cannot be dodged. Once Depth Charge knocks the host into the air, the displacement allows you to easily chain Dredge Line and Staggering Blow, locking down both targets simultaneously and rendering Zoomies healing useless against your burst. Details ansehen
Yuumi

Warum

When Yuumi uses You and Me! to attach, she ties her fate directly to her host. You bypass this protection entirely because your Depth Charge is a point-and-click projectile that cannot be dodged. Once Depth Charge knocks the host into the air, the displacement allows you to easily chain Dredge Line and Staggering Blow, locking down both targets simultaneously and rendering Zoomies healing useless against your burst.

Lane-Einfluss

This matchup removes any passive scaling safety Yuumi's carry hopes for. Because your target is predictable, you can ignore her poke from Prowling Projectile by shielding with Titan's Wrath. This allows you to constantly threaten an all-in dive. Once you reach level five, the enemies cannot step past their caster minions without risking an immediate kill, giving your carry complete lane control.

Wie man spielt

To maximize this advantage, do not waste Dredge Line on long-range hook attempts early on. Instead, wait for level five and walk directly forward. Initiate the engagement by locking down the host with Depth Charge first. While they are airborne, follow up with Dredge Line and Staggering Blow, then use Riptide to slow their escape. If Yuumi ever detaches to trigger Bop 'n' Block, immediately auto-attack her to prevent her from re-attaching.

Vollständiges Profil →
Blitzcrank

Blitzcrank

tank_matchuphook_punish This matchup is heavily in your favor because Blitzcrank's primary weapon, Rocket Grab, actually does your job for you. If he pulls you, he brings a massive disruptor directly into his own ADC's face. This mistake grants you an immediate, effortless trigger of Staggering Blow. You can then comfortably absorb any burst with Titan's Wrath and counter-engage without even having to aim Dredge Line. Details ansehen
Blitzcrank

Warum

This matchup is heavily in your favor because Blitzcrank's primary weapon, Rocket Grab, actually does your job for you. If he pulls you, he brings a massive disruptor directly into his own ADC's face. This mistake grants you an immediate, effortless trigger of Staggering Blow. You can then comfortably absorb any burst with Titan's Wrath and counter-engage without even having to aim Dredge Line.

Lane-Einfluss

During the laning phase, Blitzcrank is completely paralyzed. He cannot safely use Rocket Grab because you can actively step into its path to shield your marksman. This dynamic strips the enemy duo of any bush control and bush pressure. You can freely dictate wave states, zoning them off minions, and punishing any desperate Overdrive engage by simply dropping Riptide to slow their retreat.

Wie man spielt

Adopt a protective posture directly between Blitzcrank and your marksman. Never waste Dredge Line defensively; instead, walk forward and use your body to intercept Rocket Grab. When he steps up with Overdrive, stand your ground and prepare to apply Staggering Blow the moment he gets close, preventing him from reaching your ally to use Power Fist. If they attempt to disengage, lock down the enemy carry with Depth Charge to guarantee a kill.

Vollständiges Profil →

Andere Matchups

Items to Counter Nautilus

Buy these items to reduce this champion's effectiveness in your games.

Mercury's Treads
Mercury's Treads
Quicksilver Enchant
Quicksilver Enchant
Stasis Enchant
Stasis Enchant
Mikael's Blessing
Mikael's Blessing
Locket Enchant
Locket Enchant

Wie man diesen Champion kontert

Konter-Winkel

Nautilus-Konter zu verstehen, bedeutet nicht nur, Champions zu identifizieren, die ihn am Engagen hindern, sondern auch zu verstehen, warum sein Einstiegsmuster ineffektiv wird. Nautilus ist auf einen sauberen Zugang zur Backline und kontinuierliche Crowd Control angewiesen. Champions, die diese Kette durchbrechen, seinen Hook verweigern oder seine Ultimate neutralisieren, reduzieren seinen Wert drastisch. Diese Seite hilft dir, diese Situationen zu lesen und deinen Ansatz anzupassen, anstatt nur Matchups zu vermeiden.

Patch-Kontext

Nautilus ist anfällig für Disengage-Tools und Kontrollen, die seinen Einstieg bestrafen. Sobald er engagiert hat, hat er keinen wirklichen Fluchtweg mehr, was ihn empfindlich für Schilde, Knockbacks und Cleanses macht. Der aktuelle Patch begünstigt auch Supports, die auf einen Engage reagieren können, anstatt ihn zu ertragen, was seine Schwächen gegen bestimmte Profile verstärkt.

Schnell gelesen

  • Champions mit Schilden oder Immunität brechen seinen Engage.
  • Disengage reduziert seine Wirkung stark.
  • Das Bestrafen verfehlter Hooks ist der Schlüssel.

Konter-Archetypen

Anti-Engage-Supports

Diese Champions neutralisieren den Einstiegspunkt von Nautilus direkt. Morgana blockiert seine Schlüsselkontrolle mit ihrem Schild, während Janna seinen Engage unterbrechen oder zurückstoßen kann, bevor er gefährlich wird. Dies bricht seine CC-Kette vollständig und macht seine Initiierung zu einem Tempo-Verlust.

Wie sich der Champion anpasst. Warte auf defensive Cooldowns, bevor du engagierst, und spiele mehr mit Sichtwinkeln.

Poke- und Mobilitäts-Supports

Diese Supports kontern den Engage nicht direkt, machen ihn aber ineffektiv. Sie halten Nautilus auf Distanz, erzwingen unter Druck stehende Engages und bieten genug Mobilität oder Schilde, um den anfänglichen Burst zu überleben.

Wie sich der Champion anpasst. Suche nach Engages aus dem Nebel des Krieges und vermeide ausgedehnte Trades.

Engage mit mehr Kontrolle spiegeln

Diese Matchups werden zu Timing-Duellen. Thresh kann einen übermäßig aggressiven Nautilus mit seiner eigenen Kontrolle und Neupositionierung bestrafen. Wenn Nautilus schlecht engagiert, endet er isoliert und exponiert ohne Fluchtweg.

Wie sich der Champion anpasst. Spiele geduldiger und vermeide es, Engages ohne Vorteil zu erzwingen.

Prioritäts-Matchups

Morgana

Morgana ist einer der direktesten Konter von Nautilus, da sie seinen Haupteffekt negiert: Crowd Control. Ihr Schild verwandelt einen perfekten Engage in eine nutzlose Aktion. Das Matchup wird zu einer Frage von Geduld und Timing. Nautilus muss zuerst den Schild erzwingen oder jemanden anderen anvisieren. Andernfalls wird jeder Engage zu einem Risiko.

Janna

Janna blockiert nicht nur den Engage, sie kehrt ihn um. Ihr Disengage-Kit stößt Nautilus weg und stört sein Timing vollständig. Selbst ein guter Hook kann nutzlos werden, wenn Janna das Ziel neu positioniert oder das Follow-up verweigert. Dieses Matchup erfordert eine stärkere Teamkoordination.

Häufige Fehler gegen ihn

Häufige Fehler gegen ihn

  • Engagieren, ohne die defensiven Werkzeuge des Gegners zu prüfen.
  • Kämpfe in Anti-Engage-Comps erzwingen.
  • Ignorieren von Schild- oder Knockback-Timings.
  • Versagen, sich auf eine Peel-Rolle einzustellen.
  • Unterschätze die Strafe nach verfehlten Hooks nicht.

Coach-Notizen

  • Gegen Disengage ist Geduld wichtiger als Aggression.
  • Ein fehlgeschlagener Engage gegen diese Champions kostet mehr, als gar nicht zu engagen.

FAQ

Warum ist Morgana so stark gegen Nautilus?

Weil sie Nautiluss Hauptmechanik direkt neutralisiert: Crowd Control. Ihr Schild blockt den Hook oder die Folgeaktion und verhindert so die Umwandlung eines Engages. Ohne CC wird Nautilus einfach zu einem Tank ohne unmittelbare Bedrohung.

Wie spielt man gegen Poke?

Vermeide lange Trades und bevorzuge schnelle Engages aus dem Fog of War. Poke zwingt dich unter Druck, also musst du entscheidende Aktionen initiieren, anstatt zu erdulden. Vision wird essenziell, um den Mangel an Reichweite auszugleichen.

Solltest du immer zuerst engagen?

Nein. Gegen bestimmte Counter ist es effektiver, auf einen Fehler oder eine Abklingzeit zu warten. Nautilus muss nicht jedes Mal engagen – er muss unter den richtigen Bedingungen engagen.

Was solltest du tun, nachdem du einen Hook verfehlt hast?

Sofort zurückziehen und neu positionieren. Dein Einfluss ist für mehrere Sekunden reduziert, daher ist es gefährlich, vorne zu bleiben. Akzeptiere den Tempoverlust und bereite deinen nächsten Winkel vor, anstatt zu erzwingen.