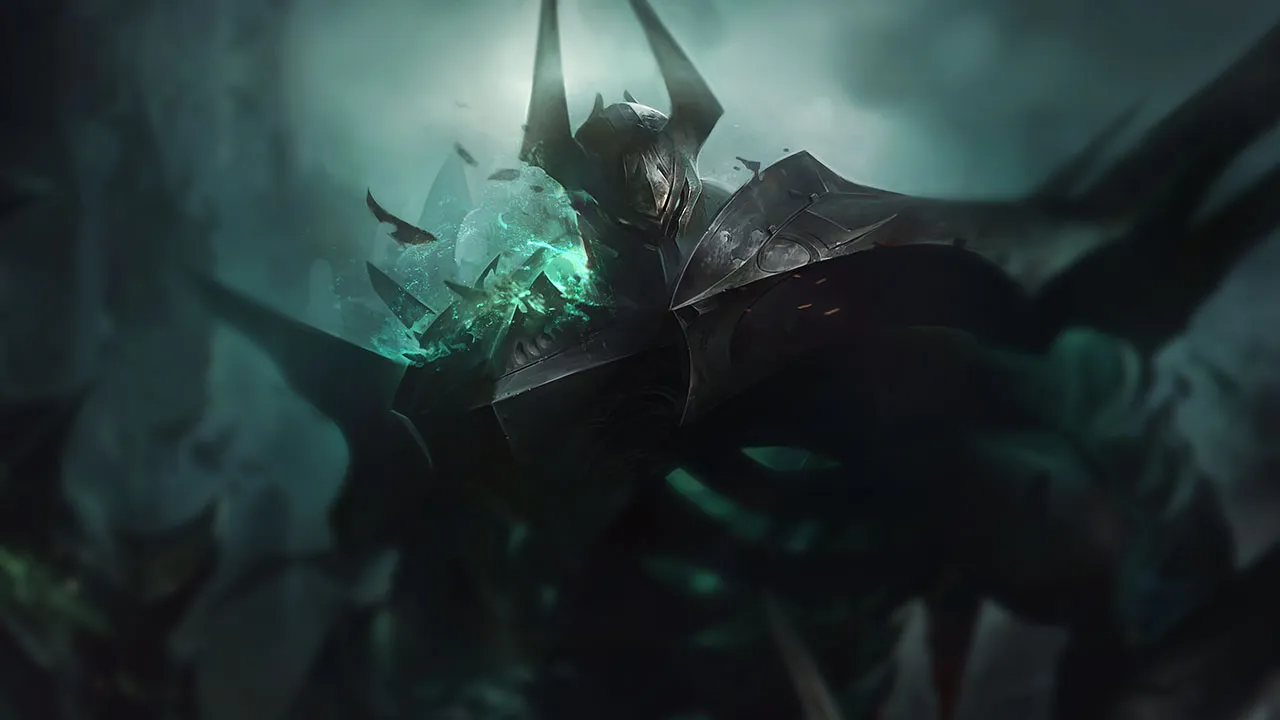
Mordekaiser wird von Champions neutralisiert, die sein Reich verlassen oder ihm darin effektiv mit Burst entgegentreten können. Cleanse-Items und -Fähigkeiten machen seine Kernmechanik direkt zunichte. Konstante Poke-Compositions zehren sein passives Schild vor Kämpfen auf.
★ TOP · JUNGLETier S
SCHADEN
UTIL
TANK
DIFF
Win51.0%#31 · ↓0pt
Pick11.0%#3
Ban30.6%#8
Mordekaiser Wild Rift Counter-Guide
Hard Counters
2
Diese Champions haben ein Build und einen Spielstil, der deinen direkt überlegen ist, was die Kontrolle der Lane und das Farmen extrem schwierig machen kann. Ihr Kit kann deine Kernstärken neutralisieren oder dich bestrafen, sobald du versuchst, deinen gewohnten Spielplan umzusetzen. In diesen Matchups geht es oft darum, Fehler zu minimieren und nach Wegen zu suchen, außerhalb der direkten Konfrontation zu gewinnen.
PositionierungKitenLanding your skillshots is almost impossible because Vayne can reactively dodge both Obliterate and Death's Grasp using the short-cooldown dash of Tumble. Even if you manage to close the distance or trap her inside your Realm of Death, she holds a supreme counter-measure; her Condemn will instantly knock you away to the edge of your own arena, leaving you helpless while she melts you with Silver Bolts.Vayne Build →Details ansehen
Vayne
Warum
Landing your skillshots is almost impossible because Vayne can reactively dodge both Obliterate and Death's Grasp using the short-cooldown dash of Tumble. Even if you manage to close the distance or trap her inside your Realm of Death, she holds a supreme counter-measure; her Condemn will instantly knock you away to the edge of your own arena, leaving you helpless while she melts you with Silver Bolts.
Lane-Einfluss
Because you cannot threaten her, you are forced to concede early wave control. Vayne will comfortably freeze or slow-push while using Silver Bolts to punish you every time you walk up to secure minion gold. Your Indestructible shield will constantly be depleted just to absorb her ranged poke, forcing you into early, disadvantageous recalls that bleed tower plates and leave you starved of gold.
Wie man spielt
Survival requires absolute discipline under your own turret. Never initiate with Death's Grasp; instead, hold it to threaten a pull only if she overextends into turret range. When she activates Final Hour, immediately retreat and use Indestructible to block the third stack of Silver Bolts rather than trying to chase her. If you must use Realm of Death, wait until she has already wasted Condemn, otherwise you will spend your entire ultimate running back to her.
UltimateCC-ImmunitätThe matchup is heavily skewed because Olaf's Ragnarok completely negates your ultimate. If you cast Realm of Death, he can activate his ultimate to instantly cleanse the shadow realm or block its activation entirely. Without the ability to isolate him and steal his stats, you are forced to fight his high sustained DPS from Berserker Rage and Vicious Strikes in the open, where his raw stats easily overwhelm yours.Olaf Build →Details ansehen
Olaf
Warum
The matchup is heavily skewed because Olaf's Ragnarok completely negates your ultimate. If you cast Realm of Death, he can activate his ultimate to instantly cleanse the shadow realm or block its activation entirely. Without the ability to isolate him and steal his stats, you are forced to fight his high sustained DPS from Berserker Rage and Vicious Strikes in the open, where his raw stats easily overwhelm yours.
Lane-Einfluss
This interaction strips away your post-level-5 safety and kill pressure. Olaf will constantly fish for slows with Undertow to run you down. Since you cannot threaten him with your ultimate, he will freeze the wave and zone you. Trying to farm with Obliterate exposes you to massive true damage from Reckless Swing, forcing you to sit under tower.
Wie man spielt
To survive, you must never initiate trades with Death's Grasp, as pulling Olaf closer only helps him engage. Keep your distance and use Obliterate solely to secure minion last-hits from safety. Save Indestructible to absorb his Reckless Swing burst rather than using its heal reactively. Most importantly, never cast Realm of Death unless you have seen him waste Ragnarok, otherwise save it to peel for yourself when his ultimate expires.
Diese Champions haben Werkzeuge, die ihnen im Kampf meist einen Vorteil verschaffen, ohne das Matchup unspielbar zu machen. Sie haben vielleicht mehr Reichweite, können deine Offensive besser abfangen oder haben mehr Möglichkeiten, auf deine Engages zu reagieren. Du musst deine Herangehensweise anpassen und sorgfältig die Momente wählen, in denen du den Kampf annimmst.
PositionierungAusweichenYone's extreme mobility creates a challenging dynamic because Soul Unbound allows him to trade without risk. He can dash forward to strike you, easily sidestep your slow Death's Grasp, and snap back to his starting point to completely bypass your Realm of Death if he times the return window during your ultimate's cast. His mixed damage from Way of the Hunter also bypasses early magic resistance stack options.Yone Build →Details ansehen
Yone
Warum
Yone's extreme mobility creates a challenging dynamic because Soul Unbound allows him to trade without risk. He can dash forward to strike you, easily sidestep your slow Death's Grasp, and snap back to his starting point to completely bypass your Realm of Death if he times the return window during your ultimate's cast. His mixed damage from Way of the Hunter also bypasses early magic resistance stack options.
Lane-Einfluss
You will find yourself constantly pushed under turret because Yone's Mortal Steel and Spirit Cleave clear waves faster while building a protective shield. If you try to fight back, he will use Soul Unbound to chunk your health bar and retreat before your passive Darkness Rise can even activate. This forces you to burn Indestructible defensively, losing priority and allowing him to freely roam.
Wie man spielt
To survive, never cast Death's Grasp proactively; hold it to pull Yone back only after he has committed his Soul Unbound dash or to disrupt his Mortal Steel third cast. Position yourself near your own tower to minimize his run-down distance. If he activates his spirit form, step backward and prepare to aim Obliterate at his physical body's return marker, forcing him to take damage upon his inevitable retreat.
ReichweiteAusweichenThis matchup is dictated by Kennen's superior mobility. Whenever you attempt to pull him in with Death's Grasp, he can reactively activate Lightning Rush to easily dash out of the hand's hitbox. Once your primary crowd control is on cooldown, Kennen can freely position forward to harass you with Thundering Shuriken and stack Mark of the Storm without any fear of your retaliation.Kennen Build →Details ansehen
Kennen
Warum
This matchup is dictated by Kennen's superior mobility. Whenever you attempt to pull him in with Death's Grasp, he can reactively activate Lightning Rush to easily dash out of the hand's hitbox. Once your primary crowd control is on cooldown, Kennen can freely position forward to harass you with Thundering Shuriken and stack Mark of the Storm without any fear of your retaliation.
Lane-Einfluss
You will constantly find yourself pushed under turret, absorbing poke while trying to secure minions. If you step up to contest the wave, Kennen will chip away at your health bar, forcing early recalls and giving him a massive gold lead through turret plates. Since you cannot easily lock him down, he maintains complete control over the wave state and can comfortably rotate.
Wie man spielt
To survive, never cast Death's Grasp unless Kennen has already wasted Lightning Rush to clear minions or trade. Position yourself deep inside your own minion wave to block his Thundering Shuriken pathing. If he steps past your wave to harass, use Obliterate on isolated minions to push back, and rely heavily on the shield from Indestructible to absorb his Electrical Surge damage. If he locks you in Slicing Maelstrom, use Realm of Death to isolate him.
SchildeAusweichenFiora completely dictates the pace of this duel through her Riposte. If you attempt to pull her in with Death's Grasp, she can parry it instantly to stun you and easily strike your vitals revealed by Duelist's Dance. Even worse, a skilled Fiora will reactively hold her Riposte to completely cancel the cast of your Realm of Death, stripping away your primary stat-stealing tool and leaving you vulnerable in a raw duel.Fiora Build →Details ansehen
Fiora
Warum
Fiora completely dictates the pace of this duel through her Riposte. If you attempt to pull her in with Death's Grasp, she can parry it instantly to stun you and easily strike your vitals revealed by Duelist's Dance. Even worse, a skilled Fiora will reactively hold her Riposte to completely cancel the cast of your Realm of Death, stripping away your primary stat-stealing tool and leaving you vulnerable in a raw duel.
Lane-Einfluss
This interaction forces you into an extremely defensive posture where you cannot freely use your crowd control. Fiora will constantly pressure you under tower, using Lunge to poke your Duelist's Dance vitals while you struggle to trade back. If she successfully parries Death's Grasp, the resulting stun often leads to a full Grand Challenge setup, resulting in a forced recall or a direct death that gives her free plates.
Wie man spielt
To survive, you must bait out Riposte before committing to any major fight. Never lead with Death's Grasp; instead, use Obliterate to farm from safety and charge Indestructible to absorb her Lunge pokes. If you must use Realm of Death, try to trigger it from a brush or walk close to force her into guessing the timing. If she wastes her parry, you have a brief fifteen-second window to aggressively force a trade with your active Darkness Rise aura.
TarnungDuellAkali holds a massive advantage because her superior mobility allows her to easily dodge your slow Obliterate and Death's Grasp. More importantly, the lane is heavily dictated by how Twilight Shroud interacts with your Realm of Death. If you pull her into your death dimension, she can simply deploy her shroud inside, completely concealing herself and stalling out the entire duration of your ultimate without taking damage.Akali Build →Details ansehen
Akali
Warum
Akali holds a massive advantage because her superior mobility allows her to easily dodge your slow Obliterate and Death's Grasp. More importantly, the lane is heavily dictated by how Twilight Shroud interacts with your Realm of Death. If you pull her into your death dimension, she can simply deploy her shroud inside, completely concealing herself and stalling out the entire duration of your ultimate without taking damage.
Lane-Einfluss
During the laning phase, Akali will constantly poke you with Five Point Strike while using Assassin's Mark to trade safely. Because she can easily disengage using Shuriken Flip, attempting to freeze the wave or force trades often leaves you vulnerable. Missed skillshots mean she will immediately punish you, forcing you to rely on Indestructible for shield sustain rather than building aggressive lane pressure.
Wie man spielt
To survive this lane, you must play defensively and never cast Realm of Death while her Twilight Shroud is off cooldown. Force her to use her shroud defensively in the open lane first. Keep your wave near your turret to limit her space for Shuriken Flip. When she approaches to poke, use Darkness Rise to match her movement speed, and always hold Death's Grasp as a deterrent rather than using it to initiate fights blindly.
AusweichenPositionierungGwen's mobility completely dictates the pace of this duel. Because her Skip 'n Slash is on a short cooldown, she can effortlessly dash out of your Death's Grasp. This evasion denies you the ability to pull her into your sweet spot, meaning your Obliterate will rarely hit her as an isolated target. Without that amplified damage, Gwen's A Thousand Cuts passive and Snip Snip! will quickly outpace your damage output in any direct confrontation.Gwen Build →Details ansehen
Gwen
Warum
Gwen's mobility completely dictates the pace of this duel. Because her Skip 'n Slash is on a short cooldown, she can effortlessly dash out of your Death's Grasp. This evasion denies you the ability to pull her into your sweet spot, meaning your Obliterate will rarely hit her as an isolated target. Without that amplified damage, Gwen's A Thousand Cuts passive and Snip Snip! will quickly outpace your damage output in any direct confrontation.
Lane-Einfluss
This constant threat forces you into a defensive posture near your turret. You cannot reliably contest the wave, as attempting to fish for a Death's Grasp leaves you vulnerable to a forward Skip 'n Slash trade where she shreds your health bar with Snip Snip!. If she manages to freeze the lane, you risk losing significant gold, and using your Indestructible shield early just to survive her Needlework all-ins will bleed your lane priority dry.
Wie man spielt
To survive, you must play a patient spacing game. Never initiate with Death's Grasp; instead, hold it as a disengagement tool to pull her away when she dashes in with Skip 'n Slash. Position yourself inside your own minion wave to ensure her Snip Snip! damage is split, and only trigger Indestructible when her Needlework stacks are fully unleashed. If she forces you into the Realm of Death, focus on running down her Hallowed Mist timer before committing your spells.
DuellPositionierungDarius dictates this matchup because of his healing and execute potential. Even when you isolate him inside your Realm of Death, he can swing Decimate to strike you with the outer edge, healing back your Darkness Rise passive damage. If he stacks Hemorrhage to five, his Noxian Might unlocks, allowing Noxian Guillotine to easily cut through your health pool before your AP damage can melt his higher base stats.Darius Build →Details ansehen
Darius
Warum
Darius dictates this matchup because of his healing and execute potential. Even when you isolate him inside your Realm of Death, he can swing Decimate to strike you with the outer edge, healing back your Darkness Rise passive damage. If he stacks Hemorrhage to five, his Noxian Might unlocks, allowing Noxian Guillotine to easily cut through your health pool before your AP damage can melt his higher base stats.
Lane-Einfluss
You must concede early wave control because a single Apprehend pull leads to a deadly Crippling Strike slow and a full Hemorrhage sequence. This forces you to farm from a distance, bleeding minor tower plating while preserving your health. If you get chunked below half, Darius will easily dive you with Noxian Guillotine, causing you to lose massive waves and letting him roam to your jungle.
Wie man spielt
To survive, you must play a strict spacing game. When Darius starts his Decimate swing, step inward toward his handle to negate his healing and reduce damage, or use Death's Grasp to pull him away entirely. Always hold Indestructible to shield his Noxian Guillotine execution damage rather than using it early for minor health. If he pulls you with Apprehend, immediately trade with Obliterate and walk away before his bleed stacks.
PositionierungRegenerationTeemo's constant mobility from Move Quick makes this lane exceptionally difficult for Mordekaiser. Whenever you attempt to close the distance or fish for a catch, the swift scout easily steps out of your Death's Grasp and sidesteps Obliterate. This allows him to constantly apply pressure with Toxic Shot from safety, rendering your melee-range threat null while he chips away at your health bar.Teemo Build →Details ansehen
Teemo
Warum
Teemo's constant mobility from Move Quick makes this lane exceptionally difficult for Mordekaiser. Whenever you attempt to close the distance or fish for a catch, the swift scout easily steps out of your Death's Grasp and sidesteps Obliterate. This allows him to constantly apply pressure with Toxic Shot from safety, rendering your melee-range threat null while he chips away at your health bar.
Lane-Einfluss
You will find yourself pinned under your own turret, bleeding health every time you step up to last-hit. Teemo's relentless harassment forces you to deplete Indestructible early just to survive the poison. If you drop too low, you are forced into bad recalls, losing waves and letting him place Noxious Trap clusters around the river, completely blocking your jungler from assisting you.
Wie man spielt
Concede early minions and let the wave crash. Only throw Death's Grasp if Teemo steps up too far to auto-attack and has his Move Quick on cooldown. If you manage to pull him in, immediately activate Darkness Rise and force Realm of Death to trap him before he can escape. If you hit a Noxious Trap, immediately activate Indestructible to mitigate the slow and damage, then retreat to the safety of your tower.
Früher DruckUltimateVolibear dictates this matchup because his Stormbringer grants him an unstoppable frame that can completely cancel your Realm of Death if he times it during your cast animation. This interaction denies you your stat-stealing duel entirely. Furthermore, in prolonged skirmishes, Volibear's repeated healing from Frenzied Maul outpaces the damage of your Darkness Rise aura, turning raw slugfests into losing battles for you.Volibear Build →Details ansehen
Volibear
Warum
Volibear dictates this matchup because his Stormbringer grants him an unstoppable frame that can completely cancel your Realm of Death if he times it during your cast animation. This interaction denies you your stat-stealing duel entirely. Furthermore, in prolonged skirmishes, Volibear's repeated healing from Frenzied Maul outpaces the damage of your Darkness Rise aura, turning raw slugfests into losing battles for you.
Lane-Einfluss
You cannot pressure Volibear under his tower because Stormbringer disables structures while matching your dive potential. If you attempt short trades with Obliterate and Death's Grasp, Volibear will retaliate with Sky Splitter and Thundering Smash to secure massive shield advantages. This forces you to play defensively near your turret, conceding wave control and limiting your ability to assist your jungler in early river skirmishes.
Wie man spielt
To survive, never initiate with Realm of Death; instead, hold it as a psychological threat until Volibear wastes Stormbringer offensively or to escape. When trading, always save Indestructible to absorb the damage and mitigate the healing of his second, marked Frenzied Maul. If he charges with Thundering Smash, pull him backward with Death's Grasp to interrupt his sprint, then retaliate with an isolated Obliterate while retreating to safety.
PositionierungAusweichenRiven holds a distinct advantage because her high-frequency dashes from Broken Wings and Valor allow her to effortlessly sidestep the slow, highly telegraphed animations of your Obliterate and Death's Grasp. Since your main damage and pull are easily avoided, you struggle to land clean strikes, while her Runic Blade passive ensures she wins any extended brawl if you miss your initial spells.Riven Build →Details ansehen
Riven
Warum
Riven holds a distinct advantage because her high-frequency dashes from Broken Wings and Valor allow her to effortlessly sidestep the slow, highly telegraphed animations of your Obliterate and Death's Grasp. Since your main damage and pull are easily avoided, you struggle to land clean strikes, while her Runic Blade passive ensures she wins any extended brawl if you miss your initial spells.
Lane-Einfluss
This mobility deficit forces you into a defensive posture where attempting to freeze the wave near your turret is vital. Every time you miss Obliterate, Riven will immediately initiate trades using Ki Burst to stun you before you can stack Darkness Rise. You will constantly leak health and lose lane priority, making it difficult to secure clean recall timings without losing plating to her Blade of the Exile threat.
Wie man spielt
To survive, you must never cast Death's Grasp proactively; hold it to disengage when she commits with her third strike of Broken Wings. Only trade back when she has exhausted her dashes, using Indestructible to absorb the damage from her Ki Burst and Blade of the Exile. Position yourself deep inside your own minion wave to dilute her pressure and force her to push.
HeilungsreduktionTradesWarwick heavily disrupts your trade pattern because his Jaws of the Beast allows him to latch onto you, rendering him immune to the displacement of your Death's Grasp while simultaneously healing back your poke. Even if you activate Darkness Rise during extended skirmishes, his passive Eternal Hunger keeps his health bar topped up, completely out-sustaining your isolated Obliterate damage whenever you try to chunk him down.Warwick Build →Details ansehen
Warwick
Warum
Warwick heavily disrupts your trade pattern because his Jaws of the Beast allows him to latch onto you, rendering him immune to the displacement of your Death's Grasp while simultaneously healing back your poke. Even if you activate Darkness Rise during extended skirmishes, his passive Eternal Hunger keeps his health bar topped up, completely out-sustaining your isolated Obliterate damage whenever you try to chunk him down.
Lane-Einfluss
This infinite healing loop forces you into a defensive posture. You cannot easily freeze the wave because Warwick ignores your chip damage, using Blood Hunt to run you down if you drop low. Standard trades turn negative quickly; he will simply bait your Indestructible shield with Primal Howl damage reduction, forcing you to recall early and lose crucial gold, which isolates you from helping your jungler.
Wie man spielt
To survive, prioritize buying healing reduction immediately to weaken his Eternal Hunger before attempting to fight. During skirmishes, never initiate with Death's Grasp; hold it as a defensive tool to push him away only after his Jaws of the Beast is on cooldown. If he locks you down with Infinite Duress, immediately deploy Indestructible to absorb the burst, then banish him with Realm of Death once his Primal Howl shield expires.
Diese Matchups sind vor allem Duelle der Ausführung: Beide Champions haben glaubwürdige Wege, die Oberhand zu gewinnen. Eine wichtige ausgewichene Fähigkeit, ein richtig antizipierter Engage oder ein einziger Positionierungsfehler können reichen, um das Duell zu entscheiden. Das Matchup zu kennen und die richtigen Fenster zum Handeln zu erkennen, ist hier besonders wichtig.
All-inSchildePositionierungThis matchup is a pure duel of spacing where the winner dictates the range. The crucial interaction hinges on Aatrox using Umbral Dash to reactively dodge your Death's Grasp. If he successfully evades your pull, Mordekaiser cannot close the gap to trigger Darkness Rise, leaving you vulnerable to his outer-edge The Darkin Blade strikes.Aatrox Build →Details ansehen
Aatrox
Warum
This matchup is a pure duel of spacing where the winner dictates the range. The crucial interaction hinges on Aatrox using Umbral Dash to reactively dodge your Death's Grasp. If he successfully evades your pull, Mordekaiser cannot close the gap to trigger Darkness Rise, leaving you vulnerable to his outer-edge The Darkin Blade strikes.
Lane-Einfluss
During the laning phase, every trade is a high-stakes gamble around these movement tools. If Aatrox wastes his dash, you can pull him in and force a prolonged brawl where your passive aura melts him. However, if he keeps Umbral Dash ready, he will zone you with The Darkin Blade and Infernal Chains, slowly chipping away your health bar while securing a massive sustain advantage through Deathbringer Stance.
Wie man spielt
To win this psychological war, never initiate trades with Death's Grasp. Instead, walk up and threaten him with isolated Obliterate strikes to force his Umbral Dash defensively. Only cast your pull once his dash is on cooldown. If he activates World Ender, immediately drag him into the Realm of Death to steal his bonus attack damage and neutralise his mobility, using Indestructible to absorb his third, most devastating Q strike.
AusweichenSchildeThe duel hinges on how Ambessa handles your main damage. Her passive Drakehound's Step allows her to constantly dash sideways to avoid your Obliterate. If she successfully evades this hammer slam, she can instantly jump back in while your main damage tool is cooling down, cutting through your health before you can even stack Darkness Rise.Ambessa Build →Details ansehen
Ambessa
Warum
The duel hinges on how Ambessa handles your main damage. Her passive Drakehound's Step allows her to constantly dash sideways to avoid your Obliterate. If she successfully evades this hammer slam, she can instantly jump back in while your main damage tool is cooling down, cutting through your health before you can even stack Darkness Rise.
Lane-Einfluss
This constant threat of lateral dashes forces a high-stakes spacing war. Missing a single Obliterate allows Ambessa to trigger Lacerate and stick to you, taking control of the wave position. If you waste your pull, she will bait you near her tower, using Repudiation to absorb your retaliation and block any hope of a quick disengage.
Wie man spielt
To win this, you must bait her dash before casting. Never open with Obliterate from maximum range; instead, walk up to threaten her with basic attacks to trigger Darkness Rise. Hold Death's Grasp specifically to pull her back after she commits her Drakehound's Step dash. If she uses Repudiation to block your pull, immediately activate Indestructible to absorb her incoming burst, then drag her into Realm of Death once her defensive shield expires.
TradesKitenThis matchup is a pure test of timing and reflexes inside the death realm. While Mordekaiser can steal Camille's stats with Realm of Death, her survival hinges entirely on using the untargetability frame of The Hextech Ultimatum. If she successfully buffers this ultimate to dodge your Obliterate or Death's Grasp, she can stall out your Darkness Rise aura and win the duel.Camille Build →Details ansehen
Camille
Warum
This matchup is a pure test of timing and reflexes inside the death realm. While Mordekaiser can steal Camille's stats with Realm of Death, her survival hinges entirely on using the untargetability frame of The Hextech Ultimatum. If she successfully buffers this ultimate to dodge your Obliterate or Death's Grasp, she can stall out your Darkness Rise aura and win the duel.
Lane-Einfluss
During the laning phase, short trades are dictated by Camille's passive, Adaptive Defenses. She will try to poke you with Tactical Sweep while avoiding extended fights where your Darkness Rise excels. If you miss Death's Grasp, she will aggressively dive you using Hookshot and Precision Protocol. Consequently, waves usually slow-push as both of you hesitate to commit your primary engagement tools.
Wie man spielt
To win this duel, never cast Obliterate immediately after pulling Camille into Realm of Death. Instead, walk her down with basic attacks to trigger Darkness Rise, forcing her to panic-cast The Hextech Ultimatum. Hold your Obliterate and Death's Grasp until she lands from her ultimate leap. If she engages with Hookshot, immediately activate Indestructible to absorb the true damage portion of her Precision Protocol.
KitenThis duel is a constant spacing test centered around Gnar's mobility and your pull. While Mini Gnar harasses you with Boomerang Throw to trigger Hyper, his safety entirely hinges on Hop. Keeping this jump ready allows him to negate your Death's Grasp or easily kite you inside your Realm of Death. When he wastes it, your raw magic damage melts his fragile Mini form.Gnar Build →Details ansehen
Gnar
Warum
This duel is a constant spacing test centered around Gnar's mobility and your pull. While Mini Gnar harasses you with Boomerang Throw to trigger Hyper, his safety entirely hinges on Hop. Keeping this jump ready allows him to negate your Death's Grasp or easily kite you inside your Realm of Death. When he wastes it, your raw magic damage melts his fragile Mini form.
Lane-Einfluss
Laning revolves around Gnar's rage bar. In Mini form, he constantly pushes the wave and chips your health, forcing you to use Indestructible to absorb the harass. However, his aggressive poke makes him vulnerable to sudden freezes. If you can bait his jump, a successful Death's Grasp leads to an easy kill. Once Rage Gene transforms him, he becomes a melee threat capable of slamming you with Boulder Toss.
Wie man spielt
Never cast Death's Grasp proactively while Gnar has Hop off cooldown. Instead, walk forward to threaten him with Obliterate to force his escape tool first. If you must use Realm of Death, wait until he is locked in his Mega Gnar animations, or immediately after his jump is spent. If he jumps away inside your ultimate, use the movement speed from Darkness Rise to close the gap rather than chasing blindly.
RegenerationSchildeThis matchup is a brutal battle of attrition dictated by how you manage your shield timings against his burst. Sett relies on Knuckle Down and Facebreaker to force short, explosive trades that build up his grit. If he unleashes Haymaker, the true damage in the center can turn the tide. However, if you trigger Darkness Rise and hold Indestructible to perfectly absorb that true damage blast, your superior sustained magic damage wins out.Sett Build →Details ansehen
Sett
Warum
This matchup is a brutal battle of attrition dictated by how you manage your shield timings against his burst. Sett relies on Knuckle Down and Facebreaker to force short, explosive trades that build up his grit. If he unleashes Haymaker, the true damage in the center can turn the tide. However, if you trigger Darkness Rise and hold Indestructible to perfectly absorb that true damage blast, your superior sustained magic damage wins out.
Lane-Einfluss
Because both of you possess immense sustain through Pit Grit and Indestructible, neither can easily force the other out of lane early. Wave states remain highly contested; Sett will try to pull you into his minions with Facebreaker to stun you. Missing Obliterate or wasting Death's Grasp leaves you vulnerable to a swift Knuckle Down engage, turning the lane into a tense dance where trading health bars only ends when one player mismanages their defensive cooldowns.
Wie man spielt
To secure victory, never initiate trades with Death's Grasp unless Sett's Facebreaker is down. Bait his Knuckle Down, land isolated Obliterate strikes, and stack your passive. When Sett prepares his Haymaker, do not panic-dodge sideways if you cannot escape the central true damage zone; instead, activate Indestructible at that exact micro-second to neutralize the blast. If you misstime this and take full damage, immediately cast Realm of Death to steal his stats and survive the remaining duel.
AusweichenKitenThis matchup revolves entirely around how you fish for pulls. Every time Jayce swaps stances, Hextech Capacitor grants him a sudden burst of movement speed. This extra mobility allows him to easily sidestep Death's Grasp, leaving you vulnerable to his ranged poke. If he successfully bait-and-dodges your pull, you lose all threat, as he can safely chip away at your health from afar without fear of being forced into a melee brawl.Jayce Build →Details ansehen
Jayce
Warum
This matchup revolves entirely around how you fish for pulls. Every time Jayce swaps stances, Hextech Capacitor grants him a sudden burst of movement speed. This extra mobility allows him to easily sidestep Death's Grasp, leaving you vulnerable to his ranged poke. If he successfully bait-and-dodges your pull, you lose all threat, as he can safely chip away at your health from afar without fear of being forced into a melee brawl.
Lane-Einfluss
When Jayce easily evades your pull, he gains complete control over the wave. He will use his ranged forms to thin the minions while poking you under tower, forcing you to rely heavily on Indestructible to absorb the harassment. This constant pressure delays your recalls and prevents you from assisting your jungler, as you are stuck clearing waves while he holds priority and threatens to chip down your turret plates.
Wie man spielt
To counter this, never initiate with Death's Grasp while Jayce has his transformation ready. Instead, use Obliterate to farm from a safe distance and walk up to threaten him. Force him to use To the Skies! to engage on you in hammer form. Once he commits to melee range and has expended his transformation movement speed, cast Death's Grasp behind him to pull him back in, activating Darkness Rise to win the extended duel.
KitenUltimateThis matchup revolves entirely around surviving the five seconds of Undying Rage. While Tryndamere relies on Battle Fury to ramp up his critical strikes and melt your health bar, you possess the perfect tool to neutralize his offensive peak. By dragging him inside the Realm of Death, you isolate his threat, and more importantly, you can use Death's Grasp defensively to displace him and run him out of time.Tryndamere Build →Details ansehen
Tryndamere
Warum
This matchup revolves entirely around surviving the five seconds of Undying Rage. While Tryndamere relies on Battle Fury to ramp up his critical strikes and melt your health bar, you possess the perfect tool to neutralize his offensive peak. By dragging him inside the Realm of Death, you isolate his threat, and more importantly, you can use Death's Grasp defensively to displace him and run him out of time.
Lane-Einfluss
The wave dynamic is dictated by Tryndamere's fury level. When his Battle Fury is empty, you can safely harass him with Obliterate and dictate the wave's position. However, once he charges his resource, he will look to force trades with Spinning Slash. Wasting your Death's Grasp offensively gives him a massive window to run you down under your own turret, forcing you to consume Indestructible prematurely.
Wie man spielt
To succeed, never use Death's Grasp to initiate once both of you reach level five. Keep this crowd control strictly to peel yourself. When Tryndamere commits with Spinning Slash and activates Undying Rage, immediately cast Realm of Death. Inside your arena, aim Death's Grasp behind you to pull him away, then turn and run to activate Darkness Rise for the movement speed boost. This spacing guarantees you easily outrun his ultimate's duration.
AbklingzeitenTradesThis lane is a pure battle of attrition where Vladimir heals constantly with Transfusion while you shield with Indestructible. The entire matchup hinges on Sanguine Pool. A skilled Vladimir will use it to slip away from your Death's Grasp, or worse, activate it during the cast animation of Realm of Death. If he pools under your ultimate's cast, your crucial duel is cancelled, leaving you without your stat-stealing advantage.Vladimir Build →Details ansehen
Vladimir
Warum
This lane is a pure battle of attrition where Vladimir heals constantly with Transfusion while you shield with Indestructible. The entire matchup hinges on Sanguine Pool. A skilled Vladimir will use it to slip away from your Death's Grasp, or worse, activate it during the cast animation of Realm of Death. If he pools under your ultimate's cast, your crucial duel is cancelled, leaving you without your stat-stealing advantage.
Lane-Einfluss
Because Vladimir has no resources, he will try to poke you down with Transfusion while you try to crash waves. If you blindly push with Obliterate, he will freeze near his turret, scaling safely through Crimson Pact. You must keep the wave in the middle of the lane. Letting him push allows you to threaten him with Death's Grasp, but pushing him under tower lets him safely regenerate health.
Wie man spielt
Never initiate a trade with Death's Grasp while Sanguine Pool is off cooldown. Instead, walk forward and trigger Darkness Rise using basic attacks and isolated Obliterate strikes. Force him to waste his pool to escape your passive aura's burn. The moment he resurfaces, you have a twenty-second window where he is incredibly vulnerable. That is your cue to immediately pull him in and activate Realm of Death to secure the kill.
PositionierungUltimateThis lane is a pure skill check determined by mobility versus raw power. Irelia relies on stacking Ionian Fervor and baiting your abilities. The duel hinges on whether she can use Bladesurge to dash through minions or yourself to dodge Obliterate. If she successfully evades this heavy slam, especially once isolated inside Realm of Death, her sustained physical damage will overwhelm your shield from Indestructible.Irelia Build →Details ansehen
Irelia
Warum
This lane is a pure skill check determined by mobility versus raw power. Irelia relies on stacking Ionian Fervor and baiting your abilities. The duel hinges on whether she can use Bladesurge to dash through minions or yourself to dodge Obliterate. If she successfully evades this heavy slam, especially once isolated inside Realm of Death, her sustained physical damage will overwhelm your shield from Indestructible.
Lane-Einfluss
Wave position dictates who holds the threat. When Irelia has low-health minions to reset Bladesurge, she can easily bait Death's Grasp and reposition. If you miss your pull, she will instantly stack Ionian Fervor and force heavy trades. This constant threat prevents you from blindly pushing, as a frozen wave near her turret allows her to chase you down the long lane with Vanguard's Edge.
Wie man spielt
Never cast Obliterate proactively when Irelia has active marks or low-health minions nearby to dash to. Instead, hold your slam and use basic attacks to trigger Darkness Rise. When you pull her with Death's Grasp, anticipate her immediate Bladesurge response behind you; aim your slam backward or wait for her to lock herself into the Defiant Dance channel. If she misses Flawless Duet, that is your window to cast Realm of Death and fight her without her maximum burst.
SchildePositionierungThis matchup is a true test of reaction times, centered entirely on how you manage your shield against his ultimate. Urgot relies on grinding down your health bar with Purge and passive shotgun knees to drag you into execution range. However, Mordekaiser can completely shut down this execute by activating Indestructible right before falling below the threshold of Fear Beyond Death, absorbing the lethal damage and swinging the duel.Urgot Build →Details ansehen
Urgot
Warum
This matchup is a true test of reaction times, centered entirely on how you manage your shield against his ultimate. Urgot relies on grinding down your health bar with Purge and passive shotgun knees to drag you into execution range. However, Mordekaiser can completely shut down this execute by activating Indestructible right before falling below the threshold of Fear Beyond Death, absorbing the lethal damage and swinging the duel.
Lane-Einfluss
Laning revolves around baiting and dodging Urgot's dash. If he lands Disdain, his rapid-fire Purge will quickly stack up damage. You must space yourself to avoid this flip while fishing with Obliterate to poke him down. When his dash is wasted, you gain immediate lane priority, allowing you to force him under tower or freeze the wave to deny him gold.
Wie man spielt
Always hold your Indestructible specifically for when Urgot fires Fear Beyond Death. Do not waste your shield early in the trade for minor poke. Position yourself on the opposite side of his passive legs to minimize incoming damage from Echoing Flames. If he manages to catch you with Disdain, immediately cast Realm of Death to steal his defensive stats, reducing his damage output and buying you time to regenerate your shield.
Diese Champions tun sich meist schwer, auf deine Hauptstärken zu reagieren, was dir mehr Freiheit im Matchup gibt. Du hast oft mehrere Möglichkeiten, sie unter Druck zu setzen und Trades zu deinen Gunsten zu erzwingen. Nutze diesen Vorteil, um das Tempo zu bestimmen, statt ihnen Zeit zu geben, wieder in eine komfortable Position zu kommen.
ÜberlebenTradesYou hold a distinct advantage because Garen relies on short trades with Decisive Strike and Judgment, while your passive Darkness Rise excels in extended duels. The match hinges on how he uses Courage. Inside your Realm of Death, Garen is forced to hold Courage to block your isolated Obliterate strikes. If he wastes his shield early, your raw magic damage easily overcomes his natural tankiness.Garen Build →Details ansehen
Garen
Warum
You hold a distinct advantage because Garen relies on short trades with Decisive Strike and Judgment, while your passive Darkness Rise excels in extended duels. The match hinges on how he uses Courage. Inside your Realm of Death, Garen is forced to hold Courage to block your isolated Obliterate strikes. If he wastes his shield early, your raw magic damage easily overcomes his natural tankiness.
Lane-Einfluss
Garen will try to neutralize your pressure by using Perseverance to heal up between waves. You must actively disrupt this by landing Obliterate to keep his passive offline. Because Garen lacks dash tools, a successful Death's Grasp guarantees an extended trade where your passive burns him down, forcing him to play defensively under tower or risk dying to Demacian Justice counters with Indestructible.
Wie man spielt
Pivot your build path toward early magic penetration to bypass his magic resistance. In combat, never cast Realm of Death while Garen still has Courage available, or use your isolated Obliterate first to bait his shield before trapping him. If he attempts to execute you with Demacian Justice, time your Indestructible at the absolute last microsecond to convert your stored damage into a massive shield that completely absorbs his ultimate's true damage.
RückzugMagieschadenYou hold the upper hand because your sustained damage from Darkness Rise easily overrides Gragas's hit-and-run pattern. In a straight duel, your raw stats win. However, Gragas's main defense is using Explosive Cask to knock you back inside your Realm of Death. If he manages to blast you away, he successfully stalls out the entire duration of your ultimate, neutralizing your greatest threat.Gragas Build →Details ansehen
Gragas
Warum
You hold the upper hand because your sustained damage from Darkness Rise easily overrides Gragas's hit-and-run pattern. In a straight duel, your raw stats win. However, Gragas's main defense is using Explosive Cask to knock you back inside your Realm of Death. If he manages to blast you away, he successfully stalls out the entire duration of your ultimate, neutralizing your greatest threat.
Lane-Einfluss
During the laning phase, Gragas will constantly use Barrel Roll to clear waves from afar and Body Slam to escape your pulls. Since you have the advantage, you can easily shove him under turret. Watch his mana bar closely. If he uses Drunken Rage to farm under pressure, his damage reduction is gone, creating a massive opening where you can force him out of lane.
Wie man spielt
To secure the kill, never cast Realm of Death while Gragas has both his displacement tools available. Wait for him to initiate with Body Slam, then pull him back with Death's Grasp as he tries to retreat. If you must ultimate him, position yourself so his Explosive Cask knocks you against a wall rather than away from him. Keep your Indestructible ready to absorb his burst if he tries to turn the fight.
MagieschadenPositionierungGraves relies on Quickdraw to stack armor against physical damage, which is useless against your magic output. He wants to kite you in open space, but your Death's Grasp drags him into melee range. Once you lock him down with Realm of Death, his mobility is completely neutralized. He cannot use the terrain to slip away, forcing a pure stat-check duel that your passive Darkness Rise easily wins.Graves Build →Details ansehen
Graves
Warum
Graves relies on Quickdraw to stack armor against physical damage, which is useless against your magic output. He wants to kite you in open space, but your Death's Grasp drags him into melee range. Once you lock him down with Realm of Death, his mobility is completely neutralized. He cannot use the terrain to slip away, forcing a pure stat-check duel that your passive Darkness Rise easily wins.
Lane-Einfluss
This matchup strips Graves of his usual lane dominance. He cannot use End of the Line to push safely, as standing near walls to rebound the shell makes him an easy target for Death's Grasp. You dictate the wave's position. By threatening your ultimate, you force him to play incredibly passively, preventing him from utilizing New Destiny to clear waves, which leaves his turret exposed to constant pressure.
Wie man spielt
To secure this advantage, never initiate with Death's Grasp. Instead, walk forward and threaten him with Obliterate. Force him to burn Quickdraw to dodge your smash, then immediately pull him back with Death's Grasp. If he drops Smoke Screen to blind you, step out of the cloud immediately before activating Realm of Death. Once inside your ultimate, delay your Indestructible shield until his Collateral Damage is fired to absorb his final burst.
AusweichenÜberlebenYou hold a massive raw stat advantage early on, as your Darkness Rise aura easily outdamages Kayle before she fully unlocks Divine Ascent. However, this matchup centers on a critical ultimate interaction: once you trap her in Realm of Death, a skilled Kayle will hold Divine Judgment specifically to react to and block your isolated Obliterate, stalling out your ultimate's duration and denying you the quick kill.Kayle Build →Details ansehen
Kayle
Warum
You hold a massive raw stat advantage early on, as your Darkness Rise aura easily outdamages Kayle before she fully unlocks Divine Ascent. However, this matchup centers on a critical ultimate interaction: once you trap her in Realm of Death, a skilled Kayle will hold Divine Judgment specifically to react to and block your isolated Obliterate, stalling out your ultimate's duration and denying you the quick kill.
Lane-Einfluss
This dynamic allows you to dictate the wave's positioning, freezing her out or shoving her under turret with impunity. Kayle is forced to play defensively, using Radiant Blast to farm from afar and Celestial Blessing to escape your engages. While you easily secure priority, failing to respect her ultimate under tower will result in a disastrous failed dive where she stalls you out.
Wie man spielt
To secure the kill, position yourself ahead of her wave to deny her experience, and bait out Celestial Blessing before casting Death's Grasp. When you drag her into Realm of Death, do not immediately cast Obliterate. Instead, walk her down with your Darkness Rise aura active to force her into a panic Divine Judgment. Only strike with your isolated slam once her golden shield of invulnerability fades, ensuring your highest damage source connects.
ÜberlebenPositionierungMordekaiser dominates this matchup because Jax's primary defensive tool, Counter Strike, only evades basic attacks. It does absolutely nothing to mitigate the heavy area-of-effect damage from Obliterate or the continuous burn of Darkness Rise. Consequently, Jax cannot simply stand his ground during trades; he is forced to waste Leap Strike defensively to dodge your spells rather than using it to initiate favorable skirmishes.Jax Build →Details ansehen
Jax
Warum
Mordekaiser dominates this matchup because Jax's primary defensive tool, Counter Strike, only evades basic attacks. It does absolutely nothing to mitigate the heavy area-of-effect damage from Obliterate or the continuous burn of Darkness Rise. Consequently, Jax cannot simply stand his ground during trades; he is forced to waste Leap Strike defensively to dodge your spells rather than using it to initiate favorable skirmishes.
Lane-Einfluss
This dynamic allows you to control the wave from the very first levels. Since Jax cannot safely contest your area damage, you can easily slow-push waves and trap him under his turret. Every time he attempts to last-hit, you can punish him with Obliterate. This constant pressure chip-damages his health bar, denies him gold, and secures you early plate gold without fearing his counter-engage.
Wie man spielt
Position yourself aggressively near his caster minions to bait his Leap Strike. Never lead with Death's Grasp; instead, save this pull to drag Jax back into your Darkness Rise aura once he tries to leap away. If he activates Counter Strike to stun you, activate Indestructible to absorb the burst, then immediately retaliate with an isolated Obliterate once his evasion ends. In Realm of Death, fight him near the boundary to limit his leap targets.
ZonenkontrolleFrüher DruckMordekaiser completely dominates this matchup by exploiting Nasus's weak early game and reliance on stacking Siphoning Strike. Every time Nasus walks forward to secure a minion, he is entirely vulnerable to Death's Grasp. Pulling him in allows you to trigger Darkness Rise immediately with an isolated Obliterate, forcing heavy trades that his passive Soul Eater cannot sustain against your magic damage.Nasus Build →Details ansehen
Nasus
Warum
Mordekaiser completely dominates this matchup by exploiting Nasus's weak early game and reliance on stacking Siphoning Strike. Every time Nasus walks forward to secure a minion, he is entirely vulnerable to Death's Grasp. Pulling him in allows you to trigger Darkness Rise immediately with an isolated Obliterate, forcing heavy trades that his passive Soul Eater cannot sustain against your magic damage.
Lane-Einfluss
This interaction grants you absolute authority over wave states. By freezing the minions near your turret, you force Nasus to walk deep into the lane, exposing him to lethal pull setups. Denying him stacks delays his power spike indefinitely, while your constant pressure chips away at his tower. Even if he uses Fury of the Sands to survive, your absolute control over the wave forces him into bad recall timings.
Wie man spielt
Stand directly inside his minion wave to zone him out. Hold Death's Grasp specifically for when he commits his animation to last-hit with Siphoning Strike. If he tries to slow you with Wither to escape, activate Indestructible to absorb any retaliatory damage while your passive damage ticks down. Should you miss your pull and find yourself pushed up, immediately fall back and wait for the wave to bounce, preserving your ultimate Realm of Death for when he attempts a desperate all-in under his own turret.
MagieschadenUltimateK'Santé's ultimate All Out is his own trap against you. When he sheds his defensive stats to gain offensive power, he becomes incredibly squishy inside your Realm of Death. Because your stolen stats from his base form persist, your passive Darkness Rise shreds his newly reduced magic resistance. He cannot sustain against your continuous area-of-effect damage once his tankiness evaporates.K'Santé Build →Details ansehen
K'Santé
Warum
K'Santé's ultimate All Out is his own trap against you. When he sheds his defensive stats to gain offensive power, he becomes incredibly squishy inside your Realm of Death. Because your stolen stats from his base form persist, your passive Darkness Rise shreds his newly reduced magic resistance. He cannot sustain against your continuous area-of-effect damage once his tankiness evaporates.
Lane-Einfluss
Early on, K'Santé uses Ntofo Strikes to contest waves, but you can easily out-shove him. Once you both reach level five, the lane pressure swings entirely in your favor. He cannot safely use Path Maker or Footwork to escape you because your Realm of Death neutralizes his mobility. He is forced to play defensively under tower, conceding wave control to avoid your deadly isolated Obliterate strikes.
Wie man spielt
Save your Death's Grasp to pull him back if he tries to dash away with Footwork. When trading, never activate Realm of Death until K'Santé commits to his own All Out first, or until you have fully stacked Darkness Rise on him. If he manages to stun you against a wall with his ultimate, immediately shield yourself with Indestructible to absorb his burst, then run him down with your passive's movement speed bonus.
SchildeTradesThis matchup heavily favors you because Yasuo's defensive centerpiece, Wind Wall, is completely useless against your main tools. It cannot block the overhead smash of Obliterate, nor can it stop the burning magic damage from your Darkness Rise aura. Once you close the distance, Yasuo is stripped of his primary projectile-blocking utility, forcing him into a pure stat check that his squishier skirmisher profile cannot win.Yasuo Build →Details ansehen
Yasuo
Warum
This matchup heavily favors you because Yasuo's defensive centerpiece, Wind Wall, is completely useless against your main tools. It cannot block the overhead smash of Obliterate, nor can it stop the burning magic damage from your Darkness Rise aura. Once you close the distance, Yasuo is stripped of his primary projectile-blocking utility, forcing him into a pure stat check that his squishier skirmisher profile cannot win.
Lane-Einfluss
You dominate the wave dynamic since Yasuo cannot hide behind his wind barrier to farm or trade safely. Every time he dashes forward with Sweeping Blade, he risks taking an unblockable Obliterate. This constant threat forces him to play defensively, giving you total control over the lane's push. You can easily chip away at his tower while keeping him trapped under his turret, starving his gold income.
Wie man spielt
Pop his Way of the Wanderer shield with a simple basic attack or the edge of Obliterate before committing to a fight. Wait until he discharges his Steel Tempest tornado, then immediately cast Death's Grasp to pull him in. Once you lock him down, trigger Darkness Rise to burn through his health. If he manages to knock you up, activate Indestructible to absorb Last Breath's burst, and use Realm of Death to isolate him away from minions so he cannot dash.
SchildeTradesThis matchup hinges on neutralizing Renekton's burst rotation. The crocodile wants to dash in with *Slice and Dice*, execute an empowered *Ruthless Predator* stun, and retreat. By saving *Indestructible* to absorb the exact moment he unleashes his stun, you negate his entire trading pressure. Once his main burst is spent on your shield, his long cooldowns leave him completely defenseless against your *Darkness Rise* aura in an extended chase.Renekton Build →Details ansehen
Renekton
Warum
This matchup hinges on neutralizing Renekton's burst rotation. The crocodile wants to dash in with *Slice and Dice*, execute an empowered *Ruthless Predator* stun, and retreat. By saving *Indestructible* to absorb the exact moment he unleashes his stun, you negate his entire trading pressure. Once his main burst is spent on your shield, his long cooldowns leave him completely defenseless against your *Darkness Rise* aura in an extended chase.
Lane-Einfluss
Because you can consistently negate his burst, Renekton is forced to play defensively. He cannot easily stack *Reign of Anger* on the minion wave without risking a deadly pull from your *Death's Grasp*. This gives you total control over the wave state. You can easily set up slow pushes, crash huge waves under his turret, and harass him with isolated *Obliterate* strikes while he struggles under pressure.
Wie man spielt
Never preemptively waste your *Indestructible* shield for minor poke; save its massive barrier specifically for when Renekton's blades glow with *Ruthless Predator*. When he dashes forward with *Slice and Dice*, stand your ground. As he tries to retreat after his combo, pull him back with *Death's Grasp* to trigger *Darkness Rise* and run him down. If he activates *Dominus* to survive, immediately counter with *Realm of Death* to steal his amplified health.
UltimateMordekaiser naturally dominates this matchup because *Darkness Rise* shreds Ornn's health pool during extended trades. However, Ornn can completely negate your primary engage tools. The entire lane hinges on *Bellows Breath*. Its temporary unstoppable status allows the tank to shrug off the pull from *Death's Grasp* or, worse, completely cancel the channel of *Realm of Death* if timed perfectly, wasting your ultimate.Ornn Build →Details ansehen
Ornn
Warum
Mordekaiser naturally dominates this matchup because *Darkness Rise* shreds Ornn's health pool during extended trades. However, Ornn can completely negate your primary engage tools. The entire lane hinges on *Bellows Breath*. Its temporary unstoppable status allows the tank to shrug off the pull from *Death's Grasp* or, worse, completely cancel the channel of *Realm of Death* if timed perfectly, wasting your ultimate.
Lane-Einfluss
Ornn will try to farm safely, using *Volcanic Rupture* to poke and *Searing Charge* to escape. Because your passive damage zone beats his melee threat, you can easily shove him under turret. However, if you blindly throw out *Death's Grasp*, he will react with his fire breath, trade back with Brittle procs, and safely disengage. This forces you to play a patient zoning game rather than forcing mindless fights.
Wie man spielt
Walk up and force trades with *Obliterate* and basic attacks to trigger *Darkness Rise* without using your pull. Save *Death's Grasp* for when Ornn attempts to flee with *Searing Charge*, or right after his *Bellows Breath* ends. If you intend to cast *Realm of Death*, wait out the fire breath completely; otherwise, his unstoppable frame will eat your ultimate. Keep *Indestructible* ready to absorb his *Call of the Forge God* burst.
TarnungTeamfightsThis matchup heavily favors you because of how your passive interacts with his stealth. Once you trigger Darkness Rise by landing your abilities, the persistent damage aura constantly ticks around you. This aura continuously damages and reveals the true Wukong's position even after he casts Warrior Trickster to slip away. His clone fails to deceive you, turning his main defensive tool into a wasted cooldown.Wukong Build →Details ansehen
Wukong
Warum
This matchup heavily favors you because of how your passive interacts with his stealth. Once you trigger Darkness Rise by landing your abilities, the persistent damage aura constantly ticks around you. This aura continuously damages and reveals the true Wukong's position even after he casts Warrior Trickster to slip away. His clone fails to deceive you, turning his main defensive tool into a wasted cooldown.
Lane-Einfluss
Wukong cannot survive extended trades against your raw magic damage. Whenever he initiates with Nimbus Strike and Golden Staff, his quick-burst combo falls short. Because your aura negates his escape, he is forced to play defensively near his turret. You can easily establish permanent wave priority, deny him gold, and pressure his tower while keeping him too low to assist his jungler.
Wie man spielt
Stand directly inside your minion wave to bait his Nimbus Strike engage. Always hold Death's Grasp instead of throwing it early; use it to drag him back once his Warrior Trickster clone appears and your aura reveals his true path. When he commits with Cyclone, mitigate the knock-up damage using Indestructible, then immediately cast Realm of Death to steal his stats, neutralize his passive armor, and crush him in the isolation.
UltimateRückzugHeimerdinger's entire lane presence relies on the defensive zone created by his H-28G Evolution Turret setups. However, Mordekaiser possesses the ultimate counter-measure: Realm of Death. When cast, this ultimate pulls Heimerdinger into a pocket dimension, leaving all his pre-placed H-28G Evolution Turret structures behind on the normal Rift. Deprived of his mechanical artillery, the fragile inventor is left completely defenseless against your raw physical power.Heimerdinger Build →Details ansehen
Heimerdinger
Warum
Heimerdinger's entire lane presence relies on the defensive zone created by his H-28G Evolution Turret setups. However, Mordekaiser possesses the ultimate counter-measure: Realm of Death. When cast, this ultimate pulls Heimerdinger into a pocket dimension, leaving all his pre-placed H-28G Evolution Turret structures behind on the normal Rift. Deprived of his mechanical artillery, the fragile inventor is left completely defenseless against your raw physical power.
Lane-Einfluss
Before you unlock your ultimate, Heimerdinger will aggressively push the wave and try to poke you under tower. Once you have access to Realm of Death, the dynamic shifts dramatically. He can no longer safely siege your tower or contest the wave. If he attempts to deploy a massive turret using UPGRADE!!!, you can simply isolate him away from it, neutralizing his massive ultimate investment entirely.
Wie man spielt
During the early levels, focus on preserving your health bar. Stand behind your own minions to minimize damage from rockets, and save Indestructible to absorb any unavoidable poke. Dodge the slow-moving CH-2 Electron Storm Grenade first, then walk forward. Once in range, pull him with Death's Grasp and immediately cast Realm of Death. Inside, activate Darkness Rise and crush him, ensuring you never cast your ultimate while stunned.
MagieschadenUltimateMordekaiser completely neutralizes Jarvan IV's ultimate threat through a direct mechanical counter. When the Demacian prince attempts to lock you down using Cataclysm, you can instantly respond with Realm of Death. This completely bypasses his terrain, steals his base tank stats, and traps him inside your own arena. Because his kit relies heavily on the Demacian Standard and Dragon Strike combo for mobility, he cannot escape your Darkness Rise aura once isolated.Jarvan IV Build →Details ansehen
Jarvan IV
Warum
Mordekaiser completely neutralizes Jarvan IV's ultimate threat through a direct mechanical counter. When the Demacian prince attempts to lock you down using Cataclysm, you can instantly respond with Realm of Death. This completely bypasses his terrain, steals his base tank stats, and traps him inside your own arena. Because his kit relies heavily on the Demacian Standard and Dragon Strike combo for mobility, he cannot escape your Darkness Rise aura once isolated.
Lane-Einfluss
This matchup forces Jarvan IV into a highly defensive posture once ultimates are online, stripping away his ability to contest waves. Knowing that Cataclysm is a death sentence for him, he must play passively, meaning you can freely shove waves with Obliterate and chip his tower. His trades relying on Martial Cadence and Golden Aegis fail to pierce your Indestructible shield, allowing you to dominate the top lane pocket and pull him into bad recall timings.
Wie man spielt
Never initiate with Realm of Death; instead, hold it specifically to react to his Cataclysm. Walk up aggressively to bait his Demacian Standard and Dragon Strike knockup, using Death's Grasp to pull him back if he tries to disengage. Once he commits his mobility tools and attempts to trap you, activate Indestructible to absorb his initial burst, then banish him. If he plays extremely safe, freeze the wave near your turret and deny him farm with threat of Obliterate.
Absoluter SchadenNicht anvisierbarMordekaiser naturally dominates this duel because Realm of Death completely bypasses Dr. Mundo's high health pool defense by stealing a portion of his massive tank statistics. Inside this death dimension, Dr. Mundo is isolated from safety, and the raw stats stolen directly weaken his Maximum Dosage regeneration, which relies on his total health. This turn of attributes transforms Dr. Mundo's massive defensive scaling into Mordekaiser's own offensive power.Dr. Mundo Build →Details ansehen
Dr. Mundo
Warum
Mordekaiser naturally dominates this duel because Realm of Death completely bypasses Dr. Mundo's high health pool defense by stealing a portion of his massive tank statistics. Inside this death dimension, Dr. Mundo is isolated from safety, and the raw stats stolen directly weaken his Maximum Dosage regeneration, which relies on his total health. This turn of attributes transforms Dr. Mundo's massive defensive scaling into Mordekaiser's own offensive power.
Lane-Einfluss
During the laning phase, Dr. Mundo cannot safely contest waves because Death's Grasp can pop his passive shield, Goes Where He Pleases, at the cost of his own health. Once that passive is on cooldown, Mordekaiser easily forces extended trades. Dr. Mundo is forced to farm from afar using Infected Bonesaw, giving Mordekaiser absolute control over wave positioning and allowing him to crash large waves to secure easy tower plates.
Wie man spielt
To secure this advantage, never initiate the fight with Realm of Death while Dr. Mundo's passive, Goes Where He Pleases, is active, as it will block your ultimate entirely. Instead, strip his CC shield using Death's Grasp first, then wait for him to activate Maximum Dosage before casting your ultimate. By delaying Realm of Death until he activates his healing, you steal his boosted health stats mid-fight, leaving him fragile and unable to regenerate enough health to survive your Darkness Rise aura.
MagieschadenÜberlebenThis matchup is heavily in your favor because Malphite's natural armor scaling is completely useless against your magic damage. Once you trigger Darkness Rise, the continuous area-of-effect magic damage shreds through his Granite Shield and melts his health bar. Furthermore, his main team-fighting utility is completely neutralized by Realm of Death, which isolates him in a duel where his armor-stacking kit cannot help him survive your relentless magic shred.Malphite Build →Details ansehen
Malphite
Warum
This matchup is heavily in your favor because Malphite's natural armor scaling is completely useless against your magic damage. Once you trigger Darkness Rise, the continuous area-of-effect magic damage shreds through his Granite Shield and melts his health bar. Furthermore, his main team-fighting utility is completely neutralized by Realm of Death, which isolates him in a duel where his armor-stacking kit cannot help him survive your relentless magic shred.
Lane-Einfluss
You dictate the pace of the lane from the very first waves. Malphite's Seismic Shard poke is easily absorbed by your Indestructible shield, meaning he will deplete his mana pool before putting you in danger. By constantly pushing him under tower with Darkness Rise, you force him to use Thunderclap and Ground Slam just to farm, locking him to his lane and denying him any opportunity to roam or assist his jungler.
Wie man spielt
Maintain a safe spacing distance to react to his movement. When Malphite attempts to disengage using the speed stolen by Seismic Shard, pull him back into your range with Death's Grasp to prolong the trade. Always pop his Granite Shield with a simple basic attack before committing your Obliterate for maximum damage. Finally, hold Realm of Death until he initiates with Unstoppable Force; trapping him immediately after his ultimate lands completely negates his team's follow-up potential.
SchildeSkalierungThis matchup leans heavily in your favor because your passive Darkness Rise directly counters his primary defense. When Pantheon channels Aegis Assault to block your frontal damage, your swirling passive aura continues to burn him from all directions, completely ignoring his invulnerability. Since his damage mitigation fails against your persistent area-of-effect damage, you will easily win any sustained trade.Pantheon Build →Details ansehen
Pantheon
Warum
This matchup leans heavily in your favor because your passive Darkness Rise directly counters his primary defense. When Pantheon channels Aegis Assault to block your frontal damage, your swirling passive aura continues to burn him from all directions, completely ignoring his invulnerability. Since his damage mitigation fails against your persistent area-of-effect damage, you will easily win any sustained trade.
Lane-Einfluss
Pantheon cannot easily zone you or crash waves because his short burst combos leave him vulnerable. If he initiates with Shield Vault, your shield from Indestructible absorbs his initial burst. As he tries to disengage, his high cooldowns prevent him from fighting back, allowing you to freeze the wave or force him under tower where he must waste mana farming with Comet Spear.
Wie man spielt
When Pantheon walks up with Mortal Will fully charged, do not panic. Let him initiate with Shield Vault, then immediately activate Indestructible to negate the damage. Once his stun ends, pull him back with Death's Grasp and trigger Darkness Rise. Hold your Obliterate until his Aegis Assault ends, or step behind him to land it. If he attempts to escape using Grand Starfall, cast Realm of Death to trap him.
ÜberlebenMaokai relies heavily on setting up zones with Sapling Toss and locking you down near brush. However, Mordekaiser completely negates this setup with Realm of Death. By dragging Maokai into the death dimension, you strip him of any pre-placed saplings and team support. Isolated in this arena, Maokai's low damage cannot match Mordekaiser's sustained DPS once Darkness Rise activates, melting his tanky health bar before he can escape.Maokai Build →Details ansehen
Maokai
Warum
Maokai relies heavily on setting up zones with Sapling Toss and locking you down near brush. However, Mordekaiser completely negates this setup with Realm of Death. By dragging Maokai into the death dimension, you strip him of any pre-placed saplings and team support. Isolated in this arena, Maokai's low damage cannot match Mordekaiser's sustained DPS once Darkness Rise activates, melting his tanky health bar before he can escape.
Lane-Einfluss
Maokai's passive Sap Magic lets him sustain through short trades, but he cannot contest your wave clear once you start spamming Obliterate. Whenever Maokai tries to engage with Twisted Advance, he plays right into your hands. You can easily pull him back with Death's Grasp as he retreats, forcing him to waste his mana on Bramble Smash to disengage, which slowly bleeds his tower pressure and forces early recalls.
Wie man spielt
Start by building offensive magic penetration and damage items rather than defensive ones, leveraging your natural tankiness from Indestructible. During skirmishes, save Realm of Death until Maokai commits his Nature's Grasp or retreats toward a brush filled with Sapling Toss charges. Once inside the ultimate, use Death's Grasp to prevent him from kiting you, allowing Darkness Rise to shred his health. If he uses Bramble Smash to knock you back, immediately pop Indestructible to absorb the damage and walk him down.
UnterbrechungThis matchup heavily favors you because you can completely shut down Sion's primary source of damage and waveclear. Whenever Sion begins channeling Decimating Smash, you can use Death's Grasp to pull him out of his stance, canceling the ability and wasting his cooldown. Without this tool, his tanky scaling via Glory in Death is slowed, and his Soul Furnace shield cannot absorb your sustained magic damage once Darkness Rise is active.Sion Build →Details ansehen
Sion
Warum
This matchup heavily favors you because you can completely shut down Sion's primary source of damage and waveclear. Whenever Sion begins channeling Decimating Smash, you can use Death's Grasp to pull him out of his stance, canceling the ability and wasting his cooldown. Without this tool, his tanky scaling via Glory in Death is slowed, and his Soul Furnace shield cannot absorb your sustained magic damage once Darkness Rise is active.
Lane-Einfluss
By constantly denying his main channel, you dictate the entire pace of the top lane. Sion is forced to choose between using Decimating Smash far back, which ruins his wave control, or risking a massive trade where you drag him in. This allows you to easily freeze the wave near your turret or crash large waves to dive him, heavily delaying his health stacking while you freely build up your own passive.
Wie man spielt
Never initiate a trade with Death's Grasp. Keep this ability ready as an reactive tool; only cast it the moment you see Sion charging his axe. If he tries to escape or engage with Unstoppable Onslaught, wait out his unstoppable state before pulling him, or immediately trap him inside your Realm of Death to steal his defensive stats. If you happen to miss your pull, immediately activate Indestructible to absorb his fully charged slam.
UnterbrechungKartendruckMordekaiser dominates this matchup because Shen's global presence is entirely shut down by your crowd control. When Shen tries to save an ally with Stand United, you can cancel the channel using Death's Grasp or drag him away entirely with Realm of Death. Shen cannot match your raw magical DPS from Darkness Rise in a prolonged duel, and Spirit's Refuge does nothing against your spell damage.Shen Build →Details ansehen
Shen
Warum
Mordekaiser dominates this matchup because Shen's global presence is entirely shut down by your crowd control. When Shen tries to save an ally with Stand United, you can cancel the channel using Death's Grasp or drag him away entirely with Realm of Death. Shen cannot match your raw magical DPS from Darkness Rise in a prolonged duel, and Spirit's Refuge does nothing against your spell damage.
Lane-Einfluss
This interaction forces Shen to play defensively under his turret, fearing that any attempt to teleport across the map will leave him vulnerable. Mordekaiser can constantly shove waves with Obliterate, creating massive tower pressure. If Shen attempts to use Stand United while visible, he risks losing massive chunks of health or being killed inside Realm of Death, effectively trapping him in the top lane and denying his team global support.
Wie man spielt
To execute this, always hold Death's Grasp specifically for when Shen begins channeling Stand United. Do not waste this pull on random trades unless you know his ultimate is on cooldown. When Shen retreats towards his tower to teleport safely, immediately follow him to maintain vision. If Death's Grasp is unavailable, use Realm of Death to isolate him, which instantly cancels his teleport and forces him into a duel he cannot win.
Diese Champions haben ein Build und einen Spielstil, der deinen direkt überlegen ist, was die Kontrolle der Lane und das Farmen extrem schwierig machen kann. Ihr Kit kann deine Kernstärken neutralisieren oder dich bestrafen, sobald du versuchst, deinen gewohnten Spielplan umzusetzen. In diesen Matchups geht es oft darum, Fehler zu minimieren und nach Wegen zu suchen, außerhalb der direkten Konfrontation zu gewinnen.
CC-ImmunitätUltimateThe core of this matchup is Olaf's ability to completely negate Realm of Death. The moment you pull him into your pocket dimension, he can activate Ragnarok to instantly cleanse the effect and return to the normal map. This leaves you without your stat-stealing tool, forced to fight an immune juggernaut who easily dodges Obliterate while shredding you with Reckless Swing and constant Undertow slows.Olaf Build →Details ansehen
Olaf
Warum
The core of this matchup is Olaf's ability to completely negate Realm of Death. The moment you pull him into your pocket dimension, he can activate Ragnarok to instantly cleanse the effect and return to the normal map. This leaves you without your stat-stealing tool, forced to fight an immune juggernaut who easily dodges Obliterate while shredding you with Reckless Swing and constant Undertow slows.
Lane-Einfluss
Because you cannot trap him, you lose the ability to safely contest Rift Scuttlers or epic monsters. In river skirmishes, Olaf can run you down using Undertow slows without fearing your peel, as Ragnarok ignores the pull from Death's Grasp. This forces you to concede early objectives and play defensively in your own camps, falling behind his fast clear fueled by Berserker Rage.
Wie man spielt
Never cast Realm of Death on Olaf first. Instead, save your ultimate exclusively for his vulnerable teammates during skirmishes, or wait out the duration of Ragnarok before engaging him. When he charges at you, activate Darkness Rise to gain the movement speed needed to kite his axes, and use Indestructible to shield against his Reckless Swing burst. Only use Death's Grasp to pull him back once his crowd-control immunity has expired.
Diese Champions haben Werkzeuge, die ihnen im Kampf meist einen Vorteil verschaffen, ohne das Matchup unspielbar zu machen. Sie haben vielleicht mehr Reichweite, können deine Offensive besser abfangen oder haben mehr Möglichkeiten, auf deine Engages zu reagieren. Du musst deine Herangehensweise anpassen und sorgfältig die Momente wählen, in denen du den Kampf annimmst.
RegenerationMassenkontrolleThis matchup is defined by how Warwick counters your crowd control and out-heals your damage. Whenever you try to pull him with Death's Grasp, a skilled Warwick will hold Jaws of the Beast to latch onto you, granting him displacement immunity and completely ignoring your pull. Combined with his passive Eternal Hunger, he easily sustains through your Darkness Rise aura in extended jungle skirmishes.Warwick Build →Details ansehen
Warwick
Warum
This matchup is defined by how Warwick counters your crowd control and out-heals your damage. Whenever you try to pull him with Death's Grasp, a skilled Warwick will hold Jaws of the Beast to latch onto you, granting him displacement immunity and completely ignoring your pull. Combined with his passive Eternal Hunger, he easily sustains through your Darkness Rise aura in extended jungle skirmishes.
Lane-Einfluss
Because you cannot reliably displace him, you lose the ability to disengage or peel him off. In the river and jungle camps, Warwick's Blood Hunt allows him to hunt you down if you drop low during clears. Every skirmish turns into a duel of attrition where his low-health healing from Eternal Hunger outpaces your Indestructible shield, giving him constant priority over early neutral camps.
Wie man spielt
To survive this matchup, you must alter your build path immediately to rush healing reduction, cutting down his Eternal Hunger and Infinite Duress recovery. Never initiate fights with Death's Grasp; instead, save it as a bait tool or only cast it after he has committed Jaws of the Beast. If he locks you down with Infinite Duress, immediately activate Indestructible right after the suppression ends to absorb his follow-up bite damage.
DuellSkalierungDuel-locking Kayn is highly deceptive because of how his kit interacts with your ultimate. When you drag him into the Realm of Death, Kayn can instantly retaliate by casting Umbral Trespass on you. This completely stalls out the duel, allowing him to hide inside your character model and waste almost the entire duration of your stolen stat window, rendering your main win condition useless.Kayn Build →Details ansehen
Kayn
Warum
Duel-locking Kayn is highly deceptive because of how his kit interacts with your ultimate. When you drag him into the Realm of Death, Kayn can instantly retaliate by casting Umbral Trespass on you. This completely stalls out the duel, allowing him to hide inside your character model and waste almost the entire duration of your stolen stat window, rendering your main win condition useless.
Lane-Einfluss
In the jungle, this interaction strips away your ability to easily secure neutral objectives through forced isolation. If you try to force a smite fight by banishing him, he simply buys time inside you while his team secures the objective or collapses. This forces you into passive farming routes, as you cannot confidently contest him in the river without a massive gold lead.
Wie man spielt
To win these skirmishes, you must alter your ultimate timing. Never initiate with Realm of Death if Kayn has already damaged you, as he will immediately use it to dodge your burst. Instead, bait his escape tools first. Force him to burn Shadow Step to cross a wall or use Reaping Slash defensively. Once he is forced to activate Umbral Trespass early in the teamfight, that is your precise cue to pull him into your domain and crush him with Obliterate.
SchildeSichtNocturne holds a massive advantage in the jungle because his Shroud of Darkness completely nullifies your primary tools. A reactive Nocturne will wait for the animation of your Realm of Death or Death's Grasp, absorbing the spell to gain massive attack speed. This leaves you trapped in a duel without your stat-stealing arena, or unable to pull him away while he shreds you with Duskbringer and Unspeakable Horror.Nocturne Build →Details ansehen
Nocturne
Warum
Nocturne holds a massive advantage in the jungle because his Shroud of Darkness completely nullifies your primary tools. A reactive Nocturne will wait for the animation of your Realm of Death or Death's Grasp, absorbing the spell to gain massive attack speed. This leaves you trapped in a duel without your stat-stealing arena, or unable to pull him away while he shreds you with Duskbringer and Unspeakable Horror.
Lane-Einfluss
This interaction severely limits your jungle skirmishing. You cannot contest scuttle crabs or neutral objectives safely because Nocturne can counter-gank using Paranoia to bypass your vision. In 1v1 river duels, you are forced to play incredibly passively, unable to initiate with Death's Grasp. If he blocks your ultimate, you lose all pressure, forcing your laners to play defensively under their towers to avoid his global threat.
Wie man spielt
To win this, you must bait out Shroud of Darkness before committing. Start skirmishes by walking up with Darkness Rise active or using Obliterate to force his shield. Never cast Realm of Death while his spell shield is available; instead, hold it until you see the purple barrier fade. If he channels Unspeakable Horror on you, use Indestructible immediately to absorb his burst before the fear lands, then use Death's Grasp to disengage if he still has his shield.
Konter-EngageTanksDr. Mundo is a massive headache in the jungle because his passive, Goes Where He Pleases, outright blocks the suppression from your Realm of Death. If you attempt to banish him while his canister shield is active, your ultimate is immediately consumed with zero effect, leaving you without your stat-stealing duel during critical skirmishes while he runs free with Maximum Dosage.Dr. Mundo Build →Details ansehen
Dr. Mundo
Warum
Dr. Mundo is a massive headache in the jungle because his passive, Goes Where He Pleases, outright blocks the suppression from your Realm of Death. If you attempt to banish him while his canister shield is active, your ultimate is immediately consumed with zero effect, leaving you without your stat-stealing duel during critical skirmishes while he runs free with Maximum Dosage.
Lane-Einfluss
This immunity drastically shifts objective contests and counter-ganking scenarios in Dr. Mundo's favor. Since you cannot reliably isolate him, he can safely contest Scuttle Crabs and neutral monsters, poking you down with Infected Bonesaw. Your inability to peel him off your allies with Death's Grasp without triggering his passive first forces your team to play defensively, giving up early river control.
Wie man spielt
To survive and win encounters, you must systematically bait out his passive before committing your ultimate. Start fights by landing Death's Grasp to pop his spell shield, and immediately step on the dropped canister to deny his healing and cooldown reduction. Only once Goes Where He Pleases is on cooldown should you activate Realm of Death. If he triggers Maximum Dosage early, use Indestructible to absorb his physical onslaught and delay the duel until his healing peak subsides.
DuellAbsoluter SchadenIn direct jungle skirmishes, Master Yi holds a massive mechanical advantage because his Alpha Strike allows him to effortlessly dodge the narrow slam of your Obliterate. Even if you trap him inside your Realm of Death, his Wuju Style bypasses your stolen defensive stats by dealing raw true damage, allowing him to quickly shred through your Indestructible shield.Master Yi Build →Details ansehen
Master Yi
Warum
In direct jungle skirmishes, Master Yi holds a massive mechanical advantage because his Alpha Strike allows him to effortlessly dodge the narrow slam of your Obliterate. Even if you trap him inside your Realm of Death, his Wuju Style bypasses your stolen defensive stats by dealing raw true damage, allowing him to quickly shred through your Indestructible shield.
Lane-Einfluss
You cannot contest isolated river skirmishes or neutral camps directly against him, as he will scale much faster if he secures early gold. If you meet him in the river, his Highlander makes him immune to the slow from Darkness Rise, letting him run you down. This forces you to concede direct jungle pressure, slowing down your clear speed as you must path defensively to avoid deadly encounters.
Wie man spielt
Never cast Obliterate or Death's Grasp proactively while Master Yi has his Alpha Strike available. Instead, clear camps with basic attacks and wait for him to commit his untargetability. Once he reappears, immediately pull him with Death's Grasp to disrupt his flow, then activate Indestructible to absorb his Wuju Style true damage burst. If forced to use Realm of Death, wait until he is locked in his Meditate channel to guarantee your full combo.
KitenDuellLillia's innate mobility turns your ultimate against you. Inside the Realm of Death, she easily stacks movement speed from Blooming Blows to dance around your slow skillshots. This makes landing Obliterate or catching her with Death's Grasp nearly impossible. If she applies Dream-Laden Bough and triggers Lilting Lullaby, she can easily put you to sleep, wasting your entire ultimate duration while keeping her distance.Lillia Build →Details ansehen
Lillia
Warum
Lillia's innate mobility turns your ultimate against you. Inside the Realm of Death, she easily stacks movement speed from Blooming Blows to dance around your slow skillshots. This makes landing Obliterate or catching her with Death's Grasp nearly impossible. If she applies Dream-Laden Bough and triggers Lilting Lullaby, she can easily put you to sleep, wasting your entire ultimate duration while keeping her distance.
Lane-Einfluss
Because you cannot reliably lock Lillia down, contesting the Rift Scuttler or epic monsters becomes highly dangerous. If you try to force a duel in the river, her Swirlseed can slow you from afar, allowing her to dictate the engagement. You risk being constantly outpaced in your clear speed, and attempting to counter-gank her often results in her sleeping you with Lilting Lullaby before you can activate Indestructible.
Wie man spielt
Never initiate a fight by casting Realm of Death while Lillia already has maximum Blooming Blows stacks. Instead, save your Death's Grasp for the exact moment she locks herself into the leap animation of Watch Out! Eep!, which is her only predictable movement. If she misses this jump, activate Indestructible to absorb her passive burn damage, and only ultimate her once her movement speed stacks decay, trapping her in a tight corridor.
ScharmützelDarius thrives in extended duels, which makes using your Realm of Death incredibly risky. Inside your pocket dimension, Darius easily stacks Hemorrhage on you, quickly unlocking his full combat power. Since you cannot escape, he will comfortably hit the outer ring of Decimate to heal and then execute you with a fully stacked Noxian Guillotine. Your Darkness Rise and Obliterate simply cannot match his raw, ramping single-target damage in this forced arena.Darius Build →Details ansehen
Darius
Warum
Darius thrives in extended duels, which makes using your Realm of Death incredibly risky. Inside your pocket dimension, Darius easily stacks Hemorrhage on you, quickly unlocking his full combat power. Since you cannot escape, he will comfortably hit the outer ring of Decimate to heal and then execute you with a fully stacked Noxian Guillotine. Your Darkness Rise and Obliterate simply cannot match his raw, ramping single-target damage in this forced arena.
Lane-Einfluss
In the jungle, this power dynamic shifts early skirmishes in his favor. If you meet Darius at a Scuttle Crab or in the river, his Apprehend can pull you out of your Obliterate sweet spot. He will force long trades where his Hemorrhage beats your Indestructible shield. This forces you to concede early river priority and farm defensively, delaying your level spikes while he pressures your laners with impunity.
Wie man spielt
Never initiate a fight with Realm of Death while Darius has his full health pool. Instead, use Death's Grasp defensively to pull him away if he charges with Crippling Strike. Save your Indestructible to absorb the bleeding damage from Hemorrhage rather than using it early. If you must use your ultimate, wait until his Decimate is on cooldown or his health is low enough that an isolated Obliterate can finish him before he reaches five stacks.
MobilitätFrüher DruckNidalee uses her passive Prowl in the brush and her constant Bushwhack / Pounce resets to clear her jungle camps and cross the map vastly faster than Mordekaiser. This high mobility means she easily sidesteps your slow Obliterate slams and Death's Grasp pulls. Mordekaiser cannot match her raw speed, making it hard to trap her before she leaps away.Nidalee Build →Details ansehen
Nidalee
Warum
Nidalee uses her passive Prowl in the brush and her constant Bushwhack / Pounce resets to clear her jungle camps and cross the map vastly faster than Mordekaiser. This high mobility means she easily sidesteps your slow Obliterate slams and Death's Grasp pulls. Mordekaiser cannot match her raw speed, making it hard to trap her before she leaps away.
Lane-Einfluss
Because Nidalee clears and rotates so fast, she will consistently impact the lanes before you can respond. She sets up counter-ganks, leaving you to arrive late to fights where your Darkness Rise cannot turn the tide. If she invades, she can steal camps and hop over walls with Bushwhack / Pounce, bleeding your gold while you struggle to retaliate with slow skillshots.
Wie man spielt
Instead of chasing her through the river, focus on predicting her gank destinations based on her fast clear. Hold Death's Grasp until she commits her leap, using it to disrupt her escape. If she isolates you, activate Indestructible to absorb her initial burst, then drag her into Realm of Death where her mobility is restricted by the arena walls, forcing her into a close-quarters brawl where Darkness Rise can finally burn her down.
Diese Matchups sind vor allem Duelle der Ausführung: Beide Champions haben glaubwürdige Wege, die Oberhand zu gewinnen. Eine wichtige ausgewichene Fähigkeit, ein richtig antizipierter Engage oder ein einziger Positionierungsfehler können reichen, um das Duell zu entscheiden. Das Matchup zu kennen und die richtigen Fenster zum Handeln zu erkennen, ist hier besonders wichtig.
UltimateKitenThe jungle duel hinges entirely on how you manage Tryndamere's invulnerability window. When you drag him into the Realm of Death, his goal is to stack Battle Fury and survive using Undying Rage while shredding you. Because you cannot out-damage his death immunity, your survival depends on using Death's Grasp to displace him and using Darkness Rise to gain the movement speed needed to outrun his sword swings.Tryndamere Build →Details ansehen
Tryndamere
Warum
The jungle duel hinges entirely on how you manage Tryndamere's invulnerability window. When you drag him into the Realm of Death, his goal is to stack Battle Fury and survive using Undying Rage while shredding you. Because you cannot out-damage his death immunity, your survival depends on using Death's Grasp to displace him and using Darkness Rise to gain the movement speed needed to outrun his sword swings.
Lane-Einfluss
This matchup transforms neutral objective skirmishes into a tense game of chicken. If you waste your crowd control too early, Tryndamere will easily close the gap with Spinning Slash and force your Indestructible shield before he even triggers his own ultimate. A failed duel means giving up jungle priority, leaving your camps vulnerable to counter-jungling because he clears exceptionally fast once ahead.
Wie man spielt
Never initiate the fight with Death's Grasp. Instead, start the duel with Obliterate to activate Darkness Rise, then immediately cast Realm of Death when his health drops. Once Tryndamere activates Undying Rage, cast Death's Grasp pointing away from your escape route to pull him backward, utilizing your passive movement speed to kite him. If he tries to slow you with Mocking Shout, make sure you are facing him to negate the slow entirely.
Konter-EngageThis jungle matchup revolves around Vi's initiation and Mordekaiser's ultimate counter. When Vi charges with Vault Breaker or commits her unstoppable Cease and Desist to dive your backline, she is locked into a predictable trajectory. By timing Realm of Death right as she lands, you strip her of crucial defensive stats from Blast Shield and isolate her, completely neutralizing her dive and turning her engage into a deadly trap.Vi Build →Details ansehen
Vi
Warum
This jungle matchup revolves around Vi's initiation and Mordekaiser's ultimate counter. When Vi charges with Vault Breaker or commits her unstoppable Cease and Desist to dive your backline, she is locked into a predictable trajectory. By timing Realm of Death right as she lands, you strip her of crucial defensive stats from Blast Shield and isolate her, completely neutralizing her dive and turning her engage into a deadly trap.
Lane-Einfluss
In the jungle, this even dynamic turns every neutral objective skirmish into a high-stakes standoff. If Vi uses Vault Breaker to rush objectives, she leaves herself vulnerable to Death's Grasp. However, if you waste Indestructible early, her Denting Blows armor shred will quickly melt your health bar. Skirmishes are decided purely by who baits the other's defensive cooldowns first during river contests.
Wie man spielt
Never cast Realm of Death prematurely while Vi has her charge ready. Instead, position yourself near your priority targets and wait for the visual indicator of her Cease and Desist. The moment she flies in, prepare to pull her with Death's Grasp if she tries to disengage, or immediately trap her in your duel. If you miss your timing and she triggers Blast Shield, activate Indestructible to survive her initial burst, then retaliate with isolated Obliterate strikes.
PicksKitenThis jungle matchup is a constant test of spacing inside locked arenas. While your Realm of Death forces an isolated duel to strip Kindred of external help, her mobility with Dance of Arrows allows her to easily dodge your Obliterate and Death's Grasp within the boundary. Furthermore, her Lamb's Respite acts as the ultimate counter-measure, letting her deny your execution threshold and wait out your stat-steal duration.Kindred Build →Details ansehen
Kindred
Warum
This jungle matchup is a constant test of spacing inside locked arenas. While your Realm of Death forces an isolated duel to strip Kindred of external help, her mobility with Dance of Arrows allows her to easily dodge your Obliterate and Death's Grasp within the boundary. Furthermore, her Lamb's Respite acts as the ultimate counter-measure, letting her deny your execution threshold and wait out your stat-steal duration.
Lane-Einfluss
Neutral objective contests and jungle skirmishes turn into high-stakes mind games. If Kindred secures her passive hunts, she gains the range to poke you down before you can even engage. Your presence at Scuttle Crabs or Epic Monsters requires tracking her Wolf's Frenzy zones; getting caught in them without Indestructible ready means taking massive percent-health damage from Mounting Dread, forcing you to concede map control.
Wie man spielt
Never open a duel with Realm of Death unless you have already forced out her Dance of Arrows. Instead, walk up with Darkness Rise active to threaten her. Save Death's Grasp to pull her back immediately after she dashes. If she drops Lamb's Respite, do not panic-cast Obliterate; instead, time your slam to hit the exact millisecond her healing zone expires, or use the shield from Indestructible to survive her post-ult execute.
TeamfightsMechanikThis jungle matchup is a psychological battle centered on Warrior Trickster. Wukong’s primary goal is to deploy his clone to absorb the isolated damage from Obliterate or, even more critically, to bait out Realm of Death. If Wukong successfully tricks you into banishing his decoy, you lose your ultimate entirely. However, if Wukong misuses this stealth window, your continuous burn from Darkness Rise will inevitably overwhelm his Stone Skin.Wukong Build →Details ansehen
Wukong
Warum
This jungle matchup is a psychological battle centered on Warrior Trickster. Wukong’s primary goal is to deploy his clone to absorb the isolated damage from Obliterate or, even more critically, to bait out Realm of Death. If Wukong successfully tricks you into banishing his decoy, you lose your ultimate entirely. However, if Wukong misuses this stealth window, your continuous burn from Darkness Rise will inevitably overwhelm his Stone Skin.
Lane-Einfluss
In the jungle, this tension dictates every skirmish around objectives. Wukong uses Nimbus Strike to initiate fast ganks, forcing you to match his map pressure. When fighting over Scuttle Crabs or Epic Monsters, you cannot blindly throw Death's Grasp. Missing your pull or hitting a clone during a chaotic teamfight allows Wukong to freely spin through your backline with Cyclone, securing the area and the objective for his team.
Wie man spielt
Never lead an engagement with Realm of Death. Instead, initiate with basic attacks and Obliterate to trigger Darkness Rise. The passive aura will continue to tick even if Wukong goes invisible, helping you track his actual position. Only cast Realm of Death after you see the clone from Warrior Trickster appear on the battlefield. If Wukong jumps on you with Nimbus Strike and activates Cyclone, activate Indestructible immediately to absorb the knock-up damage before retaliating.
MechanikKitenThis jungle matchup is a dance of timing where Riven uses the high mobility of Broken Wings and Valor to easily dash out of your slow Obliterate strikes. While Darkness Rise provides superb sustained damage if you can stick to her, she excels at short, bursty skirmishes. If she baits out your Death's Grasp, she can freely reposition to avoid your isolation damage while stacking Runic Blade.Riven Build →Details ansehen
Riven
Warum
This jungle matchup is a dance of timing where Riven uses the high mobility of Broken Wings and Valor to easily dash out of your slow Obliterate strikes. While Darkness Rise provides superb sustained damage if you can stick to her, she excels at short, bursty skirmishes. If she baits out your Death's Grasp, she can freely reposition to avoid your isolation damage while stacking Runic Blade.
Lane-Einfluss
In the river and jungle corridors, the outcome of neutral contests relies heavily on who initiates. Riven wants to blow her cooldowns to chunk you, then disengage. If she successfully dodges Obliterate with her dashes, she wins the trade and forces you to pop Indestructible defensively, conceding crab or camp priority. However, if she wastes her mobility entering the fight, she cannot escape your Realm of Death.
Wie man spielt
To win these jungle duels, never lead with Obliterate or Death's Grasp while Riven has her dashes available. Instead, clear camps while keeping your passive ready, and force her to use Broken Wings to close the gap. Once she commits her third strike or uses Valor, immediately cast Death's Grasp behind her to pull her back, followed by an unavoidable Obliterate. If she activates Blade of the Exile, pull her into Realm of Death to steal her bonus stats and neutralize her execute.
UltimateFrüher DruckThis matchup hinges on a scaling race where Xin Zhao dominates early skirmishes but falls off compared to your late-game presence. While his Determination and Three Talon Strike give him supreme early dueling, the dynamic shifts entirely once you unlock Realm of Death. Inside your ultimate, Xin Zhao's Crescent Guard becomes completely useless against you, as you are permanently inside his defense circle, allowing your AP damage to melt him.Xin Zhao Build →Details ansehen
Xin Zhao
Warum
This matchup hinges on a scaling race where Xin Zhao dominates early skirmishes but falls off compared to your late-game presence. While his Determination and Three Talon Strike give him supreme early dueling, the dynamic shifts entirely once you unlock Realm of Death. Inside your ultimate, Xin Zhao's Crescent Guard becomes completely useless against you, as you are permanently inside his defense circle, allowing your AP damage to melt him.
Lane-Einfluss
Early on, you must concede crab priority if Xin Zhao contests with Audacious Charge and Wind Becomes Lightning. He will try to invade your camps to delay your level five. However, once you survive this initial pressure and secure your ultimate, his ability to secure neutral objectives collapses. He can no longer safely peel you off with Crescent Guard during smite fights, turning objective pits into death traps for him.
Wie man spielt
To win the mid-game duels, never initiate with Death's Grasp; save it to pull Xin Zhao back if he tries to disengage after his Three Talon Strike knockup. Activate Indestructible right as his third strike launches you to absorb his burst. When contesting objectives, wait for him to jump onto your backline with Audacious Charge, then instantly cast Realm of Death to isolate him, rendering his defensive ultimate useless for his team.
Diese Champions tun sich meist schwer, auf deine Hauptstärken zu reagieren, was dir mehr Freiheit im Matchup gibt. Du hast oft mehrere Möglichkeiten, sie unter Druck zu setzen und Trades zu deinen Gunsten zu erzwingen. Nutze diesen Vorteil, um das Tempo zu bestimmen, statt ihnen Zeit zu geben, wieder in eine komfortable Position zu kommen.
PicksSchildeThis matchup swings heavily in your favor once ultimates are unlocked. When you drag Ambessa into the Realm of Death, her mobility via Drakehound's Step becomes a liability rather than an asset. The confined space of your ultimate makes it incredibly easy to trigger and maintain Darkness Rise. This constant area-of-effect burn negates her attempts to kite you, allowing you to easily stat-check her down.Ambessa Build →Details ansehen
Ambessa
Warum
This matchup swings heavily in your favor once ultimates are unlocked. When you drag Ambessa into the Realm of Death, her mobility via Drakehound's Step becomes a liability rather than an asset. The confined space of your ultimate makes it incredibly easy to trigger and maintain Darkness Rise. This constant area-of-effect burn negates her attempts to kite you, allowing you to easily stat-check her down.
Lane-Einfluss
In the jungle, this dynamic prevents Ambessa from aggressively invading your camps or contesting epic monsters. She cannot easily use Public Execution to pick off your allies because you can immediately intercept her and force her into a duel. Consequently, you command absolute control over neutral objectives, forcing her to play defensively and cede jungle priority to avoid deadly isolated skirmishes.
Wie man spielt
When fighting her, do not rush to use Death's Grasp. Save this pull to disrupt her movement when she attempts to dash away with Drakehound's Step. Use Indestructible to absorb the burst from her Repudiation or Public Execution. Walk directly at her to guarantee Darkness Rise stays active, and only cast Obliterate when her dash animations end, ensuring she cannot dodge your main damage source.
MagieschadenPicksMordekaiser completely neutralizes Graves's defensive identity. While Graves relies on stacking armor via Quickdraw to win close-range duels, Mordekaiser's magic damage entirely bypasses this defense. Once trapped in Realm of Death, Graves loses the open space he needs to kite, allowing Mordekaiser to easily land Obliterate on a single target for massive isolated damage.Graves Build →Details ansehen
Graves
Warum
Mordekaiser completely neutralizes Graves's defensive identity. While Graves relies on stacking armor via Quickdraw to win close-range duels, Mordekaiser's magic damage entirely bypasses this defense. Once trapped in Realm of Death, Graves loses the open space he needs to kite, allowing Mordekaiser to easily land Obliterate on a single target for massive isolated damage.
Lane-Einfluss
This matchup shifts power dynamics around neutral objectives and jungle skirmishes. Graves cannot comfortably contest Rift Scuttlers or invade your camps because he fears the threat of an isolated duel. If he tries to steal a camp, a well-timed Realm of Death turns the encounter into a death trap. This pressure forces Graves into passive farming, conceding early map priority and allowing you to secure objectives without contest.
Wie man spielt
Keep your distance initially and avoid standing near terrain to deny Graves the fast rebound of End of the Line. Save Death's Grasp to pull him back after he uses Quickdraw to dash away. When you activate Realm of Death, position yourself between Graves and the arena's edge, forcing him into a corner where his Smoke Screen cannot save him from a guaranteed Obliterate strike. If he flashes over a wall inside the realm, immediately use Indestructible to absorb his Collateral Damage.
DuellPicksJarvan IV excels at locking down your team inside Cataclysm, but you hold a massive advantage because Realm of Death completely nullifies his teamfight engage. By banishing Jarvan to the Death Realm when he leaps, you instantly free your allies from his arena. Once isolated, Jarvan cannot survive a pure stat-check duel against your Darkness Rise and isolated Obliterate strikes, turning his primary engage tool into his own grave.Jarvan IV Build →Details ansehen
Jarvan IV
Warum
Jarvan IV excels at locking down your team inside Cataclysm, but you hold a massive advantage because Realm of Death completely nullifies his teamfight engage. By banishing Jarvan to the Death Realm when he leaps, you instantly free your allies from his arena. Once isolated, Jarvan cannot survive a pure stat-check duel against your Darkness Rise and isolated Obliterate strikes, turning his primary engage tool into his own grave.
Lane-Einfluss
In the jungle and around objective pits, this interaction shifts all pressure onto Jarvan IV. He cannot freely initiate with Demacian Standard and Dragon Strike because your counter-engage is devastating. Knowing you can cancel his Cataclysm forces him to delay his ultimate or use it suboptimally, giving your lanes complete safety during skirmishes and letting you secure neutral objectives with superior zone control.
Wie man spielt
During major teamfights, never initiate with Realm of Death. Instead, position yourself near your vulnerable carries and wait for Jarvan IV to dive in with his Demacian Standard and Dragon Strike combo. The moment he activates Cataclysm, immediately cast Realm of Death on him to dissolve his arena. If he attempts to disengage inside your realm, pull him back with Death's Grasp and shield his remaining burst with Indestructible.
UltimateDuellFiddlesticks relies entirely on finding devastating angles to channel Crowstorm and wipe your team. However, your Realm of Death is the ultimate counter-measure. By banishing him mid-ultimate, you strip his massive area-of-effect damage away from your allies, forcing him into a 1v1 where his Bountiful Harvest cannot heal off multiple targets, leaving him vulnerable to your isolated Obliterate strikes.Fiddlesticks Build →Details ansehen
Fiddlesticks
Warum
Fiddlesticks relies entirely on finding devastating angles to channel Crowstorm and wipe your team. However, your Realm of Death is the ultimate counter-measure. By banishing him mid-ultimate, you strip his massive area-of-effect damage away from your allies, forcing him into a 1v1 where his Bountiful Harvest cannot heal off multiple targets, leaving him vulnerable to your isolated Obliterate strikes.
Lane-Einfluss
This dynamic reshapes neutral objective contests. Fiddlesticks is forced to play passively, unable to launch a surprise Crowstorm without risking an immediate banishment. You dictate the pace of jungle skirmishes because his threat is effectively neutralized. If he attempts to contest dragons or barons, your presence alone denies his primary teamfight tool, granting your team free rein over the river.
Wie man spielt
Track Fiddlesticks' positioning around blind corners where he loves to channel. Never waste Realm of Death early in a teamfight; hold it specifically for the moment he blinks in with Crowstorm. Once inside your domain, use Death's Grasp to disrupt his Bountiful Harvest channel if he attempts to heal, then activate Indestructible to absorb any residual damage while beating him down with your passive Darkness Rise.
Nicht anvisierbarTanksYou hold a massive advantage in direct skirmishes because Realm of Death completely neutralizes Hecarim's teamfight-oriented kit. Once you trap him in your pocket dimension, you strip away the extra targets he needs to sustain himself through Spirit of Dread. Furthermore, the isolation removes his momentum-based damage from Warpath, leaving him with only Rampage to fight back against your superior AP juggernaut stats.Hecarim Build →Details ansehen
Hecarim
Warum
You hold a massive advantage in direct skirmishes because Realm of Death completely neutralizes Hecarim's teamfight-oriented kit. Once you trap him in your pocket dimension, you strip away the extra targets he needs to sustain himself through Spirit of Dread. Furthermore, the isolation removes his momentum-based damage from Warpath, leaving him with only Rampage to fight back against your superior AP juggernaut stats.
Lane-Einfluss
This dynamic dictates the pace of jungle contests and objective fights. Hecarim cannot freely dive your backline with Onslaught of Shadows because you can immediately shut down his assault by banishing him. He is forced to play passively, avoiding direct counter-jungling and delaying his skirmishes. If he attempts to contest scuttle crabs or neutral objectives, your threat of isolation forces him to cede priority or risk dying alone in your arena.
Wie man spielt
When contesting objectives, hold onto Realm of Death specifically for the moment Hecarim activates Devastating Charge or launches Onslaught of Shadows. Pull him in with Death's Grasp if he tries to kite away, then lock him down. Once inside your arena, hit him with an isolated Obliterate and activate Darkness Rise to shred his health. If he manages to disengage early, use Indestructible defensively to absorb his remaining Rampage stacks while waiting for your cooldowns to return.
DuellRückzugThis jungle matchup turns heavily in your favor once you unlock your ultimate. Lee Sin relies on high mobility to escape, but your Realm of Death completely strips him of this option. Inside your realm, Safeguard still moves him but the arena is far too cramped to disengage through. Trapped in the duel, he is forced into a direct duel against your Darkness Rise aura where your magic damage simply melts his assassin defense.Lee Sin Build →Details ansehen
Lee Sin
Warum
This jungle matchup turns heavily in your favor once you unlock your ultimate. Lee Sin relies on high mobility to escape, but your Realm of Death completely strips him of this option. Inside your realm, Safeguard still moves him but the arena is far too cramped to disengage through. Trapped in the duel, he is forced into a direct duel against your Darkness Rise aura where your magic damage simply melts his assassin defense.
Lane-Einfluss
This dynamic alters how you contest neutral monsters. Lee Sin cannot comfortably contest the Rift Scuttler or invade your jungle camps because stepping too close means risking a forced duel. If he attempts to steal a camp, your ability to isolate him prevents any quick escape over walls. This constant threat forces him to play passively, granting you uncontested pressure and making his early-game ganking presence much riskier to execute.
Wie man spielt
Position yourself aggressively between Lee Sin and his escape routes near jungle walls. Never initiate with Death's Grasp; instead, save it to pull him back if he attempts to run before you cast Realm of Death. When he lands Sonic Wave on you, activate Indestructible to absorb the incoming burst of his second activation, then immediately pull him into your ultimate. If he manages to kick you away with Dragon's Rage first, walk back to your camps and farm up.
SkalierungSchildeThis matchup leans heavily in your favor because Pantheon cannot mitigate your sustained damage. While his Aegis Assault successfully blocks the burst from your Obliterate slams, it does absolutely nothing to stop the continuous burn of Darkness Rise. Once you trigger your passive, your aura melts his health bar even while he cowers behind his shield, allowing you to outscale his early burst and dominate him in direct skirmishes.Pantheon Build →Details ansehen
Pantheon
Warum
This matchup leans heavily in your favor because Pantheon cannot mitigate your sustained damage. While his Aegis Assault successfully blocks the burst from your Obliterate slams, it does absolutely nothing to stop the continuous burn of Darkness Rise. Once you trigger your passive, your aura melts his health bar even while he cowers behind his shield, allowing you to outscale his early burst and dominate him in direct skirmishes.
Lane-Einfluss
In the jungle, Pantheon thrives on early map pressure using Grand Starfall to snowball lanes. However, your superior clear speed allows you to safely reach your level five spike. Once you unlock Realm of Death, Pantheon can no longer contest neutral objectives or invade your camps. If he tries to force a duel, his early lead evaporates as you trap him in your death realm, neutralizing his global presence.
Wie man spielt
To secure this advantage, initiate fights by pulling him with Death's Grasp and landing basic attacks to activate Darkness Rise immediately. Do not waste Obliterate while his Aegis Assault is active; instead, walk through or around him to let your aura burn him from behind. If he attempts to escape or counter-engage using Shield Vault, activate Indestructible to absorb his empowered burst, then drag him into Realm of Death to strip his stats and finish him off.
UltimateThis matchup heavily favors you because Shyvana relies entirely on the massive stat steroid from Dragon's Descent to win duels. By holding your Realm of Death until she commits her ultimate, you can immediately steal those enhanced dragon attributes. This instantly strips away her tankiness and damage scaling, leaving her vulnerable in the death realm while your own Darkness Rise and Obliterate burn through her reduced health pool.Shyvana Build →Details ansehen
Shyvana
Warum
This matchup heavily favors you because Shyvana relies entirely on the massive stat steroid from Dragon's Descent to win duels. By holding your Realm of Death until she commits her ultimate, you can immediately steal those enhanced dragon attributes. This instantly strips away her tankiness and damage scaling, leaving her vulnerable in the death realm while your own Darkness Rise and Obliterate burn through her reduced health pool.
Lane-Einfluss
In the jungle, Shyvana's early clear is fast, but she cannot contest you at neutral camps once you both unlock your ultimates. Because you dominate the duel, she is forced to play passively and cannot freely stack her Fury of the Dragonborn. Any attempt by her to secure objectives with Dragon's Descent becomes a massive liability, as you can trap her, steal her stats, and secure the area.
Wie man spielt
Never initiate a fight with Realm of Death. Instead, clear camps and wait for Shyvana to engage first. When she flies in with Dragon's Descent, immediately cast your ultimate to capture her. If she tries to run away inside the realm, use Death's Grasp to pull her back into your Darkness Rise aura. If her Twin Bite or Flame Breath burst gets dangerous, activate Indestructible to absorb the damage and secure the kill.
ScharmützelUltimateThis jungle matchup hinges on a deceptive interaction inside your ultimate. While dragging the void predator into Realm of Death activates his isolation bonus for Taste Their Fear, his burst is insufficient to cut you down before your passive, Darkness Rise, activates. Once your swirling aura is active, the raw magic damage and stat steal easily overpower his fragile assassin frame in a prolonged duel.Kha'Zix Build →Details ansehen
Kha'Zix
Warum
This jungle matchup hinges on a deceptive interaction inside your ultimate. While dragging the void predator into Realm of Death activates his isolation bonus for Taste Their Fear, his burst is insufficient to cut you down before your passive, Darkness Rise, activates. Once your swirling aura is active, the raw magic damage and stat steal easily overpower his fragile assassin frame in a prolonged duel.
Lane-Einfluss
Because you hold the upper hand in a direct face-to-face brawl, the enemy assassin cannot easily contest your camps or invade your territory. However, he will try to exploit chaotic river skirmishes where his Leap and Unseen Threat allow him to pick off your low-health allies. Your presence forces him to play passively in the river, delaying his evolution power spikes and neutralizing his early-game snowball potential.
Wie man spielt
To convert this advantage, actively avoid chaotic, multi-man skirmishes where he thrives on resets. Instead, track him and force direct duels. When he jumps in, hold Indestructible until his initial Taste Their Fear burst lands, maximizing your shield value. If he attempts to escape using Leap or hides with Void Assault, use the wide sweep of Obliterate to keep Darkness Rise burning, and drag him back with Death's Grasp once he reappears.
Konter-EngageSichtRengar relies entirely on Unseen Predator to execute his high-burst leap combos from the jungle brush. When you trap him inside Realm of Death, you pull him into a barren arena completely devoid of bushes. Without any foliage to trigger his leaps, he loses his primary mobility and burst setup, turning him into a vulnerable, stationary target who cannot dodge your Obliterate or escape your continuous damage from Darkness Rise.Rengar Build →Details ansehen
Rengar
Warum
Rengar relies entirely on Unseen Predator to execute his high-burst leap combos from the jungle brush. When you trap him inside Realm of Death, you pull him into a barren arena completely devoid of bushes. Without any foliage to trigger his leaps, he loses his primary mobility and burst setup, turning him into a vulnerable, stationary target who cannot dodge your Obliterate or escape your continuous damage from Darkness Rise.
Lane-Einfluss
This structural advantage completely dictates neutral objective contests and river skirmishes. Rengar cannot safely contest the Rift Herald or Dragons because you can instantly nullify his ambush threat by casting your ultimate. He is forced to play passively outside of his jungle, losing his early-game pressure and snowball potential, which allows you to safely secure neutral objectives and scale into a teamfight menace without fearing his Thrill of the Hunt pickoffs.
Wie man spielt
When patrolling the river or entering his jungle, always position yourself away from the immediate brush line to deny him an initial Unseen Predator jump. If he attempts to initiate with Thrill of the Hunt, do not panic; wait for him to land his initial Savagery burst, then immediately cast Realm of Death. Once inside your arena, pull him with Death's Grasp if he tries to run, and use Indestructible to shield his remaining burst before crushing him.
TeamfightsHinrichtungMordekaiser dominates this matchup because he can completely shut down Viego's teamfight reset potential. When Viego attempts to trigger Sovereign's Domination on a fallen teammate's soul, Mordekaiser can cast Realm of Death to banish him to the Death Realm. This isolates Viego, cutting him off from the battlefield souls, negating his passive healing, and stripping away his offensive momentum.Viego Build →Details ansehen
Viego
Warum
Mordekaiser dominates this matchup because he can completely shut down Viego's teamfight reset potential. When Viego attempts to trigger Sovereign's Domination on a fallen teammate's soul, Mordekaiser can cast Realm of Death to banish him to the Death Realm. This isolates Viego, cutting him off from the battlefield souls, negating his passive healing, and stripping away his offensive momentum.
Lane-Einfluss
In the jungle, this interaction shifts the power balance of skirmishes around objectives. Viego cannot freely skirmish or secure early kills because any death on Mordekaiser's team becomes a trap rather than a reset source. Viego is forced to play passively near walls with Harrowed Path, unable to aggressively dive Mordekaiser's backline with Heartbreaker, knowing he will be locked in a 1v1 he cannot win.
Wie man spielt
Position yourself directly between Viego and your low-health allies during mid-game skirmishes. Do not waste Realm of Death early in the fight; hold it specifically for the moment Viego tries to channel Sovereign's Domination or dives with Heartbreaker. If he uses Spectral Maw to gap-close, pull him back with Death's Grasp, activate Darkness Rise, and drag him into your duel before he can touch a single soul on the ground.
Konter-EngageTarnungTalon's jungle dominance relies entirely on using Assassin's Path to hop over walls and escape bad engagements. However, the moment you trap him with Realm of Death, his mobility is completely neutralized. Inside your arena, the boundary cuts off his escape routes, rendering Assassin's Path useless. Without walls to leap over, Talon is forced into a direct brawl where your Darkness Rise aura and isolated Obliterate strikes will easily shred his fragile health pool.Talon Build →Details ansehen
Talon
Warum
Talon's jungle dominance relies entirely on using Assassin's Path to hop over walls and escape bad engagements. However, the moment you trap him with Realm of Death, his mobility is completely neutralized. Inside your arena, the boundary cuts off his escape routes, rendering Assassin's Path useless. Without walls to leap over, Talon is forced into a direct brawl where your Darkness Rise aura and isolated Obliterate strikes will easily shred his fragile health pool.
Lane-Einfluss
This interaction completely shifts the power dynamic during river skirmishes and objective fights. Talon cannot safely invade your jungle or contest Scuttle Crabs because any face-to-face encounter near a wall puts him at risk of being banished. This forces him to play passively, slowing down his gold generation and preventing him from snowballing other lanes. Your presence alone denies him the freedom to flank your teammates from unexpected angles.
Wie man spielt
When patrolling the river or invading, position yourself between Talon and the nearest thick terrain to block his quick escape. Hold Death's Grasp specifically to disrupt his jump animation if he tries to flee before you ultimate. The moment he commits Rake to a camp or skirmish, immediately activate Realm of Death. If he tries to hide using Shadow Assault inside your arena, pop Indestructible to absorb the burst and let Darkness Rise reveal his position.
RegenerationVolibear relies entirely on the massive bonus health and attack range granted by Stormbringer to dominate jungle skirmishes. By delaying Realm of Death until after his leap, you steal a percentage of these temporarily inflated statistics. This massive swing leaves him fragile inside your arena, while Darkness Rise melts his remaining health while you easily out-range and overpower his base kit.Volibear Build →Details ansehen
Volibear
Warum
Volibear relies entirely on the massive bonus health and attack range granted by Stormbringer to dominate jungle skirmishes. By delaying Realm of Death until after his leap, you steal a percentage of these temporarily inflated statistics. This massive swing leaves him fragile inside your arena, while Darkness Rise melts his remaining health while you easily out-range and overpower his base kit.
Lane-Einfluss
In the jungle, this dynamic dictates objective fights and counter-ganking. Because you win the post-level-5 duel, Volibear cannot safely contest the Rift Herald or Dragons if you are lurking. He is forced to use Stormbringer defensively to escape or secure objectives early, meaning you can dictate the pace of neutral objectives and punish his aggressive jungle invades with absolute confidence.
Wie man spielt
Never initiate with Realm of Death when contesting camps or ganking. Instead, bait Volibear into committing with Thundering Smash and Sky Splitter. Once he feels pressured and activates Stormbringer to turn the tide, immediately banish him. If he holds his ultimate, simply chip away at him with Obliterate and Death's Grasp, forcing him into a losing battle where he must either die without ultimate or use it and get countered.
SchutzUltimateThis matchup is defined by how Realm of Death completely neutralizes Skarner's ultimate playmaking ability. Whenever Skarner attempts to turn a fight by grabbing your allies with Impale, casting Realm of Death on him instantly breaks his suppression and isolates him in your duel. By stealing his tank stats, you easily shred him with Darkness Rise and Obliterate, turning his primary engage tool into a death sentence.Skarner Build →Details ansehen
Skarner
Warum
This matchup is defined by how Realm of Death completely neutralizes Skarner's ultimate playmaking ability. Whenever Skarner attempts to turn a fight by grabbing your allies with Impale, casting Realm of Death on him instantly breaks his suppression and isolates him in your duel. By stealing his tank stats, you easily shred him with Darkness Rise and Obliterate, turning his primary engage tool into a death sentence.
Lane-Einfluss
In the jungle, this interaction completely shifts objective contests in your favor. Skarner cannot confidently use Ixtal's Impact to flank or secure picks because you are constantly waiting to peel him off. His gank pressure heavily drops, and whenever a skirmish breaks out near the river, his fear of being isolated prevents him from playing front-line, giving your team free reign over major neutral objectives.
Wie man spielt
To execute this, your positioning in skirmishes must be defensive and reactive. Stand directly between Skarner and your vulnerable carries, holding Realm of Death solely to counter his Impale or to stop his Ixtal's Impact charge. If he manages to activate Seismic Bastion to absorb damage, do not panic; simply activate Indestructible to match his shield, pull him closer with Death's Grasp, and let your Darkness Rise burn through his health bar.
DuellSchutzIn the jungle, Poppy relies on her Steadfast Presence to shut down highly mobile skirmishers. Since you have no dashes, her primary defensive tool becomes completely useless in direct combat. Your damage comes entirely from walking her down with Darkness Rise and smashing her with Obliterate. This nullifies her main anti-engage tool, allowing you to stat-check her easily in 1v1 jungle duels.Poppy Build →Details ansehen
Poppy
Warum
In the jungle, Poppy relies on her Steadfast Presence to shut down highly mobile skirmishers. Since you have no dashes, her primary defensive tool becomes completely useless in direct combat. Your damage comes entirely from walking her down with Darkness Rise and smashing her with Obliterate. This nullifies her main anti-engage tool, allowing you to stat-check her easily in 1v1 jungle duels.
Lane-Einfluss
This dynamic completely shifts the jungle pressure in your favor. When contesting Scuttle Crabs or invading her camps, Poppy cannot peel you off or escape using her mobility denial. You can aggressively force her out of her own jungle because she cannot disengage your raw AP damage. This secures early neutral monster priority and allows you to constantly steal her camps without fearing her defensive zones.
Wie man spielt
To exploit this, position yourself carefully to avoid standing near walls, preventing her from landing a stun. When you find her in the river, drag her into Realm of Death to isolate her from teammates. Save your Indestructible to absorb her burst if she tries to fight back, and pull her back with Death's Grasp if she attempts to walk away. Focus on tracking her pathing to constantly invade and deny her gold.
SchildeTwitch relies entirely on catching you off-guard in the jungle with Ambush and maximizing his pierce damage via Spray and Pray. However, his initial burst is completely countered by your Indestructible. By turning the rat's opening volley into a massive shield, you negate his main win condition, easily keeping him in range to trigger your Darkness Rise and beat him in a prolonged duel.Twitch Build →Details ansehen
Twitch
Warum
Twitch relies entirely on catching you off-guard in the jungle with Ambush and maximizing his pierce damage via Spray and Pray. However, his initial burst is completely countered by your Indestructible. By turning the rat's opening volley into a massive shield, you negate his main win condition, easily keeping him in range to trigger your Darkness Rise and beat him in a prolonged duel.
Lane-Einfluss
This matchup dynamic completely strips Twitch of his early skirmishing pressure. He cannot safely contest scuttle crabs or invade your camps, as any ambush he attempts backfires. You can aggressively secure objectives, knowing that even if he opens with Venom Cask and Contaminate, you will always win the ensuing trade, forcing him to play passively and fall behind.
Wie man spielt
When navigating the river or entering unwarded areas, never waste Indestructible on camps; hold it specifically for when Twitch breaks stealth. Once he activates Spray and Pray, activate your shield to soak the pierce damage, then pull him back with Death's Grasp. If he tries to kite away, drag him into the Realm of Death where his stealth is useless, and crush him with Obliterate. Focus your gold on armor-heavy magic items early.
ZonenkontrolleThis jungle matchup centers entirely around neutral monster security. Nunu & Willump rely heavily on combining Consume with Smite to instantly burst down epic monsters, making traditional smite fights almost impossible to win. However, your Realm of Death completely nullifies this threat. By dragging the yeti into your death dimension, you isolate them from the Baron or Dragon pit, rendering their high-damage execute completely useless while your team easily secures the objective.Nunu & Willump Build →Details ansehen
Nunu & Willump
Warum
This jungle matchup centers entirely around neutral monster security. Nunu & Willump rely heavily on combining Consume with Smite to instantly burst down epic monsters, making traditional smite fights almost impossible to win. However, your Realm of Death completely nullifies this threat. By dragging the yeti into your death dimension, you isolate them from the Baron or Dragon pit, rendering their high-damage execute completely useless while your team easily secures the objective.
Lane-Einfluss
Because you hold the ultimate denial tool, Nunu & Willump cannot safely rush early Dragons or Rift Heralds. Any attempt they make to engage with Biggest Snowball Ever! can be turned against them. Your ability to survive their initial burst with Indestructible and fight back using Darkness Rise means they lose all priority in the river. This forces the enemy jungler into a passive farming style, bleeding map pressure.
Wie man spielt
Your primary positioning rule is to hover near the epic monster's pit entrance, keeping Nunu & Willump in sight. Do not initiate the fight with Realm of Death. Instead, wait until the objective's health drops to around 3,000 HP, then banish Nunu & Willump immediately. If they try to channel Absolute Zero to zone your team, casting your ultimate will instantly cancel it. Use Death's Grasp to pull them away if they try to approach the pit beforehand.
Rammus relies heavily on his Defensive Ball Curl to boost his armor and reflect physical attacks, making him an anti-AD powerhouse. However, your entire damage profile is magic-based, rendering his primary defensive tool highly ineffective. Furthermore, the magic penetration granted by Death's Grasp naturally shreds through any magic resistance he attempts to build, ensuring your Obliterate and Darkness Rise melt his health pool during skirmishes.Rammus Build →Details ansehen
Rammus
Warum
Rammus relies heavily on his Defensive Ball Curl to boost his armor and reflect physical attacks, making him an anti-AD powerhouse. However, your entire damage profile is magic-based, rendering his primary defensive tool highly ineffective. Furthermore, the magic penetration granted by Death's Grasp naturally shreds through any magic resistance he attempts to build, ensuring your Obliterate and Darkness Rise melt his health pool during skirmishes.
Lane-Einfluss
In the jungle, this matchup strips Rammus of his early dueling pressure. He cannot safely contest Scuttle Crabs or defend his camps against your invades, as he lacks the damage to threaten you. When he attempts to gank lanes using Powerball, you can easily counter-gank or force him into Realm of Death, isolating him away from his allies and stealing his tank stats to secure easy neutral objectives.
Wie man spielt
Prioritize early magic damage and magic penetration items rather than defensive armor, maximizing your damage output against his health pool. During skirmishes, save Death's Grasp to cancel his Powerball escape or pull him back if he tries to roll away. When he forces you to attack him with Frenzying Taunt, immediately activate Indestructible to absorb the reflected damage, ensuring you win the trade and maintain full control over the neutral objectives.
ÜberlebenSchutzMaokai relies entirely on disrupting teamfights to succeed, but you completely shut down this utility. By using Realm of Death, you isolate him from his team, rendering his Twisted Advance and Nature's Grasp useless for protecting his carries. Inside your domain, his low damage output cannot match your continuous DPS from Darkness Rise, turning a teamfight initiator into an easy, isolated target.Maokai Build →Details ansehen
Maokai
Warum
Maokai relies entirely on disrupting teamfights to succeed, but you completely shut down this utility. By using Realm of Death, you isolate him from his team, rendering his Twisted Advance and Nature's Grasp useless for protecting his carries. Inside your domain, his low damage output cannot match your continuous DPS from Darkness Rise, turning a teamfight initiator into an easy, isolated target.
Lane-Einfluss
This dynamic strips Maokai of his objective control. He cannot safely contest the Rift Scuttler or epic monsters because his Sapling Toss scouting won't stop you from forcing a fight. Whenever a skirmish erupts, Maokai is forced to delay his Nature's Grasp, knowing that if he steps forward to crowd-control your teammates, you will instantly banish him, leaving his backline completely exposed to your allies.
Wie man spielt
Position yourself aggressively at the front of your team during objective dances, blocking his path. Do not initiate with Realm of Death; instead, wait for Maokai to commit with Twisted Advance onto your frontline. The moment he roots someone, pull him deeper into your team with Death's Grasp, then activate Realm of Death. Inside, trigger Darkness Rise quickly and use Indestructible to absorb his Bramble Smash knockback while you crush him with Obliterate.
Vorteil: kanonisches Urteil von Wild Rift Core (−3 bis +3), aus Sicht des in der Zeile genannten Champions. Siegrate und Pickrate: die eigenen Werte des Gegners in dieser Rolle — Wild Rift CN · Challenger, Patch 7.3b. Keine Siegrate im direkten Duell.
Vorteil: kanonisches Urteil von Wild Rift Core (−3 bis +3), aus Sicht des in der Zeile genannten Champions. Siegrate und Pickrate: die eigenen Werte des Gegners in dieser Rolle — Wild Rift CN · Challenger, Patch 7.3b. Keine Siegrate im direkten Duell.
Wie man diesen Champion kontert
Konter-Winkel
Mordekaiser-Konter zu verstehen, bedeutet nicht nur, Champions aufzulisten, die ihn schlagen, sondern Profile zu identifizieren, die sein Kernmuster durchbrechen: ausgedehnte Kämpfe auf engem Raum. Mordekaiser will in Reichweite bleiben, seine passive aktivieren und mit seinem Ultimate isolierte Duelle erzwingen. Effektive Konter stören diese Logik, indem sie Kontakt vermeiden, frühe Duelle gewinnen oder sein Ultimate neutralisieren. Diese Seite erklärt diese Dynamiken, um eine echte Anpassung im Spiel zu ermöglichen.
Patch-Kontext
Mordekaisers Konter in diesem Patch nutzen hauptsächlich seine geringe Mobilität und seine Abhängigkeit von Kontakt. Champions, die kiten, seinem E ausweichen oder seine Aura-Laufzeit reduzieren können, verringern seinen Einfluss drastisch. Zusätzlich machen ihn diejenigen, die reine Duelle gewinnen oder seinem Ultimate entkommen können, selbst dann ineffektiv, wenn er korrekt angreift. Das Problem ist nicht sein Schaden, sondern seine Unfähigkeit, ihn in diesen Kontexten anzubringen.
Schnell gelesen
Mobile Champions reduzieren seine Kontaktzeit.
Starke Duellanten können auch innerhalb seines R gewinnen.
Anti-Ultimate-Werkzeuge reduzieren seinen Wert drastisch.
Konter-Archetypen
Dominante Duellanten
Diese Champions haben keine Angst vor Mordekaisers erzwungenem 1v1. Selbst innerhalb des Reichs des Todes können sie das Duell durch defensive Mechaniken oder Sustain übertreffen oder übertreffen. Fiora kann zum Beispiel seine Animationen bestrafen und seinen rohen Druck ignorieren. Für Mordekaiser wird sein vermeintlicher Vorteil – die Isolierung des Kampfes – ineffektiv oder sogar gefährlich.
Wie sich der Champion anpasst. Vermeide es, das R früh zu erzwingen. Warte auf Item-Vorteile oder nutze das Ultimate in Teamkämpfen für ein anderes Ziel.
Kiten und ständiges Poken
Diese Champions verhindern, dass Mordekaiser seine passive Laufzeit aufrechterhält. Indem sie außerhalb der Reichweite bleiben oder ihn ständig verlangsamen, brechen sie seinen Schadenszyklus. Ohne ausgedehnten Kontakt verliert sein Riftmaker- und Dämonen-Build erheblich an Wert. Selbst mit Rylais ist er möglicherweise immer noch zu langsam, um sie effektiv zu fangen.
Wie sich der Champion anpasst. Suche Kämpfe auf engem Raum und verlasse dich auf Flash oder verbündete Initiierung, um Kontakt zu erzwingen.
Aggressiver früher Druck
Diese Champions bestrafen Mordekaiser, bevor er seine wichtigsten Spitzen erreicht. Sie gewinnen kurze Trades, erzwingen Rückrufe und verzögern seinen Level-5-Power-Spike. Indem sie ihn zurückhalten, verhindern sie seinen Übergang ins mid-Spiel, wo er wirklich gefährlich wird.
Fiora ist eines von Mordekaisers schlimmsten Matchups, weil sie seinen Vorteil in eine Schwäche verwandelt. Sein R ist keine Bedrohung für sie, sondern eine Gelegenheit. Sie kann seinen Q ausweichen, seine Timings bestrafen und ihn selbst in ausgedehnten Kämpfen schlagen. Mordekaiser muss unnötige Trades vermeiden und um sein Team herum spielen.
Vayne neutralisiert Mordekaiser vollständig, indem er seine Kontaktzeit auf Null reduziert. Selbst in Teamkämpfen kann sie ihn unendlich kiten. Sein R wird schwer zu benutzen, da sie einfach überleben oder sich neu positionieren kann. Das Matchup wird eher zu einem strukturellen Problem als zu einem Duell.
Häufige Fehler gegen ihn
Häufige Fehler gegen ihn
Unterschätzung der Bedeutung von anhaltendem Kontakt.
Erzwingen des R in einem schlechten Matchup.
Ignorieren des gegnerischen Kiting.
Falsche Positionierung des E.
Nimmst unnötige kurze Trades.
Coach-Notizen
Wenn du das Ziel nicht erreichen kannst, kannst du den Kampf nicht gewinnen.
Dein R gleicht kein schlechtes Matchup aus.
FAQ
Warum ist Fiora so stark gegen Mordekaiser?
Fiora gewinnt das reine Duell selbst im Reich des Todes. Sie kann wichtige Fähigkeiten ausweichen, seine Animationen bestrafen und sich durch längere Trades heilen. Das Problem ist, dass Mordekaiser seinen Isolationsvorteil gegen sie nicht nutzen kann.
Wie spielt man gegen Kiting-Champions?
Du musst Kämpfe in engen Bereichen erzwingen oder Werkzeuge wie Flash oder verbündete Initiationen nutzen, um die Distanz zu überbrücken. Ohne das verliert Mordekaiser naturgemäß gegen diese Profile, da er die passive Laufzeit nicht aufrechterhalten kann.
Reicht sein R, um ein Matchup zu gewinnen?
Nein. Gegen bestimmte Champions wird sein R ineffektiv, weil sie das Duell gewinnen oder entkommen können. Du musst das gesamte Matchup betrachten, nicht nur die Ultimate.
Was ist sein größter Teamfight-Counter?
Mobile Kompositionen, die kiten und disengagen können, sind seine größten Counter. Sie hindern Mordekaiser daran, sein Spiel zu spielen, und reduzieren seinen Gesamteinfluss, selbst wenn er seine Ultimate korrekt einsetzt.