septiembre de 2026 · Patch 7.2d
Mage · TOP · JUNGLE

Guía de counters de Mordekaiser Wild Rift

Mordekaiser es neutralizado por campeones que pueden salir de su reino o enfrentarse a él eficazmente con burst dentro del mismo. Los objetos y habilidades de Cleanse anulan directamente su mecánica principal. Las composiciones de poke sostenido agotan su escudo pasivo antes de los combates.

★ TOP · JUNGLE Tier S
DAÑO
UTIL
TANK
DIFF
Win 51.2% #35 · ↑5pt
Pick 12.3% #4
Ban 26.6% #8

Guía de counters de Mordekaiser Wild Rift ★ Counter Sheet

Tabla de emparejamientos
Emparejamiento Veredicto Ventaja Tasa de victorias Tasa de selección
Vayne Contras Difíciles +2 53.4% 2.1%
Olaf Contras Difíciles +2 51.7% 1.1%
Yone Desfavorables +1 51.8% 6.9%
Gwen Desfavorables +1 51.3% 3.2%
Volibear Desfavorables +1 51.0% 6.7%
Teemo Desfavorables +1 50.4% 3.1%
Kennen Desfavorables +1 50.1% 1.4%
Darius Desfavorables +1 50.0% 15.8%
Fiora Desfavorables +1 47.7% 4.9%
Riven Desfavorables +1 46.7% 1.2%
Akali Desfavorables +1
Aurora Desfavorables +1
Kalista Desfavorables +1
Ryze Desfavorables +1
Warwick Desfavorables +1
Singed Matchups de Habilidad ±0 51.3% 1.5%
Gnar Matchups de Habilidad ±0 51.1% 3.5%
Irelia Matchups de Habilidad ±0 50.6% 1.9%
Camille Matchups de Habilidad ±0 49.8% 3.4%
Tryndamere Matchups de Habilidad ±0 49.6% 2.1%
Sett Matchups de Habilidad ±0 49.6% 11.2%
Aatrox Matchups de Habilidad ±0 49.4% 6.1%
Urgot Matchups de Habilidad ±0 49.3% 3.8%
Ambessa Matchups de Habilidad ±0 49.0% 1.9%
Vladimir Matchups de Habilidad ±0 48.2% 1.1%
Jayce Matchups de Habilidad ±0 48.0% 2.6%
Smolder Favorables −1 52.1% 1.6%
Jax Favorables −1 51.7% 3.8%
Wukong Favorables −1 51.5% 2.2%
Kayle Favorables −1 51.0% 1.8%
Ornn Favorables −1 51.0% 1.9%
Cho'Gath Favorables −1 50.8% 12.5%
Garen Favorables −1 49.7% 14.9%
Rumble Favorables −1 49.1% 2.2%
K'Santé Favorables −1 48.8% 5.9%
Nasus Favorables −1 48.6% 6.0%
Renekton Favorables −1 48.5% 4.1%
Yasuo Favorables −1 46.4% 2.9%
Gragas Favorables −1
Graves Favorables −1
Pantheon Favorables −1
Rengar Favorables −1
Swain Favorables −1
Shen Favorables −2 53.3% 1.6%
Malphite Favorables −2 52.1% 5.5%
Dr. Mundo Favorables −2 50.6% 5.8%
Poppy Favorables −2 50.5% 2.3%
Sion Favorables −2 50.0% 4.1%
Skarner Favorables −2 47.8% 1.4%
Heimerdinger Favorables −2
Jarvan IV Favorables −2
Maokai Favorables −2
Nautilus Favorables −2

Edge: Wild Rift Core canonical verdict (−3 to +3), shown from the point of view of the champion named in the row. Win rate and pick rate: the opponent's own rate in this role — Wild Rift CN · Challenger, Patch 7.2d. Not a head-to-head win rate.

Contras Difíciles

2

Estos campeones tienen una build y un estilo de juego que superan directamente al tuyo, lo que puede hacer que controlar la línea y farmear sea extremadamente difícil. Sus habilidades pueden neutralizar tus principales fortalezas o castigarte en cuanto intentas jugar tu plan habitual. En estos matchups, el objetivo suele ser minimizar errores y buscar soluciones fuera del enfrentamiento directo.

Vayne

Vayne+2

spacingkiting Landing your skillshots is almost impossible because Vayne can reactively dodge both Obliterate and Death's Grasp using the short-cooldown dash of Tumble. Even if you manage to close the distance or trap her inside your Realm of Death, she holds a supreme counter-measure; her Condemn will instantly knock you away to the edge of your own arena, leaving you helpless while she melts you with Silver Bolts. Ver detalles
Vayne

Por qué

Landing your skillshots is almost impossible because Vayne can reactively dodge both Obliterate and Death's Grasp using the short-cooldown dash of Tumble. Even if you manage to close the distance or trap her inside your Realm of Death, she holds a supreme counter-measure; her Condemn will instantly knock you away to the edge of your own arena, leaving you helpless while she melts you with Silver Bolts.

Impacto en la línea

Because you cannot threaten her, you are forced to concede early wave control. Vayne will comfortably freeze or slow-push while using Silver Bolts to punish you every time you walk up to secure minion gold. Your Indestructible shield will constantly be depleted just to absorb her ranged poke, forcing you into early, disadvantageous recalls that bleed tower plates and leave you starved of gold.

Cómo jugar

Survival requires absolute discipline under your own turret. Never initiate with Death's Grasp; instead, hold it to threaten a pull only if she overextends into turret range. When she activates Final Hour, immediately retreat and use Indestructible to block the third stack of Silver Bolts rather than trying to chase her. If you must use Realm of Death, wait until she has already wasted Condemn, otherwise you will spend your entire ultimate running back to her.

Ficha completa →
Olaf

Olaf+2

ultimate interactioncc immunity The matchup is heavily skewed because Olaf's Ragnarok completely negates your ultimate. If you cast Realm of Death, he can activate his ultimate to instantly cleanse the shadow realm or block its activation entirely. Without the ability to isolate him and steal his stats, you are forced to fight his high sustained DPS from Berserker Rage and Vicious Strikes in the open, where his raw stats easily overwhelm yours. Ver detalles
Olaf

Por qué

The matchup is heavily skewed because Olaf's Ragnarok completely negates your ultimate. If you cast Realm of Death, he can activate his ultimate to instantly cleanse the shadow realm or block its activation entirely. Without the ability to isolate him and steal his stats, you are forced to fight his high sustained DPS from Berserker Rage and Vicious Strikes in the open, where his raw stats easily overwhelm yours.

Impacto en la línea

This interaction strips away your post-level-5 safety and kill pressure. Olaf will constantly fish for slows with Undertow to run you down. Since you cannot threaten him with your ultimate, he will freeze the wave and zone you. Trying to farm with Obliterate exposes you to massive true damage from Reckless Swing, forcing you to sit under tower.

Cómo jugar

To survive, you must never initiate trades with Death's Grasp, as pulling Olaf closer only helps him engage. Keep your distance and use Obliterate solely to secure minion last-hits from safety. Save Indestructible to absorb his Reckless Swing burst rather than using its heal reactively. Most importantly, never cast Realm of Death unless you have seen him waste Ragnarok, otherwise save it to peel for yourself when his ultimate expires.

Ficha completa →

Desfavorables

13

Estos campeones tienen herramientas que generalmente les dan ventaja en el enfrentamiento, sin llegar a hacer el matchup injugable. Pueden tener más alcance, mejor capacidad para aguantar tu ofensiva o más formas de responder a tus engagements. Tendrás que adaptar tu enfoque y elegir con cuidado los momentos en los que aceptas el combate.

Yone

Yone+1

spacingdodge mechanics Yone's extreme mobility creates a challenging dynamic because Soul Unbound allows him to trade without risk. He can dash forward to strike you, easily sidestep your slow Death's Grasp, and snap back to his starting point to completely bypass your Realm of Death if he times the return window during your ultimate's cast. His mixed damage from Way of the Hunter also bypasses early magic resistance stack options. Ver detalles
Yone

Por qué

Yone's extreme mobility creates a challenging dynamic because Soul Unbound allows him to trade without risk. He can dash forward to strike you, easily sidestep your slow Death's Grasp, and snap back to his starting point to completely bypass your Realm of Death if he times the return window during your ultimate's cast. His mixed damage from Way of the Hunter also bypasses early magic resistance stack options.

Impacto en la línea

You will find yourself constantly pushed under turret because Yone's Mortal Steel and Spirit Cleave clear waves faster while building a protective shield. If you try to fight back, he will use Soul Unbound to chunk your health bar and retreat before your passive Darkness Rise can even activate. This forces you to burn Indestructible defensively, losing priority and allowing him to freely roam.

Cómo jugar

To survive, never cast Death's Grasp proactively; hold it to pull Yone back only after he has committed his Soul Unbound dash or to disrupt his Mortal Steel third cast. Position yourself near your own tower to minimize his run-down distance. If he activates his spirit form, step backward and prepare to aim Obliterate at his physical body's return marker, forcing him to take damage upon his inevitable retreat.

Ficha completa →
Kennen

Kennen+1

ranged pokeskillshot dodge This matchup is dictated by Kennen's superior mobility. Whenever you attempt to pull him in with Death's Grasp, he can reactively activate Lightning Rush to easily dash out of the hand's hitbox. Once your primary crowd control is on cooldown, Kennen can freely position forward to harass you with Thundering Shuriken and stack Mark of the Storm without any fear of your retaliation. Ver detalles
Kennen

Por qué

This matchup is dictated by Kennen's superior mobility. Whenever you attempt to pull him in with Death's Grasp, he can reactively activate Lightning Rush to easily dash out of the hand's hitbox. Once your primary crowd control is on cooldown, Kennen can freely position forward to harass you with Thundering Shuriken and stack Mark of the Storm without any fear of your retaliation.

Impacto en la línea

You will constantly find yourself pushed under turret, absorbing poke while trying to secure minions. If you step up to contest the wave, Kennen will chip away at your health bar, forcing early recalls and giving him a massive gold lead through turret plates. Since you cannot easily lock him down, he maintains complete control over the wave state and can comfortably rotate.

Cómo jugar

To survive, never cast Death's Grasp unless Kennen has already wasted Lightning Rush to clear minions or trade. Position yourself deep inside your own minion wave to block his Thundering Shuriken pathing. If he steps past your wave to harass, use Obliterate on isolated minions to push back, and rely heavily on the shield from Indestructible to absorb his Electrical Surge damage. If he locks you in Slicing Maelstrom, use Realm of Death to isolate him.

Ficha completa →
Fiora

Fiora+1

parry timingdodge skillshot Fiora completely dictates the pace of this duel through her Riposte. If you attempt to pull her in with Death's Grasp, she can parry it instantly to stun you and easily strike your vitals revealed by Duelist's Dance. Even worse, a skilled Fiora will reactively hold her Riposte to completely cancel the cast of your Realm of Death, stripping away your primary stat-stealing tool and leaving you vulnerable in a raw duel. Ver detalles
Fiora

Por qué

Fiora completely dictates the pace of this duel through her Riposte. If you attempt to pull her in with Death's Grasp, she can parry it instantly to stun you and easily strike your vitals revealed by Duelist's Dance. Even worse, a skilled Fiora will reactively hold her Riposte to completely cancel the cast of your Realm of Death, stripping away your primary stat-stealing tool and leaving you vulnerable in a raw duel.

Impacto en la línea

This interaction forces you into an extremely defensive posture where you cannot freely use your crowd control. Fiora will constantly pressure you under tower, using Lunge to poke your Duelist's Dance vitals while you struggle to trade back. If she successfully parries Death's Grasp, the resulting stun often leads to a full Grand Challenge setup, resulting in a forced recall or a direct death that gives her free plates.

Cómo jugar

To survive, you must bait out Riposte before committing to any major fight. Never lead with Death's Grasp; instead, use Obliterate to farm from safety and charge Indestructible to absorb her Lunge pokes. If you must use Realm of Death, try to trigger it from a brush or walk close to force her into guessing the timing. If she wastes her parry, you have a brief fifteen-second window to aggressively force a trade with your active Darkness Rise aura.

Ficha completa →
Akali

Akali+1

shroud playstat check Akali holds a massive advantage because her superior mobility allows her to easily dodge your slow Obliterate and Death's Grasp. More importantly, the lane is heavily dictated by how Twilight Shroud interacts with your Realm of Death. If you pull her into your death dimension, she can simply deploy her shroud inside, completely concealing herself and stalling out the entire duration of your ultimate without taking damage. Ver detalles
Akali

Por qué

Akali holds a massive advantage because her superior mobility allows her to easily dodge your slow Obliterate and Death's Grasp. More importantly, the lane is heavily dictated by how Twilight Shroud interacts with your Realm of Death. If you pull her into your death dimension, she can simply deploy her shroud inside, completely concealing herself and stalling out the entire duration of your ultimate without taking damage.

Impacto en la línea

During the laning phase, Akali will constantly poke you with Five Point Strike while using Assassin's Mark to trade safely. Because she can easily disengage using Shuriken Flip, attempting to freeze the wave or force trades often leaves you vulnerable. Missed skillshots mean she will immediately punish you, forcing you to rely on Indestructible for shield sustain rather than building aggressive lane pressure.

Cómo jugar

To survive this lane, you must play defensively and never cast Realm of Death while her Twilight Shroud is off cooldown. Force her to use her shroud defensively in the open lane first. Keep your wave near your turret to limit her space for Shuriken Flip. When she approaches to poke, use Darkness Rise to match her movement speed, and always hold Death's Grasp as a deterrent rather than using it to initiate fights blindly.

Ficha completa →
Gwen

Gwen+1

dodge skillshotspacing control Gwen's mobility completely dictates the pace of this duel. Because her Skip 'n Slash is on a short cooldown, she can effortlessly dash out of your Death's Grasp. This evasion denies you the ability to pull her into your sweet spot, meaning your Obliterate will rarely hit her as an isolated target. Without that amplified damage, Gwen's A Thousand Cuts passive and Snip Snip! will quickly outpace your damage output in any direct confrontation. Ver detalles
Gwen

Por qué

Gwen's mobility completely dictates the pace of this duel. Because her Skip 'n Slash is on a short cooldown, she can effortlessly dash out of your Death's Grasp. This evasion denies you the ability to pull her into your sweet spot, meaning your Obliterate will rarely hit her as an isolated target. Without that amplified damage, Gwen's A Thousand Cuts passive and Snip Snip! will quickly outpace your damage output in any direct confrontation.

Impacto en la línea

This constant threat forces you into a defensive posture near your turret. You cannot reliably contest the wave, as attempting to fish for a Death's Grasp leaves you vulnerable to a forward Skip 'n Slash trade where she shreds your health bar with Snip Snip!. If she manages to freeze the lane, you risk losing significant gold, and using your Indestructible shield early just to survive her Needlework all-ins will bleed your lane priority dry.

Cómo jugar

To survive, you must play a patient spacing game. Never initiate with Death's Grasp; instead, hold it as a disengagement tool to pull her away when she dashes in with Skip 'n Slash. Position yourself inside your own minion wave to ensure her Snip Snip! damage is split, and only trigger Indestructible when her Needlework stacks are fully unleashed. If she forces you into the Realm of Death, focus on running down her Hallowed Mist timer before committing your spells.

Ficha completa →
Darius

Darius+1

stat checkspacing Darius dictates this matchup because of his healing and execute potential. Even when you isolate him inside your Realm of Death, he can swing Decimate to strike you with the outer edge, healing back your Darkness Rise passive damage. If he stacks Hemorrhage to five, his Noxian Might unlocks, allowing Noxian Guillotine to easily cut through your health pool before your AP damage can melt his higher base stats. Ver detalles
Darius

Por qué

Darius dictates this matchup because of his healing and execute potential. Even when you isolate him inside your Realm of Death, he can swing Decimate to strike you with the outer edge, healing back your Darkness Rise passive damage. If he stacks Hemorrhage to five, his Noxian Might unlocks, allowing Noxian Guillotine to easily cut through your health pool before your AP damage can melt his higher base stats.

Impacto en la línea

You must concede early wave control because a single Apprehend pull leads to a deadly Crippling Strike slow and a full Hemorrhage sequence. This forces you to farm from a distance, bleeding minor tower plating while preserving your health. If you get chunked below half, Darius will easily dive you with Noxian Guillotine, causing you to lose massive waves and letting him roam to your jungle.

Cómo jugar

To survive, you must play a strict spacing game. When Darius starts his Decimate swing, step inward toward his handle to negate his healing and reduce damage, or use Death's Grasp to pull him away entirely. Always hold Indestructible to shield his Noxian Guillotine execution damage rather than using it early for minor health. If he pulls you with Apprehend, immediately trade with Obliterate and walk away before his bleed stacks.

Ficha completa →
Teemo

Teemo+1

spacingsustain Teemo's constant mobility from Move Quick makes this lane exceptionally difficult for Mordekaiser. Whenever you attempt to close the distance or fish for a catch, the swift scout easily steps out of your Death's Grasp and sidesteps Obliterate. This allows him to constantly apply pressure with Toxic Shot from safety, rendering your melee-range threat null while he chips away at your health bar. Ver detalles
Teemo

Por qué

Teemo's constant mobility from Move Quick makes this lane exceptionally difficult for Mordekaiser. Whenever you attempt to close the distance or fish for a catch, the swift scout easily steps out of your Death's Grasp and sidesteps Obliterate. This allows him to constantly apply pressure with Toxic Shot from safety, rendering your melee-range threat null while he chips away at your health bar.

Impacto en la línea

You will find yourself pinned under your own turret, bleeding health every time you step up to last-hit. Teemo's relentless harassment forces you to deplete Indestructible early just to survive the poison. If you drop too low, you are forced into bad recalls, losing waves and letting him place Noxious Trap clusters around the river, completely blocking your jungler from assisting you.

Cómo jugar

Concede early minions and let the wave crash. Only throw Death's Grasp if Teemo steps up too far to auto-attack and has his Move Quick on cooldown. If you manage to pull him in, immediately activate Darkness Rise and force Realm of Death to trap him before he can escape. If you hit a Noxious Trap, immediately activate Indestructible to mitigate the slow and damage, then retreat to the safety of your tower.

Ficha completa →
Volibear

Volibear+1

early skirmishultimate timing Volibear dictates this matchup because his Stormbringer grants him an unstoppable frame that can completely cancel your Realm of Death if he times it during your cast animation. This interaction denies you your stat-stealing duel entirely. Furthermore, in prolonged skirmishes, Volibear's repeated healing from Frenzied Maul outpaces the damage of your Darkness Rise aura, turning raw slugfests into losing battles for you. Ver detalles
Volibear

Por qué

Volibear dictates this matchup because his Stormbringer grants him an unstoppable frame that can completely cancel your Realm of Death if he times it during your cast animation. This interaction denies you your stat-stealing duel entirely. Furthermore, in prolonged skirmishes, Volibear's repeated healing from Frenzied Maul outpaces the damage of your Darkness Rise aura, turning raw slugfests into losing battles for you.

Impacto en la línea

You cannot pressure Volibear under his tower because Stormbringer disables structures while matching your dive potential. If you attempt short trades with Obliterate and Death's Grasp, Volibear will retaliate with Sky Splitter and Thundering Smash to secure massive shield advantages. This forces you to play defensively near your turret, conceding wave control and limiting your ability to assist your jungler in early river skirmishes.

Cómo jugar

To survive, never initiate with Realm of Death; instead, hold it as a psychological threat until Volibear wastes Stormbringer offensively or to escape. When trading, always save Indestructible to absorb the damage and mitigate the healing of his second, marked Frenzied Maul. If he charges with Thundering Smash, pull him backward with Death's Grasp to interrupt his sprint, then retaliate with an isolated Obliterate while retreating to safety.

Ficha completa →
Riven

Riven+1

spacingdodge mechanics Riven holds a distinct advantage because her high-frequency dashes from Broken Wings and Valor allow her to effortlessly sidestep the slow, highly telegraphed animations of your Obliterate and Death's Grasp. Since your main damage and pull are easily avoided, you struggle to land clean strikes, while her Runic Blade passive ensures she wins any extended brawl if you miss your initial spells. Ver detalles
Riven

Por qué

Riven holds a distinct advantage because her high-frequency dashes from Broken Wings and Valor allow her to effortlessly sidestep the slow, highly telegraphed animations of your Obliterate and Death's Grasp. Since your main damage and pull are easily avoided, you struggle to land clean strikes, while her Runic Blade passive ensures she wins any extended brawl if you miss your initial spells.

Impacto en la línea

This mobility deficit forces you into a defensive posture where attempting to freeze the wave near your turret is vital. Every time you miss Obliterate, Riven will immediately initiate trades using Ki Burst to stun you before you can stack Darkness Rise. You will constantly leak health and lose lane priority, making it difficult to secure clean recall timings without losing plating to her Blade of the Exile threat.

Cómo jugar

To survive, you must never cast Death's Grasp proactively; hold it to disengage when she commits with her third strike of Broken Wings. Only trade back when she has exhausted her dashes, using Indestructible to absorb the damage from her Ki Burst and Blade of the Exile. Position yourself deep inside your own minion wave to dilute her pressure and force her to push.

Ficha completa →
Warwick

Warwick+1

anti healextended trades Warwick heavily disrupts your trade pattern because his Jaws of the Beast allows him to latch onto you, rendering him immune to the displacement of your Death's Grasp while simultaneously healing back your poke. Even if you activate Darkness Rise during extended skirmishes, his passive Eternal Hunger keeps his health bar topped up, completely out-sustaining your isolated Obliterate damage whenever you try to chunk him down. Ver detalles
Warwick

Por qué

Warwick heavily disrupts your trade pattern because his Jaws of the Beast allows him to latch onto you, rendering him immune to the displacement of your Death's Grasp while simultaneously healing back your poke. Even if you activate Darkness Rise during extended skirmishes, his passive Eternal Hunger keeps his health bar topped up, completely out-sustaining your isolated Obliterate damage whenever you try to chunk him down.

Impacto en la línea

This infinite healing loop forces you into a defensive posture. You cannot easily freeze the wave because Warwick ignores your chip damage, using Blood Hunt to run you down if you drop low. Standard trades turn negative quickly; he will simply bait your Indestructible shield with Primal Howl damage reduction, forcing you to recall early and lose crucial gold, which isolates you from helping your jungler.

Cómo jugar

To survive, prioritize buying healing reduction immediately to weaken his Eternal Hunger before attempting to fight. During skirmishes, never initiate with Death's Grasp; hold it as a defensive tool to push him away only after his Jaws of the Beast is on cooldown. If he locks you down with Infinite Duress, immediately deploy Indestructible to absorb the burst, then banish him with Realm of Death once his Primal Howl shield expires.

Ficha completa →

Otros emparejamientos

Matchups de Habilidad

11

Estos enfrentamientos son sobre todo duelos de ejecución: ambos campeones tienen formas reales de tomar la ventaja. Esquivar una habilidad clave, anticipar bien un engagement o un simple error de posicionamiento puede inclinar el duelo hacia un lado. Conocer el matchup y reconocer las ventanas de acción correctas es especialmente importante aquí.

Aatrox

Aatrox±0

all inshield bypassspacing This matchup is a pure duel of spacing where the winner dictates the range. The crucial interaction hinges on Aatrox using Umbral Dash to reactively dodge your Death's Grasp. If he successfully evades your pull, Mordekaiser cannot close the gap to trigger Darkness Rise, leaving you vulnerable to his outer-edge The Darkin Blade strikes. Ver detalles
Aatrox

Por qué

This matchup is a pure duel of spacing where the winner dictates the range. The crucial interaction hinges on Aatrox using Umbral Dash to reactively dodge your Death's Grasp. If he successfully evades your pull, Mordekaiser cannot close the gap to trigger Darkness Rise, leaving you vulnerable to his outer-edge The Darkin Blade strikes.

Impacto en la línea

During the laning phase, every trade is a high-stakes gamble around these movement tools. If Aatrox wastes his dash, you can pull him in and force a prolonged brawl where your passive aura melts him. However, if he keeps Umbral Dash ready, he will zone you with The Darkin Blade and Infernal Chains, slowly chipping away your health bar while securing a massive sustain advantage through Deathbringer Stance.

Cómo jugar

To win this psychological war, never initiate trades with Death's Grasp. Instead, walk up and threaten him with isolated Obliterate strikes to force his Umbral Dash defensively. Only cast your pull once his dash is on cooldown. If he activates World Ender, immediately drag him into the Realm of Death to steal his bonus attack damage and neutralise his mobility, using Indestructible to absorb his third, most devastating Q strike.

Ficha completa →
Ambessa

Ambessa±0

dodge relianceshield timing The duel hinges on how Ambessa handles your main damage. Her passive Drakehound's Step allows her to constantly dash sideways to avoid your Obliterate. If she successfully evades this hammer slam, she can instantly jump back in while your main damage tool is cooling down, cutting through your health before you can even stack Darkness Rise. Ver detalles
Ambessa

Por qué

The duel hinges on how Ambessa handles your main damage. Her passive Drakehound's Step allows her to constantly dash sideways to avoid your Obliterate. If she successfully evades this hammer slam, she can instantly jump back in while your main damage tool is cooling down, cutting through your health before you can even stack Darkness Rise.

Impacto en la línea

This constant threat of lateral dashes forces a high-stakes spacing war. Missing a single Obliterate allows Ambessa to trigger Lacerate and stick to you, taking control of the wave position. If you waste your pull, she will bait you near her tower, using Repudiation to absorb your retaliation and block any hope of a quick disengage.

Cómo jugar

To win this, you must bait her dash before casting. Never open with Obliterate from maximum range; instead, walk up to threaten her with basic attacks to trigger Darkness Rise. Hold Death's Grasp specifically to pull her back after she commits her Drakehound's Step dash. If she uses Repudiation to block your pull, immediately activate Indestructible to absorb her incoming burst, then drag her into Realm of Death once her defensive shield expires.

Ficha completa →
Camille

Camille±0

short tradeskite This matchup is a pure test of timing and reflexes inside the death realm. While Mordekaiser can steal Camille's stats with Realm of Death, her survival hinges entirely on using the untargetability frame of The Hextech Ultimatum. If she successfully buffers this ultimate to dodge your Obliterate or Death's Grasp, she can stall out your Darkness Rise aura and win the duel. Ver detalles
Camille

Por qué

This matchup is a pure test of timing and reflexes inside the death realm. While Mordekaiser can steal Camille's stats with Realm of Death, her survival hinges entirely on using the untargetability frame of The Hextech Ultimatum. If she successfully buffers this ultimate to dodge your Obliterate or Death's Grasp, she can stall out your Darkness Rise aura and win the duel.

Impacto en la línea

During the laning phase, short trades are dictated by Camille's passive, Adaptive Defenses. She will try to poke you with Tactical Sweep while avoiding extended fights where your Darkness Rise excels. If you miss Death's Grasp, she will aggressively dive you using Hookshot and Precision Protocol. Consequently, waves usually slow-push as both of you hesitate to commit your primary engagement tools.

Cómo jugar

To win this duel, never cast Obliterate immediately after pulling Camille into Realm of Death. Instead, walk her down with basic attacks to trigger Darkness Rise, forcing her to panic-cast The Hextech Ultimatum. Hold your Obliterate and Death's Grasp until she lands from her ultimate leap. If she engages with Hookshot, immediately activate Indestructible to absorb the true damage portion of her Precision Protocol.

Ficha completa →
Gnar

Gnar±0

dodgingkiting This duel is a constant spacing test centered around Gnar's mobility and your pull. While Mini Gnar harasses you with Boomerang Throw to trigger Hyper, his safety entirely hinges on Hop. Keeping this jump ready allows him to negate your Death's Grasp or easily kite you inside your Realm of Death. When he wastes it, your raw magic damage melts his fragile Mini form. Ver detalles
Gnar

Por qué

This duel is a constant spacing test centered around Gnar's mobility and your pull. While Mini Gnar harasses you with Boomerang Throw to trigger Hyper, his safety entirely hinges on Hop. Keeping this jump ready allows him to negate your Death's Grasp or easily kite you inside your Realm of Death. When he wastes it, your raw magic damage melts his fragile Mini form.

Impacto en la línea

Laning revolves around Gnar's rage bar. In Mini form, he constantly pushes the wave and chips your health, forcing you to use Indestructible to absorb the harass. However, his aggressive poke makes him vulnerable to sudden freezes. If you can bait his jump, a successful Death's Grasp leads to an easy kill. Once Rage Gene transforms him, he becomes a melee threat capable of slamming you with Boulder Toss.

Cómo jugar

Never cast Death's Grasp proactively while Gnar has Hop off cooldown. Instead, walk forward to threaten him with Obliterate to force his escape tool first. If you must use Realm of Death, wait until he is locked in his Mega Gnar animations, or immediately after his jump is spent. If he jumps away inside your ultimate, use the movement speed from Darkness Rise to close the gap rather than chasing blindly.

Ficha completa →
Sett

Sett±0

sustained combatshield timing This matchup is a brutal battle of attrition dictated by how you manage your shield timings against his burst. Sett relies on Knuckle Down and Facebreaker to force short, explosive trades that build up his grit. If he unleashes Haymaker, the true damage in the center can turn the tide. However, if you trigger Darkness Rise and hold Indestructible to perfectly absorb that true damage blast, your superior sustained magic damage wins out. Ver detalles
Sett

Por qué

This matchup is a brutal battle of attrition dictated by how you manage your shield timings against his burst. Sett relies on Knuckle Down and Facebreaker to force short, explosive trades that build up his grit. If he unleashes Haymaker, the true damage in the center can turn the tide. However, if you trigger Darkness Rise and hold Indestructible to perfectly absorb that true damage blast, your superior sustained magic damage wins out.

Impacto en la línea

Because both of you possess immense sustain through Pit Grit and Indestructible, neither can easily force the other out of lane early. Wave states remain highly contested; Sett will try to pull you into his minions with Facebreaker to stun you. Missing Obliterate or wasting Death's Grasp leaves you vulnerable to a swift Knuckle Down engage, turning the lane into a tense dance where trading health bars only ends when one player mismanages their defensive cooldowns.

Cómo jugar

To secure victory, never initiate trades with Death's Grasp unless Sett's Facebreaker is down. Bait his Knuckle Down, land isolated Obliterate strikes, and stack your passive. When Sett prepares his Haymaker, do not panic-dodge sideways if you cannot escape the central true damage zone; instead, activate Indestructible at that exact micro-second to neutralize the blast. If you misstime this and take full damage, immediately cast Realm of Death to steal his stats and survive the remaining duel.

Ficha completa →
Jayce

Jayce±0

dodge skillshotskite This matchup revolves entirely around how you fish for pulls. Every time Jayce swaps stances, Hextech Capacitor grants him a sudden burst of movement speed. This extra mobility allows him to easily sidestep Death's Grasp, leaving you vulnerable to his ranged poke. If he successfully bait-and-dodges your pull, you lose all threat, as he can safely chip away at your health from afar without fear of being forced into a melee brawl. Ver detalles
Jayce

Por qué

This matchup revolves entirely around how you fish for pulls. Every time Jayce swaps stances, Hextech Capacitor grants him a sudden burst of movement speed. This extra mobility allows him to easily sidestep Death's Grasp, leaving you vulnerable to his ranged poke. If he successfully bait-and-dodges your pull, you lose all threat, as he can safely chip away at your health from afar without fear of being forced into a melee brawl.

Impacto en la línea

When Jayce easily evades your pull, he gains complete control over the wave. He will use his ranged forms to thin the minions while poking you under tower, forcing you to rely heavily on Indestructible to absorb the harassment. This constant pressure delays your recalls and prevents you from assisting your jungler, as you are stuck clearing waves while he holds priority and threatens to chip down your turret plates.

Cómo jugar

To counter this, never initiate with Death's Grasp while Jayce has his transformation ready. Instead, use Obliterate to farm from a safe distance and walk up to threaten him. Force him to use To the Skies! to engage on you in hammer form. Once he commits to melee range and has expended his transformation movement speed, cast Death's Grasp behind him to pull him back in, activating Darkness Rise to win the extended duel.

Ficha completa →
Tryndamere

Tryndamere±0

kitingultimate timing This matchup revolves entirely around surviving the five seconds of Undying Rage. While Tryndamere relies on Battle Fury to ramp up his critical strikes and melt your health bar, you possess the perfect tool to neutralize his offensive peak. By dragging him inside the Realm of Death, you isolate his threat, and more importantly, you can use Death's Grasp defensively to displace him and run him out of time. Ver detalles
Tryndamere

Por qué

This matchup revolves entirely around surviving the five seconds of Undying Rage. While Tryndamere relies on Battle Fury to ramp up his critical strikes and melt your health bar, you possess the perfect tool to neutralize his offensive peak. By dragging him inside the Realm of Death, you isolate his threat, and more importantly, you can use Death's Grasp defensively to displace him and run him out of time.

Impacto en la línea

The wave dynamic is dictated by Tryndamere's fury level. When his Battle Fury is empty, you can safely harass him with Obliterate and dictate the wave's position. However, once he charges his resource, he will look to force trades with Spinning Slash. Wasting your Death's Grasp offensively gives him a massive window to run you down under your own turret, forcing you to consume Indestructible prematurely.

Cómo jugar

To succeed, never use Death's Grasp to initiate once both of you reach level five. Keep this crowd control strictly to peel yourself. When Tryndamere commits with Spinning Slash and activates Undying Rage, immediately cast Realm of Death. Inside your arena, aim Death's Grasp behind you to pull him away, then turn and run to activate Darkness Rise for the movement speed boost. This spacing guarantees you easily outrun his ultimate's duration.

Ficha completa →
Vladimir

Vladimir±0

cooldown baitextended trades This lane is a pure battle of attrition where Vladimir heals constantly with Transfusion while you shield with Indestructible. The entire matchup hinges on Sanguine Pool. A skilled Vladimir will use it to slip away from your Death's Grasp, or worse, activate it during the cast animation of Realm of Death. If he pools under your ultimate's cast, your crucial duel is cancelled, leaving you without your stat-stealing advantage. Ver detalles
Vladimir

Por qué

This lane is a pure battle of attrition where Vladimir heals constantly with Transfusion while you shield with Indestructible. The entire matchup hinges on Sanguine Pool. A skilled Vladimir will use it to slip away from your Death's Grasp, or worse, activate it during the cast animation of Realm of Death. If he pools under your ultimate's cast, your crucial duel is cancelled, leaving you without your stat-stealing advantage.

Impacto en la línea

Because Vladimir has no resources, he will try to poke you down with Transfusion while you try to crash waves. If you blindly push with Obliterate, he will freeze near his turret, scaling safely through Crimson Pact. You must keep the wave in the middle of the lane. Letting him push allows you to threaten him with Death's Grasp, but pushing him under tower lets him safely regenerate health.

Cómo jugar

Never initiate a trade with Death's Grasp while Sanguine Pool is off cooldown. Instead, walk forward and trigger Darkness Rise using basic attacks and isolated Obliterate strikes. Force him to waste his pool to escape your passive aura's burn. The moment he resurfaces, you have a twenty-second window where he is incredibly vulnerable. That is your cue to immediately pull him in and activate Realm of Death to secure the kill.

Ficha completa →
Irelia

Irelia±0

spacingultimate interaction This lane is a pure skill check determined by mobility versus raw power. Irelia relies on stacking Ionian Fervor and baiting your abilities. The duel hinges on whether she can use Bladesurge to dash through minions or yourself to dodge Obliterate. If she successfully evades this heavy slam, especially once isolated inside Realm of Death, her sustained physical damage will overwhelm your shield from Indestructible. Ver detalles
Irelia

Por qué

This lane is a pure skill check determined by mobility versus raw power. Irelia relies on stacking Ionian Fervor and baiting your abilities. The duel hinges on whether she can use Bladesurge to dash through minions or yourself to dodge Obliterate. If she successfully evades this heavy slam, especially once isolated inside Realm of Death, her sustained physical damage will overwhelm your shield from Indestructible.

Impacto en la línea

Wave position dictates who holds the threat. When Irelia has low-health minions to reset Bladesurge, she can easily bait Death's Grasp and reposition. If you miss your pull, she will instantly stack Ionian Fervor and force heavy trades. This constant threat prevents you from blindly pushing, as a frozen wave near her turret allows her to chase you down the long lane with Vanguard's Edge.

Cómo jugar

Never cast Obliterate proactively when Irelia has active marks or low-health minions nearby to dash to. Instead, hold your slam and use basic attacks to trigger Darkness Rise. When you pull her with Death's Grasp, anticipate her immediate Bladesurge response behind you; aim your slam backward or wait for her to lock herself into the Defiant Dance channel. If she misses Flawless Duet, that is your window to cast Realm of Death and fight her without her maximum burst.

Ficha completa →
Urgot

Urgot±0

shield timingspacing This matchup is a true test of reaction times, centered entirely on how you manage your shield against his ultimate. Urgot relies on grinding down your health bar with Purge and passive shotgun knees to drag you into execution range. However, Mordekaiser can completely shut down this execute by activating Indestructible right before falling below the threshold of Fear Beyond Death, absorbing the lethal damage and swinging the duel. Ver detalles
Urgot

Por qué

This matchup is a true test of reaction times, centered entirely on how you manage your shield against his ultimate. Urgot relies on grinding down your health bar with Purge and passive shotgun knees to drag you into execution range. However, Mordekaiser can completely shut down this execute by activating Indestructible right before falling below the threshold of Fear Beyond Death, absorbing the lethal damage and swinging the duel.

Impacto en la línea

Laning revolves around baiting and dodging Urgot's dash. If he lands Disdain, his rapid-fire Purge will quickly stack up damage. You must space yourself to avoid this flip while fishing with Obliterate to poke him down. When his dash is wasted, you gain immediate lane priority, allowing you to force him under tower or freeze the wave to deny him gold.

Cómo jugar

Always hold your Indestructible specifically for when Urgot fires Fear Beyond Death. Do not waste your shield early in the trade for minor poke. Position yourself on the opposite side of his passive legs to minimize incoming damage from Echoing Flames. If he manages to catch you with Disdain, immediately cast Realm of Death to steal his defensive stats, reducing his damage output and buying you time to regenerate your shield.

Ficha completa →

Otros emparejamientos

Favorables

27

Estos campeones suelen tener problemas para responder a tus principales fortalezas, lo que te permite afrontar el enfrentamiento con más libertad. Normalmente tienes varias formas de presionarlos y forzar intercambios a tu favor. Aprovecha esta ventaja para imponer tu ritmo en lugar de darles tiempo para volver a una posición cómoda.

Garen

Garen−1

magic defenseextended trades You hold a distinct advantage because Garen relies on short trades with Decisive Strike and Judgment, while your passive Darkness Rise excels in extended duels. The match hinges on how he uses Courage. Inside your Realm of Death, Garen is forced to hold Courage to block your isolated Obliterate strikes. If he wastes his shield early, your raw magic damage easily overcomes his natural tankiness. Ver detalles
Garen

Por qué

You hold a distinct advantage because Garen relies on short trades with Decisive Strike and Judgment, while your passive Darkness Rise excels in extended duels. The match hinges on how he uses Courage. Inside your Realm of Death, Garen is forced to hold Courage to block your isolated Obliterate strikes. If he wastes his shield early, your raw magic damage easily overcomes his natural tankiness.

Impacto en la línea

Garen will try to neutralize your pressure by using Perseverance to heal up between waves. You must actively disrupt this by landing Obliterate to keep his passive offline. Because Garen lacks dash tools, a successful Death's Grasp guarantees an extended trade where your passive burns him down, forcing him to play defensively under tower or risk dying to Demacian Justice counters with Indestructible.

Cómo jugar

Pivot your build path toward early magic penetration to bypass his magic resistance. In combat, never cast Realm of Death while Garen still has Courage available, or use your isolated Obliterate first to bait his shield before trapping him. If he attempts to execute you with Demacian Justice, time your Indestructible at the absolute last microsecond to convert your stored damage into a massive shield that completely absorbs his ultimate's true damage.

Ficha completa →
Gragas

Gragas−1

disengagemagic damage You hold the upper hand because your sustained damage from Darkness Rise easily overrides Gragas's hit-and-run pattern. In a straight duel, your raw stats win. However, Gragas's main defense is using Explosive Cask to knock you back inside your Realm of Death. If he manages to blast you away, he successfully stalls out the entire duration of your ultimate, neutralizing your greatest threat. Ver detalles
Gragas

Por qué

You hold the upper hand because your sustained damage from Darkness Rise easily overrides Gragas's hit-and-run pattern. In a straight duel, your raw stats win. However, Gragas's main defense is using Explosive Cask to knock you back inside your Realm of Death. If he manages to blast you away, he successfully stalls out the entire duration of your ultimate, neutralizing your greatest threat.

Impacto en la línea

During the laning phase, Gragas will constantly use Barrel Roll to clear waves from afar and Body Slam to escape your pulls. Since you have the advantage, you can easily shove him under turret. Watch his mana bar closely. If he uses Drunken Rage to farm under pressure, his damage reduction is gone, creating a massive opening where you can force him out of lane.

Cómo jugar

To secure the kill, never cast Realm of Death while Gragas has both his displacement tools available. Wait for him to initiate with Body Slam, then pull him back with Death's Grasp as he tries to retreat. If you must ultimate him, position yourself so his Explosive Cask knocks you against a wall rather than away from him. Keep your Indestructible ready to absorb his burst if he tries to turn the fight.

Ficha completa →
Graves

Graves−1

ap threatspacing Graves relies on Quickdraw to stack armor against physical damage, which is useless against your magic output. He wants to kite you in open space, but your Death's Grasp drags him into melee range. Once you lock him down with Realm of Death, his mobility is completely neutralized. He cannot use the terrain to slip away, forcing a pure stat-check duel that your passive Darkness Rise easily wins. Ver detalles
Graves

Por qué

Graves relies on Quickdraw to stack armor against physical damage, which is useless against your magic output. He wants to kite you in open space, but your Death's Grasp drags him into melee range. Once you lock him down with Realm of Death, his mobility is completely neutralized. He cannot use the terrain to slip away, forcing a pure stat-check duel that your passive Darkness Rise easily wins.

Impacto en la línea

This matchup strips Graves of his usual lane dominance. He cannot use End of the Line to push safely, as standing near walls to rebound the shell makes him an easy target for Death's Grasp. You dictate the wave's position. By threatening your ultimate, you force him to play incredibly passively, preventing him from utilizing New Destiny to clear waves, which leaves his turret exposed to constant pressure.

Cómo jugar

To secure this advantage, never initiate with Death's Grasp. Instead, walk forward and threaten him with Obliterate. Force him to burn Quickdraw to dodge your smash, then immediately pull him back with Death's Grasp. If he drops Smoke Screen to blind you, step out of the cloud immediately before activating Realm of Death. Once inside your ultimate, delay your Indestructible shield until his Collateral Damage is fired to absorb his final burst.

Ficha completa →
Kayle

Kayle−1

dodge skillssurvival You hold a massive raw stat advantage early on, as your Darkness Rise aura easily outdamages Kayle before she fully unlocks Divine Ascent. However, this matchup centers on a critical ultimate interaction: once you trap her in Realm of Death, a skilled Kayle will hold Divine Judgment specifically to react to and block your isolated Obliterate, stalling out your ultimate's duration and denying you the quick kill. Ver detalles
Kayle

Por qué

You hold a massive raw stat advantage early on, as your Darkness Rise aura easily outdamages Kayle before she fully unlocks Divine Ascent. However, this matchup centers on a critical ultimate interaction: once you trap her in Realm of Death, a skilled Kayle will hold Divine Judgment specifically to react to and block your isolated Obliterate, stalling out your ultimate's duration and denying you the quick kill.

Impacto en la línea

This dynamic allows you to dictate the wave's positioning, freezing her out or shoving her under turret with impunity. Kayle is forced to play defensively, using Radiant Blast to farm from afar and Celestial Blessing to escape your engages. While you easily secure priority, failing to respect her ultimate under tower will result in a disastrous failed dive where she stalls you out.

Cómo jugar

To secure the kill, position yourself ahead of her wave to deny her experience, and bait out Celestial Blessing before casting Death's Grasp. When you drag her into Realm of Death, do not immediately cast Obliterate. Instead, walk her down with your Darkness Rise aura active to force her into a panic Divine Judgment. Only strike with your isolated slam once her golden shield of invulnerability fades, ensuring your highest damage source connects.

Ficha completa →
Jax

Jax−1

magic defensespacing Mordekaiser dominates this matchup because Jax's primary defensive tool, Counter Strike, only evades basic attacks. It does absolutely nothing to mitigate the heavy area-of-effect damage from Obliterate or the continuous burn of Darkness Rise. Consequently, Jax cannot simply stand his ground during trades; he is forced to waste Leap Strike defensively to dodge your spells rather than using it to initiate favorable skirmishes. Ver detalles
Jax

Por qué

Mordekaiser dominates this matchup because Jax's primary defensive tool, Counter Strike, only evades basic attacks. It does absolutely nothing to mitigate the heavy area-of-effect damage from Obliterate or the continuous burn of Darkness Rise. Consequently, Jax cannot simply stand his ground during trades; he is forced to waste Leap Strike defensively to dodge your spells rather than using it to initiate favorable skirmishes.

Impacto en la línea

This dynamic allows you to control the wave from the very first levels. Since Jax cannot safely contest your area damage, you can easily slow-push waves and trap him under his turret. Every time he attempts to last-hit, you can punish him with Obliterate. This constant pressure chip-damages his health bar, denies him gold, and secures you early plate gold without fearing his counter-engage.

Cómo jugar

Position yourself aggressively near his caster minions to bait his Leap Strike. Never lead with Death's Grasp; instead, save this pull to drag Jax back into your Darkness Rise aura once he tries to leap away. If he activates Counter Strike to stun you, activate Indestructible to absorb the burst, then immediately retaliate with an isolated Obliterate once his evasion ends. In Realm of Death, fight him near the boundary to limit his leap targets.

Ficha completa →
Nasus

Nasus−1

zone controlearly pressure Mordekaiser completely dominates this matchup by exploiting Nasus's weak early game and reliance on stacking Siphoning Strike. Every time Nasus walks forward to secure a minion, he is entirely vulnerable to Death's Grasp. Pulling him in allows you to trigger Darkness Rise immediately with an isolated Obliterate, forcing heavy trades that his passive Soul Eater cannot sustain against your magic damage. Ver detalles
Nasus

Por qué

Mordekaiser completely dominates this matchup by exploiting Nasus's weak early game and reliance on stacking Siphoning Strike. Every time Nasus walks forward to secure a minion, he is entirely vulnerable to Death's Grasp. Pulling him in allows you to trigger Darkness Rise immediately with an isolated Obliterate, forcing heavy trades that his passive Soul Eater cannot sustain against your magic damage.

Impacto en la línea

This interaction grants you absolute authority over wave states. By freezing the minions near your turret, you force Nasus to walk deep into the lane, exposing him to lethal pull setups. Denying him stacks delays his power spike indefinitely, while your constant pressure chips away at his tower. Even if he uses Fury of the Sands to survive, your absolute control over the wave forces him into bad recall timings.

Cómo jugar

Stand directly inside his minion wave to zone him out. Hold Death's Grasp specifically for when he commits his animation to last-hit with Siphoning Strike. If he tries to slow you with Wither to escape, activate Indestructible to absorb any retaliatory damage while your passive damage ticks down. Should you miss your pull and find yourself pushed up, immediately fall back and wait for the wave to bounce, preserving your ultimate Realm of Death for when he attempts a desperate all-in under his own turret.

Ficha completa →
K'Santé

K'Santé−1

magic damageult interaction K'Santé's ultimate All Out is his own trap against you. When he sheds his defensive stats to gain offensive power, he becomes incredibly squishy inside your Realm of Death. Because your stolen stats from his base form persist, your passive Darkness Rise shreds his newly reduced magic resistance. He cannot sustain against your continuous area-of-effect damage once his tankiness evaporates. Ver detalles
K'Santé

Por qué

K'Santé's ultimate All Out is his own trap against you. When he sheds his defensive stats to gain offensive power, he becomes incredibly squishy inside your Realm of Death. Because your stolen stats from his base form persist, your passive Darkness Rise shreds his newly reduced magic resistance. He cannot sustain against your continuous area-of-effect damage once his tankiness evaporates.

Impacto en la línea

Early on, K'Santé uses Ntofo Strikes to contest waves, but you can easily out-shove him. Once you both reach level five, the lane pressure swings entirely in your favor. He cannot safely use Path Maker or Footwork to escape you because your Realm of Death neutralizes his mobility. He is forced to play defensively under tower, conceding wave control to avoid your deadly isolated Obliterate strikes.

Cómo jugar

Save your Death's Grasp to pull him back if he tries to dash away with Footwork. When trading, never activate Realm of Death until K'Santé commits to his own All Out first, or until you have fully stacked Darkness Rise on him. If he manages to stun you against a wall with his ultimate, immediately shield yourself with Indestructible to absorb his burst, then run him down with your passive's movement speed bonus.

Ficha completa →
Yasuo

Yasuo−1

shield bypassextended trades This matchup heavily favors you because Yasuo's defensive centerpiece, Wind Wall, is completely useless against your main tools. It cannot block the overhead smash of Obliterate, nor can it stop the burning magic damage from your Darkness Rise aura. Once you close the distance, Yasuo is stripped of his primary projectile-blocking utility, forcing him into a pure stat check that his squishier skirmisher profile cannot win. Ver detalles
Yasuo

Por qué

This matchup heavily favors you because Yasuo's defensive centerpiece, Wind Wall, is completely useless against your main tools. It cannot block the overhead smash of Obliterate, nor can it stop the burning magic damage from your Darkness Rise aura. Once you close the distance, Yasuo is stripped of his primary projectile-blocking utility, forcing him into a pure stat check that his squishier skirmisher profile cannot win.

Impacto en la línea

You dominate the wave dynamic since Yasuo cannot hide behind his wind barrier to farm or trade safely. Every time he dashes forward with Sweeping Blade, he risks taking an unblockable Obliterate. This constant threat forces him to play defensively, giving you total control over the lane's push. You can easily chip away at his tower while keeping him trapped under his turret, starving his gold income.

Cómo jugar

Pop his Way of the Wanderer shield with a simple basic attack or the edge of Obliterate before committing to a fight. Wait until he discharges his Steel Tempest tornado, then immediately cast Death's Grasp to pull him in. Once you lock him down, trigger Darkness Rise to burn through his health. If he manages to knock you up, activate Indestructible to absorb Last Breath's burst, and use Realm of Death to isolate him away from minions so he cannot dash.

Ficha completa →
Renekton

Renekton−1

shield timingextended trades This matchup hinges on neutralizing Renekton's burst rotation. The crocodile wants to dash in with *Slice and Dice*, execute an empowered *Ruthless Predator* stun, and retreat. By saving *Indestructible* to absorb the exact moment he unleashes his stun, you negate his entire trading pressure. Once his main burst is spent on your shield, his long cooldowns leave him completely defenseless against your *Darkness Rise* aura in an extended chase. Ver detalles
Renekton

Por qué

This matchup hinges on neutralizing Renekton's burst rotation. The crocodile wants to dash in with *Slice and Dice*, execute an empowered *Ruthless Predator* stun, and retreat. By saving *Indestructible* to absorb the exact moment he unleashes his stun, you negate his entire trading pressure. Once his main burst is spent on your shield, his long cooldowns leave him completely defenseless against your *Darkness Rise* aura in an extended chase.

Impacto en la línea

Because you can consistently negate his burst, Renekton is forced to play defensively. He cannot easily stack *Reign of Anger* on the minion wave without risking a deadly pull from your *Death's Grasp*. This gives you total control over the wave state. You can easily set up slow pushes, crash huge waves under his turret, and harass him with isolated *Obliterate* strikes while he struggles under pressure.

Cómo jugar

Never preemptively waste your *Indestructible* shield for minor poke; save its massive barrier specifically for when Renekton's blades glow with *Ruthless Predator*. When he dashes forward with *Slice and Dice*, stand your ground. As he tries to retreat after his combo, pull him back with *Death's Grasp* to trigger *Darkness Rise* and run him down. If he activates *Dominus* to survive, immediately counter with *Realm of Death* to steal his amplified health.

Ficha completa →
Ornn

Ornn−1

ultimate timingstat steal Mordekaiser naturally dominates this matchup because *Darkness Rise* shreds Ornn's health pool during extended trades. However, Ornn can completely negate your primary engage tools. The entire lane hinges on *Bellows Breath*. Its temporary unstoppable status allows the tank to shrug off the pull from *Death's Grasp* or, worse, completely cancel the channel of *Realm of Death* if timed perfectly, wasting your ultimate. Ver detalles
Ornn

Por qué

Mordekaiser naturally dominates this matchup because *Darkness Rise* shreds Ornn's health pool during extended trades. However, Ornn can completely negate your primary engage tools. The entire lane hinges on *Bellows Breath*. Its temporary unstoppable status allows the tank to shrug off the pull from *Death's Grasp* or, worse, completely cancel the channel of *Realm of Death* if timed perfectly, wasting your ultimate.

Impacto en la línea

Ornn will try to farm safely, using *Volcanic Rupture* to poke and *Searing Charge* to escape. Because your passive damage zone beats his melee threat, you can easily shove him under turret. However, if you blindly throw out *Death's Grasp*, he will react with his fire breath, trade back with Brittle procs, and safely disengage. This forces you to play a patient zoning game rather than forcing mindless fights.

Cómo jugar

Walk up and force trades with *Obliterate* and basic attacks to trigger *Darkness Rise* without using your pull. Save *Death's Grasp* for when Ornn attempts to flee with *Searing Charge*, or right after his *Bellows Breath* ends. If you intend to cast *Realm of Death*, wait out the fire breath completely; otherwise, his unstoppable frame will eat your ultimate. Keep *Indestructible* ready to absorb his *Call of the Forge God* burst.

Ficha completa →
Wukong

Wukong−1

stealth counteraoe damage This matchup heavily favors you because of how your passive interacts with his stealth. Once you trigger Darkness Rise by landing your abilities, the persistent damage aura constantly ticks around you. This aura continuously damages and reveals the true Wukong's position even after he casts Warrior Trickster to slip away. His clone fails to deceive you, turning his main defensive tool into a wasted cooldown. Ver detalles
Wukong

Por qué

This matchup heavily favors you because of how your passive interacts with his stealth. Once you trigger Darkness Rise by landing your abilities, the persistent damage aura constantly ticks around you. This aura continuously damages and reveals the true Wukong's position even after he casts Warrior Trickster to slip away. His clone fails to deceive you, turning his main defensive tool into a wasted cooldown.

Impacto en la línea

Wukong cannot survive extended trades against your raw magic damage. Whenever he initiates with Nimbus Strike and Golden Staff, his quick-burst combo falls short. Because your aura negates his escape, he is forced to play defensively near his turret. You can easily establish permanent wave priority, deny him gold, and pressure his tower while keeping him too low to assist his jungler.

Cómo jugar

Stand directly inside your minion wave to bait his Nimbus Strike engage. Always hold Death's Grasp instead of throwing it early; use it to drag him back once his Warrior Trickster clone appears and your aura reveals his true path. When he commits with Cyclone, mitigate the knock-up damage using Indestructible, then immediately cast Realm of Death to steal his stats, neutralize his passive armor, and crush him in the isolation.

Ficha completa →
Heimerdinger

Heimerdinger−2

ultimate threatdisengagement Heimerdinger's entire lane presence relies on the defensive zone created by his H-28G Evolution Turret setups. However, Mordekaiser possesses the ultimate counter-measure: Realm of Death. When cast, this ultimate pulls Heimerdinger into a pocket dimension, leaving all his pre-placed H-28G Evolution Turret structures behind on the normal Rift. Deprived of his mechanical artillery, the fragile inventor is left completely defenseless against your raw physical power. Ver detalles
Heimerdinger

Por qué

Heimerdinger's entire lane presence relies on the defensive zone created by his H-28G Evolution Turret setups. However, Mordekaiser possesses the ultimate counter-measure: Realm of Death. When cast, this ultimate pulls Heimerdinger into a pocket dimension, leaving all his pre-placed H-28G Evolution Turret structures behind on the normal Rift. Deprived of his mechanical artillery, the fragile inventor is left completely defenseless against your raw physical power.

Impacto en la línea

Before you unlock your ultimate, Heimerdinger will aggressively push the wave and try to poke you under tower. Once you have access to Realm of Death, the dynamic shifts dramatically. He can no longer safely siege your tower or contest the wave. If he attempts to deploy a massive turret using UPGRADE!!!, you can simply isolate him away from it, neutralizing his massive ultimate investment entirely.

Cómo jugar

During the early levels, focus on preserving your health bar. Stand behind your own minions to minimize damage from rockets, and save Indestructible to absorb any unavoidable poke. Dodge the slow-moving CH-2 Electron Storm Grenade first, then walk forward. Once in range, pull him with Death's Grasp and immediately cast Realm of Death. Inside, activate Darkness Rise and crush him, ensuring you never cast your ultimate while stunned.

Ficha completa →
Jarvan IV

Jarvan IV−2

ap juggernautultimate interaction Mordekaiser completely neutralizes Jarvan IV's ultimate threat through a direct mechanical counter. When the Demacian prince attempts to lock you down using Cataclysm, you can instantly respond with Realm of Death. This completely bypasses his terrain, steals his base tank stats, and traps him inside your own arena. Because his kit relies heavily on the Demacian Standard and Dragon Strike combo for mobility, he cannot escape your Darkness Rise aura once isolated. Ver detalles
Jarvan IV

Por qué

Mordekaiser completely neutralizes Jarvan IV's ultimate threat through a direct mechanical counter. When the Demacian prince attempts to lock you down using Cataclysm, you can instantly respond with Realm of Death. This completely bypasses his terrain, steals his base tank stats, and traps him inside your own arena. Because his kit relies heavily on the Demacian Standard and Dragon Strike combo for mobility, he cannot escape your Darkness Rise aura once isolated.

Impacto en la línea

This matchup forces Jarvan IV into a highly defensive posture once ultimates are online, stripping away his ability to contest waves. Knowing that Cataclysm is a death sentence for him, he must play passively, meaning you can freely shove waves with Obliterate and chip his tower. His trades relying on Martial Cadence and Golden Aegis fail to pierce your Indestructible shield, allowing you to dominate the top lane pocket and pull him into bad recall timings.

Cómo jugar

Never initiate with Realm of Death; instead, hold it specifically to react to his Cataclysm. Walk up aggressively to bait his Demacian Standard and Dragon Strike knockup, using Death's Grasp to pull him back if he tries to disengage. Once he commits his mobility tools and attempts to trap you, activate Indestructible to absorb his initial burst, then banish him. If he plays extremely safe, freeze the wave near your turret and deny him farm with threat of Obliterate.

Ficha completa →
Dr. Mundo

Dr. Mundo−2

ap shredrealm isolation Mordekaiser naturally dominates this duel because Realm of Death completely bypasses Dr. Mundo's high health pool defense by stealing a portion of his massive tank statistics. Inside this death dimension, Dr. Mundo is isolated from safety, and the raw stats stolen directly weaken his Maximum Dosage regeneration, which relies on his total health. This turn of attributes transforms Dr. Mundo's massive defensive scaling into Mordekaiser's own offensive power. Ver detalles
Dr. Mundo

Por qué

Mordekaiser naturally dominates this duel because Realm of Death completely bypasses Dr. Mundo's high health pool defense by stealing a portion of his massive tank statistics. Inside this death dimension, Dr. Mundo is isolated from safety, and the raw stats stolen directly weaken his Maximum Dosage regeneration, which relies on his total health. This turn of attributes transforms Dr. Mundo's massive defensive scaling into Mordekaiser's own offensive power.

Impacto en la línea

During the laning phase, Dr. Mundo cannot safely contest waves because Death's Grasp can pop his passive shield, Goes Where He Pleases, at the cost of his own health. Once that passive is on cooldown, Mordekaiser easily forces extended trades. Dr. Mundo is forced to farm from afar using Infected Bonesaw, giving Mordekaiser absolute control over wave positioning and allowing him to crash large waves to secure easy tower plates.

Cómo jugar

To secure this advantage, never initiate the fight with Realm of Death while Dr. Mundo's passive, Goes Where He Pleases, is active, as it will block your ultimate entirely. Instead, strip his CC shield using Death's Grasp first, then wait for him to activate Maximum Dosage before casting your ultimate. By delaying Realm of Death until he activates his healing, you steal his boosted health stats mid-fight, leaving him fragile and unable to regenerate enough health to survive your Darkness Rise aura.

Ficha completa →
Malphite

Malphite−2

magic damagedefensive play This matchup is heavily in your favor because Malphite's natural armor scaling is completely useless against your magic damage. Once you trigger Darkness Rise, the continuous area-of-effect magic damage shreds through his Granite Shield and melts his health bar. Furthermore, his main team-fighting utility is completely neutralized by Realm of Death, which isolates him in a duel where his armor-stacking kit cannot help him survive your relentless magic shred. Ver detalles
Malphite

Por qué

This matchup is heavily in your favor because Malphite's natural armor scaling is completely useless against your magic damage. Once you trigger Darkness Rise, the continuous area-of-effect magic damage shreds through his Granite Shield and melts his health bar. Furthermore, his main team-fighting utility is completely neutralized by Realm of Death, which isolates him in a duel where his armor-stacking kit cannot help him survive your relentless magic shred.

Impacto en la línea

You dictate the pace of the lane from the very first waves. Malphite's Seismic Shard poke is easily absorbed by your Indestructible shield, meaning he will deplete his mana pool before putting you in danger. By constantly pushing him under tower with Darkness Rise, you force him to use Thunderclap and Ground Slam just to farm, locking him to his lane and denying him any opportunity to roam or assist his jungler.

Cómo jugar

Maintain a safe spacing distance to react to his movement. When Malphite attempts to disengage using the speed stolen by Seismic Shard, pull him back into your range with Death's Grasp to prolong the trade. Always pop his Granite Shield with a simple basic attack before committing your Obliterate for maximum damage. Finally, hold Realm of Death until he initiates with Unstoppable Force; trapping him immediately after his ultimate lands completely negates his team's follow-up potential.

Ficha completa →
Pantheon

Pantheon−1

shield bypassoutscaling This matchup leans heavily in your favor because your passive Darkness Rise directly counters his primary defense. When Pantheon channels Aegis Assault to block your frontal damage, your swirling passive aura continues to burn him from all directions, completely ignoring his invulnerability. Since his damage mitigation fails against your persistent area-of-effect damage, you will easily win any sustained trade. Ver detalles
Pantheon

Por qué

This matchup leans heavily in your favor because your passive Darkness Rise directly counters his primary defense. When Pantheon channels Aegis Assault to block your frontal damage, your swirling passive aura continues to burn him from all directions, completely ignoring his invulnerability. Since his damage mitigation fails against your persistent area-of-effect damage, you will easily win any sustained trade.

Impacto en la línea

Pantheon cannot easily zone you or crash waves because his short burst combos leave him vulnerable. If he initiates with Shield Vault, your shield from Indestructible absorbs his initial burst. As he tries to disengage, his high cooldowns prevent him from fighting back, allowing you to freeze the wave or force him under tower where he must waste mana farming with Comet Spear.

Cómo jugar

When Pantheon walks up with Mortal Will fully charged, do not panic. Let him initiate with Shield Vault, then immediately activate Indestructible to negate the damage. Once his stun ends, pull him back with Death's Grasp and trigger Darkness Rise. Hold your Obliterate until his Aegis Assault ends, or step behind him to land it. If he attempts to escape using Grand Starfall, cast Realm of Death to trap him.

Ficha completa →
Maokai

Maokai−2

magic resistsurvival Maokai relies heavily on setting up zones with Sapling Toss and locking you down near brush. However, Mordekaiser completely negates this setup with Realm of Death. By dragging Maokai into the death dimension, you strip him of any pre-placed saplings and team support. Isolated in this arena, Maokai's low damage cannot match Mordekaiser's sustained DPS once Darkness Rise activates, melting his tanky health bar before he can escape. Ver detalles
Maokai

Por qué

Maokai relies heavily on setting up zones with Sapling Toss and locking you down near brush. However, Mordekaiser completely negates this setup with Realm of Death. By dragging Maokai into the death dimension, you strip him of any pre-placed saplings and team support. Isolated in this arena, Maokai's low damage cannot match Mordekaiser's sustained DPS once Darkness Rise activates, melting his tanky health bar before he can escape.

Impacto en la línea

Maokai's passive Sap Magic lets him sustain through short trades, but he cannot contest your wave clear once you start spamming Obliterate. Whenever Maokai tries to engage with Twisted Advance, he plays right into your hands. You can easily pull him back with Death's Grasp as he retreats, forcing him to waste his mana on Bramble Smash to disengage, which slowly bleeds his tower pressure and forces early recalls.

Cómo jugar

Start by building offensive magic penetration and damage items rather than defensive ones, leveraging your natural tankiness from Indestructible. During skirmishes, save Realm of Death until Maokai commits his Nature's Grasp or retreats toward a brush filled with Sapling Toss charges. Once inside the ultimate, use Death's Grasp to prevent him from kiting you, allowing Darkness Rise to shred his health. If he uses Bramble Smash to knock you back, immediately pop Indestructible to absorb the damage and walk him down.

Ficha completa →
Sion

Sion−2

cc interruptstat steal This matchup heavily favors you because you can completely shut down Sion's primary source of damage and waveclear. Whenever Sion begins channeling Decimating Smash, you can use Death's Grasp to pull him out of his stance, canceling the ability and wasting his cooldown. Without this tool, his tanky scaling via Glory in Death is slowed, and his Soul Furnace shield cannot absorb your sustained magic damage once Darkness Rise is active. Ver detalles
Sion

Por qué

This matchup heavily favors you because you can completely shut down Sion's primary source of damage and waveclear. Whenever Sion begins channeling Decimating Smash, you can use Death's Grasp to pull him out of his stance, canceling the ability and wasting his cooldown. Without this tool, his tanky scaling via Glory in Death is slowed, and his Soul Furnace shield cannot absorb your sustained magic damage once Darkness Rise is active.

Impacto en la línea

By constantly denying his main channel, you dictate the entire pace of the top lane. Sion is forced to choose between using Decimating Smash far back, which ruins his wave control, or risking a massive trade where you drag him in. This allows you to easily freeze the wave near your turret or crash large waves to dive him, heavily delaying his health stacking while you freely build up your own passive.

Cómo jugar

Never initiate a trade with Death's Grasp. Keep this ability ready as an reactive tool; only cast it the moment you see Sion charging his axe. If he tries to escape or engage with Unstoppable Onslaught, wait out his unstoppable state before pulling him, or immediately trap him inside your Realm of Death to steal his defensive stats. If you happen to miss your pull, immediately activate Indestructible to absorb his fully charged slam.

Ficha completa →
Shen

Shen−2

cc interruptglobal deny Mordekaiser dominates this matchup because Shen's global presence is entirely shut down by your crowd control. When Shen tries to save an ally with Stand United, you can cancel the channel using Death's Grasp or drag him away entirely with Realm of Death. Shen cannot match your raw magical DPS from Darkness Rise in a prolonged duel, and Spirit's Refuge does nothing against your spell damage. Ver detalles
Shen

Por qué

Mordekaiser dominates this matchup because Shen's global presence is entirely shut down by your crowd control. When Shen tries to save an ally with Stand United, you can cancel the channel using Death's Grasp or drag him away entirely with Realm of Death. Shen cannot match your raw magical DPS from Darkness Rise in a prolonged duel, and Spirit's Refuge does nothing against your spell damage.

Impacto en la línea

This interaction forces Shen to play defensively under his turret, fearing that any attempt to teleport across the map will leave him vulnerable. Mordekaiser can constantly shove waves with Obliterate, creating massive tower pressure. If Shen attempts to use Stand United while visible, he risks losing massive chunks of health or being killed inside Realm of Death, effectively trapping him in the top lane and denying his team global support.

Cómo jugar

To execute this, always hold Death's Grasp specifically for when Shen begins channeling Stand United. Do not waste this pull on random trades unless you know his ultimate is on cooldown. When Shen retreats towards his tower to teleport safely, immediately follow him to maintain vision. If Death's Grasp is unavailable, use Realm of Death to isolate him, which instantly cancels his teleport and forces him into a duel he cannot win.

Ficha completa →

Otros emparejamientos

Items to Counter Mordekaiser

Buy these items to reduce this champion's effectiveness in your games.

Mercury's Treads
Mercury's Treads
Quicksilver Enchant
Quicksilver Enchant
Stasis Enchant
Stasis Enchant
Maw of Malmortius
Maw of Malmortius
Serpent's Fang
Serpent's Fang

Cómo contrarrestar a este campeón

Ángulo de contra

Entender los counters de Mordekaiser no consiste solo en listar campeones que le ganan, sino en identificar perfiles que rompen su patrón de juego principal: peleas prolongadas en espacios cerrados. Mordekaiser quiere mantenerse a rango, activar su pasiva y forzar duelos aislados con su ultimate. Los counters eficaces rompen esta lógica evitando el contacto, ganando duelos tempranos o neutralizando su ultimate. Esta página explica estas dinámicas para permitir una adaptación real en la partida.

Contexto del parche

Los counters de Mordekaiser en este parche aprovechan principalmente su baja movilidad y su dependencia del contacto. Los campeones que pueden hacer kite, esquivar su E o reducir el tiempo de actividad de su aura disminuyen drásticamente su impacto. Además, aquellos que ganan duelos puros o pueden escapar de su ultimate lo vuelven ineficaz incluso cuando hace engage correctamente. El problema no es su daño, sino su incapacidad para aplicarlo en estos contextos.

Lectura rápida

  • Los campeones móviles reducen su tiempo de contacto.
  • Los duelistas fuertes pueden ganar incluso dentro de su R.
  • Las herramientas anti-ultimate reducen drásticamente su valor.

Arquetipos de contra

Duelistas dominantes

Estos campeones no temen al 1v1 forzado de Mordekaiser. Incluso dentro de Realm of Death, pueden superar o hacer outscale en el duelo mediante mecánicas defensivas o sustain. Fiora, por ejemplo, puede castigar sus animaciones e ignorar su presión bruta. Para Mordekaiser, su supuesta ventaja —aislar la pelea— se vuelve ineficaz o incluso peligrosa.

Cómo se adapta el campeón. Evita forzar la R temprano. Espera a tener ventaja de objetos o usa la ultimate en otro objetivo en las teamfights.

Kite y poke constante

Estos campeones evitan que Mordekaiser mantenga activa su pasiva. Al mantenerse fuera de rango o ralentizarlo constantemente, rompen su ciclo de daño. Sin un contacto prolongado, su build de Riftmaker y Demonic pierde un valor significativo. Incluso con Rylai’s, puede seguir siendo demasiado lento para alcanzarlos eficazmente.

Cómo se adapta el campeón. Busca peleas en espacios cerrados y confía en el flash o en el engage aliado para forzar el contacto.

Presión agresiva en el early game

Estos campeones castigan a Mordekaiser antes de que alcance sus power spikes clave. Ganan trades cortos, fuerzan recalls y retrasan su power spike de nivel 5. Al mantenerlo por detrás, evitan su transición al mid game, donde se vuelve verdaderamente peligroso.

Cómo se adapta el campeón. Juega defensivo al principio, acepta perder CS y espera a tus picos de objetos para remontar.

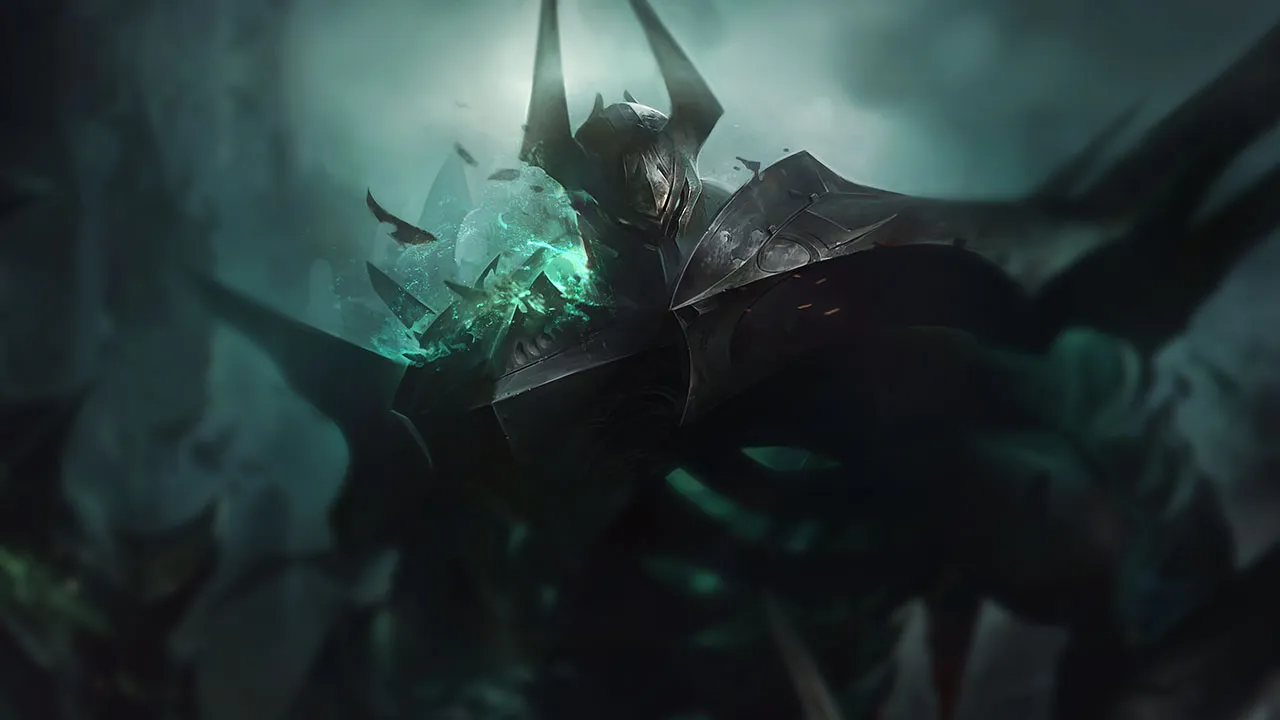
Emparejamientos prioritarios

Fiora

Fiora es uno de los peores matchups de Mordekaiser porque convierte su ventaja en una debilidad. Su R no es una amenaza para ella, sino una oportunidad. Ella puede esquivar su Q, castigar sus timings y ganarle incluso en peleas prolongadas. Mordekaiser debe evitar trades innecesarios y jugar alrededor de su equipo.

Vayne

Vayne neutraliza por completo a Mordekaiser al reducir su tiempo de contacto a cero. Incluso en las teamfights, puede hacerle kite indefinidamente. Su R se vuelve difícil de usar, ya que ella simplemente puede sobrevivir o reposicionarse. El matchup se convierte en un problema estructural más que en un duelo.

Errores comunes en su contra

Errores comunes en su contra

  • Subestimar la importancia del contacto constante.
  • Forzar la R en un mal matchup.
  • Ignorar el kite enemigo.
  • Posicionar mal la E.
  • Tomar trades cortos innecesarios.

Notas del coach

  • Si no puedes alcanzar al objetivo, no puedes ganar la pelea.
  • Tu R no compensa un mal matchup.

FAQ

¿Por qué Fiora es tan fuerte contra Mordekaiser?

Fiora gana el duelo puro incluso dentro de Realm of Death. Puede esquivar habilidades clave, castigar sus animaciones y tener sustain en intercambios largos. El problema es que Mordekaiser no puede aprovechar su ventaja de aislamiento contra ella.

¿Cómo se juega contra campeones de kite?

Necesitas forzar peleas en zonas estrechas o usar herramientas como Flash o el engage aliado para recortar la distancia. Sin eso, Mordekaiser pierde de forma natural contra estos perfiles, ya que no puede mantener activa su pasiva.

¿Es su R suficiente para ganar un matchup?

No. Contra ciertos campeones, su R se vuelve ineficaz porque pueden ganar el duelo o escapar. Debes considerar el matchup en general, no solo la definitiva.


¿Cuál es su mayor counter en teamfights?

Las composiciones móviles que pueden hacer kite y disengage son sus mayores counters. Evitan que Mordekaiser juegue su partida y reducen su impacto general incluso si usa su definitiva correctamente.