










































































septiembre de 2026 · Patch 7.2d
Tank · TOP · JUNGLE · SUPPORT

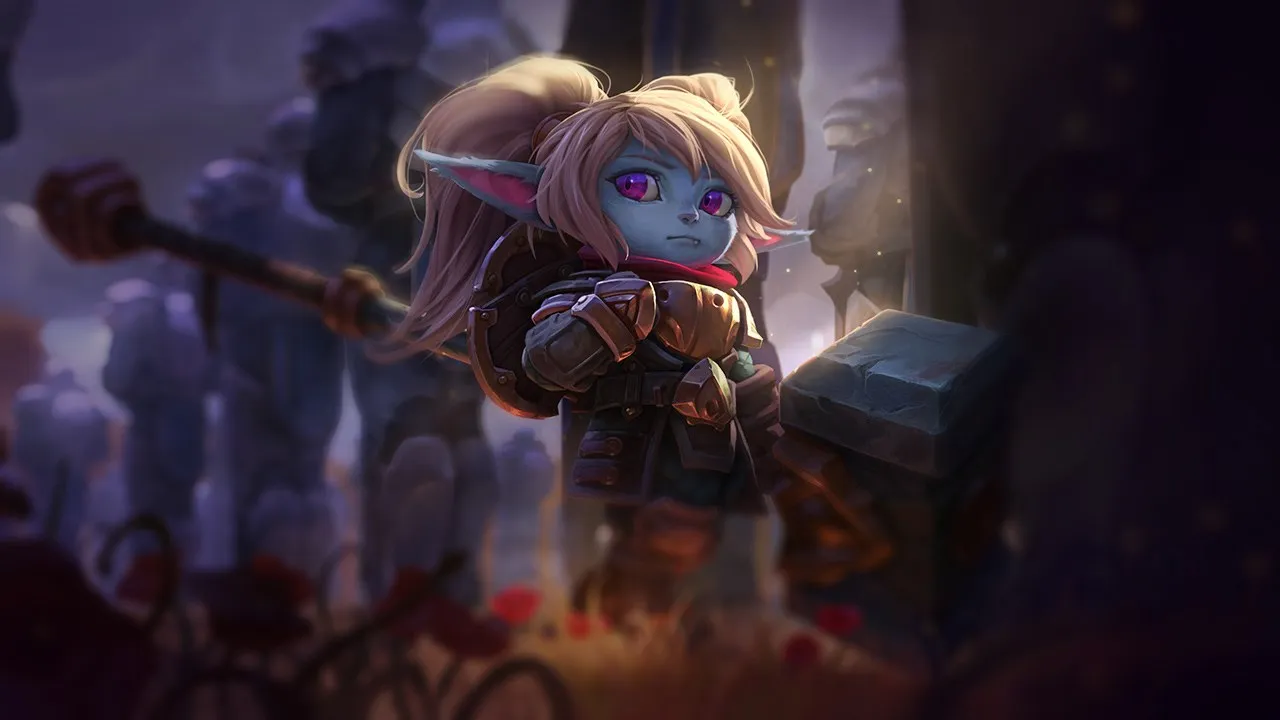
Guía de counters de Poppy Wild Rift

Poppy pierde utilidad contra composiciones que no dependen de dashes para iniciar combates. Los campeones de poke de largo alcance o con CC a distancia la obligan a mantenerse pasiva. Las composiciones de daño mágico sostenido ignoran su acumulación de armadura.

★ TOP · JUNGLE · SUPPORT Tier S
DAÑO
UTIL
TANK
DIFF
Win 50.5% #47 · ↑7pt
Pick 2.3% #24
Ban 0.4% #111

Guía de counters de Poppy Wild Rift ★ Counter Sheet

Tabla de emparejamientos
Emparejamiento Veredicto Ventaja Tasa de victorias Tasa de selección
Olaf Contras Difíciles +2 51.7% 1.1%
Gwen Contras Difíciles +2 51.3% 3.2%
Mordekaiser Contras Difíciles +2 51.2% 12.3%
Dr. Mundo Contras Difíciles +2 50.6% 5.8%
Darius Contras Difíciles +2 50.0% 15.8%
Heimerdinger Contras Difíciles +2
Ryze Contras Difíciles +2
Volibear Desfavorables +1 51.0% 6.7%
Teemo Desfavorables +1 50.4% 3.1%
Sett Desfavorables +1 49.6% 11.2%
Rumble Desfavorables +1 49.1% 2.2%
Nasus Desfavorables +1 48.6% 6.0%
Vladimir Desfavorables +1 48.2% 1.1%
Swain Desfavorables +1
Vayne Matchups de Habilidad ±0 53.4% 2.1%
Singed Matchups de Habilidad ±0 51.3% 1.5%
Kayle Matchups de Habilidad ±0 51.0% 1.8%
Ornn Matchups de Habilidad ±0 51.0% 1.9%
Cho'Gath Matchups de Habilidad ±0 50.8% 12.5%
Kennen Matchups de Habilidad ±0 50.1% 1.4%
Sion Matchups de Habilidad ±0 50.0% 4.1%
Garen Matchups de Habilidad ±0 49.7% 14.9%
Gragas Matchups de Habilidad ±0
Gnar Favorables −1 51.1% 3.5%
Aatrox Favorables −1 49.4% 6.1%
Jayce Favorables −1 48.0% 2.6%
Fiora Favorables −1 47.7% 4.9%
Graves Favorables −1
Maokai Favorables −1
Warwick Favorables −1
Yone Favorables −2 51.8% 6.9%
Jax Favorables −2 51.7% 3.8%
Wukong Favorables −2 51.5% 2.2%
Irelia Favorables −2 50.6% 1.9%
Camille Favorables −2 49.8% 3.4%
Tryndamere Favorables −2 49.6% 2.1%
Urgot Favorables −2 49.3% 3.8%
K'Santé Favorables −2 48.8% 5.9%
Renekton Favorables −2 48.5% 4.1%
Skarner Favorables −2 47.8% 1.4%
Yasuo Favorables −2 46.4% 2.9%
Akali Favorables −2
Jarvan IV Favorables −2
Pantheon Favorables −2
Ambessa Favorables −3 49.0% 1.9%
Riven Favorables −3 46.7% 1.2%
Kalista Favorables −3
Rengar Favorables −3

Edge: Wild Rift Core canonical verdict (−3 to +3), shown from the point of view of the champion named in the row. Win rate and pick rate: the opponent's own rate in this role — Wild Rift CN · Challenger, Patch 7.2d. Not a head-to-head win rate.

Contras Difíciles

7

Estos campeones tienen una build y un estilo de juego que superan directamente al tuyo, lo que puede hacer que controlar la línea y farmear sea extremadamente difícil. Sus habilidades pueden neutralizar tus principales fortalezas o castigarte en cuanto intentas jugar tu plan habitual. En estos matchups, el objetivo suele ser minimizar errores y buscar soluciones fuera del enfrentamiento directo.

Olaf

Olaf+2

anti tankanti cc Poppy relies heavily on locking down targets against walls or peeling with her ultimate, but Olaf completely shuts this down. Once Olaf activates Ragnarok, he becomes entirely immune to crowd control, meaning your Heroic Charge cannot stun him and Keeper's Verdict fails to knock him back. Combined with his Undertow slowing you repeatedly, your defensive tools are nullified, leaving you defenseless against his raw true damage. Ver detalles
Olaf

Por qué

Poppy relies heavily on locking down targets against walls or peeling with her ultimate, but Olaf completely shuts this down. Once Olaf activates Ragnarok, he becomes entirely immune to crowd control, meaning your Heroic Charge cannot stun him and Keeper's Verdict fails to knock him back. Combined with his Undertow slowing you repeatedly, your defensive tools are nullified, leaving you defenseless against his raw true damage.

Impacto en la línea

This immunity transforms the lane into a constant zone of danger where you cannot safely contest waves. If you step up to farm, Olaf can fish for an Undertow slow and run you down with Reckless Swing. Since you cannot peel him off with Keeper's Verdict after level six, any extended trade results in your death, forcing you to bleed gold under tower while he freely pressures your plate armor.

Cómo jugar

To survive, your primary positioning rule is to hug your turret and use Iron Ambassador from maximum range to secure minions. Keep Steadfast Presence ready solely for the passive armor boost when low on health, rather than trying to block non-existent dashes. If Olaf freezes the wave or dives you with Ragnarok active, do not fight back; instead, use the movement speed from Steadfast Presence to run behind your tower and wait out his ultimate's duration.

Ficha completa →

Otros emparejamientos

Desfavorables

7

Estos campeones tienen herramientas que generalmente les dan ventaja en el enfrentamiento, sin llegar a hacer el matchup injugable. Pueden tener más alcance, mejor capacidad para aguantar tu ofensiva o más formas de responder a tus engagements. Tendrás que adaptar tu enfoque y elegir con cuidado los momentos en los que aceptas el combate.

Otros emparejamientos

Matchups de Habilidad

9

Estos enfrentamientos son sobre todo duelos de ejecución: ambos campeones tienen formas reales de tomar la ventaja. Esquivar una habilidad clave, anticipar bien un engagement o un simple error de posicionamiento puede inclinar el duelo hacia un lado. Conocer el matchup y reconocer las ventanas de acción correctas es especialmente importante aquí.

Kennen

Kennen±0

dash blockwall stun This matchup revolves entirely around how you handle Kennen's lightning-fast escape. While he tries to harass you with ranged attacks, his only safety net when overextending is Lightning Rush. By activating Steadfast Presence, you completely nullify his sprint, grounding him. This shutdown leaves him incredibly vulnerable to a swift Heroic Charge into the nearest wall, turning his main defensive tool into a death trap. Ver detalles
Kennen

Por qué

This matchup revolves entirely around how you handle Kennen's lightning-fast escape. While he tries to harass you with ranged attacks, his only safety net when overextending is Lightning Rush. By activating Steadfast Presence, you completely nullify his sprint, grounding him. This shutdown leaves him incredibly vulnerable to a swift Heroic Charge into the nearest wall, turning his main defensive tool into a death trap.

Impacto en la línea

Because of this threat, Kennen cannot freely use his range to freeze you out. If he steps close to the side alcoves or walls to land Thundering Shuriken, he risks getting pinned. You will give up some early minion gold under tower, but the moment the wave bounces, the threat of your block-into-stun combo forces him to retreat, preventing him from building a massive, uncontested farm lead.

Cómo jugar

Stand constantly between the minion wave and the river wall, baiting him to use Lightning Rush offensively or defensively. Never initiate with Heroic Charge unless his movement speed buff is already down, or you have activated Steadfast Presence to catch his dash mid-air. If he manages to poke you low with Electrical Surge passive stacks, use Iron Ambassador to grab a shield, absorb his burst, and safely disengage.

Ficha completa →
Vayne

Vayne±0

terrain interactionspacing This skill-reliant matchup revolves entirely around the interaction between your Steadfast Presence and Vayne's Tumble. Because your active aura grounds her and stops her short roll, Vayne is forced to play defensively and hold her mobility spell until your defensive shield dissipates. Without her quick repositioning tool, her reliance on Silver Bolts is severely hindered, allowing you to control the immediate space around you. Ver detalles
Vayne

Por qué

This skill-reliant matchup revolves entirely around the interaction between your Steadfast Presence and Vayne's Tumble. Because your active aura grounds her and stops her short roll, Vayne is forced to play defensively and hold her mobility spell until your defensive shield dissipates. Without her quick repositioning tool, her reliance on Silver Bolts is severely hindered, allowing you to control the immediate space around you.

Impacto en la línea

The lane becomes a psychological standoff near the walls. Vayne will try to bait out your defensive aura with basic attacks to safely trigger Silver Bolts. If you waste your anti-dash, she can freely space you down with Final Hour and Tumble. However, as long as you hold your grounding field, she must farm cautiously, preventing her from aggressively pushing you under tower or securing easy plates.

Cómo jugar

Never activate Steadfast Presence proactively; wait until Vayne actually initiates the animation of Tumble or attempts to escape a trade. Use the extra range from Iron Ambassador to secure minions from a safe distance and pick up the buckler shield to absorb her basic attacks. If she mispositions near the alcove or terrain, punish her immediately with Heroic Charge to wall-stun her, then use Hammer Shock to chunk her down before she can cast Condemn.

Ficha completa →
Singed

Singed±0

displacement clashpeel vs peel This even matchup centers on a common misunderstanding of Poppy's defensive tools. While Steadfast Presence is excellent at stopping mobile skirmishers, it is completely useless against Singed's Fling. Because Fling is a targeted displacement cast upon you rather than a dash performed by Singed, your protective barrier will not block it. This allows him to bypass your primary defensive utility and toss you directly into his Poison Trail. Ver detalles
Singed

Por qué

This even matchup centers on a common misunderstanding of Poppy's defensive tools. While Steadfast Presence is excellent at stopping mobile skirmishers, it is completely useless against Singed's Fling. Because Fling is a targeted displacement cast upon you rather than a dash performed by Singed, your protective barrier will not block it. This allows him to bypass your primary defensive utility and toss you directly into his Poison Trail.

Impacto en la línea

Since you cannot interrupt his engage, lane control dictates the pace. If Singed attempts to proxy or fast-shove with Poison Trail, you must respond by matching his clear using Hammer Shock. Allowing him to crash waves freely gives him easy recall windows or map rotations, while overextending to stop him opens you up to being flipped into a dangerous position far from your own tower.

Cómo jugar

To win trades, play around your passive Iron Ambassador to poke him down and secure a shield before he gets into Fling range. If he charges forward, do not waste Steadfast Presence; instead, use Heroic Charge on a minion to escape or pin him to a wall if he mispositions. If he activates Insanity Potion to run you down, use a quick cast of Keeper's Verdict to knock him airborne and disengage.

Ficha completa →

Otros emparejamientos

Favorables

25

Estos campeones suelen tener problemas para responder a tus principales fortalezas, lo que te permite afrontar el enfrentamiento con más libertad. Normalmente tienes varias formas de presionarlos y forzar intercambios a tu favor. Aprovecha esta ventaja para imponer tu ritmo en lugar de darles tiempo para volver a una posición cómoda.

Camille

Camille−2

disengagedefensive play Poppy hard-counters Camille because Steadfast Presence acts as an absolute wall against Camille's primary engagement tool, Hookshot. When Camille attempts to grapple off a wall to dive you, activating Steadfast Presence instantly interrupts her mid-air, grounding her and preventing her from triggering her attack speed buff. This leaves her stranded without an escape, turning her primary offensive tool into a self-inflicted stun trap right next to terrain. Ver detalles
Camille

Por qué

Poppy hard-counters Camille because Steadfast Presence acts as an absolute wall against Camille's primary engagement tool, Hookshot. When Camille attempts to grapple off a wall to dive you, activating Steadfast Presence instantly interrupts her mid-air, grounding her and preventing her from triggering her attack speed buff. This leaves her stranded without an escape, turning her primary offensive tool into a self-inflicted stun trap right next to terrain.

Impacto en la línea

This interaction completely strips Camille of her offensive initiative. She cannot safely use Tactical Sweep to poke or thin the wave without exposing herself to a sudden Heroic Charge. Since she cannot rely on Hookshot to escape, she is forced to concede wave control. You can safely freeze the wave near your turret, forcing her to step up into narrow corridors where any mistake results in a fatal wall-stun.

Cómo jugar

Never waste Steadfast Presence just for its movement speed; keep it strictly to react to her Hookshot. Position yourself close to the lane walls to bait her into grappling, then reactively activate your shield to knock her down. The moment she is grounded, immediately align your Heroic Charge to slam her into that same wall, following up with Hammer Shock. If she tries to trap you with The Hextech Ultimatum, simply use Keeper's Verdict to blow her out of her own zone.

Ficha completa →
Akali

Akali−2

anti mobilityspacing This matchup heavily favors you because your Steadfast Presence completely shuts down Akali's entire assassination toolkit. Whenever Akali attempts to reposition or engage using Shuriken Flip or her ultimate Perfect Execution, activating your protective barrier cancels her dash mid-air, grounding her and leaving her exposed. Without her high-speed mobility, her Assassin's Mark becomes extremely difficult to trigger, turning her into an easy target for your hammer. Ver detalles
Akali

Por qué

This matchup heavily favors you because your Steadfast Presence completely shuts down Akali's entire assassination toolkit. Whenever Akali attempts to reposition or engage using Shuriken Flip or her ultimate Perfect Execution, activating your protective barrier cancels her dash mid-air, grounding her and leaving her exposed. Without her high-speed mobility, her Assassin's Mark becomes extremely difficult to trigger, turning her into an easy target for your hammer.

Impacto en la línea

In the lane, this interaction strips Akali of her usual safety inside Twilight Shroud. Since she cannot safely use Shuriken Flip to escape your Heroic Charge, you can constantly threaten to pin her against the lane walls. She is forced to play passively under her turret, allowing you to secure easy health trades with Hammer Shock and slow down her level five power spike by denying her access to the minion wave.

Cómo jugar

To execute this perfectly, never waste Steadfast Presence proactively; hold it specifically for when she casts Shuriken Flip or initiates Perfect Execution. Position yourself near the alcove or river walls to bait her into using her dashes, then immediately pin her with Heroic Charge for a wall-stun. If she drops Twilight Shroud to hide, back away slightly and wait for the mist to dissipate before resuming your aggressive zoning with Iron Ambassador buckler tosses.

Ficha completa →
Irelia

Irelia−2

anti mobilitydefensive play You completely shut down Irelia's entire kit because Steadfast Presence directly counters her Bladesurge. Whenever she attempts to dash to a minion for a reset or onto you to stack Ionian Fervor, activating your aura interrupts her movement, grounds her, and prevents further mobility. Without her mobility, she cannot dodge Hammer Shock or escape a wall-stun from Heroic Charge, turning her main threat into a free trade for you. Ver detalles
Irelia

Por qué

You completely shut down Irelia's entire kit because Steadfast Presence directly counters her Bladesurge. Whenever she attempts to dash to a minion for a reset or onto you to stack Ionian Fervor, activating your aura interrupts her movement, grounds her, and prevents further mobility. Without her mobility, she cannot dodge Hammer Shock or escape a wall-stun from Heroic Charge, turning her main threat into a free trade for you.

Impacto en la línea

This shutdown dynamic lets you dictate the wave's position. By holding your defensive aura, you force Irelia to crash waves slowly, preventing her from easily setup-killing low-health minions. If she steps up to thin the wave with Bladesurge, you can crash her against the lane walls with Heroic Charge. She is forced to play under her turret, bleeding gold while you pressure her or deny her farm safely.

Cómo jugar

Position yourself deliberately near your own low-health caster minions. Hold Steadfast Presence specifically for when Irelia’s blades glow or when she steps up to execute a minion with Bladesurge. Never waste this ability offensively. If she misses her Flawless Duet, immediately walk up to trigger Iron Ambassador for a free shield, then use Hammer Shock to punish her retreat. If she catches you with Vanguard's Edge, cast Keeper's Verdict quickly to disengage her ultimate's zone.

Ficha completa →
Jarvan IV

Jarvan IV−2

tank matchupdash block Poppy completely neutralizes Jarvan IV's primary initiation. When Jarvan IV throws his Demacian Standard and attempts to slide to it using Dragon Strike, you can activate Steadfast Presence. This immediately interrupts his dash mid-flight, leaving him grounded, damaged, and entirely stripped of his mobility. Without his signature combo, Jarvan IV loses his main source of burst damage and crowd control, turning his aggressive plunge into a massive self-punish. Ver detalles
Jarvan IV

Por qué

Poppy completely neutralizes Jarvan IV's primary initiation. When Jarvan IV throws his Demacian Standard and attempts to slide to it using Dragon Strike, you can activate Steadfast Presence. This immediately interrupts his dash mid-flight, leaving him grounded, damaged, and entirely stripped of his mobility. Without his signature combo, Jarvan IV loses his main source of burst damage and crowd control, turning his aggressive plunge into a massive self-punish.

Impacto en la línea

This interaction dictates the entire rhythm of the laning phase, stripping Jarvan IV of his offensive threat. He cannot safely use Demacian Standard to farm or poke without risking a deadly counter-engage. Every time you successfully block his mobility, his long downtime periods leave him defenseless, allowing you to easily dictate wave state, deny him gold, or shove him under tower where Heroic Charge setups become lethal.

Cómo jugar

Never activate Steadfast Presence preemptively; hold it specifically for the moment you see his Demacian Standard drop and his lance animation start. Position yourself slightly off-center from his flag to bait his dash, then react. Once he is knocked down, immediately use Heroic Charge to smash him into the nearest wall, followed by Hammer Shock. If he traps you with Cataclysm, use a quick cast of Keeper's Verdict to knock him airborne and walk out.

Ficha completa →
Tryndamere

Tryndamere−2

anti dasharmor stack Poppy dominates this matchup because her Steadfast Presence directly shuts down Tryndamere's only gap-closer and escape tool, Spinning Slash. When he attempts to spin in for a trade or spin away to safety, activating your defensive field grounds and stuns him. This completely negates his aggressive mobility, leaving him vulnerable to your Hammer Shock damage and preventing him from building Battle Fury safely. Ver detalles
Tryndamere

Por qué

Poppy dominates this matchup because her Steadfast Presence directly shuts down Tryndamere's only gap-closer and escape tool, Spinning Slash. When he attempts to spin in for a trade or spin away to safety, activating your defensive field grounds and stuns him. This completely negates his aggressive mobility, leaving him vulnerable to your Hammer Shock damage and preventing him from building Battle Fury safely.

Impacto en la línea

This interaction forces Tryndamere to play passively under his turret, stripping away his ability to dictate wave pressure. Since he cannot freely use Spinning Slash to disengage, you can constantly harass him with Iron Ambassador and Hammer Shock whenever he steps up to build fury. He cannot easily dive you or escape your ganks, giving you total control over freeze setups and recall timings.

Cómo jugar

Always position yourself between Tryndamere and his tower, hugging the lane walls. Never use Steadfast Presence aggressively; hold it exclusively to react to the start of his Spinning Slash animation. If he uses Undying Rage, use Heroic Charge to pin him against a wall or cast Keeper's Verdict to knock him away and waste his ultimate's duration. If you misplay the anti-dash timing, back off immediately using the shield from Iron Ambassador to absorb his critical strikes.

Ficha completa →
Renekton

Renekton−2

anti mobilitydisengage Renekton relies entirely on Slice and Dice to initiate trades or escape. By activating Steadfast Presence the moment he dashes, you completely cancel his mobility, grounding him on the spot. This denial leaves him helpless right next to the terrain, setting up an easy angle for your Heroic Charge stun and a subsequent Hammer Shock slam while his main defensive tool is on a long cooldown. Ver detalles
Renekton

Por qué

Renekton relies entirely on Slice and Dice to initiate trades or escape. By activating Steadfast Presence the moment he dashes, you completely cancel his mobility, grounding him on the spot. This denial leaves him helpless right next to the terrain, setting up an easy angle for your Heroic Charge stun and a subsequent Hammer Shock slam while his main defensive tool is on a long cooldown.

Impacto en la línea

Because you shut down his double-dash, Renekton cannot freely chunk you with Cull the Meek and dash back out. This lets you dictate the wave state, forcing him to use Ruthless Predator on minions to build Fury rather than saving it for you. You can freeze the wave near your tower, turning any attempt he makes to step up into a lethal wall-stun threat under your own terms.

Cómo jugar

Never waste Steadfast Presence proactively. Hold it specifically as a reaction to his Slice and Dice animation. Position yourself permanently between the wave and the river wall, baiting him to dash in. If he activates Dominus, do not panic-fight; use Keeper's Verdict with a quick cast to knock him airborne, or charge it up to launch him away, completely wasting his ultimate's duration while you pick up your Iron Ambassador shield.

Ficha completa →
Pantheon

Pantheon−2

anti engagepositioning Poppy completely shuts down Pantheon's offensive pattern because Steadfast Presence reactively blocks his Shield Vault. When Pantheon attempts to leap forward to stun you, activating your barrier instantly grounds and slows him. This leaves him vulnerable in melee range without his main engage tool, allowing you to easily trade back with Hammer Shock and win the exchange. Ver detalles
Pantheon

Por qué

Poppy completely shuts down Pantheon's offensive pattern because Steadfast Presence reactively blocks his Shield Vault. When Pantheon attempts to leap forward to stun you, activating your barrier instantly grounds and slows him. This leaves him vulnerable in melee range without his main engage tool, allowing you to easily trade back with Hammer Shock and win the exchange.

Impacto en la línea

Since Pantheon cannot safely initiate with his leap, he loses his early pressure and is forced to passively farm or poke with Comet Spear. This allows you to control the wave state at will. You can slowly stack waves and push him under tower, rendering his Aegis Assault useless for active defense while you chip away at his health or setup dives with your jungler.

Cómo jugar

To dominate this lane, never use Steadfast Presence proactively. Keep your finger on the key and activate it only when you see the start of Pantheon's Shield Vault animation. Position yourself near the river walls to threaten a Heroic Charge stun if he steps up. If you miss your reaction window and get stunned, immediately strike back with Hammer Shock and grab your Iron Ambassador buckler to absorb his incoming Comet Spear poke.

Ficha completa →
K'Santé

K'Santé−2

dash blockspacing Poppy controls this matchup because Steadfast Presence completely neutralizes K'Santé's mobility tools. Whenever K'Santé attempts to reposition with Footwork or charge forward using Path Maker, your active barrier stops him in his tracks, dealing magic damage and grounding him. This converts his main defensive and positioning tools into self-sabotaging abilities, leaving him vulnerable and unable to escape your trading range. Ver detalles
K'Santé

Por qué

Poppy controls this matchup because Steadfast Presence completely neutralizes K'Santé's mobility tools. Whenever K'Santé attempts to reposition with Footwork or charge forward using Path Maker, your active barrier stops him in his tracks, dealing magic damage and grounding him. This converts his main defensive and positioning tools into self-sabotaging abilities, leaving him vulnerable and unable to escape your trading range.

Impacto en la línea

Because K'Santé cannot dash without being punished, you dictate the lane's tempo. He cannot easily stack Ntofo Strikes without exposing himself to a devastating wall-stun from Heroic Charge. This fear forces him to yield wave control, allowing you to crash waves at will, harass him under tower with Iron Ambassador passive bucklers, and secure early river priority to assist your jungler.

Cómo jugar

Position yourself parallel to the river and alcove walls to constantly threaten a wall-slam. Never initiate trades with Steadfast Presence; hold it strictly to react to his Footwork or Path Maker animations. If he goes All Out, don't panic. Immediately use the uncharged version of Keeper's Verdict to knock him airborne, neutralizing his stat-boosted aggression and allowing you to easily reposition or re-engage on your terms.

Ficha completa →
Urgot

Urgot−2

anti dashtank matchup Poppy completely shuts down Urgot's primary engage tool. Whenever Urgot winds up Disdain to flip you, activating Steadfast Presence cancels his dash mid-air. This leaves him grounded and completely unable to reposition behind you to trigger the devastating shotgun blasts from his passive Echoing Flames. Because his primary trade starter is neutralized, he loses his main source of burst damage. Ver detalles
Urgot

Por qué

Poppy completely shuts down Urgot's primary engage tool. Whenever Urgot winds up Disdain to flip you, activating Steadfast Presence cancels his dash mid-air. This leaves him grounded and completely unable to reposition behind you to trigger the devastating shotgun blasts from his passive Echoing Flames. Because his primary trade starter is neutralized, he loses his main source of burst damage.

Impacto en la línea

This denial completely shifts the trading dynamics in your favor. Urgot cannot safely zone you with Purge or walk past your wave, as failing a Disdain flip leaves him extremely vulnerable to a counter-engage. You can force him to farm from a distance using Corrosive Charge, securing easy wave priority. This allows you to constantly threaten him with wall stuns near his own turret.

Cómo jugar

Keep your finger hovering over Steadfast Presence and never use it reactively for the movement speed alone; save it strictly to react to the startup animation of his Disdain. If he hesitates to dash, use the ranged buckler from Iron Ambassador to chip away his shield, then aim your Heroic Charge to slam him into the alcove or turret walls. If you accidentally misstime your barrier, immediately disengage with Hammer Shock to slow his Purge pursuit.

Ficha completa →
Wukong

Wukong−2

disengagepeel threat This matchup is heavily in your favor because Wukong relies on Nimbus Strike to close the distance and trigger his attack speed buff. By activating Steadfast Presence the moment he begins his leap, you completely interrupt his dash, grounding him and negating his offensive burst. Without this momentum, his Stone Skin armor and Golden Staff pokes are insufficient to challenge your innate tankiness. Ver detalles
Wukong

Por qué

This matchup is heavily in your favor because Wukong relies on Nimbus Strike to close the distance and trigger his attack speed buff. By activating Steadfast Presence the moment he begins his leap, you completely interrupt his dash, grounding him and negating his offensive burst. Without this momentum, his Stone Skin armor and Golden Staff pokes are insufficient to challenge your innate tankiness.

Impacto en la línea

Because you shut down his engage, Wukong is forced to play defensively, often relying on Warrior Trickster to escape trades rather than initiate them. You dictate the wave's position easily. He cannot safely contest your Iron Ambassador buckler pickups, allowing you to secure constant shields, force him under his turret, and freely chip away at his health with Hammer Shock.

Cómo jugar

Stand constantly near the lane walls to threaten a Heroic Charge stun. Never initiate with Steadfast Presence; instead, hold it as a reactive tool. When Wukong approaches to last-hit, bait his Nimbus Strike by stepping forward. Reactively block his jump, smash him with Hammer Shock, and if he attempts to escape with Warrior Trickster or casts Cyclone, use Keeper's Verdict as a quick-cast knock-up to interrupt him.

Ficha completa →
Yone

Yone−2

anti dashdisengagewall positioning This favorable matchup revolves entirely around denying Yone's mobility. Yone relies heavily on his third cast of Mortal Steel to initiate trades or escape. By activating Steadfast Presence the moment he launches his Q3 tornado dash, you ground him mid-air, blocking his knock-up and leaving him vulnerable to a swift Hammer Shock retaliation. His primary tool for aggressive trading becomes his biggest liability. Ver detalles
Yone

Por qué

This favorable matchup revolves entirely around denying Yone's mobility. Yone relies heavily on his third cast of Mortal Steel to initiate trades or escape. By activating Steadfast Presence the moment he launches his Q3 tornado dash, you ground him mid-air, blocking his knock-up and leaving him vulnerable to a swift Hammer Shock retaliation. His primary tool for aggressive trading becomes his biggest liability.

Impacto en la línea

Because you can consistently shut down his Mortal Steel dashes, Yone cannot freely use Soul Unbound to harass you under your tower. You command the wave's position, forcing him to farm with his shorter range or bleed health. If he mispositions near the alcove or walls while trying to land Spirit Cleave, you can easily punish him, taking complete control of the lane's physical space.

Cómo jugar

Stand constantly near the lane walls to threaten a Heroic Charge stun whenever Yone uses Soul Unbound. Never waste Steadfast Presence preemptively; hold it specifically for when his Mortal Steel wind charge is active and he moves forward. If he attempts to escape or engage with Fate Sealed, use a quick-cast tap of your own Keeper's Verdict to instantly knock him airborne and cancel his channel before he can slide away.

Ficha completa →
Ambessa

Ambessa−3

hard counterdisengage focus This matchup is highly favorable for Poppy because Ambessa relies entirely on Drakehound's Step to maneuver, deal damage, and restore energy. By activating Steadfast Presence, you completely nullify her passive dashes. Every time she tries to trigger her mobility after Cunning Sweep or Lacerate, she gets grounded and interrupted, rendering her unable to weave her empowered attacks or execute her fast-paced combo. Ver detalles
Ambessa

Por qué

This matchup is highly favorable for Poppy because Ambessa relies entirely on Drakehound's Step to maneuver, deal damage, and restore energy. By activating Steadfast Presence, you completely nullify her passive dashes. Every time she tries to trigger her mobility after Cunning Sweep or Lacerate, she gets grounded and interrupted, rendering her unable to weave her empowered attacks or execute her fast-paced combo.

Impacto en la línea

In lane, this dynamic strips Ambessa of her aggressive trade priority. She cannot safely use Cunning Sweep to poke without risking a counter-engage. Whenever she tries to secure cs or harass, your threat of blocking her dashes forces her to play defensively. You can easily control the wave near the walls, making her terrified of approaching because any failed dash means an easy wall-stun with Heroic Charge.

Cómo jugar

Never waste Steadfast Presence preemptively. Hold it until Ambessa commits to her first slash of Cunning Sweep or starts her Lacerate spin, then pop it right as she attempts her Drakehound's Step dash. While she is grounded and unable to trigger her passive, smash her with Hammer Shock and use Iron Ambassador to secure a shield. If she tries to ultimate you with Public Execution, react with Keeper's Verdict to completely deny her execute window.

Ficha completa →
Yasuo

Yasuo−2

anti dashtank matchup Yasuo relies entirely on the constant mobility of Sweeping Blade to trade and dodge. By activating Steadfast Presence, you instantly shut down his primary movement tool. This grounds him on the spot, cancelling his dash and leaving him unable to dodge both parts of your Hammer Shock. Because his Wind Wall cannot block your hammer strikes, his defense is completely bypassed when he is locked down near you. Ver detalles
Yasuo

Por qué

Yasuo relies entirely on the constant mobility of Sweeping Blade to trade and dodge. By activating Steadfast Presence, you instantly shut down his primary movement tool. This grounds him on the spot, cancelling his dash and leaving him unable to dodge both parts of your Hammer Shock. Because his Wind Wall cannot block your hammer strikes, his defense is completely bypassed when he is locked down near you.

Impacto en la línea

This dynamic completely shifts the wave control in your favor. Yasuo cannot safely dash through minions to stack Steel Tempest or poke you without risking an immediate, punishing lockup. You can easily zone him away from his wave or freeze it. Any attempt he makes to force a trade near walls turns deadly, as a quick Heroic Charge into a stun guarantees a massive health lead and easy tower pressure.

Cómo jugar

Position yourself constantly near your own low-health minions, as these are the exact targets Yasuo wants to target with Sweeping Blade. Never initiate with Steadfast Presence; instead, hold it until he starts his dash animation to guarantee the knockup. If he manages to bait it out, back off immediately. Once you lock him down, quickly position yourself to angle a Heroic Charge into the nearest wall, then follow up with Hammer Shock to secure the trade.

Ficha completa →
Riven

Riven−3

hard counterdefensive play Poppy completely shuts down Riven's high-mobility skirmishing style. Riven relies entirely on chaining Broken Wings and Valor to trade, reposition, and escape. However, Poppy's Steadfast Presence acts as an absolute barrier, stopping any of these dashes mid-air. This grounds Riven, deals magic damage, and completely halts her offensive flow, turning her primary tools into self-inflicted crowd control. Ver detalles
Riven

Por qué

Poppy completely shuts down Riven's high-mobility skirmishing style. Riven relies entirely on chaining Broken Wings and Valor to trade, reposition, and escape. However, Poppy's Steadfast Presence acts as an absolute barrier, stopping any of these dashes mid-air. This grounds Riven, deals magic damage, and completely halts her offensive flow, turning her primary tools into self-inflicted crowd control.

Impacto en la línea

Because Riven cannot dash without risking being grounded, you dictate the wave state. Freezing the minions near your turret forces Riven to walk up manually to farm. If she attempts to secure CS with Broken Wings, she exposes herself to a devastating trade. This zone of control allows you to deny her gold and build a massive lead, neutralizing her early-game snowball potential.

Cómo jugar

Never activate Steadfast Presence proactively. Keep this tool ready until Riven commits to her third strike of Broken Wings or tries to retreat with Valor. Once you ground her mid-dash, immediately retaliate with Hammer Shock and pick up your Iron Ambassador buckler to absorb her Ki Burst damage. If you accidentally waste your defensive field, step back instantly and respect her range until your cooldowns recover.

Ficha completa →

Otros emparejamientos

Cómo contrarrestar a este campeón

Ángulo de contra

La página de counters de Poppy debe leerse con un matiz importante: no solo pierde contra campeones que son "mejores duelistas", sino contra campeones que la fuerzan a salir de sus condiciones preferidas. Cuando Poppy puede controlar un muro, denegar un dash o elegir la entrada de una pelea, se siente como un muro infranqueable. Cuando el rival la fuerza a trades largos, la aleja del terreno útil o espera pacientemente a que termine su anti-dash, se vuelve mucho más predecible. Los matchups difíciles como Fiora, Gwen, Darius, Sett, Riven o Renekton no castigan todos lo mismo: algunos ganan por puro duelo, otros por sustain, tempo de trade o por forzar a Poppy a gastar sus herramientas demasiado pronto. Por otro lado, los matchups favorables muestran su identidad: le encanta hacer pagar su entrada a los campeones que dependen de la movilidad.

Contexto del parche

Para hacer counter a Poppy, debes entender que su kit es más fuerte cuando el rival hace el primer movimiento de forma predecible. Los campeones que pueden retrasar su movilidad, ganar sin dashes directos o forzarla a quedarse en contacto durante mucho tiempo reducen enormemente su impacto. Ella quiere peleas cortas y con ángulo cerca de los muros, con un momento claro donde deniega la entrada. Los campeones que convierten el duelo en un intercambio largo, se regeneran o rompen su timing evitan que elija el ritmo. El verdadero counterplay es, por lo tanto, evitar darle el terreno que desea.

Lectura rápida

  • Poppy sufre más cuando no puede convertir un ángulo de muro, un anti-dash o una separación en una ventaja concreta.
  • Los duelistas que ganan trades largos la fuerzan a jugar a la defensiva incluso cuando acierta su primer control.
  • Los campeones móviles se vuelven favorables para Poppy solo si usan su dash dentro de su zona en lugar de guardarlo para escapar.

Arquetipos de contra

Duelistas que ganan trades largos

Estos matchups son problemáticos porque no se limitan a entrar y salir. Pueden quedarse en contacto, forzar a Poppy a absorber varios ciclos de daño y reducir el valor de su primera parada. Si Poppy no encuentra un muro o no deniega el momento adecuado, acaba en un duelo donde su control no es suficiente para compensar la presión constante. Contra este perfil, la lane se basa en el spacing, el control de oleadas y en rechazar peleas innecesarias.

Cómo se adapta el campeón. Poppy debe jugar trades cortos, mantener la oleada en una zona donde el terreno importe y evitar aceptar un duelo tras fallar su ángulo. Si el rival quiere alargar la pelea, la decisión correcta suele ser retroceder, recuperar su escudo y esperar a un error más claro.

Bruisers que rompen su timing

Este perfil es peligroso porque no siempre juega la pelea a través de una entrada predecible. Puede amenazar mediante pequeños timings, forzar a Poppy a usar su anti-dash demasiado pronto y luego volver cuando su respuesta defensiva ya no está disponible. Poppy quiere responder al movimiento decisivo; estos campeones difuminan ese momento. Incluso con herramientas de control, puede verse superada si confunde una finta con el all-in real.

Cómo se adapta el campeón. Poppy debe ralentizar el ritmo e identificar el cooldown real que crea el peligro. Es mejor perder un pequeño trade que gastar la herramienta que evita el all-in completo. La paciencia importa más que la reacción inmediata.

Campeones móviles que Poppy puede castigar

Estos matchups muestran la otra cara de la página de counters: algunos campeones se complican la vida a sí mismos cuando Poppy está bien posicionada. Su plan suele depender de una entrada móvil, un reset de distancia o un intento de llegar a la backline. Poppy puede romper esa lógica denegando el dash o convirtiendo su trayectoria en una trampa contra el muro. El matchup no se gana automáticamente, pero el rival debe jugar con mucha más precisión de lo habitual.

Cómo se adapta el campeón. Poppy debe mantener su cuerpo entre la amenaza móvil y el objetivo que quiere proteger. El objetivo no es perseguir al campeón móvil, sino controlar el lugar que quiere cruzar. Si mantiene esa línea, su kit se vuelve naturalmente opresivo.

Emparejamientos prioritarios

Fiora

Fiora merece prioridad porque ataca directamente el límite de Poppy: el duelo largo y la precisión del timing. Poppy puede desbaratar una entrada o castigar un mal posicionamiento cerca de un muro, pero Fiora no necesita darle una pelea sencilla. Puede buscar intercambios repetidos, probar los cooldowns y forzar a Poppy a defender más que a organizar la lane. El plan de Poppy debe ser, por tanto, disciplinado: evitar trades largos, jugar alrededor de la oleada y buscar valor al agruparse en lugar de intentar demostrar nada en el duelo.

Camille

Camille es un matchup prioritario porque muestra exactamente por qué existe Poppy en ciertas drafts. Camille quiere crear acceso, aislar a un objetivo y convertir la movilidad en presión constante. Poppy puede romper esa intención si guarda su anti-dash para el momento adecuado y se posiciona entre Camille y el objetivo importante. El peligro viene de la impaciencia: si Poppy gasta su herramienta defensiva en una entrada falsa, Camille recupera la libertad para elegir el all-in real.

Errores comunes en su contra

Errores comunes en su contra

  • Enfrentarse a Poppy usando un dash en línea recta hacia una entrada del río que ella ya controla.
  • Jugar contra ella cerca de los muros cuando la oleada te permitiría quedarte en el centro de la lane.
  • Hacer bait a su anti-dash y luego continuar la pelea como si la situación de los cooldowns no hubiera cambiado.
  • Subestimar su ultimate alrededor de un objective, especialmente cuando el jungler o el frontliner pueden ser expulsados de la pelea.
  • Pensar que Poppy es débil porque no está logrando snowball, cuando puede ganar la partida simplemente denegando el engage decisivo.

Notas del coach

  • Contra Poppy, el mejor counterplay suele ser no darle una primera acción clara. Cuanto más predecible sea tu entrada, más fácil se vuelve su kit.
  • Con Poppy, no intentes ganar todos los matchups mediante duelos. En algunas lanes el objetivo principal es llegar limpios al mid game, donde tus zonas se vuelven más fuertes.

FAQ

¿Qué tipos de campeones son counters de Poppy TOP?

A Poppy le molestan principalmente los campeones que ganan trades largos, no necesitan dashes predecibles o pueden obligarla a usar sus herramientas de control antes del all-in real. Matchups como Fiora, Darius o Sett castigan su dificultad para aguantar un duelo largo sin un ángulo perfecto. Otros, como Gwen, Riven o Renekton, pueden romper sus tiempos variando sus ventanas de acción. El counterplay no consiste tanto en "matar al tank" sino en rechazar las condiciones en las que su kit se vuelve opresivo.

¿Cómo se debe jugar contra Poppy si eres un campeón con movilidad?

Debes evitar usar tu dash como primera acción evidente. Poppy quiere leer tu entrada, colocarse en la trayectoria y denegar el acceso a tu objetivo. Si consigues hacer bait de su anti-dash, cambiar de ángulo o esperar a que lo use para proteger a otra persona, recuperarás mucha libertad. Lo más importante es no pelear cerca de un muro sin motivo: incluso un campeón móvil se vuelve frágil cuando su trayectoria es predecible.

¿Por qué Fiora es tan difícil para Poppy?

Fiora es difícil porque no juega el tipo de pelea que Poppy quiere controlar. Poppy prefiere un intercambio corto, con un ángulo claro, un dash que frenar o un objetivo al que estampar. Fiora puede multiplicar los pequeños trades, amenazar en duelos largos y obligar a Poppy a responder a varios tiempos diferentes. Si Poppy falla su control o acepta quedarse en contacto demasiado tiempo, el matchup se vuelve muy incómodo. La respuesta correcta es jugar con la oleada, limitar riesgos y buscar más valor en las teamfights.

¿Poppy siempre es counter de campeones con dash?

No, no automáticamente. Poppy es muy fuerte contra campeones con dash cuando puede predecir su entrada, guardar su cooldown defensivo y controlar el espacio entre ellos y su objetivo. Pero si el campeón móvil logra hacer bait de su herramienta, cambiar de ángulo o esperar a que Poppy la use en otra parte, el matchup se vuelve más complejo. Por eso Camille, Lee Sin, Jax o Irelia pueden ser castigados por Poppy, pero solo si ella juega con disciplina y no malgasta su respuesta demasiado pronto.