










































































S
2026年9月 · Patch 7.2d
Tank · TOP · JUNGLE · SUPPORT

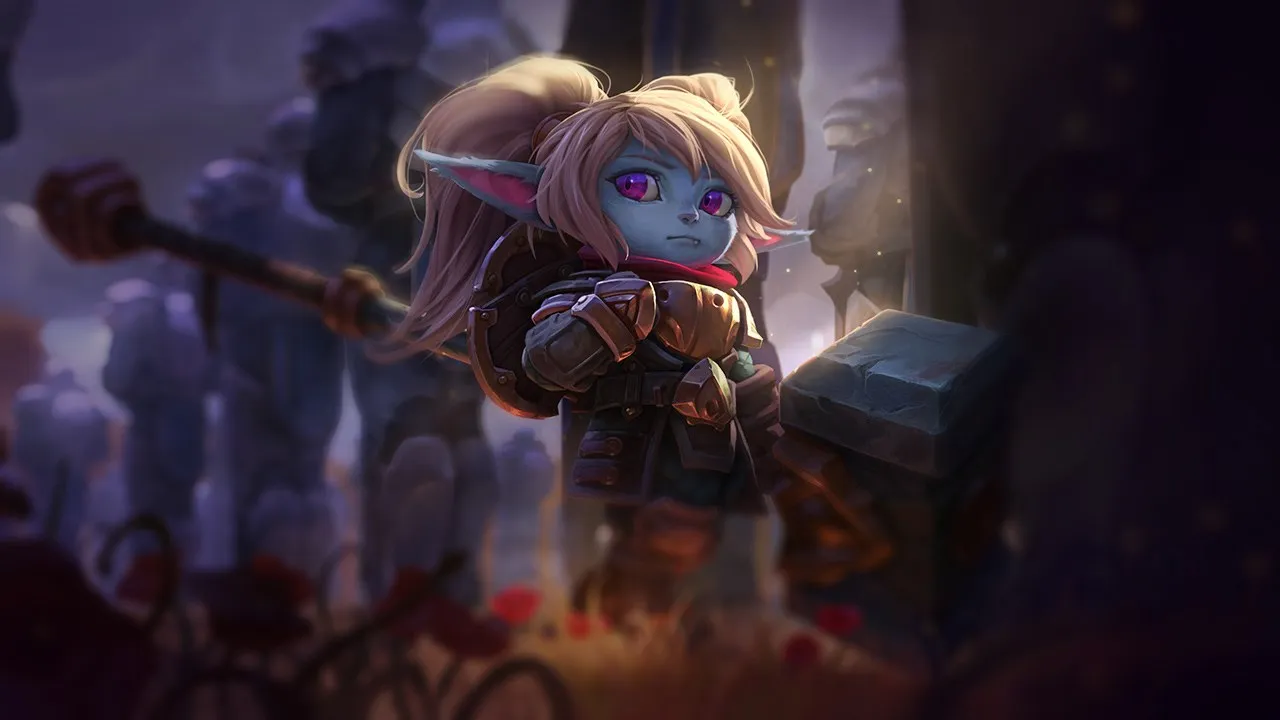
Poppy Wild Rift カウンターガイド

Poppyは、エンゲージにdashesを依存しない構成に対してはユーティリティが低下します。射程の長いpokeranged CCを持つチャンピオンは、彼女を受動的な立ち回りに追い込みます。持続的なmagic damage構成は、彼女のアーマー強化をバイパスします。

★ TOP · JUNGLE · SUPPORT Tier S
ダメージ
UTIL
TANK
DIFF
Win 50.4% #55 · ↑4pt
Pick 2.3% #25
Ban 0.4% #110

Poppy Wild Rift カウンターガイド ★ Counter Sheet

マッチアップ一覧
マッチアップ 判定 有利度 勝率 ピック率
Gwen ハードカウンター +2 51.4% 3.1%
Olaf ハードカウンター +2 51.0% 1.1%
Mordekaiser ハードカウンター +2 50.9% 11.5%
Darius ハードカウンター +2 50.2% 16.0%
Dr. Mundo ハードカウンター +2 50.2% 5.9%
Heimerdinger ハードカウンター +2
Ryze ハードカウンター +2
Teemo 不利なマッチアップ +1 51.8% 3.2%
Volibear 不利なマッチアップ +1 51.4% 7.1%
Rumble 不利なマッチアップ +1 49.4% 2.3%
Nasus 不利なマッチアップ +1 49.1% 5.9%
Sett 不利なマッチアップ +1 49.1% 11.4%
Vladimir 不利なマッチアップ +1 47.0% 1.1%
Swain 不利なマッチアップ +1
Vayne スキル次第のマッチアップ ±0 52.2% 2.0%
Singed スキル次第のマッチアップ ±0 51.8% 1.4%
Cho'Gath スキル次第のマッチアップ ±0 50.8% 12.1%
Ornn スキル次第のマッチアップ ±0 50.5% 2.0%
Kayle スキル次第のマッチアップ ±0 50.0% 1.8%
Garen スキル次第のマッチアップ ±0 50.0% 14.7%
Sion スキル次第のマッチアップ ±0 49.6% 3.8%
Kennen スキル次第のマッチアップ ±0 49.1% 1.3%
Gragas スキル次第のマッチアップ ±0
Gnar 有利なマッチアップ −1 51.5% 3.5%
Aatrox 有利なマッチアップ −1 48.9% 6.1%
Jayce 有利なマッチアップ −1 48.1% 2.7%
Fiora 有利なマッチアップ −1 48.1% 4.6%
Graves 有利なマッチアップ −1
Maokai 有利なマッチアップ −1
Warwick 有利なマッチアップ −1
Wukong 有利なマッチアップ −2 51.5% 2.2%
Yone 有利なマッチアップ −2 51.0% 6.7%
Jax 有利なマッチアップ −2 50.9% 3.9%
Irelia 有利なマッチアップ −2 50.4% 2.0%
Camille 有利なマッチアップ −2 50.4% 3.7%
Urgot 有利なマッチアップ −2 50.0% 3.8%
K'Santé 有利なマッチアップ −2 49.0% 5.9%
Tryndamere 有利なマッチアップ −2 48.5% 2.1%
Renekton 有利なマッチアップ −2 48.4% 3.9%
Skarner 有利なマッチアップ −2 48.1% 1.3%
Yasuo 有利なマッチアップ −2 47.0% 3.0%
Akali 有利なマッチアップ −2
Jarvan IV 有利なマッチアップ −2
Pantheon 有利なマッチアップ −2
Ambessa 有利なマッチアップ −3 49.7% 2.0%
Riven 有利なマッチアップ −3 48.9% 1.2%
Kalista 有利なマッチアップ −3
Rengar 有利なマッチアップ −3

Edge: Wild Rift Core canonical verdict (−3 to +3), shown from the point of view of the champion named in the row. Win rate and pick rate: the opponent's own rate in this role — Wild Rift CN · Challenger, Patch 7.2d. Not a head-to-head win rate.

ハードカウンター

7

これらのチャンピオンは、こちらのビルドやプレイスタイルを真正面から上回る構成を持ち、レーン戦のコントロールとファームを極めて難しくする。彼らのスキルはこちらの主要な強みを無効化し、いつも通りのプランを実行しようとした瞬間に手痛い反撃を受けさせてくる。こうしたマッチアップでは、ミスを最小限に抑え、正面からの対決以外で解決策を探すことが重要になる。

Olaf

Olaf+2

anti tankanti cc Poppy relies heavily on locking down targets against walls or peeling with her ultimate, but Olaf completely shuts this down. Once Olaf activates Ragnarok, he becomes entirely immune to crowd control, meaning your Heroic Charge cannot stun him and Keeper's Verdict fails to knock him back. Combined with his Undertow slowing you repeatedly, your defensive tools are nullified, leaving you defenseless against his raw true damage. Olafのビルド → 詳細を見る
Olaf

理由

Poppy relies heavily on locking down targets against walls or peeling with her ultimate, but Olaf completely shuts this down. Once Olaf activates Ragnarok, he becomes entirely immune to crowd control, meaning your Heroic Charge cannot stun him and Keeper's Verdict fails to knock him back. Combined with his Undertow slowing you repeatedly, your defensive tools are nullified, leaving you defenseless against his raw true damage.

レーン戦への影響

This immunity transforms the lane into a constant zone of danger where you cannot safely contest waves. If you step up to farm, Olaf can fish for an Undertow slow and run you down with Reckless Swing. Since you cannot peel him off with Keeper's Verdict after level six, any extended trade results in your death, forcing you to bleed gold under tower while he freely pressures your plate armor.

立ち回り方

To survive, your primary positioning rule is to hug your turret and use Iron Ambassador from maximum range to secure minions. Keep Steadfast Presence ready solely for the passive armor boost when low on health, rather than trying to block non-existent dashes. If Olaf freezes the wave or dives you with Ragnarok active, do not fight back; instead, use the movement speed from Steadfast Presence to run behind your tower and wait out his ultimate's duration.

チャンピオン詳細 → Olafのビルド →

その他のマッチアップ

不利なマッチアップ

7

これらのチャンピオンは、マッチアップ自体を絶望的にするわけではないが、対面で優位に立ちやすいツールを持っている。射程が長かったり、攻撃を受け止める力が高かったり、エンゲージへの対応手段が豊富だったりする。アプローチを調整し、戦闘を受け入れるタイミングを慎重に選ぶ必要がある。

その他のマッチアップ

スキル次第のマッチアップ

9

このマッチアップは何よりもまず実行力の勝負であり、両者ともに優位を取れる現実的な手段を持っている。重要なスキルを一つ避けられるか、エンゲージを正しく読めるか、あるいはたった一つの位置取りのミスが、勝敗を分けることもある。マッチアップを理解し、行動すべき瞬間を見極める力がとりわけ重要になる。

Kennen

Kennen±0

dash blockwall stun This matchup revolves entirely around how you handle Kennen's lightning-fast escape. While he tries to harass you with ranged attacks, his only safety net when overextending is Lightning Rush. By activating Steadfast Presence, you completely nullify his sprint, grounding him. This shutdown leaves him incredibly vulnerable to a swift Heroic Charge into the nearest wall, turning his main defensive tool into a death trap. Kennenのビルド → 詳細を見る
Kennen

理由

This matchup revolves entirely around how you handle Kennen's lightning-fast escape. While he tries to harass you with ranged attacks, his only safety net when overextending is Lightning Rush. By activating Steadfast Presence, you completely nullify his sprint, grounding him. This shutdown leaves him incredibly vulnerable to a swift Heroic Charge into the nearest wall, turning his main defensive tool into a death trap.

レーン戦への影響

Because of this threat, Kennen cannot freely use his range to freeze you out. If he steps close to the side alcoves or walls to land Thundering Shuriken, he risks getting pinned. You will give up some early minion gold under tower, but the moment the wave bounces, the threat of your block-into-stun combo forces him to retreat, preventing him from building a massive, uncontested farm lead.

立ち回り方

Stand constantly between the minion wave and the river wall, baiting him to use Lightning Rush offensively or defensively. Never initiate with Heroic Charge unless his movement speed buff is already down, or you have activated Steadfast Presence to catch his dash mid-air. If he manages to poke you low with Electrical Surge passive stacks, use Iron Ambassador to grab a shield, absorb his burst, and safely disengage.

チャンピオン詳細 → Kennenのビルド →
Vayne

Vayne±0

terrain interactionspacing This skill-reliant matchup revolves entirely around the interaction between your Steadfast Presence and Vayne's Tumble. Because your active aura grounds her and stops her short roll, Vayne is forced to play defensively and hold her mobility spell until your defensive shield dissipates. Without her quick repositioning tool, her reliance on Silver Bolts is severely hindered, allowing you to control the immediate space around you. Vayneのビルド → 詳細を見る
Vayne

理由

This skill-reliant matchup revolves entirely around the interaction between your Steadfast Presence and Vayne's Tumble. Because your active aura grounds her and stops her short roll, Vayne is forced to play defensively and hold her mobility spell until your defensive shield dissipates. Without her quick repositioning tool, her reliance on Silver Bolts is severely hindered, allowing you to control the immediate space around you.

レーン戦への影響

The lane becomes a psychological standoff near the walls. Vayne will try to bait out your defensive aura with basic attacks to safely trigger Silver Bolts. If you waste your anti-dash, she can freely space you down with Final Hour and Tumble. However, as long as you hold your grounding field, she must farm cautiously, preventing her from aggressively pushing you under tower or securing easy plates.

立ち回り方

Never activate Steadfast Presence proactively; wait until Vayne actually initiates the animation of Tumble or attempts to escape a trade. Use the extra range from Iron Ambassador to secure minions from a safe distance and pick up the buckler shield to absorb her basic attacks. If she mispositions near the alcove or terrain, punish her immediately with Heroic Charge to wall-stun her, then use Hammer Shock to chunk her down before she can cast Condemn.

チャンピオン詳細 → Vayneのビルド →
Singed

Singed±0

displacement clashpeel vs peel This even matchup centers on a common misunderstanding of Poppy's defensive tools. While Steadfast Presence is excellent at stopping mobile skirmishers, it is completely useless against Singed's Fling. Because Fling is a targeted displacement cast upon you rather than a dash performed by Singed, your protective barrier will not block it. This allows him to bypass your primary defensive utility and toss you directly into his Poison Trail. Singedのビルド → 詳細を見る
Singed

理由

This even matchup centers on a common misunderstanding of Poppy's defensive tools. While Steadfast Presence is excellent at stopping mobile skirmishers, it is completely useless against Singed's Fling. Because Fling is a targeted displacement cast upon you rather than a dash performed by Singed, your protective barrier will not block it. This allows him to bypass your primary defensive utility and toss you directly into his Poison Trail.

レーン戦への影響

Since you cannot interrupt his engage, lane control dictates the pace. If Singed attempts to proxy or fast-shove with Poison Trail, you must respond by matching his clear using Hammer Shock. Allowing him to crash waves freely gives him easy recall windows or map rotations, while overextending to stop him opens you up to being flipped into a dangerous position far from your own tower.

立ち回り方

To win trades, play around your passive Iron Ambassador to poke him down and secure a shield before he gets into Fling range. If he charges forward, do not waste Steadfast Presence; instead, use Heroic Charge on a minion to escape or pin him to a wall if he mispositions. If he activates Insanity Potion to run you down, use a quick cast of Keeper's Verdict to knock him airborne and disengage.

チャンピオン詳細 → Singedのビルド →

その他のマッチアップ

有利なマッチアップ

25

これらのチャンピオンは、こちらの主要な強みに効果的に対応するのが難しく、より自由に対面を組み立てることができる。プレッシャーをかけて有利な交換を引き出す手段は複数あることが多い。相手が態勢を立て直す時間を与えるのではなく、この優位を活かして主導権を握ろう。

Camille

Camille−2

disengagedefensive play Poppy hard-counters Camille because Steadfast Presence acts as an absolute wall against Camille's primary engagement tool, Hookshot. When Camille attempts to grapple off a wall to dive you, activating Steadfast Presence instantly interrupts her mid-air, grounding her and preventing her from triggering her attack speed buff. This leaves her stranded without an escape, turning her primary offensive tool into a self-inflicted stun trap right next to terrain. Camilleのビルド → 詳細を見る
Camille

理由

Poppy hard-counters Camille because Steadfast Presence acts as an absolute wall against Camille's primary engagement tool, Hookshot. When Camille attempts to grapple off a wall to dive you, activating Steadfast Presence instantly interrupts her mid-air, grounding her and preventing her from triggering her attack speed buff. This leaves her stranded without an escape, turning her primary offensive tool into a self-inflicted stun trap right next to terrain.

レーン戦への影響

This interaction completely strips Camille of her offensive initiative. She cannot safely use Tactical Sweep to poke or thin the wave without exposing herself to a sudden Heroic Charge. Since she cannot rely on Hookshot to escape, she is forced to concede wave control. You can safely freeze the wave near your turret, forcing her to step up into narrow corridors where any mistake results in a fatal wall-stun.

立ち回り方

Never waste Steadfast Presence just for its movement speed; keep it strictly to react to her Hookshot. Position yourself close to the lane walls to bait her into grappling, then reactively activate your shield to knock her down. The moment she is grounded, immediately align your Heroic Charge to slam her into that same wall, following up with Hammer Shock. If she tries to trap you with The Hextech Ultimatum, simply use Keeper's Verdict to blow her out of her own zone.

チャンピオン詳細 → Camilleのビルド →
Akali

Akali−2

anti mobilityspacing This matchup heavily favors you because your Steadfast Presence completely shuts down Akali's entire assassination toolkit. Whenever Akali attempts to reposition or engage using Shuriken Flip or her ultimate Perfect Execution, activating your protective barrier cancels her dash mid-air, grounding her and leaving her exposed. Without her high-speed mobility, her Assassin's Mark becomes extremely difficult to trigger, turning her into an easy target for your hammer. Akaliのビルド → 詳細を見る
Akali

理由

This matchup heavily favors you because your Steadfast Presence completely shuts down Akali's entire assassination toolkit. Whenever Akali attempts to reposition or engage using Shuriken Flip or her ultimate Perfect Execution, activating your protective barrier cancels her dash mid-air, grounding her and leaving her exposed. Without her high-speed mobility, her Assassin's Mark becomes extremely difficult to trigger, turning her into an easy target for your hammer.

レーン戦への影響

In the lane, this interaction strips Akali of her usual safety inside Twilight Shroud. Since she cannot safely use Shuriken Flip to escape your Heroic Charge, you can constantly threaten to pin her against the lane walls. She is forced to play passively under her turret, allowing you to secure easy health trades with Hammer Shock and slow down her level five power spike by denying her access to the minion wave.

立ち回り方

To execute this perfectly, never waste Steadfast Presence proactively; hold it specifically for when she casts Shuriken Flip or initiates Perfect Execution. Position yourself near the alcove or river walls to bait her into using her dashes, then immediately pin her with Heroic Charge for a wall-stun. If she drops Twilight Shroud to hide, back away slightly and wait for the mist to dissipate before resuming your aggressive zoning with Iron Ambassador buckler tosses.

チャンピオン詳細 → Akaliのビルド →
Irelia

Irelia−2

anti mobilitydefensive play You completely shut down Irelia's entire kit because Steadfast Presence directly counters her Bladesurge. Whenever she attempts to dash to a minion for a reset or onto you to stack Ionian Fervor, activating your aura interrupts her movement, grounds her, and prevents further mobility. Without her mobility, she cannot dodge Hammer Shock or escape a wall-stun from Heroic Charge, turning her main threat into a free trade for you. Ireliaのビルド → 詳細を見る
Irelia

理由

You completely shut down Irelia's entire kit because Steadfast Presence directly counters her Bladesurge. Whenever she attempts to dash to a minion for a reset or onto you to stack Ionian Fervor, activating your aura interrupts her movement, grounds her, and prevents further mobility. Without her mobility, she cannot dodge Hammer Shock or escape a wall-stun from Heroic Charge, turning her main threat into a free trade for you.

レーン戦への影響

This shutdown dynamic lets you dictate the wave's position. By holding your defensive aura, you force Irelia to crash waves slowly, preventing her from easily setup-killing low-health minions. If she steps up to thin the wave with Bladesurge, you can crash her against the lane walls with Heroic Charge. She is forced to play under her turret, bleeding gold while you pressure her or deny her farm safely.

立ち回り方

Position yourself deliberately near your own low-health caster minions. Hold Steadfast Presence specifically for when Irelia’s blades glow or when she steps up to execute a minion with Bladesurge. Never waste this ability offensively. If she misses her Flawless Duet, immediately walk up to trigger Iron Ambassador for a free shield, then use Hammer Shock to punish her retreat. If she catches you with Vanguard's Edge, cast Keeper's Verdict quickly to disengage her ultimate's zone.

チャンピオン詳細 → Ireliaのビルド →
Jarvan IV

Jarvan IV−2

tank matchupdash block Poppy completely neutralizes Jarvan IV's primary initiation. When Jarvan IV throws his Demacian Standard and attempts to slide to it using Dragon Strike, you can activate Steadfast Presence. This immediately interrupts his dash mid-flight, leaving him grounded, damaged, and entirely stripped of his mobility. Without his signature combo, Jarvan IV loses his main source of burst damage and crowd control, turning his aggressive plunge into a massive self-punish. Jarvan IVのビルド → 詳細を見る
Jarvan IV

理由

Poppy completely neutralizes Jarvan IV's primary initiation. When Jarvan IV throws his Demacian Standard and attempts to slide to it using Dragon Strike, you can activate Steadfast Presence. This immediately interrupts his dash mid-flight, leaving him grounded, damaged, and entirely stripped of his mobility. Without his signature combo, Jarvan IV loses his main source of burst damage and crowd control, turning his aggressive plunge into a massive self-punish.

レーン戦への影響

This interaction dictates the entire rhythm of the laning phase, stripping Jarvan IV of his offensive threat. He cannot safely use Demacian Standard to farm or poke without risking a deadly counter-engage. Every time you successfully block his mobility, his long downtime periods leave him defenseless, allowing you to easily dictate wave state, deny him gold, or shove him under tower where Heroic Charge setups become lethal.

立ち回り方

Never activate Steadfast Presence preemptively; hold it specifically for the moment you see his Demacian Standard drop and his lance animation start. Position yourself slightly off-center from his flag to bait his dash, then react. Once he is knocked down, immediately use Heroic Charge to smash him into the nearest wall, followed by Hammer Shock. If he traps you with Cataclysm, use a quick cast of Keeper's Verdict to knock him airborne and walk out.

チャンピオン詳細 → Jarvan IVのビルド →
Tryndamere

Tryndamere−2

anti dasharmor stack Poppy dominates this matchup because her Steadfast Presence directly shuts down Tryndamere's only gap-closer and escape tool, Spinning Slash. When he attempts to spin in for a trade or spin away to safety, activating your defensive field grounds and stuns him. This completely negates his aggressive mobility, leaving him vulnerable to your Hammer Shock damage and preventing him from building Battle Fury safely. Tryndamereのビルド → 詳細を見る
Tryndamere

理由

Poppy dominates this matchup because her Steadfast Presence directly shuts down Tryndamere's only gap-closer and escape tool, Spinning Slash. When he attempts to spin in for a trade or spin away to safety, activating your defensive field grounds and stuns him. This completely negates his aggressive mobility, leaving him vulnerable to your Hammer Shock damage and preventing him from building Battle Fury safely.

レーン戦への影響

This interaction forces Tryndamere to play passively under his turret, stripping away his ability to dictate wave pressure. Since he cannot freely use Spinning Slash to disengage, you can constantly harass him with Iron Ambassador and Hammer Shock whenever he steps up to build fury. He cannot easily dive you or escape your ganks, giving you total control over freeze setups and recall timings.

立ち回り方

Always position yourself between Tryndamere and his tower, hugging the lane walls. Never use Steadfast Presence aggressively; hold it exclusively to react to the start of his Spinning Slash animation. If he uses Undying Rage, use Heroic Charge to pin him against a wall or cast Keeper's Verdict to knock him away and waste his ultimate's duration. If you misplay the anti-dash timing, back off immediately using the shield from Iron Ambassador to absorb his critical strikes.

チャンピオン詳細 → Tryndamereのビルド →
Renekton

Renekton−2

anti mobilitydisengage Renekton relies entirely on Slice and Dice to initiate trades or escape. By activating Steadfast Presence the moment he dashes, you completely cancel his mobility, grounding him on the spot. This denial leaves him helpless right next to the terrain, setting up an easy angle for your Heroic Charge stun and a subsequent Hammer Shock slam while his main defensive tool is on a long cooldown. Renektonのビルド → 詳細を見る
Renekton

理由

Renekton relies entirely on Slice and Dice to initiate trades or escape. By activating Steadfast Presence the moment he dashes, you completely cancel his mobility, grounding him on the spot. This denial leaves him helpless right next to the terrain, setting up an easy angle for your Heroic Charge stun and a subsequent Hammer Shock slam while his main defensive tool is on a long cooldown.

レーン戦への影響

Because you shut down his double-dash, Renekton cannot freely chunk you with Cull the Meek and dash back out. This lets you dictate the wave state, forcing him to use Ruthless Predator on minions to build Fury rather than saving it for you. You can freeze the wave near your tower, turning any attempt he makes to step up into a lethal wall-stun threat under your own terms.

立ち回り方

Never waste Steadfast Presence proactively. Hold it specifically as a reaction to his Slice and Dice animation. Position yourself permanently between the wave and the river wall, baiting him to dash in. If he activates Dominus, do not panic-fight; use Keeper's Verdict with a quick cast to knock him airborne, or charge it up to launch him away, completely wasting his ultimate's duration while you pick up your Iron Ambassador shield.

チャンピオン詳細 → Renektonのビルド →
Pantheon

Pantheon−2

anti engagepositioning Poppy completely shuts down Pantheon's offensive pattern because Steadfast Presence reactively blocks his Shield Vault. When Pantheon attempts to leap forward to stun you, activating your barrier instantly grounds and slows him. This leaves him vulnerable in melee range without his main engage tool, allowing you to easily trade back with Hammer Shock and win the exchange. Pantheonのビルド → 詳細を見る
Pantheon

理由

Poppy completely shuts down Pantheon's offensive pattern because Steadfast Presence reactively blocks his Shield Vault. When Pantheon attempts to leap forward to stun you, activating your barrier instantly grounds and slows him. This leaves him vulnerable in melee range without his main engage tool, allowing you to easily trade back with Hammer Shock and win the exchange.

レーン戦への影響

Since Pantheon cannot safely initiate with his leap, he loses his early pressure and is forced to passively farm or poke with Comet Spear. This allows you to control the wave state at will. You can slowly stack waves and push him under tower, rendering his Aegis Assault useless for active defense while you chip away at his health or setup dives with your jungler.

立ち回り方

To dominate this lane, never use Steadfast Presence proactively. Keep your finger on the key and activate it only when you see the start of Pantheon's Shield Vault animation. Position yourself near the river walls to threaten a Heroic Charge stun if he steps up. If you miss your reaction window and get stunned, immediately strike back with Hammer Shock and grab your Iron Ambassador buckler to absorb his incoming Comet Spear poke.

チャンピオン詳細 → Pantheonのビルド →
K'Santé

K'Santé−2

dash blockspacing Poppy controls this matchup because Steadfast Presence completely neutralizes K'Santé's mobility tools. Whenever K'Santé attempts to reposition with Footwork or charge forward using Path Maker, your active barrier stops him in his tracks, dealing magic damage and grounding him. This converts his main defensive and positioning tools into self-sabotaging abilities, leaving him vulnerable and unable to escape your trading range. K'Santéのビルド → 詳細を見る
K'Santé

理由

Poppy controls this matchup because Steadfast Presence completely neutralizes K'Santé's mobility tools. Whenever K'Santé attempts to reposition with Footwork or charge forward using Path Maker, your active barrier stops him in his tracks, dealing magic damage and grounding him. This converts his main defensive and positioning tools into self-sabotaging abilities, leaving him vulnerable and unable to escape your trading range.

レーン戦への影響

Because K'Santé cannot dash without being punished, you dictate the lane's tempo. He cannot easily stack Ntofo Strikes without exposing himself to a devastating wall-stun from Heroic Charge. This fear forces him to yield wave control, allowing you to crash waves at will, harass him under tower with Iron Ambassador passive bucklers, and secure early river priority to assist your jungler.

立ち回り方

Position yourself parallel to the river and alcove walls to constantly threaten a wall-slam. Never initiate trades with Steadfast Presence; hold it strictly to react to his Footwork or Path Maker animations. If he goes All Out, don't panic. Immediately use the uncharged version of Keeper's Verdict to knock him airborne, neutralizing his stat-boosted aggression and allowing you to easily reposition or re-engage on your terms.

チャンピオン詳細 → K'Santéのビルド →
Urgot

Urgot−2

anti dashtank matchup Poppy completely shuts down Urgot's primary engage tool. Whenever Urgot winds up Disdain to flip you, activating Steadfast Presence cancels his dash mid-air. This leaves him grounded and completely unable to reposition behind you to trigger the devastating shotgun blasts from his passive Echoing Flames. Because his primary trade starter is neutralized, he loses his main source of burst damage. Urgotのビルド → 詳細を見る
Urgot

理由

Poppy completely shuts down Urgot's primary engage tool. Whenever Urgot winds up Disdain to flip you, activating Steadfast Presence cancels his dash mid-air. This leaves him grounded and completely unable to reposition behind you to trigger the devastating shotgun blasts from his passive Echoing Flames. Because his primary trade starter is neutralized, he loses his main source of burst damage.

レーン戦への影響

This denial completely shifts the trading dynamics in your favor. Urgot cannot safely zone you with Purge or walk past your wave, as failing a Disdain flip leaves him extremely vulnerable to a counter-engage. You can force him to farm from a distance using Corrosive Charge, securing easy wave priority. This allows you to constantly threaten him with wall stuns near his own turret.

立ち回り方

Keep your finger hovering over Steadfast Presence and never use it reactively for the movement speed alone; save it strictly to react to the startup animation of his Disdain. If he hesitates to dash, use the ranged buckler from Iron Ambassador to chip away his shield, then aim your Heroic Charge to slam him into the alcove or turret walls. If you accidentally misstime your barrier, immediately disengage with Hammer Shock to slow his Purge pursuit.

チャンピオン詳細 → Urgotのビルド →
Wukong

Wukong−2

disengagepeel threat This matchup is heavily in your favor because Wukong relies on Nimbus Strike to close the distance and trigger his attack speed buff. By activating Steadfast Presence the moment he begins his leap, you completely interrupt his dash, grounding him and negating his offensive burst. Without this momentum, his Stone Skin armor and Golden Staff pokes are insufficient to challenge your innate tankiness. Wukongのビルド → 詳細を見る
Wukong

理由

This matchup is heavily in your favor because Wukong relies on Nimbus Strike to close the distance and trigger his attack speed buff. By activating Steadfast Presence the moment he begins his leap, you completely interrupt his dash, grounding him and negating his offensive burst. Without this momentum, his Stone Skin armor and Golden Staff pokes are insufficient to challenge your innate tankiness.

レーン戦への影響

Because you shut down his engage, Wukong is forced to play defensively, often relying on Warrior Trickster to escape trades rather than initiate them. You dictate the wave's position easily. He cannot safely contest your Iron Ambassador buckler pickups, allowing you to secure constant shields, force him under his turret, and freely chip away at his health with Hammer Shock.

立ち回り方

Stand constantly near the lane walls to threaten a Heroic Charge stun. Never initiate with Steadfast Presence; instead, hold it as a reactive tool. When Wukong approaches to last-hit, bait his Nimbus Strike by stepping forward. Reactively block his jump, smash him with Hammer Shock, and if he attempts to escape with Warrior Trickster or casts Cyclone, use Keeper's Verdict as a quick-cast knock-up to interrupt him.

チャンピオン詳細 → Wukongのビルド →
Yone

Yone−2

anti dashdisengagewall positioning This favorable matchup revolves entirely around denying Yone's mobility. Yone relies heavily on his third cast of Mortal Steel to initiate trades or escape. By activating Steadfast Presence the moment he launches his Q3 tornado dash, you ground him mid-air, blocking his knock-up and leaving him vulnerable to a swift Hammer Shock retaliation. His primary tool for aggressive trading becomes his biggest liability. Yoneのビルド → 詳細を見る
Yone

理由

This favorable matchup revolves entirely around denying Yone's mobility. Yone relies heavily on his third cast of Mortal Steel to initiate trades or escape. By activating Steadfast Presence the moment he launches his Q3 tornado dash, you ground him mid-air, blocking his knock-up and leaving him vulnerable to a swift Hammer Shock retaliation. His primary tool for aggressive trading becomes his biggest liability.

レーン戦への影響

Because you can consistently shut down his Mortal Steel dashes, Yone cannot freely use Soul Unbound to harass you under your tower. You command the wave's position, forcing him to farm with his shorter range or bleed health. If he mispositions near the alcove or walls while trying to land Spirit Cleave, you can easily punish him, taking complete control of the lane's physical space.

立ち回り方

Stand constantly near the lane walls to threaten a Heroic Charge stun whenever Yone uses Soul Unbound. Never waste Steadfast Presence preemptively; hold it specifically for when his Mortal Steel wind charge is active and he moves forward. If he attempts to escape or engage with Fate Sealed, use a quick-cast tap of your own Keeper's Verdict to instantly knock him airborne and cancel his channel before he can slide away.

チャンピオン詳細 → Yoneのビルド →
Ambessa

Ambessa−3

hard counterdisengage focus This matchup is highly favorable for Poppy because Ambessa relies entirely on Drakehound's Step to maneuver, deal damage, and restore energy. By activating Steadfast Presence, you completely nullify her passive dashes. Every time she tries to trigger her mobility after Cunning Sweep or Lacerate, she gets grounded and interrupted, rendering her unable to weave her empowered attacks or execute her fast-paced combo. Ambessaのビルド → 詳細を見る
Ambessa

理由

This matchup is highly favorable for Poppy because Ambessa relies entirely on Drakehound's Step to maneuver, deal damage, and restore energy. By activating Steadfast Presence, you completely nullify her passive dashes. Every time she tries to trigger her mobility after Cunning Sweep or Lacerate, she gets grounded and interrupted, rendering her unable to weave her empowered attacks or execute her fast-paced combo.

レーン戦への影響

In lane, this dynamic strips Ambessa of her aggressive trade priority. She cannot safely use Cunning Sweep to poke without risking a counter-engage. Whenever she tries to secure cs or harass, your threat of blocking her dashes forces her to play defensively. You can easily control the wave near the walls, making her terrified of approaching because any failed dash means an easy wall-stun with Heroic Charge.

立ち回り方

Never waste Steadfast Presence preemptively. Hold it until Ambessa commits to her first slash of Cunning Sweep or starts her Lacerate spin, then pop it right as she attempts her Drakehound's Step dash. While she is grounded and unable to trigger her passive, smash her with Hammer Shock and use Iron Ambassador to secure a shield. If she tries to ultimate you with Public Execution, react with Keeper's Verdict to completely deny her execute window.

チャンピオン詳細 → Ambessaのビルド →
Yasuo

Yasuo−2

anti dashtank matchup Yasuo relies entirely on the constant mobility of Sweeping Blade to trade and dodge. By activating Steadfast Presence, you instantly shut down his primary movement tool. This grounds him on the spot, cancelling his dash and leaving him unable to dodge both parts of your Hammer Shock. Because his Wind Wall cannot block your hammer strikes, his defense is completely bypassed when he is locked down near you. Yasuoのビルド → 詳細を見る
Yasuo

理由

Yasuo relies entirely on the constant mobility of Sweeping Blade to trade and dodge. By activating Steadfast Presence, you instantly shut down his primary movement tool. This grounds him on the spot, cancelling his dash and leaving him unable to dodge both parts of your Hammer Shock. Because his Wind Wall cannot block your hammer strikes, his defense is completely bypassed when he is locked down near you.

レーン戦への影響

This dynamic completely shifts the wave control in your favor. Yasuo cannot safely dash through minions to stack Steel Tempest or poke you without risking an immediate, punishing lockup. You can easily zone him away from his wave or freeze it. Any attempt he makes to force a trade near walls turns deadly, as a quick Heroic Charge into a stun guarantees a massive health lead and easy tower pressure.

立ち回り方

Position yourself constantly near your own low-health minions, as these are the exact targets Yasuo wants to target with Sweeping Blade. Never initiate with Steadfast Presence; instead, hold it until he starts his dash animation to guarantee the knockup. If he manages to bait it out, back off immediately. Once you lock him down, quickly position yourself to angle a Heroic Charge into the nearest wall, then follow up with Hammer Shock to secure the trade.

チャンピオン詳細 → Yasuoのビルド →
Riven

Riven−3

hard counterdefensive play Poppy completely shuts down Riven's high-mobility skirmishing style. Riven relies entirely on chaining Broken Wings and Valor to trade, reposition, and escape. However, Poppy's Steadfast Presence acts as an absolute barrier, stopping any of these dashes mid-air. This grounds Riven, deals magic damage, and completely halts her offensive flow, turning her primary tools into self-inflicted crowd control. Rivenのビルド → 詳細を見る
Riven

理由

Poppy completely shuts down Riven's high-mobility skirmishing style. Riven relies entirely on chaining Broken Wings and Valor to trade, reposition, and escape. However, Poppy's Steadfast Presence acts as an absolute barrier, stopping any of these dashes mid-air. This grounds Riven, deals magic damage, and completely halts her offensive flow, turning her primary tools into self-inflicted crowd control.

レーン戦への影響

Because Riven cannot dash without risking being grounded, you dictate the wave state. Freezing the minions near your turret forces Riven to walk up manually to farm. If she attempts to secure CS with Broken Wings, she exposes herself to a devastating trade. This zone of control allows you to deny her gold and build a massive lead, neutralizing her early-game snowball potential.

立ち回り方

Never activate Steadfast Presence proactively. Keep this tool ready until Riven commits to her third strike of Broken Wings or tries to retreat with Valor. Once you ground her mid-dash, immediately retaliate with Hammer Shock and pick up your Iron Ambassador buckler to absorb her Ki Burst damage. If you accidentally waste your defensive field, step back instantly and respect her range until your cooldowns recover.

チャンピオン詳細 → Rivenのビルド →

その他のマッチアップ

このチャンピオンへの対策

カウンターアングル

Poppyのカウンターページは、重要なニュアンスを理解して読む必要があります。彼女は「より優れたデュエリスト」に負けるだけでなく、彼女を好条件の外に追い出すチャンピオンにも負けます。Poppyが壁をコントロールし、ダッシュを阻止し、戦闘の入口を選べる場合、彼女は乗り越えられない壁のように感じられます。対戦相手が彼女との長期トレードを強制したり、有用な地形から引き離したり、彼女のアンチダッシュを辛抱強く待ったりすると、彼女ははるかに読みやすくなります。Fiora、Gwen、Darius、Sett、Riven、Renektonのような難しいマッチアップは、すべて同じことを罰するわけではありません。純粋なデュエルで勝つもの、サステイン、トレードテンポ、またはPoppyにツールを使いすぎさせるものがあります。一方で、有利なマッチアップは彼女のアイデンティティを示します。彼女は機動力依存のチャンピオンがエントリーに対して代償を払うことを好みます。

パッチの文脈

Poppyをカウンターするには、彼女のキットが最も強力になるのは、対戦相手が予測可能な方法で最初の動きをしたときであることを理解する必要があります。機動性を遅らせることができるチャンピオン、直接的なダッシュなしで勝てるチャンピオン、または彼女に長時間接触を強いるチャンピオンは、彼女の影響を大きく減らします。彼女は壁の近くでの短く角度のついた戦闘を好み、エントリーを阻止する明確な瞬間を求めています。デュエルを長期的な交換に変えたり、回復したり、タイミングを崩したりするチャンピオンは、彼女がリズムを選ぶのを妨げます。したがって、本当のカウンタープレイは、彼女が望む地形を与えないことです。

クイックリード

  • Poppyは、壁の角度、アンチダッシュ、または分離を具体的な有利に転換できない場合に最も苦労します。
  • 長期トレードで勝つデュエリストは、彼女が最初のコントロールを決めたときでさえ、彼女に防御的なプレイを強います。
  • 機動力のあるチャンピオンは、Poppyの有利になるのは、脱出のために温存するのではなく、彼女のゾーン内にダッシュを使用したときだけです。

カウンターの原型

長期トレードで勝つデュエリスト

これらのマッチアップは、単純に出入りするだけではないため問題があります。彼らは接触を維持し、Poppyに複数のダメージサイクルを吸収させ、彼女の最初のストップの価値を減らすことができます。Poppyが壁を見つけたり、適切な瞬間を阻止したりしない場合、彼女はコントロールが継続的なプレッシャーを補うには不十分なデュエルに陥ります。このプロファイルに対しては、レーンはスペーシング、ウェーブコントロール、そして不必要な戦闘の拒否が重要になります。

チャンピオンの適応方法. Poppyは、短いトレードを行い、地形が重要になるエリアにウェーブを維持し、角度をミスした後のデュエルを受け入れるのを避けるべきです。相手が延長を望むなら、下がってシールドを回復し、より明確なミスを待つのが正しい判断です。

タイミングを崩すブルーザー

このプロファイルは危険です。なぜなら、常に一つの読みやすいエントリーで戦闘を終わらせるわけではないからです。小さなタイミングで脅威を与え、Poppyにアンチダッシュを早期に使用させ、その後、彼女の防御的な回答が利用できなくなったときに戻ってくることができます。Poppyは決定的な動きに対応したいのですが、これらのチャンピオンはその瞬間を曖昧にします。コントロールツールを持っていても、フェイントを本当のオールインと間違えると圧倒される可能性があります。

チャンピオンの適応方法. Poppyはリズムを遅くし、危険を生み出す本当のクールダウンを特定する必要があります。完全なオールインを防ぐツールを使うよりも、小さなトレードを失う方が良いです。即時の反応よりも忍耐が重要です。

Poppyが有利にできる機動力のあるチャンピオン

これらのマッチアップは、カウンターページのもう一方の側面を示しています。一部のチャンピオンは、Poppyが適切に配置されていると、自身にとって困難になります。彼らの計画は、機動力のあるエントリー、距離のリセット、またはバックラインへの到達を試みることに依存することがよくあります。Poppyは、ダッシュを阻止したり、彼らのパスを壁の罠に変えたりすることで、その論理を破ることができます。マッチアップは自動的に勝てるわけではありませんが、相手は通常よりもはるかに正確にプレイする必要があります。

チャンピオンの適応方法. Poppyは、機動力のある脅威と守りたいターゲットの間に自分の体を置くべきです。目標は機動力のあるチャンピオンを追いかけることではなく、彼らが横切りたい場所をコントロールすることです。そのラインを維持できれば、彼女のキットは自然に圧力的になります。

優先度の高いマッチアップ

Fiora

Fioraは、Poppyの限界である長期デュエルとタイミング精度を直接攻撃するため、優先されるべきです。Poppyはエントリーを妨害したり、壁の近くの悪いポジショニングを罰したりできますが、Fioraは単純な戦闘を与える必要はありません。彼女は繰り返しの交換を探し、クールダウンをテストし、Poppyにレーンを組織するよりも防御を強いることができます。したがって、Poppyの計画は規律を守る必要があります。長期トレードを避け、ウェーブを中心にプレイし、デュエルを証明しようとするのではなく、集団で価値を探してください。

Camille

Camilleは優先マッチアップです。なぜなら、特定のドラフトでPoppyが存在する理由を正確に示しているからです。Camilleはアクセスを作成し、ターゲットを孤立させ、機動性を継続的なプレッシャーに変えたいと考えています。Poppyは、適切な瞬間のためにアンチダッシュを保持し、Camilleと重要なターゲットの間に位置することで、その意図を破ることができます。危険は忍耐力の欠如から生じます。Poppyが偽のエントリーで防御ツールを費やすと、Camilleは本当のオールインを選択する自由を取り戻します。

対面時のよくある間違い

対面時のよくある間違い

  • Poppyがすでにコントロールしている川のエントリーに直線的にダッシュして対峙すること。
  • ウェーブがレーンの中心にいられるようにしてくれるのに、壁の近くで彼女と対峙すること。
  • 彼女のアンチダッシュを誘い出し、その後、クールダウン状況が変わらなかったかのように戦闘を続けること。
  • 特にジャングラーやフロントライナーが戦闘から除外できる場合、目標周辺での彼女のアルティメットを過小評価すること。
  • Poppyは、スノーボールしていないから弱いと思われがちですが、彼女は決定的なエンゲージを阻止するだけでゲームに勝てます。

コーチングノート

  • Poppyに対して、最善のカウンタープレイは、彼女に明確な先手を与えないことです。あなたのエントリーが予測しやすければしやすいほど、彼女のキットはより強力になります。
  • Poppyがいる場合、すべてのマッチアップをデュエルで打ち負かそうとしないでください。いくつかのレーンは、あなたのゾーンがより強力になるmidゲームにクリーンに到達することが主な目的です。

FAQ

Poppy TOPにはどのようなタイプのチャンピオンがカウンターになりますか?

Poppyは、長時間のトレードに勝てるチャンピオン、予測可能なダッシュを必要としないチャンピオン、または実際のオールインをする前に彼女にコントロールツールを使わせることができるチャンピオンに最も悩まされます。Fiora、Darius、またはSettのようなマッチアップは、完璧な角度なしで長いデュエルに留まるのが難しい彼女を罰します。Gwen、Riven、またはRenektonのような他のチャンピオンは、ウィンドウを変化させることで彼女のタイミングを崩すことができます。カウンタープレイは「タンクを倒す」ことよりも、彼女のキットが抑圧的になる条件を拒否することです。

機動力のあるチャンピオンとしてPoppyに対してどのようにプレイすべきですか?

最初の行動として、ダッシュを明白に使うのを避けるべきです。Poppyはあなたのエントリーを読み、その進路に立ち、あなたのターゲットへのアクセスを拒否したいと考えています。彼女のアンチダッシュを誘ったり、角度を変えたり、誰かを守るために彼女がそれを使ったのを待ったりできれば、あなたは多くの自由を取り戻せます。最も重要なことは、理由もなく壁際で戦わないことです。たとえ機動力のあるチャンピオンでも、その進路が予測可能になれば脆くなります。

なぜFioraはPoppyにとってそれほど難しいのですか?

Fioraが難しいのは、Poppyがコントロールしたい種類の戦いを彼女がしないからです。Poppyは、明確な角度、止めるべきダッシュ、または捕らえるべきターゲットがある短い交換を好みます。Fioraは小さなトレードを倍増させ、長時間のデュエルを脅かし、Poppyにいくつかの異なるタイミングに対応させることができます。Poppyが彼女のコントロールをミスしたり、長すぎる接触を受け入れたりすると、マッチアップは非常に不快になります。正しい答えは、ウェーブをプレイし、リスクを制限し、チームファイトでより多くの価値を探すことです。

Poppyは常にダッシュチャンピオンをカウンターしますか?

いいえ、自動ではありません。Poppyは、ダッシュチャンピオンのエントリーを予測し、防御的なクールダウンを保持し、彼らとそのターゲットの間のスペースをコントロールできる場合、ダッシュチャンピオンに対して非常に強力です。しかし、機動力のあるチャンピオンが彼女のツールを誘ったり、角度を変えたり、Poppyが他の場所でそれを使ったのを待ったりできれば、マッチアップはより複雑になります。だからこそ、Camille、Lee Sin、Jax、またはIreliaはPoppyに罰せられる可能性がありますが、それは彼女が規律を持ってプレイし、答えを早すぎに無駄にしない場合に限られます。