S
2026年9月 · Patch 7.2d
Mage · TOP · MID

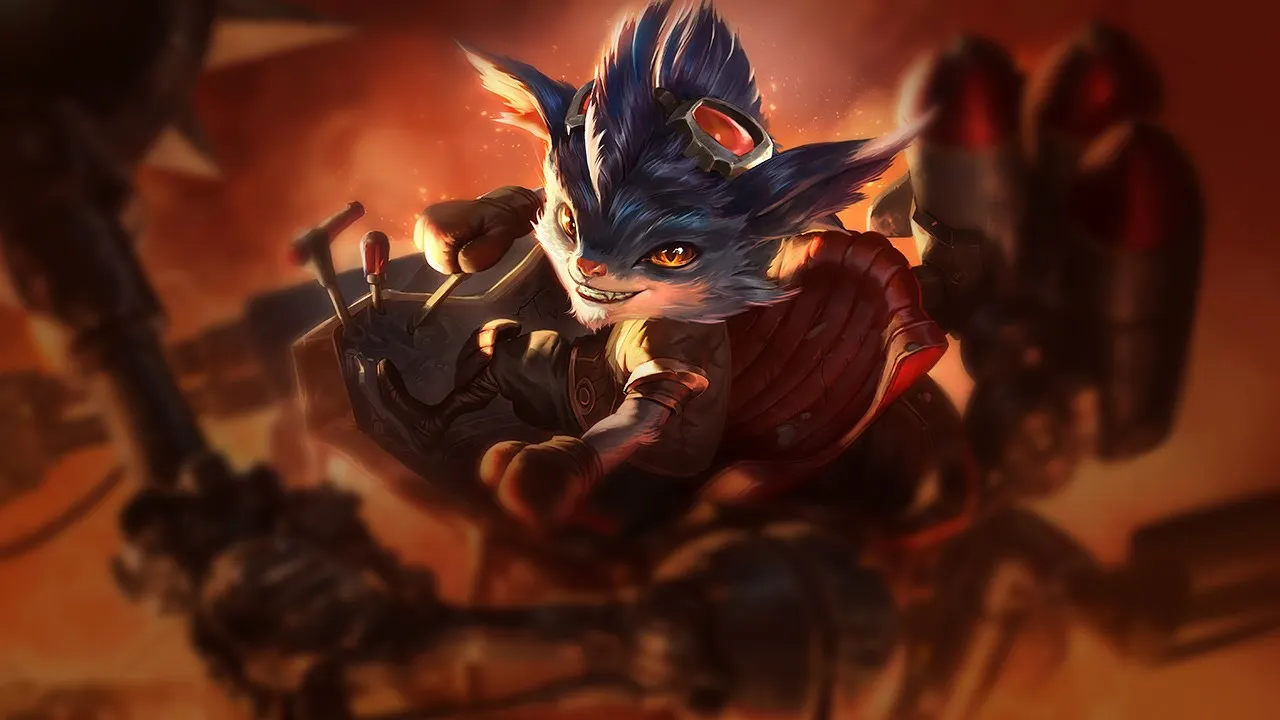
Rumble Wild Rift カウンターガイド

Rumbleは、彼がdanger zoneに入る前にengageし、魔法防御でダメージを耐えることができる構成にカウンターされます。高mobilityなチャンピオンは彼の炎とアルティメットを回避します。overheatの管理を誤ると、一時的に無防備になります。

★ TOP · MID Tier S
ダメージ
UTIL
TANK
DIFF
Win 49.4% #69 · ↓2pt
Pick 2.3% #24
Ban 0.5% #102

Rumble Wild Rift カウンターガイド ★ カウンターシート

マッチアップ一覧
マッチアップ 判定 有利度 勝率 ピック率
Vayne 不利なマッチアップ +1 52.2% 2.0%
Gwen 不利なマッチアップ +1 51.4% 3.1%
Mordekaiser 不利なマッチアップ +1 50.9% 11.5%
Darius 不利なマッチアップ +1 50.2% 16.0%
Aatrox 不利なマッチアップ +1 48.9% 6.1%
Tryndamere 不利なマッチアップ +1 48.5% 2.1%
Fiora 不利なマッチアップ +1 48.1% 4.6%
Cho'Gath スキル次第のマッチアップ ±0 50.8% 12.1%
Irelia スキル次第のマッチアップ ±0 50.4% 2.0%
Kennen スキル次第のマッチアップ ±0 49.1% 1.3%
Jayce スキル次第のマッチアップ ±0 48.1% 2.7%
Smolder 有利なマッチアップ −1 52.5% 1.6%
Singed 有利なマッチアップ −1 51.8% 1.4%
Volibear 有利なマッチアップ −1 51.4% 7.1%
Yone 有利なマッチアップ −1 51.0% 6.7%
Olaf 有利なマッチアップ −1 51.0% 1.1%
Jax 有利なマッチアップ −1 50.9% 3.9%
Ornn 有利なマッチアップ −1 50.5% 2.0%
Camille 有利なマッチアップ −1 50.4% 3.7%
Poppy 有利なマッチアップ −1 50.4% 2.3%
Dr. Mundo 有利なマッチアップ −1 50.2% 5.9%
Urgot 有利なマッチアップ −1 50.0% 3.8%
Garen 有利なマッチアップ −1 50.0% 14.7%
Ambessa 有利なマッチアップ −1 49.7% 2.0%
Sion 有利なマッチアップ −1 49.6% 3.8%
Sett 有利なマッチアップ −1 49.1% 11.4%
K'Santé 有利なマッチアップ −1 49.0% 5.9%
Riven 有利なマッチアップ −1 48.9% 1.2%
Renekton 有利なマッチアップ −1 48.4% 3.9%
Skarner 有利なマッチアップ −1 48.1% 1.3%
Vladimir 有利なマッチアップ −1 47.0% 1.1%
Akali 有利なマッチアップ −1
Gragas 有利なマッチアップ −1
Graves 有利なマッチアップ −1
Heimerdinger 有利なマッチアップ −1
Jarvan IV 有利なマッチアップ −1
Maokai 有利なマッチアップ −1
Pantheon 有利なマッチアップ −1
Ryze 有利なマッチアップ −1
Swain 有利なマッチアップ −1
Warwick 有利なマッチアップ −1
Malphite 有利なマッチアップ −2 52.5% 5.7%
Shen 有利なマッチアップ −2 51.9% 1.6%
Teemo 有利なマッチアップ −2 51.8% 3.2%
Wukong 有利なマッチアップ −2 51.5% 2.2%
Kayle 有利なマッチアップ −2 50.0% 1.8%
Nasus 有利なマッチアップ −2 49.1% 5.9%
Yasuo 有利なマッチアップ −2 47.0% 3.0%

Edge: Wild Rift Core canonical verdict (−3 to +3), shown from the point of view of the champion named in the row. Win rate and pick rate: the opponent's own rate in this role — Wild Rift CN · Challenger, Patch 7.2d. Not a head-to-head win rate.

不利なマッチアップ

7

これらのチャンピオンは、マッチアップ自体を絶望的にするわけではないが、対面で優位に立ちやすいツールを持っている。射程が長かったり、攻撃を受け止める力が高かったり、エンゲージへの対応手段が豊富だったりする。アプローチを調整し、戦闘を受け入れるタイミングを慎重に選ぶ必要がある。

Vayne

Vayne+1

poketethering Vayne completely dictates the spacing in this lane because her Tumble allows her to instantly dash out of your Flamespitter cone. Since you are melee, she can easily tether your reach and land three consecutive basic attacks to proc Silver Bolts true damage. If you try to close the gap, she can simply deploy Condemn to push you back, turning your heat-based aggression into free damage for her. Vayneのビルド → 詳細を見る
Vayne

理由

Vayne completely dictates the spacing in this lane because her Tumble allows her to instantly dash out of your Flamespitter cone. Since you are melee, she can easily tether your reach and land three consecutive basic attacks to proc Silver Bolts true damage. If you try to close the gap, she can simply deploy Condemn to push you back, turning your heat-based aggression into free damage for her.

レーン戦への影響

This spacing disadvantage forces you to play defensively near your turret. You cannot safely contest early waves with Flamespitter without taking massive chunk damage from Silver Bolts. This constant pressure slow-pushes the wave into your tower, bleeding your health pool and forcing awkward recalls. If you lose control of the wave state, Vayne can freeze it, denying you gold and threatening a deadly Condemn into the wall.

立ち回り方

To survive, prioritize using Electro Harpoon to secure distant last hits and slow Vayne down, preventing her from chasing with Night Hunter. Always hold Scrap Shield to absorb the third hit of Silver Bolts when she steps forward to harass. Let the wave push to your turret, only activating Flamespitter after she wastes Tumble. Once you unlock The Equalizer, drop it along her retreat path to cut off her movement and force a retreat.

チャンピオン詳細 → Vayneのビルド →

その他のマッチアップ

スキル次第のマッチアップ

4

このマッチアップは何よりもまず実行力の勝負であり、両者ともに優位を取れる現実的な手段を持っている。重要なスキルを一つ避けられるか、エンゲージを正しく読めるか、あるいはたった一つの位置取りのミスが、勝敗を分けることもある。マッチアップを理解し、行動すべき瞬間を見極める力がとりわけ重要になる。

Kennen

Kennen±0

ranged pokespacing This matchup is a constant battle of spacing where your close-range DPS clashes with Kennen's safety. When you try to burn him with Flamespitter, he will immediately trigger Lightning Rush to retreat out of range while retaliating with Thundering Shuriken. It becomes a DPS race: you need to land Electro Harpoon to slow his escape so your fire can tick, while he tries to stack Mark of the Storm to stun you. Kennenのビルド → 詳細を見る
Kennen

理由

This matchup is a constant battle of spacing where your close-range DPS clashes with Kennen's safety. When you try to burn him with Flamespitter, he will immediately trigger Lightning Rush to retreat out of range while retaliating with Thundering Shuriken. It becomes a DPS race: you need to land Electro Harpoon to slow his escape so your fire can tick, while he tries to stack Mark of the Storm to stun you.

レーン戦への影響

The lane remains neutral but highly volatile. If Kennen successfully evades your Flamespitter using his speed, he will slow-push the wave, poking you under tower with Electrical Surge empowered attacks. However, if you bait out his escape tool, you can freeze the wave near your turret, forcing him to walk up where his low base health makes him extremely vulnerable to a fully heated all-in.

立ち回り方

Never activate Flamespitter unless you have already hit him with Electro Harpoon to cripple his movement speed. Keep your Heat above 50 to ensure Scrap Shield provides enough shield and speed to absorb Thundering Shuriken poke when approaching the wave. If he initiates with Slicing Maelstrom, do not try to run; immediately drop The Equalizer directly on top of yourself and fight back with basic attacks, relying on your Overheated state to win the close-quarters damage race.

チャンピオン詳細 → Kennenのビルド →
Irelia

Irelia±0

magic damageall in Rumble's primary damage comes from a Danger Zone amplified Flamespitter. However, Irelia can completely blunt this offensive window by channeling Defiant Dance, reducing the incoming magic damage drastically. Once Rumble's Junkyard Titan heat decays or forces him into an Overheated silence without his flamethrower active, Irelia immediately retaliates with Bladesurge resets, healing through his remaining damage and winning the extended duel. Ireliaのビルド → 詳細を見る
Irelia

理由

Rumble's primary damage comes from a Danger Zone amplified Flamespitter. However, Irelia can completely blunt this offensive window by channeling Defiant Dance, reducing the incoming magic damage drastically. Once Rumble's Junkyard Titan heat decays or forces him into an Overheated silence without his flamethrower active, Irelia immediately retaliates with Bladesurge resets, healing through his remaining damage and winning the extended duel.

レーン戦への影響

Because Irelia sustains through her passive Ionian Fervor and Bladesurge on minions, Rumble cannot rely on simple poke to force her out. Shoving the wave mindlessly with Flamespitter plays into her hands, giving her a long lane to chase you down with repeated dashes. The lane becomes a tense freeze-and-slow-push battle where crashing a massive wave safely is your only ticket to a clean recall before she hits her lethal level spikes.

立ち回り方

Never activate Flamespitter when Irelia has four stacks of Ionian Fervor unless you can bait out Defiant Dance first. Fire your Electro Harpoon to slow her down and space away when she tries to stack her passive on low-health minions. If she begins channeling Defiant Dance to absorb your heat, immediately cease chasing, activate Scrap Shield to absorb her counter-strike, and retreat toward your tower. Only deploy The Equalizer to cut off her minion escape routes or to safely clear a crashing wave when low.

チャンピオン詳細 → Ireliaのビルド →

その他のマッチアップ

有利なマッチアップ

37

これらのチャンピオンは、こちらの主要な強みに効果的に対応するのが難しく、より自由に対面を組み立てることができる。プレッシャーをかけて有利な交換を引き出す手段は複数あることが多い。相手が態勢を立て直す時間を与えるのではなく、この優位を活かして主導権を握ろう。

Sion

Sion−1

ap bullyshield battle Rumble's relentless magic damage completely neutralizes Sion's defensive scaling early on. By maintaining your Heat above 50, an empowered Flamespitter rapidly shreds Sion's Soul Furnace before he can trigger its second phase to clear minions. Since Sion relies on that shield to absorb trading damage, your continuous flames force him to bleed health every time he tries to farm, turning his primary defense into a wasted mana cost. Sionのビルド → 詳細を見る
Sion

理由

Rumble's relentless magic damage completely neutralizes Sion's defensive scaling early on. By maintaining your Heat above 50, an empowered Flamespitter rapidly shreds Sion's Soul Furnace before he can trigger its second phase to clear minions. Since Sion relies on that shield to absorb trading damage, your continuous flames force him to bleed health every time he tries to farm, turning his primary defense into a wasted mana cost.

レーン戦への影響

Because Sion cannot rely on his shield to burst down minions, you dictate the minion line's position. You can easily lock him under his turret, forcing him to charge Decimating Smash under pressure while you poke him down. This constant priority lets you deny him passive health stacking from Glory in Death, slowly choking his scaling while keeping him too low to assist his team with Unstoppable Onslaught.

立ち回り方

Keep your Heat in the Danger Zone to maximize your damage output. When Sion attempts to charge Decimating Smash, use Scrap Shield's movement speed to quickly sidestep the hit, then retaliate with Electro Harpoon to keep him in range of your Flamespitter. If he tries to escape or retreat to his tower, drop The Equalizer directly along his path to cut off his retreat, forcing him to burn Unstoppable Onslaught defensively or perish in the flames.

チャンピオン詳細 → Sionのビルド →
Riven

Riven−1

shield timingall in Rumble dominates this matchup because his continuous magic damage from Flamespitter easily overpowers Riven's burst-and-shield patterns. Since Riven relies on Blade of the Exile to execute her targets, she is forced to play passively, waiting for Flamespitter to go on cooldown or for you to Overheat. As long as your flamethrower is active, her short dashes cannot match your sustained damage output. Rivenのビルド → 詳細を見る
Riven

理由

Rumble dominates this matchup because his continuous magic damage from Flamespitter easily overpowers Riven's burst-and-shield patterns. Since Riven relies on Blade of the Exile to execute her targets, she is forced to play passively, waiting for Flamespitter to go on cooldown or for you to Overheat. As long as your flamethrower is active, her short dashes cannot match your sustained damage output.

レーン戦への影響

This dynamic grants you absolute control over the minion waves. Riven will constantly try to bait out Flamespitter using Valor, hoping to find a window to strike. By denying her this opening, you keep her pinned under her turret, bleeding gold. Your continuous wave pressure translates into easy recall timings and allows you to assist your jungler while Riven is stuck clearing.

立ち回り方

Maintain your Heat above fifty percent to keep Flamespitter empowered, but carefully manage your resource bar to avoid an accidental Overheat when Riven has Blade of the Exile ready. If she initiates with Broken Wings, activate Scrap Shield to absorb her initial burst, then retaliate with Electro Harpoon to prevent her escape. Should she commit to an all-in, deploy The Equalizer directly along her retreat path.

チャンピオン詳細 → Rivenのビルド →
Olaf

Olaf−1

magic damagesustained dps Olaf relies on Ragnarok to ignore crowd control, but since Rumble has no hard CC, this ultimate is reduced to a simple stat stick. You can bypass his Berserker Rage entirely by ramping up your Heat with Junkyard Titan and melting his health pool with Flamespitter. Because your raw magic damage output is so high, Olaf cannot rely on his passive low-health attack speed to turn the tide before he is vaporized. Olafのビルド → 詳細を見る
Olaf

理由

Olaf relies on Ragnarok to ignore crowd control, but since Rumble has no hard CC, this ultimate is reduced to a simple stat stick. You can bypass his Berserker Rage entirely by ramping up your Heat with Junkyard Titan and melting his health pool with Flamespitter. Because your raw magic damage output is so high, Olaf cannot rely on his passive low-health attack speed to turn the tide before he is vaporized.

レーン戦への影響

The lane is decided by pure offensive pressure. You can easily push Olaf under tower using Flamespitter while using Scrap Shield to absorb the poke from Undertow. Olaf is forced to use Vicious Strikes to sustain under his turret, which prevents him from contesting your wave control. Because he cannot safely duel you without risking a sudden death, he loses the ability to assist his jungler or contest the river.

立ち回り方

When Olaf attempts to run you down with Undertow, do not panic and run. Instead, maintain your Heat in the Danger Zone to boost your Scrap Shield and immediately retaliate with Flamespitter. If he activates Ragnarok and charges, drop The Equalizer directly on top of yourself and overheat with basic attacks. This raw DPS race favors you; just ensure you land consecutive Electro Harpoon shots beforehand to chip his health down before he gains crowd control immunity.

チャンピオン詳細 → Olafのビルド →
Renekton

Renekton−1

magic damageshort trades Rumble dominates this matchup because Scrap Shield completely neutralizes Renekton's trading pattern. Renekton relies on using Slice and Dice to close the gap and burst with Cull the Meek and Ruthless Predator. However, if Rumble maintains Scrap Shield to absorb that initial dash burst, Renekton's damage is mitigated. This forces the crocodile to wait out the shield's cooldown, giving Rumble total control over when fights happen. Renektonのビルド → 詳細を見る
Renekton

理由

Rumble dominates this matchup because Scrap Shield completely neutralizes Renekton's trading pattern. Renekton relies on using Slice and Dice to close the gap and burst with Cull the Meek and Ruthless Predator. However, if Rumble maintains Scrap Shield to absorb that initial dash burst, Renekton's damage is mitigated. This forces the crocodile to wait out the shield's cooldown, giving Rumble total control over when fights happen.

レーン戦への影響

This dynamic allows Rumble to dictate the wave's position. Renekton cannot safely use Cull the Meek to sustain or push without taking heavy punishment from Flamespitter. By zoning him with Electro Harpoon, you force him to burn Slice and Dice defensively or lose massive health. This constant pressure pushes Renekton under tower, bleeding his health pool and forcing early recalls while you maintain perfect lane priority.

立ち回り方

Never initiate trades with Scrap Shield; hold it specifically for when Renekton starts his Slice and Dice animation. Once he dashes in and his abilities are on cooldown, activate Flamespitter and chase him down with Electro Harpoon slows. If you accidentally waste your shield early, immediately retreat behind your minion wave and use Electro Harpoon to deter his engage until your Scrap Shield is back online.

チャンピオン詳細 → Renektonのビルド →
Maokai

Maokai−1

magic resistsustain battle Rumble naturally dominates Maokai because continuous magic damage from Flamespitter bypasses the tank's early defenses. However, Maokai relies on Sap Magic to stay healthy. Because Rumble must constantly cast spells to manage Heat, this frequent spellcasting rapidly refreshes Maokai's passive heal. You must recognize that while your damage is superior, your spamming of Scrap Shield and Electro Harpoon actively fuels his lane sustain, turning a simple lane bully matchup into a war of attrition. Maokaiのビルド → 詳細を見る
Maokai

理由

Rumble naturally dominates Maokai because continuous magic damage from Flamespitter bypasses the tank's early defenses. However, Maokai relies on Sap Magic to stay healthy. Because Rumble must constantly cast spells to manage Heat, this frequent spellcasting rapidly refreshes Maokai's passive heal. You must recognize that while your damage is superior, your spamming of Scrap Shield and Electro Harpoon actively fuels his lane sustain, turning a simple lane bully matchup into a war of attrition.

レーン戦への影響

This dynamic creates a lane where Maokai cannot contest the push but can refuse to die. Your Flamespitter easily shoves waves and chips his health, forcing Maokai to farm under turret using Bramble Smash and Sapling Toss. While you command complete priority and can freely drop The Equalizer to assist in river fights, Maokai’s sustained recovery means you cannot easily dive him without a significant, dedicated investment in healing reduction.

立ち回り方

To convert this advantage, alter your build path immediately by prioritizing early healing reduction before finishing your main damage items. During trades, do not mindlessly spam Scrap Shield or Electro Harpoon when Maokai is simply retreating, as this only charges Sap Magic for free. Instead, save your Heat for Overheated basic attacks when he attempts to lock you down with Twisted Advance. If he successfully sustains through your pressure, stop forcing solo dives and transition your lead into taking objective control with your superior area damage.

チャンピオン詳細 → Maokaiのビルド →
Urgot

Urgot−1

magic damagespacing Rumble dominates this matchup because his continuous magic damage from Flamespitter easily melts Urgot's health bar if the crab cannot space away. Urgot relies entirely on landing Corrosive Charge to slow you and keep his distance. If he misses this slow, his Purge cannot kite you effectively, and he cannot safely trigger his Echoing Flames passive without getting roasted in your Danger Zone. Urgotのビルド → 詳細を見る
Urgot

理由

Rumble dominates this matchup because his continuous magic damage from Flamespitter easily melts Urgot's health bar if the crab cannot space away. Urgot relies entirely on landing Corrosive Charge to slow you and keep his distance. If he misses this slow, his Purge cannot kite you effectively, and he cannot safely trigger his Echoing Flames passive without getting roasted in your Danger Zone.

レーン戦への影響

Because you hold the damage advantage, you dictate the minion waves. Urgot's passive Echoing Flames naturally pushes the lane when he tries to farm, allowing you to freeze the wave near your turret. This deprives him of the long lane he needs to chase you down with Disdain and Fear Beyond Death, while letting you roast him with Flamespitter whenever he steps up to secure last hits.

立ち回り方

Actively bait out Corrosive Charge and immediately counter it by activating Scrap Shield to absorb any residual damage while gaining the movement speed to close the gap. Keep your Heat level above fifty to empower Electro Harpoon, slowing him down to guarantee a full-duration Flamespitter burn. Only trigger your Junkyard Titan overheat if Urgot has already wasted Disdain, ensuring he cannot easily flip and stun you while you are silenced.

チャンピオン詳細 → Urgotのビルド →
Kayle

Kayle−2

survivalspacing Rumble dominates because Kayle cannot sustain against his continuous burn. When Rumble lands an Electro Harpoon, the heavy slow forces Kayle to immediately burn Celestial Blessing to cleanse or outrun the slow and escape. Without that movement speed burst, she gets cooked by Danger Zone empowered Flamespitter. Since her heal has a long cooldown and high mana cost early, Rumble's short cooldowns constantly keep her on the defensive. Kayleのビルド → 詳細を見る
Kayle

理由

Rumble dominates because Kayle cannot sustain against his continuous burn. When Rumble lands an Electro Harpoon, the heavy slow forces Kayle to immediately burn Celestial Blessing to cleanse or outrun the slow and escape. Without that movement speed burst, she gets cooked by Danger Zone empowered Flamespitter. Since her heal has a long cooldown and high mana cost early, Rumble's short cooldowns constantly keep her on the defensive.

レーン戦への影響

This pressure translates into absolute wave control. Rumble can effortlessly crash huge waves into Kayle's turret using Flamespitter to fast-push, while her weak waveclear before her passive Divine Ascent evolves leaves her trapped. You can dive her easily if she uses Divine Judgment defensively, or freeze the wave near your tower, forcing her to step up into range of your Electro Harpoon where she risks dying.

立ち回り方

Do not blindly push with Flamespitter when Kayle is playing passive. Instead, slow-push the first three waves, then freeze the rebound. Position yourself aggressively past her melee minions. Hold your second Electro Harpoon until she panics and activates Celestial Blessing. Once her movement speed buff fades, activate Scrap Shield to close the gap and melt her. If she retaliates with Radiant Blast, block it with your shield and keep chasing.

チャンピオン詳細 → Kayleのビルド →
Malphite

Malphite−2

magic damagedefensive play Rumble naturally dominates this matchup because Flamespitter provides continuous magic damage that instantly shatters Malphite's Granite Shield. Since Malphite relies on that passive barrier to absorb short trades, your constant fire denies him any safety. Even if he tries to poke back with Seismic Shard, your Scrap Shield absorbs the damage while your Electro Harpoon slows him down, preventing him from escaping your heat. Malphiteのビルド → 詳細を見る
Malphite

理由

Rumble naturally dominates this matchup because Flamespitter provides continuous magic damage that instantly shatters Malphite's Granite Shield. Since Malphite relies on that passive barrier to absorb short trades, your constant fire denies him any safety. Even if he tries to poke back with Seismic Shard, your Scrap Shield absorbs the damage while your Electro Harpoon slows him down, preventing him from escaping your heat.

レーン戦への影響

This interaction forces Malphite into a purely defensive posture, trapped under his own turret. You easily dictate the wave's tempo, shoving him in while chipping away at his health. Because he struggles to farm under tower without using substantial mana, you will secure a massive gold lead and a highly favorable recall timing, leaving him too weak to setup ganks even with his Unstoppable Force.

立ち回り方

To convert this advantage, maintain a precise spacing gap just at the tip of your Flamespitter range. This prevents him from landing Ground Slam to reduce your attack speed if you overheat with Junkyard Titan. Hold your Scrap Shield specifically to absorb his Seismic Shard poke. If his jungler arrives to exploit his Unstoppable Force, drop The Equalizer directly on your own retreat path to split the opponents and escape safely.

チャンピオン詳細 → Malphiteのビルド →
Nasus

Nasus−2

magic damageearly pressure Rumble's non-stop magic damage from Flamespitter combined with the danger zone bonuses makes it impossible for Nasus to safely walk up and farm with Siphoning Strike. To survive your relentless burn, Nasus is forced to level up Spirit Fire first to secure minions from a distance. This pivot completely ruins his early stack generation, rendering his main scaling tool useless during the laning phase. Nasusのビルド → 詳細を見る
Nasus

理由

Rumble's non-stop magic damage from Flamespitter combined with the danger zone bonuses makes it impossible for Nasus to safely walk up and farm with Siphoning Strike. To survive your relentless burn, Nasus is forced to level up Spirit Fire first to secure minions from a distance. This pivot completely ruins his early stack generation, rendering his main scaling tool useless during the laning phase.

レーン戦への影響

Since Nasus must rely on Spirit Fire to farm, his wave will naturally push toward you, and his health pool will constantly dwindle. You hold absolute wave control. You can freeze near your tower to deny him further or slow push to dive him. Because he lacks Siphoning Strike stacks, he poses zero threat in 1v1 duels, allowing you to bully him under his own turret without fear of a retaliation.

立ち回り方

Focus on maintaining your Heat above 50 to keep Flamespitter empowered. Whenever he tries to walk up to stack Siphoning Strike, punish him immediately. If he casts Spirit Fire to farm, step out of the zone and use Scrap Shield to absorb any stray damage. Prioritize building magic penetration early to bypass his natural magic resistance scaling, and launch The Equalizer to cut off his escape route when he tries to retreat to his tower after using Wither to slow you.

チャンピオン詳細 → Nasusのビルド →
Yone

Yone−1

shield tradingearly pressuremagic resist Rumble dominates this matchup because Yone's only reliable way to escape the roasting cone of Flamespitter is by casting Soul Unbound. Since Soul Unbound has a massive early cooldown, Rumble can easily abuse the long windows in between. Yone's trading pattern is completely locked behind waiting for you to overheat with Junkyard Titan or wasting your Scrap Shield, making the tempo of this lane entirely yours to dictate. Yoneのビルド → 詳細を見る
Yone

理由

Rumble dominates this matchup because Yone's only reliable way to escape the roasting cone of Flamespitter is by casting Soul Unbound. Since Soul Unbound has a massive early cooldown, Rumble can easily abuse the long windows in between. Yone's trading pattern is completely locked behind waiting for you to overheat with Junkyard Titan or wasting your Scrap Shield, making the tempo of this lane entirely yours to dictate.

レーン戦への影響

You will constantly push Yone under his tower, as his Mortal Steel cannot match your waveclear without him taking massive damage from Flamespitter. Because Yone cannot safely trade without his spirit form, he is forced to concede priority. This allows you to stack waves, harass him while he tries to farm with Spirit Cleave, and secure easy plates while keeping him too low to assist his jungler.

立ち回り方

Start trades by landing Electro Harpoon to force Yone into using Soul Unbound defensively. If he snaps back or dashes forward with Mortal Steel, immediately activate Scrap Shield to absorb his burst, then chase him down with Danger Zone empowered Flamespitter. Never let your heat bar reach maximum Junkyard Titan overheat unless his clone ability is on cooldown, otherwise his Fate Sealed will easily lock you down while you are silenced.

チャンピオン詳細 → Yoneのビルド →
Teemo

Teemo−2

magic resistspacing Teemo's defensive identity relies heavily on using Blinding Dart to nullify incoming damage, but this tool is completely useless against you. Because your primary source of damage is Flamespitter rather than basic attacks, his blind does nothing to mitigate the continuous fire. Furthermore, your Scrap Shield easily absorbs his Toxic Shot poison damage, allowing you to win every trade by default. Teemoのビルド → 詳細を見る
Teemo

理由

Teemo's defensive identity relies heavily on using Blinding Dart to nullify incoming damage, but this tool is completely useless against you. Because your primary source of damage is Flamespitter rather than basic attacks, his blind does nothing to mitigate the continuous fire. Furthermore, your Scrap Shield easily absorbs his Toxic Shot poison damage, allowing you to win every trade by default.

レーン戦への影響

This mismatch gives you total command over the minion waves. Teemo cannot contest your push because stepping up to auto-attack exposes him to a lethal Flamespitter burn. You can easily build massive waves, crash them into his turret, and use Electro Harpoon to harass him while he struggles to farm under pressure. This constant push prevents him from dropping stealthy Noxious Trap setups or roaming to poison your jungler.

立ち回り方

Maintain your heat above 50 to keep Junkyard Titan active in the Danger Zone before initiating. When Teemo attempts to escape using Move Quick, tag him with Electro Harpoon to nullify his speed boost, then activate Flamespitter and run him down. If he retreats into a brush to trigger Guerrilla Warfare, immediately launch The Equalizer directly onto his path to burn him out of hiding and secure a clean, non-committal kill.

チャンピオン詳細 → Teemoのビルド →
Shen

Shen−2

magic damagepush pressure Shen relies heavily on Spirit's Refuge to block incoming auto-attacks and win short trades, but this defensive zone is completely useless against Rumble. Since Flamespitter deals continuous magic damage rather than basic attacks, you can melt his health bar right through his protective field. Even when Shen activates Ki Barrier, the sustained burn of your flamethrower easily overwhelms his temporary shield, giving you absolute damage dominance. Shenのビルド → 詳細を見る
Shen

理由

Shen relies heavily on Spirit's Refuge to block incoming auto-attacks and win short trades, but this defensive zone is completely useless against Rumble. Since Flamespitter deals continuous magic damage rather than basic attacks, you can melt his health bar right through his protective field. Even when Shen activates Ki Barrier, the sustained burn of your flamethrower easily overwhelms his temporary shield, giving you absolute damage dominance.

レーン戦への影響

This interaction forces Shen into a defensive posture, unable to contest the wave. You can constantly shove him under his turret using Flamespitter. Because his waveclear is weak, he is forced to use his abilities defensively, preventing him from setting up aggressive plays with Shadow Dash. When Shen eventually looks to impact the map with Stand United, he must sacrifice multiple turret plates and massive gold to your relentless push.

立ち回り方

Prioritize early magic penetration and burn items over flat defensive stats to exploit Shen's lack of magic resistance. In lane, bait his Shadow Dash by positioning aggressively; if he lands the taunt, immediately activate Scrap Shield to mitigate his Twilight Assault empowered strikes. Once the taunt ends, punish his retreat by burning him with Flamespitter and landing consecutive Electro Harpoon shots to slow him down, keeping him trapped under his own tower.

チャンピオン詳細 → Shenのビルド →
Poppy

Poppy−1

magic damageshield managementspacing Poppy relies heavily on Steadfast Presence to stop mobile champions, but since your kit has zero dashes, her defensive aura is entirely wasted against you. This leaves her with no way to halt your advance. You can continuously roast her with Flamespitter while maintaining your distance. Her only window to fight back is if she catches you out of position to trigger the stun from Heroic Charge against a wall. Poppyのビルド → 詳細を見る
Poppy

理由

Poppy relies heavily on Steadfast Presence to stop mobile champions, but since your kit has zero dashes, her defensive aura is entirely wasted against you. This leaves her with no way to halt your advance. You can continuously roast her with Flamespitter while maintaining your distance. Her only window to fight back is if she catches you out of position to trigger the stun from Heroic Charge against a wall.

レーン戦への影響

This matchup turns into a war of attrition where you slowly melt her high health bar. Because she passively gains resistances from Steadfast Presence, your damage shifts from burst to sustained burn. You will easily push her under turret using Flamespitter, denying her Iron Ambassador shield pickups. However, pushing her deep makes you vulnerable to being slammed into her own tower with Heroic Charge.

立ち回り方

To secure your lead, always stand in the middle of the lane, completely away from the alcove and river walls to neutralize Heroic Charge. When she throws her buckler with Iron Ambassador, use Scrap Shield to absorb the damage and step on her shield before she can reach it. If she attempts to escape or charge her Keeper's Verdict, immediately drop The Equalizer to cut off her retreat and burn her down while she is slowed.

チャンピオン詳細 → Poppyのビルド →
Wukong

Wukong−2

magic damagesustain war Your entire trading pattern on Rumble completely nullifies Wukong's defensive identity. Stone Skin only grants armor and health regeneration when facing physical threats, leaving the Monkey King completely naked against the continuous magic burn of Flamespitter. Since Electro Harpoon also shreds magic resistance, Wukong's natural tankiness in melee skirmishes is utterly non-existent, forcing him into highly inefficient early defensive purchases just to stay in the lane. Wukongのビルド → 詳細を見る
Wukong

理由

Your entire trading pattern on Rumble completely nullifies Wukong's defensive identity. Stone Skin only grants armor and health regeneration when facing physical threats, leaving the Monkey King completely naked against the continuous magic burn of Flamespitter. Since Electro Harpoon also shreds magic resistance, Wukong's natural tankiness in melee skirmishes is utterly non-existent, forcing him into highly inefficient early defensive purchases just to stay in the lane.

レーン戦への影響

You dictate the pace of every wave from level one. Wukong cannot contest your push because standing in the wave to trigger Golden Staff or Nimbus Strike means eating massive Flamespitter damage. You can constantly crash large waves, forcing him to farm under tower where you can poke him down with Electro Harpoon. This pressure denies him clean recall timings and keeps him too low to assist his jungler.

立ち回り方

Maintain your heat above 50 to keep Junkyard Titan active for empowered trades. When Wukong attempts to initiate with Nimbus Strike, activate Scrap Shield immediately to absorb his Golden Staff burst, then punish his retreat with Flamespitter. If he uses Warrior Trickster to escape, do not chase blindly; instead, aim Electro Harpoon where you predict his invisible pathing to reveal and slow him. Save The Equalizer to cut off his escape route or to counter his Cyclone during all-ins.

チャンピオン詳細 → Wukongのビルド →
Yasuo

Yasuo−2

magic damageshield management This lane is entirely dictated by how Flamespitter interacts with Yasuo's defensive options. Since Flamespitter is a continuous, non-projectile cone of magic damage, Yasuo's Wind Wall is completely useless against it. This allows you to constantly melt his Way of the Wanderer shield and shred his health bar without him being able to block your primary damage source, turning every extended trade into an easy victory for you. Yasuoのビルド → 詳細を見る
Yasuo

理由

This lane is entirely dictated by how Flamespitter interacts with Yasuo's defensive options. Since Flamespitter is a continuous, non-projectile cone of magic damage, Yasuo's Wind Wall is completely useless against it. This allows you to constantly melt his Way of the Wanderer shield and shred his health bar without him being able to block your primary damage source, turning every extended trade into an easy victory for you.

レーン戦への影響

Because Yasuo cannot block your main damage, he is forced to play defensively near his turret. You can easily maintain constant wave pressure by pushing him under tower with Flamespitter. This neutralizes his Sweeping Blade mobility, as he has fewer minions to dash through. It also prevents him from safely stacking Steel Tempest to threaten you with knockups, giving you absolute priority over the lane and early vision control.

立ち回り方

To maximize your advantage, maintain your Heat above 50 to empower your abilities through Junkyard Titan before trading. When Yasuo approaches the wave, activate Flamespitter and walk directly at him. If he tries to fight back, use Scrap Shield to absorb his Steel Tempest damage. Keep Electro Harpoon ready for when he tries to escape with Sweeping Blade, and drop The Equalizer directly along his retreat path to punish his defensive positioning.

チャンピオン詳細 → Yasuoのビルド →

その他のマッチアップ

このチャンピオンへの対策

カウンターアングル

Rumbleのカウンターは、彼の立ち位置を崩したり、ゾーンを無視できるチャンピオンのことだ。ゆっくり近づいてくる相手には有利に立ち回れるが、Flamespitterを避けられたり、Electro Harpoonを回避されたり、不適切なタイミングでOverheat状態にさせられたりすると苦戦する。Gwenは、機動力と持続ダメージでゾーンを奪い合えるため、データ上最も直接的なハードカウンターだ。相性の悪い相手であるFiora、Camille、Darius、Riven、Renektonは、それぞれ精密なデュエル、高速なエンゲージ、長期トレード、序盤のプレッシャーといった異なる側面を突いてくる。Rumbleの場合、反射的に攻撃的になるのではなく、ウェーブコントロール、Heatの準備、そして相手が本気で仕掛けてきた瞬間に備えてスロウを温存することが重要だ。

パッチの文脈

Rumbleは、相手が彼のペースに乗ってこない場合に価値が下がる。彼の理想的な動きは、Flamespitterで削り、Harpoonでスロウにし、そしてThe Equalizerで相手の進路を危険なゾーンに変えることだ。良いカウンターは、彼が準備不足なうちに戦いを強いたり、Scrap Shieldを防御的に使わせたり、あるいはOverheatによる沈黙を突くのに十分な時間稼ぎをすることで、その計画を崩す。このマッチアップがどれだけ素早い近接戦闘を要求するかによって、Rumbleの精密さがより重要になる。彼は、即座に反撃できるチャンピオンに対して、Harpoonを外したりHeatを無駄にしたりする余裕はない。

クイックリード

  • 最高のRumbleカウンターは、彼のゾーンを突破するか、本気のトレードの前にScrap Shieldを使わせることができる。
  • Rumbleは、敵のオールインの前にHeatを管理する必要がある。不適切なタイミングでのオーバーヒートは、スロウやシールドの使用を妨げる可能性がある。
  • 機動力のあるデュエリストに対しては、オープンな場所での長期デュエルを追うのではなく、ウェーブとオブジェクトで立ち回る必要がある。

カウンターの原型

ゾーンを突破してくる機動力のあるデュエリスト

これらのチャンピオンはRumbleにとって大きな問題となる。彼らは必ずしも燃やしたい場所に留まってくれるわけではない。Gwen、Fiora、Camille、Rivenは、トレードが終わる前にFlamespitterの範囲に入ったり、回避したり、離れたりするタイミングを見つけることができる。RumbleがHarpoonを外したり、早すぎたりオーバーヒートしたりすると、相手の接近をコントロールするのに役立つツールを失ってしまう。このマッチアップは、純粋なダメージよりもスペースの取り合いになり、もしデュエリストがスロウを受けずにRumbleに到達できれば、機動力を活かして素早くキルできる。

チャンピオンの適応方法. Rumbleは、ウェーブをプレイ可能なエリアに保ち、長距離の追跡を避け、Harpoonを自動的なポークではなく敵の侵入への回答として使う必要がある。彼の目標は、本格的なトレードを探す前に、接近コストを高くすることだ。

長期トレードを仕掛けてくるブルーザー

DariusとRenektonは同じ方法でこのマッチアップに勝つわけではないが、どちらもRumbleの共通のミス、つまり彼のツールを使った後に近接戦闘に長居しすぎることを突いてくる。もしRumbleが時間を稼ぐのではなく前進するためにScrap Shieldを使用したり、Heatが不適切な瞬間に彼を沈黙させたりすると、敵の反撃に対するクリーンな対応策がなくなってしまう。これらのチャンピオンは、Rumbleが距離を維持できなくなった際のウィンドウを好む。彼らは、ポークになるはずだったものを直接的な戦闘に変える。これはRumbleが好む状況ではない。

チャンピオンの適応方法. Rumbleは、短い交換を好むべきだ。Flamespitterでラストヒットを狙う相手を罰し、Harpoonで進撃を止め、ブルーザーが長期トレードを仕掛けてくる前に離れる。目標は削ること、完全なデュエルを受け入れることではない。

Rumbleがコントロールできるが無視できないフロントライナー

これらのマッチアップはデータ上有利だが、Rumbleの勝利条件を示すため、理解することは依然として重要だ。Garen、Nasus、Tryndamere、Singed、Sionは、プレイするために彼のゾーンに入る必要があることが多い。これにより、Rumbleはポーク、スロウ、ウェーブコントロールの自然なウィンドウを得る。しかし、もし彼がHeatを無駄にしたり、視界なしでプッシュしたり、The Equalizerを使いすぎたりすると、これらのチャンピオンは依然として彼らの強みを発揮できる。ダイブ、スケーリング、スプリットプッシュ、エンゲージだ。したがって、Rumbleはゾーンの有利を単なるレーンダメージではなく、真のテンポに変える必要がある。

チャンピオンの適応方法. Rumbleは、レーンの有利をプライオリティに変換する必要がある。コントロールされたプッシュ、視界、オブジェクトへの移動、そして敵の侵入を拒否するためのアルティメットの温存だ。もし彼が同じターゲットを燃やし続けるだけなら、相手に息継ぎを許してしまう。

優先度の高いマッチアップ

Gwen

Gwenは、Rumbleのゾーンロジックを直接攻撃するため、優先度の高いマッチアップだ。彼女はスペースを奪い合い、プレッシャーの一部を吸収または無視し、準備不足のトレードを長期デュエルに変えることができる。Rumbleはこのマッチアップを単純なポークレーンとしてプレイすべきではない。彼はウェーブをコントロールし、彼女の真のコミットをスロウにするためにHarpoonを温存し、出口計画なしにオーバーヒートすることを避ける必要がある。もしGwenが十分に削られることなくゾーンを越えてきた場合、Rumbleはしばしば近すぎたり、沈黙しすぎたり、コントロールを取り戻すには無防備すぎたりする。

Renekton

Renektonは、Rumbleに望むよりも速くプレイさせる能力があるため重要だ。もし彼がエントリーアングルを見つけられれば、Rumbleにプレッシャーの下でScrap ShieldとHarpoonを使わせることができる。Rumbleにとっての鍵は、レーンプレッシャーと安全性を混同しないことだ。Flamespitterでのプッシュは良いかもしれないが、それはスペーシングと視界がRenektonにダッシュをオールインに変えさせない場合に限られる。Rumbleは、接触後に勝とうとするのではなく、接触前に削る必要がある。

対面時のよくある間違い

対面時のよくある間違い

  • ラストヒットのためにFlamespitterにまっすぐ入ること。Rumbleに対しては、彼のHeatを尊重しなければ、すべてのミニオンが失ったトレードになりうる。
  • 視界のない狭い通路を通ってオブジェクトを奪い合うこと。それはまさにThe Equalizerが入ることを罠に変える地形だ。
  • ウェーブでHPを失いすぎた後にRumbleにエンゲージすること。彼がキルするためにすべてを当てる必要がなくなると、彼のオールインははるかに危険になる。
  • 彼のOverheatを忘れること。彼が沈黙している間は、激しく攻撃できるが、呪文は使えない。これは時々、位置を変えたり、罰したりするのに最適なウィンドウとなる。
  • 戦闘が始まってからの集団行動。Rumbleは、特に目標物周辺で、すでに燃えているゾーンを一緒に移動するチームを罰します。

コーチングノート

  • Rumbleに対しては、ハープーンを待つのが正しい反射行動であることが多いです。彼がそれを外した場合、彼のエントリーコントロールは大幅に低下し、ダッシュの欠如はより簡単に悪用されます。
  • レーンだけでマッチアップを判断しないでください。Rumbleがキルしていなくても、RumbleまたはDragonにうまく配置されたアルティメットでゲームに勝つことができます。

FAQ

TOPでRumbleに対してどのようにプレイしますか?

Rumbleに対しては、レーン全体を自由に与えることなく、彼のゾーンを尊重する必要があります。すべてのラストヒットで無料のFlamespitterを取るのを避け、彼にHarpoonを使わせ、次にHeatまたはScrap Shieldが有利でなくなったときのウィンドウを探してください。あなたのチャンピオンがエンゲージできるなら、あまりにも多くのHPを失った後ではしないでください。あなたのスパイクを待つ必要がある場合は、完全なトレードを与える代わりに、いくつかのミニオンを犠牲にすることもあります。

なぜGwenはRumbleにとって難しいのですか?

Gwenは、Rumbleがコントロールしたい種類のスペースを争うことができるため、難しいです。彼女は適切なタイミングを見つけてエントリーできれば、Flamespitterをパッシブに耐える必要はなく、ポークレーンを延長されたデュエルに変えることができます。したがって、RumbleはHarpoonを無駄にしないようにし、Heatを慎重に管理し、ウェーブの周りでプレイする必要があります。彼が彼女に十分なHPで到達させると、彼のダッシュの欠如は実際の問題になります。

The Equalizerの影響を減らす最善の方法は何ですか?

最善の方法は、完璧な地形を与えないことです。視界のない狭い通路を避け、完全にグループ化された状態で目標物を開始せず、エンゲージする前に明確な出口を確保してください。Rumbleが1人のターゲットまたはあなたのチームがすぐに離れることができるエリアにアルティメットを配置する必要がある場合、彼のインパクトは大幅に低下します。Rumbleに地形をコントロールするためではなく、反応的にThe Equalizerを使わせると、戦闘ははるかに簡単になります。

Rumbleがオーバーヒートしたらすぐにオールインすべきですか?

自動的にではありません。オーバーヒートは彼が短時間呪文を唱えられないことを意味し、それはウィンドウになる可能性がありますが、状況によっては彼の攻撃も危険になる可能性があります。本当の質問は、トレードの準備のためにFlamespitter、Harpoon、またはScrap Shieldをすでに使用したかということです。もしそうなら、あなたはしばしば一歩後退し、彼のプレッシャーがなくなるのを待ってから、応答することができます。彼のゾーン内で早すぎるオールインをすると、彼を罰する前にすべてのダメージを受ける可能性があります。











































































