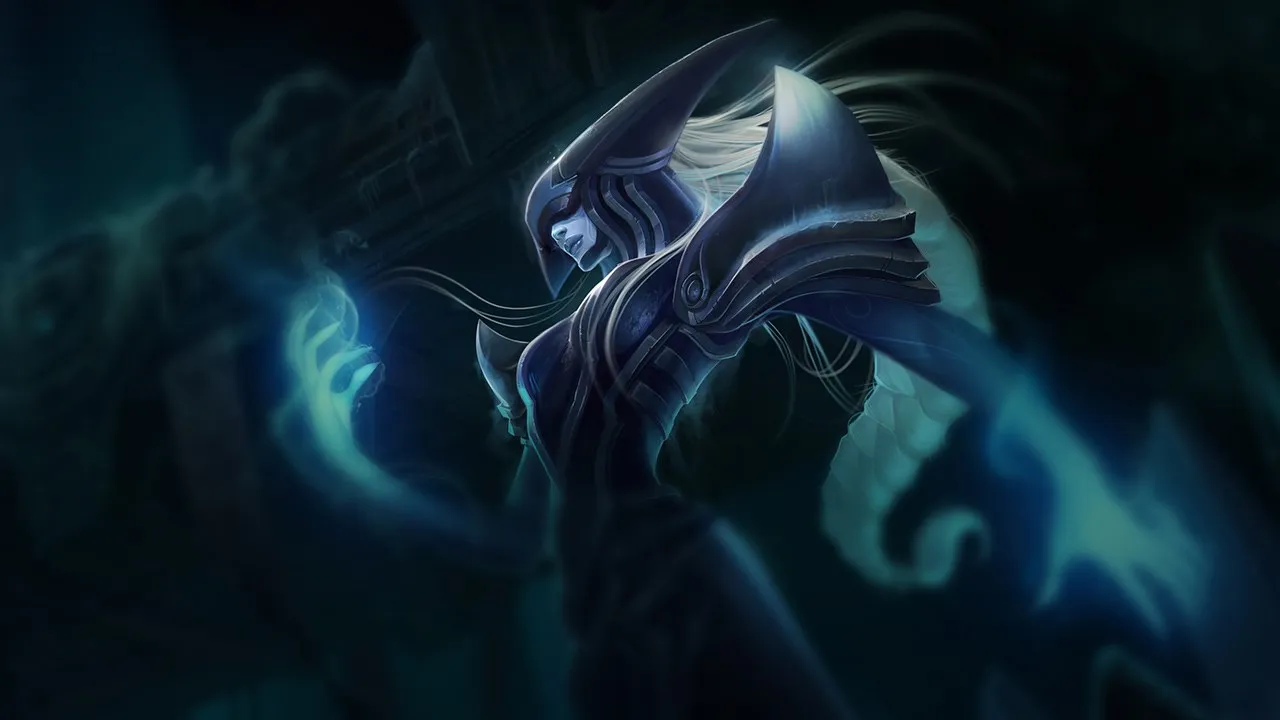













カウンターアングル
Lissandraはチャンピオンに負けるだけでなく、プレイスタイルにも負けます。遠距離メイジやスペースを大きくコントロールするチャンピオンは、彼女のエンゲージ能力を著しく制限します。一方で、彼女の射程内に入らなければならないターゲットに対しては優れています。これらのダイナミクスを理解することは、不可能な戦闘を強制することを避け、タイミングを見計らってプレイするのに役立ちます。

Lissandraは、彼女のCCがヒットする前にburstしてくるチャンピオンや、cleanseや高いtenacityでコントロールを無効化してくる相手に対して脆弱です。射程の長いpoke持ちは、彼女がengageする前にリソースを削り取ります。アイテムが揃う前の弱いearly gameは、明確な弱点となります。
これらのチャンピオンは、こちらのビルドやプレイスタイルを真正面から上回る構成を持ち、レーン戦のコントロールとファームを極めて難しくする。彼らのスキルはこちらの主要な強みを無効化し、いつも通りのプランを実行しようとした瞬間に手痛い反撃を受けさせてくる。こうしたマッチアップでは、ミスを最小限に抑え、正面からの対決以外で解決策を探すことが重要になる。

Vex は相性最悪の matchup です。あなたの主な機動手段である Glacial Path が、Vex のパッシブ Doom 'n Gloom を発動させてしまうからです。あなたが爪で前進して仕掛けるたびに、Vex に Gloom のマークを渡すことになります。Vex の Doom メーターが満タンなら、Vex の基本スキルのどれでもダッシュ中のあなたを即座に fear させ、Ring of Frost のセットアップを潰したうえで、強化された魔法ダメージで撃ち抜いてきます。
このやり取りにより、lane でのあなたの攻撃的なプレッシャーは奪われます。Glacial Path を使って wave を処理したり trade したりすることは安全にはできず、ファームは Ice Shard だけに頼ることになります。Vex は Looming Darkness と Mistral Bolt で簡単にあなたを poke し、あなたをタワー下に押し込み、あなたの体力が危険なほど減ったところで Shadow Surge を使ってダイブしようとしてきます。
生き残るには、Vex のパッシブゲージを意識して立ち回る必要があります。Glacial Path は、守りで使うか、Vex の Doom ゲージが空のとき、たいていは Vex が Mistral Bolt で minion の wave に対して fear を無駄遣いした直後に限って使ってください。Vex が fear を温存している場合は、下がって Ice Shard で安全にファームしてください。Vex に Shadow Surge で捕まったら、すぐに Frozen Tomb を自分に使って Vex の burst を吸収し、重要な ult のリセットを許さないようにしてください。

Morgana の Black Shield があなたの主な engage 手段を完全に無効化するため、この matchup は非常に厳しいです。Morgana を拘束しようとするたびに、Morgana はスペルシールドを反応的に使って、Ring of Frost や Frozen Tomb のダメージと crowd control の両方を吸収できます。その結果、あなたは敵陣の奥深くで拘束手段を失い、攻めのダイブは自殺行為になり、Morgana は Soul Siphon で体力を回復します。
lane では、Morgana は Tormented Shadow で距離を取って安全に wave を操作し、Morgana の push に合わせるためだけにあなたは Ice Shard にマナを使わされます。Glacial Path を使って trade を仕掛けようとしても、Morgana はあなたの到着地点を簡単に読み、確実に Dark Binding を当て、続けて Soul Shackles を決めてきます。これにより、lane での攻撃的なプレッシャーは一切かけられず、早い段階でのリコールを強いられ、ジャングラーはミッドの優先権を得られません。
生き残るには、忍耐のゲームをする必要があります。Black Shield が使える間は、Glacial Path を前方に使ってはいけません。代わりに Ice Shard で Morgana の体力を削り、Morgana の防御シールドを誘ってください。シールドがクールダウンに入ったら、助けを呼ぶか素早い trade を狙うための短い 20 秒の猶予があります。Morgana がシールドを温存している場合は、wave の処理だけに集中し、Dark Binding に捕まったときは Frozen Tomb を自分に使って守ることを考えてください。
その他のマッチアップ
これらのチャンピオンは、マッチアップ自体を絶望的にするわけではないが、対面で優位に立ちやすいツールを持っている。射程が長かったり、攻撃を受け止める力が高かったり、エンゲージへの対応手段が豊富だったりする。アプローチを調整し、戦闘を受け入れるタイミングを慎重に選ぶ必要がある。

Galio は生まれつきのアンチメイジのキットを持っているため、大きな壁になります。Shield of Durand はパッシブで魔法ダメージ用のシールドを与え、あなたの Ice Shard の poke を常に吸収して、lane でのプレッシャーを無効化します。さらに、Glacial Path で engage したり逃げたりするのは非常に危険です。上手い Galio は反応的に Justice Punch を使って飛行中のあなたに衝突し、テレポートをキャンセルさせ、フルの crowd control チェーンを受けやすい状態にしてきます。
Shield of Durand のせいで burst で倒しにくいため、体力を削り合う trade は基本的に負け戦です。Galio は Winds of War と Colossal Smash で wave を素早く押し込み、あなたはタワー下で Ice Shard にマナを使わされます。攻めのダイブや gank のセットアップ中に Justice Punch に捕まると、簡単に拘束され、あなたが守りで Frozen Tomb を無駄にしている間に、Galio のジャングラーが楽にキルを取ります。
生き残るには、Glacial Path を仕掛けの手段ではなく囮として扱ってください。Galio の Justice Punch がクールダウンでない間は、前方への再発動は絶対にしてはいけません。代わりに Ice Shard でファームし、ジャングラーを呼ぶ前に Galio が Shield of Durand を無駄遣いするのを待ってください。Galio が Hero's Entrance でローミングしても、むやみにリバーまで追ってはいけません。ミッシングをすぐにピンして、Ring of Frost で wave を処理して crash させ、Galio にゴールドを失わせてください。

Heimerdinger はあなたの主な engage 手段を完全に無効化します。距離を詰めるために Glacial Path を放つと、そのゆっくりした直線的な軌道が、Heimerdinger に CH-2 Electron Storm Grenade を準備するのに十分な時間を与えます。爪を再発動してテレポートする瞬間に、Heimerdinger はグレネードをあなたの到着地点に直接投げ込み、楽々とスタンを入れます。そして H-28G Evolution Turret のレーザーが、あなたが Ring of Frost を使う前にあなたの体力を溶かします。
この反応型の壁により、あなたはかなり守備的な姿勢を強いられます。Ice Shard で Heimerdinger の H-28G Evolution Turret の群れを処理しようと前に出ると Hextech Micro-Rockets の射程に入るため、Heimerdinger の push を争うことはできません。Glacial Path で安全に trade を仕掛けられないため、Heimerdinger は簡単にあなたをタワー下に押し込み、あなたのプレートを削り続け、リコールのタイミングを悪くさせてミッドの優先権を失わせます。
生き残るには、忍耐のゲームをする必要があります。Ice Shard は最大射程から minion を処理するためだけに使い、Heimerdinger の CH-2 Electron Storm Grenade が外れた、またはクールダウンに入ったのを見たときを除いて、Glacial Path を前方へ再発動してはいけません。Heimerdinger がグレネードを無駄にしたら、そのときが滑り込んで Ring of Frost で拘束する絶好のタイミングです。そうでなければ、捕まったときに Heimerdinger の UPGRADE!!! の burst を耐えるため、Frozen Tomb を温存してください。

この matchup は、Ryze が自然に主導権を握ります。Overload と Spell Flux の拡散により、Ice Shard では届かない距離から poke できるからです。Arcane Mastery で最大マナが増えるにつれ、Ryze の持続 DPS はあなたの burst の可能性をすぐに上回ります。しかし、Ryze の保険はもろいです。あなたのチームが詰めてきたときに Realm Warp をチャネリングして逃げようとした瞬間、狙った Frozen Tomb でテレポートが即座にキャンセルされ、Ryze を捕らえられます。
Ryze の素早い Overload のリセットがあるので、固定的な trade では勝てません。特に Rune Prison で Ryze の minion の wave の中に閉じ込められるとなおさらです。Ryze は簡単に push の優先権を取り、あなたはタワー下でファームすることになり、マナが苦しくなります。Ryze の wave 処理に対抗できなければ Ryze は自由にスケールしますが、押しすぎると Ryze の gank のセットアップにさらされます。ult が解放されるまで、この lane は体力を温存する勝負になります。
Ryze を直接 poke して倒そうとするのはやめてください。代わりに、フォグ・オブ・ウォーの中から Glacial Path を使って素早く wave を処理し、すぐにサイドレーンへのローミングの機会を探してください。小競り合いを仕掛けるときやジャングラーと連携するときは、Ryze が Realm Warp で逃げようとするか、Rune Prison を攻撃的に使うまで、必ず Frozen Tomb を温存してください。ローミングがうまくいかなければ、タワーの近くで耐えて、Ring of Frost で Ryze のタワー攻めを遅らせる準備をしてください。

Demonic Ascension 中の Swain の大量の体力吸収は、あなたの爆発的な burst のタイミングに直接対抗します。Ice Shard と Glacial Path は他のミッドレーナーには大ダメージを与えられますが、Swain はあなたのダメージを吸収してすぐに回復します。パッシブの Ravenous Flock により、Nevermove を当てるたびに Swain は体力が増え続けます。これにより、標準的な burst lane が苦しい戦いになり、あなたの素のダメージでは Swain の持続的な生存力に太刀打ちできません。
この matchup では、Swain が ult を解放するとあなたは後手に回ります。序盤は Ice Shard で Swain の waveclear に対抗できますが、trade は非常に危険になります。Nevermove に捕まると、続く Death's Hand の trade であなたは大きく削られ、Swain は体力を回復します。Swain をタワー下に押し込むことも、ダイブすることも簡単にはできないため、完璧に立ち回らない限り、あなたのローミングの優先度は大きく遅れます。
生き残るには、すぐに回復阻害アイテムを最優先で買って、Swain の Demonic Ascension による回復を削ってください。Swain が ult を発動したら、burst コンボで倒そうとして無駄にしてはいけません。代わりに、Frozen Tomb を自分に使うために温存し、ステイシスで Swain の ult の持続時間を耐え抜き、その間は Ring of Frost で Swain を寄せつけないようにしてください。Glacial Path は engage ではなく、Swain のゾーンから逃げるためだけに使い、変身が切れるのを待ってください。

Lissandra が苦戦するのは、主な initiate 手段である Glacial Path が Karma のキットに完全に無効化されるからです。テレポートで入った瞬間、Karma は Inspire を使って Ice Shard や Ring of Frost による最初の burst を無効化しつつ、同時に Focused Resolve であなたを繋ぎ止めることで即座に反応できます。Karma は Mantra でスキルを強化できるため、あなたのダイブに簡単に勝ち、その場にルートさせ、あなたの攻めの動きを自ら仕掛けた罠に変えてしまいます。
この否定により、あなたは受け身になり、簡単には wave を crash できません。Karma は Mantra で強化した Inner Flame を使ってあなたをタワー下に押し込みつつ、距離を保ちます。Ice Shard で処理しようと前に出ると、重い poke を受けるリスクがあります。この絶え間ないプレッシャーでローミングの可能性が制限され、Frozen Tomb は小競り合いのセットアップではなく、ダイブを生き延びるための守りで使わされることになります。
この lane を生き残るには、必ず自分の melee minion の後ろでプレイし、Ice Shard の広がった扇状の範囲を使って、Karma の繋ぎ止めの射程に入らず安全な位置からファームしてください。Karma の Focused Resolve がクールダウン中のとき以外は、Glacial Path を攻撃的に使ってはいけません。代わりに、Karma が前進してきたときに後ろへ滑って下がるための逃げ専用の手段として Glacial Path を温存してください。Karma が強化された Inner Flame を外したら、その短い隙に前に出て wave を削ってください。

Brand の優れた射程のせいで、苦しい間合いのゲームを強いられます。Ring of Frost で Brand を拘束するには距離を詰める必要があり、それは完全に Brand の思う壺です。前に出ると Pillar of Flame や Conflagration の格好の的になり、続けて Sear の弾が即座に飛んできて、engage の最中にスタンさせられます。先にあなたの crowd control が当たらなければ、あなたが下がる前に、Brand のパッシブ Blaze があなたの体力を溶かします。
このやり取りにより、安全に wave を処理することが難しくなります。minion に Ice Shard を使うと、Brand は Pillar of Flame で罰してきます。Glacial Path で不用意に仕掛けてはいけません。あなたが現れた瞬間にスタンさせるため、Brand は Sear を先打ちしてきます。あなたは序盤の優先権を譲ることを強いられ、Blaze のチップダメージを受け、自分のタワー下に押し込まれている間にローミングのタイミングも遅れます。
守備的にプレイし、攻めの一歩を踏み出す前に Pillar of Flame を誘ってください。Brand がこの主要な手段を外したら、Ice Shard で push する短い猶予があります。Brand の Sear がクールダウン中のとき以外は、Brand に向けて直接 Glacial Path を再発動してはいけません。Brand がスタンを温存している場合は、Glacial Path を横方向に使って Pyroclasm のゾーンから逃れるか、Frozen Tomb を自分に使って Brand の爆発的な burst を防ぎ、ジャングラーが来る時間を稼いでください。

Ziggs は圧倒的な射程の優位によって、この lane を完全に支配します。Ziggs は画面の外から Bouncing Bomb を撃ち続けて、あなたの短射程の Ice Shard の poke を無効化します。Ziggs は安全な位置から楽に wave を処理できるため、自然な形では trade できません。この絶え間ないプレッシャーで lane でのあなたの存在感は奪われ、距離を詰めて何らかの engage を試みるためだけに、読まれやすく、クールダウンの長い Glacial Path に頼らざるを得なくなります。
Ziggs が容赦なく効率的に wave を押し込むため、あなたは自分のタワー下に閉じ込められ、Ice Shard と Ring of Frost でファームするためにマナを使い続けることになります。これによりローミングの機会は奪われ、さらにあなたが離れるたびに、Ziggs の Satchel Charge によるトドメでタワーが大きなダメージを受けます。Hexplosive Minefield で体力を削られると優先権をすべて失い、Ziggs は自由にジャングラーを助けに行けます。
生き残るには、Ziggs が安全にファームできないよう、タワーの射程のすぐ外で wave を freeze することを最優先にしてください。Glacial Path は minion の処理には絶対に使わず、Mega Inferno Bomb を避ける守りの手段か、ジャングラーが gank に来たときの急な追撃として取っておいてください。Ziggs が位置取りを誤ったら、Glacial Path を前方に使い、すぐに Ring of Frost と Frozen Tomb で拘束して、Ziggs が Satchel Charge で逃げる前に確実にキルを取ってください。

Orianna は ball を minion の wave に置くことで、この matchup のペースを握ります。Orianna は Command: Attack と Command: Dissonance を使ってあなたを繰り返し wave から遠ざけ、あなたが Ice Shard を当てようとするたびに体力を削ってきます。あなたの基本射程はずっと短いため、攻撃可能な距離に入るためだけに Glacial Path を使わされ続け、唯一の脱出手段を失ってしまいます。
この絶え間ないゾーニングによって、あなたはタワー下に押し込まれ、Ice Shard での wave 処理でマナがすぐに尽きます。ゴールドと優先権を失い続け、リバーでの小競り合いも争えません。trade のために歩いて近づこうとするたびに、Orianna は Command: Protect で自分にシールドを張って反撃してきます。Frozen Tomb を解放しても、あなたの体力は常に低すぎて、all-in を狙えません。
生き残るには、自分の minion から離れて横方向に位置取りし、Orianna に wave を push するか Command: Attack をあなたに向けるかを選ばせてください。ジャングラーが実際に lane に入ってくるときを除いて、Glacial Path で仕掛けてはいけません。代わりに、Orianna の Command: Shockwave から逃げる守りの手段として温存してください。Orianna が ball を自分の caster minion より先に出しすぎたら、その短い隙に前に出て Ice Shard で CS を確保してください。

この matchup は、あなたの機動手段が弱点になるかどうかで決まります。engage や逃げのために Glacial Path を使うたびに、爪の軌道と最終到達地点は Zoe に完全に丸見えです。Zoe は終点の表示に直接 Sleepy Trouble Bubble を簡単に投げられます。爪を再発動してテレポートすると、あなたは即座に眠らされ、最大距離から放たれる壊滅的な Paddle Star! の追撃に完全に無防備になります。
このやり取りにより、Glacial Path で trade を仕掛けることができなくなり、攻撃の選択肢が大きく制限されます。Sleepy Trouble Bubble を防ぐため minion の後ろで守備的にプレイせざるを得ず、その間に Zoe は Portal Jump と Paddle Star! を使って、あなたの Ice Shard の射程の外から安全にあなたを poke できます。Zoe にうまく眠らされると、体力を大きく失い、早いリコールを強いられます。
生き残るには、Glacial Path を移動手段ではなく、あくまで囮として扱ってください。爪を投げて Zoe に Sleepy Trouble Bubble を無駄遣いさせ、ただし再発動はしないでください。minion の wave にぴったり張りつき、Ice Shard でファームを確保してください。Zoe が危険な Portal Jump で前に出てきたら、Zoe の着地点を Ring of Frost で罰し、Zoe がブリンクで戻る前にすぐ Frozen Tomb で拘束してください。

Zyra は、あなたの前進のプレッシャーを完全に封じます。Rampant Growth の植物が物理的な盾になり、Ice Shard が Zyra に届く前に受け止めてしまうからです。これであなたの主な poke は完全に無効化されます。さらに、Glacial Path で距離を詰めようとするのはあまりに読まれやすく、Zyra は目的地に簡単に Grasping Roots を先打ちして、あなたを即座に拘束し、致命的な反撃の burst を発動してきます。
Zyra が wave のテンポを支配するため、あなたは常にタワー下に追いやられます。Ice Shard では、Zyra が展開した庭をすり抜けて minion と Zyra の両方に当てることができないため、すべての trade に負けます。ファームしようとして体力を失い続け、早いリコールは避けられません。この絶え間ない lane でのプレッシャーでローミングは制限され、Zyra があなたのタワーを削っている間、あなたは lane に縛りつけられます。
生き残るには、minion の wave の後ろではなく、wave と平行に立ち、Zyra に、あなたを狙うか push するかを選ばせてください。Zyra の Grasping Roots がクールダウン中のとき以外は、Glacial Path を攻撃的に使ってはいけません。代わりに、爪を横方向に使って Zyra のスキルショットを避けてください。Zyra が Stranglethorns で仕掛けてきたら、すぐに Frozen Tomb を自分に使ってノックアップを無効化し、ジャングラーが来る時間を稼ぐか、Zyra が出すぎたときに Ring of Frost で拘束してください。

Syndra は優れた射程と自己防衛手段によって、あなたの主な engage 手段を完全に無効化し、この lane を支配します。initiate したり Glacial Path で距離を詰めようとしたりするたびに、Syndra は反応的に Scatter the Weak を使えます。これによりあなたはノックバックされ、テレポートして Ring of Frost や Frozen Tomb で Syndra を拘束する前に、ダッシュが空中でキャンセルされ、あなたは取り残されて無防備になります。
あなたの engage が封じられているため、Syndra は離れた位置から安全に wave を支配します。あなたが minion を処理しようとしている間、Syndra は Dark Sphere と Force of Will で常にあなたを harass してきます。wave に Ice Shard を使うために前に出すぎると、Syndra は Scatter the Weak で簡単にスタンを発動できます。あなたはタワー下に閉じ込められ、優先権と体力を失い続けるため、ジャングラーを助けに行けなくなります。
生き残るには、守備的にプレイして、仕掛ける前に Scatter the Weak を誘ってください。そのクールダウンが残っている間は、Syndra に向けて直接 Glacial Path を使ってはいけません。代わりに minion の wave に対して斜めに立ち、Syndra に、Dark Sphere で push するか、あなたを poke するかを選ばせてください。Syndra がノックバックを無駄にしたら、すぐに Glacial Path で回り込むか、Frozen Tomb で拘束する機会を狙ってください。Syndra がノックバックを温存している場合は、最大射程からの Ice Shard によるファームだけに集中してください。

Lux はこの matchup を支配します。Lucent Singularity の優れた射程があなたを寄せつけないからですが、本当の危険はあなたの initiate 手段にあります。距離を詰めるために Glacial Path を使うたびに、そのゆっくりした読まれやすい軌道が、Lux に到着地点へ Light Binding を狙う十分な時間を与えます。テレポートで入ると、Lux のルートの真ん中に現れ、壊滅的な Final Spark の burst に完全に無防備になります。
この反応型の脅威により、機動手段を攻撃に使うのはほぼ自殺行為なので、あなたは守備的な姿勢を強いられます。Lux は自由に Lucent Singularity を使って wave を push しつつあなたの体力を削り、あなたはタワー下で minion を確保するためだけに Ice Shard を使うことになります。ルートされずに撃ち返すのは難しいため、優先権を失い続け、ローミングやチームの援護が制限されます。
生き残るには、minion の wave に対して斜めに位置取りし、Lux に、あなたを poke するか minion を処理するかを選ばせてください。Lux の Light Binding を誘って避けるまでは、Glacial Path を攻撃的に再発動してはいけません。代わりに、爪を横方向に使う逃げの手段にするか、カウンター engage を警戒させるために温存し続けてください。Lux のルートがクールダウン中なら、フラッシュで仕掛けて Ring of Frost を使い、Lux が Prismatic Barrier を張る前に Frozen Tomb で拘束できます。

Viktor は、あなたの主な機動手段を無効化することでこの matchup を支配します。engage や逃げのために Glacial Path を使うたびに、Viktor は爪の目的地の表示にすぐ Gravity Field を落とせます。これにより、テレポートを丸ごとキャンセルしてクールダウンを無駄にするか、そのまま即座のスタンに飛び込むかの二択を強いられます。Hextech Ray による優れた poke も加わり、簡単には距離を詰められず、安全に trade もできません。
あなたの主なギャップクローザーが事実上人質に取られているため、Viktor は自由に minion の wave を支配します。Viktor は Hextech Ray であなたをタワー下に押し込みつつ poke してきます。あなたは処理するためだけに Ice Shard を守りで使わされ、マナを消耗します。この恒常的なプレッシャーのせいで、ジャングラーを助けにローミングすることができません。lane を離れると、Viktor の速い wave 処理でプレートを失うからです。
生き残るには、crash の阻止を最優先にしてください。Ice Shard を使って、wave がタワーに届く前に早めに数を減らし、ファームのために体力を trade するのを避けてください。Glacial Path は守りの disengage 専用に温存し、Viktor が Gravity Field を間に合うように置きにくい壁に向かって斜めに使ってください。Viktor が Gravity Field を攻撃的に無駄にしたら、短い猶予ができるので、Ring of Frost と Frozen Tomb で拘束して gank のセットアップをしてください。

Lissandra は Glacial Path で距離を詰めて crowd control をセットアップすることに頼っています。しかし、Taliyah は Unraveled Earth でこの initiate を完全に封じます。Lissandra が Taliyah の地雷原を通って爪のところへテレポートすると、岩が即座に発動し、壊滅的なダメージを受けます。この機構的なカウンターのせいで、積極的な engage は非常に危険になり、Lissandra は守備的にプレイせざるを得ません。
laning フェーズでは、Taliyah が wave の状態を支配します。Taliyah は Threaded Volley で簡単に push でき、あなたは push に対抗するのに苦労します。Glacial Path で wave を処理しようとすると、Taliyah はあなたの進路の下に Unraveled Earth を置いて位置取りを罰し、体力の大きな部分を奪う脅威になります。この優先権の喪失により、Taliyah は Rock Surfing と Weaver's Wall を使って自由にローミングできます。
生き残るには、完全に受け身のプレイスタイルを取ってください。Taliyah の Unraveled Earth がクールダウン中のとき以外は、Glacial Path を前方に使ってはいけません。wave の外側に立ち、Taliyah に、Threaded Volley であなたを poke するか push するかを選ばせてください。Taliyah がローミングしても、ワードのない通路をむやみに追いかけてはいけません。代わりに、タワーの下で wave を処理し、Taliyah がダイブしてきたら Frozen Tomb を守りで使うか、ジャングラーが来たときに Taliyah の攻撃的な位置取りを罰して拘束するために温存してください。
その他のマッチアップ
このマッチアップは何よりもまず実行力の勝負であり、両者ともに優位を取れる現実的な手段を持っている。重要なスキルを一つ避けられるか、エンゲージを正しく読めるか、あるいはたった一つの位置取りのミスが、勝敗を分けることもある。マッチアップを理解し、行動すべき瞬間を見極める力がとりわけ重要になる。

この lane は、純粋に ult 同士のにらみ合いです。この matchup は、Annie の致命的な Summon: Tibbers の burst にどう対応するかですべてが決まります。Pyromania のスタンが溜まっているとき、Annie のクマの召喚は非常に読まれやすいので、Annie が落とした瞬間に先打ちして Frozen Tomb を自分に使えます。このステイシスは Annie の burst ダメージとスタンを完全に吸収し、Annie の主なキルの脅威を即座に無効化します。
お互いに攻撃的な動きを即座に封じる手段を持っているため、この lane は自然と、守りの wave 処理による膠着状態になります。2 人とも、Ice Shard と Disintegrate を使って、安全な距離から minion を確保することになります。どちらのメイジも、タワー下でカウンターの拘束を受けるリスクなしには solo kill を無理に狙えないので、lane は非常に安定し、プレッシャーはレイトゲームのスケールへと移ります。
Annie の Pyromania が 3 スタックか 4 スタック溜まっている間は、Glacial Path で仕掛けてはいけません。Annie が簡単にあなたの前進を妨害してくるからです。代わりに、通常攻撃と Ice Shard でファームし、Annie がクマを召喚する最初のフレームで Frozen Tomb を自分に使えるよう、カーソルを構えておいてください。Annie が膠着を破るためにローミングしようとしたら、すぐに Ring of Frost で wave を処理して Annie のタワーを罰してください。

この lane は、完全に Yone の Soul Unbound による trade のタイミングを軸に動きます。Yone が魂を前に出してあなたにプレッシャーをかけているとき、Yone は激しいカウンター engage にさらされます。Yone は本体に戻らなければならないため、元に戻る直前に Ring of Frost や Frozen Tomb で拘束すれば、Yone の逃げるタイミングを完全に崩せます。これで Yone の攻撃的な機動手段は罠になり、大きなダメージを受けます。
どちらのチャンピオンも、重い trade のリスクなしには簡単に push を強制できません。Yone は Mortal Steel を溜めてノックアップの脅威をかけ、あなたを下がらせようとします。しかし、Yone がこのダッシュを無駄にしたら、Ice Shard で Yone をタワー下に押し込めます。あなたの拘束は gank のセットアップに簡単に使えるため、Yone は慎重にプレイしなければならず、タワーのプレートを失うリスクなしには、どちらも楽にローミングできません。
Yone の Mortal Steel が 3 スタック目まで溜まっているときは、Ring of Frost を無駄にしてはいけません。Yone はあなたの守りの手段を誘おうとしているからです。代わりに、Yone が Soul Unbound で仕掛けてくるまでクールダウンを温存してください。Yone がダッシュで入ってきた瞬間に Ring of Frost で即座に反応して Yone のダメージの時間帯を遅らせるか、Yone が Fate Sealed を使ってきたら Frozen Tomb を Yone に落としてください。外した場合は、すぐに Glacial Path を後ろ向きに使って、Yone の物理ダメージの追撃から逃げてください。

この matchup は消耗戦で、Vladimir は Transfusion であなたの harass を受け流そうとし、あなたは Vladimir を lane から追い出そうとします。重要なやり取りはあなたの ult を中心にしています。上手い Vladimir は、Sanguine Pool のターゲット不可を使って Frozen Tomb を反応的に避けようとします。しかし、Ice Shard による優れた waveclear の速さのおかげで、Vladimir はあなたを拘束することができません。
Vladimir は短い trade を通して sustain するので、poke で追い出そうとするのは罠です。代わりに、優れた waveclear を使って Vladimir をタワー下に押し込んでください。Ice Shard による絶え間ないプレッシャーで、Vladimir は自分の体力を犠牲にして Tides of Blood を使うか、ファームを失うかを選ばされます。このプレッシャーは、あなたが lane を離れる隙を生み、ローミングの可能性を使って他の場所で有利を取れます。
Vladimir の Sanguine Pool が使える間は、Frozen Tomb で仕掛けてはいけません。代わりに、Glacial Path でギャップクローズし、Ring of Frost で仕掛けるふりをして Sanguine Pool を誘ってください。Vladimir が Pool を使ったら、すぐに下がってクールダウンを待ってください。Vladimir が Pool を温存している場合は、単に Ice Shard で wave に集中して Vladimir を自分のタワー下に押し込み、それからサイドレーンへローミングして、crowd control で楽にキルを取ってください。

この lane は、純粋に ult のタイミングの勝負です。あなたの主な engage 手段である Frozen Tomb は、Kayle が反応的に使う Divine Judgment に完全にカウンターされます。gank 中のあなたの burst ダメージを丸ごと吸収できてしまうからです。Divine Judgment で Kayle は無敵になるため、スペルのローテーションを一気に吐き出してはいけません。Kayle の反応時間を意識する必要があります。タイミングを誤った engage は、CC がない状態のあなたを完全に無防備にします。
Kayle が ult を解放する前なら、Ice Shard で簡単に wave を push して trade を強要できます。しかし、お互いがピークに達すると、Divine Judgment の脅威によって攻めのダイブは制限されます。ジャングラーが到着する前にこの防御手段を使わせられなければ、Kayle は安全にプレッシャーを吸収し、Divine Ascent でスケールし、最終的には Ring of Frost の射程を上回って、ミッドゲームの主導権を握ります。
この心理戦に勝つには、Frozen Tomb から入る形で gank を仕掛けてはいけません。代わりに、Glacial Path で距離を詰め、Ring of Frost で拘束してパニックの反応を誘ってください。Kayle が Divine Judgment を誤って使うか、逃げるために Celestial Blessing を使わされるまで、ult を温存してください。Kayle が ult を完璧に温存している場合は、Ice Shard で体力を削り続け、Kayle に、死ぬか早めに ult を使うかを選ばせてください。

この lane は、マップのプレッシャーをめぐる純粋な戦略的レースです。Twisted Fate は Wild Cards で wave を処理し、Destiny でテレポートで離れたがります。しかし、Lissandra は Ice Shard で Twisted Fate の push にカードごとに対抗します。小競り合いが起きれば、Frozen Tomb で即座に拘束できますし、Glacial Path で逃げ道を捕まえることもできるので、Twisted Fate のグローバルな脅威は無効化され、ローミングは罠になります。
お互いに solo kill を簡単には狙えない、絶え間ない push 合戦になると思ってください。Twisted Fate は Wild Cards で wave を削り続けつつ、Destiny を使うプレイを狙います。あなたの役目は、Twisted Fate をタワーに釘付けにしておくことです。Twisted Fate が離れたら、Ice Shard ですぐに wave を crash させ、Twisted Fate がチャージされた Dice のパッシブ分のゴールドを失うように、その不在を罰してください。
Twisted Fate の Pick a Card の選択を常に確認してください。青か赤のカードを固定したら、Ice Shard で積極的に wave を push してください。Destiny のチャネリングが始まったら、すぐに Twisted Fate に向けて Glacial Path を使って妨害するか、そのプレイに合流してください。小競り合いでは、Frozen Tomb を Twisted Fate のために特別に温存してください。Twisted Fate が金のカードを固定して味方をスタンさせようとしたら、すぐに拘束して Twisted Fate の burst の時間帯を完全に潰してください。
その他のマッチアップ
これらのチャンピオンは、こちらの主要な強みに効果的に対応するのが難しく、より自由に対面を組み立てることができる。プレッシャーをかけて有利な交換を引き出す手段は複数あることが多い。相手が態勢を立て直す時間を与えるのではなく、この優位を活かして主導権を握ろう。

この matchup は、Aurelion Sol の保険を封じる ult をあなたが持っているため、大きくあなたに有利に傾きます。Aurelion Sol が Astral Flight で逃げたり位置を変えたりしようとするたびに、ポイント&クリックの Frozen Tomb が飛行を即座に中断し、Aurelion Sol をあなたのチームのど真ん中に落とします。さらに、Breath of Light をチャネリングしている間は動けないため、Ice Shard の poke と簡単な Ring of Frost のルートの格好の的になります。
Aurelion Sol は非常に受け身のプレイスタイルを強いられ、Singularity で Cosmic Creator を自由に溜めることができません。Glacial Path から Frozen Tomb で逃げ場のないダイブが始まる脅威が常にあるため、Aurelion Sol の lane でのプレッシャーは奪われます。Ice Shard で push して wave の優先権を楽に確保でき、Aurelion Sol にきれいなリコールをさせず、Aurelion Sol がタワーに張りついている間、あなたはサイドレーンへローミングできます。
Aurelion Sol の Astral Flight が使える間は、Frozen Tomb を先走って無駄にしてはいけません。代わりに、Ice Shard で wave を処理し、Aurelion Sol を飛ばせるように誘ってください。Aurelion Sol が空に飛んだら、Glacial Path を再発動して射程に入り、すぐに拘束してください。Aurelion Sol があなたを牽制するために Singularity を落としたら、ゾーンの中を歩いて抜けるのではなく、周りを回り込み、素早い Ring of Frost でチャネリングを止めてキルを確保してください。

この matchup では、Lissandra が Irelia の攻撃的な機動手段を完全に封じます。Irelia が minion を使って、またはあなたに直接 Bladesurge でダッシュしようとするたびに、タイミングの合った Ring of Frost が空中で Irelia を即座に止めます。これにより、Irelia は安全に Ionian Fervor を溜められず、主な逃げ手段もリセット手段も失って取り残され、あなたの Ice Shard の poke に非常に弱くなります。
このやり取りで、Irelia は wave の扱い方を根本から変えなければなりません。体力の低い minion を Bladesurge のリセット用に準備しようとすると、あなたのタワーのすぐ下でルートされるリスクがあるため、自由にはできません。その結果、あなたがテンポを支配し、Irelia は Defiant Dance を守りのために使わざるを得なくなります。この安全さによって、あなたは素早く wave を処理し、強力なローミングのタイミングを確保してジャングラーを助けられますが、Irelia は自分のタワー下でファームしたままになります。
これを実行するには、必ず自分の体力の低い minion の近くに立ち、Irelia に Bladesurge で前に出るよう誘ってください。Ring of Frost を先走って無駄にしてはいけません。Irelia のダッシュを中断するために温存してください。Irelia が Vanguard's Edge で仕掛けてきたら、Frozen Tomb を自分に使って最初の burst を無効化するか、gank 中に Irelia に使ってキルを確保してください。wave を処理し終えたら、Irelia が wave の処理に縛られている間に、すぐに Glacial Path で壁を越えてサイドレーンへローミングしてください。

Jayce は、致命的な近接ジャンプを仕掛ける前に Transform Mercury Cannon でフォームを切り替えてあなたを poke することに頼っています。しかし、Jayce の主なギャップクローザーである To the Skies! は非常に直線的で読みやすいです。Jayce があなたに向かって跳んだ瞬間、Ring of Frost で勢いを即座に止めるか、Frozen Tomb で完全に拘束できます。これで、Jayce が Lightning Field や Thundering Blow を発動する前に、Jayce の burst の可能性は完全に封じられます。
Jayce は安全にあなたへダイブできないため、lane でのプレッシャーはひどく抑え込まれます。Jayce は遠距離フォームに留まらざるを得ず、あなたが簡単に受け流せる poke にマナを無駄にします。Jayce が wave を削ろうとするたびに、Jayce 自身の minion を貫通する Ice Shard で罰せられます。この受け身の姿勢により、あなたは簡単に wave のテンポを支配し、安全なリコールの時間を確保したり、Jayce が poke しようとして出すぎている間に楽な gank をセットアップしたりできます。
Jayce がハンマーフォームで近づいてくる間は、必ず Ring of Frost を温存してください。waveclear のためだけに無駄にしてはいけません。caster minion のやや後ろに立って Jayce の To the Skies! を誘い、すぐにルートで反応してください。Jayce のジャンプへの対応を誤って大きなダメージを受けたら、すぐに Frozen Tomb を自分に使って時間を稼ぎ、それから Glacial Path を後ろ向きに使って逃げてください。自分から攻撃的な Glacial Path の engage を狙う前に、Jayce に Transform Mercury Cannon のクールダウンを無駄にさせてください。

この lane があなたに有利なのは、Kai'Sa が距離を詰めてトドメを刺すための主な手段が、あなたの crowd control に完全に無効化されるからです。Kai'Sa がダイブするために Killer Instinct を発動するたびに、Kai'Sa 自身があなたの melee の射程に入ります。これによって、Ring of Frost や自分に使う Frozen Tomb で Kai'Sa の攻撃性を即座に封じ、Kai'Sa の攻撃的なダッシュを自ら招いた死の罠に変えられます。
あなたは wave の中に立ったまま Ice Shard でファームできるため、Kai'Sa は Icathian Rain で孤立した trade を見つけるのに苦労します。Kai'Sa が攻撃的に前に出ると、壊滅的な Glacial Path の initiate にさらされるため、Supercharge を使ってあなたを harass することは安全にはできません。あなたは lane の優先権を常に維持し、Kai'Sa をタワー下に押し込みます。そこでは射程の短さのせいで、Kai'Sa は poke に耐えるか、ゴールドを失うかを強いられます。
Kai'Sa があなたにプラズマのスタックを乗せている間は、必ず Ring of Frost を温存してください。Kai'Sa は Killer Instinct を発動して burst の trade を狙ってくるはずだからです。Kai'Sa がダイブしてきたら、すぐに拘束手段で反応して、Kai'Sa が Supercharge で kite するのを防いでください。最初の Ice Shard の poke を外したら、少し下がって Kai'Sa の長射程の Void Seeker を避け、crowd control のクールダウンが完全に戻っていて、Kai'Sa の次の跳躍を罰せるときだけ戦うようにしてください。

Lissandra がこの matchup を支配するのは、Yasuo が Wind Wall で彼女の主な crowd control を防げないからです。Yasuo のバリアは Ice Shard と Glacial Path は簡単に無効化しますが、Ring of Frost の即時ルートと、Frozen Tomb の対象指定のサプレッションにはまったく役に立ちません。Yasuo は trade するために melee の射程に入らなければならないため、自らあなたのブロック不能なスペルの範囲に歩いて入ることになり、Yasuo の攻撃的な機動手段は罠に変わります。
Yasuo は守備的にプレイせざるを得ず、あなたのタワー下で Ring of Frost の拘束を受けるリスクなしには、minion の wave を通して Sweeping Blade を自由に使えません。これにより、Steel Tempest を安全に溜める余地が制限されます。Yasuo が all-in を狙ってきても、勢いを即座に止められるため、Yasuo は先回りして Wind Wall を無駄に使うか、ルートされている間にあなたの minion の wave から大ダメージを受けることになります。
コミットする前に、通常攻撃で Yasuo のパッシブシールドを発動させてください。Yasuo が Sweeping Blade で前にダッシュしてきても、慌てて Glacial Path を使ってはいけません。代わりに、その場に踏みとどまり、Yasuo が着地した瞬間に Ring of Frost を使って、Wind Wall を完全にすり抜けてください。Ice Shard での追撃は、Yasuo のバリアを回り込んでからにしてください。Yasuo がノックアップを発動したら、Yasuo に Frozen Tomb を使って、Last Breath の追撃を完全に封じてください。

Lissandra が Corki を支配するのは、Corki 唯一の逃げ手段である Valkyrie が、Lissandra の即時の crowd control に完全に無効化されるからです。Corki が飛んで逃げようとしても、タイミングの合った Ring of Frost がダッシュの途中で Corki を止め、Corki は取り残されます。さらに、Frozen Tomb は回避不能のポイント&クリックの拘束で、反応する時間を与えません。そのため、ファームのために前に出てきた Corki は、もろい marksman として簡単な的になります。
このやり取りで lane の動きが根本から変わり、Corki はあなたの脅威範囲を意識せざるを得ず、非常に受け身にプレイすることになります。Corki が前に出れば致命的な gank にさらされると分かっているので、Ice Shard で簡単に minion の wave を支配できます。あなたの拘束は確実なので、ジャングラーは繰り返しミッドを狙えて、序盤のキルを確保でき、Corki は自分のタワー下で大量のゴールドを失うことになります。
trade 中に Corki が Valkyrie を攻撃的にも守りにも使うよう、誘ってください。ジャングラーが近づいてきたら、Glacial Path を前方に放って距離を詰めてください。Corki がパニックになって Valkyrie を発動したら、すぐに Ring of Frost で反応して空中でダッシュを中断するか、アニメーションが始まる前に Frozen Tomb で単純に拘束してください。Corki が後ろに下がりすぎている場合は、minion の wave越しに Ice Shard を使って体力を削りつつ、crowd control をいつでも使える状態に保ってください。

Mel は安全にスケールしたいのですが、Lissandra の Ice Shard は wave を貫通して Mel の処理速度に簡単に並びます。これで Mel 本来の push のプレッシャーは打ち消されます。Lissandra も同じ速さで push できるので、地形を越えて反応的にでも先手でも Glacial Path を放ち、小競り合いを仕掛けたりローミングしたりできます。Mel にはこれらのローテーションについていく序盤の機動力がなく、スケールの優位は始まる前から無意味になります。
この matchup はすぐに wave 処理のレースになります。Ice Shard で Mel の push に即座に並べるので、Mel はあなたをタワー下に閉じ込めることも、不自然なリコールのタイミングを強いることもできません。代わりに、あなたが恒常的な優先権を確保します。この絶え間ないプレッシャーは、Mel が安全にスケールする余地を奪い、Mel は自分のタワー下でファームを失うか、あなたの不意の Glacial Path の engage で死ぬリスクを取るかを選ばされます。
melee minion に Ice Shard を使い続けて、Mel が詠唱のために前に出てきたときに貫通ダメージを Mel に当てられるよう、角度を合わせてください。wave を crash させたら、すぐに Glacial Path でフォグ・オブ・ウォーに消えて、Mel のサイドレーンを脅かしてください。Mel が自分のタワー下で極端に受け身にプレイしているなら、無理にダイブしてはいけません。代わりに、ジャングラーと連携して、Mel があなたのローテーションを追ってきたときにリバーで Ring of Frost と Frozen Tomb を使って奇襲してください。

Kassadin は Riftwalk の高機動な burst に完全に頼ってトレードや roam を行いますが、あなたのキットは Kassadin に対する絶対的なカウンターです。Kassadin が前方にブリンクした瞬間、ポイント&クリックの Frozen Tomb で勢いを即座に止められ、後続のジャンプで後退する前にその場に固定されます。この即時のロックダウンにより、Kassadin の Void Stone のシールド発動タイミングが無効化され、耐久の低い近接の体が致命的な反撃にさらされます。
Kassadin はあなたの即時 CC を恐れるため、序盤の priority を譲らざるを得ません。あなたは Ice Shard で wave を簡単にコントロールでき、Kassadin は Nether Blade を使ってタワー下で farm するしかなくなります。自陣タワー下では Riftwalk を攻撃的に使うと即座に Frozen Tomb を受ける危険があるため、Kassadin は安全に使えず、lane に縛られたまま、スケーリングに必要な勢いを得られません。
Kassadin の caster minion の近くに積極的にポジションを取り、farm を妨害しましょう。Ice Shard を飛ばし続けて体力を削りつつ、ジャングラーが到着する時のために Ring of Frost と Glacial Path は必ず温存してください。Kassadin が Nether Blade で minion を確保しようと前に出てきたら、あなたも前に出て Riftwalk を誘います。Kassadin が使った瞬間に Frozen Tomb でロックダウンすれば、ジャングラーが動けない相手を簡単にキルできます。

Lissandra は Veigar の守備と攻撃の勝ち筋を自然に封じます。Veigar が Event Horizon を置いてあなたを zone したり collapse を狙ったりしても、Glacial Path を絶妙なタイミングで再発動すれば、スタンの境界線をきれいにブリンクで抜けられます。さらに Veigar が Primordial Burst であなたを仕留めようとしても、自分自身に Frozen Tomb を使えば即座にステイシスに入り、Veigar の ult を完全に無駄にしつつ、Veigar を burst で倒せる距離に入れます。
この相性では Veigar から安全が奪われ、Veigar はタワーのかなり後ろでプレイせざるを得なくなります。Veigar の cage を恐れずに Ice Shard で wave を簡単に push でき、mid lane の priority を常に握れます。Veigar はあなたに対して安全にトレードできないため、タワー圧力の下で Phenomenal Evil Power と Baleful Strike のスタックを落とすしかなく、その間あなたは自由に roam したり、深い vision を確保したりできます。
Veigar の minion wave と並行するように積極的にポジションを取り、Event Horizon を誘ってください。Veigar が使ったら、すぐに cage を通して Veigar に向けて Glacial Path を投げ、再発動してスタンの境界線を越えます。Veigar が焦って Dark Matter を使ったら、Ring of Frost で Veigar をその場に root して、歩いて離れられないようにします。Primordial Burst の弾が Veigar の手を離れるのが見えた瞬間に、自分自身に Frozen Tomb を使えるよう、常に指を構えておきましょう。

Lissandra は Pyke の捉えにくい skirmish スタイルを完全に封じます。Pyke が Ghostwater Dive で危険から滑り出そうとしても、Lissandra は Ring of Frost で即座に反応して Pyke をその場に root でき、Pyke のステルスは無意味になります。さらに Pyke が Death from Below で Lissandra や味方を処刑しようとしても、絶妙なタイミングで自分自身に使った Frozen Tomb が無敵を与え、Pyke の ult を完全に無駄にして、重要なゴールド共有のリセットも阻止します。
Pyke は waveclear が弱いため、Lissandra は Ice Shard で Pyke を簡単にタワー下まで push できます。この絶え間ない圧力により、Pyke は vision の外で Gift of the Drowned Ones を発動できません。Pyke はタワー下で CS を失うか、不利なトレードを受けるかの二択を迫られます。一度 push すれば、あなたがマップのテンポを握り、Pyke がサイド lane へ Ghostwater Dive で roam するのを、優れた Glacial Path の機動力で並ぶか上回って、見ていることになります。
Pyke が Phantom Undertow で前にダッシュしてくる時は、必ず Ring of Frost を温存してください。焦らず、Pyke が到着するのを待って root し、必要なら Glacial Path で位置を取り直します。Pyke の姿が見えなくなったら、すぐに wave を push して、その vision の空白を使って Pyke の roam を追いましょう。skirmish が始まったら、Death from Below の地面のインジケーターが見えた瞬間に自分自身に Frozen Tomb を使えるよう、カーソルを構えておけば、Pyke の一か八かのダイブを死の罠に変えられます。

あなたの CC が Talon のキルの脅威を完全に無効化するため、大きな有利を握れます。Talon が Noxian Diplomacy で距離を詰めようとしても、反応して使った Ring of Frost がダッシュ中の Talon を中断します。これにより Talon は Blade's End を発動するのに必要な通常攻撃を当てられません。さらに、あなたの Ice Shard は Talon の Rake の waveclear に簡単に並び、Talon の本来の priority を奪います。
Talon は安全にトレードできず、roam するために wave を簡単に push することもできない、困った立場に追い込まれます。Talon が minion に Rake を使うたびに、あなたは Talon を punish できます。Talon が Assassin's Path で逃げたり壁越しに roam したりしようとしても、Glacial Path で Talon のローテーションにすばやく付いていくことも、wave を素早く crash させて Talon のタワーを脅かすこともできます。
自分の近接 minion のすぐ後ろにポジションを取り、Talon の前進を誘ってください。Ring of Frost は常に使える状態にしておき、wave の処理には絶対に使わないでください。Talon の Noxian Diplomacy に反応するためだけに必要です。Talon がレベル 5 になり Shadow Assault で姿を消したら、Talon の burst を耐えるために自分自身にすぐ Frozen Tomb を使い、Talon があなたの味方を狙うなら Talon に使います。Talon が roam するなら、川の壁越しに Glacial Path を使ってローテーションの速さに並びましょう。

Lissandra の CC が Akali の高機動な暗殺パターンを完全に無効化するため、Lissandra は大きな有利を握ります。Akali がフルコンボを決めようとしても、Lissandra は即座にダイブを止められます。Akali が Shuriken Flip や Perfect Execution でダッシュしてきたら、Lissandra は Ring of Frost で Akali を即座に root するか、自分自身に Frozen Tomb を使って burst を完全に無効化でき、Akali は無防備な場所に取り残されます。
この matchup の力学により、lane は Akali にとって zone される悪夢になります。Akali は、素早い Ice Shard の poke やフルロックアップを受ける危険を冒さずに、Five Point Strike を使うために前に出ることも Assassin's Mark を発動させることもできません。その結果、Akali は farm を集めるためだけに Twilight Shroud の中に隠れるしかなくなり、Lissandra が minion wave を完全に支配します。これにより Lissandra は大きな wave priority を築き、早めのローテーションを狙えます。
この有利を活かすには、Akali が farm しようとするたびに punish してください。minion 越しに Ice Shard で Akali の体力を削り、Akali が engage してくる時のために Ring of Frost を特別に温存します。Akali が Perfect Execution を発動しても慌てず、自分自身に Frozen Tomb を使って 2 回目のダッシュを吸収するか、Glacial Path で Akali の shroud の範囲から逃れましょう。Akali が recall せざるを得なくなったら、すぐに shove してサイド lane へ roam してください。

Diana は Crescent Strike を当てて Lunar Rush をリセットし、あなたにダイブすることに完全に頼っています。しかし、Diana の積極的なダッシュはまさにあなたの思う壺です。Diana があなたの近接範囲に入った瞬間、Ring of Frost で勢いを即座に止められます。Diana が ult の Moonfall を使っても、自分自身に素早く使った Frozen Tomb で burst を完全に無効化でき、Diana はあなたの領域の奥深くで無防備になります。
Diana は安全にあなたへダイブできないため、Ice Shard による遠距離 harass を耐えるだけのために Pale Cascade を使わざるを得ません。これにより、wave の位置を簡単に自分で決められます。Diana が反撃できないと分かっているので、タワー下まで素早く shove できます。この priority により、Diana が minion の処理に縛られている間に、Glacial Path で壁を越えて roam し、サイド lane に影響を与える絶好のタイミングが生まれます。
Ring of Frost は Diana のダッシュのためだけに必ず温存し、farm のためだけに無駄にしないでください。Diana が minion を叩くために前に出てきたら、Ice Shard の範囲ダメージで poke しましょう。Diana の Crescent Strike があなたにマークを付けたら、タワーの方へ下がってください。Diana が Lunar Rush を使ってきたら、すぐに root します。Diana のジャングラーがダイブに加わってきたら、自分自身に Frozen Tomb を使って時間を稼ぎ、相手が失敗した時に Iceborn Subjugation を発動させましょう。

Ahri は Spirit Rush で戦闘の中を縫うように動き、危険から逃げることに頼っていますが、Lissandra はこの機動力を完全に無効化します。Frozen Tomb の即時のポイント&クリックのスタンはダッシュ中の Ahri を止め、Ahri の安全網を奪います。このロックダウンを Ring of Frost につなげることで、Lissandra は Ahri がポジションを取り直すことも逃げることも許さず、捉えにくいアサシンを格好の的に変えます。
Ahri は即座に Frozen Tomb で止められる危険を冒さずに Spirit Rush を攻撃的に使えないため、lane でのキルの圧力は消え去ります。Ice Shard で Ahri の Orb of Deception の waveclear に余裕を持って並べます。このロックダウンの脅威により、Ahri は自分のタワー下で守備的にプレイせざるを得なくなり、Ahri が farm に縛られている間、あなたはマップのローテーションを支配し、サイド lane への roam のタイミングを決められます。
lane では、特に gank の時に、Ahri の Spirit Rush のダッシュを中断するために Frozen Tomb を温存してください。Glacial Path を予測しやすい形で投げるのは避け、Ahri が roam しようとした時に側面から回り込んだり退路を断ったりするために使いましょう。Ahri が Orb of Deception で poke しようと前に出てきたら、戻りのダメージを避けるために横に動いて避け、Ice Shard で反撃します。Ahri が Charm を外したら、すぐに強めのトレードを仕掛けてください。

Akshan は Heroic Swing の機動力でトレードを支配し、圧力から逃れることに頼っていますが、Lissandra はそれを難なく封じます。Akshan が壁にフックした瞬間、反応して使った Ring of Frost か狙いを定めた Frozen Tomb が Akshan の飛行を即座に中断します。主な脱出手段を奪われ、Dirty Fighting の 2 連撃のシールドも発動できなくなった Akshan は完全に封じ込められ、積極的なプレイが致命的なミスに変わります。
この完全な封じ込めにより、Akshan は守備的にプレイせざるを得なくなり、Akshan が普段 lane で持つ支配力は無効化されます。Akshan は即死の危険を冒さずに Heroic Swing で積極的にトレードすることができません。その結果、Ice Shard で Akshan の Avengerang の waveclear に簡単に並べます。Akshan が Going Rogue で姿を消してサイド lane でのキルを狙おうとしても、あなたの優れた wave コントロールと Glacial Path により、Akshan をタワー下に閉じ込めることも、Akshan より先に roam することもできます。
laning 中は Ring of Frost を cooldown 中にしないようにし、minion に無駄使いしないで、常に Heroic Swing を中断できるよう準備しておいてください。壁の近くにポジションを取って Akshan がスイングするよう誘い、反応してロックダウンすれば、簡単な gank の下地になります。Akshan が遠くから Comeuppance をチャネリングしたら、Glacial Path で距離を詰めて中断するか、自分自身に Frozen Tomb を使って弾を完全に吸収しつつ、Iceborn Subjugation が戦闘の後始末を準備するのを待ちましょう。

Aurora は Across the Veil の超機動力と Between Worlds のテレポートする境界線に大きく頼り、戦闘の中を出入りします。Lissandra はこの捉えにくいプレイスタイルを完全に無効化します。Frozen Tomb を構えておくことで、逃れようのないポイント&クリックの封じ込めの脅威を突きつけられます。Aurora がジャンプを使った瞬間、あなたの即時発動の CC が Aurora の回避のチャンスをすべて奪います。
この matchup の力学により、Aurora は極端に守備的にプレイせざるを得ず、あなたは lane を簡単に支配できます。Aurora が Twofold Hex で wave を処理しようとしたら、Ice Shard で積極的にトレードできます。Aurora はあなたの仕掛けから Across the Veil で安全に逃げられないため、priority を譲らざるを得ず、タワー下の Aurora に圧力をかけられます。
Aurora の守備手段を誘い出して、Aurora の cooldown を突きましょう。Glacial Path を無闇に前へ投げるのは避けてください。代わりに、歩いて近づき、Ice Shard と Ring of Frost で Aurora を脅かします。Aurora が焦って Across the Veil を使って逃げたら、大きな有利のタイミングが訪れます。Aurora が Between Worlds を置いたら、境界線の間を跳ね回られないよう、Aurora に直接 Frozen Tomb を使いましょう。

Lissandra の ult である Frozen Tomb は、Ekko の主な生存手段である Chronobreak を直接無効化するため、Lissandra は大きな有利を握ります。Ekko は近接のアサシンで、ダメージを与えるには Phase Dive で突っ込まなければならないため、あなたの脅威範囲に自ら入ってきます。Ekko が時間操作の ult を発動する前に Frozen Tomb で即座にロックダウンすれば、Ekko の大きな回復と脱出の両方を防げ、Ekko のダイブは死刑宣告に変わります。
この相性では、Ekko はあなたの CC を恐れて守備的にプレイせざるを得なくなります。Ice Shard で wave を shove してタワー下の Ekko に安全に圧力をかけられます。Ekko が wave を削ったり Timewinder でトレードしたりしようとするたびに、そのポジションを punish できます。Ekko は中断される危険なしに Parallel Convergence を安全に展開できないため、roam の可能性が大きく妨げられ、あなたは lane priority を確保して mid lane のマップのローテーションを支配できます。
Ekko が前に出てくる時は必ず Ring of Frost を温存し、wave の処理に使わないでください。Ekko が Phase Dive で仕掛けてきたら、すぐに Ring of Frost で反応して Ekko をその場に root し、Z-Drive Resonance の発動を防ぎます。Ekko の体力が十分に減ったら、これを Frozen Tomb につなげて、Ekko が Chronobreak を押す前に burst で倒しましょう。Ekko が非常に安全にプレイしてくるなら、Ekko の体力が削れている時に Glacial Path でタワー下の Ekko にダイブしてください。

Lissandra は Fizz にとって大きな障害です。Lissandra のキットが Fizz の高機動な暗殺パターンを直接無効化するためです。Fizz が Urchin Strike で engage したり Playful から降りてきたりするたびに、Lissandra は Fizz の勢いを即座に止められます。Ring of Frost は即座に発動する外しようのない root を与え、Frozen Tomb は Fizz の捉えにくい回避を完全にすり抜けるポイント&クリックのスタンを与えるため、Fizz は無防備になり、逃げられません。
この力学により、Fizz は守備的でみじめな laning phase に追い込まれ、体力を保つために minion のゴールドを犠牲にしなければなりません。wave 越しに Ice Shard で Fizz に絶えず圧力をかけ、タワー下へ shove できます。Fizz は大ダメージを受けずに安全に wave を争えないため、mid の priority を常に握れ、Fizz が farm に閉じ込められている間、サイド lane への roam のタイミングを決められます。
この matchup を完璧にこなすには、Ring of Frost を攻撃的に使わず、Fizz が Urchin Strike で突っ込んでくる時のための反応用として温存してください。Fizz が Chum the Waters で仕掛けてきたら、ult のダメージとノックアップを完全に無効化するために自分自身に Frozen Tomb を使う準備をしましょう。wave を shove したら、すぐにジャングルの壁越しに Glacial Path を使ってサイド lane に影響を与え、Fizz が自分のタワーを処理することすらできないうちに有利を確保してください。

Lissandra は Kennen の代名詞である engage を完全に無効化します。Kennen が Lightning Rush でダイブして Slicing Maelstrom の準備をしようとするたびに、Lissandra には完璧な対処法があります。Ring of Frost でダッシュ中の Kennen を root するか、自分自身に Frozen Tomb を使って ターゲット不可になり、Kennen の ult の嵐をすべて吸収しながらダメージを返せます。これにより skirmish における Kennen の主な勝ち筋が封じられます。
この matchup の力学により、Kennen は安全に体力をトレードできないため、守備的にプレイせざるを得ません。Kennen の Lightning Rush は簡単に punish されるため、遠くから farm するには Thundering Shuriken に頼るしかありません。Ice Shard で wave を簡単に push して、Kennen をタワー下に留めておけます。この絶え間ない圧力が Kennen の roam のタイミングを制限し、teamfight の流れを変える ult をサイド lane に持ち込ませません。
Kennen の Lightning Rush が発動中の時は必ず Ring of Frost を温存し、Kennen が近くにいる時は waveclear のために使わないでください。Kennen の Thundering Shuriken を防ぐために minion の少し後ろにポジションを取り、wave 越しに Ice Shard で Kennen を poke しましょう。Kennen が Slicing Maelstrom で all-in を強要してきたら、すぐに自分自身に Frozen Tomb を押して Kennen の ult を無駄にし、その後は逃げるか Glacial Path で追撃してください。

Katarina は高機動のリセットに頼っていますが、あなたの CC が Katarina のチャンスの窓を完全に無効化します。Katarina が Shunpo で飛び込んで Death Lotus をチャネリングした瞬間、Ring of Frost で Katarina の ult を即座に中断するか、Frozen Tomb で完全にロックダウンできます。この対応により Katarina の脅威は奪われ、Katarina はあなたの遠距離 harass に対して守備的にプレイせざるを得なくなります。
Katarina はあなたに対して安全に engage できないため、あなたが wave のテンポを決められます。Ice Shard で Katarina を絶えずタワー下へ shove でき、Katarina は farm を失うか体力を削ることになります。Katarina が試合に戻る唯一の手段は roam を探すことですが、あなたの優れた waveclear のおかげで、あなたが主導権を握り、Katarina に付いていくことも、Katarina のサイド lane での試みを大きなタワー圧力で punish することもできます。
Ring of Frost や Frozen Tomb を waveclear に無駄使いしないでください。Katarina の Shunpo に反応するために常に温存しましょう。Katarina の engage を誘うために、Bouncing Blade で落とされた dagger から少し離れた位置に立ってください。Katarina が lane から姿を消したら、すぐに壁越しに Glacial Path を使って roam のタイミングに並ぶか、素早く shove して Katarina のタワーを脅かしましょう。Katarina が teamfight にダイブしてきたら、Katarina の回転を封じるためだけに ult を温存してください。

Frozen Tomb は Death Mark に対する究極のカウンターであるため、Lissandra は Zed の主な脅威を完全に無効化します。Zed がマークを付けた瞬間に自分自身に ult を使うことで、Lissandra はステイシスに入り、受けるはずの burst をすべて無効化します。Zed が再び現れた時、Zed はすぐ隣で無防備になっているため、タワー下や自分の minion wave の中で Ring of Frost を使ってロックダウンする簡単な仕掛けができます。
この相性では、lane の圧力がすべて Zed にかかり、あなたがレベル 5 になった後の Zed はソロキルを取れません。Death Mark であなたを仕留められないと分かっているため、Zed は受け身でのプレイを強いられ、トレードではなく Living Shadow を使って Razor Shuriken で遠くから farm するしかありません。あなたは wave のテンポを完全に握り、Ice Shard で Zed を絶えずタワー下へ shove し、サイド lane へ roam できます。
これを実行するには、Zed の Death Mark による engage のためだけに Frozen Tomb を必ず温存し、Zed の ult が cooldown 中の場合を除き攻撃的に使って無駄にしないでください。caster minion の近くに立って Zed を誘い、Zed が仕掛けてきたら自分自身に ult を使います。ステイシスから出た瞬間にすぐ Ring of Frost で追撃して Zed をその場に root し、Ice Shard で Zed を貫きましょう。Zed が Living Shadow で逃げようとしたら、Glacial Path で距離を詰めてキルを確保してください。
その他のマッチアップ
これらのアイテムを購入すると、このチャンピオンの影響力を抑えられます。

| マッチアップ | 判定 | 有利度 | 勝率 | ピック率 |
|---|---|---|---|---|
| Morgana | ハードカウンター | +2 | 52.0% | 6.6% |
| Vel'Koz | ハードカウンター | +2 | 50.2% | 3.5% |
| Vex | ハードカウンター | +2 | 49.2% | 2.0% |
| Zilean | ハードカウンター | +2 | — | — |
| Hwei | 不利なマッチアップ | +1 | 52.8% | 7.4% |
| Brand | 不利なマッチアップ | +1 | 52.6% | 10.4% |
| Zyra | 不利なマッチアップ | +1 | 51.7% | 3.0% |
| Syndra | 不利なマッチアップ | +1 | 51.7% | 6.5% |
| Taliyah | 不利なマッチアップ | +1 | 51.4% | 1.9% |
| Galio | 不利なマッチアップ | +1 | 51.3% | 11.4% |
| Orianna | 不利なマッチアップ | +1 | 51.1% | 4.7% |
| Heimerdinger | 不利なマッチアップ | +1 | 50.0% | 1.5% |
| Norra | 不利なマッチアップ | +1 | 49.9% | 1.4% |
| Swain | 不利なマッチアップ | +1 | 49.7% | 2.8% |
| Viktor | 不利なマッチアップ | +1 | 49.3% | 3.0% |
| Lux | 不利なマッチアップ | +1 | 49.0% | 5.6% |
| Ziggs | 不利なマッチアップ | +1 | 48.6% | 5.0% |
| Ryze | 不利なマッチアップ | +1 | 47.8% | 3.0% |
| Karma | 不利なマッチアップ | +1 | — | — |
| Rumble | 不利なマッチアップ | +1 | — | — |
| Seraphine | 不利なマッチアップ | +1 | — | — |
| Varus | 不利なマッチアップ | +1 | — | — |
| Zoe | 不利なマッチアップ | +1 | — | — |
| Annie | スキル次第のマッチアップ | ±0 | 52.3% | 2.1% |
| Vladimir | スキル次第のマッチアップ | ±0 | 51.9% | 4.3% |
| Twisted Fate | スキル次第のマッチアップ | ±0 | 50.1% | 5.6% |
| Yone | スキル次第のマッチアップ | ±0 | 49.3% | 5.6% |
| Cho'Gath | スキル次第のマッチアップ | ±0 | — | — |
| Kayle | スキル次第のマッチアップ | ±0 | — | — |
| Malphite | スキル次第のマッチアップ | ±0 | — | — |
| Teemo | 有利なマッチアップ | −1 | 53.2% | 2.3% |
| Aurelion Sol | 有利なマッチアップ | −1 | 51.6% | 6.4% |
| Kassadin | 有利なマッチアップ | −1 | 50.9% | 1.7% |
| Jayce | 有利なマッチアップ | −1 | 50.6% | 2.3% |
| Veigar | 有利なマッチアップ | −1 | 48.9% | 7.1% |
| Yasuo | 有利なマッチアップ | −1 | 47.0% | 9.1% |
| Mel | 有利なマッチアップ | −1 | 45.6% | 8.8% |
| Corki | 有利なマッチアップ | −1 | — | — |
| Irelia | 有利なマッチアップ | −1 | — | — |
| Kai'Sa | 有利なマッチアップ | −1 | — | — |
| Pyke | 有利なマッチアップ | −1 | — | — |
| Talon | 有利なマッチアップ | −1 | — | — |
| Kennen | 有利なマッチアップ | −2 | 51.7% | 1.6% |
| Ekko | 有利なマッチアップ | −2 | 50.8% | 5.2% |
| Ahri | 有利なマッチアップ | −2 | 50.8% | 4.3% |
| Zed | 有利なマッチアップ | −2 | 50.7% | 4.5% |
| Aurora | 有利なマッチアップ | −2 | 50.3% | 4.2% |
| Fizz | 有利なマッチアップ | −2 | 48.8% | 2.2% |
| Tristana | 有利なマッチアップ | −2 | 48.7% | 1.2% |
| Katarina | 有利なマッチアップ | −2 | 48.5% | 1.4% |
| Akali | 有利なマッチアップ | −2 | 47.7% | 4.3% |
| Diana | 有利なマッチアップ | −2 | 47.4% | 1.1% |
| Akshan | 有利なマッチアップ | −2 | — | — |
| Lucian | 有利なマッチアップ | −2 | — | — |
| Pantheon | 有利なマッチアップ | −2 | — | — |
有利度:Wild Rift Coreの公式判定(−3〜+3)で、各行に記載されたチャンピオンの視点から見た値です。勝率とピック率:このロールにおける相手チャンピオン自身の数値 — Wild Rift CN · Challenger、Patch 7.3b。直接対決の勝率ではありません。
Lissandraはチャンピオンに負けるだけでなく、プレイスタイルにも負けます。遠距離メイジやスペースを大きくコントロールするチャンピオンは、彼女のエンゲージ能力を著しく制限します。一方で、彼女の射程内に入らなければならないターゲットに対しては優れています。これらのダイナミクスを理解することは、不可能な戦闘を強制することを避け、タイミングを見計らってプレイするのに役立ちます。
Lissandraのカウンターは、彼女の射程の短さとエンゲージへの依存という2つの弱点を突きます。遠距離からポークできるチャンピオンや、彼女の突入を妨害できるチャンピオンは、戦闘が始まる前に彼女の影響力を低下させます。もし彼女がターゲットに到達できなければ、彼女はプレッシャーの少ないユーティリティメイジになってしまいます。
これらのチャンピオンは距離をコントロールし、Lissandraのエンゲージアングルを拒否します。彼らの継続的なポークは、彼女がエンゲージする前に体力を削り、彼らのゾーンコントロールは側面からの攻撃を危険にします。彼女は機会を創出するのではなく、ミスを待たなければならなくなります。
チャンピオンの適応方法. 視界外からの側面攻撃を探し、正面から強制するのではなく、敵のクールダウンを見計らってプレイしましょう。
これらのチャンピオンは彼女のゲームプランを直接的にカウンターします。シールドや防御的なCCは彼女のバーストを無効化したり、彼女のエンゲージを彼女自身に対して不利に変えたりします。Lissandraは予測可能になり、カウンターされやすくなります。
チャンピオンの適応方法. エンゲージする前に、防御的なツールが使われるのを待ちましょう。
これらのチャンピオンはLissandraのmidプライオリティを拒否し、マップのテンポを決定します。プライオリティがなければ、彼女はローミングしてグローバルにゲームに影響を与える能力を失います。
チャンピオンの適応方法. レーンではより防御的にプレイし、レーン外での機会を探しましょう。
ZiggsはLissandraにとって最悪のシナリオです。彼は遠距離からレーンをコントロールし、エンゲージを拒否し、あらゆる接近を罰します。側面からのアングルがなければ、このマッチアップは受動的でフラストレーションの溜まるものになります。
敵が距離をコントロールして接近を拒否しているからです。アプローチを変えて側面を探すか、ミスを待つ必要があります。
被ダメージを最小限に抑え、視界を意識して立ち回り、無理に突っ込まずにチャンスを待つ。
敵の防御ツールがクールダウンに入り、味方が即座に追随できる時。
無理にエンゲージせず、キャリーを守るためにクラウドコントロールを使い、ミスを罰する。