A
2026年9月 · Patch 7.2d
Assassin · JUNGLE · TOP

Pantheon Wild Rift カウンターガイド

Pantheonは、よりスケールするチャンピオンに対してmid and late gameで失速します。回復やシールドによって彼のearly burstを吸収できるターゲットは、彼の影響力を低下させます。彼のAegisengageを回避するranged構成は、彼のドミナンスの可能性を制限します。

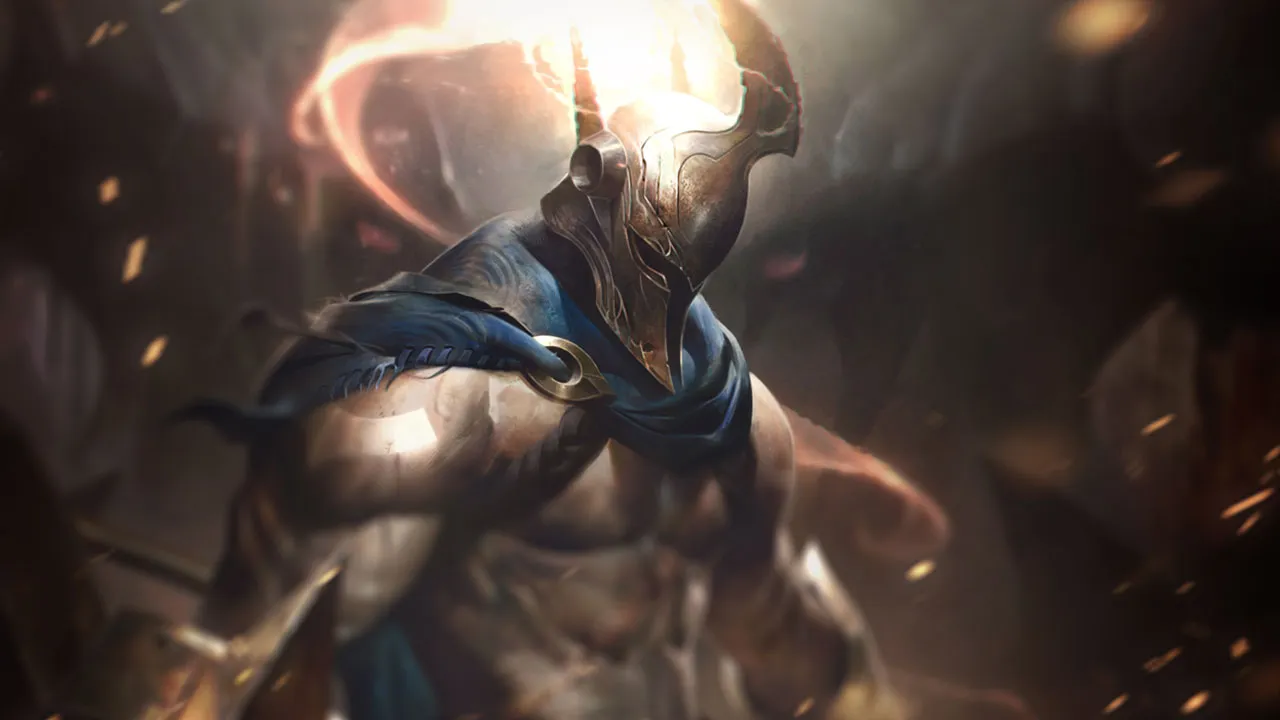
Pantheon
★ JUNGLE · TOP Tier A
ダメージ
UTIL
TANK
DIFF
Win 51.7% #19 · ↑5pt
Pick 5.5% #11
Ban 6.9% #34

Pantheon Wild Rift カウンターガイド ★ Counter Sheet

マッチアップ一覧
マッチアップ 判定 有利度 勝率 ピック率
Rammus ハードカウンター +2 54.7% 4.3%
Poppy ハードカウンター +2
Warwick 不利なマッチアップ +1 52.6% 2.7%
Olaf 不利なマッチアップ +1 52.5% 2.4%
Skarner 不利なマッチアップ +1 50.6% 1.1%
Ambessa 不利なマッチアップ +1 50.3% 1.2%
Nocturne 不利なマッチアップ +1 50.3% 5.5%
Volibear 不利なマッチアップ +1 49.9% 3.3%
Dr. Mundo 不利なマッチアップ +1 48.6% 1.1%
Mordekaiser 不利なマッチアップ +1
Morgana 不利なマッチアップ +1
Taliyah 不利なマッチアップ +1
Vi スキル次第のマッチアップ ±0 51.9% 9.3%
Xin Zhao スキル次第のマッチアップ ±0 50.7% 9.5%
Wukong スキル次第のマッチアップ ±0 50.3% 3.7%
Riven スキル次第のマッチアップ ±0 48.8% 1.2%
Cho'Gath スキル次第のマッチアップ ±0 47.6% 5.4%
Gragas スキル次第のマッチアップ ±0
Amumu 有利なマッチアップ −1 55.1% 3.3%
Nunu & Willump 有利なマッチアップ −1 54.8% 1.9%
Jarvan IV 有利なマッチアップ −1 52.4% 8.5%
Diana 有利なマッチアップ −1 52.1% 2.9%
Lillia 有利なマッチアップ −1 51.9% 3.3%
Gwen 有利なマッチアップ −1 51.8% 1.9%
Darius 有利なマッチアップ −1 51.5% 8.1%
Shyvana 有利なマッチアップ −1 51.1% 7.0%
Tryndamere 有利なマッチアップ −1 50.6% 6.8%
Nidalee 有利なマッチアップ −1 50.2% 2.4%
Kha'Zix 有利なマッチアップ −1 50.0% 4.9%
Kindred 有利なマッチアップ −1 49.8% 2.6%
Hecarim 有利なマッチアップ −1 49.2% 2.6%
Talon 有利なマッチアップ −1 49.1% 2.8%
Jax 有利なマッチアップ −1 48.4% 2.1%
Graves 有利なマッチアップ −1 48.3% 7.6%
Rengar 有利なマッチアップ −1 47.8% 1.6%
Lee Sin 有利なマッチアップ −1 47.3% 12.0%
Viego 有利なマッチアップ −1 46.0% 3.4%
Aatrox 有利なマッチアップ −1
Camille 有利なマッチアップ −1
Maokai 有利なマッチアップ −1
Nautilus 有利なマッチアップ −1
Nilah 有利なマッチアップ −1
Twitch 有利なマッチアップ −1
Ekko 有利なマッチアップ −2 51.6% 4.3%
Fiddlesticks 有利なマッチアップ −2 50.8% 2.7%
Kayn 有利なマッチアップ −2 50.6% 9.2%
Yone 有利なマッチアップ −2 49.1% 2.0%
Evelynn 有利なマッチアップ −2 48.6% 2.4%
Master Yi 有利なマッチアップ −2 48.0% 9.3%
Zed 有利なマッチアップ −2 47.6% 1.8%
Fizz 有利なマッチアップ −2 47.4% 2.1%

Edge: Wild Rift Core canonical verdict (−3 to +3), shown from the point of view of the champion named in the row. Win rate and pick rate: the opponent's own rate in this role — Wild Rift CN · Challenger, Patch 7.2d. Not a head-to-head win rate.

ハードカウンター

2

これらのチャンピオンは、こちらのビルドやプレイスタイルを真正面から上回る構成を持ち、レーン戦のコントロールとファームを極めて難しくする。彼らのスキルはこちらの主要な強みを無効化し、いつも通りのプランを実行しようとした瞬間に手痛い反撃を受けさせてくる。こうしたマッチアップでは、ミスを最小限に抑え、正面からの対決以外で解決策を探すことが重要になる。

Poppy

Poppy+2

hard counteranti dash This jungle matchup hinges entirely on how Poppy's Steadfast Presence completely shuts down your primary engage tool. Whenever you attempt to leap forward with Shield Vault to initiate a gank or skirmish, her active barrier immediately interrupts the dash, grounding you on the spot and leaving you vulnerable. This makes your point-and-click stun completely useless while giving her the upper hand in every direct jungle duel. Poppyのビルド → 詳細を見る
Poppy

理由

This jungle matchup hinges entirely on how Poppy's Steadfast Presence completely shuts down your primary engage tool. Whenever you attempt to leap forward with Shield Vault to initiate a gank or skirmish, her active barrier immediately interrupts the dash, grounding you on the spot and leaving you vulnerable. This makes your point-and-click stun completely useless while giving her the upper hand in every direct jungle duel.

レーン戦への影響

Because you cannot reliably land Shield Vault, you lose all priority in the river and around objectives. Ganking lanes becomes highly risky if Poppy is hovering nearby, as she can counter-gank and cancel your engage mid-air, turning fights against you. Your clear speed is comparable, but you cannot contest her directly, forcing you to concede early Scuttle Crabs and play defensively near your jungle camps.

立ち回り方

To survive this matchup, you must alter how you use your abilities. Never initiate with Shield Vault when Poppy is in range; instead, walk up to poke with Comet Spear or use Aegis Assault to absorb her initial damage. Wait for her to waste Steadfast Presence before committing your dash. If she holds her barrier, use Grand Starfall to bypass her entirely, targeting isolated lanes where she cannot defend her allies in time.

チャンピオン詳細 → Poppyのビルド →
Rammus

Rammus+2

hard counteranti ad Your main engage tool backfires horribly here. When you use your empowered Shield Vault via Mortal Will, the rapid triple-strike hits Rammus while his Defensive Ball Curl is active. Instead of shredding him, this interaction triggers his armor-scaled damage reflection three times instantly, melting your own health bar. His passive Rolling Armordillo further amplifies this self-destructive burst, turning your core assassination tool into a suicide button. Rammusのビルド → 詳細を見る
Rammus

理由

Your main engage tool backfires horribly here. When you use your empowered Shield Vault via Mortal Will, the rapid triple-strike hits Rammus while his Defensive Ball Curl is active. Instead of shredding him, this interaction triggers his armor-scaled damage reflection three times instantly, melting your own health bar. His passive Rolling Armordillo further amplifies this self-destructive burst, turning your core assassination tool into a suicide button.

レーン戦への影響

You lose all early 1v1 agency in the river and cannot contest objectives or Scuttle Crabs directly. If Rammus intercepts you with Powerball, his Frenzying Taunt forces you to auto-attack his spiked shell, guaranteeing you lose the duel. This map-wide pressure forces you to play reactively, conceding early neutral camps and leaving your lanes vulnerable to his high-speed ganks while you struggle to safely clear your camps.

立ち回り方

Shift your build away from pure lethality toward heavy armor penetration and health. During skirmishes, never initiate with Shield Vault unless Rammus has already wasted Defensive Ball Curl. Instead, poke from distance with Comet Spear to chip his health. If he charges at you with Powerball, intercept him with Aegis Assault facing his direction to absorb the impact and block the immediate follow-up damage, then use Grand Starfall to counter-gank his map plays rather than fighting him head-on.

チャンピオン詳細 → Rammusのビルド →

不利なマッチアップ

10

これらのチャンピオンは、マッチアップ自体を絶望的にするわけではないが、対面で優位に立ちやすいツールを持っている。射程が長かったり、攻撃を受け止める力が高かったり、エンゲージへの対応手段が豊富だったりする。アプローチを調整し、戦闘を受け入れるタイミングを慎重に選ぶ必要がある。

Mordekaiser

Mordekaiser+1

outscalingshield bypass Mordekaiser outscales you rapidly in extended skirmishes because of how his passive interacts with your defense. While you can perfectly block his heavy-hitting Obliterate using a well-timed Aegis Assault, the passive damage from Darkness Rise bypasses this frontal shield entirely. The continuous magic damage aura burns you down even while your defensive stance is active, making long duels in the jungle mathematically impossible to win. Mordekaiserのビルド → 詳細を見る
Mordekaiser

理由

Mordekaiser outscales you rapidly in extended skirmishes because of how his passive interacts with your defense. While you can perfectly block his heavy-hitting Obliterate using a well-timed Aegis Assault, the passive damage from Darkness Rise bypasses this frontal shield entirely. The continuous magic damage aura burns you down even while your defensive stance is active, making long duels in the jungle mathematically impossible to win.

レーン戦への影響

This dynamic forces you into a strict early-game clock. If you fail to secure advantages before he unlocks Realm of Death, you lose the ability to contest objectives. In the river, a single Death's Grasp can pull you into a lethal range where his passive aura melts your health pool, forcing early recalls that cost your laners valuable pressure and map priority.

立ち回り方

Focus entirely on short, burst-oriented trades during his cooldown windows. Initiate with a Mortal Will empowered Shield Vault, strike with Comet Spear, and immediately disengage using Aegis Assault to block his retaliatory Obliterate while walking away. Never commit to a full fight once his Darkness Rise activates. If he traps you with Realm of Death, use your mobility to stall out the timer rather than trying to out-damage his Indestructible shield.

チャンピオン詳細 → Mordekaiserのビルド →
Olaf

Olaf+1

duelingcounter engage The matchup pivots entirely around your CC against Olaf's unstoppable nature. Your primary engage and lockdown tool, Shield Vault, becomes completely useless the moment Olaf activates Ragnarok. Because he is immune to your stun, Olaf can easily shrug off your burst setup and immediately retaliate. Once your gap-closer is spent and failed, he will relentlessly hunt you down with the slow from Undertow. Olafのビルド → 詳細を見る
Olaf

理由

The matchup pivots entirely around your CC against Olaf's unstoppable nature. Your primary engage and lockdown tool, Shield Vault, becomes completely useless the moment Olaf activates Ragnarok. Because he is immune to your stun, Olaf can easily shrug off your burst setup and immediately retaliate. Once your gap-closer is spent and failed, he will relentlessly hunt you down with the slow from Undertow.

レーン戦への影響

In the jungle, this interaction strips away your early dueling confidence. If you meet Olaf in the river or during a counter-gank, you cannot force a proactive fight. He can invade your camps with impunity once he has his ultimate, knowing he can break your crowd control. Attempting to contest objectives directly becomes extremely risky, as Olaf's Berserker Rage and Vicious Strikes will easily out-sustain your initial burst.

立ち回り方

To survive and outplay Olaf, you must play as a disengage specialist. Never initiate with Shield Vault when his ultimate is available. Instead, bait his Ragnarok by poking from a distance with Comet Spear. If he charges at you, immediately cast Aegis Assault facing him to absorb his Reckless Swing and Undertow axes while walking backward. Only commit your stun to peel for your allies after his ultimate expires, or use Grand Starfall to impact side lanes where Olaf cannot react in time.

チャンピオン詳細 → Olafのビルド →
Dr. Mundo

Dr. Mundo+1

outscalinganti engage This jungle matchup is dictated by how Dr. Mundo's passive, Goes Where He Pleases, neutralizes your primary gank tool. When you attempt to execute an early gank or skirmish using Shield Vault, Dr. Mundo simply absorbs the stun, drops his canister, and walks away. Because your early-game pressure relies entirely on securing these quick locks, losing your main crowd control to his passive prevents you from snowballing before his massive scaling kicks in. Dr. Mundoのビルド → 詳細を見る
Dr. Mundo

理由

This jungle matchup is dictated by how Dr. Mundo's passive, Goes Where He Pleases, neutralizes your primary gank tool. When you attempt to execute an early gank or skirmish using Shield Vault, Dr. Mundo simply absorbs the stun, drops his canister, and walks away. Because your early-game pressure relies entirely on securing these quick locks, losing your main crowd control to his passive prevents you from snowballing before his massive scaling kicks in.

レーン戦への影響

In the jungle, this interaction strips away your early map-wide threat. Invading Dr. Mundo is highly risky because he can poke you down with Infected Bonesaw and ignore your engage. If you waste time chasing him, he safely clears his camps, reaches his level spikes, and uses Maximum Dosage to bait your teammates into bad fights, forcing you to play defensively around neutral objectives.

立ち回り方

To succeed, never initiate on Dr. Mundo with Shield Vault unless his passive Goes Where He Pleases is already on cooldown. Instead, focus your early ganking pressure on lanes with vulnerable targets using Grand Starfall to bypass him entirely. If forced to skirmish him in the river, use Comet Spear to poke from distance and hold Aegis Assault to block the high-damage physical execute from his Blunt Force Trauma.

チャンピオン詳細 → Dr. Mundoのビルド →
Nocturne

Nocturne+1

spell shield timingcounter gank This matchup is dictated by Nocturne's reaction speed with Shroud of Darkness. When you initiate with Shield Vault, a competent Nocturne will immediately deploy his spell shield, absorbing your stun and nullifying your Mortal Will-empowered burst. Deprived of your crowd control, you remain trapped in close quarters, making you an easy target for Unspeakable Horror's tether which will inevitably fear and kill you. Nocturneのビルド → 詳細を見る
Nocturne

理由

This matchup is dictated by Nocturne's reaction speed with Shroud of Darkness. When you initiate with Shield Vault, a competent Nocturne will immediately deploy his spell shield, absorbing your stun and nullifying your Mortal Will-empowered burst. Deprived of your crowd control, you remain trapped in close quarters, making you an easy target for Unspeakable Horror's tether which will inevitably fear and kill you.

レーン戦への影響

Because Nocturne wins the direct duel if his spell shield is up, you lose the freedom to contest scuttle crabs and neutral objectives early. If you try to force a fight in the river, his Duskbringer trail gives him the speed to chase you down. During skirmishes, his Paranoia can completely shut down your Grand Starfall flank attempts by blinding you and counter-ganking before you can land.

立ち回り方

To win this, never lead with Shield Vault. Instead, walk up or use Comet Spear to bait his Shroud of Darkness first. If Nocturne panics and wastes his spell shield, you have a brief window to execute your full combo. If you get caught by Unspeakable Horror, channel Aegis Assault facing Nocturne right before the fear triggers to mitigate his incoming burst damage while you are unable to move.

チャンピオン詳細 → Nocturneのビルド →

その他のマッチアップ

スキル次第のマッチアップ

6

このマッチアップは何よりもまず実行力の勝負であり、両者ともに優位を取れる現実的な手段を持っている。重要なスキルを一つ避けられるか、エンゲージを正しく読めるか、あるいはたった一つの位置取りのミスが、勝敗を分けることもある。マッチアップを理解し、行動すべき瞬間を見極める力がとりわけ重要になる。

Xin Zhao

Xin Zhao±0

duelingearly pressure This early-game jungle matchup revolves around a high-stakes mechanical interaction. While your Aegis Assault is designed to absorb Xin Zhao's initial burst from Audacious Charge and Wind Becomes Lightning, his Three Talon Strike poses a major threat. If he lands the third strike, the knockup immediately cancels your shield's channel, leaving you completely vulnerable to his sustained melee damage and healing from Determination. Xin Zhaoのビルド → 詳細を見る
Xin Zhao

理由

This early-game jungle matchup revolves around a high-stakes mechanical interaction. While your Aegis Assault is designed to absorb Xin Zhao's initial burst from Audacious Charge and Wind Becomes Lightning, his Three Talon Strike poses a major threat. If he lands the third strike, the knockup immediately cancels your shield's channel, leaving you completely vulnerable to his sustained melee damage and healing from Determination.

レーン戦への影響

Because of this volatile interaction, early river skirmishes and level three invades are extremely tense. Neither of you can easily secure Scuttle Crabs without a direct confrontation. If you mistime your defensive shield, Xin Zhao wins the duel, forcing you to forfeit jungle priority and pressure on the side lanes. However, if you block his burst correctly, you can force him out of his own jungle.

立ち回り方

To win these skirmishes, do not lead with Aegis Assault immediately after your Shield Vault stun. Instead, use your Mortal Will empowered Comet Spear to poke him as he approaches. Wait out the first two hits of his Three Talon Strike. The moment he prepares the third, knockup-inducing strike, use your Shield Vault to interrupt his attack animation, or back away slightly, saving Aegis Assault until his main crowd control is completely wasted.

チャンピオン詳細 → Xin Zhaoのビルド →
Gragas

Gragas±0

sustain warearly skirmish Early jungle skirmishes dictate this matchup's pace. While Pantheon relies on his Mortal Will passive to unleash a lethal, empowered Comet Spear burst, Gragas has the perfect counter. By activating Drunken Rage right as you engage, Gragas mitigates a massive portion of your physical damage, then heals back up with Happy Hour, turning a seemingly favorable engage into a losing duel. Gragasのビルド → 詳細を見る
Gragas

理由

Early jungle skirmishes dictate this matchup's pace. While Pantheon relies on his Mortal Will passive to unleash a lethal, empowered Comet Spear burst, Gragas has the perfect counter. By activating Drunken Rage right as you engage, Gragas mitigates a massive portion of your physical damage, then heals back up with Happy Hour, turning a seemingly favorable engage into a losing duel.

レーン戦への影響

This defensive tool stifles your early jungle pressure. You cannot safely invade Gragas or force aggressive scuttle crab skirmishes without tracking his cooldowns. If you blindly unleash your burst into his damage reduction, Gragas wins the trade, utilizes Body Slam to disrupt your escape, and secures river priority, which ultimately slows down your snowball potential.

立ち回り方

To win these skirmishes, you must pace your spell casting. Never lead with your empowered Comet Spear if Gragas has Drunken Rage active. Instead, initiate with basic attacks to bait out his damage reduction, then lock him down with Shield Vault once his guard is down. If he tries to counter-attack with Body Slam, use Aegis Assault facing his direction to absorb the blow.

チャンピオン詳細 → Gragasのビルド →
Vi

Vi±0

skirmishhard cc This jungle matchup is a pure test of reflexes centered on your Aegis Assault. You have the unique tool to completely negate Vi's explosive entry, whether she charges in with Vault Breaker or targets you with Cease and Desist. However, you cannot afford to let the skirmish drag out; her Denting Blows will rapidly shred your armor and swing the duel in her favor through sustained damage. Viのビルド → 詳細を見る
Vi

理由

This jungle matchup is a pure test of reflexes centered on your Aegis Assault. You have the unique tool to completely negate Vi's explosive entry, whether she charges in with Vault Breaker or targets you with Cease and Desist. However, you cannot afford to let the skirmish drag out; her Denting Blows will rapidly shred your armor and swing the duel in her favor through sustained damage.

レーン戦への影響

Neither jungler can easily invade or secure objectives without tracking the opponent's location. When Vi misses her Vault Breaker, she becomes extremely vulnerable, allowing you to counter-engage with Shield Vault and heavy Comet Spear pokes. Conversely, if you waste Aegis Assault, she will immediately trigger Blast Shield to absorb your retaliation and force an extended, unfavorable duel in your own jungle.

立ち回り方

Hold Aegis Assault strictly for her primary engage tools; never use it to block simple auto-attacks. Direct your shield toward her incoming Vault Breaker or time it to absorb the massive slam of Cease and Desist. If she successfully applies her Denting Blows stacks, break the trade immediately. Use Shield Vault to lock her down, throw a quick Comet Spear, and disengage until her armor shred passive falls off.

チャンピオン詳細 → Viのビルド →

その他のマッチアップ

有利なマッチアップ

33

これらのチャンピオンは、こちらの主要な強みに効果的に対応するのが難しく、より自由に対面を組み立てることができる。プレッシャーをかけて有利な交換を引き出す手段は複数あることが多い。相手が態勢を立て直す時間を与えるのではなく、この優位を活かして主導権を握ろう。

Amumu

Amumu−1

early skirmishscaling gap Pantheon dominates early jungle duels because your Aegis Assault perfectly blocks Amumu's initial burst initiated by his Bandage Toss. However, keep in mind that the passive of his Tantrum significantly reduces the physical damage of your rapid attacks, especially the triple strike from your Shield Vault empowered by Mortal Will. You must use patience instead of aiming for an instant burst. Amumuのビルド → 詳細を見る
Amumu

理由

Pantheon dominates early jungle duels because your Aegis Assault perfectly blocks Amumu's initial burst initiated by his Bandage Toss. However, keep in mind that the passive of his Tantrum significantly reduces the physical damage of your rapid attacks, especially the triple strike from your Shield Vault empowered by Mortal Will. You must use patience instead of aiming for an instant burst.

レーン戦への影響

This dominance allows you to constantly invade his jungle to track his movements. By stealing his camps and forcing him to retreat, you delay his power spike and the acquisition of his Curse of the Sad Mummy. Amumu finds himself unable to gank safely, which releases immense pressure on all your lanes and secures you control of the river.

立ち回り方

Start on the same side of the map as Amumu to actively cross paths in the river or on his own camps. Do not launch your empowered Shield Vault immediately if he is full health, as his Tantrum will absorb too much damage. Instead, use your Comet Spear from a distance to chip away his health pool, then trigger Aegis Assault as soon as he tries to retaliate with his bandages. If Amumu avoids you, use Grand Starfall to counter-gank.

チャンピオン詳細 → Amumuのビルド →
Aatrox

Aatrox−1

early skirmishinvade threat Pantheon dominates this jungle duel because his quick-burst combo easily overrides Aatrox's sustained healing. The matchup hinges on shutting down Aatrox's Q rotations. When Aatrox commits to his final heavy strike, your Aegis Assault is the perfect counter. By facing him directly, you completely absorb the massive impact of his third The Darkin Blade cast, neutralizing his primary source of damage and leaving him highly vulnerable to your counter-burst. Aatroxのビルド → 詳細を見る
Aatrox

理由

Pantheon dominates this jungle duel because his quick-burst combo easily overrides Aatrox's sustained healing. The matchup hinges on shutting down Aatrox's Q rotations. When Aatrox commits to his final heavy strike, your Aegis Assault is the perfect counter. By facing him directly, you completely absorb the massive impact of his third The Darkin Blade cast, neutralizing his primary source of damage and leaving him highly vulnerable to your counter-burst.

レーン戦への影響

This interaction dictates how early jungle skirmishes unfold around camps and objectives. Knowing you can nullify his heaviest hit, you can aggressively invade Aatrox's territory or force direct fights at crabs. He cannot contest you safely because missing his third The Darkin Blade sweetspot destroys his clearing tempo and health pool, forcing him to concede neutral objectives or risk dying to your quick execution.

立ち回り方

To execute this flawlessly, never waste Aegis Assault early in the duel. Initiate with a high-stack Shield Vault followed by Comet Spear to force his cooldowns. Watch his casts closely; when Aatrox prepares his third The Darkin Blade slam, activate your shield facing him, taking care to step back slightly so his Umbral Dash cannot reposition him behind you. If he activates World Ender, use Grand Starfall to disengage or reposition behind your team to wait out his ultimate's duration.

チャンピオン詳細 → Aatroxのビルド →
Jarvan IV

Jarvan IV−1

early gamedueling Pantheon dominates early skirmishes because Aegis Assault perfectly counters Jarvan IV's main damage source. When Jarvan engages with his Demacian Standard and Dragon Strike combo, Pantheon can immediately cast Aegis Assault facing him. This negates both the armor-penetrating strike and the heavy follow-up auto-attack from Martial Cadence, completely neutralizing Jarvan's burst potential and leaving him defenseless during his long cooldowns. Jarvan IVのビルド → 詳細を見る
Jarvan IV

理由

Pantheon dominates early skirmishes because Aegis Assault perfectly counters Jarvan IV's main damage source. When Jarvan engages with his Demacian Standard and Dragon Strike combo, Pantheon can immediately cast Aegis Assault facing him. This negates both the armor-penetrating strike and the heavy follow-up auto-attack from Martial Cadence, completely neutralizing Jarvan's burst potential and leaving him defenseless during his long cooldowns.

レーン戦への影響

In the jungle, this interaction makes you the absolute ruler of the river and neutral camps. Jarvan IV cannot safely contest Scuttle Crabs or secure early drakes because a direct duel results in his defeat. If he tries to lock you down with Cataclysm, you can simply block his initial landing damage, wait out the arena wall, and turn the fight with Shield Vault and Comet Spear once his shield from Golden Aegis expires.

立ち回り方

To execute this flawlessly, never initiate with Shield Vault when invading Jarvan IV. Instead, bait his Demacian Standard into Dragon Strike jump, then activate Aegis Assault the moment he flies toward you to absorb his burst. Once he lands and his abilities are on cooldown, use your empowered Shield Vault followed by Comet Spear to shred him. If he traps you with Cataclysm, hold your Grand Starfall to escape or reposition immediately.

チャンピオン詳細 → Jarvan IVのビルド →
Kayn

Kayn−2

early gameskirmish Pantheon dominates the early jungle because Kayn is extremely weak before choosing a form with The Darkin Scythe. Whenever Kayn tries to slip away through walls using Shadow Step, your point-and-click Shield Vault immediately shuts him down. This instant stun prevents him from escaping, leaving him completely exposed to a heavy Mortal Will empowered physical burst from Comet Spear before he can react. Kaynのビルド → 詳細を見る
Kayn

理由

Pantheon dominates the early jungle because Kayn is extremely weak before choosing a form with The Darkin Scythe. Whenever Kayn tries to slip away through walls using Shadow Step, your point-and-click Shield Vault immediately shuts him down. This instant stun prevents him from escaping, leaving him completely exposed to a heavy Mortal Will empowered physical burst from Comet Spear before he can react.

レーン戦への影響

This matchup dynamic forces Kayn to play defensively, drastically slowing down his orb collection for The Darkin Scythe. You command early priority in the river, allowing you to secure Scuttle Crabs and contest his camps with zero fear. Because Kayn cannot easily escape your invades, he must concede his jungle camps or risk dying, which heavily delays his transformation and cripples his mid-game scaling.

立ち回り方

Invade Kayn's jungle during his first clear and hold Shield Vault specifically for when he attempts to cast Shadow Step near terrain. Once he is stunned, unleash a rapid Mortal Will combo followed by Comet Spear to force his Flash or secure the kill. If he manages to reach safety, immediately pivot to gank the nearest lane with Grand Starfall while his weak early-game presence prevents him from counter-ganking effectively.

チャンピオン詳細 → Kaynのビルド →
Ekko

Ekko−2

early gameburst damage Pantheon dominates this jungle matchup because his point-and-click crowd control completely neutralizes Ekko's slippery nature. The moment Ekko tries to engage or escape, your instant Shield Vault locks him in place before he can react with Phase Dive to dash away or activate Chronobreak to undo your burst. This immediate lockdown prevents him from triggering Z-Drive Resonance or escaping after a bad commit. Ekkoのビルド → 詳細を見る
Ekko

理由

Pantheon dominates this jungle matchup because his point-and-click crowd control completely neutralizes Ekko's slippery nature. The moment Ekko tries to engage or escape, your instant Shield Vault locks him in place before he can react with Phase Dive to dash away or activate Chronobreak to undo your burst. This immediate lockdown prevents him from triggering Z-Drive Resonance or escaping after a bad commit.

レーン戦への影響

This interaction turns early river skirmishes and jungle invasions heavily in your favor. Knowing you can lock him down instantly prevents Ekko from contesting Scuttle Crabs or securing his own camps safely. He cannot risk trading health because your Comet Spear poke and immediate stun burst will force him out of the jungle or kill him before he can safely trigger his shield from Parallel Convergence.

立ち回り方

When hunting Ekko in his jungle, always hold Shield Vault until he commits his movement. If he tries to slow you with Timewinder, walk around the returning projectile and gap-close. Use Mortal Will to empower your stun, preventing any window for him to cast Chronobreak when low. If he casts Parallel Convergence, immediately burst him down or use Aegis Assault to block his incoming damage while stepping out of the stun zone.

チャンピオン詳細 → Ekkoのビルド →
Jax

Jax−1

early pressureinvade You hold a distinct advantage because Jax relies entirely on timing Counter Strike to negate your empowered Shield Vault burst. However, even if he blocks your initial leap, you can immediately channel Aegis Assault to absorb the retaliatory stun and damage from his Counter Strike. This completely neutralizes his main defensive tool while leaving him vulnerable to a follow-up Comet Spear once his evasion ends. Jaxのビルド → 詳細を見る
Jax

理由

You hold a distinct advantage because Jax relies entirely on timing Counter Strike to negate your empowered Shield Vault burst. However, even if he blocks your initial leap, you can immediately channel Aegis Assault to absorb the retaliatory stun and damage from his Counter Strike. This completely neutralizes his main defensive tool while leaving him vulnerable to a follow-up Comet Spear once his evasion ends.

レーン戦への影響

This dynamic makes you a nightmare for Jax during early jungle skirmishes and scuttle crab contests. Knowing you can nullify his Counter Strike allows you to force aggressive duels in his jungle. If he wastes Leap Strike to flee or engage, his escape route is gone. You win almost every direct duel, securing early priority and restricting his ability to contest neutral objectives.

立ち回り方

Never initiate with your empowered Shield Vault if Jax has Counter Strike active; instead, bait his defensive stance by walking up or throwing a short-cast Comet Spear. If he panics and activates his evasion, immediately hold Aegis Assault facing his direction to block the stun. Once his Counter Strike expires, use your full Mortal Will combo, starting with Shield Vault, to easily execute him.

チャンピオン詳細 → Jaxのビルド →
Fiddlesticks

Fiddlesticks−2

early gamehard cc You hold a massive advantage in the jungle because Fiddlesticks relies entirely on channeling Bountiful Harvest to clear his camps and stay healthy. By hunting him in his own territory, you can use Shield Vault to immediately cancel his drain. Without this channeling tool, Fiddlesticks loses both his primary damage output and his healing, making him an incredibly easy target for your physical burst. Fiddlesticksのビルド → 詳細を見る
Fiddlesticks

理由

You hold a massive advantage in the jungle because Fiddlesticks relies entirely on channeling Bountiful Harvest to clear his camps and stay healthy. By hunting him in his own territory, you can use Shield Vault to immediately cancel his drain. Without this channeling tool, Fiddlesticks loses both his primary damage output and his healing, making him an incredibly easy target for your physical burst.

レーン戦への影響

Your constant threat of invasion completely derails Fiddlesticks' pathing, forcing him to take inefficient routes. It delays his level 5 power spike and his access to Crowstorm. This dominance allows you to secure both Scuttle Crabs, establish deep vision in his camps, and execute early ganks with high health while the enemy jungler is trapped under-leveled in his own jungle, desperately trying to catch up.

立ち回り方

Start with an aggressive pathing route that leads straight to Fiddlesticks' second buff. When you find him, do not initiate with your crowd control immediately; walk up or use Comet Spear first, holding Shield Vault exclusively to react to his Bountiful Harvest. Once he starts channeling, stun him instantly to shut down his healing, then use Aegis Assault to block any retaliatory damage from Reap or Terrify as he tries to flee.

チャンピオン詳細 → Fiddlesticksのビルド →
Lillia

Lillia−1

skirmishingearly game This matchup favors you heavily in the early jungle skirmishes because Lillia relies on building up movement speed stacks from Blooming Blows to kite. By using your point-and-click Shield Vault immediately when you spot her, you interrupt her tempo before she can dance around you. This lockdown window allows you to unload a Mortal Will empowered Comet Spear, bursting her down before she can even retaliate with Watch Out! Eep!. Lilliaのビルド → 詳細を見る
Lillia

理由

This matchup favors you heavily in the early jungle skirmishes because Lillia relies on building up movement speed stacks from Blooming Blows to kite. By using your point-and-click Shield Vault immediately when you spot her, you interrupt her tempo before she can dance around you. This lockdown window allows you to unload a Mortal Will empowered Comet Spear, bursting her down before she can even retaliate with Watch Out! Eep!.

レーン戦への影響

Your threat of an instant engage forces Lillia to concede early Scuttle Crabs and play defensively in her own camps. If she tries to contest the river, your superior early pressure means you can easily invade her blue or red buffs. She cannot safely roll Swirlseed to poke you out without risking a sudden Grand Starfall landing behind her, which completely shuts down her ability to safely farm her camps.

立ち回り方

When patrolling the river or invading, camp inside unwarded bushes to deny her vision. Never initiate with Comet Spear; instead, walk up or wait for her to approach a camp, then strike with Shield Vault to catch her flat-footed. If she manages to tag you with Dream-Laden Bough and attempts to cast Lilting Lullaby, hold Aegis Assault to block the incoming burst from Watch Out! Eep! as you fall asleep.

チャンピオン詳細 → Lilliaのビルド →
Nautilus

Nautilus−1

early skirmishpeel Your early pressure in the river dictates this matchup. While Nautilus can disrupt your initial engage by peeling 'Shield Vault' with a well-timed 'Staggering Blow' auto-attack, his threat ends there. By immediately raising 'Aegis Assault', you completely absorb his subsequent burst from 'Titan's Wrath' and 'Riptide'. You block his primary damage window, leaving him vulnerable to your sustained physical assault. Nautilusのビルド → 詳細を見る
Nautilus

理由

Your early pressure in the river dictates this matchup. While Nautilus can disrupt your initial engage by peeling 'Shield Vault' with a well-timed 'Staggering Blow' auto-attack, his threat ends there. By immediately raising 'Aegis Assault', you completely absorb his subsequent burst from 'Titan's Wrath' and 'Riptide'. You block his primary damage window, leaving him vulnerable to your sustained physical assault.

レーン戦への影響

This interaction shifts map control heavily in your favor, allowing you to invade or gank without fearing his counter-engage. Because you win early skirmishes, you can force Nautilus to stay defensive near his turrets. Your superior mobility means you can time your roams to impact the side lanes long before he can drag his slow frame to assist his teammates, snowballing your lanes.

立ち回り方

When ganking his lane, do not lead with your empowered stun if he is looking at you. Instead, bait his hook or walk up to pressure him. If he stops your 'Shield Vault' with 'Staggering Blow', immediately channel 'Aegis Assault' facing his direction to soak 'Depth Charge' or 'Riptide'. Once his crowd control is spent, use the increased reach of 'Comet Spear' to execute him as he tries to retreat.

チャンピオン詳細 → Nautilusのビルド →
Master Yi

Master Yi−2

early gameinvade This matchup is heavily skewed in your favor because Master Yi cannot sustain through your burst or out-duel you. When he attempts to channel Meditate to reduce damage and heal, your point-and-click Shield Vault instantly interrupts him. Furthermore, when he activates Highlander and Wuju Style to retaliate, your Aegis Assault completely negates his frontal true and physical damage, leaving him entirely vulnerable once his Alpha Strike ends. Master Yiのビルド → 詳細を見る
Master Yi

理由

This matchup is heavily skewed in your favor because Master Yi cannot sustain through your burst or out-duel you. When he attempts to channel Meditate to reduce damage and heal, your point-and-click Shield Vault instantly interrupts him. Furthermore, when he activates Highlander and Wuju Style to retaliate, your Aegis Assault completely negates his frontal true and physical damage, leaving him entirely vulnerable once his Alpha Strike ends.

レーン戦への影響

In the jungle, this interaction completely strips Master Yi of his dueling confidence. He cannot contest Scuttle Crabs or secure direct 1v1s in the river, as you can force him to burn Alpha Strike defensively. Because his primary defensive tool is instantly neutralized by your stun, he is forced to concede early jungle pressure, allowing you to dominate neutral objectives and invade his camps with absolute safety.

立ち回り方

Never initiate a skirmish by blindly throwing Shield Vault. Instead, bait Master Yi into using Alpha Strike first. Once he reappears, strike him with Comet Spear, and hold Shield Vault specifically to cancel his Meditate the moment he channels it. If he activates his Highlander to chase, raise Aegis Assault facing him to absorb his entire burst duration, then execute him with a empowered Comet Spear when his defensive options are exhausted.

チャンピオン詳細 → Master Yiのビルド →
Evelynn

Evelynn−2

invadeearly game Pantheon dominates this jungle matchup before Evelynn can even unlock Demon Shade. Your early skirmishing with Comet Spear and Shield Vault completely outclasses her weak early clears. When she attempts to fight back or trigger Allure, you can perfectly negate her entire burst, including Hate Spike and Whiplash, by casting Aegis Assault in her direction, leaving her completely vulnerable with no escape. Evelynnのビルド → 詳細を見る
Evelynn

理由

Pantheon dominates this jungle matchup before Evelynn can even unlock Demon Shade. Your early skirmishing with Comet Spear and Shield Vault completely outclasses her weak early clears. When she attempts to fight back or trigger Allure, you can perfectly negate her entire burst, including Hate Spike and Whiplash, by casting Aegis Assault in her direction, leaving her completely vulnerable with no escape.

レーン戦への影響

Because Evelynn is incredibly weak early, your aggressive early jungle tracking forces her off her camps. By invading her red or blue side constantly, you delay her stealth spike. This relief allows your laners to play aggressively without fearing invisible ganks, while you secure early scuttle priority and map control, effectively choking out her resources before she can access Last Caress.

立ち回り方

Start with an aggressive vertical pathing to find her at her second buff. Save Shield Vault to interrupt her if she tries to run, but crucially, hold Aegis Assault until she commits her Hate Spike or tries to proc the Allure charm. If she manages to go invisible, place deep wards directly on her camps rather than in bushes, and use Grand Starfall to counter-gank the moment her position is revealed.

チャンピオン詳細 → Evelynnのビルド →
Zed

Zed−2

assassin duelcounter engage This jungle matchup is highly favorable because your kit directly invalidates Zed's assassination potential. Whenever Zed commits with Death Mark, you can simply channel Aegis Assault facing him to block both his incoming Razor Shuriken and the final delayed mark explosion. By neutralizing his ultimate's damage, you strip away his primary scaling threat and turn him into an easy target for your physical burst. Zedのビルド → 詳細を見る
Zed

理由

This jungle matchup is highly favorable because your kit directly invalidates Zed's assassination potential. Whenever Zed commits with Death Mark, you can simply channel Aegis Assault facing him to block both his incoming Razor Shuriken and the final delayed mark explosion. By neutralizing his ultimate's damage, you strip away his primary scaling threat and turn him into an easy target for your physical burst.

レーン戦への影響

This defensive advantage translates into total map control. Knowing Zed cannot safely duel you after level five, you can aggressively invade his camps and force skirmishes. Zed is forced to rely on Living Shadow to escape your counter-jungle attempts, which completely drains his offensive pressure and allows you to secure neutral objectives and ganks without facing any real threat of a counter-engage.

立ち回り方

To consistently win these skirmishes, you must hold Aegis Assault specifically for his ultimate. Never waste this cooldown during initial trades. When Zed targets you with Death Mark, wait for him to reappear behind you, then direct your shield toward him to absorb his entire burst. Once his ultimate fails, lock him down with a Mortal Will empowered Shield Vault to burst him before he can escape back to his Living Shadow.

チャンピオン詳細 → Zedのビルド →

その他のマッチアップ

Pantheon対策アイテム

これらのアイテムを購入すると、このチャンピオンの影響力を抑えられます。

Plated Steelcaps
Plated Steelcaps
Stasis Enchant
Stasis Enchant
Randuin's Omen
Randuin's Omen
Thornmail
Thornmail
Bramble Vest
Bramble Vest

このチャンピオンへの対策

カウンターアングル

Pantheon jungleへのカウンターは、バーストダメージを生き延びるだけではありません。真の目的は、彼のキットを危険なものにしている連鎖を断ち切ることです:素早い到着、ターゲット指定W、短いQ、ダメージ吸収のためのE、そしてオブジェクトへの変換。最初の行動で価値を生み出すのを阻止できれば、Pantheonはテンポの大部分を失います。データにすでに存在するチャンピオンは、彼を妨害する3つの方法を示しています:エントリーを吸収して戦闘を有利に進める、延長戦で彼に勝つ、または彼が本当のチャンスを作る前に防御的にEを使わせる。Pantheonに対しては、深い視界と賢い集団行動が、純粋なデュエルと同じくらい重要です。なぜなら、彼のアルティメットは孤立したローテーションやカバーの薄い通路を最も罰するからです。

パッチの文脈

Pantheonは、敵がシンプルで明確なパスを提供してくれる時に強力です。Wがキルできない時、Eが回避された時、または最初のローテーション後に戦闘が続く時には、彼ははるかに不快になります。Rammus、Gragas、Wukong、Dariusのようなマッチアップは、この問題をよく示しています:彼らはPantheonが突っ込みすぎた時に、吸収、コントロール、遅延、または罰することができます。Lee Sinのような、より機動力のある、または爆発的なジャングラーも、悪いWや不正確なEが全小競り合いを台無しにする可能性があるため、彼自身のタイミングを尊重させます。

クイックリード

  • オブジェクトの前にPantheonを孤立したターゲットにしない:彼のRは、集団にエンゲージするよりも、後退を遮断する方がはるかに危険です。
  • 本当のバーストをコミットする前に彼のEを強制する。彼の方向性シールドが使われたり、不正確に狙われたりすると、Pantheonははるかに罰しやすくなります。
  • あなたの構成が許すなら、戦闘を長引かせる。Pantheonは短い交換を好みます。W→Qの後、戦闘が長引けば長引くほど、彼の最初のインパクトは価値を失います。

カウンターの原型

エントリーを吸収するフロントライナー

Pantheonは、最初のWで利用できるターゲットを開きたいと考えています。その接触を吸収または遅延できるフロントライナーは、この論理を破ります。RammusとGragasは、Pantheonが求めている速い変換を容易に与えません:バーストを吸収し、パスを妨害し、またはクラウドコントロールでエンゲージを有利に進めることができます。Pantheonの問題は、ダメージ不足だけでなく、タイミングを失うことです。もし彼が生き残るターゲットにWを使い、その後罰を避けるためにEを使わなければならないなら、彼のチームはキルもオブジェクトも、ポジショナルな優位性も得られないことが多いです。

チャンピオンの適応方法. Pantheonは、チームがすぐに倒せない限り、これらのターゲットから始めるのを避けるべきです。代わりに、サイドからの角度を探すか、防御的なスペルを強制するか、またはバックラインに到達するためにグランドスターフォールを使用して、正面の壁に当たるのではなく、正面の壁に当たるのを避けるべきです。

デュエリストとブルーザーがトレードを延長する

Pantheonは短い最初のローテーションでは優れていますが、バースト後に接触し続けるチャンピオンは嫌います。Darius、Jax、Wukongは、時間による耐久性、スタン後の脅威の返還、またはPantheonのエントリーをクリーンにしにくくする能力など、さまざまな方法でその限界を罰することができます。PantheonがW→Qで決定的なアドバンテージを生み出せない場合、彼はしばしば後退するか、早すぎるEを使わなければなりません。このタイプのマッチアップでは、相手は最初のヒットを避けるだけでなく、Pantheonがプレッシャーを失うまで十分に生き残ろうとしています。

チャンピオンの適応方法. Pantheonは、エゴではなく、タイミングでこれらのマッチアップをプレイしなければなりません。彼はレーンアドバンテージ、数のアドバンテージ、またはすでに使われた敵のスペルを探します。もし彼が目的もなく延長されたデュエルに一人で入ると、これらのチャンピオンに彼らが望むまさにその戦いを与えてしまいます。

窓を逃した時に罰する機動力のあるジャングラー

Pantheonはターゲット指定Wのおかげで非常に信頼性が高く見えますが、その窓がクリーンな変換を生み出さないと脆弱になります。Lee Sin、Vi、カ=ジックスは、彼のタイミングに挑戦したり、別のレーンで対応したり、エンゲージ後のポジショニングを罰したりすることができます。彼らは必ずしも同じ正面の戦いを彼としたいわけではありません。彼らは彼の最初のクールダウン、彼の方向性E、そしてレベル3やオブジェクトに向かう予測可能なルートを回ることを好みます。Pantheonがテンポを逃すと、これらのジャングラーは彼の攻撃性をファームの赤字、視界の損失、またはカウンターgankに変えることができます。

チャンピオンの適応方法. Pantheonは移動する前に視界を確保し、過度に明白なギャンクを避ける必要があります。これらのジャングラーに対しては、レーン優先度、機動力のないターゲット、またはプレイ後の即時オブジェクトなど、すべてのエントリーには明確な理由が必要です。

優先度の高いマッチアップ

Rammus

Rammusは、Pantheonの通常の論理を逆転させるため、説明する価値があります。PantheonがWの後にすぐに倒れるターゲットを見つけたいのに対し、Rammusはインパクトを吸収し、変換を遅らせ、Pantheonを予想以上に長く露出させ続けることができます。したがって、このマッチアップは最初のスタンよりもターゲット選択が重要です。Pantheonが十分な味方のダメージなしにRammusにエンゲージした場合、彼はテンポを失い、敵に応答する時間を与えます。彼はサイドからの角度、孤立したキャリー、またはRammusがまだエントリーを破るために配置されていないウィンドウを探す必要があります。

Lee Sin

Lee Sinは、Pantheonのテンポに挑戦するため、詳細な分析に値します。Pantheonはシンプルなgankを課し、素早く変換したいと考えています。Lee Sinは、カウンターgank、侵入、またはPantheonがルートを早期に明らかにした場合に別のレーンを圧迫することで対応できます。危険なのは、デュエルに負けるだけでなく、マップ上のすべての予測可能な行動が罰せられるのを見ることです。Pantheonは、明白なパスを避け、レーン優先度でプレイし、Lee Sinの位置に関する情報なしにグランドスターフォールをキャストすることを避ける必要があります。

対面時のよくある間違い

対面時のよくある間違い

  • PantheonがRを持っている時に、サイドレーンに一人で低体力でいること。たとえ彼の位置を一瞬遅れて見たとしても、グランドスターフォールはすでにあなたの後退を遮断している可能性があります。
  • すべてのバーストを彼のEに投げ込むこと。方向性シールドはまさにそのタイミングを吸収するように設計されています。それを強制し、再配置してから、後で罰する必要があります。
  • 彼のレベル3を過小評価すること。Pantheonは複雑なセットアップを必要としません。オーバーエクステンションされたレーンと1回のWがあれば、単純なミスをキルに変えるのに十分です。

  • オブジェクトの前に、深い視界なしにスプリットすること。Pantheonは孤立したローテーションを好みます。なぜなら、彼のアルティメットは孤立したパスを簡単なエンゲージに変えるからです。

  • gankを生き延びれば十分だと思っていると、Pantheonにフラッシュを強制され、dragonかHeraldに移動された場合、キルがなくてもテンポの大部分を失っています。

コーチングノート

  • Pantheonに対しては、レベル5を実際の目標タイミングとしてピンを立てましょう。多くのプレイヤーはデュエルで死ぬのではなく、次のローテーションが空から来ることを忘れているために死にます。
  • Pantheonに対する最善の防御は、しばしば集団的なものです。深いワード、孤立したレーンを減らす、目標の前にグループ化する。彼に自由なルートを与えれば、メカニクスで彼を倒すだけでは不十分です。

FAQ

序盤のPantheon jungleにはどう対抗しますか?

レベル3をリスペクトし、ビジョンなしでオーバーエクステンドしないようにする必要があります。Pantheonはしばしば機動性のないターゲットを探し、Wを使って簡単なクラウドコントロールを作成します。適切な対応は、彼の可能性のあるgankルートにワードを置き、彼のタイミングを伝え、敵のジャングラーがまだ見えていないからといって体力を低く保たないことです。Pantheonに最初のギャンクを変換する代わりにファームを強制できれば、彼のチャンピオンアイデンティティを大幅に減らすことができます。

なぜPantheonは、戦闘が長引くと危険性が減るのですか?

Pantheonは、脅威の大部分を最初のシーケンスに集中させています。Wでロックダウンし、Qでバーストし、Eでリターンダメージをブロックします。そのシーケンスでキルまたは即時のアドバンテージを強制できない場合、危険なエリアに留まりながらクールダウンを待つ必要があります。したがって、彼のバーストを吸収したり、遅延させたり、その後も戦闘を続けたりできるチャンピオンは、彼のインパクトを減らします。それは彼が無用になるという意味ではありませんが、彼は脅威的なイニシエーターから、チームに大きく依存するファイターへとシフトします。

Pantheonがグランドスターフォールを使用したときはどうすべきですか?

最初の決断は、同じ方向に all 逃げないことです。グランドスターフォールは、エリアをカットし、予測可能な撤退をトラップに変えるため危険です。あなたのチームがインテリジェントに散らばり、クラウドコントロールを保持し、狭い通路を避ければ、Pantheonは着地を変換するのが難しくなります。また、誰が彼に追従できるかにも注意する必要があります。時々、本当の危険はPantheonだけではなく、あなたが彼のアルティメットをかわしている間に到着する味方のレーンかもしれません。

Pantheonに対してアーマーを購入すべきですか?

アーマーは、特にPantheonがヨームゥのゴーストブレードとブラッククリーバーでスノーボールした場合、彼の物理的なバーストを減らすのに明らかに役立ちます。しかし、答えは防御的であるだけではいけません。アーマーを購入しても、彼に孤立したターゲットを与え続けるなら、彼はまだWと彼のアルティメットでテンポを作り出すことができます。最善の対応は、アイテム化、ビジョン、ポジショニング規律を組み合わせることです。目標は、彼の最初のクラウドコントロールをキルや目標にさせないようにすることであり、低体力で生き残るだけではありません。














































































