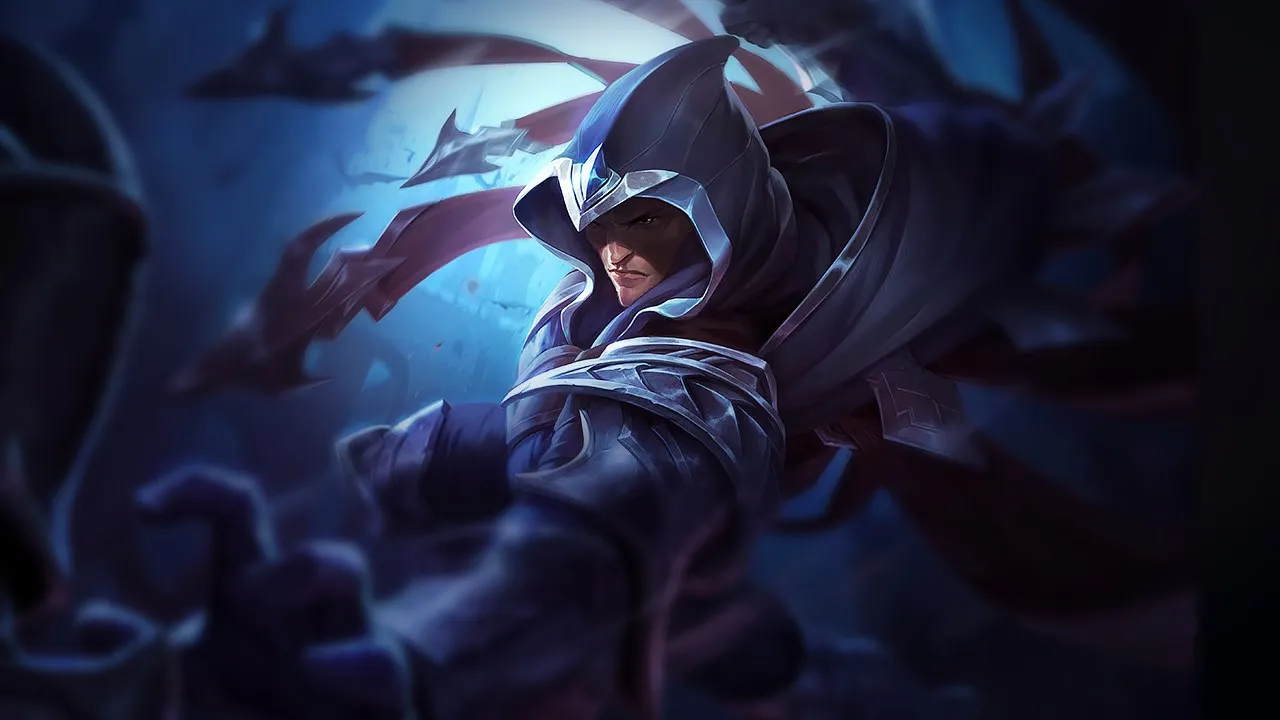























































カウンターアングル
Talon jungleのカウンターは、彼の最初のテンポを崩し、狙いを定めたロックダウンで彼の離脱を妨害し、または彼の物理バーストを不十分にするチャンピオンのことです。

Talonは、接近時やコンボ中に自身を妨害する即時CCを持つ構成に対して無防備になります。Rangedチャンピオンや濃密なvisionは、彼のroamの機会を減少させます。キャリーの周囲で強固なpeelを提供する構成は、彼のassassinationポテンシャルを制限します。
これらのチャンピオンは、こちらのビルドやプレイスタイルを真正面から上回る構成を持ち、レーン戦のコントロールとファームを極めて難しくする。彼らのスキルはこちらの主要な強みを無効化し、いつも通りのプランを実行しようとした瞬間に手痛い反撃を受けさせてくる。こうしたマッチアップでは、ミスを最小限に抑え、正面からの対決以外で解決策を探すことが重要になる。

Rumble 本来の硬さと scrap shield は、あなたの素早い burst コンボを完全に無効化します。Rake と Noxian Diplomacy で Blade's End をスタックさせようとするたびに、Rumble の shield が最初の衝撃を吸収し、その一方で Rumble の持続する炎があなたの体力を削り返してきます。お互い近接なので、ファームしようとする間も Rumble の近距離の炎を避けられず、trade を試みても負け戦になります。
この matchup では、序盤からあなたは自分のタワー下に押し込まれます。Rumble は炎で絶えず wave を押してくるため、last-hit を取るためだけに Rake を守りのために使わされます。前に出て近接 minion を叩くと体力が大量に失われ、不利な recall のタイミングを強いられます。その結果、mid lane の priority をすべて失い、あなたが wave 処理に縛られている間に、Rumble は vision を確保したり、あなたの jungler にプレッシャーをかけたりできます。
体力を高く保つために cs は諦めましょう。level 3 になったら、raptor か river の壁越しに Assassin's Path を使い、Rumble の lane でのプレッシャーを完全にすり抜けます。Rumble を倒そうとして Shadow Assault を無駄にせず、ult は side lane にダイブするために取っておきましょう。Rumble が wave を freeze したら、それを崩そうとするのをやめます。すぐに bot か top へ歩いて skirmish を仕掛け、優れた map mobility を頼りに、Rumble の lane 支配を上回ってください。

あなたの持ち味は、Blade's End と Shadow Assault で優先ターゲットを素早く仕留めることにあります。しかし Zilean は Chronoshift でこのプレッシャーを完全に無効化し、あなたが burst で倒した相手を蘇生させます。あなたのキットは単体への burst に大きく依存しているので、スキル回し全体を Zilean の ult で取り消されると、追撃のダメージがなくなって極めて無防備になり、その間 Zilean の Time Bomb に zone されます。
lane では、Zilean は Time Bomb と Twisted Timeflow を使って、あなたの minion wave に爆弾を二重に仕掛け、安全にファームしながら遠くからあなたを poke します。Noxian Diplomacy で trade しようとすると、大量の counter-poke を受けるので簡単にはできません。Zilean が ult を解放すると、あなたが仕掛けるどんな積極的なダイブもリソースの無駄になります。この構造的な不利により、mid lane で solo kill のプレッシャーをかけることができず、自分のタワー下に閉じ込められます。
この膠着状態をすり抜けるには、Rake で素早く wave を押し込み、すぐに Assassin's Path を使って jungle に消えましょう。Zilean が遠すぎて味方に Chronoshift を使えない skirmish を探してください。どうしても Zilean と直接戦うなら、Shadow Assault は温存し、まず通常攻撃と Noxian Diplomacy で Zilean の ult を誘い出します。Zilean が慌てて早めに使ったら、ターゲットを切り替えるか、金色の輝きが消えるまで離脱してください。

Vex は mobility の高い assassin を封じるよう設計されており、この lane は並外れて困難です。Noxian Diplomacy で距離を詰めようとしたり、Assassin's Path で逃げようとしたりするたびに、Vex の passive である Doom 'n Gloom があなたにマークを付けます。これにより、Vex は fear を伴う Personal Space か Mistral Bolt で空中のあなたのジャンプを即座に中断でき、Blade's End を付与する前に burst を無効化されます。
大ダメージを受けずに、wave を直接争うことはできません。Rake で minion を処理しようとすると、Vex は Looming Darkness と Mistral Bolt で罰してきます。積極的に前進すると、Vex の Personal Space の shield があなたのダメージを吸収しつつ、あなたを fear させます。この絶え間ない脅威によって、あなたはタワー下に追いやられて gold を失い、その間 Vex は priority を維持して安全にスケールします。
生き残りの鍵は、Vex を完全に無視して、優れた map mobility を活かすことです。Vex に押し込まれるままにし、安全に取れるファームだけ Rake で確保しつつ、Vex の passive のバーを見ておきます。Vex が wave clear のスキルで Doom のバーを無駄にした瞬間、すぐに Assassin's Path で side の壁を飛び越えて roam しましょう。目標は、他の lane を snowball させるか jungler を手伝うことで、Vex の防御的な zone をすり抜けて、Vex のような anti-dash の手段を持たないターゲットを見つけることです。

Taliyah は、あなたの mobility の高いキットに対する hard counter です。Noxian Diplomacy で距離を詰めようとしたり、Assassin's Path で壁越えを試みたりするたびに、Taliyah は Unraveled Earth で即座に反応できます。この minefield はあなたの dash を即座に中断し、空中で致命的な stun を発生させて完全に無防備にし、あなたの主要な mobility の手段を致命的な弱点に変えてしまいます。
この力関係により、あなたは自分のタワー下で完全に守りの姿勢を取らされます。Taliyah は Threaded Volley で遠くから簡単に wave を押せます。Rake で poke しようと前に出ると、Taliyah の Seismic Shove で弾き飛ばされ、致命的なコンボを受ける危険があります。gold と priority を失い続ける一方で、Taliyah は Rock Surfing と Weaver's Wall で map をコントロールし、あなたを楽々と out-roam できます。
この lane を生き延びるには、dash を温存し、Taliyah の Unraveled Earth がクールダウン中のとき以外は、Noxian Diplomacy を積極的に使わないでください。Rake を使って離れた位置から安全にファームしましょう。roam を狙うときは、壁越えの Assassin's Path が読まれて罰されないよう、ward のない広めの経路を通ります。Taliyah に捕らえられたら、展開中の岩の領域を dash で突っ切って逃げようとせず、すぐに Shadow Assault を発動して透明化し、位置を取り直しましょう。
これらのチャンピオンは、マッチアップ自体を絶望的にするわけではないが、対面で優位に立ちやすいツールを持っている。射程が長かったり、攻撃を受け止める力が高かったり、エンゲージへの対応手段が豊富だったりする。アプローチを調整し、戦闘を受け入れるタイミングを慎重に選ぶ必要がある。

Irelia のキットは、あなたの素早い暗殺パターンを封じるよう設計されています。burst を狙うと、Irelia は Defiant Dance をチャネリングして、Rake と Noxian Diplomacy の物理ダメージを両方とも軽減できます。この最初のダメージを軽減されることで、Blade's End の 3 スタック目を付与することを完全に妨げられます。passive の bleed がなければ、あなたの trade の火力は消え失せ、その間 Irelia はあなたを相手に Ionian Fervor をスタックしていきます。
この相性では、wave の状況の中で受け身の姿勢を取らされます。Irelia が自分のタワー付近で freeze すると、Rake を使おうとするたびに Bladesurge で突っ込まれるリスクがあるため、歩いて近づいて処理することができません。Irelia はあなたの戻ってくる刃を簡単に避け、Flawless Duet を当て、あなたを追い詰められます。あなたは常に priority を譲らされ、recall のタイミングが遅れ、Assassin's Path で river に影響を及ぼす能力も制限されます。
生き残るには、wave の駆け引きを守り重視で行う必要があります。Irelia の Defiant Dance がクールダウン中のとき以外は、Noxian Diplomacy で仕掛けないでください。代わりに、Rake は安全な距離から押し寄せる minion を減らすことだけに使い、Irelia が Ionian Fervor を簡単にスタックできないようにします。Irelia が Flawless Duet を外したら、それが wave を crash させる合図です。すぐに Assassin's Path で逃げ道を探して、Irelia があなたの push に追いつく前に side lane に影響を与えましょう。

あなたのキルの脅威は大きく制限されています。Ahri が Noxian Diplomacy の dash に楽々と反応できるからです。Blade's End を発動させようと前に跳んだ瞬間、Ahri はあなたの直線的な軌道上に Charm を投げ込み、空中で dash を中断させて、CC を受けて無防備な状態にできます。主要な gap-closer と burst の準備を反応で無効化できるため、正面からのデュエルで確実に勝つことはできません。
この相性では、タワー下で守りの立ち回りを強いられます。Ahri は、あなたが安全にエンゲージできないと分かっているので、Orb of Deception で自由に wave を処理し、Fox-Fire で poke してきます。無理に trade しようとして大きく削られると、roam に必要な体力を失います。そうなると lane は side lane への影響力を競う競争になり、あなたが出発のタイミングを完璧に合わせなければ、Ahri の Spirit Rush によって、Ahri はあなたの map rotation に追いつくか上回れます。
Charm が使える間は、Noxian Diplomacy を initiator として使わないでください。代わりに、離れた位置から Rake で wave を減らします。Ahri に push させ、Ahri が minion に Orb of Deception を使ったまさにその瞬間に roam のチャンスを探しましょう。Ahri が crowd control を温存している場合は、すぐに Assassin's Path を発動して side の壁を飛び越え、flank の角度を作ります。これにより Ahri は、Spirit Rush で闇雲にあなたを追うか、side lane を失うかの選択を迫られます。

Karma は、あなたの主な map 上の強みを組織的に封じます。しばしば Transcendent Embrace で強化された Inner Flame を連打することで、wave を crash させ続けます。この絶え間ないプレッシャーのせいで、river の壁越しに Assassin's Path を自由に使えなくなります。Noxian Diplomacy で無理に trade しようとしても、Karma は Inspire で burst を吸収し、Focused Resolve で反撃して、あなたを lane に閉じ込め続けます。
自分のタワー下で守りの姿勢を強いられ、last-hit を取るためだけに Rake で mana を消費することになります。wave が crash するたびに、あなたの side lane は無防備になる時間帯ですが、大量のタワーの plate を失わずには対応できません。Karma の push を争おうとすると、ranged attack で大きな chip ダメージを受け、skirmish を安全に狙うには体力が低すぎる状態になります。
最初の大きな back の前は、完璧なファームよりも体力を優先しましょう。Karma に push させ、Karma が自分に Inspire を無駄に使うのを待ってから、Rake で短い trade を試みます。roam すると決めたら、早めに wave を仕込み、Shadow Assault で Karma の視界を切って wave を片付けます。これにより、Assassin's Path で raptor の壁を飛び越えて side lane を攻める貴重な 10 秒の猶予が得られます。

Lissandra はこの matchup を支配します。あなたのエンゲージの可能性を完全に無効化するからです。passive をスタックさせるために Noxian Diplomacy で gap-close しようとすると、Lissandra は Ring of Frost で dash の途中のあなたを即座に中断できます。この root によって、Blade's End の最後のスタックを付与できなくなります。さらに Lissandra は、Ice Shard で遠くから安全に wave を砕くことで、あなたの lane でのプレッシャーにも楽に対抗できます。
Lissandra の Ice Shard の連発があなたの Rake を上回るため、常にタワー下に押し込まれることになります。正面からの trade はどれも罠になります。Ring of Frost で root されると、あなたが反撃できないまま、Lissandra は ranged attack で体力を削ってきます。Lissandra が Frozen Tomb を解放すると、all-in を実行することはほぼ不可能になり、mid の priority を手放して、序盤の map rotation も制限されます。
生き延びるには、trade ではなく、Rake で安全な位置から wave を処理することに集中します。Lissandra が minion wave に Ring of Frost を無駄に使うのを見たとき以外は、Noxian Diplomacy で仕掛けないでください。Lissandra に押し込まれたら、Assassin's Path で自分の jungle の壁を飛び越えて side lane の skirmish を狙い、Lissandra の mid lane の支配を完全にすり抜けましょう。team fight で Lissandra が Frozen Tomb であなたを封じ込めようとしたら、すぐに Shadow Assault を発動して透明化し、位置を取り直してください。

この matchup は、Yasuo があなたの burst パターンを完全に無効化できるかどうかにかかっています。うまくタイミングを合わせた Wind Wall は、Rake の行きと戻りの両方を遮り、Shadow Assault の戻ってくる短剣も飲み込みます。これらの projectile が消されるため、重要な bleed ダメージに必要な Blade's End の 3 スタックを付与できず、残るのは Noxian Diplomacy の単体ダメージだけになります。
Yasuo にブロックされるリスクがあるため、Rake で確実に wave を処理できず、常にタワー下に押し込まれることになります。trade しようとすると、Yasuo は Sweeping Blade であなたの minion の間を dash し、Way of the Wanderer の shield を発動して Noxian Diplomacy を吸収し、あなたの counter-poke をブロックできます。そのため守りのファームを強いられ、Assassin's Path による roam の機会が遅れます。
生き残るには、主要な cooldown を commit する前に Wind Wall を誘い出す必要があります。まず通常攻撃 1 回か、最大レンジの Noxian Diplomacy で Yasuo の Way of the Wanderer の shield を割りましょう。Yasuo が wall を温存しているなら、正面から戦う代わりに Assassin's Path で完全にすり抜けて side lane を gank します。Yasuo の防御的な wall が有効な間は Shadow Assault を使わないでください。Yasuo が Steel Tempest の 3 回目の発動を使うまで待ってから、jungle から flank します。

この matchup は、Vladimir があなたの burst を完全に無効化できるかどうかにかかっています。Shadow Assault で all-in に commit するたびに、Vladimir は Sanguine Pool を発動してターゲット不可になれます。この 1 手だけで、あなたの刃が収束するダメージを避け、重要な bleed 効果のための Blade's End のスタックも阻止されます。Vladimir は Transfusion で sustain するため、この暗殺に失敗すると完全に無防備になります。
Vladimir の絶え間ない Transfusion の回復を相手に、消耗戦で勝つことはできません。Vladimir に体力を削られていくなか、あなたには sustain がないので、早い recall か、タワー下での受け身のプレイを強いられます。Sanguine Pool のおかげで Vladimir は solo のダイブをほぼ受けつけないため、Mid でキルを狙うのはリソースの無駄です。この安全性によって Vladimir は自由にスケールでき、あなたは自分のタワーに釘付けにされます。
このもどかしい膠着をすり抜けるには、wave clear と map 上の動きに全力を注ぎましょう。Rake で minion を強く押し込み、すぐに Assassin's Path で壁を飛び越えて side lane へ roam します。Vladimir の Sanguine Pool を誘い出し終えたとき以外は、Noxian Diplomacy を Vladimir に直接使わないでください。Vladimir が pool を守りのために温存しているなら、完全に無視して、優れた mobility で Vladimir のスケーリングが効き始める前に map に影響を与えましょう。

Yone は Talon の主要な poke と burst の手段に対するカウンターです。Soul Unbound を発動して前方へ dash し、Rake の戻りの斬撃をきれいに避けつつ、安全な位置から攻撃できます。Talon が素早い trade で反撃しようとしても、Yone の Spirit Cleave が絶妙なタイミングで shield を張り、Noxian Diplomacy と Blade's End の物理 burst の大部分を吸収するため、Talon はリソースを消耗し、passive も発動しません。
Yone は報復を受けずに trade できるため、lane のプレッシャーはすぐに入れ替わります。Rake で minion を確保しようと前に出るたびに、Yone は一気に前に踏み込んで罰してきます。これによってあなたは下がらされ、wave の priority を譲り、体力をじわじわ失います。その結果、タワー下に釘付けにされることが多く、Assassin's Path で roam する機会を見つけるのが極めて難しくなります。
生き延びるには、commit する前に Yone の手札を誘い出す必要があります。Yone の Soul Unbound が使える状態のときは、壁の近くにいて Assassin's Path ですぐ逃げられる位置にいる場合を除き、Rake を投げないでください。Yone が spirit form で仕掛けてきたら、Mortal Steel を避けるために射線に対して垂直に歩き、Spirit Cleave の shield が消えるまで Noxian Diplomacy を遅らせましょう。体力が低くなったら、wave を諦めて Shadow Assault を使った flank を探してください。
その他のマッチアップ
このマッチアップは何よりもまず実行力の勝負であり、両者ともに優位を取れる現実的な手段を持っている。重要なスキルを一つ避けられるか、エンゲージを正しく読めるか、あるいはたった一つの位置取りのミスが、勝敗を分けることもある。マッチアップを理解し、行動すべき瞬間を見極める力がとりわけ重要になる。

この matchup は、マップ全体への影響力を競う純粋な競争です。Galio の magic shield と Shield of Durand のダメージ軽減のせいで、Galio を簡単には burst できません。代わりにあなたの目的は、Assassin's Path で Galio をすり抜けて、数的優位を作ることです。しかし Galio はこの戦略を無効化するのが得意で、あなたの rotation を見つけたら、脅かされた味方に Hero's Entrance を使って、あなたの flank に即座に対応できます。
mid lane では、wave の状態がすべてを決めます。Galio は Winds of War と Colossal Smash を絶えず使って、あなたをタワー下に押し込み、あなたを閉じ込めるか、あなたが roam したらタワーを削ろうとします。正面から trade するのは危険です。Galio が Justice Punch であなたの Noxian Diplomacy のジャンプを捉えると、Galio の crowd control の連鎖で Blade's End を発動できなくなり、早い base を強いられて roam の機会が台無しになります。
この戦略的な戦いに勝つには、Rake で wave を減らし、タワー下にずっと閉じ込められないようにします。Galio がすぐに Hero's Entrance で追従できる構えでいるときは、Assassin's Path で壁を飛び越えないでください。代わりに、fog of war の中で roam の方向をフェイントし、Galio に読み合いを強いましょう。Galio が Justice Punch で戦いを仕掛けてきたら、すぐに Shadow Assault を発動して Galio のターゲティングを切り、taunt から逃れます。

この matchup は、一発勝負のステルスデュエルが中心です。*Shadow Assault* で仕掛けて Aurora を burst しようとすると、Aurora は *Across the Veil* で即座に反応できます。この短い透明化とジャンプによって target lock が外れ、*Blade's End* を発動させるための通常攻撃を当てることも、収束する刃を狙った方向へ向けることもできなくなります。さらに *The Weirding* があなたの接近を遅くし、主要なエンゲージを読み合いに変えてしまいます。
Aurora は ranged なので、あなたが *Rake* で wave を処理しようとしている間、*Twofold Hex* で poke できます。つかみどころのない防御のせいで Aurora を solo で倒すのは極めて難しく、mid lane はしばしば push 合戦になります。タワー下で poke されて削られるわけにはいかないので、この膠着状態では、五分五分の mid lane の skirmish ではなく、*Assassin's Path* を使って他の場所で map のプレッシャーを探すことになります。
ult から仕掛けてはいけません。代わりに、*Rake* を投げて Aurora をスローにし、*Noxian Diplomacy* のジャンプを匂わせて、まず Aurora の防御手段を使わせます。Aurora が *Across the Veil* を使うのを見るまで、*Shadow Assault* は温存してください。Aurora がジャンプを使ってあなたの最初の poke を避けたなら、それが all-in の合図です。Aurora が受け身に回ってジャンプを温存するなら、*Assassin's Path* で壁を飛び越え、ターゲットがあなたの刃から消えられない side lane へ素早く roam しましょう。

この lane は、map mobility を中心とした高速のチェスです。あなたには Corki を脅かせる素の burst がありますが、Corki は Valkyrie で Noxian Diplomacy のレンジから即座に滑り出せるため、lane での solo kill の試みは無効化されます。ただし、Assassin's Path を使うあなたの map 全域の rotation に Corki が追いつけるかどうかは、Special Delivery の package の入手とそのタイミングに完全に左右され、side lane の skirmish は純粋な読み合いの競争になります。
Corki は Phosphorus Bomb と Missile Barrage を使って絶えずあなたの体力を削り、体力に余裕のある roam の機会を見つけさせないようにしてきます。poke で削られるわけにはいきません。Rake を使って Corki の wave clear に素早く対抗しましょう。Corki に自分のタワー下で Valkyrie を守りのために使わせられれば、壁を飛び越える自由な機会が得られ、Corki は対応するためだけに Special Delivery の package を無駄に使わされます。
Corki の脱出手段が使える状態のときは、Noxian Diplomacy で仕掛けないでください。代わりに歩いて近づき Rake で poke して、Corki が慌てて Valkyrie を使うのを待ちます。Corki が package を持っているときは、minimap で Corki のアイコンを追いましょう。Corki が Special Delivery で進路を取ってあなたを阻止しようとしていると思われるときは、Assassin's Path で闇雲に壁を飛び越えないでください。Corki が追いついてきて roam が失敗したら、すぐに jungle camp に切り替えるか、Corki の package が切れる前に side lane にダイブしましょう。
その他のマッチアップ
これらのチャンピオンは、こちらの主要な強みに効果的に対応するのが難しく、より自由に対面を組み立てることができる。プレッシャーをかけて有利な交換を引き出す手段は複数あることが多い。相手が態勢を立て直す時間を与えるのではなく、この優位を活かして主導権を握ろう。

Ziggs は、あなたを弾き飛ばして Noxian Diplomacy を妨害するために、Satchel Charge に完全に頼っています。しかし、Hexplosive Minefield による Ziggs の防御的な包囲網は、あなたの mobility の前ではまったく役に立ちません。mid lane の壁越しに Assassin's Path を使えば、Ziggs の minefield を完全にすり抜け、Bouncing Bomb ではカバーできない角度から flank でき、Ziggs の displacement を早い段階で使わせて無防備にできます。
Ziggs は Bouncing Bomb と Short Fuse を使えば、遠くから簡単に wave を押してあなたのタワーにプレッシャーをかけられますが、Satchel Charge で構造物を破壊するために安全に前へ出ることはできません。Ziggs が wave を押し込むたびに、それはあなたが Rake で処理して姿を消す誘いになります。Ziggs は常にタワー下で安全に立ち回る必要があるため map 上の存在感が限られ、あなたは river を支配し、Mega Inferno Bomb が他の lane に影響を与える前に、楽な roam のタイミングを見つけられます。
エンゲージするために Ziggs の Hexplosive Minefield の中を直接歩いて通らないでください。代わりに Rake で wave を押し込み、jungle に潜り込んで raptor か river の壁越しに Assassin's Path を使います。Ziggs が minion に Bouncing Bomb を無駄に使うのを待ってから、背後から flank しましょう。Ziggs が Satchel Charge で逃げたら、すぐに追撃を中止し、mobility を活かして side lane へ roam して、Ziggs が wave 処理に縛られている間に、lane のプレッシャーを map をまたいだキルに変えます。

Talon は Veigar の主力の self-peel を無効化することで、このマッチアップを支配します。Event Horizon は Noxian Diplomacy の前方へのダッシュを阻止できますが、側面からの攻撃までは防げません。Assassin's Path でミッド lane のリバーの壁を越えれば、檻の外周を完全にすり抜けられます。Veigar は自分のスタンであなたを寄せつけておけないため、素早い Rake と Shadow Assault の burst には耐えられません。
Veigar は極めてディフェンシブなプレイを強いられ、あなたにパッシブをスタックするのではなく、Baleful Strike と Dark Matter で遠くから wave を処理することになります。これによりあなたは常にミッドのプライオリティを握れます。Veigar が Event Horizon を積極的に使おうと前に出れば、マナがない状態で lane に閉じ込められるおそれがあり、あなたはジャングラーとの dive の機会を簡単に作ることも、自由に roam することもできます。
サイド lane の段差の近くに常にポジションを取り、Assassin's Path を逃走または engage のルートとして使える状態に保ってください。Veigar が Event Horizon を使える状態のときは、Noxian Diplomacy で trade を仕掛けてはいけません。代わりに Rake を投げて、檻を使わせます。境界が消えたら、20 秒という大きな猶予ができるので、壁を飛び越えて距離を詰め、Veigar のスタンが戻る前に Blade's End を発動させてください。檻の中に捕まった場合は、すぐに Shadow Assault を使って Veigar の Dark Matter を遅らせてください。

Kassadin は mid lane の poke を吸収するために Void Stone に全面的に頼っていますが、この魔法シールドはあなたの物理ダメージに対しては全く役に立ちません。Rake を当てて Noxian Diplomacy で追撃すると、Blade's End の 3 スタックが強力な物理出血を発生させます。Kassadin はこの物理 burst を軽減できないため、アーマーが揃う前の序盤は、近接距離での trade がどれも本質的に彼にとって致命的です。
最初の wave から、あなたが lane のペースを支配します。Kassadin は poke してくるのではなく、Null Sphere で離れた位置から last hit するしかなく、zoning に対して無防備になります。Nether Blade で minion を叩こうと近づいてくれば、すぐに体力を大きく削れます。この強烈なプレッシャーによって Kassadin は悪いタイミングでの recall を強いられ、彼がタワー下に釘付けになっている間、あなたは Assassin's Path で楽に roam できます。
序盤のアドバンテージを活かすため、Kassadin が前に出て Force Pulse を使うかファームするまで、Noxian Diplomacy を温存してください。やみくもに shove せず、最初の 2 つの wave はゆっくり push し、レベル 2 になった瞬間に flash で engage する機会を狙います。Kassadin が Null Sphere で安全にファームし、守りに徹しすぎて倒せない場合は、Assassin's Path でリバーの壁を飛び越えてサイド lane に dive し、ビルドの方向性を序盤の物理貫通寄りに変えて snowball させてください。

Seraphine は、遅い直線のスキルショットを当てることに全面的に頼ってあなたを寄せつけないようにしています。Assassin's Path でリバーの壁を越えれば、Seraphine の Beat Drop や Encore の射出を楽に回避できます。この独特の機動力によって、Seraphine の防御用 Surround Sound のシールドを側面から回り込み、一気に距離を詰めて Shadow Assault と Noxian Diplomacy をすぐに発動させ、Seraphine が反応する前に Blade's End の出血を発動させられます。
Seraphine は minion を安全に処理するために Stage Presence の High Note を二重に使う必要があるため、常に wave をあなたの方へ押してきます。これによりあなたはタワー下で安全にファームできますが、それ以上に重要なのは、Seraphine が前に出すぎた状態になることです。あなたが Rake で wave を処理すると、Seraphine は自分のタワーの奥深くまで下がるしかなくなり、あなたは誰にも邪魔されずに roam してサイド lane に影響を与えるプライオリティを得られ、Seraphine は追いかけるのに苦労します。
Seraphine に向かってまっすぐ走ってはいけません。Beat Drop の格好の的になってしまいます。代わりに、サイドのブッシュやラプターの壁の裏に潜んでください。Seraphine が wave を削ろうとしたら、Assassin's Path で段差を飛び越え、すぐに Rake で追撃して slow させます。Seraphine がパニックになって Encore を発動した場合は、すぐに Shadow Assault で姿を消し、Noxian Diplomacy で距離を詰めてください。
その他のマッチアップ
これらのチャンピオンは、こちらのビルドやプレイスタイルを真正面から上回る構成を持ち、レーン戦のコントロールとファームを極めて難しくする。彼らのスキルはこちらの主要な強みを無効化し、いつも通りのプランを実行しようとした瞬間に手痛い反撃を受けさせてくる。こうしたマッチアップでは、ミスを最小限に抑え、正面からの対決以外で解決策を探すことが重要になる。

Rammus はジャングルでの最大のカウンターです。Noxian Diplomacy と Shadow Assault による物理 burst のコンボは、あなた自身のダメージを跳ね返す Rammus の Defensive Ball Curl にすべて吸収されます。さらに悪いことに、主力の脱出手段の Assassin's Path も非常に脆弱で、タイミングよく Rammus の Powerball が入ると、壁越えのモーションから叩き落とされ、取り残されて Frenzying Taunt で簡単に拘束されます。
この matchup では、ジャングルでの攻めの主導権を奪われます。Scuttle Crab を安全に取りにいくことも、Rammus のキャンプへ invade することもできません。正面から決闘すれば自滅に終わるからです。Rammus は Powerball の速さであなたの gank の圧力を上回り、あなたは守りに回らざるを得ません。標準的な flank を試みても、Rammus は自分の carry からあなたを簡単に peel でき、あなたの暗殺は危険な counter-gank に変わります。
生き残るには、動き方を変える必要があります。Rammus が Powerball で近くを転がっているなら、Assassin's Path で壁を越えようとしないでください。Rammus が minion かモンスターに当たるのを先に待ってください。リバーを渡る前に Rake を使って、安全な位置からブッシュを確認してください。チームファイトが始まっても、すぐにダイブしないでください。Rammus があなたのフロントラインに Frenzying Taunt と Defensive Ball Curl を使い切ってから、バックラインを攻撃してください。

俊敏な jungler というあなたの持ち味は、Poppy の *Steadfast Presence* に完全に封じられます。*Noxian Diplomacy* のダッシュで仕掛けようとしても、*Assassin's Path* で壁越えに逃げようとしても、Poppy の防御オーラが空中であなたの動きを即座に止め、地面に落としてスタンさせます。この相性のせいで、高機動の skirmish は死の罠になり、Poppy のチームが集まって襲いかかる格好の的になります。
ジャングルでは、この相性のせいで序盤のプレッシャーも安全も失います。*Assassin's Path* を使おうとすると Poppy が地形にあなたを押さえ込めるので、Scuttle Crab を安全に取りにいくことも counter-jungle もできません。Poppy が中立オブジェクトにいると、素早いスティールや突然の離脱を当てにできず、マップ全体への gank の脅威も大きく減るため、あなたの laner は守りに回らざるを得ません。
生き残るには、Poppy の位置を常に把握し、*Steadfast Presence* が使える間は決して戦いを仕掛けないでください。*Rake* を安全な距離から使って、自分の体を危険にさらさずに poke し、*Blade's End* をスタックしてください。Poppy がオーラを発動したら、すぐにその場を離れるか、*Shadow Assault* を発動して透明になり、バリアが切れるのを待ってから壁越えを試みてください。Poppy が近くにいるときは、壁を脱出ルートではなく危険地帯として扱ってください。

Warwick は Blood Hunt のせいであなたの逃げ道を完全に封じます。体力が低くなると、このスキルが Warwick にあなたの進路のグローバルな視界を与え、Assassin's Path の壁越えの安全性は無意味になります。Rake と Noxian Diplomacy で先制できても、Warwick は Eternal Hunger と Jaws of the Beast による本来の回復で、あなたの最初の burst を耐えて、しつこく追い詰めてきます。
この matchup では、あなたは自分のジャングルから追い出されます。Warwick の Primal Howl があなたの Blade's End のダメージを軽減しつつ、Warwick が体力を取り戻すため、Scuttle Crab や中立キャンプでの直接の決闘では張り合えません。skirmish で傷を負ったら、すぐに base へ撤退しなければなりません。とどまってファームすると、Shadow Assault の透明を貫通する Infinite Duress の格好の的になります。
生き残るには、Warwick の開始位置を把握し、マップの反対側へ pathing してください。Rake を使った素早いキャンプクリアに専念し、Warwick が反応する前に lane を gank できる時間を作ってください。うっかり skirmish になってしまったら、Blood Hunt が発動して脱出ルートがばれるのを待たず、体力が高いうちに早めに Assassin's Path で壁を越えてください。

Skarner はあなたの暗殺の絶対的な障害です。Assassin's Path で flank し、Shadow Assault で優先ターゲットを burst しようとするたびに、Skarner は Impale を反応的に撃てます。このサプレッションが空中でのあなたの burst ローテーションを完全に止め、あなたを無防備にします。あなたのダメージは Blade's End のスタックに依存しているため、出血を発動する前に拘束されると、きれいなキルは取れません。
この相性のせいで、オブジェクトを巡る skirmish では守りに回らざるを得ません。Skarner が相手のバックラインを守っている間は、確実にダイブできないため、あなたの脅威度は大きく下がります。正面から flank しようとしても、Skarner は Ixtal's Impact で壁越しにあなたを迎撃したり、単に自分の carry の近くにとどまったりできます。これでマップ上の自由が制限され、snowball の可能性が下がり、あなたのチームは動けるアサシンなしで戦うことになります。
これを突破するには、チームファイトでの突入タイミングを調整する必要があります。自分からは戦闘を始めず、フォグオブウォーの中で Assassin's Path を使って待機し、Skarner の Impale を見張ってください。Skarner が ult をあなたのチームメイトに無駄撃ちするか、位置取りを誤ったときにだけ、Noxian Diplomacy と Rake で戦闘に入ってください。Skarner がサプレッションを温存している場合は、フルの burst を出し切らず、フロントラインを削るか、Rake のスローで kite することに集中してください。
その他のマッチアップ
これらのチャンピオンは、マッチアップ自体を絶望的にするわけではないが、対面で優位に立ちやすいツールを持っている。射程が長かったり、攻撃を受け止める力が高かったり、エンゲージへの対応手段が豊富だったりする。アプローチを調整し、戦闘を受け入れるタイミングを慎重に選ぶ必要がある。

Darius は、Hemorrhage があなたの素早い Blade's End の burst を上回る価値を持つジャングルの skirmish で力を発揮します。主力の脱出手段の Assassin's Path が簡単にカウンターされるため、この matchup は非常に不利です。腕のある Darius は Apprehend を反応的に使って、空中の壁越えモーションからあなたを引きずり出し、ダッシュをキャンセルして地面に落とし、外輪の Decimate を楽々当てる態勢を整えます。
Darius の Decimate による sustain と Apprehend の脅威のせいで、領域を譲らざるを得ず、中立オブジェクトや Scuttle Crab を直接の決闘では争えません。invade は致命的になります。壁の近くで Darius に捕まって Assassin's Path をキャンセルされると、生き残るためだけに Shadow Assault を守りに使うしかなくなり、マッププレッシャーを失い、ゴールドスパイクも遅れます。
Darius が射程内にいて Apprehend が使える状況では、Assassin's Path で壁を越えようとしないでください。代わりに、地面に立ったまま Darius の引き寄せを誘ってください。Darius が Decimate で仕掛けてきたら、Noxian Diplomacy のダッシュで斧の内側の柄の部分に入り、Darius の回復と追加ダメージを防いでください。Blade's End と Shadow Assault の burst をフルで出し切るのは、Darius が先に引き寄せをあなたのチームメイトに無駄撃ちしたときだけにしてください。

この matchup は、Gragas が飛行中のあなたの burst を拒否できるかどうかにかかっています。Noxian Diplomacy で距離を詰めようとするたびに、Gragas は Body Slam で簡単に counter-engage できます。Gragas の打ち上げが優先されるため、あなたのダッシュは完全に中断されます。これでは、Blade's End の 3 スタック出血を発動するのに必要な重要な物理攻撃を当てられず、あなたの主なダメージ源は完全に無効化されます。
ジャングルでは、この相性のせいで直接の skirmish やリバー争いは非常に危険になります。Gragas が invade してきたり Scuttle で出会ったりしても、Drunken Rage があなたの最初の Rake の poke を軽減し、Body Slam の脅威で踏み込めないため、素早くキルを取ることはできません。決闘に失敗するとマッププレッシャーを失い、Assassin's Path を壁越えの守りに使うしかなくなります。
これに勝つには、Noxian Diplomacy で自分から仕掛けないでください。代わりに Rake で Gragas をスローにしてスタックを狙うか、Shadow Assault で Body Slam をやみくもに無駄撃ちさせてください。Gragas がチャージ技をキャンプのクリアや味方への engage に使うのを待ってから飛び込んでください。Body Slam を温存している場合は、Assassin's Path で Gragas を完全にすり抜けて、Gragas の柔らかい carry を暗殺してください。

この jungle の matchup の核心は、Ekko があなたの Shadow Assault の burst を完全に無効化できることです。Noxian Diplomacy で突っ込むと、腕のある Ekko はあなたの刃が収束するまさにそのタイミングで Chronobreak を発動します。この防御の反応であなたの ult のダメージを完全に避け、Blade's End パッシブの発動も阻止し、Ekko の体力まで戻ります。
この力関係のせいで、中立オブジェクトを争うことも Ekko のキャンプに直接 invade することも大きく制限されます。リバーで決闘を強行しようとしても、タイミングのよい Chronobreak で体力のリードが逆転し、あなたの engage は大惨事になることがよくあります。snowball の可能性が下がり、あなたの gank は Ekko の Parallel Convergence による counter-gank に弱くなります。
対抗するには、仕掛ける前に Ekko の ult を誘う必要があります。skirmish を Shadow Assault のフル発動で始めないでください。代わりに Assassin's Path で flank し、Rake で poke して、Ekko に Phase Dive で位置を取り直させてください。高ダメージのスキルは温存して待ちの展開にし、Noxian Diplomacy で仕留めるのは、Ekko の Chronobreak が確実に cooldown に入ってからにしてください。

純粋なジャングルの決闘では Diana が優位です。Pale Cascade があなたの burst への完璧なカウンターになるからです。Noxian Diplomacy で Blade's End を発動しようとしても、Diana のシールドがあなたの主要な物理ダメージを吸収します。最初の burst が無効化されると、Diana は Moonsilver Blade のボーナス攻撃速度と魔法ダメージのおかげで、継続戦闘であなたのダメージを簡単に上回ります。
この防御バリアのせいで、リバーでの直接の争いや counter-jungle はあなたにとって非常に危険です。体力プールで trade する余裕がないため、中立オブジェクトの近くで Diana と遭遇すると守りに回らざるを得ません。Diana の Crescent Strike に捕まると、Diana は Lunar Rush で距離を詰められ、あなたは脱出手段を早々に使わされます。残りのキャンプを安全に処理するのに苦労する間、マップ上の存在感も失います。
生き残って勝つには、Pale Cascade が cooldown でない間はフルコンボを出さないでください。Diana が Lunar Rush で仕掛けてきたら、すぐに Assassin's Path で近くの壁越しに disengage し、Diana のシールドが減衰するのを待ってください。Diana の防御バリアが切れ、スキルのローテーションを使い切ったら、Noxian Diplomacy で再 engage し、Blade's End を乗せて、Diana の主な防御が使えない間に burst で倒せます。

究極の狩人対獲物という力関係は、Rengar の ult で決まります。Rengar が Thrill of the Hunt を発動すると、あなたに対するトゥルーサイトを得ます。これで Shadow Assault の透明は完全に無効化されます。時間を稼ぐステルスがないので、ジャングルの壁越えの脱出に向けて安全に Assassin's Path を合わせることができず、Blade's End のコンボを完成させる前に Rengar の Savagery の burst に完全に無防備になります。
ジャングルでは、中立キャンプや Scuttle Crab をやみくもに争えません。Unseen Predator でブッシュにいるところを Rengar に捕まると、即座の跳躍と Bola Strike のスローで、あなたの cooldown を守りに使わされます。Rengar はリバー越しにあなたのローテーションを追跡できるため、invade や counter-jungle の自由を失い、受け身でプレイすることになり、安全にファームする間あなたの lane は序盤のプレッシャーを失います。
生き残るには、Rengar が Thrill of the Hunt を発動する前に見つけられるよう、リバーの深い視界を優先してください。Rengar の居場所がわからないときは、壁越えを cooldown から戻しておく必要があるので、Assassin's Path を攻めに使わないでください。Rengar が跳びかかってきたら、Rake でスローにして接近を鈍らせ、すぐに Noxian Diplomacy で反撃して Blade's End をスタックし、Rengar があなたを追い詰めるのではなく Battle Roar を守りに使うよう仕向けてください。

Lee Sin はあなたの ult による生存の仕組みを真っ向から無効化します。脱出や位置取り直しのために Shadow Assault を発動した瞬間、Lee Sin は Tempest を撃ってあなたのトゥルーサイトを即座に得られます。これで透明は完全に無効化され、高ダメージのフォローアップにさらされます。ult のステルスがなければ、Lee Sin が近くにいる状況で素早い Blade's End の burst を決めるのは非常に危険です。
この相性のせいで、ジャングルでは守りに回らざるを得ません。Scuttle Crab を自信を持って争うことも、決闘を仕掛けることもできません。Lee Sin は counter-engage でき、また、あなたが露見したあと Assassin's Path で逃げようとしても壁越しに追跡できるからです。Lee Sin に counter-gank されると、いつもの脱出ルートは塞がれ、チームにとってダブルキルになり得た場面が、序盤のマップコントロールを明け渡す悲惨な shutdown に変わります。
生き残るには、Lee Sin が近くにいるときは ult で仕掛けないでください。飛び込む前に、味方に Lee Sin の Tempest を吐かせるのを待ってください。どうしても Lee Sin と戦うなら、Rake と Noxian Diplomacy で Blade's End をスタックし、Shadow Assault は opener ではなく、遅らせたフィニッシュの一撃としてだけ温存してください。Lee Sin が Sonic Wave を外したら、それが仕掛け時のサインですが、背後には常に Assassin's Path のルートを空けておいてください。

Jax は大きな壁です。Counter Strike があなたの Noxian Diplomacy の物理ダメージを完全に無効化し、Blade's End を発動するのに必要なオートアタックもブロックするからです。この防御であなたの主力の暗殺シーケンスは無効化されます。Assassin's Path で地形をすり抜けられても、Jax が Leap Strike を温存していれば、それで食らいついてくるため、ジャングルの直接の決闘はあなたにとって非常に危険です。
中立オブジェクトを巡る争いでも、深いジャングルの skirmish でも、Jax と正面から戦うことはできません。捕まると、Jax の Relentless Assault と Empower が長引く trade であなたを溶かします。このため直接の争いを譲ることになり、序盤のリバーコントロールで劣勢になります。ただし、あなたの優れた機動力により、Jax より速くサイドの lane にプレッシャーをかけられ、直接の対決を、マップ全体での skirmish の優位と引き換えにできます。
Jax の開始キャンプを把握し、反対方向へ pathing することを優先してください。gank するときは、すぐに飛び込まず、Rake でターゲットをスローにして、遠くからパッシブのスタックを貯めてください。Jax に追い詰められたら、Noxian Diplomacy は絶対に使わず、すぐに Assassin's Path で壁を越えてください。Jax に Leap Strike を守りで無駄撃ちさせ、Jax のヘリコプター回避が完全に切れてから Shadow Assault で攻撃してください。

Vi はあなたの逃げ道にカウンターを持っています。Assassin's Path で地形をパルクールしている最中に、Vi の Vault Breaker が空中のあなたに衝突し、移動を完全にキャンセルできるからです。さらに、Vi が Cease and Desist を習得すると、止められない突進で、Shadow Assault での透明による逃走をすべて無効化し、Denting Blows による削りにあなたは完全に無防備になります。
ジャングルでは、この相性のせいで攻めの pathing は非常に危険です。Vi の Vault Breaker が使える間は、Scuttle Crab を安全に争うことも Vi のキャンプに invade することもできません。捕まると、Noxian Diplomacy を吸収する大きな Blast Shield を伴った、Relentless Force のフルの burst を受けるからです。Vi に counter-gank されると、タワー下で拘束され、積極的な skirmish は悲惨なダブルキルに変わります。
Vi の動きを把握し、Vault Breaker の射程内にいるときは Assassin's Path で壁越えを始めないでください。Blade's End のパッシブを乗せようとする前に、Vi がこのダッシュをキャンプや Vi の味方に無駄撃ちするのを待ってください。Vi があなたを Cease and Desist の対象にしたら、すぐに Shadow Assault を発動して厚い壁の近くに位置取りし、Vi の CC が終わったら Noxian Diplomacy で minion かモンスターへダッシュしてください。

Mordekaiser はあなたの最大のセーフティネットを完全に無効化して、この matchup を支配します。捕まると、Realm of Death があなたを物理的な壁がすべて消える平らなアリーナへ送ります。これで Assassin's Path は完全に使えなくなり、脱出できません。飛び越える地形がないので、逃げ場のない狭い決闘に閉じ込められ、Mordekaiser のパッシブ Darkness Rise のオーラと孤立した Obliterate のダメージで、あなたの柔らかい体力プールは一気に削られます。
この孤立させられる脅威が常にあるため、invade したり中立モンスターを争ったりする自由が大きく制限されます。Mordekaiser のキャンプを自信を持ってスティールすることも、Scuttle Crab を確保することもできません。突然の Death's Grasp の引き込みで、致命的な射程内に引きずり込まれるからです。オブジェクトの近くで追い詰められたらそのエリアを譲るしかなく、チームは序盤のマッププレッシャーを失い、Mordekaiser が別の場所で ult を使うまで skirmish を遅らせなければなりません。
生き残るには、Mordekaiser の ult を常に把握し、Realm of Death が使える間は決して直接 engage しないでください。もし死の次元に閉じ込められても、慌てて端に向けて Assassin's Path を撃たないでください。代わりに、すぐに Shadow Assault を発動してステルスになり、その移動速度で予測しにくい動きで走り回って、Mordekaiser の貴重な秒数を無駄にさせてください。近くの minion やモンスターに Noxian Diplomacy を使って Death's Grasp の引き込みをかわし、Rake で Mordekaiser をスローにし続けて、Darkness Rise があなたに付着しないようにしてください。
その他のマッチアップ
このマッチアップは何よりもまず実行力の勝負であり、両者ともに優位を取れる現実的な手段を持っている。重要なスキルを一つ避けられるか、エンゲージを正しく読めるか、あるいはたった一つの位置取りのミスが、勝敗を分けることもある。マッチアップを理解し、行動すべき瞬間を見極める力がとりわけ重要になる。

このジャングルでの対決は、比類のないマップ移動力をめぐるものです。Talon は Assassin's Path で地形を飛び越えて危険な状況から脱出しますが、Hecarim はこの縦方向の安全策に対抗できます。Hecarim が Devastating Charge で得る大きな移動速度は Warpath によってさらに高まり、Talon が飛び越えたばかりの壁を素早く回り込んで、反対側で Talon に追いつけます。
Hecarim はあなたのローテーションに合わせて追いかけてこられるため、純粋なパワーでのファームは危険です。むやみにインベードするのではなく、カウンターガンクに集中する必要があります。Hecarim のルートを把握することが重要です。Hecarim が Devastating Charge や Onslaught of Shadows を使ってあなたのレーナーにエンゲージしてきたら、Rake と Noxian Diplomacy で上から降りて Hecarim の打たれ弱い味方に burst を叩き込み、長引く戦闘で Spirit of Dread の回復によって Hecarim が生き延びる前に倒しましょう。
Hecarim がクールダウンの空いた状態で近くにいるときは、Assassin's Path を攻撃的に使ってはいけません。burst の後に離脱するため、壁越えを温存する必要があります。Hecarim が Devastating Charge で突進してきたら、ノックバックが当たるのを待ってから Shadow Assault を使いましょう。この透明化によって Hecarim の追跡が途切れ、位置を取り直せます。Rampage のスタックが溜まってあなたが圧倒される前に、Rake と Noxian Diplomacy で素早く Blade's End を付与し、Hecarim を退かせましょう。

ステルスを使う2人のアサシンによるこの命がけのかくれんぼは、反応速度で決まります。Evelynn は Demon Shade で姿を隠したままジャングルを徘徊し、Allure であなたを捕らえようとします。Evelynn が Allure の魅了を命中させると、続く Hate Spike と Whiplash で、あなたは一瞬で倒されます。生き残れるかどうかは、Evelynn のマークが出た瞬間に Assassin's Path で壁を飛び越え、マークが炸裂する前に Evelynn の発動範囲から抜け出せるかにかかっています。
ジャングルでは、この絶え間ない脅威のせいで、非常に守備的なパスと慎重なスキルミッシュの判断が求められます。Evelynn が Demon Shade を習得すると、ワードのない場所に入るのは非常に大きな賭けになります。お互いに相手を捕まえられるかどうかで、リバーの主導権が決まります。pick が1回成功すれば、生き残った側は自由にサイドレーンへプレッシャーをかけたりオブジェクトを確保したりできますが、負けた側は自陣のキャンプにも入れなくなり、ゴールドの獲得が止まります。
Evelynn を出し抜くには、ステルスが発動する前に見つけられるよう、Evelynn のキャンプに直接コントロールワードを置くことを優先しましょう。キャンプ処理を速めるために Assassin's Path を使ってはいけません。緊急回避用に温存してください。Allure のインジケーターが出た瞬間に、すぐ近くの壁を飛び越えて Evelynn の視線を切りましょう。Evelynn の不意を突けたら、Rake と Noxian Diplomacy で素早く burst を叩き込んで Blade's End を発動させ、Evelynn に早めの守りの Last Caress を使わせましょう。

このマッチアップは地形のコントロールをめぐるものです。Talon は Assassin's Path でジャングルのスキルミッシュを回避しますが、Jarvan IV は Cataclysm でこの機動力を完全に無効化できます。重要なのは、Cataclysm が作る人工の輪は Assassin's Path の有効な地形として扱われないことです。そのため Talon は、Noxian Diplomacy で外側のターゲットに飛び移るか Flash を使わない限り、アリーナの中に物理的に閉じ込められてしまいます。
この相性はジャングルでのスキルミッシュやオブジェクト戦を左右します。リバーのような開けた場所で Jarvan IV がエンゲージしてくると、Talon は簡単には離脱できません。Demacian Standard から Dragon Strike につなげられて捕まると、Talon は守りのために Shadow Assault を使わされます。これによりマップのプレッシャーは大きく Demacian の王子の側に傾き、Jarvan IV は Talon の逃げ道が人工の罠だと分かったうえで戦いを仕掛けられます。
生き残るには、ジャングルの自然な地形の近くで戦う必要があります。Jarvan IV が Cataclysm を使っても、アリーナの端と重なっている自然な壁を Assassin's Path のターゲットにして脱出できるよう、分厚い本物の壁の近くに位置取りましょう。Jarvan IV の Demacian Standard と Dragon Strike のコンボは常に追っておきましょう。Jarvan IV がノックアップを外すまでは Noxian Diplomacy でエンゲージせず、外したところで Rake で反撃して Blade's End を安全にスタックさせましょう。
その他のマッチアップ
これらのチャンピオンは、こちらの主要な強みに効果的に対応するのが難しく、より自由に対面を組み立てることができる。プレッシャーをかけて有利な交換を引き出す手段は複数あることが多い。相手が態勢を立て直す時間を与えるのではなく、この優位を活かして主導権を握ろう。

Twitch は Ambush のステルスを使ってジャングルのパスを探り、奇襲ガンクを仕掛けることに大きく頼っています。しかし、Assassin's Path による優れた機動力のおかげで、あなたは Twitch のローテーションより先に動けます。Twitch を見つけてしまえば、信頼できる自己防衛手段がない Twitch は非常に脆くなります。Noxian Diplomacy で Twitch に直接飛びついて Venom Cask のスローをすり抜け、Shadow Assault を発動して、Deadly Venom をスタックさせる前に Twitch の脆い体力を一気に削り取れます。
このマッチアップでは、Twitch の序盤のマッププレッシャーが完全に奪われます。Ambush のルートを追えると分かっているので、Twitch は守備的にキャンプを処理せざるを得ず、パワースパイクが遅れます。Twitch が Spray and Pray でスキルミッシュの流れを変えようとしても、予想外の角度から回り込めるあなたの動きがそのポジショニングを崩し、Twitch の長射程の貫通ボルトを無力にします。同時に、Twitch お得意の透明化した奇襲からあなたのレーナーも守れます。
Twitch がキャンプを始めたのを見つけたら、積極的に Twitch のジャングルへインベードしましょう。Twitch が Ambush を発動するか、モンスターに手を出したところで、Assassin's Path で近くの壁を飛び越えます。すぐに Rake を当ててスローを付与し、続けて Noxian Diplomacy と Shadow Assault で Blade's End を発動させましょう。Twitch が Flash で逃げた場合は、ワードのない場所へ闇雲に追わず、Twitch が放棄せざるを得なかった中立オブジェクトを確保するためにローテーションで戻りましょう。

このジャングルでの対決は Talon が決定的に有利です。Shadow Assault が、Zed の主なキル手段を完全に無効化するからです。Zed が Death Mark であなたを対象にした瞬間にアルティメットを発動すれば、即座に透明化できます。この簡単な反応によって、Zed は Contempt for the Weak のパッシブ付きのオートアタックと正確な Razor Shuriken を当てる重要な猶予を奪われ、遅れて炸裂する Death Mark のダメージはわずかで、致命傷にはなりません。
この相性によってジャングル全体の力関係があなたに有利に傾き、Zed のキャンプはあなた専用の狩場になります。Zed への最強のカウンターボタンを持っていると分かっているので、Zed の領域に積極的にインベードし、リバー付近で一か八かのデュエルを仕掛け、Zed の burst を恐れずにオブジェクトを確保できます。あなたが Assassin's Path で自由に roam する間、Zed は守備的にプレイするしかなく、マッププレッシャーを譲り、パワースパイクも遅れます。
Zed に対して、Shadow Assault から入ってスキルミッシュを始めてはいけません。代わりに Noxian Diplomacy と Rake でエンゲージして Blade's End をスタックさせましょう。Zed を焦らせて Death Mark を撃たせます。Zed があなたの背後に現れたまさにその瞬間にアルティメットを発動して姿を消しましょう。うっかり早い段階でアルティメットを使ってしまったら、すぐに Assassin's Path で近くの壁を飛び越えて離脱し、クールダウンが戻るのを待ってから Zed と再び戦いましょう。
その他のマッチアップ
これらのアイテムを購入すると、このチャンピオンの影響力を抑えられます。





| マッチアップ | 判定 | 有利度 | 勝率 | ピック率 |
|---|---|---|---|---|
| Taliyah | ハードカウンター | +2 | 51.5% | 1.9% |
| Vex | ハードカウンター | +2 | 49.0% | 2.1% |
| Rumble | ハードカウンター | +2 | — | — |
| Zilean | ハードカウンター | +2 | — | — |
| Lissandra | 不利なマッチアップ | +1 | 52.1% | 4.6% |
| Kennen | 不利なマッチアップ | +1 | 51.9% | 1.6% |
| Vladimir | 不利なマッチアップ | +1 | 51.5% | 4.3% |
| Annie | 不利なマッチアップ | +1 | 51.1% | 2.1% |
| Ekko | 不利なマッチアップ | +1 | 50.8% | 5.2% |
| Ahri | 不利なマッチアップ | +1 | 50.7% | 4.4% |
| Heimerdinger | 不利なマッチアップ | +1 | 49.8% | 1.6% |
| Yone | 不利なマッチアップ | +1 | 49.0% | 5.2% |
| Swain | 不利なマッチアップ | +1 | 48.9% | 2.6% |
| Akali | 不利なマッチアップ | +1 | 47.6% | 4.4% |
| Yasuo | 不利なマッチアップ | +1 | 47.6% | 8.3% |
| Diana | 不利なマッチアップ | +1 | 47.2% | 1.0% |
| Irelia | 不利なマッチアップ | +1 | — | — |
| Karma | 不利なマッチアップ | +1 | — | — |
| Malphite | 不利なマッチアップ | +1 | — | — |
| Pantheon | 不利なマッチアップ | +1 | — | — |
| Galio | スキル次第のマッチアップ | ±0 | 51.3% | 11.4% |
| Aurora | スキル次第のマッチアップ | ±0 | 50.4% | 4.0% |
| Jayce | スキル次第のマッチアップ | ±0 | 49.8% | 2.3% |
| Fizz | スキル次第のマッチアップ | ±0 | 48.1% | 2.2% |
| Akshan | スキル次第のマッチアップ | ±0 | — | — |
| Corki | スキル次第のマッチアップ | ±0 | — | — |
| Teemo | 有利なマッチアップ | −1 | 52.8% | 2.3% |
| Brand | 有利なマッチアップ | −1 | 52.6% | 10.8% |
| Hwei | 有利なマッチアップ | −1 | 52.4% | 6.5% |
| Zyra | 有利なマッチアップ | −1 | 52.4% | 3.3% |
| Morgana | 有利なマッチアップ | −1 | 52.2% | 6.5% |
| Syndra | 有利なマッチアップ | −1 | 51.8% | 6.4% |
| Aurelion Sol | 有利なマッチアップ | −1 | 51.5% | 6.4% |
| Orianna | 有利なマッチアップ | −1 | 50.8% | 4.6% |
| Norra | 有利なマッチアップ | −1 | 50.4% | 1.3% |
| Twisted Fate | 有利なマッチアップ | −1 | 50.4% | 5.7% |
| Viktor | 有利なマッチアップ | −1 | 50.1% | 3.1% |
| Veigar | 有利なマッチアップ | −1 | 49.4% | 7.7% |
| Lux | 有利なマッチアップ | −1 | 48.8% | 5.6% |
| Ziggs | 有利なマッチアップ | −1 | 48.4% | 5.4% |
| Nasus | 有利なマッチアップ | −1 | 48.3% | 1.1% |
| Mel | 有利なマッチアップ | −1 | 46.0% | 8.5% |
| Kai'Sa | 有利なマッチアップ | −1 | — | — |
| Kayle | 有利なマッチアップ | −1 | — | — |
| Varus | 有利なマッチアップ | −1 | — | — |
| Kassadin | 有利なマッチアップ | −2 | 50.5% | 1.8% |
| Vel'Koz | 有利なマッチアップ | −2 | 50.2% | 3.4% |
| Seraphine | 有利なマッチアップ | −2 | — | — |
有利度:Wild Rift Coreの公式判定(−3〜+3)で、各行に記載されたチャンピオンの視点から見た値です。勝率とピック率:このロールにおける相手チャンピオン自身の数値 — Wild Rift CN · Challenger、Patch 7.3c。直接対決の勝率ではありません。
| マッチアップ | 判定 | 有利度 | 勝率 | ピック率 |
|---|---|---|---|---|
| Poppy | ハードカウンター | +3 | — | — |
| Amumu | ハードカウンター | +2 | 56.5% | 2.7% |
| Rammus | ハードカウンター | +2 | 55.3% | 4.6% |
| Skarner | ハードカウンター | +2 | 53.9% | 1.6% |
| Warwick | ハードカウンター | +2 | 51.0% | 2.0% |
| Taliyah | ハードカウンター | +2 | — | — |
| Shen | 不利なマッチアップ | +1 | 54.9% | 1.4% |
| Ambessa | 不利なマッチアップ | +1 | 54.1% | 1.2% |
| Ekko | 不利なマッチアップ | +1 | 54.0% | 7.3% |
| Nunu & Willump | 不利なマッチアップ | +1 | 53.1% | 1.9% |
| Dr. Mundo | 不利なマッチアップ | +1 | 52.9% | 1.7% |
| Nocturne | 不利なマッチアップ | +1 | 52.5% | 6.6% |
| Pantheon | 不利なマッチアップ | +1 | 51.0% | 6.1% |
| Cho'Gath | 不利なマッチアップ | +1 | 50.7% | 8.3% |
| Xin Zhao | 不利なマッチアップ | +1 | 50.6% | 9.0% |
| Darius | 不利なマッチアップ | +1 | 50.4% | 6.5% |
| Diana | 不利なマッチアップ | +1 | 50.3% | 1.4% |
| Kha'Zix | 不利なマッチアップ | +1 | 50.1% | 5.3% |
| Jax | 不利なマッチアップ | +1 | 49.8% | 1.9% |
| Wukong | 不利なマッチアップ | +1 | 49.6% | 3.4% |
| Vi | 不利なマッチアップ | +1 | 49.0% | 4.8% |
| Tryndamere | 不利なマッチアップ | +1 | 48.8% | 8.6% |
| Rengar | 不利なマッチアップ | +1 | 48.8% | 2.2% |
| Riven | 不利なマッチアップ | +1 | 48.6% | 1.3% |
| Fizz | 不利なマッチアップ | +1 | 48.5% | 1.8% |
| Volibear | 不利なマッチアップ | +1 | 48.4% | 4.5% |
| Master Yi | 不利なマッチアップ | +1 | 48.0% | 9.8% |
| Lee Sin | 不利なマッチアップ | +1 | 46.9% | 12.4% |
| Camille | 不利なマッチアップ | +1 | — | — |
| Gragas | 不利なマッチアップ | +1 | — | — |
| Maokai | 不利なマッチアップ | +1 | — | — |
| Mordekaiser | 不利なマッチアップ | +1 | — | — |
| Nautilus | 不利なマッチアップ | +1 | — | — |
| Jarvan IV | スキル次第のマッチアップ | ±0 | 52.4% | 7.3% |
| Olaf | スキル次第のマッチアップ | ±0 | 51.8% | 1.8% |
| Kayn | スキル次第のマッチアップ | ±0 | 51.6% | 6.9% |
| Nidalee | スキル次第のマッチアップ | ±0 | 50.1% | 2.3% |
| Hecarim | スキル次第のマッチアップ | ±0 | 49.6% | 1.8% |
| Evelynn | スキル次第のマッチアップ | ±0 | 48.7% | 2.0% |
| Aatrox | スキル次第のマッチアップ | ±0 | 44.9% | 1.1% |
| Lillia | 有利なマッチアップ | −1 | 53.3% | 3.0% |
| Gwen | 有利なマッチアップ | −1 | 52.8% | 2.6% |
| Zed | 有利なマッチアップ | −1 | 51.4% | 2.6% |
| Kindred | 有利なマッチアップ | −1 | 50.7% | 2.4% |
| Viego | 有利なマッチアップ | −1 | 46.3% | 4.2% |
| Shyvana | 有利なマッチアップ | −1 | 45.2% | 2.8% |
| Nilah | 有利なマッチアップ | −1 | — | — |
| Twitch | 有利なマッチアップ | −2 | 46.8% | 2.1% |
有利度:Wild Rift Coreの公式判定(−3〜+3)で、各行に記載されたチャンピオンの視点から見た値です。勝率とピック率:このロールにおける相手チャンピオン自身の数値 — Wild Rift CN · Challenger、Patch 7.3c。直接対決の勝率ではありません。
Talon jungleのカウンターは、彼の最初のテンポを崩し、狙いを定めたロックダウンで彼の離脱を妨害し、または彼の物理バーストを不十分にするチャンピオンのことです。
Talonはタンクに弱いだけでなく、主に戦闘タイミングを選べない場合に負けます。序盤のインベード、キャンプの視界、シャドウアサルト後のクラウドコントロールが最も確実な対策です。
彼の最初のクリアを追跡し、使用された壁をピンし、彼のギャンクを選択する代わりにキャンプを守ることを強制します。
 Leona
Leona