S
2026年9月 · Patch 7.2d
Support · TOP · SUPPORT

Shen Wild Rift カウンターガイド

Shenは、彼のアーマーをバイパスする高magic damage構成に対して苦戦します。extended duelsにおける相対的な無力さにより、強力な物理スケーリングを持つチャンピオンに対して脆弱になります。複数のレーンをsplit-pushingできる構成は、彼のグローバルアルティメットを無効化します。

★ TOP · SUPPORT Tier S
ダメージ
UTIL
TANK
DIFF
Win 51.9% #30 · ↑2pt
Pick 1.6% #34
Ban 0.1% #132

Shen Wild Rift カウンターガイド ★ Counter Sheet

マッチアップ一覧
マッチアップ 判定 有利度 勝率 ピック率
Vayne ハードカウンター +2 52.2% 2.0%
Mordekaiser ハードカウンター +2 50.9% 11.5%
Rumble ハードカウンター +2 49.4% 2.3%
Singed 不利なマッチアップ +1 51.8% 1.4%
Teemo 不利なマッチアップ +1 51.8% 3.2%
Volibear 不利なマッチアップ +1 51.4% 7.1%
Gwen 不利なマッチアップ +1 51.4% 3.1%
Cho'Gath 不利なマッチアップ +1 50.8% 12.1%
Ornn 不利なマッチアップ +1 50.5% 2.0%
Darius 不利なマッチアップ +1 50.2% 16.0%
Garen 不利なマッチアップ +1 50.0% 14.7%
Kennen 不利なマッチアップ +1 49.1% 1.3%
Aatrox 不利なマッチアップ +1 48.9% 6.1%
Riven 不利なマッチアップ +1 48.9% 1.2%
Jayce 不利なマッチアップ +1 48.1% 2.7%
Vladimir 不利なマッチアップ +1 47.0% 1.1%
Akali 不利なマッチアップ +1
Gragas 不利なマッチアップ +1
Heimerdinger 不利なマッチアップ +1
Maokai 不利なマッチアップ +1
Ryze 不利なマッチアップ +1
Swain 不利なマッチアップ +1
Gnar スキル次第のマッチアップ ±0 51.5% 3.5%
Olaf スキル次第のマッチアップ ±0 51.0% 1.1%
Jax スキル次第のマッチアップ ±0 50.9% 3.9%
Camille スキル次第のマッチアップ ±0 50.4% 3.7%
Poppy スキル次第のマッチアップ ±0 50.4% 2.3%
Dr. Mundo スキル次第のマッチアップ ±0 50.2% 5.9%
Kayle スキル次第のマッチアップ ±0 50.0% 1.8%
Ambessa スキル次第のマッチアップ ±0 49.7% 2.0%
Nasus スキル次第のマッチアップ ±0 49.1% 5.9%
Sett スキル次第のマッチアップ ±0 49.1% 11.4%
K'Santé スキル次第のマッチアップ ±0 49.0% 5.9%
Renekton スキル次第のマッチアップ ±0 48.4% 3.9%
Fiora スキル次第のマッチアップ ±0 48.1% 4.6%
Skarner スキル次第のマッチアップ ±0 48.1% 1.3%
Jarvan IV スキル次第のマッチアップ ±0
Nautilus スキル次第のマッチアップ ±0
Pantheon スキル次第のマッチアップ ±0
Malphite 有利なマッチアップ −1 52.5% 5.7%
Wukong 有利なマッチアップ −1 51.5% 2.2%
Yone 有利なマッチアップ −1 51.0% 6.7%
Irelia 有利なマッチアップ −1 50.4% 2.0%
Sion 有利なマッチアップ −1 49.6% 3.8%
Yasuo 有利なマッチアップ −1 47.0% 3.0%
Graves 有利なマッチアップ −1
Urgot 有利なマッチアップ −2 50.0% 3.8%
Tryndamere 有利なマッチアップ −2 48.5% 2.1%

Edge: Wild Rift Core canonical verdict (−3 to +3), shown from the point of view of the champion named in the row. Win rate and pick rate: the opponent's own rate in this role — Wild Rift CN · Challenger, Patch 7.2d. Not a head-to-head win rate.

ハードカウンター

3

これらのチャンピオンは、こちらのビルドやプレイスタイルを真正面から上回る構成を持ち、レーン戦のコントロールとファームを極めて難しくする。彼らのスキルはこちらの主要な強みを無効化し、いつも通りのプランを実行しようとした瞬間に手痛い反撃を受けさせてくる。こうしたマッチアップでは、ミスを最小限に抑え、正面からの対決以外で解決策を探すことが重要になる。

Mordekaiser

Mordekaiser+2

cc interruptglobal deny Mordekaiser completely neutralizes your primary map influence. Your goal with Stand United is to turn fights elsewhere, but Mordekaiser can easily cancel the channel using the displacement of Death's Grasp or by banishing you directly with Realm of Death. This means you cannot safely cast your ultimate while visible in lane, forcing you to forfeit minion waves just to find a safe fog-of-war position to channel. Mordekaiserのビルド → 詳細を見る
Mordekaiser

理由

Mordekaiser completely neutralizes your primary map influence. Your goal with Stand United is to turn fights elsewhere, but Mordekaiser can easily cancel the channel using the displacement of Death's Grasp or by banishing you directly with Realm of Death. This means you cannot safely cast your ultimate while visible in lane, forcing you to forfeit minion waves just to find a safe fog-of-war position to channel.

レーン戦への影響

Because you must retreat deep under tower or into your jungle to cast Stand United, Mordekaiser gains free reign over the wave. He will shove you in with Obliterate and Darkness Rise, chipping your tower or taking plates. If you try to match his push, he wins short trades using Indestructible to negate your Twilight Assault damage, slowly grinding you down and locking you to your tier-one turret.

立ち回り方

To salvage this matchup, never channel Stand United in his line of sight. Wait for him to waste Death's Grasp on a pull attempt before walking back to cast. If he holds it, use Shadow Dash defensively to escape his Realm of Death range or to slide under your turret. When you must ult to save a carry, accept that you will lose at least two plates; do not hesitate to sacrifice your tower if it guarantees a major cross-map shutdown.

チャンピオン詳細 → Mordekaiserのビルド →
Vayne

Vayne+2

spacing punishall in timing Vayne completely shuts down your primary tool for closing the gap. Whenever you attempt to initiate with Shadow Dash, she can instantly react with Condemn to knock you back before you connect. Once your gap-closer is on cooldown, you are stranded at her mercy. She will easily kite you using Night Hunter and Tumble, shredding your health with successive Silver Bolts procs while you cannot retaliate. Vayneのビルド → 詳細を見る
Vayne

理由

Vayne completely shuts down your primary tool for closing the gap. Whenever you attempt to initiate with Shadow Dash, she can instantly react with Condemn to knock you back before you connect. Once your gap-closer is on cooldown, you are stranded at her mercy. She will easily kite you using Night Hunter and Tumble, shredding your health with successive Silver Bolts procs while you cannot retaliate.

レーン戦への影響

You are entirely denied from controlling the minion wave, forced to bleed gold under your turret. Any attempt to step up to secure minions results in heavy poke. While Spirit's Refuge can temporarily block her basic attacks, Vayne simply waits out the zone. Furthermore, you cannot safely cast Stand United in her line of sight, as she will immediately interrupt your channel with Condemn, neutralizing your global presence.

立ち回り方

Prioritize your health bar over individual minion gold. Position yourself far back, using the brush to break her vision and prevent Night Hunter from giving her free movement speed. Only use Twilight Assault defensively to trigger Ki Barrier's shield when soaking inevitable poke. Never use Shadow Dash forward unless her Condemn is on cooldown. If she activates Final Hour, immediately retreat toward your turret and prepare to use Spirit's Refuge to survive her invisible assault.

チャンピオン詳細 → Vayneのビルド →
Rumble

Rumble+2

magic damagepush pressure Rumble completely neutralizes your primary defensive tool because his continuous magic damage completely ignores Spirit's Refuge. While you can block basic attacks, his constant flame spouts bypass this zone entirely, melting your health bar. This creates a severe sustain gap where your Ki Barrier cannot keep pace with his resource-free damage, leaving you unable to trade back effectively when utilizing Twilight Assault or Shadow Dash. Rumbleのビルド → 詳細を見る
Rumble

理由

Rumble completely neutralizes your primary defensive tool because his continuous magic damage completely ignores Spirit's Refuge. While you can block basic attacks, his constant flame spouts bypass this zone entirely, melting your health bar. This creates a severe sustain gap where your Ki Barrier cannot keep pace with his resource-free damage, leaving you unable to trade back effectively when utilizing Twilight Assault or Shadow Dash.

レーン戦への影響

You are constantly trapped under your turret, struggling to secure minions while Rumble relentlessly shoves the waves. Because his damage constantly threatens to break your Ki Barrier, you cannot contest the wave. This relentless pressure means that using Stand United to assist your team across the map will almost certainly cost you multiple turret plates or even your entire outer tower, punishing your global map presence severely.

立ち回り方

To survive, abandon your standard offensive build path and rush magic resistance immediately to blunt his burning damage. Never use Shadow Dash aggressively; instead, save it exclusively to disengage or drag Rumble under your tower if he overextends while chasing you. When his flames are active, step back and let your Ki Barrier absorb what it can, waiting to use Twilight Assault only when you are safe under your turret to secure farm.

チャンピオン詳細 → Rumbleのビルド →

不利なマッチアップ

19

これらのチャンピオンは、マッチアップ自体を絶望的にするわけではないが、対面で優位に立ちやすいツールを持っている。射程が長かったり、攻撃を受け止める力が高かったり、エンゲージへの対応手段が豊富だったりする。アプローチを調整し、戦闘を受け入れるタイミングを慎重に選ぶ必要がある。

Garen

Garen+1

armor shredmap pressure The lane hinges on how Garen's Judgment interacts with your kit. While your Spirit's Refuge blocks his Decisive Strike silence, it does nothing to stop the spinning damage of Judgment. Furthermore, Judgment shreds your armor while rapidly clearing the wave. This means Garen can easily shove you under turret, and if you leave with Stand United, he will immediately demolish your tower. Garenのビルド → 詳細を見る
Garen

理由

The lane hinges on how Garen's Judgment interacts with your kit. While your Spirit's Refuge blocks his Decisive Strike silence, it does nothing to stop the spinning damage of Judgment. Furthermore, Judgment shreds your armor while rapidly clearing the wave. This means Garen can easily shove you under turret, and if you leave with Stand United, he will immediately demolish your tower.

レーン戦への影響

You are constantly forced into a defensive posture under your own turret because Garen's wave clear outmatches yours. Trading directly with him is dangerous; if he shreds your armor, his Demacian Justice becomes a lethal threat. The real punishment occurs when your teammates need aid. Channeling Stand United means conceding multiple plates or even your entire outer turret to Garen's relentless push.

立ち回り方

To survive, trigger Ki Barrier frequently by pulling your blade with Twilight Assault through him to slow his retreat. Save Shadow Dash to disengage the moment he starts spinning with Judgment, rather than using it to initiate trades. Only cast Stand United when your wave is fully pushed out or if the global play guarantees a massive objective cross-map to compensate for the guaranteed loss of your turret plates.

チャンピオン詳細 → Garenのビルド →
Darius

Darius+1

auto blockextended trades This matchup is tough because Darius dominates extended skirmishes with Hemorrhage. Although your Spirit's Refuge blocks his basic attacks, an experienced Darius will simply step outside your protective zone to land Crippling Strike and stack his bleed elsewhere. If you get caught after a missed Shadow Dash, his Apprehend pulls you back into a fatal Noxian Guillotine execution. Dariusのビルド → 詳細を見る
Darius

理由

This matchup is tough because Darius dominates extended skirmishes with Hemorrhage. Although your Spirit's Refuge blocks his basic attacks, an experienced Darius will simply step outside your protective zone to land Crippling Strike and stack his bleed elsewhere. If you get caught after a missed Shadow Dash, his Apprehend pulls you back into a fatal Noxian Guillotine execution.

レーン戦への影響

Darius commands wave control, forcing you to farm under turret while dodging the outer edge of Decimate. Trading health is highly unfavorable, meaning you must forfeit gold to stay healthy. Most importantly, your global presence is severely hindered; you cannot safely channel Stand United within his vision, as he will easily cancel it with Apprehend, leaving your team without your crucial shield.

立ち回り方

Focus entirely on Darius's major cooldowns. When he wastes Decimate, initiate a quick trade using Twilight Assault enhanced by Ki Barrier, then pull back. Save Spirit's Refuge specifically to block Crippling Strike. If Darius attempts to walk out of your protective zone to stack Hemorrhage, immediately Shadow Dash away toward safety. Never commit to prolonged fights; your goal is to neutralize his early pressure through disciplined, short trades.

チャンピオン詳細 → Dariusのビルド →
Maokai

Maokai+1

cc interruptglobal pressure This matchup hinges on Maokai's ability to completely shut down your global pressure. While your Ki Barrier and Twilight Assault keep you safe in short trades, you can never freely cast Stand United in his presence. If you attempt to shield a distant ally, Maokai can instantly cancel your channel using either the knockback of Bramble Smash or by locking you down directly with Twisted Advance. Maokaiのビルド → 詳細を見る
Maokai

理由

This matchup hinges on Maokai's ability to completely shut down your global pressure. While your Ki Barrier and Twilight Assault keep you safe in short trades, you can never freely cast Stand United in his presence. If you attempt to shield a distant ally, Maokai can instantly cancel your channel using either the knockback of Bramble Smash or by locking you down directly with Twisted Advance.

レーン戦への影響

Because you cannot easily teleport away, Maokai dictating the wave state becomes a massive issue. He will constantly push you under tower with Sapling Toss, knowing that if you try to use Stand United, he will punish you instantly. If you are forced to stay in lane to defend against his siege, your team loses your map-wide presence, rendering your main utility tool useless.

立ち回り方

To impact the map, you must bait out Maokai's abilities before attempting a roam. Never channel Stand United while visible to him; instead, walk back deep under your turret or into the fog of war where his Twisted Advance cannot target you. If he uses Bramble Smash to clear the wave, that is your cue to immediately step back and shield your team. If he holds his crowd control, use Shadow Dash to escape his grasp before channeling.

チャンピオン詳細 → Maokaiのビルド →
Gragas

Gragas+1

cc interruptglobal pressure Gragas completely neutralizes Shen's global presence. If you try to cast Stand United within his sight, he can instantly cancel the teleport using either the displacement from Body Slam or the massive knockback of Explosive Cask. Since Shen relies on this ultimate to save map-wide allies, Gragas's kit turns your main utility tool into a massive risk, forcing you to play under constant threat of interruption. Gragasのビルド → 詳細を見る
Gragas

理由

Gragas completely neutralizes Shen's global presence. If you try to cast Stand United within his sight, he can instantly cancel the teleport using either the displacement from Body Slam or the massive knockback of Explosive Cask. Since Shen relies on this ultimate to save map-wide allies, Gragas's kit turns your main utility tool into a massive risk, forcing you to play under constant threat of interruption.

レーン戦への影響

This interaction locks you under your tower. You cannot easily match Gragas's wave clear from Barrel Roll and Drunken Rage, meaning you are constantly pushed in. While you struggle to clear, you cannot simply channel Stand United safely behind your minions because Gragas can dive forward with Body Slam to disrupt you, leaving your team without your crucial shield while you lose waves.

立ち回り方

To bypass this lockout, you must strictly time your roams. Only initiate Stand United after forcing Gragas to use Body Slam to clear minions, or walk entirely out of vision into your own jungle before casting. When trading, use Shadow Dash defensively to disengage rather than initiate, and rely on Spirit's Refuge to block his empowered Drunken Rage auto-attack. If he holds his displacements, accept losing some farm to keep your global ultimate option alive.

チャンピオン詳細 → Gragasのビルド →
Ryze

Ryze+1

free farmmacro pressure Ryze heavily outscales you as the game goes on due to Arcane Mastery. The biggest issue in lane is that your defensive tool, Spirit's Refuge, is useless against his spell rotations. It only blocks basic attacks, meaning Ryze can freely trigger Spell Flux and Rune Prison to root you, then blast you with an empowered Overload without any mitigation from your zone. Ryzeのビルド → 詳細を見る
Ryze

理由

Ryze heavily outscales you as the game goes on due to Arcane Mastery. The biggest issue in lane is that your defensive tool, Spirit's Refuge, is useless against his spell rotations. It only blocks basic attacks, meaning Ryze can freely trigger Spell Flux and Rune Prison to root you, then blast you with an empowered Overload without any mitigation from your zone.

レーン戦への影響

You will find yourself constantly shoved under turret as Ryze uses Spell Flux and Overload to clear waves rapidly. Trying to trade back is painful; he easily kiting you with Rune Prison. If you stay to defend your tower from his relentless push, you lose the window to impact other lanes with Stand United, effectively letting him scale into a late-game monster while pinning you down.

立ち回り方

Focus entirely on survival and map influence. Do not waste Shadow Dash defensively; hold it to threaten an engage if Ryze steps too close to your tower, or to interrupt his Realm Warp channel. Absorb damage with Ki Barrier when securing minion last-hits. Once you reach the mid-game, look for proactive Stand United plays the moment Ryze backs or freezes, trading your top tower's health for map-wide advantages before his scaling becomes unstoppable.

チャンピオン詳細 → Ryzeのビルド →
Kennen

Kennen+1

ranged pokeskillshot dodge Kennen constantly pressures you from distance using Thundering Shuriken to chip away your Ki Barrier and health. However, because you carry deadly trading potential with Twilight Assault, Kennen is forced to hold Lightning Rush to reactively escape your Shadow Dash. If Kennen wastes his lightning form, he becomes highly vulnerable to your taunt, making this a tense stalemate where his safety relies entirely on saving his mobility tool to dodge yours. Kennenのビルド → 詳細を見る
Kennen

理由

Kennen constantly pressures you from distance using Thundering Shuriken to chip away your Ki Barrier and health. However, because you carry deadly trading potential with Twilight Assault, Kennen is forced to hold Lightning Rush to reactively escape your Shadow Dash. If Kennen wastes his lightning form, he becomes highly vulnerable to your taunt, making this a tense stalemate where his safety relies entirely on saving his mobility tool to dodge yours.

レーン戦への影響

You will spend most of the early game trapped under your turret, absorbing waves while trying to block passive marks with Spirit's Refuge. Kennen easily secures lane priority, meaning you cannot contest his push without risking heavy damage. This constant pressure limits your manual recall windows, but it also creates the perfect setup to look for Stand United plays, as Kennen cannot easily interrupt your global ultimate from afar unless he commits his entire ultimate, Slicing Maelstrom.

立ち回り方

Never initiate with Shadow Dash while Kennen has Lightning Rush available. Instead, walk forward threateningly to bait his movement speed, or wait for him to use his lightning form offensively before launching your taunt. Under your turret, activate Spirit's Refuge to block his empowered basic attacks, preventing him from proc'ing Electrical Surge. When launching Stand United, accept that you will lose plates, but time it immediately after clearing a wave to minimize the top-lane bleeding.

チャンピオン詳細 → Kennenのビルド →
Singed

Singed+1

proxy defensemap pressure Singed's Poison Trail completely dictates the flow of this lane because it allows him to bypass direct combat, proxy behind your tower, and clear waves instantly. While you want to impact the map with Stand United, Singed exploits your absence. If you channel your ultimate to help allies, his rapid wave clear with Poison Trail guarantees he will tear down your turret plates before you can return. Singedのビルド → 詳細を見る
Singed

理由

Singed's Poison Trail completely dictates the flow of this lane because it allows him to bypass direct combat, proxy behind your tower, and clear waves instantly. While you want to impact the map with Stand United, Singed exploits your absence. If you channel your ultimate to help allies, his rapid wave clear with Poison Trail guarantees he will tear down your turret plates before you can return.

レーン戦への影響

This creates a severe structural deficit where your global presence is held hostage by his proxy pressure. You cannot easily trade with Twilight Assault and Shadow Dash when he refuses to lane, running away with Noxious Slipstream. Every time you use Stand United, you trade map influence for guaranteed loss of tower health, forcing you into a constant race against Singed's relentless siege.

立ち回り方

To survive this matchup, you must only cast Stand United when Singed's wave is fully cleared or if he is resetting. Hold your Shadow Dash to interrupt his Fling if he tries to displace you into his Poison Trail or Mega Adhesive. If he begins proxying behind your tier-one turret, do not chase him into his gas; instead, focus on securing last hits under tower using Ki Barrier to mitigate damage from stray minions.

チャンピオン詳細 → Singedのビルド →
Ornn

Ornn+1

cc interruptglobal pressure Ornn outscales you hard through Living Forge, but the matchup becomes truly punishing because of how easily he neutralizes your global presence. If you attempt to cast Stand United within his vision, Ornn can instantly disrupt your channel. He will either knock you up using Searing Charge against a Volcanic Rupture pillar, or trigger Call of the Forge God from a distance to cancel your teleport entirely. Ornnのビルド → 詳細を見る
Ornn

理由

Ornn outscales you hard through Living Forge, but the matchup becomes truly punishing because of how easily he neutralizes your global presence. If you attempt to cast Stand United within his vision, Ornn can instantly disrupt your channel. He will either knock you up using Searing Charge against a Volcanic Rupture pillar, or trigger Call of the Forge God from a distance to cancel your teleport entirely.

レーン戦への影響

Because you cannot easily escape with Stand United while Ornn is in lane, your map-wide impact is severely bottlenecked. If you try to walk away to find a safe spot, Ornn uses Volcanic Rupture and Bellows Breath to quickly push waves under your tower, threatening heavy plates. This constant pressure forces you into bad recall timings or leaves your botlane without your crucial shield.

立ち回り方

To bypass his interrupts, you must master your roam timing by walking deep into your own jungle or behind your turret before casting Stand United. During trades, save Shadow Dash to dodge Bellows Breath, preventing him from proc'ing Brittle on you. If Ornn blocks your teleport attempt anyway, immediately use Twilight Assault to trigger Ki Barrier and trade back under your turret rather than chasing him into a long fight.

チャンピオン詳細 → Ornnのビルド →

その他のマッチアップ

スキル次第のマッチアップ

17

このマッチアップは何よりもまず実行力の勝負であり、両者ともに優位を取れる現実的な手段を持っている。重要なスキルを一つ避けられるか、エンゲージを正しく読めるか、あるいはたった一つの位置取りのミスが、勝敗を分けることもある。マッチアップを理解し、行動すべき瞬間を見極める力がとりわけ重要になる。

Renekton

Renekton±0

shield baitshort trades This lane is a pure duel of reaction times centered on your blade's zone. The entire matchup hinges on whether you can block Renekton's *Ruthless Predator* with your *Spirit's Refuge*. If he activates his stun, your protective barrier completely nullifies his main burst and crowd control. However, if he successfully baits out your zone without committing his fury-empowered strikes, his high-damage rotations will quickly shred your *Ki Barrier*. Renektonのビルド → 詳細を見る
Renekton

理由

This lane is a pure duel of reaction times centered on your blade's zone. The entire matchup hinges on whether you can block Renekton's *Ruthless Predator* with your *Spirit's Refuge*. If he activates his stun, your protective barrier completely nullifies his main burst and crowd control. However, if he successfully baits out your zone without committing his fury-empowered strikes, his high-damage rotations will quickly shred your *Ki Barrier*.

レーン戦への影響

Trades are incredibly short and explosive. Whenever *Spirit's Refuge* is on cooldown, Renekton can aggressively use *Slice and Dice* to force trades, leaving you unable to contest the wave. Conversely, when your block is available, he cannot easily crash waves or dive you, meaning the lane remains a tense, slow-pushing stalemate where neither of you can easily secure a decisive health lead without a massive cooldown mistake.

立ち回り方

Never cast *Spirit's Refuge* preemptively when Renekton dashes in with *Slice and Dice*. Instead, look at his weapon glow and fury bar; hold the barrier until you see the animation of *Ruthless Predator* begin. If you misstime it and get stunned, immediately use *Shadow Dash* backward to escape his *Cull the Meek* follow-up. Always pull your blade with *Twilight Assault* through him first to keep your *Ki Barrier* active during his initial engage.

チャンピオン詳細 → Renektonのビルド →
Camille

Camille±0

interruptshort trades This matchup revolves around denying Camille's high true damage conversion while safeguarding your global presence. When Camille empowers her leg with Precision Protocol, your Spirit's Refuge can completely negate both strikes of her signature tool. However, she holds a massive structural advantage during map plays: if you attempt to channel Stand United within her sight, she can easily cancel your ultimate using the stun from Hookshot. Camilleのビルド → 詳細を見る
Camille

理由

This matchup revolves around denying Camille's high true damage conversion while safeguarding your global presence. When Camille empowers her leg with Precision Protocol, your Spirit's Refuge can completely negate both strikes of her signature tool. However, she holds a massive structural advantage during map plays: if you attempt to channel Stand United within her sight, she can easily cancel your ultimate using the stun from Hookshot.

レーン戦への影響

Short trades dictate the lane flow. If you successfully block her Precision Protocol with your defensive zone, Camille loses her primary trading power and can be punished with Twilight Assault empowered attacks. However, because she can threaten to cancel Stand United with Hookshot, you cannot freely save allies while standing in the lane. This forces you to forfeit wave priority to find safe, hidden spots to teleport, conceding tower plates.

立ち回り方

Never cast Stand United while visible to Camille; always retreat deep under your turret or into the brush where Hookshot cannot reach you. In direct trades, hold Spirit's Refuge specifically for her second, true-damage strike of Precision Protocol rather than panic-using it on her initial sweep. If she misses her Hookshot against a wall, use Shadow Dash immediately to trade aggressively while her mobility and crowd control are offline.

チャンピオン詳細 → Camilleのビルド →
Sett

Sett±0

aa blockglobal pressure This lane is a pure contest of cooldown tracking and denial. Sett holds the ultimate tool to shut down your global presence, as either his Facebreaker pull or The Show Stopper suppression can instantly cancel your Stand United channel. Meanwhile, your Spirit's Refuge completely nullifies his Knuckle Down and Pit Grit punches, turning his aggressive trades into wasted animations if timed correctly. Settのビルド → 詳細を見る
Sett

理由

This lane is a pure contest of cooldown tracking and denial. Sett holds the ultimate tool to shut down your global presence, as either his Facebreaker pull or The Show Stopper suppression can instantly cancel your Stand United channel. Meanwhile, your Spirit's Refuge completely nullifies his Knuckle Down and Pit Grit punches, turning his aggressive trades into wasted animations if timed correctly.

レーン戦への影響

Because Sett can cancel your teleport, you cannot simply retreat under tower and channel to save your team. You are forced to contest the wave directly. Missing your Shadow Dash allows Sett to pull you in with Facebreaker and charge up a massive Haymaker. This pressure restricts your map-wide impact, anchoring you to the top lane unless you find a clean window where his crowd control is down.

立ち回り方

Walk up to bait his Facebreaker before attempting any cross-map teleports. If he holds it, use Shadow Dash backwards to create distance, then channel Stand United out of his visual range. When trading in lane, always hold Spirit's Refuge until Sett activates Knuckle Down to block his heavy-hitting punches, and immediately sidestep to avoid the true damage center of his Haymaker while your Ki Barrier absorbs the remaining physical damage.

チャンピオン詳細 → Settのビルド →

その他のマッチアップ

有利なマッチアップ

9

これらのチャンピオンは、こちらの主要な強みに効果的に対応するのが難しく、より自由に対面を組み立てることができる。プレッシャーをかけて有利な交換を引き出す手段は複数あることが多い。相手が態勢を立て直す時間を与えるのではなく、この優位を活かして主導権を握ろう。

Yone

Yone−1

block mechanicshort trades Shen dominates this matchup because Yone's primary trading tool, his Soul Unbound forward sprint, relies entirely on landing basic attacks and Mortal Steel to build up damage. By deploying Spirit's Refuge right as Yone engages, you completely negate his burst during this temporary spirit form. Since his attacks fail to connect, his mark inflicts almost zero damage upon snapping back, letting you win every single short trade. Yoneのビルド → 詳細を見る
Yone

理由

Shen dominates this matchup because Yone's primary trading tool, his Soul Unbound forward sprint, relies entirely on landing basic attacks and Mortal Steel to build up damage. By deploying Spirit's Refuge right as Yone engages, you completely negate his burst during this temporary spirit form. Since his attacks fail to connect, his mark inflicts almost zero damage upon snapping back, letting you win every single short trade.

レーン戦への影響

This interaction forces Yone into a defensive stance, stripping away his ability to bully you out of lane or crash waves at will. You can comfortably maintain wave freeze near your turret, forcing Yone to overextend for farm. When he tries to secure minions, you can drag your blade through him with Twilight Assault to chunk his health, while threat of Shadow Dash under your tower prevents him from executing aggressive dives.

立ち回り方

Never waste Spirit's Refuge proactively; keep it ready specifically for when Yone activates Soul Unbound. Position your blade slightly ahead of your minion line using Twilight Assault. When Yone dashes forward, stand on your blade and trigger your zone to block his strikes. If he misses his Mortal Steel tornado, immediately taunt him with Shadow Dash before he snaps back, forcing a massive health deficit that secures your lane dominance.

チャンピオン詳細 → Yoneのビルド →
Sion

Sion−1

cc interruptscaling denial Shen dictates this lane because his Shadow Dash completely neutralizes Sion's primary threat, Decimating Smash. Whenever Sion stops to charge his heavy axe strike, Shen can instantly taunt him out of the channel. This interaction leaves Sion without his main waveclear and damage tool, while triggering Shen's Ki Barrier to absorb any minor retaliation from Soul Furnace or Roar of the Slayer. Sionのビルド → 詳細を見る
Sion

理由

Shen dictates this lane because his Shadow Dash completely neutralizes Sion's primary threat, Decimating Smash. Whenever Sion stops to charge his heavy axe strike, Shen can instantly taunt him out of the channel. This interaction leaves Sion without his main waveclear and damage tool, while triggering Shen's Ki Barrier to absorb any minor retaliation from Soul Furnace or Roar of the Slayer.

レーン戦への影響

This constant threat of disruption prevents Sion from easily shoving waves with Decimating Smash. Since you can cancel his charge at will, Sion is forced to play defensively or risk losing massive health trades. You easily secure wave priority, meaning you can look for Stand United plays across Wild Rift without fear of Sion immediately destroying your turret, as his tower-taking speed is severely delayed without wave control.

立ち回り方

Position yourself slightly to the side of your minion wave, forcing Sion to choose between targeting you or the minions with Decimating Smash. Always hold your Shadow Dash until you see his red targeting indicator appear on the ground. If you misplay and get hit by Roar of the Slayer, immediately activate Spirit's Refuge to block his subsequent basic attacks and drag Twilight Assault through him to trigger the slow, allowing you to safely disengage or turn the fight.

チャンピオン詳細 → Sionのビルド →
Tryndamere

Tryndamere−2

block mechanickite play This matchup is heavily in your favor because your defensive tools completely shut down Tryndamere's offensive design. Since his entire damage output relies on critical strikes amplified by Battle Fury, your Spirit's Refuge acts as an absolute barrier, denying his auto-attacks entirely. Furthermore, when he triggers Undying Rage to survive death, you can easily neutralize his final offensive window by casting Shadow Dash to kite him backward safely. Tryndamereのビルド → 詳細を見る
Tryndamere

理由

This matchup is heavily in your favor because your defensive tools completely shut down Tryndamere's offensive design. Since his entire damage output relies on critical strikes amplified by Battle Fury, your Spirit's Refuge acts as an absolute barrier, denying his auto-attacks entirely. Furthermore, when he triggers Undying Rage to survive death, you can easily neutralize his final offensive window by casting Shadow Dash to kite him backward safely.

レーン戦への影響

Tryndamere's lane presence is crippled from the start. He cannot build Battle Fury easily when you zone him off waves using Twilight Assault's empowered attacks. If he attempts to force a trade using Spinning Slash, your Spirit's Refuge negates his engage, leaving him vulnerable to a counter-taunt. Under your tower, he poses zero dive threat because you can easily stall out his Undying Rage with well-timed crowd control.

立ち回り方

Never waste Spirit's Refuge when Tryndamere has zero fury; instead, save this zone for when he initiates with a fully charged Battle Fury. Position your blade aggressively using Twilight Assault to block his path. When he activates Undying Rage, do not panic or run blindly; wait for him to swing, then use Shadow Dash to taunt him and slide away, forcing him to waste his ultimate's duration chasing air while Ki Barrier absorbs any stray damage.

チャンピオン詳細 → Tryndamereのビルド →
Urgot

Urgot−2

block mechanicall in denial Shen completely shuts down Urgot's primary source of damage. Urgot relies heavily on the rapid-fire basic attacks from Purge to quickly melt your health and trigger his Echoing Flames passive. However, Shen's Spirit's Refuge creates a protective zone that blocks every single one of these rapid-fire attacks. By deploying this defensive field during Urgot's main offensive window, you completely negate his trading power, leaving him entirely harmless during crucial duels. Urgotのビルド → 詳細を見る
Urgot

理由

Shen completely shuts down Urgot's primary source of damage. Urgot relies heavily on the rapid-fire basic attacks from Purge to quickly melt your health and trigger his Echoing Flames passive. However, Shen's Spirit's Refuge creates a protective zone that blocks every single one of these rapid-fire attacks. By deploying this defensive field during Urgot's main offensive window, you completely negate his trading power, leaving him entirely harmless during crucial duels.

レーン戦への影響

This interaction completely shifts lane control to Shen. When Urgot attempts to setup trades with Corrosive Charge or aggressive Disdain dashes, you can confidently stand your ground. Blocking his Purge turns every trade into a massive health victory for you. Urgot is forced to play defensively under his turret, giving you total wave control to setup deep vision or channel a game-changing Stand United without risking your own plates.

立ち回り方

To dominate, never waste Spirit's Refuge preemptively. Save this ability specifically for when Urgot commits with Disdain or activates his Purge. If he successfully flips you, immediately recall your blade with Twilight Assault and trigger Spirit's Refuge to block his retaliatory rapid-fire. If he misses his flip, aggressively initiate with Shadow Dash, taunting him to force his Purge into your protective zone while you shred him with your empowered attacks.

チャンピオン詳細 → Urgotのビルド →

その他のマッチアップ

Shen対策アイテム

これらのアイテムを購入すると、このチャンピオンの影響力を抑えられます。

Cotte épineuse
Cotte épineuse
Plaque du mort
Plaque du mort
Visage spirituel
Visage spirituel
Gantelet de glace
Gantelet de glace

このチャンピオンへの対策

カウンターアングル

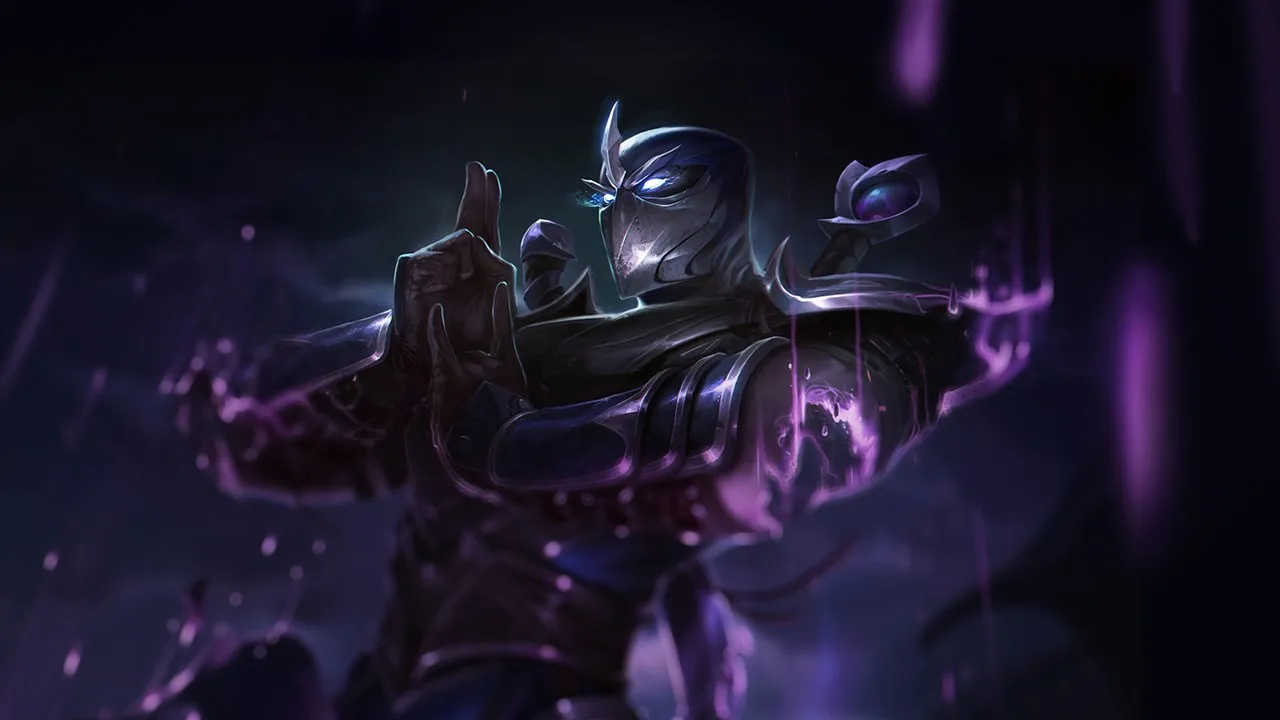
Shenのカウンターを理解することは、彼が二重人格をどうプレイできなくするかを理解することだ。サイドレーンを維持しつつマップを脅かすこと。悪いマッチアップは、彼の体力を奪うだけではない。アルティメットを高くつくようにさせたり、Eを防御的に使わせたり、短いトレードを長期的なデュエルに変えたりするものが、主な悪いマッチアップだ。Shenは多くのレーンを生き残れるが、生き残るだけでは十分ではない。もし彼がウェーブを準備できなければ、オブジェクトに遅れたり、グローバルプレイの後に多くのリソースを失ったりする。彼のデータに既に存在するチャンピオンは、3つの大きな問題を示している。彼のリズムを崩すデュエリスト、ウェーブコントロールを妨げる遠距離の脅威、そして彼の挑発が予測可能になりすぎるマッチアップだ。

パッチの文脈

Shenは、相手が長時間攻撃できる場合に脆弱になる。彼のキットは短いウィンドウを非常にうまく保護する。パッシブシールド、Q、W、そしてエンゲージまたはエスケープのためのE。しかし、敵がそのウィンドウを生き延びてデュエルを続けた場合、Shenはトレードを終わらせるためのダメージが不足しがちだ。効果的なカウンターは、早期に彼を殺そうとするだけではない。彼にウェーブを失うか、挑発を使いすぎるか、グローバルな機会を諦めるかの選択を強いる。だから、Shenが死ななくても、マッチアップが難しいことがある。もし彼がローテーションを準備できなければ、彼のアルティメットは戦略的価値の多くを失う。

クイックリード

  • Shenを罰することは、必ずしも彼を殺すことではない。彼にプレッシャーをかけ続け、アルティメットの準備を妨げるだけで十分なことが多い。
  • 彼のEはキーとなるクールダウンだ。一度使われると、Shenはエンゲージ、エスケープ、そして防御的な罰の全てを同時に失う。
  • 長期的なトレードは、短いトレードよりもShenに対して有利だ。なぜなら、彼のシールドとQは限られたウィンドウで最大の価値を発揮するからだ。

カウンターの原型

長期的なプレッシャーをかけるデュエリスト

これらのマッチアップは、Shenとは異なるタイプのトレードをするため難しい。Shenは短い交換を作り、パッシブでダメージの一部を吸収し、その後、戦闘が長くなりすぎる前に離れることを望む。Fiora、Camille、Gwen、Dariusのようなデュエリストは逆のことをする。彼らはシーケンスを延長し、Eがミスしたり早すぎたりしたときに罰し、持続的なダメージやオールインの脅威を通じて彼の耐久性をより信頼しなくさせる。

チャンピオンの適応方法. Shenは、エゴな1v1を拒否しなければならない。彼はウェーブを中心にプレイし、Eをエスケープや罰のために保持し、長期的なデュエルではなくマップバリューを探すべきだ。トレードの勝利は、それが次のオブジェクトに対応するのを妨げない場合にのみ意味がある。

遠距離からのプレッシャーとウェーブコントロール

遠距離からのプレッシャーはShenを悩ませる。なぜなら、彼はラストヒットごとにペナルティを払い、ウェーブ準備を遅らせるからだ。Shenは危険な挑発を持っているにもかかわらず、相手はしばしば彼の実際の射程を回避し、彼のEを誘い出し、出口がないときに彼を罰することができる。このタイプのレーンは、直接的なオールインでShenを破壊するとは限らないが、彼の体力を減らし、テンポをリセットし、多くのtop側のリソースを失うことなくアルティメットを使用する自由を奪う。

チャンピオンの適応方法. Shenは、レベル5になる前に体力を失いすぎるのを避けるために、いくつかのラストヒットを諦めることを受け入れるべきだ。目標は、Eフラッシュを脅かすのに十分なHPを維持し、防御的なリセットを保ち、マップのために使用可能なアルティメットを保持することだ。

予測可能な挑発を罰するマッチアップ

Shenは、彼のEの質に大きく依存している。もし挑発が読まれたり、避けられたり、悪い角度で強制されたりすると、彼は主要なコントロールと安全ツールを失う。一部のチャンピオンは、そのクールダウンを誘い出したり、最初のウィンドウを吸収したり、それが使われた後も脅威を与え続けたりすることができる。問題はメカニクスだけではない。Eが利用できなくなると、Shenはもはやウェーブを簡単に守ったり、近くの小競り合いでジャングラーを守ったり、アルティメット後のクリーンな到着を保証したりすることができない。

チャンピオンの適応方法. Shenは、エンゲージしたいという欲求ではなく、敵のミスと結びつけてEを遅らせるべきだ。挑発は、敵が既にダッシュ、スロウ、追撃、またはウェーブの近くでの悪いポジションをコミットした場合に、はるかに強力になる。

優先度の高いマッチアップ

Fiora

Fioraは、彼女がShenが避けたいもの、つまりシールドと挑発がもはやリズムをコントロールするのに十分でなくなった長期的なデュエルを正確に攻撃するため、理解すべき優先度の高いマッチアップだ。Shenは、繰り返しのトレードで彼女に勝とうとすべきではない。彼は主に体力を守り、辛抱強くウェーブをプレイし、Fioraが本当にコミットしたときにエスケープまたは罰のツールとしてEを保持する必要がある。レーンが直接的な支配で勝たれることはめったにない。それは安定化され、Shenが他の場所でより多くの価値を生み出せるようにする。

Camille

Camilleは、Shenにクールダウンの精度を非常に要求させる。もしShenがEを早すぎると、Camilleはスペースを取り戻し、交換を孤立させ、彼女のスケーリングがより危険になるデュエルを脅かすことができる。罠は、すべてのプレッシャーポイントに積極的な挑発で対応しようとすることだ。このマッチアップでは、Shenは主にCamilleがオブジェクト前にクリーンなウィンドウを得るのを防ぐ必要がある。なぜなら、保持されていないウェーブは彼のアルティメットをより高くし、Camilleに罰するチャンスを与えるからだ。

対面時のよくある間違い

対面時のよくある間違い

  • Shenに対して、彼のレベル5または利用可能なアルティメットを確認せずに戦闘を仕掛けると、良いエンゲージが罠に変わることがよくある。
  • オブジェクトの前に彼が自由にウェーブを準備できるようにすることは、彼が代償を払わずにレーンを離れるのに必要なウィンドウを正確に与える。
  • 彼が到着した後、Shenにクラウドコントロールを浪費することは、本当の脅威が彼が救ったキャリーである場合、間違っている可能性がある。
  • 彼のEフラッシュの射程に近すぎると、特にShenが追随するチームを持っている場合、突然のキャッチにさらされるリスクがある。
  • Shenを相手に中立レーンで十分だと考えるのは間違いだ。彼が安定していれば、グローバルな介入でゲームに勝つことができる。

コーチングノート

  • Shenに勝つには、体力バーよりもテンポを攻撃しよう。凍結したウェーブ、高コストなアルティメット、強制的なEは、リスクの高いキルよりも価値がある場合がある。
  • Shenをプレイするなら、サバイバルと成功を混同しないでほしい。死なないが、決して動けないレーンは、君のチャンピオンのアイデンティティにとっては負けレーンだ。

FAQ

Shenに有利なチャンピオンは?

Shenに最も有利なのは、彼のショートトレードのリズムを崩せるチャンピオンだ。トレードを延長できるデュエリスト、ウェーブから彼を引き離せるチャンピオン、そしてEを罰する相手は、彼の計画をはるかに困難にする。Shenはしばしば生き残ることができるが、敵の真の目標は、彼がウェーブを準備するのを阻止し、アルティメットをあまりにも高コストにすることだ。もし彼がチームを救うか、レーン全体を失うかの選択を迫られたら、カウンターはすでに価値を生み出している。

Shenのアルティメットの使用を止めるべきか?

はい、しかし直接的なクラウドコントロールだけではありません。彼のアルティメットを制限する最善の方法は、しばしばオブジェクトの前にウェーブをコントロールすることだ。Shenがタワーに巨大なウェーブをぶつけるのを残さなければならないなら、彼のアルティメットは高コストな決断となる。また、戦闘前に彼のEを強制することもできる。たとえ彼がアルティメットを持って到着したとしても、その到着を変換するコントロールは少なくなるだろう。目標は常にアルティメットをキャンセルすることではなく、それが与えるものを減らすことだ。

難しいマッチアップでShenはどうプレイすべきか?

難しいマッチアップでは、Shenはデュエルを通しての承認を求めるのをやめなければならない。彼の優先事項は、ウェーブを維持するのに十分な体力を保ち、本当に重要な瞬間のためにEを保存し、アルティメットのタイミングを準備することだ。彼はゲームを失うことなくいくつかの短い交換で負けることができるが、フリーキルや壊滅的なウェーブを与えない限りは。真の勝利は、プレイ可能なレーンとオブジェクトを決定できるアルティメットを持ってmidゲームに到達することであることが多い。

Shenは良いアルティメットを持っていてもゲームを失うことがあるのはなぜか?

なぜなら、一つの良いアルティメットは、常に悪いマップ管理を補うわけではないからだ。Shenが味方を救っても、2つのウェーブ、プレート、そして全てのtopプレッシャーを失ったら、そのトレードはまだマイナスになる可能性がある。彼はアルティメットを完全なマクロの決断として使う必要がある:どの戦いが勝ち、どのウェーブが失われ、その後どのオブジェクトが利用可能になるか?その読みなしでは、彼は自分がうまくプレイしていると感じるかもしれないが、敵にあまりにも多くのリソースを与えているのだ。