A
2026年9月 · Patch 7.2d
Bruiser · JUNGLE · TOP

Olaf Wild Rift カウンターガイド

Olafは、効果的に彼をkiteし、速度を維持するためのaxe(斧)への依存度を突いてくる構成に対して苦戦します。アルティメットが使えない状態では、CCによって不利な戦闘に晒されます。永続的なdisengage構成は、彼がcarryに接近する機会を減少させます。

★ JUNGLE · TOP Tier A
ダメージ
UTIL
TANK
DIFF
Win 52.5% #12 · ↑4pt
Pick 2.4% #29
Ban 3.1% #52

Olaf Wild Rift カウンターガイド ★ カウンターシート

マッチアップ一覧
マッチアップ 判定 有利度 勝率 ピック率
Rammus ハードカウンター +2 54.7% 4.3%
Warwick 不利なマッチアップ +1 52.6% 2.7%
Tryndamere 不利なマッチアップ +1 50.6% 6.8%
Nidalee 不利なマッチアップ +1 50.2% 2.4%
Master Yi 不利なマッチアップ +1 48.0% 9.3%
Volibear スキル次第のマッチアップ ±0 49.9% 3.3%
Jax スキル次第のマッチアップ ±0 48.4% 2.1%
Nilah スキル次第のマッチアップ ±0
Vi 有利なマッチアップ −1 51.9% 9.3%
Gwen 有利なマッチアップ −1 51.8% 1.9%
Pantheon 有利なマッチアップ −1 51.7% 5.5%
Ekko 有利なマッチアップ −1 51.6% 4.3%
Darius 有利なマッチアップ −1 51.5% 8.1%
Shyvana 有利なマッチアップ −1 51.1% 7.0%
Kayn 有利なマッチアップ −1 50.6% 9.2%
Wukong 有利なマッチアップ −1 50.3% 3.7%
Kha'Zix 有利なマッチアップ −1 50.0% 4.9%
Kindred 有利なマッチアップ −1 49.8% 2.6%
Riven 有利なマッチアップ −1 48.8% 1.2%
Rengar 有利なマッチアップ −1 47.8% 1.6%
Zed 有利なマッチアップ −1 47.6% 1.8%
Viego 有利なマッチアップ −1 46.0% 3.4%
Poppy 有利なマッチアップ −1
Twitch 有利なマッチアップ −1
Nunu & Willump 有利なマッチアップ −2 54.8% 1.9%
Jarvan IV 有利なマッチアップ −2 52.4% 8.5%
Diana 有利なマッチアップ −2 52.1% 2.9%
Lillia 有利なマッチアップ −2 51.9% 3.3%
Fiddlesticks 有利なマッチアップ −2 50.8% 2.7%
Skarner 有利なマッチアップ −2 50.6% 1.1%
Ambessa 有利なマッチアップ −2 50.3% 1.2%
Nocturne 有利なマッチアップ −2 50.3% 5.5%
Hecarim 有利なマッチアップ −2 49.2% 2.6%
Yone 有利なマッチアップ −2 49.1% 2.0%
Dr. Mundo 有利なマッチアップ −2 48.6% 1.1%
Evelynn 有利なマッチアップ −2 48.6% 2.4%
Fizz 有利なマッチアップ −2 47.4% 2.1%
Lee Sin 有利なマッチアップ −2 47.3% 12.0%
Camille 有利なマッチアップ −2
Amumu 有利なマッチアップ −3 55.1% 3.3%
Cho'Gath 有利なマッチアップ −3 47.6% 5.4%
Aatrox 有利なマッチアップ −3
Gragas 有利なマッチアップ −3
Maokai 有利なマッチアップ −3
Mordekaiser 有利なマッチアップ −3
Morgana 有利なマッチアップ −3
Nautilus 有利なマッチアップ −3
Taliyah 有利なマッチアップ −3

Edge: Wild Rift Core canonical verdict (−3 to +3), shown from the point of view of the champion named in the row. Win rate and pick rate: the opponent's own rate in this role — Wild Rift CN · Challenger, Patch 7.2d. Not a head-to-head win rate.

ハードカウンター

1

これらのチャンピオンは、こちらのビルドやプレイスタイルを真正面から上回る構成を持ち、レーン戦のコントロールとファームを極めて難しくする。彼らのスキルはこちらの主要な強みを無効化し、いつも通りのプランを実行しようとした瞬間に手痛い反撃を受けさせてくる。こうしたマッチアップでは、ミスを最小限に抑え、正面からの対決以外で解決策を探すことが重要になる。

Rammus

Rammus+2

hard counterdamage reflection Rammus completely neutralizes your offensive pressure through sheer armor scaling. While activating Ragnarok successfully grants you immunity to Frenzying Taunt, it actually lures you into a deadly trap. When you trigger Berserker Rage and Vicious Strikes to shred him down, his Defensive Ball Curl reflects massive magic damage directly back at your rapid auto-attacks, turning your own attack speed against you. Rammusのビルド → 詳細を見る
Rammus

理由

Rammus completely neutralizes your offensive pressure through sheer armor scaling. While activating Ragnarok successfully grants you immunity to Frenzying Taunt, it actually lures you into a deadly trap. When you trigger Berserker Rage and Vicious Strikes to shred him down, his Defensive Ball Curl reflects massive magic damage directly back at your rapid auto-attacks, turning your own attack speed against you.

レーン戦への影響

This interaction destroys your early jungle dueling power and neutralizes your skirmish presence. You cannot contest crabs or invade his jungle because any prolonged trade triggers his Defensive Ball Curl, causing you to kill yourself through your own high-speed attacks. Rammus will freely initiate ganks with Powerball and Soaring Slam, forcing you to play defensively and giving up early map priority.

立ち回り方

To survive this matchup, you must alter your build path immediately, prioritizing armor penetration and magic resistance to mitigate his Defensive Ball Curl damage rather than raw attack speed. During skirmishes, track his Defensive Ball Curl and completely stop auto-attacking him while it is active; instead, use Undertow to slow him and spam Reckless Swing for true damage. If he rolls in with Powerball, intercept him with Undertow to protect your allies before disengaging.

チャンピオン詳細 → Rammusのビルド →

不利なマッチアップ

4

これらのチャンピオンは、マッチアップ自体を絶望的にするわけではないが、対面で優位に立ちやすいツールを持っている。射程が長かったり、攻撃を受け止める力が高かったり、エンゲージへの対応手段が豊富だったりする。アプローチを調整し、戦闘を受け入れるタイミングを慎重に選ぶ必要がある。

その他のマッチアップ

スキル次第のマッチアップ

3

このマッチアップは何よりもまず実行力の勝負であり、両者ともに優位を取れる現実的な手段を持っている。重要なスキルを一つ避けられるか、エンゲージを正しく読めるか、あるいはたった一つの位置取りのミスが、勝敗を分けることもある。マッチアップを理解し、行動すべき瞬間を見極める力がとりわけ重要になる。

Volibear

Volibear±0

duelingskirmish This Jungle duel is a continuous war of attrition decided by how you manage your health bar. While Ragnarok completely nullifies the crowd control from Thundering Smash, denying Volibear's setup, the danger lies in his Frenzied Maul. Volibear's second bite heals him massively when you are both low, which can easily overpower your own passive lashing from Berserker Rage if the fight drags on too long. Volibearのビルド → 詳細を見る
Volibear

理由

This Jungle duel is a continuous war of attrition decided by how you manage your health bar. While Ragnarok completely nullifies the crowd control from Thundering Smash, denying Volibear's setup, the danger lies in his Frenzied Maul. Volibear's second bite heals him massively when you are both low, which can easily overpower your own passive lashing from Berserker Rage if the fight drags on too long.

レーン戦への影響

Skirmishes in the river or around neutral camps become highly volatile. If Volibear lands Sky Splitter for a shield and marks you with Frenzied Maul, he wins extended trades. This forces you to fight only in short bursts around Undertow resets, or risk losing your jungle priority, delaying your camp rotations, and giving up early scuttle crabs because neither of you can easily force the other out without risking a counter-kill.

立ち回り方

Never activate Ragnarok preemptively; hold it specifically to cleanse the stun of Thundering Smash right as Volibear charges at you, allowing you to keep landing Reckless Swing. If he hits you with his first Frenzied Maul, disengage immediately using the slow from Undertow to let the mark expire. Only commit to a lethal fight when his bite is on cooldown, using Vicious Strikes to burst-heal before his second bite can execute you.

チャンピオン詳細 → Volibearのビルド →
Jax

Jax±0

duelingtrue damage This duel revolves entirely around the interaction between Ragnarok and Counter Strike. Activating your ultimate completely nullifies the stun from Jax's defensive spin, but it does not bypass his evasion. During these two seconds, your basic attacks will miss, rendering Berserker Rage and Vicious Strikes useless for lifesteal. Winning depends entirely on how you navigate this specific defensive window when your ultimate is running. Jaxのビルド → 詳細を見る
Jax

理由

This duel revolves entirely around the interaction between Ragnarok and Counter Strike. Activating your ultimate completely nullifies the stun from Jax's defensive spin, but it does not bypass his evasion. During these two seconds, your basic attacks will miss, rendering Berserker Rage and Vicious Strikes useless for lifesteal. Winning depends entirely on how you navigate this specific defensive window when your ultimate is running.

レーン戦への影響

Because both champions excel at sustained dueling, early jungle skirmishes remain highly volatile. Before level five, Jax can easily dictate trades using Counter Strike to block your Berserker Rage-infused autos. Once Ragnarok is unlocked, the power dynamic shifts toward mid-game skirmishes around neutral camps, where the precise timing of your ultimate determines who dominates the river fights and controls epic monster zones.

立ち回り方

When Jax activates Counter Strike, immediately stop auto-attacking to avoid wasting your damage and healing. Instead, use this two-second window to kite him with Undertow and land true damage with Reckless Swing, which cannot be dodged. Once his evasion ends, activate Vicious Strikes to quickly regenerate health using your high attack speed. If he uses Leap Strike to escape over walls, do not blindly pursue unless your axe is already on his path.

チャンピオン詳細 → Jaxのビルド →
Nilah

Nilah±0

sustain fighterultimate interaction This matchup is a pure test of execution centered on ultimate and defensive timings. Olaf can activate Ragnarok to completely ignore the crowd control pull of Apotheosis, allowing him to stay on top of Nilah. However, Nilah can counter-play his offensive surge by activating Jubilant Veil, which completely blocks Olaf's basic attacks, rendering his Vicious Strikes healing useless during those crucial seconds. Nilahのビルド → 詳細を見る
Nilah

理由

This matchup is a pure test of execution centered on ultimate and defensive timings. Olaf can activate Ragnarok to completely ignore the crowd control pull of Apotheosis, allowing him to stay on top of Nilah. However, Nilah can counter-play his offensive surge by activating Jubilant Veil, which completely blocks Olaf's basic attacks, rendering his Vicious Strikes healing useless during those crucial seconds.

レーン戦への影響

Jungle skirmishes revolve around who can bait out the other's defensive tool. If you force Nilah to use Jubilant Veil early, your Undertow slow guarantees a kill. However, if she saves her dodge for your Ragnarok, she will easily survive your burst, turn the fight with Apotheosis's healing, and force you to retreat into your own jungle, losing control over neutral camps.

立ち回り方

To win these duels, never activate Vicious Strikes immediately when charging Nilah. Instead, initiate with Undertow to force her to use Slipstream or Jubilant Veil. While she is dodging, rely on the true damage of Reckless Swing which cannot be dodged. Save your Ragnarok for the moment she winds up Apotheosis, and only activate Vicious Strikes once her defensive shroud fades so you can heal back your lost health.

チャンピオン詳細 → Nilahのビルド →

有利なマッチアップ

40

これらのチャンピオンは、こちらの主要な強みに効果的に対応するのが難しく、より自由に対面を組み立てることができる。プレッシャーをかけて有利な交換を引き出す手段は複数あることが多い。相手が態勢を立て直す時間を与えるのではなく、この優位を活かして主導権を握ろう。

Fiddlesticks

Fiddlesticks−2

hard countercc immunity This matchup is heavily weighted in your favor because your ultimate, Ragnarok, completely nullifies Fiddlesticks’ entire defensive utility. When you activate it, his Terrify and Reap cannot peel you off, leaving him utterly defenseless. Without his crowd control to keep you at bay, Fiddlesticks cannot safely channel Bountiful Harvest to heal, allowing your raw physical damage to quickly tear through his fragile health bar. Fiddlesticksのビルド → 詳細を見る
Fiddlesticks

理由

This matchup is heavily weighted in your favor because your ultimate, Ragnarok, completely nullifies Fiddlesticks’ entire defensive utility. When you activate it, his Terrify and Reap cannot peel you off, leaving him utterly defenseless. Without his crowd control to keep you at bay, Fiddlesticks cannot safely channel Bountiful Harvest to heal, allowing your raw physical damage to quickly tear through his fragile health bar.

レーン戦への影響

In the jungle, this interaction completely changes how skirmishes and objective fights play out. Fiddlesticks is forced to play extremely defensively, unable to contest scuttle crabs or invade your camps. If you catch him in the river, he has to flash away immediately because he cannot duel you. You dictate the pace of the map, securing neutral objectives while he is stuck relying on passive vision from A Harmless Scarecrow.

立ち回り方

Your main objective is tracking his positioning to prevent surprise ambushes. Always sweep bushes before entering narrow jungle corridors to avoid face-checking an unseen Crowstorm. When engaging, save Ragnarok specifically for the moment he attempts to cast Terrify or Reap on you. Once your ultimate is active, spam Undertow to keep him slowed, activate Vicious Strikes to out-heal his Bountiful Harvest, and execute him with Reckless Swing before he can retreat to safety.

チャンピオン詳細 → Fiddlesticksのビルド →
Dr. Mundo

Dr. Mundo−2

duelingtrue damage Olaf dominates this jungle matchup because Dr. Mundo relies on stacking health and armor, which is completely bypassed by the flat true damage from Reckless Swing. When both junglers drop low in a skirmish, Berserker Rage gives Olaf an overwhelming attack speed advantage. This easily outpaces Dr. Mundo's own low-health damage scaling from Blunt Force Trauma, turning what looks like a close duel into a decisive victory for you. Dr. Mundoのビルド → 詳細を見る
Dr. Mundo

理由

Olaf dominates this jungle matchup because Dr. Mundo relies on stacking health and armor, which is completely bypassed by the flat true damage from Reckless Swing. When both junglers drop low in a skirmish, Berserker Rage gives Olaf an overwhelming attack speed advantage. This easily outpaces Dr. Mundo's own low-health damage scaling from Blunt Force Trauma, turning what looks like a close duel into a decisive victory for you.

レーン戦への影響

This matchup allows you to invade Dr. Mundo's camps with impunity. He cannot contest you at the Scuttle Crab or in river skirmishes, as he lacks the burst to finish you before Berserker Rage activates. Your pressure forces him to rely purely on Infected Bonesaw to farm from afar, yielding total control over early objectives and leaving his lanes vulnerable to your proactive ganks while he is trapped clearing.

立ち回り方

When crossing paths in the river, initiate immediately by landing Undertow. Keep picking up your axes to maintain the slow, preventing him from escaping. If he activates Maximum Dosage to regenerate and run, trigger Ragnarok to ignore the slows from Infected Bonesaw and run him down. Never panic when your health bar gets low; instead, activate Vicious Strikes and relentlessly spam Reckless Swing to lifesteal through his desperate damage and secure the kill.

チャンピオン詳細 → Dr. Mundoのビルド →
Diana

Diana−2

duelingcc immune Olaf completely neutralizes Diana's primary teamfight and skirmish tool. When Diana commits with Lunar Rush and triggers Moonfall to pull you in for her burst, activating Ragnarok instantly negates the displacement and slow. Deprived of her crowd control and unable to disengage once her dash is spent, Diana is forced into a sustained melee duel where your Vicious Strikes and Berserker Rage easily overwhelm her fragile assassin stat pool. Dianaのビルド → 詳細を見る
Diana

理由

Olaf completely neutralizes Diana's primary teamfight and skirmish tool. When Diana commits with Lunar Rush and triggers Moonfall to pull you in for her burst, activating Ragnarok instantly negates the displacement and slow. Deprived of her crowd control and unable to disengage once her dash is spent, Diana is forced into a sustained melee duel where your Vicious Strikes and Berserker Rage easily overwhelm her fragile assassin stat pool.

レーン戦への影響

In the jungle, this interaction completely warps Diana's pathing. She cannot safely contest Scuttle Crabs or epic monsters if you are nearby, as any attempt to trigger Moonfall on you results in her death. You can aggressively invade her camps, knowing that even if she lands Crescent Strike, her Lunar Rush jump into you is a death sentence once you have your ultimate active.

立ち回り方

Never activate Ragnarok too early while chasing. Wait for Diana to use Crescent Strike and commit her Lunar Rush onto you or an ally. The exact moment she begins the animation for Moonfall, pop your ultimate to ignore the pull, then immediately throw Undertow at point-blank range so she cannot escape. If you miss your axe or she escapes over a wall with a jungle camp dash, use the bonus movement speed of your ultimate to secure her camps rather than chasing blindly.

チャンピオン詳細 → Dianaのビルド →
Jarvan IV

Jarvan IV−2

duelingcc immunity Olaf completely dominates this duel because Ragnarok makes him entirely immune to Jarvan IV's primary disruption tools. When Jarvan IV attempts his signature knockup combination with Demacian Standard and Dragon Strike, or tries to escape using the slow from Golden Aegis, Olaf simply ignores both. This direct counter to his crowd control strips the Demacian prince of his disengage, forcing him to take a brutal, losing head-on fight. Jarvan IVのビルド → 詳細を見る
Jarvan IV

理由

Olaf completely dominates this duel because Ragnarok makes him entirely immune to Jarvan IV's primary disruption tools. When Jarvan IV attempts his signature knockup combination with Demacian Standard and Dragon Strike, or tries to escape using the slow from Golden Aegis, Olaf simply ignores both. This direct counter to his crowd control strips the Demacian prince of his disengage, forcing him to take a brutal, losing head-on fight.

レーン戦への影響

This matchup dynamic guarantees you absolute dominance in the river and inside the enemy jungle. Because Jarvan IV cannot lock you down or peel you off without wasting his arena, his clear paths become highly predictable and easily invaded. You can aggressively contest his camps and neutral objectives, knowing that any direct jungle collision or early skirmish heavily favors your raw damage output over his defensive utility.

立ち回り方

To execute this, track Jarvan IV's Demacian Standard and Dragon Strike combo. Once he commits his lance forward, immediately activate Ragnarok to nullify the knockup, then spam Undertow to keep him slowed while triggering Vicious Strikes for sustained healing. If he traps you inside Cataclysm, do not panic; your Reckless Swing deals true damage that melts his armor, turning his own arena into a cage where you easily shred him with Berserker Rage.

チャンピオン詳細 → Jarvan IVのビルド →
Evelynn

Evelynn−2

cc immunedueling Evelynn's entire assassination pattern relies on cooking her Allure mark to charm you and shred your resistances before bursting. Because Ragnarok grants you complete crowd control immunity, you can activate it the moment she attempts to trigger the charm. This totally neutralizes her primary defensive and offensive tool, allowing you to relentlessly hunt her down with consecutive Undertow axes while she is left completely vulnerable. Evelynnのビルド → 詳細を見る
Evelynn

理由

Evelynn's entire assassination pattern relies on cooking her Allure mark to charm you and shred your resistances before bursting. Because Ragnarok grants you complete crowd control immunity, you can activate it the moment she attempts to trigger the charm. This totally neutralizes her primary defensive and offensive tool, allowing you to relentlessly hunt her down with consecutive Undertow axes while she is left completely vulnerable.

レーン戦への影響

This matchup dynamic turns her jungle into your playground. Evelynn cannot safely clear near you or contest Scuttle Crabs, because any duel ends in her forced retreat. If you invade her camps, she is forced to concede them or waste Last Caress defensively just to escape your axes. This constant threat of invasion ruins her power spikes, keeping her passive and unable to secure early neutral objectives.

立ち回り方

When hunting Evelynn, never initiate with Ragnarok pre-emptively. Instead, walk up to her or throw Undertow to force her to panic-cast Allure. Wait for the heart icon above your head to fill completely; the exact micro-second she steps forward to trigger the charm with Hate Spike or Whiplash, activate your ultimate. If she manages to escape over a wall using Last Caress, immediately turn back to steal her remaining jungle camps.

チャンピオン詳細 → Evelynnのビルド →
Lee Sin

Lee Sin−2

duelingskirmish This matchup is dictated by Olaf's absolute negation of Lee Sin's defensive tools. When you activate Ragnarok, you become completely immune to the massive knockback of Dragon's Rage and the crippling slow of Tempest. Without these crowd control abilities to keep you at bay, Lee Sin cannot peel you off himself, turning his high-mobility assassin kit into a sitting duck against your relentless pursuit. Lee Sinのビルド → 詳細を見る
Lee Sin

理由

This matchup is dictated by Olaf's absolute negation of Lee Sin's defensive tools. When you activate Ragnarok, you become completely immune to the massive knockback of Dragon's Rage and the crippling slow of Tempest. Without these crowd control abilities to keep you at bay, Lee Sin cannot peel you off himself, turning his high-mobility assassin kit into a sitting duck against your relentless pursuit.

レーン戦への影響

In the jungle, this interaction strips Lee Sin of his early-game skirmishing dominance. He cannot contest neutral camps or rivers safely because he cannot peel you off. If he attempts to steal camps, you can simply force a direct duel; he is forced to waste Safeguard over walls to escape rather than using it to shield himself or trade.

立ち回り方

To execute this properly, never trigger Ragnarok too early. Let Lee Sin commit with Sonic Wave first. The moment he lands on you or tries to queue up Dragon's Rage to disengage, activate Ragnarok to absorb the kick entirely. Immediately retaliate with continuous Undertow throws to prevent him from walking away, while activating Vicious Strikes to out-sustain his burst. If he manages to Safeguard over a wall, do not blindly flash unless your axes can immediately finish him.

チャンピオン詳細 → Lee Sinのビルド →
Lillia

Lillia−2

cc immunitykiting Olaf dominates this jungle matchup because Lillia relies entirely on her ultimate to peel or turn fights. The moment she applies Dream-Laden Bough and casts Lilting Lullaby, activating Ragnarok completely cleanses the drowsy effect and grants crowd control immunity. Without her sleep, Lillia's massive movement speed from Blooming Blows is countered by your Undertow axes, leaving her fragile frame completely exposed to your raw physical damage. Lilliaのビルド → 詳細を見る
Lillia

理由

Olaf dominates this jungle matchup because Lillia relies entirely on her ultimate to peel or turn fights. The moment she applies Dream-Laden Bough and casts Lilting Lullaby, activating Ragnarok completely cleanses the drowsy effect and grants crowd control immunity. Without her sleep, Lillia's massive movement speed from Blooming Blows is countered by your Undertow axes, leaving her fragile frame completely exposed to your raw physical damage.

レーン戦への影響

This interaction shifts all skirmish pressure in your favor once you reach level five. You can aggressively invade her camps or force fights at neutral objectives without fearing her sleep-and-strike combo. Since Lillia cannot safely utilize Watch Out! Eep! on a sleeping target when you are nearby, her zoning power vanishes. This forces her to play passively, yielding early Epic Monsters to your superior objective speed.

立ち回り方

To execute this flawlessly, never activate Ragnarok preemptively just to close the gap. Wait for the exact moment Lillia's Lilting Lullaby indicator appears on your character, then pop your ultimate to instantly erase the drowsy debuff. Immediately chain this with a precise Undertow to slow her down, preventing her from stacking Blooming Blows. Once closed in, activate Vicious Strikes and spam Reckless Swing to melt her health pool.

チャンピオン詳細 → Lilliaのビルド →
Aatrox

Aatrox−3

cc immunitydueling This matchup heavily favors you because your ultimate, Ragnarok, completely neutralizes Aatrox's entire crowd control kit. By becoming immune to the knockups of his The Darkin Blade and preventing the pull from his Infernal Chains, you strip him of his ability to space you out. While his World Ender increases his healing, your Berserker Rage and Vicious Strikes allow you to out-sustain him in direct, uninterrupted melee combat. Aatroxのビルド → 詳細を見る
Aatrox

理由

This matchup heavily favors you because your ultimate, Ragnarok, completely neutralizes Aatrox's entire crowd control kit. By becoming immune to the knockups of his The Darkin Blade and preventing the pull from his Infernal Chains, you strip him of his ability to space you out. While his World Ender increases his healing, your Berserker Rage and Vicious Strikes allow you to out-sustain him in direct, uninterrupted melee combat.

レーン戦への影響

In the jungle, this interaction turns every river skirmish or invade into a nightmare for Aatrox. He cannot stop your forward movement, meaning you can aggressively contest his camps and secure Scuttle Crabs with impunity. Since his Umbral Dash cannot save him once you run him down under Ragnarok, his jungle clear is constantly threatened, forcing him to concede neutral objectives and retreat.

立ち回り方

Initiate duels by landing Undertow to slow him down, but do not activate Ragnarok immediately. Wait for him to commit with his first strike of The Darkin Blade or throw his Infernal Chains. The moment he casts either, activate your ultimate to bypass the crowd control, then activate Vicious Strikes to maximize your healing. If he uses Umbral Dash to jump over a wall and escape, immediately stop the chase and secure his nearby jungle monsters.

チャンピオン詳細 → Aatroxのビルド →
Hecarim

Hecarim−2

duelingunstoppable This matchup heavily favors Olaf because Ragnarok completely negates Hecarim's entire crowd control kit. When Hecarim attempts to initiate or disengage using Onslaught of Shadows or the knockback from Devastating Charge, activating your ultimate makes you entirely immune to these effects. Hecarim relies on these tools to disrupt and space his opponents, but your unstoppable charge allows you to ignore his disruption entirely and run him down. Hecarimのビルド → 詳細を見る
Hecarim

理由

This matchup heavily favors Olaf because Ragnarok completely negates Hecarim's entire crowd control kit. When Hecarim attempts to initiate or disengage using Onslaught of Shadows or the knockback from Devastating Charge, activating your ultimate makes you entirely immune to these effects. Hecarim relies on these tools to disrupt and space his opponents, but your unstoppable charge allows you to ignore his disruption entirely and run him down.

レーン戦への影響

Because Hecarim cannot peel you off, he is forced to concede early River skirmishes and cannot safely contest the Scuttle Crabs. You can aggressively invade his jungle camps, knowing that if he tries to fight back with Rampage and Spirit of Dread, you can simply run him over. This constant threat forces Hecarim to take suboptimal, defensive pathing, giving your lanes permanent pressure and secure neutral objectives.

立ち回り方

In skirmishes, save Ragnarok specifically for the moment Hecarim commits to his charge. Do not activate it too early, or he will simply use Devastating Charge to run away. Instead, wait for him to initiate with Onslaught of Shadows, pop your ultimate to negate the fear, and immediately slow him with Undertow. If he manages to escape over a wall, immediately pivot to stealing his nearby camps to punish his retreat.

チャンピオン詳細 → Hecarimのビルド →
Gragas

Gragas−3

hard countersurvival Olaf entirely neutralizes Gragas's defensive and offensive utility. Gragas relies on Body Slam to peel or engage, and uses Explosive Cask to scatter fights. Once you activate Ragnarok, you become completely immune to these displacement tools, turning his primary survival kit useless. Without his crowd control to keep you at bay, Gragas cannot escape your melee range or protect his allies from your direct onslaught. Gragasのビルド → 詳細を見る
Gragas

理由

Olaf entirely neutralizes Gragas's defensive and offensive utility. Gragas relies on Body Slam to peel or engage, and uses Explosive Cask to scatter fights. Once you activate Ragnarok, you become completely immune to these displacement tools, turning his primary survival kit useless. Without his crowd control to keep you at bay, Gragas cannot escape your melee range or protect his allies from your direct onslaught.

レーン戦への影響

This matchup makes jungle skirmishes highly oppressive for Gragas. He cannot contest scuttle crabs or neutral objectives because your Undertow slows him while he tries to disengage, and his Drunken Rage damage reduction cannot withstand the true damage from Reckless Swing. If he tries to steal camps or fight in the river, your ability to ignore his displacements forces him to concede territory or die trying to peel you off.

立ち回り方

Do not trigger Ragnarok immediately upon seeing Gragas. Instead, initiate with Undertow to force him to panic-cast Body Slam or use Explosive Cask to push you away. The moment you see his animation start for either of these displacement skills, activate your ultimate to cancel the knockback entirely, then activate Vicious Strikes to heal through his burst from Barrel Roll. If he successfully retreats over a wall with his dash before you can activate your ultimate, do not waste it; reset and secure his camps instead.

チャンピオン詳細 → Gragasのビルド →
Amumu

Amumu−3

cc immunitysurvival This matchup is dictated by Olaf's ultimate. Amumu relies entirely on locking targets down, but activating Ragnarok grants Olaf total immunity to both Bandage Toss and Curse of the Sad Mummy. This absolute negation turns Amumu's primary engage tools into useless animations, letting you ignore his crowd control completely while you run him down with Undertow and shred him using Reckless Swing. Amumuのビルド → 詳細を見る
Amumu

理由

This matchup is dictated by Olaf's ultimate. Amumu relies entirely on locking targets down, but activating Ragnarok grants Olaf total immunity to both Bandage Toss and Curse of the Sad Mummy. This absolute negation turns Amumu's primary engage tools into useless animations, letting you ignore his crowd control completely while you run him down with Undertow and shred him using Reckless Swing.

レーン戦への影響

In the jungle, this interaction strips Amumu of any dueling authority. He cannot contest Rift Scuttlers or secure objectives if you invade his territory. When team fights erupt around neutral monsters, you can comfortably frontline and absorb his Curse of the Sad Mummy without taking the lockup, rendering his main team-fighting utility useless and forcing his teammates to retreat since their initiator has no crowd control leverage.

立ち回り方

Save Ragnarok specifically for the moment Amumu commits. Do not activate it too early; wait for him to launch Bandage Toss or trigger Curse of the Sad Mummy, then press your ultimate to instantly negate the crowd control. Once immune, spam Undertow to prevent him from escaping and activate Vicious Strikes to easily out-sustain his Despair and Tantrum damage. If he uses his mobility to hop over walls, reset your chase immediately rather than chasing blindly.

チャンピオン詳細 → Amumuのビルド →
Maokai

Maokai−3

survivaldisengagement This matchup is entirely dictated by how your ultimate spoils Maokai's entire crowd control kit. When Maokai attempts to lock you down with Twisted Advance or peel you off with Bramble Smash, activating Ragnarok completely negates these tools. He relies on holding targets in place, but your crowd control immunity allows you to ignore his Nature's Grasp completely and run him down with sequential Undertow axes. Maokaiのビルド → 詳細を見る
Maokai

理由

This matchup is entirely dictated by how your ultimate spoils Maokai's entire crowd control kit. When Maokai attempts to lock you down with Twisted Advance or peel you off with Bramble Smash, activating Ragnarok completely negates these tools. He relies on holding targets in place, but your crowd control immunity allows you to ignore his Nature's Grasp completely and run him down with sequential Undertow axes.

レーン戦への影響

In the jungle, this interaction strips Maokai of his safety during skirmishes and objective contests. He cannot contest scuttle crabs or epic monsters if you are nearby, as any attempt to engage with Twisted Advance turns into a death trap for him. You can aggressively invade his camps, forcing him to throw Sapling Toss into bushes defensively rather than using them to scout or secure priority, completely halting his early pressure.

立ち回り方

Save Ragnarok specifically for the moment Maokai commits. Don't press it pre-emptively; wait for him to launch Twisted Advance or cast Nature's Grasp. Once he is committed to the animation, activate your ultimate to break the root instantly, then activate Vicious Strikes and spam Undertow to reset your axes as you chase him down. If he tries to knock you back with Bramble Smash, your active ultimate will ignore the displacement, leaving him completely defenseless.

チャンピオン詳細 → Maokaiのビルド →
Nautilus

Nautilus−3

cc immunitypeel denial Nautilus relies entirely on locking down targets with Staggering Blow, Dredge Line, and Depth Charge to protect his team or setup kills. Once you activate Ragnarok, his entire kit is rendered completely useless against you. He cannot peel you off his squishy allies or stop your advance, turning his heavy crowd control into empty animations while you shred him with Reckless Swing and continuous Undertow axes. Nautilusのビルド → 詳細を見る
Nautilus

理由

Nautilus relies entirely on locking down targets with Staggering Blow, Dredge Line, and Depth Charge to protect his team or setup kills. Once you activate Ragnarok, his entire kit is rendered completely useless against you. He cannot peel you off his squishy allies or stop your advance, turning his heavy crowd control into empty animations while you shred him with Reckless Swing and continuous Undertow axes.

レーン戦への影響

In early skirmishes and river fights, Nautilus cannot contest neutral zones if you are present. Any attempt from him to fish with Dredge Line turns into a death trap, as pulling himself towards you allows you to run him down with Undertow. You dictate the pace of jungle invasions, knowing that his Titan's Wrath shield cannot save him from your true damage when you retaliate.

立ち回り方

Do not waste Ragnarok too early when approaching. Wait for Nautilus to commit to his Dredge Line or cast Depth Charge on you or an ally, then activate your ultimate to completely negate the crowd control. Once Ragnarok is active, ignore his Riptide slows and run straight past him to slaughter his backline. If he tries to stall you with Staggering Blow, punish his melee range immediately with consecutive Undertow pickups.

チャンピオン詳細 → Nautilusのビルド →
Mordekaiser

Mordekaiser−3

cc immunityultimate negation Mordekaiser relies entirely on Realm of Death to isolate targets and steal their stats to win skirmishes. However, Olaf completely nullifies this threat. By activating Ragnarok, you instantly break out of his death realm or prevent its cast entirely. Without his ultimate's stat steal and isolation, Mordekaiser is forced to fight you in a raw DPS race where your Berserker Rage and Vicious Strikes easily overwhelm his slower magic damage output. Mordekaiserのビルド → 詳細を見る
Mordekaiser

理由

Mordekaiser relies entirely on Realm of Death to isolate targets and steal their stats to win skirmishes. However, Olaf completely nullifies this threat. By activating Ragnarok, you instantly break out of his death realm or prevent its cast entirely. Without his ultimate's stat steal and isolation, Mordekaiser is forced to fight you in a raw DPS race where your Berserker Rage and Vicious Strikes easily overwhelm his slower magic damage output.

レーン戦への影響

This matchup dynamic alters how jungle objectives and river skirmishes are played. Since Mordekaiser cannot trap you, he loses his primary tool for securing Epic Monsters or peeling you off his teammates. You can aggressively invade his camps and force river fights with Undertow. He is forced to hold Realm of Death indefinitely, rendering him a passive defender who must rely on slow Obliterate hits while you dictate the map's pace.

立ち回り方

Never initiate a fight by opening with Ragnarok. Instead, run at Mordekaiser using the movement speed from Undertow and trade using Vicious Strikes and Reckless Swing. Force him to panic-cast Realm of Death. The moment the animation starts or as soon as you enter his arena, press Ragnarok to immediately cancel it. If he refuses to cast it, simply rely on your Berserker Rage to out-damage his passive Darkness Rise in a prolonged melee brawl.

チャンピオン詳細 → Mordekaiserのビルド →

その他のマッチアップ

Olaf対策アイテム

これらのアイテムを購入すると、このチャンピオンの影響力を抑えられます。

Plated Steelcaps
Plated Steelcaps
Randuin's Omen
Randuin's Omen
Frozen Heart
Frozen Heart
Thornmail
Thornmail
Stasis Enchant
Stasis Enchant

このチャンピオンへの対策

カウンターアングル

Olafへの対策は、単にCCを盛るだけじゃなく、ラグナロクが孤立したスタン1回で十分だと考える相手を罰するために存在することを理解しよう。相手の入り方、接触の維持、最初のエンゲージを無効化できるかが、良い対策になる。チャンピオンによっては、長期的なデュエルで相手を悩ませたり、バックラインへのアクセスを断ったり、アルティメットを早めに使わせたりできる。だからOlafに対する本当の疑問は、「フリーターゲットを与えずに、最初の波を生き残れるか?」ということだ。敵チームが距離を取り、斧を警戒し、広い空間を走らせることを強いるなら、Olafの脅威は大きく減る。逆に、視界のない狭い目標物の通路で戦えば、相手が望む通りの戦いをさせてしまう。

パッチの文脈

Olafは、相手が正面からコントロールしようとせず、タイミングをずらしてきた時に苦戦する。彼はCCが使われた後に突っ込み、ターゲットに張り付き、ダメージと耐久力が優位に立つまで戦闘を長引かせたい。そのため、困難なマッチアップとは、その連続性を否定するものだ。彼より粘り強いデュエリスト、デスダンスが意味を持つ前に彼を後退させるバースト、斧を空振りさせる機動力、あるいは彼が突っ込んでいる間に味方を脅かす敵のエンゲージなどが挙げられる。Olafがターゲットを追うか味方を守るかの選択を迫られるほど、彼の計画は窮屈になる。

クイックリード

  • Olafを倒す最善の方法は、ターゲットを仕留めるためではなく、ラグナロクを生存や移動のために使わせることだ。
  • 彼の斧が全ての退路を塞ぐような目標物の通路での戦闘は避け、戦闘前にエリアを広げよう。
  • ラグナロクが出現した瞬間に全てのCCを使い切るな。相手が弱くなるまで待ってから反撃しよう。

カウンターの原型

長期戦に耐えられるデュエリスト

Olafは、単純なデュエルを仕掛けたがることが多い。接触を維持し、斧を回収し、征服者(Conqueror)をスタックし、継続的なプレッシャーで勝利しようとする。その間に崩れないデュエリストは、彼の確実性を大きく削ぐ。Jaxは特にこの点で重要だ。なぜならOlafは、長期戦は自分のものだと単純に決めつけることができないからだ。もしOlafが1v1を始める前に二度考える必要があるなら、彼はスカトル、敵のジャングル、目標物へのエントリーの自由を失う。

チャンピオンの適応方法. Olafは、全てのjungleとの遭遇をエゴのぶつかり合いに変えることを避けるべきだ。レーン優先度を意識し、Jaxにマップへの対応を強要し、直接的なマッチアップが孤立していない状況で目標物を活用すべきだ。

直線的なアクセスを断ち切る機動力のあるジャングラー

Olafは、ターゲットが予測可能なパスで逃げる時に、はるかに脅威となる。機動力のあるジャングラーは、その追跡をクリーンにしない。彼らは斧のラインから抜け出したり、Olafにゴーストを早く使わせたり、あるいは戦闘のターゲットを急に変えたりできる。ラグナロクはCCを無視するが、距離、ジャンプ、ステルス、再配置を無効にするわけではない。Olafが最初のスロウを外したり、ターゲットを遅らせる相手を追わなければならなかったりすると、彼の突入は丸見えになり、彼のチームは他の場所でエンゲージされる可能性がある。

チャンピオンの適応方法. Olafは、主要な機動力スキルが使われるのを待つか、視界から角度を作るべきだ。正しい計画は、より長く走ることではなく、斧、側面攻撃、あるいは栄光のエンチャント(Glorious Enchant)でコミットする前にスペースを縮めることだ。

彼のチームを罰するエンゲージとゾーンコントロール

Olafは自分自身に対するCCを無視できるが、味方を無敵にするわけではない。彼の周りでエンゲージするチャンピオンは、彼のアイデンティティを逆手に取ることができる。Olafが前に突っ込んでいる間、彼のバックラインは捕らえられたり、後退を強いられたり、彼から引き離されたりする可能性がある。これは目標物の周りで特に危険だ。なぜならOlafは敵ジャングラーやキャリーを脅かしたいが、彼のチームはまだゾーンに入る必要があるからだ。もし彼らが戦闘から切り離されれば、Olafは全体のシーケンスを失いながら、自分のデュエルには勝つかもしれない。

チャンピオンの適応方法. Olafは、バックラインにダイブする前に味方の状態を読む必要がある。時には、味方が捕らえられている間にキャリーを追うのではなく、目標物の近くで敵ジャングラーを脅かすのが最善の適応策だ。

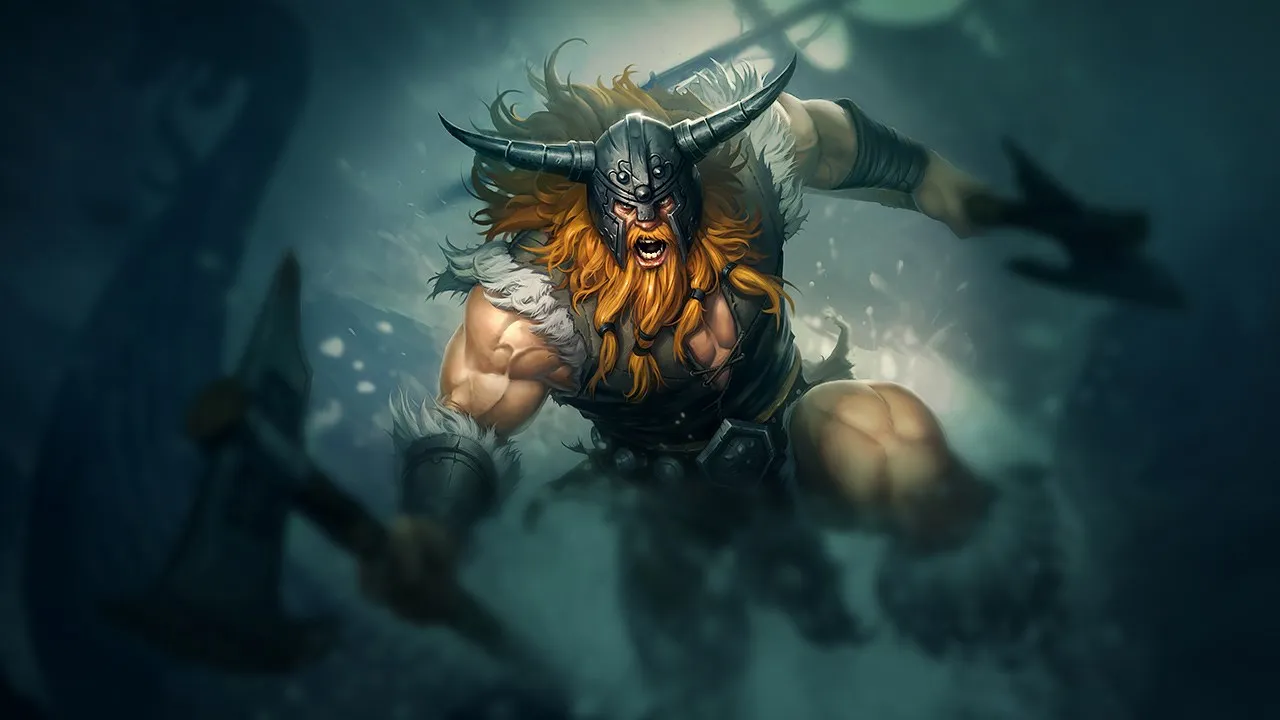
優先度の高いマッチアップ

Jax

Jaxは、Olafが通常確実性を求める場所、つまり長期的なデュエルで彼に挑むため、特別な注意に値する。これはダメージのマッチアップだけでなく、自信のマッチアップでもある。もしOlafが、レーンの状態を確認せずに全てのスカトルを奪ったり、インベードしたりできると信じているなら、Jaxはその習慣を直接的な罰に変えることができる。Olafにとって正しい読みは、情報のない孤立した1v1を避け、味方と目標物のタイミングでプレイし、Jaxにクリーンなデュエルではなく複数の脅威に対応させることだ。

Lee Sin

Lee Sinは、Olafと常に同じ種類の戦いをしないため危険だ。Olafは連続性を求めるが、Lee Sinは短いウィンドウを作り、ターゲットを移動させ、あるいは斧が戦いを決定する前に接触から逃れることができる。このマッチアップは、最初の川での読み合いに大きく依存する。もしOlafが優先度と視界を持って到着すれば、彼は純粋な力で押し付けることができる。もし彼が遅れて到着したり、情報なしで到着したりすれば、Lee Sinはテンポをコントロールし、ラグナロクを防御的に使わせ、Olafが序盤のゲームを目標物に繋げるのを阻止できる。

対面時のよくある間違い

対面時のよくある間違い

  • ラグナロクが出現した瞬間に全てのCCスキルを使い、Olafが再び弱くなった時には何も残っていない。
  • 戦闘前にエリアを広げるのではなく、斧が全ての退路を遅くする目標物の通路で戦うこと。
  • 彼の序盤のゲームがそのような孤立したデュエルを罰するように設計されている時に、レーン優先度なしでスカトル1v1を与えること。
  • フォグ・オブ・ウォーから予想されるよりも早く脅威になり得るOlafの距離計算時に、ゴーストと栄光のエンチャントを無視すること。
  • Olafをキルする計画なしにフォーカスするのは、チームが射程内に留まりながらOlafENDにヒットした場合、彼が望む延長戦を許すことになります。

コーチングノート

  • OlafENDに対して、常に彼を最初に倒すことが目標ではありません。ほとんどの場合、彼の時間を無駄にし、早すぎるラグナロクを強制し、彼が孤立している間に彼のチームを罰したいのです。
  • OlafENDがゴーストとアルティメットを使える状態なら、戦闘が始まる前にすべてのキャリーはすでに脱出経路を考えておくべきです。彼が走り始めた後に反応するのは、しばしば遅すぎます。

FAQ

ラグナロクを持っているOlafENDに対してどうやってプレイしますか?

すべての問題を即時のクラウドコントロールで解決しようとするべきではありません。ラグナロクは、それが早すぎるとその対策を無効にします。最善のアプローチは、より広いスペースに後退し、重要なダッシュを保持し、距離によって彼の接近を遅らせ、アルティメットの終盤のためにあなたのコントロールの一部を保持することです。OlafENDはあなたがパニックになってすべてを一度に使うことを望んでいます。もしあなたが最初の侵入を遅らせれば、彼は罰しやすくなります。

OlafENDを序盤に侵入すべきですか?

OlafENDを序盤に侵入することは可能ですが、レーン優先度があり、少なくとも一人の味方が移動できる準備ができている場合に限ります。スカトルや彼のjungleENDで一人で彼と戦うことは、特にチームが集まる前は、しばしば彼が望んでいることです。OlafENDに対する侵入の目標は、あなたがデュエルに勝つことを証明することではなく、彼のクリアを妨害し、テンポを奪い、彼のレーンが彼を助けられないエリアで彼をプレイさせることです。

どのようなチャンピオンがOlafENDを最も悩ませますか?

OlafENDは、彼の接触時間を破るチャンピオンを嫌います。それは、彼の延長戦に耐える決闘者、彼の斧のラインから移動する機敏なジャングラー、または彼が前進している間に彼のチームを脅かすエンゲージャーから来る可能性があります。それは単なるダメージ量ではありません。本当のカウンターは、OlafENDにゴーストまたはラグナロクを使わせるが、その後確実なターゲットを与えないものです。

なぜOlafENDは止められないと感じることがあるのですか?

OlafENDは、彼の理想的なシーケンス(視界からの侵入、斧ヒット、接触を維持するためのゴースト、最初のコントロールを無視するためのラグナロク、そしてブルーザーアイテムでの延長戦)を得たときに、止められないと感じます。そのシナリオでは、正面から止めようとするのは遅すぎます。答えはもっと早く来る必要があります:視界、スペーシング、脱出経路、そして目標の周りの狭い通路を拒否することです。













































































