A
2026年9月 · Patch 7.2d
Tank · TOP · SUPPORT

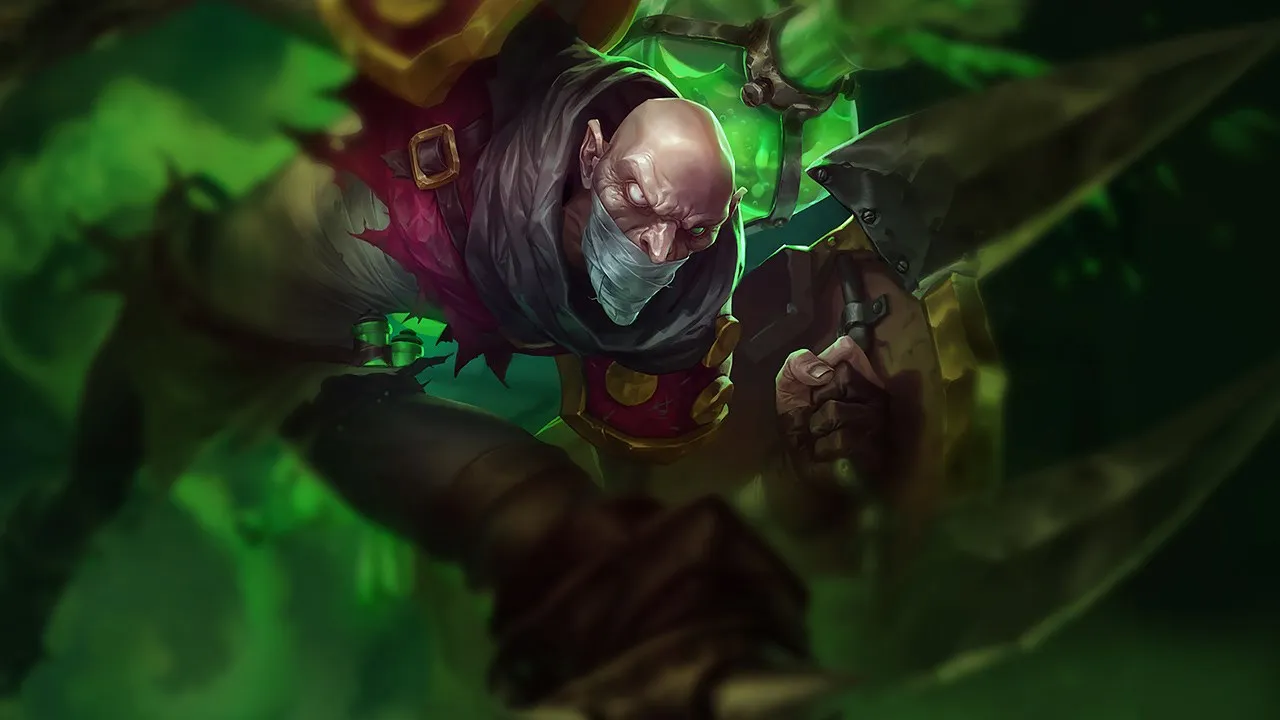
Singed Wild Rift カウンターガイド

Singedは、彼をignore(無視)して毒のトレイルに捕まることなく射程外から攻撃できる構成に対して脆弱です。Magic burstranged damageを持つチャンピオンは、彼のproxyにリスクを冒すことなく彼を無力化します。素早い集団戦を狙う構成は、彼のsplit戦略をバイパスします。

★ TOP · SUPPORT Tier A
ダメージ
UTIL
TANK
DIFF
Win 51.8% #31 · ↓4pt
Pick 1.4% #35
Ban 0.4% #112

Singed Wild Rift カウンターガイド ★ Counter Sheet

マッチアップ一覧
マッチアップ 判定 有利度 勝率 ピック率
Vayne ハードカウンター +2 52.2% 2.0%
Teemo ハードカウンター +2 51.8% 3.2%
Dr. Mundo ハードカウンター +2 50.2% 5.9%
Nasus ハードカウンター +2 49.1% 5.9%
Kennen ハードカウンター +2 49.1% 1.3%
Fiora ハードカウンター +2 48.1% 4.6%
Heimerdinger ハードカウンター +2
Ryze ハードカウンター +2
Smolder 不利なマッチアップ +1 52.5% 1.6%
Gnar 不利なマッチアップ +1 51.5% 3.5%
Volibear 不利なマッチアップ +1 51.4% 7.1%
Gwen 不利なマッチアップ +1 51.4% 3.1%
Yone 不利なマッチアップ +1 51.0% 6.7%
Olaf 不利なマッチアップ +1 51.0% 1.1%
Cho'Gath 不利なマッチアップ +1 50.8% 12.1%
Irelia 不利なマッチアップ +1 50.4% 2.0%
Camille 不利なマッチアップ +1 50.4% 3.7%
Darius 不利なマッチアップ +1 50.2% 16.0%
Kayle 不利なマッチアップ +1 50.0% 1.8%
Urgot 不利なマッチアップ +1 50.0% 3.8%
Ambessa 不利なマッチアップ +1 49.7% 2.0%
Rumble 不利なマッチアップ +1 49.4% 2.3%
Aatrox 不利なマッチアップ +1 48.9% 6.1%
Jayce 不利なマッチアップ +1 48.1% 2.7%
Akali 不利なマッチアップ +1
Gragas 不利なマッチアップ +1
Graves 不利なマッチアップ +1
Pantheon 不利なマッチアップ +1
Swain 不利なマッチアップ +1
Warwick 不利なマッチアップ +1
Wukong スキル次第のマッチアップ ±0 51.5% 2.2%
Mordekaiser スキル次第のマッチアップ ±0 50.9% 11.5%
Poppy スキル次第のマッチアップ ±0 50.4% 2.3%
Garen スキル次第のマッチアップ ±0 50.0% 14.7%
Skarner スキル次第のマッチアップ ±0 48.1% 1.3%
Vladimir スキル次第のマッチアップ ±0 47.0% 1.1%
Jarvan IV スキル次第のマッチアップ ±0
Maokai スキル次第のマッチアップ ±0
Malphite 有利なマッチアップ −1 52.5% 5.7%
Shen 有利なマッチアップ −1 51.9% 1.6%
Jax 有利なマッチアップ −1 50.9% 3.9%
Ornn 有利なマッチアップ −1 50.5% 2.0%
Sion 有利なマッチアップ −1 49.6% 3.8%
Sett 有利なマッチアップ −1 49.1% 11.4%
K'Santé 有利なマッチアップ −1 49.0% 5.9%
Tryndamere 有利なマッチアップ −1 48.5% 2.1%
Renekton 有利なマッチアップ −1 48.4% 3.9%
Yasuo 有利なマッチアップ −1 47.0% 3.0%

Edge: Wild Rift Core canonical verdict (−3 to +3), shown from the point of view of the champion named in the row. Win rate and pick rate: the opponent's own rate in this role — Wild Rift CN · Challenger, Patch 7.2d. Not a head-to-head win rate.

ハードカウンター

8

これらのチャンピオンは、こちらのビルドやプレイスタイルを真正面から上回る構成を持ち、レーン戦のコントロールとファームを極めて難しくする。彼らのスキルはこちらの主要な強みを無効化し、いつも通りのプランを実行しようとした瞬間に手痛い反撃を受けさせてくる。こうしたマッチアップでは、ミスを最小限に抑え、正面からの対決以外で解決策を探すことが重要になる。

Kennen

Kennen+2

easy lanekite defense Kennen systematically shuts down your engage potential. Every time you attempt to trigger Noxious Slipstream to run him down and fling him with Fling, he activates Lightning Rush to instantly escape. Meanwhile, his ranged basic attacks and Thundering Shuriken constantly chip away at your health, while Electrical Surge punishes you for staying in range, making any offensive approach highly punishing. Kennenのビルド → 詳細を見る
Kennen

理由

Kennen systematically shuts down your engage potential. Every time you attempt to trigger Noxious Slipstream to run him down and fling him with Fling, he activates Lightning Rush to instantly escape. Meanwhile, his ranged basic attacks and Thundering Shuriken constantly chip away at your health, while Electrical Surge punishes you for staying in range, making any offensive approach highly punishing.

レーン戦への影響

This matchup forces you into a permanent defensive posture under your turret. Attempting to clear minions with Poison Trail exposes you to free poke, allowing Kennen to stack Mark of the Storm and stun you under tower. You will suffer from delayed recall timings, bleed turret plates, and completely lose the priority needed to secure nearby river skirmishes early on.

立ち回り方

Prioritize survival over gold by letting the waves crash into your turret. Avoid chasing Kennen; instead, hold Mega Adhesive for moments when he steps too deep under your tower, using its grounding effect to block Lightning Rush before attempting a defensive Fling. Once you unlock Insanity Potion, use its defensive stats to safely proxy waves behind his turret, avoiding direct confrontation entirely to recover your tempo.

チャンピオン詳細 → Kennenのビルド →
Ryze

Ryze+2

kitingfree farm Singed struggles immensely because his entire offensive loop requires running in a straight line toward Ryze to execute Fling. Against a ranged mage, this predictable approach is easily punished. Ryze can effortlessly stop your advance with a targeted Rune Prison, anchoring you in place while he chains Spell Flux and Overload to shred your health pool before you can even touch him. Ryzeのビルド → 詳細を見る
Ryze

理由

Singed struggles immensely because his entire offensive loop requires running in a straight line toward Ryze to execute Fling. Against a ranged mage, this predictable approach is easily punished. Ryze can effortlessly stop your advance with a targeted Rune Prison, anchoring you in place while he chains Spell Flux and Overload to shred your health pool before you can even touch him.

レーン戦への影響

This interaction forces you into a defensive posture under your own turret from the opening waves. Attempting to contest the wave triggers heavy poke, leaving you too low to utilize Noxious Slipstream for escapes. Ryze easily dictates the wave state, keeping you trapped while his Realm Warp lets him influence map objectives or skirmishes long before you can rotate.

立ち回り方

Survive by conceding early gold and letting the wave crash. Only look for a trade if you can bait out Rune Prison near your turret; if he wastes it, use Mega Adhesive to ground him, preventing him from kiting or channeling Realm Warp, then commit with Insanity Potion to run him down. Otherwise, hold your health bar intact and focus on clearing waves with Poison Trail.

チャンピオン詳細 → Ryzeのビルド →
Vayne

Vayne+2

poke avoidanceproxy priority Singed needs to get close to use Fling, but Vayne's kit completely shuts this down. If you activate Noxious Slipstream and try to run her down, she simply rolls away with Tumble or blasts you back with Condemn. While you struggle to close the gap, her Silver Bolts passively melt your health pool with true damage, rendering your natural tankiness completely useless in direct duels. Vayneのビルド → 詳細を見る
Vayne

理由

Singed needs to get close to use Fling, but Vayne's kit completely shuts this down. If you activate Noxious Slipstream and try to run her down, she simply rolls away with Tumble or blasts you back with Condemn. While you struggle to close the gap, her Silver Bolts passively melt your health pool with true damage, rendering your natural tankiness completely useless in direct duels.

レーン戦への影響

You are forced into a miserable defensive position under your turret. If you try to farm normally, Vayne harasses you constantly using Tumble to maintain perfect spacing. Even landing Mega Adhesive rarely helps, as she will just save Condemn to repel your advance. This constant pressure denies you gold, chips away at your turret, and keeps you pinned while she scales effortlessly.

立ち回り方

Abandon your usual offensive build path in favor of early defensive items to survive her physical harass. Never run directly at Vayne while her Condemn is available; instead, bait it out or wait for your jungler before trying to set up a Fling. Use Poison Trail to clear minions quickly under your turret. If she freezes the lane, activate Insanity Potion to absorb her true damage poke while securing essential farm.

チャンピオン詳細 → Vayneのビルド →
Nasus

Nasus+2

free farmscaling lane Trying to play your usual proxy game with Poison Trail is a massive trap here. By clearing waves behind the turret, you hand Nasus the perfect, pressure-free environment to freeze near his tower. He will comfortably farm every minion, stacking Siphoning Strike endlessly while recovering any chip damage via his passive Soul Eater. Your main roaming and wave-clearing strength completely negates your ability to delay his scaling. Nasusのビルド → 詳細を見る
Nasus

理由

Trying to play your usual proxy game with Poison Trail is a massive trap here. By clearing waves behind the turret, you hand Nasus the perfect, pressure-free environment to freeze near his tower. He will comfortably farm every minion, stacking Siphoning Strike endlessly while recovering any chip damage via his passive Soul Eater. Your main roaming and wave-clearing strength completely negates your ability to delay his scaling.

レーン戦への影響

Because you cannot easily contest his freeze, the wave remains permanently locked on his side. If you try to trade, his Wither completely ruins your Noxious Slipstream speed boosts, leaving you vulnerable to Spirit Fire defense shredding. Nasus will never lose tower plating early, and once he hits level five, Fury of the Sands allows him to run you down the entire length of the long lane if you overextend.

立ち回り方

You must abandon the proxy plan entirely and focus on keeping the wave in the middle of the lane. Slow-push whenever possible, and hold Fling strictly as a defensive tool to fling Nasus away when he casts Wither on you. If he activates Fury of the Sands, immediately drop Mega Adhesive to ground him and prevent his approach while you run away. Accept losing some gold to keep him away from his tower's safety, forcing him to overextend for stacks.

チャンピオン詳細 → Nasusのビルド →
Teemo

Teemo+2

poke avoidanceproxy priority In this lane, you face a constant threat of range denial. Whenever you try to close the distance, Teemo activates Move Quick to easily kite backward, staying completely out of your Fling range. As you retreat, his passive Toxic Shot inflicts continuous magic damage on your health bar. Because your Poison Trail requires you to run ahead or through minions, you cannot retaliate without taking massive, un-tradeable poke. Teemoのビルド → 詳細を見る
Teemo

理由

In this lane, you face a constant threat of range denial. Whenever you try to close the distance, Teemo activates Move Quick to easily kite backward, staying completely out of your Fling range. As you retreat, his passive Toxic Shot inflicts continuous magic damage on your health bar. Because your Poison Trail requires you to run ahead or through minions, you cannot retaliate without taking massive, un-tradeable poke.

レーン戦への影響

You will find yourself trapped under your own turret, bleeding health for every minion you attempt to clear. Initiating trades is impossible because Blinding Dart neutralizes your basic attacks, while Noxious Trap mushrooms placed in the lane brushes cut off your escape or chase paths. This constant pressure forces early, unfavorable recalls, letting Teemo chip away at your turret plates and preventing you from roaming to help your jungler.

立ち回り方

To survive, you must abandon standard AP rushes and shift your itemization towards heavy magic resistance and health regeneration early. Let the wave crash and farm only what you can safely reach. If you must engage during a gank, place Mega Adhesive directly behind Teemo to ground him, preventing him from utilizing the active speed of Move Quick. When you activate Insanity Potion, use the temporary stats to safely clear waves under your tower rather than chasing him into his hidden Noxious Trap minefield.

チャンピオン詳細 → Teemoのビルド →
Heimerdinger

Heimerdinger+2

kitingwave shove Heimerdinger completely shuts down your proxy desires. Singed relies on slipping past the opponent to clear waves, but running through a nest of H-28G Evolution Turret structures to reach the secondary tower is impossible. Their laser charges shred your health instantly. If you try to run directly at him, he easily halts your approach with CH-2 Electron Storm Grenade and retaliates with a point-blank burst of Hextech Micro-Rockets. Heimerdingerのビルド → 詳細を見る
Heimerdinger

理由

Heimerdinger completely shuts down your proxy desires. Singed relies on slipping past the opponent to clear waves, but running through a nest of H-28G Evolution Turret structures to reach the secondary tower is impossible. Their laser charges shred your health instantly. If you try to run directly at him, he easily halts your approach with CH-2 Electron Storm Grenade and retaliates with a point-blank burst of Hextech Micro-Rockets.

レーン戦への影響

This interaction traps you under your own turret for the entire laning phase. Because you cannot safely proxy, you are forced to farm under-tower while Heimerdinger constantly shoves the wave. Your Poison Trail cannot safely match his rapid wave-clear without exposing you to constant poke. This denies you any early roaming opportunities, leaving your team without your signature map pressure while your turret slowly crumbles.

立ち回り方

Give up on proxying entirely and focus on surviving the siege. Let him push and preserve your health bar. When farming under turret, throw Mega Adhesive behind Heimerdinger if he steps too close, hoping to set up a Fling into the tower's aggro range. Only attempt aggressive trades when your jungler arrives, or once you have activated Insanity Potion to mitigate the heavy magic damage from his UPGRADE!!! turret combinations while running him down.

チャンピオン詳細 → Heimerdingerのビルド →

その他のマッチアップ

不利なマッチアップ

22

これらのチャンピオンは、マッチアップ自体を絶望的にするわけではないが、対面で優位に立ちやすいツールを持っている。射程が長かったり、攻撃を受け止める力が高かったり、エンゲージへの対応手段が豊富だったりする。アプローチを調整し、戦闘を受け入れるタイミングを慎重に選ぶ必要がある。

Olaf

Olaf+1

anti cckiting This matchup hinges on a brutal mechanical interaction: when Olaf activates Ragnarok, your primary defensive tools are completely neutralized. The crowd control immunity nullifies both the grounding effect of Mega Adhesive and the displacement of Fling. This strips away your ability to kite, leaving you vulnerable to being run down by his continuous slow from Undertow and the raw true damage of Reckless Swing. Olafのビルド → 詳細を見る
Olaf

理由

This matchup hinges on a brutal mechanical interaction: when Olaf activates Ragnarok, your primary defensive tools are completely neutralized. The crowd control immunity nullifies both the grounding effect of Mega Adhesive and the displacement of Fling. This strips away your ability to kite, leaving you vulnerable to being run down by his continuous slow from Undertow and the raw true damage of Reckless Swing.

レーン戦への影響

Because you cannot peel him off once he reaches level five, the threat of Ragnarok dictates wave positioning. You cannot safely freeze or proxy deep because Undertow allows Olaf to stick to you all the way back to your tower. Trades are highly risky; if you attempt to chip his health with Poison Trail, he can retaliate with Vicious Strikes and Berserker Rage, turning low health into massive attack speed to shred your health bar.

立ち回り方

To survive, you must bait out his ultimate without committing your own resources. Keep your distance and trigger Noxious Slipstream off him only to run away, never to engage. If he activates Ragnarok, immediately pop Insanity Potion for the defensive stats and movement speed boost, running in a straight line while leaving a Poison Trail. Hold both Mega Adhesive and Fling entirely until his ultimate expires; only then can you use them to disengage or turn the fight.

チャンピオン詳細 → Olafのビルド →
Kayle

Kayle+1

easy scalingkite spacing Singed struggles immensely to close the gap because Kayle possesses the perfect tools to dismantle his linear approach. Whenever you try to run at her to initiate with Poison Trail, she can immediately halt your momentum by striking you with Radiant Blast to slow you down. She then activates Celestial Blessing to gain a massive burst of movement speed, keeping her entirely out of range of your Fling. Kayleのビルド → 詳細を見る
Kayle

理由

Singed struggles immensely to close the gap because Kayle possesses the perfect tools to dismantle his linear approach. Whenever you try to run at her to initiate with Poison Trail, she can immediately halt your momentum by striking you with Radiant Blast to slow you down. She then activates Celestial Blessing to gain a massive burst of movement speed, keeping her entirely out of range of your Fling.

レーン戦への影響

This dynamic forces you into a highly defensive posture where proxying or hugging your turret becomes the norm. Kayle will freely poke you with Starfire Spellblade whenever you step up to contest minions, gradually chipping away your health. If you try to force an engagement, she will simply kite backwards, meaning you lose chunks of health without ever trading back, giving her a completely free scaling phase.

立ち回り方

To survive, you must bait out her defensive options before committing. Never run directly at her; instead, fake an engage to force her to waste Radiant Blast. Once her projectile misses, use Mega Adhesive behind her to ground her and block the movement speed boost from Celestial Blessing. Only then should you activate Insanity Potion to speed yourself up, utilizing Noxious Slipstream off your own minions to quickly gap-close and execute a successful Fling.

チャンピオン詳細 → Kayleのビルド →
Yone

Yone+1

ground disruptionkiting phase Yone dominates neutral skirmishes by abusing Soul Unbound to strike from safety and cleanse away. However, his return anchor is his ultimate vulnerability. If you drop Mega Adhesive directly on his physical body's starting location, the grounding effect prevents him from snapping back to safety. This leaves him stranded deep in your Poison Trail, turning his aggressive trade into an extended, painful retreat where you hold the upper hand. Yoneのビルド → 詳細を見る
Yone

理由

Yone dominates neutral skirmishes by abusing Soul Unbound to strike from safety and cleanse away. However, his return anchor is his ultimate vulnerability. If you drop Mega Adhesive directly on his physical body's starting location, the grounding effect prevents him from snapping back to safety. This leaves him stranded deep in your Poison Trail, turning his aggressive trade into an extended, painful retreat where you hold the upper hand.

レーン戦への影響

This interaction forces Yone to respect your positioning when his Soul Unbound is active. If he miscalculates, you can punish him under your tower or deny his crash. However, when his Soul Unbound is on cooldown, you must aggressively manage the wave; otherwise, his constant Mortal Steel thrusts and Spirit Cleave shields will slowly bleed your health pool and force an early recall, letting him freely scale.

立ち回り方

Never waste Mega Adhesive to initiate. Keep it ready for the exact second Yone casts Soul Unbound. Run towards his spirit's starting anchor using Noxious Slipstream for a speed boost, coat his return portal in glue, and position yourself to Fling him deeper into your Poison Trail when he tries to run. If he baits your glue with a short dash, immediately pop Insanity Potion to survive his Fate Sealed burst and run back to safety.

チャンピオン詳細 → Yoneのビルド →
Urgot

Urgot+1

displacement clashkiting phase The matchup revolves around the clash of displacement tools. If you attempt to fling Urgot with *Fling*, he can buffer your flip using *Disdain*'s forward dash. Instead of being tossed behind you, Urgot's dash overrides the animation, shielding him and throwing you backward into his firing range. This allows him to easily trigger his *Echoing Flames* passive legs, turning your main defensive tool into a lethal setup for his *Purge*. Urgotのビルド → 詳細を見る
Urgot

理由

The matchup revolves around the clash of displacement tools. If you attempt to fling Urgot with *Fling*, he can buffer your flip using *Disdain*'s forward dash. Instead of being tossed behind you, Urgot's dash overrides the animation, shielding him and throwing you backward into his firing range. This allows him to easily trigger his *Echoing Flames* passive legs, turning your main defensive tool into a lethal setup for his *Purge*.

レーン戦への影響

This interaction completely dictates wave control. You cannot safely freeze or proxy because approaching the wave exposes you to *Corrosive Charge* slows, setting up an easy *Disdain*. If Urgot flips you, his *Purge* quickly shreds your health bar, forcing early recalls or putting you in execution range of *Fear Beyond Death*. You must constantly forfeit early priority, bleeding gold under your tower while trying to keep your health high.

立ち回り方

To survive, adopt a bait-and-switch positioning rule. Walk towards Urgot at an angle to bait out *Disdain*, then quickly slip aside using *Noxious Slipstream*. Never use *Fling* reactively. Instead, drop *Mega Adhesive* directly on yourself or behind him to ground him, preventing his dash entirely. If he misses his dash, you can safely apply *Poison Trail* and pop *Insanity Potion* to run him down, but if you get flipped first, disengage immediately.

チャンピオン詳細 → Urgotのビルド →
Volibear

Volibear+1

disengagementproxy priority Volibear dominates extended trades through the healing of Frenzied Maul and the shielding from Sky Splitter. Your saving grace is his predictable engage pattern. When he charges with Thundering Smash, casting Fling immediately flips him backward into your Poison Trail. This wastes his stun duration while he is airborne and running back, preventing him from chaining his standard combos and keeping him decaying in your toxic gas. Volibearのビルド → 詳細を見る
Volibear

理由

Volibear dominates extended trades through the healing of Frenzied Maul and the shielding from Sky Splitter. Your saving grace is his predictable engage pattern. When he charges with Thundering Smash, casting Fling immediately flips him backward into your Poison Trail. This wastes his stun duration while he is airborne and running back, preventing him from chaining his standard combos and keeping him decaying in your toxic gas.

レーン戦への影響

The passive lightning from The Relentless Storm naturally pushes the wave toward you, making early wave control your primary defensive tool. If you let Volibear freeze near his tower, you cannot safely farm. Poor health management exposes you to a dive via Stormbringer. Keep the minions near your turret to safely absorb farm, denying him the space to run you down.

立ち回り方

Never use Fling aggressively; hold it strictly as a counter-engage tool for when Thundering Smash is active. If Volibear casts Sky Splitter, use the speed from Noxious Slipstream to escape the impact zone. Should you get marked by Frenzied Maul, back away instantly until the mark expires. If you get shoved under tower with low health, pop Insanity Potion early to survive his inevitable Stormbringer dive.

チャンピオン詳細 → Volibearのビルド →

その他のマッチアップ

スキル次第のマッチアップ

8

このマッチアップは何よりもまず実行力の勝負であり、両者ともに優位を取れる現実的な手段を持っている。重要なスキルを一つ避けられるか、エンゲージを正しく読めるか、あるいはたった一つの位置取りのミスが、勝敗を分けることもある。マッチアップを理解し、行動すべき瞬間を見極める力がとりわけ重要になる。

Maokai

Maokai±0

disengagewave clear This lane is a pure test of wave-clearing speed because Maokai can completely neutralize your primary offensive tool. Whenever you run in to launch him with Fling, a skilled Maokai will instantly buffer Bramble Smash. This interrupts your flip mid-air, preventing him from landing in your Poison Trail while knocking you back. Consequently, neither of you can easily secure solo kills, making the lane a non-stop wave-shoving battle. Maokaiのビルド → 詳細を見る
Maokai

理由

This lane is a pure test of wave-clearing speed because Maokai can completely neutralize your primary offensive tool. Whenever you run in to launch him with Fling, a skilled Maokai will instantly buffer Bramble Smash. This interrupts your flip mid-air, preventing him from landing in your Poison Trail while knocking you back. Consequently, neither of you can easily secure solo kills, making the lane a non-stop wave-shoving battle.

レーン戦への影響

Since trades often end in a stalemate, the lane revolves around controlling minion priority. You want to quickly spread Poison Trail to crash waves, but Maokai uses Sapling Toss in the bushes to deter your proxy paths. If you fail to clear efficiently, Maokai will lock you under his turret with Twisted Advance, forcing you into awkward recall timings or leaving you vulnerable to enemy jungle rotations.

立ち回り方

To bypass his defense, drop Mega Adhesive directly under Maokai before approaching. This grounds him, preventing him from using Twisted Advance to escape, and can throw off his Bramble Smash timing. If he holds his knockback, don't force the Fling; instead, activate Poison Trail and run horizontally to bait his swipe. If you get chunked, activate Insanity Potion to shrug off his slow and quickly clear the remaining minions before roaming.

チャンピオン詳細 → Maokaiのビルド →
Wukong

Wukong±0

clone baitdisengagement This matchup revolves entirely around how you manage your poison spread during his clone windows. While Wukong aims to absorb your *Fling* using the clone from *Warrior Trickster*, your *Poison Trail* completely bypasses this trickery. The continuous poison damage melts his decoy while inevitably clipping his stealth path. It becomes a pure battle of cooldowns, where wasting your flip on his double leaves you vulnerable to a heavy counter-engage. Wukongのビルド → 詳細を見る
Wukong

理由

This matchup revolves entirely around how you manage your poison spread during his clone windows. While Wukong aims to absorb your *Fling* using the clone from *Warrior Trickster*, your *Poison Trail* completely bypasses this trickery. The continuous poison damage melts his decoy while inevitably clipping his stealth path. It becomes a pure battle of cooldowns, where wasting your flip on his double leaves you vulnerable to a heavy counter-engage.

レーン戦への影響

The lane constantly oscillates between fast wave clearing and explosive skirmishes. Wukong will use *Nimbus Strike* to jump in for quick trades, relying on *Golden Staff* for armor reduction. However, because his passive *Stone Skin* only grants armor, your magic damage remains highly effective. If you force him to use his clone defensively to escape your poison, you gain total lane priority, allowing you to proxy or secure deep vision.

立ち回り方

Never rush your *Fling* when approaching Wukong; instead, keep *Poison Trail* active and run past him to see if he deploys his clone. Place *Mega Adhesive* directly behind him to prevent both *Nimbus Strike* and *Warrior Trickster* escapes, grounding him in your poison. If he triggers *Cyclone*, immediately activate *Insanity Potion* to gain the necessary stats to survive the knock-up, then toss him away once his ultimate's initial spin ends.

チャンピオン詳細 → Wukongのビルド →
Poppy

Poppy±0

displacement clashpeel vs peel This matchup is a pure battle of positioning and wave pressure. While Poppy excels at stopping mobile champions, her Steadfast Presence is entirely useless against your Fling because tossing her is a targeted displacement rather than a dash. This key interaction means you can always disrupt her positioning or peel her off, turning what is normally her strongest defensive tool into a dead ability when you run her down with Noxious Slipstream. Poppyのビルド → 詳細を見る
Poppy

理由

This matchup is a pure battle of positioning and wave pressure. While Poppy excels at stopping mobile champions, her Steadfast Presence is entirely useless against your Fling because tossing her is a targeted displacement rather than a dash. This key interaction means you can always disrupt her positioning or peel her off, turning what is normally her strongest defensive tool into a dead ability when you run her down with Noxious Slipstream.

レーン戦への影響

Because neither of you can easily execute the other under normal conditions, the lane quickly becomes a contest of wave control. You want to constantly push with Poison Trail to force her to farm under turret, where her high mana costs make clearing waves difficult. If you fail to keep her pinned, she can easily wall-stun you or roam to assist her jungler, costing your team map pressure.

立ち回り方

To win this stalemate, always hold Mega Adhesive to prevent her from escaping or positioning for a wall-slam. When she approaches a wall, trigger Insanity Potion for the extra durability and speed to outmaneuver her. If she manages to freeze the wave near her tower, do not try to force a trade; instead, activate Noxious Slipstream off incoming minions to safely retreat and reset the lane, or proxy the next wave behind her outer turret.

チャンピオン詳細 → Poppyのビルド →

その他のマッチアップ

有利なマッチアップ

10

これらのチャンピオンは、こちらの主要な強みに効果的に対応するのが難しく、より自由に対面を組み立てることができる。プレッシャーをかけて有利な交換を引き出す手段は複数あることが多い。相手が態勢を立て直す時間を与えるのではなく、この優位を活かして主導権を握ろう。

Shen

Shen−1

proxy defensemap pressure This lane is a battle of map influence where your waveclear completely overpowers Shen's defensive kit. While Shen relies on Ki Barrier and Twilight Assault to trade in short bursts, he completely lacks AoE damage. Your Poison Trail allows you to melt waves effortlessly. When Shen attempts to turn the map with Stand United, he is forced to abandon his tower to your rapid push. Shenのビルド → 詳細を見る
Shen

理由

This lane is a battle of map influence where your waveclear completely overpowers Shen's defensive kit. While Shen relies on Ki Barrier and Twilight Assault to trade in short bursts, he completely lacks AoE damage. Your Poison Trail allows you to melt waves effortlessly. When Shen attempts to turn the map with Stand United, he is forced to abandon his tower to your rapid push.

レーン戦への影響

You dictate the lane's pace by pulling minion waves behind Shen's turret. Because Shen's Spirit's Refuge only blocks basic attacks and does nothing against your damage over time, he cannot contest your proxy farming. Every time Shen channels Stand United to save a teammate, you punish him by taking multiple turret plates, transforming his global presence into a massive gold and experience lead for yourself.

立ち回り方

Start proxying waves as soon as possible to force Shen under his tower. If he tries to intercept you with Shadow Dash, use Mega Adhesive to ground him, then trigger Noxious Slipstream to run away. Keep your Fling available to interrupt his Stand United if he tries to channel it in your vision. If he teleports from a safe spot, immediately activate Insanity Potion and focus entirely on destroying his turret plates.

チャンピオン詳細 → Shenのビルド →
Yasuo

Yasuo−1

ground disruptionkiting phase Yasuo relies entirely on the mobility of Sweeping Blade to dance through waves and trade effectively. Singed completely neutralizes this with Mega Adhesive. Dropping the adhesive zone grounds Yasuo, instantly disabling his dashes. Without his mobility, he cannot dodge Poison Trail or easily stack Steel Tempest, leaving him completely exposed to a massive trade while you easily out-kite his static damage. Yasuoのビルド → 詳細を見る
Yasuo

理由

Yasuo relies entirely on the mobility of Sweeping Blade to dance through waves and trade effectively. Singed completely neutralizes this with Mega Adhesive. Dropping the adhesive zone grounds Yasuo, instantly disabling his dashes. Without his mobility, he cannot dodge Poison Trail or easily stack Steel Tempest, leaving him completely exposed to a massive trade while you easily out-kite his static damage.

レーン戦への影響

This interaction dictates the wave dynamics. Yasuo cannot safely crash waves because dashing forward with Sweeping Blade risks getting him grounded and flung into your turret. You can easily drag the wave or proxy, knowing that if he tries to chase, Mega Adhesive stops him dead in his tracks. He is forced to play defensively, losing priority and allowing you to manipulate the lane completely.

立ち回り方

Position yourself near your own dying minions, baiting Yasuo to dash in for a last hit. The moment he starts Sweeping Blade, drop Mega Adhesive directly on his target minion to catch him mid-dash. Once grounded, run through him with Poison Trail active, and use Fling to toss him backward if he attempts to charge Steel Tempest. Activate Insanity Potion if he gets a lucky knock-up to shrug off his ultimate.

チャンピオン詳細 → Yasuoのビルド →
Sion

Sion−1

channel interruptproxy priority Singed dominates this matchup because his Fling completely cancels Sion's Decimating Smash. Since Sion relies heavily on channeling this heavy strike to clear waves and threaten trades, you can constantly deny his main tool. Running around him with Poison Trail active while holding your displacement means Sion can never safely charge his axe or pop his Soul Furnace shield on his own terms. Sionのビルド → 詳細を見る
Sion

理由

Singed dominates this matchup because his Fling completely cancels Sion's Decimating Smash. Since Sion relies heavily on channeling this heavy strike to clear waves and threaten trades, you can constantly deny his main tool. Running around him with Poison Trail active while holding your displacement means Sion can never safely charge his axe or pop his Soul Furnace shield on his own terms.

レーン戦への影響

This interaction shifts the wave control entirely in your favor. Whenever Sion attempts to prep the melee minions with Decimating Smash, you can run up, flip him, and force him to lose the mana and cooldown. This prevents him from pushing you under tower or easily stacking his passive health from Glory in Death. You dictate the push, allowing you to proxy safely or roam while he struggles to clear under his own turret.

立ち回り方

Never use Fling aggressively just for random damage. Instead, bait Sion into starting his Decimating Smash channel by walking into his indicator, then immediately flip him behind you into your Poison Trail. If he tries to escape or ult with Unstoppable Onslaught, drop Mega Adhesive directly on him to ground him or slow his escape. If you mess up and get knocked up, activate Insanity Potion immediately to shrug off the follow-up slow from Roar of the Slayer and run him down.

チャンピオン詳細 → Sionのビルド →
Tryndamere

Tryndamere−1

kiting phaseground disruption Tryndamere relies entirely on Spinning Slash to close the gap and unleash his Battle Fury critical strikes. By placing Mega Adhesive directly under him, you completely block his dash. Because he is grounded, he cannot reach you, transforming his Undying Rage into a wasted ultimate as you easily outrun his five-second invulnerability window. Tryndamereのビルド → 詳細を見る
Tryndamere

理由

Tryndamere relies entirely on Spinning Slash to close the gap and unleash his Battle Fury critical strikes. By placing Mega Adhesive directly under him, you completely block his dash. Because he is grounded, he cannot reach you, transforming his Undying Rage into a wasted ultimate as you easily outrun his five-second invulnerability window.

レーン戦への影響

You command the lane tempo from the moment you get your basic abilities. Tryndamere cannot safely freeze the minion wave because any aggressive Spinning Slash forward results in an immediate Fling into your Poison Trail. This forces him to consume his fury on Bloodlust for healing rather than trading, completely neutralizing his early-game lane pressure and tower-taking threat.

立ち回り方

Never preemptively throw Mega Adhesive during neutral farming. Instead, wait for Tryndamere to walk forward, then drop the puddle directly behind you. When he attempts Spinning Slash, he will be instantly grounded. If he triggers Undying Rage, activate Insanity Potion for the massive stat boost, use Noxious Slipstream off him to gain speed, and run away. Let your Poison Trail drain his health while his ultimate ticks down to zero.

チャンピオン詳細 → Tryndamereのビルド →

その他のマッチアップ

Singed対策アイテム

これらのアイテムを購入すると、このチャンピオンの影響力を抑えられます。

Mercury's Treads
Mercury's Treads
Plated Steelcaps
Plated Steelcaps
Force of Nature
Force of Nature
Thornmail
Thornmail
Dead Man's Plate
Dead Man's Plate

このチャンピオンへの対策

カウンターアングル

Singedへの対策は、彼との1対1のデュエルに勝つことだけではありません。真の目的は、彼が作り出したい「時間」「無駄な追撃」「フリーパス」を奪うことです。多くのプレイヤーがSingedに敗北するのは、感情的に対応してしまうからです。追撃しすぎたり、レーンを放棄したり、オブジェクトに遅れて到着したりします。彼に対して最も有利なマッチアップは、ライライ(Rylai)入手前に彼を罰せるか、彼の毒の上を長時間歩かずにサイドレーンをコントロールできるかのどちらかです。Singedに対しては、シンプルなルールを一つ守ってください。もし彼が戦闘の場所を決めたなら、彼はすでに駆け引きの一部で勝っています。

パッチの文脈

Singedのカウンターは、派手なキルを狙うのではなく、彼のリズムを崩すことで勝利することが多いです。良い相手は、彼が生き残るためだけにマナを使わせ、プロキシ(proxy)がより危険になるようにウェーブを管理し、彼の突入のためにCC(クラウドコントロール)を温存し、すでに設置された毒の軌道を通ることを避けます。サイドレーンで彼を脅かせたり、遠距離から攻撃したり、彼の逃走経路を遮断したりできるチャンピオンは、彼の影響力を大きく低下させます。重要なのは、すべてのSingedのローテーションを、チーム全体が無意味に彼に群がるミニゲームに変えないことです。

クイックリード

  • 後で具体的な目的がない限り、Singedが設置した毒の上を追わないでください。彼よりも多くの時間を失うことが多いです。
  • ライライ(Rylai)入手前の彼の移動ルートを罰することは非常に重要です。なぜなら、その後のスパイク(spike)では、すべての追撃がはるかに高コストになるからです。
  • 良いカウンターは、彼に通常通りレーンをプレイさせるか、彼がウェーブを歪めようとしたときに彼の逃走経路を遮断します。

カウンターの原型

彼をサイドレーンに閉じ込めることができるデュエリスト

Singedはしばしば直接的なデュエルを避け、ウェーブ、プロキシ(proxy)、またはローテーションで勝ちたいと思っています。彼に追従でき、かつ毒に長時間閉じ込められないデュエリストは、その自由を奪います。彼らの価値は、サイドレーンを脅かし、逃走経路を遮断し、SingedにアルティメットやGhostを防御的に使わせることにあります。もしSingedが、自分の目的のタイミングを選ぶのではなく、常に死を避けるためにプレイしなければならないなら、彼はマクロ(macro)のアイデンティティの大部分を失います。

チャンピオンの適応方法. Singedはトレードを短縮し、MegaのAdhesiveを温存して追撃を断ち切り、情報なしでのプロキシ(proxy)を避ける必要があります。これらのプロファイルに対して、彼はデュエルに勝つことを証明しようとすべきではありません。彼はウェーブ、ビジョン、ローテーションをプレイし、サイドレーンに閉じ込められる前にチームに合流します。

接触を拒否するレンジ(range)とポーク(poke)

Singedは、相手が彼に向かって歩いたり、彼の毒を横切ったりする必要があるときに価値を得ます。レンジ(range)チャンピオンは、そのロジックを変えます。彼らは、彼がスロー(slow)を適用する前に彼を消耗させ、Flingを受け入れずにウェーブを争い、彼がレーンに入るためだけにリソースを使わせることができます。もしSingedがオブジェクトに非常に低いHPで到着した場合、彼のカオス(chaos)の角度は理論上のものになります。なぜなら、彼は最初のCC(クラウドコントロール)やバースト(burst)を吸収できなくなるからです。

チャンピオンの適応方法. Singedは、いくつかの短いトレードで負けることを受け入れ、重要なタイマーのためにHPを温存し、フォグ・オブ・ウォー(fog-of-war)の角度を探す必要があります。レーンは必ずしもキルで勝つものではありません。クリーンなウェーブクリア、適切なリセット、Ghostが利用可能な状態でのオブジェクトへのエントリーによって安定します。

直線的なエントリーを罰するブルーザー(bruiser)

Singedは追撃を誘発するのが好きですが、一部のブルーザー(bruiser)は慌てる必要はありません。彼らは接触を維持し、彼のエントリーを脅かし、彼に防御的にツールを使わせることができます。Singedの問題はダメージを受けることだけではありません。リズムのコントロールを失うことです。もし彼が有用なエリアに毒を置く前に後退しなければならないなら、彼のチームはスロー(slow)、妨害、またはFlingのいずれも得られません。

チャンピオンの適応方法. Singedは、まっすぐなエントリーを避け、斜めのルートをプレイする必要があります。移動経路に毒、出口にAdhesiveを置き、ブルーザー(bruiser)が自身のテンポを課す前に離脱します。目標は、プライドから接触し続けることではなく、消耗させて移動させることです。

優先度の高いマッチアップ

Fiora

Fioraは優先的なマッチアップです。なぜなら、彼女はSingedの正確なサイドレーンリミットを攻撃するからです。彼は長引くデュエルを避けたいのに対し、彼女は彼を個別の対応に追い込みたいのです。このマッチアップは、オールイン(all-in)というよりも、SingedがAdhesiveの外に留まらず、ビジョンなしでプロキシ(proxy)せず、アルティメットを使いすぎない能力にかかっています。もし彼がすべてのウェーブを孤立したデュエルに変えるなら、Fioraがコントロールを得ます。もし彼がトレードを短縮し、閉じ込められる前にオブジェクトに到達するなら、彼は価値を維持します。

Vayne

Vayneは危険です。なぜなら、彼女はしばしばSingedの好むシナリオを否定するからです。彼女は彼を脅かすために、長い間毒の中を歩く必要がありません。彼女は遠距離から罰し、距離を保ち、彼のエントリーをはるかに高コストにすることができます。したがって、Singedはこのマッチアップを忍耐強くプレイする必要があります。クリーンなウェーブ、ビジョン、側面からのセットアップ、そして強制的な移動後に逃走経路を遮断するためにMegaのAdhesiveを使用することです。もし彼が正面から彼女に向かって走ると、彼は彼女が望む通りの戦いを提供することになります。

対面時のよくある間違い

対面時のよくある間違い

  • すでに経路全体に毒を設置したSingedを、彼の逃走経路を遮断せずに追うこと。
  • 彼がプロキシ(proxy)している間にウェーブを無視すること。もし失敗した追撃のために2つのウェーブを失うなら、Singedはすでにトレードで勝っています。
  • 彼の突入時に、フロントライン(frontline)にすべてのCC(クラウドコントロール)を使い果たし、Ghostを発動したときに何も対応できないこと。
  • 彼の毒とライライ(Rylai)が自然に逃走経路をカバーするオブジェクトの通路で彼と戦うこと。
  • キルがないと無能だと思われがちですが、Singedはタイミングを間違えさせれば、3体のチャンピオンをスローにするだけで戦闘に勝てます。

コーチングノート

  • Singedに対しては、彼を追いかけた後に何を得られるのかを常に問いましょう。得られるものがウェーブ、オブジェクト、または確実なキルでなければ、追うのをやめましょう。
  • Singedへの最善の対処法は、しばしば横からのアプローチです。彼の進路を遮断し、ウェーブを維持し、彼が入ってくるためのCCを用意しましょう。直線的に彼を追うのは、ほとんどの場合最適ではありません。

FAQ

レーンでSingedを倒すにはどうすればいいですか?

まず、彼のゲームプランに乗らないようにしましょう。Singedはプッシュしてあなたを追いかけさせ、レーンをテンポの問題に変えたいのです。彼に勝つには、プロキシ(敵タワー裏への侵入)が危険になるような位置にウェーブを保ち、彼がポイズンを無駄にしたときに罰し、彼を追うのではなく出口を塞ぎましょう。キルは常に必要ではありません。彼がヘルス、アルティメット、ゴーストを残したままオブジェクトに到達するのを阻止できれば、すでに彼のインパクトを減らしています。

なぜSingedを追うべきではないのですか?

なぜなら、追うことはしばしば彼がまさに望んでいることだからです。あなたが彼を追いかけている間、あなたはポイズンダメージを受け、時間を失い、ウェーブを離れ、次のオブジェクトに遅れて到着する可能性があります。彼が追われることを想定していない場合、キルが迅速な場合、またはマップを犠牲にすることなく複数の味方が合流できる場合にのみ追うべきです。それ以外の場合は、ウェーブをコントロールし、視界を置き、彼がパスアドバンテージを持たないエリアに彼を押し戻す方が良いでしょう。

Singedを最も悩ませるチャンピオンのプロフィールは何ですか?

最も難しいプロフィールは、彼の動きに囚われないものです。Fiora、Camille、Jaxのようなデュエリストは、彼にサイドレーンを尊重させることができます。Vayne、Kennen、Teemo、Gnarのようなレンジチャンピオンは、彼がリズムを確立する前に消耗させることができます。Darius、Sett、Garen、Olafのようなブルーザーも、過度に直接的なエントリーを罰します。共通点はシンプルです。彼らは戦闘の進路を選ぶ自由を減らします。

Singedに対してオブジェクトをどのようにプレイすべきですか?

彼がサイドから到着する前にオブジェクトを準備する必要があります。もしSingedがワーディングされていない角度からゴーストで突入してきたら、あなたのキャリーを後退させ、フォーメーション全体を崩壊させることができます。側面をワーディングし、彼の突入のためのCCを保持し、彼のポイズンで既にカバーされている狭い通路に集まるのを避けましょう。目的は彼を倒すことだけではありません。あなたのチームがどこに移動しなければならないかを彼が決めるのを阻止することです。


















































