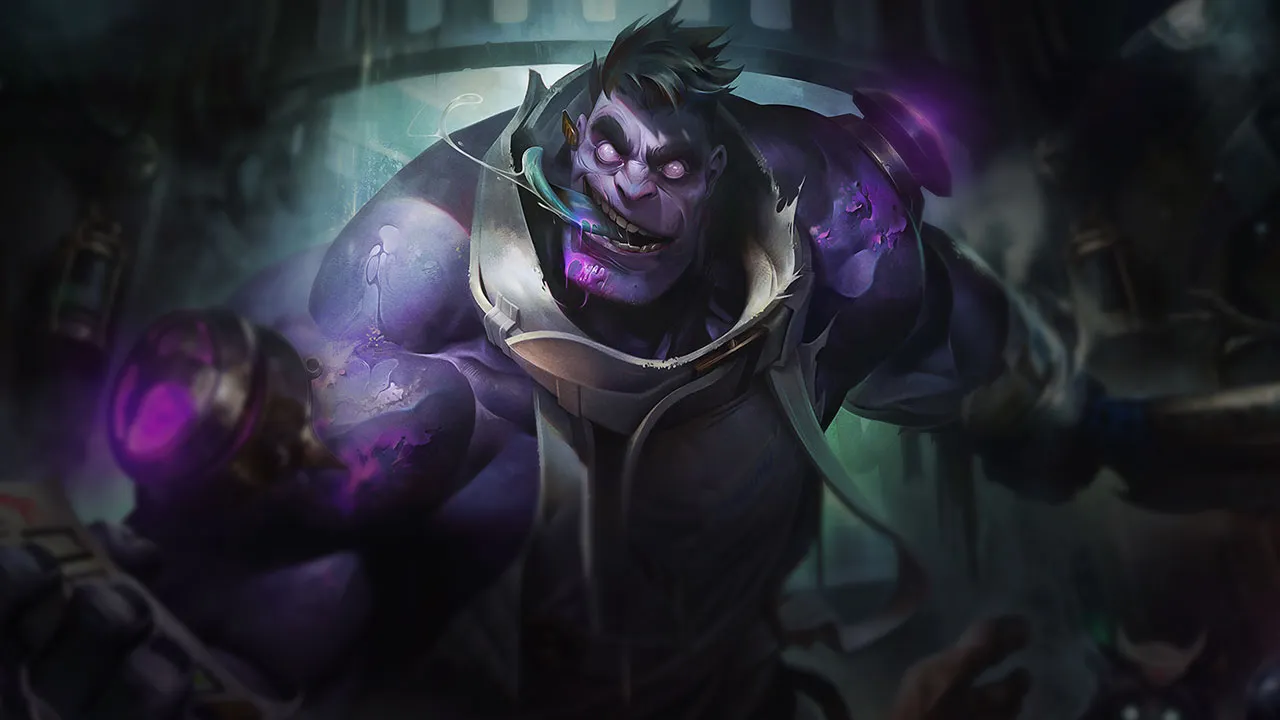




























カウンターアングル
ムンドーのカウンターはダメージだけでなく、彼の回復サイクルを断ち切ること。常にプレッシャーをかけられるチャンピオン、アンチヒール、そして彼の強みが出る前に叩ける相手は非常に厄介だ。マッチアップがなぜ難しいのかを理解すれば、立ち回りを調整できる。ムンドーは無理なプレイを避けさえすれば、多くの状況を生き延びられるからだ。

Dr. Mundoは、持続的なダメージを与えてくる構成や、強力なhealing reductionを付与してくる構成を苦手とします。継続的なpoke、kite戦略、そして最大体力比例ダメージは彼の耐久力を低下させます。強力なregenerationへの依存が、彼の主な構造的弱点です。
これらのチャンピオンは、こちらのビルドやプレイスタイルを真正面から上回る構成を持ち、レーン戦のコントロールとファームを極めて難しくする。彼らのスキルはこちらの主要な強みを無効化し、いつも通りのプランを実行しようとした瞬間に手痛い反撃を受けさせてくる。こうしたマッチアップでは、ミスを最小限に抑え、正面からの対決以外で解決策を探すことが重要になる。

Dr. Mundo の持ち味は膨大な体力とその回復ですが、Vayne はこの防御を完全に無効化します。Vayne の3回目の攻撃ごとに Silver Bolts が発動し、Maximum Dosage による膨大な HP は、最大体力に応じた確定ダメージによって弱点に変わります。あなたには gap closer がないため、Vayne はパッシブの Night Hunter と Tumble で楽にあなたと距離を取り、Condemn が正面からの接近をあっさり防ぎます。
あなたは level 1 から minion wave に完全に近づけません。通常攻撃で last hit を取ろうとすると Vayne に体力を大きく削られ、遠くからの farm しかできなくなります。常にタワー下まで押し込まれ、plates と gold を失い続けます。この強い圧力のせいで jungler を手伝いに行けず、Vayne が止められないまま scale する間、動けないままになります。
生き延びるには、trade をあきらめ、Infected Bonesaw を完全に安全な位置からの minion 確保だけに使ってください。Vayne が実際にあなたのタワーを攻撃している場合を除き、wave に Blunt Force Trauma を使いに前へ出てはいけません。XP 範囲の外へ押し出されたときの Vayne の最初の poke を吸収するために、Heart Zapper を温存してください。Vayne が壁の近くで位置取りを誤ったら、Goes Where He Pleases で Condemn のスタンを吸収させれば、Maximum Dosage で下がるためのわずかな隙ができます。

Gwen はあなたにとって最悪の天敵です。パッシブの A Thousand Cuts が、あなたの膨大な体力を Gwen 自身のダメージと回復に変えるからです。Gwen が snip をスタックして Snip Snip! を放つと、割合体力の魔法ダメージと確定ダメージの組み合わせで、あなたの高い HP をずたずたに削ります。生き延びるために Maximum Dosage を使っても Gwen の回復を増やすだけで、Dr. Mundo 本来の防御スケーリングはまったく通用しません。
あなたは wave を争うことも、直接 trade することもできません。Gwen は Skip 'n Slash で自由に前へダッシュしてタワー下のあなたを poke でき、Hallowed Mist であなたが Infected Bonesaw を投げて反撃しても、それを無視できます。この絶え間ない圧力で、あなたは早い段階で不利なリコールを強いられ、タワーは plates への大ダメージにさらされます。防御的に wave を処理し続けることになり、チームを助けることも、序盤の中立 objective を争うこともできません。
ビルドを純粋な体力から切り替え、すぐに魔法防御を急いで揃え、Gwen の通常攻撃を弱めてください。Infected Bonesaw は poke には決して使わず、最大射程からの farm 確保にだけ使ってください。Gwen に dive される前にタワー下で wave を素早く処理するために、Blunt Force Trauma を温存してください。Gwen が Needlework で仕掛けてきたら、反撃しようとせず、すぐに Heart Zapper を発動して最初の burst を吸収し、Maximum Dosage で移動速度を得て、安全な場所まで下がってください。

この matchup はステータスの厳しい比べ合いで、Dr. Mundo 本来の耐久力が逆に命取りになります。Mordekaiser が Realm of Death を発動すると、あなたの防御ステータスの大部分を奪われます。Maximum Dosage の回復力は、体力1ポイントごとの価値を高めるだけの高い耐性があってこそ機能するため、その素のステータスを決闘ゾーンに奪われると、あなたは極めて脆くなり、ult の回復は完全に無力化されます。
Mordekaiser が ult を習得した瞬間から、あなたは lane の圧力をすべて失い、タワー下で守りに回らざるを得ません。Darkness Rise のオーラは Death's Grasp の引き寄せから簡単に発動し、Indestructible のシールドはあなたの Infected Bonesaw による poke をすべて吸収するため、trade は不可能です。あなたは gold を失い続け、序盤の優先権を譲り、jungler はトップ側のサポートを得られなくなります。
生き延びるには、通常の物理防御ビルドから外れて、すぐに魔法防御アイテムを重めに急いで揃えてください。lane では Infected Bonesaw を安全な距離からの minion 確保だけに使い、パッシブの Goes Where He Pleases が有効で Mordekaiser の Death's Grasp を防げる場合を除き、決して前に出ないでください。Realm of Death に閉じ込められたら、反撃しようとせず、Maximum Dosage の移動速度でひたすら円を描くように走って、タイマーが切れるのを待ってください。

Olaf の Ragnarok は、スローを無視することで、あなたが自分を守る主力の peel である Infected Bonesaw を完全に無効化します。この CC で Olaf を寄せつけないことができなければ、Olaf は簡単に距離を詰められます。近接範囲に入られると、Berserker Rage と Vicious Strikes があなたの自然回復を上回る sustain を発揮し、Reckless Swing は素の確定ダメージであなたの高い魔法防御とアーマーを貫通して、防御ステータスを無意味にします。
この組み合わせにより、最初の wave からあなたは極めて守備的な姿勢を強いられます。Olaf は Undertow でスローを狙え、当たれば追いかけてくるため、あなたは wave control を争えません。Blunt Force Trauma で trade しようとしても、Heart Zapper で sustain しようとしても、体力に関係なく通る確定ダメージが返ってきて、早期のリコールを強いられ、Olaf は自由に wave を crash させてあなたのタワーを脅かせます。
この猛攻を生き延びるには、純粋なアーマーを急ぐのではなく、すぐにビルドを体力を積むアイテムへ切り替えて、Reckless Swing の確定ダメージを和らげてください。Infected Bonesaw は poke には決して使わず、最大射程からの farm だけに使ってください。Olaf が Ragnarok を発動したら、反撃したり Heart Zapper で回復したりしようとせず、すぐに Maximum Dosage を使って移動速度を上げ、タワーまで走って戻り、ult を防御的に使って Olaf の ult の持続時間を耐えてください。

Fiora は baron lane におけるあなたの最悪のステータス上の天敵です。あなたの持ち味は、膨大な体力を積み、Maximum Dosage で回復することですが、Fiora のパッシブの Duelist's Dance と ult の Grand Challenge は、最大体力の割合の確定ダメージを与えて、あなたの防御を完全に貫通します。Fiora は Lunge で楽々と vital を突き、あなたの頑丈さを自分の回復に変えます。さらに Riposte は Infected Bonesaw のスローを簡単に無効化できます。
あなたは wave を争うことも、長い trade をすることもできません。minion に Blunt Force Trauma を使おうと前に出るたび、Fiora は Lunge で vital を発動させ、その trade を即座に制します。Fiora が Grand Challenge を習得すると、タワー下にいても安全ではなくなります。Fiora は dive して4つの vital をすべて発動させ、Heart Zapper のダメージを突き抜けて回復し、あなたに頻繁で痛手となるリコールを強いて、gold と plates を失わせます。
生き延びるには、地形に寄り添ってください。Duelist's Dance が Fiora の正面に vital を出したら、視界範囲の外へ後ろ向きに歩いて、より安全な側にリセットするか、Grand Challenge 中は壁に寄って、Fiora が vital を攻撃できないよう物理的に塞いでください。Infected Bonesaw で距離を取って farm だけしてください。Fiora が ult で dive してきたら、Heart Zapper を早めに発動して最初の burst を吸収し、Fiora が Riposte を使うまで Maximum Dosage を遅らせてください。
その他のマッチアップ
これらのチャンピオンは、マッチアップ自体を絶望的にするわけではないが、対面で優位に立ちやすいツールを持っている。射程が長かったり、攻撃を受け止める力が高かったり、エンゲージへの対応手段が豊富だったりする。アプローチを調整し、戦闘を受け入れるタイミングを慎重に選ぶ必要がある。

Aatrox はあなたのパッシブ回復のループを完全に崩します。The Darkin Blade には3つの異なるノックアップ範囲があり、Q1 の sweetspot が当たるだけで Goes Where He Pleases が即座に発動してしまいます。パッシブの canister が落ちたら、あなたは不利なミニゲームを強いられます。体力と cooldown を回復するために拾いに行き、Infernal Chains とそれに続く Q2/Q3 の sweetspot による combo をフルで受けるリスクを負うか、拾うのをあきらめて無防備なまま戦うかです。
この組み合わせは、wave の状況を絶え間ない忍耐比べに変えます。Aatrox は Deathbringer Stance と Umbral Dash で大きく sustain するため、sweetspot を受け続けるなら、純粋な消耗戦には勝てません。パッシブの canister を取り損ねると貴重な体力回復を失い、Infected Bonesaw で離れた位置から受け身に farm するしかなくなります。Aatrox が自分のタワー近くで freeze してきた場合、World Ender に追い詰められるリスクがあります。
生き延びるには、The Darkin Blade が使える間は、Infected Bonesaw を安全な last hit の確保だけに使ってください。Aatrox が Q1 を外したり wave に無駄打ちしたりしたら、前に出て Blunt Force Trauma で push や poke をするわずかな隙ができます。Goes Where He Pleases が使えない状態で Infernal Chains を受けたら、すぐに Heart Zapper を発動して burst を吸収し、引き寄せの方向に対して垂直に外へ走ってください。戦況をひっくり返そうとせず、Aatrox の ult の追撃力に対抗するために Maximum Dosage を温存してください。

この matchup は危険なチキンレースです。Maximum Dosage によるパッシブ回復は、あなたの失った体力に応じた確定ダメージを与える Garen の Demacian Justice によって、完全に打ち消されます。Blunt Force Trauma の追加攻撃力を最大にするために ult を遅らせようとすると、Garen は回復が始まる前に、あなたの回復の仕組みごと無視して、あなたを即座に処刑します。
低い体力で安全に誘うことができないため、Garen は短い trade を支配します。Garen は Decisive Strike で Infected Bonesaw のスローを解除し、あなたをサイレンスにして、Judgment で回転します。これによりあなたはタワー下で守りに回り、遠くから farm することを強いられます。優先権を失い、Garen は簡単に Perseverance を発動させ、あなたが当てたどんな poke も回復し返し、タワーの plates をじわじわ削っていきます。
生き延びるには、Infected Bonesaw で安全な距離から minion を確保してください。Garen の Courage が有効な間は決して trade せず、代わりに Garen の防御シールドを誘い、その cooldown の猶予が閉じるのを待ってから反撃してください。最も重要なのは、skirmish の早い段階で Maximum Dosage を発動することです。Blunt Force Trauma の低体力時のダメージボーナスを待ってはいけません。体力を高く保つことが Demacian Justice に対する唯一の盾だからです。Garen が wave を freeze したら、Heart Zapper で素早く壊して下がってください。

Darius は、あなたのパッシブを逆手に取ってこの lane を支配します。Apprehend で引き寄せられると、Goes Where He Pleases が即座に発動します。Darius はすでに近接範囲にいるため、あなたが届く前に落ちた canister を簡単に踏めてしまい、あなたの重要な体力回復を永久に阻止します。その回復がなければ、Hemorrhage のスタックがあなたの自然回復を一気に上回ります。
あなたはタワー下で守りの farm を強いられ、Infected Bonesaw で last hit を確保することになります。Blunt Force Trauma を使おうと前に出ると、Darius の grab 範囲に入る危険があります。一歩でも位置を誤ると、Darius は wave を freeze させ、あなたの体力を大きく削り、圧力下で低体力のままでいなければならなくなったところで、Noxian Guillotine による処刑を狙えます。
生き延びるには、安全な距離を保ち、minion を争う前に Apprehend を吐かせてください。Darius に掴まれて canister を踏まれたら、すぐに Heart Zapper を発動して burst を軽減し、その後 Infected Bonesaw をゼロ距離で投げて Darius の追撃を遅らせてください。低体力になったら、Maximum Dosage を早めに発動してください。体力が Noxian Guillotine の処刑ラインまで落ちるのを待ってはいけません。Hemorrhage のスタックが、遅れた回復をすぐに突き抜けるからです。

Yone は Soul Unbound の素早い移動で Infected Bonesaw を簡単に回避できるため、あなたの遠距離 poke を完全に無効化します。距離を詰められると、Spirit Cleave が割合体力ダメージであなたの膨大な体力を削りつつ、あなたの反撃から Yone を守るシールドも与えます。この機械的な優位のため、あなたは直接の trade に勝てず、特に Yone の scaling があなたの防御成長を上回っていくほどそうなります。
Yone の wave clear を争えば命取りの trade になるため、Yone が wave のテンポを握ります。minion を何度も crash させると、Yone はタワー下のあなたを Mortal Steel と Spirit Cleave で poke してきます。wave をあなたのタワーの射程のすぐ外に保てないと、Yone は freeze でき、あなたの gold を枯らし、Fate Sealed を習得したら楽に dive できる状況を作ります。
Infected Bonesaw で最大射程から last hit を確保する、安全な farm に完全に集中してください。Yone の Soul Unbound が使える間は cleaver を投げず、温存して farm に使うか、Yone が前にダッシュしてきたときに遅らせるために使ってください。Yone がスピリット状態を発動したら、すぐに下がって Heart Zapper を発動し、受けるダメージを軽減し、その後の爆発する終了効果で隣接する minion を処理してください。Maximum Dosage は、タワー下での Yone の Fate Sealed all-in を生き延びるためだけに温存してください。

Volibear は、あなたの体力回復の強みを徹底的に無効化します。パッシブの Goes Where He Pleases は Thundering Smash のスタンを簡単に吸収できますが、長い skirmish では Volibear に sustain で勝てません。Frenzied Maul が大きな処刑ダメージを与え、失った体力に応じて Volibear を回復させるからです。Maximum Dosage に頼って戦況をひっくり返そうとしても、Volibear が Frenzied Maul で繰り返し噛みついて回復が相殺され、あなたの代名詞である回復が罠に変わります。
この回復量の互角さのせいで、あなたは守りの farm を強いられます。Volibear のパッシブ The Relentless Storm は自然に wave を push し、Sky Splitter はあなたを倒れかけの minion から遠ざけます。Blunt Force Trauma で反撃しようとしても、Volibear はダメージをシールドで防ぎ、噛み返してきます。その結果、laning phase の間ずっとタワー下に押し込まれ、Volibear が行動不能にする Stormbringer を習得すると、常に dive の脅威にさらされます。
生き延びるには、Volibear に2回噛まれないようにして、trade の連鎖を断ち切ってください。Infected Bonesaw は、離れた位置の farm の確保と Volibear の接近を遅らせることだけに使ってください。Volibear が Thundering Smash で仕掛けてきたら、Goes Where He Pleases に CC を吸収させ、Heart Zapper を発動して最初の burst を軽減し、すぐに下がってください。マークされたら近接範囲に決してとどまらず、再び近づく前に Frenzied Maul のマークが消えるのを待ってください。

Gnar の Rage Gene により、Gnar はほとんどの時間 Mini 形態にとどまります。その状態では Hyper のパッシブが割合体力の魔法ダメージで Dr. Mundo の高い HP を削り、同時に Gnar 自身の移動速度も上がります。Boomerang Throw のスローと組み合わさると、Gnar は簡単にあなたを kite でき、あなたの近接の脅威を無効化します。また Gnar はあなたを寄せつけないのに強い CC を必要としないため、Goes Where He Pleases の価値も下がります。
あなたはタワー近くで守りに回り、Infected Bonesaw で遠くの minion を確保するしかありません。Blunt Force Trauma を使おうと前に出ると、Gnar は簡単に Hyper を発動でき、Hop で反撃から逃げられます。この絶え間ない harass があなたの体力を削り、早期のリコールを強いて、Maximum Dosage を生存手段として効果の薄いものにし、トップ lane の序盤の優先権を完全に明け渡すことになります。
Gnar の Rage Gene が溜まっている間は、Gnar の通常攻撃の射程の外の安全な位置にとどまってください。Gnar が Mega Gnar に変身したときだけ、wave を争うことを考えてください。モーションが遅くなるので Infected Bonesaw を当てやすくなります。Gnar が Boomerang Throw を外したら、その短い隙に Blunt Force Trauma で minion を確保してください。捕まったら、Heart Zapper を発動して burst を吸収し、その後下がって Goes Where He Pleases の canister を回収してください。

K'Sante が All Out を習得すると、あなたの高い HP は弱点になります。この ult は K'Sante の耐性を素の攻撃力に変え、Dauntless Instinct を強化して、確定ダメージであなたをずたずたにします。決定的なのは、All Out の強制移動が、あなたのパッシブ Goes Where He Pleases の CC 無効を無視し、どのみち壁越しにあなたを強制的に移動させる点です。あなたの主な防御手段は無駄な cooldown となり、その間にあなたは解体されます。
この組み合わせは、あなたに守りのテンポ勝負を強います。序盤は Infected Bonesaw で離れた位置から farm して wave を争えますが、K'Santé の Footwork と Path Maker のせいで直接の trade は危険です。K'Santé が level 5 に達すると、river の中間点を越えて前に出るのは致命的です。悪い trade を一度でもすれば、K'Santé のタワー下に連れ去られ、あなたのリコールのタイミングは崩れ、gold も枯渇します。
生き延びるには、lane の中央か自分のタワーに厳密に自分を固定してください。K'Santé の ult が使える間は、くぼみや壁に寄ってはいけません。Infected Bonesaw をいつでも撃てる状態にして poke し、K'Santé の接近を遅らせ、Maximum Dosage は必ず K'Santé が All Out を発動した直後のために温存してください。増幅された確定ダメージと戦うのではなく、急激な体力の回復と移動速度で離脱するために使ってください。

Sett は、あなたの膨大な体力をチームに対する武器に変えます。パッシブの Goes Where He Pleases は Facebreaker の最初のスタンを防ぎますが、Sett の ult である The Show Stopper は、あなたの最大体力にそのまま比例してスケールします。Maximum Dosage を発動すると、チームファイトで Sett があなたを後衛へ叩きつけるときに、後衛に与える広範囲の巨大なダメージを、知らないうちに増やしてしまいます。
lane では、Sett は Knuckle Down で絶えずあなたを寄せつけず、短く爆発的な trade を強いてきます。Blunt Force Trauma で last hit を取ろうと前に出ると、Sett は Haymaker でダメージを吸収し、burst を返してきます。あなたは守りに回って Infected Bonesaw で安全な距離から farm し、タワー下で wave を crash させるしかなく、序盤のマッププレッシャーを犠牲にします。
生き延びるには、安全な距離を保ち、Infected Bonesaw だけで farm してください。Sett がすでに Haymaker のシールドを無駄にしている場合を除き、Heart Zapper を発動してはいけません。最も重要なのは、チームファイトが始まったら、Sett とあなたの carry の間ではなく、Sett に対して垂直か背後に位置取りすることです。一直線の経路を避けることで、Sett が The Show Stopper をあなたの脆い後衛に直撃させる壊滅的な事態を防げます。

Urgot は危険な優位を持っています。Fear Beyond Death の処刑ラインが、Maximum Dosage の体力回復の立ち上がりを完全に無視するからです。Goes Where He Pleases は Disdain による最初のフリップをうまく防げますが、Urgot の高い物理 burst はあなたの HP をすぐに溶かします。処刑ラインより下にあなたを落とされると、ult の回復でもすり潰されるのを防げません。
Urgot のパッシブの脚がチャージされている間は、安全に争えず、離れた位置からの farm を強いられます。Goes Where He Pleases が cooldown 中は毎回、wave control を明け渡してタワー下まで下がらなければなりません。Disdain が一度当たり、続けて Purge が決まるだけで、Urgot の処刑が発動するからです。この圧力はあなたの scaling を遅らせ、早期の不利なリコールを強います。
自分の minion wave の後ろにいて Corrosive Charge を防ぎ、Infected Bonesaw で最大射程から cs を確保してください。Maximum Dosage をぎりぎりで発動してはいけません。体力40%前後で早めに発動し、Fear Beyond Death のラインを十分に上回ったままにしてください。パッシブの canister が Urgot の近くに落ちたら、すぐにあきらめてください。予測しやすい動きを Urgot が Disdain で咎めてくるからです。

Tryndamere は、あなたの低体力時の決闘力に真っ向から対抗します。体力が低くなると、*Blunt Force Trauma* は反撃のための大きな追加 AD をくれますが、*Undying Rage* によって Tryndamere はこの burst を完全に無視できます。*Maximum Dosage* で回復しようとしても、Tryndamere はクリティカル重視の通常攻撃であなたの DPS に楽に張り合い、直接の長い対決では、低 HP での生存力も誘いの力も無意味になります。
Tryndamere が *Battle Fury* を積むと、序盤は wave を争えません。Tryndamere は *Spinning Slash* で短い trade を仕掛け、あなたをタワー下に追い込みます。通常攻撃で farm しようとすると、*Mocking Shout* があなたの AD を削るので、last hit が難しくなります。その結果、常に遠距離からの farm を強いられ、lane の優先権を明け渡し、plating を削られていきます。
*Infected Bonesaw* を最大限に活用して、完全に安全な位置から minion を確保し、wave をタワー近くに保ってください。Tryndamere が *Spinning Slash* で飛び込んできたら、すぐに *Heart Zapper* を発動して最初の burst を吸収し、回復のために弾けさせてください。下がるときは Tryndamere の方を向いたまま下がり、*Mocking Shout* のスローを防いでください。Tryndamere が *Undying Rage* を使ったら、*Maximum Dosage* の移動速度ですぐに離脱し、5秒間の不死が終わるのを待ってから反撃してください。

この matchup は、痛いメカニクス上の相互作用にかかっています。Nasus の Wither はスローであり拘束ではないので、あなたの Goes Where He Pleases を完全にすり抜けます。パッシブはこの動きを鈍らせる debuff に対して何の防御にもならないため、Nasus は簡単に距離を詰められます。Nasus が Siphoning Strike のスタックを十分に溜めると、執拗に追い詰めてきて、長い決闘ではあなたの自然な体力回復も防御手段も役に立たなくなります。
Nasus が調子に乗ると、一直線の 1v1 trade ではあなたは Nasus に太刀打ちできません。wave が Nasus のタワーの方へ跳ね返るままにすると、Nasus は freeze し、安全に Siphoning Strike をスタックし、あなたを寄せつけなくなります。freeze を崩そうとするたびに Wither を受け、安全な場所から遠く離れて無防備になります。これにより優先権を譲ることになり、成長が遅れ、序盤の skirmish で jungler はトップ側のサポートを得られません。
生き延びるには、wave を自分のタワーへ引き寄せることに完全に集中してください。長射程から Infected Bonesaw を使って last hit を確保し、Nasus がスタックのために前に出てきたら poke してください。自分のタワー下で minion を素早く処理できるよう Blunt Force Trauma を準備しておいてください。Nasus が Fury of the Sands を発動して Wither を使ってきたら、戦わず、すぐに Heart Zapper で加速し、Maximum Dosage を発動して、Spirit Fire の範囲から逃げてください。
その他のマッチアップ
このマッチアップは何よりもまず実行力の勝負であり、両者ともに優位を取れる現実的な手段を持っている。重要なスキルを一つ避けられるか、エンゲージを正しく読めるか、あるいはたった一つの位置取りのミスが、勝敗を分けることもある。マッチアップを理解し、行動すべき瞬間を見極める力がとりわけ重要になる。

この matchup は、Jax の防御能力を中心にした純粋な cooldown の勝負です。Jax が Counter Strike で仕掛けて、あなたの通常攻撃を回避しつつスタンさせようとしても、パッシブの Goes Where He Pleases がスタンを完全に吸収します。これで Jax は主力の防御手段が使えない完全に無防備な状態になり、回避が戻る前に Blunt Force Trauma で安全に反撃して体力を大きく削れる決定的な隙が生まれます。
これらのスキルがぶつかったとき、誰が wave を握っているかによって、lane のテンポは急激に変わります。Jax が回避を無駄にすれば下がるしかなく、あなたは Blunt Force Trauma で自由に wave を push したり、Infected Bonesaw のスローを当てたりできます。しかし、Jax が仕掛けたときにパッシブが使えない状態だと、Jax は短い trade に簡単に勝ち、あなたをタワー下に追い込んで、dive や痛手となるリコールの脅威をかけてきます。
前に出る前に、必ずパッシブのインジケーターを確認してください。Goes Where He Pleases が使えるなら、Jax の射程に歩いて入って Counter Strike を誘い、すぐに canister を拾って体力を回復し、Heart Zapper を発動して最初の burst を吸収してください。Jax の回避が終わったら、すぐに Blunt Force Trauma を当て、Infected Bonesaw で追ってください。パッシブが cooldown 中なら、守りに回り、回復するまで長射程の cleaver だけで farm してください。

この matchup は、Ornn の Bellows Breath が、あなたのパッシブ Goes Where He Pleases とどう相互作用するかにすべてかかっています。Ornn があなたを炎で包むと、Brittle を付与します。続く通常攻撃がノックバックを起こし、あなたの canister を即座に弾けさせ、割合体力の大ダメージを与えます。この相互作用はあなたの自然な頑丈さを無視するため、短い trade のたびに、ブレスを回避するか canister を確保するかの位置取りの競争になります。
Ornn が Brittle で強化された攻撃で Goes Where He Pleases を弾けさせることに成功すると、あなたは canister を回収するために守りに回らざるを得ません。この即座の体力と圧力の喪失により、Ornn は Volcanic Rupture で wave の状態を支配できます。Ornn にパッシブの回収を阻止されると、Ornn は自由にリコールできる時間を得るか、Searing Charge で dive を仕掛けてきて、あなたは Infected Bonesaw でタワー下で farm するしかなくなります。
このテンポ勝負に勝つには、斜めの角度を保ちながら Bellows Breath を誘ってください。Ornn が炎のブレスを発動したら、すぐに後ろか横に歩いて、Ornn に続く通常攻撃を当てさせず、Goes Where He Pleases を温存してください。パッシブが使えないときは、Ornn の Volcanic Rupture と Searing Charge の combo を警戒してください。壁から離れ、Infected Bonesaw で安全に last hit を取ってください。Heart Zapper は、Ornn の trade の全ダメージから逃げられないときだけ、少し体力を取り戻すために発動してください。

この matchup は、防御手段の正確な交換で決まる戦略的な膠着状態です。パッシブの Goes Where He Pleases は、Shen の主力の engage である Shadow Dash を完全に無効化し、致命的な挑発からあなたを守ります。しかし、あなたが反撃しようとすると、Shen は Spirit's Refuge を展開して、Blunt Force Trauma の高ダメージの頭突きを完全に防げます。そのため、直接の trade では、どちらも決定的な一撃を当てるのに苦労します。
どちらの tank も相手を簡単には倒せないため、lane は minion の優先権を争う純粋な戦いになります。Shen が Stand United をチャネリングしてマップの反対側のチームを助けようとしたら、すぐに wave を押し込んで咎めなければなりません。wave control が弱いと、Shen は自分のタワーを失うことなく自由に roam できますが、Shen をタワー下に釘付けにしておけば、仲間を救うか、Blunt Force Trauma で plates を失うかの選択を迫れます。
このテンポ勝負に勝つには、Infected Bonesaw で距離を取って絶えず Shen を harass してください。Shen の Spirit's Refuge の範囲が有効な間は、Blunt Force Trauma を決して発動せず、先に防護フィールドを誘うか、崩れるのを待ってから攻撃してください。パッシブの Ki Barrier のシールドが張られているなら、trade を遅らせてください。Shen が Stand United を準備しているのが見えたら、すぐに Heart Zapper と Blunt Force Trauma を使って wave を処理し、plates を確保してください。

Vladimir には強い CC が一切ないため、パッシブの Goes Where He Pleases はここでは完全に無意味で、回復用の canister をまったく得られません。その代わり、この matchup は Infected Bonesaw と Vladimir の Transfusion による、邪魔のない直接の消耗戦になります。どちらも base に戻らずに体力を回復し続けられるため、lane は体力コストと回復サイクルをどちらがうまく管理できるかだけで決まります。
trade は絶えず起こりますが、序盤はほとんど致命的になりません。Vladimir は3回目の強化された Transfusion であなたを poke で削ろうとしつつ、Sanguine Pool であなたの反撃を回避します。どちらも非常にしぶといため、どちらも簡単にはリコールを強いられません。lane は膠着状態のまま、どちらかが体力管理を誤るまで、minion wave は Blunt Force Trauma と Tides of Blood でゆっくり処理されます。
この終わりのない繰り返しを断ち切るには、Vladimir の Crimson Pact はどのみち Vladimir 自身の体力に応じてスケールするので、いつもの体力を積むアイテムではなく、早い段階でビルドを変更して、回復阻害と魔法防御を急いでください。Vladimir のリソースバーが赤くなったら、強化された Transfusion が使える合図なので、すぐに下がってください。それが減衰したら、前に出て Infected Bonesaw を投げるか、Blunt Force Trauma で wave を処理してください。タワー下で dive されたら、Maximum Dosage を早めに発動して、Vladimir の Hemoplague の爆発を誘ってください。
その他のマッチアップ
これらのチャンピオンは、こちらの主要な強みに効果的に対応するのが難しく、より自由に対面を組み立てることができる。プレッシャーをかけて有利な交換を引き出す手段は複数あることが多い。相手が態勢を立て直す時間を与えるのではなく、この優位を活かして主導権を握ろう。

Soul Furnace による Sion の無限の体力スタックは、あなたにとって好都合です。Infected Bonesaw は現在体力に応じた高い魔法ダメージを与えるため、Sion が分厚くなるほど、cleaver の威力が際立ちます。さらに、Decimating Smash による Sion の主な CC は Goes Where He Pleases に完全に無効化されるため、Sion の膨大な体力バーを溶かしていく間、あなたを拘束できません。
この matchup の力学では、Sion は lane の主導権を一度も握れません。Sion は立ち止まらずに Decimating Smash を安全にチャージできないので、Infected Bonesaw の格好の的になります。倒した minion を Blunt Force Trauma で投げ飛ばして、Sion の wave clear に簡単に張り合えます。Sion の trade のパターンはあなたの体力回復に追いつけないため、Sion は守りに回るしかありません。
minion wave のすぐ横に位置取りして、Infected Bonesaw の射線を確保しつつ、Roar of the Slayer を避けてください。Sion が Decimating Smash をチャージしたら、その場に踏みとどまり、Goes Where He Pleases に衝撃を吸収させて、すぐに canister を回収し、Blunt Force Trauma で反撃してください。長い trade では積極的に Heart Zapper を使って体力を回復し、Maximum Dosage は Sion が Unstoppable Onslaught を使ってからにしてください。

Jayce が自分を守る主力の peel である Thundering Blow が、あなたのパッシブ Goes Where He Pleases に完全に無効化されるため、この matchup は大きくあなたに有利に傾きます。Jayce がハンマー形態に切り替えてあなたを弾き飛ばそうとしても、パッシブが強制移動を吸収します。そのため、Maximum Dosage を発動して追い詰めるとき、Jayce は完全に無防備になり、近接形態への切り替えが死の罠に変わります。
minion wave を自分のタワーの近くに保てば、Jayce の射程の優位は無効化されます。wave を自分側で freeze させておくことで、Jayce があなたを poke するのに必要な広い lane のスペースを与えません。この freeze を崩そうと出すぎれば、Jayce は完全に無防備になります。farm を失うか、ハンマーのノックバックでも助からない危険な追跡に踏み込むかの選択を迫られます。
Infected Bonesaw と Blunt Force Trauma での farm に集中して、パッシブの容器を温存しながら安全に last hit を確保してください。Maximum Dosage が使えるようになるまで、積極的に仕掛けてはいけません。戦うと決めたら、Jayce に向かって真っ直ぐ走り、Goes Where He Pleases のシールドに Thundering Blow を無駄打ちさせ、その直後に Heart Zapper を発動して残りの burst を吸収し、とどめを刺してください。

Goes Where He Pleases が Renekton の trade のパターンをすべて完全に無効化するため、この matchup は大きくあなたに有利に傾きます。Renekton が飛び込んであなたを拘束しようとするたび、パッシブが Ruthless Predator のスタンを吸収し、Renekton はあなたの minion wave の中で無防備になります。その即座のスタンがなければ、Renekton は素早い burst と離脱の combo を決められず、長い skirmish で簡単に sustain で上回れます。
lane 支配の主力手段が無効化されるため、Renekton は受け身に回らざるを得ません。freeze で締め出される心配なく、minion wave を自分のタワー近くに維持するか、ゆっくり push できます。Renekton が trade を試みるたびに、Slice and Dice と Ruthless Predator の長い cooldown のせいで、あなたの反撃に完全にさらされ、lane は Renekton が勝てない消耗戦になります。
パッシブの canister を安全に保ち、Goes Where He Pleases が弾けたら、戻るまで下がってプレイしてください。使えるときは、体力の低い minion の近くに立って Renekton のダッシュを誘い、失敗したスタンを Infected Bonesaw で咎めて遅らせてください。Renekton が Dominus を発動しても、慌ててすぐに ult を使わず、代わりに Heart Zapper を発動して最初の burst を吸収し、Renekton が下がろうとするところを Blunt Force Trauma で削ってください。

Teemo は物理攻撃役を封じるために Blinding Dart に大きく依存していますが、この弾はあなたの Infected Bonesaw にはまったく効果がありません。cleaver は安全な距離から魔法ダメージを与えるので、Teemo の blind の仕組みを完全にすり抜けられます。さらに、Toxic Shot の毒は Goes Where He Pleases のパッシブの体力回復で簡単に無効化されるため、この遠距離 matchup はあなたにとって意外なほど楽にコントロールできます。
この組み合わせは、通常は近接 champion にとって厳しい相手を、素早い斥候である Teemo にとってのじわじわ続く出血に変えます。Infected Bonesaw を当て続けることで Teemo を自分の minion wave の後ろに押し込み、Guerrilla Warfare を使ってあなたを harass することを防げます。あなたが wave のテンポを握り、Teemo の遠距離からの圧力からタワーの plates を守り、Maximum Dosage で dive する前に Teemo を不自然なリコールのタイミングに追い込みます。
この優位を活かすには、序盤の購入を魔法防御に寄せて、Noxious Trap と Toxic Shot を無効化してください。茂みを使って射線を切り、Teemo が farm しようとするたびに Infected Bonesaw を投げてください。Blunt Force Trauma を温存して minion を倒し、Teemo が Move Quick で走って逃げたら、その minion を Teemo に向けて飛ばしてください。cleaver を外しすぎたら、Heart Zapper を発動して、タワー下で安全に wave を処理してください。

Malphite は Unstoppable Force でキルや gank を作りますが、Goes Where He Pleases がこの ult を完全に無効化するため、Malphite はあなたを拘束できません。一方、Seismic Shard による Malphite の魔法ダメージは、Infected Bonesaw と Maximum Dosage で簡単に回復し返せるため、この lane は消耗戦になり、あなたの体力が尽きるよりずっと前に Malphite の mana が尽きます。
あなたは wave の状態を完全に自由に支配できます。Ground Slam はスキルでの farm を遅らせられないため、Blunt Force Trauma で Malphite を絶えず Malphite のタワー下に押し込めます。Unstoppable Force で仕掛けようとしても失敗するため、Malphite はあなたの攻めを咎めることも wave を freeze することもできず、Granite Shield を削りながら楽に plates を確保できます。その間 Malphite はタワー下での last hit に苦労します。
Infected Bonesaw を絶えず投げて Granite Shield を割り、再生を阻止してください。wave を push するときは、体力の低い minion を並べて、Blunt Force Trauma で Malphite の顔面めがけて飛ばしてください。Malphite が Thunderclap で trade をしに前に出てきたら、Heart Zapper を発動して burst を吸収し、すぐに Goes Where He Pleases の canister の上を歩いて体力を満タンに保ってください。Malphite の苦し紛れの、誘い込み型の gank には Maximum Dosage を温存し、悠々と歩いて離れてください。
その他のマッチアップ
これらのチャンピオンは、こちらのビルドやプレイスタイルを真正面から上回る構成を持ち、レーン戦のコントロールとファームを極めて難しくする。彼らのスキルはこちらの主要な強みを無効化し、いつも通りのプランを実行しようとした瞬間に手痛い反撃を受けさせてくる。こうしたマッチアップでは、ミスを最小限に抑え、正面からの対決以外で解決策を探すことが重要になる。

ジャングルタンクとしてのあなたの主要な防御ツール、Maximum Dosage の体力比例のリジェネは、Master Yi によって完全に無効化されます。Master Yi が Wuju Style を発動すると、Master Yi の true damage があなたの大きな体力バーとアーマーを貫通します。さらに、あなたの主要な自己 peel と距離調整のツールである Infected Bonesaw のスローは、Master Yi が Highlander を発動すると完全に役に立たなくなり、Master Yi は何の対抗手段も受けずにあなたを追い詰められます。
Master Yi と決闘できないため、ジャングルのテンポは Master Yi が握ります。Master Yi が近くにいると、crab や epic monster を直接争うことはできません。Master Yi が Highlander でリセットを得る序盤の小競り合いは、試合を雪だるま式に不利にします。Master Yi が侵入してきても Infected Bonesaw では Master Yi を peel できないため、ジャングルキャンプを譲るか、レーナーに助けてもらうことになりがちです。
Master Yi がレベル5に達した後は、1v1 の遭遇をすべて避けてください。Master Yi が侵入して Highlander を発動したら、Infected Bonesaw で Master Yi にスローをかけようとして無駄にしないでください。代わりに Blunt Force Trauma でモンスターをすばやくクリアして脱出するか、Heart Zapper を発動してダメージを蓄えてから Maximum Dosage を使って逃げましょう。Master Yi の Wuju Style が cooldown 中のとき、または Master Yi が味方に Alpha Strike を使って無防備になり、チームのハード CC を受けやすくなったときにだけ engage してください。
Olaf はジャングルで悪夢です。Reckless Swing が固定の true damage を与え、あなたの硬いステータスを完全に無視するからです。さらに、Berserker Rage は体力が減るほど攻撃速度が上がるため、Olaf を削っていくというあなたの狙いに直接対抗します。離脱しようとしても、Olaf の Undertow の斧が執拗にスローをかけてくるため、孤立した小競り合いで安心して殴り合うことはできません。
この matchup は、あなたの序盤のジャングルの自由とオブジェクトへの圧力を台無しにします。Olaf はあらゆる直接の決闘に勝つため、Olaf が近くにいると Scuttle Crab を争うことも中立オブジェクトを確保することもできません。Olaf が領域に侵入してくると決めたなら、自分のキャンプを諦めることもよくあります。これにより守りのルートを強いられ、最終的にスケールが遅れ、レーナーが脆い状態になります。
生き残るには、Infected Bonesaw を遠くから使って茂みを偵察し、閉じ込められることなく安全にキャンプをクリアしてください。Olaf が Undertow で仕掛けてきても、反撃のために Heart Zapper を発動してはいけません。代わりに体力を温存し、Maximum Dosage は壁越しに脱出するため、または逃げられるだけの移動速度を得るためだけに使ってください。Olaf が侵入してきたら、すぐに川を渡って、Olaf の反対側のキャンプを奪いましょう。

Kindred はあなたの攻撃の脅威を完全に無効化します。*Lamb's Respite* が死を拒むゾーンを作り出し、あなたの *Blunt Force Trauma* の execute の可能性と、*Infected Bonesaw* の大きな現在体力割合ダメージを無効化するからです。あなたは相手を削って体力が低くなったところで仕留める戦い方に頼っているため、この ult があなたの kill 圧力を完全に止めます。さらに、Kindred の遠距離攻撃と *Dance of Arrows* で、Kindred は簡単にあなたを kite でき、*Goes Where He Pleases* を完全に無視できます。
ジャングルでは、Kindred は *Mark of the Kindred* のマークを確保するために、積極的にあなたのキャンプを狙います。川で衝突しても、Kindred を拘束することはできません。*Wolf's Frenzy* の中での *Dance of Arrows* による絶え間ないダッシュで、あなたは距離を保たれてしまいます。オブジェクトを確保しようとしても、Kindred は *Lamb's Respite* を落としてチームを守ることで簡単にあなたを上回れ、*Heart Zapper* で誰かを burst することもできなくなります。
この matchup を生き残るには、teamfight でのポジショニングを調整し、ダイバーではなく肉壁として動く必要があります。敵が *Lamb's Respite* の中で瀕死のとき、*Blunt Force Trauma* や *Infected Bonesaw* を無駄にしないでください。代わりにゾーンの端に位置取り、これらの cooldown を温存します。Kindred の ult が切れた瞬間に、*Maximum Dosage* のボーナス移動速度で Kindred を追いかけるか、*Heart Zapper* を使って *Mounting Dread* の遅延 burst を吸収してください。
Gwen はジャングルにおけるあなたの最悪の悪夢です。パッシブの A Thousand Cuts は、攻撃のたびに割合体力の魔法ダメージを与えることで、あなたの大きな体力プールを Gwen 自身の回復とダメージに変換します。Maximum Dosage を発動して体力を大きく増やしても、Gwen は難なくそれを切り裂きます。Snip Snip! の素早い true damage が加わると、あなたの持ち前の硬さは強みではなく弱点になります。
この相互作用が、ジャングルのペースを完全に決めます。序盤の Scuttle crab や epic monster を Gwen と争うことはできません。長引く決闘はすべてあなたの早い死に終わるからです。Gwen は Skip 'n Slash で位置取りしてあなたのキャンプに自由に侵入でき、あなたは領域を譲らざるを得ません。あなたのクリアが遅いぶん、Gwen が優先権を握り、あなたが追いつこうともがいている間、レーナーは Gwen の gank に対して脆い状態になります。
生き残るには、Gwen のルートから離れて動いてください。Infected Bonesaw を最大射程から使って争いのあるキャンプを安全に確保し、Blunt Force Trauma で素早くクリアします。Gwen の Needlework が有効な間は決して engage しないでください。何度もかかるスローとダメージのスパイクで一瞬で溶かされます。Gwen があなたの red 側に侵入してきたら、すぐにマップを横断して Gwen の反対側のキャンプを取るか、反対側のオブジェクトを確保してください。あなたの目標はチームのユーティリティを確保することであり、Gwen と決闘することではありません。

Lillia はジャングルで悪夢の matchup です。Dream-Laden Bough が最大体力割合の魔法ダメージを与え、あなたの大きな体力プールに直接対抗するからです。さらに、Blooming Blows から得るパッシブの移動速度で Lillia は非常に素早くなり、Infected Bonesaw を簡単に避けられます。Lillia がクリーバーの投擲の周りを絶えず踊るように動けるのに、拘束することも効果的にトレードすることもできません。
この力関係は、序盤のジャングルの圧力を完全に奪います。Infected Bonesaw を確実に当てられないため、Lillia は簡単にあなたのキャンプを争ったり、Swirlseed と Watch Out! Eep! でカウンターガンクしたりできます。川で Lillia に捕まると、いつまでも kite され、序盤に帰還を強いられ、レーナーは Lillia のテンポの速い gank に完全に無防備になります。
生き残れるかどうかは、距離を保ち、Lillia の Blooming Blows のスタックを把握できるかにかかっています。Lillia が最大の速度のときは engage せず、Infected Bonesaw は Lillia が Watch Out! Eep! のダッシュを使い、一瞬その場に固定されるまで温存してください。Swirlseed に当たって Lillia が Lilting Lullaby の準備をしたら、すぐに壁の方へ下がり、パッシブの Goes Where He Pleases が canister を安全に落とせるようにしてください。
これらのチャンピオンは、マッチアップ自体を絶望的にするわけではないが、対面で優位に立ちやすいツールを持っている。射程が長かったり、攻撃を受け止める力が高かったり、エンゲージへの対応手段が豊富だったりする。アプローチを調整し、戦闘を受け入れるタイミングを慎重に選ぶ必要がある。

この matchup は、Graves があなたの直線的な接近を無効化できるかどうかで決まります。あなたは Infected Bonesaw を当てて距離を詰めようとしますが、Graves は Quickdraw で軌道から簡単に滑り出て無効化します。さらに悪いことに、近づけても Graves の Smoke Screen があなたを完全に盲目にして、ターゲットの捕捉を妨げ、前進を遅らせるため、Blunt Force Trauma を確実に当てることも Graves に張り付くこともできません。
ジャングルでは、これにより序盤のキャンプの争いや積極的な小競り合いができなくなります。Graves は New Destiny でクリアが速く体力も保てると分かっているので、積極的にあなたのジャングルをカウンタージャングルしてきます。あなたのジャングルで捕まると、End of the Line があなたのキャンプの壁で瞬時に跳ね返り、大きな burst になります。序盤の Scuttle Crab を諦めることになりがちで、ゴールドの加速が遅れます。
生き残るには、Graves の位置とルートを把握し、マップの反対側へルートを取ってください。進路が交わったときは、Infected Bonesaw から入らず、まず歩いて近づいて Quickdraw を使わせてください。Graves が Smoke Screen を落としたら、やみくもに追いかけず、すぐに Maximum Dosage の移動速度を使って煙の外へ横方向に下がってください。Heart Zapper は、Graves があなたを execute しようとしたときに Collateral Damage の burst を回復するために温存してください。

Kayn の The Darkin Scythe による変身は大きなスケールの差を生み、Dr. Mundo の高い体力プールを Dr. Mundo 自身に不利に働かせます。Kayn が赤い形態を解放すると、Reaping Slash の割合体力ダメージがあなたの硬さを削り取り、Kayn のパッシブの回復は長引く小競り合いで Maximum Dosage と Heart Zapper のリジェネを簡単に上回ります。
序盤のジャングルのローテーションでは、Infected Bonesaw で Kayn のクリアを遅らせ、crab を確保しながらキャンプを争えます。しかし、Kayn が赤い形態になった瞬間、力関係は完全に変わります。Kayn が Shadow Step で有利な戦いを始め、あなたの大きな体力プールから回復するため、直接の決闘では中立オブジェクトを争うことも自分のジャングルキャンプを守ることもできなくなります。
ビルドの重点を、純粋な体力からすぐに回復阻害とアーマーに切り替え、Kayn の回復を軽減してください。小競り合いでは、Kayn が Umbral Trespass の後にあなたから出る正確な瞬間まで Heart Zapper の起爆を温存し、Kayn が与えた burst ダメージを回復してください。Kayn が Shadow Step でキャンプに侵入してきたら、Blunt Force Trauma の高いダメージでモンスターを素早く確保し、長期戦が始まる前に撤退してください。

パッシブの Goes Where He Pleases は、Warwick の Infinite Duress の suppress を簡単に無効化し、偽りの安心感を与えます。しかし、この matchup は序盤では勝てない消耗戦です。Warwick の ult をブロックしても、Warwick は Jaws of the Beast による絶え間ない回復とパッシブの Eternal Hunger により、長引く決闘ではあなたの Heart Zapper と Infected Bonesaw を sustain で上回ります。
ジャングルでは、この力関係により Scuttle Crab を争ったり序盤に侵入したりできなくなります。中立キャンプを巡って Warwick と戦うと、Warwick の Blood Hunt があなたの Infected Bonesaw による体力コストを追跡し、大きな攻撃速度であなたを狩り殺せます。Warwick の小競り合いの圧力に対抗できないため、安全なクリアに集中せざるを得ず、レーナーは Warwick の優れた序盤の gank 力に苦しみます。
生き残るには、Infected Bonesaw を最大射程から使ってキャンプを確保し、Warwick の近接レンジに入らずに poke してください。起爆で回復できると確信できない限り、序盤に Heart Zapper を発動してはいけません。Warwick が Jaws of the Beast で飛びかかってきても決闘に踏み込まず、代わりに Maximum Dosage を発動してその移動速度の burst でタワーの方へ離脱してください。追い詰められたら、反撃するのではなく、パッシブの canister の拾得で体力を回復して脱出してください。

Dr. Mundo としてのあなたの本質は、体力を積んで Blunt Force Trauma を支え、Maximum Dosage で生き延びることにあります。しかし、Viego の Blade of the Ruined King のパッシブは、現在体力に基づくボーナスダメージを与えることで、この戦略に直接ペナルティを課します。Goes Where He Pleases が Spectral Maw のスタンを吸収しても、Viego の通常攻撃は、あなたが回復するより速く、大きな体力プールを削り取ります。
純粋なステータス勝負の決闘には勝てないため、序盤の川の crab は譲り、ジャングルでの孤立した小競り合いは避けるべきです。Viego が Harrowed Path で接近してきたとき、踏みとどまることはできません。直接オブジェクトを争おうとすると、Viego の攻撃があなたの体力を極めて速く危険域まで削るため、Heartbreaker で簡単に execute され、Viego の Sovereign's Domination のリセット手段になってしまいます。
この matchup を生き残るには、序盤からビルドを純粋な体力アイテムから離し、アーマーと回復減少を優先して Viego の通常攻撃を弱めてください。小競り合いでは距離を保ち、近接戦闘ではなく Infected Bonesaw で Viego を poke してスローをかけましょう。Maximum Dosage を遅すぎるタイミングで使ってはいけません。リジェネが効く前に Heartbreaker で execute されます。Viego が Spectral Maw を外したら、すぐに離脱してください。
パッシブの Goes Where He Pleases は、Jax の Counter Strike のスタンを吸収する確実なシールドとして働きます。しかし、この安全網は避けられない事態を先延ばしにするだけです。Jax が Relentless Assault を積み、パッシブの Grandmaster-at-Arms の魔法ダメージとともに Empower のリセットを織り交ぜ始めると、Jax のハイブリッド DPS があなたの体力プールを完全に上回ります。Jax のスケールには太刀打ちできず、ゲームが進むほど決闘を挑むことは自殺行為に近づきます。
ジャングルでは、Jax は ult を確保すると積極的にオブジェクトを争ってきます。Blunt Force Trauma で素早くキャンプをクリアし、Infected Bonesaw で sustain できますが、孤立した小競り合いで Scuttle Crab や Epic Monster を巡って Jax と安全に戦うことはできません。Jax が Leap Strike で飛びかかってきたら撤退するしかなく、川の圧力を譲り、レーナーは Jax の強力な gank に対して脆い状態になります。
Blunt Force Trauma の範囲ダメージを最大限に活かして、序盤は Jax にファームで勝つことに集中してください。小競り合いでは、Jax が Leap Strike を使った後に Jax にスローをかけるためだけに Infected Bonesaw を温存し、Jax があなたやあなたのバックラインに張り付くのを防ぎます。Heart Zapper と Maximum Dosage を発動して Jax の最初の burst を吸収しますが、Jax の Relentless Assault のスタックがピークに達する前に必ず離脱してください。自分のジャングルで追い詰められたら、負け戦に踏み込まず、Maximum Dosage を守りのために使って逃げてください。

Goes Where He Pleases は Jarvan IV の定番のノックアップコンボを簡単に受け流しますが、Cataclysm の物理的な壁に対しては何の防御にもなりません。Dr. Mundo としてのあなたは自前のダッシュを持たないため、そのアリーナの中に閉じ込められたら、完全に Jarvan IV のなすがままです。飛び出すこともできず、孤立して Jarvan IV の味方に burst されやすくなります。
ジャングルの小競り合いや川の争いでは、この相互作用があなたの動きの自由を大きく制限します。Jarvan IV が ult を使える状態だと、Jarvan IV は即座にあなたをチームから孤立させられるため、Rift Herald や drake のようなオブジェクトを安全に争えません。この脅威により守りの立ち回りを強いられ、序盤の川の優先権を譲ることになり、逃げ道のないまま押さえ込まれる危険があるため、積極的なカウンタージャングルは非常に危険になります。
生き残るには、厳格なポジショニングのルールを守ってください。視界なしで狭い川の隘路に入ってはいけません。距離を保ち、Infected Bonesaw で poke して、Jarvan IV に Cataclysm を守りのために使わせましょう。Jarvan IV に閉じ込められても慌てず、すぐに Heart Zapper を発動して最初の burst ダメージを吸収し、次に Maximum Dosage を発動して集中攻撃の中でリジェネしてください。体力が下がりすぎたときは、Jarvan IV の ult の通れない壁から脱出するために、Flash を必ず温存してください。
その他のマッチアップ
このマッチアップは何よりもまず実行力の勝負であり、両者ともに優位を取れる現実的な手段を持っている。重要なスキルを一つ避けられるか、エンゲージを正しく読めるか、あるいはたった一つの位置取りのミスが、勝敗を分けることもある。マッチアップを理解し、行動すべき瞬間を見極める力がとりわけ重要になる。

どちらのチャンピオンも基本 kit に相手を止めるハード CC を持たないため、この matchup は直接の PvE ファーム勝負になります。Shyvana は Burnout と Twin Bite で素早くキャンプをクリアして Fury of the Dragonborn を積み、Dr. Mundo は Blunt Force Trauma と Infected Bonesaw で Shyvana の速度に並びます。直接の妨害なしに、ピークのアイテムスパイクに先に到達する純粋な競争です。
このファーム速度が、そのままマップの圧力を形作ります。Shyvana は序盤の Elemental Drake を絶えず確保して Dragon's Descent を強化し、パッシブを積もうとします。Shyvana を放置すると、Flame Breath でオブジェクトを溶かされます。ただし、Heart Zapper と Maximum Dosage により Dr. Mundo は安全なので、Shyvana を積極的にカウンタージャングルでき、マップは中立オブジェクトを交換し合う split-map のファーム祭りになります。
テンポを無駄にする早い gank を無理に狙ってはいけません。代わりに Shyvana の Fury を把握し、レーンにワードを置いて Shyvana が Drake に向かうのを察知してください。Shyvana が Dragon's Descent をオブジェクトに使ったとき、人数が足りないなら闇雲に争わず、代わりに Infected Bonesaw を使って Shyvana の反対側のジャングルキャンプを奪うか、Rift Herald を確保してください。終盤の teamfight では、Maximum Dosage と Blunt Force Trauma で Shyvana のダメージを受け切りつつ、Shyvana の動線を塞いでください。

このジャングルのmatchupは、スペル無効化の勝負です。Vi は、Vault Breaker か ultimate の Cease and Desist を当てて戦闘を開始し、拘束を与えることに完全に頼っています。あなたのパッシブ Goes Where He Pleases は、この最初のcrowd controlを完全に吸収し、Vi を近接距離に取り残します。ただし、Vi があなたのcanisterを発動させた場合、彼女のパッシブ Denting Blows が、長引くデュエルであなたのアーマーと最大体力をすぐに削り取ります。
river やスカーミッシュでは、あなたの無効化がどちらがプレッシャーを握るかを左右します。Vi が fog of war からの突然の Vault Breaker に頼れない場合、彼女の gank の可能性は大きく下がります。彼女は Scuttle Crabs を争う前に、あなたのパッシブが使用不可になるのを待たざるを得ません。counter-gank の際に彼女の ultimate の Cease and Desist を防げば、彼女のburstコンボ全体が失敗し、Infected Bonesaw のスローで戦況をひっくり返せます。
パッシブの状態を常に確認してください。Goes Where He Pleases がcooldown中は、中立オブジェクトを絶対に争わないでください。Vi が Vault Breaker をチャージしたら、squishyな味方の前に立ち、安全に受け止めてください。Vi があなたのパッシブを発動させた場合は、すぐにcanisterを拾いに急ぎ、体力を回復してcooldownを短縮してください。彼女の Relentless Force の連打中に Heart Zapper を発動してburstダメージを取り戻し、彼女の機動力が尽きたら Maximum Dosage を使って追い詰めてください。

このジャングルのmatchupは、sustainと移動妨害無効の真っ向勝負です。Hecarim がチャージしてきたとき、Goes Where He Pleases は Devastating Charge のノックバックを完全に吸収し、彼の主要な initiation 能力を奪います。ただし、相手を簡単にburstで倒すことはできません。Hecarim は Spirit of Dread で、近接距離のスカーミッシュで大量の体力を吸収し、あなた自身の自然回復に対抗します。
両チャンピオンともキャンプの処理が非常に速いため、このmatchupはすぐにマップ全体でのスカーミッシュ競争へと発展します。Hecarim は序盤の gank の確保に Devastating Charge を頼りますが、あなたはこの移動妨害を無視できるため、頼れる counter-ganker になります。river で衝突した場合、Infected Bonesaw が Hecarim を減速させ、彼のパッシブのダメージ成長を抑えますが、Spirit of Dread のおかげで彼はオブジェクトを争える程度の体力を保てます。
スカーミッシュに勝つには、Goes Where He Pleases が有効なときに、味方のために Hecarim の Devastating Charge を積極的にbody-blockし、彼の主力技を無駄にさせてください。Infected Bonesaw で距離を保ち、移動速度を落としてパッシブのダメージを弱めましょう。Hecarim が Onslaught of Shadows で仕掛けて Spirit of Dread を発動したら、いったん離脱して回復エリアが消えるのを待ち、その後 Maximum Dosage と Blunt Force Trauma で叩き潰してください。
このジャングルのmatchupは、体力プールの管理で決まる消耗戦です。あなたのパッシブ Goes Where He Pleases は、Volibear の Thundering Smash を完全に無効化し、彼の主要なgankとデュエルの手段を封じます。ただし、Volibear は Frenzied Maul で継続的に回復し、あなた自身の自然回復に匹敵するため、簡単にburstで倒すことはできません。スカーミッシュは、どちらも素早く倒しきれない長引くデュエルになります。
両チャンピオンとも粘り強さが非常に高いため、中立オブジェクトの争いやジャングルでのスカーミッシュは非常に長引きます。Volibear は river で長いtradeを強要しようとし、Frenzied Maul であなたの Infected Bonesaw のpokeに打ち勝とうとします。あなたにマークを付けて2回目の噛みつきを当てられると、Volibear がtradeに勝ちます。この体力バーの応酬が続くと、マップ上の動きが遅れ、どちらにとっても素早く決定的な gank が難しくなります。
形勢を傾けるには、Volibear の Frenzied Maul のインジケーターを見てください。最初の噛みつきでマークを付けられたら、すぐに Infected Bonesaw のスローを使って離脱し、Volibear が再び噛みつく前にマークを消してください。回復する噛みつきがcooldown中のときだけ、Heart Zapper を使ってフルデュエルを仕掛けてください。Volibear が Thundering Smash であなたの Goes Where He Pleases を発動させたら、canisterを踏んで体力を回復し、パッシブのcooldownを短縮することを優先してください。

このmatchupは、重要な仕組み上の制約で決まります。Dr. Mundo にはhard crowd controlがなく、Fiddlesticks の Bountiful Harvest を中断できません。Infected Bonesaw と Blunt Force Trauma で Fiddlesticks の体力をごっそり削れますが、Fiddlesticks はあなたのダメージを吸収しながら簡単に耐えます。Goes Where He Pleases は彼の Terrify を無効化できますが、チャネリングを止める手段がないため、大量の回復を持つ彼に対して solo kill を取ることはできません。
ジャングルでは、この真っ向からの膠着状態により、焦点は完全にオブジェクトの速度とマップ上の存在感に移ります。どちらも直接のデュエルで相手を簡単に倒せないため、クリアはマッププレッシャーを確保する競争になります。Fiddlesticks は Crowstorm であなたのチームを奇襲しようとします。一方あなたは、Heart Zapper と Maximum Dosage の継続回復を活かし、彼が ultimate をチャネリングする前に drakes と heralds を確保しなければなりません。
オブジェクトを争うときは、Bountiful Harvest が使用可能な Fiddlesticks に絶対に直接engageしないでください。代わりに、Crowstorm の仕込みを防ぐため、茂みから追い出すことに集中してください。A Harmless Scarecrow が潜んでいるかもしれない暗い茂みは、Infected Bonesaw で確認してください。オブジェクト戦が始まったら、Maximum Dosage を取っておいて彼の最初のburstを吸収し、彼の進路をbody-blockする位置取りをして、キャリーではなくあなたに対してドレインを無駄に使わせてください。

このジャングルのデュエルは、たった1つのパッシブにあなたの生存力がかかった、純粋な地力の勝負です。Xin Zhao は序盤のデュエル性能に大きく頼り、Audacious Charge で戦いを強要し、Three Talon Strike の3発目であなたをノックアップしようとします。しかし、Goes Where He Pleases はこの重要なノックアップを完全に無効化します。Xin Zhao はあなたのダメージの流れを簡単に妨害できないため、勝負は体力プールの地力比べのままになります。
どちらのjunglerも相手を簡単に倒せないため、Scuttle Crabs や中立オブジェクトをめぐる序盤のスカーミッシュは長引く殴り合いになります。パッシブのcanisterを温存していれば、Xin Zhao はあなたへのinvadeからsnowballできません。つまり、お互いにジャングルでの衝突を低い体力で終えることが多く、すぐにマッププレッシャーをかける代わりに、頻繁なrecallを強いられます。この膠着状態のため、どちらも簡単にlaneへdiveできず、序盤はfarmingの競争になります。
Xin Zhao が Audacious Charge で飛びかかってきても、慌てないでください。Xin Zhao の通常攻撃を追い続け、Three Talon Strike があなたの Goes Where He Pleases を発動させたらすぐに、Xin Zhao の位置の上を歩いて化学canisterを拾ってください。この回復と、burstを吸収する Heart Zapper を組み合わせることで、体力面で優位に立てます。Xin Zhao が先に Wind Becomes Lightning を当ててあなたにマークを付けた場合は、Infected Bonesaw で減速させ、安全な方向へ離脱してください。

このジャングルの対決は、純粋なマップテンポの競争です。あなたのパッシブ Goes Where He Pleases は、Nunu の主要なgank手段に対する究極の盾であり、Biggest Snowball Ever! の大きなノックアップを完全に吸収します。ただし、Nunu のgankは受け流せても、Nunu は Consume が確定true damageのburstを与えるため、あなたの Infected Bonesaw と Smite の組み合わせを簡単に上回り、エピックモンスターが争われるエリアを支配します。
Nunu の snowball gank の中を歩き抜けられるため、Nunu はあなたを簡単にinvadeしたり、river での1v1のスカーミッシュで拘束したりできません。しかし、これによりオブジェクトをめぐる高プレッシャーな競争が生まれます。Nunu は序盤から Baron や Dragon を急ぎ、Consume で即座に確保します。気づかないうちに Nunu にこれらのエピックモンスターを始められると、最後の一撃を争えなくなり、オブジェクトをひっくり返す代わりに、マップの反対側と交換するか、別の場所でlaneにプレッシャーをかけることになります。
このテンポ争いに勝つには、Infected Bonesaw で river の茂みを常に偵察し、Nunu が奇襲でオブジェクトを始めるのを防がなければなりません。オブジェクト戦が始まったら、Consume に対して out-smite しようとしないでください。代わりに、Nunu に向かって真っすぐ走って Heart Zapper を発動させ、Blunt Force Trauma を使い、その大きな体力プールで Nunu をピットから遠ざけてください。Nunu が Absolute Zero をチャネリングしたら、Maximum Dosage を使ってburstを上回る回復をしながら、追い詰め続けてください。
その他のマッチアップ
これらのチャンピオンは、こちらの主要な強みに効果的に対応するのが難しく、より自由に対面を組み立てることができる。プレッシャーをかけて有利な交換を引き出す手段は複数あることが多い。相手が態勢を立て直す時間を与えるのではなく、この優位を活かして主導権を握ろう。

Pantheon は積極的なgankで序盤をsnowballさせることを得意としていますが、あなたを拘束する主要な手段である Shield Vault は、Goes Where He Pleases によって完全に無効化されます。スタンを吸収することで、Mortal Will と Comet Spear によるburstの布石を封じられます。試合が進むにつれて、あなたの自然なスケーリングによってあなたは倒せない juggernaut になり、Pantheon のassassinとしてのburstがあなたの大きな体力プールに通用しなくなるにつれて、パワー差は広がります。
Pantheon は river であなたを簡単に拘束できないため、序盤のジャングルへのinvadeや scuttle crab の争いの脅威は薄れます。Pantheon が Grand Starfall でリスクの高いgankを強行しようとしても、あなたは安全にキャンプをpower-farmし、大きなゴールドリードを確保できます。あなたの体力回復のおかげで、チームが崩れる前にburstで倒すことは不可能なため、Pantheon がcounter-gankを試みても裏目に出ます。
ジャングルをスピードクリアすることに集中し、ultimate の Maximum Dosage にできるだけ早く到達してください。オブジェクトを争うときは前線に立って Pantheon の Shield Vault を誘い、パッシブが使用可能で吸収できるようにしてください。Pantheon があなたのダメージを防ぐために Aegis Assault を使ったら、すぐに Pantheon の背後に歩くか Infected Bonesaw を投げて、シールドが切れるときに減速させ、その後 Heart Zapper と Blunt Force Trauma を発動して追い詰めてください。

このジャングルのmatchupは、たった1つの大きな相互作用で決まります。Skarner は ultimate の Impale でターゲットを位置からドラッグすることに大きく頼っていますが、あなたのパッシブ Goes Where He Pleases は、このsuppressionを完全に吸収します。pickを確保しteamfightを始めるための主要な手段が、あなたの生まれつきのcrowd control無効によって完全に無力化されるため、Skarner は主要な勝ち筋を失い、スカーミッシュであなたを抑え込めません。
この無効化は、オブジェクト戦と river でのスカーミッシュを根本的に変えます。Skarner は、エピックモンスターからあなたを安全にpeelしたり、laner のためにあなたを拘束したりできません。Ixtal's Impact と Impale を無視できるため、Skarner のキャンプに自由にinvadeし、Skarner の領域の奥深くまで歩いて入れます。Skarner は ultimate を温存するか、あなたの味方に無駄撃ちするしかなくなり、あなたのlaneに大きなプレッシャーを与えます。
中立オブジェクトの争いでは、Skarner とsquishyなキャリーの間に、人間の盾として立ってください。Skarner の Shattered Earth / Upheaval の飛び道具を避けて Goes Where He Pleases を有効に保ち、パッシブが Impale を吸収できる状態にしておいてください。うっかりcanisterを失ったら、すぐに下がって回収するか、パッシブが戻るまで Heart Zapper を使って、Skarner の Shattered Earth / Upheaval と Seismic Bastion のburstを吸収してください。

Evelynn は Allure のcharmに完全に頼り、あなたの魔法防御を削って高burstのコンボのためにあなたを拘束します。Goes Where He Pleases がこのcrowd control効果を自動的にブロックするため、Evelynn の暗殺の試みはすべて失敗します。最初のcrowd controlがなければ、Evelynn はフルローテーションを安全に実行できず、あなたは最初のダメージを吸収して反撃でき、一方 Evelynn にはあなたの大きな体力バーをburstで削る手段がありません。
この相互作用は、ジャングルの力関係を完全にあなたに有利に変え、捕まる心配なく Evelynn のキャンプにinvadeできます。Evelynn があなたの laner に gank を仕掛けようとしても、主要なcrowd controlがあなたには無効だとわかっているので、自信を持ってcounter-gankできます。これにより、Evelynn が切実に必要とする序盤のsnowballを防ぎ、Evelynn は守りのプレイを強いられ、あなたのlaneは Evelynn のステルスによるプレッシャーから完全に解放されます。
これを活かすには、Evelynn があなたのパッシブによる防御を突破できないとわかっているので、序盤から積極的に純粋な魔法防御と体力のアイテムを選んでください。Evelynn のジャングルで追うときは、Evelynn のマークを追跡し、わざと前に出て Goes Where He Pleases で Allure を発動させてください。Evelynn のcharmが無駄になったら、すぐに Infected Bonesaw で減速させ、Heart Zapper を発動して張り付き、容赦ない追跡から逃れるために Last Caress を守りのために無駄撃ちさせてください。

このジャングルのmatchupは、Goes Where He Pleases が Gragas の主要なdisengage手段である Explosive Cask を完全に無効化するかどうかにかかっています。Gragas がチームをpeelするため、または自分を助けるために ultimate であなたを吹き飛ばそうとしても、あなたのパッシブがその移動を完全に吸収します。これにより、主要なcrowd controlを受け流して、得意のpeelを失って無防備になった Gragas を追い詰められます。
river 周辺での激しいスカーミッシュや counter-gank では、この相互作用により Gragas は安全策を失います。あなたの無効状態が Explosive Cask の奪取を防ぐため、Gragas はオブジェクトを簡単に確保したり、あなたをピットから押し出したりできません。Gragas の Body Slam に対処できれば、Gragas は近距離の追跡から安全にdisengageできないとわかっているので、Gragas の領域に常にinvadeし、直接のデュエルを強要し、laneにプレッシャーをかけられます。
これを完璧に実行するには、gank中は Gragas と逃走経路の間に位置取りしてください。engageする前に Goes Where He Pleases のシールドを有効にしておいてください。Gragas が Body Slam で早めにそれを発動させようとしたら、避けるか発動させてかまいませんが、Explosive Cask をくぐり抜ける体力プールがあることを確認してください。パッシブが使用不可の場合は、少し後ろに下がり、無効化が復活するまで Infected Bonesaw でpokeしてから、深くdiveしてください。

Lee Sin は pick を作ることとターゲットの孤立に完全に頼っていますが、あなたのパッシブ Goes Where He Pleases は、彼の主要なプレイメイク手段 Dragon's Rage を完全に無効化します。Lee Sin が得意の Safeguard のキックであなたを味方のいる方へ飛ばそうとしても、あなたのパッシブがノックバックを吸収します。Lee Sin はあなたを移動させられず ultimate も無駄になるため、Infected Bonesaw のスローで簡単に追い詰められます。
この相互作用は、オブジェクトをめぐるスカーミッシュを大きくあなたに有利にします。Lee Sin はあなたを引き離せないので、中立モンスターを安全に争えません。Lee Sin がオブジェクトを奪う、または確保しようとしても、あなたの存在が彼の退路をふさぎます。ジャングルでのスカーミッシュでは、Lee Sin はあなたを蹴り飛ばせないので、あなたは彼に張り付き続けられ、彼は角度を探して攻めるためではなく、守りのために Safeguard を使わざるを得なくなります。
Lee Sin とあなたの無防備な味方の間に立って、Lee Sin のengageを積極的に誘ってください。オブジェクトを争う前に、パッシブの Goes Where He Pleases を有効にしておいてください。Lee Sin に Sonic Wave を当てられても慌てず、彼にdashさせて Dragon's Rage を吸収し、すぐに Heart Zapper と Blunt Force Trauma を発動してtradeし返してください。パッシブが使用不可の場合は、canisterを拾ってcrowd control無効を取り戻せるまで少し後ろに下がってください。

Ekko は、Phase Dive と Timewinder を使った素早いburstループで、Z-Drive Resonance を発動させることに頼っています。しかし、この魔法ダメージのパターンは、あなたの大きな自然体力プールの前では全く通用しません。さらに、あなたのパッシブ Goes Where He Pleases は、Parallel Convergence という Ekko の唯一のhard crowd controlを完全に無効化するため、Ekko にはあなたに追い詰められる前に拘束する手段がありません。
ジャングルでは、この力関係により、恐れることなく Ekko のキャンプに積極的にinvadeし、両方の Scuttle Crabs を争えます。Blunt Force Trauma を手にした後は、Ekko はあなたのクリア速度に太刀打ちできず、river での直接のデュエルはどれも Ekko にとって遅かれ早かれ避けられない敗北になります。Ekko にジャングルの優先権を手放させ、序盤の得意なスカーミッシュからあなたの laner を守れます。
Ekko のスケーリングを完全に封じるため、序盤から Magic Resist のアイテムを優先して急いでください。スカーミッシュでは Infected Bonesaw を当てて、Ekko があなたの周りを踊るように動き回るのを防ぎ、Ekko がフルローテーションを仕掛けてきた瞬間のために Maximum Dosage を取っておいてください。Ekko が Chronobreak で逃げる、または戦況を覆そうとしたら、Heart Zapper を有効にしたまま Ekko の影の範囲から歩いて出て、遅延ダメージを回復してください。

Maokai はスカーミッシュを支配するために重いcrowd controlに完全に頼っているため、このジャングルのmatchupは大きくあなたに有利です。Maokai の主要なengage手段である Twisted Advance と Nature's Grasp は、あなたのパッシブ Goes Where He Pleases に完全に対策されています。拘束される代わりに、最初のrootを吸収し、canisterを落として回復し、すぐに Infected Bonesaw で一方的な追撃へと戦況を変えられます。
序盤の river でのスカーミッシュやオブジェクトの争いでは、Maokai はあなたの前進を止められません。Maokai は味方からあなたをpeelできないので、Bramble Smash を無視して敵のbacklineに直接歩いて入れます。この防御面の脅威の欠如により、Maokai のキャンプに積極的にinvadeし、Scuttle Crabs 周辺で戦いを強要できます。長引くスカーミッシュの消耗戦では、あなたが必ず勝つとわかっているからです。
スカーミッシュを始めるときは、Maokai に向かって自信を持って歩き、Twisted Advance を誘ってください。Goes Where He Pleases がrootを防いだら、すぐにcanisterを拾ってcooldownをリセットしてください。すぐに Heart Zapper を発動して Maokai の反撃の Bramble Smash を吸収し、Blunt Force Trauma で反撃してください。Infected Bonesaw は Maokai の味方が逃げようとするときのために取っておき、Maximum Dosage を使って、お咎めなしで敵のbacklineを追い詰めてください。

Goes Where He Pleases が Nocturne の主要なデュエル手段 Unspeakable Horror を完全に無効化するため、このmatchupは大きくあなたに有利です。Nocturne があなたを繋いでフィアーさせようとしても、あなたのパッシブがcrowd controlを吸収し、Nocturne には通常攻撃しか残りません。あなたの追撃を止めるhard crowd controlがなければ、Nocturne はあなたの継続ダメージに対して out-skirmish できず、危険なassassinも river のデュエルでは簡単な標的になります。
ジャングルのペースはあなたが握ります。孤立して倒される心配なく、Nocturne のキャンプに積極的にinvadeしたり、Scuttle Crabs を争ったりできます。Nocturne が Paranoia を使ってあなたの laner にdiveしてきたら、自信を持って counter-gank するか、Nocturne の反対側のジャングルにinvadeできます。Nocturne はあなたを拘束できないので、彼の領域で常にプレッシャーをかけ続けられ、Nocturne は狩りではなく守りのfarmを強いられます。
戦いを始める前に、必ず Goes Where He Pleases の状態を確認してください。パッシブが使用不可の場合は、戻るまでより安全にプレイしてください。engageするときは、Nocturne の Shroud of Darkness が有効な間は、すぐに Infected Bonesaw を投げないでください。Nocturne にブロックされて attack speed を得られてしまいます。代わりに Heart Zapper と Blunt Force Trauma で追い詰めて Nocturne のシールドを吐かせ、その後、スローがかかった cleaver と Maximum Dosage で kill を確保してください。

Rammus の主要なcrowd control Frenzying Taunt は、あなたのパッシブ Goes Where He Pleases に即座に吸収されるため、Rammus を完全に封じ込められます。Rammus は Rolling Armordillo でダメージを上げるために大量のアーマーを積みますが、あなたの Infected Bonesaw は Rammus の現在の体力に基づく大きな魔法ダメージを与え、防御面のスケーリングを完全に無視します。Rammus が Defensive Ball Curl を発動しても、魔法ダメージが Rammus を削り取り、パッシブによってあなたは Rammus のengageに対して無効のままです。
この相互作用により、Rammus のジャングルに積極的にinvadeし、river で Scuttle Crabs をめぐるスカーミッシュを強要できます。Rammus は crowd control なしではあなたを脅かすダメージがないため、単独ではあなたと争えません。Rammus が Powerball で逃げようとしたら、進路をふさぐか Infected Bonesaw で減速させて、ジャングルに閉じ込め、gank を見つけさせないようにできます。
Rammus と戦うときは、Rammus が Defensive Ball Curl を発動するのを待ってから Heart Zapper を使ってください。そうすれば、Rammus があなたに与える反射ダメージを回復できます。Goes Where He Pleases が落とした化学canisterは必ず歩いて拾い、パッシブのcooldownをリセットしてください。Rammus が Powerball で逃げようとしたら、Infected Bonesaw を投げて勢いを止め、Blunt Force Trauma で距離を詰め、安全圏に届く前に仕留めてください。
Mordekaiser は優先度の高い標的を閉じ込めることに頼っていますが、Dr. Mundo のパッシブ Goes Where He Pleases は Realm of Death を完全にブロックします。Mordekaiser はあなたを自分のアリーナに引きずり込む代わりに、あなたのcanisterを発動させるだけで、ultimate は無駄になり、その間あなたは体力を回復します。この相互作用により、Mordekaiser のteamfightでの有用性はすべて失われます。主要な手段を無駄にしない限り、あなたを孤立させることも、あなたをすり抜けてあなたのbacklineに届くこともできないからです。
ジャングルでは、この相互作用によりスカーミッシュの優位は完全にあなた側に移ります。Mordekaiser は中立オブジェクトの争いであなたを追放できないので、安全に前線に立てます。Infected Bonesaw で射程外から Mordekaiser をpokeでき、Mordekaiser があなたを閉じ込められないため、簡単な Smite 勝負も確保できません。Mordekaiser は ultimate を温存するか、あまり適さない標的に使うしかなく、チームのzoning戦略は台無しになります。
オブジェクトを争うとき、または river のスカーミッシュに入るときは、常に Goes Where He Pleases を有効にしておいてください。Mordekaiser が Death's Grasp であなたを引き寄せようとしたら、わざとその中に踏み込んで彼のチームの追撃を誘い、すぐにcanisterを拾ってcooldownをリセットしてください。Mordekaiser が Realm of Death をあなたのパッシブに無駄撃ちしたら、Maximum Dosage と Heart Zapper を発動して追い詰め、Blunt Force Trauma で Mordekaiser の機動力の低さを突いてください。
その他のマッチアップ
これらのアイテムを購入すると、このチャンピオンの影響力を抑えられます。




| マッチアップ | 判定 | 有利度 | 勝率 | ピック率 |
|---|---|---|---|---|
| Vayne | ハードカウンター | +3 | 52.1% | 1.7% |
| Gwen | ハードカウンター | +3 | 50.5% | 3.4% |
| Fiora | ハードカウンター | +3 | 50.4% | 3.7% |
| Olaf | ハードカウンター | +2 | 52.0% | 1.0% |
| Mordekaiser | ハードカウンター | +2 | 51.3% | 11.5% |
| Kayle | ハードカウンター | +2 | 50.2% | 2.1% |
| Ambessa | 不利なマッチアップ | +1 | 52.7% | 1.7% |
| K'Santé | 不利なマッチアップ | +1 | 51.4% | 7.4% |
| Sett | 不利なマッチアップ | +1 | 50.4% | 8.3% |
| Yone | 不利なマッチアップ | +1 | 50.4% | 5.9% |
| Gnar | 不利なマッチアップ | +1 | 50.0% | 3.3% |
| Aatrox | 不利なマッチアップ | +1 | 49.6% | 7.0% |
| Darius | 不利なマッチアップ | +1 | 49.5% | 14.8% |
| Camille | 不利なマッチアップ | +1 | 48.9% | 2.1% |
| Urgot | 不利なマッチアップ | +1 | 48.9% | 3.8% |
| Garen | 不利なマッチアップ | +1 | 48.7% | 12.1% |
| Irelia | 不利なマッチアップ | +1 | 48.5% | 1.4% |
| Volibear | 不利なマッチアップ | +1 | 48.2% | 8.7% |
| Rumble | 不利なマッチアップ | +1 | 48.1% | 1.9% |
| Nasus | 不利なマッチアップ | +1 | 46.4% | 5.6% |
| Tryndamere | 不利なマッチアップ | +1 | 45.9% | 2.5% |
| Yasuo | 不利なマッチアップ | +1 | 45.5% | 1.8% |
| Graves | 不利なマッチアップ | +1 | — | — |
| Heimerdinger | 不利なマッチアップ | +1 | — | — |
| Swain | 不利なマッチアップ | +1 | — | — |
| Warwick | 不利なマッチアップ | +1 | — | — |
| Shen | スキル次第のマッチアップ | ±0 | 54.9% | 2.9% |
| Ornn | スキル次第のマッチアップ | ±0 | 51.1% | 1.9% |
| Jax | スキル次第のマッチアップ | ±0 | 50.6% | 3.6% |
| Riven | スキル次第のマッチアップ | ±0 | 50.3% | 1.7% |
| Wukong | スキル次第のマッチアップ | ±0 | 50.1% | 1.6% |
| Vladimir | スキル次第のマッチアップ | ±0 | 48.7% | 1.0% |
| Akali | スキル次第のマッチアップ | ±0 | — | — |
| Gragas | スキル次第のマッチアップ | ±0 | — | — |
| Teemo | 有利なマッチアップ | −1 | 53.4% | 4.9% |
| Kennen | 有利なマッチアップ | −1 | 50.5% | 2.5% |
| Jayce | 有利なマッチアップ | −1 | 50.2% | 4.8% |
| Cho'Gath | 有利なマッチアップ | −1 | 50.1% | 9.0% |
| Sion | 有利なマッチアップ | −1 | 49.9% | 2.5% |
| Renekton | 有利なマッチアップ | −1 | 48.7% | 3.1% |
| Jarvan IV | 有利なマッチアップ | −1 | — | — |
| Pantheon | 有利なマッチアップ | −1 | — | — |
| Ryze | 有利なマッチアップ | −1 | — | — |
| Malphite | 有利なマッチアップ | −2 | 54.2% | 8.2% |
| Singed | 有利なマッチアップ | −2 | 51.5% | 1.3% |
| Poppy | 有利なマッチアップ | −2 | 49.4% | 1.8% |
| Maokai | 有利なマッチアップ | −2 | — | — |
| Skarner | 有利なマッチアップ | −2 | — | — |
有利度:Wild Rift Coreの公式判定(−3〜+3)で、各行に記載されたチャンピオンの視点から見た値です。勝率とピック率:このロールにおける相手チャンピオン自身の数値 — Wild Rift CN · Challenger、Patch 7.3c。直接対決の勝率ではありません。
| マッチアップ | 判定 | 有利度 | 勝率 | ピック率 |
|---|---|---|---|---|
| Lillia | ハードカウンター | +2 | 53.3% | 3.0% |
| Gwen | ハードカウンター | +2 | 52.8% | 2.6% |
| Olaf | ハードカウンター | +2 | 51.8% | 1.8% |
| Kindred | ハードカウンター | +2 | 50.7% | 2.4% |
| Master Yi | ハードカウンター | +2 | 48.0% | 9.8% |
| Jarvan IV | 不利なマッチアップ | +1 | 52.4% | 7.3% |
| Kayn | 不利なマッチアップ | +1 | 51.6% | 6.9% |
| Warwick | 不利なマッチアップ | +1 | 51.0% | 2.0% |
| Darius | 不利なマッチアップ | +1 | 50.4% | 6.5% |
| Jax | 不利なマッチアップ | +1 | 49.8% | 1.9% |
| Tryndamere | 不利なマッチアップ | +1 | 48.8% | 8.6% |
| Yone | 不利なマッチアップ | +1 | 48.7% | 2.7% |
| Graves | 不利なマッチアップ | +1 | 47.9% | 7.3% |
| Viego | 不利なマッチアップ | +1 | 46.3% | 4.2% |
| Nilah | 不利なマッチアップ | +1 | — | — |
| Shen | スキル次第のマッチアップ | ±0 | 54.9% | 1.4% |
| Nunu & Willump | スキル次第のマッチアップ | ±0 | 53.1% | 1.9% |
| Fiddlesticks | スキル次第のマッチアップ | ±0 | 51.6% | 1.8% |
| Cho'Gath | スキル次第のマッチアップ | ±0 | 50.7% | 8.3% |
| Xin Zhao | スキル次第のマッチアップ | ±0 | 50.6% | 9.0% |
| Nidalee | スキル次第のマッチアップ | ±0 | 50.1% | 2.3% |
| Hecarim | スキル次第のマッチアップ | ±0 | 49.6% | 1.8% |
| Vi | スキル次第のマッチアップ | ±0 | 49.0% | 4.8% |
| Riven | スキル次第のマッチアップ | ±0 | 48.6% | 1.3% |
| Volibear | スキル次第のマッチアップ | ±0 | 48.4% | 4.5% |
| Twitch | スキル次第のマッチアップ | ±0 | 46.8% | 2.1% |
| Shyvana | スキル次第のマッチアップ | ±0 | 45.2% | 2.8% |
| Camille | スキル次第のマッチアップ | ±0 | — | — |
| Amumu | 有利なマッチアップ | −1 | 56.5% | 2.7% |
| Ekko | 有利なマッチアップ | −1 | 54.0% | 7.3% |
| Skarner | 有利なマッチアップ | −1 | 53.9% | 1.6% |
| Nocturne | 有利なマッチアップ | −1 | 52.5% | 6.6% |
| Zed | 有利なマッチアップ | −1 | 51.4% | 2.6% |
| Pantheon | 有利なマッチアップ | −1 | 51.0% | 6.1% |
| Diana | 有利なマッチアップ | −1 | 50.3% | 1.4% |
| Kha'Zix | 有利なマッチアップ | −1 | 50.1% | 5.3% |
| Talon | 有利なマッチアップ | −1 | 50.0% | 3.0% |
| Wukong | 有利なマッチアップ | −1 | 49.6% | 3.4% |
| Rengar | 有利なマッチアップ | −1 | 48.8% | 2.2% |
| Evelynn | 有利なマッチアップ | −1 | 48.7% | 2.0% |
| Fizz | 有利なマッチアップ | −1 | 48.5% | 1.8% |
| Lee Sin | 有利なマッチアップ | −1 | 46.9% | 12.4% |
| Aatrox | 有利なマッチアップ | −1 | 44.9% | 1.1% |
| Gragas | 有利なマッチアップ | −1 | — | — |
| Maokai | 有利なマッチアップ | −1 | — | — |
| Mordekaiser | 有利なマッチアップ | −1 | — | — |
| Poppy | 有利なマッチアップ | −1 | — | — |
| Rammus | 有利なマッチアップ | −2 | 55.3% | 4.6% |
| Morgana | 有利なマッチアップ | −2 | — | — |
| Nautilus | 有利なマッチアップ | −2 | — | — |
有利度:Wild Rift Coreの公式判定(−3〜+3)で、各行に記載されたチャンピオンの視点から見た値です。勝率とピック率:このロールにおける相手チャンピオン自身の数値 — Wild Rift CN · Challenger、Patch 7.3c。直接対決の勝率ではありません。
ムンドーのカウンターはダメージだけでなく、彼の回復サイクルを断ち切ること。常にプレッシャーをかけられるチャンピオン、アンチヒール、そして彼の強みが出る前に叩ける相手は非常に厄介だ。マッチアップがなぜ難しいのかを理解すれば、立ち回りを調整できる。ムンドーは無理なプレイを避けさえすれば、多くの状況を生き延びられるからだ。
メタは序盤に叩けるチャンピオンや、常にプレッシャーをかけられるチャンピオンを有利にする。ムンドーは即座に対処する手段が少ないため、こうしたタイプの相手に苦戦する。彼はアイテムで安定させる必要がある。このタイミングを理解している相手は、彼が脅威になる前に決定的なアドバンテージを作り出せる。
Vayneはムンドーのタンク性能を無視するため、構造的なカウンターだ。彼女の最大HP比例ダメージとカイト能力は、うまくポジショニングされればファイトを不可能にする。問題はレーンだけでなく、集団戦で彼女に脅威を与えられないことだ。
Vayneは最大HP比例ダメージと機動力でタンクの常識を覆す。ムンドーは彼女を簡単に捕まえたり、ダメージを効果的に軽減したりできない。たとえ生き残ったとしても、彼女に脅威を与えることができず、集団戦で無力になる。