S+
2026年9月 · Patch 7.2d
Assassin · MID · JUNGLE

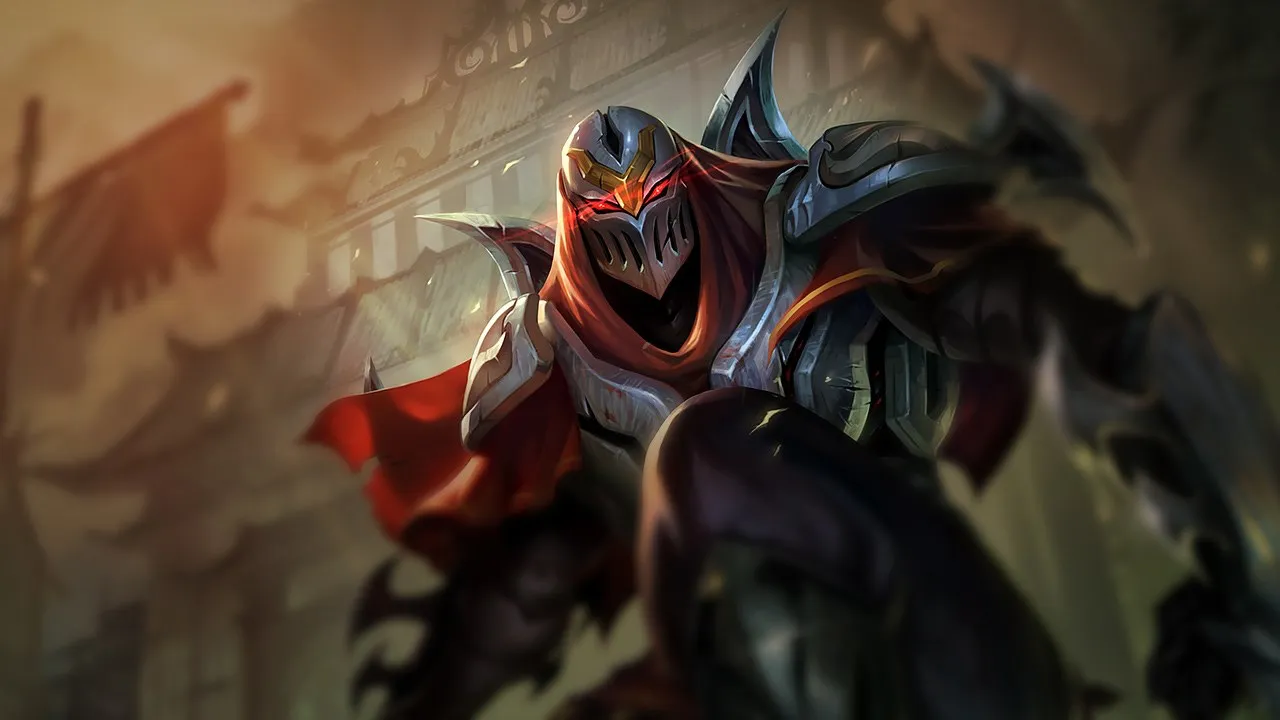
Zed Wild Rift カウンターガイド

Zedは、自身のキル性能を無効化するinvulnerabilityshieldを持つキャリーに対して苦戦します。高sustainanti-death効果は、彼の暗殺の影響力を低下させます。ロームエリアでの優れたvisionは、pickの機会を減少させます。

★ MID · JUNGLE Tier S+
ダメージ
UTIL
TANK
DIFF
Win 48.9% #65 · ↓5pt
Pick 3.8% #19
Ban 1.6% #75

Zed Wild Rift カウンターガイド ★ カウンターシート

マッチアップ一覧
マッチアップ 判定 有利度 勝率 ピック率
Lissandra ハードカウンター +2 48.8% 4.1%
Malphite ハードカウンター +2
Pantheon ハードカウンター +2
Swain 不利なマッチアップ +1 52.8% 4.6%
Vladimir 不利なマッチアップ +1 49.4% 4.9%
Annie 不利なマッチアップ +1 49.3% 2.2%
Cho'Gath 不利なマッチアップ +1
Gragas 不利なマッチアップ +1
Irelia 不利なマッチアップ +1
Karma 不利なマッチアップ +1
Rumble 不利なマッチアップ +1
Tristana 不利なマッチアップ +1
Zilean 不利なマッチアップ +1
Taliyah スキル次第のマッチアップ ±0 51.9% 2.8%
Yone スキル次第のマッチアップ ±0 51.8% 5.3%
Akshan スキル次第のマッチアップ ±0 51.5% 1.1%
Ahri スキル次第のマッチアップ ±0 51.5% 5.1%
Ekko スキル次第のマッチアップ ±0 50.5% 2.9%
Aurora スキル次第のマッチアップ ±0 49.8% 3.8%
Kennen スキル次第のマッチアップ ±0 49.6% 1.5%
Yasuo スキル次第のマッチアップ ±0 48.9% 10.8%
Ryze スキル次第のマッチアップ ±0 48.8% 2.9%
Diana スキル次第のマッチアップ ±0 48.7% 1.4%
Fizz スキル次第のマッチアップ ±0 48.6% 2.0%
Vex スキル次第のマッチアップ ±0 48.6% 2.2%
Akali スキル次第のマッチアップ ±0 45.0% 2.5%
Kayle スキル次第のマッチアップ ±0
Lucian スキル次第のマッチアップ ±0
Zyra 有利なマッチアップ −1 51.6% 2.9%
Morgana 有利なマッチアップ −1 51.2% 6.1%
Orianna 有利なマッチアップ −1 50.8% 4.9%
Viktor 有利なマッチアップ −1 50.5% 3.5%
Corki 有利なマッチアップ −1
Kai'Sa 有利なマッチアップ −1
Syndra 有利なマッチアップ −2 53.3% 13.3%
Twisted Fate 有利なマッチアップ −2 52.5% 6.8%
Brand 有利なマッチアップ −2 52.0% 9.4%
Teemo 有利なマッチアップ −2 50.8% 1.6%
Vel'Koz 有利なマッチアップ −2 50.6% 3.5%
Aurelion Sol 有利なマッチアップ −2 50.2% 6.8%
Kassadin 有利なマッチアップ −2 50.1% 1.5%
Lux 有利なマッチアップ −2 48.7% 5.6%
Ziggs 有利なマッチアップ −2 48.2% 5.9%
Veigar 有利なマッチアップ −2 47.4% 9.4%
Mel 有利なマッチアップ −2 46.3% 7.9%
Seraphine 有利なマッチアップ −2
Varus 有利なマッチアップ −2
Norra 有利なマッチアップ −3 50.5% 1.5%

Edge: Wild Rift Core canonical verdict (−3 to +3), shown from the point of view of the champion named in the row. Win rate and pick rate: the opponent's own rate in this role — Wild Rift CN · Challenger, Patch 7.2d. Not a head-to-head win rate.

ハードカウンター

3

これらのチャンピオンは、こちらのビルドやプレイスタイルを真正面から上回る構成を持ち、レーン戦のコントロールとファームを極めて難しくする。彼らのスキルはこちらの主要な強みを無効化し、いつも通りのプランを実行しようとした瞬間に手痛い反撃を受けさせてくる。こうしたマッチアップでは、ミスを最小限に抑え、正面からの対決以外で解決策を探すことが重要になる。

Malphite

Malphite+2

ad counterburst negation Zed's reliance on physical burst is completely neutralized by Malphite's structural design. His high base armor, bolstered by the passive armor multiplier of Thunderclap, renders him virtually immune to the delayed pop of Death Mark. Even if you land multiple Razor Shuriken and Shadow Slash strikes during your ultimate window, his Granite Shield absorbs the initial impact, severely mitigating the final mark trigger. Malphiteのビルド → 詳細を見る
Malphite

理由

Zed's reliance on physical burst is completely neutralized by Malphite's structural design. His high base armor, bolstered by the passive armor multiplier of Thunderclap, renders him virtually immune to the delayed pop of Death Mark. Even if you land multiple Razor Shuriken and Shadow Slash strikes during your ultimate window, his Granite Shield absorbs the initial impact, severely mitigating the final mark trigger.

レーン戦への影響

Trading with Malphite is a losing battle. He will shrug off your Living Shadow harass and retaliate with Seismic Shard, stealing your movement speed to prevent you from disengaging. If you attempt to trigger Contempt for the Weak with melee attacks, his Ground Slam cripples your attack speed. You are forced to use Razor Shuriken purely to last-hit from safety, giving up mid-lane priority.

立ち回り方

Abandon all lane-kill pressure and pivot your build path immediately toward armor penetration and wave clearance. Save Living Shadow as an escape tool to dodge his Unstoppable Force rather than using it for aggressive poke. If he freezes, use Razor Shuriken to farm from range. Once he reaches his ultimate, stay at maximum range; if he misses Unstoppable Force, that is your cue to shove and roam.

チャンピオン詳細 → Malphiteのビルド →
Lissandra

Lissandra+2

hard counterdive defense Lissandra's kit completely shuts down your assassination attempts. When you initiate with Death Mark, she can immediately self-cast Frozen Tomb, neutralizing your entire burst window and leaving you stationary. As you emerge from your ultimate, she easily chains Ring of Frost to lock you down under her own terms, turning your primary offensive tool into a self-inflicted death trap. Lissandraのビルド → 詳細を見る
Lissandra

理由

Lissandra's kit completely shuts down your assassination attempts. When you initiate with Death Mark, she can immediately self-cast Frozen Tomb, neutralizing your entire burst window and leaving you stationary. As you emerge from your ultimate, she easily chains Ring of Frost to lock you down under her own terms, turning your primary offensive tool into a self-inflicted death trap.

レーン戦への影響

This matchup forces you into defensive passivity once both of you reach ultimate status. Lissandra will constantly shove waves using Ice Shard, leaving you to farm under turret using Razor Shuriken and Contempt for the Weak. Because you cannot threaten her with an all-in, she gains free priority to roam using Glacial Path, while you are stuck trying to match her clear without wasting Living Shadow.

立ち回り方

You must bait her defensive tools before committing. Use Living Shadow combined with Shadow Slash and Razor Shuriken to poke her from a safe distance, attempting to force her to use Glacial Path defensively. Never initiate with Death Mark unless Frozen Tomb is confirmed on cooldown. If she holds her ultimate, focus your efforts on roaming to side lanes or coordinating with your jungler to trigger her self-cast defensively before you commit your own high-damage resources.

チャンピオン詳細 → Lissandraのビルド →

その他のマッチアップ

不利なマッチアップ

10

これらのチャンピオンは、マッチアップ自体を絶望的にするわけではないが、対面で優位に立ちやすいツールを持っている。射程が長かったり、攻撃を受け止める力が高かったり、エンゲージへの対応手段が豊富だったりする。アプローチを調整し、戦闘を受け入れるタイミングを慎重に選ぶ必要がある。

Irelia

Irelia+1

predictive defenseall in The matchup is dictated by how easily Irelia can neutralize your ultimate. When you cast Death Mark, she knows exactly where you will land. By channeling Defiant Dance right at that moment, she absorbs the impact of your triple Razor Shuriken combo. This mitigation completely defuses your burst, wasting your energy pool and leaving you defenseless against her immediate physical counter-attack. Ireliaのビルド → 詳細を見る
Irelia

理由

The matchup is dictated by how easily Irelia can neutralize your ultimate. When you cast Death Mark, she knows exactly where you will land. By channeling Defiant Dance right at that moment, she absorbs the impact of your triple Razor Shuriken combo. This mitigation completely defuses your burst, wasting your energy pool and leaving you defenseless against her immediate physical counter-attack.

レーン戦への影響

In the lane, this dynamic forces you to play defensively. You cannot simply jump in with Living Shadow and Shadow Slash because she can quickly clear minions with Bladesurge, stack Ionian Fervor, and turn the trade. If you waste your shadow energy, she will lock you down with Flawless Duet and force you to retreat to your tower, losing priority and allowing her to roam freely.

立ち回り方

To survive, you must bait out her defensive abilities before committing your ultimate. Poke her down from a distance using Razor Shuriken and Living Shadow to force her to use Defiant Dance early. If she holds it, hold your Death Mark too. When you do engage, use the mobility of Living Shadow to dodge her Flawless Duet stun, then wait out her defensive channel before finishing her off.

チャンピオン詳細 → Ireliaのビルド →

その他のマッチアップ

スキル次第のマッチアップ

15

このマッチアップは何よりもまず実行力の勝負であり、両者ともに優位を取れる現実的な手段を持っている。重要なスキルを一つ避けられるか、エンゲージを正しく読めるか、あるいはたった一つの位置取りのミスが、勝敗を分けることもある。マッチアップを理解し、行動すべき瞬間を見極める力がとりわけ重要になる。

Ahri

Ahri±0

assassinreaction time This matchup is a pure duel of reactions centered around Zed's ultimate. While you can poke her down with *Living Shadow* into *Razor Shuriken*, the entire lane swings on *Death Mark*. Ahri has a guaranteed counter: she can buffer *Charm* directly behind herself the moment you land. If she hits this, your burst is neutralized; if she misses or you bait it, she has no protection against your high physical damage. Ahriのビルド → 詳細を見る
Ahri

理由

This matchup is a pure duel of reactions centered around Zed's ultimate. While you can poke her down with *Living Shadow* into *Razor Shuriken*, the entire lane swings on *Death Mark*. Ahri has a guaranteed counter: she can buffer *Charm* directly behind herself the moment you land. If she hits this, your burst is neutralized; if she misses or you bait it, she has no protection against your high physical damage.

レーン戦への影響

Before level five, Ahri uses *Orb of Deception* to shove waves and heal with *Essence Theft*, forcing you to farm under turret using *Razor Shuriken*. Once both ultimates are unlocked, passive play is punished. You cannot blindly initiate with *Death Mark* because of her *Charm* threat, and she cannot step up too aggressively without risking a sudden trade. It becomes a tense stand-off where executing a single combo determines lane priority.

立ち回り方

To win this duel, you must manipulate her cooldowns. Never initiate with *Death Mark* while her *Charm* is available unless you have placed a *Living Shadow* far away beforehand. Press *Death Mark*, and the microsecond you emerge, immediately reactivate your *Living Shadow* to swap places and dodge her buffered heart. Once her main crowd control is wasted, use your *Razor Shuriken* and *Shadow Slash* to execute her while her *Spirit Rush* is on cooldown.

チャンピオン詳細 → Ahriのビルド →
Akali

Akali±0

shroud playoutplay This duel is dictated by how you manage your ultimate against her stealth. When you unleash Death Mark, Akali will instantly deploy Twilight Shroud to vanish. This completely denies you the ability to land basic attacks or Shadow Slash to ramp up your mark's pop damage. Without target visibility, your entire offensive window evaporates, turning your main kill tool into a wasted cooldown. Akaliのビルド → 詳細を見る
Akali

理由

This duel is dictated by how you manage your ultimate against her stealth. When you unleash Death Mark, Akali will instantly deploy Twilight Shroud to vanish. This completely denies you the ability to land basic attacks or Shadow Slash to ramp up your mark's pop damage. Without target visibility, your entire offensive window evaporates, turning your main kill tool into a wasted cooldown.

レーン戦への影響

Before level five, you must fight for wave control using Razor Shuriken to poke her down while avoiding her Five Point Strike. Once both of you unlock your ultimates, the lane becomes a high-stakes standoff. You cannot dive or commit with Living Shadow because Akali can retaliate with Perfect Execution if she knows your shadow swap is unavailable. Minion waves are often cleared from a safe distance.

立ち回り方

To win this mental game, never initiate a trade with Death Mark while her Twilight Shroud is active. Instead, use Living Shadow combined with Shadow Slash and Razor Shuriken to chip away her health and force her to hide. Once her smoke screen dissipates, you have a brief twenty-second window to strike. If she hits you with Shuriken Flip, swap to your shadow to throw off her dash before counter-attacking.

チャンピオン詳細 → Akaliのビルド →
Kayle

Kayle±0

assassininvulnerability This matchup is a pure test of nerves centered around the interaction of your ultimates. While your high physical burst can easily shred Kayle's fragile base stats, her Divine Judgment is the ultimate countermeasure. If she casts it just before your Death Mark detonates, she completely negates the accumulated damage, turning an apparent assassination into a wasted cooldown that leaves you highly vulnerable. Kayleのビルド → 詳細を見る
Kayle

理由

This matchup is a pure test of nerves centered around the interaction of your ultimates. While your high physical burst can easily shred Kayle's fragile base stats, her Divine Judgment is the ultimate countermeasure. If she casts it just before your Death Mark detonates, she completely negates the accumulated damage, turning an apparent assassination into a wasted cooldown that leaves you highly vulnerable.

レーン戦への影響

Before level five, you can freely pressure Kayle with Living Shadow and Razor Shuriken combos since her ranged farming relies heavily on Starfire Spellblade. Once both of you unlock your ultimates, the lane halts. You cannot blindly dive her under tower, as her invulnerability easily turns dives into double kills, allowing her to scale safely towards her ranged power spikes.

立ち回り方

To win this mental game, never lead with Death Mark when she is at full health. Instead, chip her down with Living Shadow combined with Shadow Slash and Razor Shuriken. Force her to choose between burning Divine Judgment early to survive your basic poke or dying to your passive Contempt for the Weak. If you must ultimate, immediately swap back to your shadow to wait out her invulnerability before landing your triple shurikens.

チャンピオン詳細 → Kayleのビルド →

その他のマッチアップ

有利なマッチアップ

20

これらのチャンピオンは、こちらの主要な強みに効果的に対応するのが難しく、より自由に対面を組み立てることができる。プレッシャーをかけて有利な交換を引き出す手段は複数あることが多い。相手が態勢を立て直す時間を与えるのではなく、この優位を活かして主導権を握ろう。

Aurelion Sol

Aurelion Sol−2

assassin divedodge ult Zed completely dominates this matchup because Death Mark serves as a flawless counter to Aurelion Sol's telegraphed kit. When the star dragon casts Falling Star, you can reactively trigger Death Mark to become untargetable, completely nullifying the stun. Upon reappearing directly behind him, Aurelion Sol's frontal channel, Breath of Light, is aimed in the wrong direction, leaving him entirely defenseless against your sudden burst. Aurelion Solのビルド → 詳細を見る
Aurelion Sol

理由

Zed completely dominates this matchup because Death Mark serves as a flawless counter to Aurelion Sol's telegraphed kit. When the star dragon casts Falling Star, you can reactively trigger Death Mark to become untargetable, completely nullifying the stun. Upon reappearing directly behind him, Aurelion Sol's frontal channel, Breath of Light, is aimed in the wrong direction, leaving him entirely defenseless against your sudden burst.

レーン戦への影響

Before level five, Aurelion Sol tries to stack Cosmic Creator using Singularity. However, once you unlock your ultimate, the dynamic completely shifts. He can no longer channel Breath of Light to clear waves without putting himself in lethal range. This forces him to play extremely far back, sacrificing his stacking speed, and allowing you to freely control the wave, secure easy recall timings, or pressure his tower.

立ち回り方

Never initiate with your ultimate preemptively; hold Death Mark strictly to react to his Falling Star. If he attempts to escape using Astral Flight, quickly deploy Living Shadow to close the gap before marking him. When trading, wait for him to channel Breath of Light, as he becomes semi-stationary. This is your cue to land a guaranteed double Razor Shuriken and Shadow Slash combo, followed by Contempt for the Weak auto-attacks to secure the execution.

チャンピオン詳細 → Aurelion Solのビルド →
Brand

Brand−2

defenseitemization shift Brand is a sitting duck once his main self-peel is gone. He relies on marking you with Blaze to trigger the stun on Sear. Because Death Mark makes you untargetable, you can consistently bypass the projectile of Sear when he tries to peel you off. Without this crowd control, Brand's complete lack of mobility makes him unable to escape your raw burst damage. Brandのビルド → 詳細を見る
Brand

理由

Brand is a sitting duck once his main self-peel is gone. He relies on marking you with Blaze to trigger the stun on Sear. Because Death Mark makes you untargetable, you can consistently bypass the projectile of Sear when he tries to peel you off. Without this crowd control, Brand's complete lack of mobility makes him unable to escape your raw burst damage.

レーン戦への影響

Before unlocking your ultimate, you must tolerate Brand pushing the wave with Pillar of Flame and spreading Conflagration. Keep your health high by farming with Razor Shuriken from a safe distance. Once you reach level five, the threat of your all-in completely paralyzes him. Brand can no longer step up to aggressively clear waves without risking a lethal encounter, forcing him to play defensively near his turret.

立ち回り方

Initiate trades using Living Shadow combined with Shadow Slash and Razor Shuriken to chip away at his health. When you commit, never open with Death Mark immediately unless he has already wasted his stun. Instead, walk at him or use your shadow swap to force him to panic-cast Sear. The moment you see the projectile animation of Sear, activate Death Mark to phase through it, landing directly behind him to trigger Contempt for the Weak.

チャンピオン詳細 → Brandのビルド →
Kassadin

Kassadin−2

physical damagedodge timing Zed dominates this matchup because Kassadin’s passive Void Stone only generates a magic shield, leaving him completely exposed to Zed's physical burst. Since Kassadin is melee, you can constantly harass him with Razor Shuriken and Living Shadow combos. The lane's core revolves around Death Mark: Kassadin is forced to immediately use Riftwalk the moment you reappear to dodge your double Razor Shuriken follow-up, or face instant execution. Kassadinのビルド → 詳細を見る
Kassadin

理由

Zed dominates this matchup because Kassadin’s passive Void Stone only generates a magic shield, leaving him completely exposed to Zed's physical burst. Since Kassadin is melee, you can constantly harass him with Razor Shuriken and Living Shadow combos. The lane's core revolves around Death Mark: Kassadin is forced to immediately use Riftwalk the moment you reappear to dodge your double Razor Shuriken follow-up, or face instant execution.

レーン戦への影響

This physical advantage translates into total lane dominance from the first levels. Kassadin cannot contest the wave without taking heavy damage. His Null Sphere cannot mitigate your physical poke, forcing him to farm under turret and bleed gold. You will easily secure mid priority, enabling you to pressure his tower or dive him once his mana pool limits his defensive Riftwalk casts.

立ち回り方

To convert this advantage, rush heavy physical lethality items to completely bypass his natural armor scaling. During an all-in, do not throw your Razor Shuriken immediately after Death Mark ends. Anticipate his panic Riftwalk and hold your shurikens for a split second, or use Living Shadow to follow his blink and trigger Contempt for the Weak with an auto-attack once his magic shield fails to protect him.

チャンピオン詳細 → Kassadinのビルド →
Lux

Lux−2

mobilitydodgeburst Lux relies entirely on landing Light Binding to survive your dive and setup her own Lucent Singularity and Final Spark. As Zed, you can easily bypass this crowd control. By activating Living Shadow to swap positions or timing Death Mark to become untargetable, you completely bypass her only defensive tool, exposing her fragile health bar to your full physical burst. Luxのビルド → 詳細を見る
Lux

理由

Lux relies entirely on landing Light Binding to survive your dive and setup her own Lucent Singularity and Final Spark. As Zed, you can easily bypass this crowd control. By activating Living Shadow to swap positions or timing Death Mark to become untargetable, you completely bypass her only defensive tool, exposing her fragile health bar to your full physical burst.

レーン戦への影響

This matchup dynamic forces Lux to play extremely passively, giving you absolute control over the minion wave. She cannot step up to harass you with Illumination without risking a lethal trade. You can easily maintain high health, crash waves at will, and secure clean recall timings. If she misses a single Light Binding, she is forced to abandon her tower and concede all mid priority.

立ち回り方

Walk aggressively toward Lux to bait out Light Binding. Do not use Living Shadow offensively until she throws her snare. Once she casts it, react instantly by blinking over it with Living Shadow or dodging through her with Death Mark. Follow up with Shadow Slash to slow her, then land multiple Razor Shuriken while Prismatic Barrier is down. If you fail the dodge, retreat immediately to wait for your shadow cooldown.

チャンピオン詳細 → Luxのビルド →
Seraphine

Seraphine−2

dodge mechanicarmor rush This matchup heavily favors you because Seraphine relies on highly predictable, slow-moving projectiles to defend herself. Both Encore and Beat Drop are easily reactable. By timing your Death Mark just as she launches either of these spells, you completely bypass her crowd control, appearing directly behind her fragile frame to execute a fatal burst combo with Razor Shuriken and Shadow Slash. Seraphineのビルド → 詳細を見る
Seraphine

理由

This matchup heavily favors you because Seraphine relies on highly predictable, slow-moving projectiles to defend herself. Both Encore and Beat Drop are easily reactable. By timing your Death Mark just as she launches either of these spells, you completely bypass her crowd control, appearing directly behind her fragile frame to execute a fatal burst combo with Razor Shuriken and Shadow Slash.

レーン戦への影響

During the early levels, you must tolerate her long-range poke from High Note and Stage Presence. However, once you unlock your ultimate, the entire lane pressure flips. She cannot safely step up to clear waves with her passive because stepping past her caster minions puts her in range of your Living Shadow gap-close, forcing her to constantly cower near her turret and bleed gold.

立ち回り方

To secure this advantage, shift your build path towards heavy, flat physical penetration early on to completely negate the shield from Surround Sound. In lane, never initiate with Death Mark if she has her double-cast passive ready. Instead, poke her down with Living Shadow combined with Razor Shuriken. Once she panics and casts Encore or Beat Drop to disengage, reactively press your ultimate to dodge the projectile and trigger Contempt for the Weak.

チャンピオン詳細 → Seraphineのビルド →
Teemo

Teemo−2

stasis rushblind timing Teemo's primary defense relies on Blinding Dart to negate physical basic attacks, but this tool is completely useless against your spell-based assault. By combining Living Shadow with Razor Shuriken and Shadow Slash, you can safely whittle down his health from a distance. Once he is low enough, Death Mark allows you to close the gap and execute him, as your primary damage comes from your abilities rather than basic attacks. Teemoのビルド → 詳細を見る
Teemo

理由

Teemo's primary defense relies on Blinding Dart to negate physical basic attacks, but this tool is completely useless against your spell-based assault. By combining Living Shadow with Razor Shuriken and Shadow Slash, you can safely whittle down his health from a distance. Once he is low enough, Death Mark allows you to close the gap and execute him, as your primary damage comes from your abilities rather than basic attacks.

レーン戦への影響

Early on, Teemo will harass you with Toxic Shot, using Move Quick to escape. However, the dynamic shifts dramatically once you unlock your basic ability combo. Because he lacks any hard crowd control or shields, he cannot contest the minion wave without risking half his health to your ranged shadows. This pressure forces him to play defensively, preventing him from establishing control with Noxious Trap in the lane.

立ち回り方

Prioritize pure physical penetration and burst over utility to ensure your combos instantly delete him before he can react with Guerrilla Warfare. During trades, throw your Razor Shuriken and Shadow Slash from your Living Shadow to drop his health. When you commit with Death Mark, do not immediately auto-attack if he uses Blinding Dart; wait out the short duration of the blind before applying Contempt for the Weak to secure the kill.

チャンピオン詳細 → Teemoのビルド →
Twisted Fate

Twisted Fate−2

untargetableburst threat This matchup is heavily in your favor because Twisted Fate's sole defensive tool, the Gold Card from Pick a Card, is completely neutralized by Death Mark. When he throws the yellow projectile, your ultimate makes you untargetable, erasing his only self-peel. You then reappear right behind him, leaving him completely defenseless against your high-damage physical burst. Twisted Fateのビルド → 詳細を見る
Twisted Fate

理由

This matchup is heavily in your favor because Twisted Fate's sole defensive tool, the Gold Card from Pick a Card, is completely neutralized by Death Mark. When he throws the yellow projectile, your ultimate makes you untargetable, erasing his only self-peel. You then reappear right behind him, leaving him completely defenseless against your high-damage physical burst.

レーン戦への影響

Because of this threat, Twisted Fate must play with extreme caution, restricting his ability to harass you. He will often resort to clearing waves from afar using Wild Cards. This passive playstyle allows you to control the lane tempo. You can safely position to poke him down using Living Shadow combined with Razor Shuriken and Shadow Slash, ultimately preventing him from finding opportunities to roam with Destiny.

立ち回り方

To execute this perfectly, never initiate with Death Mark while his Pick a Card is off cooldown unless you are baiting it. Walk within range and wait for the gold card animation to start. The exact millisecond the projectile is in flight, cast your ultimate to dodge it. Once you reappear, immediately follow up with Shadow Slash and multiple Razor Shuriken hits, finishing him off with an auto-attack to trigger Contempt for the Weak.

チャンピオン詳細 → Twisted Fateのビルド →
Veigar

Veigar−2

defensetiming Zed holds a massive advantage because Death Mark completely invalidates Veigar's primary self-peel. When Veigar drops Event Horizon to zone you out, you can simply activate Death Mark to blink straight past the cage's perimeter, landing safely behind him while completely avoiding the stun. This forces Veigar to play defensively, as his high-damage Dark Matter and Primordial Burst become incredibly easy to dodge once you are in close quarters. Veigarのビルド → 詳細を見る
Veigar

理由

Zed holds a massive advantage because Death Mark completely invalidates Veigar's primary self-peel. When Veigar drops Event Horizon to zone you out, you can simply activate Death Mark to blink straight past the cage's perimeter, landing safely behind him while completely avoiding the stun. This forces Veigar to play defensively, as his high-damage Dark Matter and Primordial Burst become incredibly easy to dodge once you are in close quarters.

レーン戦への影響

This interaction dictates the lane pressure. Veigar cannot safely step up to stack Phenomenal Evil Power on you or clear waves with Baleful Strike without risking a lethal dive. Since you can bypass his cage, Veigar is forced to clear waves from extreme range under his tower, granting you absolute mid priority. You can easily trade health by using Living Shadow and Shadow Slash to slow him, then landing Razor Shuriken before forcing him out of lane.

立ち回り方

Do not waste Living Shadow aggressively if Veigar still has Event Horizon available, as you need your mobility to punish him. Walk forward to bait out his cage. Once he places Event Horizon, immediately cast Death Mark to bypass the stun, then follow up with Shadow Slash and Razor Shuriken to trigger Contempt for the Weak. If he holds his cage, chunk him down with safe shadow combos from a distance until he is low enough to execute.

チャンピオン詳細 → Veigarのビルド →
Ziggs

Ziggs−2

dive targetdodge skillshots Ziggs wants to keep you at bay with Bouncing Bomb and clear waves from safety, relying entirely on Satchel Charge to blast himself away or knock you back if you get close. However, Zed completely neutralizes this safety net. By casting Death Mark, you become untargetable and bypass the blast, or you can instantly close the gap after his self-peel displacement using Living Shadow to finish him off. Ziggsのビルド → 詳細を見る
Ziggs

理由

Ziggs wants to keep you at bay with Bouncing Bomb and clear waves from safety, relying entirely on Satchel Charge to blast himself away or knock you back if you get close. However, Zed completely neutralizes this safety net. By casting Death Mark, you become untargetable and bypass the blast, or you can instantly close the gap after his self-peel displacement using Living Shadow to finish him off.

レーン戦への影響

In the early levels, you will take some poke from Bouncing Bomb and Short Fuse while trying to last-hit. However, once you unlock your mobility, Ziggs is forced to play extremely far back, conceding control of the wave. He cannot safely use Satchel Charge to execute your tower because stepping up to use it exposes him to an instant, lethal dive.

立ち回り方

Position yourself diagonally to the wave to force Ziggs to choose between hitting you or the minions with Bouncing Bomb. Never initiate with Living Shadow unless you know his Satchel Charge is on cooldown. Instead, walk up to threaten him, trigger Death Mark when he panics, and use Living Shadow to follow his displacement or swap back to safety if he attempts to retreat through his own Hexplosive Minefield.

チャンピオン詳細 → Ziggsのビルド →
Mel

Mel−2

burst trademobility advantage Mel relies heavily on her ranged zone control to keep melee targets at bay, but your kit renders this defense obsolete. By utilizing Living Shadow, you instantly bypass her threat range to initiate trades. When she attempts to peel you off with her defensive spells, activating Death Mark grants you the perfect untargetable frame to dodge them entirely, leaving her completely vulnerable to your high-damage follow-up. Melのビルド → 詳細を見る
Mel

理由

Mel relies heavily on her ranged zone control to keep melee targets at bay, but your kit renders this defense obsolete. By utilizing Living Shadow, you instantly bypass her threat range to initiate trades. When she attempts to peel you off with her defensive spells, activating Death Mark grants you the perfect untargetable frame to dodge them entirely, leaving her completely vulnerable to your high-damage follow-up.

レーン戦への影響

This absolute mobility advantage forces Mel to play exceptionally far back, conceding wave control. She cannot safely use her ranged abilities to poke you down without risking a sudden, lethal all-in. Consequently, you dictate the pace of the lane, easily securing priority. If she attempts to contest the wave, a single successful trade puts her in range for Contempt for the Weak to secure an easy under-tower execution.

立ち回り方

To exploit this, avoid throwing Living Shadow randomly; hold it to threaten her whenever she steps up to farm. Walk forward to bait her defensive spells, then react instantly with Living Shadow to close the gap, immediately buffering Death Mark to slip past her crowd control. Upon reappearing, unleash Shadow Slash and a double Razor Shuriken, finishing with a basic attack to proc Contempt for the Weak.

チャンピオン詳細 → Melのビルド →
Syndra

Syndra−2

untargetabilitydodge mechanics This matchup swings heavily in your favor due to how Death Mark interacts with Unleashed Power. Since Syndra relies on a single massive burst of damage from her ultimate to execute targets, your ability to become untargetable at the exact moment she casts it completely neutralizes her win condition. She cannot burst you down if you reactively dodge her entire sphere payload, leaving her extremely vulnerable. Syndraのビルド → 詳細を見る
Syndra

理由

This matchup swings heavily in your favor due to how Death Mark interacts with Unleashed Power. Since Syndra relies on a single massive burst of damage from her ultimate to execute targets, your ability to become untargetable at the exact moment she casts it completely neutralizes her win condition. She cannot burst you down if you reactively dodge her entire sphere payload, leaving her extremely vulnerable.

レーン戦への影響

Before level five, you must endure her ranged poke from Dark Sphere. However, once you unlock your ultimate, the lane dynamic completely reverses. Syndra is forced to play incredibly defensively, holding onto Scatter the Weak out of sheer terror. If she wastes her knockback to clear waves or poke, you can instantly close the distance with Living Shadow and execute her, giving you total control over the mid lane priority.

立ち回り方

To secure the kill, poke her down to half health using your Living Shadow, Shadow Slash, and Razor Shuriken combo. When committing, never lead with Death Mark if her Scatter the Weak is active, as she will stun you the millisecond you reappear. Instead, bait her crowd control, or use your ultimate reactively the moment you see the animation of Unleashed Power begin, guaranteeing you dodge her burst and finish her off with Contempt for the Weak.

チャンピオン詳細 → Syndraのビルド →
Varus

Varus−2

assassin threatdodge timingexhaust utility Varus lacks any natural mobility to escape your burst, relying solely on Chain of Corruption to stop dives. The entire matchup hinges on this interaction: the moment he casts his ultimate to peel you off, you can activate Death Mark to bypass the projectile entirely. By dodging his only crowd control, you land right behind his vulnerable, immobile frame, making him an incredibly easy target for your Razor Shuriken and Shadow Slash burst. Varusのビルド → 詳細を見る
Varus

理由

Varus lacks any natural mobility to escape your burst, relying solely on Chain of Corruption to stop dives. The entire matchup hinges on this interaction: the moment he casts his ultimate to peel you off, you can activate Death Mark to bypass the projectile entirely. By dodging his only crowd control, you land right behind his vulnerable, immobile frame, making him an incredibly easy target for your Razor Shuriken and Shadow Slash burst.

レーン戦への影響

Before reaching level five, expect Varus to harass you with Piercing Arrow and Hail of Arrows while trying to shove the wave. However, once your ultimate is available, the lane dynamic flips instantly. The constant threat of your all-in forces him to play extremely defensively under his tower. He cannot safely step up to secure plates or poke, granting you complete control over lane priority and forcing him into a passive state.

立ち回り方

When executing your offensive, never initiate directly with Death Mark unless he has already wasted Chain of Corruption. Instead, throw a clone with Living Shadow to close the gap or poke him down with Razor Shuriken. Walk up to him and force him to panic-cast his ultimate. The instant you see the animation of his vine starting, press your ultimate to dodge it, land behind him, and execute him with Contempt for the Weak enhanced basic attacks.

チャンピオン詳細 → Varusのビルド →

その他のマッチアップ

Zed対策アイテム

これらのアイテムを購入すると、このチャンピオンの影響力を抑えられます。

Stasis Enchant
Stasis Enchant
Plated Steelcaps
Plated Steelcaps
Frozen Heart
Frozen Heart
Randuin's Omen
Randuin's Omen
Guardian Angel
Guardian Angel

このチャンピオンへの対策

カウンターアングル

Zedへのカウンターは、アルティメットを生き延びるだけじゃない。デスマーカーを報酬にする連鎖を断ち切ることが本当の目標だ。ウェーブセットアップを阻止し、壁の角度を制限し、リターン時のCCや防御スキルを温存し、影を使い切った後の存在感のなさを叩こう。彼が苦手とするチャンピオンは、シンプルで immobile、孤立したターゲットを与えないという共通点がある。バーストを吸収する者、離脱時にコントロールする者、彼が望まないリズムでエンゲージを強いる者もいる。Zedに対しては、個々のマッチアップと同じくらいチームの規律が重要だ。

パッチの文脈

Zedが最も苦戦するのは、初動からクリーンキルに繋げるのを阻止されることだ。デスマーカーのターゲットが生き残った場合、Wを防御的に使わざるを得ない場合、リターン地点にCCが待ち構えている場合、彼のプレッシャーは急激に低下する。不利なマッチアップがすべて同じように勝てるわけではない。レーンで直接スタンさせて罰する者、自然な耐久力や無敵でオールインを無効化する者、バーストを逆に利用する者もいる。重要なのは、オブジェクト前にフリーターゲットを与えないことだ。

クイックリード

  • デスマーカーのポップ用ではなく、最初のポーク用に防御スキルを温存しよう。
  • 彼のWを罰することは、アルティメットを罰することよりも重要であることが多い。影がなければ、Zedは脅威も離脱手段も失う。
  • Zedをフロントラインからプレイさせることは、特に壁を使った角度を狙いたいオブジェクト周りでの彼の価値を大きく低下させる。

カウンターの原型

ターゲット指定CCとリターン地点への罰

Zedは、エンゲージと離脱の正確なタイミングを選びたい。確実なCCを持つチャンピオンは、デスマーカー後、影の近く、ターゲットへのCCなど、彼が予測可能になった瞬間にCCや防御スキルを保持できるため、その原則を破る。これにより、彼はより遅いプレイを強いられ、脅威ではなく回避のためにWを使い、報われないエンゲージを取ることになる。コンボを決めたとしても、シーケンスの終盤をコントロールできなくなる危険がある。

チャンピオンの適応方法. Zedは、まずキーとなるスキルを強制するか、CCの悪い使い方を誘う必要がある。また、直接オールインを狙うのではなく、影を使ったポーク、ウェーブプレッシャー、ロームでプレイすることもできる。

バースト耐性と自然な防御力

Zedは、最初の主要なサイクルでキル、あるいは少なくとも主要なサモナースペルを作り出したい。アーマーを購入したり、バーストを吸収したり、爆発を遅延させたりできるチャンピオンは、そのウィンドウをはるかに決定力のないものにする。Zedにとっての問題は、ダメージ不足だけではない。すべての失敗したオールインは、テンポ、エネルギー、影、そしてしばしばレーンプレッシャーを失わせる。相手が生き残れば、ウェーブをプッシュしたり、チームに合流したりできるが、Zedはクールダウンを待つことになる。

チャンピオンの適応方法. Zedは、倒せないターゲットにトンネルビジョンを当てるのを避けなければならない。サイドレーンにプレッシャーを移動させ、オブジェクト前に防御リソースを強制し、最も耐久力のあるmidのマッチアップではなく、より保護されていないキャリーを選ぶべきだ。

機動力のあるデュエルと影への罰

一部のマッチアップは、生き残るだけでなく、Zedのシーケンスを不安定にする。機動力、回避、即時のリターン脅威により、コンボの一部を回避したり、攻撃的な影を罰したり、Zedがツールを使い果たした後にデュエルを反転させたりできる。これにより、Zedはタイミングをより正確にし、手裏剣の無駄遣いを避ける必要がある。コンボの最初の部分をミスした場合、ターゲットを倒すのに十分なプレッシャーがなく、自身を晒すことになることが多い。

チャンピオンの適応方法. Zedはより忍耐強くプレイし、敵の動きに対応するためにWを温存し、情報なしのオールインを避ける必要がある。このプロファイルに対しては、デスマーカーが戻ってきたらすぐにキルを狙うのではなく、セットアップポークを決めることがより重要になることが多い。

優先度の高いマッチアップ

Lissandra

LissandraはZedにとって最も象徴的なマッチアップの1つだ。彼女は最初のポークでパニックになるのではなく、彼のコミットを待つことができるからだ。彼女の価値は、デスマーカーをトラップに変えることにある。Zedが彼女のツールを強制せずにエンゲージした場合、フィニッシュまたはエグジットしたい時にロックダウンされる可能性がある。Zedにとって、このマッチアップは、純粋なメカニカルデュエルではなく、ウェーブ、ビジョン、誘いを中心にプレイする必要がある。

Malphite

Malphiteは異なる問題を引き起こす。彼はバーストの価値を下げつつ、Zedが直接対面したくないエンゲージ脅威をもたらす。Zedが時折別のターゲットを見つけられたとしても、Malphiteがグループ化を強制し、Zedがすでにコントロールされたゾーンにエンゲージするようになると、マッチアップは危険になる。正しい適応は、耐久力が高すぎるターゲットにサイクルを無駄にせず、Malphiteがファイトをロックダウンする前にローテーションを探すことだ。

対面時のよくある間違い

対面時のよくある間違い

  • デスマーカーの前、そして数秒後にZedに本当のエンゲージを取らせてしまう前に、スタシスエンチャントを使いすぎること。
  • 特にWが利用可能な状態で、サイドビジョンなしでフォグオブウォーに追従すること。
  • レベル5を尊重せずレーンをプッシュし、彼にフリーロームアングルを与えること。
  • Zedのリターンまたはエグジットのために1つを予約するのではなく、味方のエンゲージのためにすべてのCCを温存すること。
  • ゲームが早期のアーマーや遅延ツールを要求する際に、ダメージビルドのみに固執しないこと。

コーチングノート

  • Zedに対しては、自分のHPバーだけでなく、彼のクールダウンを意識して立ち回りましょう。彼がキルを狙えない状況で影を使ったら、前に出てプッシュしたり、視界を取ったりするチャンスです。
  • チームとして最善のカウンタープレイは、ターゲットを孤立させないことです。少し後ろにいるキャリー、supportをペールできる味方、そして壁際の角度に置かれたワードがあれば、彼のエンゲージをミスに変えるのに十分なことが多いです。

FAQ

レーンでZedを生き残るための最善の方法は何ですか?

最善の方法は、単に下がるのではなく、ウェーブと彼のクールダウンをコントロールすることです。HPが低すぎると、Zedはレベル5からデス・マークを狙ってきます。視界なしでプッシュすると、彼は姿を消して他の場所でスノーボールする可能性があります。彼の真のコミットに備え、Wを尊重し、彼の位置情報なしで壁の近くに立たないようにしましょう。

Zedに対して常にスタシスエンチャントを買うべきですか?

脆いキャリーにとって、スタシスエンチャントは最も直接的な回答となることが多いですが、それだけでは不十分です。早すぎたり、チームが後でZedを罰せないタイミングで使用したりすると、問題が遅れるだけです。適切なポジショニング、側面からの視界、そしてZedが離脱しようとした瞬間に備えたクラウドコントロールと組み合わせる必要があります。

Zedは視界が悪いと、なぜより強く感じるのですか?

Zedは、影がキャリーが時間内に計算できない角度を与えるため、フォーグ・オブ・ウォーから大きな恩恵を受けます。jungleがエンゲージする際や目標地点の周りの壁にワードがない場合、彼はターゲット、距離、バーストのタイミングを選ぶことができます。良い視界があれば、彼はしばしば正面から入らざるを得なくなり、彼の決断ははるかに予測可能で罰しやすくなります。

すでに有利なZedをどのように罰しますか?

育ったZedは、すべてのローテーションをピックに変えたいと思っています。彼を罰するには、孤立した動きを減らし、重要なウェーブの周りに集まり、彼を追いかけるのではなく、彼の離脱に対する対応を準備してください。視界なしでサイドレーンでのフリーのデュエルを与えないでください。彼のエンゲージがすぐにキルにつながらない場合、彼のクールダウン中にシャットダウンを取り戻せる可能性があります。





























































































