A
2026年9月 · Patch 7.2d
Assassin · JUNGLE · MID

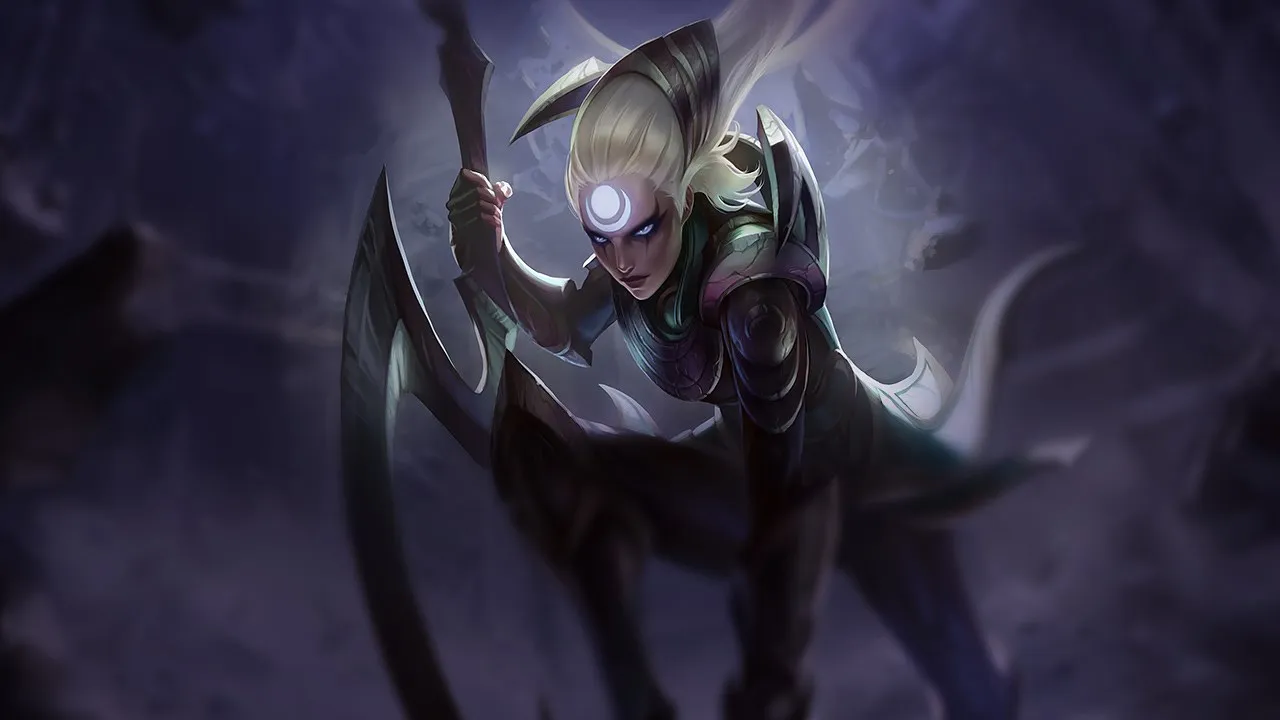
Diana Wild Rift カウンターガイド

Dianaは、自身の爆発的なengageパターンを妨害してくる構成を苦手とします。強力なCCdisengageツール、そして持続的なpokeは、彼女が優先ターゲットに接近するのを防ぎます。直接的なengage windowsへの依存が、彼女の構造的な弱点となっています。

★ JUNGLE · MID Tier A
ダメージ
UTIL
TANK
DIFF
Win 52.1% #15 · ↑3pt
Pick 2.9% #22
Ban 0.4% #109

Diana Wild Rift カウンターガイド ★ Counter Sheet

マッチアップ一覧
マッチアップ 判定 有利度 勝率 ピック率
Warwick ハードカウンター +2 52.6% 2.7%
Olaf ハードカウンター +2 52.5% 2.4%
Skarner ハードカウンター +2 50.6% 1.1%
Poppy ハードカウンター +2
Amumu 不利なマッチアップ +1 55.1% 3.3%
Rammus 不利なマッチアップ +1 54.7% 4.3%
Vi 不利なマッチアップ +1 51.9% 9.3%
Gwen 不利なマッチアップ +1 51.8% 1.9%
Pantheon 不利なマッチアップ +1 51.7% 5.5%
Xin Zhao 不利なマッチアップ +1 50.7% 9.5%
Tryndamere 不利なマッチアップ +1 50.6% 6.8%
Wukong 不利なマッチアップ +1 50.3% 3.7%
Ambessa 不利なマッチアップ +1 50.3% 1.2%
Nocturne 不利なマッチアップ +1 50.3% 5.5%
Nidalee 不利なマッチアップ +1 50.2% 2.4%
Volibear 不利なマッチアップ +1 49.9% 3.3%
Dr. Mundo 不利なマッチアップ +1 48.6% 1.1%
Jax 不利なマッチアップ +1 48.4% 2.1%
Maokai 不利なマッチアップ +1
Mordekaiser 不利なマッチアップ +1
Lillia スキル次第のマッチアップ ±0 51.9% 3.3%
Ekko スキル次第のマッチアップ ±0 51.6% 4.3%
Darius スキル次第のマッチアップ ±0 51.5% 8.1%
Kayn スキル次第のマッチアップ ±0 50.6% 9.2%
Kha'Zix スキル次第のマッチアップ ±0 50.0% 4.9%
Hecarim スキル次第のマッチアップ ±0 49.2% 2.6%
Yone スキル次第のマッチアップ ±0 49.1% 2.0%
Riven スキル次第のマッチアップ ±0 48.8% 1.2%
Cho'Gath スキル次第のマッチアップ ±0 47.6% 5.4%
Zed スキル次第のマッチアップ ±0 47.6% 1.8%
Lee Sin スキル次第のマッチアップ ±0 47.3% 12.0%
Gragas スキル次第のマッチアップ ±0
Nautilus スキル次第のマッチアップ ±0
Nunu & Willump 有利なマッチアップ −1 54.8% 1.9%
Jarvan IV 有利なマッチアップ −1 52.4% 8.5%
Shyvana 有利なマッチアップ −1 51.1% 7.0%
Fiddlesticks 有利なマッチアップ −1 50.8% 2.7%
Kindred 有利なマッチアップ −1 49.8% 2.6%
Talon 有利なマッチアップ −1 49.1% 2.8%
Evelynn 有利なマッチアップ −1 48.6% 2.4%
Graves 有利なマッチアップ −1 48.3% 7.6%
Master Yi 有利なマッチアップ −1 48.0% 9.3%
Rengar 有利なマッチアップ −1 47.8% 1.6%
Fizz 有利なマッチアップ −1 47.4% 2.1%
Viego 有利なマッチアップ −1 46.0% 3.4%
Aatrox 有利なマッチアップ −1
Camille 有利なマッチアップ −1
Nilah 有利なマッチアップ −1
Twitch 有利なマッチアップ −2

Edge: Wild Rift Core canonical verdict (−3 to +3), shown from the point of view of the champion named in the row. Win rate and pick rate: the opponent's own rate in this role — Wild Rift CN · Challenger, Patch 7.2d. Not a head-to-head win rate.

ハードカウンター

4

これらのチャンピオンは、こちらのビルドやプレイスタイルを真正面から上回る構成を持ち、レーン戦のコントロールとファームを極めて難しくする。彼らのスキルはこちらの主要な強みを無効化し、いつも通りのプランを実行しようとした瞬間に手痛い反撃を受けさせてくる。こうしたマッチアップでは、ミスを最小限に抑え、正面からの対決以外で解決策を探すことが重要になる。

Warwick

Warwick+2

duelingsustain Warwick completely shuts down your assassination potential. If you engage with Crescent Strike and Lunar Rush, he can easily activate Primal Howl to absorb your initial burst. Once your main damage is on cooldown, his passive Eternal Hunger provides him with massive healing that scales as his health drops, meaning you can never win a prolonged duel in the river or jungle camps. Warwickのビルド → 詳細を見る
Warwick

理由

Warwick completely shuts down your assassination potential. If you engage with Crescent Strike and Lunar Rush, he can easily activate Primal Howl to absorb your initial burst. Once your main damage is on cooldown, his passive Eternal Hunger provides him with massive healing that scales as his health drops, meaning you can never win a prolonged duel in the river or jungle camps.

レーン戦への影響

This matchup severely limits your early map pressure. You cannot contest Scuttle Crabs or fight him for neutral objectives, as his Blood Hunt reveals your position if you get low clearing camps. If he invades your jungle, you must abandon your camps; trying to defend them results in him using Infinite Duress to suppress you, leading to an easy death and giving up complete control of your side of the map.

立ち回り方

To survive, you must rush anti-heal itemization immediately to cut down his self-healing. Never initiate fights; instead, path to the opposite side of the map to secure cross-map ganks. If he jumps on you with Jaws of the Beast, use Pale Cascade to absorb his immediate damage while you retreat. If a teamfight erupts, save your Moonfall to disrupt his Infinite Duress channel when he targets your carries, rather than using it to engage.

チャンピオン詳細 → Warwickのビルド →
Olaf

Olaf+2

duelingcc immune Your ultimate combo relies heavily on pulling enemies in to burst them down, but Olaf completely shuts this down. When he activates Ragnarok, he gains absolute immunity to the displacement and slowing effects of Moonfall. Without this crowd control, Diana cannot stop his advance, and he can easily shrug off your initial damage while tearing you apart in close quarters with his high physical damage. Olafのビルド → 詳細を見る
Olaf

理由

Your ultimate combo relies heavily on pulling enemies in to burst them down, but Olaf completely shuts this down. When he activates Ragnarok, he gains absolute immunity to the displacement and slowing effects of Moonfall. Without this crowd control, Diana cannot stop his advance, and he can easily shrug off your initial damage while tearing you apart in close quarters with his high physical damage.

レーン戦への影響

In the jungle, this interaction makes direct duels near the Rift Scuttler or inside your own camps extremely dangerous. You cannot contest neutral objectives alone because Olaf will force an all-in the moment you step up. If he hits you with Undertow, you are forced to retreat using Lunar Rush on a distant monster, costing you tempo and leaving your camps open to aggressive counter-jungling.

立ち回り方

To survive this matchup, you must track his ultimate cooldown meticulously. Never initiate with Moonfall if you suspect Ragnarok is available; instead, poke from a distance using Crescent Strike. If he charges at you, use Pale Cascade to absorb the initial burst from Reckless Swing and retreat. Only engage in skirmishes when you can target his vulnerable allies, or wait out the duration of his crowd-control immunity before committing your full burst.

チャンピオン詳細 → Olafのビルド →

その他のマッチアップ

不利なマッチアップ

16

これらのチャンピオンは、マッチアップ自体を絶望的にするわけではないが、対面で優位に立ちやすいツールを持っている。射程が長かったり、攻撃を受け止める力が高かったり、エンゲージへの対応手段が豊富だったりする。アプローチを調整し、戦闘を受け入れるタイミングを慎重に選ぶ必要がある。

Rammus

Rammus+1

hard ccteamfights Rammus represents a massive roadblock for Diana's dive-heavy playstyle. While his Defensive Ball Curl makes him incredibly durable against your burst, the true danger lies in his Frenzying Taunt. The moment you dive in with Lunar Rush, Rammus can instantly force you into a taunt, completely neutralizing your mobility and leaving you exposed to his team's follow-up damage before you can trigger Moonfall. Rammusのビルド → 詳細を見る
Rammus

理由

Rammus represents a massive roadblock for Diana's dive-heavy playstyle. While his Defensive Ball Curl makes him incredibly durable against your burst, the true danger lies in his Frenzying Taunt. The moment you dive in with Lunar Rush, Rammus can instantly force you into a taunt, completely neutralizing your mobility and leaving you exposed to his team's follow-up damage before you can trigger Moonfall.

レーン戦への影響

This matchup limits your aggressive skirmishing in the river and jungle. Rammus uses Powerball to outpace your rotations, applying heavy pressure to your laners while you try to farm. In skirmishes, his presence forces you to delay your initiation; if you jump in first, his immediate Frenzying Taunt turns what should be a winning fight into a swift defeat, costing your team neutral objectives.

立ち回り方

Your success hinges on strict trigger discipline and flank positioning. Never lead the charge with Crescent Strike into Lunar Rush while Rammus has his crowd control ready. Instead, position yourself in the fog of war and wait for him to commit Powerball or Frenzying Taunt onto your frontline. Once his lock-down tools are on cooldown, sweep in from the side to access their backline and unleash Moonfall on the unprotected squishies.

チャンピオン詳細 → Rammusのビルド →
Nidalee

Nidalee+1

early pressurekiting The jungle matchup hinges entirely on Nidalee landing Javelin Toss. If she tags you from the brush, her Aspect of the Cougar form grants her the mobility to close the gap instantly. Her execution damage with Takedown will delete your health bar before you can trigger the attack speed from Moonsilver Blade to fight back. Without your passive stacked, you simply cannot match her rapid burst rotation in a direct duel. Nidaleeのビルド → 詳細を見る
Nidalee

理由

The jungle matchup hinges entirely on Nidalee landing Javelin Toss. If she tags you from the brush, her Aspect of the Cougar form grants her the mobility to close the gap instantly. Her execution damage with Takedown will delete your health bar before you can trigger the attack speed from Moonsilver Blade to fight back. Without your passive stacked, you simply cannot match her rapid burst rotation in a direct duel.

レーン戦への影響

You cannot contest camps aggressively or invade her jungle. This pressure forces you to clear your camps while constantly positioning behind jungle monsters to block Javelin Toss. If she spots you in the river without a camp to shield you, you are forced to retreat, giving up early Scuttle Crabs and leaving your laners vulnerable to her rapid, high-tempo gank rotations.

立ち回り方

Always scout brushes with Crescent Strike before entering them to avoid point-blank spears. During skirmishes, keep Pale Cascade ready to absorb the damage from her Pounce if Javelin Toss connects. If she misses her spear, immediately retaliate. Dash in with Lunar Rush, trigger your Moonsilver Blade passive with quick auto-attacks, and use Moonfall to disrupt her escape. If you are low, retreat behind thick walls where her Pounce cannot easily follow.

チャンピオン詳細 → Nidaleeのビルド →
Pantheon

Pantheon+1

early pressureinvade This matchup hinges on a devastating mechanical denial. When you engage with Crescent Strike and Lunar Rush to trigger your massive Moonfall, Pantheon can instantly react with Aegis Assault. By simply facing your direction, his shield completely blocks the entire burst damage of your ultimate. This interaction strips away your primary tool to burst him down, leaving you vulnerable to his immediate Shield Vault counter-attack. Pantheonのビルド → 詳細を見る
Pantheon

理由

This matchup hinges on a devastating mechanical denial. When you engage with Crescent Strike and Lunar Rush to trigger your massive Moonfall, Pantheon can instantly react with Aegis Assault. By simply facing your direction, his shield completely blocks the entire burst damage of your ultimate. This interaction strips away your primary tool to burst him down, leaving you vulnerable to his immediate Shield Vault counter-attack.

レーン戦への影響

Pantheon's early game skirmishing power severely limits your jungle freedom. If you contest the Scuttle Crab, his Mortal Will-empowered Shield Vault guarantees he wins any direct duel. You cannot safely contest him 1v1 in the river. Furthermore, his Grand Starfall allows him to instantly counter-gank your lanes, turning your proactive dives into disasters if you fail to track his positioning and cooldowns.

立ち回り方

To survive and win skirmishes, you must bait out Aegis Assault before committing your ultimate. Initiate with Crescent Strike and Lunar Rush, but immediately hold your Moonfall. Use Pale Cascade to shield against his Comet Spear poke. Once he panics and raises his shield, use your second Lunar Rush reset to dash behind him, changing his facing direction, and only then unleash your ultimate to bypass his frontal defense.

チャンピオン詳細 → Pantheonのビルド →
Gwen

Gwen+1

scalingdueling Gwen dominates this jungle duel because her Hallowed Mist completely nullifies your Crescent Strike from a distance. If you cannot land this projectile, you cannot apply the Moonlight mark required to reset Lunar Rush. Without your high-mobility resets, you are forced into a prolonged melee scrap where Gwen's passive A Thousand Cuts and rapid Snip Snip! shred your health and out-sustain your Pale Cascade shield. Gwenのビルド → 詳細を見る
Gwen

理由

Gwen dominates this jungle duel because her Hallowed Mist completely nullifies your Crescent Strike from a distance. If you cannot land this projectile, you cannot apply the Moonlight mark required to reset Lunar Rush. Without your high-mobility resets, you are forced into a prolonged melee scrap where Gwen's passive A Thousand Cuts and rapid Snip Snip! shred your health and out-sustain your Pale Cascade shield.

レーン戦への影響

This interaction forces you to play defensively around neutral objectives and your own camps. You cannot safely contest scuttle crabs or early drakes if Gwen is present, as she can deploy Hallowed Mist to deny your initiation and then run you down with Skip 'n Slash. This limits your map pressure, forcing you to concede early skirmishes and rely on lanes to setup ganks instead of taking solo fights.

立ち回り方

To survive, never throw Crescent Strike from maximum range while her Hallowed Mist is available. Instead, position yourself to bait out her defensive zone by pathing closely, or wait until she commits her Skip 'n Slash forward. Once her mist fades, quickly execute your Crescent Strike into Lunar Rush combo. If caught inside her Hallowed Mist, immediately trigger Moonfall to disrupt her Snip Snip! and buy time for your Pale Cascade to absorb her initial burst before disengaging.

チャンピオン詳細 → Gwenのビルド →
Nocturne

Nocturne+1

duelingspell shield Nocturne holds a massive advantage because his Shroud of Darkness completely neutralizes your offensive flow. If he blocks your Crescent Strike, you lose the Moonlight mark, preventing any Lunar Rush reset and leaving you stranded. Alternatively, he can reactively absorb the entire impact of your Moonfall, stripping away your primary burst tool while gaining a massive attack speed boost to shred you down. Nocturneのビルド → 詳細を見る
Nocturne

理由

Nocturne holds a massive advantage because his Shroud of Darkness completely neutralizes your offensive flow. If he blocks your Crescent Strike, you lose the Moonlight mark, preventing any Lunar Rush reset and leaving you stranded. Alternatively, he can reactively absorb the entire impact of your Moonfall, stripping away your primary burst tool while gaining a massive attack speed boost to shred you down.

レーン戦への影響

You cannot safely contest Nocturne in the river or duel him near camps. If he intercepts your ganks using Paranoia, his Unspeakable Horror will fear you before your Pale Cascade shield can absorb his Duskbringer-empowered auto-attacks. This forces you to play defensively, conceding early Scuttle Crabs and prioritizing safe, reactive farm rather than attempting aggressive invades, which slows down your ability to snowball.

立ち回り方

To win skirmishes, you must bait out Shroud of Darkness before committing your main damage. Initiate with basic attacks empowered by Moonsilver Blade or trigger Pale Cascade to crack his shield if he deploys it early. Never cast Moonfall while his spell shield is active. If he targets you with Unspeakable Horror, use Lunar Rush to dash to a nearby enemy minion or monster to break the fear tether before turning back to fight.

チャンピオン詳細 → Nocturneのビルド →
Vi

Vi+1

skirmishhard cc Vi hard-counters your primary initiation. The moment you cast Crescent Strike and attempt to follow up with Lunar Rush, she can reactively release Vault Breaker to knock you out of the air mid-dash. This disruption completely denies your Lunar Rush reset and leaves you stranded next to her without your main mobility tool, allowing her to easily stack Denting Blows and shred your health pool. Viのビルド → 詳細を見る
Vi

理由

Vi hard-counters your primary initiation. The moment you cast Crescent Strike and attempt to follow up with Lunar Rush, she can reactively release Vault Breaker to knock you out of the air mid-dash. This disruption completely denies your Lunar Rush reset and leaves you stranded next to her without your main mobility tool, allowing her to easily stack Denting Blows and shred your health pool.

レーン戦への影響

This interaction cripples your early skirmishing power in the river and around camps. You can never safely initiate a duel because initiating with your signature combo guarantees you get counter-engaged and locked down. In 2v2 or 3v3 skirmishes, you are forced to play defensively, as Vi can bypass your Pale Cascade shield with her raw physical burst or lock you down with Cease and Desist before you can execute Moonfall.

立ち回り方

To survive this matchup, you must treat your Lunar Rush as a secondary tool rather than an opener. Never dash onto Vi while her Vault Breaker is available. Wait for her to waste this charge on a teammate or to initiate on someone else. Once her dash is on cooldown, you have a brief window to strike with Crescent Strike and trigger Moonfall. If she targets you with Cease and Desist, activate Pale Cascade immediately to absorb the impact.

チャンピオン詳細 → Viのビルド →
Xin Zhao

Xin Zhao+1

duelingearly game The matchup hinges on how Crescent Guard completely shuts down your initiation. If Xin Zhao activates his ultimate, any Crescent Strike you cast from outside his protective arena is entirely blocked. Because the projectile deals no damage, it fails to apply the Moonlight mark. This prevents you from executing your Lunar Rush resets, leaving you unable to dive in and set up Moonfall without putting your dash on a crippling cooldown. Xin Zhaoのビルド → 詳細を見る
Xin Zhao

理由

The matchup hinges on how Crescent Guard completely shuts down your initiation. If Xin Zhao activates his ultimate, any Crescent Strike you cast from outside his protective arena is entirely blocked. Because the projectile deals no damage, it fails to apply the Moonlight mark. This prevents you from executing your Lunar Rush resets, leaving you unable to dive in and set up Moonfall without putting your dash on a crippling cooldown.

レーン戦への影響

Xin Zhao's early pressure dictates the jungle pacing, forcing you to play defensively around your camps. In early skirmishes, his Three Talon Strike knock-up and Wind Becomes Lightning slow easily overpower your Pale Cascade shield. If he invades your territory, you cannot contest him directly. Conceding early scuttle crabs or backing off from your buffs is mandatory to avoid giving away early kills.

立ち回り方

To survive, track his position and path away from his starting side to secure a safe full clear. When skirmishing, never throw Crescent Strike from a distance if his ultimate is active; instead, hold the ability until you step inside his Crescent Guard perimeter or wait for it to expire. If he initiates with Audacious Charge, immediately activate Pale Cascade to mitigate his Three Talon Strike damage, then look to disengage.

チャンピオン詳細 → Xin Zhaoのビルド →

その他のマッチアップ

スキル次第のマッチアップ

13

このマッチアップは何よりもまず実行力の勝負であり、両者ともに優位を取れる現実的な手段を持っている。重要なスキルを一つ避けられるか、エンゲージを正しく読めるか、あるいはたった一つの位置取りのミスが、勝敗を分けることもある。マッチアップを理解し、行動すべき瞬間を見極める力がとりわけ重要になる。

Kayn

Kayn±0

skirmishscaling This jungle matchup is a pure race of timing centered around your ultimate. While your standard Crescent Strike into Lunar Rush combo delivers fast burst, Kayn holds a massive defensive trump card. The moment you pull him in with Moonfall, he can reactively cast Umbral Trespass to infest you. This completely dodges your ultimate's damage and displacement, leaving you vulnerable while he waits inside you. Kaynのビルド → 詳細を見る
Kayn

理由

This jungle matchup is a pure race of timing centered around your ultimate. While your standard Crescent Strike into Lunar Rush combo delivers fast burst, Kayn holds a massive defensive trump card. The moment you pull him in with Moonfall, he can reactively cast Umbral Trespass to infest you. This completely dodges your ultimate's damage and displacement, leaving you vulnerable while he waits inside you.

レーン戦への影響

Because both of you clear camps incredibly fast using Pale Cascade and Reaping Slash, this matchup becomes a high-speed tempo battle. Neither jungler can easily force a direct duel without risking a counter-gank. Skirmishes around neutral objectives are decided entirely by who gets their transformation or ultimate spike first. If you waste your crowd control early, Kayn easily escapes through walls using Shadow Step.

立ち回り方

To win this mental game, never initiate a skirmish with Moonfall. Instead, engage with Crescent Strike and Lunar Rush, then trigger Pale Cascade to shield his initial Reaping Slash damage. Force Kayn to panic and use Umbral Trespass defensively to avoid your basic attacks. Once he emerges from your body, that is your cue to immediately cast your ultimate to lock him down and finish him before he can slide away.

チャンピオン詳細 → Kaynのビルド →
Ekko

Ekko±0

ap assassinskirmish This jungle duel is a pure race of explosive damage where the outcome hinges entirely on your ultimate's crowd control. Ekko relies on Chronobreak to erase your initial burst and heal back his health bar. However, the knockup from your Moonfall completely disables his ability to activate this escape. If you can land Crescent Strike and Lunar Rush to trigger a fatal Moonfall burst, he dies before he can press his ultimate. Ekkoのビルド → 詳細を見る
Ekko

理由

This jungle duel is a pure race of explosive damage where the outcome hinges entirely on your ultimate's crowd control. Ekko relies on Chronobreak to erase your initial burst and heal back his health bar. However, the knockup from your Moonfall completely disables his ability to activate this escape. If you can land Crescent Strike and Lunar Rush to trigger a fatal Moonfall burst, he dies before he can press his ultimate.

レーン戦への影響

Both of you clear camps incredibly quickly, meaning early skirmishes over Scuttle Crabs are highly volatile. A single misstep near the river can decide the jungle tempo. Because both champions spike heavily at level five, the first major teamfight around the Drake or Herald becomes a high-stakes standoff. If you fail to lock him down, his Parallel Convergence shield and stun will allow him to turn the fight and secure the objective.

立ち回り方

To win this duel, never initiate with Moonfall while Ekko has full health and his Chronobreak is available. Instead, poke him down or bait out his Phase Dive and Timewinder. Once his health is low enough for a lethal combo, execute your Crescent Strike into Lunar Rush, and immediately chain it with Moonfall to lock him in place. If he manages to deploy Parallel Convergence, use your Pale Cascade shield to absorb the initial blow and disengage until his zone fades.

チャンピオン詳細 → Ekkoのビルド →
Gragas

Gragas±0

disengageskirmish This jungle matchup hinges entirely on how Gragas uses his crowd control to deny your mobility. When you initiate with Crescent Strike and attempt to follow up with Lunar Rush, a skilled Gragas will reactively deploy Body Slam. Because Body Slam has priority, it cancels your Lunar Rush mid-air, leaving you stranded without your reset and completely vulnerable to his counter-engage. Gragasのビルド → 詳細を見る
Gragas

理由

This jungle matchup hinges entirely on how Gragas uses his crowd control to deny your mobility. When you initiate with Crescent Strike and attempt to follow up with Lunar Rush, a skilled Gragas will reactively deploy Body Slam. Because Body Slam has priority, it cancels your Lunar Rush mid-air, leaving you stranded without your reset and completely vulnerable to his counter-engage.

レーン戦への影響

In the river and around early neutral camps, this interaction dictates who controls the pace. If Gragas holds his Body Slam, you cannot risk initiating with Lunar Rush, forcing you to farm passively or rely on your teammates. Missing your dash reset in a skirmish instantly swings the fight, as your Pale Cascade shield won't save you from a coordinated collapse.

立ち回り方

To win these jungle skirmishes, you must play a patient waiting game. Never lead with Lunar Rush unless Gragas has already wasted Body Slam to clear a camp or engage on an ally. Instead, poke from distance using Crescent Strike, or close the gap on a secondary target first, waiting for him to exhaust his defensive options before using Moonfall.

チャンピオン詳細 → Gragasのビルド →
Kha'Zix

Kha'Zix±0

skirmishisolation This jungle duel hinges on how you handle isolation. Kha'Zix thrives on finding you alone to unleash a devastating Taste Their Fear, boosted by Unseen Threat. However, your Pale Cascade provides a multi-layered shield that directly absorbs his single-target burst. If he tries to escape with Leap after a failed ambush, your Crescent Strike and Lunar Rush allow you to relentlessly pursue and match his mobility. Kha'Zixのビルド → 詳細を見る
Kha'Zix

理由

This jungle duel hinges on how you handle isolation. Kha'Zix thrives on finding you alone to unleash a devastating Taste Their Fear, boosted by Unseen Threat. However, your Pale Cascade provides a multi-layered shield that directly absorbs his single-target burst. If he tries to escape with Leap after a failed ambush, your Crescent Strike and Lunar Rush allow you to relentlessly pursue and match his mobility.

レーン戦への影響

Skirmishes in the river or near objectives are highly volatile and decided by your exact coordinate on the map. Getting caught in the open river gives him the isolation bonus on Taste Their Fear, leading to a quick death. Conversely, fighting near active jungle camps like Raptors or Krugs nullifies his primary damage source. This forces him to play passively, yielding early neutral objectives and relieving pressure from your lanes.

立ち回り方

Never facecheck bushes where he can ambush you with Unseen Threat. When contesting him, actively position yourself directly inside a monster camp so the monsters break his isolation bonus on Taste Their Fear. Activate Pale Cascade immediately when he jumps on you to negate his initial burst. If he activates Void Assault to slip away into stealth, prepare your Moonfall to drag him back the moment he reappears, preventing him from resetting his cooldowns.

チャンピオン詳細 → Kha'Zixのビルド →
Lee Sin

Lee Sin±0

skirmishmobility This jungle duel revolves around Diana's initiation versus Lee Sin's peel. Your primary engage relies on hitting Crescent Strike to reset Lunar Rush and group enemies with Moonfall. However, Lee Sin possesses the perfect counter-button with Dragon's Rage. If you dash in blindly, he can instantly kick you away mid-flight or right after landing, completely nullifying your burst and leaving you stranded far from your targets. Lee Sinのビルド → 詳細を見る
Lee Sin

理由

This jungle duel revolves around Diana's initiation versus Lee Sin's peel. Your primary engage relies on hitting Crescent Strike to reset Lunar Rush and group enemies with Moonfall. However, Lee Sin possesses the perfect counter-button with Dragon's Rage. If you dash in blindly, he can instantly kick you away mid-flight or right after landing, completely nullifying your burst and leaving you stranded far from your targets.

レーン戦への影響

Because of this dynamic, the early jungle rotation becomes a high-stakes race for map pressure. Lee Sin uses Flurry and Sonic Wave to execute fast, aggressive ganks before you scale. If you fall behind in clearing or fail to match his early skirmishes, he will snowball the map. Every neutral objective fight becomes a tense standoff where the first to commit can easily be punished.

立ち回り方

To beat the blind monk, you must play a patient bait-and-switch game. Never initiate fights directly onto Lee Sin if his Dragon's Rage is available. Instead, clear camps rapidly using Moonsilver Blade and look to counter-gank. Use Crescent Strike to poke and threaten, but hold your Lunar Rush. Force him to waste Safeguard or commit his ultimate on your teammates first, then plunge in with Moonfall to clean up the fight.

チャンピオン詳細 → Lee Sinのビルド →
Lillia

Lillia±0

skirmishkiting This matchup is a high-speed pursuit in the jungle where Diana's target acquisition faces Lillia's hit-and-run capabilities. Everything hinges on Crescent Strike. If you land this arc, you get a reset on Lunar Rush to close the gap instantly. If you miss, Lillia accumulates passive stacks from Blooming Blows, boosting her movement speed to a point where she can easily dance outside your melee range while applying Dream-Laden Bough. Lilliaのビルド → 詳細を見る
Lillia

理由

This matchup is a high-speed pursuit in the jungle where Diana's target acquisition faces Lillia's hit-and-run capabilities. Everything hinges on Crescent Strike. If you land this arc, you get a reset on Lunar Rush to close the gap instantly. If you miss, Lillia accumulates passive stacks from Blooming Blows, boosting her movement speed to a point where she can easily dance outside your melee range while applying Dream-Laden Bough.

レーン戦への影響

Clear speeds are neck-and-neck, making the jungle pathing highly competitive. When contesting Scuttle Crabs or epic monsters, missing your initial skillshot gives Lillia the freedom to poke you down with Swirlseed and kite you across the river. If she secures enough space to cast Lilting Lullaby, you will be put to sleep before you can even get close enough to pull her in with Moonfall, costing your team early objective control.

立ち回り方

Do not initiate with Lunar Rush dry. Instead, track Lillia's movement pattern and wait for her to lock herself into the animation of Watch Out! Eep! before casting Crescent Strike. This guarantees your Moonlight reset. If she manages to dodge your initial crescent arc, immediately back off and use Pale Cascade to absorb any incoming Swirlseed damage. Do not chase her while her movement speed stacks are fully loaded; instead, wait for her stacks to decay before re-engaging.

チャンピオン詳細 → Lilliaのビルド →

その他のマッチアップ

有利なマッチアップ

16

これらのチャンピオンは、こちらの主要な強みに効果的に対応するのが難しく、より自由に対面を組み立てることができる。プレッシャーをかけて有利な交換を引き出す手段は複数あることが多い。相手が態勢を立て直す時間を与えるのではなく、この優位を活かして主導権を握ろう。

Viego

Viego−1

skirmishdueling Diana dominates skirmishes because her burst potential is significantly faster than Viego's steady DPS. When you engage, your combo of Crescent Strike into Lunar Rush sets up an immediate Moonfall pull. This explosive damage instantly shreds Viego's health bar before he can land enough basic attacks to stack his Blade of the Ruined King passive. He thrives on extended fights, but your burst denies him that ramp-up. Viegoのビルド → 詳細を見る
Viego

理由

Diana dominates skirmishes because her burst potential is significantly faster than Viego's steady DPS. When you engage, your combo of Crescent Strike into Lunar Rush sets up an immediate Moonfall pull. This explosive damage instantly shreds Viego's health bar before he can land enough basic attacks to stack his Blade of the Ruined King passive. He thrives on extended fights, but your burst denies him that ramp-up.

レーン戦への影響

Your superior burst pressure forces Viego to play defensively in the river and his own jungle. He cannot contest Scuttle Crabs or objectives directly if you are both healthy, as a face-to-face duel ends in your favor. This threat allows you to invade his camps when you see him using Harrowed Path to clear, stealing his resources and securing double-crab priority to starve his gold income.

立ち回り方

When contesting camps, wait for Viego to charge Spectral Maw. Use Crescent Strike to mark him, then immediately trigger Lunar Rush to reposition behind him, dodging his stun. Once his crowd control is wasted, activate Pale Cascade to absorb his minor retaliatory damage while triggering Moonfall to execute him. If he attempts to escape or counter-engage with Heartbreaker, your shield and remaining mobility will easily secure the kill.

チャンピオン詳細 → Viegoのビルド →
Graves

Graves−1

skirmishap vs ad This jungle matchup leans heavily in Diana's favor due to how their defensive tools interact. While Graves relies on Quickdraw to stack physical armor, this defense does absolutely nothing against your magic damage. Once you tag him with Crescent Strike, you can bypass his range advantage. Your Lunar Rush gap-close exposes his lack of magic resistance, allowing your full AP burst to shred his health pool before his New Destiny reload cycle ramps up. Gravesのビルド → 詳細を見る
Graves

理由

This jungle matchup leans heavily in Diana's favor due to how their defensive tools interact. While Graves relies on Quickdraw to stack physical armor, this defense does absolutely nothing against your magic damage. Once you tag him with Crescent Strike, you can bypass his range advantage. Your Lunar Rush gap-close exposes his lack of magic resistance, allowing your full AP burst to shred his health pool before his New Destiny reload cycle ramps up.

レーン戦への影響

In the jungle, this dynamic shifts early pressure entirely to your side. Graves cannot safely invade your camps or contest scuttle crabs because he dreads a direct confrontation. Since your AP burst wins the duel, you command river priority. If he attempts to secure objectives, your threat of a sudden engage forces him to concede space, leaving his lanes vulnerable to your ganks while he falls behind in farm.

立ち回り方

To execute this, track Graves's position in the river and always initiate from the brush to catch him off guard. Do not throw Crescent Strike blindly; wait until he uses Quickdraw to reposition, then hit him with your projectile. Once marked, execute your Lunar Rush and activate Pale Cascade to absorb his End of the Line damage. If he blinds you with Smoke Screen, retreat slightly using the attack speed and movement from Moonsilver Blade until your vision returns.

チャンピオン詳細 → Gravesのビルド →
Shyvana

Shyvana−1

counter junglescaling Diana dominates the early jungle because Shyvana lacks any crowd control to disrupt her. While Shyvana tries to stack Fury of the Dragonborn using Burnout and Flame Breath, she remains highly vulnerable. Diana utilizes Moonsilver Blade for rapid, sustained early clearing, and Pale Cascade provides a protective shield that completely negates Shyvana's early damage from Twin Bite, allowing Diana to force early skirmishes without fear of being locked down. Shyvanaのビルド → 詳細を見る
Shyvana

理由

Diana dominates the early jungle because Shyvana lacks any crowd control to disrupt her. While Shyvana tries to stack Fury of the Dragonborn using Burnout and Flame Breath, she remains highly vulnerable. Diana utilizes Moonsilver Blade for rapid, sustained early clearing, and Pale Cascade provides a protective shield that completely negates Shyvana's early damage from Twin Bite, allowing Diana to force early skirmishes without fear of being locked down.

レーン戦への影響

This matchup dynamic turns the river and Shyvana's own jungle into a playground for Diana. Because Shyvana cannot lock you down, you easily secure both Scuttle Crabs. Striking her with Crescent Strike followed by Lunar Rush forces her out of her own camps. By invading her early, you delay her acquisition of Draconic Bloodline stacks, severely weakening her mid-game transition and leaving her lanes completely unprotected from your ganks.

立ち回り方

Path aggressively to cross paths with Shyvana at level three. When invading her camps, save Crescent Strike to scout bushes or mark her before she can run with Burnout. If she attempts to flee using that movement speed, use Lunar Rush to close the gap instantly. Hold Moonfall to interrupt her positioning or pull her back after she attempts to leap away with Dragon's Descent, ensuring she cannot escape your burst.

チャンピオン詳細 → Shyvanaのビルド →
Evelynn

Evelynn−1

stealthburst Diana completely shuts down Evelynn's stealth-based jungle pressure. The core of this matchup lies in Crescent Strike, which grants true sight on anything it hits. When Evelynn tries to stalk you or your teammates in Demon Shade, landing this crescent arc exposes her immediately. This negates her element of surprise, preventing her from comfortably cooking Allure, and opens her up to an immediate, lethal dive. Evelynnのビルド → 詳細を見る
Evelynn

理由

Diana completely shuts down Evelynn's stealth-based jungle pressure. The core of this matchup lies in Crescent Strike, which grants true sight on anything it hits. When Evelynn tries to stalk you or your teammates in Demon Shade, landing this crescent arc exposes her immediately. This negates her element of surprise, preventing her from comfortably cooking Allure, and opens her up to an immediate, lethal dive.

レーン戦への影響

This interaction shifts the entire jungle dynamic in your favor. Knowing you can strip her stealth makes her jungle camps unsafe to farm. When she attempts to secure objectives or gank, you can aggressively counter-jungle and hunt her down. She cannot easily escape your burst with Last Caress if you force her to use it defensively early, rendering her unable to pressure your lanes effectively.

立ち回り方

Actively track Evelynn's pathing and sweep high-traffic bushes. When she casts Allure on you, do not panic or retreat; instead, predict her approach angle and throw Crescent Strike to reveal her inside Demon Shade. Instantly follow up with Lunar Rush, activate Pale Cascade to absorb her initial Hate Spike damage, and pull her in with Moonfall. If she manages to slip away using Last Caress, immediately ping your team to seize the neutral objective she can no longer contest.

チャンピオン詳細 → Evelynnのビルド →
Talon

Talon−1

skirmishmobility Diana dominates this jungle duel because her Pale Cascade perfectly counters Talon's burst pattern. When Talon attempts to engage with Noxian Diplomacy and Rake, activating your shield negates his initial damage spike. Once his burst is mitigated, Talon has no sustained damage, allowing Diana to easily beat him down using the attack speed and bonus magic damage from her Moonsilver Blade passive during the cooldown window. Talonのビルド → 詳細を見る
Talon

理由

Diana dominates this jungle duel because her Pale Cascade perfectly counters Talon's burst pattern. When Talon attempts to engage with Noxian Diplomacy and Rake, activating your shield negates his initial damage spike. Once his burst is mitigated, Talon has no sustained damage, allowing Diana to easily beat him down using the attack speed and bonus magic damage from her Moonsilver Blade passive during the cooldown window.

レーン戦への影響

In the jungle, this matchup grants you absolute freedom to invade and contest neutral camps. Talon cannot safely fight you over Scuttle Crabs or buffs, forcing him to rely on Assassin's Path to escape over walls. This pressure limits his early ganking potential, as he must constantly concede his own camps or risk dying to your aggressive counter-jungling whenever his major cooldowns are spent.

立ち回り方

Never waste Pale Cascade prematurely while clearing camps if you suspect Talon is nearby. Keep it ready to absorb his initial Noxian Diplomacy leap. If he attempts to escape over a wall with Assassin's Path, quickly tag him with Crescent Strike beforehand to secure vision, then follow him instantly with Lunar Rush. Should he activate Shadow Assault to go invisible, pull him back with Moonfall to disrupt his escape and finish him off.

チャンピオン詳細 → Talonのビルド →
Fiddlesticks

Fiddlesticks−1

skirmishhard cc Diana dominates this jungle matchup because she possesses the perfect tool to shut down Fiddlesticks's primary sustain. During skirmishes, Fiddlesticks relies entirely on the channeled healing from Bountiful Harvest to survive your burst. By holding Moonfall, you can instantly interrupt his channel with the pull effect. Once Bountiful Harvest is canceled, Fiddlesticks is left extremely vulnerable, allowing Diana's high-damage Crescent Strike and Lunar Rush follow-up to quickly melt his fragile health bar. Fiddlesticksのビルド → 詳細を見る
Fiddlesticks

理由

Diana dominates this jungle matchup because she possesses the perfect tool to shut down Fiddlesticks's primary sustain. During skirmishes, Fiddlesticks relies entirely on the channeled healing from Bountiful Harvest to survive your burst. By holding Moonfall, you can instantly interrupt his channel with the pull effect. Once Bountiful Harvest is canceled, Fiddlesticks is left extremely vulnerable, allowing Diana's high-damage Crescent Strike and Lunar Rush follow-up to quickly melt his fragile health bar.

レーン戦への影響

This interaction shifts the jungle pressure entirely in Diana's favor, allowing you to aggressively contest camps and neutral objectives. Fiddlesticks cannot safely secure his blue or red buffs if you invade, as he cannot out-duel you without his drain. You can force him off his camps, delay his level spikes, and easily secure Scuttle Crabs, leaving him starved of gold while you freely accelerate your AP build path.

立ち回り方

When invading or contesting, never initiate a duel by using Moonfall. Instead, gap-close with Crescent Strike and Lunar Rush, then activate Pale Cascade to absorb his initial damage. Save Moonfall specifically for the exact moment Fiddlesticks begins channeling Bountiful Harvest. If he panics and uses Terrify to flee, stick to him using your reset on Lunar Rush. If he jumps you with Crowstorm from a brush, immediately use Moonfall to disrupt his positioning and cancel his follow-up drain.

チャンピオン詳細 → Fiddlesticksのビルド →
Kindred

Kindred−1

skirmishultimate interaction Diana dominates this jungle matchup because her high-burst kit forces Kindred into an early, defensive Lamb's Respite. While Kindred relies on Dance of Arrows to kite out melee threats inside Wolf's Frenzy, Diana's Crescent Strike and Lunar Rush reset allow her to stick to them instantly. The matchup's defining point is Moonfall, which can physically pull Kindred out of their safe zone just as Lamb's Respite expires, rendering their main survival tool completely useless. Kindredのビルド → 詳細を見る
Kindred

理由

Diana dominates this jungle matchup because her high-burst kit forces Kindred into an early, defensive Lamb's Respite. While Kindred relies on Dance of Arrows to kite out melee threats inside Wolf's Frenzy, Diana's Crescent Strike and Lunar Rush reset allow her to stick to them instantly. The matchup's defining point is Moonfall, which can physically pull Kindred out of their safe zone just as Lamb's Respite expires, rendering their main survival tool completely useless.

レーン戦への影響

In the jungle, this pressure completely alters how you contest Mark of the Kindred camps. Knowing you win the direct all-in, you can aggressively invade Kindred's camps, forcing them to concede marks or risk a fatal duel. Because they cannot safely deploy Mounting Dread without being run down, Kindred is forced to play passively, yielding early river crab priority and objective control to your team.

立ち回り方

When engaging, initiate with Crescent Strike followed by Lunar Rush and Pale Cascade to chunk their health, but absolutely hold Moonfall. Wait for Kindred to panic-cast Lamb's Respite. Stand on the edge of their golden circle, monitoring the ultimate's visual timer. Just before the zone heals them, cast Moonfall to drag Kindred outside the boundary for an instant execute. If they escape with Dance of Arrows beforehand, disengage until your basic cooldowns reset.

チャンピオン詳細 → Kindredのビルド →
Master Yi

Master Yi−1

duelinghard cc Diana dominates this jungle duel because her burst pattern directly overrides Master Yi's main defensive tool. When Master Yi attempts to stall your damage and heal using Meditate, you have the ultimate answer. Activating Moonfall instantly cancels his channel, stripping away his damage reduction and leaving his fragile health bar completely exposed to your subsequent Crescent Strike and Lunar Rush follow-up. Master Yiのビルド → 詳細を見る
Master Yi

理由

Diana dominates this jungle duel because her burst pattern directly overrides Master Yi's main defensive tool. When Master Yi attempts to stall your damage and heal using Meditate, you have the ultimate answer. Activating Moonfall instantly cancels his channel, stripping away his damage reduction and leaving his fragile health bar completely exposed to your subsequent Crescent Strike and Lunar Rush follow-up.

レーン戦への影響

This interaction completely shifts the power dynamic during early skirmishes over scuttle crabs and neutral objectives. Master Yi cannot safely contest you in the river because he cannot rely on his defensive channel to wait for backup. You can aggressively invade his camps, force him off resources, and dictate the pace of skirmishes, knowing you win any direct confrontation if both of you commit fully.

立ち回り方

When engaging, never lead with Moonfall. Start your assault with Crescent Strike followed by Lunar Rush and Pale Cascade to force him to react. Keep your basic attacks flowing with Moonsilver Blade. Only trigger Moonfall the exact moment he channels Meditate or tries to dodge your damage. If he initiates with Alpha Strike, wait for him to reappear before unleashing your full combo, keeping your displacement ready to interrupt his healing.

チャンピオン詳細 → Master Yiのビルド →
Nunu & Willump

Nunu & Willump−1

skirmishhard cc This jungle matchup heavily favors Diana because your ultimate, Moonfall, serves as a direct, instant counter to Nunu & Willump's primary teamfight tool, Absolute Zero. When Nunu channels his massive area-of-effect ultimate, your Moonfall pulls him out of it instantly, wasting his biggest damage source and shield. Without this threat, Nunu is reduced to a simple tank who cannot easily peel your high-damage dives. Nunu & Willumpのビルド → 詳細を見る
Nunu & Willump

理由

This jungle matchup heavily favors Diana because your ultimate, Moonfall, serves as a direct, instant counter to Nunu & Willump's primary teamfight tool, Absolute Zero. When Nunu channels his massive area-of-effect ultimate, your Moonfall pulls him out of it instantly, wasting his biggest damage source and shield. Without this threat, Nunu is reduced to a simple tank who cannot easily peel your high-damage dives.

レーン戦への影響

During early skirmishes and objective contests, Nunu & Willump relies on Biggest Snowball Ever! to initiate and Consume to secure monsters. Since Moonfall shuts down his ultimate, you can confidently contest neutral camps. Even if he tries to peel you with Snowball Barrage, your Pale Cascade shield absorbs his chip damage while you prepare a counter-engage using Crescent Strike and Lunar Rush to bypass his front-line presence.

立ち回り方

Your absolute rule is to hold Moonfall until you see Nunu & Willump start channeling Absolute Zero. Do not use it early in a fight just for damage. When he rolls in with Biggest Snowball Ever!, dodge the knock-up using Lunar Rush on a minion or monster marked by Crescent Strike. Once he panics and triggers his ultimate, immediately press your ultimate to cancel his channel and secure the kill.

チャンピオン詳細 → Nunu & Willumpのビルド →

その他のマッチアップ

Diana対策アイテム

これらのアイテムを購入すると、このチャンピオンの影響力を抑えられます。

Mercury's Treads
Mercury's Treads
Stasis Enchant
Stasis Enchant
Crown of the Shattered Queen
Spirit Visage
Spirit Visage
Maw of Malmortius
Maw of Malmortius

このチャンピオンへの対策

カウンターアングル

Diana jungleのカウンターを理解することは、彼女に1対1で勝てる相手を見つけるだけではありません。Dianaは、最初の大きな影響力が出る前にリズムを崩されると主に苦しみます。序盤のインベード、クリアリングのテンポの競り合い、深い視界、ディスエンゲージ、または彼女のエンゲージを耐えられるチャンピオンなどがそれに該当します。Lee SinとOlafは彼女の最初のチャンスに直接的な脅威となり、Graves、Kha'Zix、Wukong、またはJarvan IVのようなチャンピオンは、戦闘の角度次第で彼女を罰することができます。逆に、より遅い、または予測しやすいジャングラーは、彼女がレベル5に到達し、オブジェクト周りでプレイするのを許し、彼女のプランをより快適にします。

パッチの文脈

最高のDianaカウンターは、単にMoonfallを待つのではなく、彼女が準備できる前にゲームをプレイさせます。彼女が最初のクリアでテンポを失ったり、敵ジャングラーより後にレベル5に到達したり、視界のないリバーに入らなければならない場合、彼女の脅威は急激に低下します。2つのアイテムがあれば依然として危険ですが、序盤で彼女と競合できる、またはバックラインへのアクセスを妨げることができるジャングラーは、彼女の信頼性を低下させます。したがって、彼女に対する鍵は、戦闘そのものだけでなく、戦闘前の状態を罰することです。

クイックリード

  • 序盤のデュエリストは、彼女のレベル5を遅らせ、最初のオブジェクトを有利な戦闘に変えるのを防ぐことができます。
  • 彼女のバーストを耐えられる、またはE後の彼女をコントロールできるジャングラーは、Moonfallの決定力を大幅に低下させます。
  • 側面への視界は、単にリバーで守備的に集まるよりも、Dianaに対してしばしばより効果的です。

カウンターの原型

序盤のデュエリストとインベードの脅威

Dianaは、十分なテンポでレベル5に到達するために、クリーンな序盤のゲームが必要です。Lee SinとOlafは、Moonfallが利用可能になる前に彼女と競合したり、彼女のjungleで戦闘を強制したり、彼女が自由に最初のオブジェクトを選択するのを防いだりすることができます。このカウンタータイプは、彼女がクリア速度を持っているが、まだ集団戦を覆す同じ能力を持っていないときに、Dianaを攻撃するため機能します。

チャンピオンの適応方法. Dianaは、彼女が実際に助けられるレーンに向かってパスし、レベル5前に不必要なデュエルを避け、時には失ったキャンプを守る代わりにクロスマッピングを受け入れるべきです。彼女の目標は1v1に勝つことを証明することではなく、大きな遅延なしに最初の本当のタイミングに到達することです。

彼女のアクセスを妨げるジャングラー

Dianaは、Q、E、そしてMoonfallで重要なターゲットに到達したいと考えています。そのパスを妨害するジャングラーは、彼女のオールインをはるかにクリーンでなくします。Gravesはスペーシングをプレイして即座のバーストを否定でき、Wukongはクローンとノックアップで戦闘を妨害でき、Jarvan IVはDianaが不利な条件でエンゲージすることを強制する地形を作成できます。問題はデュエルだけでなく、クリアアングルの喪失です。

チャンピオンの適応方法. Dianaは、これらのチャンピオンが機動力やコントロールの一部を消費するのを待ってからコミットすべきです。早すぎるエンゲージは、彼らが彼女をターゲットから切り離す機会を与えます。彼女は側面、狭い通路、そして敵がすでに他の場所にコミットしている瞬間を探すべきです。

エグゼキューションの脅威と孤立の罰者

Dianaは5v5では非常に強力に見えますが、jungleを一人で移動したり、十分な視界なしに側面を準備したりすると、より脆弱になります。Kha'Zixはこれらの瞬間を罰します。なぜなら、彼は孤立を即時の脅威に変えるからです。Dianaが戦闘前に体力を失いすぎたり、守備的にスペルを使わなければならない場合、彼女はもはやMoonfallでエンゲージする同じ能力を持っていません。このマッチアップは、Dianaが爆発を探す前にスペースをコントロールしなければならないことを示しています。

チャンピオンの適応方法. Dianaは、情報のない孤立したパスを避け、supportの視界と共に移動し、チームから離れすぎた側面の準備を避けるべきです。このプロファイルに対しては、リスクの高い攻撃的な角度を取るよりも、集団戦まで生き残ることがしばしばより価値があります。

優先度の高いマッチアップ

Lee Sin

Lee Sinは、Dianaが安定を望むまさにその瞬間に攻撃するため、説明すべき優先度の高いマッチアップです。彼は侵入し、スカトルの競合をし、Moonfall前に小競り合いを強制し、彼女の最初のスパイクからゲームのペースを遠ざけることができます。Dianaは、すべてのプレッシャーポイントに機械的に対応しようとするべきではありません。彼女はレーンと共にパスし、クロスマップトレードを受け入れ、競合したキャンプをdragonとレベル5を遅らせる死に変えることを避けるべきです。

Olaf

Olafは異なる問題を作成します。彼はDianaが課したいバーストやコントロールを容易に尊重しません。彼は序盤の戦闘で前に歩き、テンポを競合し、彼女がアイテムを持つ前に小競り合いを非常に不快にさせることができます。Dianaは長いデュエルを避け、コントロールや追加のバーストを追加できるレーンの周りでプレイし、Olafの周りのターゲットにレベル5を変換することを目指すべきであり、彼にすべてを投資するのではなく。

対面時のよくある間違い

対面時のよくある間違い

  • Dianaに対して、dragonの入り口にきつくグループ化することは、彼女が探しているまさにMoonfallを与えます。
  • プレッシャーなしでレベル5に到達させ、その後、側面の視界なしに最初のオブジェクトを競合することは、彼女の土俵でプレイすることです。
  • Dianaがエンゲージする前に、最前線にすべてのクラウドコントロールスペルを使用することは、彼女のセカンドウェーブエンゲージをはるかに容易にします。
  • 彼女が序盤にgankしなかったから弱いと思っているのは危険です。彼女は単に、よりクリーンなオブジェクトスパイクを準備しているだけかもしれません。
  • ナーシャズ・トゥースやライチ・ベインといったアイテムのタイミングを無視すると、彼女のクリア、デュエルパワー、バーストスピードを過小評価することにつながります。

コーチングノート

  • Dianaに対する最善の策は、彼女のアルティメットを生き延びるだけでなく、彼女がクリーンに戦闘に到達するのを阻止することであることが多いです。
  • Dianaに直面した場合、彼女の角度に対する深い視界は、防御スペルにほぼ値します。これにより、ムーンフォールを決定的にするサプライズがなくなります。

FAQ

Dianaとjungleを効果的にどうやってカウンターしますか?

最も効果的な方法は、レベル5になる前に彼女のテンポを崩すか、オブジェクトの前に彼女の角度をコントロールすることです。Dianaは、ムーンフォール、敵の視界不良、そして追随する準備のできたチームと共に到達すると危険になります。jungleのパスを追跡し、側面に着弾地点を置き、タイトなグループ化を避け、あまり早く消費せずに彼女の参入のために防御ツールを保持する必要があります。

なぜLee SinはDianaにとって難しいのですか?

Lee Sinが難しいのは、彼女よりも早くプレイするからです。Dianaはクリーンにレベル5に到達したいと考えていますが、Lee Sinはムーンフォールが利用可能になる前に侵入したり、小競り合いを強制したり、川を争ったりすることができます。Dianaがレーン優先権なしで応答した場合、彼女はキャンプ以上のものを失うリスクがあります。彼女はオブジェクトのタイミングを失い、midゲームで遅れをとる可能性があり、これにより彼女の脅威が大幅に減少します。

チームファイトでDianaに対して散開すべきですか?

はい、しかしランダムではありません。ムーンフォールを避けるためだけに散開すると、到達しやすい孤立したターゲットが作成される可能性もあります。正しい対応は、彼女がアルティメットで複数のキャリーにヒットできないように十分なスペースを保ちつつ、彼女が参入した後に彼女をコントロールできるほど近くにいることです。目標は、無料のデュエルを犠牲にすることなく、彼女のエンゲージ価値を減らすことです。

どのアイテムやエンチャントがDianaを最も悩ませますか?

彼女のバーストを吸収または遅延させるツールが最も迷惑です。特にムーンフォールのために保持されたステイシスはそうです。Dianaは、彼女の参入がすぐに戦闘を開くことを望んでいます。彼女のアルティメットがステイシスに着弾した場合、または彼女のターゲットがペールを受けるのに十分長く生き残った場合、彼女はしばしば同じプレッシャーなしで敵チームの真ん中にいることになります。防御的なタイミングは、アイテム自体と同じくらい重要です。