S
2026年9月 · Patch 7.2d
Assassin · SUPPORT · MID

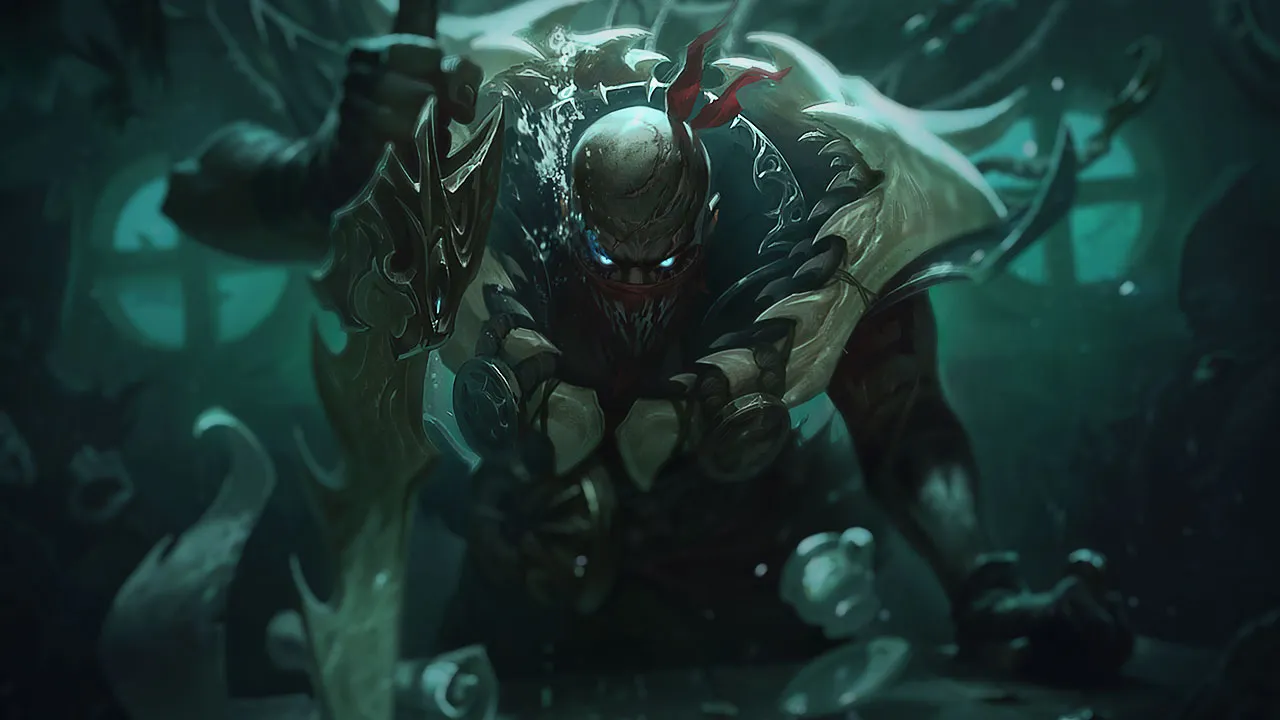
Pyke Wild Rift カウンターガイド

Pykeは、彼のexecutionの確実性を下げるhealshield主体の構成にカウンターされます。ステルス中の彼をrevealできるチャンピオンや、彼のreposition前にエンゲージできるチャンピオンは、彼の影響力を制限します。孤立したターゲットを作らないグループ主体の構成は、彼のpickの機会を減少させます。

★ SUPPORT · MID Tier S
ダメージ
UTIL
TANK
DIFF
Win 50.4% #43 · ↓4pt
Pick 5.7% #15
Ban 3.5% #49

Pyke Wild Rift カウンターガイド ★ Counter Sheet

マッチアップ一覧
マッチアップ 判定 有利度 勝率 ピック率
Zilean ハードカウンター +2 52.0% 1.3%
Rell ハードカウンター +2 51.2% 3.3%
Poppy ハードカウンター +2
Morgana 不利なマッチアップ +1 51.5% 6.3%
Zyra 不利なマッチアップ +1 51.4% 4.8%
Ornn 不利なマッチアップ +1 50.7% 1.4%
Sett 不利なマッチアップ +1 50.3% 2.1%
Bard 不利なマッチアップ +1 50.1% 1.2%
Thresh 不利なマッチアップ +1 50.1% 13.6%
Alistar 不利なマッチアップ +1 49.7% 4.4%
Lulu 不利なマッチアップ +1 48.5% 11.2%
Soraka スキル次第のマッチアップ ±0 51.3% 5.8%
Rakan スキル次第のマッチアップ ±0 50.5% 3.1%
Janna スキル次第のマッチアップ ±0 50.4% 1.5%
Blitzcrank スキル次第のマッチアップ ±0 49.4% 7.2%
Sona 有利なマッチアップ −1 52.8% 6.6%
Braum 有利なマッチアップ −1 52.1% 4.1%
Galio 有利なマッチアップ −1 52.0% 2.8%
Senna 有利なマッチアップ −1 51.5% 5.0%
Brand 有利なマッチアップ −1 51.3% 2.5%
Maokai 有利なマッチアップ −1 51.1% 5.0%
Leona 有利なマッチアップ −1 51.0% 8.9%
Malphite 有利なマッチアップ −1 50.3% 7.6%
Seraphine 有利なマッチアップ −1 50.3% 6.5%
Milio 有利なマッチアップ −1 49.3% 5.5%
Nautilus 有利なマッチアップ −1 48.9% 10.7%
Swain 有利なマッチアップ −1 48.2% 3.1%
Veigar 有利なマッチアップ −1 47.7% 2.9%
Ashe 有利なマッチアップ −1
Norra 有利なマッチアップ −1
Vel'Koz 有利なマッチアップ −2 51.8% 1.7%
Karma 有利なマッチアップ −2 51.4% 6.8%
Nami 有利なマッチアップ −2 49.7% 6.5%
Lux 有利なマッチアップ −2 49.7% 8.0%
Yuumi 有利なマッチアップ −2 46.9% 10.7%

Edge: Wild Rift Core canonical verdict (−3 to +3), shown from the point of view of the champion named in the row. Win rate and pick rate: the opponent's own rate in this role — Wild Rift CN · Challenger, Patch 7.2d. Not a head-to-head win rate.

ハードカウンター

3

これらのチャンピオンは、こちらのビルドやプレイスタイルを真正面から上回る構成を持ち、レーン戦のコントロールとファームを極めて難しくする。彼らのスキルはこちらの主要な強みを無効化し、いつも通りのプランを実行しようとした瞬間に手痛い反撃を受けさせてくる。こうしたマッチアップでは、ミスを最小限に抑え、正面からの対決以外で解決策を探すことが重要になる。

Zilean

Zilean+2

execute denialrevive mechanic This matchup is a direct mechanical counter because of how your ultimate interacts with his. Zilean can reactively cast Chronoshift on whoever you target with Death from Below. When he does, your execute is entirely negated, the target revives, and you are denied both your kill reset and the gold sharing. Additionally, his ranged harass with Time Bomb makes finding safe engages very difficult. Zileanのビルド → 詳細を見る
Zilean

理由

This matchup is a direct mechanical counter because of how your ultimate interacts with his. Zilean can reactively cast Chronoshift on whoever you target with Death from Below. When he does, your execute is entirely negated, the target revives, and you are denied both your kill reset and the gold sharing. Additionally, his ranged harass with Time Bomb makes finding safe engages very difficult.

レーン戦への影響

During the laning phase, Zilean uses Temporal Mirage to escape your Bone Skewer or speed up his ADC to dodge your Phantom Undertow. This means your lane pressure is severely neutralized. Even if you land a hook, double Time Bomb zones you out, forcing you to rely on Gift of the Drowned Ones to survive the poke. Once he gets his ultimate, your kill threat vanishes, trapping you in a passive lane.

立ち回り方

To win this mental chess game, you must bait out Chronoshift before committing your execute. Engage with Bone Skewer and Phantom Undertow to force the opponent low, but intentionally hold Death from Below. If Zilean panics and casts his revive early, swap targets immediately or use Ghostwater Dive to disengage and wait out the five-second duration. Only strike with your ultimate when you are absolutely sure his revive is on cooldown.

チャンピオン詳細 → Zileanのビルド →
Rell

Rell+2

heavy ccanti engage Rell fundamentally counters your offensive toolkit. Whenever you attempt to engage or escape with Phantom Undertow, her rapid knockups easily interrupt your dash mid-air, leaving you stranded in the enemy team. Her heavy crowd control also makes pulling her with Bone Skewer incredibly dangerous, as she can immediately turn the trade into a lethal counter-engage. Rellのビルド → 詳細を見る
Rell

理由

Rell fundamentally counters your offensive toolkit. Whenever you attempt to engage or escape with Phantom Undertow, her rapid knockups easily interrupt your dash mid-air, leaving you stranded in the enemy team. Her heavy crowd control also makes pulling her with Bone Skewer incredibly dangerous, as she can immediately turn the trade into a lethal counter-engage.

レーン戦への影響

This matchup forces you to play completely defensively, sacrificing wave priority. Being pushed under your turret prevents you from slipping into bushes to trigger Gift of the Drowned Ones, leaving you low on health and vulnerable to dives. This lack of agency inside the lane delays your gold spike and heavily limits your early map pressure.

立ち回り方

Activate Ghostwater Dive to bypass her vision and secure roaming paths rather than trying to fight in lane. Never commit with Phantom Undertow unless you see her waste her knockup abilities. If your carry is safe, abandon the lane to pressure other lanes, holding Bone Skewer purely to peel Rell away from your allies, and focus on securing gold resets using Death from Below in chaotic skirmishes.

チャンピオン詳細 → Rellのビルド →

その他のマッチアップ

不利なマッチアップ

8

これらのチャンピオンは、マッチアップ自体を絶望的にするわけではないが、対面で優位に立ちやすいツールを持っている。射程が長かったり、攻撃を受け止める力が高かったり、エンゲージへの対応手段が豊富だったりする。アプローチを調整し、戦闘を受け入れるタイミングを慎重に選ぶ必要がある。

Morgana

Morgana+1

peelskirmish Morgana completely neutralizes your engage potential. Every time you charge Bone Skewer or dash forward with Phantom Undertow, she can instantly cast Black Shield to absorb the crowd control, leaving you overextended. Her Dark Binding also easily punishes your linear dash path, stopping you mid-air. This constant threat forces you to play defensively in a lane where you cannot force direct 2v2 kills. Morganaのビルド → 詳細を見る
Morgana

理由

Morgana completely neutralizes your engage potential. Every time you charge Bone Skewer or dash forward with Phantom Undertow, she can instantly cast Black Shield to absorb the crowd control, leaving you overextended. Her Dark Binding also easily punishes your linear dash path, stopping you mid-air. This constant threat forces you to play defensively in a lane where you cannot force direct 2v2 kills.

レーン戦への影響

This interaction forces you into a passive stance near your turret, as stepping up to hook invites a counter-engage. Since her Tormented Shadow helps her AD carry push waves easily, you will often find yourself shoved under tower. Trading health is highly inefficient because her Soul Siphon keeps her healthy while your Gift of the Drowned Ones only heals you if you can safely drop vision.

立ち回り方

Do not waste your mana trying to break her magic shield. Instead, abuse your mobility. Use Ghostwater Dive to camouflage yourself and fake your presence in lane, then immediately sprint to mid lane or the river. If Morgana is forced to hold her Black Shield in lane, you can pressure other map areas. When returning to lane, only cast Bone Skewer from brush to force her to react blindly and waste her cooldowns.

チャンピオン詳細 → Morganaのビルド →
Thresh

Thresh+1

disrupt engagehook vs hook Thresh holds all the cards in direct trades because Flay completely shuts down your main setup. Whenever you attempt to close the distance with Phantom Undertow, a reactive Thresh can cancel your dash mid-air. This denies your stun, keeps you trapped in hostile range, and leaves you wide open to a point-blank Death Sentence or The Box without any easy way to escape. Threshのビルド → 詳細を見る
Thresh

理由

Thresh holds all the cards in direct trades because Flay completely shuts down your main setup. Whenever you attempt to close the distance with Phantom Undertow, a reactive Thresh can cancel your dash mid-air. This denies your stun, keeps you trapped in hostile range, and leaves you wide open to a point-blank Death Sentence or The Box without any easy way to escape.

レーン戦への影響

Because your primary engage is so easily countered, you cannot freely fish with Bone Skewer near their wave. If you miss, Thresh can walk up and zone you. You lose the ability to force early advantages, meaning you will often find yourself pushed under turret, relying on Gift of the Drowned Ones to recover from ranged harass while Thresh uses Dark Passage to keep his marksman completely safe.

立ち回り方

To survive and thrive, you must play a patient baiting game. Never initiate with Phantom Undertow while Thresh has Flay available. Instead, use Ghostwater Dive to threaten an angle, forcing him to waste his sweep early. Hook them with Bone Skewer from maximum range, but only follow up with your dash if you see his chain sweep on cooldown. If he misses his hook, use that brief recovery window to reposition.

チャンピオン詳細 → Threshのビルド →
Zyra

Zyra+1

hook blockingzone control Landing a clean Bone Skewer is nearly impossible against a skilled Zyra. The moment you channel your harpoon, she can instantly drop a seed with Rampant Growth and trigger it with Deadly Spines or Grasping Roots. This spawns a plant directly in the path of your hook, absorbing the entire projectile. Combined with her passive Garden of Thorns, the lane becomes a minefield where your main engage is constantly intercepted by disposable summons. Zyraのビルド → 詳細を見る
Zyra

理由

Landing a clean Bone Skewer is nearly impossible against a skilled Zyra. The moment you channel your harpoon, she can instantly drop a seed with Rampant Growth and trigger it with Deadly Spines or Grasping Roots. This spawns a plant directly in the path of your hook, absorbing the entire projectile. Combined with her passive Garden of Thorns, the lane becomes a minefield where your main engage is constantly intercepted by disposable summons.

レーン戦への影響

Because your hook is neutralized, Zyra freely dictates the wave's pace. She will constantly shove you under turret using Deadly Spines plants to chip away at your health bar. Your passive Gift of the Drowned Ones is heavily taxed as you are forced to constantly retreat into brushes or use Ghostwater Dive just to regenerate her relentless ranged poke, leaving your ADC isolated and bleeding gold under tower.

立ち回り方

To bypass her summons, you must alter your angling. Instead of seeking direct hooks, position parallel to the minion wave and use Ghostwater Dive to threaten a flank. Hold your Bone Skewer until she wastes Rampant Growth charges on wave clear. If she mispositions to poke, use a sudden Phantom Undertow dash over her plants to close the distance, putting her fragile health bar directly within range of your Death from Below.

チャンピオン詳細 → Zyraのビルド →
Lulu

Lulu+1

disengageexecute deny This matchup is dictated by how Lulu's defensive utility neutralizes your assassination attempts. While your Bone Skewer and Phantom Undertow combo can lock down her carry, her Wild Growth acts as the ultimate counter-measure. By granting instant bonus health to your target, she pushes them right out of your Death from Below execute threshold, stripping you of your reset and gold sharing while leaving you stranded in melee range. Luluのビルド → 詳細を見る
Lulu

理由

This matchup is dictated by how Lulu's defensive utility neutralizes your assassination attempts. While your Bone Skewer and Phantom Undertow combo can lock down her carry, her Wild Growth acts as the ultimate counter-measure. By granting instant bonus health to your target, she pushes them right out of your Death from Below execute threshold, stripping you of your reset and gold sharing while leaving you stranded in melee range.

レーン戦への影響

Lulu's ranged poke using Glitterlance and Help, Pix! makes it difficult to maintain high health, forcing you to rely heavily on Gift of the Drowned Ones in the brushes. If you attempt an all-in, her Whimsy can polymorph you mid-dash during Phantom Undertow, turning your aggression into a heavy health deficit. This constant threat of neutralisation denies you easy kill pressure, slowing down your gold generation.

立ち回り方

You must play like a patient predator. Never commit Death from Below early in skirmishes; instead, bait out Wild Growth by using Bone Skewer to drag her or her ally into a threatening position. If she panics and uses her ultimate, immediately disengage with Ghostwater Dive. Once her defensive ultimates and Whimsy are on cooldown, you have a brief window to re-engage and secure the clean execute before her shields return.

チャンピオン詳細 → Luluのビルド →
Bard

Bard+1

execution denialroaming This lane is highly unfavorable because Bard possesses the ultimate tool to neutralize your execution mechanic. The moment you cast Death from Below to execute a low-health target, Bard can react with Tempered Fate. By putting his endangered ally in stasis, he entirely blocks your ultimate's damage, wasting your crucial ability and completely denying your gold-sharing reset loop, leaving you vulnerable in the middle of the fight. Bardのビルド → 詳細を見る
Bard

理由

This lane is highly unfavorable because Bard possesses the ultimate tool to neutralize your execution mechanic. The moment you cast Death from Below to execute a low-health target, Bard can react with Tempered Fate. By putting his endangered ally in stasis, he entirely blocks your ultimate's damage, wasting your crucial ability and completely denying your gold-sharing reset loop, leaving you vulnerable in the middle of the fight.

レーン戦への影響

During the laning phase, Bard's ranged pressure through Traveler's Call makes it painful to fish for hooks. Even if you land a clean Bone Skewer into Phantom Undertow, Bard can mitigate the trade with Caretaker's Shrine heals or escape through walls using Magical Journey. Once ultimates are unlocked, your threat of diving under tower vanishes, forcing you to play passively while Bard roams freely to gather chimes.

立ち回り方

To survive and find openings, you must track the cooldown of Tempered Fate meticulously. Never initiate with your execution; instead, use Bone Skewer to pull Bard or his carry, forcing him to panic-cast his stasis defensively. If he roams, abuse his absence to catch the isolated marksman, but ensure you disengage with Ghostwater Dive if Cosmic Binding threatens to stun you against a wall. Hold your ultimate until his stasis is strictly on cooldown.

チャンピオン詳細 → Bardのビルド →
Alistar

Alistar+1

kill lanepeel heavy Engaging Alistar directly is highly punishing because he completely neutralizes your primary engage tool. Whenever you try to slide in with Phantom Undertow, a reactive Alistar can instantly trigger Pulverize to knock you up mid-dash. This completely cancels your movement, leaving you stranded in the middle of their duo lane without landing your stun, while his Triumphant Roar passively heals off any chip damage you try to poke with. Alistarのビルド → 詳細を見る
Alistar

理由

Engaging Alistar directly is highly punishing because he completely neutralizes your primary engage tool. Whenever you try to slide in with Phantom Undertow, a reactive Alistar can instantly trigger Pulverize to knock you up mid-dash. This completely cancels your movement, leaving you stranded in the middle of their duo lane without landing your stun, while his Triumphant Roar passively heals off any chip damage you try to poke with.

レーン戦への影響

This threat forces you into a passive role where you cannot freely fish for hooks. If you attempt a Bone Skewer, Alistar can easily counter-engage with Headbutt to push your ADC away or isolate you. You will find yourself unable to establish brush control, and any aggressive trade usually ends up with you taking massive damage, forcing early uses of Ghostwater Dive just to escape and heal your passive.

立ち回り方

To survive and impact the lane, you must play around his cooldowns. Never cast Phantom Undertow offensively while his Pulverize is available; instead, bait his Headbutt first. If he wastes his combo, you have a brief window to strike. Use Bone Skewer from the safety of the bushes to displace his ADC instead of him. If the lane becomes totally locked down, look to roam using Ghostwater Dive to assist other lanes.

チャンピオン詳細 → Alistarのビルド →

その他のマッチアップ

スキル次第のマッチアップ

4

このマッチアップは何よりもまず実行力の勝負であり、両者ともに優位を取れる現実的な手段を持っている。重要なスキルを一つ避けられるか、エンゲージを正しく読めるか、あるいはたった一つの位置取りのミスが、勝敗を分けることもある。マッチアップを理解し、行動すべき瞬間を見極める力がとりわけ重要になる。

Blitzcrank

Blitzcrank±0

mobility clashskill matchup This matchup is a pure battle of reaction times and spatial awareness. Your entire survival depends on using Ghostwater Dive to gain the movement speed needed to sidestep Rocket Grab, or buffering Phantom Undertow to escape the pull direction. If Blitzcrank successfully lands his hook, his immediate follow-up with Power Fist and Static Field will burst you down before Gift of the Drowned Ones can even trigger. Blitzcrankのビルド → 詳細を見る
Blitzcrank

理由

This matchup is a pure battle of reaction times and spatial awareness. Your entire survival depends on using Ghostwater Dive to gain the movement speed needed to sidestep Rocket Grab, or buffering Phantom Undertow to escape the pull direction. If Blitzcrank successfully lands his hook, his immediate follow-up with Power Fist and Static Field will burst you down before Gift of the Drowned Ones can even trigger.

レーン戦への影響

The lane is a tense stalemate where neither side can step past the minion wave without risking death. When Blitzcrank misses Rocket Grab, he loses all lane pressure, allowing you to walk up aggressively, fish for your own Bone Skewer, and force trades. However, if you get hooked near his tower, his Mana Barrier makes counter-killing him extremely difficult, resulting in lost turret plates and forced early recalls.

立ち回り方

Actively bait his hook by fake-stepping out of minion cover with Ghostwater Dive active, then immediately change direction. Always hold Phantom Undertow as a pure escape tool rather than an engage until Rocket Grab is on cooldown. If you do get pulled, immediately dash through him to stun him with Phantom Undertow and prevent his follow-up Power Fist, then use Death from Below only once you have bypassed his Mana Barrier shield.

チャンピオン詳細 → Blitzcrankのビルド →
Janna

Janna±0

disengagepeel focusexecute danger This matchup is a pure contest of reaction speeds. Janna can completely shut down your primary engage by releasing a fast Howling Gale to knock you up mid-dash during Phantom Undertow. However, the tide turns completely once health bars drop. Even if Janna attempts to protect her low-health marksman with Eye of the Storm, the shield's raw absorption is completely bypassed by the execute threshold of your Death from Below. Jannaのビルド → 詳細を見る
Janna

理由

This matchup is a pure contest of reaction speeds. Janna can completely shut down your primary engage by releasing a fast Howling Gale to knock you up mid-dash during Phantom Undertow. However, the tide turns completely once health bars drop. Even if Janna attempts to protect her low-health marksman with Eye of the Storm, the shield's raw absorption is completely bypassed by the execute threshold of your Death from Below.

レーン戦への影響

You cannot blindly fish for hooks or dash forward without tracking Janna's tornado. If she holds her Howling Gale, your lane presence is severely choked, forcing you to rely on passive health regeneration from Gift of the Drowned Ones after taking poke from her Zephyr. However, because her Eye of the Storm cannot save her AD carry from your ultimate, any successful hook on her or her carry creates a lethal, un-shieldable execution window.

立ち回り方

To bypass Janna's disengage, bait her tornado before committing. Charge your Bone Skewer from the brush to force her to react with a hasty Howling Gale, or use the camouflage of Ghostwater Dive to flank from an angle where her linear knockup is harder to aim. If she misses or wastes her wind, immediately follow up with Phantom Undertow. Once an enemy is below the threshold, ignore her shield and drop Death from Below directly on top of them for an unmitigated reset.

チャンピオン詳細 → Jannaのビルド →
Soraka

Soraka±0

silence zonetarget focus This matchup is defined by how you manage your hook channel against her instant silence. The moment you start charging Bone Skewer, you become a slow target, making it incredibly easy for Soraka to drop Equinox directly beneath your feet. This instantly cancels your charge, puts your main catch tool on cooldown, and prevents you from immediately escaping using Ghostwater Dive or Phantom Undertow. Sorakaのビルド → 詳細を見る
Soraka

理由

This matchup is defined by how you manage your hook channel against her instant silence. The moment you start charging Bone Skewer, you become a slow target, making it incredibly easy for Soraka to drop Equinox directly beneath your feet. This instantly cancels your charge, puts your main catch tool on cooldown, and prevents you from immediately escaping using Ghostwater Dive or Phantom Undertow.

レーン戦への影響

If Soraka holds her silence, you cannot pressure her marksman because charging your hook openly guarantees a trade loss. She will poke you with Starcall, neutralizing your Gift of the Drowned Ones regen if you cannot drop vision. However, if she misplays her Equinox, she becomes entirely defenseless against your Phantom Undertow, turning her into an easy execute target for Death from Below.

立ち回り方

To bypass her silence, never charge Bone Skewer in plain sight. Activate Ghostwater Dive to mask your channel from the brush, or use the instant tap-cast of your hook to prevent her from reacting in time. If she wastes Equinox to poke or peel her ally, you have a brief window to aggressively dash forward with Phantom Undertow. Once she is CC'd, ignore her Astral Infusion sustain and focus her down to unlock your Death from Below.

チャンピオン詳細 → Sorakaのビルド →

その他のマッチアップ

有利なマッチアップ

20

これらのチャンピオンは、こちらの主要な強みに効果的に対応するのが難しく、より自由に対面を組み立てることができる。プレッシャーをかけて有利な交換を引き出す手段は複数あることが多い。相手が態勢を立て直す時間を与えるのではなく、この優位を活かして主導権を握ろう。

Milio

Milio−1

anti engageexecute threat Pyke dominates this matchup because Death from Below completely ignores the temporary shield value provided by Milio's Warm Hugs. Since Milio cannot block your execute threshold with his shield, he is forced to rely on the healing over time from Cozy Campfire or his ultimate Breath of Life to keep his marksman alive. This vulnerability turns his defensive kit into a reactive, inefficient tool against your ultimate. Milioのビルド → 詳細を見る
Milio

理由

Pyke dominates this matchup because Death from Below completely ignores the temporary shield value provided by Milio's Warm Hugs. Since Milio cannot block your execute threshold with his shield, he is forced to rely on the healing over time from Cozy Campfire or his ultimate Breath of Life to keep his marksman alive. This vulnerability turns his defensive kit into a reactive, inefficient tool against your ultimate.

レーン戦への影響

This interaction forces Milio to play incredibly far back, rendering his ranged poke from Fired Up! much harder to land without exposing himself. You can easily threaten the bushes with Ghostwater Dive, establishing deep zone control. Because Milio cannot safely trade into your engage, his carry is starved of the extended range from Cozy Campfire, allowing your lane to dictate recall timings.

立ち回り方

Position yourself aggressively in the lane brush to force Milio into awkward angles. Use Ghostwater Dive to close the distance, then hold Bone Skewer until he attempts to disengage with Ultra Mega Fire Kick. If he pre-emptively shields his carry with Warm Hugs, immediately trigger Phantom Undertow to lock them down. Should he negate your stun with Breath of Life, disengage temporarily to let your passive Gift of the Drowned Ones heal you.

チャンピオン詳細 → Milioのビルド →
Karma

Karma−2

engageall in Karma wants to poke you down with Inner Flame and use Inspire to negate trades, but her lack of hard mobility makes her incredibly vulnerable. A single accurate Bone Skewer pulls her out of her safe zone, setting up an easy stun with Phantom Undertow. Because Death from Below completely ignores her Inspire shields when she is low, her defensive utility is rendered useless once you find an opening. Karmaのビルド → 詳細を見る
Karma

理由

Karma wants to poke you down with Inner Flame and use Inspire to negate trades, but her lack of hard mobility makes her incredibly vulnerable. A single accurate Bone Skewer pulls her out of her safe zone, setting up an easy stun with Phantom Undertow. Because Death from Below completely ignores her Inspire shields when she is low, her defensive utility is rendered useless once you find an opening.

レーン戦への影響

This matchup forces Karma to play with extreme caution, ruining her usual plan of shoving waves with Inner Flame. She cannot step up to tether you with Focused Resolve without risking a fatal counter-engage. This constant threat of your Bone Skewer creates immense zoning pressure, allowing you to control the brush, heal up poke via Gift of the Drowned Ones, and set up easy dives.

立ち回り方

Abuse the lane brushes to constantly trigger Gift of the Drowned Ones and clear her vision. Watch for Karma to waste her Mantra on an empowered Inner Flame; the moment she does, activate Ghostwater Dive to close the distance and charge Bone Skewer. If she attempts to bind you with Focused Resolve, dash straight through her with Phantom Undertow to turn her tether into a self-destructive stun.

チャンピオン詳細 → Karmaのビルド →
Seraphine

Seraphine−1

immobile targetdodge cc Seraphine relies on poking you down from afar using Stage Presence and High Note, but her complete lack of mobility makes her a sitting duck for Bone Skewer. Because she cannot quickly reposition without committing her long-cooldown Surround Sound, any successful hook guarantees a massive health chunk. Your Gift of the Drowned Ones easily negates her chip damage, while she cannot survive your immediate burst if caught out of position. Seraphineのビルド → 詳細を見る
Seraphine

理由

Seraphine relies on poking you down from afar using Stage Presence and High Note, but her complete lack of mobility makes her a sitting duck for Bone Skewer. Because she cannot quickly reposition without committing her long-cooldown Surround Sound, any successful hook guarantees a massive health chunk. Your Gift of the Drowned Ones easily negates her chip damage, while she cannot survive your immediate burst if caught out of position.

レーン戦への影響

This matchup forces Seraphine to play incredibly scared, neutralizing her ability to shove waves with Beat Drop. You command the lane bushes, forcing her to yield wave control and play under her turret. This constant threat of a Bone Skewer trade prevents her from safely generating Notes, allowing you to easily lock down her ADC or freely exit the lane to pressure mid lane.

立ち回り方

Stand aggressively in the lane brush to keep Seraphine guessing. Never charge Bone Skewer predictably; instead, tap-cast it or walk up to threaten Phantom Undertow when she steps up to farm. During skirmishes and teamfights, do not engage blindly. Hold Ghostwater Dive specifically to gain the burst of movement speed needed to reactively dodge her massive Encore wave. If she manages to shield herself with Surround Sound, delay your Death from Below until the temporary health decay clears.

チャンピオン詳細 → Seraphineのビルド →
Sona

Sona−1

early kill pressurescaling threat Sona's frail starting stats make her the ultimate prey for Pyke. Because her base health pool is exceptionally low, a single successful Bone Skewer pulling her in, followed immediately by Phantom Undertow, will force her to burn Flash or die instantly. Before she can scale her healing through Aria of Perseverance or stack Power Chord, your physical burst completely overwhelms her squishy profile. Sonaのビルド → 詳細を見る
Sona

理由

Sona's frail starting stats make her the ultimate prey for Pyke. Because her base health pool is exceptionally low, a single successful Bone Skewer pulling her in, followed immediately by Phantom Undertow, will force her to burn Flash or die instantly. Before she can scale her healing through Aria of Perseverance or stack Power Chord, your physical burst completely overwhelms her squishy profile.

レーン戦への影響

This vulnerability completely paralyzes Sona's early lane presence. She cannot step up to poke with Hymn of Valor without risking absolute annihilation. This grants you total control over the lane brushes, allowing you to zone her and her carry off the wave. Any attempt by Sona to trade back will result in chunked health that her costly Aria of Perseverance cannot sustain, leading to rapid dive opportunities or forced recalls.

立ち回り方

To execute this lane perfectly, abuse the brush using Ghostwater Dive to hide your positioning and force Sona into defensive positioning. Hold your Bone Skewer ; the sheer threat of the hook prevents her from poking. Once she steps up to trigger Power Chord, instantly unleash the Bone Skewer and Phantom Undertow chain. If she reaches level five, do not engage head-on if her Crescendo is up; instead, wait for your ADC to bait it, then clean up with Death from Below.

チャンピオン詳細 → Sonaのビルド →
Lux

Lux−2

vision controlspacing Lux relies entirely on landing her roots to survive or burst, but you hold all the cards here. Because Light Binding is a relatively slow projectile, you can easily react and dodge it using the movement speed from Ghostwater Dive or the dash from Phantom Undertow. Once her primary self-peel is gone, Lux has zero mobility, making her an incredibly easy target for your Bone Skewer. Luxのビルド → 詳細を見る
Lux

理由

Lux relies entirely on landing her roots to survive or burst, but you hold all the cards here. Because Light Binding is a relatively slow projectile, you can easily react and dodge it using the movement speed from Ghostwater Dive or the dash from Phantom Undertow. Once her primary self-peel is gone, Lux has zero mobility, making her an incredibly easy target for your Bone Skewer.

レーン戦への影響

This dynamic forces Lux to play extremely far back, severely limiting her ability to poke you down with Lucent Singularity or trigger Illumination. Any attempt by her to step forward to secure bush control or apply pressure instantly turns into a lethal threat. You can command the lane, zoning her away from the wave while keeping your health high with Gift of the Drowned Ones if she lands a stray hit.

立ち回り方

Position yourself aggressively in the lane brushes to force Lux to throw Light Binding blindly. Do not start trades with Bone Skewer; instead, activate Ghostwater Dive to bait out her root. Once she misses or you dash through her with Phantom Undertow, pull her back for an easy kill. If her shield Prismatic Barrier is active, delay your execution with Death from Below just a second until the shield decays to secure the reset.

チャンピオン詳細 → Luxのビルド →
Nami

Nami−2

peeldisengage Pyke dominates this matchup because Nami is incredibly fragile against raw physical burst, but executing her requires baiting her main crowd control. When you dash forward with Phantom Undertow, your movement path becomes entirely linear and predictable. A skilled Nami will immediately throw Aqua Prison along that trajectory to bubble you mid-dash, canceling your stun setup and leaving you vulnerable to her trading back with Ebb and Flow. Namiのビルド → 詳細を見る
Nami

理由

Pyke dominates this matchup because Nami is incredibly fragile against raw physical burst, but executing her requires baiting her main crowd control. When you dash forward with Phantom Undertow, your movement path becomes entirely linear and predictable. A skilled Nami will immediately throw Aqua Prison along that trajectory to bubble you mid-dash, canceling your stun setup and leaving you vulnerable to her trading back with Ebb and Flow.

レーン戦への影響

This interaction turns the lane into a high-stakes baiting game where Nami cannot safely step up to poke with Tidecaller's Blessing without risking a lethal hook. If she holds her bubble, you can zone her off the wave, giving your carry complete control over the wave state and secure easy tower plates. However, missing your engage or getting bubbled mid-dash immediately swings the pressure, forcing you to retreat with Ghostwater Dive to heal up.

立ち回り方

To safely secure kills, never lead with your dash. Instead, fish for a hook with Bone Skewer from the brush or use the movement speed from Ghostwater Dive to force her to panic-cast Aqua Prison early. Only launch Phantom Undertow once her bubble is visibly wasted, allowing you to easily lock her down and finish her with Death from Below. If she refuses to use her crowd control, simply walk her down and save your dash to follow her Tidal Wave disengage.

チャンピオン詳細 → Namiのビルド →
Yuumi

Yuumi−2

squishy targetroaming advantage Yuumi’s entire defensive loop relies on being untargetable via You and Me!, which consolidates her and her host into a single, massive target for your hooks. By landing Bone Skewer on the anchored ADC, you drag both enemies into melee range simultaneously. Since Zoomies has an immense early mana cost and weak healing output, Yuumi simply cannot out-sustain the raw physical burst you and your Marksman unleash during these early engagements. Yuumiのビルド → 詳細を見る
Yuumi

理由

Yuumi’s entire defensive loop relies on being untargetable via You and Me!, which consolidates her and her host into a single, massive target for your hooks. By landing Bone Skewer on the anchored ADC, you drag both enemies into melee range simultaneously. Since Zoomies has an immense early mana cost and weak healing output, Yuumi simply cannot out-sustain the raw physical burst you and your Marksman unleash during these early engagements.

レーン戦への影響

Because Yuumi cannot block skillshots while attached, the enemy duo is forced to play extremely safe, giving up wave control and letting you dictate the push. This constant threat of an all-in allows you to crash waves easily, creating massive windows to leave lane. Because you require very little presence to protect your ADC against a low-threat Yuumi lane, you gain complete freedom to impact other map areas.

立ち回り方

Utilize Ghostwater Dive to bypass the lane brushes unseen, forcing the enemy carry to retreat in panic. Hold Bone Skewer until Yuumi’s host locks themselves in an auto-attack animation to guarantee the hook. If Yuumi detaches to trigger Bop 'n' Block, immediately punish her with Phantom Undertow before she can re-attach. Once you crash a wave, immediately roam toward mid, using Death from Below to secure kills while Yuumi is stuck slowly farming under her turret.

チャンピオン詳細 → Yuumiのビルド →

その他のマッチアップ

Pyke対策アイテム

これらのアイテムを購入すると、このチャンピオンの影響力を抑えられます。

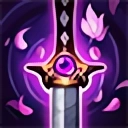
Umbral Glaive
Umbral Glaive
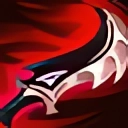
Youmuu's Ghostblade
Youmuu's Ghostblade
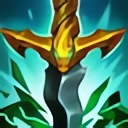
Edge of Night
Edge of Night
Duskblade of Draktharr
Serpent's Fang
Serpent's Fang

このチャンピオンへの対策

カウンターアングル

Pykeへのカウンターを理解することは、レーンで彼に勝てるサポートをリストアップするだけではありません。Pykeは、彼の最初の行動ウィンドウを破るチャンピオンに対して主に負けます。Ghostwater Diveから出た瞬間のインスタントCC、Death From Belowを遅らせるシールドやエンゲージ妨害、または彼と脆いターゲットの間に立てるフロントラインです。一方で、彼はブッシュを取ったり、川から斜めにプレイしたりするPykeに対して、即座の対応策を持たない、クリーンなバックラインのポジショニングに頼るチャンピオンを罰します。したがって、マッチアップはフックの前、つまり視界、ボットレーンのウェーブ状況、防御的なクールダウン、そして敵のキャリーを守る能力によって決まることが多いです。Pykeが見えていると、彼は予測可能になります。情報なしで無理をすると、彼は脆くなります。地形を準備すれば、難しいマッチアップでもプレイ可能になります。

パッチの文脈

最高のPykeカウンターは、単に彼のエンゲージを生き延びるだけでなく、彼が入ってきたことを後悔させます。Morganaはシーケンスをブロックまたは遅延させることができ、LeonaとAlistarは彼が踏み込みすぎるとロックダウンでき、Threshはフックをトラップに変えることができ、BraumやNautilusのようなプロファイルはバックラインへのアクセスをはるかに危険にします。Pykeを悩ませるのは、単にタンクであることだけではありません。Death From Belowが脅威になる前に、彼の短いタイミングウィンドウが中断されることです。したがって、彼はこれらのマッチアップを視界、ローム、強制的なクールダウンで勝つ必要があり、繰り返しの正面からのオールインではありません。

クイックリード

  • Pykeは、敵がフックを吸収するだけでなく、エントリーに即座に対応できる場合に苦労します。
  • シールド、強力なCC、そして保護的なフロントラインは、Death From Belowの信頼性を低下させます。
  • 彼の最高の対戦相手は、ターゲットがフォグを尊重する必要があるが、Pykeが角度を見つけたときに直接的な罰がない場合です。

カウンターの原型

エンゲージ妨害と実行を妨げるシールド

Pykeは、ノックバックまたはスタンされたターゲットを非常に速い実行しきい値に変えたいと考えています。シールドを追加したり、CCをブロックしたり、フィニッシュを遅延させたりするチャンピオンは、そのロジックを破ります。Morganaは、Pykeにフックを投げる前に考えさせる必要があります。なぜなら、一度の適切な防御タイミングが、彼が作り出したウィンドウを消去する可能性があるからです。Braumも短いトレードを複雑にします。彼はターゲットを保護し、Pykeのステップインを罰し、オールインを延長戦に変えることができます。これはまさにPykeがプレイしたくない種類の戦いです。

チャンピオンの適応方法. Pykeは、直接的な実行を探すのではなく、まず防御的なスペルを強制する必要があります。フックを脅かし、視界をクリアし、離れてから、シールドまたはエンゲージ妨害が利用できないときに戻ります。レーンでの無理強いよりもロームの方が良い場合もあります。

エントリーを罰するインスタントCCサポート

Pykeは、角度とタイミングを選択したときに危険です。Leona、Alistar、またはThreshに対して、その特権はしばしば消えます。Bone Skewerをチャージしたり、Ghostwater Diveから出たりするために踏み込みすぎると、シーケンスを完了する前にロックダウンされる可能性があります。これらのマッチアップは主に過信を罰します。Pykeはエンゲージしていると思っているかもしれませんが、相手は彼のエントリーを固定点に変え、彼のADCを後退させ、Death From Belowが良い状態で到着するのを防ぎます。

チャンピオンの適応方法. 正面からのエンゲージデュエルをプレイしないでください。敵に位置を示させ、サイドのブッシュを悪用し、敵の主要なCCがちょうど使われたタイミングを探してください。敵のsupportがレーンを保持している場合、川またはmidを攻撃してください。

脆いターゲットへのアクセスをブロックするフロントライン

Pykeは、すでにダメージを受けたターゲットに到達するために、戦闘構造をバイパスしたいと考えています。保護的なフロントラインは、この計画を遅く、より危険にします。Nautilusはスペースを占有し、エントリーを吸収し、代わりにCCを脅かすことができます。AlistarとBraumもPykeのパスを自由にしにくくします。彼は自分自身をさらけ出すことなく、最初のラインを越えることはできません。保護されたキャリーを中心に戦闘が組織化されるほど、Pykeは実行を自分で作成するのではなく、間違いを待つ必要があります。

チャンピオンの適応方法. 戦闘前に作業してください。ワードをクリアし、フロントラインを振り向かせ、中央ではなくサイドを攻撃してください。バックラインに到達できない場合は、最初の低HPターゲットでリセットの脅威のためにプレイしてください。

フォグとフックに罰せられる脆いターゲット

Pykeはブッシュとロームを通じて恐怖を課すことができるため、これらのマッチアップはより有利です。Lux、Seraphine、Nami、Sona、またはSorakaは、ポーク、ヒーリング、またはゾーンプレッシャーを通じてレーンをコントロールしたいことが多いですが、Pykeが視界を奪い、対角線のフックを見つけた場合は苦しみます。Yuumiは特別なケースです。彼女は1人のターゲットをフィニッシュしにくくすることができますが、彼女のパートナーが前方に立ちすぎるとレーンが脆弱になる可能性があります。Pykeは規律を保つ必要があります。フックがセットアップなしで投げられた場合、これらのチャンピオンは生き残り、後退し、レンジプレッシャーを回復することができます。

チャンピオンの適応方法. ポークをまっすぐ通り抜けないでください。ブッシュを取り、ワードを強制し、ターゲットがラストヒットまたはADCに従う必要があるときに脅かしてください。目標は、決定的なフックを探す前に、彼らのスペースを縮小することです。

優先度の高いマッチアップ

Morgana

Morganaは、彼女がPykeをレーンでカウンターするだけでなく、彼のシーケンスロジックに直接攻撃するため、説明する優先度の高いマッチアップです。Pykeはフックし、ターゲットを低くし、実行したいと考えています。Morganaは、彼女の防御ツールでその連鎖を遅延させ、Pykeがクールダウンを強制せずに踏み込んだ場合にエントリーを罰することができます。したがって、正しい計画は、最初に表示されたターゲットにBone Skewerをスパムすることではなく、視界をプレイし、フェイントをチャージし、ロームして、Morganaがキャリー、自分自身、またはマップの別のエリアを保護することを選択しなければならない状況を作り出すことです。

Leona

Leonaは、心理的なプレッシャーを逆転させるため、重要なマッチアップです。Pykeは通常、敵が前に踏み出すことを恐れたいと考えていますが、Leonaは接触を受け入れ、彼のエントリーを彼女自身のエンゲージに変えることができます。Pykeがフックを近すぎるとチャージしたり、有利なウェーブなしでGhostwater Diveから出たりすると、離れる前にロックダウンされる可能性があります。このマッチアップをプレイするには、彼はLeonaが彼女のCCをADCに使用した瞬間や、キャリーから離れすぎたときに、support対supportのエンゲージデュエルを探すのではなく、罰する必要があります。

対面時のよくある間違い

対面時のよくある間違い

  • すべての脆いsupportが自動的にフリーになると仮定してPykeをプレイすること。Pykeが角度を間違え、視界なしでポークを通り抜けた場合でも、Lux、Nami、またはSorakaはレーンを取り戻すことができます。

  • Leona、Thresh、Alistarに、まず主要なCCを強制せずに突っ込むこと。Pykeは戦闘で最初に immobilization される側になってはいけない。
  • シールドと執行遅延の過小評価。Death From Below が0.5秒早すぎても遅すぎても、リセットはすべて消える。
  • ボットレーンウェーブが多くのマッチアップを決定することを忘れている。ミニオンをすり抜けられない、または不適切なタイミングでターゲットを取ってしまうと、良いフックも意味をなさない。
  • 不利なマッチアップに対して、さらに純粋な攻撃性で対応すること。Pykeのカウンターに対しては、より速く仕掛けるのではなく、タイミングを改善することが解決策となることが多い。

コーチングノート

  • CCサポートに対しては、ダメージを数える前に彼らのスキルを数えよ。Pykeは、最初の明白な罠を拒否するだけで、多くの難しいレーンで勝つことができる。
  • エンチャンターに対しては、脆さと容易さを混同しないこと。まず視界とブッシュで彼らのスペースを奪う必要があり、それから初めてフックが真に脅威となる。

FAQ

なぜMorganaはPykeにとって難しいのか?

Morganaが難しいのは、Pykeのキットの最も重要な部分である「高速コンバージョン」を破壊するからだ。Pykeはフックを当てるだけでなく、そのフックでターゲットを低HPにし、Death From Below を開くことを望んでいる。Morganaが適切なタイミングでターゲットを守るか、Pykeの突撃を阻止できれば、そのシーケンスは速度を失う。したがって、このマッチアップには忍耐が必要だ:Bone Skewer で牽制し、防御スキルを誘い、ロームを仕掛け、すでに守られているターゲットに主要なエンゲージを無駄にすることを避ける。

PykeはLeonaまたはAlistarに対してどのようにプレイすべきか?

LeonaまたはAlistarに対して、Pykeは正面からのエンゲージデュエルを狙うべきではない。これらのチャンピオンはPykeが前に出てくることを望んでおり、彼らを immobilization して突撃を即座の罰に変えることができるからだ。正しい計画は、より広くプレイすることだ:ブッシュをコントロールし、彼らの主要なCCが使われるのを待ち、または他の場所でアクションを起こすためにレーンを離れる。レーンでプレイする必要がある場合は、Bone Skewer をオールインの義務としてではなく、ゾーン脅威として使用する。目標は、誰がより激しくエンゲージするかを競うことではなく、彼らにタイミングを外させることだ。

Pykeはエンチャンターに対して常に有利か?

いいえ、しかしPykeはしばしばそれらに対して現実的な勝利条件を持っている。Sona、Soraka、Nami、またはSeraphineのようなエンチャンターは、ブッシュコントロールを失い、すべてのPykeの離脱を警戒しなければならない場合、苦しむ可能性がある。しかし、Pykeがダメージを受けすぎたり、フックをミスしたり、回復とシールドを考慮せずにエンゲージしたりすると、理論的に有利なマッチアップにもかかわらずレーンを失う可能性がある。キルを探す前にスペースを減らすことが鍵だ:視界、斜めの動き、ウェーブタイミング、そしてIgniteの脅威。

レーンでPykeがハードカウンターされた場合はどうすればよいか?

レーンでPykeがハードカウンターされた場合、力でマッチアップが勝てることを証明しようとすべきではない。直接的なトレードを減らし、ADCの重要なタイミングを守り、それから他の場所で価値を探す:リバーの視界、midのローム、オブジェクト前のプレッシャー、またはレーンを悪く離れるsupportを罰すること。Pykeは、不確実性を作り出せる限り有用であり続ける。もし彼がボットに留まり、彼を罰するチャンピオンに対して正面からのフックを投げ続けるなら、彼はカウンターにまさに望んでいるものを提供することになる。