S
2026年9月 · Patch 7.2d
Mage · MID · SUPPORT

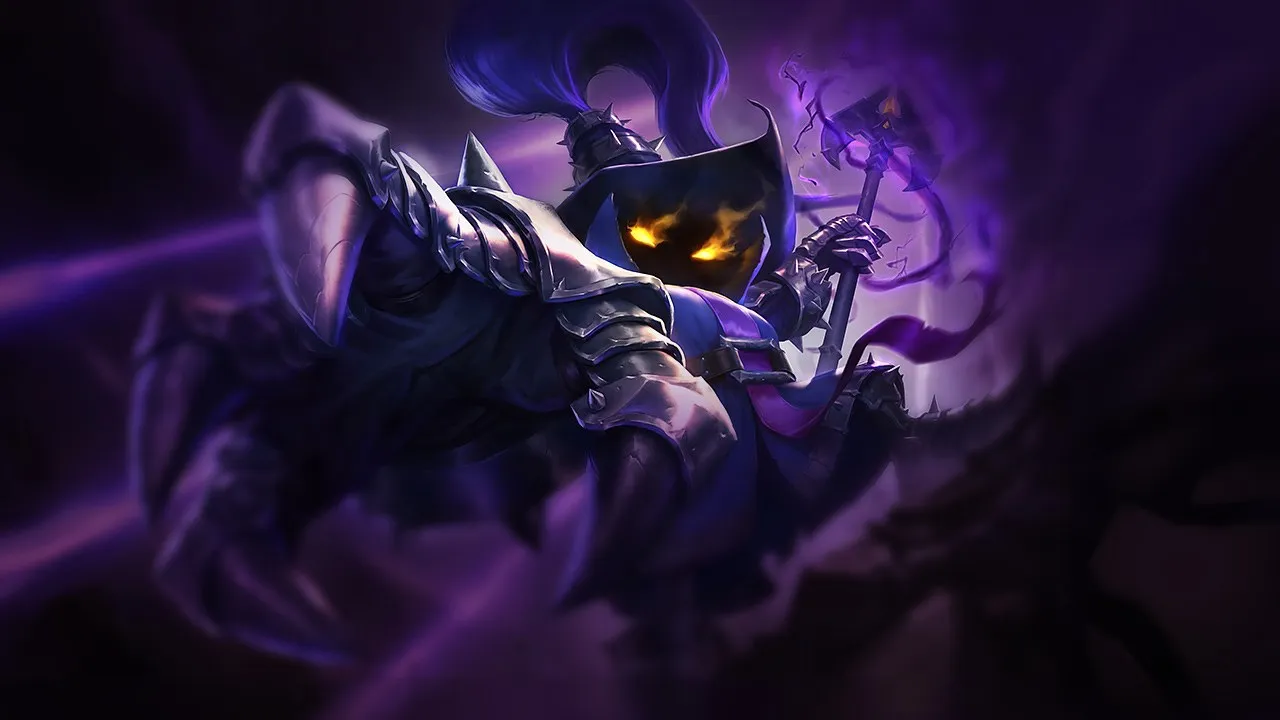
Veigar Wild Rift カウンターガイド

Veigarは、cage(イベントホライズン)を展開する前に接近してくるassassinsdive構成に対して脆弱です。高mobilityチャンピオンは、彼のケージを通り抜けるか回避します。極めて弱いearly gameが、彼の致命的な弱点となる時間帯です。

★ MID · SUPPORT Tier S
ダメージ
UTIL
TANK
DIFF
Win 47.4% #88 · ↓1pt
Pick 9.4% #4
Ban 9.1% #26

Veigar Wild Rift カウンターガイド ★ カウンターシート

マッチアップ一覧
マッチアップ 判定 有利度 勝率 ピック率
Yone ハードカウンター +2 51.8% 5.3%
Morgana ハードカウンター +2 51.2% 6.1%
Kassadin ハードカウンター +2 50.1% 1.5%
Zed ハードカウンター +2 48.9% 3.8%
Yasuo ハードカウンター +2 48.9% 10.8%
Katarina ハードカウンター +2 48.6% 1.7%
Syndra 不利なマッチアップ +1 53.3% 13.3%
Twisted Fate 不利なマッチアップ +1 52.5% 6.8%
Brand 不利なマッチアップ +1 52.0% 9.4%
Taliyah 不利なマッチアップ +1 51.9% 2.8%
Zyra 不利なマッチアップ +1 51.6% 2.9%
Ahri 不利なマッチアップ +1 51.5% 5.1%
Galio 不利なマッチアップ +1 51.1% 11.3%
Orianna 不利なマッチアップ +1 50.8% 4.9%
Vel'Koz 不利なマッチアップ +1 50.6% 3.5%
Heimerdinger 不利なマッチアップ +1 50.6% 1.3%
Norra 不利なマッチアップ +1 50.5% 1.5%
Ekko 不利なマッチアップ +1 50.5% 2.9%
Aurora 不利なマッチアップ +1 49.8% 3.8%
Annie 不利なマッチアップ +1 49.3% 2.2%
Ryze 不利なマッチアップ +1 48.8% 2.9%
Lissandra 不利なマッチアップ +1 48.8% 4.1%
Diana 不利なマッチアップ +1 48.7% 1.4%
Lux 不利なマッチアップ +1 48.7% 5.6%
Fizz 不利なマッチアップ +1 48.6% 2.0%
Zoe 不利なマッチアップ +1 48.6% 1.0%
Ziggs 不利なマッチアップ +1 48.2% 5.9%
Jayce 不利なマッチアップ +1 47.7% 1.3%
Akali 不利なマッチアップ +1 45.0% 2.5%
Corki 不利なマッチアップ +1
Irelia 不利なマッチアップ +1
Karma 不利なマッチアップ +1
Kayle 不利なマッチアップ +1
Lucian 不利なマッチアップ +1
Malphite 不利なマッチアップ +1
Pantheon 不利なマッチアップ +1
Seraphine 不利なマッチアップ +1
Talon 不利なマッチアップ +1
Tristana 不利なマッチアップ +1
Swain スキル次第のマッチアップ ±0 52.8% 4.6%
Kai'Sa スキル次第のマッチアップ ±0
Varus スキル次第のマッチアップ ±0
Akshan 有利なマッチアップ −1 51.5% 1.1%
Teemo 有利なマッチアップ −1 50.8% 1.6%
Aurelion Sol 有利なマッチアップ −1 50.2% 6.8%
Kennen 有利なマッチアップ −1 49.6% 1.5%
Pyke 有利なマッチアップ −1
Rumble 有利なマッチアップ −1

Edge: Wild Rift Core canonical verdict (−3 to +3), shown from the point of view of the champion named in the row. Win rate and pick rate: the opponent's own rate in this role — Wild Rift CN · Challenger, Patch 7.2d. Not a head-to-head win rate.

ハードカウンター

6

これらのチャンピオンは、こちらのビルドやプレイスタイルを真正面から上回る構成を持ち、レーン戦のコントロールとファームを極めて難しくする。彼らのスキルはこちらの主要な強みを無効化し、いつも通りのプランを実行しようとした瞬間に手痛い反撃を受けさせてくる。こうしたマッチアップでは、ミスを最小限に抑え、正面からの対決以外で解決策を探すことが重要になる。

Yone

Yone+2

spacingdefense Yone completely neutralizes your primary defensive tool, *Event Horizon*, by exploiting the snap-back mechanic of *Soul Unbound*. When Yone initiates a trade with his spirit form, he can bypass your cage's stun entirely by cleansing the crowd control upon returning to his physical body. This leaves you completely exposed to his high-velocity physical burst from *Mortal Steel* and *Fate Sealed* without any reliable way to lock him down. Yoneのビルド → 詳細を見る
Yone

理由

Yone completely neutralizes your primary defensive tool, *Event Horizon*, by exploiting the snap-back mechanic of *Soul Unbound*. When Yone initiates a trade with his spirit form, he can bypass your cage's stun entirely by cleansing the crowd control upon returning to his physical body. This leaves you completely exposed to his high-velocity physical burst from *Mortal Steel* and *Fate Sealed* without any reliable way to lock him down.

レーン戦への影響

This interaction forces you into a passive posture under your own turret. Because Yone can safely poke with *Spirit Cleave* and dive you from long range using *Mortal Steel* stacks, you cannot contest the minion waves. Attempting to push makes you an easy target, bleeding your health pool and forcing early recalls that cost you massive stacks of *Phenomenal Evil Power* and tower plating.

立ち回り方

To survive, you must master strict wave management near your tower. Never cast *Event Horizon* aggressively; hold it exclusively to zone Yone's physical body when he activates *Soul Unbound*. Predict his return point and drop *Dark Matter* on his original physical husk rather than his active spirit form. If his *Mortal Steel* Q3 tornado is primed, step back immediately and use *Baleful Strike* only to secure safe, long-range last hits.

チャンピオン詳細 → Yoneのビルド →
Zed

Zed+2

defensetiming Zed completely neutralizes Veigar's primary defensive tool, Event Horizon. When Veigar drops his cage to self-peel, Zed can immediately cast Death Mark, turning untargetable and blinking directly behind Veigar. This bypasses the stun entirely, letting Zed unleash a lethal combination of Razor Shuriken and Shadow Slash up close, while Contempt for the Weak secures the kill on the low-health yordle. Zedのビルド → 詳細を見る
Zed

理由

Zed completely neutralizes Veigar's primary defensive tool, Event Horizon. When Veigar drops his cage to self-peel, Zed can immediately cast Death Mark, turning untargetable and blinking directly behind Veigar. This bypasses the stun entirely, letting Zed unleash a lethal combination of Razor Shuriken and Shadow Slash up close, while Contempt for the Weak secures the kill on the low-health yordle.

レーン戦への影響

Once Zed reaches level five, the threat of Death Mark forces Veigar to play incredibly far back, sacrificing lane priority and farm. If Veigar attempts to stack Phenomenal Evil Power with Baleful Strike on the wave, he risks getting poked down by Living Shadow combined with Razor Shuriken. This constant health pressure forces early recalls, allowing Zed to shove, roam freely, and dive Veigar under tower.

立ち回り方

You must hold Event Horizon defensively and never cast it proactively. When Zed initiates with Living Shadow, immediately walk laterally to dodge the incoming Razor Shuriken. If he commits with Death Mark, wait for his reappearance animation behind you before placing Event Horizon directly on top of yourself. This guarantees the stun as he lands, allowing you to quickly retaliate with Baleful Strike and Primordial Burst before retreating to the safety of your turret.

チャンピオン詳細 → Zedのビルド →
Katarina

Katarina+2

blink advantageburst trade Your entire defensive gameplan relies on Event Horizon to zone threats, but Katarina completely nullifies this. Because Shunpo is an instantaneous blink rather than a dash, she can teleport directly over your cage's stun boundary to land right on top of you. This allows her to safely ignore your crowd control and immediately execute her full Preparation and Death Lotus burst sequence. Katarinaのビルド → 詳細を見る
Katarina

理由

Your entire defensive gameplan relies on Event Horizon to zone threats, but Katarina completely nullifies this. Because Shunpo is an instantaneous blink rather than a dash, she can teleport directly over your cage's stun boundary to land right on top of you. This allows her to safely ignore your crowd control and immediately execute her full Preparation and Death Lotus burst sequence.

レーン戦への影響

You are forced into a permanent defensive posture, unable to step up to stack Phenomenal Evil Power with Baleful Strike. Every time you walk past your caster minions, Katarina can throw Bouncing Blade and blink behind you. This constant threat forces you to concede wave priority, letting her easily crash waves and roam to side lanes to farm kills with Voracity while you are stuck farming under tower.

立ち回り方

Never drop Event Horizon to catch her proactively; instead, hold it and place its perimeter directly on yourself only after she commits with Shunpo. Stand far away from her Bouncing Blade daggers on the ground so she cannot reset her cooldowns. If she leaves the lane to roam, do not follow her blindly into the fog; instead, quickly clear the wave using Dark Matter to stack your passive and ping your teammates back.

チャンピオン詳細 → Katarinaのビルド →
Kassadin

Kassadin+2

mobilityburst mitigation Your entire defensive identity revolves around Event Horizon, but Kassadin completely bypasses this obstacle once he reaches level 5. Because Riftwalk is an instantaneous blink rather than a dash, he can teleport directly over your stun boundary without triggering it, landing on top of you. This interaction completely negates your zone control, allowing him to easily follow up with Null Sphere and Nether Blade. Kassadinのビルド → 詳細を見る
Kassadin

理由

Your entire defensive identity revolves around Event Horizon, but Kassadin completely bypasses this obstacle once he reaches level 5. Because Riftwalk is an instantaneous blink rather than a dash, he can teleport directly over your stun boundary without triggering it, landing on top of you. This interaction completely negates your zone control, allowing him to easily follow up with Null Sphere and Nether Blade.

レーン戦への影響

Once Kassadin unlocks his ultimate, you can no longer safely step past your tower range. Trading with Baleful Strike or attempting to stack Phenomenal Evil Power with Dark Matter becomes incredibly risky, as any forward step baiting out Riftwalk results in a chunked health bar. You will constantly be pushed under tower, sacrificing mid lane priority and leaving your jungler without backup during early skirmishes.

立ち回り方

To survive this lane, you must alter your positioning to stay strictly within tower range once Kassadin has his ultimate. Never cast Event Horizon proactively; instead, hold it and place the boundary directly on yourself only after he uses Riftwalk to engage. If he blinks onto you, instantly drop Event Horizon around your own feet to prevent him from walking away after his combo, forcing him to take tower shots or tank your Primordial Burst.

チャンピオン詳細 → Kassadinのビルド →
Morgana

Morgana+2

hard counterscaling gap Morgana completely neutralizes your defensive and offensive setups because her Black Shield grants crowd control immunity. Whenever you drop Event Horizon to lock her down or escape her advance, she can simply activate Black Shield and walk straight through the boundary without being stunned. This interaction invalidates your main zoning tool, leaving you highly vulnerable to her Dark Binding and Tormented Shadow follow-up. Morganaのビルド → 詳細を見る
Morgana

理由

Morgana completely neutralizes your defensive and offensive setups because her Black Shield grants crowd control immunity. Whenever you drop Event Horizon to lock her down or escape her advance, she can simply activate Black Shield and walk straight through the boundary without being stunned. This interaction invalidates your main zoning tool, leaving you highly vulnerable to her Dark Binding and Tormented Shadow follow-up.

レーン戦への影響

Laning becomes a passive, defensive struggle. Because you cannot threaten her with Event Horizon, Morgana easily pushes waves with Tormented Shadow, forcing you under turret. You are forced to use Baleful Strike and Dark Matter solely to secure farm rather than trading. Attempting to contest her lane priority risks getting hit by Dark Binding, which sets up her Soul Shackles and guarantees you lose massive health or your life.

立ち回り方

Stand deep behind your minion wave to block Dark Binding, using them as a physical shield. Never drop Event Horizon unless Morgana has already wasted Black Shield on herself or an ally. If she approaches with Soul Shackles, do not panic-cast your cage on her; instead, retreat towards your turret and focus on stacking Phenomenal Evil Power safely from a distance with Baleful Strike. If she freezes, concede priority and wait for the wave to bounce.

チャンピオン詳細 → Morganaのビルド →
Yasuo

Yasuo+2

spacingdefense Yasuo's kit directly neutralizes Veigar's threat. His Wind Wall completely nullifies both Baleful Strike and the critical execute damage of Primordial Burst. Furthermore, Yasuo's high mobility from Sweeping Blade allows him to dash through minions and slide clean around Event Horizon before the cage edges can stun him, making your main defensive tool highly unreliable. Yasuoのビルド → 詳細を見る
Yasuo

理由

Yasuo's kit directly neutralizes Veigar's threat. His Wind Wall completely nullifies both Baleful Strike and the critical execute damage of Primordial Burst. Furthermore, Yasuo's high mobility from Sweeping Blade allows him to dash through minions and slide clean around Event Horizon before the cage edges can stun him, making your main defensive tool highly unreliable.

レーン戦への影響

You cannot contest waves safely. Yasuo will constantly use Sweeping Blade to close the distance, popping his Way of the Wanderer shield to absorb your retaliatory damage. Because you must hold Event Horizon for defense, you lose the ability to control the wave with Dark Matter. This forces you under tower, bleeding gold while Yasuo roams freely to pressure your map.

立ち回り方

Play defensively and prioritize stacking. Never throw Baleful Strike or Primordial Burst while Yasuo has Wind Wall available. Instead, bait this defensive barrier by stepping forward, then immediately step back. If he dashes in with Sweeping Blade, drop Event Horizon centered on yourself rather than him, forcing him to collide with the edge. Always keep moving to dodge his third Steel Tempest cast, denying him the knock-up needed for Last Breath.

チャンピオン詳細 → Yasuoのビルド →

不利なマッチアップ

33

これらのチャンピオンは、マッチアップ自体を絶望的にするわけではないが、対面で優位に立ちやすいツールを持っている。射程が長かったり、攻撃を受け止める力が高かったり、エンゲージへの対応手段が豊富だったりする。アプローチを調整し、戦闘を受け入れるタイミングを慎重に選ぶ必要がある。

Ahri

Ahri+1

scaling gaproaming This lane is dictated by how Ahri's mobility nullifies your primary self-peel. While Event Horizon is your ultimate defensive tool, Ahri can easily position herself outside its perimeter before activating Spirit Rush. This allows her to dash around the cage entirely rather than through it, closing the gap to land a fatal Charm and Orb of Deception combo without ever touching your stun. Ahriのビルド → 詳細を見る
Ahri

理由

This lane is dictated by how Ahri's mobility nullifies your primary self-peel. While Event Horizon is your ultimate defensive tool, Ahri can easily position herself outside its perimeter before activating Spirit Rush. This allows her to dash around the cage entirely rather than through it, closing the gap to land a fatal Charm and Orb of Deception combo without ever touching your stun.

レーン戦への影響

Ahri uses Orb of Deception to rapidly clear waves and trigger Essence Theft sustain, forcing you to use Baleful Strike defensively under turret. Because you cannot safely step up to trade without risking her Spirit Rush engage, she secures early priority. This allows her to roam to side lanes while you are stuck stacking Phenomenal Evil Power on incoming minions, punishing your map.

立ち回り方

To survive, never cast Event Horizon proactively unless her ultimate is down. Keep the wave frozen near your turret, utilizing Baleful Strike and Dark Matter solely for safe farming. If Ahri activates Spirit Rush and dashes past your cage, retreat directly to your tower and prepare to flash her Charm. When she roams, do not blindly follow her into the river; instead, ping missing instantly and punish her absence by stacking Phenomenal Evil Power as fast as possible.

チャンピオン詳細 → Ahriのビルド →
Galio

Galio+1

burst mitigationcc bypass Galio acts as a natural wall against Veigar's burst potential. His Shield of Durand provides massive magic damage reduction, directly neutralizing the execution power of Primordial Burst. Furthermore, Veigar's defensive tool, Event Horizon, is not foolproof here; if Galio winds up Justice Punch during the cage's brief arming delay, his dash can cross the boundary before the stun wall fully materializes, leaving Veigar vulnerable to Colossal Smash. Galioのビルド → 詳細を見る
Galio

理由

Galio acts as a natural wall against Veigar's burst potential. His Shield of Durand provides massive magic damage reduction, directly neutralizing the execution power of Primordial Burst. Furthermore, Veigar's defensive tool, Event Horizon, is not foolproof here; if Galio winds up Justice Punch during the cage's brief arming delay, his dash can cross the boundary before the stun wall fully materializes, leaving Veigar vulnerable to Colossal Smash.

レーン戦への影響

Trading with Baleful Strike and Dark Matter feels unrewarding against Galio's innate tankiness. He will constantly shove waves using Winds of War, forcing you to use your mana on waveclear rather than stacking Phenomenal Evil Power on him. If you overextend, his Justice Punch engage forces you back to base, while his Hero's Entrance allows him to map-play while you are trapped under your tower clearing the wave.

立ち回り方

To survive this lane, your primary goal is to safely stack Phenomenal Evil Power from a distance using Baleful Strike. Never throw Event Horizon aggressively unless Galio has already wasted Justice Punch. If he initiates with Justice Punch, drop Event Horizon directly on yourself, but step backward immediately to account for the arming delay. Finally, never cast Primordial Burst while his Shield of Durand is active; wait out his defensive channel or bait it with Dark Matter before committing your ultimate.

チャンピオン詳細 → Galioのビルド →
Irelia

Irelia+1

dodge ccall in This matchup is dictated by the delay on your cage. If you deploy Event Horizon to stop an engage, Irelia can reactively use Bladesurge on a low-health minion or directly onto you before the stun walls fully materialize. Once she bypasses this perimeter, her Ionian Fervor stacks allow her to shred your health bar, while Defiant Dance easily mitigates your reactive Baleful Strike and Dark Matter burst. Ireliaのビルド → 詳細を見る
Irelia

理由

This matchup is dictated by the delay on your cage. If you deploy Event Horizon to stop an engage, Irelia can reactively use Bladesurge on a low-health minion or directly onto you before the stun walls fully materialize. Once she bypasses this perimeter, her Ionian Fervor stacks allow her to shred your health bar, while Defiant Dance easily mitigates your reactive Baleful Strike and Dark Matter burst.

レーン戦への影響

You cannot safely contest the wave when Irelia has low-health minions nearby to chain Bladesurge. She will constantly bait out your Event Horizon to create a massive zone of control. If she successfully dodges or bypasses the stun, you are forced to retreat under tower, bleeding gold and losing priority. Missing your stun window means giving her a free dive opportunity with Vanguard's Edge.

立ち回り方

Never cast Event Horizon preemptively just to poke. Instead, hold it until Irelia commits her Flawless Duet. If she misses her stun, that is your cue to safely farm with Baleful Strike from a distance. If she dashes in, drop the cage directly on yourself, forcing her to either step into the stun or use Defiant Dance passively. If you get marked by Vanguard's Edge, disengage immediately and farm under tower using Dark Matter.

チャンピオン詳細 → Ireliaのビルド →
Annie

Annie+1

burst racecage dodge This matchup hinges on the deployment delay of your Event Horizon. When Annie activates Molten Shield, the sudden burst of movement speed allows her to sprint straight through your cage's perimeter before the boundary fully materializes and stuns. Once inside your zone, she can easily discharge a Pyromania-empowered Disintegrate or Summon: Tibbers to lock you down, bypassing your primary self-peel and setting up her lethal burst combo. Annieのビルド → 詳細を見る
Annie

理由

This matchup hinges on the deployment delay of your Event Horizon. When Annie activates Molten Shield, the sudden burst of movement speed allows her to sprint straight through your cage's perimeter before the boundary fully materializes and stuns. Once inside your zone, she can easily discharge a Pyromania-empowered Disintegrate or Summon: Tibbers to lock you down, bypassing your primary self-peel and setting up her lethal burst combo.

レーン戦への影響

Because Annie can bypass your cage, you are forced to play incredibly far back, sacrificing wave priority. You cannot safely step forward to secure stacks for Phenomenal Evil Power using Baleful Strike. If you attempt to match her wave clear with Dark Matter, she can easily initiate a trade. Consequently, you will find yourself pushed under turret, constantly bleeding mana on defensive cages while trying to survive her flash-stuns.

立ち回り方

To survive, never cast Event Horizon proactively when Annie has her Pyromania stun ready or her Molten Shield off cooldown. Instead, position yourself deep behind your caster minions, forcing her to burn her movement speed just to reach you. If she overextends and wastes her shield, immediately drop Dark Matter on her path while retreating. Only use Primordial Burst to execute her when she commits Summon: Tibbers, turning her aggressive dive into a double-kill opportunity.

チャンピオン詳細 → Annieのビルド →
Fizz

Fizz+1

dodge ccall in This matchup is dictated by how easily Fizz can bypass your primary defensive tool. Normally, Event Horizon keeps aggressive melee champions at bay, but Fizz can use Playful to hop cleanly over the stun boundary without taking any crowd control. This leaves you completely exposed to his heavy burst from Urchin Strike and Rending Wave, turning your main safety net into an empty threat. Fizzのビルド → 詳細を見る
Fizz

理由

This matchup is dictated by how easily Fizz can bypass your primary defensive tool. Normally, Event Horizon keeps aggressive melee champions at bay, but Fizz can use Playful to hop cleanly over the stun boundary without taking any crowd control. This leaves you completely exposed to his heavy burst from Urchin Strike and Rending Wave, turning your main safety net into an empty threat.

レーン戦への影響

Because you cannot reliably self-peel, you lose all lane priority. If you step up past the river to stack Phenomenal Evil Power, Fizz will fish for Chum the Waters to initiate. This forces you to constantly retreat, farming passively with Baleful Strike under your turret. You will bleed gold, lose early plates, and struggle to assist your jungler because Fizz can roam freely while you clear slowly.

立ち回り方

To survive, you must never cast Event Horizon proactively. Hold this ability as a deterrent; if Fizz initiates with Urchin Strike instead of jumping, drop the cage directly on yourself to force out his Playful. Once he lands, you have a brief sixteen-second window where his mobility is gone. Only then can you safely drop Dark Matter and look to execute him with Primordial Burst if he is already low. Otherwise, stay back and stack.

チャンピオン詳細 → Fizzのビルド →
Talon

Talon+1

cage baitingburst race While a well-timed Event Horizon can interrupt Talon's Noxian Diplomacy mid-dash, his mobility advantage dictates the lane. By using Assassin's Path over the mid-lane walls, he can completely bypass your defensive cage to flank you from unexpected angles. This ability to ignore your primary self-peel tool makes lane safety deceptive, forcing you to respect angles where your stun cannot protect you. Talonのビルド → 詳細を見る
Talon

理由

While a well-timed Event Horizon can interrupt Talon's Noxian Diplomacy mid-dash, his mobility advantage dictates the lane. By using Assassin's Path over the mid-lane walls, he can completely bypass your defensive cage to flank you from unexpected angles. This ability to ignore your primary self-peel tool makes lane safety deceptive, forcing you to respect angles where your stun cannot protect you.

レーン戦への影響

Whenever Talon uses Rake to clear waves, you must exploit this brief recovery period to safely stack Phenomenal Evil Power with Baleful Strike. However, the moment he vanishes over a wall using Assassin's Path, your map pressure vanishes. Following him through the river is suicidal, as he can wait in unwarded bushes to ambush you with Shadow Assault before your cage can land.

立ち回り方

Position yourself strictly in the dead center of the lane, far from the side walls, to maximize your reaction time against an Assassin's Path flank. Never cast Event Horizon preemptively; hold it specifically to threaten his Noxian Diplomacy dash. If he unleashes Shadow Assault, immediately retreat toward your turret and drop Dark Matter directly on your own character model to deter his melee burst.

チャンピオン詳細 → Talonのビルド →
Jayce

Jayce+1

pokecc avoidance Jayce dominates this matchup because his accelerated To the Skies! projectile, fired through his Thundering Blow acceleration gate, vastly outranges your Event Horizon. He can repeatedly chip away at your health from complete safety, and because he remains outside the stun radius of your cage, you have no way to lock him down or retaliate. This neutralizes your ability to stack Phenomenal Evil Power safely. Jayceのビルド → 詳細を見る
Jayce

理由

Jayce dominates this matchup because his accelerated To the Skies! projectile, fired through his Thundering Blow acceleration gate, vastly outranges your Event Horizon. He can repeatedly chip away at your health from complete safety, and because he remains outside the stun radius of your cage, you have no way to lock him down or retaliate. This neutralizes your ability to stack Phenomenal Evil Power safely.

レーン戦への影響

Under constant threat of long-range poke, you are forced to retreat behind your minions, sacrificing crucial farm. Jayce will easily secure wave control, pushing you under turret with his Lightning Field. If your health drops too low from his cannon shots, he can easily swap with Transform Mercury Cannon and leap in with his melee To the Skies! to execute you under your own tower, starving you of gold.

立ち回り方

Focus entirely on survival and safe stacking. Keep your distance and use Baleful Strike from maximum range to secure minions rather than trying to poke him. Never deploy Event Horizon aggressively; instead, hold this cage as a self-peel tool. If Jayce decides to engage with his hammer form's To the Skies!, immediately place the stun boundary directly on yourself to stop his burst, then retreat and clear what you can with Dark Matter.

チャンピオン詳細 → Jayceのビルド →
Kayle

Kayle+1

scalingburst denial The primary issue in this matchup is how Divine Judgment completely invalidates your main execute, Primordial Burst. While you can stack Phenomenal Evil Power early against her weak melee phase, she will outscale you once Divine Ascent kicks in. Any attempt to burst her down inside your Event Horizon is easily countered if she reacts with her ultimate, leaving you completely vulnerable with no remaining burst. Kayleのビルド → 詳細を見る
Kayle

理由

The primary issue in this matchup is how Divine Judgment completely invalidates your main execute, Primordial Burst. While you can stack Phenomenal Evil Power early against her weak melee phase, she will outscale you once Divine Ascent kicks in. Any attempt to burst her down inside your Event Horizon is easily countered if she reacts with her ultimate, leaving you completely vulnerable with no remaining burst.

レーン戦への影響

Before level five, you can freely farm stacks with Baleful Strike as Kayle plays passively. However, once she unlocks her ultimate, your kill pressure vanishes. If you try to trade, she uses Celestial Blessing to dodge Dark Matter or escape Event Horizon. This forces a passive farming lane where her Divine Ascent gradually gives her the upper hand, slowly pushing you under your own turret.

立ち回り方

Never cast Primordial Burst as an opener; you must bait out Divine Judgment first. Trap her inside Event Horizon and drop Dark Matter to force her to panic-cast her ultimate defensively. If she uses it, immediately back off and wait for this massive cooldown window to reset. If she holds her ultimate, focus solely on stacking Phenomenal Evil Power with Baleful Strike and matching her wave clear rather than seeking solo kills.

チャンピオン詳細 → Kayleのビルド →
Orianna

Orianna+1

spacingscaling Orianna completely neutralizes your defensive zone control because her sphere operates independently of her own body. When you cast Event Horizon to protect yourself or lock her down, she can effortlessly position her ball inside your cage using Command: Attack. This allows her to safely trigger Command: Dissonance to chunk your health, turning your main defensive tool into an arena where she can poke you without any risk of retaliation. Oriannaのビルド → 詳細を見る
Orianna

理由

Orianna completely neutralizes your defensive zone control because her sphere operates independently of her own body. When you cast Event Horizon to protect yourself or lock her down, she can effortlessly position her ball inside your cage using Command: Attack. This allows her to safely trigger Command: Dissonance to chunk your health, turning your main defensive tool into an arena where she can poke you without any risk of retaliation.

レーン戦への影響

This constant threat severely limits where you can stand to stack Phenomenal Evil Power. You are forced to use Baleful Strike from maximum range to secure minions, yielding wave priority. As Orianna pushes you under turret, she will continuously place her ball to block your pathing. If you get chipped down too low, her Command: Shockwave becomes a lethal dive threat, forcing suboptimal recall timings and preventing you from assisting your jungler.

立ち回り方

To survive, never stand in a direct line between Orianna and her ball. Keep your distance and use Baleful Strike exclusively to farm from safety, accepting that you cannot contest early lane priority. Hold Event Horizon to deter her from walking forward to auto-attack you with Clockwork Windup. If she mispositions her ball far to one side, immediately step to the opposite side to create space and drop Dark Matter on the wave to prevent complete crashes.

チャンピオン詳細 → Oriannaのビルド →

その他のマッチアップ

スキル次第のマッチアップ

3

このマッチアップは何よりもまず実行力の勝負であり、両者ともに優位を取れる現実的な手段を持っている。重要なスキルを一つ避けられるか、エンゲージを正しく読めるか、あるいはたった一つの位置取りのミスが、勝敗を分けることもある。マッチアップを理解し、行動すべき瞬間を見極める力がとりわけ重要になる。

Kai'Sa

Kai'Sa±0

dodge ccassassination This matchup is a volatile race of burst damage dictated entirely by the uptime of your cage. While you want to stack *Phenomenal Evil Power* from afar, Kai'Sa thrives on finding isolated targets. The entire lane pivots on *Event Horizon*. If you fail to trap her or force her away with it, she will instantly cross the distance using *Killer Instinct* to blow you up with *Icathian Rain* while you are defenseless. Kai'Saのビルド → 詳細を見る
Kai'Sa

理由

This matchup is a volatile race of burst damage dictated entirely by the uptime of your cage. While you want to stack *Phenomenal Evil Power* from afar, Kai'Sa thrives on finding isolated targets. The entire lane pivots on *Event Horizon*. If you fail to trap her or force her away with it, she will instantly cross the distance using *Killer Instinct* to blow you up with *Icathian Rain* while you are defenseless.

レーン戦への影響

You cannot afford to use *Event Horizon* aggressively to secure minions or force random trades. Missing it leaves you completely vulnerable, allowing Kai'Sa to activate *Supercharge* and run you down. To survive, you must position yourself directly inside your own minion wave so that if she does engage, her *Icathian Rain* damage is split among your minions rather than isolating and killing you instantly.

立ち回り方

Never initiate trades; instead, focus on stacking *Phenomenal Evil Power* using *Baleful Strike* from maximum range. Hold *Event Horizon* strictly as a disengage tool. If Kai'Sa hits you with *Void Seeker*, immediately retreat to prevent her from using *Killer Instinct*. Should she manage to dash onto you, drop your cage directly centered on your own character model to stun her mid-flight and retaliate with *Primordial Burst* to turn the fight.

チャンピオン詳細 → Kai'Saのビルド →
Varus

Varus±0

burst threatcc avoidancescaling clash This matchup is a pure contest of distance. Varus relies on the extreme range of Piercing Arrow, empowered by Blighted Quiver, to poke you down from absolute safety. However, to land these arrows, he must momentarily channel, making his movement predictable. If he steps even slightly too close to charge his arrow, he enters the threat zone of your Event Horizon, which completely shuts down his mobility and sets up your Dark Matter. Varusのビルド → 詳細を見る
Varus

理由

This matchup is a pure contest of distance. Varus relies on the extreme range of Piercing Arrow, empowered by Blighted Quiver, to poke you down from absolute safety. However, to land these arrows, he must momentarily channel, making his movement predictable. If he steps even slightly too close to charge his arrow, he enters the threat zone of your Event Horizon, which completely shuts down his mobility and sets up your Dark Matter.

レーン戦への影響

Because Varus can clear waves quickly with Hail of Arrows and Piercing Arrow, you will often find yourself pushed under turret early. He will attempt to trap you there, using the threat of Chain of Corruption to lock you down for a lethal combo. This constant pressure limits your ability to safely stack Phenomenal Evil Power with Baleful Strike, forcing you to choose between secure last-hits and keeping your health bar high enough to prevent an all-in.

立ち回り方

To survive and scale, never step forward when Varus is actively charging Piercing Arrow unless your Event Horizon is ready to catch him mid-channel. Stand behind your minions to reduce the arrow's damage, and use Hail of Arrows' slow as your cue to back off immediately. If he misses his ultimate, Chain of Corruption, aggressively search for a counter-attack using Baleful Strike and Primordial Burst to execute him before his attack speed from Living Vengeance can overwhelm you.

チャンピオン詳細 → Varusのビルド →
Swain

Swain±0

spacingcooldown windows This matchup revolves around controlling space during Swain's ultimate. While Swain relies on Demonic Ascension to drain health and sustain through fights, Veigar has the perfect counter-tool. Placing Event Horizon directly around Swain halts his advance, preventing him from getting into range for Death's Hand or maintaining his drain. This interaction turns a potentially devastating teamfight ultimate into a self-contained cage, neutralizing Swain's main threat. Swainのビルド → 詳細を見る
Swain

理由

This matchup revolves around controlling space during Swain's ultimate. While Swain relies on Demonic Ascension to drain health and sustain through fights, Veigar has the perfect counter-tool. Placing Event Horizon directly around Swain halts his advance, preventing him from getting into range for Death's Hand or maintaining his drain. This interaction turns a potentially devastating teamfight ultimate into a self-contained cage, neutralizing Swain's main threat.

レーン戦への影響

During the laning phase, Swain will constantly try to fish with Nevermove to trigger Ravenous Flock and pull you into his high-damage Death's Hand. Missing your positioning means giving Swain free health stacks. Because Veigar wants to farm safely with Baleful Strike, Swain often secures early wave priority using Vision of Empire to disrupt your recalls, forcing you to play defensively under tower while hoarding your mana.

立ち回り方

To succeed, never use Event Horizon offensively unless Swain has already wasted Nevermove. Keep this cage ready as a disengage tool. When Swain activates Demonic Ascension, drop the cage so the boundary sits right between you, forcing him to either stun himself or waste his ultimate's duration. If he manages to root you, immediately buffer Dark Matter on your own position to punish his forward walk.

チャンピオン詳細 → Swainのビルド →

有利なマッチアップ

6

これらのチャンピオンは、こちらの主要な強みに効果的に対応するのが難しく、より自由に対面を組み立てることができる。プレッシャーをかけて有利な交換を引き出す手段は複数あることが多い。相手が態勢を立て直す時間を与えるのではなく、この優位を活かして主導権を握ろう。

その他のマッチアップ

Veigar対策アイテム

これらのアイテムを購入すると、このチャンピオンの影響力を抑えられます。

Stasis Enchant
Stasis Enchant
Void Staff
Void Staff
Morellonomicon
Morellonomicon
Rabadon's Deathcap
Rabadon's Deathcap

このチャンピオンへの対策

カウンターアングル

Veigarへの対策は、彼のバーストダメージを生き延びるだけではありません。真の目的は、彼がプレイする基盤を破壊することです。安全なスタック、安定したポジショニング、そしてオブジェクト前のプロアクティブなケージです。彼に対して最も有利なマッチアップは、スペースをコントロールするためではなく、生き残るためにイベント・ホライゾンを使わざるを得ないものです。もしVeigarが視界外やチョークポイントから先にケージを設置した場合、その戦いは非常に困難になることがよくあります。しかし、敵が彼を押し返し、midの優先権を奪い、あるいは本命の侵入前にケージを無駄に使わせることができれば、彼の影響力は急激に低下します。サイトデータで彼にとって困難であることがすでに特定されているチャンピオンは、しばしば一つの共通点を持っています。それは、彼が動けないこと、ケージのタイミング、あるいはすでに準備されたスペースでオブジェクトに到達する能力を脅かすことです。

パッチの文脈

Veigarは、「脅威を視認した」と「対応しなければならない」の間隔が短くなるマッチアップで最も苦しみます。彼は予測し、進路にケージを設置し、ゾーンを準備し、侵入を罰することを望んでいます。速攻型アサシンやダイバーは、彼のキットが好むよりも速い反応を強います。長距離または継続的なプレッシャーをかけるメイジも、彼がリズムを崩すのを妨げることができます。特に、彼にクリーンなスタッキングではなく、プレッシャー下でのファームを強いる場合です。したがって、鍵となるのはWを回避したりケージから脱出したりするだけでなく、彼がケージを使用してもポジションもオブジェクトもキルも得られない状況を作り出すことです。

クイックリード

  • 最善のカウンタープレイは、本命のエンゲージの前にイベント・ホライゾンを使わせ、その後クールダウン中に再侵入することです。
  • Veigarは、オブジェクトへの到着が遅れ、防御的にケージを設置せざるを得なくなった場合、はるかに危険性が低下します。
  • 機動力の高い、あるいは継続的なプレッシャーをかけるマッチアップは、バーストが重要になる前に安定したポジションを崩すため、彼を罰します。

カウンターの原型

速攻型アサシン

これらのチャンピオンは、Veigarの意思決定時間を短縮するため、彼にとって本当の問題となります。Fizz、Zed、またはAkaliは、Veigarが快適なケージセットアップを構築する前に、オールインを脅かすことができます。イベント・ホライゾンが彼らを罰することができるとしても、それは適切な瞬間に温存されなければなりません。早すぎると、相手は待つか回避します。遅すぎると、Veigarはすでにポジションを失っています。彼らの強みは、ケージをゾーンコントロールツールではなく、必須の防御スペルに変えることです。

チャンピオンの適応方法. Veigarは視界に向かってプレイし、より安全なファームを受け入れ、敵の本命の侵入のためにケージを温存する必要があります。敵のダッシュやアルティメットがまだ利用可能な場合、Eでポケることは試みるべきではありません。

ゾーンを横切る機動力の高いデュエリスト

これらのマッチアップは、機動力のないメイジとは異なり、ケージを同じようには尊重しないため危険です。Yone、Yasuo、またはDianaは、複数の侵入タイミングを脅かし、Veigarに自己防衛とウェーブコントロールのどちらかを選択させ、その後機動力を利用して中央に寄りすぎたポジショニングを罰することができます。たとえ直接キルできなくても、Veigarがレーンを自分のリズムでプレイするのを妨げ、クリーンなスタッキングを制限し、彼がオブジェクトに優先権を少なくして到着するようにさせることができます。

チャンピオンの適応方法. Veigarは、レーンの真ん中でパニックケージを使用することを避ける必要があります。最善の適応策は、安全な距離からウェーブをコントロールし、ロームをピンし、孤立したトレードを追いかけるのではなく、敵の侵入経路を遮断するためにケージを使用することです。

継続的なプレッシャーを持つレンジメイジ

これらのチャンピオンは、必ずしもVeigarに飛びかかることで彼を倒すわけではありませんが、彼がセットアップするのを妨げることで倒します。Orianna、Ahri、またはSyndraはウェーブを争い、レンジトレードを脅かし、あらゆるスタッキング試行をよりコストのかかるものにすることができます。彼らの利点は、VeigarにHPを維持するか、スタックするか、あるいは次のオブジェクトのために十分なマナとポジションを保つかの選択を強いることです。もしVeigarがそのテンポを失うと、彼のケージはしばしば、スペースを決定するツールではなく、遅い回答になってしまいます。

チャンピオンの適応方法. Veigarは、より忍耐強いレーンを受け入れ、1スタックのためにHPを失いすぎるのを避け、繰り返しの正面トレードよりも、ウェーブ後の視界外からのケージを探すべきです。

優先度の高いマッチアップ

Fizz

Fizzは、Veigarの脆弱なポイント、つまりケージと本当の安全の間にある遅延を正確に攻撃するため、説明すべき優先度の高いマッチアップです。もしVeigarがイベント・ホライゾンをウェーブコントロールやポケに使った場合、Fizzはそのスペルが切れるのを待ってから、はるかに簡単なウィンドウでオールインを脅かすことができます。このマッチアップは単に「死なない」ということではありません。Veigarは、レベル5、サイドの視界を尊重し、ケージを温存することを中心にレーンを構築する必要があります。うまく保持された防御的なケージはトレードを有利に変えることができますが、明確な理由なく使用されたケージはFizzに侵入の合図を与えます。

Zed

Zedは、レーン、視界外、オブジェクトへのローテーションを脅かすことができるため、Veigarに規律を持ってプレイすることを強います。ケージは単純なポケツールとして使用されるべきではありません。それは本当のコミットに対応するか、Zedがバースト後に脱出するのを防ぐ必要があります。重要なのは、視界なしでレーンの真ん中に立たないことです。なぜならZedはそのポジションを継続的なプレッシャーに変えることができるからです。Veigarは、早期の攻撃的なコンボを探すよりも、侵入角度を否定することでこのマッチアップに勝つことが多いです。

対面時のよくある間違い

対面時のよくある間違い

  • オブジェクトの前にケージを使わせるのではなく、すでにコントロールされたチョークポイントでVeigarとエンゲージすること。
  • すべてのダッシュを使って侵入し、その後イベント・ホライゾンの中に閉じ込められ、信頼できる出口がない状態になること。
  • ウェーブプレッシャーやロームで罰することなく、Veigarに自由にmidをスタックさせること。
  • Veigarが特にケージを設置するのを待っている進路で、dragonと真っ直ぐに争うこと。
  • Wを避けるだけで十分だと思ったら、Veigarがケージでアクセスを遮断してきた時点で、すでに戦いの半分は勝ったも同然です。

コーチングノート

  • Veigarに勝つには、彼のダメージだけでなく、ケージが使用可能になるタイミングを警戒してください。それが彼の真のコントロールボタンです。

  • 彼に対して最も効果的なタイミングは、ケージをミスしたか、無理に使わせた後であることが多いです。そのクールダウンを共有しましょう。なぜなら、その時に彼のゾーンは崩壊するからです。

FAQ

Veigarに最も効果的なチャンピオンタイプは何ですか?

Veigarのカウンターとして最も効果的なのは、彼が「イベント・ホライゾン」を能動的に使用するのを阻止できるチャンピオンです。素早いアサシン、機動力の高いデュエリスト、継続的なプレッシャーをかけられるメイジは、それぞれ異なる理由で彼を苦しめることができます。アサシンは彼の反応時間を減らし、機動力の高いデュエリストは彼のゾーンを横切るか誘い出し、レンジメイジは彼が快適にスタックするのを阻止します。共通する考え方は常に同じです。彼にケージを防御的に使わせ、それが利用できなくなった時に再びプレイしましょう。

Veigarのケージにどう対抗しますか?

ケージを単なる回避すべきスタンとして扱ってはいけません。それは主にスペースを遮断するツールです。もしあなたが明白な通路から目標地点に入ろうとしたら、Veigarはスタンを当てる必要すらなく、あなたのポジションを失わせることができます。効果的なカウンタープレイとは、本格的なエンゲージの前にケージを誘い出し、侵入角度を変え、ケージが設置される前にすべての機動力スキルを使わないことです。イベント・ホライゾンがクールダウンに入ると、Veigarは自身の安全性と脅威の大部分を失います。

Veigarが immobile だからといって、すぐにダイブすべきですか?

自動的にではありません。Veigarは immobile ですが、彼のケージは準備不足のダイブを非常にうまく罰します。味方の視界がないまま直線的にエンゲージすると、罠にかかり、タイミングを失い、彼のアルティメットによる簡単な実行を許してしまう可能性があります。ダイブが有効になるのは、彼のケージがすでに強制された後、複数の侵入角度がある場合、またはあなたのチームが彼の最初のコントロールを受け止められる場合です。目標は彼に向かって突進することではなく、コミットする前に彼の有用なケージを取り除くことです。

Veigarのスケールをどう止めますか?

彼が完全にスタックするのを常に止められるわけではありませんが、彼のスタックをより高価にすることはできます。ウェーブにプレッシャーをかけ、ファームか安全かの選択を迫り、mid laneが過度にパッシブになったらロームを脅し、彼よりも先に目標に到達しましょう。Veigarは、ゲームが彼にデッドタイムを与えた場合に非常にうまくスケールします。すべてのウェーブをプレッシャーのかかる決断に変えれば、彼はまだAPを得るかもしれませんが、そのスケーリングを実際のコントロールに変換させるポジションとテンポを失うでしょう。