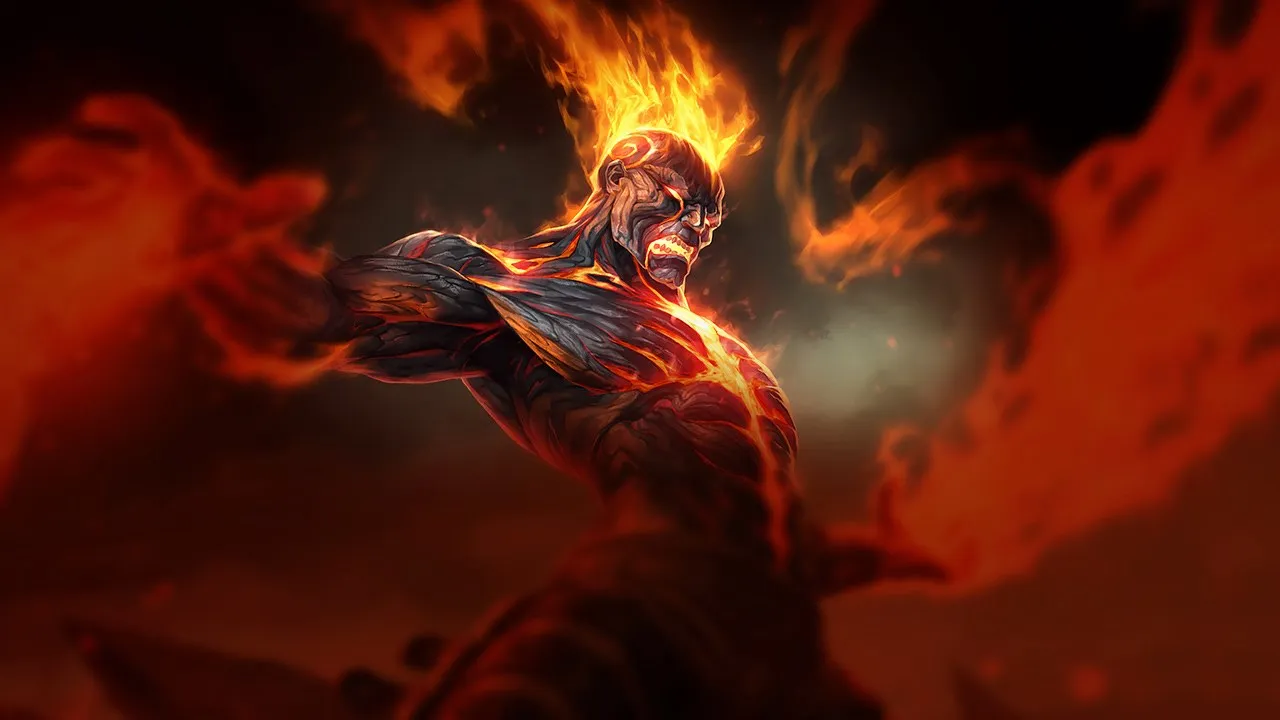

























カウンターアングル
Brandは、ポジショニングとファイトテンポに大きく依存します。効果的なカウンターは、ダメージだけでなく、彼が行動を起こす前にセットアップを妨害することです。これには、素早く距離を詰めたり、彼のゾーンを回避したり、短期決戦を仕掛けたりできるチャンピオンが含まれます。これらのプロファイルを理解することが、彼の限界を予測する鍵となります。

Brandは、フルspell comboを完了する前に素早くburstしてくる構成や、距離を詰めてくる構成を苦手とします。射程の長いpoke、高いmobility、そして強力なdisengageツールは、彼の持続ダメージキットの影響力を大幅に減少させます。アビリティを連鎖して当てることへの依存度とpositioningが、彼の構造的な弱点を決定づけています。
これらのチャンピオンは、こちらのビルドやプレイスタイルを真正面から上回る構成を持ち、レーン戦のコントロールとファームを極めて難しくする。彼らのスキルはこちらの主要な強みを無効化し、いつも通りのプランを実行しようとした瞬間に手痛い反撃を受けさせてくる。こうしたマッチアップでは、ミスを最小限に抑え、正面からの対決以外で解決策を探すことが重要になる。

Dredge Line が Nautilus と Brand を引き寄せ、その後 Staggering Blow と Depth Charge が拘束を延ばします。Brand は Sear が stun を与える前にターゲットに火をつける必要があります。CC で交戦が始まると、Brand には Blaze、Sear、Pillar of Flame を順番に使う時間がありません。
アンカーの脅威によって poke の角度が減り、あなたと Nautilus の間に minion を置いておく必要が生じます。1回捕まるだけで wave を譲り、さらに brush の支配権も失うほどの体力を失うことがあります。また Titan's Wrath により、Nautilus はあなたの最初のダメージ連携の一部を吸収できます。
Dredge Line で味方の carry と並んで2人を簡単な標的にしないよう、並ばずに wave の後ろでプレイしてください。Sear は、Blaze を付与して Nautilus が前に歩いてくるまで取っておきましょう。stun は Nautilus の追撃を止めるために使うもので、気軽な poke に使うものではありません。アンカーが外れたあとは、Pillar of Flame を使い、Depth Charge が次の連携を始める前に離れてください。

Rocket Grab は Brand を近接距離に引き寄せ、そこで Power Fist が knock up し、Static Field が silence できます。Brand には移動スキルがないため、1回捕まると、Sear の stun を可能にする連携が阻止されることが多くなります。Blitzcrank は、1回の悪い射角を決定的な交戦に変えます。
Rocket Grab が使える間は、wave の両脇や近くの brush に立つのが難しくなります。後ろに下がりすぎると、Pillar of Flame の poke と minion へのプレッシャーを手放すことになり、遮蔽なしで前に出ると grab を誘います。この緊張関係が wave の管理と river へのアクセスを決めます。
Rocket Grab の進路上に生きている minion を置き、wave が減るにつれて立つ側を切り替えてください。Sear を気軽に使ってはいけません。Blaze から Sear につなげれば、近づいてきた Blitzcrank を止められます。Rocket Grab が外れたら、前に出て Pillar of Flame と Conflagration を使い、Blitzcrank の次の試みの前に位置を立て直してください。
これらのチャンピオンは、マッチアップ自体を絶望的にするわけではないが、対面で優位に立ちやすいツールを持っている。射程が長かったり、攻撃を受け止める力が高かったり、エンゲージへの対応手段が豊富だったりする。アプローチを調整し、戦闘を受け入れるタイミングを慎重に選ぶ必要がある。

Black Shield は持続中、魔法ダメージを吸収し CC を防ぐため、Sear の stun を無効化できます。Dark Binding は Brand を root させ、Tormented Shadow が継続ダメージを与えるのに十分な時間拘束します。したがって Morgana は、あなたの先制攻撃から1人の対象を守りつつ、あなたの位置取りを咎めることができます。
Black Shield に正面から仕掛けると、Blaze と Sear を使っても期待した足止めが得られず、Morgana に主導権を握られます。また Dark Binding の射線上に立つと、Pillar of Flame を当てる機会も減ります。lane は resource の駆け引きになります。つまり、shield を使わせ、root を避け、そのあとで初めて全力で trade に踏み込むのです。
Sear を使う前に、Pillar of Flame か Conflagration で Black Shield を弱め、Dark Binding との間に minion を置いておいてください。shield が残ったままなら、CC を無理に押し込まず、ターゲットを変えるか待ってください。shield が消えたら、Blaze を付与し、Morgana が防御を張り直す前に Sear を狙ってください。

Senna は Mist を集めることで射程とダメージを伸ばし、Piercing Darkness は同じ直線上の敵にダメージを与え、味方を回復できます。Brand は Blaze を付与するために、より遠くまで近づく必要があります。したがって passive な lane では、Senna があなたの先制攻撃をますます難しくする、まさにその射程の優位をさらに伸ばしてしまいます。
放置された soul は1つごとに Senna の将来のプレッシャーを高めますが、まっすぐ前に歩くと Piercing Darkness や Last Embrace を受けることになります。何度か trade に負けたあとは、Senna の回復があなたの poke を徐々に帳消しにし、wave から押し出されます。最もきれいなチャンスは、Senna が soul を取るために足を止めたときか、root する弾を使い切ったときです。
wave を越えて追いかけずに済むよう、Senna が soul を取るために足を止めなければならない場所に Pillar of Flame を置いてください。Last Embrace とあなたの間には minion を置いておきましょう。その弾を使い切ったあとで、Blaze と Sear を使って短い交戦を1回だけ行ってください。Piercing Darkness がダメージをすぐに回復してしまうなら、Senna の好むリズムに付き合わず離れてください。

Unbreakable は最初の projectile を防ぎ、同じ方向からの以降のダメージを軽減します。これは Sear や Pyroclasm の最初のバウンドを消し、その後 Braum の carry を守ります。さらに Winter's Bite は最初の Concussive Blows のスタックを付与するため、動けない Brand にとって長引く交戦は危険です。
連携のすべてを shield に撃ち込んでもほとんどダメージは入らず、あなたのスキルが cooldown から戻る間に Braum が前に歩いてきます。Winter's Bite が当たると、Braum の相方の攻撃が stun の脅威となり、wave から押し出されます。ここではスペルを撃つ数よりも、横からの角度のほうが重要です。
まず Pillar of Flame か Conflagration で Unbreakable の向きを強制し、そのあと Sear を撃つ前に角度を変えてください。shield の正面に Pyroclasm を撃ってはいけません。Winter's Bite が当たったら、Concussive Blows がスタックする前に離れてください。外れたら、角度を取り直し、Braum ではなく carry に Blaze を付与してください。

Light Binding と Lucent Singularity は、Brand が Blaze を簡単に付与できるようになる前に Brand に届き、Prismatic Barrier は行きと戻りの両方で Lux を守ります。Lux は、Sear を当てるのにより大きなリスクを要する位置から Brand の体力を削れます。さらに root が成功すれば、Brand が位置を調整する前に Final Spark の準備も整います。
minion が少ない状態で一直線に立つと、Light Binding に lane を支配され、Lucent Singularity が狭い進路を塞ぎます。すべての poke に応じようと前に出ると、Lux の shield のせいで体力の交換が非効率になります。2つの zoning スペルがどちらも使えず、wave がまだ遮蔽を提供してくれるときに、優勢が入れ替わります。
wave の周りを横に動き、Sear の準備中に Lucent Singularity の中にとどまらないでください。Light Binding が使われたあと、Pillar of Flame を当てて Blaze を付与できる距離まで離れ、それから Prismatic Barrier ごしに Lux を追いかけることなく stun で脅してください。root が使える間は、距離を保ち、まず体力を温存してください。
その他のマッチアップ
このマッチアップは何よりもまず実行力の勝負であり、両者ともに優位を取れる現実的な手段を持っている。重要なスキルを一つ避けられるか、エンゲージを正しく読めるか、あるいはたった一つの位置取りのミスが、勝敗を分けることもある。マッチアップを理解し、行動すべき瞬間を見極める力がとりわけ重要になる。

この matchup では、Pyke の cooldown を咎めるために、Brand の正確なスキル実行が求められます。一方、Pyke は Brand のミスやスペルの無駄打ちを突いて、決定的な trade に勝ちます。
Pyke の hook の脅威とステルスのダイブにより、Brand は完璧な間合いと油断のない視界管理を保たざるを得ません。これを怠ると、すぐに wave の優先権を譲り、致命的な all-in を仕掛けられるリスクにさらされます。
Brand は、安定してよく狙った poke と油断のない間合い取りを優先すべきです。先手を打った視界確保で Pyke の flank を封じれば、Brand は Pyke の cooldown やミスを辛抱強く突くことができます。

Zyra の seed は Deadly Spines や Grasping Roots が当たると plant になります。この plant は poke を増やし、Sear の進路を塞ぐことがあります。Brand は Pillar of Flame と Conflagration でより即効性のある範囲ダメージを持っていますが、projectile を plant に使い切ってしまうと交戦に負けます。
wave 付近の seed が1つあるごとに、あなたの stun の角度が変わり、Zyra は自分を直接さらさずに push できます。Grasping Roots が当たると、あなたが root されている間も plant がプレッシャーを延長します。一方、seed が消費されて root が使われたあとなら、代わりに brush の支配権を取り戻し、Zyra を押し返せます。
Sear は進路が開いているときだけ撃ち、Pillar of Flame を使って、防がれる projectile に頼らず Zyra に届かせてください。Grasping Roots の射線を避け、通過したあとに前に出て Blaze を付与し、stun で脅してください。Stranglethorns に対しては、連携をその場で終わらせようとせず、knock-up の前にゾーンから離れてください。

Thresh は Brand のスキルが cooldown 中であることを常に突き、小さなミスを大きな lane の優位に変えます。Brand にとって、交戦パターンの繊細なやりとりを極めることが勝利の鍵です。
Thresh の脅威と、Thresh が先制する力を軽視すると、lane の主導権がすぐに移り、Brand は守勢に追い込まれます。これは、Brand が視界を確保し、objective を巡る戦いに効果的に影響を及ぼす能力に直接響きます。
この matchup では、Brand のプレイヤーに正確なスキル実行が求められます。綿密な間合い取りで Thresh の hook を避け、明らかなチャンスの中でだけスキルを使ってください。ダメージを確保したら素早く離脱し、リスクの高い交戦を無理に行わず、次の有利な機会を辛抱強く待ってください。

Grand Entrance は、Rakan があなたの duo の中に着地してターゲットを knock up する必要があり、その後 Battle Dance で味方のもとに戻ります。その突入により、Brand は Blaze と Pillar of Flame を当てる近くのターゲットを得ますが、最初の CC がセットアップを妨害することがあります。したがってこの matchup は、着地用に Sear を温存できるかどうかにかかっています。
poke に Sear を使ってしまうと、Rakan は Sear の cooldown 中に Grand Entrance を使い、Battle Dance で離脱できます。Sear を温存すれば、Rakan はあなたの carry の周辺に警戒せざるを得ず、lane は安定します。knock-up が決まれば Rakan は brush の支配権を取り戻し、突入を止めれば wave の優先権はあなたのものです。
Rakan が Grand Entrance を始めるまで Sear を温存し、Conflagration か Pillar of Flame で Rakan の着地地点に Blaze を付与してください。Rakan が到着したあとに stun を狙い、Battle Dance を追いかけずに、Rakan とあなたの carry の間に立ってください。The Quickness が発動している間は、charm されるのが1人だけになるように、あなたの duo を離してください。
その他のマッチアップ
これらのチャンピオンは、こちらの主要な強みに効果的に対応するのが難しく、より自由に対面を組み立てることができる。プレッシャーをかけて有利な交換を引き出す手段は複数あることが多い。相手が態勢を立て直す時間を与えるのではなく、この優位を活かして主導権を握ろう。

Sona は、Hymn of Valor と Aria of Perseverance のオーラを共有するため、味方の近くにいなければなりません。この集まりにより、Conflagration には近くのターゲットが、Pyroclasm には短いバウンドの経路が与えられます。Sona の回復は孤立した poke を帳消しにできますが、Blaze とあなたの範囲ダメージが2人の両方に届くと苦戦します。
Sona は小さな trade を繰り返してから回復することを望み、Brand は duo に届く1回の連携を望みます。2人の位置を脅かせるくらい wave を中立に保てば、Sona は Hymn of Valor のために自由に前に出られません。範囲攻撃を1回うまく当てると、体力と回復用の mana、そしてしばしば brush の支配権まで失わせます。
Sona が carry に近づくのを待ってから、Pillar of Flame を使うか、Conflagration で Blaze を広げてください。Aria of Perseverance が1人だけで回復できるような poke に、連携を最後まで使ってはいけません。両方のターゲットが燃えたら、Sear が stun を脅かし、Pyroclasm はあなたの優位を実際に勝ちに変えるバウンドを得ます。

You and Me! は Yuumi を untargetable にしますが、味方の位置に固定します。したがって Brand は Pillar of Flame と Conflagration をどこに落とせばよいか予測でき、固まった duo に対して Pyroclasm を使えます。Zoomies は、あなたの範囲ダメージの的となる2人を引き離すことなく、回復と加速を行います。
Yuumi の carry は last hit のたびに単独で身をさらさなければならず、あなたの zoning が単純になります。poke が1回当たっても Zoomies が回復しますが、Blaze が広がり2人の両方に範囲ダメージが入ると、2人の sustain ははるかに大きく削られます。プレッシャーは、スペルの量ではなく質で決まります。
やみくもに撃たず、くっついている味方の last hit の動線に Pillar of Flame を向けてください。Yuumi が Bop 'n' Block のために離れたときは、Blaze を付与したあとなら Sear で Yuumi を罰することができます。Pyroclasm は、2人のチャンピオンが近くにいるときのために温存し、Final Chapter が rooting する波をスタックし始めたら下がってください。

Nami は、Ebb and Flow を味方と敵の間でバウンドさせるために前に出なければなりません。その動きで Nami は Pillar of Flame の射程に入り、その後 Blaze が Sear の stun を可能にします。ただし Aqua Prison が Nami の答えです。連携の間 Brand が立ち止まっていると、bubble が Pyroclasm の前にその優位を中断させかねません。
攻撃的な回復のたびに Nami は一瞬無防備になりますが、Ebb and Flow は決めきれなかった poke も回復できます。その動きを咎めれば、Nami の体力と brush へのアクセスが下がり、外せばスペルを2つ使って1回の回復バウンドを許すことになります。この lane は、絶え間ない連打ではなく、明確なチャンスに報います。
Aqua Prison の間は横に動き、Tidal Wave に対して carry の横に並ばないでください。Nami が Ebb and Flow のために前に出たら、Pillar of Flame を置き、Blaze を付与して、Nami の退路に Sear を狙ってください。bubble がまだ使えるなら、最初のスペルのあとに離れてください。外れたなら、Conflagration か Pyroclasm で連携を完成させてください。
その他のマッチアップ
これらのチャンピオンは、こちらのビルドやプレイスタイルを真正面から上回る構成を持ち、レーン戦のコントロールとファームを極めて難しくする。彼らのスキルはこちらの主要な強みを無効化し、いつも通りのプランを実行しようとした瞬間に手痛い反撃を受けさせてくる。こうしたマッチアップでは、ミスを最小限に抑え、正面からの対決以外で解決策を探すことが重要になる。

Wind Wall があるため、Yasuo はあなたのburstシーケンス全体に対する直接のcounterです。このスキル1つで、空中の Pyroclasm を消され、Sear のスタンも完全に防がれるため、自分の身を守ることも Blaze の爆発を発動させることも一瞬でできなくなります。Yasuo は Sweeping Blade でminionをすり抜けて距離を詰められるので、主力のself-peel用projectileを Yasuo の壁に封じられると、Yasuo の容赦ない物理ダメージに対して完全に無防備になります。
Yasuo が Steel Tempest の竜巻で常にあなたを脅かすため、laneの中央を安全に保つことはできません。ファームを確保しようと Pillar of Flame を使うために前に出るたびに、Yasuo にdashで詰められて、Last Breath につながるノックアップを受ける危険があります。その結果、自分のタワーの下まで下がらされ、wave controlを失い、あなたがwaveを安全に処理するのに苦戦している間に、Yasuo は自由にroamして自分のjunglerを助けられます。
生き残るには、大きなリソースを使う前に Wind Wall を誘い出さなければなりません。通常攻撃で Yasuo の Way of the Wanderer のシールドを割り、その後 Pillar of Flame で、直線のprojectileを投げずにpokeします。Sear は抑止力として温存してください。投げない限り、Yasuo はスタンの可能性を警戒せざるを得ません。Yasuo が壁を無駄に使ったら、20秒間の短いチャンスが生まれ、Conflagration と Pyroclasm のchainを積極的に狙えます。

Kassadin は魔法ダメージを吸収しskillshotを避けるように作られているため、あなたにとって最悪の相手です。Kassadin をpokeしようとするたびに、Kassadin の Null Sphere が魔法シールドを生成してあなたの Pillar of Flame のダメージを無効化し、Void Stone は、あなたがスキルを撃つだけで追加のシールドを与えます。Riftwalk を習得すると、Kassadin は Sear と Pillar of Flame を楽々とblinkで飛び越えられ、あなたのburst combo全体が無意味になります。
このmatchupは序盤のプレッシャーを大きく制限します。Kassadin はあなたのpokeに対してsustainできるので、体力を懸けたtradeは安全にできず、Kassadin を簡単にlaneから追い出すこともできません。レベル5以降は、Riftwalk から Force Pulse につながる脅威のため、川を越えて前に出すぎることはできません。後ろに下がってプレイするしかなく、mid priorityを譲り、Kassadin は自由にスケーリングして止められないレイトゲームの怪物になります。
生き残るには、自分のタワーの近くでminion waveをコントロールすることだけに集中しなければなりません。Pillar of Flame で無闇にpushしてはいけません。代わりに Conflagration を使い、minionを自分側のlaneに留めたまま安全にwaveを削りましょう。Sear は Kassadin の積極的なジャンプを抑止するために温存し、Riftwalk がcooldownから戻っている間は、自分から先に投げてはいけません。Kassadin が Riftwalk でengageしてきたら、すぐに Pyroclasm と Conflagration を撃ち込んで、diveを咎めてください。

Yone は圧倒的に有利です。Soul Unbound により、前進しながら あなたの Pillar of Flame と Sear のskillshotを楽々と避けられるためです。あなたのzoningの手段をすり抜けることで、スタンによる防御の構えを完全に無効化します。この霊体の状態で距離を詰められたら、Mortal Steel のノックアップから Fate Sealed へ簡単につなげられ、あなたのパッシブ Blaze が溜まる前にburstで倒されます。
この脅威により、あなたは非常に守備的な姿勢を強いられ、序盤のwave controlを譲ることになります。いつ急にengageされるか分からないので、minionに Conflagration を使うために安全に前に出ることはできません。Yone の Mortal Steel の竜巻が準備できているたびに、タワーまで下がらなければなりません。この絶え間ないプレッシャーはrecallのタイミングを制限し、体力を削り、近くのobjectiveの確保でjunglerを助けることも妨げます。
Yone が霊体の状態で突進してきたとき、反応して Sear を投げてはいけません。代わりに、タワーの近くに立って、Pillar of Flame を Yone の本体が戻るアンカーに向けて狙ってください。Yone の分身を注意深く見て、Soul Unbound が終わって Yone が戻ってくる瞬間に、Conflagration と Pyroclasm を撃ち込んで退路を咎めます。タワーの下で Fate Sealed を受けてしまったら、tradeを返そうとせず、すぐにflashで離れてください。

このmatchupは非常に厳しいです。Fizz があなたの脅威全体を無効化する完璧な手段を持っているためです。Sear のスタンで Fizz を捕まえようとしたり Pyroclasm をバウンドさせたりするたびに、Fizz は Playful を発動するだけでそのスキルを完全に避けられます。これらの防御手段がないと、Fizz の追撃に対して完全に無防備になり、Fizz は Urchin Strike でdashして入ってきて、あなたをburstで倒せます。
最初のwaveから守備的な姿勢を強いられます。caster minionより前に出ると、致命的な Chum the Waters のengageを招くため、Pillar of Flame でpokeしたり Conflagration で Blaze を広げたりするのは非常に危険になります。waveを押しすぎると、Fizz はfreezeしてくるので、あなたが前に出て止めざるを得なくなり、タワーでは守れない避けられないall-in diveに直面します。
生き残れるかどうかは、Sear を温存できるかにかかっています。自分から先に投げてはいけません。Fizz が Urchin Strike を使うのを抑止するために、チャージした状態で脅威として持ち続ける必要があります。waveを削るには、最大射程から Pillar of Flame を使うことだけに集中してください。Fizz がminionを処理するために Playful を無駄に使ったら、12秒間の短いチャンスが生まれるので、積極的に動けます。Chum the Waters が自分にくっついたら、飛んでくるノックアップをすぐにflashで避ける準備をしましょう。

Irelia は、Bladesurge があなたのskillshotとどう噛み合うかによって、このlaneのペースを完全に握ります。Pillar of Flame を放ったり Sear でスタンを狙ったりするたびに、Irelia は体力の少ないminionを通ってすぐにdashし、それらを避けられます。あなた自身のwaveを足場にして楽々と距離を詰めてくるので、あなたのレンジの優位は無意味になり、Irelia の Ionian Fervor があなたを溶かす、致命的な近距離戦を強いられます。
急死のリスクなしに、waveを争ったりpriorityのためにpushしたりすることはできません。minionの体力が減った瞬間に下がらなければならず、序盤のゴールドとタワープレッシャーを犠牲にします。Irelia が自分のタワーの近くでlaneをfreezeしたら、あなたは完全にzoneアウトされます。それを崩すために前に出ると、Flawless Duet の格好の的になるからです。mid priorityを失うと、序盤の川でのskirmishで、あなたのjunglerはバックアップのない状態になります。
生き残るには、Irelia がdashできる体力の少ないminionが近くにいるとき、waveに Pillar of Flame を撃ってはいけません。代わりに Sear と Conflagration は、自衛のためだけに温存してください。スタンは、Irelia が Bladesurge をあなた自身に向けて使ったときにだけ撃ちます。それにより Irelia の軌道が読みやすくなります。Irelia が Flawless Duet を当ててきたり Vanguard's Edge でengageしてきたりしたら、すぐに Pyroclasm を撃ってタワーの方へ下がりましょう。体力を高く保ってdiveを防ぐために、多少のゴールドを失うのは受け入れてください。

Death Mark で Zed がターゲット不可になるため、Zed はあなたの防御手段を完全に無効化し、Sear のスタンを簡単にすり抜けられます。Blaze を発動させて Sear を投げ、self-peelしようとしても、Zed はultを使って避けるだけです。mobilityがないと、Brand は Razor Shuriken と Shadow Slash による後続のburstから逃げられず、crowd controlを使い切ったあとは完全に無防備になります。
Zed が Death Mark を習得すると、mid laneでの攻撃の主導権をすべて失います。前に出ると Living Shadow と Shadow Slash のスローを受けて簡単にdiveされるので、極端に離れた距離から Pillar of Flame でファームするしかありません。Zed にpokeされて体力が半分を切ると、Contempt for the Weak によって自分のタワーの下で素早く処刑され、不利なrecallを強いられ、Zed は自由にroamできます。
Sear は絶対的な抑止力として温存しなければなりません。tradeのために自分から先に撃ってはいけません。Zed が Death Mark でengageしてきたら、Zed があなたの背後に再び現れる正確な瞬間まで待ってください。すぐに Conflagration を当て、自分のキャラクターの真後ろに向けて Sear を撃ち、スタンを確実に当てます。これが生き残れる唯一のチャンスです。当たったら Pillar of Flame と Pyroclasm で追撃し、Zed の mark が爆発する前にtrade-killに持ち込みましょう。
その他のマッチアップ
これらのチャンピオンは、マッチアップ自体を絶望的にするわけではないが、対面で優位に立ちやすいツールを持っている。射程が長かったり、攻撃を受け止める力が高かったり、エンゲージへの対応手段が豊富だったりする。アプローチを調整し、戦闘を受け入れるタイミングを慎重に選ぶ必要がある。

Galio の脅威は、Justice Punch を使って Pillar of Flame の円からすっと抜け出せる点にあります。あなたの主力の範囲スキルの発動前の溜めは予測しやすいため、反応する Galio はその爆発をすり抜けて真っ直ぐ突っ込み、Shield of Durand につなげてきます。この素早い距離詰めにより、Sear を当てて Blaze を発動させるのに必要な間合いを取れなくなり、あなたのpokeは致命的なロックダウンに変わります。
overextendすると Justice Punch の格好の的になるため、何も考えずにwaveをshoveしてはいけません。Galio が自分のタワーの近くでfreezeしていると、あなたがminionをcrashさせようとする間に、Galio の Winds of War があなたの体力を削ります。前方へのdashの脅威が常にあるため、自分のタワーの下で守備的にプレイするしかなく、序盤のpriorityを犠牲にし、Galio は Hero's Entrance で自由にroamできます。
生き残るには、Galio が minion を処理するためにすでに Justice Punch を無駄に使っていない限り、Pillar of Flame を強気に撃ってはいけません。距離を保ち、代わりに近くのminionへの Conflagration で Blaze を広げることに集中してください。それでも Galio が突っ込んできたら、Shield of Durand の挑発がチャネリングされる前に、Galio が来る進路へ直接 Sear を投げて、dashの途中でスタンさせます。捕まってしまったら、Galio が味方と固まる瞬間のために Pyroclasm を取っておきましょう。

Akali の高いmobilityは、あなたのskillshotを完全に無効化します。あなたの主力のburstは Pillar of Flame を当てて Sear でスタンを確実に決めることに頼っていますが、Akali は Shuriken Flip や Perfect Execution のdashでその両方を楽々と避けられるので、tradeは極めて危険です。Akali が最初のzoning手段をすり抜けて Assassin's Mark を発動させたら、mobilityのないあなたは、Akali のフル処刑comboに完全にさらされます。
自分側の川より先に安全にpushしに出ることはできません。overextendした位置にいると、Akali が Shuriken Flip を当てて致命的なall-inを強いてくるからです。この制約のせいでタワーの下で守備的にプレイするしかなく、priorityを譲り、Akali は自由にroamできます。Blaze を付けるために前に出ると、体力が常に脅かされるので、悪いrecallのタイミングを強いられることも多くなります。
生き残るには、Sear はpokeに使わず、守りの抑止力として温存しなければなりません。Akali がすでに Shuriken Flip を無駄に使った場合か、モーションに縛られている場合を除き、Pillar of Flame を投げてはいけません。タワーの安全圏にくっついたまま、minionへの Conflagration で Blaze を広げて、受動的にwave clearをしてください。Akali が Twilight Shroud を展開したら、すぐに下がって、Akali がultを使ってきたときに Pyroclasm を撃つ準備をしましょう。

Akshan のmobilityがあなたの自衛を封じるため、このmatchupは Brand にとって非常に不利です。あなたが身を守ろうとすると、Akshan は Heroic Swing であなたの周りを回ります。この素早い円運動により、直線のskillshotである Sear を避けるのが極めて簡単になり、あなたはスタンを発動できません。その間に Akshan の物理ダメージが、あなたの脆い体力を一気に削ります。
Akshan が物理burstのtradeを常に狙っているため、タワーの下か近くで守備的にプレイするしかありません。minion waveに Pillar of Flame を使うと完全に無防備になるため、Akshan のpushを簡単には争えません。Akshan は Avengerang で楽にwaveを処理してlane priorityを取り、Going Rogue で気づかれずにサイドlaneへroamして、あなたがwaveを処理して動けない間に、マップ全体に大きなプレッシャーをかけます。
生き残るには、Sear を先んじて撃ってはいけません。Akshan が実際に Heroic Swing を使うまで、このスキルを温存してください。スタンは Akshan のアンカー地点に向けて撃つか、Akshan があなたかminionにぶつかるまで待って、確実に当てましょう。minion waveの後ろか、地形の角の近くに位置取って、Akshan のスイングの進路を塞いでください。開けた場所で捕まってしまったら、すぐに自分の足元に Conflagration と Pillar of Flame を撃ち、Akshan が距離を詰めてくる間に Blaze でtradeに持ち込みましょう。

Annie は、Molten Shield による瞬間的な移動速度のおかげで Pillar of Flame を楽にサイドステップで避けられるため、あなたのpokeのパターンに対抗できます。この重要なスキルを外した瞬間に、Annie は積極的に距離を詰めてきます。パッシブ Pyromania がフルチャージされていれば、Annie はすぐに Disintegrate や Incinerate であなたを封じ込め、あなたは反撃する手段もないまま、Annie のフルburst comboにさらされます。
この反応速度の差により、守備的な姿勢を強いられ、mid laneのpriorityを手放すことになります。Annie はスタンの脅威を持ち続けたまま、Disintegrate で安全にファームしwaveを管理できます。Conflagration でminionを処理しようと前に出すぎると、Annie はすぐに Summon: Tibbers を叩き込んであなたの体力を消し飛ばせるので、早すぎるrecallを強いられるか、タワーのプレートを大きく失います。
生き残るには、極めて辛抱強くプレイしなければなりません。Pillar of Flame でtradeを始めてはいけません。代わりに、Annie が Molten Shield を無駄に使うのを待ってから投げるか、Annie が Disintegrate のモーションに自分で縛られた瞬間に撃ってください。Annie の Pyromania の表示を常に見ておきましょう。Annie がスタンを発動して突進してきたら、守りの Conflagration から Sear につなげるcomboを準備して、動いている途中でスタンさせ、すぐに離脱します。

Orianna は、Ball をあなたのレンジより前に置き続けることで、このlaneを完全に支配します。Orianna は、あなたの Pillar of Flame が届かない距離から Command: Attack で何度もharassしてきます。あなたが前に出てtradeしようとしても、Orianna はすぐに Command: Protect でそのやり返しを無効化し、そのシールドであなたのパッシブ Blaze の継続ダメージを吸収します。その間あなたは、Orianna のzoneから一方的にダメージを受けます。
この絶え間ないアウトレンジのせいで、wave priorityを譲ることになります。常にタワーの下でファームする羽目になり、Command: Dissonance に捕まらずにパッシブをwaveに広げる Conflagration を当てるのに苦労します。体力はじわじわ減っていき、早いrecallを強いられ、junglerを助けられなくなります。一方 Orianna は、守ってくれるボールの後ろで安全かつ健康なままです。
生き残るには、自分のminion waveの中に立たないでください。Orianna に、Command: Attack であなたをpokeするか、waveをpushするかを選ばせましょう。Orianna がボールを置くために前に出すぎたら、Command: Protect を無駄に使うのを待ってから、Pillar of Flame と Sear のcomboを当てにいってください。Orianna がskillshotを外したら、minionを通して Blaze を広げてOriannaを退かせ、Orianna が Command: Shockwave を使ってきたときのために Pyroclasm を取っておきましょう。

Aurora のmobilityは、あなたの通常のtradeのパターンを完全に崩します。Pillar of Flame を撃った瞬間に、Aurora は Across the Veil ですぐに反応して飛び退き、透明になり、あなたの主なダメージ源を完全に無駄にできます。重要なスキルを無駄にされたら、Aurora は安全に距離を詰めて Twofold Hex を当て、Spirit Abjuration を発動でき、あなたにはtradeを返す確実な手段が残りません。
Pillar of Flame を無闇に投げられないため、minion waveのコントロールを失います。waveを処理するために使うと、Aurora はすぐに Twofold Hex で咎めてきます。Across the Veil の脅威が常にあるため、タワーの近くで守備的にプレイするしかありません。mid priorityを確保するのに苦労し、junglerを助けられない一方で、Aurora は高いmobilityで余裕を持ってroamできます。
生き残るには、Pillar of Flame をengageの手段ではなく、抑止力として温存しなければなりません。tradeは、Conflagration で Blaze を広げてスタンの脅威を作ることから始めてください。Aurora が Across the Veil で積極的に前に飛び込んできたら、短い透明状態が切れるのを待ってから Sear を投げてスタンさせます。Aurora を封じ込めたら、Pillar of Flame と Pyroclasm を安全に解き放って、tradeを有利にひっくり返せます。
このmatchupは、Morgana が Black Shield をどう使ってあなたの攻撃的なプレッシャーを封じるかで大きく決まります。burstを成立させるには、すでに Blaze が付いている対象に Sear を当てなければなりません。しかし Black Shield は魔法ダメージを吸収し、Sear のスタン効果を完全に無効化します。このcrowd controlがないと、フルcomboを確実には決められず、Morgana の Dark Binding と Tormented Shadow による反撃に非常に弱くなります。
Morgana は、minionに Tormented Shadow を置くことで、あなたのwaveへのプレッシャーを簡単に無効化します。あなたは追いつくためだけに Pillar of Flame と Conflagration を守りに使わざるを得なくなります。Morgana はあなたのスタンの脅威を無視できるので、Dark Binding を狙って自信を持って前に出てきます。Morgana の Tormented Shadow が体力を削る中で Morgana のrootに当たると、mid priorityを失うことになり、最終的に早いrecallを強いられ、あなたのjunglerはバックアップのない状態になります。
成功できるかは、Morgana の防御用cooldownを誘い出せるかにかかっています。Pillar of Flame を撃ってtradeの脅威をかけつつ、Morgana が Black Shield を無駄に使うのを見るまで Sear は温存しましょう。Morgana のシールドのcooldownは非常に長いため、15秒間の確かな攻め時があります。Morgana がシールドを温存している場合は、Conflagration でのファームに集中してください。Morgana が Soul Shackles を撃つために前進してきても、慌てて Morgana のシールドに Sear を投げてはいけません。代わりに後ろに歩いて鎖を断ち切り、シールドが切れるのを待ってから反撃しましょう。
Lux は、あなたのスキル射程のはるか外の安全な距離から Light Binding でrootを狙えるため、このmatchupを支配します。Pillar of Flame でtradeを返せたとしても、Lux の Prismatic Barrier は、あなたのパッシブ Blaze の継続ダメージを吸収するのに優れています。これにより、あなたの主力のDoTによるプレッシャーは無効化され、Lux はあなたの Sear のスタンの射程の外に完全に置かれたままになります。
Lux が Lucent Singularity で安全にwaveを処理するため、あなたは絶えずタワーの下に押し込まれることになります。waveを争いに前に出ると Light Binding に当たる危険があり、すぐに高ダメージの Final Spark comboにつながります。この絶え間ない脅威によって守備的な姿勢を強いられ、priorityを失い、minion waveを通して Conflagration を広げて Lux にプレッシャーをかける機会も限られます。
生き残るには、Light Binding を防ぐために自分のminion waveの後ろに立ちましょう。ただし、Light Binding は1体を貫通できることに注意してください。横に動いてスネアを誘い出し、そのあとすぐ長いcooldownを突いて、前に出て Pillar of Flame で処理してください。Lux が Prismatic Barrier でminionを守ってきたら、無理にtradeしてはいけません。代わりに体力の少ないminionへ Conflagration を使い、Lux のレーザーの危険範囲に踏み込まずに Blaze を安全に Lux へバウンドさせましょう。

Talon が Rake でwaveを安全な位置から一瞬で処理し、すぐに Assassin's Path で川の壁を飛び越えられるため、Talon はマップのテンポを支配します。動きの遅いmageである Brand は、jungleでのこの超高mobilityに太刀打ちできません。無闇に Talon を追うと、brushの中で Noxian Diplomacy と Blade's End に捕まり、Sear を当てる前にburstで倒される危険があります。
Talon のshoveについていくためだけに Pillar of Flame と Conflagration を使い、絶えず自分のタワーの下にいることになります。この絶え間ないプレッシャーはrecallのタイミングを制限し、junglerを助けることを妨げます。Talon が壁の向こうに消えるたびに、サイドlaneは下がらなければならず、ゴールドと経験値が流出します。あなたはタワーのプレートを取るか、危険なローテーションを冒すかの二択を迫られます。
Talon がroamしたとき、jungleを通って追いかけてはいけません。代わりに、すぐに Talon がいなくなったことをpingで知らせ、Conflagration から Pillar of Flame の順で使って、waveを Talon のタワーへ強くshoveしてください。Talon が近づいてきたときは常に Sear を温存しましょう。スタンの脅威を見せることが、Talon の Noxian Diplomacy によるengageに対する唯一の抑止力です。Talon が Shadow Assault で飛びかかってきたら、すぐに Pyroclasm を撃って2人の間をバウンドさせ、Talon を退かせるか、命と引き換えのtradeに持ち込みましょう。

Ziggs は、このlaneを決める大きなレンジの優位を持っています。Ziggs の Bouncing Bomb は、あなたが前に出て Pillar of Flame や Conflagration を撃てるようになるはるか前から、安全な位置からあなたをharassできます。Blaze を付けたり Sear のスタンを狙ったりするには、Ziggs の弾道の中に直接歩いて入るしかなく、距離を詰めるだけで避けられないpokeを受けることになります。
Ziggs のwave clearに張り合うのに苦労し、絶えずタワーの下に釘付けにされます。Bouncing Bomb で体力を低く保たれるため、死ぬ危険なしに Ziggs のpushを争うことはできません。これにより Ziggs は、Short Fuse で自由にあなたのプレートを削り、Satchel Charge でタワーを素早く落とせます。そして Hexplosive Minefield があなたのroamの試みを封じます。
生き残るには、minion waveのど真ん中に立たないでください。これにより Ziggs は、Bouncing Bomb でminionを処理するか、あなたをpokeするかの選択を迫られます。Ziggs が前に出すぎて Short Fuse を当てようとしたら、すぐに Pillar of Flame、続けて Sear で咎めてください。体力が減ったときは、欲張ってプレートを守ってはいけません。waveを処理しようとして Mega Inferno Bomb で死ぬくらいなら、タワーのpriorityを譲りましょう。

このmatchupは、純粋なリーチとburstの速さで決まります。Syndra の Scatter the Weak は、あなたのスキルの射程のはるか外から Dark Sphere を飛ばせるため、Syndra はあなたをアウトレンジします。Conflagration と Pillar of Flame は前に出る必要があるため、Syndra はあなたの接近を簡単に迎え撃ち、すぐにスタンさせ、あなたがパッシブ Blaze を付ける前に Force of Will と Unleashed Power で追撃できます。
安全にwaveを争いに前に出ることはできません。Pillar of Flame でminionを処理しようとするたびに、Syndra のsphereの設置ラインに踏み込む危険があります。これにより序盤のpriorityを譲ることになり、Syndra は自分のパッシブ Transcendent を労せず積み上げられます。投射されたsphereで体力を削られたら、早すぎるrecallを強いられ、あなたが苦戦する間、Syndra に自由にroamされてしまいます。
生き残るには、自分のcaster minionの後ろに陣取り、Pillar of Flame の外縁でファームすることに集中しなければなりません。Syndra の Dark Sphere がすでに地面にあるときは、直線に歩いてはいけません。Syndra が Scatter the Weak を無駄に使って外したら、前に出て、Conflagration で Blaze を広げ、Sear のスタンで脅す短いチャンスが生まれます。Syndra がスタンを温存している場合は、Syndra に合わせて辛抱強く、安全にファームしてください。

このmatchupは、あなたの遅い詠唱時間に対する Ekko のmobilityの優位で決まります。Pillar of Flame でharassしたりwaveを処理したりしようとするたびに、Ekko は Phase Dive にすぐ反応して爆発範囲からblinkで抜け出せます。このdashで一瞬で距離を詰め、通常攻撃と Timewinder で素早く Z-Drive Resonance を発動させ、あなたの体力を削り、あなたは反撃できません。
この絶え間ない脅威のため、laneの中間点より先に安全に出ることはできません。Pillar of Flame を強気に撃って外すと、Ekko はすぐにwaveの状態を握り、freezeするか、重いtradeであなたを押し戻します。守備的にプレイするしかなく、序盤のpriorityを犠牲にして Ekko のroamを許します。押しすぎると、Parallel Convergence を使ったタワー下での致命的なdiveにさらされるためです。
生き残るには、辛抱強く待つ展開にしなければなりません。Pillar of Flame でtradeを始めてはいけません。代わりに温存して、Conflagration で Blaze を広げ、離れた位置からより安全にファームしましょう。Ekko が Phase Dive で前に積極的に出てきたら、それが合図です。Sear を投げて Ekko の着地する軌道を迎え撃ってスタンさせ、そこで初めてフルcomboを叩き込んでください。Ekko が burst を巻き戻す Chronobreak を持っていない場合は、Pyroclasm も含めます。

Diana の脅威は、Crescent Strike を当ててパッシブの mark を付与できるかにかかっています。mark が付くと、Diana は2連続の Lunar Rush で一瞬で距離を詰め、Moonfall の重いburstにあなたを引き込めます。動けないmageである Brand は、この状況をそのままでは切り抜けられません。生き残れるかは、dive中の Diana を Sear でスタンさせる即座の反応にかかっていますが、そのためには Diana が別のスキルですでに燃えている必要があります。
このmatchupは非常に守備的な姿勢を強いられ、waveをpushするのは危険です。Pillar of Flame で Diana をpokeしようとすると、Diana のdashの射程内に入ってしまうことが多く、あらゆるtradeが大きなリスクになります。Diana に体力を削られたら、Diana はwaveをfreezeするか、あなたにdiveして、ファームから追い払い、自由にroamしている間あなたは川のskirmishを助けられなくなります。
Crescent Strike の湾曲した軌道の反対側に位置取って、サイドステップで避けやすくしましょう。Sear は信念を持って温存しなければなりません。pokeのために投げてはいけません。Diana が Lunar Rush で仕掛けてきたら、すぐに Conflagration を使い、続けて Sear で、至近距離の即座のスタンを決めます。Diana が Pale Cascade を発動してあなたの反撃ダメージを吸収してきたら、Diana のシールドが消えるまで少しの間 Pyroclasm を温存してから、爆発的なシーケンス全体を解き放ちましょう。
その他のマッチアップ
このマッチアップは何よりもまず実行力の勝負であり、両者ともに優位を取れる現実的な手段を持っている。重要なスキルを一つ避けられるか、エンゲージを正しく読めるか、あるいはたった一つの位置取りのミスが、勝敗を分けることもある。マッチアップを理解し、行動すべき瞬間を見極める力がとりわけ重要になる。

このmatchupは、Aurelion Sol の自己拘束をどう利用するかで決まります。Breath of Light をチャネリングするには、Aurelion Sol は完全に静止していなければならず、回避する能力が完全に失われます。この静止している間は、Aurelion Sol はあなたの Sear のprojectileの非常に簡単な的になります。先に Conflagration か素早い Pillar of Flame で下準備をしておけば、Blaze のスタンを即座に発動でき、Aurelion Sol の主なダメージ源を中断して、burstのtradeに勝てます。
laning phaseの間、Aurelion Sol は、minionから Cosmic Creator のスタックを集めるために、絶えず Singularity を落とそうとします。Aurelion Sol が前に出て Breath of Light でminionを倒そうとしても、突然の Sear のスタンの脅威があるため、Aurelion Sol はチャネリングをキャンセルするか、大きなダメージを受けるかを迫られます。これにより、Aurelion Sol が楽にあなたをタワーの下へshoveすることを防げ、laneは互角に保たれ、cooldownが戻っているときは必ず体力を大きく削り合うtradeになります。
Aurelion Sol が動いている間に、闇雲に Sear を投げてはいけません。代わりに、Aurelion Sol が Breath of Light を発動して自分を固定する正確な瞬間か、Astral Flight で予測しやすい直線で飛んでくる瞬間を、辛抱強く待ってください。すぐに Conflagration を当てて Blaze を付与してから、スタンを投げます。このcomboを外したら、すぐにminionの後ろへ下がって Aurelion Sol の Singularity のpullを避け、cooldownが戻るのを待ってから再び前に出ましょう。

このmatchupは、Vladimir の Transfusion による絶え間ない回復と、あなたの Blaze の持続ダメージの正面衝突です。Vladimir の Crimson Pact は力を付けるにつれて体力を自然に増やしますが、この余分な体力はむしろ、あなたのパッシブ Blaze の継続ダメージを増幅させ、Vladimir にとって不利に働きます。ただし、Sanguine Pool で逃れる能力は、Pyroclasm のバウンドを完全に無効化したり、重要な Sear のスタンを外したりして、戦いの流れをリセットできます。
laningは、Vladimir の crimson のリソースバーに左右されます。強化された Transfusion のためにバーが満タンになったら、あなたのtradeダメージを帳消しにされないよう下がらなければなりません。Vladimir は waveを処理するために自分の体力を代償に Tides of Blood を使うので、タワーの下に簡単に閉じ込められます。ただし、Vladimir が Sanguine Pool を使い切る前にall-inを強いるのは罠です。Vladimir はあなたのburstを安全に吸収し、その間 Hemoplague が Vladimir を回復し続けるからです。
この処刑の戦いに勝つには、Vladimir が Sanguine Pool を使える間は、Pyroclasm を撃ったり Sear を使い切ったりしてはいけません。代わりに、minionに広げた Conflagration で離れた位置から Vladimir をpokeして、Vladimir に早めに守りの Pool を使わせましょう。Vladimir が液状化したら、cooldownの秒数を数えて、そのあとすぐに Pillar of Flame とフルcomboで攻めに転じてください。Vladimir が Hemoplague で縛ってきたら、あなたの燃焼のダメージが入るのを待つ間、後ろに歩いて、フルチャージの Tides of Blood を受けないようにします。

このmatchupは、反応速度が試される一発勝負のduelです。Katarina は Voracity と Shunpo であなたのskillshotの間を舞うように避けますが、Death Lotus をチャネリングするときは静止しなければなりません。このチャネリングが絶好のチャンスです。全体の展開は、Katarina が回転を始める瞬間にスタンさせられる Sear を準備できているか、それとも Katarina に誘い出されて安全に暗殺されるかにかかっています。
この脅威のせいで、lane pressureは大きく揺れ動きます。pokeしようとして Sear を無駄に使うと、Katarina はすぐに Bouncing Blade と Shunpo でengageしてあなたの体力を削ります。しかし、Pillar of Flame と Conflagration で Katarina 側のwaveをpushし続ければ、Katarina はタワーの下で短剣を使ってファームせざるを得なくなります。これにより、Katarina がroamしてkillを確保し、マップ全体でsnowballすることを防げます。
Katarina がすでにジャンプしていて、Conflagration で確実に Blaze を付与している場合を除き、Sear を自分から先に撃ってはいけません。skirmish中は、自分のminionの近くに位置取って、Katarina の Bouncing Blade の落下地点を把握してください。Katarina が Preparation でengageしてきたら、下がって短剣が消えるのを待ちます。Katarina が Death Lotus をチャネリングした瞬間に、すぐ Conflagration と Sear のcomboを当てて、ultを一瞬で止めましょう。外した場合は、すぐにタワーまで下がってください。
その他のマッチアップ
これらのチャンピオンは、こちらの主要な強みに効果的に対応するのが難しく、より自由に対面を組み立てることができる。プレッシャーをかけて有利な交換を引き出す手段は複数あることが多い。相手が態勢を立て直す時間を与えるのではなく、この優位を活かして主導権を握ろう。

Ryze は、ダメージを広げる前に Spell Flux でminion waveに mark を付けるため、minion waveにかなり近づかなければなりません。Ryze のレンジは限られているので、この予測しやすい動きは、Pillar of Flame を Ryze に直接落とす大きなチャンスになります。Ryze には避けるためのmobilityスキルがないため、大きなダメージを受けるか、wave clearを諦めるかを選ばなければならず、あなたのパッシブ Blaze で楽に体力を削れます。
この展開により、waveの状態を完全に握れます。Ryze は、絶えずpokeを受けずにあなたのwave clearに張り合うことはできないため、タワーの下でファームせざるを得ず、そこでは Overload のリセットをtradeに使いにくくなります。プレッシャーをかけて体力を低く保つことで、Arcane Mastery によるスケーリングを遅らせ、Realm Warp で他のlaneに影響を及ぼすのを防いで、Ryze をmidに閉じ込められます。
Rune Prison の射程のすぐ外に立って、自分の体力の少ないminionを見張ってください。Ryze が Spell Flux を撃つために前に出た瞬間に、すぐ Ryze が立っている場所に Pillar of Flame を置きます。Ryze が強気になって距離を詰めようとしたら、すでに付いている Blaze のスタックに Sear を当ててスタンを発動させ、さらに Ryze が自分のminion waveの中で反撃しようとするなら、Conflagration と Pyroclasm で追撃しましょう。

Veigar は Phenomenal Evil Power のスタックのために Baleful Strike を撃つ際、常に動きを止めなければならないため、このmatchupはあなたに大きく有利です。この短い自己rootは、Veigar の足元に Pillar of Flame を置く完璧なチャンスです。Veigar の序盤のwaveclearは遅く予測しやすいので、ゴールドを失うか、あなたのパッシブ Blaze から大きな魔法ダメージを受けるかを、楽に選ばせることができます。
Veigar のラストヒットを咎められるので、minion waveを完全に握れます。Conflagration と Pillar of Flame で絶えず Veigar をタワーの下に押し込めば、Veigar はスタックを積む代わりに、manaを消費してファームせざるを得なくなります。Veigar は体力が低すぎて前に出て Event Horizon で閉じ込めることができず、Veigar は自分のjunglerにとって役立たずになり、あなたは自由にroam priorityを取れます。
自分の体力の少ないminionをよく見てください。Veigar が前に出てminionの方を向き、Baleful Strike を撃つ正確な瞬間に、すぐ Pillar of Flame を Veigar に落としましょう。Veigar が Event Horizon であなたを閉じ込めて反撃してきても、慌てて stun の壁に走り込んではいけません。檻の中で踏みとどまり、遅れて来る Dark Matter を避け、Veigar が Primordial Burst のために距離を詰めようとした瞬間に Sear を撃ってスタンさせる準備をしましょう。

Swain は Demonic Ascension で大きな体力を得てあなたのチームの体力を吸いますが、この変身によって Swain はあなたのキットにとって完璧な的になります。大きくなった体と、近くにいたがる性質のせいで、Swain はあなたのスキルを避けられず、あなたのパッシブ Blaze が膨れ上がった体力を削り取れます。さらに、Swain が近づいてくると、あなたの Pyroclasm が Swain と Swain のminionの間を容赦なくバウンドし、Swain のultが自らの罠に変わります。
laning phaseでは、waveの状態を完全に握れます。Pillar of Flame と Conflagration を使って、絶えず Swain を Swain のタワーの下へ押し込めば、Swain はtradeではなくファームのために Death's Hand を無駄にせざるを得なくなります。Swain はパッシブ Ravenous Flock のために Nevermove を当てに前へ出なければならないので、その動きを予測して咎めやすく、体力に大きな差が生まれて、Swain の最初のrecallが遅れます。
Nevermove を無効化するため、常に最大の詠唱射程を保ってください。戻ってくる Swain の爪の進路には絶対に入らないでください。Swain が当然のように Demonic Ascension を発動してあなたを追い詰めてきても、慌てないでください。Conflagration か Pillar of Flame で Blaze を付与して、即座にスタンを確実に決められるまで Sear を温存しましょう。スタンを外したら、すぐ Pyroclasm を使って、Swain を退かせるか、あなたが後ろへkiteしている間にバウンドダメージで倒してください。

Lissandra の脅威は、距離を詰めて Ring of Frost を発動できるかどうかにすべてかかっています。しかし、歩いて近づくにせよ Glacial Path を使うにせよ、Lissandra の予測しやすい接近は、あなたの思う壺です。意味のあるダメージを与えるには、Lissandra はあなたの有効射程に入らなければならないため、簡単に Blaze の下準備を許すことになります。Conflagration を楽に当てて、確実な Sear のスタンで接近の途中で止められ、Lissandra の攻撃性を完全に無効化できます。
この展開により、Lissandra は守備的にプレイせざるを得ず、離れた位置から Ice Shard でminionを確保するので、waveは自然にあなた側へ押されます。laneのペースはあなたが握ります。Lissandra の Glacial Path がcooldown中は、Lissandra はあらゆる安全を失い、積極的にzoneアウトしたり、Pillar of Flame でタワーの下に閉じ込めたりでき、命を危険にさらさずに大きなCS差を作れます。
Lissandra が仕掛けてくるまで、常に Sear を温存してください。Lissandra が Glacial Path を放ったら、その進路の終点のすぐ後ろに位置取ります。Lissandra がテレポートした瞬間に、すぐ Conflagration、続けて Sear を使い、Lissandra が Ring of Frost で反応する前にスタンさせましょう。Lissandra が Frozen Tomb で自分を守ってきても、慌てないでください。事前に Pillar of Flame を撃っておき、stasis が終わるまさにその瞬間に Pyroclasm を解き放って、一瞬でburstして倒しましょう。

Mel は詠唱中に動けないアニメーションを持つため、あなたの主力 burst シーケンスに対して極めて無防備になります。Mel が足を止めてスペルをチャネリングするたびに、機動力のなさから格好の的になります。そのため、最大ダメージの Pillar of Flame を簡単に置くことができ、Blaze を発動させる素早い連鎖を始められます。お互いに高ダメージのローテーションに頼っているため、この動けない時間帯が trade の可能性で決定的な先行をもたらします。
この弱点により Mel は守りの立ち回りを強いられ、あなたは minion wave を完全に支配できます。Conflagration と Pillar of Flame で簡単に wave を crash させ、深いビジョンの確保や roam ができます。Mel はスペルの詠唱中にあなたの skillshot を簡単に避けられないため、常に体力を削られ続け、早すぎる recall に追い込まれるか、自分のタワー下で Pyroclasm を使った致命的な dive にさらされることになります。
Mel の脅威範囲のすぐ外で斜めの位置を保ち、Mel の詠唱インジケーターを見張ってください。Mel がチャネリングのアニメーションを始めた瞬間に、すぐ足元へ Pillar of Flame を落とし、続けて Sear で、その場に固定されている Mel を stun させます。この最初の skillshot を外した場合は、Mel の counter-burst を避けるためすぐに minion の後ろへ下がり、Conflagration を牽制として温存して、追いかけられるのを防いでください。

Heimerdinger の lane での存在感は、すべて H-28G Evolution Turret の陣地に籠もることに依存しています。しかし、これはあなたにとって好都合です。Heimerdinger の動かない turret に Blaze を付与しておけば、Heimerdinger がその近くに立ったときに Conflagration で炎を Heimerdinger へ難なく広げられます。Heimerdinger 自身の設置物が、あなたのリーチを伸ばす固定の目印になり、Blaze の爆発を発動させて Pillar of Flame を楽に当てられます。
この関係により、Heimerdinger はいつもの push の優位性を完全に失います。あなたをタワー下に閉じ込めるどころか、Heimerdinger が H-28G Evolution Turret を置くことで、あなたは minion wave を一瞬で一掃しながら、同時に Heimerdinger の体力も削れます。あなたが常に wave のペースを握り、Heimerdinger は turret を失うか、強力な継続ダメージを受けるかの選択を迫られ、その圧力は事実上無力化されます。
Heimerdinger の CH-2 Electron Storm Grenade を避けるため、自分の minion の後ろの安全な位置に立ってください。Heimerdinger が wave の近くに H-28G Evolution Turret を置いたら、通常攻撃かスペルで Blaze を付与しておき、Conflagration で Heimerdinger へ Blaze を飛び火させます。Heimerdinger が自分の陣地を守るために前に出てきたら、すぐに Sear で stun させ、続けて Pillar of Flame を落としてください。Heimerdinger が UPGRADE!!! で大型の turret を置こうとした場合は、そのまま下がって遠くから溶かしてください。

Twisted Fate の laning は、Pick a Card で色付きのカードを確定させることに依存しています。しかし、これは Twisted Fate の動きを読まれやすくし、一瞬だけ予測しやすい軌道に固定します。Twisted Fate には機動力がないため、Brand はこの隙を簡単に突けます。Twisted Fate がカードを選ぶために前へ出た瞬間に、真下へ Pillar of Flame を落とし、Conflagration と簡単な Sear の stun につなげて、Blaze の炎を最大限に燃え上がらせられます。
常に wave への圧力を保つことで、Twisted Fate が Wild Cards を使って安全に wave を処理するのを防げます。Twisted Fate はあなたの push に合わせるか、Pick a Card を使ってタワー下で farm するかの選択を迫られ、動きを封じられます。Twisted Fate が caster minion の前に出て trade を狙っても、あなたの burst の脅威で後退せざるを得ません。これにより Twisted Fate のマップ全体への圧力が完全に無力化され、体力が低いままになるため、安全に Destiny をチャネリングできなくなります。
スキルをむやみに撃たないでください。Pick a Card の頭上のカードサイクルが始まるのを待ちましょう。Twisted Fate がゴールドカードを確定させた場合、投げるためにこちらへ真っすぐ歩いてこなければなりません。この直線的な動きを利用して Conflagration を当て、すぐに Sear を続けて、ゴールドカードが当たる前に Twisted Fate を stun させてください。Twisted Fate が近くで Destiny をチャネリングしているのが見えたら、すぐに Pyroclasm と Pillar of Flame を放って動けないチャネリングを罰し、roam の試みを灰色の画面に変えてください。
その他のマッチアップ
これらのアイテムを購入すると、このチャンピオンの影響力を抑えられます。


| マッチアップ | 判定 | 有利度 | 勝率 | ピック率 |
|---|---|---|---|---|
| Braum | 不利なマッチアップ | +2 | 53.2% | 5.2% |
| Blitzcrank | ハードカウンター | +2 | 49.2% | 6.9% |
| Zyra | スキル次第のマッチアップ | +1 | 51.1% | 5.2% |
| Thresh | スキル次第のマッチアップ | +1 | 51.0% | 15.7% |
| Karma | 不利なマッチアップ | +1 | 49.7% | 5.1% |
| Pyke | スキル次第のマッチアップ | +1 | 49.6% | 3.8% |
| Lux | 不利なマッチアップ | +1 | 49.4% | 7.6% |
| Hwei | スキル次第のマッチアップ | ±0 | 52.4% | 1.4% |
| Morgana | 不利なマッチアップ | ±0 | 50.9% | 6.6% |
| Rakan | スキル次第のマッチアップ | ±0 | 50.4% | 3.0% |
| Nautilus | ハードカウンター | ±0 | 49.1% | 12.7% |
| Leona | 有利なマッチアップ | −1 | 51.7% | 10.7% |
| Soraka | 有利なマッチアップ | −1 | 51.1% | 4.9% |
| Nami | 有利なマッチアップ | −1 | 49.5% | 4.5% |
| Senna | 不利なマッチアップ | −1 | 49.5% | 6.7% |
| Lulu | 有利なマッチアップ | −1 | 49.2% | 10.0% |
| Alistar | 有利なマッチアップ | −1 | 49.0% | 4.4% |
| Cho'Gath | 有利なマッチアップ | −1 | — | — |
| Sona | 有利なマッチアップ | −2 | 52.1% | 4.0% |
| Yuumi | 有利なマッチアップ | −2 | 48.1% | 9.4% |
有利度:Wild Rift Coreの公式判定(−3〜+3)で、各行に記載されたチャンピオンの視点から見た値です。勝率とピック率:このロールにおける相手チャンピオン自身の数値 — Wild Rift CN · Challenger、Patch 7.3c。直接対決の勝率ではありません。
| マッチアップ | 判定 | 有利度 | 勝率 | ピック率 |
|---|---|---|---|---|
| Zed | ハードカウンター | +2 | 51.3% | 4.5% |
| Kassadin | ハードカウンター | +2 | 50.5% | 1.8% |
| Vel'Koz | ハードカウンター | +2 | 50.2% | 3.4% |
| Yone | ハードカウンター | +2 | 49.0% | 5.2% |
| Fizz | ハードカウンター | +2 | 48.1% | 2.2% |
| Yasuo | ハードカウンター | +2 | 47.6% | 8.3% |
| Irelia | ハードカウンター | +2 | — | — |
| Hwei | 不利なマッチアップ | +1 | 52.4% | 6.5% |
| Zyra | 不利なマッチアップ | +1 | 52.4% | 3.3% |
| Morgana | 不利なマッチアップ | +1 | 52.2% | 6.5% |
| Syndra | 不利なマッチアップ | +1 | 51.8% | 6.4% |
| Taliyah | 不利なマッチアップ | +1 | 51.5% | 1.9% |
| Galio | 不利なマッチアップ | +1 | 51.3% | 11.4% |
| Annie | 不利なマッチアップ | +1 | 51.1% | 2.1% |
| Orianna | 不利なマッチアップ | +1 | 50.8% | 4.6% |
| Ekko | 不利なマッチアップ | +1 | 50.8% | 5.2% |
| Ahri | 不利なマッチアップ | +1 | 50.7% | 4.4% |
| Norra | 不利なマッチアップ | +1 | 50.4% | 1.3% |
| Aurora | 不利なマッチアップ | +1 | 50.4% | 4.0% |
| Jayce | 不利なマッチアップ | +1 | 49.8% | 2.3% |
| Lux | 不利なマッチアップ | +1 | 48.8% | 5.6% |
| Ziggs | 不利なマッチアップ | +1 | 48.4% | 5.4% |
| Akali | 不利なマッチアップ | +1 | 47.6% | 4.4% |
| Diana | 不利なマッチアップ | +1 | 47.2% | 1.0% |
| Akshan | 不利なマッチアップ | +1 | — | — |
| Pantheon | 不利なマッチアップ | +1 | — | — |
| Pyke | 不利なマッチアップ | +1 | — | — |
| Talon | 不利なマッチアップ | +1 | — | — |
| Varus | 不利なマッチアップ | +1 | — | — |
| Zoe | 不利なマッチアップ | +1 | — | — |
| Aurelion Sol | スキル次第のマッチアップ | ±0 | 51.5% | 6.4% |
| Vladimir | スキル次第のマッチアップ | ±0 | 51.5% | 4.3% |
| Viktor | スキル次第のマッチアップ | ±0 | 50.1% | 3.1% |
| Katarina | スキル次第のマッチアップ | ±0 | 48.2% | 1.5% |
| Corki | スキル次第のマッチアップ | ±0 | — | — |
| Karma | スキル次第のマッチアップ | ±0 | — | — |
| Rumble | スキル次第のマッチアップ | ±0 | — | — |
| Lissandra | 有利なマッチアップ | −1 | 52.1% | 4.6% |
| Kennen | 有利なマッチアップ | −1 | 51.9% | 1.6% |
| Twisted Fate | 有利なマッチアップ | −1 | 50.4% | 5.7% |
| Veigar | 有利なマッチアップ | −1 | 49.4% | 7.7% |
| Vex | 有利なマッチアップ | −1 | 49.0% | 2.1% |
| Swain | 有利なマッチアップ | −1 | 48.9% | 2.6% |
| Nasus | 有利なマッチアップ | −1 | 48.3% | 1.1% |
| Ryze | 有利なマッチアップ | −1 | 47.3% | 2.9% |
| Mel | 有利なマッチアップ | −1 | 46.0% | 8.5% |
| Cho'Gath | 有利なマッチアップ | −1 | — | — |
| Malphite | 有利なマッチアップ | −1 | — | — |
| Seraphine | 有利なマッチアップ | −1 | — | — |
| Teemo | 有利なマッチアップ | −2 | 52.8% | 2.3% |
| Heimerdinger | 有利なマッチアップ | −2 | 49.8% | 1.6% |
| Kayle | 有利なマッチアップ | −2 | — | — |
有利度:Wild Rift Coreの公式判定(−3〜+3)で、各行に記載されたチャンピオンの視点から見た値です。勝率とピック率:このロールにおける相手チャンピオン自身の数値 — Wild Rift CN · Challenger、Patch 7.3c。直接対決の勝率ではありません。
Brandは、ポジショニングとファイトテンポに大きく依存します。効果的なカウンターは、ダメージだけでなく、彼が行動を起こす前にセットアップを妨害することです。これには、素早く距離を詰めたり、彼のゾーンを回避したり、短期決戦を仕掛けたりできるチャンピオンが含まれます。これらのプロファイルを理解することが、彼の限界を予測する鍵となります。
Brandをカウンターするチャンピオンは、彼の機動力の欠如とダメージを与えるのに時間が必要な点を突きます。アサシンや機動力の高いチャンピオンは、素早くエンゲージすることで彼のインパクトウィンドウを縮めます。さらに、散開した構成は彼の効果が広がるのを防ぎ、効果を劇的に低下させます。
これらのチャンピオンは、素早く距離を詰め、Brandがスペルを発動する前にバーストダメージを与えることができます。彼らの機動力は、キーとなるアビリティを回避することも可能にし、Blazeの適用を防ぎ、彼のDPSを大幅に低下させます。Brandは、ファイトで彼の役割を果たすことができなくなります。
チャンピオンの適応方法. 遠くに位置取り、エンゲージを予測し、イニシエートではなく防御のためにスタンを温存しましょう。
敵が散開していると、Brandはその価値の多くを失います。彼のアルティメットはバウンドしなくなり、AoEはより少ないターゲットに当たります。これにより、彼の全体的なインパクトは劇的に低下し、彼のキットは脅威のない単純なポークに変わります。
チャンピオンの適応方法. 孤立したポークの角度を探し、集結のミスを待ちましょう。
インスタントエンゲージを持つチャンピオンは、Brandにプレッシャーの下で反応を強います。彼はスタックを適用したり、適切にポジショニングしたりする時間がありません。エンゲージがうまく実行されれば、彼の貢献はほぼゼロになります。
チャンピオンの適応方法. エンゲージのタイミングを予測し、最大レンジに留まりましょう。
ZedはBrandのスペルを待ってからエンゲージでき、セットアップを完全に無効化できる。エンゲージされたら、Brandは機動力や防御力がなく生き残れない。このマッチアップは、規律とクールダウン管理が鍵となる。
FizzはBrandのキーとなるスペルを避けられるため、トレードはリスキーだ。安全にプレイし、距離を保ち、ビジョンがない状態やクールダウンが整っていない状態では決してエンゲージしないこと。
はい、しかしポジショニングと敵のミス次第だ。Brandが射程外に留まり、集団戦を強要できれば、弱点を相殺できる。
最大の脅威は、キットを使えなくなることだ。アップタイムや複数ターゲットを攻撃する能力を低下させるものは、彼のインパクトを劇的に制限する。