A
2026年9月 · Patch 7.2d
Support · SUPPORT · MID

モルガナ Wild Rift 最強ビルドガイド

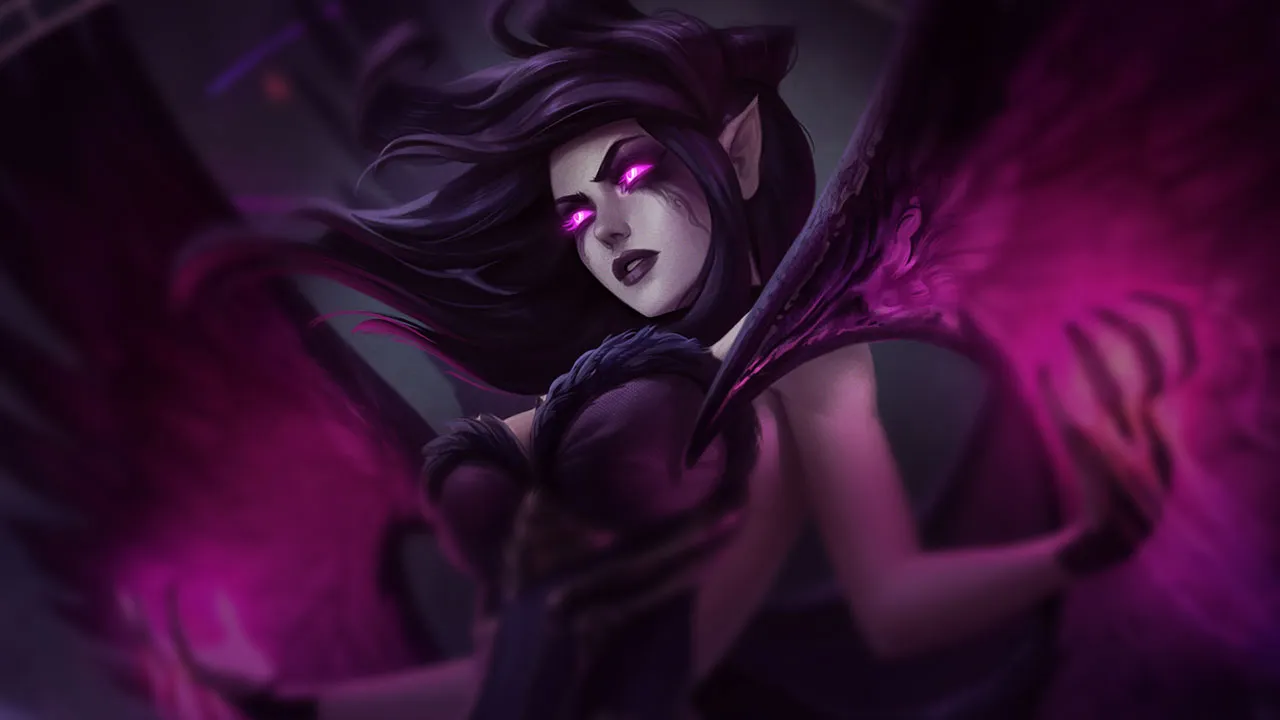
Utility mage build for dirty tempo: Morgana wins when she slows enemy reads, forces a bad step into a bind, then protects the allied response with shield. The build must therefore keep poke, utility, and safety together instead of overcommitting to raw AP.

★ SUPPORT · MID Tier A
ダメージ
UTIL
TANK
DIFF
Win 51.5% #26 · ↑3pt
Pick 6.3% #13
Ban 49.4% #3

ビルド — CNサーバー公式データ(パッチ7.2)

このデータの根拠 →
このドラフトにはどのビルド?

3つのビルド、ドラフトごとに正解は1つ。アドバイザーが敵5体(と味方)を読み、誰が何を引き起こすかを名指しします — ドラフトのMVPシートやAsk Nexusと同じルールです。

自分のドラフトで試す

Morgana Support — 推奨ビルド

Morgana(Support)のおすすめビルド:Black Mist Scythe › Imperial Mandate › Rabadon's Deathcap › Luden's Echo › Cryptbloom、ブーツはBoots of Mana、キーストーンはArcane Comet。3つのバリエーションと選び方は下記。

Boots of Mana
推奨ブーツBoots of Mana
Arcane Comet
推奨ルーン: Arcane CometManaflow BandTranscendenceScorchBone Plating

パワースパイク(算出値)

Early (1-5)
1/10
Mid (6-10)
2/10
Late (11-15)
5/10
Lv 2 Q rank 1Lv 5 UltimateLv 9 Imperial Mandate + Ultimate rank 2

10点満点の評価は、ロスター全体の中でのこのチャンピオンの位置をフェーズごとに示します。帯はレベルごとの自身の伸びを示すもので、チャンピオン同士の比較には使えません。

状況別の調整

Morellonomicon
Morellonomicon回復(ソラカ、エイトロックス、ライフスティール…)に対して
Liandry's Torment
Liandry's Tormentタンク2体以上 / HP積み構成に対して
Zhonya's Hourglass
Zhonya's HourglassADバースト(アサシン、ゼド、レンガー…)に対して
Banshee's Veil
Banshee's VeilAPバースト(シンドラ、フィズ、イブリン…)に対して
Mikael's Blessing
Mikael's BlessingCC連鎖 / ロックダウンに対して
Rylai's Crystal Scepter
Rylai's Crystal Scepter高機動力に対して

対戦相手ごとの調整

このロールで最も苦しいマッチアップと、状況アイテムの中でそれに応える一品。

Senna MorellonomiconMorellonomicon 継続的な回復
Vel'Koz Banshee's VeilBanshee's Veil 魔法ダメージ
Zyra Mikael's BlessingMikael's Blessing 長い行動妨害
Sona MorellonomiconMorellonomicon 継続的な回復

Morgana Mid Lane — 推奨ビルド

Morgana(Mid Lane)のおすすめビルド:Liandry's Torment › Rabadon's Deathcap › Blackfire Torch › Riftmaker › Zhonya's Hourglass、ブーツはBoots of Mana、キーストーンはArcane Comet。3つのバリエーションと選び方は下記。

Boots of Mana
推奨ブーツBoots of Mana
Arcane Comet
推奨ルーン: Arcane CometBotanistTranscendenceScorchBone Plating

パワースパイク(算出値)

Early (1-5)
2/10
Mid (6-10)
4/10
Late (11-15)
5/10
Lv 2 Q rank 1Lv 5 UltimateLv 9 Rabadon's Deathcap + Ultimate rank 2

10点満点の評価は、ロスター全体の中でのこのチャンピオンの位置をフェーズごとに示します。帯はレベルごとの自身の伸びを示すもので、チャンピオン同士の比較には使えません。

状況別の調整

Morellonomicon
Morellonomicon回復(ソラカ、エイトロックス、ライフスティール…)に対して
Banshee's Veil
Banshee's VeilADバースト(アサシン、ゼド、レンガー…)に対して
Rylai's Crystal Scepter
Rylai's Crystal Scepter高機動力に対して

対戦相手ごとの調整

このロールで最も苦しいマッチアップと、状況アイテムの中でそれに応える一品。

Yasuo Rylai's Crystal ScepterRylai's Crystal Scepter 機動力が高い
Irelia MorellonomiconMorellonomicon 継続的な回復
Talon Banshee's VeilBanshee's Veil 物理ダメージ
Zed Rylai's Crystal ScepterRylai's Crystal Scepter 機動力が高い

Morgana Jungle — 推奨ビルド

Morgana(Jungle)のおすすめビルド:Liandry's Torment › Rabadon's Deathcap › Blackfire Torch › Riftmaker › Void Staff、ブーツはBoots of Mana、キーストーンはArcane Comet。3つのバリエーションと選び方は下記。

Boots of Mana
推奨ブーツBoots of Mana
Arcane Comet
推奨ルーン: Arcane CometBotanistTranscendenceScorchBone Plating

パワースパイク(算出値)

Early (1-5)
2/10
Mid (6-10)
4/10
Late (11-15)
5/10
Lv 2 Q rank 1Lv 5 UltimateLv 9 Rabadon's Deathcap + Ultimate rank 2

10点満点の評価は、ロスター全体の中でのこのチャンピオンの位置をフェーズごとに示します。帯はレベルごとの自身の伸びを示すもので、チャンピオン同士の比較には使えません。

状況別の調整

Morellonomicon
Morellonomicon回復(ソラカ、エイトロックス、ライフスティール…)に対して
Zhonya's Hourglass
Zhonya's HourglassADバースト(アサシン、ゼド、レンガー…)に対して
Banshee's Veil
Banshee's VeilAPバースト(シンドラ、フィズ、イブリン…)に対して
Rylai's Crystal Scepter
Rylai's Crystal Scepter高機動力に対して

対戦相手ごとの調整

このロールで最も苦しいマッチアップと、状況アイテムの中でそれに応える一品。

Olaf Zhonya's HourglassZhonya's Hourglass 物理ダメージ
Dr. Mundo MorellonomiconMorellonomicon 継続的な回復
Fizz Banshee's VeilBanshee's Veil 魔法ダメージ
Master Yi MorellonomiconMorellonomicon 継続的な回復

同じアドバイザーがドラフト(MVPシートが実際のドラフトに適用)とAsk Nexus(選択理由を説明)でも動きます。カウンターページでは各カウンターピックに対して取るべきビルドを表示。

コアビルド — 過去の分析(パッチ7.0e)

直近の状況対応アイテムを含まない基礎的なコア構成。チャンピオンの性能を理解するための土台として残しています。最新のビルドは上のセクションを参照してください。

Morgana does not win only through raw damage; she wins by making space dangerous, enemy engages imperfect and movement mistakes immediately punishable.

推奨ビルド

スターター

Spectral Sickle Spectral Sickle
Black Mist Scythe
Black Mist Scythe

Évolution Sickle, wards + gold with poke W-Q

Liandry's Torment
Liandry's Torment

burn on the W Tormented Shadow DoT continuous

Rylai's Crystal Scepter

Slow on the W zone for guarantee the bind Q

ブーツ&エンチャント

Sorcerer's Shoes Sorcerer's Shoes
Stasis Stasis
代替オプション
Redemption Redemption

スキル優先度

WQE
パッシブ
パッシブ Soul Siphon
Q
Dark Binding
281011
W
Tormented Shadow
1467
E
Black Shield
3121415
R
Soul Shackles
5913

ルーン

Arcane Comet
Arcane Comet

the Q Dark Binding roots the target 3 secondes, guaranteeing the hit Arcane Comet.

Manaflow Band
Manaflow Band

Spamming pick Qs is costly — the stacked pool keeps a black shield always available.

Transcendence
Transcendence

Reduces cooldown of the Q Dark Binding to capturer more often targets.

Scorch
Scorch

Zone W and Q add the burn every rotation — your lane poke becomes kill pressure.

Bone Plating
Bone Plating

Discourages dives onto you — burst crashes into it while your 3-second root answers.

状況別アイテム

vs Healing
Rabadon's Deathcap Rabadon's Deathcap
Morellonomicon Morellonomicon
vs Attack Speed
Rabadon's Deathcap Rabadon's Deathcap
Frozen Heart Frozen Heart
vs Healing
Riftmaker Riftmaker
Morellonomicon Morellonomicon
vs Shielding
Riftmaker Riftmaker
Oceanid's Trident Oceanid's Trident
vs Healing
Riftmaker Riftmaker
Morellonomicon Morellonomicon
vs Shielding
Riftmaker Riftmaker
Oceanid's Trident Oceanid's Trident

状況別ルーン

vs Tanks
Coup De Grace Coup De Grace
Giant Slayer Giant Slayer

vs Tanks
Coup De Grace Coup De Grace
Giant Slayer Giant Slayer

vs Burst Damage
Transcendence Transcendence
Bone Plating Bone Plating
vs Tanks
Coup De Grace Coup De Grace
Giant Slayer Giant Slayer