A
2026年9月 · Patch 7.2d
Support · SUPPORT

Sona Wild Rift カウンターガイド

Sonaは非常に脆く、彼女を最優先で狙うpickdive構成に対して脆弱です。mobilityが不足しているため、assassinsに容易に接近されてしまいます。即座にengageしてくる構成は、彼女が回復や反撃を行う前に無力化します。

★ SUPPORT Tier A
ダメージ
UTIL
TANK
DIFF
Win 52.8% #17 · ↓0pt
Pick 6.6% #10
Ban 2.0% #66

Sona Wild Rift カウンターガイド ★ Counter Sheet

マッチアップ一覧
マッチアップ 判定 有利度 勝率 ピック率
Brand ハードカウンター +2 51.3% 2.5%
Blitzcrank ハードカウンター +2 49.4% 7.2%
Vel'Koz 不利なマッチアップ +1 51.8% 1.7%
Zyra 不利なマッチアップ +1 51.4% 4.8%
Rell 不利なマッチアップ +1 51.2% 3.3%
Leona 不利なマッチアップ +1 51.0% 8.9%
Rakan 不利なマッチアップ +1 50.5% 3.1%
Pyke 不利なマッチアップ +1 50.4% 5.7%
Thresh 不利なマッチアップ +1 50.1% 13.6%
Alistar 不利なマッチアップ +1 49.7% 4.4%
Nautilus 不利なマッチアップ +1 48.9% 10.7%
Swain 不利なマッチアップ +1 48.2% 3.1%
Norra 不利なマッチアップ +1
Zilean スキル次第のマッチアップ ±0 52.0% 1.3%
Senna スキル次第のマッチアップ ±0 51.5% 5.0%
Veigar スキル次第のマッチアップ ±0 47.7% 2.9%
Braum 有利なマッチアップ −1 52.1% 4.1%
Galio 有利なマッチアップ −1 52.0% 2.8%
Morgana 有利なマッチアップ −1 51.5% 6.3%
Karma 有利なマッチアップ −1 51.4% 6.8%
Soraka 有利なマッチアップ −1 51.3% 5.8%
Maokai 有利なマッチアップ −1 51.1% 5.0%
Janna 有利なマッチアップ −1 50.4% 1.5%
Malphite 有利なマッチアップ −1 50.3% 7.6%
Seraphine 有利なマッチアップ −1 50.3% 6.5%
Bard 有利なマッチアップ −1 50.1% 1.2%
Nami 有利なマッチアップ −1 49.7% 6.5%
Lux 有利なマッチアップ −1 49.7% 8.0%
Milio 有利なマッチアップ −1 49.3% 5.5%
Lulu 有利なマッチアップ −2 48.5% 11.2%
Yuumi 有利なマッチアップ −2 46.9% 10.7%

Edge: Wild Rift Core canonical verdict (−3 to +3), shown from the point of view of the champion named in the row. Win rate and pick rate: the opponent's own rate in this role — Wild Rift CN · Challenger, Patch 7.2d. Not a head-to-head win rate.

ハードカウンター

2

これらのチャンピオンは、こちらのビルドやプレイスタイルを真正面から上回る構成を持ち、レーン戦のコントロールとファームを極めて難しくする。彼らのスキルはこちらの主要な強みを無効化し、いつも通りのプランを実行しようとした瞬間に手痛い反撃を受けさせてくる。こうしたマッチアップでは、ミスを最小限に抑え、正面からの対決以外で解決策を探すことが重要になる。

Blitzcrank

Blitzcrank+2

squishy targetkill pressure Sona is exceptionally vulnerable in this lane because she possesses no built-in dashes or early crowd control to escape or disengage. This makes her the ultimate target for Blitzcrank. If he lands Rocket Grab, he can instantly follow up with Power Fist to knock you up before you can react with Aria of Perseverance or Song of Celerity. Without Crescendo available pre-level 5, any positioning error means instant death. Blitzcrankのビルド → 詳細を見る
Blitzcrank

理由

Sona is exceptionally vulnerable in this lane because she possesses no built-in dashes or early crowd control to escape or disengage. This makes her the ultimate target for Blitzcrank. If he lands Rocket Grab, he can instantly follow up with Power Fist to knock you up before you can react with Aria of Perseverance or Song of Celerity. Without Crescendo available pre-level 5, any positioning error means instant death.

レーン戦への影響

This threat completely paralyzes Sona's early laning phase. You cannot step up to poke with Hymn of Valor without exposing yourself to a brush-camping hook. Consequently, the enemy duo easily secures wave priority, pushing you under tower where dodging Rocket Grab becomes even harder due to confined space. Your AD carry will constantly lose farm, and you will be forced into early, unfavorable recalls under heavy tower pressure.

立ち回り方

To survive, you must treat the minion wave as your physical shield, never stepping out of its cover while Rocket Grab is off cooldown. The moment you see Blitzcrank activate Overdrive to run at you, immediately cast Song of Celerity to match his speed and retreat. If you do get hooked, immediately queue up your Aria of Perseverance version of Power Chord on their carry to reduce their burst damage while trying to walk away.

チャンピオン詳細 → Blitzcrankのビルド →

その他のマッチアップ

不利なマッチアップ

11

これらのチャンピオンは、マッチアップ自体を絶望的にするわけではないが、対面で優位に立ちやすいツールを持っている。射程が長かったり、攻撃を受け止める力が高かったり、エンゲージへの対応手段が豊富だったりする。アプローチを調整し、戦闘を受け入れるタイミングを慎重に選ぶ必要がある。

Pyke

Pyke+1

early kill pressurescaling threat Sona's fragile health pool makes her incredibly vulnerable during the early levels. If Pyke lands Bone Skewer, the forced displacement combined with Phantom Undertow's follow-up stun will reliably burst Sona down before she can react. Even with Aria of Perseverance, Sona lacks the defensive stats to survive this physical damage onslaught, meaning any positioning error results in an immediate death. Pykeのビルド → 詳細を見る
Pyke

理由

Sona's fragile health pool makes her incredibly vulnerable during the early levels. If Pyke lands Bone Skewer, the forced displacement combined with Phantom Undertow's follow-up stun will reliably burst Sona down before she can react. Even with Aria of Perseverance, Sona lacks the defensive stats to survive this physical damage onslaught, meaning any positioning error results in an immediate death.

レーン戦への影響

This threat forces Sona to play extremely defensively, conceding early lane pressure and bush control. Sona cannot safely walk up to poke with Hymn of Valor, as stepping past her minion wave exposes her to Bone Skewer. Consequently, your ADC will often be shoved under turret, facing dive pressure once Pyke unlocks Death from Below, while Pyke freely roams the map using Ghostwater Dive.

立ち回り方

To survive, you must constantly position behind your minion wave to block Bone Skewer. Keep the bushes warded to track Ghostwater Dive. Never use Song of Celerity aggressively; save its movement speed boost to dodge incoming hooks. If Pyke misses Bone Skewer, you have a brief fifteen-second window to harass him with Hymn of Valor. Once he reaches level five, prepare to use Crescendo to interrupt his Phantom Undertow dash.

チャンピオン詳細 → Pykeのビルド →
Nautilus

Nautilus+1

squishy targetearly pressure Sona struggles in this matchup because her lack of innate mobility makes her incredibly vulnerable to Nautilus's Dredge Line. Every attempt to poke with Hymn of Valor exposes you to his hook. If he lands it, the follow-up crowd control from Staggering Blow and Riptide guarantees a quick death before Aria of Perseverance can mitigate the incoming burst damage. Nautilusのビルド → 詳細を見る
Nautilus

理由

Sona struggles in this matchup because her lack of innate mobility makes her incredibly vulnerable to Nautilus's Dredge Line. Every attempt to poke with Hymn of Valor exposes you to his hook. If he lands it, the follow-up crowd control from Staggering Blow and Riptide guarantees a quick death before Aria of Perseverance can mitigate the incoming burst damage.

レーン戦への影響

This constant threat of engage completely paralyzes your lane presence, forcing you to play far behind your minion wave. You cannot step up to charge Power Chord safely, which cedes bush control entirely to Nautilus. Consequently, the enemy duo can easily slow-push waves to dive you with Depth Charge or freely roam to secure map pressure while you are stuck under turret.

立ち回り方

To survive, you must treat your minion wave as an absolute shield and never step into open space when Dredge Line is off cooldown. If Nautilus steps forward aggressively, immediately activate Song of Celerity to boost your movement speed and bait his hook. Should he bypass your frontline with Depth Charge, save Crescendo to counter-engage his ADC, and quickly apply the damage-reducing Power Chord from Aria of Perseverance.

チャンピオン詳細 → Nautilusのビルド →
Rakan

Rakan+1

kill pressurescaling threat Rakan's explosive engage relies on catching you off-guard with Grand Entrance, a task made easy by your complete lack of defensive dashes. If he lands this knock-up, his ADC can instantly burst you down. However, if Rakan misses or hesitates, your Aria of Perseverance completely nullifies any poke he attempts with Gleaming Quill. The lane is a constant test of whether he can successfully pin you down. Rakanのビルド → 詳細を見る
Rakan

理由

Rakan's explosive engage relies on catching you off-guard with Grand Entrance, a task made easy by your complete lack of defensive dashes. If he lands this knock-up, his ADC can instantly burst you down. However, if Rakan misses or hesitates, your Aria of Perseverance completely nullifies any poke he attempts with Gleaming Quill. The lane is a constant test of whether he can successfully pin you down.

レーン戦への影響

You cannot safely contest the brush because getting caught by Grand Entrance means death or burning critical summoner spells. Consequently, Rakan can easily zone you and secure bush control. This forces a defensive wave state near your tower. However, if you survive his initial dive attempt, your constant healing from Aria of Perseverance allows your ADC to win long-term health trades and slowly push him out of the lane.

立ち回り方

Maintain maximum distance and never step parallel to your ADC to prevent Rakan from hitting both of you with Grand Entrance. Always keep Song of Celerity ready; the moment he starts his dash animation, activate it to sidestep the impact zone. If he does manage to close the gap, immediately cycle your Power Chord using Aria of Perseverance to reduce his target's damage output while preparing Crescendo to lock him down under your tower.

チャンピオン詳細 → Rakanのビルド →
Zyra

Zyra+1

disengagedodge skillshots Zyra controls the lane territory by turning seeds from Garden of Thorns into aggressive spitters using Deadly Spines and Grasping Roots. Sona's lack of mobility makes her incredibly vulnerable to being locked down by Grasping Roots and bursted. Sona's saving grace is Hymn of Valor, which allows her to safely hit and clear these plants from a distance without stepping forward into Zyra's maximum threat range. Zyraのビルド → 詳細を見る
Zyra

理由

Zyra controls the lane territory by turning seeds from Garden of Thorns into aggressive spitters using Deadly Spines and Grasping Roots. Sona's lack of mobility makes her incredibly vulnerable to being locked down by Grasping Roots and bursted. Sona's saving grace is Hymn of Valor, which allows her to safely hit and clear these plants from a distance without stepping forward into Zyra's maximum threat range.

レーン戦への影響

Zyra's plants constantly push the wave, forcing you under turret while chipping away at your health bar. You will find yourself forced to repeatedly cast Aria of Perseverance to survive the poke, quickly draining your mana. Since stepping up to use a Power Chord auto-attack invites an immediate Grasping Roots counter-attack, you must accept losing early priority and focus on defending your tower under constant botanical siege.

立ち回り方

Make it an absolute rule to keep friendly minions between yourself and Zyra to block Grasping Roots. Use the auto-targeting of Hymn of Valor to safely strike her plants and collect passive stacks from afar. Save Song of Celerity exclusively to dodge her Deadly Spines or the delayed knockup of Stranglethorns. If she manages to root your carry, immediately activate Aria of Perseverance followed by Crescendo to disrupt Zyra's follow-up burst.

チャンピオン詳細 → Zyraのビルド →
Alistar

Alistar+1

kill lanescaling gap Your fragile health pool makes you the ultimate target for Alistar. The moment you step up to poke with Hymn of Valor, you enter the danger zone where his Headbutt-Pulverize combo can instantly lock you down. Because Sona lacks any natural escape tools, getting caught by this sudden displacement and knock-up means giving over an easy kill, forcing you to respect his initiation range constantly. Alistarのビルド → 詳細を見る
Alistar

理由

Your fragile health pool makes you the ultimate target for Alistar. The moment you step up to poke with Hymn of Valor, you enter the danger zone where his Headbutt-Pulverize combo can instantly lock you down. Because Sona lacks any natural escape tools, getting caught by this sudden displacement and knock-up means giving over an easy kill, forcing you to respect his initiation range constantly.

レーン戦への影響

This threat forces you to play exceptionally far behind your minion wave, completely yielding control of the lane brushes to Alistar. Your poke becomes non-existent, allowing his Triumphant Roar to easily negate any minor damage you land. Consequently, your carry faces heavy pressure, and once Alistar reaches level five, his Unbreakable Will makes diving you under tower highly likely if you are chunked.

立ち回り方

To survive, never step past your caster minions unless Alistar has wasted his Headbutt. Keep your distance and focus on healing with Aria of Perseverance rather than forcing Hymn of Valor harass. If he does manage to engage on your carry, immediately use Song of Celerity to reposition and prepare a defensive Power Chord from Aria of Perseverance to shrink his follow-up damage. Save Crescendo strictly to counter-engage when he tries to dive under your turret.

チャンピオン詳細 → Alistarのビルド →
Thresh

Thresh+1

hook avoidancescaling advantage Thresh dominates the early lane pressure because a single successful Death Sentence bypasses all of Sona's sustain from Aria of Perseverance. Sona's fragile health pool makes her an easy target for his follow-up Flay. To survive and scale, Sona must constantly anticipate the hook, using the sudden movement speed from Song of Celerity to sidestep his crowd control before he can pull himself in. Threshのビルド → 詳細を見る
Thresh

理由

Thresh dominates the early lane pressure because a single successful Death Sentence bypasses all of Sona's sustain from Aria of Perseverance. Sona's fragile health pool makes her an easy target for his follow-up Flay. To survive and scale, Sona must constantly anticipate the hook, using the sudden movement speed from Song of Celerity to sidestep his crowd control before he can pull himself in.

レーン戦への影響

This threat forces Sona to play defensively behind her minions, limiting her ability to safely poke with Hymn of Valor. Thresh can easily zone you away from gold, using Dark Passage to set up deadly ganks or rescue his partner. If you step up too far, he will trap you inside The Box, leaving you with no room to maneuver or protect your carry.

立ち回り方

Never activate Song of Celerity mindlessly for simple movement; save its mana and cooldown exclusively for when Thresh winds up his Death Sentence. Always position diagonally to him behind your minion wave. If he misses his hook, you have a brief window to step forward, poke with Hymn of Valor, and charge your Power Chord. If caught, immediately use Crescendo to interrupt his follow-up Flay and buy time.

チャンピオン詳細 → Threshのビルド →
Leona

Leona+1

kill pressurescaling gap This matchup is dictated by Leona's window of opportunity before your sustain scales up. Early on, your Aria of Perseverance provides negligible healing and shielding compared to the burst damage Leona facilitates. If she connects a Zenith Blade into Shield of Daybreak, her Sunlight passive amplifies her ally's follow-up, easily melting your fragile health pool before you can reach the safety of your late-game auras. Leonaのビルド → 詳細を見る
Leona

理由

This matchup is dictated by Leona's window of opportunity before your sustain scales up. Early on, your Aria of Perseverance provides negligible healing and shielding compared to the burst damage Leona facilitates. If she connects a Zenith Blade into Shield of Daybreak, her Sunlight passive amplifies her ally's follow-up, easily melting your fragile health pool before you can reach the safety of your late-game auras.

レーン戦への影響

You are forced to concede early wave control, as stepping up to poke with Hymn of Valor puts you in direct range of her engage. Every missed dodge on Zenith Blade results in a forced recall or death, handing Leona complete dominance over the wave and turret plating. This pressure delays your level-up spikes and prevents you from safely stacking your passive Power Chord safely.

立ち回り方

To survive, constantly monitor Leona's positioning and maintain maximum distance, using the extra movement speed from Song of Celerity to bait and dodge her Zenith Blade. If she does manage to close the gap, immediately cycle your spells to prime a Power Chord green chord (diminuendo from Aria of Perseverance) on her follow-up damage dealer to negate their burst. Once you have Crescendo, save it strictly to interrupt her follow-up or lock her down under your tower.

チャンピオン詳細 → Leonaのビルド →

その他のマッチアップ

スキル次第のマッチアップ

3

このマッチアップは何よりもまず実行力の勝負であり、両者ともに優位を取れる現実的な手段を持っている。重要なスキルを一つ避けられるか、エンゲージを正しく読めるか、あるいはたった一つの位置取りのミスが、勝敗を分けることもある。マッチアップを理解し、行動すべき瞬間を見極める力がとりわけ重要になる。

Senna

Senna±0

sustain battlelate game This matchup is a pure scaling race. Senna attempts to farm Mist stacks using her Basic Attack and Piercing Darkness poke, but your Aria of Perseverance completely neutralizes this chip damage. Because neither of you can easily force a kill through the other's sustain, the lane remains passive. The true test of skill shifts entirely to how you use Crescendo to lock down targets compared to her global Dawning Shadow shield. Sennaのビルド → 詳細を見る
Senna

理由

This matchup is a pure scaling race. Senna attempts to farm Mist stacks using her Basic Attack and Piercing Darkness poke, but your Aria of Perseverance completely neutralizes this chip damage. Because neither of you can easily force a kill through the other's sustain, the lane remains passive. The true test of skill shifts entirely to how you use Crescendo to lock down targets compared to her global Dawning Shadow shield.

レーン戦への影響

You will experience a low-intensity laning phase where waves slowly bounce back and forth. Trading with Hymn of Valor is safe, but Senna will instantly heal her carry with Piercing Darkness, just as you will match her pressure with Aria of Perseverance. Because both sides sustain through minor skirmishes, recalls are clean, towers rarely fall early, and the lane is decided by who impacts the map first once ultimates are unlocked.

立ち回り方

Focus entirely on conserving mana for Aria of Perseverance rather than fishing for aggressive Hymn of Valor poke. Position behind your minions to make her Last Embrace projectile useless. Once you both reach your power spikes, do not try to match her global Dawning Shadow with a rotation; instead, look for a decisive, multi-target Crescendo engage on her or her carry to shut down her scaling momentum before she outranges you.

チャンピオン詳細 → Sennaのビルド →
Zilean

Zilean±0

scaling matchuputility clash This matchup is a pure race of execution and timing, centered on Zilean using Temporal Mirage to force fights with double Time Bomb stuns. Sona can shut down his aggressive speed boosts directly. She neutralizes his pick potential by using Song of Celerity to outrun his chase or casting Crescendo to freeze his acceleration in its tracks, balancing the lane's pressure. Zileanのビルド → 詳細を見る
Zilean

理由

This matchup is a pure race of execution and timing, centered on Zilean using Temporal Mirage to force fights with double Time Bomb stuns. Sona can shut down his aggressive speed boosts directly. She neutralizes his pick potential by using Song of Celerity to outrun his chase or casting Crescendo to freeze his acceleration in its tracks, balancing the lane's pressure.

レーン戦への影響

Zilean constantly seeks to zone you with Time Bomb, forcing you to sustain through the poke using Aria of Perseverance. When Zilean uses Temporal Mirage to aggressively position for a double-bomb stun, your immediate speed boost or stun response prevents a complete collapse. Neither side can easily force a recall or dive, turning the lane into a neutral stalemate where lane priority depends entirely on ultimate cooldowns.

立ち回り方

Always hold Song of Celerity to reactively mirror Zilean's Temporal Mirage; do not waste your movement speed aura for casual poke. When he speeds up to engage, activate your aura to pull your carry back safely. If he overcommits, use Crescendo to lock him down before he can cast Chronoshift on his target. If his ultimate does land, immediately swap targets or stall the fight with Aria of Perseverance to waste his revival window.

チャンピオン詳細 → Zileanのビルド →

その他のマッチアップ

有利なマッチアップ

15

これらのチャンピオンは、こちらの主要な強みに効果的に対応するのが難しく、より自由に対面を組み立てることができる。プレッシャーをかけて有利な交換を引き出す手段は複数あることが多い。相手が態勢を立て直す時間を与えるのではなく、この優位を活かして主導権を握ろう。

Galio

Galio−1

sustainscaling Sona naturally outscales Galio's threat because his melee-gated engage is highly predictable. Galio's only way to shut down your scaling is a flash-engage or surprise charge using Shield of Durand. However, because Sona possesses Crescendo, you can immediately halt his forward momentum mid-dash during Justice Punch or interrupt his taunt channel, turning his aggressive dive into a death trap for his duo. Galioのビルド → 詳細を見る
Galio

理由

Sona naturally outscales Galio's threat because his melee-gated engage is highly predictable. Galio's only way to shut down your scaling is a flash-engage or surprise charge using Shield of Durand. However, because Sona possesses Crescendo, you can immediately halt his forward momentum mid-dash during Justice Punch or interrupt his taunt channel, turning his aggressive dive into a death trap for his duo.

レーン戦への影響

Sona dictating the pace means Galio is forced to take heavy poke from Hymn of Valor whenever he steps up to trigger Colossal Smash on the wave. Since Galio cannot easily trade back without committing his Justice Punch, you easily establish health supremacy. His inability to find a clean Shield of Durand setup neutralizes his kill threat, leaving him stuck under tower while you safely scale.

立ち回り方

Keep a safe distance behind your minions to block Justice Punch, forcing Galio to walk up manually to charge Shield of Durand. The moment he tries this, activate Song of Celerity to kite backwards while peppering him with Hymn of Valor. If he commits his Flash, immediately cast Crescendo to lock him down under your own minion wave, using the power chord from Aria of Perseverance to mitigate his Winds of War.

チャンピオン詳細 → Galioのビルド →
Bard

Bard−1

scalingcatch potential Sona naturally outscales Bard because her constant team-wide buffs from Aria of Perseverance and Hymn of Valor offer far superior late-game value compared to Bard's single-target Caretaker’s Shrine. However, this scaling advantage is gated by Bard's ability to shut her down using Tempered Fate. If Bard lands his ultimate to freeze Sona, he can completely interrupt her Crescendo or isolate her before her scaling-driven sustain can save her allies. Bardのビルド → 詳細を見る
Bard

理由

Sona naturally outscales Bard because her constant team-wide buffs from Aria of Perseverance and Hymn of Valor offer far superior late-game value compared to Bard's single-target Caretaker’s Shrine. However, this scaling advantage is gated by Bard's ability to shut her down using Tempered Fate. If Bard lands his ultimate to freeze Sona, he can completely interrupt her Crescendo or isolate her before her scaling-driven sustain can save her allies.

レーン戦への影響

During the laning phase, Bard will frequently leave his ADC to collect chimes for Traveler’s Call. You must punish these roams by playing aggressively with Hymn of Valor to force his partner off the wave. Although Bard's Caretaker’s Shrine provides some sustain, your consistent shielding ensures you win prolonged trades. Keep the wave pushed to punish his roams, but watch out for Magical Journey ganks from behind.

立ち回り方

To secure your scaling advantage, never stand near walls to deny Bard easy stuns from Cosmic Binding. When teamfights erupt, do not lead the engage. Hold Crescendo and wait for Bard to cast Tempered Fate first. If you see the golden circle of his ultimate, immediately activate Song of Celerity to escape the radius. Only unleash your own ultimate once the stasis resolves to counter-engage and save your teammates.

チャンピオン詳細 → Bardのビルド →
Braum

Braum−1

sustain poketeamfight Sona naturally dominates this matchup through her superior scaling. While Braum can completely block Crescendo using Unbreakable, his kit lacks the sustain to survive your constant poke. Every Hymn of Valor and Aria of Perseverance trade slowly drains his health pool. Unless he triggers Concussive Blows early, Sona's healing and Power Chord utility will inevitably outvalue his defensive shield as the game progresses. Braumのビルド → 詳細を見る
Braum

理由

Sona naturally dominates this matchup through her superior scaling. While Braum can completely block Crescendo using Unbreakable, his kit lacks the sustain to survive your constant poke. Every Hymn of Valor and Aria of Perseverance trade slowly drains his health pool. Unless he triggers Concussive Blows early, Sona's healing and Power Chord utility will inevitably outvalue his defensive shield as the game progresses.

レーン戦への影響

You dictate the lane's pace by keeping Braum at a distance. Since he relies on Winter's Bite to initiate, dodging it with Song of Celerity leaves him helpless. This allows you to safely poke with Hymn of Valor, slowly forcing Braum and his carry under their tower. Without early kills, Braum cannot match your scaling, turning the lane into a war of attrition that you easily win.

立ち回り方

Never blindly cast Crescendo while Braum has Unbreakable ready; instead, wait for him to waste it on your Hymn of Valor before unleashing your ultimate. Use Song of Celerity to bait out and sidestep Winter's Bite. If he tries to jump forward with Stand Behind Me, immediately hit his carry with a Power Chord enhanced by Aria of Perseverance to reduce their damage, then safely retreat.

チャンピオン詳細 → Braumのビルド →
Morgana

Morgana−1

pokescaling Morgana relies on slowly chipping away at your health using Tormented Shadow. However, your Aria of Perseverance completely neutralizes this damage with its combined heal and shield, turning her primary zoning tool into wasted mana. Because Morgana cannot easily break through your defensive aura without landing a risky Dark Binding, you safely bypass her early-game pressure and effortlessly scale toward your overwhelming late-game teamfighting power. Morganaのビルド → 詳細を見る
Morgana

理由

Morgana relies on slowly chipping away at your health using Tormented Shadow. However, your Aria of Perseverance completely neutralizes this damage with its combined heal and shield, turning her primary zoning tool into wasted mana. Because Morgana cannot easily break through your defensive aura without landing a risky Dark Binding, you safely bypass her early-game pressure and effortlessly scale toward your overwhelming late-game teamfighting power.

レーン戦への影響

This matchup turns the lane into a slow, controlled push where you dictate the wave's position. Since Tormented Shadow inevitably damages the minions when Morgana tries to poke, she will constantly push the wave toward your tower. You can easily hold the minions just outside your turret range using Aria of Perseverance to sustain through the incoming damage, denying her any real tower pressure while securing safe farm.

立ち回り方

Always stand behind your minion wave to block her Dark Binding trajectory while maintaining maximum range. Keep Song of Celerity ready to dodge her unexpected skillshots or to quickly escape if she attempts to flash-engage with Soul Shackles. If your ADC gets caught by her root, do not panic; immediately cast Aria of Perseverance to absorb the burst from Tormented Shadow and use your Power Chord to weaken her follow-up.

チャンピオン詳細 → Morganaのビルド →
Maokai

Maokai−1

all inpoke survival Sona naturally outscales Maokai as the match progresses, creating a massive utility gap. Maokai's primary win condition is locking you down early with Twisted Advance. However, because you fight from range, you can constantly chip his health with Hymn of Valor before he can engage. Any minor poke he attempts with Sapling Toss is immediately erased by your Aria of Perseverance, rendering his lane presence obsolete. Maokaiのビルド → 詳細を見る
Maokai

理由

Sona naturally outscales Maokai as the match progresses, creating a massive utility gap. Maokai's primary win condition is locking you down early with Twisted Advance. However, because you fight from range, you can constantly chip his health with Hymn of Valor before he can engage. Any minor poke he attempts with Sapling Toss is immediately erased by your Aria of Perseverance, rendering his lane presence obsolete.

レーン戦への影響

This matchup translates into total lane dominance where you dictate the wave state. Because Maokai cannot safely step up to use Bramble Smash without taking heavy damage, his ADC is forced under turret. Your relentless health trades force early recalls, giving your duo free plates. Once you unlock Crescendo, Maokai's engage threats are completely neutralized, securing your transition into an unstoppable teamfight powerhouse.

立ち回り方

Maintain a safe distance just outside the reach of Twisted Advance, forcing Maokai to walk forward predictably if he wants to engage. Only step up to poke with Hymn of Valor when he hesitates, and immediately fall back. If he throws Sapling Toss into the lane brushes, reposition to the opposite side of the lane. Should he commit with Nature's Grasp, immediately counter with Crescendo to lock him down and protect your carry.

チャンピオン詳細 → Maokaiのビルド →
Lulu

Lulu−2

sustain waroutscaled Sona's ability to nullify Lulu's early aggression dictates this matchup. While Lulu relies on Glitterlance and Help, Pix! to chip away at your carry's health, your Aria of Perseverance completely neutralizes this poke. Because Lulu lacks a natural hard-engage to punish you, her early lane pressure is wasted, allowing you to comfortably scale into a late-game powerhouse where your team-wide auras easily outclass her single-target utility. Luluのビルド → 詳細を見る
Lulu

理由

Sona's ability to nullify Lulu's early aggression dictates this matchup. While Lulu relies on Glitterlance and Help, Pix! to chip away at your carry's health, your Aria of Perseverance completely neutralizes this poke. Because Lulu lacks a natural hard-engage to punish you, her early lane pressure is wasted, allowing you to comfortably scale into a late-game powerhouse where your team-wide auras easily outclass her single-target utility.

レーン戦への影響

In lane, this dynamic translates to a war of attrition that Lulu cannot win. When Lulu uses Help, Pix! aggressively to poke, she leaves herself or her ADC without a shield. This creates a massive window where you can trade back with Hymn of Valor and Power Chord. Lulu is forced to play defensively, losing wave control and failing to secure the early tower pressure her kit normally demands, letting you farm safely.

立ち回り方

To exploit this, always monitor Lulu's cooldowns, specifically Whimsy. If she uses it on her ally for attack speed, she cannot polymorph you, which is your green light to walk up and poke. Keep your distance to avoid double-hit Glitterlance angles. If Lulu uses Wild Growth to turn a fight, do not panic; immediately counter with Crescendo to lock down her giant target, then use Song of Celerity to kite back until her ultimate's health buff expires.

チャンピオン詳細 → Luluのビルド →
Nami

Nami−1

sustainteamfight Sona naturally outscales Nami as the game progresses because her teamfight utility becomes unmatched. While Nami relies on the single-target bounces of Ebb and Flow, your ability to constantly cycle Aria of Perseverance provides superior, non-stop area shielding. Nami is forced to use Tidal Wave proactively to disrupt your positioning, as she cannot match your raw output once you reach your mid-game power spikes. Namiのビルド → 詳細を見る
Nami

理由

Sona naturally outscales Nami as the game progresses because her teamfight utility becomes unmatched. While Nami relies on the single-target bounces of Ebb and Flow, your ability to constantly cycle Aria of Perseverance provides superior, non-stop area shielding. Nami is forced to use Tidal Wave proactively to disrupt your positioning, as she cannot match your raw output once you reach your mid-game power spikes.

レーン戦への影響

Early trades revolve around matching Nami's aggressive Ebb and Flow bounces. By using Hymn of Valor to poke from safety and mitigating her return damage with Aria of Perseverance, you prevent Nami from gaining lane control. Your inevitable scaling advantage forces Nami to take risky positions to land Aqua Prison, often leaving her vulnerable to ganks and draining her mana pool while you steadily build your lead.

立ち回り方

To secure your advantage, track Nami's ultimate. Never clump with your carries, forcing her to choose between targeting you or your frontline with Tidal Wave. If she unleashes the wave, activate Song of Celerity immediately to help your allies dodge the slow. Once her ultimate is spent, aggressively cycle Aria of Perseverance and use Crescendo to lock down her exposed allies, turning her failed engagement into an easy teamfight victory.

チャンピオン詳細 → Namiのビルド →
Yuumi

Yuumi−2

aura valuesustain battle This matchup tilts heavily in your favor as the game goes on due to how Yuumi's attachment mechanics work. When Yuumi uses You and Me! to latch onto her marksman, she loses the ability to block incoming skillshots. This makes her host an incredibly easy target for your Crescendo. You can consistently stun both Yuumi and her host simultaneously, completely neutralizing their defensive tools like Zoomies during crucial teamfights. Yuumiのビルド → 詳細を見る
Yuumi

理由

This matchup tilts heavily in your favor as the game goes on due to how Yuumi's attachment mechanics work. When Yuumi uses You and Me! to latch onto her marksman, she loses the ability to block incoming skillshots. This makes her host an incredibly easy target for your Crescendo. You can consistently stun both Yuumi and her host simultaneously, completely neutralizing their defensive tools like Zoomies during crucial teamfights.

レーン戦への影響

During the laning phase, you hold the initiative. Every time Yuumi attempts to poke with Prowling Projectile, you can instantly mitigate the damage using Aria of Perseverance. Meanwhile, your Hymn of Valor pressure forces her to stay attached, preventing her from safely stepping out to trigger Bop 'n' Block. This mana starvation limits their sustain, letting your duo dictate the wave's tempo and push them under turret.

立ち回り方

To secure this advantage, never waste Crescendo on solo targets; save it specifically for when Yuumi is attached to a priority target entering a skirmish. Actively watch for her to cast Final Chapter, then interrupt her team's offensive momentum with your ultimate. In lane, use the extra movement speed from Song of Celerity to dodge her Prowling Projectile, then immediately punish her host with a Hymn of Valor empowered Power Chord attack.

チャンピオン詳細 → Yuumiのビルド →

その他のマッチアップ

Sona対策アイテム

これらのアイテムを購入すると、このチャンピオンの影響力を抑えられます。

Putrificateur techno-chimique
Rappel mortel
Rappel mortel
Morellonomicon
Morellonomicon
Sandales de Mercure
Sandales de Mercure
Voile de la Banshee / Voile de la nuit

このチャンピオンへの対策

カウンターアングル

Sonaへの対策は、回復阻害アイテムを買うだけじゃない。彼女がオーラを張る時間を奪うことこそが本当の鍵だ。Sonaは、味方ミニオンの後ろで立ち回り、Qで削り、パワーコードを溜めてから、アルティメット(Crescendo)が使える状態で集団戦に参加したい。だから、彼女のコンボが有効になる前に決断を迫れるチャンピオンこそが最良のカウンターになる。例えば、即座のフック、強力なエンゲージ、一瞬のミスを突くオールイン、あるいはサバイブにマナを使わせることでスペースコントロールをさせないレーンプレッシャーなどだ。もしSonaがmidまで遅れを取らずに到達できれば、彼女の回復やバフ、エンチャントの効果は集団戦ごとに増していくため、弱体化させるのはずっと難しくなる。

パッチの文脈

Sonaが主に負けるのは、彼女が本来のパターンをフルに展開する時間を与えられない試合だ。エンゲージサポートは彼女の機動力のなさを突き、フックは貧弱なウェーブの後ろから彼女が削ろうとする試みを無視しやすく、サステインや削り性能の高いサポートは、彼女のアイテムが揃う前にレーンを無力化できる。したがって、彼女に対する正しいプランは二つある。序盤は全ての茂みを警戒させること、そしてmidでは、Crescendoの範囲に一直線に固まって入らないことだ。多くのチームはSonaに対してレーンで勝っても、彼女のアルティメットとオーラが最も影響力を持つ場所、つまり集団でdragonを争うことで、後々負けてしまう。

クイックリード

  • Sonaを攻める絶好の機会は、レベル5到達前とハーモニックエコー入手前だ。
  • 目標(オブジェクト)には固まって挑まないこと。Crescendoは狭い通路での突入を激しく罰する。
  • Sonaに防御的なマナ消費を強いることで、彼女の削り、回復、レーン維持能力を低下させる。

カウンターの原型

フックと即座のキャッチ

SonaはQを使うために少し前に出る必要があり、パワーコードを準備し、彼女のADCをオーラ範囲内に留める。フックはまさにそのわずかな前進を罰する。一瞬のミスが彼女のスケールプラン全体を台無しにする可能性がある。Blitzcrank、Thresh、Pykeは毎回のトレードに勝つ必要はない。ただ、Sonaが自由に削れなくなる程度の脅威を作り出せれば十分だ。彼女が下がりすぎるとADCはレーンプレッシャーを失い、上がりすぎるとCrescendoを使う前に倒される可能性がある。

チャンピオンの適応方法. Sonaはミニオンの後ろに隠れ、Qでの削り機会はいくつか失っても受け入れ、ウェーブに触れる前にサイドの角度をワードで確保する必要がある。彼女の目標はレーンでフックを持つsupportに勝つことではなく、敵のゲーム加速につながるキャッチを与えずに序盤を生き延びることだ。

強力なエンゲージと正面からのオールイン

Leona、Nautilus、RakanはSonaに非常に素早く対応することを強いる。これは彼女のコアな弱点を突く。彼女は戦いを準備したいのであって、即座に吸収したいわけではないのだ。レベル5前には、彼女はエンゲージを打破するCrescendoを持っていない。たとえレベル5以降であっても、彼女が最初に攻撃されたり、生き残るためだけにアルティメットを使わざるを得なくなったりすれば、彼女のチームは目的を確保するために使うはずだったコントロールツールを失う。これらのマッチアップは危険だ。なぜなら、全てのワード設置、レーンへの復帰、押し込んだウェーブが、即座の戦闘の可能性になるからだ。

チャンピオンの適応方法. Sonaは、メインのエンゲージのためにイグゾースト(Exhaust)を温存し、必要であれば彼女のADCよりもさらに後ろに位置取り、敵のクラウドコントロールが利用可能な間はウェーブを争わないようにすべきだ。レベル5以降は、Crescendoは野心的な開始を狙うのではなく、エンゲージに応答するために使うべき場合が多い。

サステインとレーン無力化

これらのサポートは、必ずしもSonaを直接破壊するわけではないが、彼女が削りによって真のリードを生み出す能力を低下させる。もしSoraka、Nami、Lulu、あるいはSeraphineが小規模なトレードを受け入れ、デュオを健康に保てば、Sonaは繰り返しのQキャストで簡単にレーンに勝つことはできない。このマッチアップはmidでのバリューレースになる。誰がキャリーをより良く守るか、誰がより良いオブジェクトツールを持つか、誰が相手にスペルを使いすぎさせるか。Sonaにとって、これはフックほど致命的ではないが、はるかに巧妙だ。彼女は有利な状況を作り出していないと感じながら、自由にスケールしているように感じるかもしれない。

チャンピオンの適応方法. Sonaは、クオリティを重視すべきだ。適切なパワーコード、適切なアイテムタイミング、そしてオブジェクト周りでの適切なCrescendo。もし彼女が敵のサステインに合わせるためだけに連投すれば、有用なプレッシャーを得ずにマナ切れのリスクを負う。

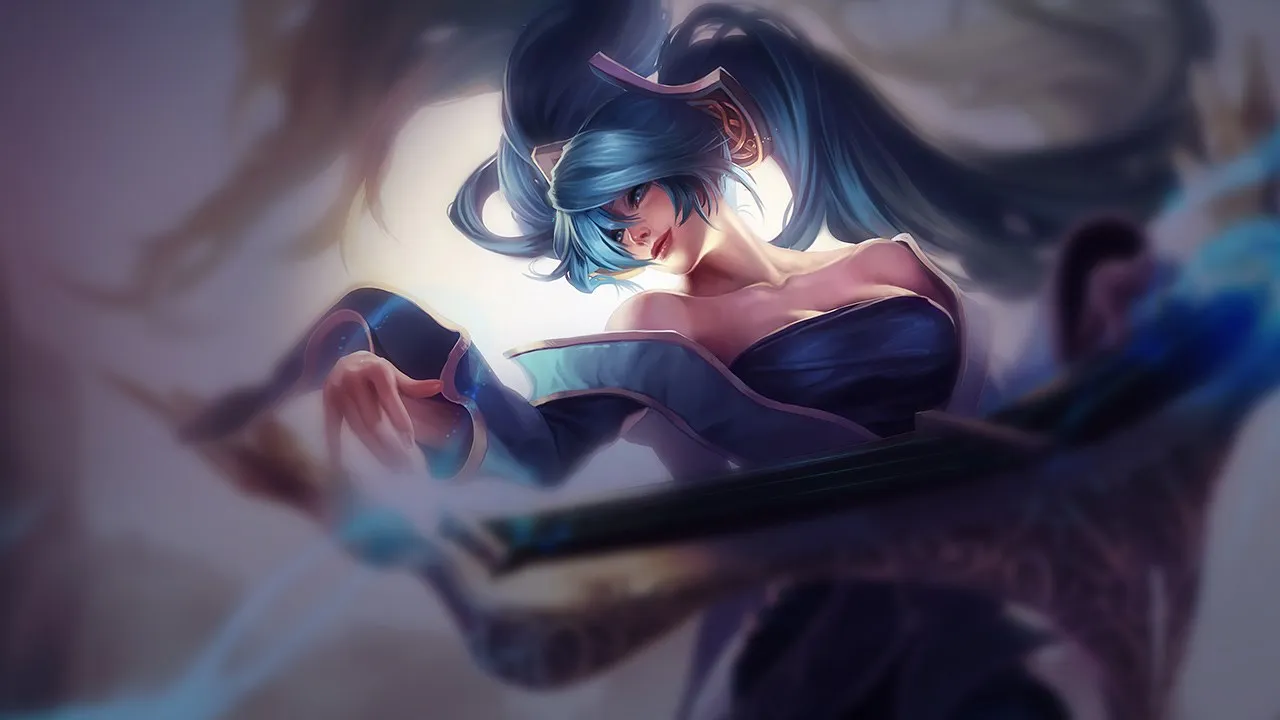
優先度の高いマッチアップ

Leona

Leonaは、Sonaにとって最も決定的なマッチアップの一つだ。なぜなら、彼女は即座に彼女のスペーシング規律を試すからだ。もしSonaがZenith Bladeを警戒せずにQのために前に出れば、アイテムが揃う前にレーンが崩壊する可能性がある。答えは恐れてプレイすることではなく、クリーンにプレイすることだ。ウェーブの後ろに留まり、フルエンゲージのためにExhaustを温存し、いくつかのトレードを諦めることを受け入れ、Leonaが深入りしすぎた時にエンゲージを返すためにCrescendoを保持することだ。

Blitzcrank

BlitzcrankはSonaの自然な自由を大きく制限する。彼女は削るために範囲の内外を移動したいが、全てのサイドステップがRocket Grabの角度になりうる。したがって、このマッチアップは主にウェーブの位置と茂みに依存する。もしSonaがミニオンを自分とBlitzcrankの間に保てれば、生き延びてスケールできる。もしレーンが開いていたり、視界が失われていたりすれば、グラブが使われるまでほとんど前に出ないようにしなければならない。

対面時のよくある間違い

対面時のよくある間違い

  • プレッシャーなしでレベル5に到達させ、最初のdragonでCrescendoについて文句を言うこと。
  • Crescendoが利用可能で、チームが集まっている状態で、狭い通路を通して目標(オブジェクト)を強行すること。
  • ADCに全てのクラウドコントロールを使い、Sonaが回復したり、加速したり、アルティメットで反撃したりするのを止めないこと。
  • Sonaに対してレーンで勝ったが、彼女のオーラアイテムが揃う前にゲームを速めることができなかったこと。
  • バフ、CC、エンチャントテンポが有効なまま、アンチヒールを買っただけで十分だと思っている。

コーチングノート

  • Sonaに対して、最も効果的なカウンターは戦闘前に行われることが多い:視界を奪い、ウェーブを開き、ブッシュをコントロールし、彼女がQのために前に出た瞬間にエンゲージする。
  • 序盤にSonaを倒せないなら、少なくともマナを使わせるように仕向けよう。目標(オブジェクト)を前にしてマナがないSonaは、脅威の大部分を失う。

FAQ

どのようなsupportがSonaに最も効果的にカウンターできるか?

オーラを張る前に彼女を罰するサポートが最も危険だ。Blitzcrank、Thresh、Pykeのようなフックは、1回のポジショニングミスをキルに変えることができる。Leona、Nautilus、Rakanのようなハードエンゲージサポートは、彼女に即座の対応を強いるが、彼女は戦闘の準備を好む。サステインサポートも彼女を無力化できるが、直接的に打ち負かすわけではない:主に彼女のポークが有利を作り出すのを阻止する。

Sonaを倒すにはアンチヒールだけで十分か?

いいえ。アンチヒールは彼女の価値の重要な部分を減らすが、Sonaは回復だけで勝つわけではない。彼女はバフ、移動速度、ポーク、エンチャント、そしてクレッシェンドも持ち込んでいる。アンチヒールを買っても、彼女のアルティメットに向かって集団で歩けば、まだ戦闘を決定づけることができる。アンチヒールは、実際の計画の一部でなければならない:序盤に彼女を罰し、目標(オブジェクト)への入り口をコントロールし、彼女が複数のスペルサイクルをプレイするのを防ぐ。

Sonaに対して目標(オブジェクト)をどのようにプレイすべきか?

彼女が望む戦闘、つまりクレッシェンドが利用可能な状態で、チョークポイントに5人のチャンピオンが集まるような状況を与えるのを避けなければならない。Sonaに対しては、複数の角度から侵入し、スポーン前に彼女の視界を圧迫し、彼女のポジショニングを脅かし、キーとなるスペルを使うのを待ってからコミットする方が良い。もし正面からエンゲージしなければならないなら、あなたのチームが彼女の前に円錐状に並ばないようにすること、さもなければ彼女のアルティメットは目標(オブジェクト)を後ろからでも決定づけることができる。

なぜSonaはレーンでは弱く見えるのに、後半では強くなることがあるのか?

彼女の力は一つのレーン・スペルに集中しているわけではない。序盤は、彼女は脆く、マナ依存性が高く、速いエンゲージに弱い。後半になると、彼女のスペルはアイテムと組み合わさり、彼女のオーラは複数の味方に影響を与え、クレッシェンドは目標(オブジェクト)エリアを脅かす。キルを与えなかったSonaは、10分間静かに見えるかもしれないが、戦闘が集団化し長引くと、突破するのが非常に困難になる。


































