Ağustos 2026 · Patch 7.2d
Support · SUPPORT

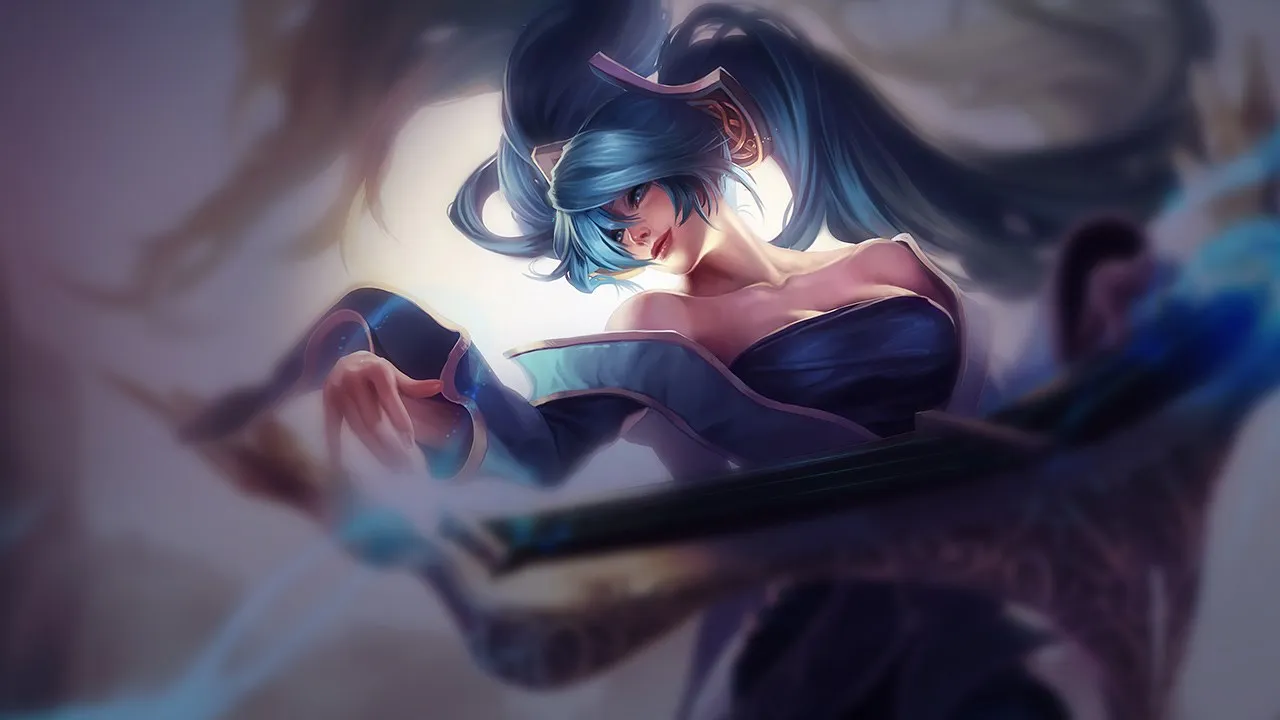
Sona Wild Rift Counter Rehberi

Sona, kendisini ilk hedef alan pick veya dive kompozisyonlarına karşı son derece kırılgan ve savunmasızdır. Mobility eksikliği, onu assassins için kolay bir hedef haline getirir. Anlık engage kompozisyonları, o heal atamadan veya karşılık veremeden onu etkisiz hale getirir.

★ SUPPORT Tier A
HASAR
UTIL
TANK
DIFF
Win 53.1% #16 · ↓1pt
Pick 6.8% #10
Ban 2.4% #59

Sona Wild Rift Counter Rehberi ★ Counter Sheet

Hard Counter

1

Bu şampiyonlar, seninkini doğrudan geride bırakan bir build ve oynanış tarzına sahip, bu da lane kontrolünü ve farmı son derece zorlaştırabilir. Yetenekleri temel güçlerini etkisiz hale getirebilir ya da her zamanki planını oynamaya çalıştığın anda seni cezalandırabilir. Bu matchuplarda amaç genellikle hataları en aza indirmek ve doğrudan çatışmanın dışında çözümler bulmaktır.

Blitzcrank

Blitzcrank

squishy_targetkill_pressure Sona is exceptionally vulnerable in this lane because she possesses no built-in dashes or early crowd control to escape or disengage. This makes her the ultimate target for Blitzcrank. If he lands Rocket Grab, he can instantly follow up with Power Fist to knock you up before you can react with Aria of Perseverance or Song of Celerity. Without Crescendo available pre-level 5, any positioning error means instant death. Detayları gör
Blitzcrank

Neden

Sona is exceptionally vulnerable in this lane because she possesses no built-in dashes or early crowd control to escape or disengage. This makes her the ultimate target for Blitzcrank. If he lands Rocket Grab, he can instantly follow up with Power Fist to knock you up before you can react with Aria of Perseverance or Song of Celerity. Without Crescendo available pre-level 5, any positioning error means instant death.

Lane etkisi

This threat completely paralyzes Sona's early laning phase. You cannot step up to poke with Hymn of Valor without exposing yourself to a brush-camping hook. Consequently, the enemy duo easily secures wave priority, pushing you under tower where dodging Rocket Grab becomes even harder due to confined space. Your AD carry will constantly lose farm, and you will be forced into early, unfavorable recalls under heavy tower pressure.

Nasıl oynanır

To survive, you must treat the minion wave as your physical shield, never stepping out of its cover while Rocket Grab is off cooldown. The moment you see Blitzcrank activate Overdrive to run at you, immediately cast Song of Celerity to match his speed and retreat. If you do get hooked, immediately queue up your Aria of Perseverance version of Power Chord on their carry to reduce their burst damage while trying to walk away.

Tam profil →

Dezavantajlı

9

Bu şampiyonlar, matchup'ı tamamen oynanmaz hale getirmeden genellikle çatışmada avantaj sağlayan araçlara sahiptir. Daha fazla menzilleri, senin saldırılarını daha iyi karşılama kapasiteleri veya engage'lerine karşılık verecek daha fazla yolları olabilir. Yaklaşımını buna göre uyarlaman ve dövüşü kabul edeceğin anları dikkatle seçmen gerekir.

Pyke

Pyke

early_kill_pressurescaling_threat Sona's fragile health pool makes her incredibly vulnerable during the early levels. If Pyke lands Bone Skewer, the forced displacement combined with Phantom Undertow's follow-up stun will reliably burst Sona down before she can react. Even with Aria of Perseverance, Sona lacks the defensive stats to survive this physical damage onslaught, meaning any positioning error results in an immediate death. Detayları gör
Pyke

Neden

Sona's fragile health pool makes her incredibly vulnerable during the early levels. If Pyke lands Bone Skewer, the forced displacement combined with Phantom Undertow's follow-up stun will reliably burst Sona down before she can react. Even with Aria of Perseverance, Sona lacks the defensive stats to survive this physical damage onslaught, meaning any positioning error results in an immediate death.

Lane etkisi

This threat forces Sona to play extremely defensively, conceding early lane pressure and bush control. Sona cannot safely walk up to poke with Hymn of Valor, as stepping past her minion wave exposes her to Bone Skewer. Consequently, your ADC will often be shoved under turret, facing dive pressure once Pyke unlocks Death from Below, while Pyke freely roams the map using Ghostwater Dive.

Nasıl oynanır

To survive, you must constantly position behind your minion wave to block Bone Skewer. Keep the bushes warded to track Ghostwater Dive. Never use Song of Celerity aggressively; save its movement speed boost to dodge incoming hooks. If Pyke misses Bone Skewer, you have a brief fifteen-second window to harass him with Hymn of Valor. Once he reaches level five, prepare to use Crescendo to interrupt his Phantom Undertow dash.

Tam profil →
Nautilus

Nautilus

squishy_targetearly_pressure Sona struggles in this matchup because her lack of innate mobility makes her incredibly vulnerable to Nautilus's Dredge Line. Every attempt to poke with Hymn of Valor exposes you to his hook. If he lands it, the follow-up crowd control from Staggering Blow and Riptide guarantees a quick death before Aria of Perseverance can mitigate the incoming burst damage. Detayları gör
Nautilus

Neden

Sona struggles in this matchup because her lack of innate mobility makes her incredibly vulnerable to Nautilus's Dredge Line. Every attempt to poke with Hymn of Valor exposes you to his hook. If he lands it, the follow-up crowd control from Staggering Blow and Riptide guarantees a quick death before Aria of Perseverance can mitigate the incoming burst damage.

Lane etkisi

This constant threat of engage completely paralyzes your lane presence, forcing you to play far behind your minion wave. You cannot step up to charge Power Chord safely, which cedes bush control entirely to Nautilus. Consequently, the enemy duo can easily slow-push waves to dive you with Depth Charge or freely roam to secure map pressure while you are stuck under turret.

Nasıl oynanır

To survive, you must treat your minion wave as an absolute shield and never step into open space when Dredge Line is off cooldown. If Nautilus steps forward aggressively, immediately activate Song of Celerity to boost your movement speed and bait his hook. Should he bypass your frontline with Depth Charge, save Crescendo to counter-engage his ADC, and quickly apply the damage-reducing Power Chord from Aria of Perseverance.

Tam profil →
Rakan

Rakan

kill_pressurescaling_threat Rakan's explosive engage relies on catching you off-guard with Grand Entrance, a task made easy by your complete lack of defensive dashes. If he lands this knock-up, his ADC can instantly burst you down. However, if Rakan misses or hesitates, your Aria of Perseverance completely nullifies any poke he attempts with Gleaming Quill. The lane is a constant test of whether he can successfully pin you down. Detayları gör
Rakan

Neden

Rakan's explosive engage relies on catching you off-guard with Grand Entrance, a task made easy by your complete lack of defensive dashes. If he lands this knock-up, his ADC can instantly burst you down. However, if Rakan misses or hesitates, your Aria of Perseverance completely nullifies any poke he attempts with Gleaming Quill. The lane is a constant test of whether he can successfully pin you down.

Lane etkisi

You cannot safely contest the brush because getting caught by Grand Entrance means death or burning critical summoner spells. Consequently, Rakan can easily zone you and secure bush control. This forces a defensive wave state near your tower. However, if you survive his initial dive attempt, your constant healing from Aria of Perseverance allows your ADC to win long-term health trades and slowly push him out of the lane.

Nasıl oynanır

Maintain maximum distance and never step parallel to your ADC to prevent Rakan from hitting both of you with Grand Entrance. Always keep Song of Celerity ready; the moment he starts his dash animation, activate it to sidestep the impact zone. If he does manage to close the gap, immediately cycle your Power Chord using Aria of Perseverance to reduce his target's damage output while preparing Crescendo to lock him down under your tower.

Tam profil →
Zyra

Zyra

disengagedodge_skillshots Zyra controls the lane territory by turning seeds from Garden of Thorns into aggressive spitters using Deadly Spines and Grasping Roots. Sona's lack of mobility makes her incredibly vulnerable to being locked down by Grasping Roots and bursted. Sona's saving grace is Hymn of Valor, which allows her to safely hit and clear these plants from a distance without stepping forward into Zyra's maximum threat range. Detayları gör
Zyra

Neden

Zyra controls the lane territory by turning seeds from Garden of Thorns into aggressive spitters using Deadly Spines and Grasping Roots. Sona's lack of mobility makes her incredibly vulnerable to being locked down by Grasping Roots and bursted. Sona's saving grace is Hymn of Valor, which allows her to safely hit and clear these plants from a distance without stepping forward into Zyra's maximum threat range.

Lane etkisi

Zyra's plants constantly push the wave, forcing you under turret while chipping away at your health bar. You will find yourself forced to repeatedly cast Aria of Perseverance to survive the poke, quickly draining your mana. Since stepping up to use a Power Chord auto-attack invites an immediate Grasping Roots counter-attack, you must accept losing early priority and focus on defending your tower under constant botanical siege.

Nasıl oynanır

Make it an absolute rule to keep friendly minions between yourself and Zyra to block Grasping Roots. Use the auto-targeting of Hymn of Valor to safely strike her plants and collect passive stacks from afar. Save Song of Celerity exclusively to dodge her Deadly Spines or the delayed knockup of Stranglethorns. If she manages to root your carry, immediately activate Aria of Perseverance followed by Crescendo to disrupt Zyra's follow-up burst.

Tam profil →
Alistar

Alistar

kill_lanescaling_gap Your fragile health pool makes you the ultimate target for Alistar. The moment you step up to poke with Hymn of Valor, you enter the danger zone where his Headbutt-Pulverize combo can instantly lock you down. Because Sona lacks any natural escape tools, getting caught by this sudden displacement and knock-up means giving over an easy kill, forcing you to respect his initiation range constantly. Detayları gör
Alistar

Neden

Your fragile health pool makes you the ultimate target for Alistar. The moment you step up to poke with Hymn of Valor, you enter the danger zone where his Headbutt-Pulverize combo can instantly lock you down. Because Sona lacks any natural escape tools, getting caught by this sudden displacement and knock-up means giving over an easy kill, forcing you to respect his initiation range constantly.

Lane etkisi

This threat forces you to play exceptionally far behind your minion wave, completely yielding control of the lane brushes to Alistar. Your poke becomes non-existent, allowing his Triumphant Roar to easily negate any minor damage you land. Consequently, your carry faces heavy pressure, and once Alistar reaches level five, his Unbreakable Will makes diving you under tower highly likely if you are chunked.

Nasıl oynanır

To survive, never step past your caster minions unless Alistar has wasted his Headbutt. Keep your distance and focus on healing with Aria of Perseverance rather than forcing Hymn of Valor harass. If he does manage to engage on your carry, immediately use Song of Celerity to reposition and prepare a defensive Power Chord from Aria of Perseverance to shrink his follow-up damage. Save Crescendo strictly to counter-engage when he tries to dive under your turret.

Tam profil →
Thresh

Thresh

hook_avoidancescaling_advantage Thresh dominates the early lane pressure because a single successful Death Sentence bypasses all of Sona's sustain from Aria of Perseverance. Sona's fragile health pool makes her an easy target for his follow-up Flay. To survive and scale, Sona must constantly anticipate the hook, using the sudden movement speed from Song of Celerity to sidestep his crowd control before he can pull himself in. Detayları gör
Thresh

Neden

Thresh dominates the early lane pressure because a single successful Death Sentence bypasses all of Sona's sustain from Aria of Perseverance. Sona's fragile health pool makes her an easy target for his follow-up Flay. To survive and scale, Sona must constantly anticipate the hook, using the sudden movement speed from Song of Celerity to sidestep his crowd control before he can pull himself in.

Lane etkisi

This threat forces Sona to play defensively behind her minions, limiting her ability to safely poke with Hymn of Valor. Thresh can easily zone you away from gold, using Dark Passage to set up deadly ganks or rescue his partner. If you step up too far, he will trap you inside The Box, leaving you with no room to maneuver or protect your carry.

Nasıl oynanır

Never activate Song of Celerity mindlessly for simple movement; save its mana and cooldown exclusively for when Thresh winds up his Death Sentence. Always position diagonally to him behind your minion wave. If he misses his hook, you have a brief window to step forward, poke with Hymn of Valor, and charge your Power Chord. If caught, immediately use Crescendo to interrupt his follow-up Flay and buy time.

Tam profil →
Leona

Leona

kill_pressurescaling_gap This matchup is dictated by Leona's window of opportunity before your sustain scales up. Early on, your Aria of Perseverance provides negligible healing and shielding compared to the burst damage Leona facilitates. If she connects a Zenith Blade into Shield of Daybreak, her Sunlight passive amplifies her ally's follow-up, easily melting your fragile health pool before you can reach the safety of your late-game auras. Detayları gör
Leona

Neden

This matchup is dictated by Leona's window of opportunity before your sustain scales up. Early on, your Aria of Perseverance provides negligible healing and shielding compared to the burst damage Leona facilitates. If she connects a Zenith Blade into Shield of Daybreak, her Sunlight passive amplifies her ally's follow-up, easily melting your fragile health pool before you can reach the safety of your late-game auras.

Lane etkisi

You are forced to concede early wave control, as stepping up to poke with Hymn of Valor puts you in direct range of her engage. Every missed dodge on Zenith Blade results in a forced recall or death, handing Leona complete dominance over the wave and turret plating. This pressure delays your level-up spikes and prevents you from safely stacking your passive Power Chord safely.

Nasıl oynanır

To survive, constantly monitor Leona's positioning and maintain maximum distance, using the extra movement speed from Song of Celerity to bait and dodge her Zenith Blade. If she does manage to close the gap, immediately cycle your spells to prime a Power Chord green chord (diminuendo from Aria of Perseverance) on her follow-up damage dealer to negate their burst. Once you have Crescendo, save it strictly to interrupt her follow-up or lock her down under your tower.

Tam profil →

Diğer eşleşmeler

Skill Matchup

2

Bu eşleşmeler her şeyden önce yürütme düellosudur: her iki şampiyon da avantaj elde etmek için gerçek yollara sahiptir. Kaçırılan önemli bir yetenek, doğru öngörülen bir engage ya da tek bir pozisyon hatası düelloyu bir tarafa çevirebilir. Matchup'ı bilmek ve doğru anları tanımak burada özellikle önemlidir.

Senna

Senna

sustain_battlelate_game This matchup is a pure scaling race. Senna attempts to farm Mist stacks using her Basic Attack and Piercing Darkness poke, but your Aria of Perseverance completely neutralizes this chip damage. Because neither of you can easily force a kill through the other's sustain, the lane remains passive. The true test of skill shifts entirely to how you use Crescendo to lock down targets compared to her global Dawning Shadow shield. Detayları gör
Senna

Neden

This matchup is a pure scaling race. Senna attempts to farm Mist stacks using her Basic Attack and Piercing Darkness poke, but your Aria of Perseverance completely neutralizes this chip damage. Because neither of you can easily force a kill through the other's sustain, the lane remains passive. The true test of skill shifts entirely to how you use Crescendo to lock down targets compared to her global Dawning Shadow shield.

Lane etkisi

You will experience a low-intensity laning phase where waves slowly bounce back and forth. Trading with Hymn of Valor is safe, but Senna will instantly heal her carry with Piercing Darkness, just as you will match her pressure with Aria of Perseverance. Because both sides sustain through minor skirmishes, recalls are clean, towers rarely fall early, and the lane is decided by who impacts the map first once ultimates are unlocked.

Nasıl oynanır

Focus entirely on conserving mana for Aria of Perseverance rather than fishing for aggressive Hymn of Valor poke. Position behind your minions to make her Last Embrace projectile useless. Once you both reach your power spikes, do not try to match her global Dawning Shadow with a rotation; instead, look for a decisive, multi-target Crescendo engage on her or her carry to shut down her scaling momentum before she outranges you.

Tam profil →
Zilean

Zilean

scaling_matchuputility_clash This matchup is a pure race of execution and timing, centered on Zilean using Temporal Mirage to force fights with double Time Bomb stuns. Sona can shut down his aggressive speed boosts directly. She neutralizes his pick potential by using Song of Celerity to outrun his chase or casting Crescendo to freeze his acceleration in its tracks, balancing the lane's pressure. Detayları gör
Zilean

Neden

This matchup is a pure race of execution and timing, centered on Zilean using Temporal Mirage to force fights with double Time Bomb stuns. Sona can shut down his aggressive speed boosts directly. She neutralizes his pick potential by using Song of Celerity to outrun his chase or casting Crescendo to freeze his acceleration in its tracks, balancing the lane's pressure.

Lane etkisi

Zilean constantly seeks to zone you with Time Bomb, forcing you to sustain through the poke using Aria of Perseverance. When Zilean uses Temporal Mirage to aggressively position for a double-bomb stun, your immediate speed boost or stun response prevents a complete collapse. Neither side can easily force a recall or dive, turning the lane into a neutral stalemate where lane priority depends entirely on ultimate cooldowns.

Nasıl oynanır

Always hold Song of Celerity to reactively mirror Zilean's Temporal Mirage; do not waste your movement speed aura for casual poke. When he speeds up to engage, activate your aura to pull your carry back safely. If he overcommits, use Crescendo to lock him down before he can cast Chronoshift on his target. If his ultimate does land, immediately swap targets or stall the fight with Aria of Perseverance to waste his revival window.

Tam profil →

Avantajlı

15

Bu şampiyonlar genellikle senin temel güçlerine etkili şekilde karşılık veremez, bu da çatışmaya daha fazla özgürlükle yaklaşmanı sağlar. Onları baskı altına almak ve lehine dönen trade'ler zorlamak için genellikle birden fazla yolun vardır. Onlara rahat bir pozisyona dönme fırsatı vermek yerine, bu avantajı kendi temponu dayatmak için kullan.

Galio

Galio

sustainscaling Sona naturally outscales Galio's threat because his melee-gated engage is highly predictable. Galio's only way to shut down your scaling is a flash-engage or surprise charge using Shield of Durand. However, because Sona possesses Crescendo, you can immediately halt his forward momentum mid-dash during Justice Punch or interrupt his taunt channel, turning his aggressive dive into a death trap for his duo. Detayları gör
Galio

Neden

Sona naturally outscales Galio's threat because his melee-gated engage is highly predictable. Galio's only way to shut down your scaling is a flash-engage or surprise charge using Shield of Durand. However, because Sona possesses Crescendo, you can immediately halt his forward momentum mid-dash during Justice Punch or interrupt his taunt channel, turning his aggressive dive into a death trap for his duo.

Lane etkisi

Sona dictating the pace means Galio is forced to take heavy poke from Hymn of Valor whenever he steps up to trigger Colossal Smash on the wave. Since Galio cannot easily trade back without committing his Justice Punch, you easily establish health supremacy. His inability to find a clean Shield of Durand setup neutralizes his kill threat, leaving him stuck under tower while you safely scale.

Nasıl oynanır

Keep a safe distance behind your minions to block Justice Punch, forcing Galio to walk up manually to charge Shield of Durand. The moment he tries this, activate Song of Celerity to kite backwards while peppering him with Hymn of Valor. If he commits his Flash, immediately cast Crescendo to lock him down under your own minion wave, using the power chord from Aria of Perseverance to mitigate his Winds of War.

Tam profil →
Bard

Bard

scalingcatch_potential Sona naturally outscales Bard because her constant team-wide buffs from Aria of Perseverance and Hymn of Valor offer far superior late-game value compared to Bard's single-target Caretaker’s Shrine. However, this scaling advantage is gated by Bard's ability to shut her down using Tempered Fate. If Bard lands his ultimate to freeze Sona, he can completely interrupt her Crescendo or isolate her before her scaling-driven sustain can save her allies. Detayları gör
Bard

Neden

Sona naturally outscales Bard because her constant team-wide buffs from Aria of Perseverance and Hymn of Valor offer far superior late-game value compared to Bard's single-target Caretaker’s Shrine. However, this scaling advantage is gated by Bard's ability to shut her down using Tempered Fate. If Bard lands his ultimate to freeze Sona, he can completely interrupt her Crescendo or isolate her before her scaling-driven sustain can save her allies.

Lane etkisi

During the laning phase, Bard will frequently leave his ADC to collect chimes for Traveler’s Call. You must punish these roams by playing aggressively with Hymn of Valor to force his partner off the wave. Although Bard's Caretaker’s Shrine provides some sustain, your consistent shielding ensures you win prolonged trades. Keep the wave pushed to punish his roams, but watch out for Magical Journey ganks from behind.

Nasıl oynanır

To secure your scaling advantage, never stand near walls to deny Bard easy stuns from Cosmic Binding. When teamfights erupt, do not lead the engage. Hold Crescendo and wait for Bard to cast Tempered Fate first. If you see the golden circle of his ultimate, immediately activate Song of Celerity to escape the radius. Only unleash your own ultimate once the stasis resolves to counter-engage and save your teammates.

Tam profil →
Braum

Braum

sustain_poketeamfight Sona naturally dominates this matchup through her superior scaling. While Braum can completely block Crescendo using Unbreakable, his kit lacks the sustain to survive your constant poke. Every Hymn of Valor and Aria of Perseverance trade slowly drains his health pool. Unless he triggers Concussive Blows early, Sona's healing and Power Chord utility will inevitably outvalue his defensive shield as the game progresses. Detayları gör
Braum

Neden

Sona naturally dominates this matchup through her superior scaling. While Braum can completely block Crescendo using Unbreakable, his kit lacks the sustain to survive your constant poke. Every Hymn of Valor and Aria of Perseverance trade slowly drains his health pool. Unless he triggers Concussive Blows early, Sona's healing and Power Chord utility will inevitably outvalue his defensive shield as the game progresses.

Lane etkisi

You dictate the lane's pace by keeping Braum at a distance. Since he relies on Winter's Bite to initiate, dodging it with Song of Celerity leaves him helpless. This allows you to safely poke with Hymn of Valor, slowly forcing Braum and his carry under their tower. Without early kills, Braum cannot match your scaling, turning the lane into a war of attrition that you easily win.

Nasıl oynanır

Never blindly cast Crescendo while Braum has Unbreakable ready; instead, wait for him to waste it on your Hymn of Valor before unleashing your ultimate. Use Song of Celerity to bait out and sidestep Winter's Bite. If he tries to jump forward with Stand Behind Me, immediately hit his carry with a Power Chord enhanced by Aria of Perseverance to reduce their damage, then safely retreat.

Tam profil →
Morgana

Morgana

pokescaling Morgana relies on slowly chipping away at your health using Tormented Shadow. However, your Aria of Perseverance completely neutralizes this damage with its combined heal and shield, turning her primary zoning tool into wasted mana. Because Morgana cannot easily break through your defensive aura without landing a risky Dark Binding, you safely bypass her early-game pressure and effortlessly scale toward your overwhelming late-game teamfighting power. Detayları gör
Morgana

Neden

Morgana relies on slowly chipping away at your health using Tormented Shadow. However, your Aria of Perseverance completely neutralizes this damage with its combined heal and shield, turning her primary zoning tool into wasted mana. Because Morgana cannot easily break through your defensive aura without landing a risky Dark Binding, you safely bypass her early-game pressure and effortlessly scale toward your overwhelming late-game teamfighting power.

Lane etkisi

This matchup turns the lane into a slow, controlled push where you dictate the wave's position. Since Tormented Shadow inevitably damages the minions when Morgana tries to poke, she will constantly push the wave toward your tower. You can easily hold the minions just outside your turret range using Aria of Perseverance to sustain through the incoming damage, denying her any real tower pressure while securing safe farm.

Nasıl oynanır

Always stand behind your minion wave to block her Dark Binding trajectory while maintaining maximum range. Keep Song of Celerity ready to dodge her unexpected skillshots or to quickly escape if she attempts to flash-engage with Soul Shackles. If your ADC gets caught by her root, do not panic; immediately cast Aria of Perseverance to absorb the burst from Tormented Shadow and use your Power Chord to weaken her follow-up.

Tam profil →
Maokai

Maokai

all_inpoke_survival Sona naturally outscales Maokai as the match progresses, creating a massive utility gap. Maokai's primary win condition is locking you down early with Twisted Advance. However, because you fight from range, you can constantly chip his health with Hymn of Valor before he can engage. Any minor poke he attempts with Sapling Toss is immediately erased by your Aria of Perseverance, rendering his lane presence obsolete. Detayları gör
Maokai

Neden

Sona naturally outscales Maokai as the match progresses, creating a massive utility gap. Maokai's primary win condition is locking you down early with Twisted Advance. However, because you fight from range, you can constantly chip his health with Hymn of Valor before he can engage. Any minor poke he attempts with Sapling Toss is immediately erased by your Aria of Perseverance, rendering his lane presence obsolete.

Lane etkisi

This matchup translates into total lane dominance where you dictate the wave state. Because Maokai cannot safely step up to use Bramble Smash without taking heavy damage, his ADC is forced under turret. Your relentless health trades force early recalls, giving your duo free plates. Once you unlock Crescendo, Maokai's engage threats are completely neutralized, securing your transition into an unstoppable teamfight powerhouse.

Nasıl oynanır

Maintain a safe distance just outside the reach of Twisted Advance, forcing Maokai to walk forward predictably if he wants to engage. Only step up to poke with Hymn of Valor when he hesitates, and immediately fall back. If he throws Sapling Toss into the lane brushes, reposition to the opposite side of the lane. Should he commit with Nature's Grasp, immediately counter with Crescendo to lock him down and protect your carry.

Tam profil →
Lulu

Lulu

sustain_waroutscaled Sona's ability to nullify Lulu's early aggression dictates this matchup. While Lulu relies on Glitterlance and Help, Pix! to chip away at your carry's health, your Aria of Perseverance completely neutralizes this poke. Because Lulu lacks a natural hard-engage to punish you, her early lane pressure is wasted, allowing you to comfortably scale into a late-game powerhouse where your team-wide auras easily outclass her single-target utility. Detayları gör
Lulu

Neden

Sona's ability to nullify Lulu's early aggression dictates this matchup. While Lulu relies on Glitterlance and Help, Pix! to chip away at your carry's health, your Aria of Perseverance completely neutralizes this poke. Because Lulu lacks a natural hard-engage to punish you, her early lane pressure is wasted, allowing you to comfortably scale into a late-game powerhouse where your team-wide auras easily outclass her single-target utility.

Lane etkisi

In lane, this dynamic translates to a war of attrition that Lulu cannot win. When Lulu uses Help, Pix! aggressively to poke, she leaves herself or her ADC without a shield. This creates a massive window where you can trade back with Hymn of Valor and Power Chord. Lulu is forced to play defensively, losing wave control and failing to secure the early tower pressure her kit normally demands, letting you farm safely.

Nasıl oynanır

To exploit this, always monitor Lulu's cooldowns, specifically Whimsy. If she uses it on her ally for attack speed, she cannot polymorph you, which is your green light to walk up and poke. Keep your distance to avoid double-hit Glitterlance angles. If Lulu uses Wild Growth to turn a fight, do not panic; immediately counter with Crescendo to lock down her giant target, then use Song of Celerity to kite back until her ultimate's health buff expires.

Tam profil →
Nami

Nami

sustainteamfight Sona naturally outscales Nami as the game progresses because her teamfight utility becomes unmatched. While Nami relies on the single-target bounces of Ebb and Flow, your ability to constantly cycle Aria of Perseverance provides superior, non-stop area shielding. Nami is forced to use Tidal Wave proactively to disrupt your positioning, as she cannot match your raw output once you reach your mid-game power spikes. Detayları gör
Nami

Neden

Sona naturally outscales Nami as the game progresses because her teamfight utility becomes unmatched. While Nami relies on the single-target bounces of Ebb and Flow, your ability to constantly cycle Aria of Perseverance provides superior, non-stop area shielding. Nami is forced to use Tidal Wave proactively to disrupt your positioning, as she cannot match your raw output once you reach your mid-game power spikes.

Lane etkisi

Early trades revolve around matching Nami's aggressive Ebb and Flow bounces. By using Hymn of Valor to poke from safety and mitigating her return damage with Aria of Perseverance, you prevent Nami from gaining lane control. Your inevitable scaling advantage forces Nami to take risky positions to land Aqua Prison, often leaving her vulnerable to ganks and draining her mana pool while you steadily build your lead.

Nasıl oynanır

To secure your advantage, track Nami's ultimate. Never clump with your carries, forcing her to choose between targeting you or your frontline with Tidal Wave. If she unleashes the wave, activate Song of Celerity immediately to help your allies dodge the slow. Once her ultimate is spent, aggressively cycle Aria of Perseverance and use Crescendo to lock down her exposed allies, turning her failed engagement into an easy teamfight victory.

Tam profil →
Yuumi

Yuumi

aura_valuesustain_battle This matchup tilts heavily in your favor as the game goes on due to how Yuumi's attachment mechanics work. When Yuumi uses You and Me! to latch onto her marksman, she loses the ability to block incoming skillshots. This makes her host an incredibly easy target for your Crescendo. You can consistently stun both Yuumi and her host simultaneously, completely neutralizing their defensive tools like Zoomies during crucial teamfights. Detayları gör
Yuumi

Neden

This matchup tilts heavily in your favor as the game goes on due to how Yuumi's attachment mechanics work. When Yuumi uses You and Me! to latch onto her marksman, she loses the ability to block incoming skillshots. This makes her host an incredibly easy target for your Crescendo. You can consistently stun both Yuumi and her host simultaneously, completely neutralizing their defensive tools like Zoomies during crucial teamfights.

Lane etkisi

During the laning phase, you hold the initiative. Every time Yuumi attempts to poke with Prowling Projectile, you can instantly mitigate the damage using Aria of Perseverance. Meanwhile, your Hymn of Valor pressure forces her to stay attached, preventing her from safely stepping out to trigger Bop 'n' Block. This mana starvation limits their sustain, letting your duo dictate the wave's tempo and push them under turret.

Nasıl oynanır

To secure this advantage, never waste Crescendo on solo targets; save it specifically for when Yuumi is attached to a priority target entering a skirmish. Actively watch for her to cast Final Chapter, then interrupt her team's offensive momentum with your ultimate. In lane, use the extra movement speed from Song of Celerity to dodge her Prowling Projectile, then immediately punish her host with a Hymn of Valor empowered Power Chord attack.

Tam profil →

Diğer eşleşmeler

Items to Counter Sona

Buy these items to reduce this champion's effectiveness in your games.

Putrificateur techno-chimique
Rappel mortel
Rappel mortel
Morellonomicon
Morellonomicon
Sandales de Mercure
Sandales de Mercure
Voile de la Banshee / Voile de la nuit

Bu şampiyon nasıl counterlanır

Counter açısı

Sona’e karşı koymak sadece iyileştirme önleyici yetenekler satın almaktan ibaret değildir. Asıl anahtar, onun auralarını kurmak için ihtiyaç duyduğu süreyi kesintiye uğratmaktır. Sona, dalgasının gerisinde oynamak, Q ile rakibi rahatsız etmek, Power Chord’u şarj etmek ve ardından Crescendo hazır haldeyken hedeflerin çevresinde grup halinde toplanmak ister. Bu nedenle en iyi karşı stratejiler, döngüleri kârlı hale gelmeden önce karar vermeye zorlayan şampiyonlardır: anında kancalamalar, sert angajmanlar, tek bir mesafe hatasından sonra all-in'ler veya alanı kontrol etmek yerine hayatta kalmak için mana harcamasına neden olan koridor baskısı. Sona, geride kalmadan mid aşamasına ulaşırsa, cezalandırılması çok daha zor hale gelir; çünkü her grup çatışması, iyileştirme, güçlendirmeler ve büyülerinin değerini artırır.

Patch bağlamı

Sona, özellikle maçta tam oyun stilini sergilemek için yeterli zamanı bulamadığında mağlup olur. Saldırgan destekler, hareket kabiliyetindeki eksikliğini cezalandırır; kancalı destekler, zayıf bir dalganın arkasından saldırı girişimlerini sıklıkla görmezden gelir; dayanıklılık veya saldırı odaklı destekler ise, eşyaları etkisini göstermeye başlamadan önce onun koridorunu etkisiz hale getirebilir. Bu nedenle ona karşı doğru strateji iki aşamalıdır: Erken dönemde her çalılığa dikkat etmesini sağlamak, ardından mid oyununda grup halinde düz bir çizgide Crescendo’ya doğru ilerlemekten kaçınmak. Birçok takım Sona’e karşı koridorda galip gelir ancak daha sonra, tam da onun ultisinin ve auralarının en etkili olduğu yerde, dragon’e karşı grup halinde mücadele ettikleri için maçı kaybeder.

Hızlı okuma

  • Sona’i cezalandırmak için en uygun zaman, seviye 5’e ulaşmadan ve Harmonic Echo’dan önce.
  • Hedefleri bir yığın halinde oynamayın: Crescendo, nehirde sıkışık girişleri ağır şekilde cezalandırır.
  • Sona’in manasını savunma amaçlı kullanmaya zorlamak, onun rakibi rahatsız etme, iyileşme ve koridoru temiz tutma yeteneklerini azaltır.

Counter arketipleri

Kancalar ve anında yakalamalar

Sona’in Q’yu kullanmak, Power Chord’u hazırlamak ve ADC’i aura menzilinde tutmak için küçük ileri adımlar atması gerekir. Hook’lar tam da bu küçük ileri adımları cezalandırır: tek bir mesafe hatası, onun tüm ölçeklendirme planını bozabilir. Blitzcrank, Thresh veya Pyke'in her çatışmayı kazanması gerekmez; tek yapmaları gereken, Sona'in artık rahatça poke yapamayacağı kadar yeterli bir tehdit oluşturmaktır. Çok fazla geri çekildiğinde, ADC'i koridor baskısını kaybeder; çok fazla öne çıktığında ise Crescendo'yu kullanamadan ölebilir.

Şampiyon nasıl uyum sağlamalı. Sona, minyonların arkasında oynamalı, bazı Q ile rakibe hasar verme fırsatlarını kaçırmayı göze almalı ve dalgaya dokunmadan önce yan açıları gözetlemelidir. Amacı, koridorda support’in kancasını yenmek değil, düşmanın oyununu hızlandıracak bir yakalama fırsatı vermeden oyunun erken aşamalarında hayatta kalmaktır.

Sert çatışma ve cepheden tam saldırı

Leona, Nautilus ve Rakan, Sona’in çok hızlı tepki vermesini zorunlu kılar; bu da onun temel zayıf noktasına saldırır: O, dövüşe hazırlanmak ister, anında darbeyi emmek değil. 5. seviyeye ulaşana kadar, saldırıyı engelleyecek bir Crescendo’su yoktur. Bundan sonra bile, ilk olarak vurulursa ya da hayatta kalmak için ultisini kullanmaya zorlanırsa, takımı hedefi güvence altına alması gereken kontrol aracını kaybeder. Bu eşleşmeler tehlikelidir çünkü her ward yerleştirme, koridora dönüş ve itilen dalga, anında bir kavgaya dönüşme potansiyeli taşır.

Şampiyon nasıl uyum sağlamalı. Sona, ana saldırıya hazır olmak için Exhaust'u elinde tutmalı, gerekirse ADC'den daha geride konumlanmalı ve düşmanın kitle kontrol yetenekleri aktifken dalga mücadelesine girmekten kaçınmalıdır. 5. seviyeden sonra Crescendo, iddialı bir başlangıç aramak yerine genellikle saldırıya karşılık vermelidir.

Sürdürme ve şerit etkisizleştirme

Bu destekler her zaman Sona’i doğrudan yok etmez, ancak onun poke yoluyla gerçek bir avantaj elde etme yeteneğini azaltır. Eğer Soraka, Nami, Lulu veya Seraphine küçük takasları üstlenip ikililerini sağlıklı tutarsa, Sona tekrarlanan Q atışlarıyla koridoru kolayca kazanamaz. Maç, mid'in oyununda bir değer yarışına dönüşür: kim carry'sini daha iyi korur, kim daha iyi objektif aracına sahiptir, kim rakibini yeteneklerini çok erken harcamaya zorlar. Sona için bu, kanca kadar ölümcül olmasa da çok daha incelikli bir durumdur: gerçek bir avantaj yaratamasa da serbestçe ölçekleniyormuş gibi hissedebilir.

Şampiyon nasıl uyum sağlamalı. Sona, nicelikten çok niteliğe önem vermeli: Hedefin çevresinde doğru Güç Akoru, doğru yetenek zamanlaması ve doğru Kreşendo. Eğer sadece düşmanın dayanıklılığına ayak uydurmak için yeteneklerini arka arkaya kullanırsa, yararlı bir baskı oluşturamadan manası bitme riskiyle karşı karşıya kalır.

Öncelikli matchuplar

Leona

Leona, Sona için en belirleyici eşleşmelerden biridir çünkü bu eşleşme, onun mesafe disiplinini anında sınar. Eğer Sona, Zenith Blade’e dikkat etmeden Q için öne çıkarsa, eşyaları devreye girmeden önce koridor çökebilir. Çözüm, korkarak oynamak değil, temiz oynamaktır: dalganın arkasında kalın, tam çatışma anına kadar Exhaust’u saklayın, bazı takasları kabul edin ve Leona çok derine girdiğinde çatışmanın gidişatını değiştirmek için Crescendo’yu saklayın.

Blitzcrank

Blitzcrank, Sona’in doğal hareket özgürlüğünü büyük ölçüde kısıtlıyor. O, rakibine hasar vermek için menzil içine girip çıkmak istiyor, ancak attığı her yana doğru adım bir “Rocket Grab” açısı yaratabilir. Bu nedenle bu eşleşmede en önemli unsurlar dalga pozisyonu ve çalılardır: Sona, kendisiyle Blitzcrank arasında minyonları tutarsa hayatta kalabilir ve güçlenebilir; koridor açıksa veya görüş eksikse, rakip Rocket Grab’ı kullanana kadar neredeyse hiç ileri doğru oynamamalıdır.

Ona karşı yaygın hatalar

Ona karşı yaygın hatalar

  • Ona baskı yapmadan 5. seviyeye ulaşmasına izin vermek, sonra da ilk dragon’de Crescendo’dan şikayet etmek.
  • Crescendo etkisindeyken ve takım bir arada iken, bir hedefi dar bir koridordan zorla geçirmek.
  • Sona’in iyileştirmesini engellemeden tüm kitle kontrol yeteneklerini ona uygularken, aynı zamanda hızlanıp ultisiyle karşılık veriyor.

  • Sona’e karşı koridorda üstünlük sağladım, ancak o aura eşyalarını almadan önce oyunun temposunu hızlandıramadım.

  • Anti-heal satın alıp bunun yeterli olduğunu düşünmek, oysa onun güçlendirmeleri, kitle kontrolü ve büyü hızı hâlâ aktif durumda.

Koç notları

  • Sona’e karşı en etkili strateji genellikle dövüş başlamadan önce uygulanır: görüş alanını kısıtlayın, dalgayı açın, çalılığı kontrol altına alın, ardından Q için yaklaştığı anda çatışmaya girin.
  • Sona’i erken aşamada ortadan kaldıramıyorsanız, en azından onu savunma amaçlı mana harcamaya zorlayın. Bir hedef öncesinde manası kalmayan bir Sona, tehdit gücünün büyük bir kısmını yitirir.

FAQ

Hangi tür support, Sona’i en iyi şekilde dengeler?

Auralarını kurmadan önce ona hasar veren destekler en tehlikelidir. Blitzcrank, Thresh veya Pyke gibi kancalar, tek bir mesafe hatasını bir öldürmeye dönüştürebilir. Leona, Nautilus veya Rakan gibi sert angajman destekleri, onu anında karşılık vermeye zorlarken, o ise savaşa hazırlanmayı tercih eder. Sürdürme destekleri de onu etkisiz hale getirebilir, ancak onu doğrudan yenemezler: esas olarak, onun poke'larının gerçek bir avantaj yaratmasını engellerler.

Anti-heal, Sona’i yenmek için yeterli mi?

Hayır. Anti-heal, onun değerinin önemli bir kısmını azaltır, ancak Sona sadece iyileştirme yoluyla kazanmaz. Aynı zamanda güçlendirmeler, hareket hızı, uzaktan saldırı, büyüler ve Crescendo da sağlar. Anti-heal satın alsanız da yine de gruplar halinde onun ultisine doğru ilerlerseniz, o yine de çatışmanın sonucunu belirleyebilir. Anti-heal, support için gerçek bir strateji olmalıdır: onu erken aşamada cezalandırın, objektif girişlerini kontrol edin ve birkaç büyü döngüsü yapmasını engelleyin.

Sona’e karşı hedefleri nasıl oynamalısınız?

Crescendo aktifken beş şampiyonun dar bir geçitte toplanarak ona istediği çatışmayı yaşatmaktan kaçınmalısınız. Sona'e karşı, farklı açılardan saldırıya geçmek, ortaya çıkmadan önce görüş alanına baskı uygulamak, konumunu tehdit etmek ve saldırıya geçmeden önce onun önemli bir büyüsünü kullanmasını beklemek daha iyidir. Eğer önden saldırmak zorunda kalırsanız, takımınızın onun önünde koni şeklinde sıralanmadığından emin olun; aksi takdirde, ultisi hedefleri arkadan bile ele geçirebilir.

Sona neden bazen koridorda zayıf görünürken, daha sonra güçlü bir performans sergiliyor?

Gücü tek bir şerit büyüsünde yoğunlaşmamıştır. Oyunun erken aşamalarında kırılgan, manaya bağımlı ve hızlı çatışmalara karşı savunmasızdır. Daha sonraki aşamalarda ise büyüleriyle eşyaları birleşir, auraları birçok müttefiki etkiler ve Crescendo, hedef bölgeleri tehdit eder. Öldürme fırsatlarını kaçırmamış bir Sona, on dakika boyunca sessiz kalabilir, ancak çatışmalar grup halinde ve uzun süreli hale geldiğinde aşılması son derece zor bir rakip haline gelir.
































