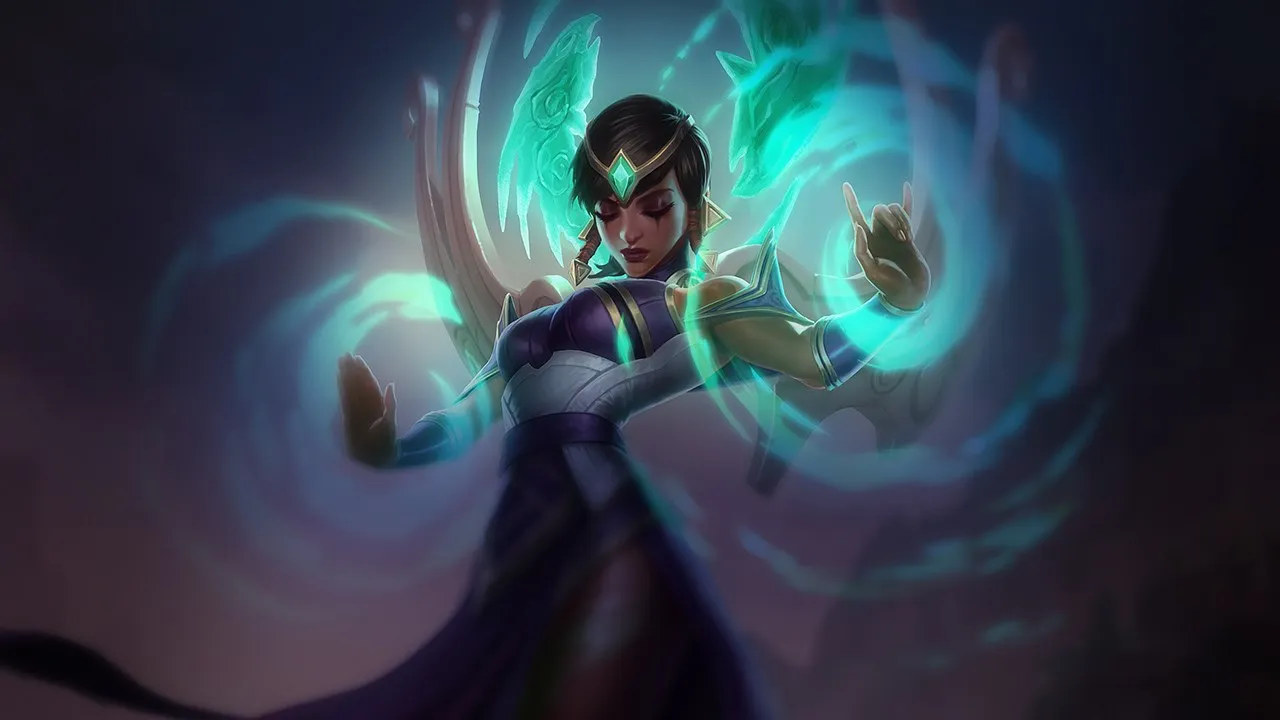
Karma, poke ve kalkanlama yoluyla takasların temposunu kontrol etmeye güvenir. Savaşları hızlıca başlatabilen veya ani burst hasarı verebilen kompozisyonlar onun etkisini önemli ölçüde azaltır. Mesafeyi koruyacak ve büyü döngülerini tekrarlayacak alan bulamadığında, etkisi hızla kaybolur.
★ SUPPORT · MIDTier S
HASAR
UTIL
TANK
DIFF
Win50.6%#35 · ↑6pt
Pick4.7%#17
Ban0.3%#115
Karma CT — Wild Rift Counter Rehberi
Hard Counter
2
Bu şampiyonlar, seninkini doğrudan geride bırakan bir build ve oynanış tarzına sahip, bu da lane kontrolünü ve farmı son derece zorlaştırabilir. Yetenekleri temel güçlerini etkisiz hale getirebilir ya da her zamanki planını oynamaya çalıştığın anda seni cezalandırabilir. Bu matchuplarda amaç genellikle hataları en aza indirmek ve doğrudan çatışmanın dışında çözümler bulmaktır.
Savaş başlatmaTam saldırıPyke ölümcül bir tehdit oluşturur çünkü Bone Skewer seni güvenli menzilden dışarı çekebilir ve hemen ardından Phantom Undertow uzun süreli bir stun'ı garantiler. Inspire geçici hasar azaltması sağlasa da, canın Death from Below'un infaz eşiğine düştüğü anda tamamen aşılır. Doğal kırılganlığın seni Pyke'ın yüksek hasarlı burst'ü için birincil hedef yapar.Pyke build →Detayları gör
Pyke
Neden
Pyke ölümcül bir tehdit oluşturur çünkü Bone Skewer seni güvenli menzilden dışarı çekebilir ve hemen ardından Phantom Undertow uzun süreli bir stun'ı garantiler. Inspire geçici hasar azaltması sağlasa da, canın Death from Below'un infaz eşiğine düştüğü anda tamamen aşılır. Doğal kırılganlığın seni Pyke'ın yüksek hasarlı burst'ü için birincil hedef yapar.
Lane etkisi
Bu sürekli infaz tehdidi seni son derece savunmacı oynamaya ve ilk wave'lerden itibaren lane priority'sinden vazgeçmeye zorlar. Bush'lardan gelecek bir hook riskine girmeden Inner Flame ile poke atmak için güvenle öne çıkamazsın. Sonuç olarak AD carry'n kule altında baskı görür; sen güvenle wave temizlemeye sıkışmışken Pyke, Ghostwater Dive ile roam yaparak mid laner'ına terör estirebilir.
Nasıl oynanır
Hayatta kalmak için Bone Skewer'ı engellemek üzere her zaman minion wave'inin arkasında konumlan ve ward'sız bush'ların yakınında asla yürüme. Focused Resolve'u kesinlikle sadece disengage aracı olarak tutmalısın; Pyke Phantom Undertow ile öne atılırsa, kaçamadan ya da infaz edemeden önce onu köklemek için hemen bağla. Pyke Ghostwater Dive ile görüş alanından kaybolursa müttefiklerine hemen ping at ve Pyke'ı kovalamak yerine wave'i push etmeye odaklan.
Geç oyun gücüUzaktan hasarKarma'nın geleneksel erken baskısı etkisiz kalır çünkü Senna'nın Piercing Darkness'ı, ADC'sini iyileştirirken aynı anda sana hasar vererek Inner Flame poke'unu doğrudan karşılar. Lane ilerledikçe Senna'nın Basic Attack pasifi ruh toplamasına izin verir ve ona kalıcı menzil ile saldırı hasarı kazandırır. Bu scaling farkı, Senna'nın poke'unun kısa sürede senin Focused Resolve bağ menzilini geçtiği anlamına gelir; onu güvenle kilitleyemezsin.Senna build →Detayları gör
Senna
Neden
Karma'nın geleneksel erken baskısı etkisiz kalır çünkü Senna'nın Piercing Darkness'ı, ADC'sini iyileştirirken aynı anda sana hasar vererek Inner Flame poke'unu doğrudan karşılar. Lane ilerledikçe Senna'nın Basic Attack pasifi ruh toplamasına izin verir ve ona kalıcı menzil ile saldırı hasarı kazandırır. Bu scaling farkı, Senna'nın poke'unun kısa sürede senin Focused Resolve bağ menzilini geçtiği anlamına gelir; onu güvenle kilitleyemezsin.
Lane etkisi
Yıpratma savaşını sürekli kaybedeceksin. Inner Flame ile denediğin her trade Senna'nın sustain'i tarafından silinir; Senna'nın üstün menzili ise seni yavaş yavaş kule altına iter. Bu, kule altında carry'ni Senna'nın uzun menzilli taciz atışlarından korumak için Inspire kullanman gereken savunmacı bir wave kontrol tarzına zorlar; lane priority'sinden vazgeçersin ve vizyon almak ya da jungler'ına yardım etmek için roam yapman engellenir.
Nasıl oynanır
Hayatta kalmak için tamamen wave'i kulenin yakınında freeze etmeye odaklan. Mantra'nı kesinlikle sadece alan etkili kalkan için Inspire'ı güçlendirmek üzere sakla; böylece Senna'nın Dawning Shadow burst'lerini ve poke'unu etkisiz kılarsın. Senna Last Embrace'i ıskalamadıkça Focused Resolve ile agresif kök peşinde koşma. Senna lane'i freeze ederse ya da seni çok hızlı scale ile geçerse poke denemelerini bırak ve carry'nin güvenle farm yapması için tamamen savunmacı bir kalkan botu gibi oyna.
Bu şampiyonlar, matchup'ı tamamen oynanmaz hale getirmeden genellikle çatışmada avantaj sağlayan araçlara sahiptir. Daha fazla menzilleri, senin saldırılarını daha iyi karşılama kapasiteleri veya engage'lerine karşılık verecek daha fazla yolları olabilir. Yaklaşımını buna göre uyarlaman ve dövüşü kabul edeceğin anları dikkatle seçmen gerekir.
Geri çekilmeKorumaSenin saldırı baskın Focused Resolve kökü ile kill kurmaya dayanır ama Morgana bu aracı tamamen etkisiz kılar. Kendini Morgana'ya ya da carry'sine bağladığın an, Morgana büyü hasarını emmek ve CC'yi tamamen iptal etmek için reaktif olarak Black Shield atabilir. Bu seni, ana CC'n kapalıyken Dark Binding ile counter-engage'e karşı savunmasız bırakır.Morgana build →Detayları gör
Morgana
Neden
Senin saldırı baskın Focused Resolve kökü ile kill kurmaya dayanır ama Morgana bu aracı tamamen etkisiz kılar. Kendini Morgana'ya ya da carry'sine bağladığın an, Morgana büyü hasarını emmek ve CC'yi tamamen iptal etmek için reaktif olarak Black Shield atabilir. Bu seni, ana CC'n kapalıyken Dark Binding ile counter-engage'e karşı savunmasız bırakır.
Lane etkisi
Focused Resolve bu kadar kolay karşılandığı için trade'leri güvenilir şekilde başlatamazsın. Inner Flame ile poke atmak için öne çıkarsan minion wave'inin üzerinden Dark Binding'e yakalanma riskini alırsın. Bu seni Tormented Shadow hasarını emmek için Inspire'a güvenmen gereken savunmacı bir duruşa zorlar; wave kontrolünü ve lane priority'sini Morgana'nın üstün zone denial'ına yavaş yavaş bırakırsın.
Nasıl oynanır
Hayatta kalmak için Black Shield'ın devasa cooldown'unu hesaba katarak oynamalısın. Yüksek hasar tehdidi için Mantra ile güçlendirilmiş bir Inner Flame atarak Black Shield'ı yemle, sonra Morgana'nın kalkanı gidene kadar Focused Resolve'unu tut. Dark Binding'i engellemek için her zaman minion'larının arkasında kal ve Morgana ult'li dövüşü zorlamaya çalıştığında Soul Shackles'tan kaçmak için Inspire'ın hareket hızını kullan.
Uzaktan hasarGeri çekilmeBu matchup, Zyra'nın bitki örtüsünün poke'unu nasıl bozduğuna bağlıdır. Inner Flame ile taciz etmeye çalıştığında Zyra, Rampant Growth'u Deadly Spines ya da Grasping Roots ile birleştirerek reaktif biçimde bitki çıkarabilir. Bu bitkilerin fiziksel hitbox'ları olduğu için mermini Zyra'ya ya da ADC'sine ulaşmadan önce keser ve emer; lane baskısı için ana aracını ve Mantra cooldown azaltmanı tamamen etkisiz kılar.Zyra build →Detayları gör
Zyra
Neden
Bu matchup, Zyra'nın bitki örtüsünün poke'unu nasıl bozduğuna bağlıdır. Inner Flame ile taciz etmeye çalıştığında Zyra, Rampant Growth'u Deadly Spines ya da Grasping Roots ile birleştirerek reaktif biçimde bitki çıkarabilir. Bu bitkilerin fiziksel hitbox'ları olduğu için mermini Zyra'ya ya da ADC'sine ulaşmadan önce keser ve emer; lane baskısı için ana aracını ve Mantra cooldown azaltmanı tamamen etkisiz kılar.
Lane etkisi
Inner Flame'den güvenilir poke olmadan minion wave'i için kolayca mücadele etme ya da Zyra'yı geri itme yeteneğini kaybedersin. Zyra, Garden of Thorns ile seni ve carry'ni rahatça kule altında zone eder. Focused Resolve'u isabet ettirmek için yürüyerek yaklaşmaya çalışırsan kendini Zyra'nın Grasping Roots counter-engage'ine açarsın; Zyra'nın spitter'ları canını törpülerken Stranglethorns'tan gelen tam bir burst'e karşı savunmasız kalırsın.
Nasıl oynanır
Hayatta kalmak için açını değiştir. Inner Flame'i bitkilerin filizlendiği minion wave'inin tam ortasından doğrudan atmak yerine, skillshot'ını wave'in dış kenarlarına denk gelecek şekilde yönlendir ya da Zyra'nın Rampant Growth tohumları cooldown'dayken bekle. Inspire'ı trade hızı için kullanmak yerine özellikle carry'ni bitkilerin auto-attack'larından korumak için sakla. Grasping Roots'a yakalanırsan, kendini iyileştirmek ve Zyra'nın ult burst'ünden sağ çıkmak için hemen Transcendent Embrace'i Focused Resolve ile birleştirerek etkinleştir.
TakasCan yenilemeNami'nin trade verimliliği onu zorlu bir rakip yapıyor, çünkü Ebb and Flow iki ucu keskin bir kılıç gibi çalışarak ADC'sini iyileştirirken sana hasar veriyor. Bunu Inspire ile azaltmaya çalışırsan, onun bounce'unun değerinin yalnızca bir kısmını engellersin. Onun yaklaşmasını cezalandırmak için Inner Flame'i istikrarlı biçimde isabet ettirmedikçe, onun saf sustain'i doğal olarak senin kalkanlarını geride bırakır ve seni ve nişancını kısa, tekrarlayan çatışmalarda yavaş yavaş eritir.Nami build →Detayları gör
Nami
Neden
Nami'nin trade verimliliği onu zorlu bir rakip yapıyor, çünkü Ebb and Flow iki ucu keskin bir kılıç gibi çalışarak ADC'sini iyileştirirken sana hasar veriyor. Bunu Inspire ile azaltmaya çalışırsan, onun bounce'unun değerinin yalnızca bir kısmını engellersin. Onun yaklaşmasını cezalandırmak için Inner Flame'i istikrarlı biçimde isabet ettirmedikçe, onun saf sustain'i doğal olarak senin kalkanlarını geride bırakır ve seni ve nişancını kısa, tekrarlayan çatışmalarda yavaş yavaş eritir.
Lane etkisi
Nami, Ebb and Flow ile poke'unu kolayca etkisiz hale getirebildiği için wave'leri düşüncesizce itemezsin. Inner Flame'i ıskalamak, Tidecaller's Blessing ile güçlenen Nami'nin carry'sine agresif oynaması için yeşil ışık yakar. Bu sürekli can farkı seni erken recall atmaya zorlar ve erken oyundaki kule baskını elinden alınır. Poke atmaya çalışırken Aqua Prison'a yakalanırsan, basit bir trade ölümcül bir engage'e dönüşür ve savunma amaçlı Mantra kullanmaya mecbur kalırsın.
Nasıl oynanır
Hayatta kalmak için carry'nle paralel dur, ama Ebb and Flow'un aranızda sekememesi için yeterince uzak ol. Inner Flame'i yalnızca Nami trade atmak için öne çıktığında kullan; böylece iyileşmesi için ağır bir mana bedeli öder. Aqua Prison'ı ıskalarsa, onu hemen Focused Resolve ile kilitle ve savunma amaçlı Tidal Wave'ini kullanmaya zorla. Canın geride kalırsa, Mantra'nı yalnızca Inspire için sakla; böylece tüm ikilini onun gelen dalgasına karşı kalkanlarsın.
Geç oyun gücüUzaktan hasarErken oyundaki baskın, Mantra ile güçlendirilmiş Inner Flame'i isabet ettirip Sona'nın canını götürmene dayanır. Ancak Sona, Aria of Perseverance'ı yükselttikçe sürekli iyileştirmesi ve kalkanlaması senin poke hasarını etkisiz kılar. Crescendo'yu açtığında, teamfight'ı belirleyen CC'si Inspire kalkanlarının faydasını fersah fersah geride bırakır ve maç ilerledikçe oyunun gidişatı tamamen onun lehine döner.Sona build →Detayları gör
Sona
Neden
Erken oyundaki baskın, Mantra ile güçlendirilmiş Inner Flame'i isabet ettirip Sona'nın canını götürmene dayanır. Ancak Sona, Aria of Perseverance'ı yükselttikçe sürekli iyileştirmesi ve kalkanlaması senin poke hasarını etkisiz kılar. Crescendo'yu açtığında, teamfight'ı belirleyen CC'si Inspire kalkanlarının faydasını fersah fersah geride bırakır ve maç ilerledikçe oyunun gidişatı tamamen onun lehine döner.
Lane etkisi
İlk birkaç seviyede wave'in konumunu kolayca belirleyebilir ve agresif Inner Flame splash hasarıyla Sona'yı kulenin altına zorlayabilirsin. Ama Sona Crescendo'ya erişmeden önce ciddi bir can avantajı sağlayamazsan, lane durağanlaşır. Aria of Perseverance'tan gelen bitmeyen toparlanması trade'leri kârsız hale getirir, push'unu etkisiz kılar ve ölümcül recall riski almadan güvenle scale etmesine izin verir.
Nasıl oynanır
Erken seviye avantajından tamamen yararlan: Sona, Power Chord'u tetiklemek için öne çıktığında Mantra'yı Inner Flame ile iç içe kullan. Yanlış pozisyon alırsa onu Focused Resolve ile kilitle. Sona Crescendo'yu açtığında oyun tarzını değiştirmelisin: agresif trade'lerin peşinden koşmayı bırak, bunun yerine Sona'nın Hymn of Valor poke'unu kalkanlamak için Inspire'ı beklet. Onun ultimate'inden çifte stun yememek için carry'nle sıkı gruplanmaktan kaçın.
Savaş başlatmaKorumaMaokai'nin hedef seçmeli Twisted Advance'ı, Karma'nın poke avantajını tamamen aşar. Inspire bir kalkan ve hareket hızı artışı sağlasa da, bu ekstra hız hedef alınamaz, hedefli ve root'u garantileyen bir dash'e karşı işe yaramaz. Maokai mesafeyi başarıyla kapattığında, Bramble Smash ile Focused Resolve'u kolayca bozabilir; böylece trade'i çeviremezsin ya da onun kilitlemesinden kolayca kurtulamazsın.Maokai build →Detayları gör
Maokai
Neden
Maokai'nin hedef seçmeli Twisted Advance'ı, Karma'nın poke avantajını tamamen aşar. Inspire bir kalkan ve hareket hızı artışı sağlasa da, bu ekstra hız hedef alınamaz, hedefli ve root'u garantileyen bir dash'e karşı işe yaramaz. Maokai mesafeyi başarıyla kapattığında, Bramble Smash ile Focused Resolve'u kolayca bozabilir; böylece trade'i çeviremezsin ya da onun kilitlemesinden kolayca kurtulamazsın.
Lane etkisi
Bu etkileşim seni son derece savunmacı bir lane aşamasına zorlar; agresif şekilde Inner Flame poke'u atmaya çalışamazsın. Maokai, brush kontrolünü sağlamak için Sapling Toss kullanır ve onu güvenle zoning yapmanı engeller. Fazla öne çıkarsan, hızlı bir Twisted Advance can barını eriten yıkıcı trade'lere yol açar, seni erken recall'a zorlar ve Mantra cooldown azaltmalarını güvenle farm etme imkanını elinden alır.
Nasıl oynanır
Hayatta kalmak için Inner Flame'in maksimum menziline eşit sıkı bir mesafeyi koru. Maokai onu çoktan boşa harcamadıysa asla Twisted Advance'ın menziline girme. Carry'nin üstüne atlamayı başarırsa, hemen Focused Resolve ile onu bağlamaya çalışma, çünkü Bramble Smash seni böler; bunun yerine hemen Mantra ile güçlendirilmiş bir Inspire kullanıp müttefikini gelen burst'e karşı kalkanla, sonra geri çekil.
Savaş başlatmaTam saldırıLeona lane baskına doğrudan tehdit oluşturur, çünkü Zenith Blade'i Inner Flame'in yarattığı mesafeyi aşar. Bu gap-closer'ı isabet ettirdiğinde, müttefikini hemen Shield of Daybreak ile kilitleyebilir ve Sunlight'ı tetikleyebilir. Bu ani engage, carry'ni kurtarmak için Mantra'nı savunma amaçlı bir Inspire'a harcamaya zorlar ve poke için Transcendent Embrace'i kullanma imkanını elinden alır.Leona build →Detayları gör
Leona
Neden
Leona lane baskına doğrudan tehdit oluşturur, çünkü Zenith Blade'i Inner Flame'in yarattığı mesafeyi aşar. Bu gap-closer'ı isabet ettirdiğinde, müttefikini hemen Shield of Daybreak ile kilitleyebilir ve Sunlight'ı tetikleyebilir. Bu ani engage, carry'ni kurtarmak için Mantra'nı savunma amaçlı bir Inspire'a harcamaya zorlar ve poke için Transcendent Embrace'i kullanma imkanını elinden alır.
Lane etkisi
Zenith Blade'den korkmak seni ADC'nin paralelinde ya da gerisinde durmaya, wave kontrolünü bırakmaya ve Inner Flame ile poke atmayı bırakmaya zorlar. Leona bush hakimiyetini kolayca sağlar ve Eclipse'i küçük hasarları umursamamak için kullanır. Kulenin altında sıkışıp lane priority'sini kaybederken cs için çabalarsınız; bu da Leona Solar Flare'i açtığında koordineli bir dive'a karşı savunmasız kalmanıza yol açar.
Nasıl oynanır
Zenith Blade'in açısını bozmak için minion wave'inin çaprazında, arkasında konumlan. Focused Resolve'u asla poke için harcama; Leona, Shield of Daybreak aktifken yürüyerek yaklaşmaya çalışırsa onu root'lamak için beklet. Kılıcını ADC'ne isabet ettirirse, hemen kendini toparla: tüm saldırı planlarını bırak, Sunlight hasarını emmesi için müttefikine anında Mantra ile güçlendirilmiş bir Inspire at ve hız artışını güvenle geri çekilmek için kullan.
Bu eşleşmeler her şeyden önce yürütme düellosudur: her iki şampiyon da avantaj elde etmek için gerçek yollara sahiptir. Kaçırılan önemli bir yetenek, doğru öngörülen bir engage ya da tek bir pozisyon hatası düelloyu bir tarafa çevirebilir. Matchup'ı bilmek ve doğru anları tanımak burada özellikle önemlidir.
Uzaktan hasarHareketlilikBu matchup yüksek riskli bir refleks oyunudur. Blitzcrank, seni yıkıcı bir Power Fist ve Static Field burst'üne çekmek için tamamen Rocket Grab'i isabet ettirmeye güvenir. Senin ana savunman, Inspire'dan gelen anlık hareket hızıdır. Hızlı tepki verirsen, onun kancasını kolayca yemleyip yan adımla atlatabilirsin. Ancak kalkanının cooldown'unu yanlış yönetirsen ya da hız olmadan yakalanırsan, anında silinirsin.Blitzcrank build →Detayları gör
Blitzcrank
Neden
Bu matchup yüksek riskli bir refleks oyunudur. Blitzcrank, seni yıkıcı bir Power Fist ve Static Field burst'üne çekmek için tamamen Rocket Grab'i isabet ettirmeye güvenir. Senin ana savunman, Inspire'dan gelen anlık hareket hızıdır. Hızlı tepki verirsen, onun kancasını kolayca yemleyip yan adımla atlatabilirsin. Ancak kalkanının cooldown'unu yanlış yönetirsen ya da hız olmadan yakalanırsan, anında silinirsin.
Lane etkisi
Wave senin fiziksel kalkanın olur. Rocket Grab'i engellemek için sürekli minion'ların arkasında konumlanmalı, aynı zamanda herhangi bir dövüşten önce onun Mana Barrier'ını devre dışı bırakmak için Blitzcrank'ı Inner Flame ile poke'lamaya çalışmalısın. Blitzcrank, wave'i aşıp ileri atılmak için Overdrive'ı aktifleştirirse, Power Fist'inin knock-up'ından kaçınmak için hemen geri çekilmek zorunda kalırsın ve lane baskısını geçici olarak bırakırsın.
Nasıl oynanır
Küçük poke'lar için Inspire'ı asla savunma amaçlı kullanma; hareket hızını yalnızca Rocket Grab'den kaçmak ya da Blitzcrank Overdrive'ı aktifleştirdiğinde ondan kaçmak için sakla. Onun kancası uzun cooldown'dayken agresif biçimde öne yürüyüp onu Focused Resolve ile bağla ve Inner Flame spamle. Kancaya yakalanırsan, Static Field burst'ünden sağ çıkmak için hemen burst heal'ı için Mantra ile güçlendirilmiş Focused Resolve'u kendine at.
Uzaktan hasarKalkanlarBu lane'in dengesi, Braum'un Unbreakable'ı senin Transcendent Embrace'ine karşı nasıl kullandığına bağlıdır. Braum'un nişancısını poke'lamak için Inner Flame'i güçlendirdiğinde, Braum'un kalkanıyla verdiği hızlı bir tepki mermiyi tamamen boşa çıkarır ve patlayıcı alanın onun takımının üzerinde patlamasını engeller. Bu etkileşim matchup'ı bedava lane-bully senaryosundan, onun savunma duvarını yemlemeye dayalı taktik bir mücadeleye çevirir.Braum build →Detayları gör
Braum
Neden
Bu lane'in dengesi, Braum'un Unbreakable'ı senin Transcendent Embrace'ine karşı nasıl kullandığına bağlıdır. Braum'un nişancısını poke'lamak için Inner Flame'i güçlendirdiğinde, Braum'un kalkanıyla verdiği hızlı bir tepki mermiyi tamamen boşa çıkarır ve patlayıcı alanın onun takımının üzerinde patlamasını engeller. Bu etkileşim matchup'ı bedava lane-bully senaryosundan, onun savunma duvarını yemlemeye dayalı taktik bir mücadeleye çevirir.
Lane etkisi
Güçlendirilmiş Inner Flame'ini Unbreakable'a harcarsan, tüm lane baskını kaybedersin. Ana tehdidin olmadan Braum'un ADC'si güvenle farm atabilir, Braum ise Winter's Bite'ı isabet ettirmeye çalışmak için Stand Behind Me ile agresif biçimde öne atılabilir. Poke fırsatını kaçırmak onların üzerinde Concussive Blows yığmasını sağlar ve menzil avantajını ölümcül, yavaşlatma destekli bir engage'e çevirir.
Nasıl oynanır
Çapraz atış açıları yaratmak için minion wave'inin ortasından kaydırılmış dur; böylece Braum, Inner Flame'ini engellemek ile ADC'sini farklı bir açıdan korumak arasında seçim yapmak zorunda kalır. Braum'un Unbreakable'ı hazırken asla Transcendent Embrace combo'nu kullanma; bunun yerine yürüyerek yaklaş ve onun kalkanını basic attack'larla yemle. Braum fazla ileri giderse, Winter's Bite'ı emmek için Inspire kullan ve geri çekilmeye zorlamak için onu Focused Resolve ile bağla; burst'ünü harcamadan.
Uzaktan hasarHareketlilikBu matchup, Karma'nın Galio'nun engage fırsatlarını etkisiz kılma yeteneği etrafında döner. Galio, Justice Punch ve Shield of Durand ile senin carry'ni kilitlemeye çalışırken, Inspire'dan gelen kalkan ve hareket hızı patlaması müttefikinin kolayca tepki vermesini sağlar. Hızlarını artırarak, müttefikin Shield of Durand'ın genişleyen taunt yarıçapından kaçabilir ve Winds of War'un yavaş hareket eden hasarından zahmetsizce yan adım atabilir.Galio build →Detayları gör
Galio
Neden
Bu matchup, Karma'nın Galio'nun engage fırsatlarını etkisiz kılma yeteneği etrafında döner. Galio, Justice Punch ve Shield of Durand ile senin carry'ni kilitlemeye çalışırken, Inspire'dan gelen kalkan ve hareket hızı patlaması müttefikinin kolayca tepki vermesini sağlar. Hızlarını artırarak, müttefikin Shield of Durand'ın genişleyen taunt yarıçapından kaçabilir ve Winds of War'un yavaş hareket eden hasarından zahmetsizce yan adım atabilir.
Lane etkisi
Inspire'ı doğru döngüye soktuğunda, Galio minion wave'ine Colossal Smash kullanmaya kalktığında Inner Flame'den ağır poke yemek zorunda kalır. Ancak kalkanın zamanlamasını yanlış yaparsan, Galio seni kilitlemek için Shield of Durand'ı serbestçe channel edebilir. Bu, tek bir kaçırılan engage'in ya da boşa harcanmış savunma cooldown'unun push'u ve kule baskısını tamamen değiştirdiği yüksek riskli bir lane yaratır.
Nasıl oynanır
Inspire'ı basit trade kalkanlaması için asla gelişigüzel basma; her zaman Galio'nun Justice Punch animasyonuna tepki vermek için sakla. Galio'yu Winds of War ile push yapmak ile seni poke'lamak arasında seçim yapmaya zorlamak için minion wave'ine çapraz dur. Galio Flash'la Shield of Durand taunt'ı atmayı başarırsa, hemen Mantra'yı Focused Resolve ile birlikte aktifleştirip onu yerine root'la ve ilk burst hasarını geri iyileştir.
Uzaktan hasarBu matchup hızla bir yıpratma savaşına dönüşür, çünkü Milio'nun senin ana poke'unu etkisiz kılacak mükemmel aracı vardır. Mantra ile güçlendirilmiş bir Inner Flame her fırlattığında, Milio carry'sini kalkanlamak ve burst'ü emmek için anında Warm Hugs kullanabilir. Onun savunma araçları senin saldırı ritmine birebir karşılık geldiği için, saf agresiflik çoğu zaman boşa giden mana ile sonuçlanır ve lane'i eşit bir farm lane'ine çevirir.Milio build →Detayları gör
Milio
Neden
Bu matchup hızla bir yıpratma savaşına dönüşür, çünkü Milio'nun senin ana poke'unu etkisiz kılacak mükemmel aracı vardır. Mantra ile güçlendirilmiş bir Inner Flame her fırlattığında, Milio carry'sini kalkanlamak ve burst'ü emmek için anında Warm Hugs kullanabilir. Onun savunma araçları senin saldırı ritmine birebir karşılık geldiği için, saf agresiflik çoğu zaman boşa giden mana ile sonuçlanır ve lane'i eşit bir farm lane'ine çevirir.
Lane etkisi
Bu kalkan-poke dinamiği erken can avantajı elde etmeni engeller ve wave'i nötr tutar. Cozy Campfire sürekli iyileşme ve menzil sağladığı için trade denemelerin nadiren işe yarar. Hiçbir ikili recall ya da dive'ı kolayca zorlayamaz; yani lane, mana havuzunu kimin daha iyi yönettiğine ve savunma araçlarının kapalı olduğu nadir anlardan kimin yararlandığına göre belirlenir.
Nasıl oynanır
Bu çıkmazı kırmak için Mantra'yı harcamadan önce Warm Hugs'ı yemlemelisin. Basic attack'larla tehdit etmek için agresifçe yürü ve Milio'yu kalkanlarını erken kullanmaya zorla. Milio'nun kalkanları cooldown'a girer girmez hemen Inner Flame'ini at. Yanlış pozisyon alırsa onu Focused Resolve ile kilitle, ama bağını bozmak için Ultra Mega Fire Kick kullanırsa geri çekilmeye hazır ol. Milio'nun müttefikleri Fired Up! pasifiyle karşılık vermeye çalıştığında carry'ni korumak için Inspire'ı sakla.
Savaş başlatmaKorumaBu matchup, kanca menzili çevresinde saf bir refleks ve pozisyon testidir. Karma, Thresh'in Death Sentence'ini yemleyip yan adımla atlatmak için Inspire'dan gelen ani hareket hızı patlamasına güvenir. Ancak Karma hareketini yanlış hesaplarsa ya da onu Focused Resolve ile kilitlemeye çalışırsa, Thresh onu geri itip mesafe eşiğini bozmak için Flay kullanarak onun bağını kolayca kesebilir.Thresh build →Detayları gör
Thresh
Neden
Bu matchup, kanca menzili çevresinde saf bir refleks ve pozisyon testidir. Karma, Thresh'in Death Sentence'ini yemleyip yan adımla atlatmak için Inspire'dan gelen ani hareket hızı patlamasına güvenir. Ancak Karma hareketini yanlış hesaplarsa ya da onu Focused Resolve ile kilitlemeye çalışırsa, Thresh onu geri itip mesafe eşiğini bozmak için Flay kullanarak onun bağını kolayca kesebilir.
Lane etkisi
Bu lane'de baskıyı minion wave'inin konumu belirler. Karma sürekli push yapıp Inner Flame ile rahatsız etmek ister; böylece kanca açılarının kısıtlı olduğu kulenin altına Thresh'i iter. Ancak Karma fazla öne çıkarsa, Dark Passage fener'iyle hızlı bir gank'e karşı savunmasız kalır. Tek bir başarılı Death Sentence can barı dengesini tamamen değiştirir ve Karma'yı savunmada oynamaya, lane priority'sini bırakmaya zorlar.
Nasıl oynanır
Bu lane'i kazanmak için, Thresh Flay'i çoktan boşa harcamış ya da sen heal'ı garantilemek için Mantra'yı Transcendent Embrace ile güvenle aktifleştirmiş olmadıkça asla Focused Resolve kullanma. Inspire'ı rastgele poke kalkanlaması için kullanmak yerine her zaman Death Sentence'ın hazırlık animasyonuna tepki vermek için beklet. Thresh kancasını ıskalarsa, onun uzun cooldown penceresinde onu Inner Flame ile cezalandırmak için hemen minion wave'inin ilerisine adım at.
Savaş başlatmaKorumaBu lane saf bir refleks ve mesafe testidir. Nautilus seni kilitlemek ister, ama senin mobilitenin onun en kötü düşmanıdır. Matchup, Dredge Line'ından yan adım atmak için Inspire'ı reaktif biçimde kullanıp kullanamayacağına bağlıdır. Nautilus'un çapası ıskalarsa, Nautilus senin Inner Flame poke'una karşı çok savunmasız kalır; ama seni kancalarsa, Staggering Blow ve Titan's Wrath kırılgan savunmanı tamamen ezer.Nautilus build →Detayları gör
Nautilus
Neden
Bu lane saf bir refleks ve mesafe testidir. Nautilus seni kilitlemek ister, ama senin mobilitenin onun en kötü düşmanıdır. Matchup, Dredge Line'ından yan adım atmak için Inspire'ı reaktif biçimde kullanıp kullanamayacağına bağlıdır. Nautilus'un çapası ıskalarsa, Nautilus senin Inner Flame poke'una karşı çok savunmasız kalır; ama seni kancalarsa, Staggering Blow ve Titan's Wrath kırılgan savunmanı tamamen ezer.
Lane etkisi
Nautilus, kanca tehdidi için lane bush'ını ele geçirmeye çalışır ve AD carry'ni savunmada oynamaya zorlar. Dredge Line'ı ıskalamak lane baskısını tamamen tersine çevirir; yürüyüp menzil avantajını kullanabilirsin. Ancak yakalanırsan, Riptide ve Depth Charge'ından gelen devasa crowd control zinciri erken summoner spell'lerini harcamana, recall zamanlamanı bozmana ve kulenin açıkta kalmasına yol açar.
Nasıl oynanır
Dredge Line'ını engellemek için seninle Nautilus arasında bir minion wave'i tut. Nautilus'un çapası cooldown'da olmadıkça Inspire'ı asla saldırı için kullanma; skillshot'larından anında kaçmak için o hareket hızı patlamasının hazır olması gerekir. Seni tehdit etmek için wave'in ötesine yürürse, ilerleyişini yavaşlatmak için hemen Inner Flame at; Depth Charge'ı sana isabet ettirmeyi başarırsa, onu root'lamak ve onun takip eden engage'i boyunca kendini iyileştirmek için Mantra'yı Focused Resolve ile birlikte hazırla.
Uzaktan hasarCan yenilemeBu lane saf bir yıpratma savaşıdır; Soraka'nın Astral Infusion'ı onun ADC'sine attığın her poke'u etkisiz kılabilir. Ancak iyileştirmesi kendi canına mal olur. Inner Flame'i ortağı yerine doğrudan Soraka'ya yönlendirirsen, onu savunma döngüsüne sokarsın. Starcall'ı isabet ettirmeden canını kolayca yenileyemez; bu da matchup'ı hassas bir mesafe ve skillshot isabeti mücadelesine çevirir.Soraka build →Detayları gör
Soraka
Neden
Bu lane saf bir yıpratma savaşıdır; Soraka'nın Astral Infusion'ı onun ADC'sine attığın her poke'u etkisiz kılabilir. Ancak iyileştirmesi kendi canına mal olur. Inner Flame'i ortağı yerine doğrudan Soraka'ya yönlendirirsen, onu savunma döngüsüne sokarsın. Starcall'ı isabet ettirmeden canını kolayca yenileyemez; bu da matchup'ı hassas bir mesafe ve skillshot isabeti mücadelesine çevirir.
Lane etkisi
Hedef seçimi tüm wave durumunu belirler. Inner Flame'i düşman nişancıya harcarsan, Soraka onun canını sadece tamamlar, lane priority'sini alır ve seni kuleye iter. Tersine, Soraka'yı düşük canda tutmak, müttefikinin güvenliği için can harcamasını engeller. Bu, yürüyüp seni zoning yapmak için Equinox bırakma yeteneğini sınırlar, wave'i nötr tutar ve nehir çevresindeki erken vision'ı çekişmene izin verir.
Nasıl oynanır
Inner Flame'i doğrudan Soraka'ya net bir açıyla atmak için, onun carry'sini yok sayarak, minion wave'ine paralel ve agresif konumlan. Soraka Starcall ile iyileşmeye çalışmak için öne çıktığı her an, onun karşı poke'unu kalkanlamak ve can yenilemesini azaltmak için hemen Inspire'ı aktifleştir. Equinox'a yakalanırsan panikle yetenek basma; susturmanın geçmesini bekle, sonra onu Mantra ile güçlendirilmiş Focused Resolve ile bağla, root'la ve savunma amaçlı Wish kullanmaya zorla.
Uzaktan hasarTakım savaşıBu matchup, senin erken baskın ile Seraphine'in savunma scale'i arasında doğrudan bir mücadeledir. Karma, Seraphine scale etmeden önce canını eritmek için Mantra ile güçlendirilmiş Inner Flame'i isabet ettirmeye güvenir. Ancak Seraphine bu poke'a Surround Sound'un kalkanı ve sonradan gelen iyileştirmesiyle karşılık verir. Onun yetenekleri ya da minion'ları yüzünden yavaşlarsan, Beat Drop'ı seni anında root'lar ve agresif bir trade'i felakete çevirir.Seraphine build →Detayları gör
Seraphine
Neden
Bu matchup, senin erken baskın ile Seraphine'in savunma scale'i arasında doğrudan bir mücadeledir. Karma, Seraphine scale etmeden önce canını eritmek için Mantra ile güçlendirilmiş Inner Flame'i isabet ettirmeye güvenir. Ancak Seraphine bu poke'a Surround Sound'un kalkanı ve sonradan gelen iyileştirmesiyle karşılık verir. Onun yetenekleri ya da minion'ları yüzünden yavaşlarsan, Beat Drop'ı seni anında root'lar ve agresif bir trade'i felakete çevirir.
Lane etkisi
Wave kontrolü lane'in temposunu kimin belirleyeceğini belirler. Push'u garantilemek için Inner Flame kullanmak, Seraphine'in hem seni hem wave'i High Note'a kolayca hizalamasını engeller. Wave priority'sini koruyamazsan, Seraphine seni kuleye iter ve Stage Presence notalarıyla kuleni eritir. Tersine, minion kalkanı olmadan fazla öne çıkmak seni uzun menzilli bir Encore engage'ine karşı çok savunmasız bırakır.
Nasıl oynanır
Trade'leri kazanmak için Inspire'ı özellikle Seraphine'in Beat Drop'ından kaçmak ya da High Note'un yolundan çıkmak için sakla. Seraphine'in Beat Drop'ının cooldown'da olduğunu doğrulamadıkça agresif bir Focused Resolve bağına asla girme; yoksa seni kolayca yerine root'layıp uzaklaşır. Seraphine Encore ile başlatırsa, tüm takımını kalkanlamak ve onun takip hamlesinden kaçmak için gereken hareket hızını sağlamak üzere hemen Mantra'yı Inspire ile birlikte aktifleştir.
Uzaktan hasarAni hasarBu lane saf bir refleks ve pozisyon testidir; kalkanları hasarla nasıl takas ettiğin belirler. Lux, Lucent Singularity ile seni ve ADC'ni yıpratmaya çalışır. Hedefi Inspire ile kalkanlayarak bu baskıyı anında etkisiz kılabilirsin. Ancak Light Binding'in yoluna girersen denge bir anda dağılır; root yemek Lux'ın burst'ünü tam isabet ettirmesini garanti eder ve eşit bir poke savaşını ölümcül bir felakete çevirir.Lux build →Detayları gör
Lux
Neden
Bu lane saf bir refleks ve pozisyon testidir; kalkanları hasarla nasıl takas ettiğin belirler. Lux, Lucent Singularity ile seni ve ADC'ni yıpratmaya çalışır. Hedefi Inspire ile kalkanlayarak bu baskıyı anında etkisiz kılabilirsin. Ancak Light Binding'in yoluna girersen denge bir anda dağılır; root yemek Lux'ın burst'ünü tam isabet ettirmesini garanti eder ve eşit bir poke savaşını ölümcül bir felakete çevirir.
Lane etkisi
İkinizin de yüksek menzilli alan etkili yetenekleri olduğundan minion wave'i sürekli değişim halindedir. Lucent Singularity'yi Inspire ile başarıyla engellediğinde, öne çıkıp Inner Flame ile baskı kurmak için gereken can avantajını korursun. Tersine, ikinizden biri, yani sen ya da nişancın, Light Binding'e yakalanırsa tüm lane priority'sini kaybedersin ve erken recall atmak ya da bush kontrolünü bırakmak zorunda kalırsın.
Nasıl oynanır
Bu lane'de hayatta kalmak için asla düşük canlı tek bir minion'un hemen arkasında durma, çünkü Light Binding onun içinden geçip seni root'layabilir. Daima Lux'a çapraz konumlan; böylece Lux seninle wave arasında hedef seçmek zorunda kalır. Inspire'ı özellikle Lucent Singularity'nin havada uçtuğunu gördüğünde kullanmak için sakla. Yakalanırsan, Lux'ı bağlamak için hemen Mantra ile güçlendirilmiş Focused Resolve'u kendine at ve gelen Final Spark burst'ünden sağ çıkmak için kendini iyileştir.
Bu şampiyonlar genellikle senin temel güçlerine etkili şekilde karşılık veremez, bu da çatışmaya daha fazla özgürlükle yaklaşmanı sağlar. Onları baskı altına almak ve lehine dönen trade'ler zorlamak için genellikle birden fazla yolun vardır. Onlara rahat bir pozisyona dönme fırsatı vermek yerine, bu avantajı kendi temponu dayatmak için kullan.
Uzaktan hasarKalkanlarKarma bu matchup'a birinci seviyeden itibaren hükmeder, çünkü Inner Flame'i Bard'ın temel poke'unu menzilde ve hasarda geride bırakır. Bard, agresif hamleler aramak yerine kendini ve ADC'sini sağlıklı tutmak için Caretaker's Shrine yerleştirmeye sınırlı mana havuzunu harcamak zorunda kalır. Erkenden poke'unu Mantra ile güçlendirmek, Bard yeterince chime toplamadan önce onun lane varlığını tamamen etkisiz kılar.Bard build →Detayları gör
Bard
Neden
Karma bu matchup'a birinci seviyeden itibaren hükmeder, çünkü Inner Flame'i Bard'ın temel poke'unu menzilde ve hasarda geride bırakır. Bard, agresif hamleler aramak yerine kendini ve ADC'sini sağlıklı tutmak için Caretaker's Shrine yerleştirmeye sınırlı mana havuzunu harcamak zorunda kalır. Erkenden poke'unu Mantra ile güçlendirmek, Bard yeterince chime toplamadan önce onun lane varlığını tamamen etkisiz kılar.
Lane etkisi
Hem minion wave'ine hem Bard'a sürekli Inner Flame isabet ettirerek mutlak wave kontrolü kurarsın. Bu amansız push, Bard'ı carry'sinin farm atmasına yardım etmek için kulesinin altında kalmaya zorlar ve onu fiilen hapseder. Kulesinin plating'ini feda etmeden Traveler's Call ile chime toplayamaz; bu da onu deneyimden yoksun bırakır ve Magical Journey ile play yaratma fırsatını elinden alır.
Nasıl oynanır
Bard'a Cosmic Binding stun'ı için kolay bir açı vermemek için kendi minion wave'inin dışında konumlan. Wave'i itili tut, ama Focused Resolve'u tam Bard Magical Journey ile arkana portal açmaya çalıştığı an için sakla; onu hemen root'lamak her türlü takibi önler. Bard Tempered Fate ile dövüşü çevirmeye çalışırsa, stasis biter bitmez tüm takımını kalkanlamak için Mantra'nı Inspire ile birlikte hazırla; böylece onun ana engage aracını etkisiz kılarsın.
Uzaktan hasarPozisyonKarma temposu tamamen belirler, çünkü Alistar'ın onun erken baskısına cevap verecek menzilli aracı yoktur. Alistar öne çıkmaya çalıştığında sürekli Inner Flame isabet ettirerek, o bir açı bulamadan canını götürürsün. Alistar Headbutt ile mesafeyi kapatmaya çalışırsa, zamanında kullanılan bir Inspire nişancına onun başlatma menzilinden zahmetsizce kayıp çıkması için gereken hareket hızı patlamasını verir ve onun ana engage aracını etkisiz kılar.Alistar build →Detayları gör
Alistar
Neden
Karma temposu tamamen belirler, çünkü Alistar'ın onun erken baskısına cevap verecek menzilli aracı yoktur. Alistar öne çıkmaya çalıştığında sürekli Inner Flame isabet ettirerek, o bir açı bulamadan canını götürürsün. Alistar Headbutt ile mesafeyi kapatmaya çalışırsa, zamanında kullanılan bir Inspire nişancına onun başlatma menzilinden zahmetsizce kayıp çıkması için gereken hareket hızı patlamasını verir ve onun ana engage aracını etkisiz kılar.
Lane etkisi
Bu etkileşim Alistar'ı kulesinin altından savunmada oynamaya zorlar; pasifi Triumphant Roar sürekli poke'una karşı yetersiz kalır. Wave priority'sini kolayca kazanırsın; böylece ikiliniz wave'leri crash edip kule plate'lerini eritebilirsiniz. Alistar, Headbutt'tan Pulverize'a combo yapamayacak kadar düşük canda tutulduğundan, nişancın ani Flash'lerden korkmadan agresifçe farm atabilir ve Alistar'ı dezavantajlı recall'lara zorlar.
Nasıl oynanır
Nişancınla paralel, Alistar'ın Headbutt menzilinin hemen dışında konumlan. Alistar dalış yapmayı başarmadıkça Mantra'nı Focused Resolve'a harcama; bunun yerine minion'ların arkasına saklandığında ağır splash hasarı için Inner Flame'i güçlendirmekte kullan. Alistar senin yavaşlatmanı üzerinden atmak için Unbreakable Will'i tetiklerse, hemen müttefikine Inspire at ve geri çekil; ultimate'inin süresinin bitmesini bekle, sonra bunaltıcı poke'una devam et.
Uzaktan hasarKalkanlarErken baskıLane hakimiyetin trade araçlarındaki basit bir matematiksel avantajdan gelir. Inner Flame'i güçlendirmek için Transcendent Embrace'i her kullandığında yıkıcı bir alan hasarı salarsın. Janna bu poke'u Eye of the Storm ile emmeye çalışırken, Janna'nın kalkanının uzun cooldown'u senin hızlı cooldown döngülerinle başa çıkamaz. Savunma bariyeri tükenir tükenmez ya can kaybetmeye ya da alan bırakmaya zorlanır.Janna build →Detayları gör
Janna
Neden
Lane hakimiyetin trade araçlarındaki basit bir matematiksel avantajdan gelir. Inner Flame'i güçlendirmek için Transcendent Embrace'i her kullandığında yıkıcı bir alan hasarı salarsın. Janna bu poke'u Eye of the Storm ile emmeye çalışırken, Janna'nın kalkanının uzun cooldown'u senin hızlı cooldown döngülerinle başa çıkamaz. Savunma bariyeri tükenir tükenmez ya can kaybetmeye ya da alan bırakmaya zorlanır.
Lane etkisi
Bu cooldown uyumsuzluğu amansız bir baskı yaratır ve Janna'yı ortağıyla birlikte kulelerinin derinlerine iter. Eye of the Storm her poke dizisine karşı koruyamadığı için karşı ikili sürekli düşük canda durur ve Howling Gale'in her türlü saldırı faydasını etkisiz kılar. Bu sürekli tehdit minion wave'i üzerinde tam kontrolü sana verir; ADC'n özgürce farm atar, Janna'ya agresif rotasyonlar yapacak alan bırakmaz.
Nasıl oynanır
Güçlendirilmemiş bir Inner Flame ile Eye of the Storm'u yemleyerek durumu zorla. Janna kendini ya da müttefikini korumak için kalkanını yaktığı an, korumasız hedefe güçlendirilmiş bir Inner Flame patlaması için hemen Transcendent Embrace'i aktifleştir. Janna Howling Gale ile geri çekilmeye ya da seni bölmeye çalışırsa, mermisinin yolundan kaçmak için Inspire kullan, sonra net ve kesin bir trade için onu hemen Focused Resolve ile kilitle.
Uzaktan hasarSavaş başlatmaKarma, ilk 5 seviye boyunca Malphite'in yakın dövüşçü yapısını ağır biçimde cezalandırır. Sürekli Inner Flame isabet ettirerek Granite Shield'ini kolayca sökersin ve pasifinin sağladığı tank dayanıklılığını kullanmasını engellersin. Erken oyunda gap-closer'ı olmadığı için menzil avantajın mutlaktır. Ancak bu denge, Unstoppable Force'unun tam zamanında kullanılan bir Inspire ile etkisiz kılman gereken bir tehdit olduğu 6. seviyede çarpıcı biçimde değişir.Malphite build →Detayları gör
Malphite
Neden
Karma, ilk 5 seviye boyunca Malphite'in yakın dövüşçü yapısını ağır biçimde cezalandırır. Sürekli Inner Flame isabet ettirerek Granite Shield'ini kolayca sökersin ve pasifinin sağladığı tank dayanıklılığını kullanmasını engellersin. Erken oyunda gap-closer'ı olmadığı için menzil avantajın mutlaktır. Ancak bu denge, Unstoppable Force'unun tam zamanında kullanılan bir Inspire ile etkisiz kılman gereken bir tehdit olduğu 6. seviyede çarpıcı biçimde değişir.
Lane etkisi
Bu matchup erken oyunda wave durumları ve trade temposu üzerinde sana tam kontrol verir. Malphite'i agresifçe kulesinin altına itebilir, last-hit atmaya çalışırken Inner Flame yemesine neden olabilirsin. Bu sürekli rahatsız etme ona gold kaybettirir ve canını gank'leri koordine edemeyecek kadar düşük tutar. Yine de Malphite 6. seviyeye ulaştığı an lane baskısı donar; ani ve ölümcül bir engage riskini göze almadan artık körlemesine öne çıkamazsın.
Nasıl oynanır
Malphite wave'e yaklaştığında Inner Flame atarak erken avantajını en üst düzeye çıkar; böylece Granite Shield'i asla aktif kalmaz. Maksimum hasar için poke'unu güçlendirmekte Mantra'yı kullan. Malphite Unstoppable Force'u açtığında oyun tarzını tamamen değiştir. Mesafeni koru, asla carry'nle yan yana toplanma ve Inspire'ı beklet. Malphite'in ultimate'ini fırlattığını gördüğün an, burst'ü emmek ve hızlı kaçışı sağlamak için Inspire'ı onun hedefine at.
Savaş başlatmaKorumaKarma bu matchup'a doğal olarak hükmeder, çünkü savunma kiti Rakan'ın ana başlatma aracını tamamen etkisiz kılar. Rakan Grand Entrance ile ileri atılmaya çalıştığında, Karma müttefikine knock-up'tan yan adım atması için gereken hareket hızını vermek üzere anında Inspire kullanabilir. Bu başarısız dive Rakan'ı çok savunmasız bırakır; Karma onu hemen Focused Resolve ile bağlayıp Battle Dance ile geri çekilmesine fırsat vermeden kilitleyebilir.Rakan build →Detayları gör
Rakan
Neden
Karma bu matchup'a doğal olarak hükmeder, çünkü savunma kiti Rakan'ın ana başlatma aracını tamamen etkisiz kılar. Rakan Grand Entrance ile ileri atılmaya çalıştığında, Karma müttefikine knock-up'tan yan adım atması için gereken hareket hızını vermek üzere anında Inspire kullanabilir. Bu başarısız dive Rakan'ı çok savunmasız bırakır; Karma onu hemen Focused Resolve ile bağlayıp Battle Dance ile geri çekilmesine fırsat vermeden kilitleyebilir.
Lane etkisi
Bu dinamik Rakan'ı pasif oynamaya zorlar ve Karma'ya wave konumlandırması üzerinde mutlak kontrol verir. Rakan güvenle engage atamadığı için, Fey Feathers kalkanını eritmek ve canını götürmek üzere onu Inner Flame ile sürekli rahatsız edebilirsin. Rakan zıplamasını her boşa harcadığında, wave'leri crash etmek, derin vision almak ya da düşman kulesinin altında gold'u engellemek için 15 saniyelik büyük bir lane hakimiyeti penceresi kazanırsın.
Nasıl oynanır
Gerektiğinde onları anında kalkanlayabilmek için nişancınla paralel konumlan. Inspire'ı daima özellikle Rakan'ın Grand Entrance'ı için beklet; çok erken kullanmak carry'ni savunmasız bırakır. Rakan engage'e zorlamak için The Quickness'ı aktifleştirirse, tüm takımını kalkanlamak ve hızlandırmak, onun ultimate'indeki charm'ı etkisiz kılmak için hemen Mantra ile güçlendirilmiş bir Inspire kullan. Kendin yakalanırsan, Mantra üzerinden iyileşip burst'ünden sağ çıkmak için Focused Resolve'u kendine at.
Uzaktan hasarBu matchup, trade'leri uzaktan belirleme yeteneğine bağlıdır. Transcendent Embrace'i Inner Flame ile birleştirerek, Lulu'nun kolayca karşılayamayacağı patlayıcı bir hasar alanı yaratırsın. Bu devasa poke burst'ü onu Help, Pix!'i hasarını azaltmak için yalnızca kalkan olarak kullanmaya zorlar; poke için saldırı amaçlı kullanmasını ya da ADC'sinin basic attack'larını güçlendirmesini engeller.Lulu build →Detayları gör
Lulu
Neden
Bu matchup, trade'leri uzaktan belirleme yeteneğine bağlıdır. Transcendent Embrace'i Inner Flame ile birleştirerek, Lulu'nun kolayca karşılayamayacağı patlayıcı bir hasar alanı yaratırsın. Bu devasa poke burst'ü onu Help, Pix!'i hasarını azaltmak için yalnızca kalkan olarak kullanmaya zorlar; poke için saldırı amaçlı kullanmasını ya da ADC'sinin basic attack'larını güçlendirmesini engeller.
Lane etkisi
Lulu sürekli geri adım atmaya zorlandığından, agresif takipler için Whimsy'yi kullanma özgürlüğünü kaybeder. Bu baskı onu ve ortağını kulelerinin altına sıkıştırır ve ikilinize lane'in push'u üzerinde tam kontrol verir. Splash hasarınla yarattığın sürekli can açığı, bush'ları çekişmelerini engeller; Lulu seni yavaşlatmak için güvenle Glitterlance isabet ettiremez.
Nasıl oynanır
Bunu uygulamak için güçlendirilmiş Inner Flame'ini fırlatmadan önce her zaman Lulu'nun Glitterlance atmak için öne çıkmasını bekle. Lulu patlamanı engellemek için Help, Pix!'i harcadığında, onun savunma yeteneklerinin kapalı olduğu net bir 10 saniyelik penceren olur. Lulu Whimsy ile mesafeyi kapatmaya çalışırsa, menzil avantajını koruyarak geriye doğru kite etmek için hemen kendine Inspire kullan ve fazla öne çıkan her hedefi root'lamak için Focused Resolve'unu hazırla.
Uzaktan hasarErken baskıYuumi tamamen ortağına You and Me! ile yapışmaya güvenir ve onları tek, devasa bir hedef haline getirir. Yuumi gelen skillshot'ları body block yapamadığı için, Inner Flame'in kaçınılmaz splash hasarı olur. Bu mermiyi Mantra ile güçlendirerek, minion wave'inin arkasındaki host nişancıyı sürekli patlatabilir ve Yuumi'nin yüksek mana maliyetli Zoomies'inin zaman içindeki iyileştirmesinden kolayca daha fazla hasar verebilirsin.Yuumi build →Detayları gör
Yuumi
Neden
Yuumi tamamen ortağına You and Me! ile yapışmaya güvenir ve onları tek, devasa bir hedef haline getirir. Yuumi gelen skillshot'ları body block yapamadığı için, Inner Flame'in kaçınılmaz splash hasarı olur. Bu mermiyi Mantra ile güçlendirerek, minion wave'inin arkasındaki host nişancıyı sürekli patlatabilir ve Yuumi'nin yüksek mana maliyetli Zoomies'inin zaman içindeki iyileştirmesinden kolayca daha fazla hasar verebilirsin.
Lane etkisi
Bu sürekli patlama yarıçapı düşmana lane'i freeze etme şansı tanımaz. Minion wave'leri üzerinde tam kontrolü kolayca sağlar, onları doğrudan düşman kulesinin altına itersin. Düşman nişancı, kulenin altında gold kaybetmek ile ağır poke yemek arasında seçim yapmak zorunda kalır. Bu sürekli baskı onların recall zamanlamalarını bozar, mana havuzlarını tüketir ve erken kule plate gold'unu garantiler.
Nasıl oynanır
Düşman ADC last-hit atmak için öne çıktığında Inner Flame'i kolayca nişan alabilmek için caster minion'larının yakınında dur. Yuumi Bop 'n' Block kalkanı için ayrılmaya çalışırsa ya da Final Chapter engage'ini karşılamak için host'u kilitlemek üzere Focused Resolve'u daima beklet. Yavaşlatmalarına yakalanırsan, root'layan dalgalardan kaçıp güvenle geri çekilmek için Inspire'ı hemen carry'ne at.
Bu şampiyonlar, seninkini doğrudan geride bırakan bir build ve oynanış tarzına sahip, bu da lane kontrolünü ve farmı son derece zorlaştırabilir. Yetenekleri temel güçlerini etkisiz hale getirebilir ya da her zamanki planını oynamaya çalıştığın anda seni cezalandırabilir. Bu matchuplarda amaç genellikle hataları en aza indirmek ve doğrudan çatışmanın dışında çözümler bulmaktır.
Bu şampiyonlar, matchup'ı tamamen oynanmaz hale getirmeden genellikle çatışmada avantaj sağlayan araçlara sahiptir. Daha fazla menzilleri, senin saldırılarını daha iyi karşılama kapasiteleri veya engage'lerine karşılık verecek daha fazla yolları olabilir. Yaklaşımını buna göre uyarlaman ve dövüşü kabul edeceğin anları dikkatle seçmen gerekir.
Can yenilemePozisyonSwain, uzun ve yıpratıcı skirmish'lerde üstünlük kurar, çünkü Ravenous Flock ve Demonic Ascension sürekli can barını doldururken senin onu anında silecek burst'ün yoktur. Bu, lane'i bir yıpratma savaşına çevirir. Dönüm noktası tamamen onun Nevermove'una bağlıdır; Karma'yı yakalarsa Swain onu doğrudan ult'inin emici alanına çekebilir ve Karma'nın poke'unu kendi iyileşme kaynağına çevirir.Swain build →Detayları gör
Swain
Neden
Swain, uzun ve yıpratıcı skirmish'lerde üstünlük kurar, çünkü Ravenous Flock ve Demonic Ascension sürekli can barını doldururken senin onu anında silecek burst'ün yoktur. Bu, lane'i bir yıpratma savaşına çevirir. Dönüm noktası tamamen onun Nevermove'una bağlıdır; Karma'yı yakalarsa Swain onu doğrudan ult'inin emici alanına çekebilir ve Karma'nın poke'unu kendi iyileşme kaynağına çevirir.
Lane etkisi
Swain seni sustain ile geçtiği için, minion'lardan ya da pasif çekişlerden kolayca can toparlarsa Inner Flame poke'un değer kaybeder. Swain'in kulesinin yanında freeze atmasına izin veremezsin, çünkü başarılı tek bir Nevermove seni ölümcül bir Demonic Ascension ile yüzleşmeye zorlar. Bu tehdit, güvenle push atma ve roam etme yeteneğini sınırlar; Swain river'a hükmederken seni kendi kulenin altına kilitler.
Nasıl oynanır
Hayatta kalmak için Inspire kullanımında disiplinli olmalısın. Wave temizlerken sırf kalkan değeri için asla kullanma; bunun yerine Swain'in Nevermove'unun dönüş yoluna tepki vermek için özellikle beklet. Ani hareket hızı patlaması, kökten yana sıyrılmak ve Demonic Ascension yarıçapının dışında kalmak için ana aracındır. Köklenirsen, kalkanın erirken Swain'in senin alanına daha derine yürümesini caydırmak için Focused Resolve ile onu hemen bağla.
Ani hasarPozisyonSyndra bu matchup'ta üstünlük kurar, çünkü Dark Sphere ve Scatter the Weak kombinasyonu Karma'nın trade araçlarının menzilini aşar. Karma Inner Flame ile poke atmak isterken Syndra güvenle farm yapıp Transcendent ile scale edebilir. Karma, Scatter the Weak ile fırlatılan bir küreye yakalanırsa, Syndra Unleashed Power ile tüm burst'ünü boşaltmadan önce Focused Resolve ile zamanında tepki veremez; küçük bir mesafe hatası bile anında ölüme dönüşür.Syndra build →Detayları gör
Syndra
Neden
Syndra bu matchup'ta üstünlük kurar, çünkü Dark Sphere ve Scatter the Weak kombinasyonu Karma'nın trade araçlarının menzilini aşar. Karma Inner Flame ile poke atmak isterken Syndra güvenle farm yapıp Transcendent ile scale edebilir. Karma, Scatter the Weak ile fırlatılan bir küreye yakalanırsa, Syndra Unleashed Power ile tüm burst'ünü boşaltmadan önce Focused Resolve ile zamanında tepki veremez; küçük bir mesafe hatası bile anında ölüme dönüşür.
Lane etkisi
Bu etkileşim Karma'yı savunmada oynamaya ve erken önceliği bırakmaya zorlar. Syndra, Force of Will ve Dark Sphere ile wave'leri kolayca iterek Karma'yı kulesinin altında tutan bir tehdit bölgesi kurar. Karma, caster minion'larının ötesine geçmek ölümcül bir stun'ı davet ettiği için last-hit almak ya da kuleyi poke'lamak için güvenle yürüyerek yaklaşamaz. Bu baskı Karma'nın roam atma ve jungler'ına yardım etme yeteneğini sınırlar.
Nasıl oynanır
Hayatta kalmak için Inspire'ı yalnızca Syndra'nın Dark Sphere yerleştirmelerinden kaçınmak için beklet. Kalkanını basit hareket için proaktif kullanma; hız artışını Scatter the Weak'in doğrusal yörüngesinden yana sıyrılmak için sakla. Syndra stun'ı ıskalarsa, bu kısa pencereyi Inner Flame ile karşılık vermek ya da Focused Resolve ile onu bağlamak için kullan. Vurulursan, Unleashed Power'dan gelen hasarı azaltmak için hemen Mantra ile güçlendirilmiş bir Inspire kullanmaya hazırlan.
Geç oyun gücüErken baskıKassadin'in ult'i Riftwalk, 6. seviyeden sonra Karma'nın menzil avantajını tamamen etkisiz kılar. Kassadin bu güç eşiğine ulaşmadan önce tek savunması Void Stone'dan gelen kısa süreli büyü kalkanıdır. Inner Flame ile bu erken fırsatı değerlendirmezsen, kaçınılmaz scaling'i sayesinde skillshot'larının ötesine blink atıp Null Sphere ile seni susturur ve Focused Resolve daha onu köklemeden seni burst'leyerek öldürür.Kassadin build →Detayları gör
Kassadin
Neden
Kassadin'in ult'i Riftwalk, 6. seviyeden sonra Karma'nın menzil avantajını tamamen etkisiz kılar. Kassadin bu güç eşiğine ulaşmadan önce tek savunması Void Stone'dan gelen kısa süreli büyü kalkanıdır. Inner Flame ile bu erken fırsatı değerlendirmezsen, kaçınılmaz scaling'i sayesinde skillshot'larının ötesine blink atıp Null Sphere ile seni susturur ve Focused Resolve daha onu köklemeden seni burst'leyerek öldürür.
Lane etkisi
İlk 5 seviye boyunca Kassadin'i onun turret'inin altına zorlamalısın; böylece Kassadin last-hit yapmak için mi yoksa trade yapmak için mi Null Sphere kullanacağını seçmek zorunda kalır. Erken dönemde sağlık havuzunu yeterince eritmezsen 6. seviyeye bedavaya ulaşır. Kassadin Riftwalk'a ulaştığında lane dinamikleri tersine döner; ölümcül bir atlayışı riske atmadan Inner Flame ile wave'i güvenle itme imkânını kaybedersin.
Nasıl oynanır
Kassadin 6. seviyeden önce minion'lara Nether Blade kullanmak için öne çıktığı her an onu Inner Flame ile sürekli poke'la. Riftwalk'ı açtıktan sonra girmeye kalkarsa skillshot'larını panikle savurma. Bunun yerine hemen Inspire ile kendine kalkan koyup burst'ünü emdir, ardından Kassadin zaten üstüne indikten sonra onu kilitlemek için Focused Resolve kullan. Tether'ı ıskalarsan hemen senin turret'inin altına geri çekil.
Dalga temizlemeGeç oyun gücüRyze'nin Arcane Mastery'si, mana'ya kavuştuğunda seni scaling ile geçeceğini garanti eder ve Spell Flux ile Overload combo'sunu ezici bir waveclear ve trade makinesine dönüştürür. Karma'nın Transcendent Embrace yüzünden klasik bir ult'ı olmadığı için senin tek kozun erken oyun baskındır. Sekerek giden Spell Flux hasarını Inspire kalkanınla azaltmalı, aynı zamanda scaling'i trade'leri imkânsız hale getirmeden önce Inner Flame ile hasarı geri vermeye devam etmelisin.Ryze build →Detayları gör
Ryze
Neden
Ryze'nin Arcane Mastery'si, mana'ya kavuştuğunda seni scaling ile geçeceğini garanti eder ve Spell Flux ile Overload combo'sunu ezici bir waveclear ve trade makinesine dönüştürür. Karma'nın Transcendent Embrace yüzünden klasik bir ult'ı olmadığı için senin tek kozun erken oyun baskındır. Sekerek giden Spell Flux hasarını Inspire kalkanınla azaltmalı, aynı zamanda scaling'i trade'leri imkânsız hale getirmeden önce Inner Flame ile hasarı geri vermeye devam etmelisin.
Lane etkisi
Ryze, seni senin turret'inin altına itmek ve Rune Prison gank'leri kurmak için Spell Flux'ı senin minion wave'inin içinden sürekli yaymaya çalışacaktır. Wave'i yönetemezsen Ryze rakipsiz biçimde güvenle scaling eşiklerine ulaşır. Bu baskı seni onun waveclear hızına karşılık vermeye zorlar; aksi halde tüm mid önceliğini kaybedersin ve sen farm'da sıkışıp kalırken Ryze Realm Warp ile roam atabilir veya kolay harita rotasyonları yapabilir.
Nasıl oynanır
Ryze'nin Spell Flux'ının sana bedavaya sekmesini önlemek için kendi minion wave'inin dışında konumlan. Ryze bunu yaymak için yaklaştığında, sıçrama hasarını emmek için Inspire kullan, ardından sağlığını eritmek için hemen Transcendent Embrace ile güçlendirilmiş bir Inner Flame ile karşılık ver. Seni Rune Prison ile kilitlerse Focused Resolve ile kendini iyileştir ve onu geri kökle; böylece art arda Overload spam'iyle seni kovalamasının önüne geç.
Uzaktan hasarDalga temizlemeBu matchup'ı Ziggs'in devasa menzil avantajı belirler. Bouncing Bomb ile wave'leri sürekli temizleyebilir ve seni Inner Flame tehdidini tamamen etkisiz kılan bir mesafeden poke'layabilir. Karşılık vermek için ona güvenilir biçimde ulaşamadığın için, Inspire'ın hareket hızını boşluğu kapatmak veya Focused Resolve kurmak için saldırgan biçimde kullanmak yerine, onun patlayıcı hasarını emmek için tekrar tekrar kendine Inspire kullanmak zorunda kalırsın.Ziggs build →Detayları gör
Ziggs
Neden
Bu matchup'ı Ziggs'in devasa menzil avantajı belirler. Bouncing Bomb ile wave'leri sürekli temizleyebilir ve seni Inner Flame tehdidini tamamen etkisiz kılan bir mesafeden poke'layabilir. Karşılık vermek için ona güvenilir biçimde ulaşamadığın için, Inspire'ın hareket hızını boşluğu kapatmak veya Focused Resolve kurmak için saldırgan biçimde kullanmak yerine, onun patlayıcı hasarını emmek için tekrar tekrar kendine Inspire kullanmak zorunda kalırsın.
Lane etkisi
Ziggs, Bouncing Bomb ve Hexplosive Minefield ile wave'i hızla senin turret'ine itecek. Bu sürekli wave baskısı seni turret'in altına kilitler ve jungler'ına yardım etmek için roam atmanı engeller. Onun poke'u yüzünden sağlığın çok düşerse, Satchel Charge ile turret'ini kolayca yıkar. Wave'in çökmesini önlemek için sırf mana harcarken kendini bulursun ve tüm mid lane önceliğini feda edersin.
Nasıl oynanır
Hayatta kalmak için tamamen onun waveclear hızına yetişmeye odaklan. Ziggs'e poke atmaya çalışmak yerine Mantra ile güçlendirilmiş Inner Flame'i doğrudan minion wave'ine kullan. Ziggs'i Bouncing Bomb'u sana mı yoksa wave'e mi atacağını seçmeye zorlamak için kendi minion'larından uzak dur. Ziggs'in Satchel Charge'ı cooldown'dayken, geri itilmekten korkmadan Focused Resolve tehdidi oluşturmak için Inspire ile güvenle öne çıkabilirsin.
Atılma karşıtıPozisyonYone, Way of the Hunter pasifinden gelen patlayıcı çifte hasarı ve amansız gap-closer'larıyla bu mid matchup'a hükmeder. Ancak Karma'nın onun saldırgan kalıplarını bozmak için çok özel bir aracı vardır: Yone Soul Unbound ile girdiğinde Karma hemen Focused Resolve kullanabilir. Bu tether bir ya-ya-da seçimi dayatır: Yone ya bağı koparmak için erkenden geri dönüp ruh formunun süresini boşa harcar, ya da kalıp sert bir köke maruz kalır.Yone build →Detayları gör
Yone
Neden
Yone, Way of the Hunter pasifinden gelen patlayıcı çifte hasarı ve amansız gap-closer'larıyla bu mid matchup'a hükmeder. Ancak Karma'nın onun saldırgan kalıplarını bozmak için çok özel bir aracı vardır: Yone Soul Unbound ile girdiğinde Karma hemen Focused Resolve kullanabilir. Bu tether bir ya-ya-da seçimi dayatır: Yone ya bağı koparmak için erkenden geri dönüp ruh formunun süresini boşa harcar, ya da kalıp sert bir köke maruz kalır.
Lane etkisi
Yone, Mortal Steel Q3 kasırgasıyla senin wave'ini aşıp sana dalabildiği için Inner Flame ile akılsızca push yapamazsın. Focused Resolve'un cooldown'dayken Yone lane'in tam kontrolünü ele geçirir, seni farm'dan uzak tutar ve Fate Sealed ile ölümcül burst tehdidi oluşturur. Bu sürekli tehdit erken önceliğini sınırlar, push gücü yerine savunmaya öncelik vermeni zorunlu kılar ve roam zamanlamalarını geciktirir.
Nasıl oynanır
Normal koşullarda poke veya trade için asla Focused Resolve'u harcama. Onu yalnızca Yone'nin Soul Unbound'u etkinleştirdiği ana sakla. Yone öne atıldığında hemen onu tether'la ve geri çekilirken Spirit Cleave hasarını emmek için Inspire ile kendine kalkan koy. Yone'nin Mortal Steel Q3'ü hazırsa, tether'ı koruyarak kasırgadan kaçınmak için çapraz yürü. Tether'ı ıskalarsan, onun kovalamasından kurtulmak için Mantra ile güçlendirilmiş Inspire kullanarak hemen geri çekil.
Uzaktan hasarGeç oyun gücüViktor bu matchup'ı kontrol eder; çünkü Hextech Ray sayesinde seni Inner Flame'in güvenilir biçimde karşılık veremeyeceği bir mesafeden poke'layabilir. Bu uzun menzilli tehdit, Focused Resolve ile onu tether'lamak için öne yürümeyi son derece tehlikeli kılar; özellikle Viktor yaklaşmanı cezalandırmak için Gravity Field bırakabilir veya Siphon Power ile kalkan kazanabilir. Glorious Evolution ilerledikçe Viktor'un scaling avantajı genişler ve sen onun tehdidine yetişmekte zorlanırsın.Viktor build →Detayları gör
Viktor
Neden
Viktor bu matchup'ı kontrol eder; çünkü Hextech Ray sayesinde seni Inner Flame'in güvenilir biçimde karşılık veremeyeceği bir mesafeden poke'layabilir. Bu uzun menzilli tehdit, Focused Resolve ile onu tether'lamak için öne yürümeyi son derece tehlikeli kılar; özellikle Viktor yaklaşmanı cezalandırmak için Gravity Field bırakabilir veya Siphon Power ile kalkan kazanabilir. Glorious Evolution ilerledikçe Viktor'un scaling avantajı genişler ve sen onun tehdidine yetişmekte zorlanırsın.
Lane etkisi
Bu menzil farkı seni geri plana iter ve lane'i bir wave kontrolü savaşına dönüştürür. Viktor, sağlığını eritirken Hextech Ray ile wave'i güvenle itebilir; böylece Inspire'ı zemin kazanmak için kullanmak yerine savunma amaçlı kalkan olarak kullanmak zorunda kalırsın. Poke yiyip sağlığın düşerse jungler'ına yardım etmek için gereken önceliği kaybedersin ve recall zamanlamaların Viktor'un üstün temizleme hızı ve Arcane Storm burst'ü yüzünden sürekli tehdit altında olur.
Nasıl oynanır
Hayatta kalmak için Mantra'yı Inner Flame ile birlikte kullanıp onun waveclear hızına yetişmeli ve minion'ları Hextech Ray'in yoluna girmeden senin turret'inden uzak tutmalısın. Viktor'un Gravity Field'i cooldown'da olmadıkça Focused Resolve'u deneme amaçlı atma. Viktor seni turret'in altına iterse onun poke'unu emmek için Inspire ile kendini kalkanlamaya odaklan. Lane durumu kötüleştiğinde onun push'una yetişmeyi bırak ve Inspire'ın hız artışıyla müttefiklerine yardım etmeye bak.
Bu eşleşmeler her şeyden önce yürütme düellosudur: her iki şampiyon da avantaj elde etmek için gerçek yollara sahiptir. Kaçırılan önemli bir yetenek, doğru öngörülen bir engage ya da tek bir pozisyon hatası düelloyu bir tarafa çevirebilir. Matchup'ı bilmek ve doğru anları tanımak burada özellikle önemlidir.
Uzaktan hasarSavaş başlatmaBu matchup, Galio'nun mesafeyi kapatma girişimlerini ne kadar etkili engellediğine bağlıdır. Galio CC zincirini başlatmak için Justice Punch'a dayandığından, Inspire en iyi karşı önlemindir. Inspire'ın sağladığı ani hareket hızı ve kalkan, onun düz çizgideki dash'ini kolayca yana kaçarak boşa çıkarmanı sağlar ve savunma araçları cooldown'dayken Galio'yu Inner Flame'inle yaptığın amansız karşılıklara açık bırakır.Galio build →Detayları gör
Galio
Neden
Bu matchup, Galio'nun mesafeyi kapatma girişimlerini ne kadar etkili engellediğine bağlıdır. Galio CC zincirini başlatmak için Justice Punch'a dayandığından, Inspire en iyi karşı önlemindir. Inspire'ın sağladığı ani hareket hızı ve kalkan, onun düz çizgideki dash'ini kolayca yana kaçarak boşa çıkarmanı sağlar ve savunma araçları cooldown'dayken Galio'yu Inner Flame'inle yaptığın amansız karşılıklara açık bırakır.
Lane etkisi
Burada haritanın kontrolünü kimin elde edeceğini wave yönetimi belirler. Galio, Hero's Entrance ile roam atabilmek için Winds of War ve Colossal Smash ile lane'i itmek ister. Inner Flame ile onun temizleme hızına yetiştiğinde, onu farm yaparken ağır poke yemekle turret'ini kaybetmek arasında seçim yapmaya zorlarsın. Nötr bir wave, Shield of Durand ile seni kolayca kilitlemesini engeller.
Nasıl oynanır
Justice Punch menzilinin hemen dışında konumlan ve Inspire'ı asla önceden kullanma. Bu kalkanı yalnızca Galio'nun ileri doğru dash'ine tepki vermek için sakla. Galio Colossal Smash'i tetiklemek için wave'e yaklaştığında hemen bir Inner Flame patlamasıyla onu cezalandır. Shield of Durand'a yakalanırsan, geri çekilirken Focused Resolve ile onu tether'la; böylece kendini iyileştirir ve onu kendi şartlarında köklersin, ardından gelecek bir Winds of War'u da engellersin.
Dalga temizlemePozisyonOrianna alanı kontrol etmek için topuna dayanır ve Command: Attack ile Command: Dissonance kullanarak seni yıpratmayı hedefler. Karma, Inspire ile tepki verip hasarı kalkanlayarak ve hareket hızını yavaşlatma bölgesinden kaçmak için kullanarak bu poke düzenini tamamen etkisiz kılabilir. Ancak oyun ilerledikçe, müttefikler birbirine yığılırsa Orianna'nın Command: Shockwave ile yarattığı devasa teamfight etkisi Karma'nın tek hedefli yardımcı gücünü bunaltma tehdidi taşır.Orianna build →Detayları gör
Orianna
Neden
Orianna alanı kontrol etmek için topuna dayanır ve Command: Attack ile Command: Dissonance kullanarak seni yıpratmayı hedefler. Karma, Inspire ile tepki verip hasarı kalkanlayarak ve hareket hızını yavaşlatma bölgesinden kaçmak için kullanarak bu poke düzenini tamamen etkisiz kılabilir. Ancak oyun ilerledikçe, müttefikler birbirine yığılırsa Orianna'nın Command: Shockwave ile yarattığı devasa teamfight etkisi Karma'nın tek hedefli yardımcı gücünü bunaltma tehdidi taşır.
Lane etkisi
Bu, minion önceliği için sürekli bir çekişme yaratır. Orianna güvenli recall'lar için topuyla push yapmak ister; sen de onun temizleme hızına yetişmek için Inner Flame kullanmalısın. Hiçbiriniz kurulum olmadan diğerini kolayca öldüremeyeceği için mid lane, wave'i itme ve river vizyonunu elde etme yarışına dönüşür. Wave'i önce kaydırmak, Orianna topunu yeniden konumlandıramadan önce jungler'ına yardım etmeni sağlar.
Nasıl oynanır
Lane'de Orianna'nın top yerleşimini izle. Orianna Command: Attack atmak için öne çıkarsa, çarpmayı emmek ve ardından gelen Command: Dissonance'tan kaçınmak için hemen kendine Inspire kullan. Topu uzaktaysa Focused Resolve ile kök için şans deneme; çünkü Orianna kendini Command: Protect ile kolayca kalkanlar ve Clockwork Windup basic attack'leriyle trade'i kazanır. Skirmish'lerde Command: Shockwave'in asla birden fazla hedefe isabet etmemesi için müttefiklerinden ayrıl.
Uzaktan hasarHayatta kalmaBu matchup, uzun menzilli skillshot'ların saf bir sınavıdır. Zoe, More Sparkles! ile güçlendirilmiş yüksek hasarlı Paddle Star!'ı kurmak için Sleepy Trouble Bubble'ı uzaktan isabet ettirmeye dayanır. Karma bu baskıya Inner Flame ile push ve poke yaparak karşılık verir. Lane kritik bir pencereyle şekillenir: Zoe'nin baloncuğu isabet ettiğinde, Karma'nın uykuya dalmadan önce kendine Inspire atmak için kısa bir gecikmesi vardır ve gelen yıldızın hasarını tamamen emer.Zoe build →Detayları gör
Zoe
Neden
Bu matchup, uzun menzilli skillshot'ların saf bir sınavıdır. Zoe, More Sparkles! ile güçlendirilmiş yüksek hasarlı Paddle Star!'ı kurmak için Sleepy Trouble Bubble'ı uzaktan isabet ettirmeye dayanır. Karma bu baskıya Inner Flame ile push ve poke yaparak karşılık verir. Lane kritik bir pencereyle şekillenir: Zoe'nin baloncuğu isabet ettiğinde, Karma'nın uykuya dalmadan önce kendine Inspire atmak için kısa bir gecikmesi vardır ve gelen yıldızın hasarını tamamen emer.
Lane etkisi
Lane, Sleepy Trouble Bubble'ı engellemek için minion konumlandırması etrafında döner. Karma'nın Inner Flame'i sürekli wave baskısı yaratır ve Zoe'yi trade yapmak yerine temizlemek için Paddle Star! kullanmaya zorlar. Zoe'nin baloncuğundan kaçınamazsan veya kalkanını yanlış zamanlarsan büyük miktarda sağlık kaybedersin; bu da erken recall'a ve Zoe'nin river'ı kontrol etmesine yol açar. Sağlığını yüksek tutmak, Zoe'nin aktif summoner spell'leriyle Spell Thief'i suistimal etmesini engeller.
Nasıl oynanır
Sleepy Trouble Bubble'ı doğal olarak engellemek için her zaman minion wave'inin arkasında konumlan. Inspire'ı asla saldırı amaçlı harcama; Zoe'nin burst'ünü azaltmak için hazır tut. Zoe baloncuğu ıskalarsa veya Portal Jump ile öne atlarsa, dönüş noktasını hemen cezalandır. Focused Resolve ile onu tether'la ve ardından Mantra ile güçlendirilmiş bir Inner Flame ile devam et. Baloncuğuna yakalanırsan uyku başlamadan önce hızla kendine Inspire bas.
Uzaktan hasarMekanikBu mid lane, skillshot'ların ve reflekslerin saf bir düellosudur. Lux, burst'ünü kurmak için minion'ların arkasından Light Binding için şans yakalamaya çalışır; sen ise onun bağlamasından yana kaçmak için Inspire'ın sağladığı ani hareket hızı artışına güvenirsin. Mermisinden başarıyla kaçmak Karma'nın mesafeyi anında kapatıp Inner Flame ile ağır hasarı geri vermesini sağlar ve savunma refleksini güçlü bir karşı saldırı trade'ine dönüştürür.Lux build →Detayları gör
Lux
Neden
Bu mid lane, skillshot'ların ve reflekslerin saf bir düellosudur. Lux, burst'ünü kurmak için minion'ların arkasından Light Binding için şans yakalamaya çalışır; sen ise onun bağlamasından yana kaçmak için Inspire'ın sağladığı ani hareket hızı artışına güvenirsin. Mermisinden başarıyla kaçmak Karma'nın mesafeyi anında kapatıp Inner Flame ile ağır hasarı geri vermesini sağlar ve savunma refleksini güçlü bir karşı saldırı trade'ine dönüştürür.
Lane etkisi
Bir trade'i ıskalamak wave kontrolünü kaybetmek demektir. Lux, Light Binding'i isabet ettirirse Lucent Singularity'sini kolayca patlatıp seni turret'in altına iter. Tersine, onun CC'sinden kaçındığında Inner Flame'in onu geri iter; savunma amaçlı Prismatic Barrier'ı senin poke'unu emmek için kullanılmak zorunda kalırken river'da vizyon almak veya turret'ine hasar vermek için gereken önceliği elde edersin.
Nasıl oynanır
Düşük canlı 2 minion'un hemen arkasında asla durma; çünkü Lux onları Light Binding'i gizlemek için kullanır. İmleci Karma'ya yakın tut ki ışık mermisi atıldığı anda yana kaçmak için Inspire'ı anında etkinleştirebilesin. Lux ıskalarsa hemen öne çıkıp Mantra ile güçlendirilmiş bir Inner Flame isabet ettir. Tuzağa düşersen, gelen Lucent Singularity veya Final Spark hasarını azaltmak için hızla kendine Inspire at.
Harita baskısıDalga temizlemeBu matchup, wave önceliği ve harita varlığı için saf bir çekişmedir. Twisted Fate, Wild Cards ile wave'i itip roam atmak ister, ancak Karma ona karşılık verecek araçlara sahiptir. Trade ritmini tamamen Pick a Card belirler. Inspire'ı onun altın kartının stun hasarını emecek şekilde zamanlamalı, kart döngüsü cooldown'dayken hemen Inner Flame ile karşılık vermelisin; böylece Twisted Fate'in bedavaya lane kontrolü kazanmasını engellersin.Twisted Fate build →Detayları gör
Twisted Fate
Neden
Bu matchup, wave önceliği ve harita varlığı için saf bir çekişmedir. Twisted Fate, Wild Cards ile wave'i itip roam atmak ister, ancak Karma ona karşılık verecek araçlara sahiptir. Trade ritmini tamamen Pick a Card belirler. Inspire'ı onun altın kartının stun hasarını emecek şekilde zamanlamalı, kart döngüsü cooldown'dayken hemen Inner Flame ile karşılık vermelisin; böylece Twisted Fate'in bedavaya lane kontrolü kazanmasını engellersin.
Lane etkisi
Twisted Fate'in altın kartını kalkanlamazsan Twisted Fate bedavaya trade kazanır ve Destiny ile turret plate sağlığı kaybetmeden yan lane'lere etki edebilir. Tersine, Pick a Card'ı bloklamak sağlığını yüksek tutar ve wave'leri Inner Flame ile agresif biçimde itmeni sağlar. Bu, Twisted Fate'i kendi turret'inin altına hapseder, pasifinin charged Dice üretimini etkisiz kılar ve onu senin rotasyonlarına yetişmek ile mid önceliğini kaybetmek arasında seçim yapmaya zorlar.
Nasıl oynanır
Twisted Fate'in başının üstünde dönen kartları izle. Altın Pick a Card'ı kilitlediği anda, gelen otomatik saldırıyı kalkanlamak için parmağını Inspire'ın üstünde tut. Stun'dan hemen sonra, ana aracı kullanılamazken Inner Flame veya güçlendirilmiş bir Transcendent Embrace combo'suyla karşılık ver. Başka bir lane'e gank atmak için Destiny kullanarak seni tamamen atlarsa, tower plate'leri almak için wave'i hızlı iterek onu cezalandırmaya hemen odaklan.
Dalga temizlemeBu midlane matchup'ı saf bir push savaşıdır; Karma'nın Inner Flame'i Seraphine'in High Note waveclear'ına doğrudan cevap verir. Karma anlık baskı için yeteneklerini güçlendirmek üzere Transcendent Embrace'e güvenir; Seraphine ise çift cast yapmak ve önceliği almak için Stage Presence kullanır. Inspire ve Surround Sound devasa kalkanlar sağladığı için hiçbir şampiyon diğerini solo kolayca öldüremez; bu da wave'i itme için sürekli bir savaşa dönüşür.Seraphine build →Detayları gör
Seraphine
Neden
Bu midlane matchup'ı saf bir push savaşıdır; Karma'nın Inner Flame'i Seraphine'in High Note waveclear'ına doğrudan cevap verir. Karma anlık baskı için yeteneklerini güçlendirmek üzere Transcendent Embrace'e güvenir; Seraphine ise çift cast yapmak ve önceliği almak için Stage Presence kullanır. Inspire ve Surround Sound devasa kalkanlar sağladığı için hiçbir şampiyon diğerini solo kolayca öldüremez; bu da wave'i itme için sürekli bir savaşa dönüşür.
Lane etkisi
Her şampiyonun da üstün menzilli temizleme araçları olduğundan, lane durumu son derece değişken ama kill açısından durgun kalır. Seraphine seni High Note ile turret'in altına iterse sen farm yapmakta zorlanırken Seraphine seni poke'lar. Tersine, onu içeri itmek Seraphine'i sana kök atmak için şans aramak yerine Beat Drop'u minion'lara harcamaya zorlar; böylece harita baskısı dengede kalır ve erken roam avantajları önlenir.
Nasıl oynanır
Makro savaşı kazanmak için çift cast hızına yetişmek üzere Inner Flame'i sürekli caster minion'lara kullan. River çevresinde skirmish çıktığında asla jungler'ının tam arkasında ya da önünde durma; Seraphine, Encore'un birden fazla hedefe isabet etmesine güvenerek Encore'un menzilini uzatır ve tüm takımını charm'lar. Seraphine Beat Drop'u ıskalarsa hemen yürüyerek Focused Resolve ile onu tether'la; böylece Surround Sound'unu harcamaya zorlayıp trade'i kazanırsın.
Bu şampiyonlar genellikle senin temel güçlerine etkili şekilde karşılık veremez, bu da çatışmaya daha fazla özgürlükle yaklaşmanı sağlar. Onları baskı altına almak ve lehine dönen trade'ler zorlamak için genellikle birden fazla yolun vardır. Onlara rahat bir pozisyona dönme fırsatı vermek yerine, bu avantajı kendi temponu dayatmak için kullan.
Atılma karşıtıKalkanlarKarma bu lane'e hükmeder; çünkü Yasuo'nun ana savunması Wind Wall, Karma'nın Focused Resolve'una karşı tamamen işe yaramazdır. Yasuo senin Inner Flame poke'unu tepkisel olarak bloklayabilse de, Focused Resolve'un tether'ı bir kez bağlandığında onu koparamaz. Bu bloklanamaz bağ bir kökü garanti eder, yüksek hareketlilikli dash'lerini kapatır ve savunma duvarı bittikten sonra Yasuo'yu ardından gelen Mantra ile güçlendirilmiş bir burst'e tamamen açık bırakır.Yasuo build →Detayları gör
Yasuo
Neden
Karma bu lane'e hükmeder; çünkü Yasuo'nun ana savunması Wind Wall, Karma'nın Focused Resolve'una karşı tamamen işe yaramazdır. Yasuo senin Inner Flame poke'unu tepkisel olarak bloklayabilse de, Focused Resolve'un tether'ı bir kez bağlandığında onu koparamaz. Bu bloklanamaz bağ bir kökü garanti eder, yüksek hareketlilikli dash'lerini kapatır ve savunma duvarı bittikten sonra Yasuo'yu ardından gelen Mantra ile güçlendirilmiş bir burst'e tamamen açık bırakır.
Lane etkisi
Bu etkileşim lane'in baskısını tamamen senin tarafına kaydırır. Yasuo bloklanamaz bir kök tehdidine saygı göstermek zorunda olduğundan, minion wave'inin içinden dash atıp trade yapmak için Sweeping Blade'i serbestçe kullanamaz. Yasuo temel bir Inner Flame'i bloklamak için Wind Wall'u her harcadığında agresif oynaman için büyük bir pencere açılır; onu turret'inin altında farm'dan ayırır ve basic attack'lerle Way of the Wanderer kalkanını sürekli aşındırırsın.
Nasıl oynanır
Kaynak harcamadan önce Way of the Wanderer kalkanını bir basic attack ile patlat. Yasuo Sweeping Blade ile öne atıldığında panikle suratına Inner Flame atma; bunun yerine hemen Focused Resolve ile onu tether'la. Bağı korumak için yanında yürü ve Steel Tempest kasırgasından kaçınmak için hareket hızı artışı sağlayan Inspire'ı kullan. Yasuo köklendiğinde ve Wind Wall'u cooldown'da ya da aşılmışken, Mantra ile aşılanmış Inner Flame'ini garantili, ağır hasar için salıver.
Erken baskıUzaktan hasarMel, uzaktan poke atmak için çok belli olan, hareketsiz cast animasyonlarına güvenir. Bu tam olarak senin işine yarar; çünkü Mel'in gelen mermisini emmek için anında Inspire ile tepki verebilirsin. Mel cast frame'lerinde kilitliyken kaçınamaz; böylece Transcendent Embrace'i kolayca hazırlayıp Mel toparlanmadan önce Mantra ile güçlendirilmiş yıkıcı bir Inner Flame ile onu vurabilirsin.Mel build →Detayları gör
Mel
Neden
Mel, uzaktan poke atmak için çok belli olan, hareketsiz cast animasyonlarına güvenir. Bu tam olarak senin işine yarar; çünkü Mel'in gelen mermisini emmek için anında Inspire ile tepki verebilirsin. Mel cast frame'lerinde kilitliyken kaçınamaz; böylece Transcendent Embrace'i kolayca hazırlayıp Mel toparlanmadan önce Mantra ile güçlendirilmiş yıkıcı bir Inner Flame ile onu vurabilirsin.
Lane etkisi
Üstün trade düzenin, mid lane wave'leri üzerinde mutlak kontrol anlamına gelir. Mel cast etmek için durmak zorunda olduğundan, minion wave'ine paralel konumlanabilirsin ve onu sana mı yoksa minion'lara mı vuracağını seçmeye zorlayabilirsin. İkisini birden yapmasını engelleyerek onu kolayca turret'inin altına itersin, onun sağlık çubuğunu eritirsin ve bedava roam zamanı elde edersin.
Nasıl oynanır
Mel ve minion wave'ine göre her zaman çapraz bir konumlanma çizgisi koru. Bu, Mel'in hedeflemesini bölmeye zorlar ve belli olan cast'lerini daha da öngörülebilir kılar. Parmağını animasyonuna tepki vermek için Inspire'ın üstünde tut ve hemen Inner Flame ile karşılık ver. Mel trade'i kurtarmak için öne çıkmaya çalışırsa, açık kalma süresini uzatmak için onu Focused Resolve ile zincirle; böylece rahat farm yapmasına asla izin vermezsin.
Erken baskıCC bağışıklığıKarma bu matchup'a hükmeder; çünkü Karma'nın Inspire'ı Veigar'ın ana kurulum aracı Event Horizon'ı tamamen etkisiz kılar. Inspire'ın sağladığı anlık hareket hızı patlaması, gecikme bitip stun etkinleşmeden kafesin çevresinden çıkmanı sağlayacak hızı verir. Event Horizon'ın CC'si olmadan Dark Matter'ının isabetini garanti edemeyen Veigar, erken baskına karşı güvenle trade yapamaz veya Phenomenal Evil Power'ını stackleyemez.Veigar build →Detayları gör
Veigar
Neden
Karma bu matchup'a hükmeder; çünkü Karma'nın Inspire'ı Veigar'ın ana kurulum aracı Event Horizon'ı tamamen etkisiz kılar. Inspire'ın sağladığı anlık hareket hızı patlaması, gecikme bitip stun etkinleşmeden kafesin çevresinden çıkmanı sağlayacak hızı verir. Event Horizon'ın CC'si olmadan Dark Matter'ının isabetini garanti edemeyen Veigar, erken baskına karşı güvenle trade yapamaz veya Phenomenal Evil Power'ını stackleyemez.
Lane etkisi
Bu etkileşim, ilk wave'lerden itibaren son derece agresif oynamana ve amansız bir lane bully dinamiği kurmana izin verir. Sürekli Inner Flame ile tehdit ederek Veigar'ı Baleful Strike'ı sana değil minion wave'lerine kullanmaya zorlarsın. Veigar turret'inin altına sıkışır ve senin push'una yetişmek için mana kaybeder. Bu erken öncelik, rahatça scaling yapmasını engeller; ilk tehlikeli güç eşiğinden önce sana temiz recall pencereleri ve mid lane üzerinde tam öncelik sağlar.
Nasıl oynanır
Veigar Event Horizon cast animasyonuna başlamadıkça Inspire'ı asla savunma amaçlı kullanma. Bu kalkanı her zaman hazır tut; kafes konturunu gördüğün anda sınırın dışına hemen adım atmak veya içeriden gelen Dark Matter'ından kaçınmak için Inspire'ı etkinleştir. Veigar'ın kafesi cooldown'dayken, Veigar köklenmiş ve çaresizken büyük hasar vermek için Mantra ile Inner Flame'i güçlendirerek Focused Resolve ile onu tether'lamak üzere agresif biçimde öne çık.
Karşı saldırıUzaktan hasarKarma, menzil engelleme yoluyla Lissandra'ya hükmeder. Lissandra, Ice Shard veya Ring of Frost kullanmak için yaklaşmak zorundadır; ancak Karma'nın Inner Flame ile üstün menzili onu uzakta tutar. Lissandra Glacial Path ile mesafeyi kapatmaya çalıştığında, Karma onu Focused Resolve ile bağlayarak ve Inspire ile her türlü karşılık burst'ünü azaltarak saldırganlığı anında bastırır.Lissandra build →Detayları gör
Lissandra
Neden
Karma, menzil engelleme yoluyla Lissandra'ya hükmeder. Lissandra, Ice Shard veya Ring of Frost kullanmak için yaklaşmak zorundadır; ancak Karma'nın Inner Flame ile üstün menzili onu uzakta tutar. Lissandra Glacial Path ile mesafeyi kapatmaya çalıştığında, Karma onu Focused Resolve ile bağlayarak ve Inspire ile her türlü karşılık burst'ünü azaltarak saldırganlığı anında bastırır.
Lane etkisi
Bu etkileşim Lissandra'yı savunmada oynamaya zorlar; ağır poke yemeden Ice Shard ile wave'leri kolayca temizlemesini engeller. Senin şartlarında bir snare riskine girmeden Glacial Path'i agresif kullanamaz. Sonuç olarak mid önceliğini sen yönetirsin ve Lissandra'yı gold kaybetmeye ya da lane baskından hayatta kalmak için Frozen Tomb'u savunma amaçlı kullanmaya zorlarsın; roam atamaz.
Nasıl oynanır
Gereksiz hasar almamak için kendini her zaman Lissandra'nın Ice Shard'ının sekme menzilinin dışında konumlandır. Minion wave'inin biraz yanında dur. Glacial Path'ten gelen pençesinin sana doğru süzüldüğünü gördüğünde kaçma. Bunun yerine kalkan için Inspire'a basmaya hazırlan, hemen onun varış noktasını Focused Resolve ile hedefle ve zorunlu trade'ini cezalandırmak için Mantra ile güçlendirilmiş bir Inner Flame ile devam et.
Karşı saldırıHayatta kalmaKarma bu matchup'a hükmeder; çünkü Zed'in ana suikast aracı Death Mark'ın çıkış noktası tamamen öngörülebilirdir. Zed arkanda belirdiği anda hemen kullanılan Focused Resolve bir kökü garanti eder ve Zed'in hareketliliğini kapatır. İlk işaretin hasarını ve peşinden gelen Razor Shuriken'i emen Inspire ile birleşince Karma, burst'ünü tamamen etkisiz kılar ve Zed'in ult commit'ini kolay bir self-peel fırsatına çevirir.Zed build →Detayları gör
Zed
Neden
Karma bu matchup'a hükmeder; çünkü Zed'in ana suikast aracı Death Mark'ın çıkış noktası tamamen öngörülebilirdir. Zed arkanda belirdiği anda hemen kullanılan Focused Resolve bir kökü garanti eder ve Zed'in hareketliliğini kapatır. İlk işaretin hasarını ve peşinden gelen Razor Shuriken'i emen Inspire ile birleşince Karma, burst'ünü tamamen etkisiz kılar ve Zed'in ult commit'ini kolay bir self-peel fırsatına çevirir.
Lane etkisi
Bu etkileşim, wave'i Inner Flame ile agresif biçimde itmene izin verir ve Zed'i poke atmak yerine farm için Razor Shuriken kullanmaya zorlar. Living Shadow trade'lerini Inspire ile kolayca bloklayabildiğini bilmek, Zed'i onun turret'inin altında güvenle harass edebileceğin anlamına gelir. Zed wave'i temizlemek için lane'de kalmak zorunda kalır, roam atamaz ve harita baskısı tamamen ortadan kalkar.
Nasıl oynanır
Zed'in Death Mark'ı hazır olduğu sürece Focused Resolve'unu her zaman elinde tut. Zed girerse, tether sırasında büyük bir kendini iyileştirme için Focused Resolve'u güçlendirmek üzere Transcendent Embrace'i cast et veya Shadow Slash'ini bloklamak için Inspire kullan. Zed'in Living Shadow'u cooldown'dayken öne çıkıp Inner Flame ile onu cezalandır. Zed'in enerjisi ve ult'i varken sana dalabileceği için CC'ni asla önceden harcama.
Can yenilemeErken baskıKarma bu mid lane matchup'ına hükmeder; çünkü Karma'nın ana CC'si Vladimir'in ana savunma aracını tamamen aşar. Focused Resolve kullandığında, Vladimir Sanguine Pool'a batarak ondan kaçmaya çalışsa bile tether devam eder. Vladimir hedef alınamaz olarak bağı koparamadığı için süre sonunda yine köklenmiş olur ve ardından gelen Mantra ile güçlendirilmiş Inner Flame'e son derece açık kalır.Vladimir build →Detayları gör
Vladimir
Neden
Karma bu mid lane matchup'ına hükmeder; çünkü Karma'nın ana CC'si Vladimir'in ana savunma aracını tamamen aşar. Focused Resolve kullandığında, Vladimir Sanguine Pool'a batarak ondan kaçmaya çalışsa bile tether devam eder. Vladimir hedef alınamaz olarak bağı koparamadığı için süre sonunda yine köklenmiş olur ve ardından gelen Mantra ile güçlendirilmiş Inner Flame'e son derece açık kalır.
Lane etkisi
Bu etkileşim Vladimir'i güvenlik ağından yoksun bırakır ve mutlak bir erken baskı kurmana izin verir. Tether riskine girmeden waveclear yapmak veya Transfusion ile trade yapmak için öne çıkamaz. Sanguine Pool, sağlığının büyük bir kısmına mal olduğundan ve köküne engel olmadığından, sen güvenle harass ederken Vladimir kötü recall'lara veya kendi turret'inin altına itilmeye sürekli zorlanır, gold kaybeder ve öncelik yitirir.
Nasıl oynanır
Vladimir güçlendirilmiş Transfusion'ını kullanmak için öne çıktığı her an onu Focused Resolve ile tether'lamaya çalış. Vladimir Sanguine Pool kullanırsa panik yapma; mesafeyi korumak için sadece havuzun yanında yürü. Vladimir kökle birlikte tekrar belirdiğinde hemen Mantra ile aşılanmış Inner Flame ile onu patlat. Vladimir turret'inin altında aşırı güvenli oynarsa turret atışlarından korunmak için Inspire ile kendine kalkan koy, wave'i it ve farm'ı kendi turret'ine kaybettir.
Erken baskıTanklarKarma, Malphite'ın ana lane aracını tamamen etkisiz kılar ve bu matchup'ı son derece avantajlı hale getirir. Malphite poke atmak için Seismic Shard fırlattığında, Karma hasarın tamamını emmek için anında Inspire cast edebilir ve hareket hızı çalmayı yok sayabilir. Bu arada Karma'nın menzilli basic attack'leri ve sık Inner Flame cast'leri, Malphite'ın Granite Shield'ini sürekli kırık tutar ve Malphite'ı kalıcı olarak kırılgan bırakır.Malphite build →Detayları gör
Malphite
Neden
Karma, Malphite'ın ana lane aracını tamamen etkisiz kılar ve bu matchup'ı son derece avantajlı hale getirir. Malphite poke atmak için Seismic Shard fırlattığında, Karma hasarın tamamını emmek için anında Inspire cast edebilir ve hareket hızı çalmayı yok sayabilir. Bu arada Karma'nın menzilli basic attack'leri ve sık Inner Flame cast'leri, Malphite'ın Granite Shield'ini sürekli kırık tutar ve Malphite'ı kalıcı olarak kırılgan bırakır.
Lane etkisi
Bu etkileşim, Malphite'ı Thunderclap veya Ground Slam ile almaya çalıştığı her minion için sağlık kaybetmeye zorlar. Malphite'ın poke'u tamamen etkisiz kaldığından wave'leri kolayca itebilir ve onu turret'inin altına kilitleyebilirsin. Malphite berbat recall zamanlamalarına zorlanır ve sana büyük lane önceliği ve kayda değer bir gold avantajı sağlar.
Nasıl oynanır
Malphite'ın Granite Shield'i yeniden etkinleşmeye çalıştığı her an onu harass edebilecek kadar yakın kalırken, Ground Slam'ın menzilinin hemen dışında konumlan. Inspire'ı yalnızca Seismic Shard animasyonu için sakla. Malphite Unstoppable Force ile girmeye çalışırsa, onu olduğu yerde köklemek ve sağlığını geri kazanmak için Mantra ile güçlendirilmiş Focused Resolve'u hemen kullan.
CC bağışıklığıUzaktan hasarKarma, Vex'in savunma kimliğini tamamen kapatır; çünkü Karma hareketlilik için Inspire'a güvenir. Inspire bir dash değil, saf bir hareket hızı artışı sağladığı için Vex'in Doom 'n Gloom pasifini asla tetiklemezsin. Bu, Vex'i bonus işaret hasarını uygulayamaz veya sana karşı fear'ını güvenilir biçimde dolduramaz halde bırakır; ana lane caydırıcı mekanizmasını tamamen işe yaramaz kılarken sen onun skillshot'larından zahmetsizce kaçınırsın.Vex build →Detayları gör
Vex
Neden
Karma, Vex'in savunma kimliğini tamamen kapatır; çünkü Karma hareketlilik için Inspire'a güvenir. Inspire bir dash değil, saf bir hareket hızı artışı sağladığı için Vex'in Doom 'n Gloom pasifini asla tetiklemezsin. Bu, Vex'i bonus işaret hasarını uygulayamaz veya sana karşı fear'ını güvenilir biçimde dolduramaz halde bırakır; ana lane caydırıcı mekanizmasını tamamen işe yaramaz kılarken sen onun skillshot'larından zahmetsizce kaçınırsın.
Lane etkisi
Bu lane'in tüm temposuna sen hükmedersin ve amansız bir lane bully'ye dönüşürsün. Onun poke'unu emmek için kendini sürekli Inspire ile kalkanlayarak, kolay Inner Flame patlamaları isabet ettirmek için yürüyebilirsin. Vex, turret'inin altındaki wave'i inceltmek için mana yakarak Personal Space veya Mistral Bolt kullanmak zorunda kalır; senin erken önceliğine karşı çıkacak veya Shadow Surge ile roam atacak baskısı kalmaz.
Nasıl oynanır
Vex'in yavaş hareket eden Looming Darkness'ını tuzağa düşürmek için sıkı bir orta menzil aralığı koru. Vex çemberini ıskaladığı anda mesafeyi kapatmak için Inspire'ı etkinleştir, Focused Resolve ile onu tether'la ve köklenmişken Transcendent Embrace ile güçlendirilmiş bir Inner Flame ile devam et. Vex Shadow Surge ile girmeye kalkarsa, burst'ünü emmek için hemen Inspire ile kendine kalkan koy; Vex ulaştığı anda da Focused Resolve ile onu derhal kilitle.
Erken baskıGeç oyun gücüBu matchup, Kayle'in menzilli Divine Ascent formlarını açmadan önce senin waveclear hızına yetişmekteki tam acizliğiyle belirlenir. Inner Flame ile wave'i acımasızca itebilirsin. Kayle'in Starfire Spellblade'i erken oyunda tek hedefli olduğundan ve Radiant Blast verimli temizleyemediğinden, Kayle karşılık vermek yerine sınırlı mana'sını turret'inin altında last-hit için kullanmak zorunda kalır.Kayle build →Detayları gör
Kayle
Neden
Bu matchup, Kayle'in menzilli Divine Ascent formlarını açmadan önce senin waveclear hızına yetişmekteki tam acizliğiyle belirlenir. Inner Flame ile wave'i acımasızca itebilirsin. Kayle'in Starfire Spellblade'i erken oyunda tek hedefli olduğundan ve Radiant Blast verimli temizleyemediğinden, Kayle karşılık vermek yerine sınırlı mana'sını turret'inin altında last-hit için kullanmak zorunda kalır.
Lane etkisi
Kayle'i sürekli turret'ine sıkıştırmak mid lane'in tüm temposunu belirler. Kayle turret'inin altında gold kaybeder; sen ise tam harita önceliğini elde edersin. Kayle farm yapmaya çabalarken scuttle crab'leri rahatça alabilirsin veya onun jungler'ına baskı yapabilirsin. Kayle meydan okumak için öne çıkmaya çalışırsa, Transcendent Embrace ile Inner Flame'in hızlı bir kombinasyonu sağlığını eritir ve onu Celestial Blessing'i harcamaya, daha da fazla mana kaybetmeye zorlar.
Nasıl oynanır
Inner Flame'ini hem minion wave'ine hem de Kayle'e isabet edecek şekilde açılandırmak için yan çalının yakınında agresif konumlan. Focused Resolve'u caydırıcı olarak hazır tut; Kayle seni yavaşlatıp girmek için Radiant Blast kullanmaya çalışırsa, onu hemen tether'la ve flash'ını veya 5. seviyeye ulaştığında Divine Judgment'ını harcamaya zorla. Kayle turret'inin altında son derece güvenli oynarsa dive'a zorlama; bunun yerine Kayle farm yaparken yan lane'lere etki etmek ve roam atmak için Inspire'ı güvenle kullan.
Karşı saldırıDalga temizlemePyke'ın midlane tehdidi, stun atıp burst'ünü kurmak için Phantom Undertow'u isabet ettirmeye dayanır. Ancak Karma bu girişi tamamen etkisiz kılar. Pyke Phantom Undertow ile öne atıldığı an Karma, bonus hareket hızıyla geri dönen stun gölgesinden kolayca yana kaçmak için Inspire'ı etkinleştirebilir. Ardından Pyke pozisyonu bozukken ve kaçamazken Focused Resolve ile onu hemen tether'layıp kilitleyebilir.Pyke build →Detayları gör
Pyke
Neden
Pyke'ın midlane tehdidi, stun atıp burst'ünü kurmak için Phantom Undertow'u isabet ettirmeye dayanır. Ancak Karma bu girişi tamamen etkisiz kılar. Pyke Phantom Undertow ile öne atıldığı an Karma, bonus hareket hızıyla geri dönen stun gölgesinden kolayca yana kaçmak için Inspire'ı etkinleştirebilir. Ardından Pyke pozisyonu bozukken ve kaçamazken Focused Resolve ile onu hemen tether'layıp kilitleyebilir.
Lane etkisi
Bu etkileşim lane'in temposunu tamamen Karma'nın lehine çevirir. Inner Flame sürekli Pyke'ın konumlanmasını cezalandırdığı için Pyke melee saldırılarıyla güvenle waveclear yapamaz. Pyke Ghostwater Dive ile roam atmaya çalışırsa, Karma'nın üstün waveclear'ı wave'leri anında Pyke'ın turret'inin altına itmesini sağlar. Bu, Pyke'ı gold dolu wave'leri kaybetmek ile senin rotasyonlarına yan lane'lerini kurtaramayacak kadar geç yetişmek arasında seçim yapmaya zorlar.
Nasıl oynanır
Pyke'ın hook'larını tuzağa çekmek için kendini caster minion'larının yakınında agresif konumlandır. Dolu bir Bone Skewer'dan tepkisel olarak kaçınmak veya Phantom Undertow'dan kaçmak için Inspire'ı her zaman hazır tut. Pyke Ghostwater Dive ile kaçmaya veya iyileşmeye çalışırsa, kamuflajını ortaya çıkarmak ve onu kilitlemek için hemen Transcendent Embrace ile birleştirilmiş Focused Resolve kullan. Wave çöktüğünde, river'daki suikast pencerelerini önlemek için Pyke'ın roam rotasını takip et.
Karşı saldırıDalga temizlemeKarma, wave önceliğine hükmederek Talon'un harita tehdidini tamamen etkisiz kılar. Inner Flame ile wave'leri sürekli iterek Talon'u turret'inin altında hapsetmiş olursun. Talon minion'ları almak için Rake harcamak zorunda kaldığında, duvarların üzerinden atlayıp roam atmak için Assassin's Path'i kolayca kullanamaz ve ana gücü etkisiz kalır.Talon build →Detayları gör
Talon
Neden
Karma, wave önceliğine hükmederek Talon'un harita tehdidini tamamen etkisiz kılar. Inner Flame ile wave'leri sürekli iterek Talon'u turret'inin altında hapsetmiş olursun. Talon minion'ları almak için Rake harcamak zorunda kaldığında, duvarların üzerinden atlayıp roam atmak için Assassin's Path'i kolayca kullanamaz ve ana gücü etkisiz kalır.
Lane etkisi
Bu sürekli wave baskısı Talon'u lane'e kilitler ve yan lane'lerini Talon'un ölümcül flank saldırılarından korur. Talon turret'inin altında farm'a sıkıştığı için roam zamanlamaları mahvolur. Talon Noxian Diplomacy ile trade yapmaya çalışırsa, burst'ünü Inspire ile kolayca emebilir ve Focused Resolve ile karşılık verebilirsin; Talon'un sağlığı roam atmak için güvenli olamayacak kadar düşük kalır.
Nasıl oynanır
İlk wave'den itibaren Mantra ile temizleme hızını artırarak Inner Flame ile minion'ları agresif biçimde it. Talon Assassin's Path ile sıvışırsa takım arkadaşlarına hemen ping at ve Talon'un turret'ine hasar ver. Talon sana Noxian Diplomacy ile atlarsa, hasarı bloklamak için Inspire cast et ve Blade's End'i tetiklemesini önlemek için Focused Resolve ile onu tether'la.
Karşı saldırıAtılma karşıtıKarma bu lane'in temposunu belirler; çünkü Katarina tam burst'ünü yıkıcı bir karşılığa kendini açmadan uygulayamaz. Katarina girmek için Shunpo kullandığında hemen Focused Resolve ile tepki verebilirsin. Bu tether onu korkunç bir açmazın içine iter: ya kaçmak için Death Lotus'unu erkenden iptal eder, ya da hareketsiz kalıp kaçınılmaz köke katlanır ve senin Inner Flame'ine tamamen açık kalır.Katarina build →Detayları gör
Katarina
Neden
Karma bu lane'in temposunu belirler; çünkü Katarina tam burst'ünü yıkıcı bir karşılığa kendini açmadan uygulayamaz. Katarina girmek için Shunpo kullandığında hemen Focused Resolve ile tepki verebilirsin. Bu tether onu korkunç bir açmazın içine iter: ya kaçmak için Death Lotus'unu erkenden iptal eder, ya da hareketsiz kalıp kaçınılmaz köke katlanır ve senin Inner Flame'ine tamamen açık kalır.
Lane etkisi
Bu etkileşim Katarina'nın agresif kill baskısını tamamen etkisiz kılar ve wave durumuna hükmetmene izin verir. Güvenle trade yapamadığı için Transcendent Embrace ile güçlendirilmiş Inner Flame ile onu sürekli turret'in altına itebilirsin. Katarina turret'ine minion gold'u kaybetmek ile ağır poke yemek arasında seçim yapmaya zorlanır; bu da roam zamanlamalarını ciddi biçimde geciktirir ve senin yan lane'lerini onun erken skirmish gücünden korur.
Nasıl oynanır
Focused Resolve'u asla önceden savurma; bu yeteneği özellikle Katarina'nın bir dagger'a blink attığı an için sakla. Katarina Bouncing Blade veya Preparation ile bir dagger bıraktığında, alma yarıçapının hemen dışında ama yemi yutarsa onu anında tether'layabilecek kadar yakında konumlan. Katarina Death Lotus channel etmeye kalkarsa, tether'ı hemen uygula ve kök dolarken ilk dagger'ları emmek için Inspire ile kendine kalkan koy.
Avantaj: Wild Rift Core'un standart kararı (−3 ile +3 arası), satırda adı geçen şampiyonun bakış açısından. Kazanma ve seçilme oranı: rakibin bu roldeki kendi oranları — Wild Rift CN · Challenger, Patch 7.3b. Birebir eşleşme kazanma oranı değildir.
Avantaj: Wild Rift Core'un standart kararı (−3 ile +3 arası), satırda adı geçen şampiyonun bakış açısından. Kazanma ve seçilme oranı: rakibin bu roldeki kendi oranları — Wild Rift CN · Challenger, Patch 7.3b. Birebir eşleşme kazanma oranı değildir.
Bu şampiyon nasıl counterlanır
Counter açısı
Karma’e karşı koyan şey sayılar değil, oyun tarzlarıdır. Hızını bozan şampiyonlara karşı zorlanır: hızlı saldırı, anlık patlama hasarı veya üstün menzilli saldırılar. O, çatışmaları uzatmak ve karşılıklı hasar alışverişini kontrol etmek isterken, ona karşı oynayanlar onu anında karar vermeye zorlar. Bu durum temel bir dengesizliğe yol açar: Karma öngörmek yerine tepki vermek zorunda kalırsa, etkisinin büyük bir kısmını yitirir. Onu engelleyen unsurları anlamak, ne zaman tempoyu kontrol edemediğini anlamak demektir.
Patch bağlamı
Karma’in rakiplerine karşı en büyük sorunu, sert kontrol yeteneklerinden yoksun olmasıdır. Hayatta kalmak için konumlandırma ve kalkanlara güveniyor, ancak bu, hedefi anında kilitleyebilen şampiyonlara karşı yetersiz kalıyor. Ayrıca, sürdürülebilirlik açısından ondan üstün olan ya da baskıyı görmezden gelip doğrudan çatışmaya giren desteklere karşı poke'ları etkisiz hale geliyor. Son olarak, Mantra'sı tahmin edilebilir hale geliyor: bir kez kullanıldığında, açık bir savunmasızlık penceresi yaratıyor.
Hızlı okuma
Hızlı ve doğrudan saldırılara karşı zorlanıyor.
Uzun menzilli poke destekleri, onun etkisini etkisiz hale getirebilir.
Mantra'nın bulunmadığı pencereleri güvenlik açığına maruz kalabilir.
Counter arketipleri
Patlayıcı saldırı
Bu şampiyonlar, Karma’in en büyük zayıflığı olan anlık tepki verememe sorununu doğrudan cezalandırıyor. Bir kez çatışmaya çekildiğinde, etkili bir şekilde geri çekilemiyor ya da kalkanlarıyla durumu telafi edemiyor. Hızlı ve öngörülemez çatışmalar karşısında, öngörüye dayalı oyun tarzı anlamsız hale geliyor. Ayrıca, Mantra E yeteneğinin etkisini tam olarak göstermesi için çarpışma anına kadar genellikle yeterli zaman kalmıyor.
Şampiyon nasıl uyum sağlamalı. Daha geride oynayın, Mantra’yı rakipten uzaklaşmak için saklayın ve koridorda gereksiz risklerden kaçının.
Üstün vuruş
Bu şampiyonlar, Karma’in kendi alanında onunla başa çıkabilir ya da ondan daha iyi performans gösterebilir. Menzilleri veya dayanıklılıkları sayesinde, onun uzak mesafeden saldırılarını etkisiz hale getirebilir ve zamanla karşılıklı çatışmalarda üstünlük sağlayabilirler. Karma, en önemli avantajı olan koridorun temposunu kontrol etme yeteneğini yitirir. Sonuç olarak, oyunu yönlendirmek yerine tepki vermek zorunda kalır.
Leona ile oynanan maç, Karma’in sınırlarını mükemmel bir şekilde ortaya koyuyor: Çatışmaya girdiğinde etkili bir şekilde karşılık veremiyor. Leona, Karma’i sürekli tepki vermeye zorluyor. Önemli olan, koridoru domine etmeye çalışmak yerine her hamleyi önceden tahmin etmektir.
Ona karşı yaygın hatalar
Ona karşı yaygın hatalar
Mantra’nın kesinti sürelerinin hafife alınması.
Engage karşısında çok agresif oynamak.
Hayatta kalmak yerine başkalarını kışkırtmaya çalışıyor.
Görme kontrolünün yetersiz olması.
Düşmanların bekleme sürelerini göz ardı etmek.
Koç notları
Rakibinin kontrataklarına karşı Karma savunma odaklı oynamalı ve rakibin hatalarını beklemelidir.
Amacınız koridoru kazanmak değil, kaybetmemektir.
FAQ
Karma ct nedir?
"Karma ct", Türkçe Wild Rift topluluğunda "Karma counter" anlamına gelir: bu şampiyona karşı avantajlı seçimler. Bu sayfada en iyi counterlar (ct listesi), zor matchup'lar, counter itemler ve karşı oynama ipuçları yer alıyor.
Karma neden Leona’e karşı zorlanıyor?
Leona, doğrudan ve anında çatışmalara zorlayarak Karma’in oyun stilini tamamen etkisiz hale getirir. Karma, öngörü ve tempo kontrolüne dayanırken, Leona ise anlık kararlar almayı gerektirir. Bir kez yakalandığında, Karma etkili bir şekilde pozisyon değiştiremez veya kendini koruyamaz; bu da her hatanın son derece ağır sonuçlara yol açmasına neden olur.