Ağustos 2026 · Patch 7.2d
Assassin · MID

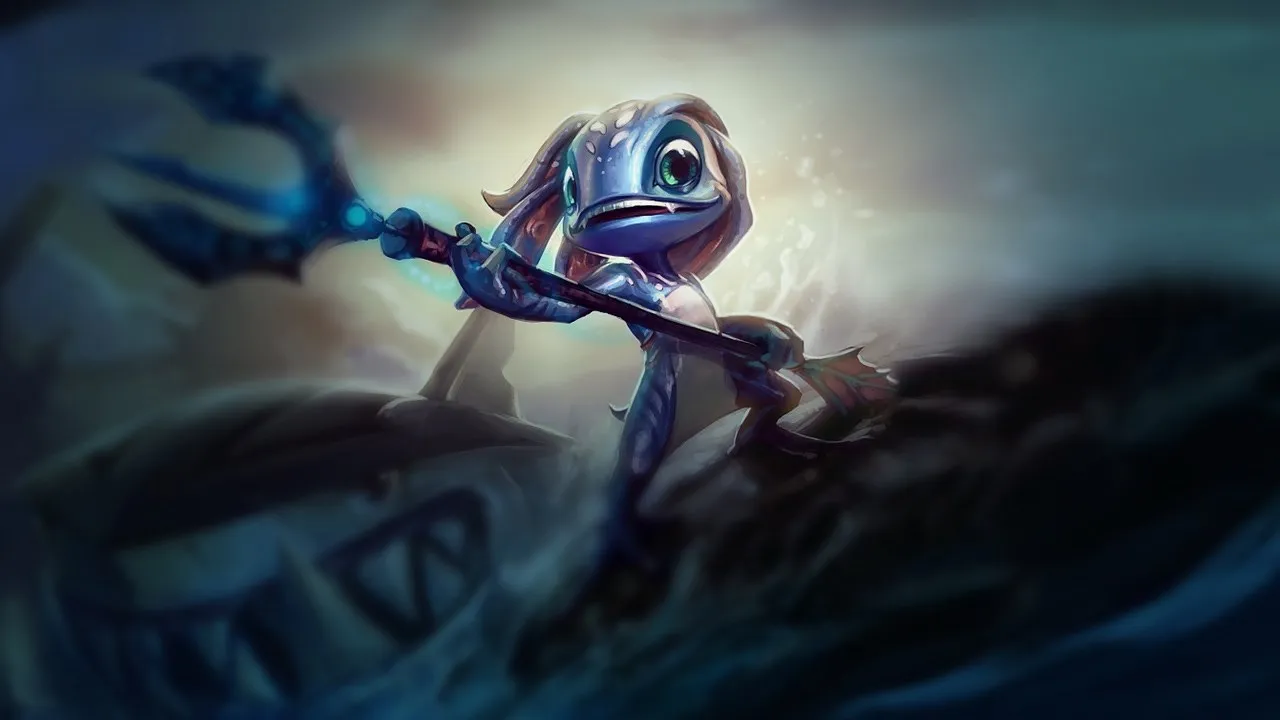
Fizz Wild Rift Counter Rehberi

Mid Lane'de bir AP assassin olan Fizz, hareketliliğini kısıtlayan kompozisyonlara karşı zorlanır. Crowd control, uzun menzilli poke veya savunmaya yönelik burst etrafına kurulu stratejiler, onun engage yeteneğini sınırlar. Hızla içeri dalıp çıkma ihtiyacı, pozisyon hatalarını son derece cezalandırıcı hale getirir.

★ MID Tier B
HASAR
UTIL
TANK
DIFF
Win 48.1% #83 · ↓7pt
Pick 1.9% #30
Ban 1.7% #74

Fizz Wild Rift Counter Rehberi ★ Counter Sheet

Hard Counter

3

Bu şampiyonlar, seninkini doğrudan geride bırakan bir build ve oynanış tarzına sahip, bu da lane kontrolünü ve farmı son derece zorlaştırabilir. Yetenekleri temel güçlerini etkisiz hale getirebilir ya da her zamanki planını oynamaya çalıştığın anda seni cezalandırabilir. Bu matchuplarda amaç genellikle hataları en aza indirmek ve doğrudan çatışmanın dışında çözümler bulmaktır.

Vex

Vex

anti_dashfear_lock Vex acts as a hard counter to your mobile kit because of Doom 'n Gloom. Every time you try to gap-close using Urchin Strike or escape with Playful, you actively trigger her passive mark. Vex can easily consume this mark with Mistral Bolt or Personal Space to deal massive bonus damage, or simply hold her charged bar to fear you mid-dash, completely neutralizing your burst potential. Detayları gör
Vex

Neden

Vex acts as a hard counter to your mobile kit because of Doom 'n Gloom. Every time you try to gap-close using Urchin Strike or escape with Playful, you actively trigger her passive mark. Vex can easily consume this mark with Mistral Bolt or Personal Space to deal massive bonus damage, or simply hold her charged bar to fear you mid-dash, completely neutralizing your burst potential.

Lane etkisi

This interaction forces you into a highly defensive posture from the very first wave. You cannot safely contest the push, as Vex will use Looming Darkness to zone you while keeping her fear ready. Engaging directly is suicide, leaving you bleeding health and stuck under turret. Consequently, you lose all mid lane priority, allowing Vex to easily secure vision and pressure your jungler.

Nasıl oynanır

To survive, you must play around Vex's resource bar. Only attempt to secure minions when her Doom 'n Gloom is uncharged. Instead of trying to kill her, focus on surviving until level five. Use Playful solely to quickly clear waves crashed under your turret, then immediately seek roaming opportunities. Watch the side lanes and follow up on your jungler's plays, using Chum the Waters to secure kills elsewhere rather than wasting it on her shield.

Tam profil →
Lissandra

Lissandra

point_click_ccanti_dive Lissandra completely shuts down your assassination attempts by punishing your mobility. Whenever you dash in with Urchin Strike or try to land Playful, she can instantly react with Ring of Frost to root you in place before you can trigger Rending Wave. Post-level five, her Frozen Tomb acts as an absolute counter, locking you down mid-air or neutralizing Chum the Waters by casting it on herself. Detayları gör
Lissandra

Neden

Lissandra completely shuts down your assassination attempts by punishing your mobility. Whenever you dash in with Urchin Strike or try to land Playful, she can instantly react with Ring of Frost to root you in place before you can trigger Rending Wave. Post-level five, her Frozen Tomb acts as an absolute counter, locking you down mid-air or neutralizing Chum the Waters by casting it on herself.

Lane etkisi

This matchup strips away your offensive pressure, forcing you into a defensive shell. Lissandra constantly shoves the wave using Ice Shard, forcing you to farm under turret where she can poke you safely. If you attempt to thin the minions using Playful, you leave yourself completely vulnerable to a fatal Ring of Frost lockdown, meaning you will consistently lose mid priority and lag behind in gold.

Nasıl oynanır

Give up on trying to kill Lissandra in 1v1 situations. Instead, focus on using Rending Wave to secure last hits under your turret and preserve Playful solely as an escape mechanism to dodge her Glacial Path gank setups. Once you have Chum the Waters, search for roaming windows. When she pushes you in, use that time to run to the side lanes where your burst can actually secure kills against less defensive targets.

Tam profil →
Malphite

Malphite

tank_midanti_burst Malphite completely shuts down your assassination threat. His Granite Shield absorbs your initial Urchin Strike or Rending Wave trade, leaving his health bar untouched. Because you are both melee, you must step up to farm, which allows him to repeatedly target you with Seismic Shard. This point-and-click poke saps your health while stealing your movement speed, preventing you from retaliating and forcing you into a defensive shell. Detayları gör
Malphite

Neden

Malphite completely shuts down your assassination threat. His Granite Shield absorbs your initial Urchin Strike or Rending Wave trade, leaving his health bar untouched. Because you are both melee, you must step up to farm, which allows him to repeatedly target you with Seismic Shard. This point-and-click poke saps your health while stealing your movement speed, preventing you from retaliating and forcing you into a defensive shell.

Lane etkisi

You will constantly find yourself pushed under turret, bleeding gold and health. Every attempt to contest the wave is met with Seismic Shard, forcing you to either absorb the damage or waste Playful to dodge it, which quickly drains your mana pool. This lack of priority means Malphite controls the lane tempo, forcing you into unfavorable recall timings and giving his team map control.

Nasıl oynanır

Stop trying to kill Malphite; instead, treat this as a roam-first lane. Let the wave crash, use Rending Wave to secure cs under tower, and wait for him to waste mana. The moment you see an opening, use Playful to quickly clear the incoming wave and immediately look for gank opportunities in the side lanes. Your Chum the Waters is useless against his tankiness, but it remains a deadly tool to secure kills on squishier targets elsewhere.

Tam profil →

Dezavantajlı

11

Bu şampiyonlar, matchup'ı tamamen oynanmaz hale getirmeden genellikle çatışmada avantaj sağlayan araçlara sahiptir. Daha fazla menzilleri, senin saldırılarını daha iyi karşılama kapasiteleri veya engage'lerine karşılık verecek daha fazla yolları olabilir. Yaklaşımını buna göre uyarlaman ve dövüşü kabul edeceğin anları dikkatle seçmen gerekir.

Vladimir

Vladimir

untargetable_clashsustain Vladimir completely neutralizes your kill pressure because Sanguine Pool allows him to effortlessly dodge the explosion of Chum the Waters. Without your ultimate's damage and knock-up, you cannot burst him down. Meanwhile, his Transfusion slowly heals back any short trades you attempt with Urchin Strike and Rending Wave, turning this lane into an exhausting battle of attrition that favors his scaling. Detayları gör
Vladimir

Neden

Vladimir completely neutralizes your kill pressure because Sanguine Pool allows him to effortlessly dodge the explosion of Chum the Waters. Without your ultimate's damage and knock-up, you cannot burst him down. Meanwhile, his Transfusion slowly heals back any short trades you attempt with Urchin Strike and Rending Wave, turning this lane into an exhausting battle of attrition that favors his scaling.

Lane etkisi

You cannot force Vladimir out of lane due to his endless health recovery. Attempting to poke him with Playful exposes you to Hemoplague and heavy retaliation from Tides of Blood. This lack of solo kill threat allows him to freely scale under his turret. Eventually, you will be shoved under your own tower, bleeding gold while he dominates the wave state and locks you in place.

Nasıl oynanır

To beat this stalemate, focus your attention on the side lanes. Use Playful to quickly clear incoming minions and immediately disappear into the fog of war. You must look for opportunities to gank when your allies have CC, using Chum the Waters on targets who do not possess Sanguine Pool. If Vladimir freezes the wave near his tower, do not overextend; instead, walk into the river to secure vision or flank the enemy jungler.

Tam profil →
Swain

Swain

anti_burstsustain Swain is an absolute wall for Fizz once he accesses Demonic Ascension. While your Urchin Strike and Rending Wave can chunk his base health pool early, his ultimate's continuous health drain completely negates your burst window. If you try to commit all-in, his Ravenous Flock passive combined with Demonic Ascension turns your damage into his healing pool, especially if he lands Nevermove. Detayları gör
Swain

Neden

Swain is an absolute wall for Fizz once he accesses Demonic Ascension. While your Urchin Strike and Rending Wave can chunk his base health pool early, his ultimate's continuous health drain completely negates your burst window. If you try to commit all-in, his Ravenous Flock passive combined with Demonic Ascension turns your damage into his healing pool, especially if he lands Nevermove.

Lane etkisi

You cannot threaten solo kills under normal circumstances, turning the mid lane into a battle of attrition you will lose. Swain will constantly shove you in using Death's Hand and Vision of Empire. If you use Playful to clear waves, you expose yourself to his Nevermove pull. Consequently, you are forced to give up mid priority, bleeding farm under turret.

Nasıl oynanır

Do not waste your Chum the Waters on a full-health Swain when his ultimate is up. Instead, use Urchin Strike through a minion to escape his Nevermove, and save Playful exclusively to dodge his pull or avoid heavy damage. Your primary goal is to find roam windows; push the wave only when his Death's Hand is on cooldown, then immediately disappear to impact the side lanes where squishier targets can actually be burst down.

Tam profil →
Morgana

Morgana

anti_ccmagic_shield Morgana completely dictates your assassination potential because her Black Shield acts as a hard stop to your entire burst window. The moment you throw Chum the Waters, she can reactively cast her spell shield to absorb the magic damage and completely negate the shark's knock-up. This interaction deprives you of your primary target-locking tool, leaving you vulnerable to a counter-engage with Dark Binding and Soul Shackles while your main damage source is wasted. Detayları gör
Morgana

Neden

Morgana completely dictates your assassination potential because her Black Shield acts as a hard stop to your entire burst window. The moment you throw Chum the Waters, she can reactively cast her spell shield to absorb the magic damage and completely negate the shark's knock-up. This interaction deprives you of your primary target-locking tool, leaving you vulnerable to a counter-engage with Dark Binding and Soul Shackles while your main damage source is wasted.

Lane etkisi

During the laning phase, Morgana will constantly shove you under tower using Tormented Shadow, forcing you to use Seastone Trident to farm under pressure. If you attempt to close the distance with Urchin Strike, she easily reactive-casts Dark Binding to root you mid-dash. This prevents trades, lets her sustain back any chip damage via Soul Siphon, and denies you any priority to roam while you struggle to clear waves.

Nasıl oynanır

To survive and win, you must bait her defensive cooldowns before committing your ultimate. Initiate short trades using Urchin Strike combined with Rending Wave, then immediately use Playful to leap away, dodging her reactive Dark Binding and forcing her to waste Black Shield. Once that shield is down, you have a brief window to strike. If she chains you with Soul Shackles, use the untargetability of Playful to delay the stun trigger and escape her zone.

Tam profil →
Galio

Galio

burst_mitigationcc_lockdown Galio naturally shuts down Fizz's assassination attempts because Shield of Durand provides massive magic damage reduction that completely absorbs the impact of Chum the Waters. When you attempt to execute your full burst, he can simply channel his taunt to mitigate the initial shark damage and then immediately taunt you the moment you land from Playful, leaving you vulnerable to a quick Justice Punch counter-engage. Detayları gör
Galio

Neden

Galio naturally shuts down Fizz's assassination attempts because Shield of Durand provides massive magic damage reduction that completely absorbs the impact of Chum the Waters. When you attempt to execute your full burst, he can simply channel his taunt to mitigate the initial shark damage and then immediately taunt you the moment you land from Playful, leaving you vulnerable to a quick Justice Punch counter-engage.

Lane etkisi

You are constantly forced under turret because Galio easily shoves waves using Winds of War combined with Colossal Smash. If you try to thin the wave with Playful, you expose yourself to a heavy trade. This means you will spend most of the early game farming under pressure, losing your roaming priority while Galio looks to impact the map with Hero's Entrance.

Nasıl oynanır

To survive and find openings, never initiate with Chum the Waters while Galio has Shield of Durand available. Instead, bait his Winds of War first, then use Urchin Strike and Rending Wave for short, quick trades, keeping Playful strictly as a defensive tool to escape his Justice Punch. If he wastes his taunt defensively, that is your precise signal to unleash your full ultimate combo before his cooldowns recover.

Tam profil →
Zilean

Zilean

revive_mechanicanti_dive Zilean's ultimate, Chronoshift, acts as a direct counter to your entire identity as an AP assassin. When you commit your full burst combo using Chum the Waters to isolate and eliminate a target, Zilean can simply cast Chronoshift on them, completely reversing the execution. Because your kit relies on high-cooldown, all-in windows to secure kills, his ability to cheat death makes standard lane solo-kills almost impossible. Detayları gör
Zilean

Neden

Zilean's ultimate, Chronoshift, acts as a direct counter to your entire identity as an AP assassin. When you commit your full burst combo using Chum the Waters to isolate and eliminate a target, Zilean can simply cast Chronoshift on them, completely reversing the execution. Because your kit relies on high-cooldown, all-in windows to secure kills, his ability to cheat death makes standard lane solo-kills almost impossible.

Lane etkisi

In lane, Zilean will safely clear waves from distance using Time Bomb, often zoning you out with double-bomb stuns via Twisted Timeflow. Since dive attempts are useless under Chronoshift, you cannot easily force him out of lane. This neutralizes your early kill pressure, leaving you stuck under turret while he scales, meaning you lose the natural priority needed to help your jungler secure nearby skirmishes.

Nasıl oynanır

To win this matchup, shift your focus away from the mid lane. Use Playful to quickly clear incoming waves and immediately disappear into the fog of war. Timing your roams is critical; wait until Zilean is locked under his own turret clearing minions before moving to the side lanes. If he attempts to follow you, abuse your superior mobility with Urchin Strike in the river to ambush him before he can safely reach his allies.

Tam profil →
Taliyah

Taliyah

anti_dashzone_control Taliyah holds an immense advantage because her Unraveled Earth directly neutralizes your entire mobility kit. If you attempt to gap-close using Urchin Strike or escape using Playful, passing through her minefield immediately triggers a stun and heavy magic damage. This interaction completely shuts down your assassination potential, forcing you to play passively while she safely pokes you down from range. Detayları gör
Taliyah

Neden

Taliyah holds an immense advantage because her Unraveled Earth directly neutralizes your entire mobility kit. If you attempt to gap-close using Urchin Strike or escape using Playful, passing through her minefield immediately triggers a stun and heavy magic damage. This interaction completely shuts down your assassination potential, forcing you to play passively while she safely pokes you down from range.

Lane etkisi

Because you cannot freely engage, Taliyah dictates the wave state. She will constantly push you under tower using Threaded Volley, chipping away at your health bar whenever you try to last-hit. If you get shoved in, she easily utilizes Rock Surfing to roam to side lanes, while you are stuck clearing waves slowly, losing map pressure and falling behind in gold.

Nasıl oynanır

To survive, you must freeze the minion wave just outside your turret range to deny her the space to zone you. Never use Urchin Strike offensively unless her Unraveled Earth is on cooldown. If she mispositions and throws Seismic Shove, use Playful laterally to dodge the knockback rather than jumping forward. If you get pushed out, coordinate with your jungler, letting them bait the minefield before you commit your burst.

Tam profil →

Diğer eşleşmeler

Skill Matchup

8

Bu eşleşmeler her şeyden önce yürütme düellosudur: her iki şampiyon da avantaj elde etmek için gerçek yollara sahiptir. Kaçırılan önemli bir yetenek, doğru öngörülen bir engage ya da tek bir pozisyon hatası düelloyu bir tarafa çevirebilir. Matchup'ı bilmek ve doğru anları tanımak burada özellikle önemlidir.

Ekko

Ekko

invulnerabilityburst This matchup is a pure test of reflexes centered on your ultimate abilities. The lane remains strictly even because while your burst can delete him, Ekko possesses the ultimate counter-tool: Chronobreak. If he times his recall perfectly, he can entirely negate the massive detonation and knockup of your Chum the Waters, leaving you vulnerable without your primary source of damage. Detayları gör
Ekko

Neden

This matchup is a pure test of reflexes centered on your ultimate abilities. The lane remains strictly even because while your burst can delete him, Ekko possesses the ultimate counter-tool: Chronobreak. If he times his recall perfectly, he can entirely negate the massive detonation and knockup of your Chum the Waters, leaving you vulnerable without your primary source of damage.

Lane etkisi

Before level five, trades are extremely volatile. You must use Playful to dodge his returning Timewinder or to avoid his Parallel Convergence stun. If you get caught by his Z-Drive Resonance proc, he will outrun you. Once both of you unlock your ultimates, lane pressure freezes; neither assassin can safely dive the other because Chronobreak and Playful make tower dives incredibly risky.

Nasıl oynanır

To win this mind game, never lead with Chum the Waters from a distance. Instead, force Ekko's hand by engaging with Urchin Strike and Rending Wave to chip his health down. Save Playful to react to his Parallel Convergence shield zone. Only unleash Chum the Waters when he is forced to use Chronobreak defensively to survive your basic abilities, or launch it from the fog of war so he has no time to react.

Tam profil →
Yone

Yone

dodge_ccextended_trades This matchup is a pure battle of reaction times and cooldown baiting. Yone relies on his third Mortal Steel tornado or the heavy engagement of Fate Sealed to lock you down. As Fizz, your entire lane revolves around Playful. If you time this ability to completely dodge his airborne setups, you bypass his main crowd control and leave him extremely vulnerable to a devastating counter-burst trade. Detayları gör
Yone

Neden

This matchup is a pure battle of reaction times and cooldown baiting. Yone relies on his third Mortal Steel tornado or the heavy engagement of Fate Sealed to lock you down. As Fizz, your entire lane revolves around Playful. If you time this ability to completely dodge his airborne setups, you bypass his main crowd control and leave him extremely vulnerable to a devastating counter-burst trade.

Lane etkisi

The lane rhythm shifts constantly based on Yone's wind stacks. When his tornado is ready, you must yield wave priority and step back to avoid being poked. Once he wastes his third Mortal Steel or is forced to use Spirit Cleave just to farm, you gain a massive window to trade. Failing to dodge his knock-ups results in heavy trade losses, forcing early recalls that bleed mid-lane pressure.

Nasıl oynanır

Never initiate a trade with Playful unless Yone has already wasted his knock-up. Instead, use Urchin Strike to close the distance and activate Rending Wave for quick trades. Hold Playful exclusively to reactively dodge his third Mortal Steel or his Fate Sealed. If he uses Soul Unbound to dive you, back off immediately; wait for his spirit to snap back before using Chum the Waters to catch him at his anchor point.

Tam profil →
Akali

Akali

outplayshroud_play This matchup is a high-octane assassin duel entirely dictated by how you time your main defensive tool against her primary engagement threats. Since both of you rely on burst damage, the lane hinges on the interaction between Playful and Akali's offensive kit. Dodging the mark from Shuriken Flip or completely absorbing the massive execution damage of her second strike of Perfect Execution shifts the momentum instantly, leaving Akali vulnerable and starved of energy. Detayları gör
Akali

Neden

This matchup is a high-octane assassin duel entirely dictated by how you time your main defensive tool against her primary engagement threats. Since both of you rely on burst damage, the lane hinges on the interaction between Playful and Akali's offensive kit. Dodging the mark from Shuriken Flip or completely absorbing the massive execution damage of her second strike of Perfect Execution shifts the momentum instantly, leaving Akali vulnerable and starved of energy.

Lane etkisi

Trades in mid lane are brief but incredibly lethal. You cannot easily shove waves early because Five Point Strike punishes melee farm, while Seastone Trident helps you last-hit under tower. Once both of you reach level five, the lane becomes a psychological standoff. Neither assassin can blindly dive or roam without giving up a massive kill opportunity, meaning a single misstep with your leap immediately invites a lethal Perfect Execution dive.

Nasıl oynanır

Never initiate a trade with Playful. Instead, use Urchin Strike and Rending Wave to trade quickly, then save your leap to reactively dodge her retaliatory Shuriken Flip. If she manages to mark you, immediately activate Playful the moment she attempts the dash recast. When fighting post-five, keep your eyes on her movement; hold your leap specifically to react to her second dash of Perfect Execution, neutralizing her ultimate's execution damage and turning the duel in your favor.

Tam profil →
Yasuo

Yasuo

projectile_blockmobility This matchup is a pure mechanical duel centered on projectile denial and evasion. Yasuo relies on Wind Wall to completely negate your primary engage, Chum the Waters. Meanwhile, his passive Way of the Wanderer shield absorbs your initial burst. However, you can use the untargetability of Playful to completely dodge his third Steel Tempest tornado, preventing him from ever activating Last Breath on you. Detayları gör
Yasuo

Neden

This matchup is a pure mechanical duel centered on projectile denial and evasion. Yasuo relies on Wind Wall to completely negate your primary engage, Chum the Waters. Meanwhile, his passive Way of the Wanderer shield absorbs your initial burst. However, you can use the untargetability of Playful to completely dodge his third Steel Tempest tornado, preventing him from ever activating Last Breath on you.

Lane etkisi

Yasuo constantly pressures the wave using Sweeping Blade to slide through your minions and land Steel Tempest pokes. Your passive Seastone Trident helps mitigate minion aggro during quick trades, but you cannot commit to all-ins while his Wind Wall is available. If he successfully blocks your shark, he immediately gains lane priority, forcing you to farm under turret and giving him free roam.

Nasıl oynanır

To win, you must first pop his Way of the Wanderer shield with a quick auto-attack or Urchin Strike before committing. To bypass Wind Wall, never throw Chum the Waters from maximum range. Instead, trigger your ultimate point-blank mid-dash during Urchin Strike, leaving him zero reaction time to block it. If he holds his wall, use Rending Wave to win short trades and save Playful exclusively to dodge his third Steel Tempest tornado.

Tam profil →
Talon

Talon

roam_raceburst_clash This matchup is a pure mid-lane assassin duel where your survival hinges on reacting to Talon's signature pattern. When Talon throws Rake, the return damage and slow are what enable his passive Blade's End burst. By timing Playful to hop over those returning blades or to completely negate his incoming Noxian Diplomacy dash, you negate his entire trading power, turning a deadly trade into a winning counter-engage. Detayları gör
Talon

Neden

This matchup is a pure mid-lane assassin duel where your survival hinges on reacting to Talon's signature pattern. When Talon throws Rake, the return damage and slow are what enable his passive Blade's End burst. By timing Playful to hop over those returning blades or to completely negate his incoming Noxian Diplomacy dash, you negate his entire trading power, turning a deadly trade into a winning counter-engage.

Lane etkisi

Laning is a tense stalemate of wave control and fast-paced trades. If Talon cannot land his full Rake on you, he cannot crash waves easily to roam with Assassin's Path. However, if you waste Playful early, Talon will instantly capitalize, chunking your health bar and forcing you to recall. This gives him the freedom to jump walls and terrorize side lanes while you are stuck clearing under tower.

Nasıl oynanır

Never initiate trades with Playful. Instead, walk up using Seastone Trident and Urchin Strike to farm or poke, and save your hop strictly for when Talon commits with Noxian Diplomacy or when his Rake blades are returning. If he disappears from the map using Assassin's Path, do not blindly follow his wall-jumping route; use your wave priority to push hard or fish for a long-range Chum the Waters to catch him before he escapes.

Tam profil →
Zed

Zed

untargetable_clashoutplay This assassin duel is dictated entirely by who blinks first with their untargetable tools. Zed can use Death Mark to cleanly dodge your Chum the Waters, but you hold the ultimate counter-play. By saving Playful, you can completely dodge the damage from his Razor Shuriken and Shadow Slash burst, leaving his Death Mark to pop for zero damage. Detayları gör
Zed

Neden

This assassin duel is dictated entirely by who blinks first with their untargetable tools. Zed can use Death Mark to cleanly dodge your Chum the Waters, but you hold the ultimate counter-play. By saving Playful, you can completely dodge the damage from his Razor Shuriken and Shadow Slash burst, leaving his Death Mark to pop for zero damage.

Lane etkisi

Early on, Zed uses Living Shadow to poke you with Razor Shuriken from safety. You must utilize Seastone Trident to safely farm under tower. Once both of you unlock your ultimates, the lane becomes a high-tension standoff. Neither of you can freely roam or push, because the moment one leaves, the other forces a fight.

Nasıl oynanır

Never initiate with Chum the Waters when Zed has his cooldowns fully available. Instead, bait his Living Shadow combo, then dash in with Urchin Strike and activate Rending Wave for quick, favorable trades. If he finally commits Death Mark, do not panic. Wait until he reappears behind you, then use Playful to hang safely in the air, completely negating his triple Razor Shuriken follow-up.

Tam profil →

Diğer eşleşmeler

Avantajlı

29

Bu şampiyonlar genellikle senin temel güçlerine etkili şekilde karşılık veremez, bu da çatışmaya daha fazla özgürlükle yaklaşmanı sağlar. Onları baskı altına almak ve lehine dönen trade'ler zorlamak için genellikle birden fazla yolun vardır. Onlara rahat bir pozisyona dönme fırsatı vermek yerine, bu avantajı kendi temponu dayatmak için kullan.

Annie

Annie

bait_mechanicsburst_race Fizz holds a massive advantage in this matchup because Playful completely nullifies Annie's primary threat. Annie relies on charging Pyromania to land a devastating stun via Summon: Tibbers or Disintegrate. By timing Playful to become untargetable when she launches her stun, you completely waste her passive charge and ultimate. Without this burst and crowd control, Annie is defenseless against your high base damage. Detayları gör
Annie

Neden

Fizz holds a massive advantage in this matchup because Playful completely nullifies Annie's primary threat. Annie relies on charging Pyromania to land a devastating stun via Summon: Tibbers or Disintegrate. By timing Playful to become untargetable when she launches her stun, you completely waste her passive charge and ultimate. Without this burst and crowd control, Annie is defenseless against your high base damage.

Lane etkisi

This interaction forces Annie to play defensively, stripping away her ranged lane dominance. She cannot freely harass you with Incinerate or Disintegrate while your Playful is off cooldown. If she attempts to freeze or push aggressively, you can zone her off the wave. The threat of your dive forces her to concede wave control, allowing you to easily crash minions and roam.

Nasıl oynanır

Never initiate a trade using Playful as your gap-closer. Instead, walk up or use Urchin Strike to close the distance, activating Rending Wave for quick trades. Keep a close eye on the swirling aura of her Pyromania. The moment she casts Summon: Tibbers or attempts a stun, activate Playful to dodge the impact, then drop down on her. If she holds her stun, simply disengage with your movement speed and wait for her to waste it.

Tam profil →
Ahri

Ahri

assassindodge Fizz dominates this matchup because his main defensive tool, Playful, perfectly counters Ahri's crowd control. When Ahri tries to peel you off or initiate with Charm, activating Playful completely nullifies the projectile. This leaves her highly vulnerable, as she cannot amplify her damage with Charm or stop your follow-up with Urchin Strike and Rending Wave while her key defensive spell is recharging. Detayları gör
Ahri

Neden

Fizz dominates this matchup because his main defensive tool, Playful, perfectly counters Ahri's crowd control. When Ahri tries to peel you off or initiate with Charm, activating Playful completely nullifies the projectile. This leaves her highly vulnerable, as she cannot amplify her damage with Charm or stop your follow-up with Urchin Strike and Rending Wave while her key defensive spell is recharging.

Lane etkisi

Ahri is forced to play passively and use her Orb of Deception primarily for waveclear from a distance rather than poking you down. She cannot safely step up to use Fox-Fire without risking a sudden lethal trade. This restriction allows you to dictate the wave's position. Once you threaten her with Chum the Waters, she must either burn Spirit Rush to escape or face an unavoidable gray screen.

Nasıl oynanır

Never initiate with Playful. Instead, walk up or use Urchin Strike to close the gap, forcing Ahri to panic-cast Charm. Reactively launch into the air with Playful to dodge her heart, then drop directly onto her to unleash Rending Wave. If she pre-emptively dashes away using Spirit Rush, hold your Chum the Waters until her third dash ends to ensure your shark lands and secures the kill.

Tam profil →
Aurora

Aurora

assassinuntargetable Aurora relies heavily on landing Twofold Hex to trigger Spirit Abjuration and deal consistent damage. However, Fizz can effortlessly nullify this entire sequence. By using Playful, you can completely dodge the return damage of Twofold Hex or simply jump over the boundaries of her Between Worlds ultimate. Once Aurora wastes these tools, her lack of sustained damage leaves her defenseless against your burst. Detayları gör
Aurora

Neden

Aurora relies heavily on landing Twofold Hex to trigger Spirit Abjuration and deal consistent damage. However, Fizz can effortlessly nullify this entire sequence. By using Playful, you can completely dodge the return damage of Twofold Hex or simply jump over the boundaries of her Between Worlds ultimate. Once Aurora wastes these tools, her lack of sustained damage leaves her defenseless against your burst.

Lane etkisi

This interaction forces Aurora to play incredibly passively, giving up control of the minion waves. Since you can trade safely by saving Playful to disengage, her poke becomes ineffective. You can easily chunk her health bar under her own tower or force her to burn Across the Veil defensively. This constant threat of lethal dive prevents her from roaming to support her jungler.

Nasıl oynanır

Do not use Playful to clear minions; always hold it until Aurora commits to her first Twofold Hex cast. When she tries to recast it for the execution damage, activate your jump to negate the burst, then land on her with Urchin Strike and Rending Wave. If she retreats using The Weirding, immediately throw Chum the Waters to lock her down and finish the kill before she can escape.

Tam profil →
Akshan

Akshan

early_bullyall_in_threat This matchup swings heavily in your favor because Playful completely neutralizes Akshan's high-damage threats. When Akshan channels Comeuppance, a single tap of Playful makes you untargetable, entirely wasting his ultimate. Furthermore, activating Playful during his Heroic Swing breaks his target lock, forcing him to stop swinging or miss his shots, leaving him vulnerable with his main mobility tool on a long cooldown. Detayları gör
Akshan

Neden

This matchup swings heavily in your favor because Playful completely neutralizes Akshan's high-damage threats. When Akshan channels Comeuppance, a single tap of Playful makes you untargetable, entirely wasting his ultimate. Furthermore, activating Playful during his Heroic Swing breaks his target lock, forcing him to stop swinging or miss his shots, leaving him vulnerable with his main mobility tool on a long cooldown.

Lane etkisi

Akshan's early ranged advantage and Dirty Fighting shield let him bully you before level three, but the dynamic flips once you have access to your full kit. He cannot safely use Heroic Swing aggressively because you can buffer Playful to stop his momentum and counter-engage. This fear forces him to play defensively, giving you control over wave states and allowing easy dive setups with Chum the Waters.

Nasıl oynanır

Let him push early, conserving your health bar while farming under turret using Seastone Trident and Urchin Strike. Once you unlock Chum the Waters, bait his Avengerang, then immediately look for an all-in. Cast Chum the Waters from maximum range; if he tries to flee with Heroic Swing, use Urchin Strike to close the distance and hold Playful exclusively to dodge Comeuppance or to disrupt his grapple trajectory.

Tam profil →
Corki

Corki

burstuntargetable Fizz completely dominates Corki due to his superior mobility and evasion. When Corki attempts to poke from afar with Missile Barrage, Fizz can easily negate the damage using Playful. This leap not only nullifies Corki's primary poke tool but also positions Fizz perfectly to execute a quick Urchin Strike, closing the distance instantly and forcing Corki into a lethal, close-quarters engagement where his squishy stats cannot survive. Detayları gör
Corki

Neden

Fizz completely dominates Corki due to his superior mobility and evasion. When Corki attempts to poke from afar with Missile Barrage, Fizz can easily negate the damage using Playful. This leap not only nullifies Corki's primary poke tool but also positions Fizz perfectly to execute a quick Urchin Strike, closing the distance instantly and forcing Corki into a lethal, close-quarters engagement where his squishy stats cannot survive.

Lane etkisi

This matchup dynamic strips Corki of his safety, forcing him to play extremely defensively under his tower. Since his Phosphorus Bomb and Gatling Gun push the wave naturally, Fizz can freeze the lane near his turret. Every time Corki steps up to collect gold, he risks a fatal trade. This pressure denies Corki easy recalls and delays his acquisition of the Package, leaving him vulnerable and isolated in mid.

Nasıl oynanır

To execute this flawlessly, always hold Playful until Corki fires his first Missile Barrage or commits to Valkyrie. Initiate trades by activating Rending Wave, then sliding through a minion or directly onto Corki with Urchin Strike. If Corki tries to escape using Valkyrie, that is your cue to land Chum the Waters. If you mess up your jump timing, retreat immediately while using Seastone Trident's minion collision ignore to safely weave through the wave.

Tam profil →
Ryze

Ryze

all_indodge_cc Ryze relies on scaling his mana with Arcane Mastery and using Rune Prison to lock targets down for his Spell Flux and Overload combos. However, Fizz completely invalidates this defense. By timing Playful to dodge Rune Prison, Fizz negates Ryze's only reliable self-peel. Without that root, Ryze is a fragile, immobile mage who cannot escape Fizz's explosive burst. Detayları gör
Ryze

Neden

Ryze relies on scaling his mana with Arcane Mastery and using Rune Prison to lock targets down for his Spell Flux and Overload combos. However, Fizz completely invalidates this defense. By timing Playful to dodge Rune Prison, Fizz negates Ryze's only reliable self-peel. Without that root, Ryze is a fragile, immobile mage who cannot escape Fizz's explosive burst.

Lane etkisi

Early on, Ryze tries to shove with Spell Flux and Overload to keep Fizz under turret. Once Fizz has access to Urchin Strike and Playful, the dynamic flips. Ryze must play incredibly safe, conceding priority. Every time Ryze walks up to cast Rune Prison, he risks a fatal trade. This pressure allows Fizz to dictate the wave state, forcing Ryze to choose between losing gold or risking death.

Nasıl oynanır

Do not blindly initiate with Playful. Instead, start your trade by matching his range, using Urchin Strike to close the distance and Rending Wave to strike. Force Ryze to panic-cast Rune Prison. The moment you see his casting animation for the root, activate Playful to dodge it entirely, landing on him to apply the slow. If he plays excessively safe under turret, use Chum the Waters from the fog of war to slow him.

Tam profil →
Mel

Mel

dive_threatcooldown_punish Mel relies on keeping you at a distance with her ranged magic, but your mobility completely negates this safety. By using Urchin Strike, you can instantly bypass her zoning tools to close the distance. If she attempts to peel you off with her defensive spells, a well-timed Playful lets you hop over her retaliation entirely, landing right on top of her fragile health bar to burst her down. Detayları gör
Mel

Neden

Mel relies on keeping you at a distance with her ranged magic, but your mobility completely negates this safety. By using Urchin Strike, you can instantly bypass her zoning tools to close the distance. If she attempts to peel you off with her defensive spells, a well-timed Playful lets you hop over her retaliation entirely, landing right on top of her fragile health bar to burst her down.

Lane etkisi

Mel is forced into a highly defensive posture, terrified of stepping past her river entrance. You can comfortably ignore early minion damage thanks to Seastone Trident while looking for trades. Once you reach level three, she cannot contest the wave without risking a lethal dive. This pressure allows you to slow-push, crash massive waves, and force her to burn mana farming under turret while you roam free.

Nasıl oynanır

Capitalize on your level three and level five spikes. Walk up threateningly to bait Mel's self-peel; never initiate with Playful. Instead, dash in using Urchin Strike, activate Rending Wave for immediate high-damage trades, and hold Playful to either dodge her counter-disengage or to escape turret shots if you commit. If she plays extremely safe under her tower, use Chum the Waters from the fog of war to lock her down before she can react.

Tam profil →
Diana

Diana

outplayburst Fizz holds the upper hand in this AP assassin clash because Playful completely neutralizes Diana's offensive sequence. By using Playful to dodge Crescent Strike, you prevent Diana from applying Moonlight, stripping away her Lunar Rush resets. Alternatively, timing your untargetability to jump over the explosive pull of Moonfall leaves her completely vulnerable, allowing you to retaliate with Urchin Strike and Rending Wave during her long recharge times. Detayları gör
Diana

Neden

Fizz holds the upper hand in this AP assassin clash because Playful completely neutralizes Diana's offensive sequence. By using Playful to dodge Crescent Strike, you prevent Diana from applying Moonlight, stripping away her Lunar Rush resets. Alternatively, timing your untargetability to jump over the explosive pull of Moonfall leaves her completely vulnerable, allowing you to retaliate with Urchin Strike and Rending Wave during her long recharge times.

Lane etkisi

This dynamic forces Diana to play defensively, as missing her arc crescent leaves her exposed to deadly trades. You can easily control the wave state because she cannot safely approach to trigger Moonsilver Blade or shield with Pale Cascade without fearing your counter-engage. When you reach level six, your kill pressure with Chum the Waters is immense, forcing her to stay under tower or risk getting burst down instantly.

Nasıl oynanır

Never initiate trades with Playful unless Diana has already wasted Crescent Strike. Instead, walk up or use Urchin Strike combined with Rending Wave to bait her defensive Pale Cascade. Once she attempts to turn the fight with her ultimate, activate Playful to float above the Moonfall shockwave, then crash down to secure the kill. If you miss your timing and get pulled, immediately disengage using your passive Seastone Trident to slip through minions.

Tam profil →
Veigar

Veigar

dodge_ccall_in Veigar's entire safety net relies on Event Horizon to zone you out and set up Dark Matter. However, your Playful allows you to hop directly over the perimeter wall without triggering the stun. This completely breaks his defensive flow, leaving the fragile yordle exposed to your raw burst damage while his primary self-peel is on a long cooldown. Detayları gör
Veigar

Neden

Veigar's entire safety net relies on Event Horizon to zone you out and set up Dark Matter. However, your Playful allows you to hop directly over the perimeter wall without triggering the stun. This completely breaks his defensive flow, leaving the fragile yordle exposed to your raw burst damage while his primary self-peel is on a long cooldown.

Lane etkisi

Because you can ignore his cage, Veigar is forced to play extremely passively under his turret, limiting his ability to farm stacks with Baleful Strike. Any attempt by him to walk up and use Dark Matter on the wave invites an immediate dive. You dictate the lane's tempo, forcing him to surrender minion priority and bleed gold.

Nasıl oynanır

Do not waste Playful to initiate trades from afar. Instead, walk up or use Urchin Strike to close the distance and bait out his Event Horizon. The moment he drops the cage, activate Playful to jump over the boundary, landing directly on him to slow him, then follow up with Rending Wave auto-attacks. If he plays too far back, lock him down from range using Chum the Waters to force a panic cage.

Tam profil →
Orianna

Orianna

dodge_ultall_in Orianna will constantly pressure you with her ranged advantage using Clockwork Windup and Command: Attack. However, this matchup leans heavily in your favor because your burst potential can quickly erase her health bar. The ultimate turning point relies entirely on your Playful. By holding this ability to completely bypass Command: Shockwave, you instantly strip Orianna of her primary defensive and offensive tool, rendering her vulnerable to your follow-up. Detayları gör
Orianna

Neden

Orianna will constantly pressure you with her ranged advantage using Clockwork Windup and Command: Attack. However, this matchup leans heavily in your favor because your burst potential can quickly erase her health bar. The ultimate turning point relies entirely on your Playful. By holding this ability to completely bypass Command: Shockwave, you instantly strip Orianna of her primary defensive and offensive tool, rendering her vulnerable to your follow-up.

Lane etkisi

Early on, Orianna tries to shove waves with Command: Dissonance to force you under tower and poke you down. If you manage the wave properly, keeping it just outside your turret range, you deny her safe farming zones. Once you threaten an all-in, she must play extremely defensively. Bypassing her wave pressure allows you to chunk her health, forcing her to recall early and giving you free roam priority.

Nasıl oynanır

Let Orianna push early while preserving your health pool, using Seastone Trident to secure minions under tower. Once you unlock your ultimate, initiate trades with Urchin Strike and Rending Wave, but never commit Playful early. You must bait her Command: Shockwave and reactively jump to become untargetable. If she holds her ultimate, disengage with your movement speed or use Chum the Waters from a distance to force her hand first.

Tam profil →
Syndra

Syndra

dodge_ccall_in Fizz dominates this matchup because his primary defensive tool, Playful, completely nullifies Syndra's only self-peel, Scatter the Weak. Since Syndra relies on landing her Dark Sphere and pushing it with her knockback to keep melee threats away, Fizz can easily bypass her defenses. Once Scatter the Weak is baited or dodged, Syndra is completely vulnerable to a full execution from Urchin Strike and Chum the Waters. Detayları gör
Syndra

Neden

Fizz dominates this matchup because his primary defensive tool, Playful, completely nullifies Syndra's only self-peel, Scatter the Weak. Since Syndra relies on landing her Dark Sphere and pushing it with her knockback to keep melee threats away, Fizz can easily bypass her defenses. Once Scatter the Weak is baited or dodged, Syndra is completely vulnerable to a full execution from Urchin Strike and Chum the Waters.

Lane etkisi

Syndra is forced to play extremely defensively, giving up control of the minion wave. She cannot safely use Force of Will or Dark Sphere to poke Fizz without risking an immediate counter-engage. This allows Fizz to maintain high health, secure easy back timings, and exert massive map pressure while Syndra remains trapped under her turret, unable to contest.

Nasıl oynanır

Position yourself just behind your melee minions, tempting Syndra to cast Dark Sphere. Never initiate with Playful; instead, use Urchin Strike to close the distance and force her to panic-cast Scatter the Weak. The moment you see her cast animation, activate Playful to hop over her spheres. If she holds her stun, disengage with Rending Wave empowered attacks and wait for another opening.

Tam profil →
Kassadin

Kassadin

melee_clashearly_pressure Before Kassadin unlocks his Riftwalk at level 6, he has no reliable escape to avoid your close-range pressure. While his Void Stone grants him a magic shield when you cast spells, it does little against the sustained physical and magical damage from your Rending Wave-empowered auto-attacks. By bridging the gap with Urchin Strike, you can force extended trades where your continuous on-hit damage completely outclasses his weak early Nether Blade responses. Detayları gör
Kassadin

Neden

Before Kassadin unlocks his Riftwalk at level 6, he has no reliable escape to avoid your close-range pressure. While his Void Stone grants him a magic shield when you cast spells, it does little against the sustained physical and magical damage from your Rending Wave-empowered auto-attacks. By bridging the gap with Urchin Strike, you can force extended trades where your continuous on-hit damage completely outclasses his weak early Nether Blade responses.

Lane etkisi

This matchup is won or lost in the first four levels. By using Seastone Trident to ignore unit collision, you can aggressively position inside the minion wave to zone Kassadin off last hits. Slow-pushing the early waves allows you to crash large waves, forcing him to waste Null Sphere on farming under turret rather than poking you, which permanently stunts his gold income and delays his late-game threat.

Nasıl oynanır

Start by letting the first wave slowly push to you, then freeze it just outside your turret. When Kassadin steps up to last-hit, slide through a minion using Urchin Strike, immediately reset your attack timer with Rending Wave, and stick to him with auto-attacks. Hold Playful strictly to dodge his slowing Force Pulse or to safely disengage from tower shots. If he reaches level 6, bait his first Riftwalk before throwing Chum the Waters.

Tam profil →
Aurelion Sol

Aurelion Sol

untargetable_dodgemelee_dive Aurelion Sol relies on locking you down with Falling Star or trapping you with Singularity to channel Breath of Light. However, your Playful completely negates his ultimate's crowd control. By becoming untargetable, you bypass his primary defensive trigger, allowing you to bypass the cosmic zone, drop directly onto his fragile frame, and burst him down before his Astral Flight can carry him to safety. Detayları gör
Aurelion Sol

Neden

Aurelion Sol relies on locking you down with Falling Star or trapping you with Singularity to channel Breath of Light. However, your Playful completely negates his ultimate's crowd control. By becoming untargetable, you bypass his primary defensive trigger, allowing you to bypass the cosmic zone, drop directly onto his fragile frame, and burst him down before his Astral Flight can carry him to safety.

Lane etkisi

Aurelion Sol's early execution with Singularity and wave clear with Breath of Light will push you under tower initially. However, once you hit level five, the lane pressure reverses. Any attempt by him to farm aggressively with Astral Flight leaves him completely vulnerable. Your threat of an all-in forces him to play extremely far back, sacrificing his Cosmic Creator stacks and giving you free roam to impact the side lanes.

Nasıl oynanır

Never initiate with Playful; save this tool to react to his Falling Star or to escape his Singularity pull. Instead, gap-close using Urchin Strike on a dying minion or directly onto him, activate Rending Wave for quick trades, and fish with Chum the Waters. If he tries to escape via Astral Flight, wait for the straight-line trajectory before throwing your shark, ensuring a guaranteed knock-up that stops his flight instantly.

Tam profil →
Viktor

Viktor

dive_threatcooldown_punish Viktor relies on poke from Hextech Ray to keep you at bay, but he cannot stop your dive. His only defense, Gravity Field, has a slow activation delay. When you engage with Urchin Strike, Viktor will drop his trap to zone you. You can easily bypass this entire stun area by using Playful to hop over it, landing directly on him to secure an easy burst kill with Rending Wave and Chum the Waters. Detayları gör
Viktor

Neden

Viktor relies on poke from Hextech Ray to keep you at bay, but he cannot stop your dive. His only defense, Gravity Field, has a slow activation delay. When you engage with Urchin Strike, Viktor will drop his trap to zone you. You can easily bypass this entire stun area by using Playful to hop over it, landing directly on him to secure an easy burst kill with Rending Wave and Chum the Waters.

Lane etkisi

Early on, Viktor uses Hextech Ray and Siphon Power to pressure your health bar while shoving the wave. However, once you reach level three, the threat of your all-in completely changes his behavior. He must play extremely safe, giving up wave priority and tower pressure. You can easily freeze the wave near your turret, forcing him to overextend where a single jump ensures his death or forces a bad recall.

Nasıl oynanır

Do not let Viktor chip you down with Siphon Power shield trades early. Let him push, use Seastone Trident to absorb minion aggro, and wait until he uses Hextech Ray to clear minions. The moment he steps up, dash in with Urchin Strike. Hold Playful specifically to react to his Gravity Field placement. If he holds his trap, simply walk him down with Rending Wave auto-attacks until he is forced to drop it, then hop over it to finish him with Chum the Waters.

Tam profil →
Katarina

Katarina

all_ininterrupt Fizz dominates this assassin duel because his kit directly negates Katarina's primary damage sources. By using Playful, you can completely dodge the damage from her daggers spawned by Bouncing Blade or Preparation. Furthermore, Katarina's channelled ultimate, Death Lotus, is easily cancelled by the knockup from your Chum the Waters, stripping her of all kill pressure in 1v1 fights. Detayları gör
Katarina

Neden

Fizz dominates this assassin duel because his kit directly negates Katarina's primary damage sources. By using Playful, you can completely dodge the damage from her daggers spawned by Bouncing Blade or Preparation. Furthermore, Katarina's channelled ultimate, Death Lotus, is easily cancelled by the knockup from your Chum the Waters, stripping her of all kill pressure in 1v1 fights.

Lane etkisi

This matchup turns into a lane of zoning. Katarina cannot step up to waveclear with Bouncing Blade without risking a lethal trade. You can easily freeze or slow-push. If she attempts to roam to make up for her lane deficit, your fast waveclear with Urchin Strike and Rending Wave allows you to shove her under tower rapidly, forcing her to lose immense gold and experience.

Nasıl oynanır

Always hold Playful during short trades; only use it once she commits to jumping on a dagger. If Katarina initiates with Shunpo or drops a dagger with Preparation, prepare your counter-engage. When you reach level 5, do not initiate with Chum the Waters immediately. Keep it ready to interrupt Death Lotus the moment she starts spinning. If she plays passively, zone her with Urchin Strike and Rending Wave.

Tam profil →
Brand

Brand

defensebaiting This matchup heavily favors you because Brand relies entirely on landing a predictable skillshot combination to survive your burst. His only self-peel, Sear, requires you to be pre-ignited by Blaze. By using Playful to dodge his incoming projectile or his bouncing Pyroclasm, you completely strip away his defensive options. Without his stun, Brand is an immobile target with zero escape tools against your Urchin Strike and Rending Wave. Detayları gör
Brand

Neden

This matchup heavily favors you because Brand relies entirely on landing a predictable skillshot combination to survive your burst. His only self-peel, Sear, requires you to be pre-ignited by Blaze. By using Playful to dodge his incoming projectile or his bouncing Pyroclasm, you completely strip away his defensive options. Without his stun, Brand is an immobile target with zero escape tools against your Urchin Strike and Rending Wave.

Lane etkisi

Early on, you must tolerate some poke from Pillar of Flame while using Seastone Trident to minimize minion damage. However, the power dynamic shifts dramatically once you unlock your full kit. Brand is forced to play exceptionally passive, terrified of stepping up to clear waves with Conflagration. Any attempt by him to harass you near your tower exposes him to a lethal chase down the lane, ruining his recall timings.

Nasıl oynanır

Never use Playful to clear minion waves; keep it strictly as your counter-engage weapon. Walk forward aggressively or initiate with Urchin Strike to bait out his Sear. Wait for the exact visual cue of his projectile before activating Playful to hop over it. Once you land, immediately activate Rending Wave for quick trades. If he has already unlocked Pyroclasm, hold your jump to absorb the ultimate's first bounce, then lock him down with Chum the Waters.

Tam profil →
Zoe

Zoe

dodge_ccall_in This matchup is heavily weighted in Fizz's favor because Zoe's entire survival hinges on her Sleepy Trouble Bubble. When she tries to self-peel, Fizz can use Playful to hop over the projectile or bypass the drowsy state entirely. Without her crowd control to set up a long-range Paddle Star!, Zoe cannot prevent Fizz from closing the gap and deleting her with a quick burst combo. Detayları gör
Zoe

Neden

This matchup is heavily weighted in Fizz's favor because Zoe's entire survival hinges on her Sleepy Trouble Bubble. When she tries to self-peel, Fizz can use Playful to hop over the projectile or bypass the drowsy state entirely. Without her crowd control to set up a long-range Paddle Star!, Zoe cannot prevent Fizz from closing the gap and deleting her with a quick burst combo.

Lane etkisi

Zoe is forced into a highly defensive posture, unable to use Paddle Star! to shove the wave without exposing herself. This allows Fizz to control the lane's tempo, securing easy farm under tower or zoning her off minions. If Zoe steps past the midpoint, the threat of an all-in starting with Chum the Waters forces her to yield priority, bleeding gold and losing mid-lane pressure.

Nasıl oynanır

Position yourself aggressively near the minion wave to bait out her Sleepy Trouble Bubble. Never lead an engagement with Playful; instead, use Urchin Strike and Rending Wave to initiate trades, holding your jump solely to react to her bubble. If she attempts to escape or poke using Portal Jump, target her return portal with Chum the Waters for an unmissable knock-up that guarantees a kill.

Tam profil →
Kayle

Kayle

early_bullyinvulnerability_clash Fizz dominates the early stages because Kayle is incredibly weak before unlocking her ranged form via Divine Ascent. You can easily chunk her with Urchin Strike followed by Rending Wave. However, once she reaches level six, her Divine Judgment becomes a massive obstacle, allowing her to completely absorb the explosive burst from your Chum the Waters if timed correctly. You must establish a lead before she gains this ultimate safety net. Detayları gör
Kayle

Neden

Fizz dominates the early stages because Kayle is incredibly weak before unlocking her ranged form via Divine Ascent. You can easily chunk her with Urchin Strike followed by Rending Wave. However, once she reaches level six, her Divine Judgment becomes a massive obstacle, allowing her to completely absorb the explosive burst from your Chum the Waters if timed correctly. You must establish a lead before she gains this ultimate safety net.

Lane etkisi

The entire lane is a race against the clock. Before level six, Kayle will desperately try to farm from safety using Starfire Spellblade and Radiant Blast. This allows you to slow-push the first waves, freeze near your turret, and force her into dangerous positions. Denying her gold early delays her scaling, preventing her from rotating to help her team or securing mid priority when neutral fights begin.

Nasıl oynanır

Abuse your level three power spike. Dive onto her with Urchin Strike and activate Rending Wave for quick trades, saving Playful to escape her slow from Radiant Blast or drop minion aggro. Once both of you reach level six, never lead with Chum the Waters. Instead, force her to panic-cast Divine Judgment using your basic trade combo, then unleash your shark the second her invulnerability shield expires.

Tam profil →
Ziggs

Ziggs

easy_targetdive_threat Ziggs's safety relies entirely on Satchel Charge to disengage, but Fizz's kit counters this perfectly. Once Fizz initiates, he can use Playful to completely hop over the explosive blast of Satchel Charge or bypass the slow of Hexplosive Minefield. Without this self-peel, Ziggs's fragile health bar melts instantly under Fizz's raw AP burst, leaving him with zero defensive answers. Detayları gör
Ziggs

Neden

Ziggs's safety relies entirely on Satchel Charge to disengage, but Fizz's kit counters this perfectly. Once Fizz initiates, he can use Playful to completely hop over the explosive blast of Satchel Charge or bypass the slow of Hexplosive Minefield. Without this self-peel, Ziggs's fragile health bar melts instantly under Fizz's raw AP burst, leaving him with zero defensive answers.

Lane etkisi

Early on, Ziggs will use Bouncing Bomb and Short Fuse to poke you down and push. However, once you reach level 3, the lane dynamic flips. Ziggs must play incredibly far back, terrified of stepping up to clear waves. If he mispositions, a quick Urchin Strike followed by Rending Wave forces him to panic-throw his displacement, giving you an immediate kill window.

Nasıl oynanır

Use Seastone Trident to minimize minion damage while letting Ziggs push the first waves. Do not waste Playful to farm. Instead, walk up or use Urchin Strike to engage. Save Playful specifically to react to his Satchel Charge. If he tries to escape or knock you back, activate Playful to dodge the blast, land on him, and execute him with Chum the Waters to secure an easy lead.

Tam profil →
Lux

Lux

easy_targetall_in Lux relies on keeping her distance, but her safety completely collapses because of how Playful interacts with Light Binding. When Lux attempts to root you, activating Playful makes you completely elusive while closing the gap. This leaves her entirely defenseless, as her Prismatic Barrier cannot absorb the burst damage from your Urchin Strike and Rending Wave follow-up, turning her long-range advantage into a deadly trap. Detayları gör
Lux

Neden

Lux relies on keeping her distance, but her safety completely collapses because of how Playful interacts with Light Binding. When Lux attempts to root you, activating Playful makes you completely elusive while closing the gap. This leaves her entirely defenseless, as her Prismatic Barrier cannot absorb the burst damage from your Urchin Strike and Rending Wave follow-up, turning her long-range advantage into a deadly trap.

Lane etkisi

Early on, you must endure her Lucent Singularity poke, but the dynamic flips instantly once you have your full basic kit. Lux is forced to play extremely far back, terrified of throwing Light Binding. She cannot safely step up to trigger Illumination with basic attacks. This pressure forces her to waste Prismatic Barrier defensively, bleeding mana, while you freely dictate the wave state and threaten a dive with Chum the Waters.

Nasıl oynanır

Position yourself slightly to the side of your minions to tempt Lux into throwing a raw Light Binding. Never initiate a trade with Playful; instead, walk forward or use Urchin Strike to pressure her into panicking. The moment you see her snare animation, activate Playful to bypass it, landing directly on her to unleash Rending Wave. If she refuses to cast her snare, simply deny her farm by standing between her and the minions.

Tam profil →
Twisted Fate

Twisted Fate

easy_targetdodge_cc Fizz dominates this matchup because he can completely negate Twisted Fate's only self-peel. When Twisted Fate locks in his yellow gold card using Pick a Card, Fizz can simply activate Playful as the projectile flies. This dodge wastes Twisted Fate's stun and mana, leaving the squishy ranged mage entirely exposed to an immediate follow-up burst. Detayları gör
Twisted Fate

Neden

Fizz dominates this matchup because he can completely negate Twisted Fate's only self-peel. When Twisted Fate locks in his yellow gold card using Pick a Card, Fizz can simply activate Playful as the projectile flies. This dodge wastes Twisted Fate's stun and mana, leaving the squishy ranged mage entirely exposed to an immediate follow-up burst.

Lane etkisi

This interaction paralyzes Twisted Fate's ability to trade or pressure the wave. He cannot step up to use Wild Cards or Stacked Deck on the minions without risking a lethal dive. Once Fizz reaches level three, Twisted Fate is forced to play extremely far back, conceding lane priority and preventing him from easily finding angles to roam with Destiny.

Nasıl oynanır

Walk up aggressively to bait Twisted Fate into activating Pick a Card. Do not initiate with Playful; instead, use Urchin Strike to close the gap and start hitting him with Rending Wave. Save Playful strictly for the moment he throws the gold card. If he panics and holds the card, simply walk him down with auto-attacks. When you have Chum the Waters, fish for max-range ultimates to force his summoner spells before diving.

Tam profil →

Diğer eşleşmeler

Items to Counter Fizz

Buy these items to reduce this champion's effectiveness in your games.

Mercury's Treads
Mercury's Treads
Quicksilver Enchant
Quicksilver Enchant
Stasis Enchant
Stasis Enchant
Maw of Malmortius
Maw of Malmortius

Bu şampiyon nasıl counterlanır

Counter açısı

Fizz’e karşı ham hasar etkili olmaz; onu alt etmenin yolu, zamanlamasını bozan ya da cezalandıran yöntemlerdir. Ona zorluk çıkaran şampiyonlar her zaman koridor hakimleri değildir; asıl önemli olan, onun all-in hamlesini etkisiz hale getiren ya da arka hattına erişimini engelleyen şampiyonlardır. Onu durduracak stratejileri anlamak, onun oyun düzenini bozan unsurları kavramak demektir: hedefli kontrol, anlık hayatta kalma yeteneği ya da E yeteneğini kullanmasını cezalandırmak.

Patch bağlamı

Bu yamada, Fizz’in stratejisi, ilk saldırı dalgasından sağ çıkmaya odaklanıyor. Eğer ultisi bir öldürmeye dönüşmezse, baskısı büyük ölçüde azalır. Koruma, hedefli kontrol yetenekleri veya anlık hayatta kalma özelliklerine sahip takım kompozisyonları, onun etkisini önemli ölçüde azaltır. Mesele istatistikler değil, dövüş yapısı: Fizz’in hızlı erişim ve anında uygulama yeteneğine ihtiyacı var.

Hızlı okuma

  • Onun E’sini cezalandırmak = Fizz’i cezalandırmak.
  • İlk saldırı dalgasından sağ çıkmak her şeyi değiştirir.
  • Açıları reddetmesi onu işe yaramaz hale getirir.

Counter arketipleri

Anında ve hedef odaklı kontrol

Fizz, E yeteneğiyle çatışmaya girmeye ve yeniden konumlanmaya dayanır. Anında etki gösteren hedefli CC’ler, onun kaçışını engelleyerek ya da girişini cezalandırarak bu kalıbı bozar. Beceri atışlarından farklı olarak, bu tür etkilerden tepki olarak kaçınmak mümkün değildir. Bu durum, Fizz’i çok daha pasif bir oyun tarzına zorlar ve çatışmaya girme fırsatlarını önemli ölçüde azaltır.

Şampiyon nasıl uyum sağlamalı. Anahtarların bekleme sürelerinin bitmesini bekleyin ve yalnızca uygun olduğu kesinleşen anlarda çatışmaya girin.

Hayatta kalma ve patlamaya karşı koruma

Bu şampiyonlar, Fizz’in ilk saldırı dalgasını emerek veya etkisiz hale getirerek onun temel galibiyet koşulunu ortadan kaldırır. Kombosu kullanıldıktan sonra Fizz savunmasız hale gelir ve anında baskısını yitirir. Bu durum, dövüşün temposunu tamamen tersine çevirir ve rakibin misilleme yapmasına imkân tanır.

Şampiyon nasıl uyum sağlamalı. Diğer düşmanları hedef alın ya da konumlandırma hatalarını bekleyin.

Sabit mid basıncı

Bu şampiyonlar, Fizz’in oyun başlangıcında rahat bir oyun sergilemesini engelliyor. Sürekli baskı uyguluyorlar, E yeteneğinin savunma amaçlı kullanılmasını zorluyorlar ve harita üzerinde dolaşma imkânlarını kısıtlıyorlar. Avantaj elde edemediğinde, Fizz oyun boyunca çok daha az tehditkar hale geliyor.

Şampiyon nasıl uyum sağlamalı. Başlangıçta temkinli oynayın ve ani yükselişleri bekleyin.

Öncelikli matchuplar

Lissandra

Lissandra, dövüşlerde Fizz’i neredeyse tamamen etkisiz hale getirir. Hedefli kontrol yetenekleri ve kendi dokunulmazlığı, onun “all-in” taktiğini etkisiz kılar. Fizz, onunla doğrudan çatışmaktan kaçınmalı ve başka hedefler aramalıdır.

Ona karşı yaygın hatalar

Ona karşı yaygın hatalar

  • Saldırı fırsatlarını hafife almak.
  • Savunma amaçlı bekleme sürelerini çok erken kullanmak.
  • E’sini cezalandırmamak.
  • Vizyon olmadan sadece konumlandırma.
  • Lich Bane’in verdiği hasar artışını göz ardı ederek.

Koç notları

  • Fizz, ancak bir hata yaparsan kazanır. Hatasız oyna.
  • Onun ulti'sine karşı her zaman bir cevabın olsun.

FAQ

Koridorda Fizz’den nasıl kurtulursun?

5. seviye yeteneğini ve Lich Bane ile yaptığı ani hasar artışını dikkate alın. Onun “all-in” hamlesine karşı her zaman bir savunma seçeneği bulundurun. Onun E yeteneğini kullanmaya zorlamak, genellikle hasar vermekten daha önemlidir. E yeteneği bittiğinde agresif oynayabilirsiniz.

Fizz neden cezalandırılması zor bir hareket?

E yeteneği ona yenilmezlik ve benzersiz bir konum değiştirme olanağı sağlar. Bu yetenek kullanılabilir olduğu sürece, pek çok tehlikeli durumdan kaçınabilir. Ona karşı avantaj elde etmek için, harekete geçmeden önce bu yeteneği kullanmaya zorlamak gerekir.

Fizz, takım savaşlarında zayıf mı?

İlle de öyle değil, ancak performansının büyük ölçüde bağlama bağlı olduğu söylenebilir. Kanatlarda ve rakibi yakalamada çok başarılı olsa da, yoğun koruma içeren düzenli çatışmalarda zorlanıyor. Değeri, kilit bir hedefe ulaşıp ulaşmamasına bağlı.

En büyük zayıflığı nedir?

Soğuma sürelerine olan bağımlılığı. E ya da R yeteneği olmadan, tehdit seviyesini neredeyse tamamen yitirir. Bu zamanlamaları iyi kavrayan oyuncular, onu etkili bir şekilde etkisiz hale getirebilir.