Ağustos 2026 · Patch 7.2d
Assassin · MID · JUNGLE

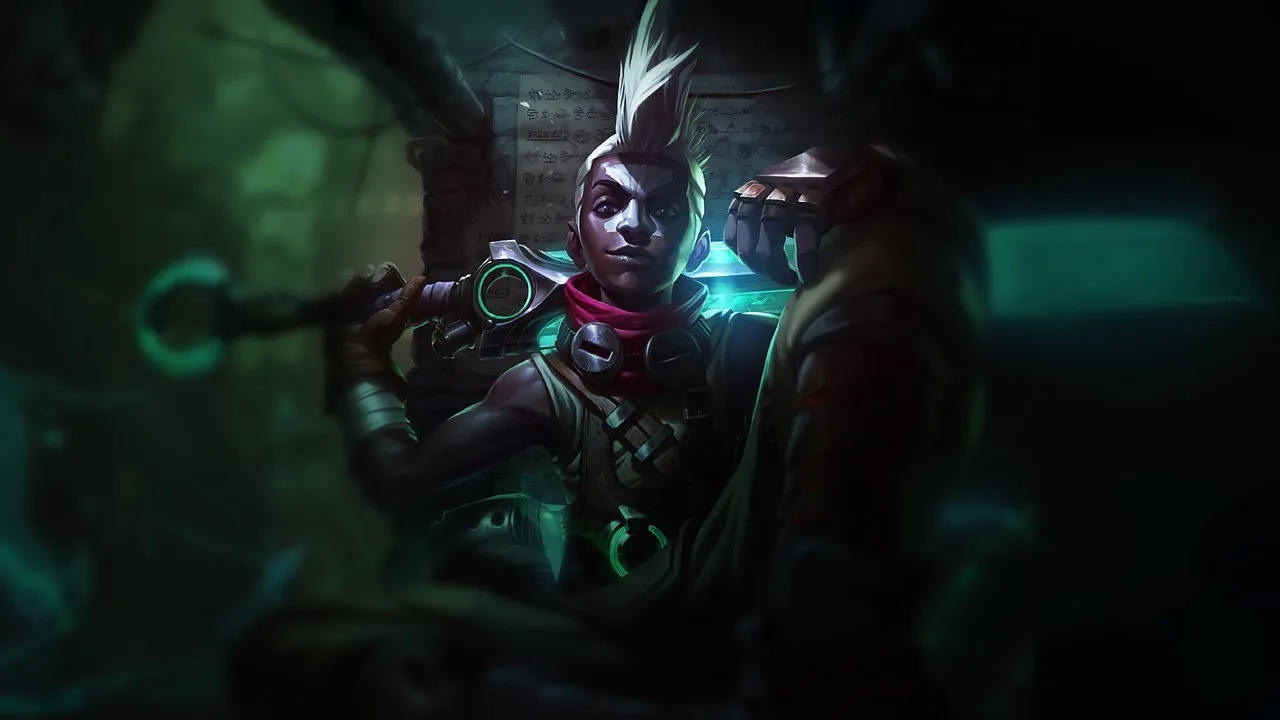
Ekko Wild Rift Counter Rehberi

Ekko, kendisi stasis alanlarını kurmadan önce engage yapan ve akıllıca pozisyon alarak ultisini counterlayan şampiyonlara karşı savunmasızdır. Hızlı burst veya anlık CC profilleri onu temkinli oynamaya zorlar. İyi vision, onun assassin potansiyelini büyük ölçüde sıfırlar.

★ MID · JUNGLE Tier A
HASAR
UTIL
TANK
DIFF
Win 50.1% #54 · ↓0pt
Pick 2.9% #23
Ban 1.1% #83

Ekko Wild Rift Counter Rehberi ★ Counter Sheet

Hard Counter

4

Bu şampiyonlar, seninkini doğrudan geride bırakan bir build ve oynanış tarzına sahip, bu da lane kontrolünü ve farmı son derece zorlaştırabilir. Yetenekleri temel güçlerini etkisiz hale getirebilir ya da her zamanki planını oynamaya çalıştığın anda seni cezalandırabilir. Bu matchuplarda amaç genellikle hataları en aza indirmek ve doğrudan çatışmanın dışında çözümler bulmaktır.

Lissandra

Lissandra

hard_ccanti_dive Lissandra completely neutralizes your slippery kit because her crowd control is instantaneous and point-and-click. The moment you attempt to dive in with Phase Dive, she can immediately stop you with Ring of Frost. More importantly, her Frozen Tomb presents a fatal threat: she can lock you down instantly, allowing her to burst you from full health before you can even trigger Chronobreak to escape and heal. Detayları gör
Lissandra

Neden

Lissandra completely neutralizes your slippery kit because her crowd control is instantaneous and point-and-click. The moment you attempt to dive in with Phase Dive, she can immediately stop you with Ring of Frost. More importantly, her Frozen Tomb presents a fatal threat: she can lock you down instantly, allowing her to burst you from full health before you can even trigger Chronobreak to escape and heal.

Lane etkisi

This matchup forces you into a highly defensive posture where trading becomes extremely risky. Lissandra will constantly harass you with Ice Shard through the minion wave, pushing you under turret while you struggle to retaliate. If you try to trade back, she will lock you in place. You are forced to surrender mid priority, which prevents you from roaming and leaves your jungler without help.

Nasıl oynanır

To survive, use Timewinder solely to secure far-away minions and match her wave clear without stepping into her attack range. Never commit your Phase Dive aggressively unless you have seen her waste Ring of Frost or Glacial Path. If she initiates with Frozen Tomb, your only hope is to pre-cast Parallel Convergence on yourself right before she stuns you, so the shield and stun activate while you are locked down, preventing her follow-up burst.

Tam profil →
Vex

Vex

fearanti_mobility This matchup is heavily dictated by Vex's passive, Doom 'n Gloom. Every time you try to close the distance using Phase Dive, Vex's charged passive immediately interrupts your dash, applying a fear that leaves you completely defenseless. Since Phase Dive is your primary tool to initiate trades and land Timewinder, her ability to shut down your mobility means you can never force a clean burst combo on her. Detayları gör
Vex

Neden

This matchup is heavily dictated by Vex's passive, Doom 'n Gloom. Every time you try to close the distance using Phase Dive, Vex's charged passive immediately interrupts your dash, applying a fear that leaves you completely defenseless. Since Phase Dive is your primary tool to initiate trades and land Timewinder, her ability to shut down your mobility means you can never force a clean burst combo on her.

Lane etkisi

Because of this interaction, you are forced to play defensively under your turret. Vex can freely harass you with Mistral Bolt and Looming Darkness whenever you try to clear waves. Trading health is always a losing battle because any offensive leap results in you taking a full combo while feared. This constant threat prevents you from gaining mid priority, forcing slow recalls and leaving your side lanes vulnerable to her Shadow Surge roams.

Nasıl oynanır

Your only window to act is when Vex's red bar is empty, meaning Doom 'n Gloom is on cooldown. When she wastes this passive on a wave with Mistral Bolt, immediately look to drop Parallel Convergence from out of vision. If you fail to stun her or if she holds her fear, do not use Phase Dive aggressively; instead, use it laterally to dodge Looming Darkness and rely on Chronobreak to escape if her Shadow Surge connects.

Tam profil →

Diğer eşleşmeler

Dezavantajlı

21

Bu şampiyonlar, matchup'ı tamamen oynanmaz hale getirmeden genellikle çatışmada avantaj sağlayan araçlara sahiptir. Daha fazla menzilleri, senin saldırılarını daha iyi karşılama kapasiteleri veya engage'lerine karşılık verecek daha fazla yolları olabilir. Yaklaşımını buna göre uyarlaman ve dövüşü kabul edeceğin anları dikkatle seçmen gerekir.

Annie

Annie

anti_mobilityburst_race Annie directly shuts down your aggressive patterns because of her passive, Pyromania. The moment you initiate with Phase Dive, she can instantly react with a stun using Disintegrate or Incinerate. This immediate interruption completely halts your burst sequence, leaving you vulnerable to a counter-burst from Summon: Tibbers before you can even reactivate Chronobreak to escape. Detayları gör
Annie

Neden

Annie directly shuts down your aggressive patterns because of her passive, Pyromania. The moment you initiate with Phase Dive, she can instantly react with a stun using Disintegrate or Incinerate. This immediate interruption completely halts your burst sequence, leaving you vulnerable to a counter-burst from Summon: Tibbers before you can even reactivate Chronobreak to escape.

Lane etkisi

This dynamic forces you into a defensive posture where trading with basic attacks is impossible. You are relegated to farming from afar using Timewinder, which quickly drains your mana. If you step up carelessly, Annie will poke you down with ranged attacks and shield herself with Molten Shield. This constant pressure forces early recalls and deprives your team of mid-lane priority.

Nasıl oynanır

To survive, track the white bar under Annie's health representing Pyromania. Only attempt short trades with Phase Dive and Timewinder when she has two or fewer stacks charged. If she holds her stun indefinitely to zone you, cast Parallel Convergence from the fog of war to force her to retreat or to absorb her retaliatory burst. If she summons her bear, walk away immediately instead of trying to fight back.

Tam profil →
Ryze

Ryze

scalingpoint_and_click_cc Engaging directly on Ryze is incredibly difficult because his Rune Prison is a point-and-click root that completely halts your Phase Dive mid-flight. If you attempt to dash in, Ryze can instantly lock you down before your reinforced auto-attack connects. This prevents you from proc'ing Z-Drive Resonance, leaving you vulnerable to a rapid Spell Flux into Overload counter-burst while you are rooted out of melee range. Detayları gör
Ryze

Neden

Engaging directly on Ryze is incredibly difficult because his Rune Prison is a point-and-click root that completely halts your Phase Dive mid-flight. If you attempt to dash in, Ryze can instantly lock you down before your reinforced auto-attack connects. This prevents you from proc'ing Z-Drive Resonance, leaving you vulnerable to a rapid Spell Flux into Overload counter-burst while you are rooted out of melee range.

Lane etkisi

This interaction strips away your offensive pressure, forcing you to play defensively under tower. Ryze will constantly bounce Spell Flux and Overload through your minion wave to poke you down while maintaining priority. Since trading directly is a losing battle, you will find yourself bleeding health if you contest the wave, ultimately giving Ryze free reign to scale his Arcane Mastery or use Realm Warp to impact side lanes.

Nasıl oynanır

To survive, prioritize clearing waves from a safe distance using Timewinder. Never use Phase Dive aggressively unless you see Ryze waste Rune Prison on a minion. Instead, cast Parallel Convergence from the fog of war to zone him or shield yourself while shoving. Once the wave is cleared, immediately look for roam opportunities to impact other lanes before his scaling takes over, rather than trying to force a solo kill.

Tam profil →
Akshan

Akshan

early_pressurespacing Akshan dominates the early mid lane because his ranged auto-attacks and Dirty Fighting shield shut down your melee access. When you attempt to initiate with Phase Dive, Akshan can easily space you out using the bonus movement speed from his passive. This allows him to negate your burst, avoid the return hit of your Timewinder, and punish you severely with a heavy counter-trade as you try to retreat to safety. Detayları gör
Akshan

Neden

Akshan dominates the early mid lane because his ranged auto-attacks and Dirty Fighting shield shut down your melee access. When you attempt to initiate with Phase Dive, Akshan can easily space you out using the bonus movement speed from his passive. This allows him to negate your burst, avoid the return hit of your Timewinder, and punish you severely with a heavy counter-trade as you try to retreat to safety.

Lane etkisi

You will constantly find yourself pushed under turret, as Akshan's Avengerang easily clears waves while poking you down. Trying to contest the wave directly results in taking massive physical damage. If you lose too much health early, Akshan can zone you completely or dive you using Heroic Swing, forcing you into poor recall timings that cost you gold and hand him map priority for free.

Nasıl oynanır

To survive, yield early priority and focus on farming safely. Use Timewinder solely to secure last hits from a distance rather than pushing. Never engage with Phase Dive unless his Heroic Swing is on cooldown. Instead, place Parallel Convergence from the fog of war to cover your retreat or to secure cannon minions. If you are chunked, use Chronobreak defensively to stay in lane rather than searching for an unrealistic offensive play.

Tam profil →
Corki

Corki

mobilityskirmish Corki safely dictates the distance in Mid lane thanks to his ranged advantage. Whenever you attempt to initiate a trade with Phase Dive, his reaction is straightforward: he activates Valkyrie to dash away instantly. This clean disengage prevents you from landing the final attack required to trigger Z-Drive Resonance, leaving you completely unable to secure your burst damage or use the bonus movement speed to escape his counter-harass. Detayları gör
Corki

Neden

Corki safely dictates the distance in Mid lane thanks to his ranged advantage. Whenever you attempt to initiate a trade with Phase Dive, his reaction is straightforward: he activates Valkyrie to dash away instantly. This clean disengage prevents you from landing the final attack required to trigger Z-Drive Resonance, leaving you completely unable to secure your burst damage or use the bonus movement speed to escape his counter-harass.

Lane etkisi

Because you cannot reliably trade, Corki easily controls the wave tempo. He will constantly shove you under turret using Phosphorus Bomb and Gatling Gun, chipping away at your health while you struggle to last-hit. Once he secures his Special Delivery upgrade from Hextech Munitions, his map pressure skyrockets, forcing you to play extremely defensively under your tower and rely solely on Timewinder to collect minions safely from afar.

Nasıl oynanır

To survive this matchup, you must discipline your engage timings. Never use Phase Dive while Corki has Valkyrie available; instead, bait it out by throwing Timewinder to threaten a slow. If he panics and dashes, you have a crucial fifteen-second window to strike. Additionally, cast Parallel Convergence from the fog of war to catch him off-guard, forcing him to slide into a disadvantageous spot where your Chronobreak can later punish his positioning.

Tam profil →
Galio

Galio

cc_lockdownanti_burst Galio acts as a direct counter to Ekko's burst patterns. Whenever you attempt to execute your trades, his Shield of Durand offers him passive magic damage mitigation and a dangerous taunt. This crowd control is the deciding factor in fights: by taunting you when your health drops, Galio prevents you from triggering Chronobreak. You end up locked down and defeated without any window to activate your ultimate safety net. Detayları gör
Galio

Neden

Galio acts as a direct counter to Ekko's burst patterns. Whenever you attempt to execute your trades, his Shield of Durand offers him passive magic damage mitigation and a dangerous taunt. This crowd control is the deciding factor in fights: by taunting you when your health drops, Galio prevents you from triggering Chronobreak. You end up locked down and defeated without any window to activate your ultimate safety net.

Lane etkisi

During the laning phase, you cannot safely trade with your classic Phase Dive and Timewinder combo because Galio easily shrugs off the burst. He will retaliate with Winds of War and Justice Punch to win every short trade. This forces you to use Timewinder defensively to clear minions under your turret. Consequently, you lose mid priority, allowing Galio to easily assist his jungler or threaten side lanes with Hero's Entrance.

Nasıl oynanır

To survive, you must play defensively and focus on farming from a distance using Timewinder. Never initiate with Phase Dive unless you see Galio waste Shield of Durand or miss Justice Punch. If you plan to engage, cast Parallel Convergence from out of vision to stun him before he can react with his magic shield. When caught in a bad fight, anticipate his taunt and trigger Chronobreak early rather than waiting until your health bar is dangerously low.

Tam profil →
Syndra

Syndra

disengageburst_clash This matchup hinges entirely on Syndra's ability to deny your gap-closer. Whenever you attempt to initiate with Phase Dive, a reactive Syndra can cast Scatter the Weak to interrupt your dash mid-air. This mechanical block prevents you from triggering Z-Drive Resonance and leaves you standing in the open, fully exposed to her follow-up Dark Sphere and Force of Will combination. Detayları gör
Syndra

Neden

This matchup hinges entirely on Syndra's ability to deny your gap-closer. Whenever you attempt to initiate with Phase Dive, a reactive Syndra can cast Scatter the Weak to interrupt your dash mid-air. This mechanical block prevents you from triggering Z-Drive Resonance and leaves you standing in the open, fully exposed to her follow-up Dark Sphere and Force of Will combination.

Lane etkisi

Because you cannot reliably trade, Syndra dictates the lane tempo. She will freely poke you with Dark Sphere while keeping you pushed under tower. If you step up to thin the wave with Timewinder, she can easily punish your positioning. You are forced to play defensively, losing priority and preventing you from roaming to assist your jungler, while she scales safely toward her Transcendent thresholds.

Nasıl oynanır

To survive, bait her defensive tools before committing. Never forward-dash with Phase Dive if Scatter the Weak is available; instead, use the initial roll to dodge her Dark Sphere laterally. Cast Parallel Convergence from the fog of war to force her to reposition or blow her knockback early. If she wastes her stun, you have a brief window to blink in, proc Z-Drive Resonance, and quickly retreat. If caught, immediately use Chronobreak to undo the burst.

Tam profil →
Orianna

Orianna

pokeall_in Orianna dictates the lane pace by positioning her ball with Command: Attack to poke you from afar. However, this zone of control has a major flaw. If she extends her ball too deep to deny you farm, she leaves her own body unprotected. Activating Phase Dive to blink right past the ball's location lets you bypass her zoning entirely, turning a safe poke lane into a dangerous close-quarters duel where your Z-Drive Resonance can overwhelm her. Detayları gör
Orianna

Neden

Orianna dictates the lane pace by positioning her ball with Command: Attack to poke you from afar. However, this zone of control has a major flaw. If she extends her ball too deep to deny you farm, she leaves her own body unprotected. Activating Phase Dive to blink right past the ball's location lets you bypass her zoning entirely, turning a safe poke lane into a dangerous close-quarters duel where your Z-Drive Resonance can overwhelm her.

Lane etkisi

Because Orianna's Command: Attack constantly threatens your health pool, you will be forced to yield early wave priority. She will easily push you under turret, forcing you to use Timewinder to secure farm rather than harass. If you take too much poke trying to contest the first few waves, you'll be forced into an early recall, letting her stack plates. This pressure limits your ability to roam, locking you in mid-lane while she maintains vision control.

Nasıl oynanır

To survive, let the wave bounce toward you and use Timewinder strictly for last-hitting from safety. Never initiate with Phase Dive while her ball is resting near her; instead, wait for her to cast Command: Attack forward. The moment the ball moves past you, immediately Phase Dive onto her to bypass its return path, triggering Z-Drive Resonance before she can shield with Command: Protect. If she holds her ball defensively, simply throw Parallel Convergence from the fog to force her movement.

Tam profil →
Viktor

Viktor

pokedisengage Viktor completely neutralizes your offensive threat because of his defensive zone control. Whenever you initiate with Phase Dive, he can instantly drop Gravity Field at his feet. This forces you to immediately disengage before triggering Z-Drive Resonance, or suffer a stun inside his minion wave. While you struggle to close the gap, his Hextech Ray and Siphon Power constantly chip away at your health bar from safety. Detayları gör
Viktor

Neden

Viktor completely neutralizes your offensive threat because of his defensive zone control. Whenever you initiate with Phase Dive, he can instantly drop Gravity Field at his feet. This forces you to immediately disengage before triggering Z-Drive Resonance, or suffer a stun inside his minion wave. While you struggle to close the gap, his Hextech Ray and Siphon Power constantly chip away at your health bar from safety.

Lane etkisi

Because you cannot trade freely, Viktor dictates the wave's tempo. He uses Hextech Ray to constantly push you under tower, forcing you to use Timewinder defensively to secure last hits. If you get chunked while farming, his Arcane Storm can easily dive or execute you. You will find yourself trapped in lane, unable to find roam timers while your tower slowly loses plates to his Siphon Power-empowered attacks.

Nasıl oynanır

To survive, prioritize slow-pushing with Timewinder from a distance to prevent Viktor from crashing huge waves. Only use Phase Dive defensively or laterally to dodge Hextech Ray, rather than rushing forward. If you want to trade, cast Parallel Convergence from the fog of war to cover his escape path, forcing him to choose between walking into your shield or placing Gravity Field too late. If trapped, use Chronobreak to safely escape his Arcane Storm burst.

Tam profil →
Yone

Yone

sustained_damagemobility The core issue in this matchup lies in how Yone's Soul Unbound entirely neutralizes your primary setup. When you cast Parallel Convergence, Yone can instantly activate his spirit form to dash out of the zone's radius, completely avoiding the stun. Because his real body remains safely behind, he can continue trading with Mortal Steel and Spirit Cleave without any fear of your crowd control, turning your defensive tool into a wasted cooldown. Detayları gör
Yone

Neden

The core issue in this matchup lies in how Yone's Soul Unbound entirely neutralizes your primary setup. When you cast Parallel Convergence, Yone can instantly activate his spirit form to dash out of the zone's radius, completely avoiding the stun. Because his real body remains safely behind, he can continue trading with Mortal Steel and Spirit Cleave without any fear of your crowd control, turning your defensive tool into a wasted cooldown.

Lane etkisi

This interaction severely cripples your early trade safety. You cannot reliably walk up to trigger Z-Drive Resonance using Phase Dive because Yone will counter-engage with Soul Unbound the moment your defensive shield fades. Consequently, you are forced to give up mid priority, farming passively with Timewinder from a distance. If you get chunked before reaching your crucial ultimate power spike, you will lose the map pressure needed to contest early skirmishes.

Nasıl oynanır

To survive, you must bait out Soul Unbound before attempting any aggressive combos. Hold Parallel Convergence entirely during his spirit state; instead, throw Timewinder to slow his return path. Once Yone snaps back to his physical body, you have a brief window where his primary mobility is down. This is your cue to strike. Use Phase Dive to trigger Z-Drive Resonance for the movement speed boost, then immediately disengage before his Mortal Steel tornado charges up again.

Tam profil →
Swain

Swain

sustainanti_burst Swain represents a war of attrition that heavily penalizes your assassin identity. While you want to trigger Z-Drive Resonance and escape, his Demonic Ascension completely nullifies your burst potential by draining your health and restoring his. If you dive in with Phase Dive, you land directly in the sweet spot of his Death's Hand, allowing him to out-sustain your combo and easily turn the engagement with continuous healing. Detayları gör
Swain

Neden

Swain represents a war of attrition that heavily penalizes your assassin identity. While you want to trigger Z-Drive Resonance and escape, his Demonic Ascension completely nullifies your burst potential by draining your health and restoring his. If you dive in with Phase Dive, you land directly in the sweet spot of his Death's Hand, allowing him to out-sustain your combo and easily turn the engagement with continuous healing.

Lane etkisi

This matchup forces you to play defensively under your turret. Swain will constantly push you in with Death's Hand while using Vision of Empire to disrupt your recalls or scout your jungler. You cannot take extended trades because his Ravenous Flock passive constantly restores his health when he pulls you off a Nevermove landing. Missing your wave clear means losing mid priority, leaving Swain free to assist his team.

Nasıl oynanır

Focus entirely on shoving the lane using Timewinder from a safe distance to prevent Swain from trapping you against your tower. Never use Phase Dive aggressively unless you have baited his Nevermove sideways, as this is his only tool to lock you down. If he activates Demonic Ascension, immediately drop Parallel Convergence behind you as a zoning tool and use Chronobreak to escape his ultimate's drain radius rather than trying to match his healing.

Tam profil →
Yasuo

Yasuo

skirmishshield_bypass This matchup is dictated by how Yasuo uses Wind Wall to swallow your Timewinder. Because your primary waveclear and the setup for Z-Drive Resonance rely entirely on the returning trajectory of this projectile, a well-placed wall leaves you completely disarmed. Without the slow and initial damage of Timewinder, you cannot safely trigger your passive movespeed to escape his relentless Steel Tempest stabs and Sweeping Blade dashes. Detayları gör
Yasuo

Neden

This matchup is dictated by how Yasuo uses Wind Wall to swallow your Timewinder. Because your primary waveclear and the setup for Z-Drive Resonance rely entirely on the returning trajectory of this projectile, a well-placed wall leaves you completely disarmed. Without the slow and initial damage of Timewinder, you cannot safely trigger your passive movespeed to escape his relentless Steel Tempest stabs and Sweeping Blade dashes.

Lane etkisi

Yasuo dictates the minion wave's rhythm. By threatening to block Timewinder, he forces you to farm with basic attacks under heavy pressure or waste mana on ineffective casts. This constant denial prevents you from shoving the lane, locking you under your turret where you must struggle to last-hit while dodging his Steel Tempest tornadoes. If he blocks your projectile, you lose all lane priority and cannot roam.

Nasıl oynanır

You must bait out Wind Wall before committing any resources. Throw a deceptive Timewinder angled away from the wave to force his reaction, or wait for him to waste it. Once Wind Wall is on its long cooldown, you have a brief window to initiate. Cast Parallel Convergence from the fog of war to catch him off-guard, then use Phase Dive to bypass his passive shield from Way of the Wanderer before executing your three-hit burst.

Tam profil →
Taliyah

Taliyah

anti_dashzone_control This matchup hinges on how heavily Taliyah punishes your mobility. The moment you initiate with Phase Dive, she can lay down Unraveled Earth to intercept you. Passing through her minefield triggers immediate, heavy damage and slows you down, making you an incredibly easy target for her Seismic Shove pushback and a subsequent barrage of Threaded Volley. Your main trading tool becomes your biggest liability. Detayları gör
Taliyah

Neden

This matchup hinges on how heavily Taliyah punishes your mobility. The moment you initiate with Phase Dive, she can lay down Unraveled Earth to intercept you. Passing through her minefield triggers immediate, heavy damage and slows you down, making you an incredibly easy target for her Seismic Shove pushback and a subsequent barrage of Threaded Volley. Your main trading tool becomes your biggest liability.

Lane etkisi

You are constantly forced onto the defensive, relying almost exclusively on Timewinder to secure minions from a safe distance. Because you cannot safely clear waves with Phase Dive, Taliyah easily secures priority. This allows her to roam freely using Rock Surfing near the river walls, eventually using Weaver's Wall to impact side lanes while you are stuck clearing under your tower.

Nasıl oynanır

Maintain a diagonal positioning angle to make her skillshots harder to land. Never use Phase Dive aggressively unless her Unraveled Earth is on cooldown; instead, save it to dodge Seismic Shove laterally. When she wastes her zone-control tools, cast Parallel Convergence from out of vision to stun her, quickly proc Z-Drive Resonance with a basic attack, and run away using the movement speed before she can retaliate.

Tam profil →
Akali

Akali

burst_windowshroud_play This matchup is a high-stakes burst race where Akali holds the upper hand due to her defensive utility. When you attempt to trigger Z-Drive Resonance using Phase Dive, Akali can immediately react with Twilight Shroud. Becoming untargetable in her smoke screen completely cancels your blink's auto-attack, leaving you stranded without your passive's movement speed and exposed to her Five Point Strike counter-burst. Detayları gör
Akali

Neden

This matchup is a high-stakes burst race where Akali holds the upper hand due to her defensive utility. When you attempt to trigger Z-Drive Resonance using Phase Dive, Akali can immediately react with Twilight Shroud. Becoming untargetable in her smoke screen completely cancels your blink's auto-attack, leaving you stranded without your passive's movement speed and exposed to her Five Point Strike counter-burst.

Lane etkisi

Because of this shroud interaction, you cannot safely contest waves once Akali reaches level three. Any aggressive trade you initiate with Timewinder can be turned against you if she retaliates with Shuriken Flip. This forces you to play defensively under tower, conceding early priority, which restricts your ability to roam and secure scuttle crabs while bleeding health whenever you step up to farm.

Nasıl oynanır

To survive this lane, you must play around her energy bar and the cooldown of Twilight Shroud. Never use Phase Dive offensively while her shroud is available. Instead, throw Timewinder to farm from a distance and bait her Shuriken Flip. If she misses, or if she wastes her shroud, you have a brief window to force a trade. If trapped, place Parallel Convergence on yourself and use Chronobreak defensively to escape her Perfect Execution.

Tam profil →
Kassadin

Kassadin

scalingmagic_shield Kassadin naturally neutralizes your lane presence because his Null Sphere grants him a magic shield whenever you try to trade. This directly absorbs the damage from your Timewinder poke, rendering your primary tool for zoning and wave control ineffective. Since you cannot easily chip away at his health bar, Kassadin easily bypasses his weak early game, scaling into a late-game monster while you struggle to find a health advantage. Detayları gör
Kassadin

Neden

Kassadin naturally neutralizes your lane presence because his Null Sphere grants him a magic shield whenever you try to trade. This directly absorbs the damage from your Timewinder poke, rendering your primary tool for zoning and wave control ineffective. Since you cannot easily chip away at his health bar, Kassadin easily bypasses his weak early game, scaling into a late-game monster while you struggle to find a health advantage.

Lane etkisi

Because your ranged poke is absorbed, Kassadin can freely match your wave clear. If you try to force a close-quarters trade with Phase Dive, his Nether Blade and Force Pulse will punish you during the silence from Null Sphere. This limits your ability to shove the wave and roam, forcing you into a passive farming lane where Kassadin holds the recall advantage and eventually outscales you.

Nasıl oynanır

To survive, bait out Null Sphere by walking forward without casting, then immediately strike with Phase Dive once his shield expires. Save Parallel Convergence to zone him under his turret or cover your retreat when he uses Riftwalk. If he plays too defensively, stop trying to poke him directly; instead, use Timewinder solely to shove the wave quickly, then look to coordinate with your jungler rather than fighting a losing battle in mid.

Tam profil →

Diğer eşleşmeler

Skill Matchup

10

Bu eşleşmeler her şeyden önce yürütme düellosudur: her iki şampiyon da avantaj elde etmek için gerçek yollara sahiptir. Kaçırılan önemli bir yetenek, doğru öngörülen bir engage ya da tek bir pozisyon hatası düelloyu bir tarafa çevirebilir. Matchup'ı bilmek ve doğru anları tanımak burada özellikle önemlidir.

Aurora

Aurora

assassinskirmish This matchup is a highly volatile duel of mobility. While you rely on Phase Dive and Z-Drive Resonance to dart in and out, Aurora matches your agility with Across the Veil. The ultimate interaction is the true turning point: when Aurora deploys Between Worlds, she severely limits your evasion zone. By confining you, she can easily track and predict where your Chronobreak hologram will land, turning your ultimate safety net into an easy target. Detayları gör
Aurora

Neden

This matchup is a highly volatile duel of mobility. While you rely on Phase Dive and Z-Drive Resonance to dart in and out, Aurora matches your agility with Across the Veil. The ultimate interaction is the true turning point: when Aurora deploys Between Worlds, she severely limits your evasion zone. By confining you, she can easily track and predict where your Chronobreak hologram will land, turning your ultimate safety net into an easy target.

Lane etkisi

Before level five, trades are short and explosive. You must use Timewinder to push back against her ranged pressure and match her wave clear. However, once ultimate spikes are online, the lane dynamic shifts dramatically. You cannot easily dive her under tower because The Weirding slows your retreat, and any overextension invites Between Worlds, forcing you into a predictable Chronobreak that can cost you all lane priority and mid-lane map control.

Nasıl oynanır

To outplay this, never initiate with Phase Dive if her ultimate is up; instead, use it to dodge Twofold Hex or escape the boundaries of her zone. Hold Parallel Convergence and cast it slightly behind you when she activates Between Worlds, forcing her to choose between chasing you into a stun or letting you walk away. If she locks you in, delay your Chronobreak until the very last second of her arena's duration to throw off her timing.

Tam profil →
Mel

Mel

burstdodge_skillshots This matchup is a pure test of reflexes. Mel wants to keep you at bay with her long-range linear spells, but her lack of mobility makes her highly vulnerable to being dived. By timing your Phase Dive correctly, you can leap over her skillshots to close the gap instantly. This allows you to apply Timewinder and trigger Z-Drive Resonance before she can establish her defensive zone. Detayları gör
Mel

Neden

This matchup is a pure test of reflexes. Mel wants to keep you at bay with her long-range linear spells, but her lack of mobility makes her highly vulnerable to being dived. By timing your Phase Dive correctly, you can leap over her skillshots to close the gap instantly. This allows you to apply Timewinder and trigger Z-Drive Resonance before she can establish her defensive zone.

Lane etkisi

Because Mel can easily push the wave from afar, you will often find yourself farming under tower early on. However, she cannot safely pressure your plate without exposing herself to a sudden engage. A single successful trade where you proc Z-Drive Resonance and run back to safety swings the lane's pressure, forcing her to play defensively and preventing her from roaming to support her jungler.

Nasıl oynanır

To win this lane, stand slightly off to the side of the minion wave to force Mel to choose between pushing or poking you. Never initiate with Phase Dive unless you see her launch her linear crowd control. If she holds her spells, throw Timewinder to slow her down first. If you miss your combo and get caught, drop Parallel Convergence behind you to secure a shield and escape safely.

Tam profil →
Zed

Zed

outplayburst This midlane matchup is a high-stakes duel dictated entirely by how you use your ultimate to deny his. Zed relies heavily on the explosive burst of his Death Mark to secure kills. However, Ekko holds the perfect counter: timing Chronobreak right before that mark detonates completely negates its damage. This single interaction neutralizes Zed's primary assassination threat, transforming his deadly dive into a massive waste of cooldowns. Detayları gör
Zed

Neden

This midlane matchup is a high-stakes duel dictated entirely by how you use your ultimate to deny his. Zed relies heavily on the explosive burst of his Death Mark to secure kills. However, Ekko holds the perfect counter: timing Chronobreak right before that mark detonates completely negates its damage. This single interaction neutralizes Zed's primary assassination threat, transforming his deadly dive into a massive waste of cooldowns.

Lane etkisi

Early on, you must contest the wave using Timewinder while dodging his Razor Shuriken. Zed will try to chunk your health with Living Shadow combos to set up an execution. Once you both unlock your ultimates, the lane becomes a psychological standoff. You can match his aggressive tower dives because Chronobreak acts as your safety net, preventing Zed from easily forcing you out of lane or gaining a massive gold advantage.

Nasıl oynanır

When laning, save Phase Dive to bait and dodge his Razor Shuriken when he projects his Living Shadow. If Zed targets you with Death Mark, do not panic-cast your ultimate immediately. Watch the visual indicator of his mark and activate Chronobreak exactly before the detonation to erase the damage. If you misstime this window, cast Parallel Convergence on your own position to gain a shield and stun him the moment he lands.

Tam profil →
Fizz

Fizz

invulnerabilityburst This matchup is a pure battle of untargetability and reaction speeds. Fizz relies on landing his shark from Chum the Waters to secure his burst, while using Playful to dodge your return damage. However, the entire lane hinges on Chronobreak. If you time your ultimate perfectly as the shark chomps, you can completely negate both the massive magic damage and the knockup, turning his primary engage tool into a wasted cooldown. Detayları gör
Fizz

Neden

This matchup is a pure battle of untargetability and reaction speeds. Fizz relies on landing his shark from Chum the Waters to secure his burst, while using Playful to dodge your return damage. However, the entire lane hinges on Chronobreak. If you time your ultimate perfectly as the shark chomps, you can completely negate both the massive magic damage and the knockup, turning his primary engage tool into a wasted cooldown.

Lane etkisi

Before level five, trades are short and aggressive. You can poke with Timewinder, but Fizz's Urchin Strike and Rending Wave make extended melee trades dangerous. Once ultimates are unlocked, lane pressure freezes. Neither of you can safely commit under tower because Chronobreak and Playful allow both assassins to drop tower aggro and survive dives, meaning a single mistimed ultimate instantly concedes mid lane priority.

Nasıl oynanır

Keep a constant eye on your holographic clone. When Fizz throws Chum the Waters, resist the urge to panic-cast Phase Dive. Instead, track the shark's countdown ring under your feet and activate Chronobreak just as it finishes to phase through the eruption. If you get baited into using your ultimate early, immediately retreat with Phase Dive over a wall, as you cannot survive his raw Urchin Strike follow-up.

Tam profil →
Vladimir

Vladimir

sustainwave_clear This matchup is a direct contest between your burst execution and Vladimir's defensive reaction. Your main trade pattern relies on triggering the third stack of Z-Drive Resonance via Phase Dive and Timewinder. However, a skilled Vladimir will always react by casting Sanguine Pool to dodge that final proc, negating your damage and movement speed bonus. Since he cannot match your early map presence, the lane becomes a race of map influence versus his scaling. Detayları gör
Vladimir

Neden

This matchup is a direct contest between your burst execution and Vladimir's defensive reaction. Your main trade pattern relies on triggering the third stack of Z-Drive Resonance via Phase Dive and Timewinder. However, a skilled Vladimir will always react by casting Sanguine Pool to dodge that final proc, negating your damage and movement speed bonus. Since he cannot match your early map presence, the lane becomes a race of map influence versus his scaling.

Lane etkisi

Vladimir will use Transfusion to sustain through your poke and slowly charge Tides of Blood to contest your push. Because his Sanguine Pool has an extremely long cooldown, you can force him to stay under tower by shoving waves rapidly with Timewinder. While he is locked down farming to scale his Crimson Pact, you gain free windows to leave the mid lane, securing river vision or diving side lanes before he can react.

Nasıl oynanır

Never commit your Chronobreak or Parallel Convergence when Vladimir has his Hemoplague active unless you can secure an immediate kill. Instead, use Timewinder to clear the caster minions instantly, then bait out Sanguine Pool with a feigned Phase Dive. If he falls for the bait, you have a twenty-second window to pressure him. If he holds it, do not force the fight; immediately run toward the river to assist your jungler or gank side lanes.

Tam profil →
Diana

Diana

outplayskirmish This matchup is a high-octane battle of reflexes centered on your ultimate abilities. Diana relies on landing Crescent Strike to reset Lunar Rush and pull you in with Moonfall for a lethal burst. However, you hold the ultimate trump card. Activating Chronobreak right as Moonfall pulls you completely negates her burst, repositioning you safely while healing back the damage from her Pale Cascade and Moonsilver Blade strikes. Detayları gör
Diana

Neden

This matchup is a high-octane battle of reflexes centered on your ultimate abilities. Diana relies on landing Crescent Strike to reset Lunar Rush and pull you in with Moonfall for a lethal burst. However, you hold the ultimate trump card. Activating Chronobreak right as Moonfall pulls you completely negates her burst, repositioning you safely while healing back the damage from her Pale Cascade and Moonsilver Blade strikes.

Lane etkisi

Before level five, trades are extremely volatile. Diana will try to poke you down with Crescent Strike while securing shields with Pale Cascade. If she misses her crescent arc, you have a brief window to initiate with Phase Dive and trigger Z-Drive Resonance. Once both of you unlock your ultimates, the lane becomes a tense standoff. Neither assassin can easily dive the other, meaning the mid-lane priority often shifts to whoever baits out the other's defensive tools first.

Nasıl oynanır

During skirmishes, never initiate with Phase Dive if Diana has Crescent Strike ready, as she will easily counter-engage and out-shield you with Pale Cascade. Instead, use Timewinder to farm from safety and fish for slows. Always keep track of your Chronobreak clone's position. If Diana commits her Lunar Rush and activates Moonfall, delay your Chronobreak just enough to absorb the initial pull, then trigger it to erase her burst. If you mess up the timing, immediately drop Parallel Convergence on your own location to zone her off.

Tam profil →
Morgana

Morgana

cc_negationmobility Morgana's ability to block the stun from Parallel Convergence using her Black Shield dictates the rhythm of every trade. Because her shield absorbs magic damage and stops crowd control, she can easily nullify Ekko's primary setup. However, Black Shield has a long cooldown, and if Ekko can bypass or break it, his raw burst from Z-Drive Resonance and Phase Dive easily shreds her low base health. Detayları gör
Morgana

Neden

Morgana's ability to block the stun from Parallel Convergence using her Black Shield dictates the rhythm of every trade. Because her shield absorbs magic damage and stops crowd control, she can easily nullify Ekko's primary setup. However, Black Shield has a long cooldown, and if Ekko can bypass or break it, his raw burst from Z-Drive Resonance and Phase Dive easily shreds her low base health.

Lane etkisi

Morgana will constantly shove the wave using Tormented Shadow, forcing you to use Timewinder to farm under turret. If you step up to trade, she will fish for Dark Binding to lock you down. This creates a high-pressure lane where neither champion can easily roam without risking tower plates, making mid priority entirely dependent on who bait out the other's defensive tools first.

Nasıl oynanır

To win this, never initiate with Parallel Convergence unless you are sure her Black Shield is on cooldown. Instead, use Phase Dive laterally to dodge her Dark Binding, then immediately trigger Z-Drive Resonance with a quick Timewinder combo to burst through her shield's health threshold. If she preemptively shields herself, disengage instantly using your passive's movement speed and wait for that twenty-second window to strike again.

Tam profil →

Diğer eşleşmeler

Avantajlı

12

Bu şampiyonlar genellikle senin temel güçlerine etkili şekilde karşılık veremez, bu da çatışmaya daha fazla özgürlükle yaklaşmanı sağlar. Onları baskı altına almak ve lehine dönen trade'ler zorlamak için genellikle birden fazla yolun vardır. Onlara rahat bir pozisyona dönme fırsatı vermek yerine, bu avantajı kendi temponu dayatmak için kullan.

Brand

Brand

spacingdefense This matchup is highly favorable for Ekko because Brand relies on the slow setup of Pillar of Flame to trigger Blaze. Since Phase Dive grants you an immediate dash followed by a blink, you can effortlessly react to his circular ground indicator, dodge the eruption entirely, and close the distance. This puts you in point-blank range to immediately pop Z-Drive Resonance and trade before he can react. Detayları gör
Brand

Neden

This matchup is highly favorable for Ekko because Brand relies on the slow setup of Pillar of Flame to trigger Blaze. Since Phase Dive grants you an immediate dash followed by a blink, you can effortlessly react to his circular ground indicator, dodge the eruption entirely, and close the distance. This puts you in point-blank range to immediately pop Z-Drive Resonance and trade before he can react.

Lane etkisi

Brand's inability to safely harass you shifts wave control completely into your hands. Whenever he attempts to use Pillar of Flame to push the wave, he exposes himself to an immediate engage. This constant threat of a deadly trade forces him to play defensively, preventing him from utilizing Pyroclasm to secure priority. You can easily crash waves, secure deep vision, or threaten dives with Parallel Convergence.

Nasıl oynanır

To execute this flawlessly, walk aggressively toward the minion wave to bait out Pillar of Flame. The moment you see his animation start, use Phase Dive sideways or forward to dodge the circle, then blink onto him. Follow up with Timewinder to slow him, ensuring you trigger Z-Drive Resonance for the movement speed boost to escape a retaliatory Sear. If he manages to land a lucky stun and activates Pyroclasm, immediately use Chronobreak to reset the fight.

Tam profil →
Ziggs

Ziggs

squishydive This matchup is highly favorable because Ziggs is incredibly fragile and lacks mobility once his primary self-peel is gone. Whenever Ziggs misuses or wastes Satchel Charge, he becomes completely defenseless. Your Phase Dive allows you to instantly close the gap, bypassing his Bouncing Bomb and Hexplosive Minefield. Without his explosive displacement tool, he cannot escape your burst damage or prevent you from easily triggering Z-Drive Resonance. Detayları gör
Ziggs

Neden

This matchup is highly favorable because Ziggs is incredibly fragile and lacks mobility once his primary self-peel is gone. Whenever Ziggs misuses or wastes Satchel Charge, he becomes completely defenseless. Your Phase Dive allows you to instantly close the gap, bypassing his Bouncing Bomb and Hexplosive Minefield. Without his explosive displacement tool, he cannot escape your burst damage or prevent you from easily triggering Z-Drive Resonance.

Lane etkisi

Ziggs will constantly try to shove waves from afar using Bouncing Bomb to chip away at your tower. However, because he must step up to use Short Fuse for maximum pressure, he constantly exposes himself. A single forward step from him allows you to initiate trades. Once he drops his defensive mines, you can force him away from the wave, completely neutralizing his siege potential and securing easy priority.

Nasıl oynanır

Position yourself parallel to the minion wave to force Ziggs to choose between clearing minions or aiming his Bouncing Bomb at you. Watch his cooldowns closely; the moment he uses Satchel Charge offensively or to clear, immediately throw Parallel Convergence behind him and engage with Phase Dive. If he manages to displace you first, retreat safely with Timewinder to slow his pursuit, then reset your approach once your gap-closer is back online.

Tam profil →
Aurelion Sol

Aurelion Sol

mobility_burstdodge_cc Aurelion Sol relies on zoning you out with Singularity while channeling Breath of Light to stack his passive. However, this matchup heavily favors you because Phase Dive completely bypasses his gravitational pull. The moment he lays down his zone to stop your approach, you can blink straight through it, landing directly on him to trigger Z-Drive Resonance and chunk his health bar before he can react. Detayları gör
Aurelion Sol

Neden

Aurelion Sol relies on zoning you out with Singularity while channeling Breath of Light to stack his passive. However, this matchup heavily favors you because Phase Dive completely bypasses his gravitational pull. The moment he lays down his zone to stop your approach, you can blink straight through it, landing directly on him to trigger Z-Drive Resonance and chunk his health bar before he can react.

Lane etkisi

Because you hold the threat of an instant gap-close, Aurelion Sol cannot freely clear waves with Breath of Light without risking his life. This allows you to dictate the wave state. You can force him under his turret, denying his Cosmic Creator stacks, or freeze the lane to set up a deadly dive. He is forced to play defensively, losing priority and mid-lane control.

Nasıl oynanır

Position yourself diagonally to the minion wave, forcing him to choose between farming and aiming Breath of Light at you. Wait for him to cast Singularity to clear minions. The millisecond the gravity zone appears, cast Timewinder to slow his retreat, then immediately use Phase Dive to blink over the zone, trigger your passive, and run him down. If he flies away with Astral Flight, recall to safety using Chronobreak if you overextended.

Tam profil →
Veigar

Veigar

scaling_racecc_bait Veigar relies heavily on boxing you in with Event Horizon to land his Dark Matter and Baleful Strike burst. However, Ekko completely negates this defensive zone. By placing Parallel Convergence directly over Veigar's cage, you can safely wait inside the perimeter. The massive shield absorbs any stray Baleful Strike damage while the threat of your stun prevents Veigar from walking up to punish you. Detayları gör
Veigar

Neden

Veigar relies heavily on boxing you in with Event Horizon to land his Dark Matter and Baleful Strike burst. However, Ekko completely negates this defensive zone. By placing Parallel Convergence directly over Veigar's cage, you can safely wait inside the perimeter. The massive shield absorbs any stray Baleful Strike damage while the threat of your stun prevents Veigar from walking up to punish you.

Lane etkisi

This dynamic forces Veigar to play incredibly far back, conceding control of the wave. You can easily shove him under tower using Timewinder to secure quick roam timings. Because he cannot safely trap and burst you, his ability to stack Phenomenal Evil Power on you is severely limited, meaning he cannot easily match your wave-clear or skirmish power during the early mid-game transitions.

Nasıl oynanır

When Veigar drops Event Horizon to stop your approach, resist the urge to immediately blink with Phase Dive. Instead, cast Parallel Convergence directly on top of yourself inside his cage boundaries. Stand still to receive the shield, then use Phase Dive to blink onto him the split second his cage dissolves. If you get low, remember Chronobreak can bail you out of a mispositioned stun before Primordial Burst lands.

Tam profil →
Katarina

Katarina

cc_interruptburst Ekko dictates this matchup because Katarina relies on stationary channeling for her maximum burst. When she commits with Shunpo into Death Lotus, she locks herself in place, allowing you to drop Parallel Convergence directly on your own position. This forces her into a disastrous dilemma: either she interrupts her ultimate to flee, or she takes a massive stun, allowing you to easily trigger Z-Drive Resonance and trade with zero retaliation. Detayları gör
Katarina

Neden

Ekko dictates this matchup because Katarina relies on stationary channeling for her maximum burst. When she commits with Shunpo into Death Lotus, she locks herself in place, allowing you to drop Parallel Convergence directly on your own position. This forces her into a disastrous dilemma: either she interrupts her ultimate to flee, or she takes a massive stun, allowing you to easily trigger Z-Drive Resonance and trade with zero retaliation.

Lane etkisi

This interaction completely shifts the trading dynamic in your favor. Katarina cannot use her daggers from Bouncing Blade and Preparation to zone you, as any aggressive Shunpo into your wave makes her vulnerable to an immediate Phase Dive and Timewinder trade. She is forced to farm defensively under turret, giving you complete priority to push waves and collapse on river skirmishes before she can react.

Nasıl oynanır

Do not throw Parallel Convergence blindly to catch her. Instead, stand near her dropped daggers from Bouncing Blade to bait her Shunpo. The moment she blinks onto you and starts Death Lotus, cast Parallel Convergence directly under your feet. Follow up immediately with Phase Dive to trigger the stun, hit a quick Timewinder, and secure the kill. If you misplay the timing and her damage spikes too quickly, use Chronobreak to instantly reset the fight and heal.

Tam profil →
Talon

Talon

roam_matchupanti_burst Ekko holds a massive advantage in this assassin duel because Chronobreak completely nullifies Talon's primary kill condition. When Talon commits his entire Shadow Assault and Noxian Diplomacy combo to trigger Blade's End, you can simply press your ultimate. This negates his burst, restores your health, and leaves a fully exposed Talon with no escape tools or cooldowns left to fight back. Detayları gör
Talon

Neden

Ekko holds a massive advantage in this assassin duel because Chronobreak completely nullifies Talon's primary kill condition. When Talon commits his entire Shadow Assault and Noxian Diplomacy combo to trigger Blade's End, you can simply press your ultimate. This negates his burst, restores your health, and leaves a fully exposed Talon with no escape tools or cooldowns left to fight back.

Lane etkisi

This dynamic prevents Talon from playing aggressively or zoning you off the wave. Since you do not fear his all-in, you can use Timewinder to match his Rake for wave priority. Talon is forced to look for roams using Assassin's Path, but your threat of shoving the wave with Phase Dive and taking plates makes his departures extremely costly, securing you a gold lead.

Nasıl oynanır

To execute this perfectly, never panic-cast Chronobreak at the start of his engage. Wait until Talon fully commits his Shadow Assault and dashes with Noxian Diplomacy before rewriting time. While invisible, place Parallel Convergence on top of your own clone; when you activate your ultimate, you will land directly inside your shield, stunning Talon as he re-emerges. If he roams, immediately ping your side lanes and shove the wave.

Tam profil →
Twisted Fate

Twisted Fate

roamingdive Twisted Fate relies heavily on Pick a Card to control distance, but his slow-moving Wild Cards cannot stop you once you engage. As Ekko, your skirmishing power is vastly superior. By triggering Z-Drive Resonance with a quick Phase Dive and Timewinder combo, you outdamage him in every short trade. If he misuses his yellow card to last-hit or poke, he loses his only self-defense tool, leaving him completely vulnerable to a lethal dive. Detayları gör
Twisted Fate

Neden

Twisted Fate relies heavily on Pick a Card to control distance, but his slow-moving Wild Cards cannot stop you once you engage. As Ekko, your skirmishing power is vastly superior. By triggering Z-Drive Resonance with a quick Phase Dive and Timewinder combo, you outdamage him in every short trade. If he misuses his yellow card to last-hit or poke, he loses his only self-defense tool, leaving him completely vulnerable to a lethal dive.

Lane etkisi

This matchup quickly turns into a fierce race to push and roam. While Twisted Fate wants to clear waves safely and look for global plays with Destiny, you can easily match his waveclear by throwing Timewinder through the minions. Since he fears your burst, you can zone him off the wave, forcing him to farm under tower where his Loaded Dice passive becomes less impactful because you constantly threaten to dive him with Parallel Convergence.

Nasıl oynanır

Keep a close eye on his overhead card rotation. The moment Twisted Fate locks in a blue or red card with Pick a Card, immediately execute a forward Phase Dive combined with Timewinder to trigger Z-Drive Resonance and chunk his health bar. If he plays too defensively, push the wave hard to prevent him from utilizing Destiny. Should you take turret aggro during a dive, instantly activate Chronobreak to drop the focus and safely escape with the kill.

Tam profil →

Diğer eşleşmeler

Items to Counter Ekko

Buy these items to reduce this champion's effectiveness in your games.

Mercury's Treads
Mercury's Treads
Quicksilver Enchant
Quicksilver Enchant
Stasis Enchant
Stasis Enchant
Maw of Malmortius
Maw of Malmortius
Force of Nature
Force of Nature

Bu şampiyon nasıl counterlanır

Counter açısı

Ekko sadece daha güçlü şampiyonlara karşı değil, aynı zamanda temposunu bozan şampiyonlara karşı da yenik düşer. Ona karşı etkili olan şampiyonlar, ya onun çatışmalara girmesini engelleyen ya da çatışmaya girdikten hemen sonra onu cezalandıran şampiyonlardır. Bu kalıpları anlamak, isimleri ezberlemekten daha önemlidir.

Patch bağlamı

Ekko, zamanlamasının bozulduğu eşleşmelerde zorlanıyor. Ani saldırısını hızlı bir şekilde gerçekleştiremezse ya da R yeteneğini kullanmadan önce kontrol altına alınırsa, tüm etkisini yitiriyor. Anında kontrol sağlayan ya da onunla eşit hareket kabiliyetine sahip şampiyonlar, onun saldırı girişimlerini riskli ve genellikle etkisiz hale getiriyor.

Hızlı okuma

  • Anlık kitle kontrolüne karşı zayıftır.
  • Erken devreye girerse cezalandırılabilir.
  • R zamanlamasına büyük ölçüde bağlıdır.

Counter arketipleri

Anında kontrol

Bu şampiyonlar, Ekko’in rotasyonunu uygulamasına engel oluyor. Kontrollerini hızlı, güvenilir ve genellikle tek tıkla gerçekleştiriyorlar; bu da onun saldırı girişimlerini tamamen engelliyor. Ekko, güvenliğini garanti edemediği durumlarda çatışmaya girme riskini göze alamaz.

Şampiyon nasıl uyum sağlamalı. Bekleme sürelerini iyi değerlendirin ve doğrudan çatışmalardan kaçının.

Daha hızlı suikastçılar

Bu şampiyonlar, Ekko’den daha hızlı saldırıya geçip onu öldürebilir ya da onun verdiği hasarı kaçınabilirler. Düellolarda onun ritmini bozarlar ve karşılıklı hasar alışverişini riskli hale getirirler.

Şampiyon nasıl uyum sağlamalı. Doğrudan düellolardan kaçının ve harita kontrolüne odaklanın.

Kontrollü menzilli patlama

Ekko, etkili bir şekilde mücadeleye girmeden önce onu cezalandırıyorlar. Tehdit bölgeleri, onun giriş açılarını kısıtlıyor ve hataya zorluyor.

Şampiyon nasıl uyum sağlamalı. Kanatlardan oynayın ve kontrol altındaki bölgelerden uzak durun.

Öncelikli matchuplar

Annie

Annie, Ekko için en kötü eşleşmelerden biridir çünkü onun oyun stilini tamamen etkisiz hale getirir. Anlık sersemletme yeteneği, temiz çatışmalara girilmesini engeller ve genellikle savunma amaçlı R kullanmaya zorlar. Ekko, onun sersemletme yeteneğini hesaba katmadan çatışmaya girerse, bu çatışmayı anında kaybeder.

Ona karşı yaygın hatalar

Ona karşı yaygın hatalar

  • Düşmanın kitle kontrolünü hafife almak.
  • Vizyon olmadan işin içine girmek.
  • Düşmanların bekleme sürelerini göz ardı etmek.
  • Elverişsiz düellolara zorlamak.
  • Zamanlamayı ayarlayamama.

Koç notları

  • Asla bir birimi hazır CC durumuna zorla sokma.
  • Zamanlaman, en önemli silahındır.

FAQ

Ekko neden Annie’e karşı zorlanıyor?

Annie, Ekko’in kombo serisini gerçekleştirmesini engelleyen anlık bir kitle kontrolüne sahiptir. Çatışmaya girdiğinde, hasar patlaması yapmadan veya R yeteneğini kullanmadan önce sersemletilme riskiyle karşı karşıya kalır. Bu durum onu pasif bir oyun tarzına zorlar ve etkisini önemli ölçüde sınırlar.

Ekko, Zed gibi suikastçıları yenebilir mi?

Evet, ama bu zamanlamaya ve okuma becerisine bağlı. Zed daha hızlı saldırı dalgaları oluşturabilir, bu yüzden Ekko onun R yeteneğine göre hareket etmeli ve doğrudan takaslardan kaçınmalıdır. Bu eşleşme, salt düellodan ziyade sabır ve hatalar üzerine kurulu hale gelir.

Ekko’e karşı hangi tür şampiyonlar etkilidir?

Anında kontrol, hızlı patlama gücü veya benzer hareket kabiliyetine sahip şampiyonlar en etkili olanlardır. Bu şampiyonlar, Ekko’in tam döngüsünü tamamlamasını engeller ve onu, kendi lehine çeviremeyeceği riskli hamlelere zorlar.


Ekko’i karşı hamlelere karşı nasıl oynamalısınız?

Hataları iyi değerlendirmeli ve doğrudan çatışmalardan kaçınmalısınız. Savaş sisi avantajını kullanın, düşmanın yetenek bekleme sürelerinin dolmasını bekleyin ve haritada dolaşmaya odaklanın. Ekko, düellolarda karşı karakterleri yenemez, ancak harita üzerindeki etkisiyle galip gelir.