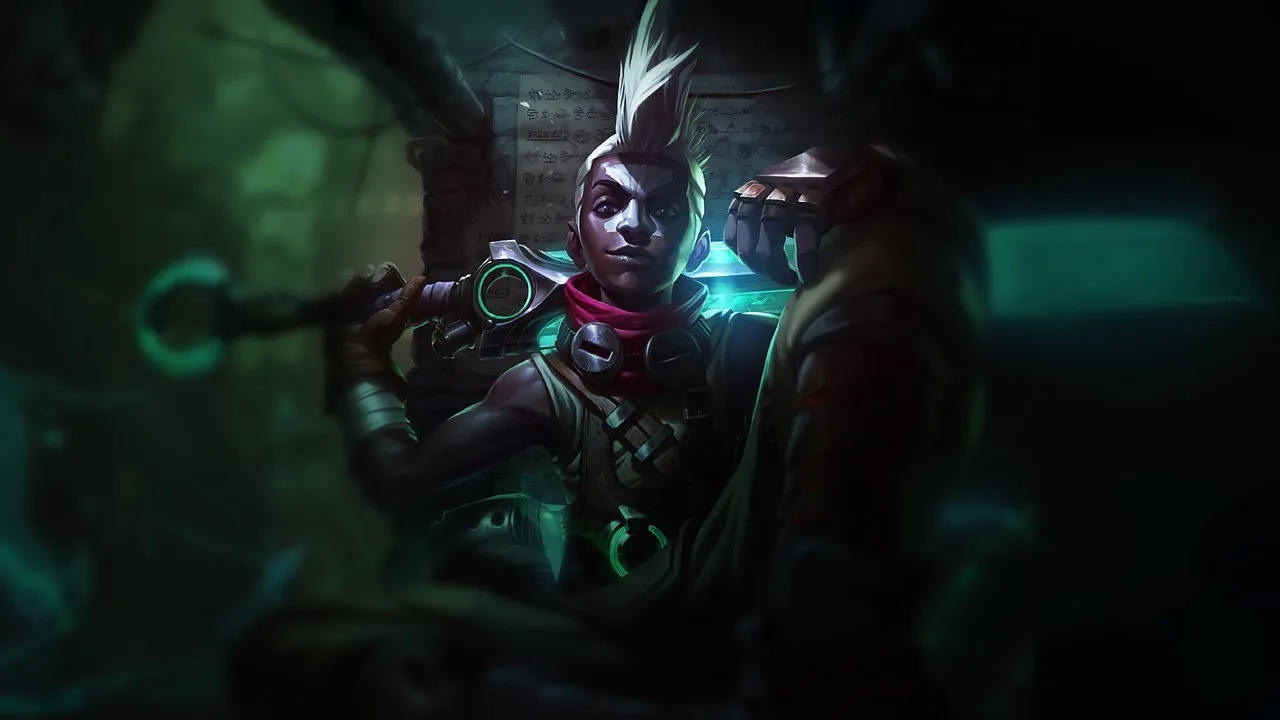
Ekko is vulnerable against champions who engage before he sets up his stasis zones and counter his ultimate through smart repositioning. Fast burst or instant CC profiles force him to play cautiously. Good vision largely negates his assassin potential.
★ MID · JUNGLETier A
DMG
UTIL
TANK
DIFF
Win50.2%#50 · ↓6pt
Pick5.2%#13
Ban4.8%#37
Ekko Wild Rift Counters Guide
Hard Counters
4
These champions have a build and playstyle that directly overpower yours, which can make controlling the lane and farming extremely difficult. Their kit can neutralize your core strengths or punish you the moment you try to play your usual game plan. In these matchups, the goal is often to minimize mistakes and look for ways to win outside of direct confrontation.
Crowd controlPeelRammus completely shuts down your assassination attempts because his Frenzying Taunt strips away your agency. When he forces you into this taunt, you are compelled to basic attack him while his Defensive Ball Curl is active, dealing self-inflicted damage. More importantly, this crowd control locks you down entirely, preventing you from activating Chronobreak to escape death, rendering your ultimate useless before you can even trigger its massive healing.Rammus build →See details
Rammus
The interaction that decides it
Rammus's Frenzying Taunt forces Ekko to attack him during Defensive Ball Curl, locking him down before he can cast Chronobreak.
Why
Rammus completely shuts down your assassination attempts because his Frenzying Taunt strips away your agency. When he forces you into this taunt, you are compelled to basic attack him while his Defensive Ball Curl is active, dealing self-inflicted damage. More importantly, this crowd control locks you down entirely, preventing you from activating Chronobreak to escape death, rendering your ultimate useless before you can even trigger its massive healing.
Lane impact
In the jungle, this dynamic prevents you from taking aggressive skirmishes or contesting neutral camps directly. Rammus can easily intercept your ganks using Powerball to knock you out of Phase Dive, or lock you down under towers. Since you cannot safely duel him, you lose the priority to secure Scuttle Crabs, forcing your lanes to play defensively while he dictates the early map pressure.
How to play
To survive teamfights, you must adopt a strict flank-and-wait positioning strategy. Never initiate when Rammus is nearby; instead, wait in the fog of war for him to waste Frenzying Taunt on your frontline. Cast Parallel Convergence from out of sight to zone his backline. Only use Phase Dive to dive their carry once Rammus's defensive curl is down, keeping Chronobreak ready as a quick disengage rather than an offensive tool.
Early pressureBurstPantheon completely neutralizes your skirmishing power in the jungle because of the instant nature of Shield Vault. Since it is a point-and-click stun, he can interrupt you the moment you attempt to reposition with Phase Dive. More importantly, this immediate crowd control prevents you from activating Chronobreak to escape death, allowing him to burst you down before you can ever trigger your ultimate.Pantheon build →See details
Pantheon
The interaction that decides it
Pantheon's Shield Vault provides an instant point-and-click stun that prevents Ekko from reacting with Phase Dive or Chronobreak.
Why
Pantheon completely neutralizes your skirmishing power in the jungle because of the instant nature of Shield Vault. Since it is a point-and-click stun, he can interrupt you the moment you attempt to reposition with Phase Dive. More importantly, this immediate crowd control prevents you from activating Chronobreak to escape death, allowing him to burst you down before you can ever trigger your ultimate.
Lane impact
This matchup strips away your early jungle agency. Knowing you cannot contest neutral camps directly, Pantheon will aggressively invade your territory with Mortal Will active. If you try to fight back, his Aegis Assault blocks your Timewinder damage on the return, while his Grand Starfall allows him to counter-gank your lanes instantly, forcing you into a passive farming style.
How to play
To survive, you must track Pantheon's starting route and actively clear the opposite side of the map. Never initiate with Phase Dive; instead, preserve it exclusively to dash over thin walls to escape when he jumps you. If he corners you, throw Parallel Convergence behind yourself and run into it, forcing him to choose between getting stunned or letting you walk away. If he targets a lane with Grand Starfall, use that window to secure a safe, distant camp.
These champions have tools that generally give them the edge in a fight, without making the matchup unwinnable. They might have more range, a better ability to soak up your offense, or more ways to answer your engages. You'll need to adapt your approach and carefully pick your moments to accept a fight.
MobilityExecuteThe jungle skirmish turns sour the moment you try to engage or escape. Darius can reactively interrupt your Phase Dive mid-dash using his Apprehend. This displacement cancels your mobility and pulls you directly into his melee range. From there, he rapidly stacks Hemorrhage with Crippling Strike, forcing you to burn Chronobreak defensively to survive before he can execute you with Noxian Guillotine.Darius build →See details
Darius
The interaction that decides it
Darius can interrupt Ekko's Phase Dive with Apprehend, forcing Ekko to use Chronobreak defensively before getting five Hemorrhage stacks.
Why
The jungle skirmish turns sour the moment you try to engage or escape. Darius can reactively interrupt your Phase Dive mid-dash using his Apprehend. This displacement cancels your mobility and pulls you directly into his melee range. From there, he rapidly stacks Hemorrhage with Crippling Strike, forcing you to burn Chronobreak defensively to survive before he can execute you with Noxian Guillotine.
Lane impact
Because you cannot safely contest close-quarters fights, Darius commands the river camps and early Scuttle Crabs. If you get caught in your own jungle, a single misplaced dash costs you your ultimate, stripping away your map pressure for the next two minutes. This vulnerability prevents you from counter-ganking effectively, as he can force you out of fights instantly, leaving your laners exposed to his snowball potential.
How to play
Never initiate with Phase Dive while his Apprehend is available; instead, throw Timewinder from afar to bait his pull. Position yourself near walls that you can blink over only after his displacement is on cooldown. If he misses his pull, immediately drop Parallel Convergence on yourself and use your Z-Drive Resonance movement speed to disengage rather than committing to a prolonged duel where Hemorrhage will inevitably overwhelm you.
MobilityCC immunityAmbessa directly counters your primary engage tool. When you cast Parallel Convergence, she can easily react with Repudiation, gaining a shield that absorbs your burst while completely blocking your stun. Worse, if you drop low, her Public Execution suppression locks you in place, preventing you from activating Chronobreak to escape. This means your safety net is entirely neutralized if she tracks your health bar correctly.Ambessa build →See details
Ambessa
The interaction that decides it
Ambessa can react to Ekko's Parallel Convergence stun with Repudiation, and use Public Execution to lock him down before he can cast Chronobreak.
Why
Ambessa directly counters your primary engage tool. When you cast Parallel Convergence, she can easily react with Repudiation, gaining a shield that absorbs your burst while completely blocking your stun. Worse, if you drop low, her Public Execution suppression locks you in place, preventing you from activating Chronobreak to escape. This means your safety net is entirely neutralized if she tracks your health bar correctly.
Lane impact
This dynamic makes early jungle skirmishes and River contests highly dangerous. You cannot reliably win isolated duels because her Drakehound's Step allows her to easily dodge your Timewinder return. If she invades your camps with Public Execution ready, you must yield territory immediately. A single misstep near neutral objectives can lead to a quick suppression death, depriving your team of your Smite.
How to play
To survive, you must track her cooldowns relentlessly. Never initiate with Phase Dive into her while her Repudiation is available; instead, use Timewinder to poke from a distance and bait her shield. If she commits with Cunning Sweep, use your Phase Dive defensively to escape the outer sweet spot. Only deploy Parallel Convergence behind her path of retreat, forcing her to choose between burning her defensive spell early or getting stunned.
ScalingTanksYour explosive burst loop is fundamentally countered by Mundo's design. Triggering Z-Drive Resonance with Phase Dive and Timewinder barely scratches his massive health pool, which he easily recovers using Maximum Dosage. Worse, his passive Goes Where He Pleases blocks the stun from Parallel Convergence, stripping you of your primary defensive and offensive setup during jungle skirmishes while he runs you down.Dr. Mundo build →See details
Dr. Mundo
The interaction that decides it
Ekko's burst-heavy AP pattern is ineffective against Mundo's massive health pool and Magic Resist itemization.
Why
Your explosive burst loop is fundamentally countered by Mundo's design. Triggering Z-Drive Resonance with Phase Dive and Timewinder barely scratches his massive health pool, which he easily recovers using Maximum Dosage. Worse, his passive Goes Where He Pleases blocks the stun from Parallel Convergence, stripping you of your primary defensive and offensive setup during jungle skirmishes while he runs you down.
Lane impact
In the jungle, you cannot contest objectives or scuttle crabs in a direct duel. If Mundo intercepts you, his Infected Bonesaw slows you down while Blunt Force Trauma chunks your health, forcing an early Chronobreak just to survive. This constant threat forces you to cede river priority, meaning your laners will suffer from his uncontested ganking pressure while you farm defensively.
How to play
Pivot your build path immediately toward heavy magic penetration and healing reduction rather than raw flat AP burst. In skirmishes, never initiate with Parallel Convergence; instead, wait for an ally to pop his Goes Where He Pleases shield first so your stun can actually land. If Mundo targets you with Infected Bonesaw, use the dash of Phase Dive to leap over thin jungle walls to escape, saving Chronobreak strictly for repositioning after he wastes his ultimate.
SkirmishesKitingIn the jungle, Graves holds a natural range advantage with New Destiny, enabling him to kite you while stacking armor with Quickdraw. The crucial bottleneck occurs when you attempt to engage: if Graves drops Smoke Screen on you, the near-instant loss of vision completely cancels your ability to target him with the second, blink portion of Phase Dive, leaving you stranded and unable to trigger your Z-Drive Resonance.Graves build →See details
Graves
The interaction that decides it
Graves's Smoke Screen can disrupt Ekko's combo by breaking his vision, preventing him from targeting with Phase Dive.
Why
In the jungle, Graves holds a natural range advantage with New Destiny, enabling him to kite you while stacking armor with Quickdraw. The crucial bottleneck occurs when you attempt to engage: if Graves drops Smoke Screen on you, the near-instant loss of vision completely cancels your ability to target him with the second, blink portion of Phase Dive, leaving you stranded and unable to trigger your Z-Drive Resonance.
Lane impact
This vision denial severely weakens your skirmishing power around jungle camps. When contesting Scuttle Crabs or during deep invades, Graves can easily force your Chronobreak defensively if you get caught in a tight corridor where End of the Line detonates instantly off a wall. You are forced to clear your camps more cautiously, as any unexpected facecheck into his Smoke Screen results in massive health loss before you can even react with Timewinder.
How to play
To survive and outplay Graves, never lead with Phase Dive if his Smoke Screen is available. Instead, throw Timewinder from maximum range to slow his movement, and cast Parallel Convergence behind him to predict his Quickdraw dash. If he blinds you, immediately walk backward or use the first dash of Phase Dive laterally to exit the dust cloud before committing. Only engage fully when you can guarantee your three-stack passive burst, otherwise use Chronobreak to reset.
SkirmishesCrowd controlVi directly counters your ultimate safety net. The moment she targets you with Cease and Desist, you are locked in place, unable to activate Chronobreak. If she immediately follows up with a fully charged Vault Breaker, the chain crowd control prevents you from ever using your time rewind, turning your main survival tool into a useless ability while her Denting Blows shreds you.Vi build →See details
Vi
The interaction that decides it
Vi's Cease and Desist can lock Ekko down and prevent him from casting Chronobreak if she chains it with Vault Breaker.
Why
Vi directly counters your ultimate safety net. The moment she targets you with Cease and Desist, you are locked in place, unable to activate Chronobreak. If she immediately follows up with a fully charged Vault Breaker, the chain crowd control prevents you from ever using your time rewind, turning your main survival tool into a useless ability while her Denting Blows shreds you.
Lane impact
In the jungle, this threat strips away your freedom to take aggressive skirmishes. When contesting epic monsters, you cannot comfortably front-line or fish for steals with Phase Dive, because Vi will simply lock you down under focus fire. Any duel near crab or in your camps becomes extremely risky if Cease and Desist is available, forcing you to play defensively and surrender early river priority.
How to play
To survive, you must track her cooldowns religiously. Never engage with Phase Dive unless you have seen her miss Vault Breaker first. In teamfights, place Parallel Convergence on top of yourself before she reaches you; if she commits Cease and Desist, she will run straight into your stun zone, giving you a window to cast Chronobreak the millisecond you are freed from her crowd control chain.
Crowd controlTeamfightsAmumu completely shuts down your assassination attempts because his continuous crowd control prevents you from ever using Chronobreak. If he lands Bandage Toss, he can instantly follow up with Curse of the Sad Mummy. This seamless lockdown chain means you will die before you can trigger your ultimate, negating your safety net. Tantrum and Despair also make him too durable for your quick Z-Drive Resonance bursts to threaten him early.Amumu build →See details
Amumu
The interaction that decides it
Amumu can chain Bandage Toss and Curse of the Sad Mummy to lock Ekko down, preventing him from activating Chronobreak.
Why
Amumu completely shuts down your assassination attempts because his continuous crowd control prevents you from ever using Chronobreak. If he lands Bandage Toss, he can instantly follow up with Curse of the Sad Mummy. This seamless lockdown chain means you will die before you can trigger your ultimate, negating your safety net. Tantrum and Despair also make him too durable for your quick Z-Drive Resonance bursts to threaten him early.
Lane impact
In the jungle, this threat severely limits your skirmishing freedom. You cannot safely contest neutral objectives or counter-gank when Amumu is present, as any teamfight turns into a death trap if he catches you. You are forced to track his location constantly, as his fast clear with Tantrum allows him to secure early map pressure while you must play defensively, unable to dive his laners without fearing a sudden Bandage Toss counter.
How to play
To survive, never initiate onto Amumu directly. Instead, wait for him to waste Bandage Toss on an ally before you jump in with Phase Dive. Keep Parallel Convergence held to zone him or cover your retreat when he charges. If he initiates with Curse of the Sad Mummy, you must proactively use Chronobreak early if you anticipate the dive, rather than trying to greed for low-health baiting, as his crowd control will not let you escape late.
DuelingEarly pressureOlaf is a nightmare matchup in the jungle because his ultimate, Ragnarok, completely nullifies your main defensive and crowd control tool, Parallel Convergence. When you drop your zone to stun him and peel for yourself, he simply activates his ultimate to ignore the stun entirely. From there, he can continuously pelt you with Undertow, resetting its cooldown by picking up his axes, which prevents you from escaping or turning the fight.Olaf build →See details
Olaf
The interaction that decides it
Olaf's Ragnarok completely ignores the stun from Parallel Convergence, allowing him to easily run Ekko down with Undertow.
Why
Olaf is a nightmare matchup in the jungle because his ultimate, Ragnarok, completely nullifies your main defensive and crowd control tool, Parallel Convergence. When you drop your zone to stun him and peel for yourself, he simply activates his ultimate to ignore the stun entirely. From there, he can continuously pelt you with Undertow, resetting its cooldown by picking up his axes, which prevents you from escaping or turning the fight.
Lane impact
This interaction dictates your entire pathing and limits your dueling power in the river or your own jungle. You cannot contest scuttle crabs or direct neutral objectives if Olaf is nearby, as he can force a fight you cannot win. If he catches you with an initial Undertow while Ragnarok is active, you are forced to burn Phase Dive and Chronobreak defensively just to survive, sacrificing your map pressure.
How to play
To survive this matchup, you must treat your Phase Dive as a pure escape tool to hop over thin walls rather than an offensive gap-closer. When Olaf activates Ragnarok, do not try to fight him inside your Parallel Convergence; instead, drop the zone behind you to gain the shield while running away. Only commit your damage after his ultimate expires, or use Chronobreak to blink backward to safety once he commits his Reckless Swing.
DuelingCrowd controlWarwick dominates the early jungle duels because his Eternal Hunger out-sustains your burst damage after you pop Z-Drive Resonance. The real danger, however, is Infinite Duress. Because suppression completely disables your ability to cast spells, Warwick can lock you down and shred you without giving you any opportunity to activate Chronobreak. If he catches you low, his Blood Hunt ensures you cannot escape.Warwick build →See details
Warwick
The interaction that decides it
Warwick's Infinite Duress suppresses Ekko, completely preventing him from activating Chronobreak to save himself.
Why
Warwick dominates the early jungle duels because his Eternal Hunger out-sustains your burst damage after you pop Z-Drive Resonance. The real danger, however, is Infinite Duress. Because suppression completely disables your ability to cast spells, Warwick can lock you down and shred you without giving you any opportunity to activate Chronobreak. If he catches you low, his Blood Hunt ensures you cannot escape.
Lane impact
You cannot contest scuttle crabs or skirmish in the river directly if Warwick has Infinite Duress ready. Any aggressive Phase Dive forward becomes a death sentence because he can react with Primal Howl to damage-reduce your burst, then fear you. This forces you to concede early neutral objectives or rely entirely on your laners to initiate, slowing down your gold generation.
How to play
Never initiate with Phase Dive when Warwick's ultimate is up. Instead, use Timewinder from a safe distance to scout brushes and slow his advance. Cast Parallel Convergence on your own location as a defensive zone; if he launches Infinite Duress at you, he will be stunned inside your shield bubble right as his suppression ends, allowing you to finally trigger Chronobreak or escape. Only engage him head-on once his Primal Howl is on cooldown.
Early pressureMobilityEarly skirmishes heavily favor the blind monk due to a direct ability clash. When you cast Parallel Convergence to turn a fight, Lee Sin can reactively use Dragon's Rage to boot you out of your own temporal zone before it triggers. This denial strips away your massive shield and potential stun, leaving you completely exposed to his high-damage Sonic Wave execution without any defensive backup.Lee Sin build →See details
Lee Sin
The interaction that decides it
Lee Sin's Dragon's Rage can kick Ekko away from his Parallel Convergence zone, denying him the shield and stun.
Why
Early skirmishes heavily favor the blind monk due to a direct ability clash. When you cast Parallel Convergence to turn a fight, Lee Sin can reactively use Dragon's Rage to boot you out of your own temporal zone before it triggers. This denial strips away your massive shield and potential stun, leaving you completely exposed to his high-damage Sonic Wave execution without any defensive backup.
Lane impact
This interaction cripples your early jungle presence, forcing you to concede contested Scuttle Crabs and neutral objectives. If Lee Sin finds you in the river, his Flurry passive ensures he wins any direct duel. Getting kicked away from your zone means you must burn Phase Dive or Chronobreak defensively, ruining your clear tempo and leaving your laners exposed to his aggressive gank pressure.
How to play
To survive this matchup, prioritize pathing to the opposite side of the map from Lee Sin. Clear your camps safely using Timewinder and avoid blind river entries. If forced into a skirmish, never initiate with Parallel Convergence; instead, hold it until after Lee Sin has expended Dragon's Rage. Use Phase Dive to escape over thin walls immediately if he tags you with Sonic Wave, neutralizing his chase before he can activate his execution.
MobilityEngageHecarim clears extremely fast and matches Ekko's mobility, but the real danger lies in teamfights and skirmishes. When Hecarim engages with Onslaught of Shadows, the crowd control locks Ekko out of his ultimate. If Ekko is feared, he cannot cast Chronobreak to escape or heal, negating his safety net while Hecarim shreds him with Rampage and sustains through Spirit of Dread.Hecarim build →See details
Hecarim
The interaction that decides it
Hecarim's Onslaught of Shadows can fear Ekko, preventing him from casting Chronobreak during the crucial opening seconds of a fight.
Why
Hecarim clears extremely fast and matches Ekko's mobility, but the real danger lies in teamfights and skirmishes. When Hecarim engages with Onslaught of Shadows, the crowd control locks Ekko out of his ultimate. If Ekko is feared, he cannot cast Chronobreak to escape or heal, negating his safety net while Hecarim shreds him with Rampage and sustains through Spirit of Dread.
Lane impact
Hecarim's sheer speed with Devastating Charge allows him to force ganks before Ekko can react, creating a map-wide pressure gap. Because Hecarim wins direct duels via continuous Rampage stacks, Ekko cannot easily contest objectives or scuttle crabs alone. This pressure forces Ekko to play reactively, losing early map priority and exposing his lanes to aggressive dives that he is too weak to turn around early on.
How to play
Track Hecarim's pathing to set up counter-ganks rather than initiating raw skirmishes. Use Parallel Convergence predictively behind Hecarim's charge path to cut off his Devastating Charge or zone his follow-up. When a fight breaks out, do not use Phase Dive aggressively until Hecarim has committed his Onslaught of Shadows. Keep your distance and wait out his ultimate, ensuring you can always activate Chronobreak if focused, then turn the fight once his main crowd control is wasted.
DuelingVisionNocturne dictates the jungle duels because his Shroud of Darkness completely nullifies your primary setup. If you attempt to catch him with Parallel Convergence, he can easily reactively spell-shield the stun, turning your zoning tool into his attack speed steroid. Alternatively, he can absorb the returning high-damage portion of Timewinder, stripping away your burst potential and leaving you with only basic attacks against his superior AD DPS.Nocturne build →See details
Nocturne
The interaction that decides it
Nocturne can block Ekko's Parallel Convergence stun or the return damage of Timewinder using Shroud of Darkness.
Why
Nocturne dictates the jungle duels because his Shroud of Darkness completely nullifies your primary setup. If you attempt to catch him with Parallel Convergence, he can easily reactively spell-shield the stun, turning your zoning tool into his attack speed steroid. Alternatively, he can absorb the returning high-damage portion of Timewinder, stripping away your burst potential and leaving you with only basic attacks against his superior AD DPS.
Lane impact
This interaction severely limits your freedom in the river and your own jungle camps. Knowing Nocturne can nullify your crowd control means you cannot safely contest Scuttle Crabs or invade. Once Paranoia is active, your lanes are permanently threatened because you cannot quickly counter-gank; if you drop Parallel Convergence to protect an ally, Nocturne simply blocks it and continues his dive, forcing you to use Chronobreak defensively rather than offensively.
How to play
To survive, never initiate with Phase Dive directly into Nocturne while his shield is up. Instead, use the initial dash of Phase Dive to reposition or escape his Unspeakable Horror tether. Throw Timewinder at an angle to delay its return, baiting out Shroud of Darkness before you commit to triggering Z-Drive Resonance. If he blocks your slow, disengage immediately and wait out the fifteen-second window before attempting another skirmish.
Early pressureDuelingXin Zhao dominates early duels because his Crescent Guard creates a barrier that completely negates the returning damage of your Timewinder if you cast it from safety. Without that crucial second hit, you cannot easily trigger your three-stack Z-Drive Resonance passive. This leaves you unable to secure the burst damage and bonus movement speed needed to escape his sticky, aggressive chase.Xin Zhao build →See details
Xin Zhao
The interaction that decides it
Xin Zhao's Crescent Guard blocks Ekko's Timewinder damage from outside the arena, making it hard for Ekko to proc Z-Drive Resonance.
Why
Xin Zhao dominates early duels because his Crescent Guard creates a barrier that completely negates the returning damage of your Timewinder if you cast it from safety. Without that crucial second hit, you cannot easily trigger your three-stack Z-Drive Resonance passive. This leaves you unable to secure the burst damage and bonus movement speed needed to escape his sticky, aggressive chase.
Lane impact
Because you cannot win direct skirmishes, Xin Zhao will aggressively invade your camps and contest early Scuttle Crabs. If he catches you with Audacious Charge and knocks you up with Three Talon Strike, you will be forced to use Chronobreak defensively just to survive. This map pressure prevents you from contesting objectives, forcing you into a passive farming route.
How to play
To survive, you must path away from Xin Zhao's starting side to avoid early river skirmishes. When he invades, do not contest; instead, use Parallel Convergence behind you to zone him off while you retreat. Always hold Phase Dive to dash over thin walls to escape his Audacious Charge. If a fight is forced, wait until his Crescent Guard expires or blink inside his arena before throwing Timewinder.
These matchups are above all duels of execution: both champions have credible ways to gain the upper hand. Dodging one key ability, anticipating an engage correctly, or a single positioning mistake can be enough to tip the duel one way or the other. Knowing the matchup and recognizing the right windows to act are especially important here.
SkirmishesMechanicsThis jungle duel revolves around a high-stakes mobility clash where your safety hinges on reacting to Infernal Chains. If Aatrox lands this tether, you are pulled back into his devastating The Darkin Blade sweetspots. However, your Phase Dive serves as the perfect escape tool, letting you blink cleanly out of the zone before the pull activates. Striking him when his primary zone-control tools are on cooldown determines who dominates the river.Aatrox build →See details
Aatrox
The interaction that decides it
Ekko uses Phase Dive to blink out of your Infernal Chains zone before the pull triggers.
Why
This jungle duel revolves around a high-stakes mobility clash where your safety hinges on reacting to Infernal Chains. If Aatrox lands this tether, you are pulled back into his devastating The Darkin Blade sweetspots. However, your Phase Dive serves as the perfect escape tool, letting you blink cleanly out of the zone before the pull activates. Striking him when his primary zone-control tools are on cooldown determines who dominates the river.
Lane impact
Mismanaging your mobility during early skirmishes turns the jungle into a dangerous territory. Getting dragged by Infernal Chains forces you to burn Chronobreak defensively or die, giving Aatrox free reign over neutral objectives. Conversely, successfully baiting his combo and escaping with Phase Dive leaves him vulnerable and slow, allowing you to secure double scuttle crabs and execute healthy counter-jungling routes while his massive early cooldowns tick down.
How to play
Never initiate a skirmish using Phase Dive offensively unless Aatrox has already wasted Infernal Chains. Instead, walk up and slow him with Timewinder, saving your dash specifically to blink out of his tether boundary. If you get caught without your dash, immediately drop Parallel Convergence on top of yourself; the incoming shield and potential stun will disrupt his The Darkin Blade sequence, buying you enough time to survive his burst.
SkirmishesScalingThis jungle matchup is a highly volatile race of power spikes, dictated by how you respond to Kayn's ultimate. While Kayn relies on *Shadow Step* to flank and *Umbral Trespass* to dodge your burst and secure kills, you hold the ultimate counter-play. The second Kayn exits your body with *Umbral Trespass*, activating *Chronobreak* completely rewinds his burst damage and repositions you to instantly delete him.Kayn build →See details
Kayn
The interaction that decides it
Ekko can use Chronobreak immediately after Kayn exits him with Umbral Trespass to completely reverse the damage and turn the fight.
Why
This jungle matchup is a highly volatile race of power spikes, dictated by how you respond to Kayn's ultimate. While Kayn relies on *Shadow Step* to flank and *Umbral Trespass* to dodge your burst and secure kills, you hold the ultimate counter-play. The second Kayn exits your body with *Umbral Trespass*, activating *Chronobreak* completely rewinds his burst damage and repositions you to instantly delete him.
Lane impact
Early clearing is a direct race. Kayn will use *Reaping Slash* and *Blade's Reach* to clear camps rapidly and seek early skirmishes to gather his passive essence. You must track his progress because his transformation spike completely shifts the matchup's dynamic. If he secures his red form, his sustain makes prolonged skirmishes deadly, whereas his blue form increases his map-wide threat, forcing you to play defensively around objectives.
How to play
To win, never initiate with *Phase Dive* if Kayn has his cooldowns. Instead, bait his *Blade's Reach* first, then use *Timewinder* to slow his escape. Always throw *Parallel Convergence* behind you when retreating through narrow corridors to catch him as he exits walls via *Shadow Step*. If Kayn successfully infests you, keep your finger hovering over *Chronobreak* and press it the millisecond he emerges to heal up and landing your massive return damage.
SkirmishesKitingThis high-speed jungle matchup hinges entirely on how your ultimate interacts with Lillia's crowd control. Lillia relies on stacking Blooming Blows to out-pace you while applying Dream-Laden Bough. When she triggers Lilting Lullaby, you have a precise golden opportunity. Activating Chronobreak right before the drowsiness transitions into sleep completely negates the crowd control, leaving her vulnerable as she tries to land Watch Out! Eep! on an empty space.Lillia build →See details
Lillia
The interaction that decides it
Ekko can time Chronobreak right before Lilting Lullaby's sleep takes effect to avoid being crowd-controlled and burst down.
Why
This high-speed jungle matchup hinges entirely on how your ultimate interacts with Lillia's crowd control. Lillia relies on stacking Blooming Blows to out-pace you while applying Dream-Laden Bough. When she triggers Lilting Lullaby, you have a precise golden opportunity. Activating Chronobreak right before the drowsiness transitions into sleep completely negates the crowd control, leaving her vulnerable as she tries to land Watch Out! Eep! on an empty space.
Lane impact
Jungle skirmishes are hyper-mobile dances where neither can easily lock the other down. You will struggle to land Parallel Convergence while Lillia has her movement speed stacks active. Instead, early river contests revolve around dodging her Swirlseed. If she misses this projectile, she cannot trigger Lilting Lullaby from a safe distance, allowing you to contest objectives or force her away with Phase Dive and Timewinder combos.
How to play
Never commit to a duel if your ultimate is down; without Chronobreak, Lillia's sleep guarantees you take maximum damage from Watch Out! Eep!. When fighting, track her passive stacks. If she infects you with Dream-Laden Bough, watch the drowsy indicator closely. Press Chronobreak at the very last fraction of a second. If you mistime this dodge, use Phase Dive defensively to dash over a wall before the sleep takes effect.
DuelingExecuteThis jungle matchup is a pure test of execution centered on a single crucial reaction. When Viego attempts to lock you down, the charge animation of his Spectral Maw gives you ample warning. By using Phase Dive to blink aside just as he releases the mist, you completely negate his crowd control and setup, allowing you to instantly burst him back and trigger your Z-Drive Resonance.Viego build →See details
Viego
The interaction that decides it
Viego's Spectral Maw stun is highly predictable, allowing Ekko to dodge it with Phase Dive and retaliate with his passive.
Why
This jungle matchup is a pure test of execution centered on a single crucial reaction. When Viego attempts to lock you down, the charge animation of his Spectral Maw gives you ample warning. By using Phase Dive to blink aside just as he releases the mist, you completely negate his crowd control and setup, allowing you to instantly burst him back and trigger your Z-Drive Resonance.
Lane impact
Neither jungler can easily invade the other without risking a lethal counter-engage. Skirmishes around epic monsters turn into high-stakes psychological battles. Whichever player commits their mobility tool first loses all agency; if Viego misses his Spectral Maw, he is left vulnerable to Timewinder slows, whereas if you waste Phase Dive early, you become an easy target for Heartbreaker.
How to play
When contesting camps, position yourself near thin walls where Phase Dive can serve as a quick escape or a flanking tool. Hold this dash strictly to react to his Spectral Maw charge. If you get caught off guard, immediately drop Parallel Convergence on your own location to zone him out while you wait for your cooldowns. Do not commit Chronobreak unless he has already wasted his ultimate, Heartbreaker, to prevent him from chasing you down.
DisengageSkirmishesThis matchup is defined by how Gragas's ultimate disrupts your setup. Your primary tool for control, *Parallel Convergence*, requires you to stand inside its zone to trigger the stun and shield. However, a skilled Gragas will hold *Explosive Cask* to knock you out of the radius the moment you jump in with *Phase Dive*. This denial turns your primary defensive buffer into wasted mana and leaves you exposed.Gragas build →See details
Gragas
The interaction that decides it
Gragas can use Explosive Cask to knock Ekko out of his Parallel Convergence zone before the stun can trigger.
Why
This matchup is defined by how Gragas's ultimate disrupts your setup. Your primary tool for control, *Parallel Convergence*, requires you to stand inside its zone to trigger the stun and shield. However, a skilled Gragas will hold *Explosive Cask* to knock you out of the radius the moment you jump in with *Phase Dive*. This denial turns your primary defensive buffer into wasted mana and leaves you exposed.
Lane impact
During river skirmishes and objective contests, this interaction dictates who controls the space. Because Gragas can deny your *Parallel Convergence* stun, you cannot blind-engage into choke points. If you force a fight near neutral camps, Gragas can easily peel your dive, turning a potential double-kill into a disaster where your team loses momentum. This forces you to play more reactively, waiting for skirmishes to spread out before committing.
How to play
To outplay this, never use *Phase Dive* directly into your *Parallel Convergence* if Gragas is holding his ultimate. Instead, throw *Timewinder* to bait out *Drunken Rage* or *Body Slam* from a distance. If he commits *Explosive Cask* to disengage, use that exact window to follow up. If you do get knocked away, immediately use *Chronobreak* to snap back into your clone's position, which often aligns with the zone, catching him off guard.
SkirmishesZone controlThis jungle matchup is defined by how your ultimate abilities collide. While Kindred kites you using Dance of Arrows inside Wolf's Frenzy, the duel hinges on Lamb's Respite. This zone of immortality is actually a trap because it forces them to stay stationary. By throwing Parallel Convergence into their circle and timing Chronobreak to detonate exactly as their ultimate ends, you turn their sanctuary into a deadly execution chamber.Kindred build →See details
Kindred
The interaction that decides it
Ekko can place Parallel Convergence inside Lamb's Respite and time Chronobreak to detonate right as Kindred's ultimate ends for an instant kill.
Why
This jungle matchup is defined by how your ultimate abilities collide. While Kindred kites you using Dance of Arrows inside Wolf's Frenzy, the duel hinges on Lamb's Respite. This zone of immortality is actually a trap because it forces them to stay stationary. By throwing Parallel Convergence into their circle and timing Chronobreak to detonate exactly as their ultimate ends, you turn their sanctuary into a deadly execution chamber.
Lane impact
Because both of you have tools to escape death, early skirmishes are incredibly tense and resolve around neutral camps. You cannot easily burst Kindred down if they have their ultimate ready, which stalls out your ganking pressure. Contesting Mark of the Kindred spawns becomes a psychological mind game. Neither of you can confidently invade without tracking the other's key cooldowns, meaning neutral objectives are decided by who baits out the opponent's ultimate first.
How to play
When Kindred triggers Lamb's Respite, do not panic or run away. Immediately cast Parallel Convergence directly on top of their golden circle. Use Phase Dive to position yourself or reposition your clone. Watch the ultimate's visual timer closely; as it expires, blink back with Chronobreak. This guarantees a massive area-of-effect stun and explosive damage right when they are at their lowest health threshold. If you misstime it, use Timewinder's slow to safely disengage.
Magic damageSkirmishesThis jungle duel revolves around a lethal game of chicken once both of you reach level five. Diana relies on landing Crescent Strike to reset Lunar Rush, pulling you in with Moonfall. The entire matchup hinges on this crowd control: while you are knocked up by Moonfall, you are silenced from casting Chronobreak. If her burst damage from Pale Cascade and Moonsilver Blade is enough to kill you during this lock, you lose.Diana build →See details
Diana
The interaction that decides it
Diana must burst Ekko down before he can react with Chronobreak, as he cannot cast it while knocked up by Moonfall.
Why
This jungle duel revolves around a lethal game of chicken once both of you reach level five. Diana relies on landing Crescent Strike to reset Lunar Rush, pulling you in with Moonfall. The entire matchup hinges on this crowd control: while you are knocked up by Moonfall, you are silenced from casting Chronobreak. If her burst damage from Pale Cascade and Moonsilver Blade is enough to kill you during this lock, you lose.
Lane impact
Since both of you clear camps at a similar speed, the jungle pacing is dictated by who secures the first successful ambush. Because a direct confrontation can go either way, you cannot afford to contest scuttle crabs or epic monsters without knowing if Moonfall is available. A single misstep near a camp allows her to engage, forcing you to use Chronobreak defensively, leaving your lanes vulnerable to her aggressive map pressure.
How to play
To survive her deadly combo, you must prioritize dodging Crescent Strike with Phase Dive. If she cannot apply Moonlight, her mobility drops drastically. When she does commit to an aggressive Lunar Rush, immediately deploy Parallel Convergence on top of yourself. This forces Diana to choose between triggering Moonfall into your incoming stun shield or backing off. If she commits, the shield absorbs her Pale Cascade burst, allowing you to survive the knock-up and safely detonate Chronobreak.
DuelingBurstThis duel hinges entirely on Kha'Zix's isolation mechanic from Taste Their Fear. When you are alone in the jungle, his burst is lethal. However, you have two direct counters to this: the clone from Parallel Convergence acts as an allied unit that negates your isolation status, and Chronobreak lets you instantly escape his Unseen Threat ambush while reversing his initial burst damage.Kha'Zix build →See details
Kha'Zix
The interaction that decides it
Kha'Zix deals massive damage to isolated targets, but Ekko can negate isolation by staying near his Parallel Convergence clone or using Chronobreak.
Why
This duel hinges entirely on Kha'Zix's isolation mechanic from Taste Their Fear. When you are alone in the jungle, his burst is lethal. However, you have two direct counters to this: the clone from Parallel Convergence acts as an allied unit that negates your isolation status, and Chronobreak lets you instantly escape his Unseen Threat ambush while reversing his initial burst damage.
Lane impact
Because face-to-face encounters are highly volatile, the jungle turns into a tense mind game around camp clears. Kha'Zix will actively seek to catch you isolated at your camps, forcing you to delay your Phase Dive to dodge his Void Spike. Skirmishes around Scuttle Crabs are decided by who gets the jump; if he catches you without your shield, you are forced to retreat, giving up neutral objective control.
How to play
Never path blindly into unwarded bushes. When clearing camps or contesting objectives, place Parallel Convergence directly on yourself; the clone will prevent the isolation damage from Taste Their Fear even before the stun triggers. If Kha'Zix initiates with Leap, immediately retaliate with Timewinder to slow him, then use Phase Dive to reposition closer to your clone or safety. Should you get caught without your cooldowns, use Chronobreak defensively to reset the fight rather than trying to out-damage him.
These champions generally struggle to answer your main strengths, which lets you approach the matchup with more freedom. You often have several ways to pressure them and force trades that go in your favor. Use this advantage to dictate the pace rather than giving them time to get back into a comfortable position.
AssassinSkirmishesThis jungle matchup tilts heavily in your favor because your ultimate completely dismantles Talon's primary assassination tool. When Talon initiates from stealth with Shadow Assault, his entire burst relies on those blades converging onto you to trigger his passive Blade's End. By activating Chronobreak exactly as the rings of blades fly back toward you, you vanish from the map, completely negating his ultimate's damage while restoring your own health.Talon build →See details
Talon
The interaction that decides it
Ekko can completely negate Talon's full Shadow Assault burst combo by timing Chronobreak right as the blades converge.
Why
This jungle matchup tilts heavily in your favor because your ultimate completely dismantles Talon's primary assassination tool. When Talon initiates from stealth with Shadow Assault, his entire burst relies on those blades converging onto you to trigger his passive Blade's End. By activating Chronobreak exactly as the rings of blades fly back toward you, you vanish from the map, completely negating his ultimate's damage while restoring your own health.
Lane impact
Because you hold the ultimate counter-button, Talon cannot safely invade your camps or contest Scuttle Crabs. He is forced to use Assassin's Path to escape rather than aggressive flanks. If he tries to burst you down in the river, your ability to ignore his Shadow Assault means you win every isolated duel, forcing him to concede jungle priority and neutral objectives to avoid giving away free kills.
How to play
Keep your finger hovering over Chronobreak whenever Talon goes invisible with Shadow Assault. Do not panic-cast it immediately; wait for the circular blades to expand fully and begin rushing back toward his target. The moment they converge, trigger your ultimate. If he attempts to escape over a wall using Assassin's Path, predict his landing zone with Parallel Convergence to stun him, then follow up instantly with Phase Dive to seal the kill.
TeamfightsThis matchup is heavily swung by your ability to shut down Fiddlesticks' primary tool for survival and damage. Because he must stand still to channel Bountiful Harvest, he becomes an incredibly easy target for your Parallel Convergence. Stunning him not only cancels his healing and damage entirely but also sets up an easy burst combo with Phase Dive and your Z-Drive Resonance passive.Fiddlesticks build →See details
Fiddlesticks
The interaction that decides it
Ekko can interrupt Fiddlesticks's Bountiful Harvest channel by placing Parallel Convergence on top of him.
Why
This matchup is heavily swung by your ability to shut down Fiddlesticks' primary tool for survival and damage. Because he must stand still to channel Bountiful Harvest, he becomes an incredibly easy target for your Parallel Convergence. Stunning him not only cancels his healing and damage entirely but also sets up an easy burst combo with Phase Dive and your Z-Drive Resonance passive.
Lane impact
In the jungle, this interaction completely strips away Fiddlesticks' dueling confidence. You can aggressively invade his camps and contest river objectives with high confidence. Since his clearing health relies on his drain, interrupting it leaves him incredibly squishy and unable to fight back, granting your lanes massive pressure and securing early neutral objectives while he is forced to retreat.
How to play
Constantly clear his A Harmless Scarecrow effigies to deny him blind-spot setups for Crowstorm. During skirmishes, never initiate with Parallel Convergence preemptively; hold it specifically to drop onto him the exact moment he begins channeling Bountiful Harvest. If he manages to catch you off guard with his ultimate, react instantly with Chronobreak to escape the damage zone and turn the fight on your own terms.
Zone controlFarmingShyvana's complete lack of crowd control prevents her from locking you down. When she initiates with Dragon's Descent, her landing zone is highly predictable. This allows you to pre-emptively drop Parallel Convergence right where she lands to stun her. Even if she pursues you with Burnout, triggering Z-Drive Resonance gives you the burst movement speed to safely disengage, rendering her offensive threat useless.Shyvana build →See details
Shyvana
The interaction that decides it
Shyvana lacks crowd control to stop Ekko, allowing him to safely disengage with Z-Drive Resonance or setup Parallel Convergence on her predictable Dragon's Descent landing.
Why
Shyvana's complete lack of crowd control prevents her from locking you down. When she initiates with Dragon's Descent, her landing zone is highly predictable. This allows you to pre-emptively drop Parallel Convergence right where she lands to stun her. Even if she pursues you with Burnout, triggering Z-Drive Resonance gives you the burst movement speed to safely disengage, rendering her offensive threat useless.
Lane impact
In the jungle, this creates a high-speed tempo race. Shyvana wants to power-farm to stack Fury of the Dragonborn, but she cannot match your gank pressure. Use Phase Dive and Timewinder to clear quickly and execute swift ganks, pulling ahead in map influence. Since she cannot easily stop your escapes, you can aggressively invade her camps, knowing you can always use Chronobreak to bail out.
How to play
Track her Fury bar closely; when it is full, expect her to force a fight with Dragon's Descent. Instead of running instantly, hold Parallel Convergence and cast it directly onto your own feet or her path just as she flies in. If she misses her Flame Breath, immediately commit with Phase Dive and Timewinder to proc Z-Drive Resonance. If a skirmish goes south, do not hesitate to use Chronobreak to reset, as she cannot lock you down to prevent it.
MobilityTeamfightsThis matchup heavily favors you because Jarvan IV relies on locking targets down, but his ultimate is completely neutralized by your mobility. Whenever he traps you inside the stone walls of Cataclysm, you can effortlessly bypass his terrain by using Phase Dive to blink right over the barrier. This interaction renders his primary engage useless, allowing you to turn the fight around while he remains stuck in his own arena.Jarvan IV build →See details
Jarvan IV
The interaction that decides it
Ekko can easily escape Jarvan IV's Cataclysm arena by using Phase Dive to dash over the wall.
Why
This matchup heavily favors you because Jarvan IV relies on locking targets down, but his ultimate is completely neutralized by your mobility. Whenever he traps you inside the stone walls of Cataclysm, you can effortlessly bypass his terrain by using Phase Dive to blink right over the barrier. This interaction renders his primary engage useless, allowing you to turn the fight around while he remains stuck in his own arena.
Lane impact
In the river and jungle skirmishes, this dynamic strips away Jarvan IV's ability to isolate you during objective contests. He cannot trap you to secure Smite fights. If he attempts a gank or an invade using his Demacian Standard and Dragon Strike combo, your ability to dodge or jump walls means you can safely contest scuttle crabs and counter-gank, forcing him into disadvantageous, extended fights where your Z-Drive Resonance shines.
How to play
Never waste Phase Dive defensively before Jarvan IV commits. Keep this ability ready specifically to counter his Cataclysm or to dodge his Demacian Standard combined with Dragon Strike. If he traps your allies instead, cast Parallel Convergence directly into his arena to stun him while he is stuck inside. Once his gap-closers are on cooldown, aggressively trigger Z-Drive Resonance with Timewinder and basic attacks to easily chase him down.
AssassinVisionIn this jungle duel, your ultimate is the ultimate counter-button to her stealth-initiated burst. When Evelynn marks you with Allure and follows up with Whiplash and Hate Spike, she relies on her burst to instantly bring you into execution range for Last Caress. However, Chronobreak allows you to completely negate her initial burst, healing back the damage instantly and turning a lethal ambush into a failed assassination attempt.Evelynn build →See details
Evelynn
The interaction that decides it
Ekko can survive Evelynn's Allure charm and burst combo by using Chronobreak to heal back her damage before she can execute him with Last Caress.
Why
In this jungle duel, your ultimate is the ultimate counter-button to her stealth-initiated burst. When Evelynn marks you with Allure and follows up with Whiplash and Hate Spike, she relies on her burst to instantly bring you into execution range for Last Caress. However, Chronobreak allows you to completely negate her initial burst, healing back the damage instantly and turning a lethal ambush into a failed assassination attempt.
Lane impact
Because you hold this survival card, Evelynn cannot freely invade your jungle or confidently contest neutral camps. Her Demon Shade passive loses its terror since you do not fear her sudden appearances. This safety lets you farm aggressively, knowing that even if she catches you off-guard, you can reverse the fight, forcing her to either waste Last Caress to escape or die to your own counter-burst.
How to play
Keep your finger hovering over Chronobreak whenever you are marked by Allure. Do not panic-cast it immediately; wait out the charm duration, absorb her Hate Spike sequence, and activate your ultimate right before she can cast Last Caress. If she tries to disengage, use Phase Dive to close the gap over walls, then slow her with Timewinder to trigger Z-Drive Resonance and finish her off before she can slip back into her passive.
DuelingCrowd controlEkko completely dictates the pace of skirmishes because Master Yi's primary initiation tool is entirely predictable. Whenever Master Yi commits with Alpha Strike, he locks himself into an animation that reveals exactly where he will land. By dropping Parallel Convergence directly under your own feet the moment he disappears, you guarantee a massive stun and shield when he reappears, leaving him completely vulnerable to your quick burst combos.Master Yi build →See details
Master Yi
The interaction that decides it
Ekko can place Parallel Convergence directly on himself when Master Yi casts Alpha Strike, guaranteeing a stun when Yi reappears.
Why
Ekko completely dictates the pace of skirmishes because Master Yi's primary initiation tool is entirely predictable. Whenever Master Yi commits with Alpha Strike, he locks himself into an animation that reveals exactly where he will land. By dropping Parallel Convergence directly under your own feet the moment he disappears, you guarantee a massive stun and shield when he reappears, leaving him completely vulnerable to your quick burst combos.
Lane impact
This interaction severely limits Master Yi's ability to contest scuttle crabs or invade your camps. Knowing he cannot safely use Alpha Strike to dodge your skills without being stunned means he must play passively, giving you free reign over neutral monsters. If he tries to force a duel under Highlander, your ability to disengage with Phase Dive or stall with Chronobreak forces his ultimate to waste its duration.
How to play
To execute this perfectly, always hold Parallel Convergence until you see him initiate. Never waste your shield preemptively. When he triggers Alpha Strike on you, immediately cast Parallel Convergence on yourself and ready a Timewinder to throw at your feet. If he attempts to channel Meditate to reduce your burst, use that exact window to proc Z-Drive Resonance for the movement speed burst and walk away, waiting for your cooldowns to cycle back before re-engaging.
MobilityZone controlThis matchup leans heavily in your favor because Nunu & Willump relies entirely on landing his giant snowball to initiate. With Phase Dive, you can effortlessly blink over or around the charging Biggest Snowball Ever!, rendering his main ganking tool useless. Once he misses, you immediately punish his vulnerable state by throwing Timewinder to slow him down, allowing you to easily trigger Z-Drive Resonance and win the ensuing skirmish.Nunu & Willump build →See details
Nunu & Willump
The interaction that decides it
Ekko can easily dodge Nunu's Biggest Snowball Ever! using Phase Dive, then counter-engage with Timewinder.
Why
This matchup leans heavily in your favor because Nunu & Willump relies entirely on landing his giant snowball to initiate. With Phase Dive, you can effortlessly blink over or around the charging Biggest Snowball Ever!, rendering his main ganking tool useless. Once he misses, you immediately punish his vulnerable state by throwing Timewinder to slow him down, allowing you to easily trigger Z-Drive Resonance and win the ensuing skirmish.
Lane impact
Because you completely neutralize his engage, Nunu & Willump cannot easily secure scuttle crabs or pressure your lanes without risking a deadly counter-gank. When contesting Epic Monsters, his massive Consume healing and damage is scary, but your ability to disrupt him with Parallel Convergence forces him to choose between finishing the objective or being stunned, swinging objective control entirely to your team.
How to play
When you hear Nunu & Willump charging Biggest Snowball Ever! from the fog of war, hold your Phase Dive specifically to dodge the impact, rather than using it to clear camps faster. During Dragon or Baron fights, throw Parallel Convergence directly onto the monster camp right before it enters Smite range; this forces him to either abandon his Consume burst or get stunned inside your shield. If he manages to lock you down with Snowball Barrage, immediately activate Chronobreak to escape his Absolute Zero blast.
These champions have a build and playstyle that directly overpower yours, which can make controlling the lane and farming extremely difficult. Their kit can neutralize your core strengths or punish you the moment you try to play your usual game plan. In these matchups, the goal is often to minimize mistakes and look for ways to win outside of direct confrontation.
Crowd controlCounter-engageLissandra completely neutralizes your slippery kit because her crowd control is instantaneous and point-and-click. The moment you attempt to dive in with Phase Dive, she can immediately stop you with Ring of Frost. More importantly, her Frozen Tomb presents a fatal threat: she can lock you down instantly, allowing her to burst you from full health before you can even trigger Chronobreak to escape and heal.Lissandra build →See details
Lissandra
The interaction that decides it
Lissandra can use Frozen Tomb to lock Ekko down and burst him before he has the chance to activate Chronobreak.
Why
Lissandra completely neutralizes your slippery kit because her crowd control is instantaneous and point-and-click. The moment you attempt to dive in with Phase Dive, she can immediately stop you with Ring of Frost. More importantly, her Frozen Tomb presents a fatal threat: she can lock you down instantly, allowing her to burst you from full health before you can even trigger Chronobreak to escape and heal.
Lane impact
This matchup forces you into a highly defensive posture where trading becomes extremely risky. Lissandra will constantly harass you with Ice Shard through the minion wave, pushing you under turret while you struggle to retaliate. If you try to trade back, she will lock you in place. You are forced to surrender mid priority, which prevents you from roaming and leaves your jungler without help.
How to play
To survive, use Timewinder solely to secure far-away minions and match her wave clear without stepping into her attack range. Never commit your Phase Dive aggressively unless you have seen her waste Ring of Frost or Glacial Path. If she initiates with Frozen Tomb, your only hope is to pre-cast Parallel Convergence on yourself right before she stuns you, so the shield and stun activate while you are locked down, preventing her follow-up burst.
Crowd controlAnti-dashThis matchup is heavily dictated by Vex's passive, Doom 'n Gloom. Every time you try to close the distance using Phase Dive, Vex's charged passive immediately interrupts your dash, applying a fear that leaves you completely defenseless. Since Phase Dive is your primary tool to initiate trades and land Timewinder, her ability to shut down your mobility means you can never force a clean burst combo on her.Vex build →See details
Vex
The interaction that decides it
Vex's Doom 'n Gloom passive interrupts and fears Ekko whenever he attempts to engage with Phase Dive.
Why
This matchup is heavily dictated by Vex's passive, Doom 'n Gloom. Every time you try to close the distance using Phase Dive, Vex's charged passive immediately interrupts your dash, applying a fear that leaves you completely defenseless. Since Phase Dive is your primary tool to initiate trades and land Timewinder, her ability to shut down your mobility means you can never force a clean burst combo on her.
Lane impact
Because of this interaction, you are forced to play defensively under your turret. Vex can freely harass you with Mistral Bolt and Looming Darkness whenever you try to clear waves. Trading health is always a losing battle because any offensive leap results in you taking a full combo while feared. This constant threat prevents you from gaining mid priority, forcing slow recalls and leaving your side lanes vulnerable to her Shadow Surge roams.
How to play
Your only window to act is when Vex's red bar is empty, meaning Doom 'n Gloom is on cooldown. When she wastes this passive on a wave with Mistral Bolt, immediately look to drop Parallel Convergence from out of vision. If you fail to stun her or if she holds her fear, do not use Phase Dive aggressively; instead, use it laterally to dodge Looming Darkness and rely on Chronobreak to escape if her Shadow Surge connects.
These champions have tools that generally give them the edge in a fight, without making the matchup unwinnable. They might have more range, a better ability to soak up your offense, or more ways to answer your engages. You'll need to adapt your approach and carefully pick your moments to accept a fight.
Anti-dashBurstAnnie directly shuts down your aggressive patterns because of her passive, Pyromania. The moment you initiate with Phase Dive, she can instantly react with a stun using Disintegrate or Incinerate. This immediate interruption completely halts your burst sequence, leaving you vulnerable to a counter-burst from Summon: Tibbers before you can even reactivate Chronobreak to escape.Annie build →See details
Annie
The interaction that decides it
When Ekko commits with Phase Dive, Annie can instantly stun him with Pyromania, preventing him from escaping with Chronobreak.
Why
Annie directly shuts down your aggressive patterns because of her passive, Pyromania. The moment you initiate with Phase Dive, she can instantly react with a stun using Disintegrate or Incinerate. This immediate interruption completely halts your burst sequence, leaving you vulnerable to a counter-burst from Summon: Tibbers before you can even reactivate Chronobreak to escape.
Lane impact
This dynamic forces you into a defensive posture where trading with basic attacks is impossible. You are relegated to farming from afar using Timewinder, which quickly drains your mana. If you step up carelessly, Annie will poke you down with ranged attacks and shield herself with Molten Shield. This constant pressure forces early recalls and deprives your team of mid-lane priority.
How to play
To survive, track the white bar under Annie's health representing Pyromania. Only attempt short trades with Phase Dive and Timewinder when she has two or fewer stacks charged. If she holds her stun indefinitely to zone you, cast Parallel Convergence from the fog of war to force her to retreat or to absorb her retaliatory burst. If she summons her bear, walk away immediately instead of trying to fight back.
ScalingCrowd controlEngaging directly on Ryze is incredibly difficult because his Rune Prison is a point-and-click root that completely halts your Phase Dive mid-flight. If you attempt to dash in, Ryze can instantly lock you down before your empowered auto-attack connects. This prevents you from proc'ing Z-Drive Resonance, leaving you vulnerable to a rapid Spell Flux into Overload counter-burst while you are rooted out of melee range.Ryze build →See details
Ryze
The interaction that decides it
Ryze can instantly stop Ekko's Phase Dive engage by locking him down with Rune Prison before the auto-attack registers.
Why
Engaging directly on Ryze is incredibly difficult because his Rune Prison is a point-and-click root that completely halts your Phase Dive mid-flight. If you attempt to dash in, Ryze can instantly lock you down before your empowered auto-attack connects. This prevents you from proc'ing Z-Drive Resonance, leaving you vulnerable to a rapid Spell Flux into Overload counter-burst while you are rooted out of melee range.
Lane impact
This interaction strips away your offensive pressure, forcing you to play defensively under tower. Ryze will constantly bounce Spell Flux and Overload through your minion wave to poke you down while maintaining priority. Since trading directly is a losing battle, you will find yourself bleeding health if you contest the wave, ultimately giving Ryze free reign to scale his Arcane Mastery or use Realm Warp to impact side lanes.
How to play
To survive, prioritize clearing waves from a safe distance using Timewinder. Never use Phase Dive aggressively unless you see Ryze waste Rune Prison on a minion. Instead, cast Parallel Convergence from the fog of war to zone him or shield yourself while shoving. Once the wave is cleared, immediately look for roam opportunities to impact other lanes before his scaling takes over, rather than trying to force a solo kill.
Early pressurePositioningAkshan dominates the early mid lane because his ranged auto-attacks and Dirty Fighting shield shut down your melee access. When you attempt to initiate with Phase Dive, Akshan can easily space you out using the bonus movement speed from his passive. This allows him to negate your burst, avoid the return hit of your Timewinder, and punish you severely with a heavy counter-trade as you try to retreat to safety.Akshan build →See details
Akshan
The interaction that decides it
Ekko's Phase Dive can be spaced out with your passive movement speed, allowing you to return trade heavily when he retreats.
Why
Akshan dominates the early mid lane because his ranged auto-attacks and Dirty Fighting shield shut down your melee access. When you attempt to initiate with Phase Dive, Akshan can easily space you out using the bonus movement speed from his passive. This allows him to negate your burst, avoid the return hit of your Timewinder, and punish you severely with a heavy counter-trade as you try to retreat to safety.
Lane impact
You will constantly find yourself pushed under turret, as Akshan's Avengerang easily clears waves while poking you down. Trying to contest the wave directly results in taking massive physical damage. If you lose too much health early, Akshan can zone you completely or dive you using Heroic Swing, forcing you into poor recall timings that cost you gold and hand him map priority for free.
How to play
To survive, yield early priority and focus on farming safely. Use Timewinder solely to secure last hits from a distance rather than pushing. Never engage with Phase Dive unless his Heroic Swing is on cooldown. Instead, place Parallel Convergence from the fog of war to cover your retreat or to secure cannon minions. If you are chunked, use Chronobreak defensively to stay in lane rather than searching for an unrealistic offensive play.
MobilitySkirmishesCorki safely dictates the distance in Mid lane thanks to his ranged advantage. Whenever you attempt to initiate a trade with Phase Dive, his reaction is straightforward: he activates Valkyrie to dash away instantly. This clean disengage prevents you from landing the final attack required to trigger Z-Drive Resonance, leaving you completely unable to secure your burst damage or use the bonus movement speed to escape his counter-harass.Corki build →See details
Corki
The interaction that decides it
Corki can easily react to Ekko's Phase Dive by using Valkyrie to disengage before Ekko can proc Z-Drive Resonance.
Why
Corki safely dictates the distance in Mid lane thanks to his ranged advantage. Whenever you attempt to initiate a trade with Phase Dive, his reaction is straightforward: he activates Valkyrie to dash away instantly. This clean disengage prevents you from landing the final attack required to trigger Z-Drive Resonance, leaving you completely unable to secure your burst damage or use the bonus movement speed to escape his counter-harass.
Lane impact
Because you cannot reliably trade, Corki easily controls the wave tempo. He will constantly shove you under turret using Phosphorus Bomb and Gatling Gun, chipping away at your health while you struggle to last-hit. Once he secures his Special Delivery upgrade from Hextech Munitions, his map pressure skyrockets, forcing you to play extremely defensively under your tower and rely solely on Timewinder to collect minions safely from afar.
How to play
To survive this matchup, you must discipline your engage timings. Never use Phase Dive while Corki has Valkyrie available; instead, bait it out by throwing Timewinder to threaten a slow. If he panics and dashes, you have a crucial fifteen-second window to strike. Additionally, cast Parallel Convergence from the fog of war to catch him off-guard, forcing him to slide into a disadvantageous spot where your Chronobreak can later punish his positioning.
Crowd controlBurstGalio acts as a direct counter to Ekko's burst patterns. Whenever you attempt to execute your trades, his Shield of Durand offers him passive magic damage mitigation and a dangerous taunt. This crowd control is the deciding factor in fights: by taunting you when your health drops, Galio prevents you from triggering Chronobreak. You end up locked down and defeated without any window to activate your ultimate safety net.Galio build →See details
Galio
The interaction that decides it
Galio can taunt Ekko with Shield of Durand (W) to prevent him from using Chronobreak (R) when he is low on health.
Why
Galio acts as a direct counter to Ekko's burst patterns. Whenever you attempt to execute your trades, his Shield of Durand offers him passive magic damage mitigation and a dangerous taunt. This crowd control is the deciding factor in fights: by taunting you when your health drops, Galio prevents you from triggering Chronobreak. You end up locked down and defeated without any window to activate your ultimate safety net.
Lane impact
During the laning phase, you cannot safely trade with your classic Phase Dive and Timewinder combo because Galio easily shrugs off the burst. He will retaliate with Winds of War and Justice Punch to win every short trade. This forces you to use Timewinder defensively to clear minions under your turret. Consequently, you lose mid priority, allowing Galio to easily assist his jungler or threaten side lanes with Hero's Entrance.
How to play
To survive, you must play defensively and focus on farming from a distance using Timewinder. Never initiate with Phase Dive unless you see Galio waste Shield of Durand or miss Justice Punch. If you plan to engage, cast Parallel Convergence from out of vision to stun him before he can react with his magic shield. When caught in a bad fight, anticipate his taunt and trigger Chronobreak early rather than waiting until your health bar is dangerously low.
DisengageBurstThis matchup hinges entirely on Syndra's ability to deny your gap-closer. Whenever you attempt to initiate with Phase Dive, a reactive Syndra can cast Scatter the Weak to interrupt your dash mid-air. This mechanical block prevents you from triggering Z-Drive Resonance and leaves you standing in the open, fully exposed to her follow-up Dark Sphere and Force of Will combination.Syndra build →See details
Syndra
The interaction that decides it
Syndra can interrupt Ekko's Phase Dive mid-dash using Scatter the Weak, leaving him stranded and vulnerable to her burst.
Why
This matchup hinges entirely on Syndra's ability to deny your gap-closer. Whenever you attempt to initiate with Phase Dive, a reactive Syndra can cast Scatter the Weak to interrupt your dash mid-air. This mechanical block prevents you from triggering Z-Drive Resonance and leaves you standing in the open, fully exposed to her follow-up Dark Sphere and Force of Will combination.
Lane impact
Because you cannot reliably trade, Syndra dictates the lane tempo. She will freely poke you with Dark Sphere while keeping you pushed under tower. If you step up to thin the wave with Timewinder, she can easily punish your positioning. You are forced to play defensively, losing priority and preventing you from roaming to assist your jungler, while she scales safely toward her Transcendent thresholds.
How to play
To survive, bait her defensive tools before committing. Never forward-dash with Phase Dive if Scatter the Weak is available; instead, use the initial roll to dodge her Dark Sphere laterally. Cast Parallel Convergence from the fog of war to force her to reposition or blow her knockback early. If she wastes her stun, you have a brief window to blink in, proc Z-Drive Resonance, and quickly retreat. If caught, immediately use Chronobreak to undo the burst.
PokeAll-inOrianna dictates the lane pace by positioning her ball with Command: Attack to poke you from afar. However, this zone of control has a major flaw. If she extends her ball too deep to deny you farm, she leaves her own body unprotected. Activating Phase Dive to blink right past the ball's location lets you bypass her zoning entirely, turning a safe poke lane into a dangerous close-quarters duel where your Z-Drive Resonance can overwhelm her.Orianna build →See details
Orianna
The interaction that decides it
Orianna can harass Ekko from safety with Command: Attack, but is highly vulnerable if Ekko uses Phase Dive to bypass the ball's position.
Why
Orianna dictates the lane pace by positioning her ball with Command: Attack to poke you from afar. However, this zone of control has a major flaw. If she extends her ball too deep to deny you farm, she leaves her own body unprotected. Activating Phase Dive to blink right past the ball's location lets you bypass her zoning entirely, turning a safe poke lane into a dangerous close-quarters duel where your Z-Drive Resonance can overwhelm her.
Lane impact
Because Orianna's Command: Attack constantly threatens your health pool, you will be forced to yield early wave priority. She will easily push you under turret, forcing you to use Timewinder to secure farm rather than harass. If you take too much poke trying to contest the first few waves, you'll be forced into an early recall, letting her stack plates. This pressure limits your ability to roam, locking you in mid-lane while she maintains vision control.
How to play
To survive, let the wave bounce toward you and use Timewinder strictly for last-hitting from safety. Never initiate with Phase Dive while her ball is resting near her; instead, wait for her to cast Command: Attack forward. The moment the ball moves past you, immediately Phase Dive onto her to bypass its return path, triggering Z-Drive Resonance before she can shield with Command: Protect. If she holds her ball defensively, simply throw Parallel Convergence from the fog to force her movement.
PokeDisengageViktor completely neutralizes your offensive threat because of his defensive zone control. Whenever you initiate with Phase Dive, he can instantly drop Gravity Field at his feet. This forces you to immediately disengage before triggering Z-Drive Resonance, or suffer a stun inside his minion wave. While you struggle to close the gap, his Hextech Ray and Siphon Power constantly chip away at your health bar from safety.Viktor build →See details
Viktor
The interaction that decides it
Viktor can drop Gravity Field directly on top of himself when Ekko dashes in, forcing Ekko to retreat or get stunned.
Why
Viktor completely neutralizes your offensive threat because of his defensive zone control. Whenever you initiate with Phase Dive, he can instantly drop Gravity Field at his feet. This forces you to immediately disengage before triggering Z-Drive Resonance, or suffer a stun inside his minion wave. While you struggle to close the gap, his Hextech Ray and Siphon Power constantly chip away at your health bar from safety.
Lane impact
Because you cannot trade freely, Viktor dictates the wave's tempo. He uses Hextech Ray to constantly push you under tower, forcing you to use Timewinder defensively to secure last hits. If you get chunked while farming, his Arcane Storm can easily dive or execute you. You will find yourself trapped in lane, unable to find roam timers while your tower slowly loses plates to his Siphon Power-empowered attacks.
How to play
To survive, prioritize slow-pushing with Timewinder from a distance to prevent Viktor from crashing huge waves. Only use Phase Dive defensively or laterally to dodge Hextech Ray, rather than rushing forward. If you want to trade, cast Parallel Convergence from the fog of war to cover his escape path, forcing him to choose between walking into your shield or placing Gravity Field too late. If trapped, use Chronobreak to safely escape his Arcane Storm burst.
SustainMobilityThe core issue in this matchup lies in how Yone's Soul Unbound entirely neutralizes your primary setup. When you cast Parallel Convergence, Yone can instantly activate his spirit form to dash out of the zone's radius, completely avoiding the stun. Because his real body remains safely behind, he can chase trading with Mortal Steel and Spirit Cleave without any fear of your crowd control, turning your defensive tool into a wasted cooldown.Yone build →See details
Yone
The interaction that decides it
Yone can use Soul Unbound to dodge Ekko's Parallel Convergence stun while maintaining offensive pressure.
Why
The core issue in this matchup lies in how Yone's Soul Unbound entirely neutralizes your primary setup. When you cast Parallel Convergence, Yone can instantly activate his spirit form to dash out of the zone's radius, completely avoiding the stun. Because his real body remains safely behind, he can chase trading with Mortal Steel and Spirit Cleave without any fear of your crowd control, turning your defensive tool into a wasted cooldown.
Lane impact
This interaction severely cripples your early trade safety. You cannot reliably walk up to trigger Z-Drive Resonance using Phase Dive because Yone will counter-engage with Soul Unbound the moment your defensive shield fades. Consequently, you are forced to give up mid priority, farming passively with Timewinder from a distance. If you get chunked before reaching your crucial ultimate power spike, you will lose the map pressure needed to contest early skirmishes.
How to play
To survive, you must bait out Soul Unbound before attempting any aggressive combos. Hold Parallel Convergence entirely during his spirit state; instead, throw Timewinder to slow his return path. Once Yone snaps back to his physical body, you have a brief window where his primary mobility is down. This is your cue to strike. Use Phase Dive to trigger Z-Drive Resonance for the movement speed boost, then immediately disengage before his Mortal Steel tornado charges up again.
SustainBurstSwain represents a war of attrition that heavily penalizes your assassin identity. While you want to trigger Z-Drive Resonance and escape, his Demonic Ascension completely nullifies your burst potential by draining your health and restoring his. If you dive in with Phase Dive, you land directly in the sweet spot of his Death's Hand, allowing him to out-sustain your combo and easily turn the engagement with continuous healing.Swain build →See details
Swain
The interaction that decides it
Swain's Demonic Ascension allows him to survive Ekko's initial burst and turn the fight with continuous healing.
Why
Swain represents a war of attrition that heavily penalizes your assassin identity. While you want to trigger Z-Drive Resonance and escape, his Demonic Ascension completely nullifies your burst potential by draining your health and restoring his. If you dive in with Phase Dive, you land directly in the sweet spot of his Death's Hand, allowing him to out-sustain your combo and easily turn the engagement with continuous healing.
Lane impact
This matchup forces you to play defensively under your turret. Swain will constantly push you in with Death's Hand while using Vision of Empire to disrupt your recalls or scout your jungler. You cannot take extended trades because his Ravenous Flock passive constantly restores his health when he pulls you off a Nevermove landing. Missing your wave clear means losing mid priority, leaving Swain free to assist his team.
How to play
Focus entirely on shoving the lane using Timewinder from a safe distance to prevent Swain from trapping you against your tower. Never use Phase Dive aggressively unless you have baited his Nevermove sideways, as this is his only tool to lock you down. If he activates Demonic Ascension, immediately drop Parallel Convergence behind you as a zoning tool and use Chronobreak to escape his ultimate's drain radius rather than trying to match his healing.
SkirmishesShieldsThis matchup is dictated by how Yasuo uses Wind Wall to swallow your Timewinder. Because your primary waveclear and the setup for Z-Drive Resonance rely entirely on the returning trajectory of this projectile, a well-placed wall leaves you completely disarmed. Without the slow and initial damage of Timewinder, you cannot safely trigger your passive movespeed to escape his relentless Steel Tempest stabs and Sweeping Blade dashes.Yasuo build →See details
Yasuo
The interaction that decides it
Yasuo can completely negate Ekko's Timewinder waveclear and trade potential by blocking it with Wind Wall.
Why
This matchup is dictated by how Yasuo uses Wind Wall to swallow your Timewinder. Because your primary waveclear and the setup for Z-Drive Resonance rely entirely on the returning trajectory of this projectile, a well-placed wall leaves you completely disarmed. Without the slow and initial damage of Timewinder, you cannot safely trigger your passive movespeed to escape his relentless Steel Tempest stabs and Sweeping Blade dashes.
Lane impact
Yasuo dictates the minion wave's rhythm. By threatening to block Timewinder, he forces you to farm with basic attacks under heavy pressure or waste mana on ineffective casts. This constant denial prevents you from shoving the lane, locking you under your turret where you must struggle to last-hit while dodging his Steel Tempest tornadoes. If he blocks your projectile, you lose all lane priority and cannot roam.
How to play
You must bait out Wind Wall before committing any resources. Throw a deceptive Timewinder angled away from the wave to force his reaction, or wait for him to waste it. Once Wind Wall is on its long cooldown, you have a brief window to initiate. Cast Parallel Convergence from the fog of war to catch him off-guard, then use Phase Dive to bypass his passive shield from Way of the Wanderer before executing your three-hit burst.
Anti-dashZone controlThis matchup hinges on how heavily Taliyah punishes your mobility. The moment you initiate with Phase Dive, she can lay down Unraveled Earth to intercept you. Passing through her minefield triggers immediate, heavy damage and slows you down, making you an incredibly easy target for her Seismic Shove pushback and a subsequent barrage of Threaded Volley. Your main trading tool becomes your biggest liability.Taliyah build →See details
Taliyah
The interaction that decides it
Taliyah's Unraveled Earth causes Ekko to take massive damage if he attempts to dash through it with Phase Dive.
Why
This matchup hinges on how heavily Taliyah punishes your mobility. The moment you initiate with Phase Dive, she can lay down Unraveled Earth to intercept you. Passing through her minefield triggers immediate, heavy damage and slows you down, making you an incredibly easy target for her Seismic Shove pushback and a subsequent barrage of Threaded Volley. Your main trading tool becomes your biggest liability.
Lane impact
You are constantly forced onto the defensive, relying almost exclusively on Timewinder to secure minions from a safe distance. Because you cannot safely clear waves with Phase Dive, Taliyah easily secures priority. This allows her to roam freely using Rock Surfing near the river walls, eventually using Weaver's Wall to impact side lanes while you are stuck clearing under your tower.
How to play
Maintain a diagonal positioning angle to make her skillshots harder to land. Never use Phase Dive aggressively unless her Unraveled Earth is on cooldown; instead, save it to dodge Seismic Shove laterally. When she wastes her zone-control tools, cast Parallel Convergence from out of vision to stun her, quickly proc Z-Drive Resonance with a basic attack, and run away using the movement speed before she can retaliate.
CooldownsStealthThis matchup is a high-stakes burst race where Akali holds the upper hand due to her defensive utility. When you attempt to trigger Z-Drive Resonance using Phase Dive, Akali can immediately react with Twilight Shroud. Becoming untargetable in her smoke screen completely cancels your blink's auto-attack, leaving you stranded without your passive's movement speed and exposed to her Five Point Strike counter-burst.Akali build →See details
Akali
The interaction that decides it
Akali can use Twilight Shroud to prevent Ekko from targeting her with Phase Dive, disrupting his three-hit passive proc.
Why
This matchup is a high-stakes burst race where Akali holds the upper hand due to her defensive utility. When you attempt to trigger Z-Drive Resonance using Phase Dive, Akali can immediately react with Twilight Shroud. Becoming untargetable in her smoke screen completely cancels your blink's auto-attack, leaving you stranded without your passive's movement speed and exposed to her Five Point Strike counter-burst.
Lane impact
Because of this shroud interaction, you cannot safely contest waves once Akali reaches level three. Any aggressive trade you initiate with Timewinder can be turned against you if she retaliates with Shuriken Flip. This forces you to play defensively under tower, conceding early priority, which restricts your ability to roam and secure scuttle crabs while bleeding health whenever you step up to farm.
How to play
To survive this lane, you must play around her energy bar and the cooldown of Twilight Shroud. Never use Phase Dive offensively while her shroud is available. Instead, throw Timewinder to farm from a distance and bait her Shuriken Flip. If she misses, or if she wastes her shroud, you have a brief window to force a trade. If trapped, place Parallel Convergence on yourself and use Chronobreak defensively to escape her Perfect Execution.
ScalingShieldsKassadin naturally neutralizes your lane presence because his Null Sphere grants him a magic shield whenever you try to trade. This directly absorbs the damage from your Timewinder poke, rendering your primary tool for zoning and wave control ineffective. Since you cannot easily chip away at his health bar, Kassadin easily bypasses his weak early game, scaling into a late-game monster while you struggle to find a health advantage.Kassadin build →See details
Kassadin
The interaction that decides it
Kassadin's Null Sphere provides a magic damage shield that absorbs Ekko's Timewinder poke, allowing Kassadin to scale safely.
Why
Kassadin naturally neutralizes your lane presence because his Null Sphere grants him a magic shield whenever you try to trade. This directly absorbs the damage from your Timewinder poke, rendering your primary tool for zoning and wave control ineffective. Since you cannot easily chip away at his health bar, Kassadin easily bypasses his weak early game, scaling into a late-game monster while you struggle to find a health advantage.
Lane impact
Because your ranged poke is absorbed, Kassadin can freely match your wave clear. If you try to force a close-quarters trade with Phase Dive, his Nether Blade and Force Pulse will punish you during the silence from Null Sphere. This limits your ability to shove the wave and roam, forcing you into a passive farming lane where Kassadin holds the recall advantage and eventually outscales you.
How to play
To survive, bait out Null Sphere by walking forward without casting, then immediately strike with Phase Dive once his shield expires. Save Parallel Convergence to zone him under his turret or cover your retreat when he uses Riftwalk. If he plays too defensively, stop trying to poke him directly; instead, use Timewinder solely to shove the wave quickly, then look to coordinate with your jungler rather than fighting a losing battle in mid.
These matchups are above all duels of execution: both champions have credible ways to gain the upper hand. Dodging one key ability, anticipating an engage correctly, or a single positioning mistake can be enough to tip the duel one way or the other. Knowing the matchup and recognizing the right windows to act are especially important here.
AssassinSkirmishesThis matchup is a highly volatile duel of mobility. While you rely on Phase Dive and Z-Drive Resonance to dart in and out, Aurora matches your agility with Across the Veil. The ultimate interaction is the true turning point: when Aurora deploys Between Worlds, she severely limits your evasion zone. By confining you, she can easily track and predict where your Chronobreak hologram will land, turning your ultimate safety net into an easy target.Aurora build →See details
Aurora
The interaction that decides it
Aurora can use Between Worlds (R) to restrict Ekko's movement, making it easier to predict his Chronobreak (R) clone.
Why
This matchup is a highly volatile duel of mobility. While you rely on Phase Dive and Z-Drive Resonance to dart in and out, Aurora matches your agility with Across the Veil. The ultimate interaction is the true turning point: when Aurora deploys Between Worlds, she severely limits your evasion zone. By confining you, she can easily track and predict where your Chronobreak hologram will land, turning your ultimate safety net into an easy target.
Lane impact
Before level five, trades are short and explosive. You must use Timewinder to push back against her ranged pressure and match her wave clear. However, once ultimate spikes are online, the lane dynamic shifts dramatically. You cannot easily dive her under tower because The Weirding slows your retreat, and any overextension invites Between Worlds, forcing you into a predictable Chronobreak that can cost you all lane priority and mid-lane map control.
How to play
To outplay this, never initiate with Phase Dive if her ultimate is up; instead, use it to dodge Twofold Hex or escape the boundaries of her zone. Hold Parallel Convergence and cast it slightly behind you when she activates Between Worlds, forcing her to choose between chasing you into a stun or letting you walk away. If she locks you in, delay your Chronobreak until the very last second of her arena's duration to throw off her timing.
BurstDodgingThis matchup is a pure test of reflexes. Mel wants to keep you at bay with her long-range linear spells, but her lack of mobility makes her highly vulnerable to being dived. By timing your Phase Dive correctly, you can leap over her skillshots to close the gap instantly. This allows you to apply Timewinder and trigger Z-Drive Resonance before she can establish her defensive zone.Mel build →See details
Mel
The interaction that decides it
Ekko can use Phase Dive to dodge Mel's linear skillshots and quickly close the distance to trigger Z-Drive Resonance.
Why
This matchup is a pure test of reflexes. Mel wants to keep you at bay with her long-range linear spells, but her lack of mobility makes her highly vulnerable to being dived. By timing your Phase Dive correctly, you can leap over her skillshots to close the gap instantly. This allows you to apply Timewinder and trigger Z-Drive Resonance before she can establish her defensive zone.
Lane impact
Because Mel can easily push the wave from afar, you will often find yourself farming under tower early on. However, she cannot safely pressure your plate without exposing herself to a sudden engage. A single successful trade where you proc Z-Drive Resonance and run back to safety swings the lane's pressure, forcing her to play defensively and preventing her from roaming to support her jungler.
How to play
To win this lane, stand slightly off to the side of the minion wave to force Mel to choose between pushing or poking you. Never initiate with Phase Dive unless you see her launch her linear crowd control. If she holds her spells, throw Timewinder to slow her down first. If you miss your combo and get caught, drop Parallel Convergence behind you to secure a shield and escape safely.
MechanicsBurstThis midlane matchup is a high-stakes duel dictated entirely by how you use your ultimate to deny his. Zed relies heavily on the explosive burst of his Death Mark to secure kills. However, Ekko holds the perfect counter: timing Chronobreak right before that mark detonates completely negates its damage. This single interaction neutralizes Zed's primary assassination threat, transforming his deadly dive into a massive waste of cooldowns.Zed build →See details
Zed
The interaction that decides it
Ekko can completely negate the damage from Zed's Death Mark by timing Chronobreak right before the mark detonates.
Why
This midlane matchup is a high-stakes duel dictated entirely by how you use your ultimate to deny his. Zed relies heavily on the explosive burst of his Death Mark to secure kills. However, Ekko holds the perfect counter: timing Chronobreak right before that mark detonates completely negates its damage. This single interaction neutralizes Zed's primary assassination threat, transforming his deadly dive into a massive waste of cooldowns.
Lane impact
Early on, you must contest the wave using Timewinder while dodging his Razor Shuriken. Zed will try to chunk your health with Living Shadow combos to set up an execution. Once you both unlock your ultimates, the lane becomes a psychological standoff. You can match his aggressive tower dives because Chronobreak acts as your safety net, preventing Zed from easily forcing you out of lane or gaining a massive gold advantage.
How to play
When laning, save Phase Dive to bait and dodge his Razor Shuriken when he projects his Living Shadow. If Zed targets you with Death Mark, do not panic-cast your ultimate immediately. Watch the visual indicator of his mark and activate Chronobreak exactly before the detonation to erase the damage. If you misstime this window, cast Parallel Convergence on your own position to gain a shield and stun him the moment he lands.
UntargetableBurstThis matchup is a pure battle of untargetability and reaction speeds. Fizz relies on landing his shark from Chum the Waters to secure his burst, while using Playful to dodge your return damage. However, the entire lane hinges on Chronobreak. If you time your ultimate perfectly as the shark chomps, you can completely negate both the massive magic damage and the knockup, turning his primary engage tool into a wasted cooldown.Fizz build →See details
Fizz
The interaction that decides it
Ekko can use Chronobreak to completely dodge the damage and knockup of Fizz's Chum the Waters if timed correctly.
Why
This matchup is a pure battle of untargetability and reaction speeds. Fizz relies on landing his shark from Chum the Waters to secure his burst, while using Playful to dodge your return damage. However, the entire lane hinges on Chronobreak. If you time your ultimate perfectly as the shark chomps, you can completely negate both the massive magic damage and the knockup, turning his primary engage tool into a wasted cooldown.
Lane impact
Before level five, trades are short and aggressive. You can poke with Timewinder, but Fizz's Urchin Strike and Rending Wave make extended melee trades dangerous. Once ultimates are unlocked, lane pressure freezes. Neither of you can safely commit under tower because Chronobreak and Playful allow both assassins to drop tower aggro and survive dives, meaning a single mistimed ultimate instantly concedes mid lane priority.
How to play
Keep a constant eye on your holographic clone. When Fizz throws Chum the Waters, resist the urge to panic-cast Phase Dive. Instead, track the shark's countdown ring under your feet and activate Chronobreak just as it finishes to phase through the eruption. If you get baited into using your ultimate early, immediately retreat with Phase Dive over a wall, as you cannot survive his raw Urchin Strike follow-up.
SustainWave clearThis matchup is a direct contest between your burst execution and Vladimir's defensive reaction. Your main trade pattern relies on triggering the third stack of Z-Drive Resonance via Phase Dive and Timewinder. However, a skilled Vladimir will always react by casting Sanguine Pool to dodge that final proc, negating your damage and movement speed bonus. Since he cannot match your early map presence, the lane becomes a race of map influence versus his scaling.Vladimir build →See details
Vladimir
The interaction that decides it
Vladimir can use Sanguine Pool to avoid the burst from Ekko's third Z-Drive Resonance stack, but cannot match Ekko's early roaming power.
Why
This matchup is a direct contest between your burst execution and Vladimir's defensive reaction. Your main trade pattern relies on triggering the third stack of Z-Drive Resonance via Phase Dive and Timewinder. However, a skilled Vladimir will always react by casting Sanguine Pool to dodge that final proc, negating your damage and movement speed bonus. Since he cannot match your early map presence, the lane becomes a race of map influence versus his scaling.
Lane impact
Vladimir will use Transfusion to sustain through your poke and slowly charge Tides of Blood to contest your push. Because his Sanguine Pool has an extremely long cooldown, you can force him to stay under tower by shoving waves rapidly with Timewinder. While he is locked down farming to scale his Crimson Pact, you gain free windows to leave the mid lane, securing river vision or diving side lanes before he can react.
How to play
Never commit your Chronobreak or Parallel Convergence when Vladimir has his Hemoplague active unless you can secure an immediate kill. Instead, use Timewinder to clear the caster minions instantly, then bait out Sanguine Pool with a feigned Phase Dive. If he falls for the bait, you have a twenty-second window to pressure him. If he holds it, do not force the fight; immediately run toward the river to assist your jungler or gank side lanes.
MechanicsSkirmishesThis matchup is a high-octane battle of reflexes centered on your ultimate abilities. Diana relies on landing Crescent Strike to reset Lunar Rush and pull you in with Moonfall for a lethal burst. However, you hold the ultimate trump card. Activating Chronobreak right as Moonfall pulls you completely negates her burst, repositioning you safely while healing back the damage from her Pale Cascade and Moonsilver Blade strikes.Diana build →See details
Diana
The interaction that decides it
Ekko can use Chronobreak to escape your Moonfall pull and heal back most of your burst damage.
Why
This matchup is a high-octane battle of reflexes centered on your ultimate abilities. Diana relies on landing Crescent Strike to reset Lunar Rush and pull you in with Moonfall for a lethal burst. However, you hold the ultimate trump card. Activating Chronobreak right as Moonfall pulls you completely negates her burst, repositioning you safely while healing back the damage from her Pale Cascade and Moonsilver Blade strikes.
Lane impact
Before level five, trades are extremely volatile. Diana will try to poke you down with Crescent Strike while securing shields with Pale Cascade. If she misses her crescent arc, you have a brief window to initiate with Phase Dive and trigger Z-Drive Resonance. Once both of you unlock your ultimates, the lane becomes a tense standoff. Neither assassin can easily dive the other, meaning the mid-lane priority often shifts to whoever baits out the other's defensive tools first.
How to play
During skirmishes, never initiate with Phase Dive if Diana has Crescent Strike ready, as she will easily counter-engage and out-shield you with Pale Cascade. Instead, use Timewinder to farm from safety and fish for slows. Always keep track of your Chronobreak clone's position. If Diana commits her Lunar Rush and activates Moonfall, delay your Chronobreak just enough to absorb the initial pull, then trigger it to erase her burst. If you mess up the timing, immediately drop Parallel Convergence on your own location to zone her off.
CC immunityMobilityMorgana's ability to block the stun from Parallel Convergence using her Black Shield dictates the rhythm of every trade. Because her shield absorbs magic damage and stops crowd control, she can easily nullify Ekko's primary setup. However, Black Shield has a long cooldown, and if Ekko can bypass or break it, his raw burst from Z-Drive Resonance and Phase Dive easily shreds her low base health.Morgana build →See details
Morgana
The interaction that decides it
Morgana's Black Shield can completely negate the stun from Parallel Convergence, but she remains vulnerable to Ekko's raw physical and magic burst.
Why
Morgana's ability to block the stun from Parallel Convergence using her Black Shield dictates the rhythm of every trade. Because her shield absorbs magic damage and stops crowd control, she can easily nullify Ekko's primary setup. However, Black Shield has a long cooldown, and if Ekko can bypass or break it, his raw burst from Z-Drive Resonance and Phase Dive easily shreds her low base health.
Lane impact
Morgana will constantly shove the wave using Tormented Shadow, forcing you to use Timewinder to farm under turret. If you step up to trade, she will fish for Dark Binding to lock you down. This creates a high-pressure lane where neither champion can easily roam without risking tower plates, making mid priority entirely dependent on who bait out the other's defensive tools first.
How to play
To win this, never initiate with Parallel Convergence unless you are sure her Black Shield is on cooldown. Instead, use Phase Dive laterally to dodge her Dark Binding, then immediately trigger Z-Drive Resonance with a quick Timewinder combo to burst through her shield's health threshold. If she preemptively shields herself, disengage instantly using your passive's movement speed and wait for that twenty-second window to strike again.
These champions generally struggle to answer your main strengths, which lets you approach the matchup with more freedom. You often have several ways to pressure them and force trades that go in your favor. Use this advantage to dictate the pace rather than giving them time to get back into a comfortable position.
PositioningSurvivalThis matchup is highly favorable for Ekko because Brand relies on the slow setup of Pillar of Flame to trigger Blaze. Since Phase Dive grants you an immediate dash followed by a blink, you can effortlessly react to his circular ground indicator, dodge the eruption entirely, and close the distance. This puts you in point-blank range to immediately pop Z-Drive Resonance and trade before he can react.Brand build →See details
Brand
The interaction that decides it
Ekko can use Phase Dive to dodge Brand's Pillar of Flame and quickly trigger Z-Drive Resonance to escape or kill.
Why
This matchup is highly favorable for Ekko because Brand relies on the slow setup of Pillar of Flame to trigger Blaze. Since Phase Dive grants you an immediate dash followed by a blink, you can effortlessly react to his circular ground indicator, dodge the eruption entirely, and close the distance. This puts you in point-blank range to immediately pop Z-Drive Resonance and trade before he can react.
Lane impact
Brand's inability to safely harass you shifts wave control completely into your hands. Whenever he attempts to use Pillar of Flame to push the wave, he exposes himself to an immediate engage. This constant threat of a deadly trade forces him to play defensively, preventing him from utilizing Pyroclasm to secure priority. You can easily crash waves, secure deep vision, or threaten dives with Parallel Convergence.
How to play
To execute this flawlessly, walk aggressively toward the minion wave to bait out Pillar of Flame. The moment you see his animation start, use Phase Dive sideways or forward to dodge the circle, then blink onto him. Follow up with Timewinder to slow him, ensuring you trigger Z-Drive Resonance for the movement speed boost to escape a retaliatory Sear. If he manages to land a lucky stun and activates Pyroclasm, immediately use Chronobreak to reset the fight.
AssassinDiveThis matchup is highly favorable because Ziggs is incredibly fragile and lacks mobility once his primary self-peel is gone. Whenever Ziggs misuses or wastes Satchel Charge, he becomes completely defenseless. Your Phase Dive allows you to instantly close the gap, bypassing his Bouncing Bomb and Hexplosive Minefield. Without his explosive displacement tool, he cannot escape your burst damage or prevent you from easily triggering Z-Drive Resonance.Ziggs build →See details
Ziggs
The interaction that decides it
Ziggs has no reliable way to escape Ekko's Phase Dive once his Satchel Charge is on cooldown.
Why
This matchup is highly favorable because Ziggs is incredibly fragile and lacks mobility once his primary self-peel is gone. Whenever Ziggs misuses or wastes Satchel Charge, he becomes completely defenseless. Your Phase Dive allows you to instantly close the gap, bypassing his Bouncing Bomb and Hexplosive Minefield. Without his explosive displacement tool, he cannot escape your burst damage or prevent you from easily triggering Z-Drive Resonance.
Lane impact
Ziggs will constantly try to shove waves from afar using Bouncing Bomb to chip away at your tower. However, because he must step up to use Short Fuse for maximum pressure, he constantly exposes himself. A single forward step from him allows you to initiate trades. Once he drops his defensive mines, you can force him away from the wave, completely neutralizing his siege potential and securing easy priority.
How to play
Position yourself parallel to the minion wave to force Ziggs to choose between clearing minions or aiming his Bouncing Bomb at you. Watch his cooldowns closely; the moment he uses Satchel Charge offensively or to clear, immediately throw Parallel Convergence behind him and engage with Phase Dive. If he manages to displace you first, retreat safely with Timewinder to slow his pursuit, then reset your approach once your gap-closer is back online.
BurstCC immunityAurelion Sol relies on zoning you out with Singularity while channeling Breath of Light to stack his passive. However, this matchup heavily favors you because Phase Dive completely bypasses his gravitational pull. The moment he lays down his zone to stop your approach, you can blink straight through it, landing directly on him to trigger Z-Drive Resonance and chunk his health bar before he can react.Aurelion Sol build →See details
Aurelion Sol
The interaction that decides it
Ekko can use Phase Dive to blink out of your Singularity and instantly close the gap to burst you down.
Why
Aurelion Sol relies on zoning you out with Singularity while channeling Breath of Light to stack his passive. However, this matchup heavily favors you because Phase Dive completely bypasses his gravitational pull. The moment he lays down his zone to stop your approach, you can blink straight through it, landing directly on him to trigger Z-Drive Resonance and chunk his health bar before he can react.
Lane impact
Because you hold the threat of an instant gap-close, Aurelion Sol cannot freely clear waves with Breath of Light without risking his life. This allows you to dictate the wave state. You can force him under his turret, denying his Cosmic Creator stacks, or freeze the lane to set up a deadly dive. He is forced to play defensively, losing priority and mid-lane control.
How to play
Position yourself diagonally to the minion wave, forcing him to choose between farming and aiming Breath of Light at you. Wait for him to cast Singularity to clear minions. The millisecond the gravity zone appears, cast Timewinder to slow his retreat, then immediately use Phase Dive to blink over the zone, trigger your passive, and run him down. If he flies away with Astral Flight, recall to safety using Chronobreak if you overextended.
ScalingCrowd controlVeigar relies heavily on boxing you in with Event Horizon to land his Dark Matter and Baleful Strike burst. However, Ekko completely negates this defensive zone. By placing Parallel Convergence directly over Veigar's cage, you can safely wait inside the perimeter. The massive shield absorbs any stray Baleful Strike damage while the threat of your stun prevents Veigar from walking up to punish you.Veigar build →See details
Veigar
The interaction that decides it
Ekko can bypass Veigar's Event Horizon stun if he places Parallel Convergence over it to gain a shield while waiting out the cage.
Why
Veigar relies heavily on boxing you in with Event Horizon to land his Dark Matter and Baleful Strike burst. However, Ekko completely negates this defensive zone. By placing Parallel Convergence directly over Veigar's cage, you can safely wait inside the perimeter. The massive shield absorbs any stray Baleful Strike damage while the threat of your stun prevents Veigar from walking up to punish you.
Lane impact
This dynamic forces Veigar to play incredibly far back, conceding control of the wave. You can easily shove him under tower using Timewinder to secure quick roam timings. Because he cannot safely trap and burst you, his ability to stack Phenomenal Evil Power on you is severely limited, meaning he cannot easily match your wave-clear or skirmish power during the early mid-game transitions.
How to play
When Veigar drops Event Horizon to stop your approach, resist the urge to immediately blink with Phase Dive. Instead, cast Parallel Convergence directly on top of yourself inside his cage boundaries. Stand still to receive the shield, then use Phase Dive to blink onto him the split second his cage dissolves. If you get low, remember Chronobreak can bail you out of a mispositioned stun before Primordial Burst lands.
InterruptBurstEkko dictates this matchup because Katarina relies on stationary channeling for her maximum burst. When she commits with Shunpo into Death Lotus, she locks herself in place, allowing you to drop Parallel Convergence directly on your own position. This forces her into a disastrous dilemma: either she interrupts her ultimate to flee, or she takes a massive stun, allowing you to easily trigger Z-Drive Resonance and trade with zero retaliation.Katarina build →See details
Katarina
The interaction that decides it
Ekko can drop Parallel Convergence on top of himself to force Katarina to abandon her Death Lotus or face a long stun.
Why
Ekko dictates this matchup because Katarina relies on stationary channeling for her maximum burst. When she commits with Shunpo into Death Lotus, she locks herself in place, allowing you to drop Parallel Convergence directly on your own position. This forces her into a disastrous dilemma: either she interrupts her ultimate to flee, or she takes a massive stun, allowing you to easily trigger Z-Drive Resonance and trade with zero retaliation.
Lane impact
This interaction completely shifts the trading dynamic in your favor. Katarina cannot use her daggers from Bouncing Blade and Preparation to zone you, as any aggressive Shunpo into your wave makes her vulnerable to an immediate Phase Dive and Timewinder trade. She is forced to farm defensively under turret, giving you complete priority to push waves and collapse on river skirmishes before she can react.
How to play
Do not throw Parallel Convergence blindly to catch her. Instead, stand near her dropped daggers from Bouncing Blade to bait her Shunpo. The moment she blinks onto you and starts Death Lotus, cast Parallel Convergence directly under your feet. Follow up immediately with Phase Dive to trigger the stun, hit a quick Timewinder, and secure the kill. If you misplay the timing and her damage spikes too quickly, use Chronobreak to instantly reset the fight and heal.
Map pressureBurstEkko holds a massive advantage in this assassin duel because Chronobreak completely nullifies Talon's primary kill condition. When Talon commits his entire Shadow Assault and Noxian Diplomacy combo to trigger Blade's End, you can simply press your ultimate. This negates his burst, restores your health, and leaves a fully exposed Talon with no escape tools or cooldowns left to fight back.Talon build →See details
Talon
The interaction that decides it
Ekko can survive Talon's full Shadow Assault burst combo by using Chronobreak, leaving Talon without cooldowns.
Why
Ekko holds a massive advantage in this assassin duel because Chronobreak completely nullifies Talon's primary kill condition. When Talon commits his entire Shadow Assault and Noxian Diplomacy combo to trigger Blade's End, you can simply press your ultimate. This negates his burst, restores your health, and leaves a fully exposed Talon with no escape tools or cooldowns left to fight back.
Lane impact
This dynamic prevents Talon from playing aggressively or zoning you off the wave. Since you do not fear his all-in, you can use Timewinder to match his Rake for wave priority. Talon is forced to look for roams using Assassin's Path, but your threat of shoving the wave with Phase Dive and taking plates makes his departures extremely costly, securing you a gold lead.
How to play
To execute this perfectly, never panic-cast Chronobreak at the start of his engage. Wait until Talon fully commits his Shadow Assault and dashes with Noxian Diplomacy before rewriting time. While invisible, place Parallel Convergence on top of your own clone; when you activate your ultimate, you will land directly inside your shield, stunning Talon as he re-emerges. If he roams, immediately ping your side lanes and shove the wave.
Map pressureDiveTwisted Fate relies heavily on Pick a Card to control distance, but his slow-moving Wild Cards cannot stop you once you engage. As Ekko, your skirmishing power is vastly superior. By triggering Z-Drive Resonance with a quick Phase Dive and Timewinder combo, you outdamage him in every short trade. If he misuses his yellow card to last-hit or poke, he loses his only self-defense tool, leaving him completely vulnerable to a lethal dive.Twisted Fate build →See details
Twisted Fate
The interaction that decides it
Twisted Fate cannot match Ekko's skirmishing power, and Ekko can easily dive him if TF wastes his Pick a Card.
Why
Twisted Fate relies heavily on Pick a Card to control distance, but his slow-moving Wild Cards cannot stop you once you engage. As Ekko, your skirmishing power is vastly superior. By triggering Z-Drive Resonance with a quick Phase Dive and Timewinder combo, you outdamage him in every short trade. If he misuses his yellow card to last-hit or poke, he loses his only self-defense tool, leaving him completely vulnerable to a lethal dive.
Lane impact
This matchup quickly turns into a fierce race to push and roam. While Twisted Fate wants to clear waves safely and look for global plays with Destiny, you can easily match his waveclear by throwing Timewinder through the minions. Since he fears your burst, you can zone him off the wave, forcing him to farm under tower where his charged Dice passive becomes less impactful because you constantly threaten to dive him with Parallel Convergence.
How to play
Keep a close eye on his overhead card rotation. The moment Twisted Fate locks in a blue or red card with Pick a Card, immediately execute a forward Phase Dive combined with Timewinder to trigger Z-Drive Resonance and chunk his health bar. If he plays too defensively, push the wave hard to prevent him from utilizing Destiny. Should you take turret aggro during a dive, instantly activate Chronobreak to drop the focus and safely escape with the kill.
Edge: Wild Rift Core canonical verdict (−3 to +3), shown from the point of view of the champion named in the row. Win rate and pick rate: the opponent's own rate in this role — Wild Rift CN · Challenger, Patch 7.3c. Not a head-to-head win rate.
Edge: Wild Rift Core canonical verdict (−3 to +3), shown from the point of view of the champion named in the row. Win rate and pick rate: the opponent's own rate in this role — Wild Rift CN · Challenger, Patch 7.3c. Not a head-to-head win rate.
How to counter this champion
Counter angle
Ekko doesn’t just lose to stronger champions, but to those who break his tempo. His counters are champions that either prevent him from entering fights or punish him instantly after engaging. Understanding these patterns matters more than memorizing names.
Patch context
Ekko struggles in matchups where his timing is disrupted. If he cannot execute his burst quickly or is controlled before using his R, he loses all impact. Champions with instant control or equal mobility make his engages risky and often ineffective.
Quick read
Weak against instant crowd control.
Punishable if he engages too early.
Heavily relies on R timing.
Counter archetypes
Instant control
These champions prevent Ekko from executing his rotation. Their control is fast, reliable, and often point-and-click, completely shutting down his engage. Ekko cannot risk entering fights without guaranteed safety.
Annie is one of Ekko’s worst matchups because she completely nullifies his identity. Her instant stun prevents clean engages and often forces a defensive R. If Ekko engages without tracking her stun, he loses the trade instantly.
Common mistakes against him
Common mistakes against him
Underestimating enemy crowd control.
Engaging without vision.
Ignoring enemy cooldowns.
Forcing unfavorable duels.
Failing to adapt timing.
Coach notes
Never force an engage into ready CC.
Your timing is your main weapon.
FAQ
Why does Ekko struggle against Annie?
Annie has instant crowd control that prevents Ekko from executing his combo. Once he engages, he risks being stunned before bursting or using R. This forces him into passive play and limits his impact significantly.
Can Ekko beat assassins like Zed?
Yes, but it depends on timing and reading. Zed can burst faster, so Ekko must play around his R and avoid direct trades. The matchup becomes about patience and mistakes rather than pure dueling.
What type of champions counter Ekko?
Champions with instant control, fast burst, or equal mobility are the most effective. They prevent Ekko from executing his full cycle and force him into risky plays he cannot capitalize on.
How should you play Ekko against counters?
You need to play around mistakes and avoid direct engages. Use fog of war, wait for enemy cooldowns, and focus on roaming. Ekko doesn’t beat counters in duels, but through map impact.