
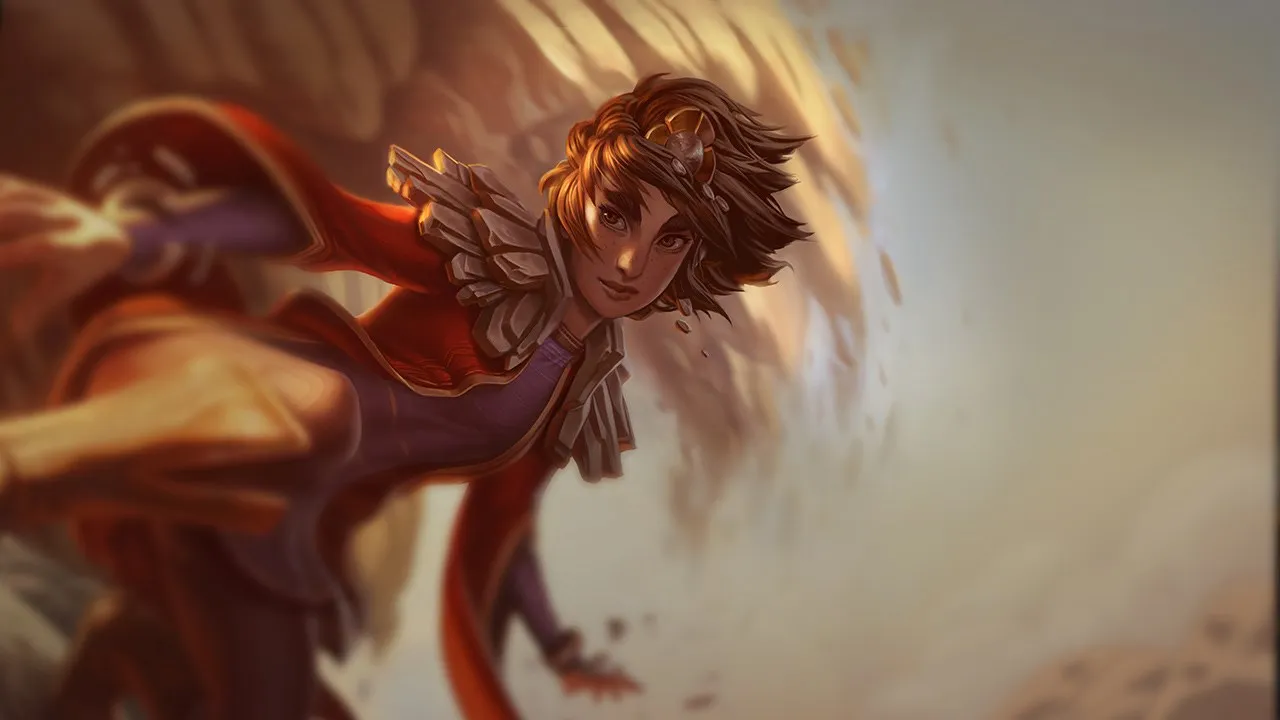

Taliyah Wild Rift Counters Guide
Unfavorable
10These champions have tools that generally give them the edge in a fight, without making the matchup unwinnable. They might have more range, a better ability to soak up your offense, or more ways to answer your engages. You'll need to adapt your approach and carefully pick your moments to accept a fight.

Jayce+1
Jayce holds the upper hand because his long-range To the Skies! in Cannon form chips away at your health from safety. However, he cannot easily transition to his melee burst; if he attempts to close the distance using To the Skies! in Hammer form, your Unraveled Earth triggers instantly, stunning him in his tracks. This interaction forces Jayce to play a disciplined poke game, keeping you under constant pressure.
Jayce build →
See details
The interaction that decides it
Taliyah's Unraveled Earth will stun Jayce if he uses To the Skies!, so Jayce must rely on Cannon form poke until her mines expire.
Why
Jayce holds the upper hand because his long-range To the Skies! in Cannon form chips away at your health from safety. However, he cannot easily transition to his melee burst; if he attempts to close the distance using To the Skies! in Hammer form, your Unraveled Earth triggers instantly, stunning him in his tracks. This interaction forces Jayce to play a disciplined poke game, keeping you under constant pressure.
Lane impact
This dynamic forces you into a defensive posture where wave control is dictated by Jayce's mana pool and poke accuracy. Every time you step up to use Threaded Volley, you risk taking massive physical damage. If you are chunked below half health, your ability to roam with Weaver's Wall or Rock Surfing is completely neutralized, confining you to clearing minions under tower while Jayce controls the river.
How to play
To survive, you must never cast Unraveled Earth proactively. Keeping this cooldown ready is your only insurance policy; as long as you hold it, Jayce is locked out of his Hammer form. Stand behind your minion wave to block his direct shots, and use the worked ground from Threaded Volley to farm from maximum range. If he attempts to flank, use Weaver's Wall to safely escape rather than to engage.
Other matchups









Skill Matchups
6These matchups are above all duels of execution: both champions have credible ways to gain the upper hand. Dodging one key ability, anticipating an engage correctly, or a single positioning mistake can be enough to tip the duel one way or the other. Knowing the matchup and recognizing the right windows to act are especially important here.

Orianna±0
This matchup is a pure battle of map presence where your mobility clashes with Orianna's zone control. While your Threaded Volley matches her waveclear, the lane hinges on your ultimate. If Orianna maintains vision of you, she can instantly disrupt your Weaver's Wall channel using a precise Command: Shockwave. This makes your roaming safety entirely dependent on denying her information and tracking her Ball.
Orianna build →
See details
The interaction that decides it
Orianna can interrupt Taliyah's Weaver's Wall channel with a well-timed Command: Shockwave if she has vision.
Why
This matchup is a pure battle of map presence where your mobility clashes with Orianna's zone control. While your Threaded Volley matches her waveclear, the lane hinges on your ultimate. If Orianna maintains vision of you, she can instantly disrupt your Weaver's Wall channel using a precise Command: Shockwave. This makes your roaming safety entirely dependent on denying her information and tracking her Ball.
Lane impact
The lane quickly becomes a non-interactive pushing duel. You must constantly trade Threaded Volley against her Command: Attack and Command: Dissonance to prevent her from locking you under turret. If you fail to match her shove, you cannot trigger Rock Surfing to roam. Consequently, any delay in your rotations allows Orianna to scale safely, securing plate gold with her passive Clockwork Windup.
How to play
Never channel Weaver's Wall within lane vision or near any brush Orianna has scouted with Command: Attack. Use Rock Surfing to slide deep into your own jungle before casting your ultimate to guarantee you are out of range of a sudden Command: Shockwave. If she plays aggressively to stop your roam, punish her by placing Unraveled Earth and pulling her into it with a quick Seismic Shove when she steps up to place her Ball.

Zed±0
This matchup is a high-stakes dance of reflexes where Zed's explosive assassination attempts collide with Taliyah's zone control. Zed relies on his Living Shadow to set up lethal Razor Shuriken angles, but his ultimate, Death Mark, is highly predictable. Because he always emerges directly behind you, you can buffer Seismic Shove behind yourself, tossing him into your Unraveled Earth the instant he lands.
Zed build →
See details
The interaction that decides it
When Zed casts Death Mark (R), Taliyah can time Seismic Shove (W) directly behind herself to knock him away the moment he reappears.
Why
This matchup is a high-stakes dance of reflexes where Zed's explosive assassination attempts collide with Taliyah's zone control. Zed relies on his Living Shadow to set up lethal Razor Shuriken angles, but his ultimate, Death Mark, is highly predictable. Because he always emerges directly behind you, you can buffer Seismic Shove behind yourself, tossing him into your Unraveled Earth the instant he lands.
Lane impact
Early on, your Threaded Volley allows you to shove waves and restrict Zed's movement, forcing him to use Razor Shuriken for farming. However, if you waste your crowd control, Zed will immediately capitalize with his Living Shadow combo. A single misstep forces a premature recall, stripping away your ability to use Rock Surfing and Weaver's Wall to impact the side lanes before he does.
How to play
Never cast Seismic Shove aggressively while Zed's ultimate is available. Instead, clear the wave from a safe distance using Threaded Volley on fresh ground. The moment he activates Death Mark, immediately lay down Unraveled Earth beneath your feet and cast Seismic Shove directly behind your champion model. If you miss this timing, retreat instantly to avoid his Shadow Slash follow-up, as his passive Contempt for the Weak will easily execute you.

Twisted Fate±0
This matchup is a pure strategic mirror centered on map influence. Once you both reach level five, your Weaver's Wall and his Destiny completely dictate the pace of the game. Taliyah relies on Rock Surfing to quickly position for a cross-map wall, but Twisted Fate can immediately match this movement or bypass your barrier entirely with his global teleport, turning every rotation into a direct test of reaction speed.
Twisted Fate build →
See details
The interaction that decides it
Twisted Fate's Destiny (R) matches Taliyah's Weaver's Wall (R) map pressure, turning the lane into a race of who can impact side lanes first.
Why
This matchup is a pure strategic mirror centered on map influence. Once you both reach level five, your Weaver's Wall and his Destiny completely dictate the pace of the game. Taliyah relies on Rock Surfing to quickly position for a cross-map wall, but Twisted Fate can immediately match this movement or bypass your barrier entirely with his global teleport, turning every rotation into a direct test of reaction speed.
Lane impact
Laning revolves around intense wave clearance to secure roaming windows. You must constantly throw Threaded Volley to match the pushing power of his Wild Cards. If you let him shove you under turret, he will freely hover in the river, threatening side lanes with a gold-card stun from Pick a Card. Conversely, forcing him to defend his tower prevents him from casting his ultimate without losing plates.
How to play
To win this macro war, never use Weaver's Wall blindly. Watch his gold card selection; if you see him lock a blue card with Pick a Card to restore mana, that is your cue to aggressively clear with Threaded Volley and seek a flank. If he channels Destiny first, use your Seismic Shove and Unraveled Earth combo to disrupt his channel if you are close, or immediately wall off his target's escape route to neutralize his arrival.
Other matchups



Favorable
32These champions generally struggle to answer your main strengths, which lets you approach the matchup with more freedom. You often have several ways to pressure them and force trades that go in your favor. Use this advantage to dictate the pace rather than giving them time to get back into a comfortable position.

Galio−1
This matchup is highly advantageous for you because Galio relies entirely on his forward movement to threaten you. Whenever he winds up his *Justice Punch* to close the distance, you can immediately react by placing *Unraveled Earth* directly in his path. The dash automatically triggers your minefield, stunning him mid-flight and completely neutralizing his attempt to chain into *Shield of Durand*, leaving him vulnerable to a quick *Threaded Volley* follow-up.
Galio build →
See details
The interaction that decides it
Taliyah's Défilage tellurique (E) stuns Galio if he tries to dash with Justice Punch (E), making it difficult for him to engage directly.
Why
This matchup is highly advantageous for you because Galio relies entirely on his forward movement to threaten you. Whenever he winds up his *Justice Punch* to close the distance, you can immediately react by placing *Unraveled Earth* directly in his path. The dash automatically triggers your minefield, stunning him mid-flight and completely neutralizing his attempt to chain into *Shield of Durand*, leaving him vulnerable to a quick *Threaded Volley* follow-up.
Lane impact
Because Galio cannot safely engage with his combo, he is forced to play defensively, using *Winds of War* solely to clear minions from afar. You can easily zone him from the wave, punishing him with *Threaded Volley* every time he steps up to trigger *Colossal Smash*. This constant pressure forces him under tower, allowing you to activate *Rock Surfing* and roam with *Weaver's Wall* before he can ever respond with *Hero's Entrance*.
How to play
To secure this lead, never waste *Unraveled Earth* purely for wave clear; always hold it as a reactive tool for his engage. Position yourself just outside the range of his *Winds of War* to bait him into using *Justice Punch*. The moment you see his backward wind-up animation, cast your mines. If he hesitates and walks up instead, use *Seismic Shove* to fling him backward, forcing him to trigger the mines anyway and securing an easy kill window.

Corki−1
Taliyah dictates this matchup because Corki relies entirely on Valkyrie for safety and mobility. Placing Unraveled Earth between yourself and Corki creates an impassable zone. If he attempts to escape or engage with Valkyrie, he triggers your mines, taking massive damage and getting stunned. This interaction completely neutralizes his main escape tool, allowing you to easily set up Seismic Shove and Threaded Volley.
Corki build →
See details
The interaction that decides it
Taliyah's Unraveled Earth heavily punishes Corki if he attempts to use Valkyrie through her minefield.
Why
Taliyah dictates this matchup because Corki relies entirely on Valkyrie for safety and mobility. Placing Unraveled Earth between yourself and Corki creates an impassable zone. If he attempts to escape or engage with Valkyrie, he triggers your mines, taking massive damage and getting stunned. This interaction completely neutralizes his main escape tool, allowing you to easily set up Seismic Shove and Threaded Volley.
Lane impact
This dynamic allows you to easily control the mid lane waves. Corki cannot match your push with Gatling Gun and Phosphorus Bomb without exposing himself. You can constantly shove him under turret. If he receives the Package, your Unraveled Earth acts as a direct counter to his Special Delivery, preventing him from cutting off your escape and turning his aggressive roam attempts into self-inflicted damage.
How to play
To dominate, always stand slightly off-center from the minion wave to force Corki to choose between hitting you with Missile Barrage or clearing minions. Never throw Unraveled Earth randomly; hold it specifically for when he steps up or tries to channel Valkyrie. If he plays extremely passively and refuses to dash, use Rock Surfing to quickly roam to side lanes, using Weaver's Wall to cut off his slower rotations.

Aurora−1
Taliyah completely shuts down Aurora's high-mobility playstyle because Unraveled Earth directly counters both her leap in Across the Veil and her border-hopping inside Between Worlds. Whenever Aurora attempts to trigger Spirit Abjuration or escape a bad trade using her dashes, she is forced to trigger your minefield. This turns her primary defensive and offensive repositioning tools into massive self-inflicted burst damage and immediate crowd control.
Aurora build →
See details
The interaction that decides it
Taliyah's Unraveled Earth (E) punishes Aurora's dash mechanics on Across the Veil (W) and Between Worlds (R).
Why
Taliyah completely shuts down Aurora's high-mobility playstyle because Unraveled Earth directly counters both her leap in Across the Veil and her border-hopping inside Between Worlds. Whenever Aurora attempts to trigger Spirit Abjuration or escape a bad trade using her dashes, she is forced to trigger your minefield. This turns her primary defensive and offensive repositioning tools into massive self-inflicted burst damage and immediate crowd control.
Lane impact
This interaction completely paralyzes Aurora’s waveclear and trade patterns. She cannot use Across the Veil to safely close the gap or dodge your skills, leaving her vulnerable to your constant Threaded Volley poke. Since she must walk manually to avoid your mines, you easily secure lane priority. This allows you to shove her under tower and use Rock Surfing to roam, while she remains trapped, unable to match your map pressure.
How to play
Never throw your Unraveled Earth mindlessly just to clear minions; hold it specifically for when Aurora moves forward. When she casts Across the Veil to initiate, immediately drop the mines right on top of yourself or her landing spot, then use Seismic Shove to fling her back into them if she hesitates. If she traps you in Between Worlds, stand near the center and place your minefield facing the borders to intercept her teleportation attempts, neutralizing her ultimate entirely.

Ahri−1
Ahri relies entirely on the high-mobility bursts of Spirit Rush to reposition and land Charm. However, your Unraveled Earth completely neutralizes this threat. If Ahri attempts to dash through your minefield with Spirit Rush, she immediately triggers the rocks, taking heavy damage and getting stunned. This interaction forces her to play defensively, stripping away her assassination potential and letting you control the lane's pace safely.
Ahri build →
See details
The interaction that decides it
Taliyah's Unraveled Earth creates a zone of mines that will stun and damage Ahri if she uses Spirit Rush over them.
Why
Ahri relies entirely on the high-mobility bursts of Spirit Rush to reposition and land Charm. However, your Unraveled Earth completely neutralizes this threat. If Ahri attempts to dash through your minefield with Spirit Rush, she immediately triggers the rocks, taking heavy damage and getting stunned. This interaction forces her to play defensively, stripping away her assassination potential and letting you control the lane's pace safely.
Lane impact
Because Ahri fears your minefield, her waveclear with Orb of Deception becomes predictable. You can easily match her push using Threaded Volley on the wave. Since she cannot safely dash forward to trade, her kill pressure vanishes. This allows you to secure priority, use Rock Surfing along the river walls to roam faster than her, or block her escape paths entirely using Weaver's Wall during skirmishes.
How to play
Never cast Unraveled Earth preemptively; hold it as a reactive tool. Stand behind your caster minions to block Charm, and wait for Ahri to activate Spirit Rush. The moment she dashes, drop Unraveled Earth directly under her path, then immediately follow up with Seismic Shove to fling her back into the remaining mines. If she plays passively, punish her farming with Threaded Volley from a safe distance, reserving your mana for her inevitable engage.

Ekko−1
You hold a massive advantage because Ekko relies entirely on Phase Dive to initiate trades and trigger Z-Drive Resonance. By laying down Unraveled Earth whenever he initiates, you punish his forward dash with devastating explosion damage. He cannot easily bypass this minefield to reach you, turning his primary tool for aggressive trading into a self-inflicted trap that leaves him too low to fight back.
Ekko build →
See details
The interaction that decides it
Taliyah's Unraveled Earth causes Ekko to take massive damage if he attempts to dash through it with Phase Dive.
Why
You hold a massive advantage because Ekko relies entirely on Phase Dive to initiate trades and trigger Z-Drive Resonance. By laying down Unraveled Earth whenever he initiates, you punish his forward dash with devastating explosion damage. He cannot easily bypass this minefield to reach you, turning his primary tool for aggressive trading into a self-inflicted trap that leaves him too low to fight back.
Lane impact
This interaction strips Ekko of his lane pressure, forcing him to farm passively from a distance using Timewinder. You can comfortably dictate the wave state with Threaded Volley, shoving him under his turret. Since he cannot safely dash forward to contest the wave, you gain uncontested priority to use Weaver's Wall or Rock Surfing to impact side lanes while he is stuck clearing minions.
How to play
Never cast Unraveled Earth preemptively; hold it as a reactive deterrent. Position yourself slightly back, but near walls to maintain your Rock Surfing speed. When Ekko activates the first part of Phase Dive, immediately drop the minefield between you. If he commits to the blink, follow up instantly with Seismic Shove to fling him back into the remaining stones. Save Weaver's Wall to cut off his escape route after he panics and uses Chronobreak.

Irelia−1
This matchup heavily favors you because Irelia's entire offensive threat relies on her Bladesurge resets. By placing Unraveled Earth directly over low-health minions, you turn her main mobility tool into a trap. The moment she attempts to dash through your minefield to stack Ionian Fervor, she immediately triggers the explosions, absorbing massive magic damage and getting stunned, leaving her completely vulnerable to your follow-up.
Irelia build →
See details
The interaction that decides it
Dashing with Bladesurge while Taliyah's Unraveled Earth is active triggers the mine explosions, dealing massive damage to you and stunning you.
Why
This matchup heavily favors you because Irelia's entire offensive threat relies on her Bladesurge resets. By placing Unraveled Earth directly over low-health minions, you turn her main mobility tool into a trap. The moment she attempts to dash through your minefield to stack Ionian Fervor, she immediately triggers the explosions, absorbing massive magic damage and getting stunned, leaving her completely vulnerable to your follow-up.
Lane impact
Irelia is forced into a passive stance, unable to freely clear waves or stack her passive. If she tries to force a trade, a quick Seismic Shove can push her back into your mines. You command the wave's tempo, keeping her trapped under her turret while you setup easy roams with Weaver's Wall or secure safe recall windows without fear of her retaliating.
How to play
Position yourself slightly behind your own low-health minions, as this is the exact trajectory Irelia wants to take. Hold Unraveled Earth specifically for her forward dash; never waste it defensively beforehand. When she steps up to last-hit, cast the mines beneath her target minion and follow up with a precise Seismic Shove. If she manages to land Flawless Duet, immediately use Rock Surfing to slide toward a wall and escape her initial burst.

Yone−1
This matchup is highly advantageous because Yone's linear mobility is extremely predictable. When Yone initiates with Soul Unbound or charges his third Mortal Steel cast, he is forced to move in straight lines. By deploying Unraveled Earth, you punish his mandatory dash paths. The moment he snaps back to his physical body, or attempts to dash forward, he triggers the minefield, stunning himself and taking massive damage.
Yone build →
See details
The interaction that decides it
Taliyah can pre-place Unraveled Earth (E) on Yone's spirit return location or in his path when he charges Mortal Steel (Q3) to trigger massive damage and stuns.
Why
This matchup is highly advantageous because Yone's linear mobility is extremely predictable. When Yone initiates with Soul Unbound or charges his third Mortal Steel cast, he is forced to move in straight lines. By deploying Unraveled Earth, you punish his mandatory dash paths. The moment he snaps back to his physical body, or attempts to dash forward, he triggers the minefield, stunning himself and taking massive damage.
Lane impact
Yone's usual trading patterns are completely neutralized, preventing him from zoning you. Because he cannot safely use Soul Unbound to harass without losing half his health pool to Unraveled Earth, you dictate the wave pace. This restriction allows you to clear waves safely with Threaded Volley and use Rock Surfing to roam, turning your lane priority into map-wide pressure while Yone is stuck farming under tower.
How to play
Never cast Unraveled Earth reactively for simple wave clear; always hold it until Yone commits. The moment he casts Soul Unbound, immediately place Unraveled Earth directly over his physical body's return anchor. If he charges his Mortal Steel tornado, stand behind a pre-placed minefield to block his dash. If you miss your Seismic Shove combo, immediately use your range advantage to kite backward while his spirit duration expires.

Yasuo−1
This matchup is highly favorable because Taliyah possesses the ultimate response to Yasuo's high mobility. While Yasuo relies on Sweeping Blade to dash through minions and close the gap, laying down Unraveled Earth completely shuts down his aggression by stunning him mid-dash. However, the entire dynamic hinges on his Wind Wall, which can absorb your Threaded Volley and Seismic Shove, making its cooldown your primary window of opportunity.
Yasuo build →
See details
The interaction that decides it
Taliyah's Unraveled Earth (E) stuns Yasuo if he attempts to dash through it with Sweeping Blade (E), but she must bait out his Wind Wall (W) first.
Why
This matchup is highly favorable because Taliyah possesses the ultimate response to Yasuo's high mobility. While Yasuo relies on Sweeping Blade to dash through minions and close the gap, laying down Unraveled Earth completely shuts down his aggression by stunning him mid-dash. However, the entire dynamic hinges on his Wind Wall, which can absorb your Threaded Volley and Seismic Shove, making its cooldown your primary window of opportunity.
Lane impact
Yasuo is forced into a defensive posture, unable to mindlessly dash through the wave without taking massive stun damage. You can easily pop Way of the Wanderer with a single stray rock from Threaded Volley. This allows you to dictate the wave state, keeping him trapped under his turret while you secure priority to roam using Rock Surfing, leaving him struggling to match your map pressure.
How to play
Never throw Seismic Shove while his Wind Wall is available; instead, use your basic attacks or a single Threaded Volley rock on worked ground to break Way of the Wanderer. Stand near your worked ground to conserve mana and wait for him to step forward. If he baits himself into casting his wall, immediately threaten him with Unraveled Earth. Should he attempt to bypass your stones, punish his Sweeping Blade instantly to setup an easy Seismic Shove pull.

Akali−2
Taliyah completely shuts down Akali's high-mobility assassination patterns. The moment Akali tries to gap-close using either the second activation of Shuriken Flip or her ultimate Perfect Execution, Taliyah reactively lays down Unraveled Earth. This field immediately punishes and stuns Akali mid-flight. Because Akali must cross this minefield to deliver her burst, Taliyah controls the pace of every single engagement.
Akali build →
See details
The interaction that decides it
Taliyah's Unraveled Earth stuns Akali if she attempts to dash through it with Shuriken Flip or Perfect Execution.
Why
Taliyah completely shuts down Akali's high-mobility assassination patterns. The moment Akali tries to gap-close using either the second activation of Shuriken Flip or her ultimate Perfect Execution, Taliyah reactively lays down Unraveled Earth. This field immediately punishes and stuns Akali mid-flight. Because Akali must cross this minefield to deliver her burst, Taliyah controls the pace of every single engagement.
Lane impact
Since Akali cannot safely dash forward, her melee status leaves her highly vulnerable. You can constantly zone her with Threaded Volley and shove waves to trigger Rock Surfing along the walls. Akali is forced to farm under turret using Five Point Strike or hide in Twilight Shroud. This massive wave priority lets Taliyah secure easy map movements while Akali struggles to clear.
How to play
Position yourself behind your worked ground to maximize the damage of single-rock Threaded Volley pokes, keeping a safe distance from her shroud. Never cast Unraveled Earth offensively to poke. Instead, hold it specifically for when Akali's Shuriken Flip attaches to you. If she takes the bait and reactivates it, drop the mines right at your feet and follow up with Seismic Shove to fling her back.

Akshan−2
Akshan's entire laning aggression relies on the mobility of Heroic Swing. However, Taliyah completely shuts this down with Unraveled Earth. The moment Akshan attempts to grapple and swing over your minefield, he immediately detonates the stones, taking massive burst damage and stopping his movement mid-air. This interaction transforms his primary engagement and escape tool into a self-inflicted trap, leaving him highly vulnerable to a follow-up Seismic Shove.
Akshan build →
See details
The interaction that decides it
Swinging with Heroic Swing over Taliyah's Unraveled Earth triggers the mines, dealing massive damage and interrupting your movement.
Why
Akshan's entire laning aggression relies on the mobility of Heroic Swing. However, Taliyah completely shuts this down with Unraveled Earth. The moment Akshan attempts to grapple and swing over your minefield, he immediately detonates the stones, taking massive burst damage and stopping his movement mid-air. This interaction transforms his primary engagement and escape tool into a self-inflicted trap, leaving him highly vulnerable to a follow-up Seismic Shove.
Lane impact
Because Akshan cannot swing safely, he loses his usual lane dominance. He is forced to rely on Avengerang to clear waves, allowing you to easily push him under tower using Threaded Volley. This pressure denies him roaming windows with Going Rogue. If he attempts to leave the lane anyway, your Rock Surfing passive and Weaver's Wall let you match his rotations or cut off his escape route entirely.
How to play
To secure this matchup, never cast Unraveled Earth proactively just to clear minions. Always hold this ability until Akshan initiates his grapple. Position yourself near the mid lane walls, forcing him to choose between a highly predictable Heroic Swing angle or trading purely with basic attacks. When he attaches to a wall, cast your mines directly in his path of travel, then easily aim Seismic Shove to push him backward into a barrage of Threaded Volley.

Kennen−2
This matchup heavily favors you because Kennen's primary tool for playmaking and wave clear, Lightning Rush, is entirely neutralized by your Unraveled Earth. Whenever the yordle attempts to speed through the wave or dash forward to apply Mark of the Storm, passing over your minefield triggers an instant stun. This leaves him completely vulnerable to an easy follow-up with Seismic Shove and Threaded Volley.
Kennen build →
See details
The interaction that decides it
Taliyah's Unraveled Earth stuns Kennen if he attempts to dash through it with Lightning Rush.
Why
This matchup heavily favors you because Kennen's primary tool for playmaking and wave clear, Lightning Rush, is entirely neutralized by your Unraveled Earth. Whenever the yordle attempts to speed through the wave or dash forward to apply Mark of the Storm, passing over your minefield triggers an instant stun. This leaves him completely vulnerable to an easy follow-up with Seismic Shove and Threaded Volley.
Lane impact
Kennen is stripped of his aggressive potential and forced to play passively, relying solely on Thundering Shuriken to last-hit from a safe distance. Because he cannot use his lightning form to contest the wave without taking massive damage, you easily secure mid lane priority. This freedom allows you to abuse Rock Surfing along the river walls and impact the map with Weaver's Wall while Kennen is stuck clearing under his turret.
How to play
Always hold Unraveled Earth as a reactive tool rather than throwing it out blindly. Stand near your worked ground to harass him with single-rock Threaded Volley casts. If Kennen activates Slicing Maelstrom and attempts to run you down, drop the mines directly in his path to stop him mid-dash. Should you miss your Seismic Shove, simply back off toward a wall to activate Rock Surfing and disengage safely.

Talon−2
Talon relies entirely on mobility to threaten you, but his kit plays right into your hands. Whenever he attempts to gap-close with Noxian Diplomacy or vault over mid lane terrain using Assassin's Path, you can instantly interrupt him. Laying down Unraveled Earth stuns him mid-dash, completely neutralizing his engage and leaving him vulnerable to a devastating follow-up combo.
Talon build →
See details
The interaction that decides it
Talon's Assassin's Path (E) and Noxian Diplomacy (Q) are completely countered by Unraveled Earth (E), which stuns him mid-dash and prevents his escape or engage.
Why
Talon relies entirely on mobility to threaten you, but his kit plays right into your hands. Whenever he attempts to gap-close with Noxian Diplomacy or vault over mid lane terrain using Assassin's Path, you can instantly interrupt him. Laying down Unraveled Earth stuns him mid-dash, completely neutralizing his engage and leaving him vulnerable to a devastating follow-up combo.
Lane impact
Because Talon cannot freely jump walls or dash onto you without eating a stun, he loses his natural lane priority. You can easily shove waves with Threaded Volley and trap him under tower. He cannot safely roam to side lanes using Assassin's Path if you keep him low, allowing you to match his map movements or even block his escape routes entirely with Weaver's Wall.
How to play
Always hold Unraveled Earth specifically for his forward movements; never use it lazily for waveclear. Position yourself slightly away from the river walls so you have time to react when he uses Assassin's Path. If Talon jumps at you, cast Unraveled Earth directly under your feet, then use Seismic Shove to fling him deeper into your stone field. If he disappears with Shadow Assault, surf away with Weaver's Wall or retreat to your tower.

Aurelion Sol−2
Taliyah completely shuts down Aurelion Sol's primary safety tool due to how their kits interact. Whenever Aurelion Sol attempts to escape or reposition using Astral Flight, laying down Unraveled Earth creates an impassable zone. Because Astral Flight counts as a dash, traversing this minefield triggers an instant stun. This interaction strips him of his mobility, leaving him completely vulnerable to a follow-up Seismic Shove and a barrage of Threaded Volley.
Aurelion Sol build →
See details
The interaction that decides it
Taliyah's Unraveled Earth will stun you instantly if you attempt to use Astral Flight over her minefield.
Why
Taliyah completely shuts down Aurelion Sol's primary safety tool due to how their kits interact. Whenever Aurelion Sol attempts to escape or reposition using Astral Flight, laying down Unraveled Earth creates an impassable zone. Because Astral Flight counts as a dash, traversing this minefield triggers an instant stun. This interaction strips him of his mobility, leaving him completely vulnerable to a follow-up Seismic Shove and a barrage of Threaded Volley.
Lane impact
This interaction dictates the lane's pressure, forcing Aurelion Sol to play passively under his turret. He cannot safely channel Breath of Light to clear waves because you can easily punish his stationary state. If he attempts to drop Singularity and fly away to safety, your reactive Unraveled Earth halts his flight mid-air, allowing you to secure easy health trades or kills. You easily secure mid priority, enabling rapid rotations using Rock Surfing.
How to play
To execute this perfectly, always hold Unraveled Earth instead of using it blindly for wave clear. Position yourself slightly forward to bait him into using Astral Flight for a trade or roam, then instantly cast your mines directly in his flight path to interrupt him. If he plays extremely safe, use Weaver's Wall to block his retreat path towards his tower, forcing him to fly into your pre-placed mines or face a guaranteed Seismic Shove into Threaded Volley.

Pyke−2
Pyke relies heavily on Phantom Undertow to initiate trades or reposition, but Taliyah completely shuts down this aggressive mobility. Whenever Pyke attempts to dash through your Unraveled Earth, he instantly triggers the stone mines, causing him to take massive damage and suffer a self-inflicted stun. This interaction strips Pyke of his main engage tool, leaving him vulnerable and unable to execute his burst combos.
Pyke build →
See details
The interaction that decides it
Taliyah's Unraveled Earth stuns and damages Pyke if he attempts to dash through it with Phantom Undertow.
Why
Pyke relies heavily on Phantom Undertow to initiate trades or reposition, but Taliyah completely shuts down this aggressive mobility. Whenever Pyke attempts to dash through your Unraveled Earth, he instantly triggers the stone mines, causing him to take massive damage and suffer a self-inflicted stun. This interaction strips Pyke of his main engage tool, leaving him vulnerable and unable to execute his burst combos.
Lane impact
This counter-interaction destroys Pyke's lane presence, forcing him to play passively and rely on Bone Skewer just to secure last hits. Since he cannot use his dash to clear, you command absolute wave control. You can safely push him under turret with Threaded Volley, then use Rock Surfing to roam to side lanes long before Pyke can safely follow without losing massive chunks of health.
How to play
Position yourself constantly behind your own minion wave to nullify his Bone Skewer hook. Never cast Unraveled Earth randomly; hold it specifically for his engage. When Pyke approaches in Ghostwater Dive or begins charging his harpoon, lay down Unraveled Earth directly in his path. If he still commits with Phantom Undertow, use Seismic Shove to fling him deeper into your mines, finishing him off with a fully charged Threaded Volley.
Other matchups


















Items to Counter Taliyah
Buy these items to reduce this champion's effectiveness in your games.





| Matchup | Verdict | Edge | Win rate | Pick rate |
|---|---|---|---|---|
| Morgana | Unfavorable | +1 | 52.8% | 6.6% |
| Vel'Koz | Unfavorable | +1 | 50.1% | 3.3% |
| Jayce | Unfavorable | +1 | 49.8% | 2.6% |
| Vex | Unfavorable | +1 | 49.2% | 2.0% |
| Lux | Unfavorable | +1 | 49.1% | 5.5% |
| Katarina | Unfavorable | +1 | 48.5% | 1.5% |
| Ziggs | Unfavorable | +1 | 48.4% | 5.1% |
| Mel | Unfavorable | +1 | 45.6% | 8.8% |
| Varus | Unfavorable | +1 | — | — |
| Zoe | Unfavorable | +1 | — | — |
| Annie | Skill Matchups | ±0 | 52.1% | 2.1% |
| Orianna | Skill Matchups | ±0 | 51.9% | 4.6% |
| Zed | Skill Matchups | ±0 | 50.5% | 4.5% |
| Twisted Fate | Skill Matchups | ±0 | 50.1% | 5.6% |
| Swain | Skill Matchups | ±0 | 49.1% | 2.8% |
| Karma | Skill Matchups | ±0 | — | — |
| Brand | Favorable | −1 | 52.1% | 10.4% |
| Lissandra | Favorable | −1 | 51.8% | 4.4% |
| Ahri | Favorable | −1 | 51.4% | 4.3% |
| Vladimir | Favorable | −1 | 51.4% | 4.2% |
| Galio | Favorable | −1 | 51.4% | 11.5% |
| Kassadin | Favorable | −1 | 51.1% | 1.7% |
| Ekko | Favorable | −1 | 50.4% | 5.1% |
| Aurora | Favorable | −1 | 50.2% | 4.0% |
| Heimerdinger | Favorable | −1 | 49.6% | 1.5% |
| Veigar | Favorable | −1 | 49.4% | 7.3% |
| Yone | Favorable | −1 | 49.1% | 5.6% |
| Fizz | Favorable | −1 | 48.8% | 2.2% |
| Yasuo | Favorable | −1 | 47.3% | 9.1% |
| Diana | Favorable | −1 | 46.9% | 1.1% |
| Corki | Favorable | −1 | — | — |
| Irelia | Favorable | −1 | — | — |
| Kai'Sa | Favorable | −1 | — | — |
| Kayle | Favorable | −1 | — | — |
| Lucian | Favorable | −1 | — | — |
| Malphite | Favorable | −1 | — | — |
| Pantheon | Favorable | −1 | — | — |
| Seraphine | Favorable | −1 | — | — |
| Zilean | Favorable | −1 | — | — |
| Teemo | Favorable | −2 | 53.1% | 2.3% |
| Kennen | Favorable | −2 | 51.6% | 1.6% |
| Aurelion Sol | Favorable | −2 | 51.1% | 6.3% |
| Tristana | Favorable | −2 | 48.3% | 1.3% |
| Akali | Favorable | −2 | 47.8% | 4.4% |
| Akshan | Favorable | −2 | — | — |
| Gragas | Favorable | −2 | — | — |
| Pyke | Favorable | −2 | — | — |
| Talon | Favorable | −2 | — | — |
Edge: Wild Rift Core canonical verdict (−3 to +3), shown from the point of view of the champion named in the row. Win rate and pick rate: the opponent's own rate in this role — Wild Rift CN · Challenger, Patch 7.3b. Not a head-to-head win rate.