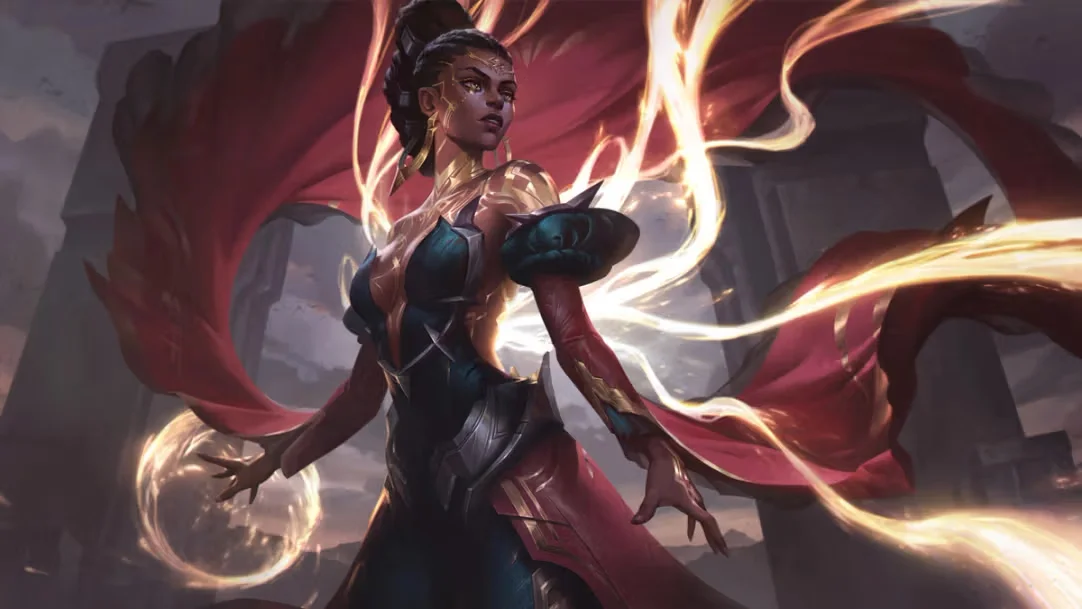
Mel's counters in Wild Rift mostly revolve around range management, her anti-projectile tool, and how vulnerable she becomes without Rebuttal. She excels into several skillshot mages, but must respect assassins who can break spacing or bypass her defensive timing.
Edge: Wild Rift Core canonical verdict (−3 to +3), shown from the point of view of the champion named in the row. Win rate and pick rate: the opponent's own rate in this role — Wild Rift CN · Challenger, Patch 7.2e. Not a head-to-head win rate.
Hard Counters
6
These champions have a build and playstyle that directly overpower yours, which can make controlling the lane and farming extremely difficult. Their kit can neutralize your core strengths or punish you the moment you try to play your usual game plan. In these matchups, the goal is often to minimize mistakes and look for ways to win outside of direct confrontation.
gap closeburst downIrelia thrives on your low-health minions, using them to repeatedly reset Bladesurge to bypass the defensive zone you attempt to build with Radiant Volley. By instantly closing the distance, she completely avoids the slow travel time of Solar Snare. Once she is in melee range, her Ionian Fervor stacks quickly overwhelm Mel's fragile health pool before you can even stack Searing Brilliance or trigger a meaningful Golden Eclipse.Irelia build →See details
Irelia
The interaction that decides it
Using low-health minions to reset Bladesurge allows you to close the distance and burst Mel down before she can establish zone control.
Why
Irelia thrives on your low-health minions, using them to repeatedly reset Bladesurge to bypass the defensive zone you attempt to build with Radiant Volley. By instantly closing the distance, she completely avoids the slow travel time of Solar Snare. Once she is in melee range, her Ionian Fervor stacks quickly overwhelm Mel's fragile health pool before you can even stack Searing Brilliance or trigger a meaningful Golden Eclipse.
Lane impact
This threat forces you into a highly defensive posture where you cannot safely step up to use Radiant Volley for push priority. Whenever a friendly minion drops to low health, you must immediately retreat, conceding wave control to Irelia. If she lands Flawless Duet or Vanguard's Edge, her dive threat under your tower becomes lethal, forcing premature recalls that bleed gold and leave your mid tower heavily pressured.
How to play
To survive, you must hold Solar Snare strictly as a disengage tool for when she commits with Bladesurge, rather than using it to poke. When she dashes forward, activate Rebuttal immediately to block the physical damage from Bladesurge or to deflect the incoming stun from Flawless Duet. If she manages to freeze the wave near her turret, do not walk up; instead, use Radiant Volley from maximum range to break the freeze safely.
divemobilityMel thrives on keeping opponents at bay, but Aurora completely bypasses this defensive screen. By using Across the Veil, Aurora easily leaps over the active zones of Radiant Volley and ignores the root potential of Solar Snare through brief invisibility. This mobility allows her to close the distance instantly, applying Spirit Abjuration stacks directly onto Mel while rendering Mel's projectile-reflecting Rebuttal practically useless.Aurora build →See details
Aurora
The interaction that decides it
Aurora can easily close the distance with Across the Veil (W) to bypass Mel's zoning tools.
Why
Mel thrives on keeping opponents at bay, but Aurora completely bypasses this defensive screen. By using Across the Veil, Aurora easily leaps over the active zones of Radiant Volley and ignores the root potential of Solar Snare through brief invisibility. This mobility allows her to close the distance instantly, applying Spirit Abjuration stacks directly onto Mel while rendering Mel's projectile-reflecting Rebuttal practically useless.
Lane impact
You are forced into a defensive posture from the very first waves. Because walking up to poke with Radiant Volley exposes you to a sudden leap, you must concede mid-lane priority. Aurora will relentlessly push you under turret using Twofold Hex, chipping away at your tower while you struggle to secure last hits. This constant pressure prevents you from assisting your jungler, leaving you trapped in lane.
How to play
To survive, freeze the minion wave just outside your turret's range. Never throw Solar Snare to poke; you must hold this ability specifically to lock Aurora down the moment she exits Across the Veil. If she initiates, immediately retreat toward your tower, using Rebuttal only to block the incoming Twofold Hex projectile during her retreat. If you get chunked, use the global execute of Golden Eclipse to secure distant low-health minions.
outscalinghealth advantageMel's lack of escape options makes her a prime target once Swain unleashes Demonic Ascension. Because Mel cannot quickly displace herself or burst him down through his massive ultimate healing, Swain easily traps her in his drain radius, using Nevermove to trigger Ravenous Flock and harvest soul fragments. This constant life-drain completely nullifies Mel's chip damage from Radiant Volley and Searing Brilliance, turning fights into a losing battle of attrition.Swain build →See details
Swain
The interaction that decides it
Mel lacks the burst or mobility to escape Demonic Ascension, allowing Swain to easily stack Ravenous Flock off her.
Why
Mel's lack of escape options makes her a prime target once Swain unleashes Demonic Ascension. Because Mel cannot quickly displace herself or burst him down through his massive ultimate healing, Swain easily traps her in his drain radius, using Nevermove to trigger Ravenous Flock and harvest soul fragments. This constant life-drain completely nullifies Mel's chip damage from Radiant Volley and Searing Brilliance, turning fights into a losing battle of attrition.
Lane impact
Since direct trades are suicidal, you must focus entirely on managing the minions. Swain wants to push you under tower with Death's Hand and catch you with Vision of Empire when you try to farm. If you let him lock you in place with Nevermove, his health pool swells while yours dwindles, forcing early recalls that cost you gold and plates. Losing control of the wave tempo allows Swain to roam freely.
How to play
To survive, you must play defensively from behind your minion wave. Save Solar Snare strictly as a disengage tool to root Swain and halt his approach when he walks forward. If he activates Demonic Ascension, immediately pop Rebuttal for the temporary invulnerability and decaying movement speed to retreat outside his drain radius, rather than trying to trade back with Golden Eclipse. Do not try to execute him unless his ultimate is completely down.
dive potentialmobility advantageYone holds a massive advantage because his Soul Unbound allows him to leap over Mel's zoning zone, ignoring the threat of Solar Snare. Even if Mel throws Radiant Volley to deter him, Yone can dash forward, trade heavily, and then snap back to his starting point. This mobility gap makes Mel’s traditional safety nets unreliable, as she cannot easily peel herself from his sudden spirit form assault.Yone build →See details
Yone
The interaction that decides it
Yone can use Soul Unbound to bypass her zoning tools and close the gap, forcing her to play defensively.
Why
Yone holds a massive advantage because his Soul Unbound allows him to leap over Mel's zoning zone, ignoring the threat of Solar Snare. Even if Mel throws Radiant Volley to deter him, Yone can dash forward, trade heavily, and then snap back to his starting point. This mobility gap makes Mel’s traditional safety nets unreliable, as she cannot easily peel herself from his sudden spirit form assault.
Lane impact
This interaction forces Mel to forfeit early wave control. Standing past the midpoint of the lane invites Yone to execute a lethal trade using Soul Unbound and Mortal Steel. You will find yourself constantly farming under tower, bleeding gold from missed minions. Consequently, Mel cannot assist her jungler during skirmishes, leaving her team vulnerable to Yone's unpunished rotations.
How to play
To survive, never use Solar Snare offensively. You must hold this ability strictly to intercept Yone's return path or to delay his advance during Soul Unbound. When he activates his spirit form, prepare your Rebuttal to deflect his Mortal Steel whirlwind. Only attempt to poke with Radiant Volley when you know Soul Unbound is on its long cooldown, keeping your distance and prioritizing safe farm over trading.
burst trademobility advantageZed completely neutralizes your defensive tools with his high mobility. When you try to zone him with Solar Snare or harass with Radiant Volley, he can simply bypass the threat using Living Shadow. More dangerously, if you attempt to lock him down, he can cast Death Mark to become untargetable, easily dodging your crowd control while setting up a lethal burst combo with Razor Shuriken and Shadow Slash.Zed build →See details
Zed
The interaction that decides it
Zed can easily bypass Mel's ranged zone control by using Living Shadow (W) to close the gap and Death Mark (R) to dodge her defensive spells.
Why
Zed completely neutralizes your defensive tools with his high mobility. When you try to zone him with Solar Snare or harass with Radiant Volley, he can simply bypass the threat using Living Shadow. More dangerously, if you attempt to lock him down, he can cast Death Mark to become untargetable, easily dodging your crowd control while setting up a lethal burst combo with Razor Shuriken and Shadow Slash.
Lane impact
This structural advantage forces you into a highly defensive posture where pushing the wave becomes risky. You cannot safely step forward to apply Searing Brilliance with basic attacks without risking a sudden gap-close. Zed dictates the wave tempo, forcing you under turret where his Contempt for the Weak makes diving you highly effective if you have been poked down by his ranged shadow clones.
How to play
To survive, you must never cast Solar Snare aggressively; hold it exclusively for when Zed commits. When he targets you with Death Mark, wait for the exact moment he lands to throw Solar Snare point-blank, then immediately activate Rebuttal to block his incoming Razor Shuriken. If his Living Shadow is on cooldown, you have a brief fifteen-second window to safely clear minions with Radiant Volley.
These champions have tools that generally give them the edge in a fight, without making the matchup unwinnable. They might have more range, a better ability to soak up your offense, or more ways to answer your engages. You'll need to adapt your approach and carefully pick your moments to accept a fight.
wave clearburst tradeVex neutralizes Mel's typical push priority by matching Radiant Volley waveclear effortlessly using the combined area damage of Looming Darkness and Mistral Bolt. This denies Mel the chance to trap Vex under turret. Once the wave is neutralized, Vex can safely wait out Rebuttal before launching Shadow Surge to close the distance and execute a devastating burst combo.Vex build →See details
Vex
The interaction that decides it
Vex can match Mel's waveclear with Looming Darkness and Mistral Bolt, then look to burst her down with Shadow Surge once her defensive tools are down.
Why
Vex neutralizes Mel's typical push priority by matching Radiant Volley waveclear effortlessly using the combined area damage of Looming Darkness and Mistral Bolt. This denies Mel the chance to trap Vex under turret. Once the wave is neutralized, Vex can safely wait out Rebuttal before launching Shadow Surge to close the distance and execute a devastating burst combo.
Lane impact
This parity in waveclear prevents you from establishing early priority or roaming to side lanes. Instead, you are locked in a tense mid lane standoff where any hasty use of Rebuttal to block poke invites an immediate Shadow Surge engagement. If you are forced to retreat or lose half your health to her burst, your tower pressure vanishes.
How to play
You must conserve Rebuttal exclusively to intercept Shadow Surge or to block the follow-up burst if the mark lands. Never use it to deflect simple Mistral Bolt poke. Focus on landing Solar Snare to root Vex when she tries to approach, then punish her with Radiant Volley. If Vex misses her ultimate, use that long cooldown window to aggressively push the wave.
squishy burstlane pressureMel struggles to keep Talon at bay because her primary disengage, Solar Snare, is easily baited. The moment you cast this orb and miss or use it to clear waves, Talon will immediately close the gap using Noxian Diplomacy. Without that root, you cannot prevent him from landing Rake to apply Blade's End stacks, forcing you into a deadly trade where Rebuttal can only mitigate a fraction of his burst.Talon build →See details
Talon
The interaction that decides it
Talon can easily close the distance with Noxian Diplomacy once Mel uses her primary self-peel or zoning tools.
Why
Mel struggles to keep Talon at bay because her primary disengage, Solar Snare, is easily baited. The moment you cast this orb and miss or use it to clear waves, Talon will immediately close the gap using Noxian Diplomacy. Without that root, you cannot prevent him from landing Rake to apply Blade's End stacks, forcing you into a deadly trade where Rebuttal can only mitigate a fraction of his burst.
Lane impact
This threat paralyzes your wave clear, forcing you to play passively under your turret. If you step up to land Radiant Volley, you risk getting chunked. Once Talon unlocks Shadow Assault, his mobility with Assassin's Path creates immense pressure, as he can shove the lane and roam over walls to side lanes while you are stuck safely securing minions under tower.
How to play
To survive, absolutely hoard Solar Snare. Only cast it defensively when Talon commits his Noxian Diplomacy forward. If he initiates with Rake, use Rebuttal to deflect the returning blades and block the passive stack. Never contest his roams through the jungle; instead, ping your teammates missing immediately and punish his absence by safely stacking Searing Brilliance on the wave and detonating it with Golden Eclipse.
roamingwave clearTwisted Fate completely neutralizes Mel's push potential by pairing the area-of-effect damage from Pick a Card's red card with Wild Cards to instantly clear minions. This rapid wave control allows him to freely activate Destiny, bypassing any zoning attempts from Solar Snare, and teleporting to side lanes. Mel's lack of mobility means she cannot match this instantaneous global map presence before her lane opponent secures advantages elsewhere.Twisted Fate build →See details
Twisted Fate
The interaction that decides it
Twisted Fate can use Red Card and Wild Cards to match Mel's waveclear, then use Destiny to impact side lanes before she can rotate.
Why
Twisted Fate completely neutralizes Mel's push potential by pairing the area-of-effect damage from Pick a Card's red card with Wild Cards to instantly clear minions. This rapid wave control allows him to freely activate Destiny, bypassing any zoning attempts from Solar Snare, and teleporting to side lanes. Mel's lack of mobility means she cannot match this instantaneous global map presence before her lane opponent secures advantages elsewhere.
Lane impact
This matchup turns into an asymmetric wave-clearing battle where your lane control is constantly challenged. Because Twisted Fate shoves from a safe distance, you are forced to burn mana on Radiant Volley just to prevent minions from crashing. The moment he disappears past your vision, the threat of Destiny forces your side lanes to retreat, stripping away your team's map control while you struggle to chip his tower.
How to play
To survive this map pressure deficit, always save Solar Snare to interrupt his channel if he attempts to cast Destiny within your vision. If he retreats to fog of war, do not embark on a futile river chase; instead, immediately unleash Radiant Volley and Searing Brilliance attacks to crash the wave, then use Golden Eclipse to secure local tower plates. Keep Rebuttal ready to deflect his gold stun card during skirmishes.
wave clearshield tradesViktor easily neutralizes Mel's poke. When Mel tries to stack Searing Brilliance using Radiant Volley, Viktor responds with Siphon Power, absorbing the damage with his shield while returning damage. Simultaneously, he matches Mel's push effortlessly from a safe distance using Hextech Ray, preventing her from gaining lane priority or landing Solar Snare through the minion wave.Viktor build →See details
Viktor
The interaction that decides it
Viktor can use Siphon Power (Q) to shield against Mel's trading patterns while using Hextech Ray (E) to match her waveclear from a safe distance.
Why
Viktor easily neutralizes Mel's poke. When Mel tries to stack Searing Brilliance using Radiant Volley, Viktor responds with Siphon Power, absorbing the damage with his shield while returning damage. Simultaneously, he matches Mel's push effortlessly from a safe distance using Hextech Ray, preventing her from gaining lane priority or landing Solar Snare through the minion wave.
Lane impact
Because Hextech Ray clears waves instantly from afar, Mel is forced to constantly spend mana on Radiant Volley just to keep her tower safe. You cannot easily set up Golden Eclipse executes because Viktor's Siphon Power shield negates the damage thresholds. This turns the lane into a grueling war of attrition where Mel is stuck under tower, unable to roam.
How to play
To survive, stop trying to force direct trades against Siphon Power. Instead, save Rebuttal specifically to block his upgraded Hextech Ray or the initial burst of Arcane Storm during all-ins. Focus your Radiant Volley purely on the caster minions to maintain even wave states. If Viktor drops Gravity Field to zone you, immediately back off and use the movement speed from Rebuttal to reposition rather than trying to walk through it.
wind wall valuemobility advantageYasuo controls this lane because Wind Wall entirely neutralizes your main threat tools. Both your wave clear and poke from Radiant Volley, alongside your defensive crowd control in Solar Snare, are completely blocked by his barrier. This projectile denial, combined with his Sweeping Blade giving him constant dashes through your minion wave, allows him to bypass your range advantage and force direct duels where Steel Tempest shreds your health.Yasuo build →See details
Yasuo
The interaction that decides it
Yasuo can block Mel's core projectile spells with Wind Wall (W) while using Sweeping Blade (E) to close the gap through the minion wave.
Why
Yasuo controls this lane because Wind Wall entirely neutralizes your main threat tools. Both your wave clear and poke from Radiant Volley, alongside your defensive crowd control in Solar Snare, are completely blocked by his barrier. This projectile denial, combined with his Sweeping Blade giving him constant dashes through your minion wave, allows him to bypass your range advantage and force direct duels where Steel Tempest shreds your health.
Lane impact
You are forced into a defensive posture under your turret, unable to contest the wave actively. Yasuo can freeze the lane and zone you away from gold, knowing that if you throw Solar Snare to farm, he can block it and immediately dash forward. Missing your crowd control means he will stack Steel Tempest, launch his tornado, and easily trigger Last Breath, forcing an early recall or securing a solo kill.
How to play
To survive, break his Way of the Wanderer shield with a basic attack before committing any mana. You must hold Solar Snare as a pure self-peel tool; only release it if his Wind Wall is on its long cooldown or if you can bait him into a bad Sweeping Blade trajectory. If he throws his Steel Tempest tornado, activate Rebuttal immediately to block the airborne effect, denying him the setup for Last Breath and keeping yourself safe under tower.
utility denialspeed advantageZilean's Temporal Mirage gives him the necessary movement speed to easily sidestep Mel's primary skillshots, Radiant Volley and Solar Snare. Because he can dodge these tools, Mel struggles to stack Searing Brilliance on him. Once Zilean reaches level five, his Chronoshift completely nullifies Mel's execution threshold from Golden Eclipse, turning what should be a lethal burst into a wasted ultimate.Zilean build →See details
Zilean
The interaction that decides it
Using Temporal Mirage to dodge her skillshots allows Zilean to safely scale and neutralize her burst with Chronoshift.
Why
Zilean's Temporal Mirage gives him the necessary movement speed to easily sidestep Mel's primary skillshots, Radiant Volley and Solar Snare. Because he can dodge these tools, Mel struggles to stack Searing Brilliance on him. Once Zilean reaches level five, his Chronoshift completely nullifies Mel's execution threshold from Golden Eclipse, turning what should be a lethal burst into a wasted ultimate.
Lane impact
This matchup becomes a race against the clock where Zilean safely farms and scales. Since you cannot easily land Solar Snare, your pressure on him is minimal, allowing him to save Time Bomb to clear waves or harass you. If you attempt aggressive trades, his Twisted Timeflow lets him double up on Time Bomb to stun you, forcing you to use Rebuttal defensively rather than using it to block his single projectile.
How to play
You must bait out Temporal Mirage before throwing your main damage spells. Watch for when he uses his speed boost to position aggressively, then wait for that buff to decay before launching Radiant Volley. Never initiate with Solar Snare; instead, hold it as a counter-engage tool for when he walks up to throw a Time Bomb. If he targets himself with Chronoshift, immediately stop attacking and save your Golden Eclipse for after his resurrection animation ends.
pokepick potentialMel is vulnerable because her primary tools, Radiant Volley and Solar Snare, force her into brief cast animations where she must stand still. Zoe thrives on this predictability. By positioning in the fog of war, Zoe can easily launch Sleepy Trouble Bubble through walls to catch you during these locked frames, setting up a devastating Paddle Star! that bypasses your wave control.Zoe build →See details
Zoe
The interaction that decides it
Zoe can easily set up Sleepy Trouble Bubble from fog of war to catch Mel when she stops to cast her long-range spells.
Why
Mel is vulnerable because her primary tools, Radiant Volley and Solar Snare, force her into brief cast animations where she must stand still. Zoe thrives on this predictability. By positioning in the fog of war, Zoe can easily launch Sleepy Trouble Bubble through walls to catch you during these locked frames, setting up a devastating Paddle Star! that bypasses your wave control.
Lane impact
This interaction dictates the entire rhythm of your wave clear. You cannot blindly throw Radiant Volley to shove the lane without risking a sudden sleep effect from the side brush. Getting hit by Sleepy Trouble Bubble forces you to immediately use Rebuttal to absorb the incoming Paddle Star!. If your barrier is on cooldown, you will be chunked to critical health, bleeding gold and losing crucial lane priority.
How to play
To survive, you must play defensively near the center of the lane, far from wall angles that extend Zoe's bubble range. Never use Rebuttal offensively; hoard it strictly to block Paddle Star! if Sleepy Trouble Bubble connects. Wait for Zoe to waste her Paddle Star! on the minion wave before attempting to fish for a root with Solar Snare or stacking Searing Brilliance with your basic attacks.
kite and pokeshield managementRumble dominates this matchup because Mel's primary defensive tool, Rebuttal, is completely useless against his primary damage sources. While Rebuttal can block Electro Harpoon, it fails to mitigate the continuous damage from Flamespitter or the zoning fire of The Equalizer. This forces Mel into a delicate spacing battle where she must rely entirely on manual positioning rather than her defensive barrier to survive his aggressive trades.Rumble build →See details
Rumble
The interaction that decides it
Mel's Rebuttal cannot block Rumble's Flamespitter or The Equalizer, making positioning crucial to avoid his non-projectile damage.
Why
Rumble dominates this matchup because Mel's primary defensive tool, Rebuttal, is completely useless against his primary damage sources. While Rebuttal can block Electro Harpoon, it fails to mitigate the continuous damage from Flamespitter or the zoning fire of The Equalizer. This forces Mel into a delicate spacing battle where she must rely entirely on manual positioning rather than her defensive barrier to survive his aggressive trades.
Lane impact
During the laning phase, Rumble will constantly push with Flamespitter while using Scrap Shield to absorb your retaliation. If you waste Solar Snare, he will immediately run you down. You are forced to farm under tower, giving up early priority. Taking heavy damage from a poorly spaced The Equalizer forces premature recalls, allowing Rumble to roam freely or secure objective control while you are stuck clearing waves.
How to play
To survive, you must play defensively and strictly respect his Heat bar. Only throw Radiant Volley to last-hit from maximum range when his Scrap Shield is on cooldown. Keep Solar Snare ready as a disengage tool for when he attempts to rush you with his Danger Zone movement speed. If Rumble drops The Equalizer, instantly activate Rebuttal solely for the decaying movement speed boost to escape the burning zone, rather than hoping to block any incoming damage.
pokezone denialZyra's Garden of Thorns and Rampant Growth create an obstacle course that completely neutralizes your offensive threat. Her spawned plants block the trajectory of your Solar Snare, preventing you from ever landing a clean root. To clear these persistent botanical threats, you are forced to expend Radiant Volley, draining your mana and putting your primary damage tool on cooldown while Zyra freely controls the lane's geometry.Zyra build →See details
Zyra
The interaction that decides it
Zyra's plants spawned from Rampant Growth can block Mel's linear skillshots and force her to waste high-cooldown spells clearing them.
Why
Zyra's Garden of Thorns and Rampant Growth create an obstacle course that completely neutralizes your offensive threat. Her spawned plants block the trajectory of your Solar Snare, preventing you from ever landing a clean root. To clear these persistent botanical threats, you are forced to expend Radiant Volley, draining your mana and putting your primary damage tool on cooldown while Zyra freely controls the lane's geometry.
Lane impact
Because you must use Radiant Volley defensively against plants, Zyra easily pushes waves into your tower using Deadly Spines. You cannot contest the push, leaving you trapped under turret while she roams or secures vision. Any attempt to step forward and trade exposes you to Grasping Roots, which can lead to a deadly Stranglethorns knock-up, forcing early recalls and depriving your jungler of mid-lane priority.
How to play
Focus entirely on pulling the minion wave toward your side to minimize the space Zyra can plant seeds. Never throw Solar Snare if she has Rampant Growth active; instead, hold it to disengage if she commits with Grasping Roots. Use your basic attacks buffed by Searing Brilliance to execute her plants instead of wasting spells. If she traps you under tower, activate Rebuttal to block her ranged plant projectiles while you safely clear the wave.
These matchups are above all duels of execution: both champions have credible ways to gain the upper hand. Dodging one key ability, anticipating an engage correctly, or a single positioning mistake can be enough to tip the duel one way or the other. Knowing the matchup and recognizing the right windows to act are especially important here.
sustain warspacingThis matchup is a constant battle between Mel's ranged poke and Vladimir's healing. Your goal is to stack Overwhelm using Radiant Volley, but Vladimir counters this attrition by constantly draining minions with Transfusion. The critical interaction centers on Solar Snare: if you throw it recklessly, Vladimir will simply dissolve into Sanguine Pool, completely wasting your crowd control and leaving you vulnerable to his Crimson Pact-scaling burst.Vladimir build →See details
Vladimir
The interaction that decides it
Vladimir relies on Transfusion to sustain through Mel's ranged poke while saving Sanguine Pool for her primary crowd control.
Why
This matchup is a constant battle between Mel's ranged poke and Vladimir's healing. Your goal is to stack Overwhelm using Radiant Volley, but Vladimir counters this attrition by constantly draining minions with Transfusion. The critical interaction centers on Solar Snare: if you throw it recklessly, Vladimir will simply dissolve into Sanguine Pool, completely wasting your crowd control and leaving you vulnerable to his Crimson Pact-scaling burst.
Lane impact
The lane rhythm shifts based on Vladimir's resource bar. When his Transfusion is about to become empowered, you must cede space, or he will nullify the health lead you built with Radiant Volley. Because Vladimir lacks waveclear early without sacrificing health via Tides of Blood, you can easily shove him under tower. However, overextending without Solar Snare available invites easy ganks, as you cannot easily trigger Golden Eclipse on a pooled target.
How to play
Never cast Solar Snare unless Vladimir has already committed Sanguine Pool or you have forced him to use it defensively. Instead, bait his pool by zoning him with Radiant Volley when he steps up for an empowered Transfusion. If he pools, immediately back off, wait for the pool to end, then punish him with your snare-into-ultimate combo before his pool comes back online. Use Rebuttal to block his Tides of Blood projectiles during close-range trades.
dodge and counterrange managementThis even matchup revolves entirely around how you handle Vel'Koz's geometry with your defensive shield. His Organic Deconstruction relies on landing consecutive skillshots to melt your health bar. By timing Rebuttal perfectly to reflect either the splitting Plasma Fission or the airborne launch of Tectonic Disruption, you don't just protect yourself; you actively deny him the passive stacks he needs to set up his devastating Life Form Disintegration Ray.Vel'Koz build →See details
Vel'Koz
The interaction that decides it
Timing Rebuttal to reflect Vel'Koz's Plasma Fission or Tectonic Disruption negates his passive stacks and allows Mel to close the distance.
Why
This even matchup revolves entirely around how you handle Vel'Koz's geometry with your defensive shield. His Organic Deconstruction relies on landing consecutive skillshots to melt your health bar. By timing Rebuttal perfectly to reflect either the splitting Plasma Fission or the airborne launch of Tectonic Disruption, you don't just protect yourself; you actively deny him the passive stacks he needs to set up his devastating Life Form Disintegration Ray.
Lane impact
Because Vel'Koz can clear waves quickly using Void Rift, you will often find yourself pushed under tower if you play too passively. Successful reflections with Rebuttal shift the lane pressure instantly. Deflecting his crowd control allows you to walk up, land Solar Snare, and execute trades without fearing his true damage burst. Failing this timing forces you to retreat, conceding mid lane priority and leaving your jungler without backup.
How to play
To win this duel, stand diagonally from the minion wave to force Vel'Koz to choose between clearing minions with Void Rift or poking you with Plasma Fission. Never cast Rebuttal preemptively; hold it specifically for when his Tectonic Disruption is cast underneath you, or when a splitting bolt is about to hit. If you successfully reflect his crowd control, immediately advance with Solar Snare and Radiant Volley to stack Overwhelm, finishing him with Golden Eclipse before he can recover his cooldowns.
spacingwave clearThis matchup is a pure battle of spatial control. Veigar relies on Event Horizon to create a barrier that denies Mel the close-to-medium distance she needs to land Radiant Volley. While he holds you at bay, he scaling-farms safely with Baleful Strike. Because Mel cannot easily bypass the stun ring to apply Searing Brilliance, the lane remains perfectly neutral unless one player missteps.Veigar build →See details
Veigar
The interaction that decides it
Veigar must use Event Horizon to zone Mel out of her optimal spellcasting range while farming with Baleful Strike.
Why
This matchup is a pure battle of spatial control. Veigar relies on Event Horizon to create a barrier that denies Mel the close-to-medium distance she needs to land Radiant Volley. While he holds you at bay, he scaling-farms safely with Baleful Strike. Because Mel cannot easily bypass the stun ring to apply Searing Brilliance, the lane remains perfectly neutral unless one player missteps.
Lane impact
The lane dynamic revolves around passive farming punctuated by sudden standoffs. Veigar will use Baleful Strike to secure minions while reserving Event Horizon to halt any aggressive forward movement from Mel. If you try to force a trade with Solar Snare, he can instantly drop his cage to isolate you. This limits your ability to pressure his tower, forcing a highly static lane where health bars remain mostly full.
How to play
To bypass his zoning, bait out Event Horizon by stepping forward and immediately pivoting back. Once his cage is on cooldown, aggressively push forward to land Solar Snare and trigger Searing Brilliance. If you get caught inside the cage, do not panic-walk into the stun; instead, activate Rebuttal to absorb the incoming Dark Matter or Primordial Burst, then retaliate with Radiant Volley once the walls fade.
These champions generally struggle to answer your main strengths, which lets you approach the matchup with more freedom. You often have several ways to pressure them and force trades that go in your favor. Use this advantage to dictate the pace rather than giving them time to get back into a comfortable position.
dodge skillshotssustain warMel's massive range advantage dictates this matchup. Because Toxic Shot requires Teemo to step into auto-attack range, Mel can easily intercept him with Solar Snare before he can even land a Blinding Dart. This forces Teemo to constantly burn Move Quick defensively to dodge Radiant Volley, leaving him unable to trade effectively while Mel continuously stacks Searing Brilliance from absolute safety.Teemo build →See details
Teemo
The interaction that decides it
Mel's superior spell range allows her to poke Teemo down from safety, forcing Teemo to rely on Move Quick to dodge her skillshots.
Why
Mel's massive range advantage dictates this matchup. Because Toxic Shot requires Teemo to step into auto-attack range, Mel can easily intercept him with Solar Snare before he can even land a Blinding Dart. This forces Teemo to constantly burn Move Quick defensively to dodge Radiant Volley, leaving him unable to trade effectively while Mel continuously stacks Searing Brilliance from absolute safety.
Lane impact
This range asymmetry warps the early lane. Teemo cannot contest the wave without taking massive poke from Radiant Volley, which keeps him pinned under his turret. His attempts to use Guerrilla Warfare for surprise trades are nullified because Mel can safely check bushes with her long-range area spells. Consequently, Teemo's health is slowly chipped away, ruining his roam timings and neutralizing his map pressure.
How to play
To execute this lane perfectly, stay well behind your caster minions, out of Teemo's auto-attack range. Watch for him to activate Move Quick; once his speed boost decays, immediately launch Solar Snare followed by Radiant Volley to lock him down. Save Rebuttal specifically to block Blinding Dart if he attempts to flash-engage. If you step on a Noxious Trap, immediately back off and detonate your stacks with Golden Eclipse to punish him from afar.
Mel isn’t countered just by champions, but by types of pressure. What threatens her are champions who break her tempo and ignore her zoning. Fast assassins or picks that bypass her control drastically reduce her impact. Conversely, she dominates champions reliant on linear movement or slow poke. Understanding these dynamics is key—it’s not about isolated matchups, but fight structure.
Patch context
Mel’s counters share one trait: they don’t respect her space. They engage quickly, force immediate decisions, and nullify her control. Meanwhile, the champions she dominates must advance slowly, exposing themselves to her poke and Golden Eclipse. The difference isn’t raw damage, but who dictates the fight tempo.
Quick read
Weak against fast dives.
Strong against linear mages.
Relies on defensive timing.
Counter archetypes
Burst assassins
These champions completely bypass Mel’s game. They don’t interact with her zones—they go straight onto her. Their burst reduces her ability to prepare Golden Eclipse and use Rebuttal effectively. Once engaged, Mel has no mobility or second chance.
How the champion adapts. Play further back, save Rebuttal for engage, and avoid exposure without vision.
Anti-mage scalers
These champions absorb poke phases and become uncontrollable over time. Mel can’t punish them early enough and loses control once they hit their spikes.
Fizz is dangerous because he completely ignores zoning. He waits for a Rebuttal misuse or positioning mistake to engage and kill. The matchup relies entirely on Mel’s discipline.
Common mistakes against him
Common mistakes against him
Underestimating enemy engage timings.
Using abilities offensively against assassins.
Not respecting enemy spikes.
Playing too far forward without vision.
Forcing unnecessary trades.
Coach notes
If the enemy doesn’t need to go through your zones, you’re in danger.
Your goal is to slow down fights, not speed them up.
FAQ
Why does Mel lose to Fizz?
Fizz doesn’t play the same game. He ignores zones and engages directly. If Mel misuses Rebuttal or mispositions, he can kill her instantly. The matchup is all about defensive discipline.
How to beat Kassadin as Mel?
You must accelerate the game. Kassadin becomes too strong late, so you need to play around early and mid-game objectives. If you let him scale, you lose control.
Is Mel strong against mages?
Yes, especially those relying on predictable movement. She can block key spells and punish timings with poke and Golden Eclipse.
What is her worst type of enemy?
Champions who can engage quickly without interacting with her zones. They break her tempo and make her kit ineffective.