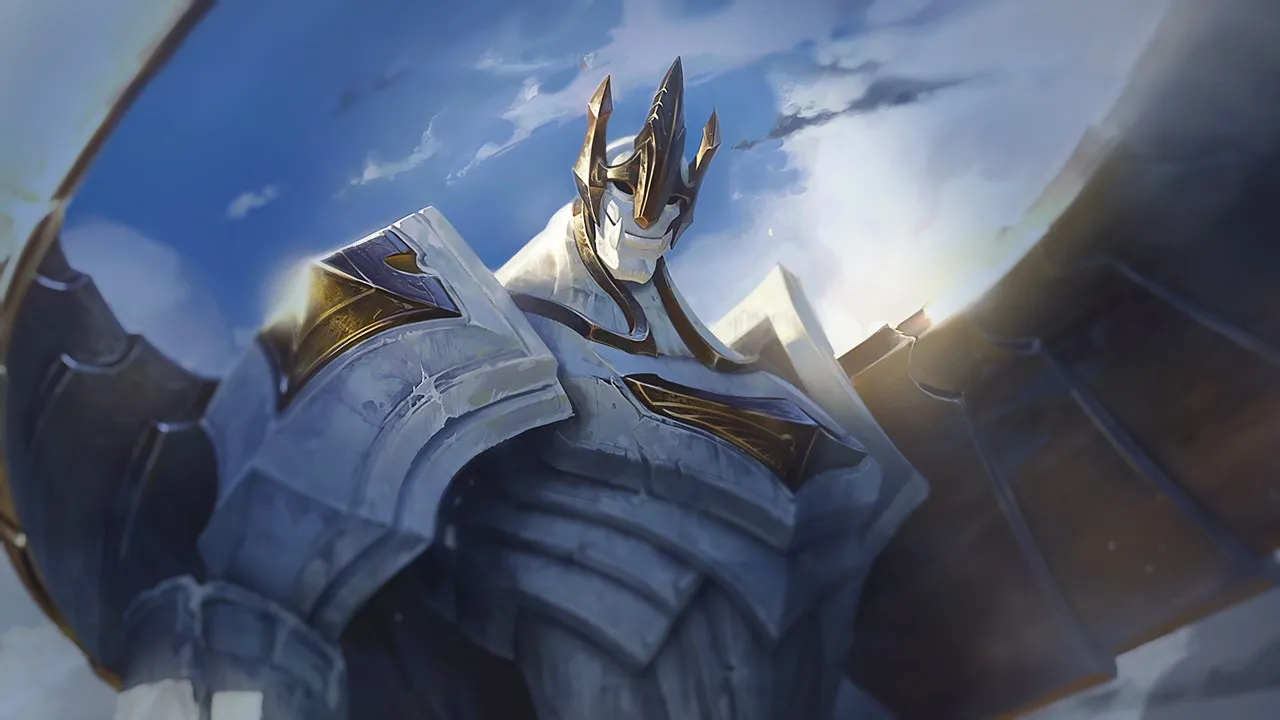
Galio, an engage-focused tank mage, struggles against compositions that maintain distance. Strategies based on poke, kiting, or sustained damage limit his impact during engagements. His effectiveness relies heavily on successfully starting fights.
★ MID · SUPPORTTier A
DMG
UTIL
TANK
DIFF
Win51.9%#24 · ↑6pt
Pick11.4%#1
Ban3.5%#44
Galio Wild Rift Counters Guide
Hard Counters
3
These champions have a build and playstyle that directly overpower yours, which can make controlling the lane and farming extremely difficult. Their kit can neutralize your core strengths or punish you the moment you try to play your usual game plan. In these matchups, the goal is often to minimize mistakes and look for ways to win outside of direct confrontation.
Physical damageMobilityThis matchup is brutal because Irelia completely neutralizes your kit. Her constant physical damage auto-attacks, amplified by Ionian Fervor, bypass the magic shield of Shield of Durand. Moreover, her Bladesurge lets her effortlessly dance through the minion wave, rendering both your Winds of War and Justice Punch highly unreliable as she can dodge them on reaction by Q-ing to a low-health minion.Irelia build →See details
Irelia
The interaction that decides it
Irelia can easily dodge Galio's abilities using Bladesurge (Q) on minions, and her physical damage auto-attacks ignore his magic shield.
Why
This matchup is brutal because Irelia completely neutralizes your kit. Her constant physical damage auto-attacks, amplified by Ionian Fervor, bypass the magic shield of Shield of Durand. Moreover, her Bladesurge lets her effortlessly dance through the minion wave, rendering both your Winds of War and Justice Punch highly unreliable as she can dodge them on reaction by Q-ing to a low-health minion.
Lane impact
You cannot contest the wave directly because every low-health allied minion is a launchpad for her Bladesurge. If you step up to use Colossal Smash or clear with Winds of War, she will dash in, stack Ionian Fervor, and shred your health bar. You are forced to surrender mid priority, meaning your Hero's Entrance is locked down as you are pinned defending your turret.
How to play
Play defensively and let the wave crash. Only use Winds of War from maximum range to secure last hits, never for trade. Keep Justice Punch strictly as a disengage tool to knock her back if she dashes in under your turret. When she misses her Flawless Duet, that is your only safe window to thin the wave. If she freezes, do not step up; wait for her to push or ping your jungler.
Physical damageMobilityGalio struggles heavily here because Yone relies on physical attacks from Way of the Hunter and physical strikes from Mortal Steel, rendering the magic shield from Shield of Durand completely useless. Furthermore, during trades, Yone can activate Soul Unbound to gain massive movement speed, allowing him to easily bait out and dodge Justice Punch before snapping back safely to his original body.Yone build →See details
Yone
The interaction that decides it
Yone's Soul Unbound (E) allows him to trade safely and dodge Galio's CC, while his physical and true damage bypasses Galio's magic shield.
Why
Galio struggles heavily here because Yone relies on physical attacks from Way of the Hunter and physical strikes from Mortal Steel, rendering the magic shield from Shield of Durand completely useless. Furthermore, during trades, Yone can activate Soul Unbound to gain massive movement speed, allowing him to easily bait out and dodge Justice Punch before snapping back safely to his original body.
Lane impact
You cannot contest the wave directly. Whenever you step up to use Colossal Smash or Winds of War, Yone can initiate with Soul Unbound and a stacked Mortal Steel tornado to shred your health. This constant threat forces you to play under your turret, losing priority and preventing you from finding windows to cast Hero's Entrance to impact the side lanes without losing your mid tower.
How to play
To survive, let the minions push to you and use Winds of War strictly to secure farm from a safe distance. Never initiate with Justice Punch unless Yone has already wasted his Soul Unbound. If he dashes forward with his spirit, immediately charge Shield of Durand defensively to mitigate his physical burst, then use Justice Punch backwards toward your tower to escape his Fate Sealed follow-up.
Physical damageEarly pressureYour passive magic shield from Shield of Durand is useless against Akshan's physical onslaught. Dirty Fighting grants him rapid physical double-attacks, while Heroic Swing allows him to swoop in and shred your health bar with physical damage. Because you must step into melee range to use Colossal Smash, Akshan can freely punish you with Avengerang and basic attacks without fearing your natural anti-mage defenses.Akshan build →See details
Akshan
The interaction that decides it
Akshan's physical damage auto-attacks and Heroic Swing (E) bypass Galio's magic shield, allowing him to bully Galio out of lane early.
Why
Your passive magic shield from Shield of Durand is useless against Akshan's physical onslaught. Dirty Fighting grants him rapid physical double-attacks, while Heroic Swing allows him to swoop in and shred your health bar with physical damage. Because you must step into melee range to use Colossal Smash, Akshan can freely punish you with Avengerang and basic attacks without fearing your natural anti-mage defenses.
Lane impact
You will constantly be pushed under your turret, bleeding health whenever you try to contest the wave. Akshan's range advantage means you cannot trade back using Winds of War without taking twice as much physical damage in return. This severe pressure forces you into early, unfavorable recalls, preventing you from ever finding a safe window to roam with Hero's Entrance.
How to play
Accept giving up early minions and use Winds of War solely to farm from a safe distance. Never use Justice Punch aggressively unless your jungler is already in the lane; instead, hold it as a disengage tool to escape if Akshan initiates with Heroic Swing. If he tries to dive you, tap Shield of Durand instantly for the brief taunt under your turret to turn the tide.
These champions have tools that generally give them the edge in a fight, without making the matchup unwinnable. They might have more range, a better ability to soak up your offense, or more ways to answer your engages. You'll need to adapt your approach and carefully pick your moments to accept a fight.
Physical damageMobilityYasuo naturally counters your defensive profile because his physical Steel Tempest and basic attacks completely bypass the magic damage shield from Shield of Durand. Furthermore, his high mobility makes landing your primary poke extremely difficult; whenever you cast Winds of War, he can easily slide out of the convergence zone by using Sweeping Blade through your minion wave, rendering your main waveclear and damage tool useless.Yasuo build →See details
Yasuo
The interaction that decides it
Yasuo can easily dodge Winds of War (Q) using Sweeping Blade (E) through minions, and his physical damage bypasses Galio's passive magic shield.
Why
Yasuo naturally counters your defensive profile because his physical Steel Tempest and basic attacks completely bypass the magic damage shield from Shield of Durand. Furthermore, his high mobility makes landing your primary poke extremely difficult; whenever you cast Winds of War, he can easily slide out of the convergence zone by using Sweeping Blade through your minion wave, rendering your main waveclear and damage tool useless.
Lane impact
Because you cannot reliably hit him with Winds of War, Yasuo will constantly push you under turret. If you try to match his push with Colossal Smash or Justice Punch, you expose yourself to extended physical trades where his Steel Tempest and Last Breath will shred your health bar. This constant pressure forces you to take bad recall timings and prevents you from finding windows to roam with Hero's Entrance.
How to play
To survive, freeze the minion wave just outside your turret's range to deny him the space needed to chain Sweeping Blade. Never initiate trades with Justice Punch; instead, hold it as an escape tool back to your tower if he dashes in. Only cast Winds of War to secure last hits from a distance, and if he catches you with Last Breath, immediately trigger Shield of Durand to absorb the physical onslaught.
CC immunityEngageMorgana completely shuts down your offensive threat because her Black Shield directly absorbs and nullifies the crowd control from your Justice Punch and Shield of Durand. Since your entire trading pattern relies on knocking enemies up and taunting them to land Winds of War, her spell shield turns your primary engage tools into useless physical dashes and empty channels, leaving you exposed to her Dark Binding.Morgana build →See details
Morgana
The interaction that decides it
Morgana's Black Shield (E) completely negates Galio's Justice Punch (E) and Shield of Durand (W) crowd control, rendering his engage useless.
Why
Morgana completely shuts down your offensive threat because her Black Shield directly absorbs and nullifies the crowd control from your Justice Punch and Shield of Durand. Since your entire trading pattern relies on knocking enemies up and taunting them to land Winds of War, her spell shield turns your primary engage tools into useless physical dashes and empty channels, leaving you exposed to her Dark Binding.
Lane impact
This interaction forces you into a defensive posture. You cannot safely step forward to trigger Colossal Smash on the wave without risking a Dark Binding into Tormented Shadow combo. Because you can't threaten her with Justice Punch, Morgana freely shoves you under turret, chipping your health and securing early priority to roam while your Hero's Entrance remains unusable due to your constant state of being pushed in.
How to play
To survive, use Winds of War from maximum range to thin the waves and match her clear. Never initiate with Justice Punch unless you see her waste Black Shield; that spell has a massive cooldown of over fifteen seconds early on. If she holds it, hold your Shield of Durand to absorb her Tormented Shadow damage rather than using it to engage. When she misses Dark Binding, immediately step forward to assert temporary zone control.
DuelingMap pressureSwain completely dominates extended engagements once he unlocks Demonic Ascension, as its constant draining nullifies your burst. If you try to lock him down with Shield of Durand, you place yourself directly in range for his maximum-damage Death's Hand. Additionally, getting caught by Nevermove allows him to trigger Ravenous Flock, pulling you in and restoring his health, making traditional trades highly inefficient.Swain build →See details
Swain
The interaction that decides it
Swain thrives in extended fights with Demonic Ascension (R), meaning Galio should avoid long trades and instead use Hero's Entrance (R) to impact other lanes.
Why
Swain completely dominates extended engagements once he unlocks Demonic Ascension, as its constant draining nullifies your burst. If you try to lock him down with Shield of Durand, you place yourself directly in range for his maximum-damage Death's Hand. Additionally, getting caught by Nevermove allows him to trigger Ravenous Flock, pulling you in and restoring his health, making traditional trades highly inefficient.
Lane impact
This matchup forces you into a defensive posture where securing minion waves with Winds of War from a distance is your safest option. You cannot contest long skirmishes in the mid lane without losing massive amounts of health to his constant poke. Consequently, you will often find yourself pushed under turret, needing to preserve your health bar so you remain healthy enough to utilize Hero's Entrance.
How to play
Focus entirely on survival and map presence. Use Winds of War and your Colossal Smash passive to shove the wave quickly, then immediately look at the minimap. The moment Swain activates Demonic Ascension, disengage immediately using Justice Punch in the opposite direction. Instead of trying to kill him, wait for your side lanes to clash and use Hero's Entrance to turn the tide of skirmishes elsewhere, leaving Swain's slow rotation speed useless.
MobilityCrowd controlVex directly counters your primary engage tool. Every time you charge forward with Justice Punch, you trigger her passive Doom 'n Gloom, marking you for bonus damage. Furthermore, if she has her fear charged, she can immediately interrupt your dash mid-air or stop your follow-up Shield of Durand taunt with a well-timed Personal Space or Mistral Bolt, leaving you completely vulnerable.Vex build →See details
Vex
The interaction that decides it
Vex's Doom 'n Gloom (P) marks Galio whenever he uses Justice Punch (E), allowing her to fear him and interrupt his engage.
Why
Vex directly counters your primary engage tool. Every time you charge forward with Justice Punch, you trigger her passive Doom 'n Gloom, marking you for bonus damage. Furthermore, if she has her fear charged, she can immediately interrupt your dash mid-air or stop your follow-up Shield of Durand taunt with a well-timed Personal Space or Mistral Bolt, leaving you completely vulnerable.
Lane impact
You cannot safely clear waves with Colossal Smash and Winds of War without getting poked down by her ranged attacks and Looming Darkness. Initiating trades is highly punishing; her instant fear disruption chunks your health bar and forces early recalls. This limits your map priority, meaning you cannot easily roam with Hero's Entrance without sacrificing your mid tower to her fast push.
How to play
Play defensively and constantly monitor Vex's passive bar. Only look for short farming trades with Winds of War from a safe distance. Never cast Justice Punch offensively while her Doom 'n Gloom fear is active. Instead, stand parallel to your minions to force her to choose between wave clearing with Mistral Bolt or poking you. If she wastes her fear on a wave, step up with Shield of Durand and save your dash to escape.
Crowd controlMobilityThe matchup is heavily dictated by how Taliyah's ground control shuts down your mobility. Whenever you attempt to engage or escape using Justice Punch, Taliyah can instantly react with Défilage tellurique. This field triggers a painful stun on your dash, completely halting your forward momentum and leaving you exposed. Because your primary engage tool is neutralized, you cannot easily force trades against her.Taliyah build →See details
Taliyah
The interaction that decides it
Taliyah's Défilage tellurique (E) stuns Galio if he tries to dash with Justice Punch (E), making it difficult for him to engage directly.
Why
The matchup is heavily dictated by how Taliyah's ground control shuts down your mobility. Whenever you attempt to engage or escape using Justice Punch, Taliyah can instantly react with Défilage tellurique. This field triggers a painful stun on your dash, completely halting your forward momentum and leaving you exposed. Because your primary engage tool is neutralized, you cannot easily force trades against her.
Lane impact
During the laning phase, this interaction forces you into a defensive posture. Taliyah will comfortably clear waves with Rafale filée and zone you from CS. If you try to step up to use Colossal Smash on the minions, she can threaten a Poussée sismique to fling you back. You will find yourself pushed under turret, losing priority and arriving late to help your jungler.
How to play
To survive this lane, you must adopt a passive positioning strategy. Never lead with Justice Punch while her Défilage tellurique is off cooldown. Instead, focus on farming from a safe distance using Winds of War. If she wastes her stone field, you have a brief window to move forward. Otherwise, hold Shield of Durand to absorb her poke, and look to match her roams using Hero's Entrance once she activates Mur de la tisseuse.
Physical damagePokeKai'Sa exploits Galio's melee profile by punishing your attempts to farm with her ranged kit. Her Void Seeker snipes you from safety, while any attempt to walk up for a melee last-hit with Colossal Smash triggers isolated physical damage from Icathian Rain. This constant barrage makes your Shield of Durand magic passive less effective since her damage profile relies heavily on physical burst and Second Skin plasma stacks.Kai'Sa build →See details
Kai'Sa
The interaction that decides it
Kai'Sa can poke Galio down with Void Seeker (W) and physical damage from Icathian Rain (Q), making it difficult for him to walk up to last-hit.
Why
Kai'Sa exploits Galio's melee profile by punishing your attempts to farm with her ranged kit. Her Void Seeker snipes you from safety, while any attempt to walk up for a melee last-hit with Colossal Smash triggers isolated physical damage from Icathian Rain. This constant barrage makes your Shield of Durand magic passive less effective since her damage profile relies heavily on physical burst and Second Skin plasma stacks.
Lane impact
Because of her poke, you will constantly find yourself pushed under turret, bleeding health whenever you try to thin the wave. This range denial prevents you from using Winds of War to contest wave priority safely. Since you cannot easily push, your ability to impact the map with Hero's Entrance is severely delayed, forcing you to choose between defending your tower plates or helping your jungler.
How to play
To survive, let the wave crash and farm safely using Winds of War from behind your minions, which blocks her Void Seeker. Never use Justice Punch forward unless her Icathian Rain is on cooldown, as she can easily kite you with Supercharge. If you get chunked below half health, abandon the turret plates to recall immediately; chasing her with Hero's Entrance to side lanes is only viable after she commits her Killer Instinct.
True damagePokeVel'Koz completely neutralizes your defensive identity because his passive true damage ignores both the magic shield and the damage reduction provided by your Shield of Durand. While Galio is built to shrug off magic burst, Vel'Koz's three-hit combos melt you regardless of your charge. This makes standing in his lane of fire incredibly dangerous, as your primary defensive tool cannot mitigate his core source of damage.Vel'Koz build →See details
Vel'Koz
The interaction that decides it
Vel'Koz's passive true damage bypasses the magic shield and damage reduction of Galio's Shield of Durand (W), making his poke extremely lethal.
Why
Vel'Koz completely neutralizes your defensive identity because his passive true damage ignores both the magic shield and the damage reduction provided by your Shield of Durand. While Galio is built to shrug off magic burst, Vel'Koz's three-hit combos melt you regardless of your charge. This makes standing in his lane of fire incredibly dangerous, as your primary defensive tool cannot mitigate his core source of damage.
Lane impact
You are forced onto the defensive from the first wave. Vel'Koz can easily zone you away from melee range, forcing you to farm passively using Winds of War and Colossal Smash under turret. If you step up to contest the wave, a single plasma split will chunk your health, leading to forced early recalls and letting him chip away at your tower. You will rarely have priority to look for Hero's Entrance plays.
How to play
To survive, adopt a diagonal positioning relative to Vel'Koz to make his geometric skillshots harder to land. Never use Justice Punch forward unless his knockup is on cooldown; instead, hold it as a lateral dodge tool to escape his plasma lines. If you get chunked, do not try to stay; yield the priority, let the wave crash, and look to assist your jungler with Hero's Entrance only when Vel'Koz is locked in place.
Physical damagePokeThe lane is tough because Varus constantly pokes you with physical damage using Piercing Arrow. Your Shield of Durand passive only grants a magic shield, which is completely useless against his physical arrows. When he charges Piercing Arrow, especially when combined with Blighted Quiver stacks, his burst is entirely physical or hybrid, leaving you without your usual defensive buffer during early trades.Varus build →See details
Varus
The interaction that decides it
Varus's physical damage poke from Piercing Arrow (Q) bypasses Galio's magic shield, forcing Galio to play defensively under tower.
Why
The lane is tough because Varus constantly pokes you with physical damage using Piercing Arrow. Your Shield of Durand passive only grants a magic shield, which is completely useless against his physical arrows. When he charges Piercing Arrow, especially when combined with Blighted Quiver stacks, his burst is entirely physical or hybrid, leaving you without your usual defensive buffer during early trades.
Lane impact
You are forced to concede early wave control and farm defensively near or under your turret. Every time you step up to use Colossal Smash or Winds of War on the minions, Varus can punish you with Hail of Arrows to slow you and guarantee a fully charged Piercing Arrow. This constant harass chips away your health, preventing you from using Hero's Entrance to help your side lanes without losing your turret.
How to play
Let the wave crash and use Winds of War to secure last hits from safety. Never initiate with Justice Punch unless Varus misses his Chain of Corruption, as he can easily root you mid-dash and retaliate. Hold your Shield of Durand to reduce incoming physical damage during his active trades rather than relying on its passive shield. If you get low, prioritize a safe recall over trying to contest his push.
Physical damagePokeJayce's physical damage poke from To the Skies! completely bypasses the magic damage shield provided by Shield of Durand, stripping away Galio's natural lane sustain. Because Transform Mercury Cannon allows Jayce to freely alternate between ranged harass and melee burst, Galio's passive defense is rendered useless against the physical onslaught of To the Skies!, leaving him vulnerable to heavy chunking before he can even attempt to close the distance.Jayce build →See details
Jayce
The interaction that decides it
Jayce's physical damage poke from To the Skies! (Q) bypasses Galio's passive magic shield, making it hard for Galio to sustain in lane.
Why
Jayce's physical damage poke from To the Skies! completely bypasses the magic damage shield provided by Shield of Durand, stripping away Galio's natural lane sustain. Because Transform Mercury Cannon allows Jayce to freely alternate between ranged harass and melee burst, Galio's passive defense is rendered useless against the physical onslaught of To the Skies!, leaving him vulnerable to heavy chunking before he can even attempt to close the distance.
Lane impact
This physical pressure forces Galio to concede early wave control, as standing near the minions invites constant ranged harass. If you try to clear waves with Winds of War, Jayce can quickly retaliate with To the Skies! and Lightning Field, forcing early recalls and threatening your turret. This restricts your ability to roam with Hero's Entrance, locking you under your own tower while trying to catch farm.
How to play
To survive, let the wave push toward you and focus on farming safely near your turret using Winds of War and Colossal Smash. Never initiate with Justice Punch unless Jayce has just wasted Thundering Blow, otherwise he will easily knock you back. If forced to trade, activate Shield of Durand solely for its active damage reduction, ignoring the useless passive shield. Once you unlock Hero's Entrance, look to impact the map rather than fighting him directly.
These matchups are above all duels of execution: both champions have credible ways to gain the upper hand. Dodging one key ability, anticipating an engage correctly, or a single positioning mistake can be enough to tip the duel one way or the other. Knowing the matchup and recognizing the right windows to act are especially important here.
PokeWave clearThis matchup is a pure battle of attrition between Orianna's ranged zone control and Galio's magic damage mitigation. While Orianna constantly repositions her ball with Command: Attack to chip your health down from safety, Shield of Durand passively absorbs a massive portion of this magic poke. Simultaneously, you can neutralize her pushing power by throwing Winds of War to clear minions from a safe distance.Orianna build →See details
Orianna
The interaction that decides it
Orianna can safely poke Galio with Command: Attack (Q), but Galio can shrug off the magic damage with Shield of Durand (W) and match her waveclear with Winds of War (Q).
Why
This matchup is a pure battle of attrition between Orianna's ranged zone control and Galio's magic damage mitigation. While Orianna constantly repositions her ball with Command: Attack to chip your health down from safety, Shield of Durand passively absorbs a massive portion of this magic poke. Simultaneously, you can neutralize her pushing power by throwing Winds of War to clear minions from a safe distance.
Lane impact
The laning phase becomes a high-tempo stalemate. Orianna cannot easily force you out of lane because your magic shield repeatedly absorbs her Command: Attack and Command: Dissonance combo. However, walking up to use Colossal Smash on minions exposes you to her basic attacks empowered by Clockwork Windup. Both mid laners end up trading waveclear, keeping pressure neutral until level 5.
How to play
Stand offset from your minion wave to force Orianna to choose between aiming Command: Attack at you or the wave. Never use Justice Punch forward unless her ball is far behind you, or she will punish your dash with Command: Shockwave on top of herself. If she plays too defensively, shove with Winds of War and look for a Hero's Entrance play to impact side lanes.
BurstCrowd controlThis matchup is a pure test of reflexes centered on Zed's ultimate. Because Zed deals physical damage, Galio's passive magic shield from Shield of Durand is useless here. However, the physical damage reduction from channeling Shield of Durand when Zed casts Death Mark, followed by an instant taunt when he reappears, completely shuts down his burst window before he can trigger Contempt for the Weak or land multiple Razor Shuriken strikes.Zed build →See details
Zed
The interaction that decides it
When Zed casts Death Mark (R), Galio can charge Shield of Durand (W) to immediately taunt Zed upon re-emergence and reduce his burst damage.
Why
This matchup is a pure test of reflexes centered on Zed's ultimate. Because Zed deals physical damage, Galio's passive magic shield from Shield of Durand is useless here. However, the physical damage reduction from channeling Shield of Durand when Zed casts Death Mark, followed by an instant taunt when he reappears, completely shuts down his burst window before he can trigger Contempt for the Weak or land multiple Razor Shuriken strikes.
Lane impact
Before level five, your Winds of War and Colossal Smash give you superior wave clear, forcing Zed to use Razor Shuriken to farm under turret. But if you waste Justice Punch aggressively, he will punish you with Living Shadow and Shadow Slash. Once ultimates are active, you cannot blindly roam with Hero's Entrance without first shoving the wave, otherwise Zed will quickly destroy your turret or follow your rotation.
How to play
Always hold Shield of Durand when Zed has Death Mark available. When he marks you, immediately start charging Shield of Durand to mitigate his initial burst, releasing it the millisecond he reappears behind you to trigger the taunt. While he is taunted, chain Justice Punch backwards to knock him up and escape his shadow's range, preventing him from landing Shadow Slash or maximizing his mark's pop damage. If you miss the taunt timing, immediately walk laterally to dodge his shurikens.
Zone controlWave clearThis neutral matchup revolves around Viktor's ability to halt your aggression. Whenever you attempt to close the distance with Justice Punch, Viktor can immediately drop Gravity Field to cancel your momentum and stun you. However, you aren't helpless; while his Hextech Ray pushes hard, your Winds of War allows you to match his waveclear perfectly, preventing him from trapping you under tower.Viktor build →See details
Viktor
The interaction that decides it
Viktor can zone Galio with Gravity Field (W) when Galio tries to engage, but Galio can match Viktor's waveclear using Winds of War (Q).
Why
This neutral matchup revolves around Viktor's ability to halt your aggression. Whenever you attempt to close the distance with Justice Punch, Viktor can immediately drop Gravity Field to cancel your momentum and stun you. However, you aren't helpless; while his Hextech Ray pushes hard, your Winds of War allows you to match his waveclear perfectly, preventing him from trapping you under tower.
Lane impact
Because direct engages are highly risky, the mid lane becomes a pure tug-of-war of wave management. Viktor will constantly seek to poke you down with Hextech Ray and trade safely using Siphon Power's shield. By matching his clear, you prevent him from securing easy recall timings or roaming, forcing a stalemate where neither champion can easily crash a wave or pressure the local turret.
How to play
To succeed, never initiate with Justice Punch unless Viktor has already wasted Gravity Field. Instead, stand parallel to the wave, using Winds of War and Colossal Smash to quickly clear the caster minions. If Viktor overextends to land Siphon Power, step back to let his shield decay, then look for a short trade. When local pressure stalls, rely on Hero's Entrance to impact side lanes rather than forcing a dry solo kill.
BurstCrowd controlThis matchup is a pure test of timing around Annie's burst potential. Her passive Pyromania dictates the flow; when she has four stacks, Galio cannot engage blindly. However, once she commits her stun, Galio can use the damage reduction from Shield of Durand to absorb her ultimate, Summon: Tibbers, and then immediately retaliate using Justice Punch to close the gap while her spell cooldowns are active.Annie build →See details
Annie
The interaction that decides it
Galio can mitigate Annie's Summon: Tibbers (R) burst with Shield of Durand (W) active damage reduction, but must respect her Pyromania (P) stun charges.
Why
This matchup is a pure test of timing around Annie's burst potential. Her passive Pyromania dictates the flow; when she has four stacks, Galio cannot engage blindly. However, once she commits her stun, Galio can use the damage reduction from Shield of Durand to absorb her ultimate, Summon: Tibbers, and then immediately retaliate using Justice Punch to close the gap while her spell cooldowns are active.
Lane impact
The lane swings back and forth based on Annie's passive bar. When Pyromania is fully charged, she will zone you, forcing you to farm passively from afar with Winds of War. If she wastes her stun on a minion using Disintegrate, the lane pressure immediately reverses, allowing you to shove the wave with Colossal Smash or force a trade before she can rebuild her passive stacks.
How to play
Watch Annie's passive indicator constantly. When she prepares Summon: Tibbers with a stun ready, hold your Shield of Durand to pre-mitigate the initial burst rather than trying to interrupt her. If she activates Molten Shield to run away, do not waste Justice Punch immediately; wait out her brief speed boost before dashing in. If you get stunned first without your shield up, disengage immediately and farm safely using Winds of War until your cooldowns recover.
PokeEngageThis matchup revolves around how Zyra uses her Garden of Thorns and Rampant Growth to neutralize your engage. Whenever you try to initiate with Justice Punch, Zyra can quickly sprout a plant in your trajectory. Because Justice Punch stops and knocks up the first target hit, colliding with a summoned plant completely cancels your dash, leaving you stranded in range of her Grasping Roots and Deadly Spines.Zyra build →See details
Zyra
The interaction that decides it
Zyra's plants from Rampant Growth (W) can block Galio's Justice Punch (E) path, preventing him from reaching her directly.
Why
This matchup revolves around how Zyra uses her Garden of Thorns and Rampant Growth to neutralize your engage. Whenever you try to initiate with Justice Punch, Zyra can quickly sprout a plant in your trajectory. Because Justice Punch stops and knocks up the first target hit, colliding with a summoned plant completely cancels your dash, leaving you stranded in range of her Grasping Roots and Deadly Spines.
Lane impact
Because of this plant blockade, you cannot easily force trades or crash waves with Colossal Smash. Zyra can comfortably sit behind her botanical wall, using Deadly Spines to safely poke you down while keeping you pushed under tower. If you blindly commit your dash, you will lose a massive chunk of health, forcing premature recalls and sacrificing your mid priority to roam with Hero's Entrance.
How to play
To bypass her plant defense, stand diagonally to the minion wave rather than directly in front of her. Wait for Zyra to waste her Grasping Roots or empty her Rampant Growth seeds before attempting a flank. If she spawns a plant to block you, immediately use Winds of War from a safe distance to clear the summon while charging Shield of Durand to absorb the ranged poke, resetting your stance until your cooldowns return.
BurstTeamfightsThis matchup is a pure test of execution centered on teamfight disruption. Kennen relies on Lightning Rush to position his devastating Slicing Maelstrom, but Galio possesses the perfect answer. By charging Shield of Durand, you can absorb the magic damage of his ultimate while taunting the yordle mid-dash, neutralizing his engage and stopping him from stacking Mark of the Storm on your allies.Kennen build →See details
Kennen
The interaction that decides it
Galio can use Shield of Durand (W) to absorb Kennen's Slicing Maelstrom (R) damage and taunt him to protect his teammates.
Why
This matchup is a pure test of execution centered on teamfight disruption. Kennen relies on Lightning Rush to position his devastating Slicing Maelstrom, but Galio possesses the perfect answer. By charging Shield of Durand, you can absorb the magic damage of his ultimate while taunting the yordle mid-dash, neutralizing his engage and stopping him from stacking Mark of the Storm on your allies.
Lane impact
During the laning phase, Kennen's ranged advantage allows him to poke you constantly with Thundering Shuriken and Electrical Surge empowered attacks. If you let him push you under tower, he will chip your health away. You must use Winds of War and Colossal Smash to match his wave clear from a safe distance, preventing him from roaming freely with his superior mobility.
How to play
Position yourself slightly behind your caster minions to make Thundering Shuriken miss, but remain close enough to your team during skirmishes to intercept Kennen's flank. Never waste Justice Punch forward if his Lightning Rush is available, as you will need it to reposition. When he activates Slicing Maelstrom, immediately charge Shield of Durand to lock him down in place, rendering his ultimate useless while your allies retreat safely.
PokeEngageThis lane is a pure contest of spacing. Karma relies on Inner Flame to constantly chip away at your health bar from a safe distance. Whenever you try to close the gap with Justice Punch, she easily nullifies your engage by using the shield and burst of movement speed from Inspire. This makes landing a clean Shield of Durand taunt incredibly difficult without setup.Karma build →See details
Karma
The interaction that decides it
Karma's Inspire (E) shield and speed boost help her dodge Galio's engage, while her Inner Flame (Q) keeps him poked down.
Why
This lane is a pure contest of spacing. Karma relies on Inner Flame to constantly chip away at your health bar from a safe distance. Whenever you try to close the gap with Justice Punch, she easily nullifies your engage by using the shield and burst of movement speed from Inspire. This makes landing a clean Shield of Durand taunt incredibly difficult without setup.
Lane impact
Karma's ranged pressure forces you to make tough decisions with your wave state. If you let her shove you under turret, she will freely harass you with Inner Flame while you try to last-hit. Conversely, pushing too hard exposes you to her Focused Resolve tether. This constant struggle for wave priority directly delays or outright prevents you from finding windows to roam using Hero's Entrance.
How to play
Avoid initiating with Justice Punch while her Inspire is available. Instead, focus on matching her waveclear from a safe distance using Winds of War and your passive Colossal Smash. If she steps forward aggressively to tether you with Focused Resolve, use that exact moment to counter-engage with Shield of Durand, as she cannot easily disengage once committed to the tether. If poked too low, yield the wave and focus on your map-wide ultimate.
Wave clearPokeThis matchup revolves entirely around zone control. Heimerdinger relies on his H-28G Evolution Turret setup to establish dominance and poke you down. However, Galio possesses a direct counter-measure: your Winds of War allows you to target and demolish his turrets from a completely safe range. By neutralizing his mechanical constructs without stepping into their firing line, you prevent him from locking you under your own tower.Heimerdinger build →See details
Heimerdinger
The interaction that decides it
Galio can use Winds of War (Q) from a safe distance to clear Heimerdinger's H-28G Evolution Turrets (Q) without taking poke.
Why
This matchup revolves entirely around zone control. Heimerdinger relies on his H-28G Evolution Turret setup to establish dominance and poke you down. However, Galio possesses a direct counter-measure: your Winds of War allows you to target and demolish his turrets from a completely safe range. By neutralizing his mechanical constructs without stepping into their firing line, you prevent him from locking you under your own tower.
Lane impact
When you successfully clear his H-28G Evolution Turret placement, the lane pressure cancels out instantly. Heimerdinger cannot easily shove the wave to crash under your turret, which preserves your health bar and keeps your Shield of Durand passive shield intact. Conversely, if you waste your Winds of War, he will quickly establish a siege, forcing you to farm under fire and exposing you to his CH-2 Electron Storm Grenade.
How to play
Never cast Winds of War randomly on the minion wave; always hold it until Heimerdinger positions an H-28G Evolution Turret, aiming to strike both the machine and the surrounding minions. When looking for an opening, never initiate with Justice Punch while his CH-2 Electron Storm Grenade is available, as he can interrupt your dash and counter-engage with UPGRADE!!!. Play patiently, clear his constructs, and look to impact other lanes with Hero's Entrance once the wave is cleared.
DuelingShieldsThis matchup is a balancing act between magical mitigation and raw sustained damage. Your Shield of Durand passively absorbs Rumble's continuous flame spouts, neutralizing his primary magic poke. However, if you linger after your initial burst, Rumble's overheat state grants him empowered physical attacks that easily bypass your magic shield. It is a battle of cooldowns where you must trade only when your defensive shield is ready.Rumble build →See details
Rumble
The interaction that decides it
While Rumble's magic damage is mitigated by Galio's Shield of Durand (W), Galio must avoid extended trades when Rumble overheats.
Why
This matchup is a balancing act between magical mitigation and raw sustained damage. Your Shield of Durand passively absorbs Rumble's continuous flame spouts, neutralizing his primary magic poke. However, if you linger after your initial burst, Rumble's overheat state grants him empowered physical attacks that easily bypass your magic shield. It is a battle of cooldowns where you must trade only when your defensive shield is ready.
Lane impact
The lane devolves into a war of attrition. You cannot easily shove Rumble under tower because his flame waves match your Winds of War and Colossal Smash clear. Short, sharp trades using Justice Punch to initiate and Shield of Durand to disengage keep your health bars even. If you misstime your engage and get caught by his overheated basic attacks, you lose priority and are forced into an early recall.
How to play
Always hold Shield of Durand until Rumble commits to his flames. When his heat bar approaches maximum, back away immediately to deny him overheated melee attacks, using Justice Punch backwards if necessary to escape his range. If you get chunked, focus on farming safely from a distance using Winds of War and prepare your Hero's Entrance to impact the side lanes rather than trying to force a solo kill against his high sustained damage.
Map pressureThis matchup is a battle of durable heavyweights where neither can easily burst the other. While Malphite relies on Granite Shield to absorb poke and Seismic Shard to harass, Galio's passive magic shield from Shield of Durand neutralizes this magic damage. Because solo kills are rare, the lane shifts to map-wide scaling, where Galio's Hero's Entrance acts as the ultimate response to counter Malphite's Unstoppable Force engages in side lane lanes.Malphite build →See details
Malphite
The interaction that decides it
Both champions have high durability, but Galio can use Hero's Entrance (R) to match or counter Malphite's Unstoppable Force (R) engages in side lanes.
Why
This matchup is a battle of durable heavyweights where neither can easily burst the other. While Malphite relies on Granite Shield to absorb poke and Seismic Shard to harass, Galio's passive magic shield from Shield of Durand neutralizes this magic damage. Because solo kills are rare, the lane shifts to map-wide scaling, where Galio's Hero's Entrance acts as the ultimate response to counter Malphite's Unstoppable Force engages in side lane lanes.
Lane impact
Laning revolves around wave clear. You hold the upper hand in push speed using Winds of War and Colossal Smash, forcing Malphite to use his mana or Ground Slam under tower. Because trading health is mostly ineffective against his Granite Shield, you should focus on clearing waves to secure roam timers. If Malphite abandons the mid lane to seek an Unstoppable Force play, you must instantly mirror his rotation.
How to play
Never waste your Hero's Entrance for raw damage; hold it exclusively to react to Malphite's rotations. When he disappears from vision, position yourself near the river so your ultimate range covers your side lanes. If he surprises you with an Unstoppable Force engage directly on your head, channel Shield of Durand immediately to absorb his burst, then use Justice Punch to disengage safely toward your tower while your team counter-attacks.
Wave clearEngageZilean's Chronoshift directly neutralizes your high-burst dive potential. If you commit with Justice Punch and Shield of Durand, he can easily resurrect his target, wasting your heavy cooldowns. However, Zilean's early wave clear is slow and reliant on double Time Bomb setups, whereas your Winds of War combined with Colossal Smash allows you to clear waves instantly, creating an intense tempo battle where your roaming speed clashes with his anti-engage ultimate.Zilean build →See details
Zilean
The interaction that decides it
Zilean can use Chronoshift (R) to negate Galio's burst-heavy engage, but Galio can easily out-shove him and roam early.
Why
Zilean's Chronoshift directly neutralizes your high-burst dive potential. If you commit with Justice Punch and Shield of Durand, he can easily resurrect his target, wasting your heavy cooldowns. However, Zilean's early wave clear is slow and reliant on double Time Bomb setups, whereas your Winds of War combined with Colossal Smash allows you to clear waves instantly, creating an intense tempo battle where your roaming speed clashes with his anti-engage ultimate.
Lane impact
Because Zilean struggles to match your wave clear without draining his mana on Time Bomb and Twisted Timeflow, you can easily secure mid-lane priority. He will try to slow you down with Temporal Mirage to prevent you from leaving. This means you can establish early map pressure and execute rotations before he can even clear the wave, turning the lane into a race where you trade direct confrontation for side-lane map control.
How to play
Do not waste your full combo on Zilean if his Chronoshift is available; instead, use Winds of War and Colossal Smash to shove the wave instantly. Once the minions are under his turret, immediately walk out of vision to threaten a roam. If he attempts to follow, ambush him in the river with Justice Punch before he can react with Temporal Mirage. If a dive is necessary, bait his ultimate with a partial engage before committing your crowd control.
Map pressureWave clearThis matchup is a pure race across the map. Talon wants to bypass lane interaction entirely, jumping over walls with Assassin's Path to terrorize your sidelanes. As Galio, you cannot follow him wall-for-wall, but your Winds of War clears waves fast enough to punish his absence. When he commits to a dive, your Hero's Entrance allows you to crash down directly on his target, turning his flank into a trap.Talon build →See details
Talon
The interaction that decides it
Talon will look to roam with Assassin's Path (E), which Galio can punish by shoving waves and matching with Hero's Entrance (R).
Why
This matchup is a pure race across the map. Talon wants to bypass lane interaction entirely, jumping over walls with Assassin's Path to terrorize your sidelanes. As Galio, you cannot follow him wall-for-wall, but your Winds of War clears waves fast enough to punish his absence. When he commits to a dive, your Hero's Entrance allows you to crash down directly on his target, turning his flank into a trap.
Lane impact
You will rarely fight to the death in mid. Talon uses Rake to quickly thin waves before disappearing into the fog. If you slow-push, you hand him a free map rotation. You must force him to stay by aggressively shoving with Colossal Smash and Winds of War. This forces him to choose between losing gold under turret or staying in a lane where your Shield of Durand negates his burst.
How to play
Never chase Talon through the jungle; Assassin's Path makes it a bait. Instead, stand near the center of the lane so you can quickly clear with Winds of War. Hold your Justice Punch to escape if he jumps on you with Noxian Diplomacy, or use it to lock him down if he missteps under your tower. If he vanishes, immediately ping your sidelanes, shove the wave, and position yourself to launch Hero's Entrance the moment his Shadow Assault ring appears on an ally.
Wave clearMap pressureThis matchup is a race against the clock. While Kassadin's late-game scaling is superior, his early waveclear is atrocious. Before he unlocks Riftwalk at level five, you hold a massive priority window. By using Winds of War and Colossal Smash, you can shove him under tower effortlessly, using this tempo to impact side lanes with Hero's Entrance while he is trapped farming with Nether Blade.Kassadin build →See details
Kassadin
The interaction that decides it
While Kassadin outscales Galio, Galio can abuse his early waveclear with Winds of War (Q) to roam with Hero's Entrance (R) before Kassadin reaches level 5.
Why
This matchup is a race against the clock. While Kassadin's late-game scaling is superior, his early waveclear is atrocious. Before he unlocks Riftwalk at level five, you hold a massive priority window. By using Winds of War and Colossal Smash, you can shove him under tower effortlessly, using this tempo to impact side lanes with Hero's Entrance while he is trapped farming with Nether Blade.
Lane impact
The early laning phase is entirely in your hands. Kassadin's weak early push forces him to use Nether Blade and Force Pulse defensively to secure minions. This minimizes his poke on you, keeping your health pool high. However, if you fail to convert this early pressure into side-lane advantages before he gets his ultimate, his scaling will quickly turn the mid-lane into an uphill battle.
How to play
Constantly pressure the first three waves using Winds of War to keep Kassadin pinned. Once you reach level five, immediately pan your camera to side lanes to find a Hero's Entrance opportunity. If he attempts to interrupt your roam or follow, use Justice Punch to knock him back, followed by Shield of Durand to lock him down. If no roam is available, focus on denying him Null Sphere shields by baiting his casts.
PokeCrowd controlThis matchup centers on how you handle Zoe's crowd control. While her ranged basic attacks empowered by More Sparkles! harass you, her main threat is Sleepy Trouble Bubble. The lane remains even because of a specific defensive interaction: when you are hit by her bubble, you can immediately channel Shield of Durand. This active damage reduction remains active while you are asleep, absorbing the brunt of her incoming Paddle Star!.Zoe build →See details
Zoe
The interaction that decides it
If hit by Sleepy Trouble Bubble (E), Galio can pre-charge Shield of Durand (W) to reduce the incoming damage from Paddle Star! (Q) while asleep.
Why
This matchup centers on how you handle Zoe's crowd control. While her ranged basic attacks empowered by More Sparkles! harass you, her main threat is Sleepy Trouble Bubble. The lane remains even because of a specific defensive interaction: when you are hit by her bubble, you can immediately channel Shield of Durand. This active damage reduction remains active while you are asleep, absorbing the brunt of her incoming Paddle Star!.
Lane impact
Zoe's ability to fish for Sleepy Trouble Bubble through mid-lane walls forces you into a defensive posture. You cannot blindly rush her with Justice Punch, as she will easily counter-engage. Instead, the lane becomes a push war. By using Winds of War and Colossal Smash to match her wave clear, you prevent her from securing the priority needed to roam or collect active spells with Spell Thief.
How to play
To survive Zoe's poke, position yourself away from the side walls to limit her Sleepy Trouble Bubble angles. Keep minion waves between you to block her bubble, but stay slightly to the side to avoid the splash radius of Paddle Star!. If the bubble connects, do not panic: immediately hold down Shield of Durand before the sleep kicks in. This mitigates her burst, allowing you to counter-attack with Justice Punch once you wake up.
These champions generally struggle to answer your main strengths, which lets you approach the matchup with more freedom. You often have several ways to pressure them and force trades that go in your favor. Use this advantage to dictate the pace rather than giving them time to get back into a comfortable position.
ShieldsMap pressureGalio excels here because the passive magic shield from Shield of Durand completely neutralizes Ryze's early poke pattern. When Ryze attempts to trade using Spell Flux and Overload, your shield absorbs the brunt of the magic damage. Since Ryze lacks physical damage, he cannot break this defense easily, leaving you healthy enough to ignore his pressure and prepare high-impact map plays with Hero's Entrance.Ryze build →See details
Ryze
The interaction that decides it
Galio's Shield of Durand (W) passive magic shield absorbs Ryze's Spell Flux (E) and Overload (Q) poke, allowing Galio to look for roam opportunities with Hero's Entrance (R).
Why
Galio excels here because the passive magic shield from Shield of Durand completely neutralizes Ryze's early poke pattern. When Ryze attempts to trade using Spell Flux and Overload, your shield absorbs the brunt of the magic damage. Since Ryze lacks physical damage, he cannot break this defense easily, leaving you healthy enough to ignore his pressure and prepare high-impact map plays with Hero's Entrance.
Lane impact
Ryze must constantly burn his mana pool using Spell Flux and Overload to match your wave clear, but your passive Colossal Smash and Winds of War push faster without costing your health pool. Because his poke fails to chip you down, you dictate the recall timings. You can easily shove the wave under his turret, forcing him to choose between matching your roam or farming, granting you total map priority.
How to play
Walk up confidently into the minion wave to trigger Colossal Smash and Winds of War. Hold Justice Punch to escape if Ryze tries to lock you down with Rune Prison. Once you push him under tower, back off into the river fog of war. The moment Ryze is forced to clear the wave, look at the minimap and activate Hero's Entrance to dive the side lanes, turning your lane safety into an map-wide lead before he can scale.
BurstEngageGalio dominates this matchup because Brand relies heavily on landing his delayed Pillar of Flame to set up his explosive combos. By reacting quickly, you can use the backward dash of Justice Punch to slide out of the targeted circle while simultaneously surging forward to close the gap. This swift engage locks Brand down before he can chain Sear or Conflagration to trigger his explosive Blaze passive.Brand build →See details
Brand
The interaction that decides it
Galio can use Justice Punch (E) to dodge Brand's Pillar of Flame (W) and immediately close the gap to lock him down before he can trigger Blaze (P).
Why
Galio dominates this matchup because Brand relies heavily on landing his delayed Pillar of Flame to set up his explosive combos. By reacting quickly, you can use the backward dash of Justice Punch to slide out of the targeted circle while simultaneously surging forward to close the gap. This swift engage locks Brand down before he can chain Sear or Conflagration to trigger his explosive Blaze passive.
Lane impact
Brand's constant urge to push with Pillar of Flame creates constant threat. Every time he misses this key ability, he is left completely vulnerable to your all-in. Because you easily shrug off his minor poke with Shield of Durand's passive magic shield, you can dictate trade health-bars. This pressure forces him to play defensively, preventing him from roaming with his high damage or safely clearing waves under his own turret.
How to play
Position yourself slightly to the side of your minion wave to force Brand to choose between harassing you or pushing. Keep your finger ready on Justice Punch; the moment you see the ground glow for Pillar of Flame, dash forward. If you get caught or miss, immediately hold Shield of Durand to absorb the incoming Sear stun and mitigate the Blaze explosion damage, then back off until your mobility cooldowns recover.
BurstCrowd controlGalio holds a massive advantage here because his passive magic shield from Shield of Durand naturally absorbs Lissandra's Ice Shard poke and burst. Furthermore, Lissandra’s main engagement tool, Glacial Path, is highly predictable. If she attempts to teleport to her claw, a well-timed Justice Punch will knock her up mid-dash, instantly shutting down her escape or her setup for Ring of Frost.Lissandra build →See details
Lissandra
The interaction that decides it
Galio's Shield of Durand (W) magic shield absorbs Lissandra's burst, and he can interrupt her Glacial Path (E) engage with a well-timed Justice Punch (E).
Why
Galio holds a massive advantage here because his passive magic shield from Shield of Durand naturally absorbs Lissandra's Ice Shard poke and burst. Furthermore, Lissandra’s main engagement tool, Glacial Path, is highly predictable. If she attempts to teleport to her claw, a well-timed Justice Punch will knock her up mid-dash, instantly shutting down her escape or her setup for Ring of Frost.
Lane impact
This interaction strips Lissandra of her lane dominance. Since her burst is mitigated by Shield of Durand, you can safely match her push by clearing minions with Winds of War and Colossal Smash. Lissandra cannot step up to pressure your tower or deny your gold because using Glacial Path offensively risks an immediate knock-up, forcing her to play defensively and bleed mana trying to clear waves.
How to play
Never waste Justice Punch to initiate trades blindly. Instead, hold it as a counter-engage tool. When you see her launch Glacial Path, immediately begin charging Shield of Durand to absorb her Ring of Frost. As soon as she teleports to her claw, unleash Justice Punch directly into her path to knock her up. If she plays extremely safe and hugs her tower, use Winds of War to push, then look for Hero's Entrance opportunities elsewhere.
BurstEngageSyndra relies on her explosive burst to dominate mid, but your kit is her direct counter. The passive magic shield and active damage reduction of Shield of Durand completely neutralize her ultimate, Unleashed Power. Even if she setups multiple spheres with Dark Sphere and launches them with Force of Will, holding your Shield of Durand during her ultimate animation ensures you absorb her entire burst, leaving her completely defenseless.Syndra build →See details
Syndra
The interaction that decides it
Galio's Shield of Durand (W) magic shield and damage reduction heavily mitigate Syndra's Unleashed Power (R) burst, allowing him to survive her full combo.
Why
Syndra relies on her explosive burst to dominate mid, but your kit is her direct counter. The passive magic shield and active damage reduction of Shield of Durand completely neutralize her ultimate, Unleashed Power. Even if she setups multiple spheres with Dark Sphere and launches them with Force of Will, holding your Shield of Durand during her ultimate animation ensures you absorb her entire burst, leaving her completely defenseless.
Lane impact
This interaction completely shifts the lane pressure in your favor. Because Syndra cannot threaten to execute you with Unleashed Power, she loses her lane-bully status. You can comfortably match her wave clear using Winds of War. Whenever she mispositions or wastes Scatter the Weak, she has no way to stop your engage, forcing her to play safely under her tower and giving you free roam priority.
How to play
Play aggressively whenever your Shield of Durand is available. Bait out her Scatter the Weak by walking forward, then immediately punish her with Justice Punch and Colossal Smash once her knockback is on cooldown. Never channel Shield of Durand prematurely; hold it specifically to react to her Unleashed Power casting animation. If she plays too far back to engage, use Winds of War to shove the wave and look for Hero's Entrance plays.
PokeMap pressureZiggs relies on keeping you at bay by bouncing his Bouncing Bomb and using Short Fuse to chip your health. However, his poke cannot pin you down. With Winds of War, you can safely obliterate minions from a distance, neutralizing his wave clear. Once you unlock Hero's Entrance, you bypass his long-range defense entirely, converting your lane priority into instant map pressure that his immobile kit cannot match.Ziggs build →See details
Ziggs
The interaction that decides it
While Ziggs can poke from afar with Bouncing Bomb (Q), Galio can easily clear waves with Winds of War (Q) and use Hero's Entrance (R) to impact the map.
Why
Ziggs relies on keeping you at bay by bouncing his Bouncing Bomb and using Short Fuse to chip your health. However, his poke cannot pin you down. With Winds of War, you can safely obliterate minions from a distance, neutralizing his wave clear. Once you unlock Hero's Entrance, you bypass his long-range defense entirely, converting your lane priority into instant map pressure that his immobile kit cannot match.
Lane impact
This matchup quickly turns into a battle of wave clearance. While Ziggs hopes to push you in to execute your tower with Satchel Charge, your fast clear prevents him from ever getting that chip damage. You dictate the recall and roam timings. By shoving the wave instantly, you create huge windows to disappear into the fog of war, forcing Ziggs to play defensively under his own tower.
How to play
Position yourself away from your minion wave to force Ziggs to choose between hitting you or clearing with Bouncing Bomb. If he misses, immediately use Winds of War on the wave. When your side lanes clash, step back into the fog of war. The moment an ally is engaged, trigger Hero's Entrance to dive into the fight. If Ziggs tries to stop your recall with Mega Inferno Bomb, use Shield of Durand to shrug off the damage.
BurstCrowd controlThis lane is heavily in your favor because Galio’s kit naturally dismantles Veigar's burst threat. The passive magic shield from Shield of Durand, combined with its active damage reduction, acts as a perfect counter to Primordial Burst. Furthermore, if you react quickly during the brief activation delay of Event Horizon, the forward dash of Justice Punch can cross the boundary before the stun walls actually materialize, leaving Veigar defenseless.Veigar build →See details
Veigar
The interaction that decides it
Galio can use Shield of Durand (W) to absorb Veigar's Primordial Burst (R) damage, and his Justice Punch (E) can sometimes bypass Event Horizon (E) if timed during the delay.
Why
This lane is heavily in your favor because Galio’s kit naturally dismantles Veigar's burst threat. The passive magic shield from Shield of Durand, combined with its active damage reduction, acts as a perfect counter to Primordial Burst. Furthermore, if you react quickly during the brief activation delay of Event Horizon, the forward dash of Justice Punch can cross the boundary before the stun walls actually materialize, leaving Veigar defenseless.
Lane impact
Veigar’s inability to threaten you with a quick kill strips away his lane pressure. You can easily shove the waves using Winds of War paired with Colossal Smash, forcing him to farm under turret. This prevents him from freely stacking Phenomenal Evil Power on you. Consequently, you gain permanent mid priority, allowing you to freely look for map-wide plays using Hero's Entrance while Veigar remains glued to his tower.
How to play
Position yourself aggressively just inside Veigar's attack range to bait out Event Horizon. The moment you see him cast it, immediately trigger Justice Punch to dash through the perimeter before the walls arm. If you get caught inside, do not panic; hold Shield of Durand to absorb the incoming Dark Matter and Primordial Burst damage. Once his cage expires, unleash your full combo to punish his lack of mobility.
Crowd controlBurstGalio naturally shuts down Ahri's assassination attempts because his magic damage shield and the active damage reduction from Shield of Durand completely negate her burst when she lands Charm. Even when she attempts to dance around fights with Spirit Rush, the wide hitbox of Justice Punch and the threat of your taunt shut down her slippery dashes, turning her aggressive mobility into a predictable trajectory you can easily punish.Ahri build →See details
Ahri
The interaction that decides it
Galio can absorb Ahri's Charm (E) combo with Shield of Durand (W) damage reduction, and lock her down with Justice Punch (E) when she dashes with Spirit Rush (R).
Why
Galio naturally shuts down Ahri's assassination attempts because his magic damage shield and the active damage reduction from Shield of Durand completely negate her burst when she lands Charm. Even when she attempts to dance around fights with Spirit Rush, the wide hitbox of Justice Punch and the threat of your taunt shut down her slippery dashes, turning her aggressive mobility into a predictable trajectory you can easily punish.
Lane impact
This dynamic prevents Ahri from zoning you. You can easily match her Orb of Deception waveclear using Winds of War and Colossal Smash without fearing her poke. Since she cannot kill you solo, she is forced to abandon the lane to look for roams, which plays directly into your hands as you can match her map pressure instantly with Hero's Entrance.
How to play
Keep a constant eye on her Charm cooldown; never initiate with Justice Punch while it is up unless you can buffer Shield of Durand to absorb the incoming crowd control and damage. When she activates Spirit Rush to dash forward, immediately charge your taunt to intercept her landing zone, then follow up with Winds of War and a heavy Colossal Smash to win the trade decisively while her main damage tools are exhausted.
PokeEngageGalio's Shield of Durand naturally generates a magic damage shield that absorbs Lux's main poke tool, Lucent Singularity, neutralizing her early lane pressure. Because Lux relies on bursting targets down after landing Light Binding, Galio's innate magic damage reduction and shield make her burst combo highly ineffective. This safety allows Galio to actively fish for engages with Justice Punch whenever she wastes her root.Lux build →See details
Lux
The interaction that decides it
Galio can absorb Lux's Lucent Singularity (E) poke with his passive magic shield and look to engage with Justice Punch (E) if she misses Light Binding (Q).
Why
Galio's Shield of Durand naturally generates a magic damage shield that absorbs Lux's main poke tool, Lucent Singularity, neutralizing her early lane pressure. Because Lux relies on bursting targets down after landing Light Binding, Galio's innate magic damage reduction and shield make her burst combo highly ineffective. This safety allows Galio to actively fish for engages with Justice Punch whenever she wastes her root.
Lane impact
Since Lucent Singularity fails to chip away your health, Lux is forced to use her mana clearing waves rather than harassing you. This grants you easy wave control with Colossal Smash and Winds of War. If Lux steps up to use Prismatic Barrier defensively, she loses the priority needed to help her jungler, leaving you free to impact side lanes with Hero's Entrance while she remains stuck under her tower.
How to play
Stand slightly off-center from your minion wave to force Lux to choose between hitting you or pushing with Lucent Singularity. Keep walking forward aggressively to bait out her Light Binding. The moment her binding misses or is blocked by minions, immediately charge in with Justice Punch, follow up with Colossal Smash, and taunt her with Shield of Durand before she can retreat. If you miss your knockup, immediately back off and let your passive shield regenerate.
Map pressureScalingVladimir's Crimson Pact and Transfusion make him a scaling threat, but he lacks early wave pressure and map mobility. Galio can ignore his passive lane sustain because Winds of War clears waves effortlessly. Once Galio unlocks Hero's Entrance, the map dynamic shifts completely. Vladimir cannot match this semi-global presence with Sanguine Pool or Tides of Blood, leaving his sidelanes completely vulnerable while he slowly gathers AP and health.Vladimir build →See details
Vladimir
The interaction that decides it
Vladimir cannot match Galio's map pressure with Hero's Entrance (R), allowing Galio to impact side lanes while Vladimir slowly scales.
Why
Vladimir's Crimson Pact and Transfusion make him a scaling threat, but he lacks early wave pressure and map mobility. Galio can ignore his passive lane sustain because Winds of War clears waves effortlessly. Once Galio unlocks Hero's Entrance, the map dynamic shifts completely. Vladimir cannot match this semi-global presence with Sanguine Pool or Tides of Blood, leaving his sidelanes completely vulnerable while he slowly gathers AP and health.
Lane impact
This matchup is a race against the clock where you set the pace. By using Colossal Smash and Winds of War to shove Vladimir under tower, you force him to use Tides of Blood to clear, which costs him health. Vladimir cannot trade back effectively if you use Shield of Durand to absorb Transfusion harass. This creates guaranteed roam windows before Vladimir can scale.
How to play
Clear waves immediately with Winds of War and Colossal Smash, then disappear into the fog. Do not waste Justice Punch trying to engage Vladimir directly, as he can easily dodge the knockup with Sanguine Pool. Instead, hold your mobility. Keep your eyes on the minimap: the moment a skirmish erupts, channel Hero's Entrance to turn the tide. If Vladimir tries to follow on foot, his lack of mobility means his Hemoplague will arrive far too late.
Crowd controlStealthGalio naturally shuts down Akali's assassination attempts because her main defensive tool, Twilight Shroud, is completely countered by your Shield of Durand. When she hides in her smoke to stall or prepare Assassin's Mark procs, the massive area-of-effect taunt forces her to reveal herself and attack you, stripping away her safety. This completely disrupts her rhythm and turns her stealth zone into a trap.Akali build →See details
Akali
The interaction that decides it
Galio can use the wide area of Shield of Durand (W) to taunt Akali even while she is hidden inside her Twilight Shroud (W).
Why
Galio naturally shuts down Akali's assassination attempts because her main defensive tool, Twilight Shroud, is completely countered by your Shield of Durand. When she hides in her smoke to stall or prepare Assassin's Mark procs, the massive area-of-effect taunt forces her to reveal herself and attack you, stripping away her safety. This completely disrupts her rhythm and turns her stealth zone into a trap.
Lane impact
Because Akali cannot safely use her shroud to reset trades, she is forced to play passively behind her minions. You can easily shove the wave using Winds of War and Colossal Smash without fear of her retaliating with Five Point Strike. This constant priority allows you to look for Hero's Entrance plays on the side lanes while she is stuck clearing under her tower, bleeding gold.
How to play
Never initiate with Justice Punch if Akali has Shuriken Flip available, as she can easily dodge and tag you. Instead, walk up and hold your Shield of Durand. Wait for her to drop Twilight Shroud, then immediately charge and release your taunt inside the smoke. Once she is forced to reveal herself, hit her with a guaranteed Winds of War and Colossal Smash combo, then use Justice Punch to knock her up as she tries to retreat.
Crowd controlEngageGalio naturally neutralizes Diana's aggressive dive patterns. When Diana attempts to initiate her burst combo by casting Crescent Strike and dashing in with Lunar Rush, she plays directly into your hands. You can immediately channel Shield of Durand to absorb her magic damage and taunt her. This prompt disruption completely ruins her Moonfall setup, leaving her vulnerable and unable to escape.Diana build →See details
Diana
The interaction that decides it
When Diana dives in with Lunar Rush (E), Galio can immediately counter-engage with Shield of Durand (W) to disrupt her Moonfall (R) setup.
Why
Galio naturally neutralizes Diana's aggressive dive patterns. When Diana attempts to initiate her burst combo by casting Crescent Strike and dashing in with Lunar Rush, she plays directly into your hands. You can immediately channel Shield of Durand to absorb her magic damage and taunt her. This prompt disruption completely ruins her Moonfall setup, leaving her vulnerable and unable to escape.
Lane impact
This matchup advantage prevents Diana from zoning you or pushing safely. Because she cannot use Lunar Rush without risking a disastrous counter-engage, you hold complete control over wave states. You can freely clear minions with Winds of War and Colossal Smash. If she steps up to trigger Moonsilver Blade on the wave, she risks taking a heavy trade you will always win.
How to play
Never initiate trades with Shield of Durand ; always hold this ability as your primary defensive counter-measure. Wait for Diana to throw her Crescent Strike. If she follows the mark with Lunar Rush, instantly tap-cast or short-charge Shield of Durand to lock her down under your minions, then chain Justice Punch and Winds of War to chunk her health. If she plays passively, use Hero's Entrance to impact other lanes before she can push.
PokeEngageTeemo thrives on suffocating melee champions with his Toxic Shot poison, but your Shield of Durand passive magic shield completely neutralizes this damage over time. Because Teemo has no real dashes to escape, any attempt he makes to poke you leaves him incredibly vulnerable. Once he steps forward, he cannot outrun your Justice Punch and Shield of Durand crowd control chain, making him an easy target to lock down.Teemo build →See details
Teemo
The interaction that decides it
Teemo's Toxic Shot (P) poke is largely absorbed by Galio's Shield of Durand (W) passive shield, and Teemo lacks the mobility to escape Galio's E-W combo.
Why
Teemo thrives on suffocating melee champions with his Toxic Shot poison, but your Shield of Durand passive magic shield completely neutralizes this damage over time. Because Teemo has no real dashes to escape, any attempt he makes to poke you leaves him incredibly vulnerable. Once he steps forward, he cannot outrun your Justice Punch and Shield of Durand crowd control chain, making him an easy target to lock down.
Lane impact
This matchup completely flips the usual ranged-versus-melee dynamic. You can ignore Teemo's Blinding Dart because your main damage comes from Winds of War and the area-of-effect slam of Colossal Smash rather than basic attacks. You will constantly hold wave priority, forcing Teemo under his turret where he struggles to farm, while preventing him from safely littering the lane with his invisible Noxious Trap mushrooms.
How to play
Walk up confidently and bait Teemo into activating his Move Quick speed boost. Once that temporary mobility expires, strike immediately by aiming your Justice Punch directly at him during his basic attack animation, following up with Winds of War and a quick Shield of Durand taunt. If you miss your knockup, do not chase him into potential Noxious Trap spots; instead, fall back until your passive magic shield regenerates before trying again.
Crowd controlBurstIn this matchup, Galio acts as a direct counter to Ekko's skirmishing kit. Because Ekko relies on Phase Dive to close the distance and trigger Z-Drive Resonance, he constantly enters your melee threat zone. The defining factor is your ability to hold Shield of Durand to taunt him when he is low, completely preventing him from activating Chronobreak to escape and heal.Ekko build →See details
Ekko
The interaction that decides it
Galio can taunt Ekko with Shield of Durand (W) to prevent him from using Chronobreak (R) when he is low on health.
Why
In this matchup, Galio acts as a direct counter to Ekko's skirmishing kit. Because Ekko relies on Phase Dive to close the distance and trigger Z-Drive Resonance, he constantly enters your melee threat zone. The defining factor is your ability to hold Shield of Durand to taunt him when he is low, completely preventing him from activating Chronobreak to escape and heal.
Lane impact
During the laning phase, Ekko cannot safely trade because his entry patterns are highly predictable. If he steps up to throw Timewinder, you can punish him with Justice Punch into a heavy Colossal Smash trade. Keeping him pushed under his turret with Winds of War prevents him from roaming, neutralising his map pressure while securing your priority for neutral skirmishes.
How to play
Save your Shield of Durand specifically for the execution phase of the fight. Never waste it on minion waves; instead, initiate with Justice Punch and Winds of War, then charge your taunt only when Ekko's health drops low enough that he wants to Chronobreak. If you see him cast Parallel Convergence, use Justice Punch to dash out of the zone before it triggers. If he avoids your engage, retreat behind your minions and use Colossal Smash to block his counter-engage.
Crowd controlWave clearAurelion Sol relies heavily on channeling Breath of Light to secure his Cosmic Creator stacks and melt minion waves. Since he must remain stationary during this channel, he is extremely vulnerable to your crowd control. You can easily disrupt his main source of damage and waveclear by knocking him up with Justice Punch or taunting him with Shield of Durand, completely shutting down his early game scaling engine.Aurelion Sol build →See details
Aurelion Sol
The interaction that decides it
Galio can interrupt Aurelion Sol's Breath of Light (Q) channel using Justice Punch (E) or Shield of Durand (W), disrupting his waveclear.
Why
Aurelion Sol relies heavily on channeling Breath of Light to secure his Cosmic Creator stacks and melt minion waves. Since he must remain stationary during this channel, he is extremely vulnerable to your crowd control. You can easily disrupt his main source of damage and waveclear by knocking him up with Justice Punch or taunting him with Shield of Durand, completely shutting down his early game scaling engine.
Lane impact
By constantly interrupting his Breath of Light, you deny Aurelion Sol the ability to shove waves effectively. This allows you to clear the lane quickly using Winds of War and your passive Colossal Smash. Having permanent priority means you can easily disappear from the mid lane to look for side lane ganks, using Hero's Entrance to join skirmishes before he can slowly fly over with Astral Flight.
How to play
Position yourself aggressively parallel to the minion wave. Do not waste Justice Punch to clear minions; instead, hold it until Aurelion Sol starts channeling Breath of Light. If he drops Singularity to zone you, walk around it and use Justice Punch to close the gap, or flash-taunt with Shield of Durand. Once he is forced to retreat, immediately push the wave and look at your minimap to launch Hero's Entrance toward active side lane fights.
Wave clearMap pressureKayle starts the match as a weak melee unit heavily restricted by Divine Ascent levels. Her early Starfire Spellblade and Radiant Blast cannot match your wave clear or threaten you. This disparity allows you to freely deploy Winds of War to instantly obliterate minion waves. Since she cannot contest the push without risking her health, you secure uncontested priority to prepare your Hero's Entrance rotations.Kayle build →See details
Kayle
The interaction that decides it
Kayle's weak early game allows Galio to shove waves easily with Winds of War (Q) and use Hero's Entrance (R) to snowball other lanes before she scales.
Why
Kayle starts the match as a weak melee unit heavily restricted by Divine Ascent levels. Her early Starfire Spellblade and Radiant Blast cannot match your wave clear or threaten you. This disparity allows you to freely deploy Winds of War to instantly obliterate minion waves. Since she cannot contest the push without risking her health, you secure uncontested priority to prepare your Hero's Entrance rotations.
Lane impact
You will spend the first seven minutes holding absolute lane control. Kayle is forced to deplete her mana using Radiant Blast and Celestial Blessing just to safely last-hit under her turret. This keeps her perpetually pinned to her tier-one tower, completely neutralizing her ability to follow your map movements. While she slowly farms her way toward Divine Ascent spikes, your side lanes enjoy a massive numbers advantage.
How to play
Start every wave by walking up to the melee minions to trigger Colossal Smash and cast Winds of War across the entire wave. Hold Justice Punch purely as an escape tool in case her jungler intervenes. Once the wave crashes, immediately fade into the fog of war. Scan the map and activate Hero's Entrance the moment an skirmish erupts. Even if she hits level five, her defensive Divine Judgment cannot protect her distant allies from your massive impact.
ShieldsMap pressureCorki relies on Hextech Munitions to convert his basic attacks into magic damage, which directly feeds into the passive magic shield of your Shield of Durand. Because his primary poke from Phosphorus Bomb and Gatling Gun is heavily magic-based, your innate damage reduction neutralizes his ranged advantage. He cannot chip away at your health bar effectively, leaving him unable to match your wave clear or threaten you.Corki build →See details
Corki
The interaction that decides it
Since Corki deals primarily magic damage, Galio's Shield of Durand (W) passive shield is highly effective, and Galio can easily out-roam him early.
Why
Corki relies on Hextech Munitions to convert his basic attacks into magic damage, which directly feeds into the passive magic shield of your Shield of Durand. Because his primary poke from Phosphorus Bomb and Gatling Gun is heavily magic-based, your innate damage reduction neutralizes his ranged advantage. He cannot chip away at your health bar effectively, leaving him unable to match your wave clear or threaten you.
Lane impact
Since you comfortably absorb his magic harass, you can aggressively push waves with Winds of War and Colossal Smash. Corki is forced to farm under turret, burning through mana, or risk using Valkyrie defensively if you threaten a Justice Punch engage. This permanent lane priority grants you uncontested roam windows to impact side lanes before he ever receives his first Package.
How to play
Use Winds of War on the wave to force Corki to use his abilities on minions rather than on you. When you spot an opportunity, walk forward to threaten with Shield of Durand; he will likely dash away with Valkyrie, draining his mana. Keep a close eye on the map and prepare to trigger Hero's Entrance the moment Corki picks up his Package, as you can easily beat his Special Delivery rotation to any skirmish.
Crowd controlMap pressureSeraphine is extremely vulnerable to your primary engage. Lacking any dash or natural escape, she cannot avoid your Justice Punch once you commit, making her an easy target for a follow-up Shield of Durand taunt. Furthermore, your Winds of War combined with Colossal Smash allows you to obliterate minion waves much faster than her High Note can match, forcing her to stay under tower.Seraphine build →See details
Seraphine
The interaction that decides it
Seraphine lacks the mobility to escape Galio's E-W engage, and Galio can easily shove the wave to look for Hero's Entrance (R) plays.
Why
Seraphine is extremely vulnerable to your primary engage. Lacking any dash or natural escape, she cannot avoid your Justice Punch once you commit, making her an easy target for a follow-up Shield of Durand taunt. Furthermore, your Winds of War combined with Colossal Smash allows you to obliterate minion waves much faster than her High Note can match, forcing her to stay under tower.
Lane impact
This clear speed disparity completely dictates the lane's rhythm. Because Seraphine is forced to use Surround Sound and Beat Drop defensively just to survive your physical threats, she cannot contest the wave. You will consistently push her under her turret, completely freeing you to disappear into the fog of war. This constant pressure denies her any map impact while securing you priority for Hero's Entrance interventions.
How to play
Walk up aggressively whenever Seraphine wastes her Beat Drop on the wave. Position yourself parallel to her minion line to threaten a forward Justice Punch. If she tries to halt your advance with Encore, immediately charge your Shield of Durand to absorb her burst and taunt her as she approaches. If she plays incredibly safe, ignore her completely, shove with Winds of War, and immediately look at your sidelanes to trigger Hero's Entrance the moment a skirmish erupts.
Crowd controlAnti-dashThis matchup favors Galio because his crowd control completely shuts down Aurora's elusive patterns. When she attempts to slip away using Across the Veil or leap across the borders of Between Worlds, charging Shield of Durand instantly disrupts her. Since the taunt is a large area-of-effect spell, her brief stealth and teleports cannot save her from being locked down and exposed mid-flight.Aurora build →See details
Aurora
The interaction that decides it
Galio can taunt Aurora with Shield of Durand (W) when she attempts to use Across the Veil (W) or jump around with Between Worlds (R).
Why
This matchup favors Galio because his crowd control completely shuts down Aurora's elusive patterns. When she attempts to slip away using Across the Veil or leap across the borders of Between Worlds, charging Shield of Durand instantly disrupts her. Since the taunt is a large area-of-effect spell, her brief stealth and teleports cannot save her from being locked down and exposed mid-flight.
Lane impact
In practice, this dynamic cripples Aurora's laning pressure. She cannot safely fish for trades with Twofold Hex because stepping forward risks a devastating counter-engage. By fast-clearing waves using Winds of War and Colossal Smash, you force her to defend her turret. This deprives her of roaming opportunities, neutralizing her impact on the map while you secure free priority.
How to play
To secure your lead, never waste Shield of Durand to initiate randomly. Hold this ability specifically to intercept her movement paths when she activates Across the Veil or attempts to hop between the edges of Between Worlds. If she tries to disengage by pushing you away with The Weirding, immediately follow up with Justice Punch to close the gap, ensuring she cannot escape while her primary defensive tools are down.
Map pressureTwisted Fate relies on unlocking global pressure with Destiny to snowball his sidelanes, but Galio is his perfect natural predator. Because your Hero's Entrance matches his semi-global range, you can immediately follow his teleportation. Furthermore, your innate magic damage mitigation from Shield of Durand makes you highly resilient against his Pick a Card and Wild Cards poke, allowing you to survive his lane harass and mirror his map movements effortlessly.Twisted Fate build →See details
Twisted Fate
The interaction that decides it
Galio can counter Twisted Fate's Destiny (R) roams by using Hero's Entrance (R) to join the same skirmish and turn the tide.
Why
Twisted Fate relies on unlocking global pressure with Destiny to snowball his sidelanes, but Galio is his perfect natural predator. Because your Hero's Entrance matches his semi-global range, you can immediately follow his teleportation. Furthermore, your innate magic damage mitigation from Shield of Durand makes you highly resilient against his Pick a Card and Wild Cards poke, allowing you to survive his lane harass and mirror his map movements effortlessly.
Lane impact
Since Twisted Fate cannot easily kill you due to your magic shield, he will try to shove waves using Wild Cards and red cards from Pick a Card to secure recall windows. You must match this push with Winds of War and Colossal Smash to keep him pinned. If he attempts to step up to harass you with Stacked Deck active, you can punish him instantly by closing the gap.
How to play
To execute this lane perfectly, keep your eyes on the minimap as soon as Twisted Fate reaches level five. Never waste Hero's Entrance for raw skirmishing in your own lane; reserve it exclusively to counter his Destiny activations. When he locks a gold card with Pick a Card to set up a gank on you, reactively charge Shield of Durand to absorb the burst and reduce the stun's impact, then disengage with Justice Punch if his jungler is nearby.
Wave clearMap pressurePyke relies heavily on Ghostwater Dive to escape the mid lane and pressure your side lanes, but your kit completely neutralizes this threat. While he struggles immensely to clear minions, you can instantly shove the wave with Winds of War and Colossal Smash. This forces him to either lose waves to his tower or try to roam anyway, which you can easily counter by launching Hero's Entrance to protect your allies.Pyke build →See details
Pyke
The interaction that decides it
Galio can match Pyke's Ghostwater Dive (W) roams using Hero's Entrance (R), while easily clearing waves that Pyke struggles to push.
Why
Pyke relies heavily on Ghostwater Dive to escape the mid lane and pressure your side lanes, but your kit completely neutralizes this threat. While he struggles immensely to clear minions, you can instantly shove the wave with Winds of War and Colossal Smash. This forces him to either lose waves to his tower or try to roam anyway, which you can easily counter by launching Hero's Entrance to protect your allies.
Lane impact
This mismatch dictates a heavily one-sided laning phase where you dictate the map's pace. Pyke cannot match your wave clear, meaning you constantly trap him under his turret. If he attempts to trade with Bone Skewer, your Shield of Durand absorbs his physical burst while positioning you to retaliate. His roams become massive gambles that cost him plates and experience, as your pressure remains absolute.
How to play
Focus on shoving every wave immediately using Winds of War combined with Colossal Smash. Once Pyke is forced under his tower, step back into the fog of war to shadow his movements. Never waste Hero's Entrance randomly; keep it ready to respond the moment Pyke activates Ghostwater Dive to gank a side lane. If he aggressively targets you with Phantom Undertow, interrupt his dash with Justice Punch to prevent his stun and win the trade.
Crowd controlInterruptYou completely shut down Katarina's kill threat because her primary damage source, Death Lotus, is a channeled ability that you can instantly interrupt. Both Shield of Durand and Justice Punch provide immediate hard crowd control to cancel her ultimate. Additionally, the passive magic shield from Shield of Durand naturally mitigates her Bouncing Blade poke, leaving her with no viable trading patterns against you.Katarina build →See details
Katarina
The interaction that decides it
Galio can instantly interrupt Katarina's Death Lotus (R) using either Shield of Durand (W) taunt or Justice Punch (E) knock-up.
Why
You completely shut down Katarina's kill threat because her primary damage source, Death Lotus, is a channeled ability that you can instantly interrupt. Both Shield of Durand and Justice Punch provide immediate hard crowd control to cancel her ultimate. Additionally, the passive magic shield from Shield of Durand naturally mitigates her Bouncing Blade poke, leaving her with no viable trading patterns against you.
Lane impact
This interaction completely strips Katarina of lane priority. She cannot step up to clear minions without risking a heavy trade, allowing you to shove waves effortlessly with Winds of War and Colossal Smash. Because she cannot kill you, she is forced to seek roams, but your Hero's Entrance allows you to follow her map rotations instantly, neutralizing her global impact while she loses mid-lane gold.
How to play
Never waste both Shield of Durand and Justice Punch simultaneously during skirmishes. Always hold at least one of these crowd control tools specifically for when Katarina activates Death Lotus. Use Winds of War to harass her whenever she approaches a dagger dropped by Bouncing Blade or Preparation. If she attempts to roam, immediately walk toward the side lane and use Hero's Entrance to protect your teammates the moment she commits to a dive.
ShieldsWave clearMel relies on continuous magic damage to zone out her opponents, but your innate magic resistance scaling combined with the passive magic shield from Shield of Durand completely neutralizes her poke. She cannot chunk your health pool down before running out of mana. This defensive safety net allows you to step up aggressively and deploy Winds of War to demolish minion waves without fearing her retaliatory spellcasts.Mel build →See details
Mel
The interaction that decides it
Galio's innate magic resistance scaling and Shield of Durand (W) shield mitigate Mel's magic damage poke, allowing him to easily clear waves with Winds of War (Q).
Why
Mel relies on continuous magic damage to zone out her opponents, but your innate magic resistance scaling combined with the passive magic shield from Shield of Durand completely neutralizes her poke. She cannot chunk your health pool down before running out of mana. This defensive safety net allows you to step up aggressively and deploy Winds of War to demolish minion waves without fearing her retaliatory spellcasts.
Lane impact
This match-up quickly turns into a one-sided shoving contest where you dictate the tempo. By constantly shoving Mel under her turret with Winds of War and Colossal Smash, you force her to waste her high-cooldown control spells on farming rather than trading. She is pinned to her lane, losing any ability to contest neutral objectives or match your map-wide rotations when you activate Hero's Entrance.
How to play
Stand directly inside the minion wave to bait Mel into aiming her skillshots at you, letting your Shield of Durand shield absorb the brunt of the magic damage. Simultaneously, aim Winds of War to clip both her and the caster minions. If she steps past her melee minions to contest you, immediately punish her with Justice Punch followed by Colossal Smash. Save Hero's Entrance for skirmishes near the river once you have pushed her deep under tower.
BurstCrowd controlGalio naturally shuts down Fizz's assassination attempts because your defensive tools perfectly absorb his burst. When Fizz attaches Chum the Waters to you, you can immediately channel Shield of Durand to negate his ultimate's massive magical impact. Once he descends from his Playful state, he is completely vulnerable. You can easily lock him down with Justice Punch and Winds of War during his lengthy downtime.Fizz build →See details
Fizz
The interaction that decides it
Galio can activate Shield of Durand (W) when hit by Chum the Waters (R) to easily survive the burst, then lock Fizz down after he lands from Playful (E).
Why
Galio naturally shuts down Fizz's assassination attempts because your defensive tools perfectly absorb his burst. When Fizz attaches Chum the Waters to you, you can immediately channel Shield of Durand to negate his ultimate's massive magical impact. Once he descends from his Playful state, he is completely vulnerable. You can easily lock him down with Justice Punch and Winds of War during his lengthy downtime.
Lane impact
This matchup forces Fizz into a passive stance where he cannot easily contest the wave. You can shove him under tower constantly using Winds of War and Colossal Smash. Since Fizz struggles to trade into your magic shield, he will lose health trying to last-hit, preventing him from roaming. This pressure keeps him trapped mid while you maintain total freedom to support your jungler.
How to play
Never waste Shield of Durand pre-emptively; hold this crucial tool specifically for when Fizz commits with Chum the Waters or tries to trade using Urchin Strike. When he activates Playful, do not panic-cast Justice Punch. Instead, wait for him to land, then immediately knock him up, trigger your passive Colossal Smash, and follow up with Winds of War. If he plays extremely safely, use Hero's Entrance to counter-gank whenever he tries to roam.
These champions have a build and playstyle that directly overpower yours, which can make controlling the lane and farming extremely difficult. Their kit can neutralize your core strengths or punish you the moment you try to play your usual game plan. In these matchups, the goal is often to minimize mistakes and look for ways to win outside of direct confrontation.
ShieldsCC immunityMorgana completely shuts down your offensive presence through Black Shield. The moment you slide forward with Justice Punch, she can reactively shield her ally, absorbing the magic damage and entirely blocking your knockup. Furthermore, her spell shield denies the taunt from your Shield of Durand, turning your primary crowd control combo into a harmless dash that leaves you vulnerable and stranded in the enemy line.Morgana build →See details
Morgana
The interaction that decides it
Morgana's Black Shield completely blocks the knockup from Justice Punch and the taunt from Shield of Durand, neutralizing Galio's entire kit.
Why
Morgana completely shuts down your offensive presence through Black Shield. The moment you slide forward with Justice Punch, she can reactively shield her ally, absorbing the magic damage and entirely blocking your knockup. Furthermore, her spell shield denies the taunt from your Shield of Durand, turning your primary crowd control combo into a harmless dash that leaves you vulnerable and stranded in the enemy line.
Lane impact
This interaction strips away your laning initiative, forcing you and your carry under tower. Morgana freely zones you with Tormented Shadow while keeping Dark Binding ready to punish any forward step. Because you cannot reliably threaten a turn-around with Justice Punch, your lane loses all kill pressure, leaving you unable to contest early priority and highly vulnerable to Soul Shackles dives.
How to play
Your only path forward is to bait out Black Shield before committing. Use Winds of War to chip away at them and walk up aggressively to force her shield early, then immediately back off. Only execute your Justice Punch and Shield of Durand combo once you confirm her shield is on its long cooldown. If she holds her spells, play defensively and look for roaming opportunities using Hero's Entrance to impact other map areas.
DisengagePeelThis matchup is an absolute nightmare because Janna holds the perfect tool to shut down your primary engage. Every single time you wind up Justice Punch to start a fight, she can instantly release a fast Howling Gale to knock you up mid-dash, completely canceling your forward momentum. Because her tornado interrupts your slide before you can ever land Shield of Durand, you can never reliably reach her or her marksman.Janna build →See details
Janna
The interaction that decides it
Janna can easily react to Galio's Justice Punch with a quick Howling Gale, completely canceling his primary engage tool.
Why
This matchup is an absolute nightmare because Janna holds the perfect tool to shut down your primary engage. Every single time you wind up Justice Punch to start a fight, she can instantly release a fast Howling Gale to knock you up mid-dash, completely canceling your forward momentum. Because her tornado interrupts your slide before you can ever land Shield of Durand, you can never reliably reach her or her marksman.
Lane impact
You are forced into a passive state under tower. Janna will safely poke you down with Zephyr and shield any counter-harass with Eye of the Storm. Attempting to step up for a Colossal Smash on minions results in heavy damage. Since your lane pressure is non-existent and you cannot force fights, your ADC will get slowly bled out, and you will lose priority for early River skirmishes.
How to play
Stop trying to force the lane. Instead, wait for Janna to waste Howling Gale offensively before even thinking about using Justice Punch. If she plays safely, shove the wave with Winds of War and immediately look for roam opportunities. Use Hero's Entrance to impact midlane or coordinate with your jungler in the river, bypassing Janna's peeling power entirely by creating numbers advantages elsewhere on the map while she is stuck babysitting her carry.
ScalingPokeSenna completely neutralizes your defensive tools while shutting down your initiation. Because her Piercing Darkness and basic attacks deal physical damage, they entirely bypass the passive magic shield from Shield of Durand. Even worse, if you try to engage with Justice Punch, she can activate Curse of the Black Mist, turning into an untargetable wraith that breaks your lock-on and leaves you stranded and exposed.Senna build →See details
Senna
The interaction that decides it
Senna's physical damage poke ignores Galio's magic shield, and Curse of the Black Mist makes her untargetable for Justice Punch.
Why
Senna completely neutralizes your defensive tools while shutting down your initiation. Because her Piercing Darkness and basic attacks deal physical damage, they entirely bypass the passive magic shield from Shield of Durand. Even worse, if you try to engage with Justice Punch, she can activate Curse of the Black Mist, turning into an untargetable wraith that breaks your lock-on and leaves you stranded and exposed.
Lane impact
This structural mismatch forces you into a highly defensive posture from the very first wave. Senna will constantly harvest souls and poke you down under your own turret, rendering Winds of War useless for wave control as you must save your health. Your inability to contest her range means your ADC is starved of farm, and you cannot easily roam with Hero's Entrance without losing your tower extremely early.
How to play
To survive, you must play strictly around bushes to break her vision and force her to walk up. Never initiate with Justice Punch while her Curse of the Black Mist is available; instead, bait her Last Embrace first. Once she steps up to poke, use Winds of War to chunk her from safety, then execute a flash-taunt combo with Shield of Durand to lock her down before she can camouflage. If this all-in fails, immediately fall back under tower.
These champions have tools that generally give them the edge in a fight, without making the matchup unwinnable. They might have more range, a better ability to soak up your offense, or more ways to answer your engages. You'll need to adapt your approach and carefully pick your moments to accept a fight.
MobilityExecutePyke counters your defensive identity because his Death from Below execution threshold entirely bypasses the damage reduction of your Shield of Durand. Even if you charge your taunt to absorb incoming damage, it won't save you or your ADC once you drop into execute range. Furthermore, Pyke can easily match or beat your map presence by combining Ghostwater Dive with Phantom Undertow, racing you to other lanes before you can deploy Hero's Entrance.Pyke build →See details
Pyke
The interaction that decides it
Pyke's Death from Below bypasses the damage reduction of Shield of Durand, making Galio's tankiness less effective when low on health.
Why
Pyke counters your defensive identity because his Death from Below execution threshold entirely bypasses the damage reduction of your Shield of Durand. Even if you charge your taunt to absorb incoming damage, it won't save you or your ADC once you drop into execute range. Furthermore, Pyke can easily match or beat your map presence by combining Ghostwater Dive with Phantom Undertow, racing you to other lanes before you can deploy Hero's Entrance.
Lane impact
During the laning phase, Pyke's Bone Skewer forces you into a passive stance. If you try to engage with Justice Punch, he can counter-dash with Phantom Undertow to stun you under his minions. This threat forces you to play defensively, allowing Pyke to freely use Ghostwater Dive to roam mid or jungle, creating a race where your Hero's Entrance is constantly reactive rather than proactive, costing your team map pressure.
How to play
To survive this matchup, never initiate with Justice Punch unless Pyke's Phantom Undertow is on cooldown. Instead, stand near your ADC and hold Shield of Durand to interrupt his pull follow-ups. When Pyke activates Ghostwater Dive to roam, do not blindly chase him through the river. Instead, quickly clear the wave using Winds of War and Colossal Smash to force his ADC under tower, then look for a safe angle to turn the tide of his roam with Hero's Entrance.
SurvivalMobilityEngaging as Galio is exceptionally tough because Zilean completely neutralizes your primary crowd control. Whenever you attempt to close the gap with Justice Punch and channel Shield of Durand, Zilean instantly casts Temporal Mirage to boost his marksman's movement speed. This hyper-mobility lets them easily sprint out of your taunt's radius before it triggers, leaving you exposed to double Time Bomb counters.Zilean build →See details
Zilean
The interaction that decides it
Zilean can use Temporal Mirage to speed up his ally, making it easy for them to run out of Galio's Shield of Durand range.
Why
Engaging as Galio is exceptionally tough because Zilean completely neutralizes your primary crowd control. Whenever you attempt to close the gap with Justice Punch and channel Shield of Durand, Zilean instantly casts Temporal Mirage to boost his marksman's movement speed. This hyper-mobility lets them easily sprint out of your taunt's radius before it triggers, leaving you exposed to double Time Bomb counters.
Lane impact
This speed advantage forces you into a defensive posture during the laning phase. Blindly rushing forward results in wasted cooldowns, allowing Zilean to retaliate with a Time Bomb and Twisted Timeflow combination that chunks your health bar. You will find yourself pushed under turret, struggling to find clean windows to use Hero's Entrance to assist your jungler without losing your own bottom tower.
How to play
To survive and win trades, your target selection must be impeccable. Never target the ally Zilean is actively guarding with his cursor. Instead, wait for him to use Temporal Mirage defensively on himself, then immediately redirect your Justice Punch onto his marksman, or vice versa. If Zilean rushes his ultimate, hold your Shield of Durand until Chronoshift expires to prevent them from resurrecting safely, turning their defensive tool into a trap.
CC immunityDisengageThis matchup is heavily dictated by Milio's ability to deny your primary engage tools. Whenever you attempt to close the distance using Justice Punch, Milio can easily interrupt your dash mid-air with Ultra Mega Fire Kick. Furthermore, even if you manage to bypass this knockback or flash in to channel a massive Shield of Durand, his Breath of Life instantly purges the taunt from his entire team, neutralizing your crowd control.Milio build →See details
Milio
The interaction that decides it
Milio can use Ultra Mega Fire Kick to knock Galio back during Justice Punch, and his Breath of Life completely cleanses Galio's Shield of Durand taunt.
Why
This matchup is heavily dictated by Milio's ability to deny your primary engage tools. Whenever you attempt to close the distance using Justice Punch, Milio can easily interrupt your dash mid-air with Ultra Mega Fire Kick. Furthermore, even if you manage to bypass this knockback or flash in to channel a massive Shield of Durand, his Breath of Life instantly purges the taunt from his entire team, neutralizing your crowd control.
Lane impact
Consequently, aggressive lane presence is highly punishable. Standard trade attempts leave your ADC exposed, as Milio uses Cozy Campfire and Warm Hugs to trade back safely from distance while you retreat empty-handed. You cannot easily lock down the lane or secure early kills. This forces your bot lane under tower, slowly bleeding health to their ranged poke while you struggle to find a clean angle to crash the wave or roam.
How to play
To survive, you must play a patient waiting game. Never lead with Justice Punch unless you see Milio waste his Ultra Mega Fire Kick on minion clear or poke. Instead, use Winds of War to help your carry clear waves from safety. If Milio triggers his Breath of Life during a skirmish, immediately back off and delay your next engage; that ultimate has a massive cooldown window. Save your Hero's Entrance to counter-engage when the enemy overextends under your turret.
DisengagePeelThis matchup hinges on a painful interruption: Lulu can react to your Justice Punch with Whimsy, morphing you into a harmless creature mid-dash before you can land your knock-up. This instant disengage completely shuts down your primary lane initiative. Furthermore, her ranged poke from Glitterlance and Pix, Faerie Companion constantly chips away at your health bar before you can even get in range to attempt a Shield of Durand taunt.Lulu build →See details
Lulu
The interaction that decides it
Lulu can use Whimsy to polymorph Galio mid-dash during his Justice Punch, completely halting his engage.
Why
This matchup hinges on a painful interruption: Lulu can react to your Justice Punch with Whimsy, morphing you into a harmless creature mid-dash before you can land your knock-up. This instant disengage completely shuts down your primary lane initiative. Furthermore, her ranged poke from Glitterlance and Pix, Faerie Companion constantly chips away at your health bar before you can even get in range to attempt a Shield of Durand taunt.
Lane impact
Because your engage is easily neutralized, you will find yourself stuck under tower absorbing pressure. Every failed attempt to step forward results in heavy trading losses, as Lulu punishes your retreat with Help, Pix! and basic attacks. She dictates the wave control entirely, forcing you to use Winds of War to prevent your ADC from being completely shoved in, which subsequently ruins any freeze or setup you wanted to maintain.
How to play
To survive, you must play a patient waiting game. Never initiate with Justice Punch while Lulu still holds Whimsy. Instead, bait her into using it on her own marksman for the attack speed buff. Once you see that purple spell cast, you have a brief window to strike. If she tries to shield her ally with Help, Pix!, use that moment to pressure. If an engage fails, immediately fall back using Shield of Durand defensively to absorb incoming magic damage.
SustainScalingSona naturally outscales you through the relentless healing of Aria of Perseverance and poke from Hymn of Valor. Your only window to prevent this scaling gap is locking her down early with Shield of Durand. However, once she unlocks Crescendo, she can instantly interrupt your Justice Punch mid-dash or stun you while you channel your taunt, completely neutralizing your engage and leaving you vulnerable to her Power Chord poke.Sona build →See details
Sona
The interaction that decides it
Galio must lock down Sona with Shield of Durand before she can scale, but her Crescendo can stop his engage in its tracks.
Why
Sona naturally outscales you through the relentless healing of Aria of Perseverance and poke from Hymn of Valor. Your only window to prevent this scaling gap is locking her down early with Shield of Durand. However, once she unlocks Crescendo, she can instantly interrupt your Justice Punch mid-dash or stun you while you channel your taunt, completely neutralizing your engage and leaving you vulnerable to her Power Chord poke.
Lane impact
Passive laning plays directly into Sona's hands. If you fail to secure early kills, her Aria of Perseverance nullifies all poke from Winds of War and Colossal Smash. Once she gets Crescendo, she gains complete lane control, forcing you under tower. This pressure prevents you from finding roams, rendering Hero's Entrance useless as you are pinned down defending your ADC from her constant poke.
How to play
You must force the issue before level five. Hide in the bushes to channel Shield of Durand out of her vision, then use Flash to unleash an instant taunt before she can react with Song of Celerity. If she already has Crescendo, never lead with Justice Punch, as she will easily interrupt the dash. Instead, wait for her to waste her ultimate or coordinate with your jungler to burst her down.
These matchups are above all duels of execution: both champions have credible ways to gain the upper hand. Dodging one key ability, anticipating an engage correctly, or a single positioning mistake can be enough to tip the duel one way or the other. Knowing the matchup and recognizing the right windows to act are especially important here.
SustainCrowd controlThis matchup revolves around the direct confrontation between your defensive channel and Nami's crowd control. When you wind up Shield of Durand to initiate a trade, your self-slow makes you a sitting duck. A skilled Nami will immediately throw Aqua Prison at your feet. Since you cannot easily dodge while channeling, her bubble completely halts your forward momentum, negating your primary zone of control.Nami build →See details
Nami
The interaction that decides it
Nami can bubble Galio with Aqua Prison when he charges Shield of Durand, neutralizing his engage threat.
Why
This matchup revolves around the direct confrontation between your defensive channel and Nami's crowd control. When you wind up Shield of Durand to initiate a trade, your self-slow makes you a sitting duck. A skilled Nami will immediately throw Aqua Prison at your feet. Since you cannot easily dodge while channeling, her bubble completely halts your forward momentum, negating your primary zone of control.
Lane impact
This interaction creates a highly rhythmic lane focused on trading tempos. If you blindly charge in, getting hit by Aqua Prison allows Nami to turn the trade around using Ebb and Flow for health swings, while her ally abuses Tidecaller's Blessing to poke you down. However, if she wastes her bubble trying to zone you, she loses her only hard disengage, letting you aggressively look for a Justice Punch setup.
How to play
To win this, never start your engage with a raw, visible Shield of Durand. Instead, bait her Aqua Prison by walking forward threateningly, or use the sudden dash of Justice Punch from brush to catch her off-guard before she can react. If she holds her bubble, use Winds of War to chip away at her health from a distance. When she commits her Tidal Wave during a skirmish, immediately prepare Hero's Entrance to counter-engage on her target.
PokeMobilityThis even matchup revolves entirely around your engage versus her disengage. While your goal is to lock down her carry, Karma's Inspire provides a massive movement speed boost that allows her ally to easily walk out of your Shield of Durand taunt radius and dodge the slow-moving Winds of War. This constant mobility check neutralizes your standard trade pattern unless you catch her with her shields down.Karma build →See details
Karma
The interaction that decides it
Karma's Inspire gives her ally the movement speed to dodge Winds of War and escape Shield of Durand's taunt radius.
Why
This even matchup revolves entirely around your engage versus her disengage. While your goal is to lock down her carry, Karma's Inspire provides a massive movement speed boost that allows her ally to easily walk out of your Shield of Durand taunt radius and dodge the slow-moving Winds of War. This constant mobility check neutralizes your standard trade pattern unless you catch her with her shields down.
Lane impact
During the laning phase, Karma will constantly pressure you with Inner Flame to chunk your health bar, making aggressive flashes risky. If you waste Justice Punch and fail to connect, her Focused Resolve link will root you in place, leaving you exposed to heavy poke. This turns the lane into a tense stalemate where missing a single crowd control spell hands over complete wave control to her side.
How to play
To overcome her speed, you must use the lane bushes to hide the channel of Shield of Durand. Never lead with Justice Punch when her Inspire is available; instead, walk up threateningly to bait her shield, then commit once the movement speed decays. If your carry gets caught by her Transcendent Embrace or Mantra empowered combos, immediately buffer your Hero's Entrance onto them to turn her aggressive surge into a counter-engage opportunity.
Crowd controlPeelThis lane is a pure skill matchup dictated by how Thresh responds to your engage. The primary bottleneck is his Flay, which can easily knock you out of Justice Punch mid-flight. If he reacts quickly enough, your main closing tool is completely cancelled, leaving you stranded while his ADC free-fires, turning your aggressive engage into a disastrous counter-engage.Thresh build →See details
Thresh
The interaction that decides it
Thresh can use Flay to interrupt Galio's Justice Punch mid-dash, preventing him from reaching the ADC.
Why
This lane is a pure skill matchup dictated by how Thresh responds to your engage. The primary bottleneck is his Flay, which can easily knock you out of Justice Punch mid-flight. If he reacts quickly enough, your main closing tool is completely cancelled, leaving you stranded while his ADC free-fires, turning your aggressive engage into a disastrous counter-engage.
Lane impact
Because of this interaction, you cannot easily force trades. If you telegraph your Justice Punch, Thresh will deny you and immediately respond with Death Sentence or The Box to lock you down. This creates a tense standoff where both duos must play respectfully; any failed dash from you translates directly into massive health losses or a forced, early Shield of Durand to survive.
How to play
To bypass this, never lead with Justice Punch from a distance where Thresh can see you coming. Instead, position yourself parallel to your ADC and use the brush to hide your windup. Force him to use Flay offensively first. If he misses a Death Sentence, walk up directly to threaten with Shield of Durand's taunt, and only use your dash to follow up once his sweep is on cooldown.
SustainCrowd controlThis skill matchup revolves around the clash of engages. When Maokai attempts to lock down your marksman with the untargetable root of Twisted Advance, he telegraphs his exact landing spot. By buffering Justice Punch directly into his destination, you can immediately interrupt his follow-up Bramble Smash. This neutralizes his engage check, turning his aggressive dive into a vulnerable position where your Colossal Smash can retaliate.Maokai build →See details
Maokai
The interaction that decides it
If Maokai uses Twisted Advance on Galio's ADC, Galio can time Justice Punch to knock Maokai up as soon as he emerges.
Why
This skill matchup revolves around the clash of engages. When Maokai attempts to lock down your marksman with the untargetable root of Twisted Advance, he telegraphs his exact landing spot. By buffering Justice Punch directly into his destination, you can immediately interrupt his follow-up Bramble Smash. This neutralizes his engage check, turning his aggressive dive into a vulnerable position where your Colossal Smash can retaliate.
Lane impact
Because of this mechanical standoff, the lane becomes a tense zone-control game. Maokai will try to use Sapling Toss to secure brush control and poke you down, preventing you from stepping up to use Winds of War on the wave. If you get chipped down, Maokai's Sap Magic sustain lets him win war-of-attrition trades. Neither side can easily force a tower dive without risking a massive counter-engage via Hero's Entrance or Nature's Grasp.
How to play
Position yourself slightly behind your partner, maintaining a diagonal angle that lets you react instantly to Twisted Advance. Never waste Justice Punch for raw damage or wave clear; keep it solely to match his engage. If Maokai manages to bait your dash and locks down your ally, immediately charge Shield of Durand to taunt him and his partner, mitigating the burst while you wait for an opening.
ShieldsPokeThis skill matchup revolves around Zyra's ability to summon plants from Rampant Growth directly in your path. When you attempt to engage with Justice Punch, a well-timed plant will body-block your dash, cutting your forward momentum short before you can reach her or her ADC. This block nullifies your main gap-closer, leaving you vulnerable to her heavy ranged poke from Deadly Spines and Garden of Thorns.Zyra build →See details
Zyra
The interaction that decides it
Zyra's plants from Rampant Growth can block Galio's Justice Punch mid-dash, preventing him from reaching her.
Why
This skill matchup revolves around Zyra's ability to summon plants from Rampant Growth directly in your path. When you attempt to engage with Justice Punch, a well-timed plant will body-block your dash, cutting your forward momentum short before you can reach her or her ADC. This block nullifies your main gap-closer, leaving you vulnerable to her heavy ranged poke from Deadly Spines and Garden of Thorns.
Lane impact
Zyra's constant poke from Deadly Spines and Grasping Roots pushes the wave under your turret while chipping away your health. Because your Justice Punch can be easily reacted to and blocked, you cannot simply walk up to engage. This forces you to absorb damage while waiting under tower, limiting your ability to assist your carry with Colossal Smash or secure early priority for river skirmishes.
How to play
To bypass her plant shield, avoid standing directly in front of Zyra's active seeds. Position yourself in the side bushes to deny her vision, making it incredibly difficult for her to reactively block your Justice Punch with Rampant Growth. If she misses her Grasping Roots, immediately threaten with Shield of Durand to force her back, or use Winds of War to clear her plants from a safe distance before looking for an opening to engage.
SustainCrowd controlThis matchup revolves around the tension between Galio's crowd control and Soraka's instant silence. The critical point is that Soraka's Equinox can be placed directly under Galio as soon as he starts channeling Shield of Durand, instantly cancelling the taunt and leaving him silenced and vulnerable. This completely shuts down your main engage tool unless you bait her silence first.Soraka build →See details
Soraka
The interaction that decides it
Soraka can place Equinox directly under Galio when he starts charging Shield of Durand, instantly cancelling his taunt.
Why
This matchup revolves around the tension between Galio's crowd control and Soraka's instant silence. The critical point is that Soraka's Equinox can be placed directly under Galio as soon as he starts channeling Shield of Durand, instantly cancelling the taunt and leaving him silenced and vulnerable. This completely shuts down your main engage tool unless you bait her silence first.
Lane impact
In lane, this makes blind aggression highly punishable. If you blindly use Justice Punch forward, you risk getting rooted in Equinox while the enemy ADC kites you. Soraka will constantly sustain her partner with Astral Infusion and poke with Starcall. You cannot win a war of attrition; you must secure clean, burst-oriented kills, but one mistimed engage forfeits all lane pressure.
How to play
To win this, your target selection must focus entirely on Soraka herself, or you must bait her silence before committing. Use Winds of War to poke and force her to step up. When engaging, try to bait Equinox with a feigned movement, or use Justice Punch directly onto Soraka so she cannot safely drop her silence on you. If she uses her silence defensively to protect her ally, immediately redirect your focus to burst her down.
UltimatePokeThis matchup revolves entirely around the race to impact teamfights with your respective ultimates. Malphite wants to look for explosive engages using Unstoppable Force to catch your marksman off guard. However, Galio can completely neutralize this threat by instantly casting Hero's Entrance on the targeted ally, mitigating the initial burst with your shield and landing a massive counter-knockup to turn the fight on its head.Malphite build →See details
Malphite
The interaction that decides it
Malphite's Unstoppable Force can be matched by Galio's Hero's Entrance to counter-engage and protect the targeted ally.
Why
This matchup revolves entirely around the race to impact teamfights with your respective ultimates. Malphite wants to look for explosive engages using Unstoppable Force to catch your marksman off guard. However, Galio can completely neutralize this threat by instantly casting Hero's Entrance on the targeted ally, mitigating the initial burst with your shield and landing a massive counter-knockup to turn the fight on its head.
Lane impact
Before level five, the lane is a slow war of attrition. Malphite will attempt to wear you down with Seismic Shard poke, while you can respond with Winds of War to push back or clear waves. Since neither of you possesses high kill pressure early, this lane quickly transforms into a roaming race. Leaving your AD carry exposed to secure mid-lane priority is highly risky if Malphite stays behind to dive them.
How to play
To win this, never stand right next to your marksman; scatter to prevent Malphite from hitting both of you with Unstoppable Force. Hold your Hero's Entrance exclusively for his ultimate engage. If he manages to roam first, use Justice Punch through terrain to accelerate your rotation, or charge Shield of Durand immediately if you get caught in a bush to absorb his Ground Slam and Thunderclap damage before escaping.
MobilityDisengageThis matchup is a pure test of reflexes centered around Rakan's Grand Entrance. Because his dash has a brief travel time, you can cast Justice Punch directly into his path. If your timing is precise, your knock-up overrides his, completely canceling his engage. However, missing this window leaves you vulnerable to a quick Battle Dance escape, making the lane a tense game of chicken.Rakan build →See details
Rakan
The interaction that decides it
Galio can interrupt Rakan's Grand Entrance mid-air with a well-timed Justice Punch, turning the engage around.
Why
This matchup is a pure test of reflexes centered around Rakan's Grand Entrance. Because his dash has a brief travel time, you can cast Justice Punch directly into his path. If your timing is precise, your knock-up overrides his, completely canceling his engage. However, missing this window leaves you vulnerable to a quick Battle Dance escape, making the lane a tense game of chicken.
Lane impact
When Rakan has Grand Entrance available, your duo must play spread out to avoid a double knock-up. A successful interruption allows you to lock him down with Shield of Durand, forcing his ADC to back off. If you waste Justice Punch early, Rakan will immediately initiate with The Quickness and Grand Entrance, securing free health trades and forcing you under tower.
How to play
Never initiate with Justice Punch unless Rakan's Grand Entrance is on cooldown. Stand slightly behind your ADC to bait Rakan's jump, then reactively dash forward. If he baits your E and dashes back with Battle Dance, immediately activate Shield of Durand to absorb incoming damage from Gleaming Quill. Save Hero's Entrance specifically to match his roam power when he uses The Quickness in river skirmishes.
Map pressureThis lane is a pure test of map awareness where Bard seeks to abandon the duo lane to gather chimes from Traveler’s Call and create sudden numbers advantages using Magical Journey. Galio is uniquely equipped to neutralize this global pressure. Instead of chasing Bard through portals, you can instantly respond to his flank attempts anywhere on the map by dropping Hero's Entrance directly onto the ally Bard is trying to corner.Bard build →See details
Bard
The interaction that decides it
Galio can use Hero's Entrance to quickly counter-gank lanes that Bard targets with Magical Journey.
Why
This lane is a pure test of map awareness where Bard seeks to abandon the duo lane to gather chimes from Traveler’s Call and create sudden numbers advantages using Magical Journey. Galio is uniquely equipped to neutralize this global pressure. Instead of chasing Bard through portals, you can instantly respond to his flank attempts anywhere on the map by dropping Hero's Entrance directly onto the ally Bard is trying to corner.
Lane impact
In lane, Bard will drop Caretaker’s Shrine to keep his marksman safe while he roams. This creates a tense dynamic where you must decide whether to engage with Justice Punch and Shield of Durand to punish the lone enemy, or preserve your health and mana to stay ready for a map response. If you waste your crowd control, Bard freely dictates the map's pace without fearing your counter-engage.
How to play
Never follow Bard directly into narrow corridors where he can easily stun you against a wall with Cosmic Binding. Instead, stand near your marksman, clear waves using Winds of War and Colossal Smash, and keep your camera locked on adjacent lanes. The moment you see Bard open a Magical Journey towards your midlaner, immediately channel Hero's Entrance to turn his dive into a deadly trap. If your ultimate is down, play defensively and ping danger.
ShieldsPeelThis matchup is a pure battle of peeling tools where target selection dictates the outcome. While Braum can easily raise Unbreakable to absorb the poke from your Winds of War, his shield is completely useless against the area-of-effect taunt of your Shield of Durand. This creates a tense stalemate where his defensive posturing can protect his marksman from raw damage, but cannot prevent you from locking them down once you get in range.Braum build →See details
Braum
The interaction that decides it
Braum's Unbreakable can block Galio's Winds of War, but it cannot stop the AoE taunt of Shield of Durand.
Why
This matchup is a pure battle of peeling tools where target selection dictates the outcome. While Braum can easily raise Unbreakable to absorb the poke from your Winds of War, his shield is completely useless against the area-of-effect taunt of your Shield of Durand. This creates a tense stalemate where his defensive posturing can protect his marksman from raw damage, but cannot prevent you from locking them down once you get in range.
Lane impact
Laning devolves into a defensive standoff where neither side can easily force a clean engage. If you try to initiate with Justice Punch, Braum can quickly counter-engage with Winter's Bite to stack Concussive Blows on you. This limits your ability to safely poke or push the wave, meaning trades are short and highly reliant on which support successfully peels the other's carry during skirmishes.
How to play
To win this, bypass Braum entirely during fights. Save your Shield of Durand for when he jumps to his ally with Stand Behind Me, ensuring you taunt both of them simultaneously. If he uses Glacial Fissure to disengage, do not chase; instead, look for a counter-engage using Hero's Entrance on your diving teammate to turn the fight around. Never waste Winds of War while Unbreakable is off cooldown.
These champions generally struggle to answer your main strengths, which lets you approach the matchup with more freedom. You often have several ways to pressure them and force trades that go in your favor. Use this advantage to dictate the pace rather than giving them time to get back into a comfortable position.
AssassinEngageSeraphine's absolute lack of mobility makes her incredibly vulnerable to your raw engage. When she steps up to poke with High Note or stack Stage Presence, she exposes herself to an immediate Justice Punch. Because she cannot dash away, this knock-up guarantees you can channel a full Shield of Durand taunt, locking her down before she can even activate Surround Sound for its shield and movement speed.Seraphine build →See details
Seraphine
The interaction that decides it
Seraphine's lack of mobility makes her an easy target for Galio's Justice Punch into Shield of Durand combo.
Why
Seraphine's absolute lack of mobility makes her incredibly vulnerable to your raw engage. When she steps up to poke with High Note or stack Stage Presence, she exposes herself to an immediate Justice Punch. Because she cannot dash away, this knock-up guarantees you can channel a full Shield of Durand taunt, locking her down before she can even activate Surround Sound for its shield and movement speed.
Lane impact
This matchup dynamic completely paralyzes Seraphine's lane presence. The constant threat of your burst combo forces her to play far behind her wave, severely limiting her ability to pressure you with Beat Drop. She cannot walk up to secure bush control, meaning your ADC can safely farm while you hold the lane hostage, ready to execute her the moment she missteps to throw a High Note.
How to play
Dominate the lane by hugging the bushes to dodge her High Note while closing the distance. Wait for her to exhaust her Beat Drop on the wave or miss it entirely. The second that projectile is gone, unleash Justice Punch from the fog of war, follow up with Shield of Durand, and crush her with Colossal Smash. If she attempts to counter-engage with Encore, immediately use Hero's Entrance onto your ADC to turn her charm into a counter-knockup.
TanksCounter-engageNautilus relies on landing Dredge Line to initiate, which pulls him right into your team's face. Because this lock-in is predictable, Galio can immediately charge Shield of Durand to taunt both Nautilus and his approaching ADC. This reaction completely halts their follow-up damage from Titan's Wrath and Riptide, rendering their primary engage useless while setting them up for a heavy counter-strike.Nautilus build →See details
Nautilus
The interaction that decides it
When Nautilus lands Dredge Line on an ally, Galio can immediately counter-engage with Shield of Durand to taunt both Nautilus and his ADC.
Why
Nautilus relies on landing Dredge Line to initiate, which pulls him right into your team's face. Because this lock-in is predictable, Galio can immediately charge Shield of Durand to taunt both Nautilus and his approaching ADC. This reaction completely halts their follow-up damage from Titan's Wrath and Riptide, rendering their primary engage useless while setting them up for a heavy counter-strike.
Lane impact
This interaction completely shifts the lane pressure in your favor. Nautilus is forced to hold his Dredge Line because firing it riskily puts his own ADC in harm's way. This lets you control the bush line easily. When trades do happen, your Colossal Smash and Winds of War ensure you win the short, bursty exchanges, forcing Nautilus to play defensively under his own tower.
How to play
Position yourself slightly parallel to your marksman, leaving just enough space to react. When Nautilus fires Dredge Line, do not flash to block it. Instead, let the hook land, then instantly unleash Shield of Durand to catch both opponents. Follow this up with Justice Punch to chain-crowd-control Nautilus, and use Winds of War to chip his health. Save Hero's Entrance to counter-engage immediately if Nautilus targets your ally with Depth Charge from afar.
TanksCounter-engageGalio holds a clear advantage here because Leona's linear engage directly plays into your counter-engage kit. Whenever she commits with Zenith Blade, she places herself in a predictable spot while her ADC tries to follow up to proc Sunlight. By immediately charging Shield of Durand, you can catch the incoming follow-up damage dealer, neutralizing their trade before she can chain Shield of Daybreak effectively.Leona build →See details
Leona
The interaction that decides it
When Leona lands Zenith Blade, Galio can intercept the follow-up by charging Shield of Durand to taunt the enemy ADC.
Why
Galio holds a clear advantage here because Leona's linear engage directly plays into your counter-engage kit. Whenever she commits with Zenith Blade, she places herself in a predictable spot while her ADC tries to follow up to proc Sunlight. By immediately charging Shield of Durand, you can catch the incoming follow-up damage dealer, neutralizing their trade before she can chain Shield of Daybreak effectively.
Lane impact
This dynamic completely stifles Leona's lane presence, forcing her to play passive or risk disastrous trades. If she attempts to force an engage, your ability to instantly peel means your carry remains healthy, giving you control over the wave's positioning. You can easily secure brush control, pressure their duo under tower, and use Hero's Entrance to impact the map first when Leona is stuck defending her lane.
How to play
Position yourself slightly behind your ADC, maintaining a diagonal angle to easily intercept Leona's trajectory. Hold Shield of Durand strictly for her Zenith Blade animation. The moment her blade connects, dash forward with Justice Punch to knock up the enemy carry, then immediately channel your taunt. If you miss your timing and your carry gets locked down by Solar Flare, immediately use Hero's Entrance directly on them to absorb the incoming burst and turn the fight around.
Crowd controlTanksBlitzcrank's primary threat is completely neutralized because pulling Galio actually helps you get in range for your crowd control. If he lands Rocket Grab on you, he delivers you directly into the enemy duo. You can immediately channel Shield of Durand to taunt both opponents, completely reversing his engage and leaving them vulnerable to Winds of War and Colossal Smash.Blitzcrank build →See details
Blitzcrank
The interaction that decides it
If Blitzcrank pulls Galio with Rocket Grab, Galio can immediately unleash a full-charge Shield of Durand on the enemy bot lane.
Why
Blitzcrank's primary threat is completely neutralized because pulling Galio actually helps you get in range for your crowd control. If he lands Rocket Grab on you, he delivers you directly into the enemy duo. You can immediately channel Shield of Durand to taunt both opponents, completely reversing his engage and leaving them vulnerable to Winds of War and Colossal Smash.
Lane impact
This interaction completely changes the lane dynamic. Blitzcrank cannot safely fish for hooks because grabbing you is a death sentence for his ADC. This allows you to walk forward, threaten with Justice Punch, and zone them away from the minion wave. It forces Blitzcrank to play passively behind his minions, giving your ADC free farm and total control over lane priority.
How to play
Actively stand in front of your ADC to bodyblock and bait his Rocket Grab. The moment you are pulled, immediately charge Shield of Durand to taunt both Blitzcrank and his ADC. Follow up with Winds of War and Colossal Smash. If they try to flee using Overdrive, use Justice Punch to knock them up and prolong the crowd control. If he silences you with Static Field, wait out the brief duration before unleashing your combo.
ShieldsGalio's passive magic shield from Shield of Durand completely neutralizes Lux's primary poke tool, Lucent Singularity. Because her zone damage gets absorbed by your shield, she cannot easily chip away at your health bar. This allows you to comfortably hold your ground and wait for her to waste Light Binding, leaving her with no reliable way to stop your engage.Lux build →See details
Lux
The interaction that decides it
Galio's passive magic shield from Shield of Durand absorbs a significant portion of Lux's Lucent Singularity poke, allowing him to wait for her to miss Light Binding.
Why
Galio's passive magic shield from Shield of Durand completely neutralizes Lux's primary poke tool, Lucent Singularity. Because her zone damage gets absorbed by your shield, she cannot easily chip away at your health bar. This allows you to comfortably hold your ground and wait for her to waste Light Binding, leaving her with no reliable way to stop your engage.
Lane impact
Lux cannot establish her typical oppressive lane pressure because her Lucent Singularity poke fails to stick. Instead of being forced under your turret with low health, you maintain high HP, allowing your duo to contest waves. Every time she misses Light Binding, she is forced to retreat deep behind her minions, giving you total control of the lane bushes and free setups for Winds of War.
How to play
Position slightly ahead of your ADC to absorb Lucent Singularity with your Shield of Durand passive shield. Never initiate with Justice Punch while her Light Binding is available, as she will easily snare you mid-dash. Instead, bait her snare by walking aggressively, then immediately dash in with Justice Punch once it misses. Follow up with Colossal Smash and a quick tap of Shield of Durand to lock her down before her Prismatic Barrier can save her.
Early pressureEngageYuumi's attachment via You and Me! removes any frontline defense for her carry, giving you a clear lane to strike. Because she cannot block skillshots for her partner, your Justice Punch becomes an unblockable tool to initiate on the isolated ADC. Even when she unleashes Final Chapter to peel, your Shield of Durand provides the perfect defensive channel to absorb the waves, mitigating the threat before executing your burst.Yuumi build →See details
Yuumi
The interaction that decides it
Yuumi's lack of body-blocking presence allows Galio to freely land Justice Punch on her ADC, while her Final Chapter can be mitigated by Shield of Durand.
Why
Yuumi's attachment via You and Me! removes any frontline defense for her carry, giving you a clear lane to strike. Because she cannot block skillshots for her partner, your Justice Punch becomes an unblockable tool to initiate on the isolated ADC. Even when she unleashes Final Chapter to peel, your Shield of Durand provides the perfect defensive channel to absorb the waves, mitigating the threat before executing your burst.
Lane impact
This dynamic forces the enemy duo into a highly defensive posture. Every time the ADC steps up to farm, they risk a sudden Justice Punch leading into Colossal Smash and Winds of War. Yuumi is forced to burn massive mana on Zoomies to keep her partner alive, destroying their lane sustain and leaving them vulnerable to diving plays once you unlock Hero's Entrance.
How to play
Position yourself aggressively in front of your minions to deny the enemy ADC any safe farming zone. When Yuumi detaches to trigger Bop 'n' Block, ignore her and immediately aim Justice Punch at her vulnerable carry. If they attempt to turn the fight with Final Chapter, immediately hold and channel Shield of Durand to absorb the magical waves, ensuring you stay healthy enough to finish the fight with Winds of War once the root expires.
ShieldsAll-inGalio enters this matchup with a massive inherent advantage because the magic shield from Shield of Durand passively absorbs the brunt of Swain's poke. When Swain tries to fish for roots with Nevermove or punish your range with Death's Hand, your shield mitigates the threat entirely. This nullifies his lane pressure, letting you choose exactly when to trigger the all-in rather than being forced to play defensively.Swain build →See details
Swain
The interaction that decides it
Galio's passive magic shield absorbs Swain's Nevermove and Death's Hand poke, allowing Galio to dictate the engage timing.
Why
Galio enters this matchup with a massive inherent advantage because the magic shield from Shield of Durand passively absorbs the brunt of Swain's poke. When Swain tries to fish for roots with Nevermove or punish your range with Death's Hand, your shield mitigates the threat entirely. This nullifies his lane pressure, letting you choose exactly when to trigger the all-in rather than being forced to play defensively.
Lane impact
Because Swain cannot chip away at your health bar through your passive defense, you can hold your ground in the lane brush. You will consistently win short health trades, meaning your ADC can farm safely while Swain's ADC is forced under tower. Once you hit level three, your kill threat prevents Swain from walking up to stack Ravenous Flock, turning his lane into a zoning nightmare where he cannot safely scale.
How to play
Position yourself slightly ahead of your ADC to intentionally block Swain's Nevermove with your magic shield active. Hold Justice Punch until Swain misses his root or overextends to use Death's Hand, then immediately dash in to chain it with Shield of Durand. If Swain activates Demonic Ascension, do not panic; immediately use Hero's Entrance to retreat to your ADC or knock up his secondary targets, peeling his ultimate away until his transformation expires.
TanksCounter-engageGalio naturally shuts down Rell's aggressive engage tools because her predictable dive puts her right into your optimal range. The moment she jumps forward to bind or stun your carry, you can immediately channel Shield of Durand. This wide-area taunt catches both Rell and her approaching ADC, completely neutralizing their burst window. By absorbing her initial crowd control, your protective taunt turns her proactive dive into a disastrous trap for her lane partner.Rell build →See details
Rell
The interaction that decides it
Galio can charge Shield of Durand to taunt Rell and her ADC when she attempts to engage, neutralizing her follow-up.
Why
Galio naturally shuts down Rell's aggressive engage tools because her predictable dive puts her right into your optimal range. The moment she jumps forward to bind or stun your carry, you can immediately channel Shield of Durand. This wide-area taunt catches both Rell and her approaching ADC, completely neutralizing their burst window. By absorbing her initial crowd control, your protective taunt turns her proactive dive into a disastrous trap for her lane partner.
Lane impact
Because Rell cannot safely engage without getting countered, she is forced to play passively, yielding bush control to you. This dominance allows you to safely poke with Winds of War and secure wave control with Colossal Smash without fear of a sudden lockdown. If Rell grows impatient and attempts a desperate dive, a swift counter-engage guarantees a favorable health trade, often forcing early recalls or securing easy tower-dive setups.
How to play
Position yourself slightly behind or directly on top of your ADC, acting as an impassable roadblock. Never waste Shield of Durand to poke; keep it ready as an exclusive reaction to her forward leap. If she misses her engage, immediately chain Justice Punch and Colossal Smash onto her ADC to punish their bad positioning. If she tries to abandon the lane to roam, match her map pressure instantly using the semi-global range of Hero's Entrance.
TanksDisengageGalio dominates this matchup because Alistar's linear engage pattern plays directly into your defensive zone. When Alistar uses Headbutt to close the gap, he separates himself from his follow-up. By immediately charging Shield of Durand, you can taunt the incoming enemy marksman before they can capitalize on Alistar's Pulverize. This completely neutralizes their offensive burst while leaving Alistar isolated and vulnerable to your Winds of War retaliation.Alistar build →See details
Alistar
The interaction that decides it
When Alistar engages with Headbutt, Galio can immediately charge Shield of Durand to taunt the follow-up attackers.
Why
Galio dominates this matchup because Alistar's linear engage pattern plays directly into your defensive zone. When Alistar uses Headbutt to close the gap, he separates himself from his follow-up. By immediately charging Shield of Durand, you can taunt the incoming enemy marksman before they can capitalize on Alistar's Pulverize. This completely neutralizes their offensive burst while leaving Alistar isolated and vulnerable to your Winds of War retaliation.
Lane impact
This interaction forces Alistar to play passively, stripping away his playmaking potential. Since he cannot safely initiate without risking his partner being locked down, you dictate the lane's pace. You can safely poke with Winds of War and help secure wave priority with Colossal Smash. Alistar is forced to trigger Triumphant Roar defensively, bleeding lane control and allowing your carry to farm with absolute safety under your protective wing.
How to play
Maintain a diagonal positioning near your ADC, ensuring you are close enough to react but spread out enough to prevent Alistar from hitting you both with Pulverize. Never waste Shield of Durand proactively; keep it ready to interrupt the enemy follow-up the split second you see Alistar start his Headbutt. If he activates Unbreakable Will to cleanse your crowd control, immediately pivot your focus away from him. Use Justice Punch to knock up his carry instead, or prepare Hero's Entrance to counter his dive.
Edge: Wild Rift Core canonical verdict (−3 to +3), shown from the point of view of the champion named in the row. Win rate and pick rate: the opponent's own rate in this role — Wild Rift CN · Challenger, Patch 7.3c. Not a head-to-head win rate.
Edge: Wild Rift Core canonical verdict (−3 to +3), shown from the point of view of the champion named in the row. Win rate and pick rate: the opponent's own rate in this role — Wild Rift CN · Challenger, Patch 7.3c. Not a head-to-head win rate.
How to counter this champion
Counter angle
Galio doesn’t just lose to specific champions, but to playstyles that disrupt his timing. His kit relies on reliable access to fights through E + taunt or R. Anything that denies this access—poke, mobility, or control—drastically reduces his impact. Understanding his counters means understanding why he can’t execute his role.
Patch context
Galio’s counters exploit either his reliance on engage or his lack of ranged pressure. Poke mages wear him down before he engages, mobile assassins dodge his engage, and certain CC tools neutralize his taunt. In this patch, these profiles are common, making his matchups more mechanically demanding.
Quick read
He struggles against constant poke.
Dashes make his engage unreliable.
Without angles, he becomes predictable.
Counter archetypes
Long-range poke mages
These champions control lane from range and prevent Galio from approaching without losing resources. Their constant poke forces defensive play and delays roam timings. Without access, he can’t activate his combo and becomes passive.
How the champion adapts. Push waves quickly and roam whenever possible. Avoid extended trades and prioritize vision and rotations.
Mobile assassins
Their mobility allows them to dodge his E and escape taunt quickly. They can bypass him and attack backlines without being punished, removing his control presence.
Ziggs perfectly illustrates a frustrating matchup. He prevents Galio from approaching without damage and controls the wave constantly. Without lane pressure, Galio must roam to stay relevant.
Common mistakes against him
Common mistakes against him
Forcing engages without angles.
Ignoring poke and losing too much HP.
Using taunt too early.
Staying in lane instead of roaming.
Underestimating enemy mobility.
Coach notes
Your role is to find openings, not force fights.
Read enemy cooldowns before every engage.
FAQ
Why does Galio lose to poke mages?
Because he must expose himself to engage. Poke mages punish him before he reaches range, reducing his ability to initiate fights.
How to deal with mobile assassins?
You need to play reactively. Save your taunt to punish their engages instead of initiating.
When to engage against anti-CC?
Only after forcing their defensive ability. Otherwise your engage will be useless.
Can he still win lane?
Yes, but rarely through dominance. He wins by controlling the wave and influencing the map.