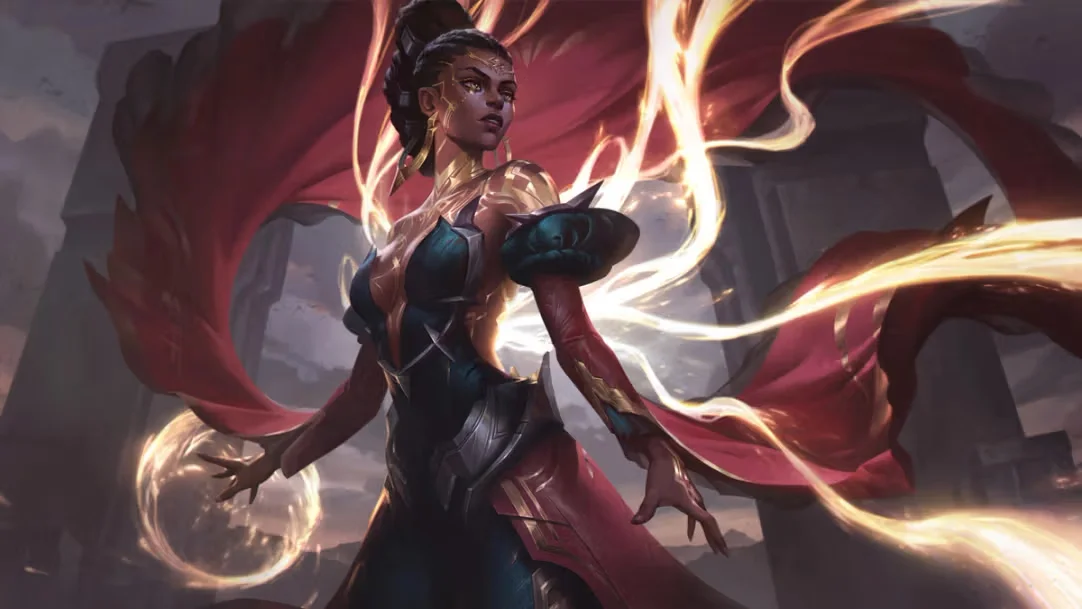
Los counters de Mel en Wild Rift se centran principalmente en la gestión del rango, su herramienta antiproyectiles y lo vulnerable que se vuelve sin Rebuttal. Destaca contra varios magos de skillshots, pero debe respetar a los asesinos que pueden romper el espaciado o saltarse sus tiempos defensivos.
★ MIDTier A
DAÑO
UTIL
TANK
DIFF
Win46.0%#102 · ↓0pt
Pick8.6%#3
Ban27.5%#10
Guía de counters de Mel Wild Rift
Contras Difíciles
6
Estos campeones tienen una build y un estilo de juego que superan directamente al tuyo, lo que puede hacer que controlar la línea y farmear sea extremadamente difícil. Sus habilidades pueden neutralizar tus principales fortalezas o castigarte en cuanto intentas jugar tu plan habitual. En estos matchups, el objetivo suele ser minimizar errores y buscar soluciones fuera del enfrentamiento directo.
MovilidadDaño explosivoIrelia prospera con tus minions de poca vida, usándolos para resetear Bladesurge una y otra vez y atravesar la zona defensiva que intentas construir con Radiant Volley. Al cerrar la distancia al instante, evita por completo el lento tiempo de viaje de Solar Snare. Una vez que está en rango cuerpo a cuerpo, sus stacks de Ionian Fervor abruman rápidamente la frágil reserva de vida de Mel antes de que puedas siquiera acumular Searing Brilliance o activar un Golden Eclipse significativo.Build de Irelia →Ver detalles
Irelia
Por qué
Irelia prospera con tus minions de poca vida, usándolos para resetear Bladesurge una y otra vez y atravesar la zona defensiva que intentas construir con Radiant Volley. Al cerrar la distancia al instante, evita por completo el lento tiempo de viaje de Solar Snare. Una vez que está en rango cuerpo a cuerpo, sus stacks de Ionian Fervor abruman rápidamente la frágil reserva de vida de Mel antes de que puedas siquiera acumular Searing Brilliance o activar un Golden Eclipse significativo.
Impacto en la línea
Esta amenaza te obliga a una postura muy defensiva en la que no puedes adelantarte con seguridad para usar Radiant Volley y ganar prioridad de push. Siempre que un minion aliado baje a poca vida, debes retirarte de inmediato, cediendo el control de la wave a Irelia. Si acierta Flawless Duet o Vanguard's Edge, su amenaza de dive bajo tu torre se vuelve letal, forzando recalls prematuros que te hacen perder oro y dejan tu torre de mid muy presionada.
Cómo jugar
Para sobrevivir, debes guardar Solar Snare estrictamente como herramienta de disengage para cuando se comprometa con Bladesurge, en lugar de usarlo para hacer poke. Cuando se lance hacia delante, activa Rebuttal de inmediato para bloquear el daño físico de Bladesurge o para desviar el stun entrante de Flawless Duet. Si consigue congelar la wave cerca de su torre, no te acerques; en su lugar, usa Radiant Volley desde el alcance máximo para romper el freeze con seguridad.
DiveMovilidadMel prospera manteniendo a los oponentes a raya, pero Aurora elude por completo esta pantalla defensiva. Con Across the Veil, Aurora salta con facilidad por encima de las zonas activas de Radiant Volley e ignora el potencial de root de Solar Snare gracias a una breve invisibilidad. Esta movilidad le permite cerrar la distancia al instante, aplicando stacks de Spirit Abjuration directamente sobre Mel y volviendo prácticamente inútil el Rebuttal de Mel, que refleja proyectiles.Build de Aurora →Ver detalles
Aurora
Por qué
Mel prospera manteniendo a los oponentes a raya, pero Aurora elude por completo esta pantalla defensiva. Con Across the Veil, Aurora salta con facilidad por encima de las zonas activas de Radiant Volley e ignora el potencial de root de Solar Snare gracias a una breve invisibilidad. Esta movilidad le permite cerrar la distancia al instante, aplicando stacks de Spirit Abjuration directamente sobre Mel y volviendo prácticamente inútil el Rebuttal de Mel, que refleja proyectiles.
Impacto en la línea
Te ves obligado a una postura defensiva desde las primeras waves. Como acercarte para hacer poke con Radiant Volley te expone a un salto repentino, debes ceder la prioridad de la lane central. Aurora te empujará sin descanso bajo la torre con Twofold Hex, desgastando tu torre mientras te cuesta asegurar los last-hits. Esta presión constante te impide ayudar a tu jungla y te deja atrapado en la lane.
Cómo jugar
Para sobrevivir, congela la wave de minions justo fuera del alcance de tu torre. Nunca lances Solar Snare para hacer poke; debes guardar esta habilidad específicamente para inmovilizar a Aurora en el momento en que salga de Across the Veil. Si ella inicia, retírate de inmediato hacia tu torre, usando Rebuttal solo para bloquear el proyectil entrante de Twofold Hex durante su retirada. Si te dejan muy débil, usa la ejecución global de Golden Eclipse para asegurar minions lejanos con poca vida.
EscaladoSustentoLa falta de opciones de escape de Mel la convierte en un objetivo prioritario cuando Swain desata Demonic Ascension. Como Mel no puede desplazarse rápidamente ni eliminarlo con burst a través de la enorme curación de su definitiva, Swain la atrapa con facilidad en su radio de drenaje, usando Nevermove para activar Ravenous Flock y recolectar fragmentos de alma. Este drenaje de vida constante anula por completo el daño de chip de Radiant Volley y Searing Brilliance de Mel, convirtiendo las peleas en una batalla de desgaste perdida.Build de Swain →Ver detalles
Swain
Por qué
La falta de opciones de escape de Mel la convierte en un objetivo prioritario cuando Swain desata Demonic Ascension. Como Mel no puede desplazarse rápidamente ni eliminarlo con burst a través de la enorme curación de su definitiva, Swain la atrapa con facilidad en su radio de drenaje, usando Nevermove para activar Ravenous Flock y recolectar fragmentos de alma. Este drenaje de vida constante anula por completo el daño de chip de Radiant Volley y Searing Brilliance de Mel, convirtiendo las peleas en una batalla de desgaste perdida.
Impacto en la línea
Como los trades directos son suicidas, debes centrarte por completo en gestionar los minions. Swain quiere empujarte bajo la torre con Death's Hand y atraparte con Vision of Empire cuando intentas farmear. Si dejas que te inmovilice con Nevermove, su reserva de vida crece mientras la tuya disminuye, forzando recalls tempranos que te cuestan oro y placas. Perder el control del ritmo de la wave permite que Swain haga roam libremente.
Cómo jugar
Para sobrevivir, debes jugar a la defensiva desde detrás de tu wave de minions. Guarda Solar Snare estrictamente como herramienta de disengage para inmovilizar a Swain y detener su avance cuando camine hacia delante. Si activa Demonic Ascension, usa de inmediato Rebuttal para obtener la invulnerabilidad temporal y la velocidad de movimiento decreciente y retirarte fuera de su radio de drenaje, en lugar de intentar devolver el trade con Golden Eclipse. No intentes ejecutarlo a menos que su definitiva esté completamente en cooldown.
DiveMovilidadYone tiene una gran ventaja porque su Soul Unbound le permite saltar por encima de la zona de control de Mel, ignorando la amenaza de Solar Snare. Aunque Mel lance Radiant Volley para disuadirlo, Yone puede avanzar con un dash, hacer un trade fuerte y luego volver a su punto de partida. Esta brecha de movilidad vuelve poco fiables las redes de seguridad tradicionales de Mel, ya que no puede hacer peel con facilidad ante su repentino asalto en forma espiritual.Build de Yone →Ver detalles
Yone
Por qué
Yone tiene una gran ventaja porque su Soul Unbound le permite saltar por encima de la zona de control de Mel, ignorando la amenaza de Solar Snare. Aunque Mel lance Radiant Volley para disuadirlo, Yone puede avanzar con un dash, hacer un trade fuerte y luego volver a su punto de partida. Esta brecha de movilidad vuelve poco fiables las redes de seguridad tradicionales de Mel, ya que no puede hacer peel con facilidad ante su repentino asalto en forma espiritual.
Impacto en la línea
Esta interacción obliga a Mel a renunciar al control temprano de la wave. Estar más allá del punto medio de la lane invita a Yone a ejecutar un trade letal usando Soul Unbound y Mortal Steel. Te encontrarás farmeando constantemente bajo la torre, perdiendo oro por minions fallados. En consecuencia, Mel no puede ayudar a su jungla durante las escaramuzas, dejando a su equipo vulnerable a las rotaciones sin castigo de Yone.
Cómo jugar
Para sobrevivir, nunca uses Solar Snare de forma ofensiva. Debes guardar esta habilidad estrictamente para interceptar el camino de regreso de Yone o para retrasar su avance durante Soul Unbound. Cuando active su forma espiritual, prepara tu Rebuttal para desviar el torbellino de Mortal Steel. Intenta hacer poke con Radiant Volley solo cuando sepas que Soul Unbound está en su largo cooldown, manteniendo la distancia y priorizando un farmeo seguro sobre los trades.
IntercambiosMovilidadZed anula por completo tus herramientas defensivas con su alta movilidad. Cuando intentas alejarlo con Solar Snare o hacerle harass con Radiant Volley, simplemente puede evitar la amenaza usando Living Shadow. Y lo que es más peligroso, si intentas inmovilizarlo, puede lanzar Death Mark para volverse inalcanzable, esquivando fácilmente tu CC mientras prepara un combo de burst letal con Razor Shuriken y Shadow Slash.Build de Zed →Ver detalles
Zed
Por qué
Zed anula por completo tus herramientas defensivas con su alta movilidad. Cuando intentas alejarlo con Solar Snare o hacerle harass con Radiant Volley, simplemente puede evitar la amenaza usando Living Shadow. Y lo que es más peligroso, si intentas inmovilizarlo, puede lanzar Death Mark para volverse inalcanzable, esquivando fácilmente tu CC mientras prepara un combo de burst letal con Razor Shuriken y Shadow Slash.
Impacto en la línea
Esta ventaja estructural te obliga a una postura muy defensiva en la que empujar la wave se vuelve arriesgado. No puedes adelantarte con seguridad para aplicar Searing Brilliance con ataques básicos sin arriesgarte a un cierre de distancia repentino. Zed marca el ritmo de la wave, obligándote a retroceder bajo la torre, donde su Contempt for the Weak hace que hacerte dive sea muy eficaz si te han debilitado con poke sus clones de sombra a distancia.
Cómo jugar
Para sobrevivir, nunca lances Solar Snare de forma agresiva; guárdalo exclusivamente para cuando Zed se comprometa. Cuando te apunte con Death Mark, espera al momento exacto en que aterrice para lanzar Solar Snare a quemarropa y activa de inmediato Rebuttal para bloquear su Razor Shuriken entrante. Si su Living Shadow está en cooldown, tienes una breve ventana de quince segundos para limpiar minions con seguridad usando Radiant Volley.
Estos campeones tienen herramientas que generalmente les dan ventaja en el enfrentamiento, sin llegar a hacer el matchup injugable. Pueden tener más alcance, mejor capacidad para aguantar tu ofensiva o más formas de responder a tus engagements. Tendrás que adaptar tu enfoque y elegir con cuidado los momentos en los que aceptas el combate.
Limpieza de oleadasIntercambiosVex neutraliza la prioridad habitual de push de Mel al igualar sin esfuerzo el waveclear de Radiant Volley con el daño en área combinado de Looming Darkness y Mistral Bolt. Esto le niega a Mel la posibilidad de atrapar a Vex bajo la torre. Una vez neutralizada la wave, Vex puede esperar con seguridad a que pase Rebuttal antes de lanzar Shadow Surge para cerrar la distancia y ejecutar un devastador combo de burst.Build de Vex →Ver detalles
Vex
Por qué
Vex neutraliza la prioridad habitual de push de Mel al igualar sin esfuerzo el waveclear de Radiant Volley con el daño en área combinado de Looming Darkness y Mistral Bolt. Esto le niega a Mel la posibilidad de atrapar a Vex bajo la torre. Una vez neutralizada la wave, Vex puede esperar con seguridad a que pase Rebuttal antes de lanzar Shadow Surge para cerrar la distancia y ejecutar un devastador combo de burst.
Impacto en la línea
Esta paridad en el waveclear te impide establecer prioridad temprana o hacer roam a las lanes laterales. En su lugar, quedas atrapado en un tenso enfrentamiento en la lane central, donde cualquier uso apresurado de Rebuttal para bloquear poke invita a un enfrentamiento inmediato con Shadow Surge. Si te ves obligado a retirarte o pierdes la mitad de tu vida por su burst, tu presión sobre la torre desaparece.
Cómo jugar
Debes reservar Rebuttal exclusivamente para interceptar Shadow Surge o para bloquear el burst posterior si la marca impacta. Nunca lo uses para desviar un simple poke de Mistral Bolt. Concéntrate en acertar Solar Snare para inmovilizar a Vex cuando intente acercarse y luego castígala con Radiant Volley. Si Vex falla su definitiva, aprovecha esa larga ventana de cooldown para empujar la wave de forma agresiva.
AsesinoPresión tempranaA Mel le cuesta mantener a Talon a raya porque su principal herramienta de disengage, Solar Snare, es fácil de provocar. En el momento en que lanzas este orbe y fallas, o lo usas para limpiar waves, Talon cerrará la distancia de inmediato usando Noxian Diplomacy. Sin ese root, no puedes impedir que acierte Rake para aplicar stacks de Blade's End, lo que te fuerza a un trade mortal en el que Rebuttal solo puede mitigar una fracción de su burst.Build de Talon →Ver detalles
Talon
Por qué
A Mel le cuesta mantener a Talon a raya porque su principal herramienta de disengage, Solar Snare, es fácil de provocar. En el momento en que lanzas este orbe y fallas, o lo usas para limpiar waves, Talon cerrará la distancia de inmediato usando Noxian Diplomacy. Sin ese root, no puedes impedir que acierte Rake para aplicar stacks de Blade's End, lo que te fuerza a un trade mortal en el que Rebuttal solo puede mitigar una fracción de su burst.
Impacto en la línea
Esta amenaza paraliza tu waveclear y te obliga a jugar de forma pasiva bajo tu torre. Si te adelantas para acertar Radiant Volley, corres el riesgo de que te quiten buena parte de la vida. Una vez que Talon desbloquea Shadow Assault, su movilidad con Assassin's Path crea una presión inmensa, ya que puede empujar la lane y hacer roam por las paredes hacia las lanes laterales mientras tú te quedas atascado asegurando minions con seguridad bajo la torre.
Cómo jugar
Para sobrevivir, acapara absolutamente Solar Snare. Lánzalo solo de forma defensiva cuando Talon se comprometa hacia delante con Noxian Diplomacy. Si inicia con Rake, usa Rebuttal para desviar las cuchillas que regresan y bloquear el stack de la pasiva. Nunca disputes sus roams por la jungla; en su lugar, avisa de inmediato con pings a tus compañeros de que falta y castiga su ausencia acumulando Searing Brilliance con seguridad sobre la wave y detonándolo con Golden Eclipse.
Presión en el mapaLimpieza de oleadasTwisted Fate neutraliza por completo el potencial de push de Mel al combinar el daño en área de la carta roja de Pick a Card con Wild Cards para limpiar los minions al instante. Este control rápido de la wave le permite activar Destiny con libertad, eludiendo cualquier intento de zoneo de Solar Snare, y teletransportarse a las side lanes. Al no tener movilidad, Mel no puede igualar esa presencia global e instantánea en el mapa antes de que su rival de lane consiga ventajas en otro lugar.Build de Twisted Fate →Ver detalles
Twisted Fate
Por qué
Twisted Fate neutraliza por completo el potencial de push de Mel al combinar el daño en área de la carta roja de Pick a Card con Wild Cards para limpiar los minions al instante. Este control rápido de la wave le permite activar Destiny con libertad, eludiendo cualquier intento de zoneo de Solar Snare, y teletransportarse a las side lanes. Al no tener movilidad, Mel no puede igualar esa presencia global e instantánea en el mapa antes de que su rival de lane consiga ventajas en otro lugar.
Impacto en la línea
Este matchup se convierte en una batalla asimétrica de waveclear en la que tu control de la lane se ve desafiado constantemente. Como Twisted Fate empuja desde una distancia segura, te ves obligado a gastar maná en Radiant Volley solo para evitar que los minions lleguen a tu torre. En cuanto desaparece de tu visión, la amenaza de Destiny obliga a tus side lanes a retroceder, quitando el control del mapa a tu equipo mientras tú te esfuerzas por dañar su torre.
Cómo jugar
Para sobrevivir a este déficit de presión en el mapa, guarda siempre Solar Snare para interrumpir su canalización si intenta lanzar Destiny dentro de tu visión. Si se retira a la niebla de guerra, no te embarques en una persecución inútil por el río; en su lugar, lanza de inmediato ataques de Radiant Volley y Searing Brilliance para hacer llegar la wave, y luego usa Golden Eclipse para asegurar las placas de la torre local. Ten Rebuttal listo para desviar su carta dorada de aturdimiento durante las escaramuzas.
Limpieza de oleadasEscudosViktor neutraliza fácilmente el poke de Mel. Cuando Mel intenta acumular Searing Brilliance usando Radiant Volley, Viktor responde con Siphon Power, absorbiendo el daño con su escudo mientras devuelve daño. Al mismo tiempo, iguala sin esfuerzo el push de Mel desde una distancia segura con Hextech Ray, impidiéndole conseguir prioridad de lane o acertar Solar Snare a través de la wave de minions.Build de Viktor →Ver detalles
Viktor
Por qué
Viktor neutraliza fácilmente el poke de Mel. Cuando Mel intenta acumular Searing Brilliance usando Radiant Volley, Viktor responde con Siphon Power, absorbiendo el daño con su escudo mientras devuelve daño. Al mismo tiempo, iguala sin esfuerzo el push de Mel desde una distancia segura con Hextech Ray, impidiéndole conseguir prioridad de lane o acertar Solar Snare a través de la wave de minions.
Impacto en la línea
Como Hextech Ray limpia las waves al instante desde lejos, Mel se ve obligada a gastar maná constantemente en Radiant Volley solo para mantener a salvo su torre. No puedes preparar con facilidad las ejecuciones de Golden Eclipse porque el escudo de Siphon Power de Viktor anula los umbrales de daño. Esto convierte la lane en una agotadora guerra de desgaste en la que Mel queda atrapada bajo su torre, sin poder hacer roam.
Cómo jugar
Para sobrevivir, deja de intentar forzar trades directos contra Siphon Power. En su lugar, guarda Rebuttal específicamente para bloquear su Hextech Ray mejorado o el burst inicial de Arcane Storm durante los all-ins. Concentra tu Radiant Volley únicamente en los minions lanzadores para mantener la wave equilibrada. Si Viktor suelta Gravity Field para zonearte, retrocede de inmediato y usa la velocidad de movimiento de Rebuttal para reposicionarte en lugar de intentar atravesarlo.
Bloqueo de proyectilesMovilidadYasuo controla esta lane porque Wind Wall neutraliza por completo tus principales herramientas de amenaza. Tanto tu waveclear como el poke de Radiant Volley, además de tu control de masas defensivo en Solar Snare, quedan totalmente bloqueados por su barrera. Esta negación de proyectiles, combinada con Sweeping Blade, que le da dashes constantes a través de tu wave de minions, le permite evitar tu ventaja de alcance y forzar duelos directos en los que Steel Tempest destroza tu vida.Build de Yasuo →Ver detalles
Yasuo
Por qué
Yasuo controla esta lane porque Wind Wall neutraliza por completo tus principales herramientas de amenaza. Tanto tu waveclear como el poke de Radiant Volley, además de tu control de masas defensivo en Solar Snare, quedan totalmente bloqueados por su barrera. Esta negación de proyectiles, combinada con Sweeping Blade, que le da dashes constantes a través de tu wave de minions, le permite evitar tu ventaja de alcance y forzar duelos directos en los que Steel Tempest destroza tu vida.
Impacto en la línea
Te ves obligado a adoptar una postura defensiva bajo tu torreta, sin poder disputar la wave de forma activa. Yasuo puede hacer freeze de la lane y alejarte del oro, sabiendo que si lanzas Solar Snare para farmear, puede bloquearlo y avanzar de inmediato con un dash. Si fallas tu CC, acumulará Steel Tempest, lanzará su tornado y activará Last Breath con facilidad, forzando una vuelta temprana a la base o consiguiendo una kill en solitario.
Cómo jugar
Para sobrevivir, rompe su escudo de Way of the Wanderer con un ataque básico antes de gastar maná. Debes reservar Solar Snare como una herramienta pura de auto-peel; úsalo solo si su Wind Wall está en su largo cooldown o si puedes engañarlo para que haga una mala trayectoria con Sweeping Blade. Si lanza su tornado de Steel Tempest, activa Rebuttal de inmediato para bloquear el efecto aéreo, negándole la preparación para Last Breath y manteniéndote a salvo bajo tu torre.
Temporal Mirage le da a Zilean la velocidad de movimiento necesaria para esquivar con facilidad las skillshots principales de Mel, Radiant Volley y Solar Snare. Como puede esquivar estas herramientas, a Mel le cuesta acumular Searing Brilliance sobre él. Cuando Zilean llega al nivel cinco, su Chronoshift anula por completo el umbral de ejecución de Golden Eclipse de Mel, convirtiendo lo que debería ser un burst letal en una definitiva desperdiciada.Build de Zilean →Ver detalles
Zilean
Por qué
Temporal Mirage le da a Zilean la velocidad de movimiento necesaria para esquivar con facilidad las skillshots principales de Mel, Radiant Volley y Solar Snare. Como puede esquivar estas herramientas, a Mel le cuesta acumular Searing Brilliance sobre él. Cuando Zilean llega al nivel cinco, su Chronoshift anula por completo el umbral de ejecución de Golden Eclipse de Mel, convirtiendo lo que debería ser un burst letal en una definitiva desperdiciada.
Impacto en la línea
Este matchup se convierte en una carrera contra el reloj en la que Zilean farmea y escala con seguridad. Como no puedes acertar Solar Snare con facilidad, tu presión sobre él es mínima, lo que le permite guardar Time Bomb para limpiar waves o hostigarte. Si intentas trades agresivos, su Twisted Timeflow le permite duplicar Time Bomb para aturdirte, obligándote a usar Rebuttal de forma defensiva en lugar de usarlo para bloquear su único proyectil.
Cómo jugar
Debes forzarlo a gastar Temporal Mirage antes de lanzar tus hechizos de daño principales. Fíjate en cuándo usa su aumento de velocidad para posicionarse de forma agresiva, y espera a que ese beneficio se disipe antes de lanzar Radiant Volley. Nunca inicies con Solar Snare; guárdalo como herramienta de contra-engage para cuando se acerque a lanzar una Time Bomb. Si se lanza Chronoshift a sí mismo, deja de atacar de inmediato y guarda tu Golden Eclipse para cuando termine su animación de resurrección.
PokePicksMel es vulnerable porque sus herramientas principales, Radiant Volley y Solar Snare, la obligan a breves animaciones de lanzamiento en las que debe quedarse quieta. Zoe se aprovecha de esta previsibilidad. Al posicionarse en la niebla de guerra, Zoe puede lanzar Sleepy Trouble Bubble a través de las paredes para atraparte durante esos fotogramas bloqueados, preparando un devastador Paddle Star! que ignora tu control de la wave.Build de Zoe →Ver detalles
Zoe
Por qué
Mel es vulnerable porque sus herramientas principales, Radiant Volley y Solar Snare, la obligan a breves animaciones de lanzamiento en las que debe quedarse quieta. Zoe se aprovecha de esta previsibilidad. Al posicionarse en la niebla de guerra, Zoe puede lanzar Sleepy Trouble Bubble a través de las paredes para atraparte durante esos fotogramas bloqueados, preparando un devastador Paddle Star! que ignora tu control de la wave.
Impacto en la línea
Esta interacción dicta todo el ritmo de tu waveclear. No puedes lanzar Radiant Volley a ciegas para empujar la lane sin arriesgarte a un efecto de sueño repentino desde el arbusto lateral. Si te alcanza Sleepy Trouble Bubble, debes usar Rebuttal de inmediato para absorber el Paddle Star! entrante. Si tu barrera está en cooldown, te dejará con la vida crítica, perdiendo oro y la prioridad de lane.
Cómo jugar
Para sobrevivir, debes jugar a la defensiva cerca del centro de la lane, lejos de los ángulos de pared que alargan el alcance de la burbuja de Zoe. Nunca uses Rebuttal de forma ofensiva; resérvalo estrictamente para bloquear Paddle Star! si Sleepy Trouble Bubble conecta. Espera a que Zoe desperdicie su Paddle Star! en la wave de minions antes de intentar acertar un inmovilizador con Solar Snare o acumular Searing Brilliance con tus ataques básicos.
PokeEscudosRumble domina este matchup porque la principal herramienta defensiva de Mel, Rebuttal, es completamente inútil contra sus principales fuentes de daño. Aunque Rebuttal puede bloquear Electro Harpoon, no mitiga el daño continuo de Flamespitter ni el fuego de zoneo de The Equalizer. Esto obliga a Mel a una delicada batalla de espaciado en la que debe depender por completo del posicionamiento manual, y no de su barrera defensiva, para sobrevivir a sus trades agresivos.Build de Rumble →Ver detalles
Rumble
Por qué
Rumble domina este matchup porque la principal herramienta defensiva de Mel, Rebuttal, es completamente inútil contra sus principales fuentes de daño. Aunque Rebuttal puede bloquear Electro Harpoon, no mitiga el daño continuo de Flamespitter ni el fuego de zoneo de The Equalizer. Esto obliga a Mel a una delicada batalla de espaciado en la que debe depender por completo del posicionamiento manual, y no de su barrera defensiva, para sobrevivir a sus trades agresivos.
Impacto en la línea
Durante la fase de lane, Rumble empujará constantemente con Flamespitter mientras usa Scrap Shield para absorber tu represalia. Si desperdicias Solar Snare, te perseguirá de inmediato. Te ves obligado a farmear bajo la torre, cediendo la prioridad temprana. Recibir mucho daño de un The Equalizer mal espaciado fuerza vueltas prematuras a la base, permitiendo a Rumble hacer roam libremente o asegurar el control de objetivos mientras tú estás atascado limpiando waves.
Cómo jugar
Para sobrevivir, debes jugar a la defensiva y respetar estrictamente su barra de Heat. Lanza Radiant Volley solo para last-hit desde el alcance máximo cuando su Scrap Shield esté en cooldown. Ten Solar Snare listo como herramienta de disengage para cuando intente abalanzarse sobre ti con la velocidad de movimiento de Danger Zone. Si Rumble suelta The Equalizer, activa Rebuttal al instante únicamente por el aumento de velocidad de movimiento decreciente para escapar de la zona en llamas, en lugar de esperar bloquear cualquier daño entrante.
PokeControl de zonaGarden of Thorns y Rampant Growth de Zyra crean una carrera de obstáculos que neutraliza por completo tu amenaza ofensiva. Sus plantas invocadas bloquean la trayectoria de tu Solar Snare, impidiéndote acertar un inmovilizador limpio. Para eliminar estas persistentes amenazas botánicas, te ves obligado a gastar Radiant Volley, drenando tu maná y dejando tu principal herramienta de daño en cooldown mientras Zyra controla libremente la geometría de la lane.Build de Zyra →Ver detalles
Zyra
Por qué
Garden of Thorns y Rampant Growth de Zyra crean una carrera de obstáculos que neutraliza por completo tu amenaza ofensiva. Sus plantas invocadas bloquean la trayectoria de tu Solar Snare, impidiéndote acertar un inmovilizador limpio. Para eliminar estas persistentes amenazas botánicas, te ves obligado a gastar Radiant Volley, drenando tu maná y dejando tu principal herramienta de daño en cooldown mientras Zyra controla libremente la geometría de la lane.
Impacto en la línea
Como debes usar Radiant Volley de forma defensiva contra las plantas, Zyra empuja con facilidad las waves hacia tu torre usando Deadly Spines. No puedes disputar el push, y quedas atrapado bajo la torreta mientras ella hace roam o asegura visión. Cualquier intento de avanzar y hacer un trade te expone a Grasping Roots, que puede acabar en un mortal derribo de Stranglethorns, forzando vueltas tempranas a la base y privando a tu jungler de la prioridad en la mid lane.
Cómo jugar
Concéntrate por completo en llevar la wave de minions hacia tu lado para reducir el espacio en el que Zyra puede plantar semillas. Nunca lances Solar Snare si ella tiene Rampant Growth activo; guárdalo para hacer disengage si se compromete con Grasping Roots. Usa tus ataques básicos potenciados por Searing Brilliance para ejecutar sus plantas en lugar de malgastar hechizos. Si te atrapa bajo la torre, activa Rebuttal para bloquear los proyectiles de sus plantas a distancia mientras limpias la wave con seguridad.
Estos enfrentamientos son sobre todo duelos de ejecución: ambos campeones tienen formas reales de tomar la ventaja. Esquivar una habilidad clave, anticipar bien un engagement o un simple error de posicionamiento puede inclinar el duelo hacia un lado. Conocer el matchup y reconocer las ventanas de acción correctas es especialmente importante aquí.
SustentoPosicionamientoEste matchup es una batalla constante entre el poke a distancia de Mel y la curación de Vladimir. Tu objetivo es acumular Overwhelm usando Radiant Volley, pero Vladimir contrarresta este desgaste drenando minions constantemente con Transfusion. La interacción crítica gira en torno a Solar Snare: si lo lanzas con imprudencia, Vladimir simplemente se disolverá en Sanguine Pool, desperdiciando por completo tu CC y dejándote vulnerable a su burst, que escala con Crimson Pact.Build de Vladimir →Ver detalles
Vladimir
Por qué
Este matchup es una batalla constante entre el poke a distancia de Mel y la curación de Vladimir. Tu objetivo es acumular Overwhelm usando Radiant Volley, pero Vladimir contrarresta este desgaste drenando minions constantemente con Transfusion. La interacción crítica gira en torno a Solar Snare: si lo lanzas con imprudencia, Vladimir simplemente se disolverá en Sanguine Pool, desperdiciando por completo tu CC y dejándote vulnerable a su burst, que escala con Crimson Pact.
Impacto en la línea
El ritmo de la lane cambia según la barra de recurso de Vladimir. Cuando su Transfusion está a punto de potenciarse, debes ceder espacio, o anulará la ventaja de vida que construiste con Radiant Volley. Como Vladimir carece de waveclear temprano sin sacrificar vida con Tides of Blood, puedes empujarlo fácilmente bajo su torre. Sin embargo, sobreextenderte sin Solar Snare disponible invita a gankeos fáciles, ya que no puedes activar Golden Eclipse con facilidad sobre un objetivo en forma de charco.
Cómo jugar
Nunca lances Solar Snare a menos que Vladimir ya haya gastado Sanguine Pool o lo hayas forzado a usarlo de forma defensiva. En su lugar, haz que gaste su charco zoneándolo con Radiant Volley cuando se adelante para una Transfusion potenciada. Si entra en el charco, retrocede de inmediato, espera a que termine y castígalo con tu combo de snare seguido de definitiva antes de que su charco vuelva a estar disponible. Usa Rebuttal para bloquear los proyectiles de Tides of Blood durante los trades a corta distancia.
EsquivaAlcanceEste matchup igualado gira por completo en torno a cómo manejas la geometría de Vel'Koz con tu escudo defensivo. Su Organic Deconstruction depende de acertar skillshots consecutivas para derretir tu barra de vida. Si cronometras Rebuttal a la perfección para reflejar el Plasma Fission que se divide o el lanzamiento aéreo de Tectonic Disruption, no solo te proteges; además le niegas activamente las acumulaciones de pasiva que necesita para preparar su devastador Life Form Disintegration Ray.Build de Vel'Koz →Ver detalles
Vel'Koz
Por qué
Este matchup igualado gira por completo en torno a cómo manejas la geometría de Vel'Koz con tu escudo defensivo. Su Organic Deconstruction depende de acertar skillshots consecutivas para derretir tu barra de vida. Si cronometras Rebuttal a la perfección para reflejar el Plasma Fission que se divide o el lanzamiento aéreo de Tectonic Disruption, no solo te proteges; además le niegas activamente las acumulaciones de pasiva que necesita para preparar su devastador Life Form Disintegration Ray.
Impacto en la línea
Como Vel'Koz puede limpiar waves rápidamente con Void Rift, a menudo te verás empujado bajo la torre si juegas con demasiada pasividad. Los reflejos exitosos con Rebuttal cambian la presión de la lane al instante. Desviar su CC te permite avanzar, acertar Solar Snare y hacer trades sin temer su burst de daño verdadero. Si fallas este timing, te ves forzado a retroceder, cediendo la prioridad de la mid lane y dejando a tu jungler sin apoyo.
Cómo jugar
Para ganar este duelo, colócate en diagonal respecto a la wave de minions para obligar a Vel'Koz a elegir entre limpiar minions con Void Rift o hacerte poke con Plasma Fission. Nunca lances Rebuttal de forma preventiva; guárdalo específicamente para cuando su Tectonic Disruption se lance bajo tus pies, o cuando un rayo que se divide esté a punto de impactar. Si reflejas con éxito su CC, avanza de inmediato con Solar Snare y Radiant Volley para acumular Overwhelm, rematándolo con Golden Eclipse antes de que recupere sus cooldowns.
PosicionamientoLimpieza de oleadasEste matchup es una pura batalla de control del espacio. Veigar se apoya en Event Horizon para crear una barrera que le niega a Mel la distancia corta-media que necesita para acertar Radiant Volley. Mientras te mantiene a raya, él escala y farmea con seguridad usando Baleful Strike. Como Mel no puede sortear con facilidad el anillo de aturdimiento para aplicar Searing Brilliance, la lane se mantiene perfectamente neutral a menos que alguno cometa un error.Build de Veigar →Ver detalles
Veigar
Por qué
Este matchup es una pura batalla de control del espacio. Veigar se apoya en Event Horizon para crear una barrera que le niega a Mel la distancia corta-media que necesita para acertar Radiant Volley. Mientras te mantiene a raya, él escala y farmea con seguridad usando Baleful Strike. Como Mel no puede sortear con facilidad el anillo de aturdimiento para aplicar Searing Brilliance, la lane se mantiene perfectamente neutral a menos que alguno cometa un error.
Impacto en la línea
La dinámica de la lane gira en torno a un farmeo pasivo interrumpido por enfrentamientos repentinos. Veigar usará Baleful Strike para asegurar minions mientras reserva Event Horizon para detener cualquier avance agresivo de Mel. Si intentas forzar un trade con Solar Snare, puede soltar al instante su jaula para aislarte. Esto limita tu capacidad de presionar su torre y genera una lane muy estática en la que las barras de vida se mantienen casi llenas.
Cómo jugar
Para sortear su zoneo, haz que gaste Event Horizon avanzando un paso y retrocediendo de inmediato. Cuando su jaula esté en cooldown, avanza con agresividad para acertar Solar Snare y activar Searing Brilliance. Si te atrapa dentro de la jaula, no entres en pánico caminando hacia el aturdimiento; en su lugar, activa Rebuttal para absorber el Dark Matter o el Primordial Burst entrante, y luego contraataca con Radiant Volley cuando las paredes desaparezcan.
Estos campeones suelen tener problemas para responder a tus principales fortalezas, lo que te permite afrontar el enfrentamiento con más libertad. Normalmente tienes varias formas de presionarlos y forzar intercambios a tu favor. Aprovecha esta ventaja para imponer tu ritmo en lugar de darles tiempo para volver a una posición cómoda.
EsquivaSustentoLa enorme ventaja de alcance de Mel dicta este matchup. Como Toxic Shot obliga a Teemo a entrar en el rango de ataque básico, Mel puede interceptarlo fácilmente con Solar Snare antes de que siquiera acierte un Blinding Dart. Esto fuerza a Teemo a gastar Move Quick constantemente de forma defensiva para esquivar Radiant Volley, dejándolo incapaz de hacer trades eficaces mientras Mel acumula Searing Brilliance de forma continua desde una seguridad absoluta.Build de Teemo →Ver detalles
Teemo
Por qué
La enorme ventaja de alcance de Mel dicta este matchup. Como Toxic Shot obliga a Teemo a entrar en el rango de ataque básico, Mel puede interceptarlo fácilmente con Solar Snare antes de que siquiera acierte un Blinding Dart. Esto fuerza a Teemo a gastar Move Quick constantemente de forma defensiva para esquivar Radiant Volley, dejándolo incapaz de hacer trades eficaces mientras Mel acumula Searing Brilliance de forma continua desde una seguridad absoluta.
Impacto en la línea
Esta asimetría de alcance distorsiona la lane temprana. Teemo no puede disputar la wave sin recibir un poke enorme de Radiant Volley, lo que lo mantiene atrapado bajo su torre. Sus intentos de usar Guerrilla Warfare para trades sorpresa quedan anulados porque Mel puede revisar los arbustos con seguridad con sus hechizos de área de largo alcance. En consecuencia, la vida de Teemo se va desgastando poco a poco, arruinando sus timings de roam y neutralizando su presión en el mapa.
Cómo jugar
Para ejecutar esta lane a la perfección, mantente bien detrás de tus minions lanzadores, fuera del rango de ataque básico de Teemo. Observa cuándo activa Move Quick; cuando su aumento de velocidad se disipe, lanza de inmediato Solar Snare seguido de Radiant Volley para inmovilizarlo. Guarda Rebuttal específicamente para bloquear Blinding Dart si intenta un engage con flash. Si pisas un Noxious Trap, retrocede de inmediato y detona tus acumulaciones con Golden Eclipse para castigarlo desde lejos.
Ventaja: veredicto canónico de Wild Rift Core (−3 a +3), desde el punto de vista del campeón nombrado en la fila. Tasa de victorias y de selección: las del propio rival en este rol — Wild Rift CN · Challenger, Patch 7.3b. No es la tasa de victorias del enfrentamiento directo.
Cómo contrarrestar a este campeón
Ángulo de contra
Mel no solo recibe counter por parte de campeones, sino por tipos de presión. Lo que la amenaza son los campeones que rompen su tempo e ignoran su zoning. Los asesinos rápidos o las elecciones que esquivan su control reducen drásticamente su impacto. Por el contrario, domina a los campeones que dependen de un movimiento lineal o de un poke lento. Entender estas dinámicas es clave: no se trata de matchups aislados, sino de la estructura de la pelea.
Contexto del parche
Los counters de Mel comparten un rasgo: no respetan su espacio. Hacen engage rápidamente, fuerzan decisiones inmediatas y anulan su control. Mientras tanto, los campeones a los que domina deben avanzar lentamente, exponiéndose a su poke y a Golden Eclipse. La diferencia no es el daño bruto, sino quién dicta el tempo de la pelea.
Lectura rápida
Débil contra dives rápidos.
Fuerte contra magos lineales.
Depende del timing defensivo.
Arquetipos de contra
Asesinos de burst
Estos campeones ignoran por completo el juego de Mel. No interactúan con sus zonas: van directos a por ella. Su burst reduce la capacidad de Mel para preparar Golden Eclipse y usar Rebuttal de forma efectiva. Una vez que sufre un engage, Mel no tiene movilidad ni segundas oportunidades.
Cómo se adapta el campeón. Juega más atrás, guarda Rebuttal para el engage y evita exponerte sin visión.
Antimagos de escalado
Estos campeones absorben las fases de poke y se vuelven incontrolables con el tiempo. Mel no puede castigarlos lo suficientemente pronto y pierde el control una vez que alcanzan sus power spikes.
Cómo se adapta el campeón. Acelera la presión en el early game y juega alrededor de los objectives antes de que escalen.
Magos de control
Estos campeones dependen de un movimiento predecible o de un poke estructurado, lo que encaja perfectamente con el kit de Mel. Ella puede bloquear, esquivar y castigar sus habilidades.
Fizz es peligroso porque ignora por completo el zoning. Espera a que uses mal Rebuttal o cometas un error de posicionamiento para hacer engage y matar. El matchup depende enteramente de la disciplina de Mel.
Errores comunes en su contra
Errores comunes en su contra
Subestimar los timings de engage del enemigo.
Usar habilidades de forma ofensiva contra asesinos.
No respetar los power spikes del enemigo.
Jugar demasiado adelantado sin visión.
Forzar trades innecesarios.
Notas del coach
Si el enemigo no necesita pasar por tus zonas, estás en peligro.
Tu objetivo es ralentizar las peleas, no acelerarlas.
FAQ
¿Por qué Mel pierde contra Fizz?
Fizz no juega al mismo juego. Ignora las zonas y hace engage directamente. Si Mel usa mal Rebuttal o se posiciona mal, puede matarla al instante. El matchup se basa en la disciplina defensiva.
¿Cómo vencer a Kassadin jugando como Mel?
Debes acelerar la partida. Kassadin se vuelve demasiado fuerte en el late game, así que necesitas jugar alrededor de los objetivos del early y mid-game. Si dejas que escale, perderás el control.
¿Es Mel fuerte contra magos?
Sí, especialmente contra aquellos que dependen de un movimiento predecible. Puede bloquear hechizos clave y castigar timings con poke y Golden Eclipse.
¿Cuál es su peor tipo de enemigo?
Campeones que pueden hacer engage rápidamente sin interactuar con sus zonas. Rompen su tempo y hacen que su kit sea ineficaz.