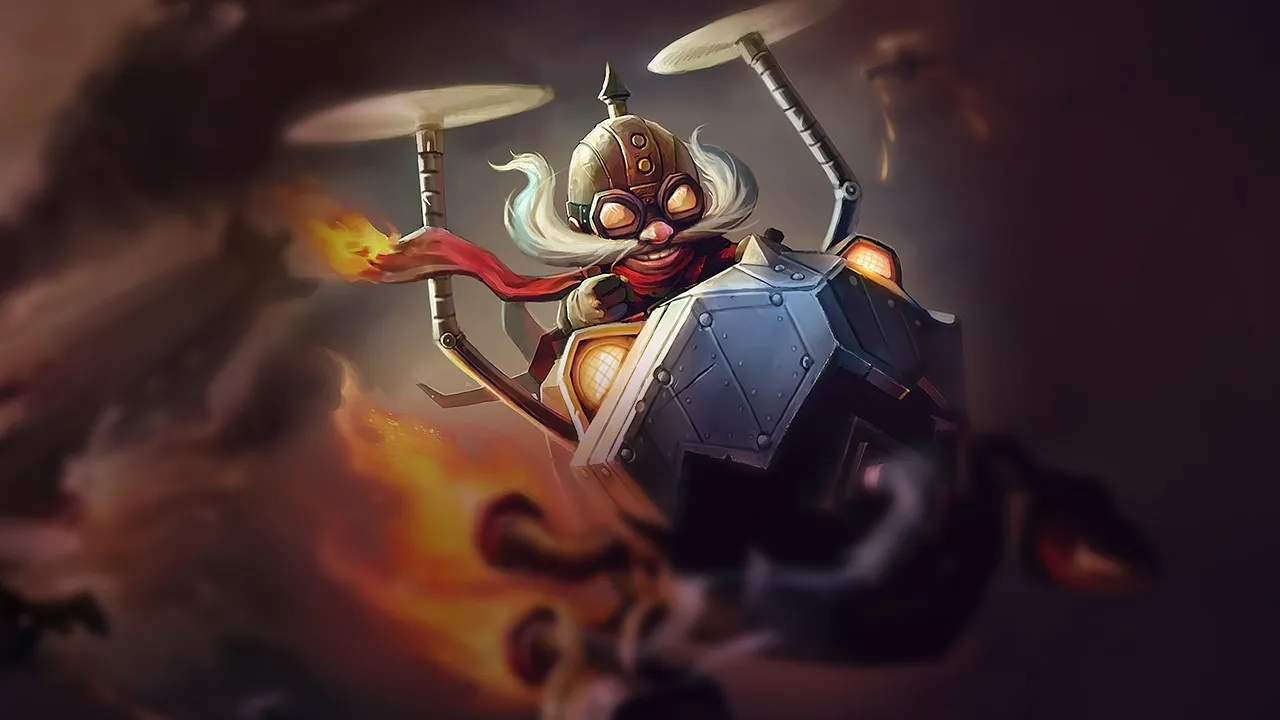
Corki sufre contra composiciones capaces de forzar engages rápidos antes de que pueda usar su poke de largo alcance. Las estrategias de dive, la alta mobility y el crowd control dirigido reducen drásticamente su potencial de daño sostenido. Su dependencia de un positioning seguro y un scaling gradual define su debilidad principal.
★ MID · DRAGONTier A
DAÑO
UTIL
TANK
DIFF
Guía de counters de Corki Wild Rift
Contras Difíciles
1
Estos campeones tienen una build y un estilo de juego que superan directamente al tuyo, lo que puede hacer que controlar la línea y farmear sea extremadamente difícil. Sus habilidades pueden neutralizar tus principales fortalezas o castigarte en cuanto intentas jugar tu plan habitual. En estos matchups, el objetivo suele ser minimizar errores y buscar soluciones fuera del enfrentamiento directo.
All-inMovilidadIrelia neutraliza por completo tu ventaja de alcance por cómo interactúa su Bladesurge con los minions con poca vida. Puede encadenar dashes rápidamente para cerrar al instante toda la distancia de la mid lane. Si te pilla desprevenido, preparará Flawless Duet para aturdirte. Como Valkyrie tiene un ligero retraso de lanzamiento, su aturdimiento te interrumpirá o te alcanzará antes de que puedas volar a un lugar seguro.Build de Irelia →Ver detalles
Irelia
Por qué
Irelia neutraliza por completo tu ventaja de alcance por cómo interactúa su Bladesurge con los minions con poca vida. Puede encadenar dashes rápidamente para cerrar al instante toda la distancia de la mid lane. Si te pilla desprevenido, preparará Flawless Duet para aturdirte. Como Valkyrie tiene un ligero retraso de lanzamiento, su aturdimiento te interrumpirá o te alcanzará antes de que puedas volar a un lugar seguro.
Impacto en la línea
Esta amenaza constante te fuerza a una postura muy defensiva. No puedes colocarte cerca de tus propios minions moribundos, ya que actúan como auténticas plataformas de lanzamiento para su Bladesurge. En consecuencia, tendrás que ceder el control de la wave al principio, farmeando a menudo desde un alcance extremo con Phosphorus Bomb. Esto te priva de prioridad, permitiéndole acumular fácilmente Ionian Fervor y hacer crash de waves para roamear mientras tú te quedas atascado bajo la torre.
Cómo jugar
Para sobrevivir, debes mantener activamente la wave de minions en freeze justo fuera del alcance de tu torre. Vigila constantemente la vida de tus propios minions; cuando uno tenga poca vida, retrocede de inmediato para hacer bait de su Bladesurge. Nunca uses Valkyrie de forma agresiva; guárdala exclusivamente para reaccionar a su Vanguard's Edge o para escapar tras esquivar Flawless Duet. Si hace freeze, usa Missile Barrage para romperlo desde la máxima seguridad sin entrar en su rango de dash.
Estos campeones tienen herramientas que generalmente les dan ventaja en el enfrentamiento, sin llegar a hacer el matchup injugable. Pueden tener más alcance, mejor capacidad para aguantar tu ofensiva o más formas de responder a tus engagements. Tendrás que adaptar tu enfoque y elegir con cuidado los momentos en los que aceptas el combate.
Presión tempranaEscaramuzasYasuo limita enormemente tu impacto porque su Wind Wall actúa como una barrera absoluta contra tus principales fuentes de daño. Tanto tu Phosphorus Bomb como tu Missile Barrage son absorbidos por completo por su muro de viento. Esto significa que tu juego basado en poke queda totalmente neutralizado durante las teamfights y escaramuzas, y te obliga a jugar alrededor del largo cooldown de su muro defensivo en lugar de infligir daño mágico constante desde la distancia con libertad.Build de Yasuo →Ver detalles
Yasuo
Por qué
Yasuo limita enormemente tu impacto porque su Wind Wall actúa como una barrera absoluta contra tus principales fuentes de daño. Tanto tu Phosphorus Bomb como tu Missile Barrage son absorbidos por completo por su muro de viento. Esto significa que tu juego basado en poke queda totalmente neutralizado durante las teamfights y escaramuzas, y te obliga a jugar alrededor del largo cooldown de su muro defensivo en lugar de infligir daño mágico constante desde la distancia con libertad.
Impacto en la línea
En lane, Sweeping Blade permite a Yasuo cerrar la distancia con facilidad, eludiendo tu ventaja de alcance. Cuando intentas retirarte con Valkyrie, a menudo puede alcanzarte con un tornado de Steel Tempest cargado para activar Last Breath. Esta amenaza constante te obliga a quedarte bajo tu torre, ya que no puedes hacer trade de vuelta con seguridad una vez que tu Phosphorus Bomb queda bloqueada, y sacrificas la prioridad en la mid lane y dejas a tu jungler sin apoyo temprano.
Cómo jugar
Debes forzar el uso de Wind Wall antes de lanzar tus cargas de Missile Barrage. Usa ataques básicos para romper primero el escudo de Way of the Wanderer y luego lanza una sola Phosphorus Bomb para obligarlo a usar su muro defensivo. Cuando Wind Wall esté en cooldown, tendrás una breve ventana para abusar de Gatling Gun y de tu spam de cohetes. Si se lanza hacia delante con Sweeping Blade, escapa de inmediato hacia atrás con Valkyrie, asegurándote de que Steel Tempest no te lance por los aires.
All-inMovilidadCorki sufre porque el poder bruto de Yone para cerrar la distancia elude por completo tu principal escape. Incluso si reaccionas rápido con Valkyrie, Yone puede igualar y superar fácilmente la distancia de tu dash al combinar el dash hacia delante de Soul Unbound con el dash con knock-up del tercer lanzamiento de Mortal Steel. Esta combinación de doble dash le permite alcanzarte en pleno vuelo, cancelar el impulso de tu escape y forzar trades letales.Build de Yone →Ver detalles
Yone
Por qué
Corki sufre porque el poder bruto de Yone para cerrar la distancia elude por completo tu principal escape. Incluso si reaccionas rápido con Valkyrie, Yone puede igualar y superar fácilmente la distancia de tu dash al combinar el dash hacia delante de Soul Unbound con el dash con knock-up del tercer lanzamiento de Mortal Steel. Esta combinación de doble dash le permite alcanzarte en pleno vuelo, cancelar el impulso de tu escape y forzar trades letales.
Impacto en la línea
Por esta amenaza constante de cierre de distancia, no puedes avanzar para atacar la wave con ataques básicos cuando Yone tiene Mortal Steel completamente cargado. Te ves obligado a ceder prioridad y a hacer farm desde la distancia máxima con Phosphorus Bomb y Missile Barrage. Si hace freeze cerca de su torre, corres el riesgo de morir ante un all-in cada vez que te acerques a reducir la wave, lo que supone oro perdido y picos de poder retrasados.
Cómo jugar
Vigila de cerca el indicador de viento de Yone. Cuando Mortal Steel tenga dos cargas, retrocede de inmediato y fuerza que desperdicie el tornado en los minions. Guarda siempre Valkyrie; nunca la uses de forma agresiva salvo que su Soul Unbound esté en cooldown. Si logra alcanzarte con su forma espiritual, activa Gatling Gun de inmediato para destrozar su armadura mientras te retiras, y usa Missile Barrage para ir restando vida a su escudo de Spirit Cleave.
Control de masasPresión en el mapaTu seguridad en este matchup queda totalmente comprometida por el CC instantáneo de Lissandra. En el momento en que intentas escapar o reposicionarte con Valkyrie, ella puede interrumpir tu vuelo en el aire con Ring of Frost. Cuando desbloquea Frozen Tomb, obtiene un stun point-and-click imposible de fallar que te inmoviliza, te impide lanzar cualquier hechizo defensivo y te deja completamente vulnerable a su seguimiento.Build de Lissandra →Ver detalles
Lissandra
Por qué
Tu seguridad en este matchup queda totalmente comprometida por el CC instantáneo de Lissandra. En el momento en que intentas escapar o reposicionarte con Valkyrie, ella puede interrumpir tu vuelo en el aire con Ring of Frost. Cuando desbloquea Frozen Tomb, obtiene un stun point-and-click imposible de fallar que te inmoviliza, te impide lanzar cualquier hechizo defensivo y te deja completamente vulnerable a su seguimiento.
Impacto en la línea
Por su letal bloqueo, no puedes avanzar con seguridad más allá del punto medio de la lane. Lissandra limpiará las waves constantemente con Ice Shard para obligarte a ir bajo la torre o para preparar ganks devastadores. Si te atrapa demasiado adelantado, su Glacial Path le permite cerrar la distancia al instante, y te obliga a elegir entre recibir mucho daño o arriesgarte a una Valkyrie interrumpida que acaba directamente en tu muerte.
Cómo jugar
Nunca lances Valkyrie de forma agresiva a menos que Lissandra acabe de desperdiciar tanto Ring of Frost como Glacial Path. Al hacer farm, colócate desplazado respecto a tus propios minions para evitar que te haga poke con el cono que se divide de Ice Shard. Si se teletransporta hacia ti con su garra, camina hacia atrás de inmediato en lugar de hacer dash por pánico; usa tu vuelo solo cuando haya gastado su inmovilización, o cuando estés completamente fuera del alcance de su Frozen Tomb.
Daño explosivoPosicionamientoSyndra dicta por completo el ritmo de esta lane porque Scatter the Weak puede interrumpir la animación del dash de Valkyrie. Si intentas escapar de sus preparativos de esferas, puede sacarte del aire de forma reactiva. Esta cancelación te deja inmóvil, sin tu principal herramienta defensiva y expuesto de inmediato a una letal ráfaga de Dark Sphere y a su ultimate de gran daño, Unleashed Power.Build de Syndra →Ver detalles
Syndra
Por qué
Syndra dicta por completo el ritmo de esta lane porque Scatter the Weak puede interrumpir la animación del dash de Valkyrie. Si intentas escapar de sus preparativos de esferas, puede sacarte del aire de forma reactiva. Esta cancelación te deja inmóvil, sin tu principal herramienta defensiva y expuesto de inmediato a una letal ráfaga de Dark Sphere y a su ultimate de gran daño, Unleashed Power.
Impacto en la línea
Esta interacción te obliga a adoptar una postura pasiva en la que debes respetar constantemente la colocación de sus esferas. No puedes disputar la wave con seguridad con Gatling Gun o Phosphorus Bomb sin arriesgarte a un stun. Cada vez que intentes reducir la wave, ella buscará hacerte poke con Force of Will. Si tu vida baja del sesenta por ciento, su amenaza de un dive repentino o de forzarte a hacer recall se dispara.
Cómo jugar
Nunca actives Valkyrie de forma defensiva mientras su Scatter the Weak no esté en cooldown; primero debes forzar ese knockback concreto moviéndote de lado, justo fuera del alcance de su Dark Sphere activa. Si lo desperdicia, tendrás una breve ventana para hacer trade con Gatling Gun y Phosphorus Bomb. Cuando lleves el Special Delivery, evita hacer dash directamente hacia ella, ya que un stun preventivo arruinará por completo la entrega de tu paquete.
EscudosPresión en el mapaCorki lo pasa muy mal aquí porque Hextech Munitions convierte sus ataques básicos en daño mágico, que alimenta constantemente el escudo mágico pasivo del Shield of Durand de Galio. Esto anula tu poke. Al mismo tiempo, Galio limpia las waves sin esfuerzo con Winds of War y puede impactar de inmediato en las side lanes con Hero's Entrance, haciendo roam antes que tú, incluso antes de que consigas tu paquete.Build de Galio →Ver detalles
Galio
Por qué
Corki lo pasa muy mal aquí porque Hextech Munitions convierte sus ataques básicos en daño mágico, que alimenta constantemente el escudo mágico pasivo del Shield of Durand de Galio. Esto anula tu poke. Al mismo tiempo, Galio limpia las waves sin esfuerzo con Winds of War y puede impactar de inmediato en las side lanes con Hero's Entrance, haciendo roam antes que tú, incluso antes de que consigas tu paquete.
Impacto en la línea
Tu potencial de trade queda muy limitado. Intentar destrozar sus resistencias con Gatling Gun o hacer poke con Phosphorus Bomb suele invitar a un contraengage con Justice Punch. Como no puedes amenazar su barra de vida, Galio dicta el tempo de la wave. Te empujará bajo tu torre y abandonará la lane para preparar jugadas con Hero's Entrance, dejando tus side lanes vulnerables mientras tú te esfuerzas por limpiar.
Cómo jugar
Juega esta lane a la defensiva. Guarda Valkyrie exclusivamente como herramienta reactiva para escapar cuando cargue hacia delante con Justice Punch. Usa Phosphorus Bomb y Missile Barrage para hacer farm con seguridad desde la distancia en lugar de intentar romper su Shield of Durand. Cuando los pings de falta de Galio indiquen un roam con Hero's Entrance, no lo persigas a ciegas. En su lugar, haz hard push a la wave para castigar su ausencia y espera tu paquete de Special Delivery para coordinar tu propia jugada de contrajuego en todo el mapa.
Daño explosivoMovilidadZed domina este matchup gracias a la amenaza letal de Death Mark combinada con Living Shadow para eludir tu ventaja de alcance. Aunque tu Phosphorus Bomb y tu Gatling Gun pueden acosarlo cuando se acerca, su alto potencial de burst puede eliminarte al instante si desperdicias tu escape. Sin embargo, el matchup gira en torno a un truco mecánico: preparar Valkyrie justo cuando Zed inicia su ultimate para atraerlo hacia el peligro.Build de Zed →Ver detalles
Zed
Por qué
Zed domina este matchup gracias a la amenaza letal de Death Mark combinada con Living Shadow para eludir tu ventaja de alcance. Aunque tu Phosphorus Bomb y tu Gatling Gun pueden acosarlo cuando se acerca, su alto potencial de burst puede eliminarte al instante si desperdicias tu escape. Sin embargo, el matchup gira en torno a un truco mecánico: preparar Valkyrie justo cuando Zed inicia su ultimate para atraerlo hacia el peligro.
Impacto en la línea
Debes esquivar constantemente Razor Shuriken y el Shadow Slash de su sombra para conservar tu barra de vida. Si tu vida baja lo suficiente para activar Contempt for the Weak, pierdes todo el control de la lane. Esto te obliga a jugar a la defensiva cerca de tu torre, cediendo presión en la mid lane y permitiendo que Zed haga roam para cazar a tus compañeros mientras tú haces farm desde lejos.
Cómo jugar
Nunca lances Valkyrie de forma agresiva a menos que el Living Shadow de Zed esté en su largo cooldown. Colócate cerca de tu torre cuando su ultimate esté disponible. En el momento en que veas aparecer la marca X de Death Mark sobre Corki, prepara Valkyrie de inmediato hacia atrás, bajo tu torre. Zed seguirá la trayectoria de tu vuelo y se materializará en lo profundo del alcance de la torre, convirtiendo su mortal dive en un error fatal. Hazle poke con seguridad desde la distancia con Missile Barrage.
EscaladoLimpieza de oleadasAunque ambos campeones quieren hacer scale, Ryze supera a Corki porque Arcane Mastery amplifica su amenaza en el late game. En lane, tu principal herramienta de seguridad, Valkyrie, queda completamente neutralizada por la Rune Prison instantánea y point-and-click de Ryze. Esta inmovilización inmediata te impide deslizarte lejos y te convierte en un objetivo muy fácil para el jungler enemigo si avanzas demasiado para hacer trade con Phosphorus Bomb o Gatling Gun.Build de Ryze →Ver detalles
Ryze
Por qué
Aunque ambos campeones quieren hacer scale, Ryze supera a Corki porque Arcane Mastery amplifica su amenaza en el late game. En lane, tu principal herramienta de seguridad, Valkyrie, queda completamente neutralizada por la Rune Prison instantánea y point-and-click de Ryze. Esta inmovilización inmediata te impide deslizarte lejos y te convierte en un objetivo muy fácil para el jungler enemigo si avanzas demasiado para hacer trade con Phosphorus Bomb o Gatling Gun.
Impacto en la línea
Como Rune Prison anula tu escape, no puedes permitirte hacer push a ciegas. Ryze usará Spell Flux y Overload para hacer rebotar el daño a través de tus minions, y te obligará a elegir entre recibir mucho daño o ceder prioridad. Esta presión te obliga a hacer farm bajo la torre, retrasa tus paquetes de Hextech Munitions y te impide ayudar a tu jungler, mientras Ryze hace scale con seguridad o prepara jugadas con Realm Warp.
Cómo jugar
Mantén la wave de minions cerca de tu torre usando Phosphorus Bomb solo para last-hit, no para limpiar. Nunca lances Valkyrie de forma ofensiva mientras Rune Prison esté disponible. Si Ryze hace freeze de la wave cerca de su torre, no avances; en su lugar, espera a que aparezca tu Hextech Munitions y usa el enorme aumento de velocidad de movimiento de Special Delivery para romper el freeze con seguridad o para hacer roam a una side lane, eludiendo por completo su CC point-and-click.
Control de zonaPresión en el mapaEl núcleo de este matchup está en que Unraveled Earth de Taliyah anula por completo tu movilidad. Si intentas usar Valkyrie para escapar o hacer engage, deslizarte por su campo de minas activa daño explosivo inmediato y una fuerte ralentización. Esta interacción convierte tu principal herramienta de escape en una trampa autoinfligida, sobre todo combinada con su Seismic Shove, que puede empujarte contra las piedras si te posicionas mal.Build de Taliyah →Ver detalles
Taliyah
Por qué
El núcleo de este matchup está en que Unraveled Earth de Taliyah anula por completo tu movilidad. Si intentas usar Valkyrie para escapar o hacer engage, deslizarte por su campo de minas activa daño explosivo inmediato y una fuerte ralentización. Esta interacción convierte tu principal herramienta de escape en una trampa autoinfligida, sobre todo combinada con su Seismic Shove, que puede empujarte contra las piedras si te posicionas mal.
Impacto en la línea
Como Valkyrie queda neutralizada, no puedes igualar con facilidad el waveclear de Taliyah usando Gatling Gun o Phosphorus Bomb sin exponerte. Si ella hace freeze o te zonea, acercarte a hacer farm es extremadamente peligroso. Además, Taliyah puede abusar de Rock Surfing y Weaver's Wall para hacer roam a las side lanes mientras tú te quedas atascado limpiando bajo la torre, obligando a tu equipo a jugar a la defensiva sin la presencia de tu paquete.
Cómo jugar
Mantén la distancia y concéntrate en hacer farm desde lejos con Missile Barrage cuando esté disponible. Nunca uses Valkyrie de forma reactiva mientras Unraveled Earth esté activa en el suelo. En su lugar, sal caminando de los ángulos de Threaded Volley y reserva tu dash estrictamente para esquivar Seismic Shove. Cuando consigas el paquete, no uses Special Delivery directamente sobre ella; úsalo de forma lateral para cortar sus rutas de Rock Surfing a lo largo de las paredes o para asegurar tu propia retirada.
PokeDaño explosivoLa versatilidad de doble forma de Jayce con Transform Mercury Cannon le da una abrumadora ventaja de burst temprano. Su Shock Blast acelerada te quita grandes trozos de vida desde lejos, y si avanzas, puede pasar a la forma de martillo para ejecutar un dive letal con To the Skies!. Tu Phosphorus Bomb y tu Gatling Gun tempranas simplemente no pueden igualar este daño bruto antes de conseguir los primeros picos de poder de tus objetos principales, lo que te deja vulnerable a trades rápidos.Build de Jayce →Ver detalles
Jayce
Por qué
La versatilidad de doble forma de Jayce con Transform Mercury Cannon le da una abrumadora ventaja de burst temprano. Su Shock Blast acelerada te quita grandes trozos de vida desde lejos, y si avanzas, puede pasar a la forma de martillo para ejecutar un dive letal con To the Skies!. Tu Phosphorus Bomb y tu Gatling Gun tempranas simplemente no pueden igualar este daño bruto antes de conseguir los primeros picos de poder de tus objetos principales, lo que te deja vulnerable a trades rápidos.
Impacto en la línea
Esta disparidad de daño te obliga a ceder pronto el control de la wave. Jayce puede hacer crash de las waves con facilidad y hacerte poke bajo la torre con Shock Blast. Te verás empujado constantemente hacia atrás, gastando maná para reducir las waves con Phosphorus Bomb. Esta prioridad cedida te impide ayudar a tu jungler a disputar las escaramuzas tempranas en el río, y te deja encerrado en la mid lane mientras te esfuerzas por mantener mucha vida para posibles paquetes de Special Delivery.
Cómo jugar
Prioriza la seguridad haciendo farm desde el alcance máximo con Phosphorus Bomb y, más adelante, con Missile Barrage. Mantén Valkyrie lista únicamente como herramienta defensiva; si Jayce se lanza hacia delante con To the Skies!, lánzala de inmediato hacia atrás para romper el engage. Nunca hagas trade de ataques básicos cuando su Thundering Blow gate esté activa. Si te quita mucha vida, acepta perder algo de oro, quédate dentro del rango de experiencia y espera a que la entrega de tu paquete impacte en el mapa en lugar de forzar peleas en la mid.
EscaladoMovilidadTu pasiva, Hextech Munitions, convierte tus ataques básicos en daño mágico, lo que juega totalmente a favor de Kassadin. Cada vez que intentas hacerle poke con Phosphorus Bomb o con ataques básicos, él responde con Null Sphere. El escudo mágico tanto de Null Sphere como de su pasiva Void Stone absorbe casi todo tu daño, lo que le permite neutralizar tu presión temprana en lane y hacer scale con comodidad hasta convertirse en un monstruo en el late game.Build de Kassadin →Ver detalles
Kassadin
Por qué
Tu pasiva, Hextech Munitions, convierte tus ataques básicos en daño mágico, lo que juega totalmente a favor de Kassadin. Cada vez que intentas hacerle poke con Phosphorus Bomb o con ataques básicos, él responde con Null Sphere. El escudo mágico tanto de Null Sphere como de su pasiva Void Stone absorbe casi todo tu daño, lo que le permite neutralizar tu presión temprana en lane y hacer scale con comodidad hasta convertirse en un monstruo en el late game.
Impacto en la línea
Durante los primeros niveles no puedes establecer una ventaja de vida porque sus escudos mágicos anulan tus intentos de trade, mientras que tus hechizos cargan constantemente su Force Pulse. Cuando Kassadin desbloquea Riftwalk, la dinámica de la lane cambia por completo. Puede saltar con facilidad por encima de tu Phosphorus Bomb o Missile Barrage, cerrar la distancia y quitarte buena parte de la vida con Nether Blade mientras te silencia, obligándote a jugar a la defensiva bajo la torre.
Cómo jugar
Para sobrevivir, nunca uses Valkyrie de forma agresiva; guárdala siempre para escapar de sus engages con Riftwalk. Al hacer trade, espera a que desperdicie Null Sphere en un minion antes de destrozarlo con Gatling Gun. Si consigues el paquete, no desperdicies Special Delivery intentando hacerle dive. En su lugar, usa el enorme aumento de velocidad de movimiento para hacer roam a las side lanes, obligándolo a elegir entre igualar tu presión en el mapa o hacer farm bajo su torre.
Control de masasAnti-desplazamientoVex es un counter natural de Corki por su pasiva, Doom 'n Gloom. Cada vez que intentas escapar o reposicionarte con Valkyrie o con el Special Delivery potenciado por el paquete, Vex te marca de inmediato con Gloom. Esto le permite consumir la marca para obtener daño adicional con Mistral Bolt o Personal Space, mientras que su pasiva Doom lista hace que su siguiente habilidad básica te aplique miedo, anulando cualquier vuelo agresivo o retirada segura.Build de Vex →Ver detalles
Vex
Por qué
Vex es un counter natural de Corki por su pasiva, Doom 'n Gloom. Cada vez que intentas escapar o reposicionarte con Valkyrie o con el Special Delivery potenciado por el paquete, Vex te marca de inmediato con Gloom. Esto le permite consumir la marca para obtener daño adicional con Mistral Bolt o Personal Space, mientras que su pasiva Doom lista hace que su siguiente habilidad básica te aplique miedo, anulando cualquier vuelo agresivo o retirada segura.
Impacto en la línea
Esta interacción te obliga a adoptar una postura muy defensiva en la que Valkyrie debe quedar guardada y usarse solo como escape de emergencia absoluta. Si haces dash hacia delante, Vex te castiga con un combo completo que empieza con el escudo de Personal Space. Te ves obligado a hacer farm desde la distancia con Phosphorus Bomb, lo que da a Vex el control del estado de la wave y le permite hacer roam primero con Shadow Surge en cuanto llegue al nivel cinco.
Cómo jugar
Para sobrevivir y hacer trade con eficacia, vigila constantemente la barra de recurso de Vex. Inicia trades cortos con Gatling Gun y Phosphorus Bomb solo cuando su pasiva Doom no esté disponible, normalmente después de que gaste su miedo en la wave de minions con Mistral Bolt o Looming Darkness. Mantén la distancia, haz poke con Missile Barrage desde un lugar seguro y nunca uses Valkyrie de forma ofensiva a menos que su Shadow Surge haya fallado y su barra de miedo esté completamente vacía.
Daño explosivoInalcanzableEste matchup es muy desfavorable para Corki porque Fizz puede neutralizar con facilidad tu poke de largo alcance. Cuando intentas ir restándole vida con Missile Barrage, puede usar Playful para volverse no seleccionable y esquivar tus cohetes por completo. Una vez que aterriza, usa de inmediato Urchin Strike para cerrar la distancia restante, convirtiendo tu ventaja de alcance en una mortal pelea cuerpo a cuerpo en la que su daño de burst te supera por completo.Build de Fizz →Ver detalles
Fizz
Por qué
Este matchup es muy desfavorable para Corki porque Fizz puede neutralizar con facilidad tu poke de largo alcance. Cuando intentas ir restándole vida con Missile Barrage, puede usar Playful para volverse no seleccionable y esquivar tus cohetes por completo. Una vez que aterriza, usa de inmediato Urchin Strike para cerrar la distancia restante, convirtiendo tu ventaja de alcance en una mortal pelea cuerpo a cuerpo en la que su daño de burst te supera por completo.
Impacto en la línea
No puedes hacer push a la wave con Phosphorus Bomb con seguridad sin exponerte. Si Fizz hace freeze de la wave cerca de su torre, te ves obligado a avanzar, lo que te convierte en un objetivo fácil para Chum the Waters. Un solo engage exitoso suyo te obliga a gastar Valkyrie de forma defensiva, lo que te cuesta mucho maná y prioridad en la lane. Esta presión te impide hacer roam con tu Special Delivery y deja tus side lanes vulnerables.
Cómo jugar
Para sobrevivir, nunca uses Gatling Gun a menos que Playful esté en cooldown. Mantén la distancia y concéntrate en hacer farm con Phosphorus Bomb. Dispara Missile Barrage solo justo después de que Fizz use Urchin Strike, ya que no puede esquivar con facilidad durante la animación del dash. Si Chum the Waters se te engancha, no entres en pánico; espera a que termine el knock-up antes de usar Valkyrie para escapar, o usa Special Delivery, si está disponible, para empujarlo hacia atrás durante su seguimiento.
Control de masasTanquesAunque Corki suele depender de Valkyrie para escapar de situaciones malas, Malphite neutraliza por completo esa red de seguridad. La enorme velocidad de Unstoppable Force puede interceptarte en pleno dash de Valkyrie. Como Malphite es inmune al CC durante su ultimate, tu Special Delivery potenciado por el paquete tampoco puede interrumpirlo, y te deja muy vulnerable a las jugadas de dive.Build de Malphite →Ver detalles
Malphite
Por qué
Aunque Corki suele depender de Valkyrie para escapar de situaciones malas, Malphite neutraliza por completo esa red de seguridad. La enorme velocidad de Unstoppable Force puede interceptarte en pleno dash de Valkyrie. Como Malphite es inmune al CC durante su ultimate, tu Special Delivery potenciado por el paquete tampoco puede interrumpirlo, y te deja muy vulnerable a las jugadas de dive.
Impacto en la línea
Esta amenaza te obliga a adoptar una postura muy defensiva en cuanto Malphite llega al nivel cinco. No puedes hacer push con agresividad con Gatling Gun ni hacer poke con Phosphorus Bomb cerca de su torre, ya que así quedas demasiado adelantado en la lane. Cada vez que tu Valkyrie es cebada o interrumpida, te conviertes en un objetivo gratuito para el jungler enemigo, lo que fuerza recalls tempranos y te cuesta un valioso farm.
Cómo jugar
Para sobrevivir, colócate siempre más cerca de tu propia torre que de la suya, manteniendo la wave de tu lado. Nunca uses Valkyrie de forma ofensiva; resérvala estrictamente como herramienta defensiva, pero actívala solo después de verlo comprometer Unstoppable Force, o usa Flash para evitar por completo su ultimate. Si Malphite hace freeze de la wave, usa el poke de largo alcance de Missile Barrage para romperlo con seguridad desde la distancia en lugar de avanzar.
Estos enfrentamientos son sobre todo duelos de ejecución: ambos campeones tienen formas reales de tomar la ventaja. Esquivar una habilidad clave, anticipar bien un engagement o un simple error de posicionamiento puede inclinar el duelo hacia un lado. Conocer el matchup y reconocer las ventanas de acción correctas es especialmente importante aquí.
PokePosicionamientoEste matchup es una pura batalla de desgaste librada a máximo alcance. Orianna utiliza Command: Attack para reposicionar constantemente su esfera e igualar la amenaza de tu Phosphorus Bomb. Como ambos poseen herramientas de rango eficientes y de bajo cooldown para ir restándose vida, ninguno de los dos puede forzar con facilidad un all-in decisivo sin antes conseguir una ventaja de vida significativa mediante un espaciado superior y precisión con las skillshots.Build de Orianna →Ver detalles
Orianna
Por qué
Este matchup es una pura batalla de desgaste librada a máximo alcance. Orianna utiliza Command: Attack para reposicionar constantemente su esfera e igualar la amenaza de tu Phosphorus Bomb. Como ambos poseen herramientas de rango eficientes y de bajo cooldown para ir restándose vida, ninguno de los dos puede forzar con facilidad un all-in decisivo sin antes conseguir una ventaja de vida significativa mediante un espaciado superior y precisión con las skillshots.
Impacto en la línea
La lane fluctúa constantemente según quién consiga la prioridad de la wave. Si Command: Attack y Command: Dissonance te empujan bajo la torre, te costará responder con Phosphorus Bomb mientras haces farm. Por el contrario, si te extiendes demasiado para hacer trade, invitas a Orianna a castigarte con el escudo de Command: Protect. Las barras de vida bajarán rápido, lo que significa que los momentos de recall los decide quién se queda sin maná primero o es expulsado de la lane a base de poke.
Cómo jugar
Colócate siempre en diagonal respecto a la esfera de Orianna para forzarla a usar ángulos de Command: Attack más amplios y predecibles. Reserva Valkyrie estrictamente para escapar de su ultimate, Command: Shockwave, en lugar de usarla de forma ofensiva. Cuando desbloquees Missile Barrage, usa el Big One para asegurar los minions a distancia y hacerle poke al mismo tiempo. Si se protege con Command: Protect, retrocede de inmediato y espera a que termine el beneficio defensivo antes de lanzar otra Phosphorus Bomb.
SustentoPeleas en equipoEste matchup es una batalla de desgaste en la que Swain confía en Ravenous Flock y Demonic Ascension para superarte en sustain en los trades cuerpo a cuerpo. Aunque su Death's Hand castiga la cercanía, tus herramientas de rango como Phosphorus Bomb y Missile Barrage te permiten ir restándole vida con seguridad. Y, sobre todo, cada vez que Swain intente drenar tu vida durante su ultimate, tu Valkyrie te ofrece un escape instantáneo para negar por completo su curación.Build de Swain →Ver detalles
Swain
Por qué
Este matchup es una batalla de desgaste en la que Swain confía en Ravenous Flock y Demonic Ascension para superarte en sustain en los trades cuerpo a cuerpo. Aunque su Death's Hand castiga la cercanía, tus herramientas de rango como Phosphorus Bomb y Missile Barrage te permiten ir restándole vida con seguridad. Y, sobre todo, cada vez que Swain intente drenar tu vida durante su ultimate, tu Valkyrie te ofrece un escape instantáneo para negar por completo su curación.
Impacto en la línea
La lane avanza como un constante tira y afloja. Swain usa Death's Hand para limpiar las waves e intenta atraerte con Nevermove. Recibir esta inmovilización activa Ravenous Flock, lo que da a Swain la ventaja de vida. Debes igualar su push usando Gatling Gun y Phosphorus Bomb. La presión sobre la torre es mínima para ambos, pero la lane se inclina según quién gestione mejor su reserva de vida antes de las grandes escaramuzas en el mapa.
Cómo jugar
Para ganar esta guerra de desgaste, mantén siempre Valkyrie fuera de cooldown. Nunca la uses de forma ofensiva a menos que Swain ya haya desperdiciado su ultimate. Mantente siempre en movimiento para esquivar Nevermove, ya que su trayectoria de regreso es muy predecible. Cuando Swain active Demonic Ascension, lanza Valkyrie de inmediato hacia atrás para romper el vínculo y espera a que termine su transformación. Mientras su ultimate esté en cooldown, abusa de tu ventaja de alcance disparando Missile Barrage y Phosphorus Bomb para expulsarlo de la lane.
Limpieza de oleadasEscaladoEste matchup se convierte en un espejo de waveclear sin descanso. Cada vez que intentas establecer prioridad en mid lanzando Phosphorus Bomb y destrozando minions con Gatling Gun, Viktor puede responder al instante desde un lugar seguro con Hextech Ray. Como su láser elimina las waves tan rápido como tus cohetes, ninguno de los dos puede forzar con facilidad al otro bajo la torre, lo que neutraliza cualquier potencial de push agresivo.Build de Viktor →Ver detalles
Viktor
Por qué
Este matchup se convierte en un espejo de waveclear sin descanso. Cada vez que intentas establecer prioridad en mid lanzando Phosphorus Bomb y destrozando minions con Gatling Gun, Viktor puede responder al instante desde un lugar seguro con Hextech Ray. Como su láser elimina las waves tan rápido como tus cohetes, ninguno de los dos puede forzar con facilidad al otro bajo la torre, lo que neutraliza cualquier potencial de push agresivo.
Impacto en la línea
La lane permanece completamente plana, con trades de vida mínimos. Intentar hacer poke a Viktor con Missile Barrage suele quedar mitigado por el escudo de su Siphon Power, y tratar de hacer engage con Valkyrie te expone a su Gravity Field. Ninguno de los dos puede conseguir un roam profundo ni un recall limpio sin ceder placas, lo que obliga a ambos a quedarse pegados a la mid lane, haciendo farm para sus respectivos picos de poder en el late game.
Cómo jugar
Para romper este estancamiento, colócate fuera de tu wave de minions. Esto obliga a Viktor a elegir entre apuntarte a ti o limpiar minions con su Hextech Ray. Mantén Valkyrie estrictamente como herramienta defensiva para escapar de su Arcane Storm o para salir con dash de su Gravity Field si intenta atraparte. Cuando consigas tu Special Delivery, usa su enorme aumento de velocidad de movimiento para ejecutar un flanqueo rápido por las side lanes, eludiendo por completo su waveclear.
Presión en el mapaDaño explosivoEsta mid lane es una disputa directa de presencia en el mapa. Aunque la Valkyrie de Corki le permite retirarse con seguridad de la Noxian Diplomacy de Talon durante la fase de lane, el Assassin's Path de Talon le otorga una velocidad de roam sin igual. Para igualar las rotaciones repentinas de Talon a través de las paredes del río, Corki depende por completo del enorme impulso de movilidad de Special Delivery, proveniente de Hextech Munitions, para llegar a tiempo y contrarrestar el flanqueo.Build de Talon →Ver detalles
Talon
Por qué
Esta mid lane es una disputa directa de presencia en el mapa. Aunque la Valkyrie de Corki le permite retirarse con seguridad de la Noxian Diplomacy de Talon durante la fase de lane, el Assassin's Path de Talon le otorga una velocidad de roam sin igual. Para igualar las rotaciones repentinas de Talon a través de las paredes del río, Corki depende por completo del enorme impulso de movilidad de Special Delivery, proveniente de Hextech Munitions, para llegar a tiempo y contrarrestar el flanqueo.
Impacto en la línea
El early game gira en torno a gestionar el push de Rake de Talon. Si Talon te empuja bajo la torre, desaparece de inmediato hacia la jungla usando Assassin's Path. Corki debe usar Phosphorus Bomb y Gatling Gun para disputar la wave, asegurándose de que Talon pague un alto coste de vida si intenta acumular Blade's End. La mid lane se convierte en una cuenta atrás, decidida por quién controle primero el río.
Cómo jugar
Guarda siempre Valkyrie para reaccionar de inmediato cuando Talon haga dash con Noxian Diplomacy; nunca la uses de forma ofensiva a menos que su Shadow Assault esté en cooldown. Cuando Hextech Munitions aparezca en la base, no lo recojas al instante. Espera a que Talon se comprometa con un roam de Assassin's Path hacia una side lane; entonces recoge el paquete y usa Special Delivery para volar por el mapa, cortándole la ruta de escape y quemándolo con el rastro.
Presión en el mapaEste matchup es una pura carrera de presión en el mapa. Twisted Fate depende del stun point-and-click de un Pick a Card dorado para inmovilizarte, impidiéndote disputar su prioridad de lane antes de que canalice Destiny. Sin embargo, Corki tiene la herramienta perfecta contra lo global: al recoger el paquete de Hextech Munitions obtienes la velocidad bruta y la zona explosiva de Special Delivery para replicar de inmediato sus rotaciones por las side lanes.Build de Twisted Fate →Ver detalles
Twisted Fate
Por qué
Este matchup es una pura carrera de presión en el mapa. Twisted Fate depende del stun point-and-click de un Pick a Card dorado para inmovilizarte, impidiéndote disputar su prioridad de lane antes de que canalice Destiny. Sin embargo, Corki tiene la herramienta perfecta contra lo global: al recoger el paquete de Hextech Munitions obtienes la velocidad bruta y la zona explosiva de Special Delivery para replicar de inmediato sus rotaciones por las side lanes.
Impacto en la línea
Espera una batalla de push sin descanso. Twisted Fate lanzará Wild Cards constantemente para empujarte bajo la torre y asegurar recalls seguros. Si lo dejas limpiar libremente, desaparecerá en la niebla de guerra. Debes igualar este push con Phosphorus Bomb y Gatling Gun para mantenerlo atado a su torre, obligándolo a elegir entre perder sus propias placas o abandonar su objetivo en la side lane.
Cómo jugar
No desperdicies Valkyrie de forma defensiva a menos que lo veas fijar una carta azul o roja de Pick a Card; si saca la carta dorada, debes mantenerte por completo fuera de su rango de ataque básico. Sincroniza el momento de tus recalls con la aparición de tus paquetes. Si activa Destiny mientras no tienes Special Delivery, no lo persigas a ciegas. En su lugar, activa Gatling Gun y usa Missile Barrage para derribar rápidamente su torre de mid, castigando su roam con una gran cantidad de oro local.
PokeEsquivaEsta lane es una pura prueba de geometría de skillshots. Si usas Valkyrie con descuido, su trayectoria en línea recta te convierte en un objetivo muy fácil para que Zoe lo intercepte con Sleepy Trouble Bubble. En cambio, una vez que desbloqueas Missile Barrage, puedes ir restándole vida con seguridad desde el alcance máximo, eludiendo su wave de minions y dificultándole avanzar para lanzar un Paddle Star! de gran daño.Build de Zoe →Ver detalles
Zoe
Por qué
Esta lane es una pura prueba de geometría de skillshots. Si usas Valkyrie con descuido, su trayectoria en línea recta te convierte en un objetivo muy fácil para que Zoe lo intercepte con Sleepy Trouble Bubble. En cambio, una vez que desbloqueas Missile Barrage, puedes ir restándole vida con seguridad desde el alcance máximo, eludiendo su wave de minions y dificultándole avanzar para lanzar un Paddle Star! de gran daño.
Impacto en la línea
Antes del nivel cinco, Zoe buscará con agresividad limpiar las waves con Paddle Star! y pescar ángulos con Sleepy Trouble Bubble a través de las paredes. Si acierta una, el burst resultante te fuerza a un recall temprano y le permite hacer roam. Una vez que consigas tus cohetes, la dinámica cambia; puedes neutralizar su waveclear y restarle vida, impidiendo que use Portal Jump con comodidad para hacerte poke bajo tu torre.
Cómo jugar
Nunca uses Valkyrie de forma agresiva a menos que Zoe ya haya desperdiciado Sleepy Trouble Bubble. Cuando use Portal Jump, no entres en pánico; en su lugar, apunta Missile Barrage directamente a la marca de su portal de regreso para garantizar un impacto del Big One de gran daño. Mantén siempre una wave de minions entre ella y tú para bloquear Paddle Star!, y usa Phosphorus Bomb solo para asegurar last-hits disputados desde un ángulo seguro. Si falla su burbuja, avanza de inmediato para destrozar sus resistencias con Gatling Gun.
Estos campeones suelen tener problemas para responder a tus principales fortalezas, lo que te permite afrontar el enfrentamiento con más libertad. Normalmente tienes varias formas de presionarlos y forzar intercambios a tu favor. Aprovecha esta ventaja para imponer tu ritmo en lugar de darles tiempo para volver a una posición cómoda.
PokeEscaladoMel depende de establecer zonas de control para mantener a raya a los mid laners, pero Corki elude por completo esa presión. Una vez que desbloqueas Missile Barrage, puedes ir restando su reserva de vida con total seguridad, muy fuera del alcance de sus hechizos. Al combinar este asedio de largo alcance con Phosphorus Bomb para waveclear rápido, neutralizas su presión sobre la wave mientras aseguras tu propio scale sin entrar nunca en su zona de peligro.Build de Mel →Ver detalles
Mel
Por qué
Mel depende de establecer zonas de control para mantener a raya a los mid laners, pero Corki elude por completo esa presión. Una vez que desbloqueas Missile Barrage, puedes ir restando su reserva de vida con total seguridad, muy fuera del alcance de sus hechizos. Al combinar este asedio de largo alcance con Phosphorus Bomb para waveclear rápido, neutralizas su presión sobre la wave mientras aseguras tu propio scale sin entrar nunca en su zona de peligro.
Impacto en la línea
Esta superioridad de alcance inclina por completo el impulso de la lane a tu favor. Mel se ve obligada a esquivar cohetes constantemente en lugar de posicionarse con agresividad para zonearte. Como no puede responder con trades sin avanzar hacia tu wave de minions, su barra de vida se va agotando poco a poco. Este chip damage constante la obliga a hacer recalls en mal momento, dándote oportunidades fáciles para hacer crash de las waves y asegurar el oro de las placas.
Cómo jugar
Mantén una distancia máxima estricta, usando tus cohetes para hacer farm y poke al mismo tiempo. Nunca uses Valkyrie de forma ofensiva a menos que Mel ya haya fallado su principal CC. Si intenta forzar un trade, retírate de inmediato hacia atrás. Cuando consigas el paquete, usa la trayectoria explosiva de Special Delivery para cortarle la ruta de escape de vuelta a su torre, obligándola a atravesar el rastro ardiente donde tu Gatling Gun puede destrozarla rápidamente.
MovilidadEscaramuzasCorki domina este matchup porque puede neutralizar por completo la principal herramienta de burst de Ekko. Cada vez que Ekko intenta cerrar la distancia con Phase Dive, Corki puede reaccionar al instante con Valkyrie para volar hacia atrás. Esta simple reacción le niega a Ekko la posibilidad de conectar su tercer ataque y activar la velocidad de movimiento y el daño de Z-Drive Resonance, dejando al asesino cuerpo a cuerpo varado y vulnerable al poke a distancia.Build de Ekko →Ver detalles
Ekko
Por qué
Corki domina este matchup porque puede neutralizar por completo la principal herramienta de burst de Ekko. Cada vez que Ekko intenta cerrar la distancia con Phase Dive, Corki puede reaccionar al instante con Valkyrie para volar hacia atrás. Esta simple reacción le niega a Ekko la posibilidad de conectar su tercer ataque y activar la velocidad de movimiento y el daño de Z-Drive Resonance, dejando al asesino cuerpo a cuerpo varado y vulnerable al poke a distancia.
Impacto en la línea
Esta superioridad defensiva se traduce en una prioridad total en la mid lane. Como Ekko no puede hacer trade con seguridad, se ve obligado a usar Timewinder solo para hacer farm desde la distancia, lo que agota rápidamente su maná. Esto te permite hacer push de forma continua con Phosphorus Bomb y Gatling Gun, manteniéndolo acorralado bajo su torre. Sin su velocidad de movimiento pasiva, no puede disputar tu control de la wave ni encontrar momentos para hacer roam.
Cómo jugar
Guarda siempre Valkyrie como respuesta estricta al Phase Dive de Ekko; usarla de forma agresiva invita a un contraengage mortal. Cuando falle Timewinder, avanza para destrozar su armadura con Gatling Gun y hacerle poke con Phosphorus Bomb. Una vez que desbloquees Missile Barrage, abusa de tu ventaja de alcance para ir restándole vida desde un lugar seguro, forzándolo a usar Chronobreak de forma defensiva en lugar de ofensiva. Si suelta Parallel Convergence, sal caminando de la zona de inmediato antes de que pueda teletransportarse a ella.
PokeEscaladoCorki domina este matchup porque su principal herramienta de daño, Missile Barrage, supera por completo en alcance a la herramienta defensiva de Veigar, Event Horizon. Mientras Veigar depende de atrapar objetivos en su jaula para conectar Dark Matter y Baleful Strike, Corki puede quedarse cómodamente atrás, lanzando cohetes para ir restando la reserva de vida de Veigar sin entrar nunca en la zona de peligro del límite del stun.Build de Veigar →Ver detalles
Veigar
Por qué
Corki domina este matchup porque su principal herramienta de daño, Missile Barrage, supera por completo en alcance a la herramienta defensiva de Veigar, Event Horizon. Mientras Veigar depende de atrapar objetivos en su jaula para conectar Dark Matter y Baleful Strike, Corki puede quedarse cómodamente atrás, lanzando cohetes para ir restando la reserva de vida de Veigar sin entrar nunca en la zona de peligro del límite del stun.
Impacto en la línea
Al amenazar constantemente a Veigar con Phosphorus Bomb y Missile Barrage, lo obligas a usar Baleful Strike sobre los minions bajo la torre en lugar de acumular su Phenomenal Evil Power contra ti. Esta presión impide que Veigar avance para disputar la wave, lo que te permite asegurar prioridad con facilidad, dañar su torre y forzarlo a hacer recalls en mal momento por su barra de vida mermada.
Cómo jugar
Mantén siempre una distancia mayor que el radio de Event Horizon, usando el alcance máximo de tu Missile Barrage para ir desgastando a Veigar. Reserva Valkyrie estrictamente como herramienta de escape; nunca la uses para hacer dash hacia delante a menos que Veigar ya haya desperdiciado su jaula o estés ejecutando una kill garantizada con Special Delivery. Si te atrapa dentro de la jaula sin aturdirte, usa Gatling Gun para destrozar sus resistencias mientras esquivas su Dark Matter.
EscaladoSustentoVladimir depende de desgastar a sus oponentes con el tiempo, pero no tiene ningún CC fuerte para interrumpir tu escape. Cada vez que intenta avanzar con Sanguine Pool o cargar su Tides of Blood, puedes retirarte sin esfuerzo con Valkyrie. Esta seguridad total le niega su presión de kill y te permite hacer farm libremente de tus objetos principales. Una vez que hagas scale, tu Gatling Gun destroza sus defensas de vida integradas durante las teamfights antes de que siquiera pueda alcanzarte.Build de Vladimir →Ver detalles
Vladimir
Por qué
Vladimir depende de desgastar a sus oponentes con el tiempo, pero no tiene ningún CC fuerte para interrumpir tu escape. Cada vez que intenta avanzar con Sanguine Pool o cargar su Tides of Blood, puedes retirarte sin esfuerzo con Valkyrie. Esta seguridad total le niega su presión de kill y te permite hacer farm libremente de tus objetos principales. Una vez que hagas scale, tu Gatling Gun destroza sus defensas de vida integradas durante las teamfights antes de que siquiera pueda alcanzarte.
Impacto en la línea
Como no temes su engage, puedes dictar la posición de la wave. Mantén los minions más cerca de tu torre al principio para forzar a Vladimir a avanzar, dejándolo vulnerable a tu poke con Phosphorus Bomb. Como su sustain de Transfusion es predecible, puedes cronometrar con facilidad tu push cuando su barra roja esté vacía. Esta presión constante lo obliga a usar Sanguine Pool de forma defensiva bajo la torre, destruyendo su barra de vida y dándote momentos libres para hacer roam.
Cómo jugar
Nunca uses Valkyrie de forma ofensiva a menos que Vladimir ya haya desperdiciado su Sanguine Pool y tenga poca vida. En su lugar, resérvala como tu red de seguridad definitiva. Avanza para hacer trade solo cuando el indicador de Transfusion sea blanco o amarillo, y retrocede de inmediato cuando se ponga rojo. Si intenta hacerte dive con Hemoplague, suelta el rastro de tu Special Delivery justo en su camino para forzarlo a meterse en una mala pool, y luego destroza su armadura con Gatling Gun mientras haces kite hacia atrás.
PokeLimpieza de oleadasEn este duelo a distancia, Corki lleva la ventaja porque su DPS sostenido con Gatling Gun y Missile Barrage supera rápidamente el burst de Ziggs. Lo más importante es que Corki puede usar Valkyrie sin esfuerzo para salir con dash del centro exacto de Mega Inferno Bomb, neutralizando la principal herramienta de ejecución de Ziggs. Mientras Ziggs depende de acertar skillshots lentas y predecibles, el daño mixto de Corki con Hextech Munitions garantiza que derrita a Ziggs en los duelos directos.Build de Ziggs →Ver detalles
Ziggs
Por qué
En este duelo a distancia, Corki lleva la ventaja porque su DPS sostenido con Gatling Gun y Missile Barrage supera rápidamente el burst de Ziggs. Lo más importante es que Corki puede usar Valkyrie sin esfuerzo para salir con dash del centro exacto de Mega Inferno Bomb, neutralizando la principal herramienta de ejecución de Ziggs. Mientras Ziggs depende de acertar skillshots lentas y predecibles, el daño mixto de Corki con Hextech Munitions garantiza que derrita a Ziggs en los duelos directos.
Impacto en la línea
Ziggs intentará hacer push a la wave constantemente con Bouncing Bomb y amenazar tu torre con Satchel Charge. Sin embargo, puedes igualar su limpieza con Phosphorus Bomb mientras lo mantienes bajo amenaza. Como ganas los trades prolongados, Ziggs se ve obligado a jugar a la defensiva, lo que le impide desplegar libremente Hexplosive Minefield para zonearte. Esto te permite asegurar la prioridad en mid y recoger con seguridad tus paquetes de Special Delivery.
Cómo jugar
Colócate fuera de tu wave de minions para que Ziggs deba elegir entre apuntarte a ti o hacer push con Bouncing Bomb. Guarda siempre Valkyrie específicamente para reaccionar a su Mega Inferno Bomb; nunca la uses de forma agresiva a menos que su ultimate esté en cooldown o tenga tan poca vida que muera a Gatling Gun. Si Hexplosive Minefield te zonea, usa el largo alcance de Missile Barrage para hacer farm con seguridad desde la distancia.
Presión en el mapaPresión tempranaComo marksman a distancia, Corki oprime de forma natural a Katarina, que lucha cuerpo a cuerpo. Cada vez que ella avanza para recoger una daga de Bouncing Blade, puedes destrozar sus resistencias con Gatling Gun. Incluso si intenta escapar del trade con Shunpo, tu daño continuo gana. Más adelante, cuando busque hacer roam para conseguir resets de Voracity, el dash de Special Delivery por todo el mapa garantiza que llegues a las escaramuzas de las side lanes al mismo tiempo para frenarla.Build de Katarina →Ver detalles
Katarina
Por qué
Como marksman a distancia, Corki oprime de forma natural a Katarina, que lucha cuerpo a cuerpo. Cada vez que ella avanza para recoger una daga de Bouncing Blade, puedes destrozar sus resistencias con Gatling Gun. Incluso si intenta escapar del trade con Shunpo, tu daño continuo gana. Más adelante, cuando busque hacer roam para conseguir resets de Voracity, el dash de Special Delivery por todo el mapa garantiza que llegues a las escaramuzas de las side lanes al mismo tiempo para frenarla.
Impacto en la línea
Dictas con facilidad la posición de la wave de minions desde el nivel uno. Al mantener a Katarina empujada bajo su torre con Phosphorus Bomb, la obligas a elegir entre perder oro o recibir poke. Como no puede hacer trade con seguridad sin exponerse a Gatling Gun, se ve presionada a hacer roams desesperados. Sin embargo, su ausencia te permite derribar rápidamente su torre, mientras que tu paquete de Special Delivery amenaza con hacer un contra-gank a su objetivo.
Cómo jugar
Colócate lateralmente, lejos de las dagas que deja Bouncing Blade, para neutralizar por completo sus ángulos de engage con Shunpo. Guarda siempre Valkyrie para escapar del radio de su Death Lotus si intenta un all-in. Cuando Hextech Munitions te dé el paquete, mira de inmediato las side lanes; cronometrar tus recalls a la base para recoger Special Delivery justo cuando ella intente un roam desesperado te permite caer sobre su escaramuza y darle la vuelta a la pelea.
EscaladoPresión tempranaKayle está completamente indefensa ante tu agresividad temprana antes de que Divine Ascent le otorgue ataques a distancia. Al activar Gatling Gun cuando ella avanza para hacer last-hit con Starfire Spellblade, destrozas sus resistencias y garantizas una Phosphorus Bomb de daño máximo. No puede responder con trades de forma eficaz, ya que su Radiant Blast es demasiado lenta para igualar tu burst de daño mixto, lo que te permite establecer un dominio absoluto sobre sus débiles primeros niveles.Build de Kayle →Ver detalles
Kayle
Por qué
Kayle está completamente indefensa ante tu agresividad temprana antes de que Divine Ascent le otorgue ataques a distancia. Al activar Gatling Gun cuando ella avanza para hacer last-hit con Starfire Spellblade, destrozas sus resistencias y garantizas una Phosphorus Bomb de daño máximo. No puede responder con trades de forma eficaz, ya que su Radiant Blast es demasiado lenta para igualar tu burst de daño mixto, lo que te permite establecer un dominio absoluto sobre sus débiles primeros niveles.
Impacto en la línea
Este matchup obliga a Kayle a jugar bajo su torre, gastando su maná en Celestial Blessing para sobrevivir y en Radiant Blast para asegurar minions lejanos. Tendrás prioridad permanente sobre la wave y la zonearás fácilmente del oro. Esta enorme presión te permite asegurar el paquete con seguridad y usar Special Delivery para impactar en las side lanes o hacerle dive bajo la torre antes de que su Divine Judgment se convierta en una amenaza.
Cómo jugar
Colócate de forma agresiva cerca de sus minions cuerpo a cuerpo. Cada vez que use Starfire Spellblade para hacer farm, castígala de inmediato combinando Gatling Gun con Phosphorus Bomb. No dejes que recupere vida gratis con Celestial Blessing. Mantén Valkyrie lista para retirarte si interviene su jungler, o para perseguirla una vez que desperdicie Divine Judgment. Si juega de forma extremadamente segura, usa Missile Barrage para ir restándole vida desde lejos.
Estos campeones tienen una build y un estilo de juego que superan directamente al tuyo, lo que puede hacer que controlar la línea y farmear sea extremadamente difícil. Sus habilidades pueden neutralizar tus principales fortalezas o castigarte en cuanto intentas jugar tu plan habitual. En estos matchups, el objetivo suele ser minimizar errores y buscar soluciones fuera del enfrentamiento directo.
MovilidadDraven domina esta lane porque su Stand Aside cancela por completo la Valkyrie de Corki en pleno dash. Si intentas escapar de sus agresivos trades de Spinning Axe, un desplazamiento bien cronometrado te deja en el suelo y vulnerable. Sin tu principal herramienta de movilidad, el Blood Rush de Draven le permite darte caza con facilidad, convirtiendo tu única herramienta defensiva en una trampa mortal.Build de Draven →Ver detalles
Draven
Por qué
Draven domina esta lane porque su Stand Aside cancela por completo la Valkyrie de Corki en pleno dash. Si intentas escapar de sus agresivos trades de Spinning Axe, un desplazamiento bien cronometrado te deja en el suelo y vulnerable. Sin tu principal herramienta de movilidad, el Blood Rush de Draven le permite darte caza con facilidad, convirtiendo tu única herramienta defensiva en una trampa mortal.
Impacto en la línea
Esta amenaza constante te obliga a ceder pronto el control de la wave, ya que avanzar para usar Gatling Gun o Phosphorus Bomb invita a un trade devastador. Draven hará freeze de la wave para negarte oro, o la hará crash para hacerte dive con Whirling Death. Debes aceptar perder el oro de los minions bajo la torre, centrándote únicamente en sobrevivir para evitar que él cobre sus acumulaciones de League of Draven.
Cómo jugar
Para sobrevivir, debes guardar tu Valkyrie estrictamente para defenderte, usándola solo después de que Draven haya desperdiciado Stand Aside o para esquivar su Whirling Death global. Haz farm con seguridad desde lejos usando el largo alcance de Missile Barrage cuando llegues al nivel cinco. Si hace freeze de la wave cerca de su torre, no avances; en su lugar, espera a que la wave rebote de vuelta, priorizando la experiencia sobre el oro.
Estos campeones tienen herramientas que generalmente les dan ventaja en el enfrentamiento, sin llegar a hacer el matchup injugable. Pueden tener más alcance, mejor capacidad para aguantar tu ofensiva o más formas de responder a tus engagements. Tendrás que adaptar tu enfoque y elegir con cuidado los momentos en los que aceptas el combate.
MovilidadPresión tempranaLa pasiva de Kalista, Martial Poise, rompe por completo tu ritmo ofensivo. Cada vez que ejecuta un ataque básico, da un salto, lo que la convierte en un objetivo increíblemente escurridizo. Este movimiento constante e impredecible hace que acertar tus principales herramientas de poke, Phosphorus Bomb y Missile Barrage, sea muy poco fiable. Como tu perfil de daño depende en gran medida de acertar estas skillshots para quitarle mucha vida antes de las peleas, su movilidad innata anula tu principal presión en lane.Build de Kalista →Ver detalles
Kalista
Por qué
La pasiva de Kalista, Martial Poise, rompe por completo tu ritmo ofensivo. Cada vez que ejecuta un ataque básico, da un salto, lo que la convierte en un objetivo increíblemente escurridizo. Este movimiento constante e impredecible hace que acertar tus principales herramientas de poke, Phosphorus Bomb y Missile Barrage, sea muy poco fiable. Como tu perfil de daño depende en gran medida de acertar estas skillshots para quitarle mucha vida antes de las peleas, su movilidad innata anula tu principal presión en lane.
Impacto en la línea
Te encontrarás constantemente empujado bajo la torre, porque fallar Phosphorus Bomb contra Kalista significa renunciar al control de la wave de minions. Ella puede hacer trade con facilidad mientras tú fallas, acumulando lanzas con Rend para sacarte de la lane o asegurar drakes tempranos. Si intentas igualar su push, puede hacer engage con Fate's Call, dejándote sin más opción que gastar Valkyrie de forma defensiva, sacrificando la presión de tu paquete.
Cómo jugar
Para sobrevivir, adopta una regla de posicionamiento estricta de seguridad ante todo. No lances Phosphorus Bomb al azar; en su lugar, espera a que ella se bloquee en la animación de su ataque básico para asegurar el impacto. Mantén Gatling Gun activa durante sus saltos de corto alcance para destrozar su armadura sin necesidad de apuntar con precisión. Lo más importante: nunca uses Valkyrie de forma ofensiva a menos que su Fate's Call esté completamente en cooldown, y reserva tu paquete para retirarte del knock-up de su support en lugar de iniciar.
MovilidadYunara supera de forma natural el daño de Corki en el late game gracias a Vow of the First Lands. Más importante aún, tus jugadas con el paquete quedan muy contrarrestadas aquí. Cuando entras con Special Delivery, Yunara puede reposicionarse al instante con Kanmei's Steps, o incluso potenciarlo hasta convertirlo en un dash veloz mediante Transcend One's Self. Escapa sin esfuerzo de tu rastro de fuego, neutralizando tu mayor amenaza en las teamfights y manteniéndote dentro de su rango de ataque.Build de Yunara →Ver detalles
Yunara
Por qué
Yunara supera de forma natural el daño de Corki en el late game gracias a Vow of the First Lands. Más importante aún, tus jugadas con el paquete quedan muy contrarrestadas aquí. Cuando entras con Special Delivery, Yunara puede reposicionarse al instante con Kanmei's Steps, o incluso potenciarlo hasta convertirlo en un dash veloz mediante Transcend One's Self. Escapa sin esfuerzo de tu rastro de fuego, neutralizando tu mayor amenaza en las teamfights y manteniéndote dentro de su rango de ataque.
Impacto en la línea
Durante la fase de lane temprana, el Cultivation of Spirit de Yunara empuja las waves más rápido y castiga tus trades de Gatling Gun de corto alcance con ataques híbridos rebotantes de daño físico y mágico. No puedes igualar su waveclear sin gastar muchísimo maná en Phosphorus Bomb. Esta presión constante te obliga a hacer farm bajo la torre, retrasando tus cruciales picos de poder por nivel e impidiéndote hacer roam para asegurar junto a tu equipo los primeros Rift Scuttlers.
Cómo jugar
Tu ventana para pelear solo se abre cuando Transcend One's Self está en cooldown. Si tienes el paquete, no hagas engage directamente sobre ella con Special Delivery; en su lugar, usa su trayectoria para cortarle la retirada o bloquear su vía de escape. Si activa Kanmei's Steps para esquivar, retrocede de inmediato con Valkyrie para evitar la ralentización de su Arc of Judgment. Si fuerza un dive duro, concéntrate en hacer farm desde la distancia máxima con Missile Barrage.
Bloqueo de proyectilesAll-inTu juego neutral basado en poke queda muy contrarrestado por las herramientas defensivas de Samira. Cuando intentas ir restándole vida con Missile Barrage, ella puede activar Blade Whirl para borrar tus cohetes en pleno aire. Esta destrucción de proyectiles te priva de tu principal herramienta de trade justo cuando ella busca acumular Daredevil Impulse y comprometerse con un engage agresivo.Build de Samira →Ver detalles
Samira
Por qué
Tu juego neutral basado en poke queda muy contrarrestado por las herramientas defensivas de Samira. Cuando intentas ir restándole vida con Missile Barrage, ella puede activar Blade Whirl para borrar tus cohetes en pleno aire. Esta destrucción de proyectiles te priva de tu principal herramienta de trade justo cuando ella busca acumular Daredevil Impulse y comprometerse con un engage agresivo.
Impacto en la línea
Como tu principal poke queda anulado, no puedes expulsar a Samira de la lane ni presionarla bajo la torre con seguridad. Ella puede mantener la wave con comodidad, sabiendo que Blade Whirl la protege de Phosphorus Bomb y del acoso de cohetes. Si desperdicias tus cohetes con descuido, usará de inmediato Wild Rush para cerrar la distancia y desatar Inferno Trigger mientras te falta burst para responder con trades.
Cómo jugar
Nunca dispares Missile Barrage directamente a Samira mientras su Blade Whirl esté disponible. En su lugar, usa Phosphorus Bomb para asegurar minions desde la distancia y forzarla a avanzar. Si inicia con Wild Rush, retírate de inmediato con Valkyrie para escapar del radio de su Inferno Trigger. Reserva tu paquete de Special Delivery para los momentos en que su giro defensivo esté en cooldown, y así dividir la pelea con seguridad.
IntercambiosMovilidadLucian domina los trades tempranos porque su gran movilidad neutraliza tu poke principal. Cada vez que lanzas una Phosphorus Bomb para acosar o farmear, Lucian puede reaccionar con un dash de Relentless Pursuit y esquivar por completo el daño. Después activa al instante su doble disparo de Lightslinger, lo que fuerza un trade muy desigual que te quita buena parte de la vida antes de que puedas reducir sus resistencias con Gatling Gun.Build de Lucian →Ver detalles
Lucian
Por qué
Lucian domina los trades tempranos porque su gran movilidad neutraliza tu poke principal. Cada vez que lanzas una Phosphorus Bomb para acosar o farmear, Lucian puede reaccionar con un dash de Relentless Pursuit y esquivar por completo el daño. Después activa al instante su doble disparo de Lightslinger, lo que fuerza un trade muy desigual que te quita buena parte de la vida antes de que puedas reducir sus resistencias con Gatling Gun.
Impacto en la línea
Esta amenaza te obliga a jugar a la defensiva bajo tu torre. Como no puedes acertar Phosphorus Bomb con fiabilidad sin que te castiguen, Lucian dicta con facilidad el ritmo de la wave, empujándote para ir desgastando tu torre. Si malgastas Valkyrie para escapar de sus dashes agresivos, pierdes toda seguridad, y Lucian puede zonearte por completo del oro o incluso ejecutarte con The Culling si tu vida baja demasiado.
Cómo jugar
Para sobrevivir, prioriza el control de la wave en lugar del enfrentamiento directo. Mantén los minions justo fuera del alcance de tu torre y usa Gatling Gun para reducir la wave con seguridad. No inicies nunca con Phosphorus Bomb; guarda esta habilidad hasta que Lucian use Relentless Pursuit de forma ofensiva y responde sobre su punto de aterrizaje. Si te inmoviliza con The Culling, usa Valkyrie de inmediato en diagonal para salir de su línea de fuego lineal y conservar tu vida hasta que llegue tu Package.
IntercambiosMovilidadTristana domina esta lane porque puede castigar tus opciones defensivas. Cuando te clava una Explosive Charge y activa Rapid Fire, tu instinto natural es alejarte con Valkyrie. Sin embargo, si completa todos los stacks de la bomba, la detonación resultante reinicia al instante su Rocket Jump, lo que le permite saltar hacia delante con agresividad para perseguir tu retirada y rematarte con Buster Shot.Build de Tristana →Ver detalles
Tristana
Por qué
Tristana domina esta lane porque puede castigar tus opciones defensivas. Cuando te clava una Explosive Charge y activa Rapid Fire, tu instinto natural es alejarte con Valkyrie. Sin embargo, si completa todos los stacks de la bomba, la detonación resultante reinicia al instante su Rocket Jump, lo que le permite saltar hacia delante con agresividad para perseguir tu retirada y rematarte con Buster Shot.
Impacto en la línea
Esta amenaza te obliga a adoptar una postura muy defensiva y le da a Tristana libertad total sobre el control de la wave. Su pasiva Draw a Bead empuja de forma natural la wave de minions, pero no puedes disputar esa presión con facilidad bajo tu torre. Si te adelantas para reducir la wave con Phosphorus Bomb, corres el riesgo de quedar atrapado en su zona letal, lo que te deja con la vida muy mermada o te fuerza a hacer recall y perder el oro de las plates.
Cómo jugar
Para sobrevivir, debes jugar alrededor de sus cooldowns. Haz trade con Phosphorus Bomb y Missile Barrage desde el alcance máximo solo cuando su Explosive Charge no esté disponible. No gastes Valkyrie de forma proactiva; guárdala estrictamente para hacer disengage. Si ella salta hacia delante antes de completar los stacks de su bomba, usa Valkyrie de inmediato para romper la distancia antes de que consiga esos cuatro ataques básicos decisivos. Si llegas a recibir todos los stacks, retrocede y acepta perder tu torre para seguir con vida.
AlcanceControl de masasEsta lane es un duelo de poke de alto riesgo en el que Varus tiene ventaja por su mayor alcance y su lockdown. Aunque quieres intercambiar cohetes por flechas, Chain of Corruption de Varus anula por completo tu principal herramienta de escape. Si intercepta tu Valkyrie con su ultimate, quedas inmovilizado en el aire y él puede detonar con facilidad los stacks de Blighted Quiver con una Piercing Arrow de carga máxima para un burst letal.Build de Varus →Ver detalles
Varus
Por qué
Esta lane es un duelo de poke de alto riesgo en el que Varus tiene ventaja por su mayor alcance y su lockdown. Aunque quieres intercambiar cohetes por flechas, Chain of Corruption de Varus anula por completo tu principal herramienta de escape. Si intercepta tu Valkyrie con su ultimate, quedas inmovilizado en el aire y él puede detonar con facilidad los stacks de Blighted Quiver con una Piercing Arrow de carga máxima para un burst letal.
Impacto en la línea
Varus empujará la wave constantemente con Hail of Arrows y Piercing Arrow, lo que te obliga a quedarte bajo la torre, donde esquivar sus skillshots resulta muy difícil. Como no puedes usar Valkyrie hacia delante con seguridad sin arriesgarte a un counter-engage letal, pierdes la prioridad necesaria para asegurar el río. Esta presión te fuerza a hacer bases tempranas, retrasa tus picos de objetos y deja a tu support expuesto a que le hagan dive bajo su propia torre.
Cómo jugar
No lances Valkyrie a la defensiva hasta que veas que Varus falla su Chain of Corruption. Colócate siempre detrás de tu wave de minions para que su Piercing Arrow haga menos daño, pero mantente separado de tu support para evitar una root encadenada. Si te alcanza Hail of Arrows, no intentes devolver el trade; retrocede de inmediato fuera del alcance de sus auto-ataques para impedir que acumule stacks de Blighted Quiver. Cuando tengas el Package, usa la velocidad de movimiento extra para hacer que gaste su ultimate antes de comprometerte.
Estos enfrentamientos son sobre todo duelos de ejecución: ambos campeones tienen formas reales de tomar la ventaja. Esquivar una habilidad clave, anticipar bien un engagement o un simple error de posicionamiento puede inclinar el duelo hacia un lado. Conocer el matchup y reconocer las ventanas de acción correctas es especialmente importante aquí.
MecánicasFarmeoEste matchup es un espejo de campeones de poke hipermóviles en el que ninguno puede acorralar fácilmente al otro. Como Valkyrie iguala al instante la utilidad defensiva de Arcane Shift de Ezreal, el engage puro queda descartado. En cambio, la lane se convierte en una lluvia constante de skillshots, que enfrenta el Missile Barrage de largo alcance de Corki directamente con el Mystic Shot de Ezreal en un duelo de puntería y velocidad de reacción.Build de Ezreal →Ver detalles
Ezreal
Por qué
Este matchup es un espejo de campeones de poke hipermóviles en el que ninguno puede acorralar fácilmente al otro. Como Valkyrie iguala al instante la utilidad defensiva de Arcane Shift de Ezreal, el engage puro queda descartado. En cambio, la lane se convierte en una lluvia constante de skillshots, que enfrenta el Missile Barrage de largo alcance de Corki directamente con el Mystic Shot de Ezreal en un duelo de puntería y velocidad de reacción.
Impacto en la línea
Con ambos tiradores contando con herramientas de escape fiables, la wave se mantiene muy dinámica pero rara vez hace crash con fuerza. No puedes hacerle dive a Ezreal con facilidad, y él tampoco puede inmovilizarte. Los trades se deciden poco a poco según cuántos proyectiles de Mystic Shot bloquees con minions mientras metes tu propia Phosphorus Bomb y el shred de Gatling Gun. Este micro-trading constante mantiene a ambos en la lane y retrasa las rotaciones decisivas por el mapa.
Cómo jugar
Para ganar esta guerra de desgaste, colócate siempre en diagonal detrás de tu wave de minions. Este escudo bloquea su Mystic Shot mientras tú lanzas Phosphorus Bomb por encima de la primera línea. No inicies nunca con Valkyrie salvo que su Arcane Shift esté en cooldown y tengas Special Delivery listo para cortarle el paso. Si te quedas con poca vida, juega de forma pasiva con Missile Barrage para asegurar el farmeo desde el alcance máximo en lugar de arriesgarte a un duelo cuerpo a cuerpo.
ProtecciónPosicionamientoEste matchup depende de la dinámica de alcance: la ultimate de Xayah, Featherstorm, puede anular por completo tu engage con Special Delivery. Sin embargo, fuera de la ventana de su ultimate, tienes una enorme ventaja de alcance. Puedes ir desgastando su vida de forma sistemática con Missile Barrage y Phosphorus Bomb mientras te mantienes a salvo fuera del alcance de sus plumas de Bladecaller.Build de Xayah →Ver detalles
Xayah
Por qué
Este matchup depende de la dinámica de alcance: la ultimate de Xayah, Featherstorm, puede anular por completo tu engage con Special Delivery. Sin embargo, fuera de la ventana de su ultimate, tienes una enorme ventaja de alcance. Puedes ir desgastando su vida de forma sistemática con Missile Barrage y Phosphorus Bomb mientras te mantienes a salvo fuera del alcance de sus plumas de Bladecaller.
Impacto en la línea
En la fase de lane, esta interacción provoca un enfrentamiento tenso. Puedes empujar la wave con facilidad con Gatling Gun y hacerle poke bajo la torre, pero los dashes agresivos hacia delante con Valkyrie son castigados con dureza si ella tiene Deadly Plumage activo. Si la fuerzas a usar Featherstorm a la defensiva, ganas prioridad de lane, pero acercarte demasiado le permite colocar rápidamente tres plumas para una root.
Cómo jugar
Para ganar esto, adopta una regla estricta de distancia: no cruces nunca la línea imaginaria de sus plumas de Clean Cuts ya colocadas. Usa el enorme alcance de Missile Barrage para hacer que gaste Featherstorm antes de pensar siquiera en comprometer tu paquete de Special Delivery. Si logra esquivar tu carga, usa Valkyrie de inmediato en lateral para escapar de la trayectoria de regreso de Bladecaller. No te comprometas nunca a una persecución en línea recta cuando sus plumas están dispersas a tu espalda.
EscudosLimpieza de oleadasEste matchup es una batalla pura de waveclear en la que ninguno puede forzar una kill con facilidad. Aunque Corki quiere hacer poke desde lejos, Spell Shield de Sivir es la herramienta definitiva para contrarrestarlo, ya que absorbe sin problema una Phosphorus Bomb perdida o un cohete Big One de Missile Barrage. En lugar de recibir daño, ella anula tu poke para hacer sustain, y convierte tus principales herramientas de presión de lane en recursos gratuitos para ella.Build de Sivir →Ver detalles
Sivir
Por qué
Este matchup es una batalla pura de waveclear en la que ninguno puede forzar una kill con facilidad. Aunque Corki quiere hacer poke desde lejos, Spell Shield de Sivir es la herramienta definitiva para contrarrestarlo, ya que absorbe sin problema una Phosphorus Bomb perdida o un cohete Big One de Missile Barrage. En lugar de recibir daño, ella anula tu poke para hacer sustain, y convierte tus principales herramientas de presión de lane en recursos gratuitos para ella.
Impacto en la línea
Como Sivir puede ignorar tu poke, esta lane se convierte en una lucha constante de tira y afloja. Si bloquea con éxito tu Phosphorus Bomb, conserva su maná y su vida, lo que le permite spamear Ricochet y Boomerang Blade para empujarte bajo la torre. Te ves obligado a usar Gatling Gun y Valkyrie a la defensiva para igualar su limpieza rápida, y ambos quedan atrapados en la lane del Dragon sin margen para hacer roam.
Cómo jugar
Para ganar esta guerra psicológica, debes hacer que gaste su escudo protector antes de comprometer tu daño pesado. Dispara cohetes normales de Missile Barrage para forzar su Spell Shield, y lanza el Big One o la Phosphorus Bomb solo cuando su barrera haya expirado. Cuando tengas el Package, no inicies directamente con Special Delivery si su Fleet of Foot está activo, porque puede dejar atrás el rastro con facilidad. En cambio, usa la velocidad de movimiento extra para reposicionarte.
IntercambiosMovilidadEsta lane se define por la tensión entre tu poke de largo alcance y su gap-close repentino. Mientras intentas desgastarla con seguridad usando Missile Barrage, Kai'Sa puede eludir por completo esa distancia. Al acertar Void Seeker para marcarte con Second Skin, puede activar al instante Killer Instinct para forzar un duelo aislado, y convierte tu ventaja de artillería en un intercambio de burst letal a corta distancia.Build de Kai'Sa →Ver detalles
Kai'Sa
Por qué
Esta lane se define por la tensión entre tu poke de largo alcance y su gap-close repentino. Mientras intentas desgastarla con seguridad usando Missile Barrage, Kai'Sa puede eludir por completo esa distancia. Al acertar Void Seeker para marcarte con Second Skin, puede activar al instante Killer Instinct para forzar un duelo aislado, y convierte tu ventaja de artillería en un intercambio de burst letal a corta distancia.
Impacto en la línea
No puedes permitirte lanzar Phosphorus Bomb a ciegas, ya que si fallas le das una ventana para activar Supercharge y cazarte. La dinámica de la lane cambia mucho según el estado de la wave; mantenerte cerca de tus minions evita que su Icathian Rain te aísle. Si te quitan mucha vida al principio, tu capacidad de hacer roam con Special Delivery queda totalmente neutralizada y te fuerza a jugar a la defensiva bajo la torre.
Cómo jugar
Colócate siempre justo dentro de tu wave de minions para diluir el daño de su Icathian Rain. No uses nunca Valkyrie de forma ofensiva; debes guardarla exclusivamente para escapar después de que ella se comprometa con Killer Instinct. Si te marca con Void Seeker, retrocede de inmediato detrás de tu wave y activa Gatling Gun para reducirle la armadura y la resistencia mágica en el momento en que intente hacer dash hacia ti.
EsquivaPeleas en equipoEsta lane es un matchup de pura habilidad definido por trades a larga distancia. Miss Fortune usa Make It Rain y Double Up para hacer poke desde detrás de los minions, mientras tú le respondes con Phosphorus Bomb y Gatling Gun. El duelo definitivo depende de su canalización: cuando lanza Bullet Time, puedes salir de inmediato del cono con Valkyrie y contraatacar con Missile Barrage, y convertir su estado estacionario en un blanco fácil.Build de Miss Fortune →Ver detalles
Miss Fortune
Por qué
Esta lane es un matchup de pura habilidad definido por trades a larga distancia. Miss Fortune usa Make It Rain y Double Up para hacer poke desde detrás de los minions, mientras tú le respondes con Phosphorus Bomb y Gatling Gun. El duelo definitivo depende de su canalización: cuando lanza Bullet Time, puedes salir de inmediato del cono con Valkyrie y contraatacar con Missile Barrage, y convertir su estado estacionario en un blanco fácil.
Impacto en la línea
Los dos pueden limpiar waves rápidamente, lo que crea un tira y afloja constante. Si te colocas justo detrás de minions con poca vida, recibirás un daño enorme de los rebotes de su Double Up. Miss Fortune depende de Strut para esquivar tus skillshots, pero acertar una sola Phosphorus Bomb o Missile Barrage detiene su velocidad de movimiento, lo que te permite forzar trades igualados e impedir que consiga prioridad de lane con facilidad.
Cómo jugar
Mantente siempre en diagonal respecto a tus minions con poca vida para negarle ángulos limpios con Double Up. Lo más importante: no uses nunca Valkyrie de forma ofensiva cuando ella tenga su ultimate lista. Guárdala específicamente como tu botón de escape. En cuanto canalice Bullet Time, lanza Valkyrie hacia un lado para salir de la zona y descarga de inmediato los cohetes de Missile Barrage sobre su cuerpo estático. Si desperdicias tu dash antes de tiempo, retrocede enseguida detrás del terreno para romper su línea de visión.
Estos campeones suelen tener problemas para responder a tus principales fortalezas, lo que te permite afrontar el enfrentamiento con más libertad. Normalmente tienes varias formas de presionarlos y forzar intercambios a tu favor. Aprovecha esta ventaja para imponer tu ritmo en lugar de darles tiempo para volver a una posición cómoda.
PicksDaño explosivoJinx depende por completo de Get Excited! para su movilidad, y para activarlo necesita antes un takedown. Eso la deja totalmente indefensa ante tu Special Delivery. Como no tiene ningún dash propio para escapar del rastro ardiente, un dive bien apuntado con el paquete la obliga a gastar Flash o a derretirse dentro de la zona de quemadura. Los cohetes de su Switcheroo! no pueden igualar el burst repentino y abrumador, ni el desplazamiento, de tu engage con el paquete.Build de Jinx →Ver detalles
Jinx
Por qué
Jinx depende por completo de Get Excited! para su movilidad, y para activarlo necesita antes un takedown. Eso la deja totalmente indefensa ante tu Special Delivery. Como no tiene ningún dash propio para escapar del rastro ardiente, un dive bien apuntado con el paquete la obliga a gastar Flash o a derretirse dentro de la zona de quemadura. Los cohetes de su Switcheroo! no pueden igualar el burst repentino y abrumador, ni el desplazamiento, de tu engage con el paquete.
Impacto en la línea
Esta vulnerabilidad dicta el ritmo de toda la dragon lane. Antes de que consigas Hextech Munitions, Jinx puede intentar empujar con Switcheroo! y hacer poke con Zap!. Sin embargo, en el momento en que tu paquete está listo, se ve forzada a jugar de manera muy defensiva, cediendo el control de la wave y la prioridad. Puedes hacer crash de las waves con facilidad, obligarla a quedarse bajo la torre y amenazar con un dive del que no puede escapar fácilmente sin que sus Flame Chompers! la salven.
Cómo jugar
Aprovecha los tiempos de aparición de tu paquete para dictar las escaramuzas. Al hacer dive, espera a que se quede fija en el sitio lanzando Zap! o farmeando con los cohetes de Switcheroo!, y ejecuta entonces Special Delivery justo detrás de ella para bloquear su retirada. Si responde con Flame Chompers!, usa Valkyrie para reposicionarte con seguridad o remata con Missile Barrage y Phosphorus Bomb desde una posición segura. No te quedes sentado sobre tu paquete; usa su amenaza de inmediato para zonearla del farmeo.
PokeEsquivaCorki tiene una ventaja clara en este matchup porque su movilidad anula por completo la amenaza de largo alcance de Jhin. Cada vez que Jhin intenta preparar una kill con Deadly Flourish o inmovilizarte con Curtain Call, un Valkyrie bien sincronizado te permite salir al instante de sus ángulos de disparo lineales. Esta negación de alcance desperdicia los setups de largo cooldown de Jhin y lo deja expuesto mientras espera a recargar.Build de Jhin →Ver detalles
Jhin
Por qué
Corki tiene una ventaja clara en este matchup porque su movilidad anula por completo la amenaza de largo alcance de Jhin. Cada vez que Jhin intenta preparar una kill con Deadly Flourish o inmovilizarte con Curtain Call, un Valkyrie bien sincronizado te permite salir al instante de sus ángulos de disparo lineales. Esta negación de alcance desperdicia los setups de largo cooldown de Jhin y lo deja expuesto mientras espera a recargar.
Impacto en la línea
Esta interacción inclina el control de la wave claramente a tu favor. Como Jhin no puede inmovilizarte con fiabilidad con Deadly Flourish para preparar los rebotes de Dancing Grenade, puedes limpiar waves con agresividad usando Phosphorus Bomb y Gatling Gun. Si Jhin intenta ejecutarte desde lejos con Curtain Call, tu capacidad de esquivarlo con Valkyrie significa que rara vez te verás obligado a hacer recalls forzados y desfavorables, y mantienes una presión constante.
Cómo jugar
Guarda siempre Valkyrie como herramienta defensiva en lugar de usarla para iniciar. Actívala en el momento en que veas el indicador rojo del Deadly Flourish de Jhin o cuando abra Curtain Call. Con su CC desperdiciado, responde de inmediato con Gatling Gun y Phosphorus Bomb mientras está bloqueado en la animación o recargando. Si Jhin juega con mucha cautela, usa Phosphorus Bomb para limpiar sus trampas de Captive Audience.
SigiloPresión tempranaTienes un scaling muy superior al de Twitch, pero la clave real para dominar esta lane está en neutralizar su sigilo. Twitch depende de Ambush para reposicionarse o colar un trade, pero tu Phosphorus Bomb te da visión inmediata en su área objetivo. Lanzarla sobre su trayectoria prevista le niega por completo el factor sorpresa y lo deja vulnerable a un trade que no puede ganar.Build de Twitch →Ver detalles
Twitch
Por qué
Tienes un scaling muy superior al de Twitch, pero la clave real para dominar esta lane está en neutralizar su sigilo. Twitch depende de Ambush para reposicionarse o colar un trade, pero tu Phosphorus Bomb te da visión inmediata en su área objetivo. Lanzarla sobre su trayectoria prevista le niega por completo el factor sorpresa y lo deja vulnerable a un trade que no puede ganar.
Impacto en la línea
Como tienes un scaling mucho mayor y puedes verlo con facilidad, tú dictas las waves de minions. Aprovecha esa ventaja para hacer slow-push y acumular waves enormes. A Twitch le cuesta limpiar bajo la torre sin gastar su maná en Contaminate. Al mantenerlo acorralado, lo obligas a elegir entre perder oro por culpa de la torre o recibir mucho poke de tu Missile Barrage.
Cómo jugar
No lances Phosphorus Bomb a ciegas solo para limpiar la wave; guárdala específicamente para cuando Twitch desaparezca con Ambush. Colócate cerca del centro de la lane para lanzarla con facilidad hacia sus probables rutas de flanqueo. Si logra eludir tu visión y te aplica stacks de Deadly Venom, usa Valkyrie para hacer disengage con seguridad, resetear la wave y retomar tu slow-push metódico para mantenerlo atrapado bajo su torre.
Ventaja: veredicto canónico de Wild Rift Core (−3 a +3), desde el punto de vista del campeón nombrado en la fila. Tasa de victorias y de selección: las del propio rival en este rol — Wild Rift CN · Challenger, Patch 7.3b. No es la tasa de victorias del enfrentamiento directo.
Ventaja: veredicto canónico de Wild Rift Core (−3 a +3), desde el punto de vista del campeón nombrado en la fila. Tasa de victorias y de selección: las del propio rival en este rol — Wild Rift CN · Challenger, Patch 7.3b. No es la tasa de victorias del enfrentamiento directo.
Cómo contrarrestar a este campeón
Ángulo de contra
Los counters de Corki no se limitan a las estadísticas, sino a romper sus tiempos. Depende en gran medida de sus power spikes y de la distancia para funcionar. Los campeones que reducen ese espacio o aceleran las peleas resultan problemáticos por naturaleza. Los asesinos, en particular, aprovechan su falta de CC y su dependencia de Valkyrie. Entender a sus counters no es solo saber quién le gana, sino por qué su plan de juego falla contra ciertos perfiles.
Contexto del parche
El meta actual destaca a campeones que pueden forzar engages rápidos o ejercer una presión constante. Corki, que prefiere peleas preparadas y con espacio, sufre en estos contextos. Los campeones que pueden ignorar su poke o llegar directamente a él reducen drásticamente su impacto. Por el contrario, rinde mejor contra campeones más estáticos o de control.
Lectura rápida
Los asesinos son sus peores matchups.
Sufre contra los dives rápidos.
Se desenvuelve mejor contra magos estáticos.
Arquetipos de contra
Asesinos de burst
Estos campeones castigan directamente la principal debilidad de Corki: la falta de CC y la dependencia de Valkyrie. Pueden baitear o esperar a que use su escape antes de comprometerse, o simplemente aplicar burst más rápido de lo que él puede reaccionar. Su movilidad les permite ignorar su poke y alcanzar rápidamente su posición en la backline.
Cómo se adapta el campeón. Juega de forma extremadamente segura, guarda Valkyrie para defenderte y prioriza la visión y el spacing.
Bruisers con movilidad
Estos campeones no mueren fácilmente con el poke y pueden forzar trades largos que Corki no quiere. Su capacidad para acortar distancias combinada con su relativa resistencia como tank les permite sobrevivir a su burst inicial y mantener la presión.
Cómo se adapta el campeón. Evita trades extendidos y juega en torno al poke y los timings.
Asesinos con reset o stealth
Estos campeones hacen que el posicionamiento de Corki sea extremadamente difícil. Pueden esquivar su poke, esperar un error y castigar al instante. Su capacidad para reiniciar habilidades o desaparecer rompe por completo la estructura de la pelea que Corki quiere crear.
Zed obliga a Corki a mantener una pasividad constante. Cualquier uso ofensivo de Valkyrie abre una ventana de kill. El matchup se convierte en una cuestión de disciplina: spacing perfecto, visión y paciencia.
Fizz ignora por completo el poke de Corki y puede hacer un all-in en cuanto aparece una oportunidad. Sin CC, Corki depende puramente de su reacción, lo que hace que el matchup sea muy inestable.
Errores comunes en su contra
Errores comunes en su contra
Subestimar los timings de engage.
Jugar demasiado agresivo sin visión.
Usar mal Valkyrie.
Ignorar los spikes enemigos.
Forzar peleas sin Package.
Notas del coach
Tu posicionamiento decide la pelea.
Nunca hagas trade si no controlas la distancia.
FAQ
¿Por qué Corki pierde contra Zed?
Zed explota a la perfección la falta de crowd control de Corki. Puede esperar a que use Valkyrie o forzar trades rápidos que Corki no puede manejar. Sin herramientas defensivas sólidas, Corki depende por completo del posicionamiento y la visión para sobrevivir.
¿Cómo se juega contra Fizz?
Contra Fizz, debes jugar de forma extremadamente segura y evitar riesgos innecesarios. Tu objetivo es sobrevivir hasta tus spikes. Coloca wards profundos, guarda Valkyrie y nunca fuerces trades sin una visión clara.
¿Puede Corki vencer a los asesinos?
Sí, pero solo jugando el spacing y los timings a la perfección. No puedes vencerlos en duelos directos. Debes castigar sus errores o jugar en torno a tu equipo y los objectives.
¿Cuál es su peor tipo de counter?
Los asesinos con movilidad son sus peores counters porque ignoran su poke y lo matan rápidamente. Rompen por completo su plan de juego basado en la distancia y el timing.