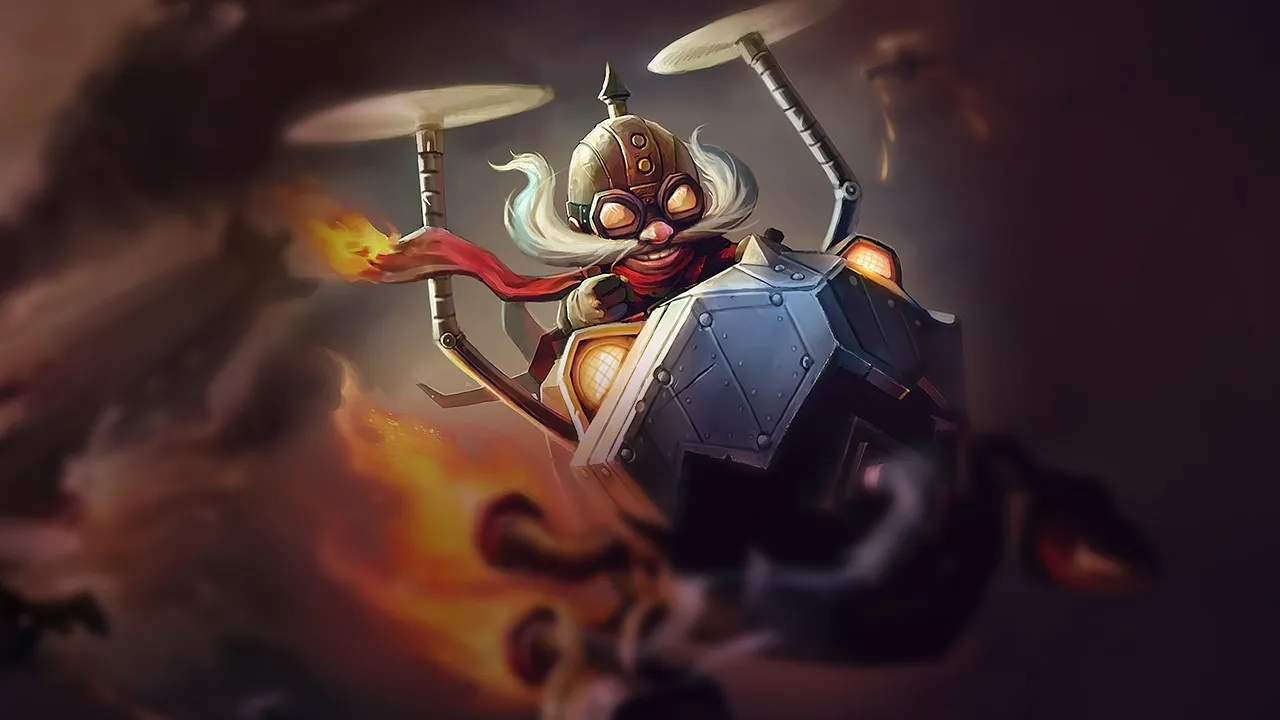
Corki hat Probleme gegen Teamkompositionen, die schnelle engages erzwingen können, bevor er seinen weitreichenden poke einsetzen kann. Dive-Strategien, hohe mobility und gezielter crowd control verringern sein Potenzial für konstanten Schaden erheblich. Seine Abhängigkeit von sicherem positioning und schrittweisem scaling bestimmt seine Kernschwäche.
★ MID · DRAGONTier A
SCHADEN
UTIL
TANK
DIFF
Corki Wild Rift Counter-Guide
Hard Counters
1
Diese Champions haben ein Build und einen Spielstil, der deinen direkt überlegen ist, was die Kontrolle der Lane und das Farmen extrem schwierig machen kann. Ihr Kit kann deine Kernstärken neutralisieren oder dich bestrafen, sobald du versuchst, deinen gewohnten Spielplan umzusetzen. In diesen Matchups geht es oft darum, Fehler zu minimieren und nach Wegen zu suchen, außerhalb der direkten Konfrontation zu gewinnen.
All-inMobilitätIrelia completely neutralizes your ranged advantage because of how her Bladesurge interacts with low-health minions. She can rapidly chain dashes to close the entire distance of the mid lane instantly. If she catches you off-guard, she will set up Flawless Duet to stun you. Because Valkyrie has a slight cast delay, her stun will interrupt or catch you before you can fly to safety.Irelia Build →Details ansehen
Irelia
Warum
Irelia completely neutralizes your ranged advantage because of how her Bladesurge interacts with low-health minions. She can rapidly chain dashes to close the entire distance of the mid lane instantly. If she catches you off-guard, she will set up Flawless Duet to stun you. Because Valkyrie has a slight cast delay, her stun will interrupt or catch you before you can fly to safety.
Lane-Einfluss
This constant threat forces you into a highly defensive posture. You cannot stand near your own dying minions, as they act as literal launchpads for her Bladesurge. Consequently, you will have to concede early wave control, often farming from extreme range using Phosphorus Bomb. This deprives you of priority, allowing her to easily stack Ionian Fervor and crash waves to roam while you are stuck under tower.
Wie man spielt
To survive, you must actively keep the minion wave frozen just outside your turret range. Constantly monitor the health of your own minions; when one is low, step back immediately to bait her Bladesurge. Never use Valkyrie aggressively; hold it exclusively to react to her Vanguard's Edge or to escape after dodging Flawless Duet. If she freezes, use Missile Barrage to break the freeze from maximum safety without walking into her dash range.
Diese Champions haben Werkzeuge, die ihnen im Kampf meist einen Vorteil verschaffen, ohne das Matchup unspielbar zu machen. Sie haben vielleicht mehr Reichweite, können deine Offensive besser abfangen oder haben mehr Möglichkeiten, auf deine Engages zu reagieren. Du musst deine Herangehensweise anpassen und sorgfältig die Momente wählen, in denen du den Kampf annimmst.
Früher DruckScharmützelYasuo severely limits your impact because his Wind Wall acts as an absolute barrier to your primary damage sources. Both your Phosphorus Bomb and your Missile Barrage are completely absorbed by his wind barrier. This means your poke-heavy gameplay is entirely neutralized during teamfights and skirmishes, forcing you to play around the high cooldown of his defensive wall rather than freely outputting consistent magic damage from a distance.Yasuo Build →Details ansehen
Yasuo
Warum
Yasuo severely limits your impact because his Wind Wall acts as an absolute barrier to your primary damage sources. Both your Phosphorus Bomb and your Missile Barrage are completely absorbed by his wind barrier. This means your poke-heavy gameplay is entirely neutralized during teamfights and skirmishes, forcing you to play around the high cooldown of his defensive wall rather than freely outputting consistent magic damage from a distance.
Lane-Einfluss
In lane, Sweeping Blade allows Yasuo to close the gap easily, bypassing your range advantage. When you try to disengage with Valkyrie, he can often catch you with a stacked Steel Tempest tornado to trigger Last Breath. This constant threat forces you under your turret, as you cannot safely trade back once your Phosphorus Bomb is blocked, sacrificing mid lane priority and leaving your jungler without early backup.
Wie man spielt
You must bait out Wind Wall before committing your Missile Barrage stacks. Use basic attacks to pop his Way of the Wanderer shield first, then throw a single Phosphorus Bomb to force his defensive wall. Once Wind Wall is on cooldown, you have a brief window to abuse Gatling Gun and your rocket spam. If he dashes forward with Sweeping Blade, immediately escape backward with Valkyrie, making sure you do not get knocked up by Steel Tempest.
All-inMobilitätCorki struggles because Yone's raw gap-closing power completely bypasses your primary escape. Even if you react quickly with Valkyrie, Yone can easily match and exceed your dash distance by combining the forward dash of Soul Unbound with the knock-up dash from Mortal Steel's third cast. This double-dash combination allows him to catch you mid-flight, cancel your escape momentum, and force lethal trades.Yone Build →Details ansehen
Yone
Warum
Corki struggles because Yone's raw gap-closing power completely bypasses your primary escape. Even if you react quickly with Valkyrie, Yone can easily match and exceed your dash distance by combining the forward dash of Soul Unbound with the knock-up dash from Mortal Steel's third cast. This double-dash combination allows him to catch you mid-flight, cancel your escape momentum, and force lethal trades.
Lane-Einfluss
Because of this constant gap-close threat, you cannot step up to auto-attack the wave when Yone has Mortal Steel fully charged. You are forced to cede priority, farming from maximum distance with Phosphorus Bomb and Missile Barrage. If he freezes near his turret, you risk dying to an all-in every time you walk up to thin the wave, resulting in lost gold and delayed power spikes.
Wie man spielt
Watch Yone's wind indicator closely. When Mortal Steel has two stacks, immediately back off and force him to waste the tornado on minions. Always hold Valkyrie; never use it aggressively unless his Soul Unbound is on cooldown. If he does catch you with his spirit form, activate Gatling Gun immediately to shred his armor as you retreat, and use Missile Barrage to chip away at his shield from Spirit Cleave.
MassenkontrolleKartendruckYour safety in this matchup is entirely compromised by Lissandra's instant crowd control. The moment you attempt to escape or reposition with Valkyrie, she can interrupt your flight mid-air using Ring of Frost. Once she unlocks Frozen Tomb, she gains an unmissable point-and-click stun that locks you in place, preventing any defensive spellcasting and leaving you completely vulnerable to her follow-up.Lissandra Build →Details ansehen
Lissandra
Warum
Your safety in this matchup is entirely compromised by Lissandra's instant crowd control. The moment you attempt to escape or reposition with Valkyrie, she can interrupt your flight mid-air using Ring of Frost. Once she unlocks Frozen Tomb, she gains an unmissable point-and-click stun that locks you in place, preventing any defensive spellcasting and leaving you completely vulnerable to her follow-up.
Lane-Einfluss
Because of her lethal lockdown, you cannot safely step past the midpoint of the lane. Lissandra will constantly clear waves with Ice Shard to force you under turret or set up devastating ganks. If you get caught too far forward, her Glacial Path allows her to close the gap instantly, forcing you to choose between taking heavy damage or risking an interrupted Valkyrie that leads directly to your death.
Wie man spielt
Never cast Valkyrie aggressively unless Lissandra has just wasted both Ring of Frost and Glacial Path. When farming, stand offset from your own minions to prevent her from poking you with the splitting cone of Ice Shard. If she teleports toward you with her claw, walk backward immediately rather than panic-dashing; only use your flight once she has committed her root, or when you are completely out of her Frozen Tomb range.
BurstPositionierungSyndra completely dictates the pace of this lane because Scatter the Weak can interrupt the dash animation of Valkyrie. If you attempt to escape her sphere setups, she can reactively knock you out of the air. This cancellation leaves you stationary, stripped of your primary defensive tool, and immediately exposed to a lethal barrage of Dark Sphere and her high-damage ultimate, Unleashed Power.Syndra Build →Details ansehen
Syndra
Warum
Syndra completely dictates the pace of this lane because Scatter the Weak can interrupt the dash animation of Valkyrie. If you attempt to escape her sphere setups, she can reactively knock you out of the air. This cancellation leaves you stationary, stripped of your primary defensive tool, and immediately exposed to a lethal barrage of Dark Sphere and her high-damage ultimate, Unleashed Power.
Lane-Einfluss
This interaction forces you into a passive posture where you must respect her sphere placement constantly. You cannot safely contest the wave with Gatling Gun or Phosphorus Bomb without risking a stun. Every time you try to thin the wave, she will look to poke you down with Force of Will. If your health drops below sixty percent, her threat of a sudden dive or forced recall skyrockets.
Wie man spielt
Never activate Valkyrie defensively while her Scatter the Weak is off cooldown; you must bait this specific knockback first by weaving sideways just out of range of her active Dark Sphere. If she wastes it, you have a brief window to trade using Gatling Gun and Phosphorus Bomb. When you hold the Special Delivery, avoid dashing directly at her, as a pre-emptive stun will completely ruin your package delivery.
SchildeKartendruckCorki struggles heavily here because Hextech Munitions converts his basic attacks into magic damage, which constantly feeds into the passive magic shield of Galio's Shield of Durand. This negates your poke. Simultaneously, Galio clears waves effortlessly with Winds of War and can immediately impact side lanes with Hero's Entrance, out-roaming you before you can even secure your package.Galio Build →Details ansehen
Galio
Warum
Corki struggles heavily here because Hextech Munitions converts his basic attacks into magic damage, which constantly feeds into the passive magic shield of Galio's Shield of Durand. This negates your poke. Simultaneously, Galio clears waves effortlessly with Winds of War and can immediately impact side lanes with Hero's Entrance, out-roaming you before you can even secure your package.
Lane-Einfluss
Your trading potential is severely stifled. Trying to shred his resistances with Gatling Gun or poke with Phosphorus Bomb often invites a counter-engage via Justice Punch. Since you cannot threaten his health bar, Galio dictates the wave tempo. He will shove you under turret and leave the lane to setup Hero's Entrance plays, leaving your side lanes vulnerable while you struggle to clear.
Wie man spielt
Play this lane defensively. Save Valkyrie exclusively as a reactive tool to escape when he charges forward with Justice Punch. Use Phosphorus Bomb and Missile Barrage to farm safely from a distance rather than trying to break his Shield of Durand. When Galio missing-pings indicate a Hero's Entrance roam, do not chase him blindly. Instead, hard-shove the wave to punish his absence, and wait for your Special Delivery package to coordinate your own map-wide counter-play.
BurstMobilitätZed dominates this matchup through the lethal threat of Death Mark combined with Living Shadow to bypass your range advantage. While your Phosphorus Bomb and Gatling Gun can harass him when he steps up, his high burst potential can delete you instantly if you waste your escape. However, the matchup pivots on a mechanical trick: buffering Valkyrie just as Zed initiates his ultimate to pull him into danger.Zed Build →Details ansehen
Zed
Warum
Zed dominates this matchup through the lethal threat of Death Mark combined with Living Shadow to bypass your range advantage. While your Phosphorus Bomb and Gatling Gun can harass him when he steps up, his high burst potential can delete you instantly if you waste your escape. However, the matchup pivots on a mechanical trick: buffering Valkyrie just as Zed initiates his ultimate to pull him into danger.
Lane-Einfluss
You must constantly dodge Razor Shuriken and Shadow Slash from his shadow to preserve your health bar. If your health drops low enough for Contempt for the Weak to trigger, you lose all lane control. This forces you to play defensively near your tower, yielding mid lane pressure and letting Zed roam to hunt your teammates while you farm from afar.
Wie man spielt
Never cast Valkyrie aggressively unless Zed's Living Shadow is on its long cooldown. Stand near your turret when his ultimate is up. The moment you see the X mark from Death Mark appear on Corki, immediately buffer Valkyrie backwards under your tower. Zed will follow your flight path and materialize deep in turret range, turning his deadly dive into a fatal mistake. Safely poke him down from distance with Missile Barrage.
SkalierungWellenräumungWhile both champions want to scale, Ryze outpaces Corki because of Arcane Mastery amplifying his late-game threat. In lane, your primary safety tool, Valkyrie, is completely neutralized by Ryze's instant, point-and-click Rune Prison. This immediate root prevents you from sliding away, making you an exceptionally easy target for the enemy jungler if you step up too far to trade with Phosphorus Bomb or Gatling Gun.Ryze Build →Details ansehen
Ryze
Warum
While both champions want to scale, Ryze outpaces Corki because of Arcane Mastery amplifying his late-game threat. In lane, your primary safety tool, Valkyrie, is completely neutralized by Ryze's instant, point-and-click Rune Prison. This immediate root prevents you from sliding away, making you an exceptionally easy target for the enemy jungler if you step up too far to trade with Phosphorus Bomb or Gatling Gun.
Lane-Einfluss
Because Rune Prison shuts down your escape, you cannot afford to push blindly. Ryze will use Spell Flux and Overload to bounce damage through your minions, forcing you to choose between taking heavy damage or giving up priority. This pressure forces you to farm under tower, delaying your Hextech Munitions packages and preventing you from assisting your jungler, while Ryze scales safely or prepares Realm Warp plays.
Wie man spielt
Keep the minion wave close to your turret by only using Phosphorus Bomb to last-hit rather than clear. Never cast Valkyrie offensively while Rune Prison is available. If Ryze freezes the wave near his tower, do not walk up; instead, wait for your Hextech Munitions to spawn, using the massive movement speed boost of Special Delivery to safely break the freeze or roam to a side lane, bypassing his point-and-click crowd control entirely.
ZonenkontrolleKartendruckThe core of this matchup lies in Taliyah's Unraveled Earth completely shutting down your mobility. If you attempt to use Valkyrie to escape or engage, sliding through her minefield triggers immediate explosive damage and a heavy slow. This interaction turns your primary escape tool into a self-inflicted trap, especially when combined with her Seismic Shove which can force you into the stones if you misposition.Taliyah Build →Details ansehen
Taliyah
Warum
The core of this matchup lies in Taliyah's Unraveled Earth completely shutting down your mobility. If you attempt to use Valkyrie to escape or engage, sliding through her minefield triggers immediate explosive damage and a heavy slow. This interaction turns your primary escape tool into a self-inflicted trap, especially when combined with her Seismic Shove which can force you into the stones if you misposition.
Lane-Einfluss
Because Valkyrie is neutralized, you cannot easily match Taliyah's wave clear using Gatling Gun or Phosphorus Bomb without exposing yourself. If she freezes or zones you, walking up to farm is extremely dangerous. Furthermore, Taliyah can abuse Rock Surfing and Weaver's Wall to roam to side lanes while you are stuck safely clearing under turret, forcing your team to play defensively without your package presence.
Wie man spielt
Keep your distance and focus on farming from afar using Missile Barrage once available. Never use Valkyrie reactively while Unraveled Earth is active on the ground. Instead, walk out of her Threaded Volley angles and save your dash strictly to dodge Seismic Shove. When you secure the Package, do not use Special Delivery directly onto her; use it laterally to cut off her Rock Surfing paths along the walls or secure your own retreat.
PokeBurstJayce's dual-form versatility via Transform Mercury Cannon gives him an overwhelming early burst advantage. His accelerated Shock Blast chunks your health from afar, and if you step up, he can transition to hammer form to execute a lethal dive with To the Skies!. Your early Phosphorus Bomb and Gatling Gun simply cannot match this raw damage output before you acquire your first major item spikes, leaving you vulnerable to quick trades.Jayce Build →Details ansehen
Jayce
Warum
Jayce's dual-form versatility via Transform Mercury Cannon gives him an overwhelming early burst advantage. His accelerated Shock Blast chunks your health from afar, and if you step up, he can transition to hammer form to execute a lethal dive with To the Skies!. Your early Phosphorus Bomb and Gatling Gun simply cannot match this raw damage output before you acquire your first major item spikes, leaving you vulnerable to quick trades.
Lane-Einfluss
This damage disparity forces you to yield early wave control. Jayce can easily crash waves and poke you under turret with Shock Blast. You will find yourself constantly pushed back, burning through mana to thin waves with Phosphorus Bomb. This conceded priority prevents you from helping your jungler contest early river skirmishes, locking you in mid lane while you struggle to maintain high health for potential Special Delivery packages.
Wie man spielt
Prioritize safety by farming from maximum range using Phosphorus Bomb, and eventually, Missile Barrage. Keep Valkyrie ready solely as a defensive tool; if Jayce lunges forward with To the Skies!, immediately cast it backward to break the engage. Never trade auto-attacks when his Thundering Blow gate is active. If you get chunked, accept losing some gold, stay in experience range, and wait for your Package delivery to impact the map rather than force fights in mid.
SkalierungMobilitätYour passive, Hextech Munitions, turns your basic attacks into magic damage, which completely plays into Kassadin's hands. Whenever you try to poke him with Phosphorus Bomb or auto-attacks, he responds with Null Sphere. The magic shield from both Null Sphere and his Void Stone passive absorbs almost all your damage, allowing him to neutralize your early lane pressure and scale comfortably into a late-game monster.Kassadin Build →Details ansehen
Kassadin
Warum
Your passive, Hextech Munitions, turns your basic attacks into magic damage, which completely plays into Kassadin's hands. Whenever you try to poke him with Phosphorus Bomb or auto-attacks, he responds with Null Sphere. The magic shield from both Null Sphere and his Void Stone passive absorbs almost all your damage, allowing him to neutralize your early lane pressure and scale comfortably into a late-game monster.
Lane-Einfluss
During the early levels, you cannot establish a health lead because his magic shields negate your trade attempts, while your spell-casting constantly charges his Force Pulse. Once Kassadin unlocks Riftwalk, the lane dynamic shifts heavily. He can easily blink over your Phosphorus Bomb or Missile Barrage, close the distance, and chunk your health bar with Nether Blade while silencing you, forcing you to play defensively under tower.
Wie man spielt
To survive, never use Valkyrie aggressively; always keep it to escape his Riftwalk engagements. When trading, wait for him to waste Null Sphere on a minion before shredding him with Gatling Gun. If you obtain the Package, do not waste Special Delivery trying to dive him. Instead, use the massive movement speed boost to roam to side lanes, forcing him to choose between matching your map pressure or farming under his turret.
MassenkontrolleAnti-DashVex is a natural counter to Corki because of her passive, Doom 'n Gloom. Every time you attempt to escape or reposition using Valkyrie or the Package-empowered Special Delivery, Vex immediately marks you with Gloom. This enables her to consume the mark for bonus damage with Mistral Bolt or Personal Space, while her ready Doom passive allows her next basic ability to fear you, shutting down any aggressive flight or safe retreat.Vex Build →Details ansehen
Vex
Warum
Vex is a natural counter to Corki because of her passive, Doom 'n Gloom. Every time you attempt to escape or reposition using Valkyrie or the Package-empowered Special Delivery, Vex immediately marks you with Gloom. This enables her to consume the mark for bonus damage with Mistral Bolt or Personal Space, while her ready Doom passive allows her next basic ability to fear you, shutting down any aggressive flight or safe retreat.
Lane-Einfluss
This interaction forces you into a highly defensive posture where Valkyrie must be locked away, used only as an absolute emergency escape. If you dash forward, Vex punishes you with a full combo starting with Personal Space's shield. You are forced to farm from a distance using Phosphorus Bomb, giving Vex control over the wave state and allowing her to roam first with Shadow Surge once she reaches level five.
Wie man spielt
To survive and trade effectively, monitor Vex's resource bar constantly. Only initiate short trades with Gatling Gun and Phosphorus Bomb when her Doom passive is down, typically after she expends her fear on the minion wave using Mistral Bolt or Looming Darkness. Keep your distance, poke with Missile Barrage from safety, and never use Valkyrie offensively unless her Shadow Surge has missed and her fear bar is completely empty.
BurstNicht anvisierbarThis matchup is highly unfavorable for Corki because Fizz can easily neutralize your long-range poke. When you try to chip him down with Missile Barrage, he can use Playful to become untargetable, dodging your rockets entirely. Once he lands, he immediately uses Urchin Strike to close the remaining gap, turning your ranged advantage into a deadly close-quarters brawl where his burst damage completely overwhelms you.Fizz Build →Details ansehen
Fizz
Warum
This matchup is highly unfavorable for Corki because Fizz can easily neutralize your long-range poke. When you try to chip him down with Missile Barrage, he can use Playful to become untargetable, dodging your rockets entirely. Once he lands, he immediately uses Urchin Strike to close the remaining gap, turning your ranged advantage into a deadly close-quarters brawl where his burst damage completely overwhelms you.
Lane-Einfluss
You cannot safely push the wave with Phosphorus Bomb without exposing yourself. If Fizz freezes the wave near his tower, you are forced to step up, making you an easy target for Chum the Waters. A single successful engage from him forces you to burn Valkyrie defensively, costing you massive mana and lane priority. This pressure prevents you from roaming with your Special Delivery, leaving your side lanes vulnerable.
Wie man spielt
To survive, never use Gatling Gun unless Playful is on cooldown. Keep your distance and focus on farming with Phosphorus Bomb. Only fire Missile Barrage immediately after Fizz uses Urchin Strike, as he cannot easily dodge during the dash animation. If Chum the Waters latches onto you, do not panic; wait for the knock-up to end before using Valkyrie to escape, or use Special Delivery if available to knock him back during his follow-up.
MassenkontrolleTanksWhile Corki usually relies on Valkyrie to escape bad situations, Malphite completely neutralizes this safety net. The sheer speed of Unstoppable Force can intercept you right in the middle of your Valkyrie dash. Because Malphite is immune to crowd control during his ultimate, your package-enhanced Special Delivery cannot interrupt him either, leaving you extremely vulnerable to dive setups.Malphite Build →Details ansehen
Malphite
Warum
While Corki usually relies on Valkyrie to escape bad situations, Malphite completely neutralizes this safety net. The sheer speed of Unstoppable Force can intercept you right in the middle of your Valkyrie dash. Because Malphite is immune to crowd control during his ultimate, your package-enhanced Special Delivery cannot interrupt him either, leaving you extremely vulnerable to dive setups.
Lane-Einfluss
This threat forces you into a highly defensive posture once Malphite reaches level five. You cannot aggressively push with Gatling Gun or poke with Phosphorus Bomb near his tower, as doing so leaves you too far up the lane. Every time your Valkyrie is baited or interrupted, you become a free target for the enemy jungler, forcing early recalls and costing you precious farm.
Wie man spielt
To survive, always position yourself closer to your own turret than to his, keeping the wave near your side. Never use Valkyrie offensively; hold it strictly as a defensive tool, but only trigger it after you see him commit Unstoppable Force, or flash his ultimate entirely. If Malphite freezes the wave, use the long-range poke of Missile Barrage to break it safely from a distance instead of walking up.
Diese Matchups sind vor allem Duelle der Ausführung: Beide Champions haben glaubwürdige Wege, die Oberhand zu gewinnen. Eine wichtige ausgewichene Fähigkeit, ein richtig antizipierter Engage oder ein einziger Positionierungsfehler können reichen, um das Duell zu entscheiden. Das Matchup zu kennen und die richtigen Fenster zum Handeln zu erkennen, ist hier besonders wichtig.
PokePositionierungThis matchup is a pure battle of attrition fought at maximum range. Orianna utilizes Command: Attack to constantly reposition her sphere and match the threat of your Phosphorus Bomb. Because both of you possess efficient, low-cooldown ranged tools to chip away at each other's health bars, neither champion can easily force a decisive all-in without first gaining a significant health advantage through superior spacing and skillshot accuracy.Orianna Build →Details ansehen
Orianna
Warum
This matchup is a pure battle of attrition fought at maximum range. Orianna utilizes Command: Attack to constantly reposition her sphere and match the threat of your Phosphorus Bomb. Because both of you possess efficient, low-cooldown ranged tools to chip away at each other's health bars, neither champion can easily force a decisive all-in without first gaining a significant health advantage through superior spacing and skillshot accuracy.
Lane-Einfluss
The lane constantly fluctuates based on who secures wave priority. If you get pushed under turret by Command: Attack and Command: Dissonance, you will struggle to retaliate with Phosphorus Bomb while farming. Conversely, overextending to trade invites Orianna to punish you with Command: Protect's shield. Health bars will deplete fast, meaning recall timings are dictated by who runs out of mana first or gets poked out of lane.
Wie man spielt
Always position yourself diagonally relative to Orianna's sphere to force her into wider, more predictable Command: Attack angles. Save Valkyrie strictly to escape her ultimate, Command: Shockwave, rather than using it offensively. Once you unlock Missile Barrage, use the Big One to secure ranged minions and poke her simultaneously. If she shields herself with Command: Protect, immediately back off and wait out the defensive buff before throwing another Phosphorus Bomb.
RegenerationTeamfightsThis matchup is a battle of attrition where Swain relies on Ravenous Flock and Demonic Ascension to outsustain you in close-quarters trades. While his Death's Hand punishes proximity, your ranged tools like Phosphorus Bomb and Missile Barrage allow you to chip away at his health bar safely. Crucially, whenever Swain attempts to drain your health during his ultimate, your Valkyrie provides an instant escape to deny his healing entirely.Swain Build →Details ansehen
Swain
Warum
This matchup is a battle of attrition where Swain relies on Ravenous Flock and Demonic Ascension to outsustain you in close-quarters trades. While his Death's Hand punishes proximity, your ranged tools like Phosphorus Bomb and Missile Barrage allow you to chip away at his health bar safely. Crucially, whenever Swain attempts to drain your health during his ultimate, your Valkyrie provides an instant escape to deny his healing entirely.
Lane-Einfluss
The lane progresses as a constant push-and-pull. Swain uses Death's Hand to clear waves and tries to pull you in with Nevermove. Getting hit by this root triggers Ravenous Flock, giving Swain the health advantage. You must match his push using Gatling Gun and Phosphorus Bomb. Tower pressure is minimal for both, but the lane swings based on who manages their health pool better before major map skirmishes.
Wie man spielt
To win this war of attrition, always keep Valkyrie off cooldown. Never use it offensively unless Swain has already wasted his ultimate. Position yourself constantly on the move to dodge Nevermove, as its return trajectory is highly predictable. When Swain triggers Demonic Ascension, immediately cast Valkyrie backward to break the tether and wait out his transformation. While his ultimate is down, abuse your range advantage by firing Missile Barrage and Phosphorus Bomb to force him out of lane.
WellenräumungSkalierungThis matchup turns into a mirror of non-stop wave clearing. Whenever you attempt to establish mid priority by throwing Phosphorus Bomb and shredding minions with Gatling Gun, Viktor can instantly answer from safety using Hextech Ray. Because his laser deletes waves just as fast as your rockets, neither of you can easily force the other under tower, neutralizing any aggressive push potential.Viktor Build →Details ansehen
Viktor
Warum
This matchup turns into a mirror of non-stop wave clearing. Whenever you attempt to establish mid priority by throwing Phosphorus Bomb and shredding minions with Gatling Gun, Viktor can instantly answer from safety using Hextech Ray. Because his laser deletes waves just as fast as your rockets, neither of you can easily force the other under tower, neutralizing any aggressive push potential.
Lane-Einfluss
The lane remains completely flat with minimal health trades. Attempting to poke Viktor with Missile Barrage is often mitigated by the shield from his Siphon Power, while trying to engage with Valkyrie exposes you to his Gravity Field. Neither champion can secure a deep roam or clean recall without giving up plates, forcing both of you to stay glued to the mid lane, farming for your respective late-game power spikes.
Wie man spielt
To break this stalemate, stand outside your minion wave. This forces Viktor to choose between targeting you or clearing minions with his Hextech Ray. Keep Valkyrie strictly as a defensive tool to escape his Arcane Storm or to dash out of his Gravity Field if he tries to trap you. When you acquire your Special Delivery, use its massive movement speed boost to execute a rapid flank on side lanes, bypassing his waveclear entirely.
KartendruckBurstThis mid lane is a direct contest of map presence. While Corki's Valkyrie lets him safely disengage from Talon's Noxian Diplomacy during laning, Talon's Assassin's Path grants him unparalleled roaming speed. To match Talon's sudden rotations across river walls, Corki relies entirely on the massive mobility burst of Special Delivery from Hextech Munitions to arrive in time and counteract the flank.Talon Build →Details ansehen
Talon
Warum
This mid lane is a direct contest of map presence. While Corki's Valkyrie lets him safely disengage from Talon's Noxian Diplomacy during laning, Talon's Assassin's Path grants him unparalleled roaming speed. To match Talon's sudden rotations across river walls, Corki relies entirely on the massive mobility burst of Special Delivery from Hextech Munitions to arrive in time and counteract the flank.
Lane-Einfluss
The early game revolves around managing Talon's Rake push. If Talon shoves you under tower, he immediately disappears into the jungle using Assassin's Path. Corki must use Phosphorus Bomb and Gatling Gun to contest the wave, ensuring Talon pays a high health cost if he tries to stack Blade's End. The mid lane turns into a ticking clock, decided by who controls the river first.
Wie man spielt
Always save Valkyrie to react immediately when Talon dashes with Noxian Diplomacy; never use it offensively unless his Shadow Assault is on cooldown. When Hextech Munitions spawns in base, do not pick it up instantly. Wait until Talon commits to an Assassin's Path roam toward a side lane, then grab the Package and use Special Delivery to fly across the map, cutting off his escape route and burning him in the trail.
KartendruckThis matchup is a pure map-pressure race. Twisted Fate relies on the point-and-click stun of a gold Pick a Card to lock you down, preventing you from contesting his lane priority before he channels Destiny. However, Corki has the perfect counter-global tool: grabbing the package from Hextech Munitions gives you the raw speed and the explosive zone of Special Delivery to immediately mirror his sidelane rotations.Twisted Fate Build →Details ansehen
Twisted Fate
Warum
This matchup is a pure map-pressure race. Twisted Fate relies on the point-and-click stun of a gold Pick a Card to lock you down, preventing you from contesting his lane priority before he channels Destiny. However, Corki has the perfect counter-global tool: grabbing the package from Hextech Munitions gives you the raw speed and the explosive zone of Special Delivery to immediately mirror his sidelane rotations.
Lane-Einfluss
Expect a non-stop pushing battle. Twisted Fate will constantly throw Wild Cards to shove you under turret and secure safe recalls. If you let him clear freely, he will disappear into the fog of war. You must match this push using Phosphorus Bomb and Gatling Gun to keep him tethered to his tower, forcing him to choose between losing his own plates or abandoning his sidelane target.
Wie man spielt
Do not waste Valkyrie defensively unless you see him lock in a blue or red card from Pick a Card; if he pulls the gold card, you must stay out of his auto-attack range entirely. Time your backing sequences to synchronize with your package spawns. If he triggers Destiny while you lack Special Delivery, do not chase blindly. Instead, activate Gatling Gun and use Missile Barrage to rapidly demolish his mid turret, punishing his roam with massive local gold.
PokeAusweichenThis lane is a pure test of skillshot geometry. If you use Valkyrie carelessly, its straight-line trajectory makes you an incredibly easy target for Zoe to intercept with Sleepy Trouble Bubble. Conversely, once you unlock Missile Barrage, you can safely whittle down her health from maximum range, bypassing her minion wave and making it difficult for her to step up to launch a high-damage Paddle Star!.Zoe Build →Details ansehen
Zoe
Warum
This lane is a pure test of skillshot geometry. If you use Valkyrie carelessly, its straight-line trajectory makes you an incredibly easy target for Zoe to intercept with Sleepy Trouble Bubble. Conversely, once you unlock Missile Barrage, you can safely whittle down her health from maximum range, bypassing her minion wave and making it difficult for her to step up to launch a high-damage Paddle Star!.
Lane-Einfluss
Before level five, Zoe will aggressively look to clear waves with Paddle Star! and fish for angles with Sleepy Trouble Bubble through the walls. If she lands one, the resulting burst forces an early recall, letting her roam. Once you obtain your rockets, the dynamic shifts; you can neutralize her wave clear and chip her down, preventing her from comfortably using Portal Jump to poke under your tower.
Wie man spielt
Never use Valkyrie aggressively unless Zoe has already wasted Sleepy Trouble Bubble. When she uses Portal Jump, do not panic; instead, aim Missile Barrage directly at her return portal marker to guarantee a high-damage Big One hit. Always keep a wave of minions between you and her to block Paddle Star!, and only use Phosphorus Bomb to secure contested lasthits from a safe angle. If she misses her bubble, immediately step forward to shred her resistances with Gatling Gun.
Diese Champions tun sich meist schwer, auf deine Hauptstärken zu reagieren, was dir mehr Freiheit im Matchup gibt. Du hast oft mehrere Möglichkeiten, sie unter Druck zu setzen und Trades zu deinen Gunsten zu erzwingen. Nutze diesen Vorteil, um das Tempo zu bestimmen, statt ihnen Zeit zu geben, wieder in eine komfortable Position zu kommen.
PokeSkalierungMel relies on establishing zones of control to keep mid laners at bay, but Corki completely bypasses this pressure. Once you unlock Missile Barrage, you can chip away her health pool from extreme safety, well outside her spell range. By pairing this long-range siege with Phosphorus Bomb for quick wave clears, you neutralize her wave pressure while securing your own scaling without ever stepping into her danger zone.Mel Build →Details ansehen
Mel
Warum
Mel relies on establishing zones of control to keep mid laners at bay, but Corki completely bypasses this pressure. Once you unlock Missile Barrage, you can chip away her health pool from extreme safety, well outside her spell range. By pairing this long-range siege with Phosphorus Bomb for quick wave clears, you neutralize her wave pressure while securing your own scaling without ever stepping into her danger zone.
Lane-Einfluss
This range superiority shifts the lane's momentum entirely in your favor. Mel is forced to constantly dodge rockets instead of positioning aggressively to zone you. Because she cannot easily trade back without walking forward into your minion wave, her health bar slowly depletes. This constant chip damage forces her into bad recall timings, giving you easy opportunities to crash waves and secure plate gold.
Wie man spielt
Maintain a strict maximum distance, using your rockets to farm and poke simultaneously. Never use Valkyrie offensively unless Mel has already missed her primary crowd control. If she attempts to force a trade, immediately disengage backwards. When you acquire the Package, use the explosive path of Special Delivery to cut off her escape route back to her tower, forcing her to walk through the burning trail where your Gatling Gun can quickly shred her.
MobilitätScharmützelCorki dominates this matchup because he can entirely neutralize Ekko's primary burst tool. Whenever Ekko attempts to close the gap with Phase Dive, Corki can instantly react with Valkyrie to fly backward. This simple reaction denies Ekko the ability to land his third attack and trigger the movement speed and damage of Z-Drive Resonance, leaving the melee assassin stranded and vulnerable to ranged poke.Ekko Build →Details ansehen
Ekko
Warum
Corki dominates this matchup because he can entirely neutralize Ekko's primary burst tool. Whenever Ekko attempts to close the gap with Phase Dive, Corki can instantly react with Valkyrie to fly backward. This simple reaction denies Ekko the ability to land his third attack and trigger the movement speed and damage of Z-Drive Resonance, leaving the melee assassin stranded and vulnerable to ranged poke.
Lane-Einfluss
This defensive superiority translates into complete mid-lane priority. Because Ekko cannot safely trade, he is forced to use Timewinder just to farm from a distance, which quickly depletes his mana. This allows you to push continuously with Phosphorus Bomb and Gatling Gun, keeping him pinned under his tower. Without his passive movement speed, he cannot contest your wave control or find roam timings.
Wie man spielt
Always hold Valkyrie as a strict response to Ekko's Phase Dive; using it aggressively invites a deadly counter-engage. When he misses Timewinder, step forward to shred his armor with Gatling Gun and poke with Phosphorus Bomb. Once you unlock Missile Barrage, abuse your range advantage to chip away his health from safety, forcing him to use Chronobreak defensively rather than offensively. If he drops Parallel Convergence, immediately walk out of the zone before he can teleport into it.
PokeSkalierungCorki dominates this matchup because his primary damage tool, Missile Barrage, completely outranges Veigar's defensive tool, Event Horizon. While Veigar relies on catching targets in his cage to land Dark Matter and Baleful Strike, Corki can sit comfortably backward, lobbing rockets to chip away at Veigar's health pool without ever stepping into the danger zone of the stun boundary.Veigar Build →Details ansehen
Veigar
Warum
Corki dominates this matchup because his primary damage tool, Missile Barrage, completely outranges Veigar's defensive tool, Event Horizon. While Veigar relies on catching targets in his cage to land Dark Matter and Baleful Strike, Corki can sit comfortably backward, lobbing rockets to chip away at Veigar's health pool without ever stepping into the danger zone of the stun boundary.
Lane-Einfluss
By constantly threatening Veigar with Phosphorus Bomb and Missile Barrage, you force him to use Baleful Strike on minions under tower rather than stacking his Phenomenal Evil Power on you. This pressure prevents Veigar from stepping up to contest the wave, allowing you to secure easy priority, chip his tower, and force him into awkward recall timings due to his depleted health bar.
Wie man spielt
Always maintain a distance greater than the radius of Event Horizon, using the maximum range of your Missile Barrage to whittle Veigar down. Save Valkyrie strictly as an escape tool; never use it to dash forward unless Veigar has already wasted his cage or you are executing a guaranteed kill with Special Delivery. If he traps you inside the cage without stunning you, use Gatling Gun to shred his resistances while dodging his Dark Matter.
SkalierungRegenerationVladimir depends on wearing down opponents over time, but he has zero hard crowd control to interrupt your escape. Whenever he tries to pool forward or charge his Tides of Blood, you can effortlessly disengage with Valkyrie. This complete safety denies his kill pressure, allowing you to freely farm your core items. Once you scale, your Gatling Gun shreds his built-in health defenses during teamfights before he can even reach you.Vladimir Build →Details ansehen
Vladimir
Warum
Vladimir depends on wearing down opponents over time, but he has zero hard crowd control to interrupt your escape. Whenever he tries to pool forward or charge his Tides of Blood, you can effortlessly disengage with Valkyrie. This complete safety denies his kill pressure, allowing you to freely farm your core items. Once you scale, your Gatling Gun shreds his built-in health defenses during teamfights before he can even reach you.
Lane-Einfluss
Since you do not fear his engage, you can dictate the wave's position. Keep the minions closer to your tower early to force Vladimir to walk up, making him vulnerable to your Phosphorus Bomb poke. Because his Transfusion sustain is predictable, you can easily time your push when his red bar is empty. This constant pressure forces him to use Sanguine Pool defensively under tower, destroying his health bar and giving you free roam timings.
Wie man spielt
Never use Valkyrie offensively unless Vladimir has already wasted his Sanguine Pool and is low on health. Instead, save it as your ultimate safety net. Walk up to trade only when his Transfusion indicator is white or yellow, and immediately back off when it turns red. If he tries to dive you with Hemoplague, drop your Special Delivery trail directly across his path to force him into a bad pool, then shred his armor with Gatling Gun while kiting backwards.
PokeWellenräumungIn this ranged shootout, Corki holds the upper hand because his sustained DPS from Gatling Gun and Missile Barrage quickly outpaces Ziggs's burst. Most importantly, Corki can effortlessly use Valkyrie to dash out of the dead center of Mega Inferno Bomb, neutralizing Ziggs's primary execution tool. While Ziggs relies on landing slow, predictable skillshots, Corki's mixed damage from Hextech Munitions ensures he melts Ziggs in direct duels.Ziggs Build →Details ansehen
Ziggs
Warum
In this ranged shootout, Corki holds the upper hand because his sustained DPS from Gatling Gun and Missile Barrage quickly outpaces Ziggs's burst. Most importantly, Corki can effortlessly use Valkyrie to dash out of the dead center of Mega Inferno Bomb, neutralizing Ziggs's primary execution tool. While Ziggs relies on landing slow, predictable skillshots, Corki's mixed damage from Hextech Munitions ensures he melts Ziggs in direct duels.
Lane-Einfluss
Ziggs will try to shove the wave constantly using Bouncing Bomb and threaten your tower with Satchel Charge. However, you can match his clear using Phosphorus Bomb while keeping him under threat. Because you win extended trades, Ziggs is forced to play defensively, preventing him from freely deploying Hexplosive Minefield to zone you out. This allows you to secure mid priority and safely collect your Special Delivery packages.
Wie man spielt
Stand outside your minion wave so Ziggs must choose between targeting you or shoving with Bouncing Bomb. Always hold Valkyrie specifically to react to his Mega Inferno Bomb ; never use it aggressively unless his ultimate is on cooldown or he is low enough to die to Gatling Gun. If you get zoned by Hexplosive Minefield, use the long range of Missile Barrage to farm safely from a distance.
KartendruckFrüher DruckAs a ranged marksman, Corki naturally oppresses the melee Katarina. Whenever she steps up to fetch a dagger from Bouncing Blade, you can shred her resistances using Gatling Gun. Even if she tries to escape the trade with Shunpo, your continuous damage output wins. Later, when she seeks to roam to get Voracity resets, the extreme map-wide dash of Special Delivery ensures you arrive at side-lane skirmishes simultaneously to shut her down.Katarina Build →Details ansehen
Katarina
Warum
As a ranged marksman, Corki naturally oppresses the melee Katarina. Whenever she steps up to fetch a dagger from Bouncing Blade, you can shred her resistances using Gatling Gun. Even if she tries to escape the trade with Shunpo, your continuous damage output wins. Later, when she seeks to roam to get Voracity resets, the extreme map-wide dash of Special Delivery ensures you arrive at side-lane skirmishes simultaneously to shut her down.
Lane-Einfluss
You easily dictate the minion wave's position from level one. By keeping Katarina shoved under her turret with Phosphorus Bomb, you force her to choose between losing gold or taking poke. Since she cannot safely trade without exposing herself to Gatling Gun, she is pressured into desperate roams. However, her absence allows you to rapidly demolish her tower, while your Special Delivery package threatens to counter-gank her target.
Wie man spielt
Position yourself laterally away from the daggers dropped by Bouncing Blade to completely neutralise her Shunpo engage angles. Always hold Valkyrie to escape her Death Lotus radius if she attempts an all-in. When Hextech Munitions grants you the package, immediately look at the side lanes; timing your base recalls to pick up Special Delivery right as she attempts a desperate roam allows you to crash onto her skirmish and turn the fight.
SkalierungFrüher DruckKayle is completely defenseless against your early aggression before Divine Ascent grants her ranged attacks. By activating Gatling Gun as she steps up to last-hit with Starfire Spellblade, you shred her resistances and guarantee a maximum damage Phosphorus Bomb. She cannot trade back effectively, as her Radiant Blast is too slow to match your mixed-damage burst, allowing you to establish absolute dominance over her weak early levels.Kayle Build →Details ansehen
Kayle
Warum
Kayle is completely defenseless against your early aggression before Divine Ascent grants her ranged attacks. By activating Gatling Gun as she steps up to last-hit with Starfire Spellblade, you shred her resistances and guarantee a maximum damage Phosphorus Bomb. She cannot trade back effectively, as her Radiant Blast is too slow to match your mixed-damage burst, allowing you to establish absolute dominance over her weak early levels.
Lane-Einfluss
This matchup forces Kayle to play under her turret, burning her mana on Celestial Blessing to survive and Radiant Blast to secure distant minions. You will hold permanent wave priority, easily zoning her from gold. This massive pressure allows you to safely secure the Package and use Special Delivery to impact side lanes or dive her under tower before her Divine Judgment becomes a threat.
Wie man spielt
Position yourself aggressively near her melee minions. Every time she uses Starfire Spellblade to farm, immediately punish her by layering Gatling Gun with Phosphorus Bomb. Do not let her heal back with Celestial Blessing for free. Keep Valkyrie ready to disengage if her jungler intervenes, or to chase her down once she wastes Divine Judgment. If she plays extremely safe, use Missile Barrage to chip away her health from afar.
Diese Champions haben ein Build und einen Spielstil, der deinen direkt überlegen ist, was die Kontrolle der Lane und das Farmen extrem schwierig machen kann. Ihr Kit kann deine Kernstärken neutralisieren oder dich bestrafen, sobald du versuchst, deinen gewohnten Spielplan umzusetzen. In diesen Matchups geht es oft darum, Fehler zu minimieren und nach Wegen zu suchen, außerhalb der direkten Konfrontation zu gewinnen.
MobilitätDraven dominates this lane because his Stand Aside completely cancels Corki's Valkyrie mid-dash. If you attempt to escape his aggressive Spinning Axe trades, a well-timed displacement leaves you grounded and vulnerable. Without your primary mobility tool, Draven's Blood Rush allows him to run you down easily, turning your only defensive tool into a deadly trap.Draven Build →Details ansehen
Draven
Warum
Draven dominates this lane because his Stand Aside completely cancels Corki's Valkyrie mid-dash. If you attempt to escape his aggressive Spinning Axe trades, a well-timed displacement leaves you grounded and vulnerable. Without your primary mobility tool, Draven's Blood Rush allows him to run you down easily, turning your only defensive tool into a deadly trap.
Lane-Einfluss
This constant threat forces you to concede early wave control, as stepping up to use Gatling Gun or Phosphorus Bomb invites a devastating trade. Draven will freeze the wave to deny you gold, or crash it to dive you with Whirling Death. You must accept losing minion gold under tower, focusing purely on surviving to prevent him from cashing in his League of Draven stacks.
Wie man spielt
To survive, you must hold your Valkyrie strictly for defense, using it only after Draven has wasted Stand Aside or to dodge his global Whirling Death. Farm safely from afar using the long range of Missile Barrage once you hit level five. If he freezes the wave near his tower, do not walk up; instead, wait for the wave to bounce back, prioritizing experience over gold.
Diese Champions haben Werkzeuge, die ihnen im Kampf meist einen Vorteil verschaffen, ohne das Matchup unspielbar zu machen. Sie haben vielleicht mehr Reichweite, können deine Offensive besser abfangen oder haben mehr Möglichkeiten, auf deine Engages zu reagieren. Du musst deine Herangehensweise anpassen und sorgfältig die Momente wählen, in denen du den Kampf annimmst.
MobilitätFrüher DruckKalista's passive, Martial Poise, completely disrupts your offensive rhythm. Every time she executes a basic attack, she hops, making her an incredibly slippery target. This constant, unpredictable movement makes landing your main poke tools, Phosphorus Bomb and Missile Barrage, highly unreliable. Because your damage profile heavily relies on hitting these skillshots to chunk her down before fights, her innate mobility nullifies your primary laning pressure.Kalista Build →Details ansehen
Kalista
Warum
Kalista's passive, Martial Poise, completely disrupts your offensive rhythm. Every time she executes a basic attack, she hops, making her an incredibly slippery target. This constant, unpredictable movement makes landing your main poke tools, Phosphorus Bomb and Missile Barrage, highly unreliable. Because your damage profile heavily relies on hitting these skillshots to chunk her down before fights, her innate mobility nullifies your primary laning pressure.
Lane-Einfluss
You will find yourself constantly pushed under turret because missing Phosphorus Bomb on Kalista means you forfeit control of the minion wave. She can easily trade while you miss, stacking spears with Rend to force you out of lane or secure early drakes. If you try to match her push, she can engage with Fate's Call, leaving you with no choice but to burn Valkyrie defensively, sacrificing your Package pressure.
Wie man spielt
To survive, adopt a strict safety-first positioning rule. Do not throw Phosphorus Bomb randomly; instead, wait for her to lock herself into her basic attack animation to secure the hit. Keep Gatling Gun active during her short-range hops to shred her armor without needing precise aim. Most importantly, never use Valkyrie offensively unless her Fate's Call is completely down, and save your Package to disengage from her support's knock-up rather than initiating.
MobilitätYunara naturally out-scales Corki's late-game damage because of Vow of the First Lands. More importantly, your package play is heavily countered here. When you crash in with Special Delivery, Yunara can instantly reposition using Kanmei's Steps, or even enhance it into a swift dash via Transcend One's Self. She effortlessly escapes your fiery trail, neutralizing your biggest teamfight threat while keeping you in her attack range.Yunara Build →Details ansehen
Yunara
Warum
Yunara naturally out-scales Corki's late-game damage because of Vow of the First Lands. More importantly, your package play is heavily countered here. When you crash in with Special Delivery, Yunara can instantly reposition using Kanmei's Steps, or even enhance it into a swift dash via Transcend One's Self. She effortlessly escapes your fiery trail, neutralizing your biggest teamfight threat while keeping you in her attack range.
Lane-Einfluss
During early laning, Yunara's Cultivation of Spirit pushes waves faster and punishes your short-range Gatling Gun trades with bouncing physical-magical hybrid attacks. You cannot match her wave clear without expending massive mana on Phosphorus Bomb. This constant pressure forces you to farm under tower, delaying your crucial level-dependent power spikes and preventing you from roaming to secure early Rift Scuttlers with your team.
Wie man spielt
Your window to fight opens only when Transcend One's Self is down. If you have the package, do not initiate directly onto her with Special Delivery; instead, use its path to cut off her retreat or block her lane of escape. If she activates Kanmei's Steps to dodge, immediately fall back using Valkyrie to avoid her Arc of Judgment slow. If she forces a hard dive, focus on farming from maximum distance with Missile Barrage.
ProjektilblockAll-inYour poke-heavy neutral game is severely countered by Samira's defensive tools. When you attempt to chip away at her health using Missile Barrage, she can activate Blade Whirl to completely erase your rockets mid-air. This projectile destruction robs you of your primary trading tool right as she seeks to stack Daredevil Impulse and commit to an aggressive engagement.Samira Build →Details ansehen
Samira
Warum
Your poke-heavy neutral game is severely countered by Samira's defensive tools. When you attempt to chip away at her health using Missile Barrage, she can activate Blade Whirl to completely erase your rockets mid-air. This projectile destruction robs you of your primary trading tool right as she seeks to stack Daredevil Impulse and commit to an aggressive engagement.
Lane-Einfluss
Because your primary poke is shut down, you cannot safely force Samira out of lane or pressure her under turret. She can comfortably hold the wave, knowing Blade Whirl protects her from Phosphorus Bomb and rocket harass. If you waste your rockets carelessly, she will immediately use Wild Rush to close the gap and unleash Inferno Trigger while you lack the burst to trade back.
Wie man spielt
Never fire Missile Barrage directly at Samira while her Blade Whirl is available. Instead, use Phosphorus Bomb to secure minions from a distance and force her to walk up. If she initiates with Wild Rush, immediately disengage using Valkyrie to escape her Inferno Trigger radius. Save your Special Delivery package for moments when her defensive spin is on cooldown to split the fight safely.
TradesMobilitätLucian dominates the early trades because his high mobility neutralizes your primary poke. Every time you throw a Phosphorus Bomb to harass or farm, Lucian can reactively dash with Relentless Pursuit to completely avoid the damage. He then instantly triggers his Lightslinger double-tap, forcing a highly uneven trade that chunks your health bar before you can shred his resistances with Gatling Gun.Lucian Build →Details ansehen
Lucian
Warum
Lucian dominates the early trades because his high mobility neutralizes your primary poke. Every time you throw a Phosphorus Bomb to harass or farm, Lucian can reactively dash with Relentless Pursuit to completely avoid the damage. He then instantly triggers his Lightslinger double-tap, forcing a highly uneven trade that chunks your health bar before you can shred his resistances with Gatling Gun.
Lane-Einfluss
This threat forces you to play defensively under your turret. Because you cannot reliably land Phosphorus Bomb without getting punished, Lucian easily dictates the wave pace, pushing you in to chip away at your tower. If you waste Valkyrie to escape his aggressive dashes, you lose all safety, allowing Lucian to zone you completely from gold or even execute you with The Culling if your health gets too low.
Wie man spielt
To survive, prioritize wave management over direct confrontation. Keep the minions just outside your tower range and use Gatling Gun to thin the wave safely. Never initiate with Phosphorus Bomb; instead, hold this ability until Lucian uses Relentless Pursuit offensively, then retaliate on his landing spot. If he locks you down with The Culling, immediately use Valkyrie diagonally to escape his linear line of fire, preserving your health until your Package arrives.
TradesMobilitätTristana dominates this lane because she can punish your defensive options. When she clamps an Explosive Charge onto you and triggers Rapid Fire, your natural instinct is to slide away with Valkyrie. However, if she fully stacks the bomb, the resulting detonation instantly resets her Rocket Jump, allowing her to aggressively leap forward to chase your retreat and finish you off with Buster Shot.Tristana Build →Details ansehen
Tristana
Warum
Tristana dominates this lane because she can punish your defensive options. When she clamps an Explosive Charge onto you and triggers Rapid Fire, your natural instinct is to slide away with Valkyrie. However, if she fully stacks the bomb, the resulting detonation instantly resets her Rocket Jump, allowing her to aggressively leap forward to chase your retreat and finish you off with Buster Shot.
Lane-Einfluss
This threat forces you into a highly defensive posture, giving Tristana free rein over wave control. Her passive Draw a Bead naturally pushes the minion wave, but you cannot easily contest this pressure under your turret. If you step up to thin the wave with Phosphorus Bomb, you risk getting caught in her lethal zone, leading to chunked health bars or forced recalls that cost you plate gold.
Wie man spielt
To survive, you must play around her cooldowns. Only trade with Phosphorus Bomb and Missile Barrage from maximum range when her Explosive Charge is unavailable. Never burn Valkyrie proactively; save it strictly to disengage. If she jumps forward before stacking her bomb, use Valkyrie immediately to break the distance before she can get those crucial four basic attacks. If you do get fully stacked, retreat and accept the loss of your turret to stay alive.
ReichweiteMassenkontrolleThis lane is a high-stakes poke duel where Varus holds the upper hand due to his superior reach and lockdown. While you want to trade rockets for arrows, Varus's Chain of Corruption completely shuts down your main escape tool. If he intercepts your Valkyrie with his ultimate, you are rooted mid-air, allowing him to easily detonate Blighted Quiver stacks with a maximum-charge Piercing Arrow for lethal burst.Varus Build →Details ansehen
Varus
Warum
This lane is a high-stakes poke duel where Varus holds the upper hand due to his superior reach and lockdown. While you want to trade rockets for arrows, Varus's Chain of Corruption completely shuts down your main escape tool. If he intercepts your Valkyrie with his ultimate, you are rooted mid-air, allowing him to easily detonate Blighted Quiver stacks with a maximum-charge Piercing Arrow for lethal burst.
Lane-Einfluss
Varus will constantly push the wave using Hail of Arrows and Piercing Arrow, forcing you under turret where dodging his skillshots becomes incredibly difficult. Because you cannot safely use Valkyrie forward without risking a lethal counter-engage, you lose the priority needed to secure the river. This pressure forces early bases, delaying your item spikes and leaving your support vulnerable to being dived under your own tower.
Wie man spielt
Never cast Valkyrie defensively until you see Varus miss his Chain of Corruption. Position yourself constantly behind your minion wave to make his Piercing Arrow do reduced damage, but stay spread from your support to avoid a chain-root. If you get hit by Hail of Arrows, do not try to trade back; immediately step back out of his auto-attack range to prevent him from stacking Blighted Quiver. When you have the Package, use the extra movement speed to bait out his ultimate before committing.
Diese Matchups sind vor allem Duelle der Ausführung: Beide Champions haben glaubwürdige Wege, die Oberhand zu gewinnen. Eine wichtige ausgewichene Fähigkeit, ein richtig antizipierter Engage oder ein einziger Positionierungsfehler können reichen, um das Duell zu entscheiden. Das Matchup zu kennen und die richtigen Fenster zum Handeln zu erkennen, ist hier besonders wichtig.
MechanikFarmenThis matchup is a mirror of hyper-mobile poke champions where neither can easily pin the other down. Because Valkyrie instantly matches the defensive utility of Ezreal's Arcane Shift, raw engage is off the table. Instead, the lane devolves into a constant barrage of skillshots, pitting Corki's long-range Missile Barrage directly against Ezreal's Mystic Shot in a battle of pure aim and reaction speed.Ezreal Build →Details ansehen
Ezreal
Warum
This matchup is a mirror of hyper-mobile poke champions where neither can easily pin the other down. Because Valkyrie instantly matches the defensive utility of Ezreal's Arcane Shift, raw engage is off the table. Instead, the lane devolves into a constant barrage of skillshots, pitting Corki's long-range Missile Barrage directly against Ezreal's Mystic Shot in a battle of pure aim and reaction speed.
Lane-Einfluss
With both marksmen boasting reliable escape tools, the wave remains highly dynamic but rarely crashes hard. You cannot easily dive Ezreal, and he cannot lock you down. Trades are decided incrementally by how many Mystic Shot bolts you block with minions while squeezing in your own Phosphorus Bomb and Gatling Gun shred. This constant micro-trading keeps both of you in lane, delaying decisive map rotations.
Wie man spielt
To win this war of attrition, always position yourself diagonally behind your minion wave. This shield blocks his Mystic Shot while letting you lob Phosphorus Bomb over the frontline. Never initiate with Valkyrie unless his Arcane Shift is on cooldown and you have Special Delivery ready to block his path. If you drop low on health, play passively with Missile Barrage to secure farm from maximum range rather than risking a close-quarters duel.
SchutzPositionierungThis matchup hinges on a range dynamic where Xayah's ultimate, Featherstorm, can completely negate your Special Delivery engage. However, outside of her ultimate window, you hold a massive range advantage. You can systematically chip away at her health pool using Missile Barrage and Phosphorus Bomb while staying safely outside the reach of her Bladecaller feathers.Xayah Build →Details ansehen
Xayah
Warum
This matchup hinges on a range dynamic where Xayah's ultimate, Featherstorm, can completely negate your Special Delivery engage. However, outside of her ultimate window, you hold a massive range advantage. You can systematically chip away at her health pool using Missile Barrage and Phosphorus Bomb while staying safely outside the reach of her Bladecaller feathers.
Lane-Einfluss
In the laning phase, this interaction forces a tense standoff. You can easily push the wave with Gatling Gun and poke her under tower, but aggressive dashes forward with Valkyrie are heavily punished if she has Deadly Plumage active. If you force her to use Featherstorm defensively, you gain lane priority, but getting too close allows her to quickly set up three feathers for a root.
Wie man spielt
To win this, adopt a strict distance rule: never cross the imaginary line of her existing Clean Cuts feathers. Use the massive range of Missile Barrage to bait out Featherstorm before you even think about committing your Special Delivery package. If she does manage to dodge your payload, immediately use Valkyrie laterally to escape her Bladecaller return path. Never commit to a straight-line chase when her feathers are scattered behind you.
SchildeWellenräumungThis matchup is a pure battle of wave clearance where neither side can easily force a kill. While Corki wants to poke from afar, Sivir's Spell Shield is the ultimate counter-tool, easily absorbing a stray Phosphorus Bomb or a Big One rocket from Missile Barrage. Instead of taking damage, she nullifies your poke to sustain herself, turning your main tools of lane pressure into free resources for her.Sivir Build →Details ansehen
Sivir
Warum
This matchup is a pure battle of wave clearance where neither side can easily force a kill. While Corki wants to poke from afar, Sivir's Spell Shield is the ultimate counter-tool, easily absorbing a stray Phosphorus Bomb or a Big One rocket from Missile Barrage. Instead of taking damage, she nullifies your poke to sustain herself, turning your main tools of lane pressure into free resources for her.
Lane-Einfluss
Because Sivir can shrug off your poke, this lane devolves into a constant push-and-pull struggle. If she successfully blocks your Phosphorus Bomb, she maintains her mana and health, allowing her to spam Ricochet and Boomerang Blade to shove you under turret. You are forced to use Gatling Gun and Valkyrie defensively to match her rapid clear, locking both of you in Dragon lane without room for roaming.
Wie man spielt
To win this psychological war, you must bait her protective shield before committing your heavy damage. Fire standard rockets from Missile Barrage to force out her Spell Shield, and only launch the Big One or Phosphorus Bomb after her barrier expires. When holding the Package, do not initiate directly with Special Delivery if her Fleet of Foot is active, as she can easily outrun the trail. Instead, use the bonus movement speed to reposition.
TradesMobilitätThis lane is defined by the tension between your long-range poke and her sudden gap-close. While you attempt to whittle her down safely using Missile Barrage, Kai'Sa can completely bypass this distance. By landing Void Seeker to mark you with Second Skin, she can instantly trigger Killer Instinct to force an isolated duel, turning your artillery advantage into a deadly close-quarters burst trade.Kai'Sa Build →Details ansehen
Kai'Sa
Warum
This lane is defined by the tension between your long-range poke and her sudden gap-close. While you attempt to whittle her down safely using Missile Barrage, Kai'Sa can completely bypass this distance. By landing Void Seeker to mark you with Second Skin, she can instantly trigger Killer Instinct to force an isolated duel, turning your artillery advantage into a deadly close-quarters burst trade.
Lane-Einfluss
You cannot afford to throw Phosphorus Bomb blindly, as missing it grants her a window to activate Supercharge and hunt you down. The lane dynamic shifts dramatically around wave states; staying near your minions prevents her Icathian Rain from isolating you. If you get chunked early, your ability to roam with Special Delivery is entirely neutralized, forcing you to play defensively under tower.
Wie man spielt
Always position yourself directly inside your minion wave to dilute the damage of her Icathian Rain. Never use Valkyrie offensively; you must hold it exclusively to escape after she commits with Killer Instinct. If she marks you with Void Seeker, immediately retreat behind your wave and activate Gatling Gun to shred her armor and magic resistance the moment she attempts to dash onto you.
AusweichenTeamfightsThis lane is a pure skill matchup defined by long-range trades. Miss Fortune uses Make It Rain and Double Up to poke from behind minions, while you match her with Phosphorus Bomb and Gatling Gun. The ultimate showdown hinges on her channel: when she casts Bullet Time, you can immediately slide out of the cone with Valkyrie and fire back with Missile Barrage, turning her stationary state into an easy target.Miss Fortune Build →Details ansehen
Miss Fortune
Warum
This lane is a pure skill matchup defined by long-range trades. Miss Fortune uses Make It Rain and Double Up to poke from behind minions, while you match her with Phosphorus Bomb and Gatling Gun. The ultimate showdown hinges on her channel: when she casts Bullet Time, you can immediately slide out of the cone with Valkyrie and fire back with Missile Barrage, turning her stationary state into an easy target.
Lane-Einfluss
Both of you can clear waves quickly, creating a constant tug-of-war. If you stand directly behind low-health minions, you will take massive damage from her Double Up bounces. Miss Fortune relies on Strut to dodge your skillshots, but landing a single Phosphorus Bomb or Missile Barrage halts her movement speed, allowing you to force even trades and prevent her from securing easy lane priority.
Wie man spielt
Always stay diagonal to your low-health minions to deny her clean angles for Double Up. Crucially, never use Valkyrie offensively when she has her ultimate ready. Hold it specifically as your escape button. The moment she channels Bullet Time, cast Valkyrie sideways to clear the zone, then immediately unload Missile Barrage rockets at her static body. If you accidentally waste your dash early, retreat immediately behind terrain to break her line of sight.
Diese Champions tun sich meist schwer, auf deine Hauptstärken zu reagieren, was dir mehr Freiheit im Matchup gibt. Du hast oft mehrere Möglichkeiten, sie unter Druck zu setzen und Trades zu deinen Gunsten zu erzwingen. Nutze diesen Vorteil, um das Tempo zu bestimmen, statt ihnen Zeit zu geben, wieder in eine komfortable Position zu kommen.
PicksBurstJinx relies entirely on Get Excited! for mobility, which requires a takedown first. This leaves her completely defenseless against your Special Delivery. Because she lacks any built-in dashes to escape the blazing trail, a well-aimed package-delivery dive forces her to burn Flash or melt inside the burn zone. Her Switcheroo! rockets cannot match the sudden, overwhelming burst and displacement of your package engage.Jinx Build →Details ansehen
Jinx
Warum
Jinx relies entirely on Get Excited! for mobility, which requires a takedown first. This leaves her completely defenseless against your Special Delivery. Because she lacks any built-in dashes to escape the blazing trail, a well-aimed package-delivery dive forces her to burn Flash or melt inside the burn zone. Her Switcheroo! rockets cannot match the sudden, overwhelming burst and displacement of your package engage.
Lane-Einfluss
This vulnerability dictates the tempo of the entire dragon lane. Before you collect Hextech Munitions, Jinx can try to push with Switcheroo! and poke with Zap!. However, the moment your package is ready, she is forced to play extremely defensively, conceding wave control and priority. You can easily crash waves, force her under tower, and threaten a dive she cannot easily escape without her Flame Chompers! saving her.
Wie man spielt
Capitalize on your package spawn times to dictate the skirmishes. When diving, wait for her to lock herself in place casting Zap! or farming with Switcheroo! rockets, then execute Special Delivery directly behind her to block her retreat. If she counters with Flame Chompers!, use Valkyrie to reposition safely or clean up with Missile Barrage and Phosphorus Bomb from safety. Do not sit on your package; use its threat immediately to zone her off the farm.
PokeAusweichenCorki holds a clear advantage in this matchup because his mobility completely nullifies Jhin's long-range threat. Whenever Jhin attempts to setup a kill with Deadly Flourish or lock you down with Curtain Call, a well-timed Valkyrie lets you instantly slide out of his linear firing angles. This range denial wastes Jhin's crucial high-cooldown setups, leaving him exposed while he waits for his reload.Jhin Build →Details ansehen
Jhin
Warum
Corki holds a clear advantage in this matchup because his mobility completely nullifies Jhin's long-range threat. Whenever Jhin attempts to setup a kill with Deadly Flourish or lock you down with Curtain Call, a well-timed Valkyrie lets you instantly slide out of his linear firing angles. This range denial wastes Jhin's crucial high-cooldown setups, leaving him exposed while he waits for his reload.
Lane-Einfluss
This interaction shifts wave control heavily in your favor. Because Jhin cannot reliably root you with Deadly Flourish to setup Dancing Grenade bounces, you can aggressively clear waves using Phosphorus Bomb and Gatling Gun. If Jhin attempts to execute you from afar with Curtain Call, your ability to dodge it with Valkyrie means you rarely have to take forced, unfavorable recalls, maintaining constant pressure.
Wie man spielt
Always hold Valkyrie as a defensive tool rather than using it to initiate. Trigger it the moment you see the red indicator of Jhin's Deadly Flourish or when he opens Curtain Call. With his crowd control wasted, immediately retaliate with Gatling Gun and Phosphorus Bomb while he is animation-locked or reloading. If Jhin plays extremely safe, use Phosphorus Bomb to clear his Captive Audience traps.
TarnungFrüher DruckYou outscale Twitch massively, but the real key to dominating this lane lies in neutralizing his stealth. Twitch relies on Ambush to reposition or sneak a trade, but your Phosphorus Bomb provides immediate vision in its target area. Dropping it on his expected path completely denies his element of surprise, leaving him vulnerable to a trade he cannot win.Twitch Build →Details ansehen
Twitch
Warum
You outscale Twitch massively, but the real key to dominating this lane lies in neutralizing his stealth. Twitch relies on Ambush to reposition or sneak a trade, but your Phosphorus Bomb provides immediate vision in its target area. Dropping it on his expected path completely denies his element of surprise, leaving him vulnerable to a trade he cannot win.
Lane-Einfluss
Because you scale much harder and can easily spot him, you dictate the minion waves. Use this edge to slow-push and stack massive waves. Twitch struggles to clear under tower without draining his mana on Contaminate. By keeping him pinned, you force him to choose between losing gold to the tower or taking heavy poke from your Missile Barrage.
Wie man spielt
Never blindly throw Phosphorus Bomb for simple wave clear; hold it specifically for when Twitch disappears into Ambush. Position yourself near the center of the lane to easily throw it toward his likely flanking routes. If he manages to bypass your vision and stacks Deadly Venom on you, use Valkyrie to disengage safely, reset the wave, and resume your methodical slow-push to keep him trapped under his turret.
Vorteil: kanonisches Urteil von Wild Rift Core (−3 bis +3), aus Sicht des in der Zeile genannten Champions. Siegrate und Pickrate: die eigenen Werte des Gegners in dieser Rolle — Wild Rift CN · Challenger, Patch 7.3b. Keine Siegrate im direkten Duell.
Vorteil: kanonisches Urteil von Wild Rift Core (−3 bis +3), aus Sicht des in der Zeile genannten Champions. Siegrate und Pickrate: die eigenen Werte des Gegners in dieser Rolle — Wild Rift CN · Challenger, Patch 7.3b. Keine Siegrate im direkten Duell.
Wie man diesen Champion kontert
Konter-Winkel
Corkis Konter drehen sich nicht nur um Stats, sondern darum, sein Timing zu stören. Er verlässt sich stark auf seine Spikes und Distanz, um zu funktionieren. Champions, die diesen Raum verringern oder Kämpfe beschleunigen, werden naturgemäß problematisch. Assassinen im Besonderen nutzen seine fehlende Crowd Control und seine Abhängigkeit von Valkyrie aus. Seine Konter zu verstehen bedeutet nicht nur zu wissen, wer ihn schlägt, sondern auch, warum sein Spielplan gegen bestimmte Profile scheitert.
Patch-Kontext
Die aktuelle Meta hebt Champions hervor, die schnelle Engagements erzwingen oder konstanten Druck ausüben können. Corki, der vorbereitete und gut positionierte Kämpfe bevorzugt, hat in diesen Kontexten Schwierigkeiten. Champions, die seinen Poke ignorieren oder ihn direkt erreichen können, reduzieren seine Wirkung drastisch. Umgekehrt schneidet er gegen statischere oder kontrollorientierte Champions besser ab.
Schnell gelesen
Assassinen sind seine schlechtesten Matchups.
Er hat Schwierigkeiten gegen schnelle Dives.
Er kommt besser mit statischen Magiern klar.
Konter-Archetypen
Burst-Assassinen
Diese Champions bestrafen Corkis Hauptschwäche direkt: fehlende Crowd Control und Abhängigkeit von Valkyrie. Sie können seinen Escape ködern oder abwarten, bevor sie angreifen, oder einfach schneller bursten, als er reagieren kann. Ihre Mobilität erlaubt es ihnen, seinen Poke zu ignorieren und schnell seine Backline zu erreichen.
Wie sich der Champion anpasst. Spiele extrem sicher, halte Valkyrie defensiv und priorisiere Vision und Spacing.
Mobile Bruiser
Diese Champions sterben nicht leicht durch Poke und können ausgedehnte Trades erzwingen, die Corki nicht will. Ihr Gap-Closing in Kombination mit relativer Tankiness erlaubt es ihnen, seinen anfänglichen Burst zu überleben und Druck aufrechtzuerhalten.
Wie sich der Champion anpasst. Vermeide ausgedehnte Trades und spiele um Poke und Timings herum.
Reset- oder Stealth-Assassinen
Diese Champions machen Corkis Positionierung extrem schwierig. Sie können seinen Poke umgehen, auf einen Fehler warten und sofort bestrafen. Ihre Fähigkeit, zurückzusetzen oder komplett zu verschwinden, bricht die Kampfstruktur, die Corki schaffen möchte.
Zed zwingt Corki in ständige Passivität. Jeder offensive Einsatz von Valkyrie öffnet ein Kill-Fenster. Das Matchup wird zu einer Frage der Disziplin: perfektes Spacing, Vision und Geduld.
Fizz ignoriert Corkis Poke komplett und kann all-in gehen, sobald sich eine Öffnung bietet. Ohne CC verlässt sich Corki rein auf Reaktion, was das Matchup sehr instabil macht.
Häufige Fehler gegen ihn
Häufige Fehler gegen ihn
Unterschätzung von Engage-Timings.
Zu aggressiv ohne Vision spielen.
Falscher Einsatz von Valkyrie.
Ignorieren von gegnerischen Spikes.
Kämpfe erzwingen ohne Paket.
Coach-Notizen
Deine Positionierung entscheidet den Kampf.
Trade niemals, wenn du die Distanz nicht kontrollierst.
FAQ
Warum verliert Corki gegen Zed?
Zed nutzt Corkis Mangel an Crowd Control perfekt aus. Er kann auf Valkyrie warten oder schnelle Trades erzwingen, die Corki nicht verkraften kann. Ohne starke defensive Werkzeuge ist Corki vollständig auf Positionierung und Vision angewiesen, um zu überleben.
Wie spielt man gegen Fizz?
Gegen Fizz musst du extrem vorsichtig spielen und unnötige Risiken vermeiden. Dein Ziel ist es, bis zu deinen Spikes zu überleben. Warde tief, halte Valkyrie und erzwinge niemals Trades ohne klare Vision.
Kann Corki Assassinen besiegen?
Ja, aber nur, indem du Spacing und Timing perfekt spielst. Du kannst sie in direkten Duellen nicht besiegen. Du musst Fehler bestrafen oder um dein Team und deine Ziele herum spielen.
Was ist sein schlimmster Konter-Typ?
Mobile Assassinen sind seine schlimmsten Konter, weil sie seinen Poke ignorieren und ihn schnell töten. Sie brechen seinen auf Distanz und Timing basierenden Gameplan komplett.