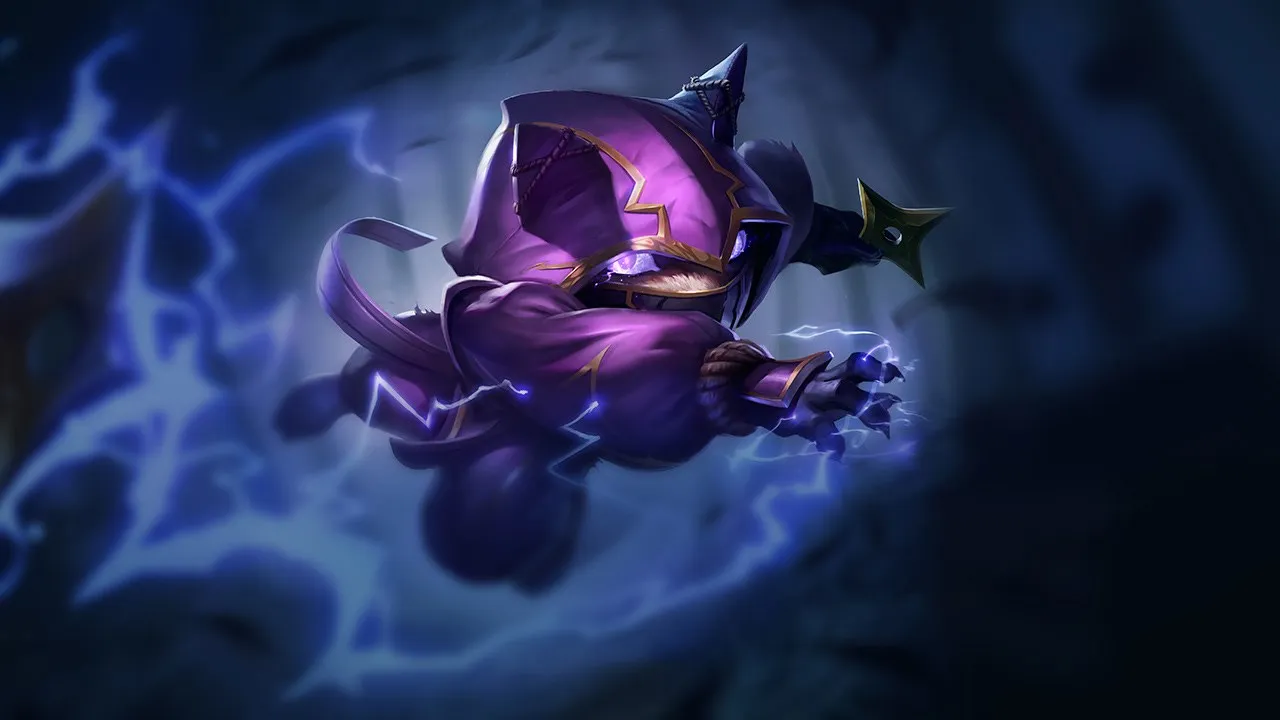
Kennen wird von Champions gekontert, die ihn angreifen, bevor er seine Markierungen anbringen kann, oder die seinem AoE-Schaden durch Magieresistenz widerstehen. Sofortige CC-Kompositionen neutralisieren ihn vor seiner Ultimate. Seine kürzere Range im Vergleich zu anderen Magiern zwingt ihn in riskante Positionen.
★ TOP · MIDTier A
SCHADEN
UTIL
TANK
DIFF
Win50.4%#39 · ↓9pt
Pick2.4%#24
Ban0.5%#98
Kennen Wild Rift Counter-Guide
Hard Counters
2
Diese Champions haben ein Build und einen Spielstil, der deinen direkt überlegen ist, was die Kontrolle der Lane und das Farmen extrem schwierig machen kann. Ihr Kit kann deine Kernstärken neutralisieren oder dich bestrafen, sobald du versuchst, deinen gewohnten Spielplan umzusetzen. In diesen Matchups geht es oft darum, Fehler zu minimieren und nach Wegen zu suchen, außerhalb der direkten Konfrontation zu gewinnen.
Harter KonterCC-ImmunitätThis matchup is dictated by Olaf's ultimate ability. Normally, Kennen relies on stacking three marks via Mark of the Storm to stun and peel aggressive melee champions. However, once Olaf activates Ragnarok, he becomes completely immune to these stuns. This nullifies Kennen's entire defensive kit, leaving him vulnerable to being run down by Olaf's slowing Undertow axes and raw true damage from Reckless Swing.Olaf Build →Details ansehen
Olaf
Warum
This matchup is dictated by Olaf's ultimate ability. Normally, Kennen relies on stacking three marks via Mark of the Storm to stun and peel aggressive melee champions. However, once Olaf activates Ragnarok, he becomes completely immune to these stuns. This nullifies Kennen's entire defensive kit, leaving him vulnerable to being run down by Olaf's slowing Undertow axes and raw true damage from Reckless Swing.
Lane-Einfluss
Early on, you can poke with Thundering Shuriken, but once Olaf unlocks Ragnarok, the lane dynamic flips dangerously. You can no longer step past the midpoint of the lane. If Olaf hits a single Undertow axe while you are extended, he will pop his ultimate, ignore your passive stuns, and chase you to your tower. This forces you to concede wave priority and farm passively under turret.
Wie man spielt
To survive, you must absolutely hug your turret and never use Lightning Rush offensively. Save this mobility tool solely to escape when Olaf launches Undertow. If he activates Ragnarok and charges, immediately use Lightning Rush to retreat deep under your tower's protection where he cannot easily dive you. If you get caught in the open, do not waste Slicing Maelstrom trying to stun him; instead, accept the loss, flash away early, and focus on farming safely with Thundering Shuriken.
Harter KonterBurstMalphite's Seismic Shard deals heavy magic damage that out-pokes Kennen's Thundering Shuriken while stealing his movement speed, making it impossible to trade back effectively. When Kennen tries to engage or escape using Lightning Rush, Malphite can reactively interrupt the momentum with Unstoppable Force. Furthermore, Unstoppable Force completely shuts down any offensive Slicing Maelstrom setups, knocking Kennen up and leaving him vulnerable before he can apply his stun.Malphite Build →Details ansehen
Malphite
Warum
Malphite's Seismic Shard deals heavy magic damage that out-pokes Kennen's Thundering Shuriken while stealing his movement speed, making it impossible to trade back effectively. When Kennen tries to engage or escape using Lightning Rush, Malphite can reactively interrupt the momentum with Unstoppable Force. Furthermore, Unstoppable Force completely shuts down any offensive Slicing Maelstrom setups, knocking Kennen up and leaving him vulnerable before he can apply his stun.
Lane-Einfluss
You are forced to play defensively, sacrificing early wave control as Seismic Shard repeatedly chips away your health pool under your own tower. Since Malphite gains speed while slowing you, he dictates every trade, forcing early recalls and depriving you of gold. Once he unlocks Unstoppable Force, you cannot safely push past the river, and your inability to pressure him allows him to freely roam, punishing your allies.
Wie man spielt
Shift your build away from pure offensive power toward magic resistance and sustain to survive the Seismic Shard spam. Max Thundering Shuriken first to farm from maximum range and avoid trading auto-attacks. Never activate Lightning Rush aggressively if Malphite has Unstoppable Force ready; keep it strictly to escape after his knock-up. In teamfights, delay your Slicing Maelstrom until after he commits his ultimate on someone else, ensuring your ultimate isn't canceled mid-air.
Diese Champions haben Werkzeuge, die ihnen im Kampf meist einen Vorteil verschaffen, ohne das Matchup unspielbar zu machen. Sie haben vielleicht mehr Reichweite, können deine Offensive besser abfangen oder haben mehr Möglichkeiten, auf deine Engages zu reagieren. Du musst deine Herangehensweise anpassen und sorgfältig die Momente wählen, in denen du den Kampf annimmst.
MobilitätBurstYone naturally bypasses Kennen's ranged superiority by pairing the dash of Soul Unbound with his stacked Mortal Steel tornado. This double gap-closer covers too much ground for Kennen to safely poke with Thundering Shuriken or basic attacks. To avoid being knocked up and taking a heavy trade, Kennen is forced to burn Lightning Rush defensively, losing his only escape tool and initiative.Yone Build →Details ansehen
Yone
Warum
Yone naturally bypasses Kennen's ranged superiority by pairing the dash of Soul Unbound with his stacked Mortal Steel tornado. This double gap-closer covers too much ground for Kennen to safely poke with Thundering Shuriken or basic attacks. To avoid being knocked up and taking a heavy trade, Kennen is forced to burn Lightning Rush defensively, losing his only escape tool and initiative.
Lane-Einfluss
Because Kennen must constantly respect Yone's loaded Mortal Steel queue, he cannot easily freeze the wave or step up to pressure him under tower. Every time Kennen uses Lightning Rush to escape Soul Unbound, he becomes vulnerable to a dive or deep freeze. This forces Kennen into a passive farm lane, relying heavily on Thundering Shuriken to secure last hits from maximum distance while slowly falling behind in early lane priority.
Wie man spielt
To survive this matchup, you must track Yone's Mortal Steel stacks closely. Never step forward for a passive mark from Electrical Surge when his sword glows with wind. If Yone activates Soul Unbound, immediately activate Lightning Rush to run diagonally, dodging the tornado. If you get caught without your movement speed boost, prepare to retaliate with a quick stun using Thundering Shuriken and Electrical Surge to halt his return attack before he snaps back to his body.
MassenkontrolleWellenräumungThis matchup is dictated by how Ryze's Rune Prison completely shuts down your main mobility tool. Whenever you try to initiate or escape using Lightning Rush, Ryze can instantly lock you in place with his point-and-click root without needing to aim. This immediate disruption cancels your momentum and leaves you completely exposed to a devastating follow-up combo of Spell Flux and Overload while you are unable to retreat.Ryze Build →Details ansehen
Ryze
Warum
This matchup is dictated by how Ryze's Rune Prison completely shuts down your main mobility tool. Whenever you try to initiate or escape using Lightning Rush, Ryze can instantly lock you in place with his point-and-click root without needing to aim. This immediate disruption cancels your momentum and leaves you completely exposed to a devastating follow-up combo of Spell Flux and Overload while you are unable to retreat.
Lane-Einfluss
Because you cannot safely use Lightning Rush to clear waves or trade, Ryze easily dictates the lane's tempo. He will constantly push you under turret using Spell Flux bounces to spread damage. If you step up to contest the wave, he threatens to freeze and punish you. Any attempt to force a trade results in you taking heavy damage without being able to retreat, slowly bleeding your health bar.
Wie man spielt
To survive, farm from a safe distance using Thundering Shuriken and only walk up to poke when your Electrical Surge passive attack is ready. Never initiate with Lightning Rush; hold this ability exclusively as a defensive tool to escape if he catches you out of position or to dodge his incoming Overload skillshots. Accept giving up some early priority, keep the wave close to your tower, and wait for teamfights where your Slicing Maelstrom will have a far greater impact.
ReichweiteMassenkontrolleThis matchup is dictated by how easily Vayne can shut down your offensive pressure. Whenever you try to initiate a trade or go for an all-in using Lightning Rush or Slicing Maelstrom, Vayne can instantly cast Condemn to blow you away. This completely neutralizes your ultimate's stun potential, leaving you stranded and vulnerable to her subsequent Silver Bolts procs while your key cooldowns are wasted.Vayne Build →Details ansehen
Vayne
Warum
This matchup is dictated by how easily Vayne can shut down your offensive pressure. Whenever you try to initiate a trade or go for an all-in using Lightning Rush or Slicing Maelstrom, Vayne can instantly cast Condemn to blow you away. This completely neutralizes your ultimate's stun potential, leaving you stranded and vulnerable to her subsequent Silver Bolts procs while your key cooldowns are wasted.
Lane-Einfluss
Because of this constant threat, you cannot freely contest the wave with basic attacks. Vayne will use Tumble to dodge your Thundering Shuriken and punish you with Silver Bolts if you overextend. You are forced to farm under tower, losing priority and allowing her to scale safely. This passivity prevents you from securing early roam opportunities, forcing your team to play map objectives without your typical teamfight presence.
Wie man spielt
To survive, you must play around her cooldowns and prioritize safe farming. Keep your distance and use Thundering Shuriken to secure last hits. Never activate Slicing Maelstrom proactively unless you see her waste Condemn on a wall-stun attempt or another target. If she activates Final Hour, immediately retreat using Lightning Rush to escape her increased movement speed, and wait for her ultimate duration to expire before attempting any counter-attack.
ProjektilblockMobilitätThis matchup is dictated by Yasuo's ability to completely neutralize your offensive threat with Wind Wall. When you attempt to poke or stack Mark of the Storm, his barrier deletes your Thundering Shuriken mid-air, halting your stun progression. Simultaneously, his Sweeping Blade allows him to dash through your minion wave, instantly closing the distance to bypass your ranged advantage and force melee trades where his physical damage outclasses you.Yasuo Build →Details ansehen
Yasuo
Warum
This matchup is dictated by Yasuo's ability to completely neutralize your offensive threat with Wind Wall. When you attempt to poke or stack Mark of the Storm, his barrier deletes your Thundering Shuriken mid-air, halting your stun progression. Simultaneously, his Sweeping Blade allows him to dash through your minion wave, instantly closing the distance to bypass your ranged advantage and force melee trades where his physical damage outclasses you.
Lane-Einfluss
Because Sweeping Blade requires minions, a chaotic, pushing wave is highly dangerous for you. Yasuo can easily bounce between your minions to land a knockup with Steel Tempest, followed by Last Breath. This restricts your ability to safely harass him, forcing you to play under your turret. If you lose control of the wave, you will find yourself zoned out of gold, bleeding health, and unable to roam.
Wie man spielt
To survive, maintain the minion wave close to your turret where Yasuo cannot safely utilize Sweeping Blade. Pop his passive shield with a basic attack before committing any energy. Hold your Lightning Rush exclusively as an escape tool for when he dashes forward. Only activate Electrical Surge or Slicing Maelstrom once his Wind Wall is on its long cooldown, ensuring your stuns can actually land to turn the duel in your favor.
SkalierungVerlangsamungEven though your ranged basic attacks and Thundering Shuriken should bully a melee champion, Nasus easily shrugs off early poke through his passive Soul Eater lifesteal. The lane becomes dangerous because of Wither. This crippling slow completely shuts down your spacing, forcing you to immediately waste Lightning Rush defensively. If you get caught without your escape tool, Nasus can activate Fury of the Sands and run you down with Siphoning Strike.Nasus Build →Details ansehen
Nasus
Warum
Even though your ranged basic attacks and Thundering Shuriken should bully a melee champion, Nasus easily shrugs off early poke through his passive Soul Eater lifesteal. The lane becomes dangerous because of Wither. This crippling slow completely shuts down your spacing, forcing you to immediately waste Lightning Rush defensively. If you get caught without your escape tool, Nasus can activate Fury of the Sands and run you down with Siphoning Strike.
Lane-Einfluss
Because of Nasus's endless Soul Eater sustain, your poke fails to force him out of lane. Pushing the wave blindly is disastrous; he will freeze it near his turret to stack Siphoning Strike safely. This positioning forces you to overextend, exposing you to Wither. If you get frozen out, you cannot safely crash the wave, giving Nasus free scaling while neutralizing your early-game map pressure.
Wie man spielt
To survive, you must maintain the minion wave close to your turret. Never use Lightning Rush offensively to apply Mark of the Storm. You must hold this ability strictly to react to Wither. The moment Nasus targets you with his slow, immediately activate Lightning Rush to retreat to safety before he can close the gap. If he commits Fury of the Sands, do not fight back; run away until his transformation ends.
Diese Matchups sind vor allem Duelle der Ausführung: Beide Champions haben glaubwürdige Wege, die Oberhand zu gewinnen. Eine wichtige ausgewichene Fähigkeit, ein richtig antizipierter Engage oder ein einziger Positionierungsfehler können reichen, um das Duell zu entscheiden. Das Matchup zu kennen und die richtigen Fenster zum Handeln zu erkennen, ist hier besonders wichtig.
ReichweitePositionierungThis matchup is a direct DPS race decided by how you manage the gap. Rumble relies on maintaining close-range flame pressure to melt your health bar, while you must abuse your ranged advantage. Everything revolves around your reaction time: you must activate Lightning Rush to instantly escape his close-range fire, while constantly landing Thundering Shuriken from a safe distance to wear him down before he can overheat you.Rumble Build →Details ansehen
Rumble
Warum
This matchup is a direct DPS race decided by how you manage the gap. Rumble relies on maintaining close-range flame pressure to melt your health bar, while you must abuse your ranged advantage. Everything revolves around your reaction time: you must activate Lightning Rush to instantly escape his close-range fire, while constantly landing Thundering Shuriken from a safe distance to wear him down before he can overheat you.
Lane-Einfluss
Every trade dictates wave control and your safety under tower. If you fail to react to his approach and take full flame damage, you will be forced into an early recall, losing valuable gold and letting him pressure your turret. Conversely, successfully kiting his advances keeps his health low enough to prevent him from freely pushing, turning the lane into a tense battle of attrition where one positioning error costs total lane priority.
Wie man spielt
Never waste Lightning Rush to clear minions or initiate trades; keep this defensive tool ready for the exact moment Rumble steps forward with his flames. Maximize your safety by throwing Thundering Shuriken from behind your minions to chip his health. If he manages to close the gap, immediately activate Lightning Rush to retreat, then turn back to trigger Electrical Surge once he backs off. If he overextends under your tower, counter with Slicing Maelstrom to lock him down.
MobilitätRückzugThis matchup is a pure test of reflexes and spacing. Riven relies on her high mobility from Broken Wings and Valor to close the gap and lock you down with Ki Burst. Because you are ranged, you have the initial advantage, but if she catches you without Lightning Rush active, her Runic Blade empowered attacks will shred your health bar. Your survival hinges entirely on using your movement speed to bait and evade her third dash.Riven Build →Details ansehen
Riven
Warum
This matchup is a pure test of reflexes and spacing. Riven relies on her high mobility from Broken Wings and Valor to close the gap and lock you down with Ki Burst. Because you are ranged, you have the initial advantage, but if she catches you without Lightning Rush active, her Runic Blade empowered attacks will shred your health bar. Your survival hinges entirely on using your movement speed to bait and evade her third dash.
Lane-Einfluss
Lane control fluctuates based on who controls the minion wave's position. If Riven pushes using Broken Wings, she becomes vulnerable to Thundering Shuriken poke. However, if she freezes near her tower, you cannot safely step up to trigger Electrical Surge passive marks. A single mistimed trade can force an early recall, costing you plate pressure or leaving you vulnerable to a dive when she activates Blade of the Exile.
Wie man spielt
Never initiate a trade with Lightning Rush; always save this ability specifically to outrun the knock-up of her third Broken Wings or to escape the stun of Ki Burst. Stand just at the maximum range of your basic attacks, poking with Thundering Shuriken. If she wastes her dashes to close the distance, immediately activate Lightning Rush to retreat, then turn back instantly to trigger Electrical Surge and Mark of the Storm stun while her defensive tools are on cooldown.
Anti-DashMassenkontrolleThis matchup is a tense test of spacing. As a ranged yordle, you easily poke Poppy down, but her anti-dash barrier completely neutralizes your safety net, Lightning Rush. If she activates her protective zone while you try to escape, you get knocked back and grounded. This vulnerability is magnified near the terrain, where her tackle can pin you for a massive wall-stun before you can trigger Mark of the Storm.Poppy Build →Details ansehen
Poppy
Warum
This matchup is a tense test of spacing. As a ranged yordle, you easily poke Poppy down, but her anti-dash barrier completely neutralizes your safety net, Lightning Rush. If she activates her protective zone while you try to escape, you get knocked back and grounded. This vulnerability is magnified near the terrain, where her tackle can pin you for a massive wall-stun before you can trigger Mark of the Storm.
Lane-Einfluss
You cannot mindlessly push the wave toward her tower because walking along the upper or lower lane walls is an invitation to get slammed. Trades are decided by baiting. If she blocks your Lightning Rush, you lose all lane pressure and are forced to farm from deep with Thundering Shuriken. Conversely, if you force her barrier out without dashing, you control the lane rhythm completely.
Wie man spielt
Anchor yourself strictly in the dead center of the lane, keeping an equal distance from the alcove and river walls. Never initiate trades with Lightning Rush; instead, poke her constantly using basic attacks enhanced by Electrical Surge and snipe with Thundering Shuriken. If she charges forward, run backward normally to bait her barrier. Only activate your speed dash once her golden aura vanishes, or chain Slicing Maelstrom immediately to stun her if she commits under your tower.
SchildeBurstThis skill-based matchup revolves around the interactions of Wukong's decoy. Warrior Trickster is a direct counter to your combo because his clone can easily intercept your Thundering Shuriken or absorb the Mark of the Storm stacks you need to trigger a stun. Since Wukong relies on this bait to negate your self-peel, the lane remains entirely even, decided by who mismanages their defensive cooldown first.Wukong Build →Details ansehen
Wukong
Warum
This skill-based matchup revolves around the interactions of Wukong's decoy. Warrior Trickster is a direct counter to your combo because his clone can easily intercept your Thundering Shuriken or absorb the Mark of the Storm stacks you need to trigger a stun. Since Wukong relies on this bait to negate your self-peel, the lane remains entirely even, decided by who mismanages their defensive cooldown first.
Lane-Einfluss
During the laning phase, this interaction dictates every trade. If Wukong successfully absorbs your poke with his clone, he will immediately use Nimbus Strike to close the gap and shred your armor with Golden Staff. This threat forces you to play conservatively, limiting your ability to zone him with basic attacks or safely push the wave. A single misstep can lead to a deadly Cyclone chain under your own turret.
Wie man spielt
To win this, never throw Thundering Shuriken directly when Wukong moves aggressively toward you. Instead, use your ranged advantage to land basic attacks and prime the passive of Electrical Surge. Force him to waste Warrior Trickster defensively. Once his clone disappears, you have a brief window to activate Lightning Rush to reposition or commit with Slicing Maelstrom. If he catches you with his ultimate before you can stun him, immediately retreat toward your tower.
ReichweiteMassenkontrolleThis matchup is a delicate balance of range and timing. Teemo neutralizes your trading power early because his Blinding Dart completely blocks your enhanced auto-attacks, preventing you from stacking Mark of the Storm via the passive of Electrical Surge. However, this lane completely swings at level six; Teemo's squishy nature makes him incredibly vulnerable to your full all-in combo once you unlock Slicing Maelstrom.Teemo Build →Details ansehen
Teemo
Warum
This matchup is a delicate balance of range and timing. Teemo neutralizes your trading power early because his Blinding Dart completely blocks your enhanced auto-attacks, preventing you from stacking Mark of the Storm via the passive of Electrical Surge. However, this lane completely swings at level six; Teemo's squishy nature makes him incredibly vulnerable to your full all-in combo once you unlock Slicing Maelstrom.
Lane-Einfluss
Before reaching level six, you will constantly absorb pressure and poison damage from Toxic Shot. If you try to trade with auto-attacks, Teemo will blind you and run you down with Move Quick. This forces you to play defensively under your turret, using Thundering Shuriken to secure minions. The dynamic shifts instantly at level six, where one successful catch means a guaranteed kill, preventing Teemo from safely controlling the lane with Noxious Trap.
Wie man spielt
To survive the early levels, focus on farming from a distance. If Teemo uses Blinding Dart on a minion or to poke you, do not immediately retaliate with autos; instead, throw Thundering Shuriken and wait out the blind duration before using your active Electrical Surge. Once you reach level six, bait him away from his Noxious Trap minefields, then activate Lightning Rush to close the gap and immediately trigger Slicing Maelstrom to burst him down before he can retreat.
Diese Champions tun sich meist schwer, auf deine Hauptstärken zu reagieren, was dir mehr Freiheit im Matchup gibt. Du hast oft mehrere Möglichkeiten, sie unter Druck zu setzen und Trades zu deinen Gunsten zu erzwingen. Nutze diesen Vorteil, um das Tempo zu bestimmen, statt ihnen Zeit zu geben, wieder in eine komfortable Position zu kommen.
ReichweiteAusweichenYour mobility completely neutralizes Mordekaiser's only tool to force a fight. Whenever he casts Death's Grasp to pull you in, the instant movement speed from Lightning Rush allows you to zip out of its path effortlessly. Because he cannot close the gap or trigger Darkness Rise without landing his pull, you can constantly chip away at his health bar using Thundering Shuriken from total safety.Mordekaiser Build →Details ansehen
Mordekaiser
Warum
Your mobility completely neutralizes Mordekaiser's only tool to force a fight. Whenever he casts Death's Grasp to pull you in, the instant movement speed from Lightning Rush allows you to zip out of its path effortlessly. Because he cannot close the gap or trigger Darkness Rise without landing his pull, you can constantly chip away at his health bar using Thundering Shuriken from total safety.
Lane-Einfluss
This matchup forces Mordekaiser into a miserable loop of wasted cooldowns. Since he cannot pull you, he must use Obliterate to clear minions rather than poke you. You can freeze the wave near your tower and harass him every time he steps up to farm. He will be forced to consume his Indestructible shield for healing rather than mitigation, slowly bleeding his sustain and keeping him pinned under his own turret.
Wie man spielt
Never initiate trades with Lightning Rush; always hold it as a reactive escape tool. Stand slightly off-center from your minion wave to force him to choose between pushing with Obliterate or trying to catch you. If he misses Death's Grasp, immediately move forward to land a passive attack from Electrical Surge followed by Thundering Shuriken. If you do get caught, immediately use Slicing Maelstrom to stun him and disengage before his Darkness Rise aura can activate.
ReichweiteRückzugKennen dominates this matchup by exploiting his ranged advantage to constantly harass Sett with basic attacks and Thundering Shuriken. Sett struggles to close the distance without exposing himself. Even if Sett tries to initiate with Knuckle Down to run you down or pull you in with Facebreaker, you can instantly activate Lightning Rush to retreat safely, nullifying his engage while applying a stack of Mark of the Storm.Sett Build →Details ansehen
Sett
Warum
Kennen dominates this matchup by exploiting his ranged advantage to constantly harass Sett with basic attacks and Thundering Shuriken. Sett struggles to close the distance without exposing himself. Even if Sett tries to initiate with Knuckle Down to run you down or pull you in with Facebreaker, you can instantly activate Lightning Rush to retreat safely, nullifying his engage while applying a stack of Mark of the Storm.
Lane-Einfluss
Because Sett cannot easily touch you, you dictate the minion wave's tempo. You can slow push waves to force him under his turret, where he must choose between taking damage from Electrical Surge or losing gold. Sett will be forced to use Haymaker defensively just to absorb your poke, wasting his shield and leaving him vulnerable. This constant pressure chip-damages his health bar, forcing premature recalls and securing early plates.
Wie man spielt
Always maintain a maximum auto-attack distance and hold Lightning Rush strictly as a counter to Facebreaker. If Sett charges at you with Knuckle Down, step back immediately; only use your escape if he actually attempts his pull. Should he manage to grab you and use The Show Stopper, do not panic. Immediately activate Slicing Maelstrom and Electrical Surge to stun him with Mark of the Storm, turning his aggressive dive into a lethal counter-offensive.
ReichweiteMassenkontrolleVolibear relies entirely on the movement speed from Thundering Smash to close the gap and lock you down. However, Kennen’s kit is perfectly suited to halt this advance. By combining Thundering Shuriken, an empowered auto-attack from Electrical Surge, and the active trigger of Electrical Surge, you can easily apply three stacks of Mark of the Storm. This stuns Volibear mid-sprint, leaving him helpless and unable to reach you.Volibear Build →Details ansehen
Volibear
Warum
Volibear relies entirely on the movement speed from Thundering Smash to close the gap and lock you down. However, Kennen’s kit is perfectly suited to halt this advance. By combining Thundering Shuriken, an empowered auto-attack from Electrical Surge, and the active trigger of Electrical Surge, you can easily apply three stacks of Mark of the Storm. This stuns Volibear mid-sprint, leaving him helpless and unable to reach you.
Lane-Einfluss
This interaction strips Volibear of any offensive pressure, forcing him to play defensively. He must rely on Sky Splitter just to secure minion last-hits or shield himself from your constant basic attacks. You command total control over the minion wave, allowing you to slow-push and harass him under his own turret. Volibear cannot contest your freeze without risking a massive, one-sided trade that forces an early recall.
Wie man spielt
Keep a safe distance and never waste Lightning Rush offensively; save this movement tool strictly to reposition if Volibear attempts to catch you off guard or to escape the slow zone of his Sky Splitter. When he activates Thundering Smash, immediately throw Thundering Shuriken and hit him with your passive-enhanced attack from Electrical Surge, then activate the active portion of Electrical Surge. This guarantees a defensive stun, allowing you to walk away or punish his retreat.
MagieschadenMassenkontrolleYour ranged advantage as Kennen lets you bully K'Santé constantly using Thundering Shuriken and passive Electrical Surge auto-attacks. While you easily deny him farm, the matchup hinges on his defensive tool. K'Santé can channel Path Maker to shrug off the stun and damage of your Slicing Maelstrom, meaning you cannot simply dive him or wipe his team if his damage-reduction charge is ready to absorb your lightning.K'Santé Build →Details ansehen
K'Santé
Warum
Your ranged advantage as Kennen lets you bully K'Santé constantly using Thundering Shuriken and passive Electrical Surge auto-attacks. While you easily deny him farm, the matchup hinges on his defensive tool. K'Santé can channel Path Maker to shrug off the stun and damage of your Slicing Maelstrom, meaning you cannot simply dive him or wipe his team if his damage-reduction charge is ready to absorb your lightning.
Lane-Einfluss
K'Santé is forced to give up early priority, taking heavy poke whenever he tries to stack Ntofo Strikes on the wave. He will use Footwork to shield your harassment, but you can easily freeze and chip his health down. However, because his Path Maker neutralizes your dive potential, you cannot easily execute him under tower, forcing you to focus on a slow, relentless gold lead rather than explosive solo kills.
Wie man spielt
Since K'Santé will rush magic resistance to survive your poke, pivot your build path early toward heavy magic penetration rather than flat burst. During skirmishes, never initiate with Slicing Maelstrom while his Path Maker is available; instead, bait it out using Lightning Rush to threaten an engage, then disengage. If he uses All Out to drag you over a wall, immediately activate Electrical Surge to trigger Mark of the Storm and stun his squishier form before he can execute you.
ReichweiteRückzugThis favorable matchup hinges on your ability to completely shut down Ornn's engage potential. While your ranged basic attacks constantly chip away at his health, his only real threat is the knockup from Searing Charge. Because you have Lightning Rush, you can instantly react whenever he spawns a pillar with Volcanic Rupture. The rapid movement speed allows you to effortlessly zip out of his crash zone, leaving him completely vulnerable.Ornn Build →Details ansehen
Ornn
Warum
This favorable matchup hinges on your ability to completely shut down Ornn's engage potential. While your ranged basic attacks constantly chip away at his health, his only real threat is the knockup from Searing Charge. Because you have Lightning Rush, you can instantly react whenever he spawns a pillar with Volcanic Rupture. The rapid movement speed allows you to effortlessly zip out of his crash zone, leaving him completely vulnerable.
Lane-Einfluss
Consequently, you dictate the minion wave's position at all times. Since Ornn cannot risk missing his knockup without taking massive damage, he must play passively under his turret. This allows you to slow push waves, harass him with Thundering Shuriken while he tries to last-hit, and stack Electrical Surge marks. You will easily secure a massive gold lead and keep him trapped in lane while your team plays with top-lane priority.
Wie man spielt
To execute this flawlessly, never use Lightning Rush offensively unless Ornn has already missed his Searing Charge. Always stand near his Volcanic Rupture pillar to bait his charge, then activate your escape speed to dodge the knockup. Once he misses, immediately retaliate with basic attacks, activate Electrical Surge to consume your passive mark, and throw a guaranteed Thundering Shuriken. If he attempts to breathe fire with Bellows Breath, retreat backward to avoid the brittle application.
ÜberlebenMassenkontrolleKennen dominates Tryndamere because his ranged kit completely neutralizes Tryndamere's melee threat. When Tryndamere engages with Spinning Slash, Kennen can instantly disengage using Lightning Rush while applying Mark of the Storm. If Tryndamere activates Undying Rage, Kennen's ability to chain stuns via his passive and poke from distance with Thundering Shuriken and Electrical Surge means he can waste the entire duration of the ultimate without letting Tryndamere land a single critical auto-attack.Tryndamere Build →Details ansehen
Tryndamere
Warum
Kennen dominates Tryndamere because his ranged kit completely neutralizes Tryndamere's melee threat. When Tryndamere engages with Spinning Slash, Kennen can instantly disengage using Lightning Rush while applying Mark of the Storm. If Tryndamere activates Undying Rage, Kennen's ability to chain stuns via his passive and poke from distance with Thundering Shuriken and Electrical Surge means he can waste the entire duration of the ultimate without letting Tryndamere land a single critical auto-attack.
Lane-Einfluss
This matchup forces Tryndamere into a defensive posture where he must constantly consume his fury via Bloodlust just to sustain through your ranged auto-attacks. You dictate the wave's position; he cannot walk up to build Battle Fury without taking heavy poke from Thundering Shuriken. Tryndamere is forced to farm under tower, preventing him from roaming or invading your jungle, while you freely scale toward teamfights.
Wie man spielt
Always hold Lightning Rush specifically for when Tryndamere uses Spinning Slash to close the gap. When he spins forward, activate your speed boost to stay out of his melee range, and immediately hit him with Thundering Shuriken followed by an Electrical Surge empowered auto-attack to trigger Mark of the Storm. Once he pops Undying Rage, circle him using your passive stuns to freeze him in place, letting his ultimate safely expire before landing the final blow.
ReichweiteAusweichenYour ranged advantage makes this matchup highly favorable, but the real key lies in baiting Urgot's primary engage. Whenever Urgot winds up his Disdain dash to catch you, you can instantly react by activating Lightning Rush. The explosive surge of movement speed allows you to easily sidestep his flip, leaving him completely overextended, out of position, and unable to trigger his passive Echoing Flames.Urgot Build →Details ansehen
Urgot
Warum
Your ranged advantage makes this matchup highly favorable, but the real key lies in baiting Urgot's primary engage. Whenever Urgot winds up his Disdain dash to catch you, you can instantly react by activating Lightning Rush. The explosive surge of movement speed allows you to easily sidestep his flip, leaving him completely overextended, out of position, and unable to trigger his passive Echoing Flames.
Lane-Einfluss
Because Urgot cannot reliably lock you down with Disdain, he is forced to play defensively or waste Corrosive Charge trying to slow you from afar. This allows you to safely poke him down with Thundering Shuriken and stack Mark of the Storm. You dictate the wave's tempo, easily forcing him under tower where his bulky hitbox makes him an easy target for repeated Electrical Surge procs.
Wie man spielt
Never initiate a trade using Lightning Rush; always hold this crucial tool to react to his Disdain. Position yourself just outside his Corrosive Charge range, baiting him to charge forward. Once you use your speed to dodge his dash, immediately turn back to retaliate. Land a basic attack to apply the passive mark from Electrical Surge, follow up with Thundering Shuriken, and activate Electrical Surge to trigger the stun, ensuring he cannot retaliate with Purge.
ÜberlebenSinged relies entirely on running you down to fling you into his poison, but your ranged profile completely shuts this down. Whenever he attempts to approach with his passive speed, you can easily poke him from a distance with Thundering Shuriken. If he manages to bypass your spacing or attempts a desperate sprint, you can instantly activate Lightning Rush to outrun him, preventing him from ever getting into range to use Fling.Singed Build →Details ansehen
Singed
Warum
Singed relies entirely on running you down to fling you into his poison, but your ranged profile completely shuts this down. Whenever he attempts to approach with his passive speed, you can easily poke him from a distance with Thundering Shuriken. If he manages to bypass your spacing or attempts a desperate sprint, you can instantly activate Lightning Rush to outrun him, preventing him from ever getting into range to use Fling.
Lane-Einfluss
This range advantage gives you total control over the minion waves. Singed cannot easily activate Poison Trail to clear minions without taking heavy damage from your basic attacks and Electrical Surge. You can easily freeze the wave near your turret, forcing him into a terrible position where he must bleed health for every single last hit, eventually forcing him to recall or die under his own tower.
Wie man spielt
Never use Lightning Rush offensively unless Singed is already low and stunned. Always hold this ability to escape his engage, especially if he drops Mega Adhesive to ground you. Keep your distance and focus on charging the passive of Electrical Surge on minions, then unleash the empowered attack on Singed followed by Thundering Shuriken to constantly stack Mark of the Storm. If he triggers his Insanity Potion, simply retreat and wait out its duration.
ÜberlebenThis matchup is heavily in your favor because Sion relies on charging Decimating Smash to threaten you or clear waves. Since you are ranged, you can easily poke him down with auto-attacks. If he attempts to charge his Q, your Lightning Rush provides instant movement speed to zip straight behind his cone of attack or completely out of its range, rendering his main threat useless.Sion Build →Details ansehen
Sion
Warum
This matchup is heavily in your favor because Sion relies on charging Decimating Smash to threaten you or clear waves. Since you are ranged, you can easily poke him down with auto-attacks. If he attempts to charge his Q, your Lightning Rush provides instant movement speed to zip straight behind his cone of attack or completely out of its range, rendering his main threat useless.
Lane-Einfluss
By neutralizing his primary zone tool, you dictate the wave's tempo. You can freeze the minions near your turret, forcing Sion to walk up and expose himself to constant basic attacks and Electrical Surge passive procs. Because he cannot safely charge Decimating Smash without getting punished, his shield from Soul Furnace will be broken by your AP poke before it can explode, starving his health pool.
Wie man spielt
Never use Lightning Rush aggressively unless Sion has already wasted Decimating Smash or Roar of the Slayer. Always stand slightly off-center from your minion wave to force him to choose between aiming at you or the wave. If he charges his Q, activate your E to speed behind him, then immediately follow up with auto-attacks, Thundering Shuriken, and Electrical Surge to trigger Mark of the Storm, preventing him from escaping with Unstoppable Onslaught.
ReichweiteAusweichenThis matchup is highly favorable due to your natural ranged advantage. You can relentlessly harass Shen using Thundering Shuriken from a safe distance, punishing him whenever he tries to last-hit. His only tool to close the gap and threaten you is Shadow Dash. As long as you react quickly with Lightning Rush, you can effortlessly dodge his taunt, leaving him completely vulnerable and unable to trade back.Shen Build →Details ansehen
Shen
Warum
This matchup is highly favorable due to your natural ranged advantage. You can relentlessly harass Shen using Thundering Shuriken from a safe distance, punishing him whenever he tries to last-hit. His only tool to close the gap and threaten you is Shadow Dash. As long as you react quickly with Lightning Rush, you can effortlessly dodge his taunt, leaving him completely vulnerable and unable to trade back.
Lane-Einfluss
In practice, this dynamic allows you to dictate the wave's tempo, forcing Shen to bleed health under his turret. Since he cannot easily approach the wave without taking free damage, you establish massive lane priority. When Shen looks to impact the map with Stand United, he faces a terrible dilemma: leaving you to demolish his turret or losing his teleportation window entirely if you disrupt his channel.
Wie man spielt
Position yourself outside his dash range and never use Lightning Rush offensively while his Shadow Dash is up. Focus on chipping away his health with Thundering Shuriken and passive procs from Electrical Surge. If you get caught by his taunt, immediately retreat once it ends to avoid his empowered attacks from Twilight Assault. When he channels his ultimate, quickly shove the minion wave and rotate to match his map pressure.
PokeRückzugThis matchup is heavily in your favor because Jax lacks the tools to stick to you. Whenever he attempts to close the gap with Leap Strike, you can immediately activate Lightning Rush to outrun his advance and completely avoid the stun from Counter Strike. This safe disengage allows you to freely harass him with Thundering Shuriken and auto-attacks, exploiting his melee nature without taking any return damage.Jax Build →Details ansehen
Jax
Warum
This matchup is heavily in your favor because Jax lacks the tools to stick to you. Whenever he attempts to close the gap with Leap Strike, you can immediately activate Lightning Rush to outrun his advance and completely avoid the stun from Counter Strike. This safe disengage allows you to freely harass him with Thundering Shuriken and auto-attacks, exploiting his melee nature without taking any return damage.
Lane-Einfluss
Jax is forced into a defensive posture, bleeding minion gold under his turret. Because he cannot engage without losing the trade, you dictate the wave tempo. You can safely stack Mark of the Storm using the passive of Electrical Surge, threatening a stun every time he approaches to last hit. This constant threat of magic damage keeps his health low, preventing him from ever roaming to assist his jungler.
Wie man spielt
To secure this lead, never use Lightning Rush offensively unless Jax has already wasted Leap Strike. Always hold this movement tool as your safety net. Additionally, pivot your build strategy away from basic attack speed, which is easily blocked by Counter Strike, and shift toward raw ability power and magic penetration. This ensures that your Slicing Maelstrom and Electrical Surge burst right through the bonus resistances granted by his Grandmaster-at-Arms active.
RückzugPositionierungKennen dominates because his ranged attacks naturally bully Renekton, but the match hinges on neutralizing the crocodile's double dash. Since Renekton relies on Slice and Dice to close the gap and land Ruthless Predator, Kennen's Lightning Rush acts as the ultimate counter-mobility tool. Instantly matching Renekton's forward movement completely denies his stun setup, leaving him stranded, overextended, and vulnerable to a massive counter-offensive.Renekton Build →Details ansehen
Renekton
Warum
Kennen dominates because his ranged attacks naturally bully Renekton, but the match hinges on neutralizing the crocodile's double dash. Since Renekton relies on Slice and Dice to close the gap and land Ruthless Predator, Kennen's Lightning Rush acts as the ultimate counter-mobility tool. Instantly matching Renekton's forward movement completely denies his stun setup, leaving him stranded, overextended, and vulnerable to a massive counter-offensive.
Lane-Einfluss
This dynamic dictates a heavily one-sided laning phase. Because Renekton cannot reliably lock you down, you can freely control the minion waves, slow-pushing to deny him easy fury generation from Cull the Meek. If he attempts an aggressive dash, your immediate disengage forces him to tank minion aggro while retreating. This relentless pressure chips his health pool down, neutralizing his dive threat and forcing him to waste Dominus purely to survive.
Wie man spielt
To secure this lead, you must adopt a strict discipline: hold Lightning Rush strictly for defense. Never use it to clear waves or to aggressively apply passive marks. Stand at the edge of your basic attack range, baiting his forward movement. The millisecond you see the animation of Slice and Dice, activate Lightning Rush to retreat. Once his dash ends and his stun window expires, immediately turn back with Thundering Shuriken and Electrical Surge to punish his retreat.
Diese Champions haben ein Build und einen Spielstil, der deinen direkt überlegen ist, was die Kontrolle der Lane und das Farmen extrem schwierig machen kann. Ihr Kit kann deine Kernstärken neutralisieren oder dich bestrafen, sobald du versuchst, deinen gewohnten Spielplan umzusetzen. In diesen Matchups geht es oft darum, Fehler zu minimieren und nach Wegen zu suchen, außerhalb der direkten Konfrontation zu gewinnen.
SchildeKonter-EngageThis matchup is a nightmare because Morgana's Black Shield completely neutralizes your offensive threat. Your entire game plan revolves around stacking Mark of the Storm to stun targets, but her magic shield absorbs your burst and blocks the stun entirely. When you commit with Slicing Maelstrom, she can simply shield herself, rendering your ultimate useless while trapping you with Dark Binding.Morgana Build →Details ansehen
Morgana
Warum
This matchup is a nightmare because Morgana's Black Shield completely neutralizes your offensive threat. Your entire game plan revolves around stacking Mark of the Storm to stun targets, but her magic shield absorbs your burst and blocks the stun entirely. When you commit with Slicing Maelstrom, she can simply shield herself, rendering your ultimate useless while trapping you with Dark Binding.
Lane-Einfluss
You will constantly struggle for priority as Morgana shoves waves effortlessly using Tormented Shadow, healing back any of your Thundering Shuriken poke with Soul Siphon. If you attempt to match her clear using Lightning Rush, you expose yourself to a lethal Dark Binding. This forces you to farm under turret, bleeding gold and preventing you from roaming.
Wie man spielt
Never activate Slicing Maelstrom while her Black Shield is available. Instead, try to bait this crucial defense by poking with Thundering Shuriken and triggering Electrical Surge. Only when her shield is on its long cooldown can you safely engage. If she holds her shield defensively, focus strictly on last-hitting from a distance and avoid using Lightning Rush forward to escape her Soul Shackles.
MassenkontrolleKonter-EngageLissandra holds a massive advantage because her defensive kit completely neutralizes your offensive dives. Whenever you attempt to close the distance with Lightning Rush, she can instantly halt your momentum using Ring of Frost. Even worse, if you commit your Slicing Maelstrom, she simply self-casts Frozen Tomb to render herself completely immune to your storm's damage and stuns, leaving you exposed and vulnerable in the middle of her team.Lissandra Build →Details ansehen
Lissandra
Warum
Lissandra holds a massive advantage because her defensive kit completely neutralizes your offensive dives. Whenever you attempt to close the distance with Lightning Rush, she can instantly halt your momentum using Ring of Frost. Even worse, if you commit your Slicing Maelstrom, she simply self-casts Frozen Tomb to render herself completely immune to your storm's damage and stuns, leaving you exposed and vulnerable in the middle of her team.
Lane-Einfluss
This matchup forces you into a highly defensive posture from the very first waves. Since you cannot safely trade with auto-attacks, she easily shoves you under turret with Ice Shard. You will struggle to assist your jungler in early skirmishes, as walking up to contest her wave clear risks getting locked down by her crowd control. This structural pressure means you must forfeit early map rotations to protect your own tower.
Wie man spielt
To survive, prioritize safe farming from maximum distance using Thundering Shuriken. Never use Lightning Rush offensively unless you have seen her waste Ring of Frost first. During teamfights, you must hold Slicing Maelstrom as a secondary response rather than an initiation tool. Wait for your allies to force out her Frozen Tomb before you dive in; otherwise, you will only waste your ultimate and your life.
Anti-DashMassenkontrolleYour main tool for closing distance, Lightning Rush, is a direct trigger for Vex's passive, Doom 'n Gloom. The moment you transform into an electric ball to initiate or clear waves, Vex gains a Gloom mark on you. This allows her to instantly interrupt your approach with a feared Personal Space or Mistral Bolt, completely shutting down your engage before you can even stack your Mark of the Storm.Vex Build →Details ansehen
Vex
Warum
Your main tool for closing distance, Lightning Rush, is a direct trigger for Vex's passive, Doom 'n Gloom. The moment you transform into an electric ball to initiate or clear waves, Vex gains a Gloom mark on you. This allows her to instantly interrupt your approach with a feared Personal Space or Mistral Bolt, completely shutting down your engage before you can even stack your Mark of the Storm.
Lane-Einfluss
Because you cannot dash safely, Vex establishes dominant wave control. She can freely harass you with Looming Darkness while keeping her Doom bar full to threaten an instant fear. This forces you to farm under turret using only Thundering Shuriken. Initiating with Slicing Maelstrom becomes suicide because if she hits Shadow Surge, she can counter-engage and blow you up while you are feared and unable to stun her back.
Wie man spielt
Never use Lightning Rush offensively unless Vex has recently wasted her Doom-empowered spell. Watch her resource bar carefully; when it is red, she has no fear charged. That is your tiny window to secure cs with your auto-attacks or poke with Thundering Shuriken. If she misses Looming Darkness while her passive is down, quickly activate Electrical Surge to poke from afar. If you get caught, immediately retreat rather than trying to force a Slicing Maelstrom counter-attack.
Anti-DashZonenkontrolleThis matchup is highly unfavorable because your primary tool for mobility and trade setup, *Lightning Rush*, is directly countered by Taliyah's *Unraveled Earth*. The moment you transform into an electric ball to close the distance or clear waves, she can lay down her minefield. Dashing through these stones triggers an immediate stun, completely interrupting your momentum and leaving you wide open to her *Seismic Shove*.Taliyah Build →Details ansehen
Taliyah
Warum
This matchup is highly unfavorable because your primary tool for mobility and trade setup, *Lightning Rush*, is directly countered by Taliyah's *Unraveled Earth*. The moment you transform into an electric ball to close the distance or clear waves, she can lay down her minefield. Dashing through these stones triggers an immediate stun, completely interrupting your momentum and leaving you wide open to her *Seismic Shove*.
Lane-Einfluss
In practice, you lose all lane priority. You cannot use *Lightning Rush* to quickly secure last hits with *Electrical Surge* without risking a lethal counter-engage. Taliyah easily shoves you under turret using *Threaded Volley*, then uses *Rock Surfing* and *Weaver's Wall* to roam while you are stuck farming. Any attempt to follow her results in being cut off or ambushed in the river.
Wie man spielt
To survive, adopt a passive stance and prioritize safe farming. Maximize the range of *Thundering Shuriken* to secure minions from afar. Never activate *Lightning Rush* offensively unless Taliyah has already wasted *Unraveled Earth*. When she roams with *Weaver's Wall*, do not chase blindly through the unwarded river; instead, ping your teammates missing and use the window to shove the lane and charge your *Mark of the Storm* passive on the remaining turret plates.
Diese Champions haben Werkzeuge, die ihnen im Kampf meist einen Vorteil verschaffen, ohne das Matchup unspielbar zu machen. Sie haben vielleicht mehr Reichweite, können deine Offensive besser abfangen oder haben mehr Möglichkeiten, auf deine Engages zu reagieren. Du musst deine Herangehensweise anpassen und sorgfältig die Momente wählen, in denen du den Kampf annimmst.
KartendruckMassenkontrolleRyze's instant point-and-click Rune Prison acts as an absolute counter to your primary mobility. Whenever you attempt to initiate or escape using Lightning Rush, Ryze can instantly root you mid-dash, neutralizing your momentum. This interruption leaves you vulnerable to a rapid Spell Flux and Overload combination, letting him win trades before you can even stack your Mark of the Storm.Ryze Build →Details ansehen
Ryze
Warum
Ryze's instant point-and-click Rune Prison acts as an absolute counter to your primary mobility. Whenever you attempt to initiate or escape using Lightning Rush, Ryze can instantly root you mid-dash, neutralizing your momentum. This interruption leaves you vulnerable to a rapid Spell Flux and Overload combination, letting him win trades before you can even stack your Mark of the Storm.
Lane-Einfluss
Ryze easily dictates the wave movement. By spreading Spell Flux through your minions and detonating them with Overload, he constantly shoves the wave under your turret. If you step up to thin the wave, you risk getting locked by Rune Prison. This forces you to use Thundering Shuriken from afar just to last-hit, draining your pressure and trapping you in lane while Ryze scales safely.
Wie man spielt
To survive, you must play defensively and focus on wave control. Never use Lightning Rush offensively unless Ryze has just wasted Rune Prison on a minion. Keep your distance and use Thundering Shuriken to farm safely. If he steps forward aggressively, prepare to trigger Electrical Surge on a marked minion to discourage his approach. Save Slicing Maelstrom for defensive disengagement or to assist your jungler when Ryze overextends under your tower.
PokePositionierungOrianna's ball placement dictates this matchup entirely. Whenever you attempt to step up to use your auto-attacks or Thundering Shuriken, she counters by sending her ball forward with Command: Attack and immediately detonating Command: Dissonance. This combination not only chunks your health bar from a safe distance but also leaves a slowing field that prevents you from closing the gap with Lightning Rush before taking critical damage.Orianna Build →Details ansehen
Orianna
Warum
Orianna's ball placement dictates this matchup entirely. Whenever you attempt to step up to use your auto-attacks or Thundering Shuriken, she counters by sending her ball forward with Command: Attack and immediately detonating Command: Dissonance. This combination not only chunks your health bar from a safe distance but also leaves a slowing field that prevents you from closing the gap with Lightning Rush before taking critical damage.
Lane-Einfluss
You will constantly find yourself pinned under your own turret, forced to use Thundering Shuriken solely to secure last hits rather than poke. Because Orianna can safely clear waves while keeping her ball positioned aggressively, your health pool is constantly threatened. This pressure forces premature recalls, denying you crucial gold and leaving your tower vulnerable to her sustained basic attacks enhanced by Clockwork Windup.
Wie man spielt
To survive, you must anchor yourself behind your caster minions, forcing Orianna to extend her ball's travel distance. Only trigger Electrical Surge when her Command: Attack is on cooldown. If she overextends her ball past your wave, immediately activate Lightning Rush laterally to escape the area of Command: Shockwave. Do not attempt to engage unless she misses her slow; your primary goal is reaching teamfights healthy enough to utilize Slicing Maelstrom.
RegenerationDuellSwain directly counters your primary win condition because Demonic Ascension grants him massive bonus health and continuous healing, easily absorbing the burst from your Slicing Maelstrom. Since your Lightning Rush requires you to dive directly into his face to apply Mark of the Storm, you play right into his preferred range where his Death's Hand deals maximum damage.Swain Build →Details ansehen
Swain
Warum
Swain directly counters your primary win condition because Demonic Ascension grants him massive bonus health and continuous healing, easily absorbing the burst from your Slicing Maelstrom. Since your Lightning Rush requires you to dive directly into his face to apply Mark of the Storm, you play right into his preferred range where his Death's Hand deals maximum damage.
Lane-Einfluss
During the laning phase, you cannot safely contest waves with basic attacks. If you step up, Swain will fish for Nevermove to pull you with Ravenous Flock. This forces you to farm from a distance using Thundering Shuriken, giving him lane priority and preventing you from roaming to secure early map objectives.
Wie man spielt
To survive, maintain a diagonal positioning profile to dodge the returning claw of Nevermove. Never initiate with Lightning Rush unless his crowd control is down. If he activates Demonic Ascension, immediately disengage and run away rather than trying to fight him. Save your Electrical Surge passive proc to poke him safely, and focus on farming with Thundering Shuriken until teamfights begin.
RückzugSkalierungThis matchup is dictated by how Event Horizon completely shuts down your main engagement tool. Whenever you attempt to close the distance using Lightning Rush to set up Slicing Maelstrom, Veigar can instantly drop his cage around himself or you. This immediately stops your lightning dash mid-flight, leaving you stunned and highly vulnerable to his heavy-hitting Dark Matter and Primordial Burst combo.Veigar Build →Details ansehen
Veigar
Warum
This matchup is dictated by how Event Horizon completely shuts down your main engagement tool. Whenever you attempt to close the distance using Lightning Rush to set up Slicing Maelstrom, Veigar can instantly drop his cage around himself or you. This immediately stops your lightning dash mid-flight, leaving you stunned and highly vulnerable to his heavy-hitting Dark Matter and Primordial Burst combo.
Lane-Einfluss
Because of this threat, you cannot play aggressively in the lane. You are forced to farm safely from a distance using Thundering Shuriken, while Veigar freely stacks his Phenomenal Evil Power using Baleful Strike. Any reckless forward movement results in getting trapped under his tower or losing half your health bar, completely stripping away your mid-lane priority and preventing you from assisting your jungler.
Wie man spielt
To survive and scale, you must adopt a strict bait-and-switch playstyle. Position yourself diagonally to the minion wave to avoid his Baleful Strike while farming with Thundering Shuriken. Never activate Lightning Rush offensively unless you see Event Horizon go on cooldown. If he does trap you, do not panic and run into the stun border; stand still inside the cage to dodge Dark Matter, and only use your flash to escape if his Primordial Burst is about to execute you.
MassenkontrolleBurstThis matchup is heavily dictated by how Syndra's defensive tools negate your mobility. Whenever you attempt to close the gap using Lightning Rush to stack Mark of the Storm, Syndra can easily react with Scatter the Weak. This knockback completely halts your forward momentum, leaving you stranded at range where her Dark Sphere and Force of Will can safely whittle your health pool down.Syndra Build →Details ansehen
Syndra
Warum
This matchup is heavily dictated by how Syndra's defensive tools negate your mobility. Whenever you attempt to close the gap using Lightning Rush to stack Mark of the Storm, Syndra can easily react with Scatter the Weak. This knockback completely halts your forward momentum, leaving you stranded at range where her Dark Sphere and Force of Will can safely whittle your health pool down.
Lane-Einfluss
You are forced into a defensive posture, relying almost exclusively on Thundering Shuriken to secure last hits from afar. Initiating trades is highly risky because a failed engage means taking a full Unleashed Power burst. Consequently, Syndra easily dictates the wave pressure, securing priority for active map rotations while you are stuck clearing under your turret.
Wie man spielt
Never activate Lightning Rush aggressively unless you see Syndra waste Scatter the Weak on a wave or a missed stun attempt. While her knockback is on its long cooldown, you have a brief window to move forward, land an empowered auto-attack from Electrical Surge, and threaten a Slicing Maelstrom engage. If she holds her crowd control, play parallel to your minion wave, dodge her Dark Sphere laterally, and focus entirely on matching her push safely.
RegenerationNicht anvisierbarVladimir's Crimson Pact makes him naturally durable, but the core issue lies in how Sanguine Pool completely nullifies your ultimate. When you initiate with Slicing Maelstrom, he can sink into the ground to become untargetable. This prevents your lightning strikes from applying Mark of the Storm stacks, rendering your primary crowd control combo useless while wasting your longest cooldown.Vladimir Build →Details ansehen
Vladimir
Warum
Vladimir's Crimson Pact makes him naturally durable, but the core issue lies in how Sanguine Pool completely nullifies your ultimate. When you initiate with Slicing Maelstrom, he can sink into the ground to become untargetable. This prevents your lightning strikes from applying Mark of the Storm stacks, rendering your primary crowd control combo useless while wasting your longest cooldown.
Lane-Einfluss
Vladimir's constant healing through Transfusion slowly devalues your Thundering Shuriken poke. Because you cannot threaten an all-in due to his defensive pool, he can safely scale. Trades feel unrewarding; even if you land an Electrical Surge empowered attack, he simply regenerates the lost health, forcing you into a passive lane where your map priority quickly diminishes.
Wie man spielt
Never lead an engagement with Slicing Maelstrom. Instead, harass him with basic attacks and Electrical Surge to pressure him into panicking. Watch his resource bar closely; when his Transfusion is empowered, use the movement speed from Lightning Rush to retreat safely. If he wastes Sanguine Pool defensively to dodge a Thundering Shuriken, you have a wide window to call for assistance.
SchildeKonter-EngageThis matchup is highly unfavorable for Kennen because Zyra's plants, sprouted via Rampant Growth, act as a constant physical shield that absorbs your Thundering Shuriken. This neutralizes your main poking tool. Furthermore, when you attempt to engage with Lightning Rush and Slicing Maelstrom, Zyra can instantly drop Stranglethorns directly on herself, knocking you up mid-ultimate and completely interrupting your burst window before you can stun her.Zyra Build →Details ansehen
Zyra
Warum
This matchup is highly unfavorable for Kennen because Zyra's plants, sprouted via Rampant Growth, act as a constant physical shield that absorbs your Thundering Shuriken. This neutralizes your main poking tool. Furthermore, when you attempt to engage with Lightning Rush and Slicing Maelstrom, Zyra can instantly drop Stranglethorns directly on herself, knocking you up mid-ultimate and completely interrupting your burst window before you can stun her.
Lane-Einfluss
Zyra's constant plant zoning forces you under turret, where Grasping Roots and Deadly Spines can poke you safely. Because your Thundering Shuriken cannot pierce her summons, you lose all wave priority and find yourself bleeding health just to last-hit. This denies you any early roaming opportunities, forcing you to use Lightning Rush defensively to dodge her roots rather than using it to create map pressure.
Wie man spielt
To survive, position yourself strictly outside the minion wave and away from active seeds to force Zyra to choose between pushing or poking. Never engage with Slicing Maelstrom while her Stranglethorns is available; instead, bait her Grasping Roots, then use the movement speed from Lightning Rush to flank her. If she drops her ultimate, immediately retreat and use the passive of Electrical Surge on single minions to safely farm from a distance until her plants wither.
MassenkontrollePositionierungKennen struggles because his main tool for closing distance, Lightning Rush, forces him into a highly predictable, linear path. Zoe thrives on this exact predictability; she can easily intercept your charge by throwing Sleepy Trouble Bubble directly into your incoming trajectory. Because you lack instantaneous blinks, trying to apply Mark of the Storm with your body turns you into an easy target for her high-damage Paddle Star! follow-up.Zoe Build →Details ansehen
Zoe
Warum
Kennen struggles because his main tool for closing distance, Lightning Rush, forces him into a highly predictable, linear path. Zoe thrives on this exact predictability; she can easily intercept your charge by throwing Sleepy Trouble Bubble directly into your incoming trajectory. Because you lack instantaneous blinks, trying to apply Mark of the Storm with your body turns you into an easy target for her high-damage Paddle Star! follow-up.
Lane-Einfluss
This interaction severely limits how you manage waves. You cannot safely use Lightning Rush to clear minion waves without risking a lethal sleep-to-wake combo. Consequently, Zoe easily pushes you under tower using Paddle Star! to secure priority. You are forced to rely heavily on Thundering Shuriken just to farm safely from afar, which drains your pressure and prevents you from helping your jungler secure the river.
Wie man spielt
To survive, adopt a diagonal positioning behind your minion wave to block Sleepy Trouble Bubble. Never use Lightning Rush aggressively unless you see Zoe miss her bubble or misposition with Portal Jump. If she uses Portal Jump forward, track her return anchor point to throw a guaranteed Thundering Shuriken and activate Electrical Surge. When you must engage with Slicing Maelstrom, flash over her bubble or wait until it is on cooldown.
WellenräumungRückzugViktor controls the pace of this lane because his zone control directly neutralizes your offensive tools. Whenever you activate Lightning Rush to charge in and stack Mark of the Storm, Viktor can simply drop Gravity Field on himself. This forces you to abort your rush or get stunned inside his zone. Additionally, his Hextech Ray outranges your Thundering Shuriken, making safe poking difficult while Siphon Power shields him from your basic attacks.Viktor Build →Details ansehen
Viktor
Warum
Viktor controls the pace of this lane because his zone control directly neutralizes your offensive tools. Whenever you activate Lightning Rush to charge in and stack Mark of the Storm, Viktor can simply drop Gravity Field on himself. This forces you to abort your rush or get stunned inside his zone. Additionally, his Hextech Ray outranges your Thundering Shuriken, making safe poking difficult while Siphon Power shields him from your basic attacks.
Lane-Einfluss
You will constantly find yourself pushed toward your turret because Hextech Ray clears waves faster than you can match. This forces you to use Thundering Shuriken to secure last hits rather than poke. Trading health is highly inefficient; if you try to step up, Viktor shields with Siphon Power and punishes you. You cannot easily pressure his tower or roam to support your jungler without risking a massive wave loss.
Wie man spielt
To survive, adopt a diagonal positioning relative to the minion wave to force Viktor to choose between aiming Hextech Ray at you or the wave. Never use Lightning Rush forward unless you see him waste Gravity Field. Instead, use your movement speed defensively to dodge his laser. If he mispositions and his gravity trap is on cooldown, that is your cue to unleash Slicing Maelstrom paired with Electrical Surge for a quick stun and safe retreat.
TanksUltimateMalphite's natural tankiness directly neutralizes your laning pressure. Your main harassment tools, Thundering Shuriken and the passive of Electrical Surge, constantly bounce off his regenerating Granite Shield, leaving him virtually unscathed. When teamfights erupt, your game-winning Slicing Maelstrom is matched or outright canceled by his Unstoppable Force, which can interrupt your dive and lock down your team before you can stack Mark of the Storm.Malphite Build →Details ansehen
Malphite
Warum
Malphite's natural tankiness directly neutralizes your laning pressure. Your main harassment tools, Thundering Shuriken and the passive of Electrical Surge, constantly bounce off his regenerating Granite Shield, leaving him virtually unscathed. When teamfights erupt, your game-winning Slicing Maelstrom is matched or outright canceled by his Unstoppable Force, which can interrupt your dive and lock down your team before you can stack Mark of the Storm.
Lane-Einfluss
This matchup turns into a battle of attrition where you cannot easily secure a health advantage. Every time you attempt to clear waves with Lightning Rush, Malphite can punish you with Seismic Shard to steal your speed and follow up with Ground Slam to reduce your attack speed. This limits your ability to pressure his turret or roam, forcing you to focus on safe farming while he dictates the recall timings.
Wie man spielt
To survive this lane, you must respect his engage range. Never cast Lightning Rush aggressively if Unstoppable Force is available; instead, hold it as your primary tool to escape his ultimate. When teamfights start, avoid grouping tightly with your allies to prevent Malphite from hitting everyone. Wait for him to commit his Unstoppable Force on your frontline before you activate Slicing Maelstrom from a flank, ensuring you can safely stack Mark of the Storm.
Diese Matchups sind vor allem Duelle der Ausführung: Beide Champions haben glaubwürdige Wege, die Oberhand zu gewinnen. Eine wichtige ausgewichene Fähigkeit, ein richtig antizipierter Engage oder ein einziger Positionierungsfehler können reichen, um das Duell zu entscheiden. Das Matchup zu kennen und die richtigen Fenster zum Handeln zu erkennen, ist hier besonders wichtig.
RückzugPositionierungThis matchup is a pure test of execution centered around your ultimate. While you want to dive in with Lightning Rush and unleash Slicing Maelstrom, Jayce possesses the perfect tool to disengage. His Thundering Blow can immediately knock you back out of your ultimate's radius before you can apply three stacks of Mark of the Storm. If he reacts quickly, your entire burst and stun potential are completely neutralized.Jayce Build →Details ansehen
Jayce
Warum
This matchup is a pure test of execution centered around your ultimate. While you want to dive in with Lightning Rush and unleash Slicing Maelstrom, Jayce possesses the perfect tool to disengage. His Thundering Blow can immediately knock you back out of your ultimate's radius before you can apply three stacks of Mark of the Storm. If he reacts quickly, your entire burst and stun potential are completely neutralized.
Lane-Einfluss
In the lane, this dynamic forces a tense standoff. You can easily farm from distance using Thundering Shuriken, but aggressive trades are risky. If Jayce switches to hammer form with To the Skies!, you must retreat. Your lane pressure depends entirely on whether you can threaten him with a stun; otherwise, his ranged poke with Transform Mercury Cannon and fast wave clear will push you under tower, costing you crucial priority.
Wie man spielt
To win this matchup, never initiate with Slicing Maelstrom while Jayce is holding his hammer form. Instead, poke safely using your passive-enhanced auto-attacks from Electrical Surge and land Thundering Shuriken. Wait for him to commit to a wave with Lightning Field or force him to use Thundering Blow defensively first. If you must engage, flash behind him during Lightning Rush to alter the angle of his knockback, keeping him inside your storm.
BurstTeamfightsThis midlane matchup is a delicate battle of zone control and teamfight denial. Your ultimate, Slicing Maelstrom, is your main weapon to turn skirmishes, but Galio is equipped to completely neutralize it. By channeling Shield of Durand, he gains massive magic damage reduction to tank your lightning storm while preparing a wide taunt that locks you down, shielding his allies and stopping your Mark of the Storm stuns from disrupting his team.Galio Build →Details ansehen
Galio
Warum
This midlane matchup is a delicate battle of zone control and teamfight denial. Your ultimate, Slicing Maelstrom, is your main weapon to turn skirmishes, but Galio is equipped to completely neutralize it. By channeling Shield of Durand, he gains massive magic damage reduction to tank your lightning storm while preparing a wide taunt that locks you down, shielding his allies and stopping your Mark of the Storm stuns from disrupting his team.
Lane-Einfluss
During the laning phase, Galio uses Winds of War and Colossal Smash to clear waves quickly, forcing you under turret. While Thundering Shuriken allows you to farm safely from range, stepping up to poke with your Electrical Surge passive makes you vulnerable to a sudden Justice Punch engage. Since you cannot easily dive him due to his innate magic shield, you must respect his roaming pressure with Hero's Entrance.
Wie man spielt
To win this mental game, never activate Slicing Maelstrom while Galio has Shield of Durand available. Instead, bait his defensive tools by poking with Thundering Shuriken and Electrical Surge. Use the speed of Lightning Rush to dodge his Justice Punch and reposition outside his taunt radius. If he roams using Hero's Entrance, do not follow him blindly into the fog; focus on pushing the wave to punish his tower.
SchildeMobilitätThis matchup revolves around Yasuo's ability to completely nullify Kennen's offensive momentum. When you attempt to stack Mark of the Storm, Yasuo can deploy Wind Wall to absorb Thundering Shuriken. This single defensive tool stops your stun progression in its tracks, leaving you unable to trigger the electrical stun and vulnerable to his aggressive Sweeping Blade dashes through the minion wave.Yasuo Build →Details ansehen
Yasuo
Warum
This matchup revolves around Yasuo's ability to completely nullify Kennen's offensive momentum. When you attempt to stack Mark of the Storm, Yasuo can deploy Wind Wall to absorb Thundering Shuriken. This single defensive tool stops your stun progression in its tracks, leaving you unable to trigger the electrical stun and vulnerable to his aggressive Sweeping Blade dashes through the minion wave.
Lane-Einfluss
The lane is a constant struggle for wave priority. Yasuo uses Steel Tempest to shove quickly, while you must use your ranged auto-attacks to pop his Way of the Wanderer shield before committing. If you waste Thundering Shuriken into his wall, he will immediately dash forward with Sweeping Blade to force a heavy trade, threatening to setup Last Breath if he lands a tornado.
Wie man spielt
To win this, you must bait out Wind Wall using basic attacks empowered by Electrical Surge's passive rather than throwing your Thundering Shuriken blindly. Once his wall is on its long cooldown, immediately activate Lightning Rush to close the distance, apply Mark of the Storm, and unleash Slicing Maelstrom. If he holds his wall, focus on safely farming from range with your shuriken and matching his wave clear.
WellenräumungAusweichenThe lane is a constant battle of range and threat. Ziggs keeps his distance, clearing waves effortlessly with Bouncing Bomb, forcing Kennen to match the push or get shoved. However, Ziggs's safety relies entirely on Satchel Charge to disengage. If he uses it offensively or mispositions it, Kennen can instantly close the gap using Lightning Rush and lock him down with Mark of the Storm.Ziggs Build →Details ansehen
Ziggs
Warum
The lane is a constant battle of range and threat. Ziggs keeps his distance, clearing waves effortlessly with Bouncing Bomb, forcing Kennen to match the push or get shoved. However, Ziggs's safety relies entirely on Satchel Charge to disengage. If he uses it offensively or mispositions it, Kennen can instantly close the gap using Lightning Rush and lock him down with Mark of the Storm.
Lane-Einfluss
Ziggs will relentlessly pressure your turret by clearing waves with Bouncing Bomb and zoning you with Hexplosive Minefield. This forces you to use Thundering Shuriken to secure last hits under tower if you lose control of the wave. Your health bar will constantly be chipped by his long-range poke unless you actively dodge. If you let him shove you in, he will execute your outer turret using Satchel Charge.
Wie man spielt
Maintain even wave state by constantly using auto-attacks and Electrical Surge passive on minions to prevent Ziggs from shoving you in. Position yourself outside the minion wave so he must choose between targeting you or the wave with Bouncing Bomb. The moment you see him waste Satchel Charge, immediately activate Lightning Rush to sprint forward, applying Mark of the Storm stacks to trigger a stun, then follow up with Slicing Maelstrom for an inevitable kill.
Nicht anvisierbarBurstThis matchup revolves entirely around how Slicing Maelstrom interacts with Death Mark. Zed wants to use his ultimate's untargetability to dodge your storm's pulses. However, rushing an early Stasis completely neutralizes his lethal burst. Once you emerge unharmed, you can instantly turn the fight, stacking Mark of the Storm with Electrical Surge and Thundering Shuriken to stun him the millisecond he lands next to you.Zed Build →Details ansehen
Zed
Warum
This matchup revolves entirely around how Slicing Maelstrom interacts with Death Mark. Zed wants to use his ultimate's untargetability to dodge your storm's pulses. However, rushing an early Stasis completely neutralizes his lethal burst. Once you emerge unharmed, you can instantly turn the fight, stacking Mark of the Storm with Electrical Surge and Thundering Shuriken to stun him the millisecond he lands next to you.
Lane-Einfluss
Before level five, your ranged basic attacks let you pressure Zed while he relies on Razor Shuriken to farm. Once both ultimates are online, active lane pressure halts. You cannot aggressively dive with Lightning Rush because Zed will react with Death Mark. This standoff forces a slower pace, delaying your raw AP damage spike for defensive utility, but it successfully prevents Zed from securing the solo kills he needs to roam.
Wie man spielt
Poke constantly in the early levels using your fourth attack's passive on Electrical Surge. Always hold Lightning Rush to quickly zip away when he throws out Living Shadow and Shadow Slash. When Zed finally commits with Death Mark, do not panic-cast Slicing Maelstrom immediately. Instead, activate your Stasis right as he reappears to absorb his combo. As you emerge, release your ultimate and press Electrical Surge to lock him down under your own terms.
MassenkontrolleKartendruckThis matchup is a pure battle of map pressure versus teamfight presence. While Twisted Fate can completely halt your Lightning Rush engages by locking you down with a gold card from Pick a Card, he cannot match the raw teamfight destruction of Slicing Maelstrom. This creates a volatile dynamic where he seeks to escape the lane using Destiny, while you want to force massive 5v5 skirmishes where your area-of-effect damage shines.Twisted Fate Build →Details ansehen
Twisted Fate
Warum
This matchup is a pure battle of map pressure versus teamfight presence. While Twisted Fate can completely halt your Lightning Rush engages by locking you down with a gold card from Pick a Card, he cannot match the raw teamfight destruction of Slicing Maelstrom. This creates a volatile dynamic where he seeks to escape the lane using Destiny, while you want to force massive 5v5 skirmishes where your area-of-effect damage shines.
Lane-Einfluss
Expect a constant push-and-pull over mid priority. Twisted Fate will continuously shove the wave using Wild Cards to search for roam opportunities. If you let him push you under tower, he will disappear with Destiny to snowball his side lanes. Your goal is to use Thundering Shuriken and the passive of Electrical Surge to match his clear, preventing him from roaming without sacrificing precious turret plates and minion waves.
Wie man spielt
Never activate Lightning Rush aggressively while his Pick a Card is active; wait for him to waste his gold card on a minion or use a blue card for mana. Once his stun is on cooldown, you have a brief window to trade with Thundering Shuriken and Electrical Surge. If he channels Destiny to roam, do not mindlessly follow if you are late; instead, hard-shove to take plates or prepare a flanking Slicing Maelstrom for the next neutral objective fight where you hold the advantage.
AusweichenBurstThis midlane matchup is a pure test of reflexes centered on Lux's Light Binding. Because Lux relies on roots to chain her Lucent Singularity and Final Spark burst, her threat is entirely binary. Kennen has a massive advantage in avoiding this crowd control because the burst of movement speed from Lightning Rush allows him to instantly reposition and side-step her projectile, rendering her burst combo useless.Lux Build →Details ansehen
Lux
Warum
This midlane matchup is a pure test of reflexes centered on Lux's Light Binding. Because Lux relies on roots to chain her Lucent Singularity and Final Spark burst, her threat is entirely binary. Kennen has a massive advantage in avoiding this crowd control because the burst of movement speed from Lightning Rush allows him to instantly reposition and side-step her projectile, rendering her burst combo useless.
Lane-Einfluss
During the laning phase, Lux will constantly use Lucent Singularity to push the wave and poke you from afar, attempting to chip away at your health. If she misses Light Binding, you gain a massive window to advance past your minions, using Thundering Shuriken and the passive of Electrical Surge to harass her. Failing to dodge, however, means taking a full combo, forcing you to play defensively under tower.
Wie man spielt
Never activate Lightning Rush aggressively unless Lux has already wasted Light Binding. Keep this mobility tool ready specifically to react to her projectile's animation. When farming, stay behind your minions to make her binding harder to land, but be ready to move laterally if she aims Lucent Singularity at the wave. If she shields herself with Prismatic Barrier, delay your Electrical Surge active until her shield decays to maximize your damage.
Diese Champions tun sich meist schwer, auf deine Hauptstärken zu reagieren, was dir mehr Freiheit im Matchup gibt. Du hast oft mehrere Möglichkeiten, sie unter Druck zu setzen und Trades zu deinen Gunsten zu erzwingen. Nutze diesen Vorteil, um das Tempo zu bestimmen, statt ihnen Zeit zu geben, wieder in eine komfortable Position zu kommen.
TeamfightsMassenkontrolleKatarina relies on channeling Death Lotus to sweep mid-game skirmishes, but your kit completely shuts down her offensive windows. When she uses Shunpo to engage, activating Slicing Maelstrom rapidly applies Mark of the Storm stacks. Because your ultimate hits multiple times, you can reliably trigger the stun to interrupt her channel immediately, neutralizing her main source of burst while keeping her trapped in your zone of electrical damage.Katarina Build →Details ansehen
Katarina
Warum
Katarina relies on channeling Death Lotus to sweep mid-game skirmishes, but your kit completely shuts down her offensive windows. When she uses Shunpo to engage, activating Slicing Maelstrom rapidly applies Mark of the Storm stacks. Because your ultimate hits multiple times, you can reliably trigger the stun to interrupt her channel immediately, neutralizing her main source of burst while keeping her trapped in your zone of electrical damage.
Lane-Einfluss
During the early levels, your ranged basic attacks and Thundering Shuriken force Katarina to play defensively. Whenever she drops a dague with Bouncing Blade or Preparation, you can position to punish her if she tries to collect it with Shunpo. This constant zoning pressure forces her to farm under tower, delaying her roam timings and giving you total control over mid lane priority prior to skirmishes.
Wie man spielt
Never initiate with Slicing Maelstrom; instead, hold it as a reactive tool for when Katarina commits. When she jumps in with Shunpo and triggers Death Lotus, immediately activate your ultimate followed by Electrical Surge to secure the rapid stun. Use Lightning Rush defensively to escape her daggers' radius if she tries to bait you, and only poke with Thundering Shuriken from behind your minion wave to avoid her Bouncing Blade harass.
TeamfightsMassenkontrolleYou hold a massive early advantage because Kayle's Divine Ascent limits her range early, letting you harass her with Thundering Shuriken and empowered autos from Electrical Surge. The matchup revolves around ultimate timing: while you want to dive in, Kayle can use Divine Judgment to make herself or a target completely invulnerable, absorbing the entire initial burst and stun ticks of your Slicing Maelstrom.Kayle Build →Details ansehen
Kayle
Warum
You hold a massive early advantage because Kayle's Divine Ascent limits her range early, letting you harass her with Thundering Shuriken and empowered autos from Electrical Surge. The matchup revolves around ultimate timing: while you want to dive in, Kayle can use Divine Judgment to make herself or a target completely invulnerable, absorbing the entire initial burst and stun ticks of your Slicing Maelstrom.
Lane-Einfluss
Before level five, you easily dictate the wave. Kayle is forced to drop CS or burn mana using Radiant Blast and Starfire Spellblade from afar. You can aggressively position forward, using Lightning Rush to force trades. However, once she unlocks Divine Judgment, your dive potential stall-mates. You cannot blindly dive her under tower because her ultimate completely reverses your burst attempts.
Wie man spielt
Position yourself to the side of the wave to keep a clear line for Thundering Shuriken while zoning her out. When initiating, do not immediately dump your full combo. Use Lightning Rush and Electrical Surge to force her to panic-cast Celestial Blessing or even Divine Judgment. In teamfights, delay your Slicing Maelstrom until she uses her ultimate, or flank so you can stun her before she reacts.
All-inPositionierungMel is a highly static control mage who struggles immensely against sudden gap-closers. By activating Lightning Rush, you can easily bypass her zone control, close the distance, and immediately unleash Slicing Maelstrom. Because she lacks any built-in mobility to escape your ultimate storm, you can rapidly stack Mark of the Storm to stun and burst her down before she can safely disengage or retaliate.Mel Build →Details ansehen
Mel
Warum
Mel is a highly static control mage who struggles immensely against sudden gap-closers. By activating Lightning Rush, you can easily bypass her zone control, close the distance, and immediately unleash Slicing Maelstrom. Because she lacks any built-in mobility to escape your ultimate storm, you can rapidly stack Mark of the Storm to stun and burst her down before she can safely disengage or retaliate.
Lane-Einfluss
This mobility advantage completely dictates the wave dynamic once you unlock your ultimate. You can comfortably farm from safety using Thundering Shuriken while Mel tries to push. The moment she overextends even slightly to harass you, your potential for a swift burst trade forces her into a defensive posture. This pressure denies her easy recalls and leaves her vulnerable to lethal dives.
Wie man spielt
Keep your distance early on, securing minions with Thundering Shuriken while preparing the passive of Electrical Surge. The moment Mel overextends past the midway point of the lane, execute your offensive transition. Dash forward using Lightning Rush to catch her off guard, then immediately channel Slicing Maelstrom. Follow up with the active of Electrical Surge to guarantee the stun, locking her down before she can react.
MassenkontrolleEngageYour range advantage lets you chip away at Yone's health pool using constant basic attacks and Thundering Shuriken. Whenever Yone tries to close the distance by activating Soul Unbound combined with his Mortal Steel tornado, you can immediately retaliate or disengage by activating Lightning Rush. Because his primary engage tool has a massive early cooldown, you hold complete control over when fights actually occur.Yone Build →Details ansehen
Yone
Warum
Your range advantage lets you chip away at Yone's health pool using constant basic attacks and Thundering Shuriken. Whenever Yone tries to close the distance by activating Soul Unbound combined with his Mortal Steel tornado, you can immediately retaliate or disengage by activating Lightning Rush. Because his primary engage tool has a massive early cooldown, you hold complete control over when fights actually occur.
Lane-Einfluss
Yone is forced into a defensive posture, relying on Spirit Cleave just to absorb your poke while attempting to last-hit. This constant harassment prevents him from safely stacking Mortal Steel. You will naturally dictate the wave tempo, driving him under tower where he must choose between taking damage from Electrical Surge passive hits or losing gold, giving you free roam priority or easy plating.
Wie man spielt
Always keep a passive charge of Electrical Surge ready to threaten Yone when he steps up. When you see him charge his third Mortal Steel stack, stand diagonally to dodge the tornado, and save Lightning Rush specifically for his Soul Unbound forward dash. If he misses his knockup, immediately chase his spirit back with Slicing Maelstrom to burst him down the moment he is forced to snap back to his body.
TeamfightsMassenkontrolleTeemo relies heavily on Blinding Dart to shut down marksmen, but your primary damage comes from spell rotations rather than basic attacks. When he tries to blind you, you can easily retaliate with Thundering Shuriken and Electrical Surge to trigger Mark of the Storm. Furthermore, once both of you unlock your ultimates, Slicing Maelstrom completely eclipses his Noxious Trap in skirmishes, giving you a massive teamfight advantage.Teemo Build →Details ansehen
Teemo
Warum
Teemo relies heavily on Blinding Dart to shut down marksmen, but your primary damage comes from spell rotations rather than basic attacks. When he tries to blind you, you can easily retaliate with Thundering Shuriken and Electrical Surge to trigger Mark of the Storm. Furthermore, once both of you unlock your ultimates, Slicing Maelstrom completely eclipses his Noxious Trap in skirmishes, giving you a massive teamfight advantage.
Lane-Einfluss
The lane remains relatively peaceful early, but the dynamic shifts dramatically once you have access to your full basic kit. Teemo cannot safely step up to poke with Toxic Shot without risking a quick Lightning Rush engage. You can easily match his wave clear while keeping him pinned under tower. When neutral fights erupt, his local Noxious Trap setups cannot compete with your teleport or flank flanks using Slicing Maelstrom.
Wie man spielt
Force trades when his Blinding Dart is on cooldown, but do not hesitate to engage even if he blinds you, as your Lightning Rush and Electrical Surge combo will still melt his health bar. Save your Slicing Maelstrom for river skirmishes where Teemo has not had time to plant Noxious Trap. If he hides using Guerrilla Warfare, sweep the brush with Thundering Shuriken to reveal him and secure an easy stun.
KartendruckFrüher DruckKennen's ranged status allows you to safely poke Talon with basic attacks and Thundering Shuriken whenever he steps up to farm. Talon's main tool to fight back, Rake, can be dodged, but his real threat is roaming. Because Assassin's Path lets him jump walls to gank your allies, your primary job is matching his wave clear. Using Lightning Rush to quickly burn down minions prevents him from leaving.Talon Build →Details ansehen
Talon
Warum
Kennen's ranged status allows you to safely poke Talon with basic attacks and Thundering Shuriken whenever he steps up to farm. Talon's main tool to fight back, Rake, can be dodged, but his real threat is roaming. Because Assassin's Path lets him jump walls to gank your allies, your primary job is matching his wave clear. Using Lightning Rush to quickly burn down minions prevents him from leaving.
Lane-Einfluss
This matchup turns into a constant push battle. Early on, you can deny him gold and force him under tower. However, if Talon clears the wave with Rake and disappears, you cannot follow him through the jungle safely. You must keep the pressure high on his tower. Shoving him in forces him to choose between losing waves of gold or staying put, neutralizing his map-wide threat.
Wie man spielt
To win this, use your passive Electrical Surge attack to poke him, and save Lightning Rush specifically for clearing the wave when he starts using Rake. Do not waste Lightning Rush aggressively if you do not know where his jungler is, as it is your only escape. If Talon manages to slip away using Assassin's Path despite your push, do not chase him into unwarded areas; instead, immediately crash the wave and ping your team.
Vorteil: kanonisches Urteil von Wild Rift Core (−3 bis +3), aus Sicht des in der Zeile genannten Champions. Siegrate und Pickrate: die eigenen Werte des Gegners in dieser Rolle — Wild Rift CN · Challenger, Patch 7.3b. Keine Siegrate im direkten Duell.
Vorteil: kanonisches Urteil von Wild Rift Core (−3 bis +3), aus Sicht des in der Zeile genannten Champions. Siegrate und Pickrate: die eigenen Werte des Gegners in dieser Rolle — Wild Rift CN · Challenger, Patch 7.3b. Keine Siegrate im direkten Duell.
Wie man diesen Champion kontert
Konter-Winkel
Kennen verliert Matchups nicht rein wegen Stats oder Trades, sondern weil bestimmte Champions seinen gesamten Spielplan durchkreuzen. Sein Ziel ist nicht, die Lane zu gewinnen, sondern seine Power-Spikes zu erreichen und im Teamfight Winkel zu finden. Die effektivsten Konter sind diejenigen, die ihn entweder daran hindern, diese Phase sicher zu erreichen, oder seine Engage-Ausführung stören. Dazu gehören Champions, die ihn vor Level 5 bestrafen, seine Einstiege blockieren oder seinen anfänglichen Burst überleben.
Patch-Kontext
Kennens Konter nutzen drei Schwächen aus: seine frühe Zerbrechlichkeit, seine Abhängigkeit von seiner Ultimate und sein Bedürfnis, ins gegnerische Team zu dive'n. Champions, die ihn schnell bursten, ihn während des Engages CC'n oder den Zugang zur Backline verwehren, reduzieren seinen Wert drastisch. Zusätzlich können einige Bruiser seinen anfänglichen Combo überleben und Extended Trades erzwingen, die er nicht gewinnen kann.
Schnell gelesen
Frühe aggressive Champions stören sein Scaling.
CC während seines Engages bricht seinen Impact.
Durable Tanks können seinen Burst absorbieren.
Konter-Archetypen
Frühe aggressive Bruiser
Diese Champions bestrafen Kennen, bevor er seine Schlüssel-Spikes erreicht. Sie können konstante Trades erzwingen, seine Positionierung einschränken und Kills drohen, wenn er zu nahe kommt. Kennen verlässt sich auf eine stabile Laning-Phase, aber gegen diese Profile wird er zu defensivem Spiel gezwungen, was seinen Gesamt-Impact verzögert.
Wie sich der Champion anpasst. Spiel sicher, priorisiere defensive Boots und vermeide Extended Trades. Das Ziel ist, bis zu den Objective-Fights zu überleben.
Direkte Engage- und CC-Champions
Diese Champions können Kennen vor oder während seines Engages unterbrechen. Da er ins gegnerische Team dive'n muss, reduziert jeder Instant-CC oder Burst seine Fähigkeit, Marks zu stacken und seine Ultimate voll auszunutzen. Sie verwandeln seine Stärke in eine Schwäche.
Wie sich der Champion anpasst. Warte auf gegnerische Cooldowns, priorisiere Flanken und vermeide Frontal-Engages.
Durable Duellanten
Diese Champions können Kennens anfänglichen Burst überleben und ihn zu Extended Trades zwingen. Da Kennen keinen echten Sustain hat, verliert er diese Duelle im Laufe der Zeit. Sie schränken auch seinen Side-Lane-Druck ein und reduzieren seine strategischen Optionen.
Renekton ist ein klassisches Beispiel für ein Matchup, das Kennen daran hindert, sein Spiel zu spielen. Sein früher Druck zwingt Kennen, sich ständig zurückzuziehen, was seine Items verzögert und seine Impact-Timings reduziert. Zusätzlich bestraft sein schneller Burst jede Positionsfehler. Gegen ihn muss Kennen Aggression aufgeben und sich ausschließlich auf das Überleben und das Scaling in Teamfights konzentrieren.
Häufige Fehler gegen ihn
Häufige Fehler gegen ihn
Unterschätzung des frühen Bruiser-Schadens.
Engagieren ohne Prüfung des gegnerischen CCs.
Erzwingen von Extended Trades in der Lane.
Ignorieren von gegnerischen Cooldown-Timings.
Nicht defensive Anpassung des Builds.
Coach-Notizen
Dein Ziel ist es nicht, die Lane zu gewinnen, sondern sie nicht zu verlieren.
Jeder fehlgeschlagene Engage gegen einen Konter ist extrem kostspielig.
FAQ
Was ist der schlimmste Matchup-Typ für Kennen?
Die härtesten Matchups sind jene, die frühen Druck mit der Fähigkeit kombinieren, schnell zu bestrafen. Kennen braucht Zeit, um seine Spikes zu erreichen, daher reduzieren Champions, die ihn zu frühem Druck zwingen, seinen Gesamteinfluss erheblich.
Wie solltest du gegen seine Konter spielen?
Du musst deinen Spielplan anpassen: Spiele defensiver auf der Lane, priorisiere das Überleben und vermeide unnötige Trades. Dein Ziel ist es, Teamfights mit deinen wichtigsten Ressourcen zu erreichen. Selbst in schlechten Matchups kann Kennen nützlich bleiben, wenn er einen guten Engage ausführt.
Warum verliere ich Duelle, selbst wenn ich vorne liege?
Weil Kennen nicht für ausgedehnte Duelle ausgelegt ist. Selbst mit einem Vorsprung können einige Champions deinen Burst absorbieren und dich über Zeit besiegen. Dein Vorteil sollte genutzt werden, um die Karte zu beeinflussen, nicht um 1v1s zu erzwingen.
Sollte ich in schwierigen Matchups roamen?
Ja, aber vorsichtig. Wenn du deine Lane nicht gewinnen kannst, versuche, Objectives oder mid-Fights zu beeinflussen. Du musst jedoch deine Wave richtig managen, um nicht zu viele Ressourcen zu verlieren, wenn du die Lane verlässt.