August 2026 · Patch 7.2d
Tank · TOP

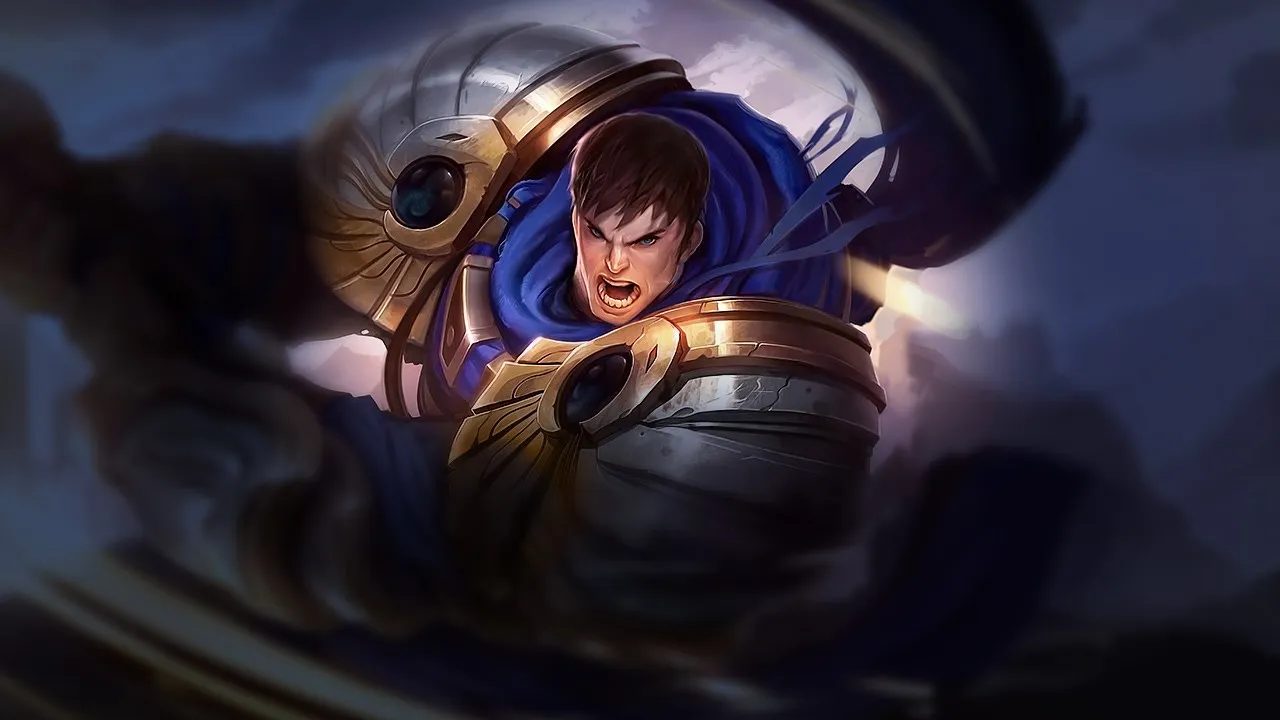
Garen Wild Rift Counter-Guide

Garen tut sich schwer gegen Kompositionen, die ihn kiten oder die Distanz kontrollieren können. Quellen für dauerhaften poke, wiederholte slows oder geschichtete crowd control hindern ihn daran, prioritäre Ziele zu erreichen. Ohne direkten Zugriff verpufft sein frontline pressure schnell.

★ TOP Tier A
SCHADEN
UTIL
TANK
DIFF
Win 50.0% #60 · ↓3pt
Pick 14.1% #2
Ban 4.4% #47

Garen Wild Rift Counter-Guide ★ Counter Sheet

Hard Counters

3

Diese Champions haben ein Build und einen Spielstil, der deinen direkt überlegen ist, was die Kontrolle der Lane und das Farmen extrem schwierig machen kann. Ihr Kit kann deine Kernstärken neutralisieren oder dich bestrafen, sobald du versuchst, deinen gewohnten Spielplan umzusetzen. In diesen Matchups geht es oft darum, Fehler zu minimieren und nach Wegen zu suchen, außerhalb der direkten Konfrontation zu gewinnen.

Vayne

Vayne

true_damagekiting This matchup is highly unfavorable for Garen because Vayne completely neutralizes your engage. Every time you activate Decisive Strike to cleanse slows and rush toward her, she can instantly cast Condemn to knock you back before you can strike. This denial, paired with her Tumble to dodge and Silver Bolts to shred your health with true damage, makes closing the distance nearly impossible without a mistake on her part. Details ansehen
Vayne

Warum

This matchup is highly unfavorable for Garen because Vayne completely neutralizes your engage. Every time you activate Decisive Strike to cleanse slows and rush toward her, she can instantly cast Condemn to knock you back before you can strike. This denial, paired with her Tumble to dodge and Silver Bolts to shred your health with true damage, makes closing the distance nearly impossible without a mistake on her part.

Lane-Einfluss

You are forced into a purely defensive posture, trapped under your turret while Vayne dictates the minion waves. Attempting to contest farm results in her triggering Silver Bolts repeatedly, forcing early recalls that cost massive gold and experience. Because you cannot trade back, Vayne freely chips away at your tower plates, securing a massive gold advantage while scaling safely into a late-game threat without any map pressure from your side.

Wie man spielt

To survive, sacrifice gold and focus on securing experience. Keep the wave just outside your turret's range to minimize her chase space. Never use Decisive Strike offensively unless she wastes Condemn. Instead, hold Courage to absorb the third strike of Silver Bolts when she pokes you under tower. If she freezes the lane near her turret, do not walk up; hide in the brush and let her push back.

Vollständiges Profil →
Gwen

Gwen

true_damagemagic_defense Gwen completely neutralizes your defensive scaling because her Snip Snip! center cuts deal percentage health true damage, augmented by A Thousand Cuts. When you activate Courage to absorb her burst, its damage reduction and shield are entirely ignored by this true damage. Since your natural tankiness is bypassed, you cannot win extended trades against her continuous healing, making her scaling advantage insurmountable in straight duels. Details ansehen
Gwen

Warum

Gwen completely neutralizes your defensive scaling because her Snip Snip! center cuts deal percentage health true damage, augmented by A Thousand Cuts. When you activate Courage to absorb her burst, its damage reduction and shield are entirely ignored by this true damage. Since your natural tankiness is bypassed, you cannot win extended trades against her continuous healing, making her scaling advantage insurmountable in straight duels.

Lane-Einfluss

You are forced into a defensive posture where contesting waves becomes incredibly risky. Whenever you try to clear with Judgment, Gwen can easily reposition with Skip 'n Slash to align her Snip Snip! stacks on you. This constant threat of true damage pushes you under your turret, forcing frequent recalls and sacrificing early priority, which prevents you from assisting your jungler or rotating.

Wie man spielt

To survive, shift your build path heavily toward magic resistance rather than general health to mitigate her A Thousand Cuts and Needlework. In lane, never initiate with Decisive Strike; save its silence and movement speed boost to cleanse the slow from Needlework and escape her zone. If she misses her fully stacked Snip Snip!, use Perseverance passively behind your turret to recover your health before attempting to contest the next wave.

Vollständiges Profil →
Olaf

Olaf

true_damagecc_immunity Olaf completely shuts down your main trading pattern. Normally, you rely on Decisive Strike to silence your opponent and prevent retaliation while you spin. However, once Olaf activates Ragnarok, he becomes entirely immune to your silence. This allows him to ignore your crowd control completely and continuously bash you with Reckless Swing's true damage while his Berserker Rage ramps up his attack speed as he gets lower. Details ansehen
Olaf

Warum

Olaf completely shuts down your main trading pattern. Normally, you rely on Decisive Strike to silence your opponent and prevent retaliation while you spin. However, once Olaf activates Ragnarok, he becomes entirely immune to your silence. This allows him to ignore your crowd control completely and continuously bash you with Reckless Swing's true damage while his Berserker Rage ramps up his attack speed as he gets lower.

Lane-Einfluss

You cannot contest waves or take short trades safely. If Olaf lands Undertow, he can run you down, and using Decisive Strike to cleanse the slow only works once; he will just pick up his axe to reset the cooldown. You are forced under your turret, losing priority and bleeding gold. Trading is suicidal because his Vicious Strikes will easily out-sustain any chip damage you attempt to regenerate with Perseverance.

Wie man spielt

Drop your standard offensive build path and rush defensive armor and health to survive his true damage. During trades, activate Courage immediately when he swings for Reckless Swing to mitigate the burst. Save Decisive Strike strictly as a mobility tool to escape after he throws Undertow, rather than using it to engage. Never cast Demacian Justice unless you are certain it executes him, as Berserker Rage makes him deadlier at low health.

Vollständiges Profil →

Ungünstig

17

Diese Champions haben Werkzeuge, die ihnen im Kampf meist einen Vorteil verschaffen, ohne das Matchup unspielbar zu machen. Sie haben vielleicht mehr Reichweite, können deine Offensive besser abfangen oder haben mehr Möglichkeiten, auf deine Engages zu reagieren. Du musst deine Herangehensweise anpassen und sorgfältig die Momente wählen, in denen du den Kampf annimmst.

Fiora

Fiora

parry_timingscaling_gap Garen struggles because Fiora can easily react to the animation of Decisive Strike with Riposte. If she parries the strike, she completely blocks the silence, slows Garen's attack speed, and easily positions herself to hit the vitals from Duelist's Dance. This neutralizes Garen's main trading tool and leaves him entirely vulnerable to her Bladework follow-up without any way to fight back. Details ansehen
Fiora

Warum

Garen struggles because Fiora can easily react to the animation of Decisive Strike with Riposte. If she parries the strike, she completely blocks the silence, slows Garen's attack speed, and easily positions herself to hit the vitals from Duelist's Dance. This neutralizes Garen's main trading tool and leaves him entirely vulnerable to her Bladework follow-up without any way to fight back.

Lane-Einfluss

Fiora controls the wave dynamic because Garen cannot safely use Judgment to clear minions without exposing himself. Every time Garen steps forward, Fiora can poke with Lunge. If Garen attempts to retaliate, the threat of her blocking Decisive Strike forces him into a defensive posture, bleeding health and losing control over the lane's physical boundary near his turret.

Wie man spielt

To survive, you must bait Riposte. Run at Fiora with Decisive Strike active, but instead of attacking immediately, spin with Judgment next to her to force her defensive reaction. If she wastes Riposte, you have a short window where you can safely trade. Additionally, hug walls when she activates Grand Challenge to block her from hitting the final vital, and use Courage to mitigate her burst.

Vollständiges Profil →
Aatrox

Aatrox

spacingshort_tradessustain Aatrox controls this matchup because he can completely shut down your main engage tool. Whenever you activate Decisive Strike to close the distance, he uses the superior range of The Darkin Blade to hit his sweetspots, knocking you back and canceling your silence attempt. This allows him to safely poke you down while healing through Deathbringer Stance, rendering your passive Perseverance regeneration insufficient to keep up. Details ansehen
Aatrox

Warum

Aatrox controls this matchup because he can completely shut down your main engage tool. Whenever you activate Decisive Strike to close the distance, he uses the superior range of The Darkin Blade to hit his sweetspots, knocking you back and canceling your silence attempt. This allows him to safely poke you down while healing through Deathbringer Stance, rendering your passive Perseverance regeneration insufficient to keep up.

Lane-Einfluss

This spacing advantage forces you to concede wave control early on. You cannot contest his push without taking heavy, unreciprocated damage. If you get dragged in by Infernal Chains, you must waste Courage just to survive his full combo. Consequently, you are pushed under turret, bleeding health, which delays your recall timings and prevents you from helping your jungler contest the top-side river.

Wie man spielt

To survive, you must bait out the first two strikes of The Darkin Blade before attempting any trade. Walk forward to trigger his swings, then immediately step back. Once his sword goes on cooldown, activate Decisive Strike to silence him, spin with Judgment, and use Courage to mitigate his passive attack. If he triggers World Ender, immediately retreat and use your movement speed to run him out of his ultimate form.

Vollständiges Profil →
Darius

Darius

extended_tradesexecute_race Darius thrives on extended trades thanks to Hemorrhage, making short skirmishes essential for you. However, whenever you engage with Decisive Strike and spin with Judgment, Darius will wait out your spin and use Apprehend to pull you back as you retreat. This forces you into an extended fight where his passive stacks up, turning a favorable short trade into a deadly duel. Details ansehen
Darius

Warum

Darius thrives on extended trades thanks to Hemorrhage, making short skirmishes essential for you. However, whenever you engage with Decisive Strike and spin with Judgment, Darius will wait out your spin and use Apprehend to pull you back as you retreat. This forces you into an extended fight where his passive stacks up, turning a favorable short trade into a deadly duel.

Lane-Einfluss

This constant threat of being pulled back means you cannot trade recklessly near his tower. If Darius freezes the wave, you risk losing chunks of health or dying to Noxian Guillotine if you step up to farm with Judgment. You are forced to play defensively, relying on Perseverance to recover between his attempts to harass you with Decimate, sacrificing early wave control.

Wie man spielt

To survive, never initiate trades with Decisive Strike. Instead, save its movement speed boost to escape after he pulls you. If Darius misses Decimate, walk up to hit him with Judgment, but keep your finger on Courage to mitigate the damage of his Crippling Strike. If he grabs you with Apprehend first, immediately silence him with Decisive Strike and spin away, using the silence window to retreat safely before Hemorrhage stacks high.

Vollständiges Profil →
Sett

Sett

short_tradesshield_bait Sett dominates extended trades because Pit Grit and Knuckle Down out-damage you in melee range, while his Haymaker converts your own damage into a massive shield and true damage nuke. Because both champions possess high passive health regeneration, this becomes a war of attrition. The entire matchup hinges on Decisive Strike; you must silence Sett right as his grit bar peaks, preventing him from casting Haymaker before you disengage. Details ansehen
Sett

Warum

Sett dominates extended trades because Pit Grit and Knuckle Down out-damage you in melee range, while his Haymaker converts your own damage into a massive shield and true damage nuke. Because both champions possess high passive health regeneration, this becomes a war of attrition. The entire matchup hinges on Decisive Strike; you must silence Sett right as his grit bar peaks, preventing him from casting Haymaker before you disengage.

Lane-Einfluss

Sett's constant threat of Facebreaker forces you to respect his zone, making blind wave-clearing with Judgment highly dangerous. If he pulls you in, a simple trade escalates into a disaster. You cannot comfortably crash waves when his The Show Stopper is online, as he can slam you into his tower. Every bad trade where he lands a high-grit Haymaker forces you out of lane, granting him free plates and total wave control.

Wie man spielt

Initiate short trades with Judgment instead of leading with your silence. As Sett’s grit bar fills up, hit him with Decisive Strike to silence him, preventing his Haymaker, then immediately retreat while activating Courage to block his physical attacks. If you fail to silence him in time, quickly step sideways to dodge the center line of Haymaker while your shield is up. Lastly, never cast Demacian Justice while his golden shield is active; wait for it to decay.

Vollständiges Profil →
Camille

Camille

short_tradesscaling_gap This lane is dictated by how Camille's Adaptive Defenses neutralizes your main trade opener. Whenever you charge in with Decisive Strike, her auto-attack triggers a massive physical shield that completely absorbs your silence's damage. Because Garen relies on this initial burst to chunk her down before spinning with Judgment, her passive shield consistently wins her these short skirmishes, leaving you with negative trades if you force the issue. Details ansehen
Camille

Warum

This lane is dictated by how Camille's Adaptive Defenses neutralizes your main trade opener. Whenever you charge in with Decisive Strike, her auto-attack triggers a massive physical shield that completely absorbs your silence's damage. Because Garen relies on this initial burst to chunk her down before spinning with Judgment, her passive shield consistently wins her these short skirmishes, leaving you with negative trades if you force the issue.

Lane-Einfluss

You cannot afford to play aggressively or trade blows randomly. Camille will use Tactical Sweep to poke you down and prevent your Perseverance from regenerating your health. If you constantly push the wave, she can easily freeze it near her tower and run you down with Hookshot or trap you with The Hextech Ultimatum, forcing an early recall or costing your team jungle pressure.

Wie man spielt

To survive, let Camille push the minions toward your side. If she triggers Adaptive Defenses, immediately back away and wait out the two-second shield before trying to fight back with Judgment. When she engages with Hookshot, activate Courage to mitigate the incoming stun and the true damage from her second Precision Protocol strike. Once her shield is on cooldown, you can look for short trades before executing her with Demacian Justice.

Vollständiges Profil →
Mordekaiser

Mordekaiser

magic_defenseextended_trades Mordekaiser dominates this matchup by turning the lane into a raw test of stats where Garen struggles to match his magic damage. Once Darkness Rise activates, his persistent aura melts your health, while Death's Grasp keeps you from easily disengaging. If you try to execute him with Demacian Justice, his Indestructible shield can completely deny your ultimate, making standard short trades highly ineffective. Details ansehen
Mordekaiser

Warum

Mordekaiser dominates this matchup by turning the lane into a raw test of stats where Garen struggles to match his magic damage. Once Darkness Rise activates, his persistent aura melts your health, while Death's Grasp keeps you from easily disengaging. If you try to execute him with Demacian Justice, his Indestructible shield can completely deny your ultimate, making standard short trades highly ineffective.

Lane-Einfluss

You will constantly find yourself pushed under turret, as Mordekaiser easily clears waves while poking you with Obliterate. Trading directly is perilous because any extended fight triggers his passive aura. This constant pressure limits your ability to roam, forcing you to utilize Perseverance frequently under your tower to sustain through his relentless magic damage harass and avoid being forced into early, disadvantageous recalls.

Wie man spielt

To survive, pivot your early gold toward magic defense instead of raw damage. During skirmishes, your primary goal is to bait his abilities. When Mordekaiser pulls you into Realm of Death, never panic. You must absolutely save Courage to block his isolated Obliterate strike inside his ultimate. Use Decisive Strike to cleanse his slows, then spin with Judgment to shred him, but keep your defensive shield held strictly for his highest burst moment.

Vollständiges Profil →
Volibear

Volibear

extended_tradeshealing_reduction Volibear dominates long trades because Frenzied Maul heals him when biting a marked target. While your Perseverance requires you to retreat to regenerate, Volibear sustains directly through combat. If you stay within his reach after he marks you, his second bite negates all damage from Judgment. Your survival hinges entirely on using Decisive Strike to break his slow and escape before he bites you a second time. Details ansehen
Volibear

Warum

Volibear dominates long trades because Frenzied Maul heals him when biting a marked target. While your Perseverance requires you to retreat to regenerate, Volibear sustains directly through combat. If you stay within his reach after he marks you, his second bite negates all damage from Judgment. Your survival hinges entirely on using Decisive Strike to break his slow and escape before he bites you a second time.

Lane-Einfluss

Volibear's constant lightning from The Relentless Storm naturally pushes the wave, forcing you under tower. Because you cannot contest extended trades, you will bleed health whenever you try to freeze. If he lands Sky Splitter to shield himself while slowing you, you are forced to use Courage defensively. This leaves you vulnerable to a dive with Stormbringer, which disables your tower and forces early, costly recalls.

Wie man spielt

Never initiate with Decisive Strike. Instead, wait for Volibear to commit with Thundering Smash. The moment he stuns you, immediately trigger Courage to mitigate his burst and Sky Splitter damage. As the stun expires, activate Decisive Strike to cleanse any lingering slow and sprint away before he can trigger his healing Frenzied Maul. If he manages to mark you anyway, abandon the wave immediately and retreat until the mark fades.

Vollständiges Profil →
Yone

Yone

spacingburst_trade Yone holds the upper hand as the laning phase progresses because his Way of the Hunter and Mortal Steel let him DPS you down through your natural armor. However, the matchup pivots around his Soul Unbound. While Yone uses this spirit form to chunk your health, Garen can mitigate the final delayed burst with Courage, turning what should be a lethal trade into a manageable survival test. Details ansehen
Yone

Warum

Yone holds the upper hand as the laning phase progresses because his Way of the Hunter and Mortal Steel let him DPS you down through your natural armor. However, the matchup pivots around his Soul Unbound. While Yone uses this spirit form to chunk your health, Garen can mitigate the final delayed burst with Courage, turning what should be a lethal trade into a manageable survival test.

Lane-Einfluss

You will constantly find yourself pushed toward your turret. Yone easily secures wave control using the sweeping range of Spirit Cleave and Mortal Steel tornados. This pressure forces you to rely on Perseverance under your tower, sacrificing early gold. If you fail to time your defensive responses, his Fate Sealed will setup easy dives, forcing you into premature recalls and sacrificing top priority.

Wie man spielt

Position yourself deliberately near Yone’s physical anchor point whenever he casts Soul Unbound. Hold your Courage specifically for the moment his spirit is about to snap back, neutralizing the marked damage. Immediately follow up with Decisive Strike to silence him, preventing an instant Spirit Cleave shield, and spin with Judgment as he returns to his body. If he unlocks Fate Sealed, keep your distance unless your silence is ready to disrupt his flow.

Vollständiges Profil →
Teemo

Teemo

passive_regenblind_bait Teemo dominates the early game by abusing his range with Toxic Shot to constantly chip away at your health, rendering Perseverance difficult to trigger. His main defensive tool is Blinding Dart, which completely neutralizes your auto-attacks. Since Decisive Strike counts as a basic attack, striking while blinded wastes your main burst, whereas Judgment is a physical spell that ignores the blind status entirely. Details ansehen
Teemo

Warum

Teemo dominates the early game by abusing his range with Toxic Shot to constantly chip away at your health, rendering Perseverance difficult to trigger. His main defensive tool is Blinding Dart, which completely neutralizes your auto-attacks. Since Decisive Strike counts as a basic attack, striking while blinded wastes your main burst, whereas Judgment is a physical spell that ignores the blind status entirely.

Lane-Einfluss

This constant harassment forces you to concede early wave control and farm under your turret. Teemo will use Move Quick to maintain distance and space you out, eventually littering the lane and bushes with Noxious Trap. If you do not shift your early purchases toward heavy magic defense, you will be forced into frequent, costly recalls, allowing him to easily take your turret plates.

Wie man spielt

Pivot your early gold immediately into magic resistance to survive the toxic lane. During skirmishes, activate Courage to absorb the initial burst of Blinding Dart. While blinded, do not attempt to auto-attack; instead, immediately spin with Judgment to deal continuous damage. Once the blind effect ends, strike with Decisive Strike to silence him, preventing him from escaping with Move Quick, and finish the fight with Demacian Justice.

Vollständiges Profil →
Jayce

Jayce

slow_cleansegap_close Jayce dictates the pace of this matchup by shifting between ranged poke and melee defense. While you want to close the distance, his Transform Mercury Cannon gives him the tools to kite you indefinitely. The core issue is his Thundering Blow knockback; if you charge in blindly, he will simply swat you away, wasting your mobility and leaving you exposed to heavy ranged retaliation. Details ansehen
Jayce

Warum

Jayce dictates the pace of this matchup by shifting between ranged poke and melee defense. While you want to close the distance, his Transform Mercury Cannon gives him the tools to kite you indefinitely. The core issue is his Thundering Blow knockback; if you charge in blindly, he will simply swat you away, wasting your mobility and leaving you exposed to heavy ranged retaliation.

Lane-Einfluss

You will spend most of the early levels pushed under your turret, absorbing shockwaves. Jayce will attempt to whittle your health down, trying to disable your Perseverance passive with constant ranged basic attacks. Failing to dodge his poke means losing turret plating or being forced into a bad recall, which hands Jayce complete control over the top side of the map.

Wie man spielt

To win trades, you must bait out Thundering Blow before committing. Walk towards him menacingly to trigger his defensive instinct. If he jumps on you with To the Skies!, activate Courage to mitigate the burst. Once he uses his knockback, immediately activate Decisive Strike to break any lingering slows, close the remaining distance, and spin with Judgment. This setup ensures your Demacian Justice can actually reach him for the execute.

Vollständiges Profil →
Gnar

Gnar

slow_cleansespacing Gnar's constant shift between forms via Rage Gene makes this a grueling matchup where you are constantly poked from range in his Mini form. His Boomerang Throw applies a heavy slow to keep you at bay, but your Decisive Strike has the unique ability to purge this slow instantly. If you trigger this cleanse while his Hop is on cooldown, you can finally close the distance and trade. Details ansehen
Gnar

Warum

Gnar's constant shift between forms via Rage Gene makes this a grueling matchup where you are constantly poked from range in his Mini form. His Boomerang Throw applies a heavy slow to keep you at bay, but your Decisive Strike has the unique ability to purge this slow instantly. If you trigger this cleanse while his Hop is on cooldown, you can finally close the distance and trade.

Lane-Einfluss

Expect to spend most of the early levels pushed under your turret, bleeding minions while Gnar harasses you. Your Perseverance is crucial here to heal back the damage from his hyper-aggressive attacks. If you fail to maintain your health bar, Gnar will easily dive you when he transforms into Mega Gnar using his Boulder Toss to smash you against the tower walls, completely shutting down your lane.

Wie man spielt

Use the lane brushes to break Gnar's line of sight and minimize his free basic attacks. Never activate Decisive Strike before his Boomerang Throw actually hits you, or you will waste the cleanse. Once the projectile slows you, activate it immediately to break free. If Gnar has recently wasted Hop, charge in with Judgment. When he transforms, hold Courage to absorb the predictable stun from his Mega form's slam before executing him with Demacian Justice.

Vollständiges Profil →
Vladimir

Vladimir

sustain_battleuntargetable_bait Vladimir slowly wears you down with ranged Transfusion pokes while matching your Perseverance passive regeneration. The lane becomes a battle of attrition where you can't easily execute him. He holds a massive defensive tool: Sanguine Pool completely nullifies your ultimate, Demacian Justice. To secure any kill threat, you are forced to shut down his escape route by landing Decisive Strike first, preventing him from slipping away. Details ansehen
Vladimir

Warum

Vladimir slowly wears you down with ranged Transfusion pokes while matching your Perseverance passive regeneration. The lane becomes a battle of attrition where you can't easily execute him. He holds a massive defensive tool: Sanguine Pool completely nullifies your ultimate, Demacian Justice. To secure any kill threat, you are forced to shut down his escape route by landing Decisive Strike first, preventing him from slipping away.

Lane-Einfluss

Since Vladimir has no resource costs and heals off waves, trading health is usually a losing battle unless you fight during his specific ability downtimes. You will often find yourself pushed under turret, absorbing pressure while your Courage shields his fully charged Tides of Blood hits. If you fail to respect his third Transfusion spike, you will be forced into a bad recall, forfeiting lane priority.

Wie man spielt

Back away immediately when his blood bar fills, indicating an empowered Transfusion. To engage, bait his Sanguine Pool by running at him with Decisive Strike activated, but do not strike immediately; instead, spin with Judgment to shred his armor. Save your Demacian Justice until he is silenced by your Decisive Strike, or after his pool has ended. If you get chunked down, let Perseverance heal you safely behind your minions.

Vollständiges Profil →

Andere Matchups

Skill Matchups

12

Diese Matchups sind vor allem Duelle der Ausführung: Beide Champions haben glaubwürdige Wege, die Oberhand zu gewinnen. Eine wichtige ausgewichene Fähigkeit, ein richtig antizipierter Engage oder ein einziger Positionierungsfehler können reichen, um das Duell zu entscheiden. Das Matchup zu kennen und die richtigen Fenster zum Handeln zu erkennen, ist hier besonders wichtig.

Akali

Akali

silence_baitshroud_stalling This matchup revolves entirely around the interaction between your Decisive Strike and Akali's Twilight Shroud. When you charge forward to silence her, she will drop her shroud to instantly break line of sight. This forces your empowered attack to expire uselessly, denying you the chance to shred her armor with Judgment. Without that silence, she can easily dance around you, landing Five Point Strike and triggering her Assassin's Mark. Details ansehen
Akali

Warum

This matchup revolves entirely around the interaction between your Decisive Strike and Akali's Twilight Shroud. When you charge forward to silence her, she will drop her shroud to instantly break line of sight. This forces your empowered attack to expire uselessly, denying you the chance to shred her armor with Judgment. Without that silence, she can easily dance around you, landing Five Point Strike and triggering her Assassin's Mark.

Lane-Einfluss

Because Garen can shrug off poke with Perseverance, this lane becomes a slow battle of attrition determined by wave placement. Shoving too hard exposes you to long-lane chases where her Shuriken Flip and Perfect Execution can run you down. Keeping the minions closer to your turret neutralizes her dive threat, allowing you to safely regenerate health between her brief, energetic bursts of Five Point Strike.

Wie man spielt

Never initiate trades by blindly activating Decisive Strike. Instead, walk up to CS and save your silence to cleanse the slow from her Five Point Strike when she tries to poke. If she panics and drops Twilight Shroud, immediately retreat to your minion wave to deny her trade. Only activate Courage when you see her dash back with Shuriken Flip or when she commits to her Perfect Execution execute, minimizing her burst.

Vollständiges Profil →
Ambessa

Ambessa

shield_timingshort_trades This matchup is a pure duel of reaction times centered on your silence. Ambessa relies on her Repudiation shield to absorb the impact of your Decisive Strike and negate its silence. If she succeeds, she can easily counter-attack with Cunning Sweep and her highly mobile passive. However, if you force her to waste her shield, your Judgment will shred her while she is silenced and unable to dash away. Details ansehen
Ambessa

Warum

This matchup is a pure duel of reaction times centered on your silence. Ambessa relies on her Repudiation shield to absorb the impact of your Decisive Strike and negate its silence. If she succeeds, she can easily counter-attack with Cunning Sweep and her highly mobile passive. However, if you force her to waste her shield, your Judgment will shred her while she is silenced and unable to dash away.

Lane-Einfluss

The lane's wave control fluctuates entirely around these short skirmishes. When Repudiation is on cooldown, Ambessa must play defensively, allowing you to push the minion wave safely with Judgment. However, if she successfully parries your Decisive Strike, she gains complete lane priority, forcing you to use Courage defensively and giving her the perfect window to crash the wave and secure a clean recall.

Wie man spielt

To win this, never initiate trades with a direct Decisive Strike. Instead, run towards her to trigger her defensive instinct, then immediately spin with Judgment first. Once she panics and activates Repudiation, wait out the brief shield duration before striking her with your empowered silence. If she holds her shield, use Courage to mitigate her Cunning Sweep damage, and execute her with Demacian Justice only after her Repudiation is down.

Vollständiges Profil →
Renekton

Renekton

shield_timingshort_trades This matchup is a pure test of reflexes centered on Renekton's Ruthless Predator. If the crocodile catches you with his stun, especially when fueled by Reign of Anger, he will chunk your health bar and dash away safely using Slice and Dice. However, Garen possesses the perfect response: activating Courage right as the stun lands. Mitigating that burst and reducing the stun's duration completely neutralizes Renekton's trading power, turning an even lane into your favor. Details ansehen
Renekton

Warum

This matchup is a pure test of reflexes centered on Renekton's Ruthless Predator. If the crocodile catches you with his stun, especially when fueled by Reign of Anger, he will chunk your health bar and dash away safely using Slice and Dice. However, Garen possesses the perfect response: activating Courage right as the stun lands. Mitigating that burst and reducing the stun's duration completely neutralizes Renekton's trading power, turning an even lane into your favor.

Lane-Einfluss

When you successfully block his stun, Renekton is left vulnerable with extremely long recovery windows. This allows you to aggressively push the wave with Judgment while his Cull the Meek is insufficient to match your clear. If you fail to time your shield, you will be forced under turret, bleeding gold while your passive Perseverance slowly ticks. Winning these trades dictates who controls the top alcove and prevents Renekton from roaming.

Wie man spielt

Watch Renekton's fury bar closely; when it glows red, expect him to dash in. Do not waste Decisive Strike early; instead, hold it to cleanse the slow from Slice and Dice or to silence him before he can activate Dominus. If he manages to stun you without your Courage active, immediately retreat, let Perseverance restore your health pool, and do not contest the wave until your shield is fully available again.

Vollständiges Profil →
Urgot

Urgot

shield_timingexecute_threshold This matchup is a pure test of reflexes centered on Urgot's dash. When Urgot charges with Disdain, his goal is to flip you and trigger Echoing Flames shotgun blasts. By timing Courage to absorb the knockup, you mitigate his burst and gain critical tenacity. This prevents him from lowering your health pool into the execution threshold of Fear Beyond Death, turning his primary offensive tool into a wasted cooldown. Details ansehen
Urgot

Warum

This matchup is a pure test of reflexes centered on Urgot's dash. When Urgot charges with Disdain, his goal is to flip you and trigger Echoing Flames shotgun blasts. By timing Courage to absorb the knockup, you mitigate his burst and gain critical tenacity. This prevents him from lowering your health pool into the execution threshold of Fear Beyond Death, turning his primary offensive tool into a wasted cooldown.

Lane-Einfluss

Trades are incredibly short and dictated by Urgot's ability cooldowns. If Urgot wastes Disdain, he loses his only escape and shield, allowing you to shove the wave safely or force him under turret with Judgment. Your passive Perseverance guarantees you can heal back any poke from Corrosive Charge, meaning Urgot must secure a full all-in to actually push you out of the lane.

Wie man spielt

Never initiate trades with Decisive Strike if Urgot has Corrosive Charge ready; instead, save it to instantly cleanse his slow. Keep your finger on Courage and trigger it only when you see the startup animation of Disdain. If you successfully block his flip, immediately counter-attack with Judgment to shred his armor, putting him in range for Demacian Justice. If you misstime your shield, immediately retreat to avoid his passive shotgun legs.

Vollständiges Profil →
Jax

Jax

damage_mitigationshort_trades This skill matchup revolves around Jax's Counter Strike and how you respond to it. While his defensive spin completely nullifies your Decisive Strike silence, it does absolutely nothing to stop the damage and armor shred of your Judgment. Because your spin continues to shred Jax's health even while he is dodging auto-attacks, you can bypass his primary defensive tool and force him to play on your terms. Details ansehen
Jax

Warum

This skill matchup revolves around Jax's Counter Strike and how you respond to it. While his defensive spin completely nullifies your Decisive Strike silence, it does absolutely nothing to stop the damage and armor shred of your Judgment. Because your spin continues to shred Jax's health even while he is dodging auto-attacks, you can bypass his primary defensive tool and force him to play on your terms.

Lane-Einfluss

Trades are highly volatile and depend on who blinks first. If Jax initiates with Leap Strike and Counter Strike, you must immediately spin to match his damage. Failing to time your defensive Courage to absorb his stun allows Jax to stack Relentless Assault and chunk your health, giving him complete control over the wave state and forcing you into a defensive, low-pressure recall cycle under tower.

Wie man spielt

Never lead a trade with Decisive Strike when Jax's cooldowns are up; instead, walk up and trigger Judgment first. If he activates Counter Strike, stay glued to him with your spin, then press Courage right before his stun triggers. Once he is vulnerable and his defense is down, immediately follow up with Decisive Strike to silence him, preventing his Leap Strike escape, and execute him with Demacian Justice if his health is low.

Vollständiges Profil →
Ornn

Ornn

tenacity_checkarmor_shred This even matchup hinges entirely on how you mitigate Ornn's heavy CC combo. When Ornn attempts to trigger Brittle with Searing Charge against a pillar from Volcanic Rupture, your Courage is the ultimate counter. The massive tenacity and damage reduction from Courage allows you to shrug off his knockup almost instantly, turning what should be a devastating trade for Ornn into an opportunity for you to strike back. Details ansehen
Ornn

Warum

This even matchup hinges entirely on how you mitigate Ornn's heavy CC combo. When Ornn attempts to trigger Brittle with Searing Charge against a pillar from Volcanic Rupture, your Courage is the ultimate counter. The massive tenacity and damage reduction from Courage allows you to shrug off his knockup almost instantly, turning what should be a devastating trade for Ornn into an opportunity for you to strike back.

Lane-Einfluss

Miss the timing on Courage, and Ornn's Bellows Breath and Searing Charge will chunk your health bar, forcing you to retreat and rely passively on Perseverance. However, successfully reacting to his charge allows you to immediately silence him with Decisive Strike, shred his armor with Judgment, and dictate the wave's position. This constant pressure prevents Ornn from safely using Living Forge to outscale you in lane.

Wie man spielt

Never stand near walls or the pillar left by Volcanic Rupture; force Ornn to telegraph his Searing Charge. Always hold Courage specifically for the impact of his charge or the second activation of Call of the Forge God. If you are marked by Bellows Breath, do not run away immediately. Instead, wait for his forward dash, press Courage right before impact, and then immediately retaliate with Decisive Strike to silence him before spinning with Judgment.

Vollständiges Profil →
Tryndamere

Tryndamere

execute_timingdisengage This duel is a constant battle of attrition where your passive healing from Perseverance matches his Bloodlust sustain. You win short trades with quick bursts, but Tryndamere excels in extended fights once his Battle Fury is fully stacked. The lane hinges entirely on how you manage his ultimate window; executing him with Demacian Justice is impossible while Undying Rage is active, turning the matchup into a precise dance of baiting and disengaging. Details ansehen
Tryndamere

Warum

This duel is a constant battle of attrition where your passive healing from Perseverance matches his Bloodlust sustain. You win short trades with quick bursts, but Tryndamere excels in extended fights once his Battle Fury is fully stacked. The lane hinges entirely on how you manage his ultimate window; executing him with Demacian Justice is impossible while Undying Rage is active, turning the matchup into a precise dance of baiting and disengaging.

Lane-Einfluss

Tryndamere will constantly push to stack Battle Fury, forcing you to defend your turret. You cannot let him hit the wave for free, so you must contest his lane control with Judgment. However, overextending is fatal; if he catches you with your abilities on cooldown, he will chase you down the long lane using Spinning Slash and Mocking Shout, turning a simple trade into a deadly pursuit.

Wie man spielt

When Tryndamere commits, activate Courage immediately to absorb his high-crit damage. The absolute golden rule of this matchup is to save Decisive Strike for his ultimate. Once he triggers Undying Rage, do not try to fight him; immediately activate Decisive Strike to cleanse the slow from Mocking Shout, gain movement speed, and run away. Kite him out for those five seconds, then turn back to finish him.

Vollständiges Profil →
K'Santé

K'Santé

silence_interrupttrue_damage This matchup is a pure duel of timing around K'Santé's defensive tools. Garen's primary weapon is Decisive Strike, which silences K'Santé. This silence is critical because it prevents K'Santé from activating Path Maker to absorb the heavy physical damage from Judgment. If K'Santé cannot channel his damage reduction, Garen wins the raw trade. However, if K'Santé anticipates the blow, his block can negate Garen's entire offensive window. Details ansehen
K'Santé

Warum

This matchup is a pure duel of timing around K'Santé's defensive tools. Garen's primary weapon is Decisive Strike, which silences K'Santé. This silence is critical because it prevents K'Santé from activating Path Maker to absorb the heavy physical damage from Judgment. If K'Santé cannot channel his damage reduction, Garen wins the raw trade. However, if K'Santé anticipates the blow, his block can negate Garen's entire offensive window.

Lane-Einfluss

Laning revolves around baiting key abilities. K'Santé wants to stack Ntofo Strikes to threaten a knock-up, forcing Garen to waste Courage. When Garen holds Decisive Strike, K'Santé cannot safely use Footwork to trade, as he risks being silenced and spun down. A wasted Path Maker from K'Santé immediately grants Garen wave priority, allowing him to pressure the tower or safely heal up with Perseverance.

Wie man spielt

Do not initiate trades with Decisive Strike. Instead, approach K'Santé directly and begin spinning with Judgment. This pressure forces him to either take unmitigated damage or commit Path Maker early. The moment his channel ends, strike him with Decisive Strike to silence him, preventing any escape via Footwork. If K'Santé initiates with All Out, immediately activate Courage to survive his stat-boosted assault, then look to execute his reduced health pool with Demacian Justice.

Vollständiges Profil →

Andere Matchups

Günstig

14

Diese Champions tun sich meist schwer, auf deine Hauptstärken zu reagieren, was dir mehr Freiheit im Matchup gibt. Du hast oft mehrere Möglichkeiten, sie unter Druck zu setzen und Trades zu deinen Gunsten zu erzwingen. Nutze diesen Vorteil, um das Tempo zu bestimmen, statt ihnen Zeit zu geben, wieder in eine komfortable Position zu kommen.

Dr. Mundo

Dr. Mundo

juggernaut_duelexecute_threat This matchup revolves around Dr. Mundo attempting to stay in lane by baiting you with Blunt Force Trauma when low, relying on his passive health regeneration and Maximum Dosage to survive. However, Garen completely counters this strategy. Because Demacian Justice deals true damage based on missing health, it instantly executes him before his ultimate's health regeneration can tick up, turning his low-HP baiting into a death sentence. Details ansehen
Dr. Mundo

Warum

This matchup revolves around Dr. Mundo attempting to stay in lane by baiting you with Blunt Force Trauma when low, relying on his passive health regeneration and Maximum Dosage to survive. However, Garen completely counters this strategy. Because Demacian Justice deals true damage based on missing health, it instantly executes him before his ultimate's health regeneration can tick up, turning his low-HP baiting into a death sentence.

Lane-Einfluss

In lane, Dr. Mundo will try to farm and poke with Infected Bonesaw. You can easily shrug off this poke using Perseverance. When he walks up to hit minions with Blunt Force Trauma, use his cooldown windows to force short trades with Decisive Strike and Judgment. Since you do not rely on crowd control, his passive Goes Where He Pleases is useless, allowing you to dominate trades without wasting resources.

Wie man spielt

Stand behind your minions to block Infected Bonesaw, preventing Dr. Mundo from slowing you or healing. When he activates Heart Zapper, do not retreat; instead, activate Courage to mitigate the magic damage and stay in range. Keep spinning with Judgment to shred his armor, and silence him with Decisive Strike when he gets low. This prevents him from activating Maximum Dosage in time, setting up an easy execute with Demacian Justice.

Vollständiges Profil →
Nasus

Nasus

slow_cleanseearly_pressure This matchup heavily favors Garen due to a direct ability counter. Nasus relies entirely on Wither to isolate you, escape ganks, or force extended trades. However, Garen's Decisive Strike immediately cleanses this massive slow on activation. Because you can nullify his primary defensive and offensive tool at will, Nasus cannot safely trade or prevent you from shredding him with Judgment. Details ansehen
Nasus

Warum

This matchup heavily favors Garen due to a direct ability counter. Nasus relies entirely on Wither to isolate you, escape ganks, or force extended trades. However, Garen's Decisive Strike immediately cleanses this massive slow on activation. Because you can nullify his primary defensive and offensive tool at will, Nasus cannot safely trade or prevent you from shredding him with Judgment.

Lane-Einfluss

You dictate the minion waves from the very first level. By holding the wave near your tower, you force Nasus to choose between stepping up to stack Siphoning Strike and taking heavy damage, or using Spirit Fire to farm. Your passive Perseverance ensures you out-sustain him, allowing you to build a massive minion crash and dive him when his Fury of the Sands is down.

Wie man spielt

Never initiate a trade by leading with Decisive Strike. Instead, simply walk up to Nasus and begin spinning with Judgment. Force him to panic-cast Wither to escape your damage. The moment the slow hits you, press Decisive Strike to instantly break the control, silence him, and secure the trade. If he activates Fury of the Sands, mitigate his retaliatory burst with Courage and walk away, returning to execute him with Demacian Justice once his ultimate expires.

Vollständiges Profil →
Shen

Shen

armor_shredmap_pressure Garen naturally dominates this matchup because his Judgment bypasses the auto-attack blocking zone of Shen's Spirit's Refuge while shredding his armor. Shen relies on Ki Barrier to absorb short trades, but the continuous physical damage of the spin quickly melts through his defenses. Furthermore, Shen lacks the tools to match Garen's rapid wave clear, turning every wave into a pressure point. Details ansehen
Shen

Warum

Garen naturally dominates this matchup because his Judgment bypasses the auto-attack blocking zone of Shen's Spirit's Refuge while shredding his armor. Shen relies on Ki Barrier to absorb short trades, but the continuous physical damage of the spin quickly melts through his defenses. Furthermore, Shen lacks the tools to match Garen's rapid wave clear, turning every wave into a pressure point.

Lane-Einfluss

This dynamic creates a relentless push that locks Shen under his turret, neutralizing his map presence. Whenever Shen attempts to influence other lanes with Stand United, he faces an impossible choice. Leaving the lane means Garen will immediately demolish his tower plates. Even if Shen stays, he is slowly chipped down under turret without any hope of matching Garen's recall timings or map priority.

Wie man spielt

Constantly shove the waves using Judgment to force Shen to farm under turret. Keep your Decisive Strike ready when Shen has his ultimate; the silence will instantly interrupt his Stand United channel if you react quickly. If he manages to taunt you with Shadow Dash, immediately activate Courage to reduce the incoming damage from his Twilight Assault empowered attacks, then counter-attack with your spin before executing him with Demacian Justice.

Vollständiges Profil →
Irelia

Irelia

silence_interruptshort_trades Garen dominates this matchup by turning Irelia's mobility into her trap. The moment she prepares to bounce between minions, your Decisive Strike silences her. This brief silence completely locks her out of Bladesurge, preventing her from securing resets on marked targets. Without her constant dashes, she cannot easily stack Ionian Fervor, stripping away her dueling power and leaving her extremely vulnerable to a full Judgment spin. Details ansehen
Irelia

Warum

Garen dominates this matchup by turning Irelia's mobility into her trap. The moment she prepares to bounce between minions, your Decisive Strike silences her. This brief silence completely locks her out of Bladesurge, preventing her from securing resets on marked targets. Without her constant dashes, she cannot easily stack Ionian Fervor, stripping away her dueling power and leaving her extremely vulnerable to a full Judgment spin.

Lane-Einfluss

This silence threat dictates the lane's flow, forcing Irelia to play defensively. She cannot freely thin the wave, allowing you to establish permanent lane priority and slow-push at will. When she attempts to trade using Flawless Duet, activating Courage neutralizes her stun and subsequent burst. You can then comfortably dive or force her to recall, steadily building a massive gold lead while denying her any roam opportunities.

Wie man spielt

Never initiate trades blindly with Decisive Strike. Instead, stand near your low-health caster minions and strike her the millisecond she dashes in to last-hit. If she tries to mitigate your subsequent Judgment by channeling Defiant Dance, do not panic. Simply walk with her, let the spin shred her armor, and hold your Demacian Justice until her defensive channel ends to guarantee a clean, unmitigated execute when her health drops.

Vollständiges Profil →
Riven

Riven

silence_interruptdamage_mitigation Garen dominates this matchup because Riven relies entirely on chaining her active spells to stack Runic Blade. By hitting her with Decisive Strike when she commits to her Broken Wings combo, you silence her instantly. This abrupt disruption leaves her completely unable to dash away or absorb your retaliatory damage with Valor, turning her aggressive trade into a highly vulnerable window where she can only walk away. Details ansehen
Riven

Warum

Garen dominates this matchup because Riven relies entirely on chaining her active spells to stack Runic Blade. By hitting her with Decisive Strike when she commits to her Broken Wings combo, you silence her instantly. This abrupt disruption leaves her completely unable to dash away or absorb your retaliatory damage with Valor, turning her aggressive trade into a highly vulnerable window where she can only walk away.

Lane-Einfluss

Because Riven cannot safely trade into you, she is forced to play defensively, giving you complete control over the wave. You can freely trigger Perseverance to heal any minor poke while keeping her trapped under her tower. If she tries to contest the wave, your superior health pool from these asymmetric trades allows you to easily dive her or force her to recall, costing her massive gold and experience.

Wie man spielt

Do not waste Decisive Strike on minion last-hits; keep it ready to counter her initiations. When she dashes forward with Broken Wings, activate Courage to absorb her initial knock-up and Ki Burst stun, then immediately strike back with Decisive Strike to silence her. While she is silenced and unable to trigger Valor, spin through her with Judgment and execute her with Demacian Justice before she can recover her mobility.

Vollständiges Profil →
Kayle

Kayle

early_pressureexecute_timing Garen dictates this matchup because Kayle is weak before Divine Ascent fully matures. The entire dynamic centers on a race to level 5. Once both of you unlock your ultimates, your win condition is straightforward: you must catch her with Decisive Strike to apply the silence. This brief window prevents her from casting Divine Judgment, allowing you to instantly execute her with Demacian Justice before she can react. Details ansehen
Kayle

Warum

Garen dictates this matchup because Kayle is weak before Divine Ascent fully matures. The entire dynamic centers on a race to level 5. Once both of you unlock your ultimates, your win condition is straightforward: you must catch her with Decisive Strike to apply the silence. This brief window prevents her from casting Divine Judgment, allowing you to instantly execute her with Demacian Justice before she can react.

Lane-Einfluss

Early on, Kayle relies on Starfire Spellblade to last hit and Radiant Blast to slow your approaches. However, Perseverance easily negates this poke. By constantly threatening to engage, you force Kayle to waste mana on Celestial Blessing to run away. This constant pressure pushes her under turret, letting you control the wave tempo and dive her the moment she falls into execution range.

Wie man spielt

When initiating trades, wait for Kayle to launch Radiant Blast before activating Decisive Strike to instantly cleanse the slow. Once you close the gap, silence her first, then shred her armor with Judgment while mitigating any retaliation with Courage. If she plays defensively near her tower, freeze the minion wave on your side to force her to overextend, making her an easy target for your silence-into-execute burst combination.

Vollständiges Profil →
Sion

Sion

silence_interruptarmor_shred Garen dominates this matchup because he can systematically shut down Sion's main source of pressure. Whenever Sion channels Decimating Smash, you can immediately activate Decisive Strike to cleanse any slow from Roar of the Slayer and silence him. This silence instantly cancels his heavy axe swing, forcing his primary damage tool into cooldown and leaving his massive hitbox completely defenseless against your high-damage trades. Details ansehen
Sion

Warum

Garen dominates this matchup because he can systematically shut down Sion's main source of pressure. Whenever Sion channels Decimating Smash, you can immediately activate Decisive Strike to cleanse any slow from Roar of the Slayer and silence him. This silence instantly cancels his heavy axe swing, forcing his primary damage tool into cooldown and leaving his massive hitbox completely defenseless against your high-damage trades.

Lane-Einfluss

This interaction completely dictates the lane's wave dynamics. Sion cannot safely position himself to clear minions, as trying to charge his axe exposes him to an immediate silence and a devastating spin from Judgment. You can constantly freeze the wave or force him under his turret, stripping away his passive health scaling from Glory in Death while mitigating his explosive Soul Furnace shield with a well-timed Courage.

Wie man spielt

Never initiate trades with Decisive Strike randomly; instead, walk up to farm and hold this ability specifically to react to Sion's red charging indicator. If he activates Soul Furnace to absorb damage, spin through his shield with Judgment to shred his armor, then execute him with Demacian Justice once he is low. If he attempts to escape using Unstoppable Onslaught at close range, react quickly with Courage to absorb the initial knock-up impact.

Vollständiges Profil →
Malphite

Malphite

slow_cleansepassive_regen Garen commands this matchup because Malphite's signature lane-harass is entirely neutralized. When Malphite hurls Seismic Shard to chip away at your health and run, activating Decisive Strike instantly removes the movement speed steal. Furthermore, any minor damage Malphite manages to stick on you is quickly erased by Perseverance, allowing you to stay healthy while he drains his limited mana pool. Details ansehen
Malphite

Warum

Garen commands this matchup because Malphite's signature lane-harass is entirely neutralized. When Malphite hurls Seismic Shard to chip away at your health and run, activating Decisive Strike instantly removes the movement speed steal. Furthermore, any minor damage Malphite manages to stick on you is quickly erased by Perseverance, allowing you to stay healthy while he drains his limited mana pool.

Lane-Einfluss

This resource disparity gives you complete authority over the minion waves. Since Malphite cannot realistically poke you down, you can comfortably slow-push waves into his turret. This forces him to burn his mana on Ground Slam and Thunderclap to secure last hits under tower. He will constantly face bad recall timings, giving you free opportunities to chip his plates or invade the jungle.

Wie man spielt

Never activate Decisive Strike before his projectile hits you; wait for Seismic Shard to impact, then cleanse the slow to run him down. Spin immediately with Judgment to shred his Granite Shield and armor. If he fights back, trigger Courage to block the burst from Ground Slam. Keep pushing waves to deny him roam opportunities with Unstoppable Force, and execute him with Demacian Justice once his health bars dwindle under tower.

Vollständiges Profil →
Pantheon

Pantheon

shield_timingpassive_regen Garen dominates this matchup because Pantheon relies heavily on poking with an empowered Comet Spear to set up his burst. By timing Courage to intercept this specific thrust, you negate his primary source of damage. Even if Pantheon lands a few hits, your Perseverance passive quickly restores your health while he burns through mana, turning his aggressive lane-bully playstyle into wasted resources. Details ansehen
Pantheon

Warum

Garen dominates this matchup because Pantheon relies heavily on poking with an empowered Comet Spear to set up his burst. By timing Courage to intercept this specific thrust, you negate his primary source of damage. Even if Pantheon lands a few hits, your Perseverance passive quickly restores your health while he burns through mana, turning his aggressive lane-bully playstyle into wasted resources.

Lane-Einfluss

Pantheon is forced to play defensively once his burst fails to dent your health bar. Since his Aegis Assault has an incredibly long cooldown, you can easily zone him from the minion wave after he wastes it. This allows you to slow push waves into his turret, forcing him to choose between losing gold or using Grand Starfall just to return to lane rather than roaming to help his team.

Wie man spielt

Watch Pantheon's passive bar closely; when it glows red, expect an empowered Comet Spear or Shield Vault. Activate Courage right as he lunges, then immediately silence him with Decisive Strike to prevent him from raising Aegis Assault. Spin through him with Judgment while his block is disabled. If you misstime your shield and take heavy damage, retreat behind your caster minions to let Perseverance safely restore your health before trading again.

Vollständiges Profil →

Andere Matchups

Items to Counter Garen

Buy these items to reduce this champion's effectiveness in your games.

Bramble Vest
Bramble Vest
Executioner's Calling
Plated Steelcaps
Plated Steelcaps
Randuin's Omen
Randuin's Omen
Frozen Heart
Frozen Heart

Wie man diesen Champion kontert

Konter-Winkel

Garens Konter basieren nicht nur auf Stats oder direkten Matchups, sondern auf Mechaniken, die sein Kernmuster durchbrechen: schnell rein, ein Ziel bursten und den Trade beenden. Immer wenn ein Champion Kämpfe verlängern, sein Timing stören oder seinen Engage bestrafen kann, verliert Garen deutlich an Wert. Diese Seite sollte nicht als einfache Liste von Kontern gelesen werden, sondern als Rahmen, um zu verstehen, warum bestimmte Profile ihn komplett neutralisieren.

Patch-Kontext

Im aktuellen Patch hat Garen hauptsächlich Probleme gegen Champions, die das Kampftempo kontrollieren. Duellanten, die Trades verlängern und auf seinen Burst reagieren, zwingen ihn aus seinem Spielplan. Mobile Fernkämpfer verwehren ihm einfach den Zugang. Gleichzeitig können einige Bruiser seinen anfänglichen Burst absorbieren und ihn in längeren Kämpfen ausskalieren. Der gemeinsame Nenner: Sie verwehren ihm das kurze Zeitfenster, in dem Garen stark ist.

Schnell gelesen

  • Er hat Probleme gegen Champions, die Trades verlängern.
  • Er kann nicht gegen konstantes Kiting spielen.
  • Er hat Probleme, wenn sein anfänglicher Burst nicht ausreicht.

Konter-Archetypen

Verlängerte Duellanten

Diese Champions brechen Garens kurzes Trade-Muster komplett. Sie absorbieren seinen anfänglichen Burst und verlängern den Kampf, in dem Garen schwach wird. Fiora bestraft jeden Engage mit ihren Duell-Mechaniken, während Jax einen Teil seines Schadens negieren und ihn in längeren Kämpfen ausskalieren kann. In diesen Matchups kann Garen nicht einfach rein und raus: Er ist gezwungen, viel passiver zu spielen.

Wie sich der Champion anpasst. Begrenze Trades, konzentriere dich auf Wave-Resets und warte auf Gelegenheiten mit dem Jungler, anstatt 1v1-Kämpfe zu erzwingen.

Fernkampf-Kiting und Poke

Diese Champions verwehren Garen die Fähigkeit, aus der Laning-Phase heraus zu spielen. Sie halten ihn auf Distanz, zermürben ihn und machen seinen Engage extrem riskant. Selbst mit Bewegungsgeschwindigkeit muss er oft zu viele Ressourcen aufwenden, nur um sein Ziel zu erreichen. Sobald er engagiert, kann er weggestoßen oder geburstet werden, bevor er überhaupt seinen Ultimate einsetzt.

Wie sich der Champion anpasst. Spiele früh defensiv, stacke Resistenzen und warte auf mids Rotationen, anstatt Lane-Fights zu erzwingen.

Robuste Bruiser mit Tempo-Kontrolle

Diese Champions können Garens Burst absorbieren und sofort mit höherem Schaden oder besserer Trade-Kontrolle reagieren. Darius verwandelt kurze Trades in verlängerte Gefahr, während Renekton das Tempo diktiert und jeden Versuch, zu engagieren, bestraft. Garen verliert seinen Einfachheitsvorteil, weil er das Kampftempo nicht mehr kontrolliert.

Wie sich der Champion anpasst. Spiele um die Cooldowns des Gegners herum, vermeide direkte Trades und konzentriere dich auf Makro-Druck.

Prioritäts-Matchups

Fiora

Fiora ist eines von Garens anspruchsvollsten Matchups, weil sie jeden Trade in ein verlängertes Duell verwandelt. Sie kann seinen Engage präzise bestrafen und seine mangelnde echte Mobilität nach dem Engage ausnutzen. Garen muss die Lane-Dominanz aufgeben und sich rein auf Überleben und gegnerische Fehler konzentrieren.

Vayne

Vayne schaltet Garens Spielplan komplett aus. Sie kitet ihn ständig, bestraft ihn aus der Ferne und macht seinen Engage fast unmöglich ohne externe Hilfe. Selbst in mids Mid-Game bleibt sie eine ständige Bedrohung durch ihre Neupositionierung und die Fähigkeit, seinen Burst zu vermeiden.

Häufige Fehler gegen ihn

Häufige Fehler gegen ihn

  • Kurze Trades gegen Champions erzwingen, die für verlängerte Kämpfe ausgelegt sind.
  • Kiting ignorieren und versuchen, frontal zu engagieren.
  • Die Fähigkeit des Gegners unterschätzen, einen Trade zu drehen.
  • Die defensive Itemisierung nicht anpassen.
  • Sucht Kills statt die Lane zu pushen.

Coach-Notizen

  • Wenn du den kurzen Trade nicht gewinnst, dann lass es ganz sein.
  • Manche Matchups drehen sich darum, nicht zu sterben, nicht zu gewinnen.

FAQ

Warum verliert Garen gegen Duellanten?

Duellanten ziehen Kämpfe in die Länge, was genau das ist, was Garen vermeiden will. Sein Kit ist auf schnelle Trades und saubere Ausstiege ausgelegt. Wenn Kämpfe sich hinziehen, fehlen ihm der Schaden und die Werkzeuge, um mitzuhalten. Das zwingt Garen, viel passiver zu spielen und sich auf den Spielverlauf zu verlassen.

Wie spielt man gegen Fernkämpfer als Garen?

Du musst akzeptieren, dass du früh an Priorität verlierst und dich auf das Überleben konzentrieren. Staple Resistenzen, vermeide unnötige Trades und warte auf Gelegenheiten durch den Jungler oder Rotationen. Lane-Fights gegen Fernkämpfer zu erzwingen, führt oft zum Snowball des Gegners.

Kann Garen Darius schlagen?

Das Matchup ist sehr schwierig, weil Darius lange Trades gewinnt. Garen kann nur gewinnen, indem er kurze Trade-Zeitpunkte perfekt ausspielt und lange Kämpfe vermeidet. Ein einziger Positionsfehler kann die Lane kippen. Es ist ein Matchup, das Disziplin und Geduld erfordert.

Was ist die schlimmste Art von Konter für Garen?

Champions, die Kiting und Scaling kombinieren, sind das Schlimmste für Garen. Sie neutralisieren ihn in der Lane und bleiben während des gesamten Spiels gefährlich. Im Gegensatz zu Bruisern kann er nicht um ihre Cooldowns herum spielen. Sie erzwingen einen Spielstil, bei dem Garen fast keinen Raum zum Agieren hat.






















































