




















A
2026年9月 · Patch 7.2d
Tank · TOP

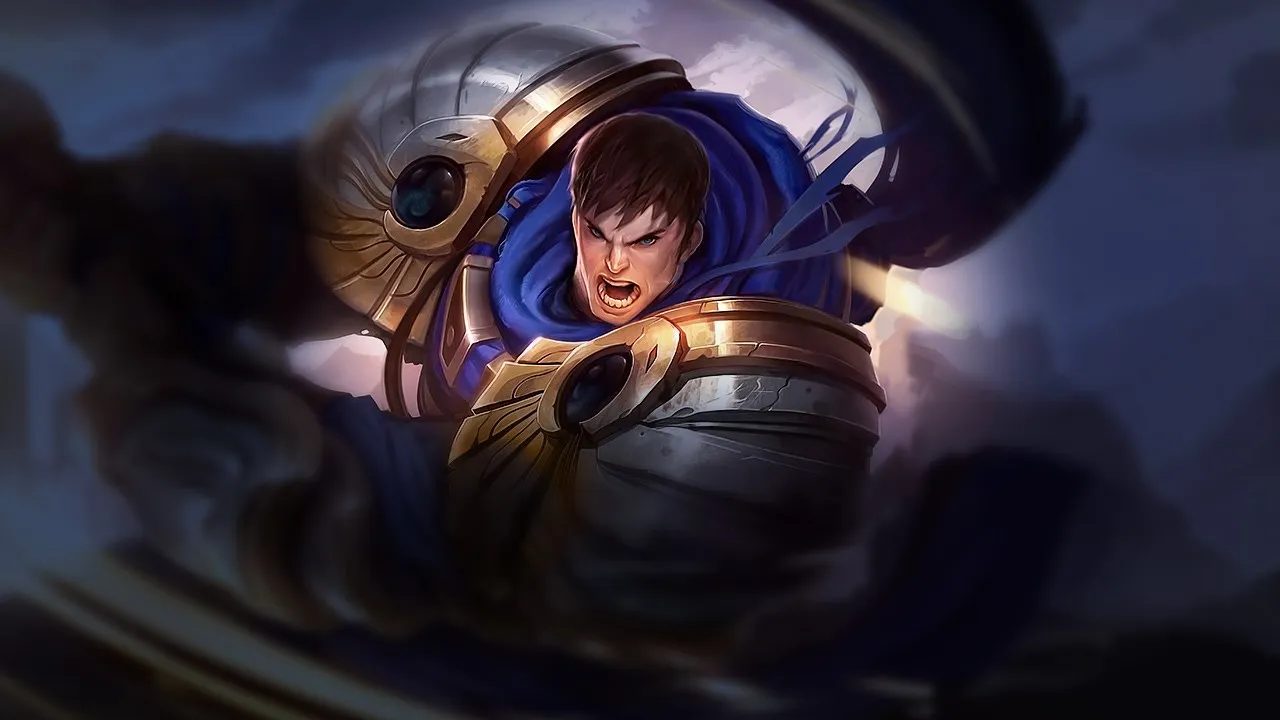
Garen Wild Rift カウンターガイド

Garenは、kiteや距離をコントロールできる構成を苦手とします。持続的なpoke、繰り返されるスロウ、または何重ものCCは、彼が優先ターゲットに到達するのを防ぎます。直接近づく手段がない場合、彼のfrontline pressureは急速に衰退します。

★ TOP Tier A
ダメージ
UTIL
TANK
DIFF
Win 50.0% #65 · ↓5pt
Pick 14.7% #2
Ban 4.3% #48

Garen Wild Rift カウンターガイド ★ Counter Sheet

マッチアップ一覧
マッチアップ 判定 有利度 勝率 ピック率
Vayne ハードカウンター +3 52.2% 2.0%
Smolder ハードカウンター +2 52.5% 1.6%
Gwen ハードカウンター +2 51.4% 3.1%
Olaf ハードカウンター +2 51.0% 1.1%
Aurora ハードカウンター +2
Kalista ハードカウンター +2
Teemo 不利なマッチアップ +1 51.8% 3.2%
Gnar 不利なマッチアップ +1 51.5% 3.5%
Volibear 不利なマッチアップ +1 51.4% 7.1%
Yone 不利なマッチアップ +1 51.0% 6.7%
Mordekaiser 不利なマッチアップ +1 50.9% 11.5%
Camille 不利なマッチアップ +1 50.4% 3.7%
Darius 不利なマッチアップ +1 50.2% 16.0%
Rumble 不利なマッチアップ +1 49.4% 2.3%
Kennen 不利なマッチアップ +1 49.1% 1.3%
Sett 不利なマッチアップ +1 49.1% 11.4%
Aatrox 不利なマッチアップ +1 48.9% 6.1%
Jayce 不利なマッチアップ +1 48.1% 2.7%
Fiora 不利なマッチアップ +1 48.1% 4.6%
Vladimir 不利なマッチアップ +1 47.0% 1.1%
Heimerdinger 不利なマッチアップ +1
Ryze 不利なマッチアップ +1
Swain 不利なマッチアップ +1
Warwick 不利なマッチアップ +1
Singed スキル次第のマッチアップ ±0 51.8% 1.4%
Jax スキル次第のマッチアップ ±0 50.9% 3.9%
Cho'Gath スキル次第のマッチアップ ±0 50.8% 12.1%
Ornn スキル次第のマッチアップ ±0 50.5% 2.0%
Poppy スキル次第のマッチアップ ±0 50.4% 2.3%
Urgot スキル次第のマッチアップ ±0 50.0% 3.8%
Ambessa スキル次第のマッチアップ ±0 49.7% 2.0%
K'Santé スキル次第のマッチアップ ±0 49.0% 5.9%
Tryndamere スキル次第のマッチアップ ±0 48.5% 2.1%
Renekton スキル次第のマッチアップ ±0 48.4% 3.9%
Akali スキル次第のマッチアップ ±0
Gragas スキル次第のマッチアップ ±0
Malphite 有利なマッチアップ −1 52.5% 5.7%
Shen 有利なマッチアップ −1 51.9% 1.6%
Wukong 有利なマッチアップ −1 51.5% 2.2%
Irelia 有利なマッチアップ −1 50.4% 2.0%
Dr. Mundo 有利なマッチアップ −1 50.2% 5.9%
Kayle 有利なマッチアップ −1 50.0% 1.8%
Sion 有利なマッチアップ −1 49.6% 3.8%
Nasus 有利なマッチアップ −1 49.1% 5.9%
Riven 有利なマッチアップ −1 48.9% 1.2%
Skarner 有利なマッチアップ −1 48.1% 1.3%
Yasuo 有利なマッチアップ −1 47.0% 3.0%
Graves 有利なマッチアップ −1
Jarvan IV 有利なマッチアップ −1
Maokai 有利なマッチアップ −1
Pantheon 有利なマッチアップ −1
Rengar 有利なマッチアップ −1
Nautilus 有利なマッチアップ −2

Edge: Wild Rift Core canonical verdict (−3 to +3), shown from the point of view of the champion named in the row. Win rate and pick rate: the opponent's own rate in this role — Wild Rift CN · Challenger, Patch 7.2d. Not a head-to-head win rate.

ハードカウンター

6

これらのチャンピオンは、こちらのビルドやプレイスタイルを真正面から上回る構成を持ち、レーン戦のコントロールとファームを極めて難しくする。彼らのスキルはこちらの主要な強みを無効化し、いつも通りのプランを実行しようとした瞬間に手痛い反撃を受けさせてくる。こうしたマッチアップでは、ミスを最小限に抑え、正面からの対決以外で解決策を探すことが重要になる。

Vayne

Vayne+3

true damagekiting This matchup is highly unfavorable for Garen because Vayne completely neutralizes your engage. Every time you activate Decisive Strike to cleanse slows and rush toward her, she can instantly cast Condemn to knock you back before you can strike. This denial, paired with her Tumble to dodge and Silver Bolts to shred your health with true damage, makes closing the distance nearly impossible without a mistake on her part. Vayneのビルド → 詳細を見る
Vayne

理由

This matchup is highly unfavorable for Garen because Vayne completely neutralizes your engage. Every time you activate Decisive Strike to cleanse slows and rush toward her, she can instantly cast Condemn to knock you back before you can strike. This denial, paired with her Tumble to dodge and Silver Bolts to shred your health with true damage, makes closing the distance nearly impossible without a mistake on her part.

レーン戦への影響

You are forced into a purely defensive posture, trapped under your turret while Vayne dictates the minion waves. Attempting to contest farm results in her triggering Silver Bolts repeatedly, forcing early recalls that cost massive gold and experience. Because you cannot trade back, Vayne freely chips away at your tower plates, securing a massive gold advantage while scaling safely into a late-game threat without any map pressure from your side.

立ち回り方

To survive, sacrifice gold and focus on securing experience. Keep the wave just outside your turret's range to minimize her chase space. Never use Decisive Strike offensively unless she wastes Condemn. Instead, hold Courage to absorb the third strike of Silver Bolts when she pokes you under tower. If she freezes the lane near her turret, do not walk up; hide in the brush and let her push back.

チャンピオン詳細 → Vayneのビルド →
Gwen

Gwen+2

true damagemagic defense Gwen completely neutralizes your defensive scaling because her Snip Snip! center cuts deal percentage health true damage, augmented by A Thousand Cuts. When you activate Courage to absorb her burst, its damage reduction and shield are entirely ignored by this true damage. Since your natural tankiness is bypassed, you cannot win extended trades against her continuous healing, making her scaling advantage insurmountable in straight duels. Gwenのビルド → 詳細を見る
Gwen

理由

Gwen completely neutralizes your defensive scaling because her Snip Snip! center cuts deal percentage health true damage, augmented by A Thousand Cuts. When you activate Courage to absorb her burst, its damage reduction and shield are entirely ignored by this true damage. Since your natural tankiness is bypassed, you cannot win extended trades against her continuous healing, making her scaling advantage insurmountable in straight duels.

レーン戦への影響

You are forced into a defensive posture where contesting waves becomes incredibly risky. Whenever you try to clear with Judgment, Gwen can easily reposition with Skip 'n Slash to align her Snip Snip! stacks on you. This constant threat of true damage pushes you under your turret, forcing frequent recalls and sacrificing early priority, which prevents you from assisting your jungler or rotating.

立ち回り方

To survive, shift your build path heavily toward magic resistance rather than general health to mitigate her A Thousand Cuts and Needlework. In lane, never initiate with Decisive Strike; save its silence and movement speed boost to cleanse the slow from Needlework and escape her zone. If she misses her fully stacked Snip Snip!, use Perseverance passively behind your turret to recover your health before attempting to contest the next wave.

チャンピオン詳細 → Gwenのビルド →
Olaf

Olaf+2

true damagecc immunity Olaf completely shuts down your main trading pattern. Normally, you rely on Decisive Strike to silence your opponent and prevent retaliation while you spin. However, once Olaf activates Ragnarok, he becomes entirely immune to your silence. This allows him to ignore your crowd control completely and continuously bash you with Reckless Swing's true damage while his Berserker Rage ramps up his attack speed as he gets lower. Olafのビルド → 詳細を見る
Olaf

理由

Olaf completely shuts down your main trading pattern. Normally, you rely on Decisive Strike to silence your opponent and prevent retaliation while you spin. However, once Olaf activates Ragnarok, he becomes entirely immune to your silence. This allows him to ignore your crowd control completely and continuously bash you with Reckless Swing's true damage while his Berserker Rage ramps up his attack speed as he gets lower.

レーン戦への影響

You cannot contest waves or take short trades safely. If Olaf lands Undertow, he can run you down, and using Decisive Strike to cleanse the slow only works once; he will just pick up his axe to reset the cooldown. You are forced under your turret, losing priority and bleeding gold. Trading is suicidal because his Vicious Strikes will easily out-sustain any chip damage you attempt to regenerate with Perseverance.

立ち回り方

Drop your standard offensive build path and rush defensive armor and health to survive his true damage. During trades, activate Courage immediately when he swings for Reckless Swing to mitigate the burst. Save Decisive Strike strictly as a mobility tool to escape after he throws Undertow, rather than using it to engage. Never cast Demacian Justice unless you are certain it executes him, as Berserker Rage makes him deadlier at low health.

チャンピオン詳細 → Olafのビルド →

その他のマッチアップ

不利なマッチアップ

18

これらのチャンピオンは、マッチアップ自体を絶望的にするわけではないが、対面で優位に立ちやすいツールを持っている。射程が長かったり、攻撃を受け止める力が高かったり、エンゲージへの対応手段が豊富だったりする。アプローチを調整し、戦闘を受け入れるタイミングを慎重に選ぶ必要がある。

Fiora

Fiora+1

parry timingscaling gap Garen struggles because Fiora can easily react to the animation of Decisive Strike with Riposte. If she parries the strike, she completely blocks the silence, slows Garen's attack speed, and easily positions herself to hit the vitals from Duelist's Dance. This neutralizes Garen's main trading tool and leaves him entirely vulnerable to her Bladework follow-up without any way to fight back. Fioraのビルド → 詳細を見る
Fiora

理由

Garen struggles because Fiora can easily react to the animation of Decisive Strike with Riposte. If she parries the strike, she completely blocks the silence, slows Garen's attack speed, and easily positions herself to hit the vitals from Duelist's Dance. This neutralizes Garen's main trading tool and leaves him entirely vulnerable to her Bladework follow-up without any way to fight back.

レーン戦への影響

Fiora controls the wave dynamic because Garen cannot safely use Judgment to clear minions without exposing himself. Every time Garen steps forward, Fiora can poke with Lunge. If Garen attempts to retaliate, the threat of her blocking Decisive Strike forces him into a defensive posture, bleeding health and losing control over the lane's physical boundary near his turret.

立ち回り方

To survive, you must bait Riposte. Run at Fiora with Decisive Strike active, but instead of attacking immediately, spin with Judgment next to her to force her defensive reaction. If she wastes Riposte, you have a short window where you can safely trade. Additionally, hug walls when she activates Grand Challenge to block her from hitting the final vital, and use Courage to mitigate her burst.

チャンピオン詳細 → Fioraのビルド →
Aatrox

Aatrox+1

spacingshort tradessustain Aatrox controls this matchup because he can completely shut down your main engage tool. Whenever you activate Decisive Strike to close the distance, he uses the superior range of The Darkin Blade to hit his sweetspots, knocking you back and canceling your silence attempt. This allows him to safely poke you down while healing through Deathbringer Stance, rendering your passive Perseverance regeneration insufficient to keep up. Aatroxのビルド → 詳細を見る
Aatrox

理由

Aatrox controls this matchup because he can completely shut down your main engage tool. Whenever you activate Decisive Strike to close the distance, he uses the superior range of The Darkin Blade to hit his sweetspots, knocking you back and canceling your silence attempt. This allows him to safely poke you down while healing through Deathbringer Stance, rendering your passive Perseverance regeneration insufficient to keep up.

レーン戦への影響

This spacing advantage forces you to concede wave control early on. You cannot contest his push without taking heavy, unreciprocated damage. If you get dragged in by Infernal Chains, you must waste Courage just to survive his full combo. Consequently, you are pushed under turret, bleeding health, which delays your recall timings and prevents you from helping your jungler contest the top-side river.

立ち回り方

To survive, you must bait out the first two strikes of The Darkin Blade before attempting any trade. Walk forward to trigger his swings, then immediately step back. Once his sword goes on cooldown, activate Decisive Strike to silence him, spin with Judgment, and use Courage to mitigate his passive attack. If he triggers World Ender, immediately retreat and use your movement speed to run him out of his ultimate form.

チャンピオン詳細 → Aatroxのビルド →
Darius

Darius+1

extended tradesexecute race Darius thrives on extended trades thanks to Hemorrhage, making short skirmishes essential for you. However, whenever you engage with Decisive Strike and spin with Judgment, Darius will wait out your spin and use Apprehend to pull you back as you retreat. This forces you into an extended fight where his passive stacks up, turning a favorable short trade into a deadly duel. Dariusのビルド → 詳細を見る
Darius

理由

Darius thrives on extended trades thanks to Hemorrhage, making short skirmishes essential for you. However, whenever you engage with Decisive Strike and spin with Judgment, Darius will wait out your spin and use Apprehend to pull you back as you retreat. This forces you into an extended fight where his passive stacks up, turning a favorable short trade into a deadly duel.

レーン戦への影響

This constant threat of being pulled back means you cannot trade recklessly near his tower. If Darius freezes the wave, you risk losing chunks of health or dying to Noxian Guillotine if you step up to farm with Judgment. You are forced to play defensively, relying on Perseverance to recover between his attempts to harass you with Decimate, sacrificing early wave control.

立ち回り方

To survive, never initiate trades with Decisive Strike. Instead, save its movement speed boost to escape after he pulls you. If Darius misses Decimate, walk up to hit him with Judgment, but keep your finger on Courage to mitigate the damage of his Crippling Strike. If he grabs you with Apprehend first, immediately silence him with Decisive Strike and spin away, using the silence window to retreat safely before Hemorrhage stacks high.

チャンピオン詳細 → Dariusのビルド →
Sett

Sett+1

short tradesshield bait Sett dominates extended trades because Pit Grit and Knuckle Down out-damage you in melee range, while his Haymaker converts your own damage into a massive shield and true damage nuke. Because both champions possess high passive health regeneration, this becomes a war of attrition. The entire matchup hinges on Decisive Strike; you must silence Sett right as his grit bar peaks, preventing him from casting Haymaker before you disengage. Settのビルド → 詳細を見る
Sett

理由

Sett dominates extended trades because Pit Grit and Knuckle Down out-damage you in melee range, while his Haymaker converts your own damage into a massive shield and true damage nuke. Because both champions possess high passive health regeneration, this becomes a war of attrition. The entire matchup hinges on Decisive Strike; you must silence Sett right as his grit bar peaks, preventing him from casting Haymaker before you disengage.

レーン戦への影響

Sett's constant threat of Facebreaker forces you to respect his zone, making blind wave-clearing with Judgment highly dangerous. If he pulls you in, a simple trade escalates into a disaster. You cannot comfortably crash waves when his The Show Stopper is online, as he can slam you into his tower. Every bad trade where he lands a high-grit Haymaker forces you out of lane, granting him free plates and total wave control.

立ち回り方

Initiate short trades with Judgment instead of leading with your silence. As Sett’s grit bar fills up, hit him with Decisive Strike to silence him, preventing his Haymaker, then immediately retreat while activating Courage to block his physical attacks. If you fail to silence him in time, quickly step sideways to dodge the center line of Haymaker while your shield is up. Lastly, never cast Demacian Justice while his golden shield is active; wait for it to decay.

チャンピオン詳細 → Settのビルド →
Camille

Camille+1

short tradesscaling gap This lane is dictated by how Camille's Adaptive Defenses neutralizes your main trade opener. Whenever you charge in with Decisive Strike, her auto-attack triggers a massive physical shield that completely absorbs your silence's damage. Because Garen relies on this initial burst to chunk her down before spinning with Judgment, her passive shield consistently wins her these short skirmishes, leaving you with negative trades if you force the issue. Camilleのビルド → 詳細を見る
Camille

理由

This lane is dictated by how Camille's Adaptive Defenses neutralizes your main trade opener. Whenever you charge in with Decisive Strike, her auto-attack triggers a massive physical shield that completely absorbs your silence's damage. Because Garen relies on this initial burst to chunk her down before spinning with Judgment, her passive shield consistently wins her these short skirmishes, leaving you with negative trades if you force the issue.

レーン戦への影響

You cannot afford to play aggressively or trade blows randomly. Camille will use Tactical Sweep to poke you down and prevent your Perseverance from regenerating your health. If you constantly push the wave, she can easily freeze it near her tower and run you down with Hookshot or trap you with The Hextech Ultimatum, forcing an early recall or costing your team jungle pressure.

立ち回り方

To survive, let Camille push the minions toward your side. If she triggers Adaptive Defenses, immediately back away and wait out the two-second shield before trying to fight back with Judgment. When she engages with Hookshot, activate Courage to mitigate the incoming stun and the true damage from her second Precision Protocol strike. Once her shield is on cooldown, you can look for short trades before executing her with Demacian Justice.

チャンピオン詳細 → Camilleのビルド →
Mordekaiser

Mordekaiser+1

magic defenseextended trades Mordekaiser dominates this matchup by turning the lane into a raw test of stats where Garen struggles to match his magic damage. Once Darkness Rise activates, his persistent aura melts your health, while Death's Grasp keeps you from easily disengaging. If you try to execute him with Demacian Justice, his Indestructible shield can completely deny your ultimate, making standard short trades highly ineffective. Mordekaiserのビルド → 詳細を見る
Mordekaiser

理由

Mordekaiser dominates this matchup by turning the lane into a raw test of stats where Garen struggles to match his magic damage. Once Darkness Rise activates, his persistent aura melts your health, while Death's Grasp keeps you from easily disengaging. If you try to execute him with Demacian Justice, his Indestructible shield can completely deny your ultimate, making standard short trades highly ineffective.

レーン戦への影響

You will constantly find yourself pushed under turret, as Mordekaiser easily clears waves while poking you with Obliterate. Trading directly is perilous because any extended fight triggers his passive aura. This constant pressure limits your ability to roam, forcing you to utilize Perseverance frequently under your tower to sustain through his relentless magic damage harass and avoid being forced into early, disadvantageous recalls.

立ち回り方

To survive, pivot your early gold toward magic defense instead of raw damage. During skirmishes, your primary goal is to bait his abilities. When Mordekaiser pulls you into Realm of Death, never panic. You must absolutely save Courage to block his isolated Obliterate strike inside his ultimate. Use Decisive Strike to cleanse his slows, then spin with Judgment to shred him, but keep your defensive shield held strictly for his highest burst moment.

チャンピオン詳細 → Mordekaiserのビルド →
Volibear

Volibear+1

extended tradeshealing reduction Volibear dominates long trades because Frenzied Maul heals him when biting a marked target. While your Perseverance requires you to retreat to regenerate, Volibear sustains directly through combat. If you stay within his reach after he marks you, his second bite negates all damage from Judgment. Your survival hinges entirely on using Decisive Strike to break his slow and escape before he bites you a second time. Volibearのビルド → 詳細を見る
Volibear

理由

Volibear dominates long trades because Frenzied Maul heals him when biting a marked target. While your Perseverance requires you to retreat to regenerate, Volibear sustains directly through combat. If you stay within his reach after he marks you, his second bite negates all damage from Judgment. Your survival hinges entirely on using Decisive Strike to break his slow and escape before he bites you a second time.

レーン戦への影響

Volibear's constant lightning from The Relentless Storm naturally pushes the wave, forcing you under tower. Because you cannot contest extended trades, you will bleed health whenever you try to freeze. If he lands Sky Splitter to shield himself while slowing you, you are forced to use Courage defensively. This leaves you vulnerable to a dive with Stormbringer, which disables your tower and forces early, costly recalls.

立ち回り方

Never initiate with Decisive Strike. Instead, wait for Volibear to commit with Thundering Smash. The moment he stuns you, immediately trigger Courage to mitigate his burst and Sky Splitter damage. As the stun expires, activate Decisive Strike to cleanse any lingering slow and sprint away before he can trigger his healing Frenzied Maul. If he manages to mark you anyway, abandon the wave immediately and retreat until the mark fades.

チャンピオン詳細 → Volibearのビルド →
Yone

Yone+1

spacingburst trade Yone holds the upper hand as the laning phase progresses because his Way of the Hunter and Mortal Steel let him DPS you down through your natural armor. However, the matchup pivots around his Soul Unbound. While Yone uses this spirit form to chunk your health, Garen can mitigate the final delayed burst with Courage, turning what should be a lethal trade into a manageable survival test. Yoneのビルド → 詳細を見る
Yone

理由

Yone holds the upper hand as the laning phase progresses because his Way of the Hunter and Mortal Steel let him DPS you down through your natural armor. However, the matchup pivots around his Soul Unbound. While Yone uses this spirit form to chunk your health, Garen can mitigate the final delayed burst with Courage, turning what should be a lethal trade into a manageable survival test.

レーン戦への影響

You will constantly find yourself pushed toward your turret. Yone easily secures wave control using the sweeping range of Spirit Cleave and Mortal Steel tornados. This pressure forces you to rely on Perseverance under your tower, sacrificing early gold. If you fail to time your defensive responses, his Fate Sealed will setup easy dives, forcing you into premature recalls and sacrificing top priority.

立ち回り方

Position yourself deliberately near Yone’s physical anchor point whenever he casts Soul Unbound. Hold your Courage specifically for the moment his spirit is about to snap back, neutralizing the marked damage. Immediately follow up with Decisive Strike to silence him, preventing an instant Spirit Cleave shield, and spin with Judgment as he returns to his body. If he unlocks Fate Sealed, keep your distance unless your silence is ready to disrupt his flow.

チャンピオン詳細 → Yoneのビルド →
Teemo

Teemo+1

passive regenblind bait Teemo dominates the early game by abusing his range with Toxic Shot to constantly chip away at your health, rendering Perseverance difficult to trigger. His main defensive tool is Blinding Dart, which completely neutralizes your auto-attacks. Since Decisive Strike counts as a basic attack, striking while blinded wastes your main burst, whereas Judgment is a physical spell that ignores the blind status entirely. Teemoのビルド → 詳細を見る
Teemo

理由

Teemo dominates the early game by abusing his range with Toxic Shot to constantly chip away at your health, rendering Perseverance difficult to trigger. His main defensive tool is Blinding Dart, which completely neutralizes your auto-attacks. Since Decisive Strike counts as a basic attack, striking while blinded wastes your main burst, whereas Judgment is a physical spell that ignores the blind status entirely.

レーン戦への影響

This constant harassment forces you to concede early wave control and farm under your turret. Teemo will use Move Quick to maintain distance and space you out, eventually littering the lane and bushes with Noxious Trap. If you do not shift your early purchases toward heavy magic defense, you will be forced into frequent, costly recalls, allowing him to easily take your turret plates.

立ち回り方

Pivot your early gold immediately into magic resistance to survive the toxic lane. During skirmishes, activate Courage to absorb the initial burst of Blinding Dart. While blinded, do not attempt to auto-attack; instead, immediately spin with Judgment to deal continuous damage. Once the blind effect ends, strike with Decisive Strike to silence him, preventing him from escaping with Move Quick, and finish the fight with Demacian Justice.

チャンピオン詳細 → Teemoのビルド →
Jayce

Jayce+1

slow cleansegap close Jayce dictates the pace of this matchup by shifting between ranged poke and melee defense. While you want to close the distance, his Transform Mercury Cannon gives him the tools to kite you indefinitely. The core issue is his Thundering Blow knockback; if you charge in blindly, he will simply swat you away, wasting your mobility and leaving you exposed to heavy ranged retaliation. Jayceのビルド → 詳細を見る
Jayce

理由

Jayce dictates the pace of this matchup by shifting between ranged poke and melee defense. While you want to close the distance, his Transform Mercury Cannon gives him the tools to kite you indefinitely. The core issue is his Thundering Blow knockback; if you charge in blindly, he will simply swat you away, wasting your mobility and leaving you exposed to heavy ranged retaliation.

レーン戦への影響

You will spend most of the early levels pushed under your turret, absorbing shockwaves. Jayce will attempt to whittle your health down, trying to disable your Perseverance passive with constant ranged basic attacks. Failing to dodge his poke means losing turret plating or being forced into a bad recall, which hands Jayce complete control over the top side of the map.

立ち回り方

To win trades, you must bait out Thundering Blow before committing. Walk towards him menacingly to trigger his defensive instinct. If he jumps on you with To the Skies!, activate Courage to mitigate the burst. Once he uses his knockback, immediately activate Decisive Strike to break any lingering slows, close the remaining distance, and spin with Judgment. This setup ensures your Demacian Justice can actually reach him for the execute.

チャンピオン詳細 → Jayceのビルド →
Gnar

Gnar+1

slow cleansespacing Gnar's constant shift between forms via Rage Gene makes this a grueling matchup where you are constantly poked from range in his Mini form. His Boomerang Throw applies a heavy slow to keep you at bay, but your Decisive Strike has the unique ability to purge this slow instantly. If you trigger this cleanse while his Hop is on cooldown, you can finally close the distance and trade. Gnarのビルド → 詳細を見る
Gnar

理由

Gnar's constant shift between forms via Rage Gene makes this a grueling matchup where you are constantly poked from range in his Mini form. His Boomerang Throw applies a heavy slow to keep you at bay, but your Decisive Strike has the unique ability to purge this slow instantly. If you trigger this cleanse while his Hop is on cooldown, you can finally close the distance and trade.

レーン戦への影響

Expect to spend most of the early levels pushed under your turret, bleeding minions while Gnar harasses you. Your Perseverance is crucial here to heal back the damage from his hyper-aggressive attacks. If you fail to maintain your health bar, Gnar will easily dive you when he transforms into Mega Gnar using his Boulder Toss to smash you against the tower walls, completely shutting down your lane.

立ち回り方

Use the lane brushes to break Gnar's line of sight and minimize his free basic attacks. Never activate Decisive Strike before his Boomerang Throw actually hits you, or you will waste the cleanse. Once the projectile slows you, activate it immediately to break free. If Gnar has recently wasted Hop, charge in with Judgment. When he transforms, hold Courage to absorb the predictable stun from his Mega form's slam before executing him with Demacian Justice.

チャンピオン詳細 → Gnarのビルド →
Vladimir

Vladimir+1

sustain battleuntargetable bait Vladimir slowly wears you down with ranged Transfusion pokes while matching your Perseverance passive regeneration. The lane becomes a battle of attrition where you can't easily execute him. He holds a massive defensive tool: Sanguine Pool completely nullifies your ultimate, Demacian Justice. To secure any kill threat, you are forced to shut down his escape route by landing Decisive Strike first, preventing him from slipping away. Vladimirのビルド → 詳細を見る
Vladimir

理由

Vladimir slowly wears you down with ranged Transfusion pokes while matching your Perseverance passive regeneration. The lane becomes a battle of attrition where you can't easily execute him. He holds a massive defensive tool: Sanguine Pool completely nullifies your ultimate, Demacian Justice. To secure any kill threat, you are forced to shut down his escape route by landing Decisive Strike first, preventing him from slipping away.

レーン戦への影響

Since Vladimir has no resource costs and heals off waves, trading health is usually a losing battle unless you fight during his specific ability downtimes. You will often find yourself pushed under turret, absorbing pressure while your Courage shields his fully charged Tides of Blood hits. If you fail to respect his third Transfusion spike, you will be forced into a bad recall, forfeiting lane priority.

立ち回り方

Back away immediately when his blood bar fills, indicating an empowered Transfusion. To engage, bait his Sanguine Pool by running at him with Decisive Strike activated, but do not strike immediately; instead, spin with Judgment to shred his armor. Save your Demacian Justice until he is silenced by your Decisive Strike, or after his pool has ended. If you get chunked down, let Perseverance heal you safely behind your minions.

チャンピオン詳細 → Vladimirのビルド →

その他のマッチアップ

スキル次第のマッチアップ

12

このマッチアップは何よりもまず実行力の勝負であり、両者ともに優位を取れる現実的な手段を持っている。重要なスキルを一つ避けられるか、エンゲージを正しく読めるか、あるいはたった一つの位置取りのミスが、勝敗を分けることもある。マッチアップを理解し、行動すべき瞬間を見極める力がとりわけ重要になる。

Akali

Akali±0

silence baitshroud stalling This matchup revolves entirely around the interaction between your Decisive Strike and Akali's Twilight Shroud. When you charge forward to silence her, she will drop her shroud to instantly break line of sight. This forces your empowered attack to expire uselessly, denying you the chance to shred her armor with Judgment. Without that silence, she can easily dance around you, landing Five Point Strike and triggering her Assassin's Mark. Akaliのビルド → 詳細を見る
Akali

理由

This matchup revolves entirely around the interaction between your Decisive Strike and Akali's Twilight Shroud. When you charge forward to silence her, she will drop her shroud to instantly break line of sight. This forces your empowered attack to expire uselessly, denying you the chance to shred her armor with Judgment. Without that silence, she can easily dance around you, landing Five Point Strike and triggering her Assassin's Mark.

レーン戦への影響

Because Garen can shrug off poke with Perseverance, this lane becomes a slow battle of attrition determined by wave placement. Shoving too hard exposes you to long-lane chases where her Shuriken Flip and Perfect Execution can run you down. Keeping the minions closer to your turret neutralizes her dive threat, allowing you to safely regenerate health between her brief, energetic bursts of Five Point Strike.

立ち回り方

Never initiate trades by blindly activating Decisive Strike. Instead, walk up to CS and save your silence to cleanse the slow from her Five Point Strike when she tries to poke. If she panics and drops Twilight Shroud, immediately retreat to your minion wave to deny her trade. Only activate Courage when you see her dash back with Shuriken Flip or when she commits to her Perfect Execution execute, minimizing her burst.

チャンピオン詳細 → Akaliのビルド →
Ambessa

Ambessa±0

shield timingshort trades This matchup is a pure duel of reaction times centered on your silence. Ambessa relies on her Repudiation shield to absorb the impact of your Decisive Strike and negate its silence. If she succeeds, she can easily counter-attack with Cunning Sweep and her highly mobile passive. However, if you force her to waste her shield, your Judgment will shred her while she is silenced and unable to dash away. Ambessaのビルド → 詳細を見る
Ambessa

理由

This matchup is a pure duel of reaction times centered on your silence. Ambessa relies on her Repudiation shield to absorb the impact of your Decisive Strike and negate its silence. If she succeeds, she can easily counter-attack with Cunning Sweep and her highly mobile passive. However, if you force her to waste her shield, your Judgment will shred her while she is silenced and unable to dash away.

レーン戦への影響

The lane's wave control fluctuates entirely around these short skirmishes. When Repudiation is on cooldown, Ambessa must play defensively, allowing you to push the minion wave safely with Judgment. However, if she successfully parries your Decisive Strike, she gains complete lane priority, forcing you to use Courage defensively and giving her the perfect window to crash the wave and secure a clean recall.

立ち回り方

To win this, never initiate trades with a direct Decisive Strike. Instead, run towards her to trigger her defensive instinct, then immediately spin with Judgment first. Once she panics and activates Repudiation, wait out the brief shield duration before striking her with your empowered silence. If she holds her shield, use Courage to mitigate her Cunning Sweep damage, and execute her with Demacian Justice only after her Repudiation is down.

チャンピオン詳細 → Ambessaのビルド →
Renekton

Renekton±0

shield timingshort trades This matchup is a pure test of reflexes centered on Renekton's Ruthless Predator. If the crocodile catches you with his stun, especially when fueled by Reign of Anger, he will chunk your health bar and dash away safely using Slice and Dice. However, Garen possesses the perfect response: activating Courage right as the stun lands. Mitigating that burst and reducing the stun's duration completely neutralizes Renekton's trading power, turning an even lane into your favor. Renektonのビルド → 詳細を見る
Renekton

理由

This matchup is a pure test of reflexes centered on Renekton's Ruthless Predator. If the crocodile catches you with his stun, especially when fueled by Reign of Anger, he will chunk your health bar and dash away safely using Slice and Dice. However, Garen possesses the perfect response: activating Courage right as the stun lands. Mitigating that burst and reducing the stun's duration completely neutralizes Renekton's trading power, turning an even lane into your favor.

レーン戦への影響

When you successfully block his stun, Renekton is left vulnerable with extremely long recovery windows. This allows you to aggressively push the wave with Judgment while his Cull the Meek is insufficient to match your clear. If you fail to time your shield, you will be forced under turret, bleeding gold while your passive Perseverance slowly ticks. Winning these trades dictates who controls the top alcove and prevents Renekton from roaming.

立ち回り方

Watch Renekton's fury bar closely; when it glows red, expect him to dash in. Do not waste Decisive Strike early; instead, hold it to cleanse the slow from Slice and Dice or to silence him before he can activate Dominus. If he manages to stun you without your Courage active, immediately retreat, let Perseverance restore your health pool, and do not contest the wave until your shield is fully available again.

チャンピオン詳細 → Renektonのビルド →
Urgot

Urgot±0

shield timingexecute threshold This matchup is a pure test of reflexes centered on Urgot's dash. When Urgot charges with Disdain, his goal is to flip you and trigger Echoing Flames shotgun blasts. By timing Courage to absorb the knockup, you mitigate his burst and gain critical tenacity. This prevents him from lowering your health pool into the execution threshold of Fear Beyond Death, turning his primary offensive tool into a wasted cooldown. Urgotのビルド → 詳細を見る
Urgot

理由

This matchup is a pure test of reflexes centered on Urgot's dash. When Urgot charges with Disdain, his goal is to flip you and trigger Echoing Flames shotgun blasts. By timing Courage to absorb the knockup, you mitigate his burst and gain critical tenacity. This prevents him from lowering your health pool into the execution threshold of Fear Beyond Death, turning his primary offensive tool into a wasted cooldown.

レーン戦への影響

Trades are incredibly short and dictated by Urgot's ability cooldowns. If Urgot wastes Disdain, he loses his only escape and shield, allowing you to shove the wave safely or force him under turret with Judgment. Your passive Perseverance guarantees you can heal back any poke from Corrosive Charge, meaning Urgot must secure a full all-in to actually push you out of the lane.

立ち回り方

Never initiate trades with Decisive Strike if Urgot has Corrosive Charge ready; instead, save it to instantly cleanse his slow. Keep your finger on Courage and trigger it only when you see the startup animation of Disdain. If you successfully block his flip, immediately counter-attack with Judgment to shred his armor, putting him in range for Demacian Justice. If you misstime your shield, immediately retreat to avoid his passive shotgun legs.

チャンピオン詳細 → Urgotのビルド →
Jax

Jax±0

damage mitigationshort trades This skill matchup revolves around Jax's Counter Strike and how you respond to it. While his defensive spin completely nullifies your Decisive Strike silence, it does absolutely nothing to stop the damage and armor shred of your Judgment. Because your spin continues to shred Jax's health even while he is dodging auto-attacks, you can bypass his primary defensive tool and force him to play on your terms. Jaxのビルド → 詳細を見る
Jax

理由

This skill matchup revolves around Jax's Counter Strike and how you respond to it. While his defensive spin completely nullifies your Decisive Strike silence, it does absolutely nothing to stop the damage and armor shred of your Judgment. Because your spin continues to shred Jax's health even while he is dodging auto-attacks, you can bypass his primary defensive tool and force him to play on your terms.

レーン戦への影響

Trades are highly volatile and depend on who blinks first. If Jax initiates with Leap Strike and Counter Strike, you must immediately spin to match his damage. Failing to time your defensive Courage to absorb his stun allows Jax to stack Relentless Assault and chunk your health, giving him complete control over the wave state and forcing you into a defensive, low-pressure recall cycle under tower.

立ち回り方

Never lead a trade with Decisive Strike when Jax's cooldowns are up; instead, walk up and trigger Judgment first. If he activates Counter Strike, stay glued to him with your spin, then press Courage right before his stun triggers. Once he is vulnerable and his defense is down, immediately follow up with Decisive Strike to silence him, preventing his Leap Strike escape, and execute him with Demacian Justice if his health is low.

チャンピオン詳細 → Jaxのビルド →
Ornn

Ornn±0

tenacity checkarmor shred This even matchup hinges entirely on how you mitigate Ornn's heavy CC combo. When Ornn attempts to trigger Brittle with Searing Charge against a pillar from Volcanic Rupture, your Courage is the ultimate counter. The massive tenacity and damage reduction from Courage allows you to shrug off his knockup almost instantly, turning what should be a devastating trade for Ornn into an opportunity for you to strike back. Ornnのビルド → 詳細を見る
Ornn

理由

This even matchup hinges entirely on how you mitigate Ornn's heavy CC combo. When Ornn attempts to trigger Brittle with Searing Charge against a pillar from Volcanic Rupture, your Courage is the ultimate counter. The massive tenacity and damage reduction from Courage allows you to shrug off his knockup almost instantly, turning what should be a devastating trade for Ornn into an opportunity for you to strike back.

レーン戦への影響

Miss the timing on Courage, and Ornn's Bellows Breath and Searing Charge will chunk your health bar, forcing you to retreat and rely passively on Perseverance. However, successfully reacting to his charge allows you to immediately silence him with Decisive Strike, shred his armor with Judgment, and dictate the wave's position. This constant pressure prevents Ornn from safely using Living Forge to outscale you in lane.

立ち回り方

Never stand near walls or the pillar left by Volcanic Rupture; force Ornn to telegraph his Searing Charge. Always hold Courage specifically for the impact of his charge or the second activation of Call of the Forge God. If you are marked by Bellows Breath, do not run away immediately. Instead, wait for his forward dash, press Courage right before impact, and then immediately retaliate with Decisive Strike to silence him before spinning with Judgment.

チャンピオン詳細 → Ornnのビルド →
Tryndamere

Tryndamere±0

execute timingdisengage This duel is a constant battle of attrition where your passive healing from Perseverance matches his Bloodlust sustain. You win short trades with quick bursts, but Tryndamere excels in extended fights once his Battle Fury is fully stacked. The lane hinges entirely on how you manage his ultimate window; executing him with Demacian Justice is impossible while Undying Rage is active, turning the matchup into a precise dance of baiting and disengaging. Tryndamereのビルド → 詳細を見る
Tryndamere

理由

This duel is a constant battle of attrition where your passive healing from Perseverance matches his Bloodlust sustain. You win short trades with quick bursts, but Tryndamere excels in extended fights once his Battle Fury is fully stacked. The lane hinges entirely on how you manage his ultimate window; executing him with Demacian Justice is impossible while Undying Rage is active, turning the matchup into a precise dance of baiting and disengaging.

レーン戦への影響

Tryndamere will constantly push to stack Battle Fury, forcing you to defend your turret. You cannot let him hit the wave for free, so you must contest his lane control with Judgment. However, overextending is fatal; if he catches you with your abilities on cooldown, he will chase you down the long lane using Spinning Slash and Mocking Shout, turning a simple trade into a deadly pursuit.

立ち回り方

When Tryndamere commits, activate Courage immediately to absorb his high-crit damage. The absolute golden rule of this matchup is to save Decisive Strike for his ultimate. Once he triggers Undying Rage, do not try to fight him; immediately activate Decisive Strike to cleanse the slow from Mocking Shout, gain movement speed, and run away. Kite him out for those five seconds, then turn back to finish him.

チャンピオン詳細 → Tryndamereのビルド →
K'Santé

K'Santé±0

silence interrupttrue damage This matchup is a pure duel of timing around K'Santé's defensive tools. Garen's primary weapon is Decisive Strike, which silences K'Santé. This silence is critical because it prevents K'Santé from activating Path Maker to absorb the heavy physical damage from Judgment. If K'Santé cannot channel his damage reduction, Garen wins the raw trade. However, if K'Santé anticipates the blow, his block can negate Garen's entire offensive window. K'Santéのビルド → 詳細を見る
K'Santé

理由

This matchup is a pure duel of timing around K'Santé's defensive tools. Garen's primary weapon is Decisive Strike, which silences K'Santé. This silence is critical because it prevents K'Santé from activating Path Maker to absorb the heavy physical damage from Judgment. If K'Santé cannot channel his damage reduction, Garen wins the raw trade. However, if K'Santé anticipates the blow, his block can negate Garen's entire offensive window.

レーン戦への影響

Laning revolves around baiting key abilities. K'Santé wants to stack Ntofo Strikes to threaten a knock-up, forcing Garen to waste Courage. When Garen holds Decisive Strike, K'Santé cannot safely use Footwork to trade, as he risks being silenced and spun down. A wasted Path Maker from K'Santé immediately grants Garen wave priority, allowing him to pressure the tower or safely heal up with Perseverance.

立ち回り方

Do not initiate trades with Decisive Strike. Instead, approach K'Santé directly and begin spinning with Judgment. This pressure forces him to either take unmitigated damage or commit Path Maker early. The moment his channel ends, strike him with Decisive Strike to silence him, preventing any escape via Footwork. If K'Santé initiates with All Out, immediately activate Courage to survive his stat-boosted assault, then look to execute his reduced health pool with Demacian Justice.

チャンピオン詳細 → K'Santéのビルド →

その他のマッチアップ

有利なマッチアップ

17

これらのチャンピオンは、こちらの主要な強みに効果的に対応するのが難しく、より自由に対面を組み立てることができる。プレッシャーをかけて有利な交換を引き出す手段は複数あることが多い。相手が態勢を立て直す時間を与えるのではなく、この優位を活かして主導権を握ろう。

Dr. Mundo

Dr. Mundo−1

juggernaut duelexecute threat This matchup revolves around Dr. Mundo attempting to stay in lane by baiting you with Blunt Force Trauma when low, relying on his passive health regeneration and Maximum Dosage to survive. However, Garen completely counters this strategy. Because Demacian Justice deals true damage based on missing health, it instantly executes him before his ultimate's health regeneration can tick up, turning his low-HP baiting into a death sentence. Dr. Mundoのビルド → 詳細を見る
Dr. Mundo

理由

This matchup revolves around Dr. Mundo attempting to stay in lane by baiting you with Blunt Force Trauma when low, relying on his passive health regeneration and Maximum Dosage to survive. However, Garen completely counters this strategy. Because Demacian Justice deals true damage based on missing health, it instantly executes him before his ultimate's health regeneration can tick up, turning his low-HP baiting into a death sentence.

レーン戦への影響

In lane, Dr. Mundo will try to farm and poke with Infected Bonesaw. You can easily shrug off this poke using Perseverance. When he walks up to hit minions with Blunt Force Trauma, use his cooldown windows to force short trades with Decisive Strike and Judgment. Since you do not rely on crowd control, his passive Goes Where He Pleases is useless, allowing you to dominate trades without wasting resources.

立ち回り方

Stand behind your minions to block Infected Bonesaw, preventing Dr. Mundo from slowing you or healing. When he activates Heart Zapper, do not retreat; instead, activate Courage to mitigate the magic damage and stay in range. Keep spinning with Judgment to shred his armor, and silence him with Decisive Strike when he gets low. This prevents him from activating Maximum Dosage in time, setting up an easy execute with Demacian Justice.

チャンピオン詳細 → Dr. Mundoのビルド →
Nasus

Nasus−1

slow cleanseearly pressure This matchup heavily favors Garen due to a direct ability counter. Nasus relies entirely on Wither to isolate you, escape ganks, or force extended trades. However, Garen's Decisive Strike immediately cleanses this massive slow on activation. Because you can nullify his primary defensive and offensive tool at will, Nasus cannot safely trade or prevent you from shredding him with Judgment. Nasusのビルド → 詳細を見る
Nasus

理由

This matchup heavily favors Garen due to a direct ability counter. Nasus relies entirely on Wither to isolate you, escape ganks, or force extended trades. However, Garen's Decisive Strike immediately cleanses this massive slow on activation. Because you can nullify his primary defensive and offensive tool at will, Nasus cannot safely trade or prevent you from shredding him with Judgment.

レーン戦への影響

You dictate the minion waves from the very first level. By holding the wave near your tower, you force Nasus to choose between stepping up to stack Siphoning Strike and taking heavy damage, or using Spirit Fire to farm. Your passive Perseverance ensures you out-sustain him, allowing you to build a massive minion crash and dive him when his Fury of the Sands is down.

立ち回り方

Never initiate a trade by leading with Decisive Strike. Instead, simply walk up to Nasus and begin spinning with Judgment. Force him to panic-cast Wither to escape your damage. The moment the slow hits you, press Decisive Strike to instantly break the control, silence him, and secure the trade. If he activates Fury of the Sands, mitigate his retaliatory burst with Courage and walk away, returning to execute him with Demacian Justice once his ultimate expires.

チャンピオン詳細 → Nasusのビルド →
Shen

Shen−1

armor shredmap pressure Garen naturally dominates this matchup because his Judgment bypasses the auto-attack blocking zone of Shen's Spirit's Refuge while shredding his armor. Shen relies on Ki Barrier to absorb short trades, but the continuous physical damage of the spin quickly melts through his defenses. Furthermore, Shen lacks the tools to match Garen's rapid wave clear, turning every wave into a pressure point. Shenのビルド → 詳細を見る
Shen

理由

Garen naturally dominates this matchup because his Judgment bypasses the auto-attack blocking zone of Shen's Spirit's Refuge while shredding his armor. Shen relies on Ki Barrier to absorb short trades, but the continuous physical damage of the spin quickly melts through his defenses. Furthermore, Shen lacks the tools to match Garen's rapid wave clear, turning every wave into a pressure point.

レーン戦への影響

This dynamic creates a relentless push that locks Shen under his turret, neutralizing his map presence. Whenever Shen attempts to influence other lanes with Stand United, he faces an impossible choice. Leaving the lane means Garen will immediately demolish his tower plates. Even if Shen stays, he is slowly chipped down under turret without any hope of matching Garen's recall timings or map priority.

立ち回り方

Constantly shove the waves using Judgment to force Shen to farm under turret. Keep your Decisive Strike ready when Shen has his ultimate; the silence will instantly interrupt his Stand United channel if you react quickly. If he manages to taunt you with Shadow Dash, immediately activate Courage to reduce the incoming damage from his Twilight Assault empowered attacks, then counter-attack with your spin before executing him with Demacian Justice.

チャンピオン詳細 → Shenのビルド →
Irelia

Irelia−1

silence interruptshort trades Garen dominates this matchup by turning Irelia's mobility into her trap. The moment she prepares to bounce between minions, your Decisive Strike silences her. This brief silence completely locks her out of Bladesurge, preventing her from securing resets on marked targets. Without her constant dashes, she cannot easily stack Ionian Fervor, stripping away her dueling power and leaving her extremely vulnerable to a full Judgment spin. Ireliaのビルド → 詳細を見る
Irelia

理由

Garen dominates this matchup by turning Irelia's mobility into her trap. The moment she prepares to bounce between minions, your Decisive Strike silences her. This brief silence completely locks her out of Bladesurge, preventing her from securing resets on marked targets. Without her constant dashes, she cannot easily stack Ionian Fervor, stripping away her dueling power and leaving her extremely vulnerable to a full Judgment spin.

レーン戦への影響

This silence threat dictates the lane's flow, forcing Irelia to play defensively. She cannot freely thin the wave, allowing you to establish permanent lane priority and slow-push at will. When she attempts to trade using Flawless Duet, activating Courage neutralizes her stun and subsequent burst. You can then comfortably dive or force her to recall, steadily building a massive gold lead while denying her any roam opportunities.

立ち回り方

Never initiate trades blindly with Decisive Strike. Instead, stand near your low-health caster minions and strike her the millisecond she dashes in to last-hit. If she tries to mitigate your subsequent Judgment by channeling Defiant Dance, do not panic. Simply walk with her, let the spin shred her armor, and hold your Demacian Justice until her defensive channel ends to guarantee a clean, unmitigated execute when her health drops.

チャンピオン詳細 → Ireliaのビルド →
Riven

Riven−1

silence interruptdamage mitigation Garen dominates this matchup because Riven relies entirely on chaining her active spells to stack Runic Blade. By hitting her with Decisive Strike when she commits to her Broken Wings combo, you silence her instantly. This abrupt disruption leaves her completely unable to dash away or absorb your retaliatory damage with Valor, turning her aggressive trade into a highly vulnerable window where she can only walk away. Rivenのビルド → 詳細を見る
Riven

理由

Garen dominates this matchup because Riven relies entirely on chaining her active spells to stack Runic Blade. By hitting her with Decisive Strike when she commits to her Broken Wings combo, you silence her instantly. This abrupt disruption leaves her completely unable to dash away or absorb your retaliatory damage with Valor, turning her aggressive trade into a highly vulnerable window where she can only walk away.

レーン戦への影響

Because Riven cannot safely trade into you, she is forced to play defensively, giving you complete control over the wave. You can freely trigger Perseverance to heal any minor poke while keeping her trapped under her tower. If she tries to contest the wave, your superior health pool from these asymmetric trades allows you to easily dive her or force her to recall, costing her massive gold and experience.

立ち回り方

Do not waste Decisive Strike on minion last-hits; keep it ready to counter her initiations. When she dashes forward with Broken Wings, activate Courage to absorb her initial knock-up and Ki Burst stun, then immediately strike back with Decisive Strike to silence her. While she is silenced and unable to trigger Valor, spin through her with Judgment and execute her with Demacian Justice before she can recover her mobility.

チャンピオン詳細 → Rivenのビルド →
Kayle

Kayle−1

early pressureexecute timing Garen dictates this matchup because Kayle is weak before Divine Ascent fully matures. The entire dynamic centers on a race to level 5. Once both of you unlock your ultimates, your win condition is straightforward: you must catch her with Decisive Strike to apply the silence. This brief window prevents her from casting Divine Judgment, allowing you to instantly execute her with Demacian Justice before she can react. Kayleのビルド → 詳細を見る
Kayle

理由

Garen dictates this matchup because Kayle is weak before Divine Ascent fully matures. The entire dynamic centers on a race to level 5. Once both of you unlock your ultimates, your win condition is straightforward: you must catch her with Decisive Strike to apply the silence. This brief window prevents her from casting Divine Judgment, allowing you to instantly execute her with Demacian Justice before she can react.

レーン戦への影響

Early on, Kayle relies on Starfire Spellblade to last hit and Radiant Blast to slow your approaches. However, Perseverance easily negates this poke. By constantly threatening to engage, you force Kayle to waste mana on Celestial Blessing to run away. This constant pressure pushes her under turret, letting you control the wave tempo and dive her the moment she falls into execution range.

立ち回り方

When initiating trades, wait for Kayle to launch Radiant Blast before activating Decisive Strike to instantly cleanse the slow. Once you close the gap, silence her first, then shred her armor with Judgment while mitigating any retaliation with Courage. If she plays defensively near her tower, freeze the minion wave on your side to force her to overextend, making her an easy target for your silence-into-execute burst combination.

チャンピオン詳細 → Kayleのビルド →
Sion

Sion−1

silence interruptarmor shred Garen dominates this matchup because he can systematically shut down Sion's main source of pressure. Whenever Sion channels Decimating Smash, you can immediately activate Decisive Strike to cleanse any slow from Roar of the Slayer and silence him. This silence instantly cancels his heavy axe swing, forcing his primary damage tool into cooldown and leaving his massive hitbox completely defenseless against your high-damage trades. Sionのビルド → 詳細を見る
Sion

理由

Garen dominates this matchup because he can systematically shut down Sion's main source of pressure. Whenever Sion channels Decimating Smash, you can immediately activate Decisive Strike to cleanse any slow from Roar of the Slayer and silence him. This silence instantly cancels his heavy axe swing, forcing his primary damage tool into cooldown and leaving his massive hitbox completely defenseless against your high-damage trades.

レーン戦への影響

This interaction completely dictates the lane's wave dynamics. Sion cannot safely position himself to clear minions, as trying to charge his axe exposes him to an immediate silence and a devastating spin from Judgment. You can constantly freeze the wave or force him under his turret, stripping away his passive health scaling from Glory in Death while mitigating his explosive Soul Furnace shield with a well-timed Courage.

立ち回り方

Never initiate trades with Decisive Strike randomly; instead, walk up to farm and hold this ability specifically to react to Sion's red charging indicator. If he activates Soul Furnace to absorb damage, spin through his shield with Judgment to shred his armor, then execute him with Demacian Justice once he is low. If he attempts to escape using Unstoppable Onslaught at close range, react quickly with Courage to absorb the initial knock-up impact.

チャンピオン詳細 → Sionのビルド →
Malphite

Malphite−1

slow cleansepassive regen Garen commands this matchup because Malphite's signature lane-harass is entirely neutralized. When Malphite hurls Seismic Shard to chip away at your health and run, activating Decisive Strike instantly removes the movement speed steal. Furthermore, any minor damage Malphite manages to stick on you is quickly erased by Perseverance, allowing you to stay healthy while he drains his limited mana pool. Malphiteのビルド → 詳細を見る
Malphite

理由

Garen commands this matchup because Malphite's signature lane-harass is entirely neutralized. When Malphite hurls Seismic Shard to chip away at your health and run, activating Decisive Strike instantly removes the movement speed steal. Furthermore, any minor damage Malphite manages to stick on you is quickly erased by Perseverance, allowing you to stay healthy while he drains his limited mana pool.

レーン戦への影響

This resource disparity gives you complete authority over the minion waves. Since Malphite cannot realistically poke you down, you can comfortably slow-push waves into his turret. This forces him to burn his mana on Ground Slam and Thunderclap to secure last hits under tower. He will constantly face bad recall timings, giving you free opportunities to chip his plates or invade the jungle.

立ち回り方

Never activate Decisive Strike before his projectile hits you; wait for Seismic Shard to impact, then cleanse the slow to run him down. Spin immediately with Judgment to shred his Granite Shield and armor. If he fights back, trigger Courage to block the burst from Ground Slam. Keep pushing waves to deny him roam opportunities with Unstoppable Force, and execute him with Demacian Justice once his health bars dwindle under tower.

チャンピオン詳細 → Malphiteのビルド →
Pantheon

Pantheon−1

shield timingpassive regen Garen dominates this matchup because Pantheon relies heavily on poking with an empowered Comet Spear to set up his burst. By timing Courage to intercept this specific thrust, you negate his primary source of damage. Even if Pantheon lands a few hits, your Perseverance passive quickly restores your health while he burns through mana, turning his aggressive lane-bully playstyle into wasted resources. Pantheonのビルド → 詳細を見る
Pantheon

理由

Garen dominates this matchup because Pantheon relies heavily on poking with an empowered Comet Spear to set up his burst. By timing Courage to intercept this specific thrust, you negate his primary source of damage. Even if Pantheon lands a few hits, your Perseverance passive quickly restores your health while he burns through mana, turning his aggressive lane-bully playstyle into wasted resources.

レーン戦への影響

Pantheon is forced to play defensively once his burst fails to dent your health bar. Since his Aegis Assault has an incredibly long cooldown, you can easily zone him from the minion wave after he wastes it. This allows you to slow push waves into his turret, forcing him to choose between losing gold or using Grand Starfall just to return to lane rather than roaming to help his team.

立ち回り方

Watch Pantheon's passive bar closely; when it glows red, expect an empowered Comet Spear or Shield Vault. Activate Courage right as he lunges, then immediately silence him with Decisive Strike to prevent him from raising Aegis Assault. Spin through him with Judgment while his block is disabled. If you misstime your shield and take heavy damage, retreat behind your caster minions to let Perseverance safely restore your health before trading again.

チャンピオン詳細 → Pantheonのビルド →

その他のマッチアップ

Garen対策アイテム

これらのアイテムを購入すると、このチャンピオンの影響力を抑えられます。

Bramble Vest
Bramble Vest
Executioner's Calling
Plated Steelcaps
Plated Steelcaps
Randuin's Omen
Randuin's Omen
Frozen Heart
Frozen Heart

このチャンピオンへの対策

カウンターアングル

Garenのカウンターは、単にステータスや直接的な相性だけでなく、彼のコアパターン(素早く入り、ターゲットをバーストし、トレードから離脱する)を崩すメカニクスにかかっています。戦闘を長引かせたり、タイミングをずらしたり、エンゲージを罰したりできるチャンピオンがいると、Garenは著しく価値を失います。このページは、単純なカウンターリストとしてではなく、特定のプロファイルが彼を完全に無力化する理由を理解するためのフレームワークとして読んでください。

パッチの文脈

現在のパッチでは、Garenは主に戦闘のテンポをコントロールするチャンピオンに苦戦します。トレードを長引かせ、彼のバーストに対応するデュエリストは、彼をゲームプランから追い出します。機動力のあるレンジチャンピオンは、単に彼へのアクセスを拒否します。一方、一部のブルーザーは、彼の最初のバーストを吸収し、延長戦で彼をアウトスケールできます。共通点:彼らはGarenが強力な短いウィンドウを拒否します。

クイックリード

  • トレードを長引かせるチャンピオンに苦戦します。
  • 絶え間ないカイトには対応できません。
  • 最初のバーストが十分でない場合に苦戦します。

カウンターの原型

延長戦のデュエリスト

これらのチャンピオンは、Garenの短いトレードパターンを完全に破壊します。彼らは彼の最初のバーストを吸収し、戦闘を長引かせ、その結果Garenは弱くなります。Fioraは彼女のデュエルメカニクスで全てのエンゲージを罰し、一方Jaxは彼のダメージの一部を無効化し、延長戦で彼をアウトスケールできます。これらのマッチアップでは、Garenは単純に入って出ることはできません。彼ははるかに受動的にプレイすることを余儀なくされます。

チャンピオンの適応方法. 短いトレードを制限し、ウェーブリセットに集中し、1v1の戦闘を強制するのではなく、ジャングラーの機会を待ちましょう。

レンジカイトとポーク

これらのチャンピオンは、Garenのレーニングフェーズからのプレイ能力を否定します。彼らは彼をレンジに保ち、削り、彼のエンゲージを非常に危険なものにします。移動速度があっても、ターゲットに到達するために多くのリソースをコミットする必要があることがよくあります。エンゲージすると、アルティメットを使用する前に押し戻されたり、バーストダウンされたりする可能性があります。

チャンピオンの適応方法. 序盤は守備的にプレイし、耐性を積み、レーンでの戦闘を強制するのではなく、midのゲームローテーションを待ちましょう。

テンポコントロールを持つ耐久力のあるブルーザー

これらのチャンピオンは、Garenのバーストを吸収し、すぐに高いダメージまたはより良いトレードコントロールで対応できます。Dariusは短いトレードを延長された危険に変え、一方Renektonはテンポをコントロールし、エンゲージの試みを罰します。Garenは、もはや戦闘ペースをコントロールしないため、単純なアドバンテージを失います。

チャンピオンの適応方法. 敵のクールダウンを考慮してプレイし、直接的なトレードを避け、マクロプレッシャーに集中しましょう。

優先度の高いマッチアップ

Fiora

Fioraは、彼女が全てのトレードを延長されたデュエルに変えるため、Garenの最も要求の厳しいマッチアップの1つです。彼女は彼のエンゲージを正確に罰し、エンゲージ後の彼の実際の機動力の欠如を悪用できます。Garenはレーン優位性を放棄し、純粋に生存と敵のミスに集中する必要があります。

Vayne

VayneはGarenのゲームプランを完全にシャットダウンします。彼女は彼を絶えずカイトし、レンジから彼を罰し、外部の助けなしでは彼のエンゲージをほぼ不可能にします。midのゲームであっても、彼女のリポジショニング能力とバーストを回避する能力により、常に脅威であり続けます。

対面時のよくある間違い

対面時のよくある間違い

  • 延長戦用に設計されたチャンピオンに対して短いトレードを強制すること。
  • カイトを無視して正面からエンゲージしようとすること。
  • トレードを覆す敵の能力を過小評価すること。
  • 防御的なアイテムビルドの適応に失敗すること。
  • ウェーブ管理よりキルを狙いすぎている。

コーチングノート

  • 短期トレードで勝てないなら、トレード自体しないこと。
  • 一部のマッチアップは、勝つことではなく、死なないことが重要。

FAQ

なぜGarenはデュエリストに負けるのか?

デュエリストは戦闘を長引かせるが、それはまさにGarenが避けたい状況だ。彼のキットは、素早いトレードと確実な離脱のために作られている。戦闘が長引くと、彼は競争するためのダメージやツールが不足する。これにより、Garenはより受動的にプレイし、ゲームの状況に頼らざるを得なくなる。

Garenはレンジチャンピオンとどう対戦すればいい?

序盤のプライオリティを失うことを受け入れ、サバイバルに集中する必要がある。耐性をスタックし、不必要なトレードを避け、ジャングラーのチャンスやローテーションを待つこと。レンジチャンピオンに対して無理にレーン戦を挑むと、敵の雪だるま式成長につながることが多い。

GarenはDariusに勝てるか?

Dariusが長期トレードで勝つため、このマッチアップは非常に難しい。Garenが勝てるのは、短期トレードのタイミングを完璧にこなし、長期的な戦闘を避けることだけだ。わずかなポジショニングミスがレーンをひっくり返す可能性がある。規律と忍耐が求められるマッチアップだ。

Garenにとって最悪のカウンタータイプは?

カイトとスケーリングを組み合わせたチャンピオンがGarenにとって最悪だ。彼らはレーンでGarenを無力化し、ゲーム全体を通して脅威であり続ける。ブルーザーとは異なり、Garenは彼らのクールダウンを活かして立ち回ることができない。彼らはGarenがほとんど何もできないようなプレイを強いる。


































