
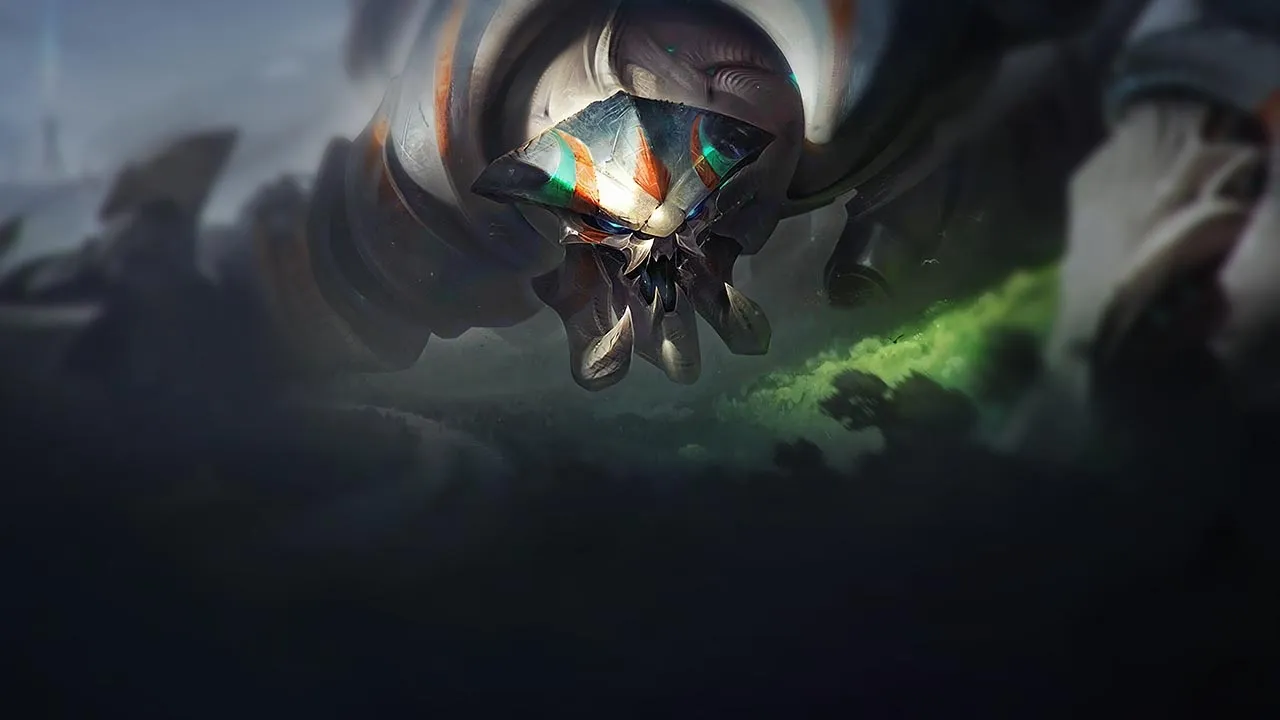

Skarner Wild Rift カウンターガイド
ハードカウンター
1これらのチャンピオンは、こちらのビルドやプレイスタイルを真正面から上回る構成を持ち、レーン戦のコントロールとファームを極めて難しくする。彼らのスキルはこちらの主要な強みを無効化し、いつも通りのプランを実行しようとした瞬間に手痛い反撃を受けさせてくる。こうしたマッチアップでは、ミスを最小限に抑え、正面からの対決以外で解決策を探すことが重要になる。

Olaf+2
Olaf はあなたにとって巨大な壁です。ultimate の Ragnarok により、CC に対する完全な無効化を得るからです。これは、あなたの主な脅威である Impale を直接無力化し、相手を引き寄せることも、carryから引き剥がすこともできなくなります。さらに相手は低HPになるほど Berserker Rage で攻撃速度が上がるので、Threads of Vibration によるじわじわ型のダメージでは相手を倒しきれず、先に Reckless Swing で切り刻まれます。
Olafのビルド →
詳細を見る
理由
Olaf はあなたにとって巨大な壁です。ultimate の Ragnarok により、CC に対する完全な無効化を得るからです。これは、あなたの主な脅威である Impale を直接無力化し、相手を引き寄せることも、carryから引き剥がすこともできなくなります。さらに相手は低HPになるほど Berserker Rage で攻撃速度が上がるので、Threads of Vibration によるじわじわ型のダメージでは相手を倒しきれず、先に Reckless Swing で切り刻まれます。
レーン戦への影響
jungleでは、neutral campやscuttle crabをdirectなduelで争えません。Olaf が Undertow を当てれば、Seismic Bastion のシールドを無視して、あなたを簡単に追い詰められます。序盤の小競り合いの圧力をすべて失うので、laner はあなたにcounter-gankを期待できません。自分のタワー下で Ixtal's Impact で相手を縛ろうとしても、相手が ultimate を押した時点で失敗し、あなたのjungleは相手の縄張りになります。
立ち回り方
Olaf が近くにいて Ragnarok が使える状態なら、Impale でfightを始めてはいけません。代わりに、守りにポジションを取ってCCを温存し、相手の ultimate を誘ってください。Shattered Earth / Upheaval で離れた距離からpokeし、Seismic Bastion で相手の最初の Reckless Swing の burst を吸収しましょう。Ragnarok が切れたら、すぐ Ixtal's Impact で相手を壁に押しつけ、Vicious Strikes で回復される前にチームで burst して倒させてください。
不利なマッチアップ
8これらのチャンピオンは、マッチアップ自体を絶望的にするわけではないが、対面で優位に立ちやすいツールを持っている。射程が長かったり、攻撃を受け止める力が高かったり、エンゲージへの対応手段が豊富だったりする。アプローチを調整し、戦闘を受け入れるタイミングを慎重に選ぶ必要がある。

Dr. Mundo+1
Dr. Mundo のパッシブ Goes Where He Pleases は、Skarner の主なplaymakingツールである Impale を完全に封じます。相手を掴もうとしても、パッシブがサプレッションを完全に無効化し、あなたは近接射程で無防備になります。さらに悪いことに、Ixtal's Impact を壁に当ててスタンさせようとしても、相手のスペルシールドに吸収され、あなたのロックダウンキットに対してほぼ無敵になります。
Dr. Mundoのビルド →
詳細を見る
理由
Dr. Mundo のパッシブ Goes Where He Pleases は、Skarner の主なplaymakingツールである Impale を完全に封じます。相手を掴もうとしても、パッシブがサプレッションを完全に無効化し、あなたは近接射程で無防備になります。さらに悪いことに、Ixtal's Impact を壁に当ててスタンさせようとしても、相手のスペルシールドに吸収され、あなたのロックダウンキットに対してほぼ無敵になります。
レーン戦への影響
このやり取りは、Dr. Mundo がいる限り、あなたのgankや小競り合いの脅威を台無しにします。相手があなたのチームのengageをブロックでき、Infected Bonesaw であなたをスロウして相手の味方に届かなくできるため、river でfightを強制することはできません。objectiveを争おうとしても、相手は罰を受けることなく Ixtal's Impact を体で受け止めて防ぐため、あなたは守りのプレイを強いられ、相手がcrabを好きに支配します。
立ち回り方
これに対応するには、teamfightでのポジショニングを Dr. Mundo から完全に離す必要があります。相手が前衛にいるなら、Impale や Ixtal's Impact でengageを先導してはいけません。代わりに、味方が先に相手の Goes Where He Pleases の缶を割るのを待ってください。あるいは、Shattered Earth / Upheaval を味方の後ろからpokeに使うか、Seismic Bastion を発動して Infected Bonesaw のpokeを吸収しながら、相手の脆い後衛の味方に向かってpathを取りましょう。

Shyvana+1
Shyvana は Skarner の耐久力を逆手に取ります。Flame Breath が相手にマークを付け、通常攻撃と Twin Bite で最大HPを削り取れるようにします。Skarner が Seismic Bastion で最初の burst を吸収しても、マークによる割合HPダメージはシールドのスケーリングを無視するため、持続するduelでは本来の防御ステータスが役に立ちません。
Shyvanaのビルド →
詳細を見る
理由
Shyvana は Skarner の耐久力を逆手に取ります。Flame Breath が相手にマークを付け、通常攻撃と Twin Bite で最大HPを削り取れるようにします。Skarner が Seismic Bastion で最初の burst を吸収しても、マークによる割合HPダメージはシールドのスケーリングを無視するため、持続するduelでは本来の防御ステータスが役に立ちません。
レーン戦への影響
このやり取りは、river と neutral objectiveの周りでパワーバランスを完全に傾けます。Skarner は、直接の1v1fightでscuttle crabや序盤のdrakeを安全に争えません。Shyvana が Flame Breath を当てれば、Skarner は退却を強いられ、優先権を手放します。その間に相手は大型monsterを邪魔されずに通って Fury of the Dragonborn を自由にスタックでき、強力なドラゴン形態への移行を加速させます。
立ち回り方
生き残るには、相手が Flame Breath を撃った瞬間に Ixtal's Impact で素早く逃げられるよう、壁の近くにポジションを取らなければなりません。マークされている間に Impale で相手を縛ろうとしてはいけません。代わりに、サプレッションは相手のマークが切れたあとにだけ使い、相手をあなたのチームから引き離してください。相手が Dragon's Descent でengageしてきたら、Shattered Earth でスロウさせ、すぐdisengageしましょう。

Poppy+1
Poppy は大きな有利を握っています。Steadfast Presence が、あなたの主なengageツールを直接封じるからです。重要な壁スタンのために Ixtal's Impact を狙うたびに、相手は反応して防御バリアを発動できます。これでチャージはすぐ止まり、あなたはダメージを受けて地面に縛られ、fightを強制することも味方をpeelすることも完全に無力化されます。
Poppyのビルド →
詳細を見る
理由
Poppy は大きな有利を握っています。Steadfast Presence が、あなたの主なengageツールを直接封じるからです。重要な壁スタンのために Ixtal's Impact を狙うたびに、相手は反応して防御バリアを発動できます。これでチャージはすぐ止まり、あなたはダメージを受けて地面に縛られ、fightを強制することも味方をpeelすることも完全に無力化されます。
レーン戦への影響
jungleでは、このやり取りがあなたのマッププレッシャーと小競り合いの力を大きく制限します。Poppy が守っているlaneへのgankは非常に危険になります。相手が自分のcarryからあなたを簡単にpeelできるからです。river の小競り合いでは、相手が Heroic Charge を使い、あなたがチャージで抜けようとした壁そのものにあなたを叩きつけて形勢を逆転できるとわかっているため、守りのプレイを強いられます。
立ち回り方
このmatchupを生き残るには、Poppy が近くにいるとき、Ixtal's Impact で先導してはいけません。代わりに、歩いて近づき、Shattered Earth / Upheaval のスロウか Seismic Bastion のシールドを使って、先に Steadfast Presence を誘ってください。相手の Heroic Charge のスタンを防ぐため、地形から距離を保ちましょう。相手の防御バリアが切れたら、安全に Impale を放って、相手かその味方を自分のチームへ引き込み、自分に有利な形でfightを進められます。

Kayn+1
Kayn があなたの ultimate を完全に無効化できることが、このmatchupを決めます。Skarner は相手を縛りたいのですが、Kayn は Impale のウィンドアップの瞬間に Umbral Trespass を反応して使い、あなたの中に消えて、主力のCCを不発に終わらせられます。さらに、The Darkin Scythe で Rhaast に変身すると、Reaping Slash と Blade's Reach があなたの高いHPプールを巨大な回復源に変え、築いたあらゆる有利を覆します。
Kaynのビルド →
詳細を見る
理由
Kayn があなたの ultimate を完全に無効化できることが、このmatchupを決めます。Skarner は相手を縛りたいのですが、Kayn は Impale のウィンドアップの瞬間に Umbral Trespass を反応して使い、あなたの中に消えて、主力のCCを不発に終わらせられます。さらに、The Darkin Scythe で Rhaast に変身すると、Reaping Slash と Blade's Reach があなたの高いHPプールを巨大な回復源に変え、築いたあらゆる有利を覆します。
レーン戦への影響
この展開で、あなたは守りのjungleのリズムを強いられます。Kayn は Shadow Step であなたの前衛をすり抜けて楽に逃げたり、あなたに矛先を向けたりできるため、neutral objectiveやscuttle crabを1人で確実に争うことはできません。Ixtal's Impact で積極的なgankを仕掛ければ、Kayn がcounter-gankして、あなたの長いcooldownを突き、小競り合いを大惨事に変え、相手が変身パッシブを自由に集めている間に各laneの圧力を失います。
立ち回り方
生き残るには、辛抱強いポジショニングの戦いをしなければなりません。Kayn が ultimate を使える間は、Impale でengageしてはいけません。代わりに、Shattered Earth / Upheaval で削り、Seismic Bastion で相手の burst を防ぎながら、先に Umbral Trespass を使わせてください。固い地形の近くに立ち、相手が出てきた瞬間に短射程の Ixtal's Impact で壁に押しつけて罰し、出てきたあとにだけ縛るようにしましょう。

Mordekaiser+1
このmatchupは、Mordekaiser があなたのteamfightのengageを無効化できるかで決まります。Ixtal's Impact で積極的なflankを実行して Impale を仕込もうとすると、Mordekaiser はすぐあなたに Realm of Death を使えます。これであなたは相手のポケット次元に追放され、tetherが即座に切れて味方から完全に引き離され、あなたが致命的なduelに閉じ込められている間、チームは無防備になります。
Mordekaiserのビルド →
詳細を見る
理由
このmatchupは、Mordekaiser があなたのteamfightのengageを無効化できるかで決まります。Ixtal's Impact で積極的なflankを実行して Impale を仕込もうとすると、Mordekaiser はすぐあなたに Realm of Death を使えます。これであなたは相手のポケット次元に追放され、tetherが即座に切れて味方から完全に引き離され、あなたが致命的なduelに閉じ込められている間、チームは無防備になります。
レーン戦への影響
Epic Monsters の周りのobjective小競り合いで、あなたの脅威度は大きく無力化されます。Mordekaiser は自分のcarryの近くに留まり、Death's Grasp であなたの接近を妨害します。突っ込もうとしても、Realm of Death の絶え間ない脅威により守りのプレイを強いられます。孤立すれば Smite の有用性を失い、バックアップなしに Darkness Rise にHPバーを削られることになるからです。
立ち回り方
これに対抗するには、Mordekaiser が ultimate を使える間は、相手自身を狙う場合を除き、Impale でengageしてはいけません。前衛の後ろに立ち、Shattered Earth / Upheaval でpokeし、Seismic Bastion で Obliterate のダメージを吸収してください。相手がチームメイトに Realm of Death を使うのを待ちましょう。相手が自分の realm に入ったら、すぐ Ixtal's Impact で相手の残りの味方を壁に押しつけ、楽に捕らえてください。
その他のマッチアップ



スキル次第のマッチアップ
8このマッチアップは何よりもまず実行力の勝負であり、両者ともに優位を取れる現実的な手段を持っている。重要なスキルを一つ避けられるか、エンゲージを正しく読めるか、あるいはたった一つの位置取りのミスが、勝敗を分けることもある。マッチアップを理解し、行動すべき瞬間を見極める力がとりわけ重要になる。

Lillia±0
Skarner が Lillia を縛れるかどうかは、Impale を当てて引き戻し、相手の高い機動力を無力化できるかに完全にかかっています。ところが、Lillia の Blooming Blows のパッシブが大きな移動速度を与えるため、相手は射程の外で踊るように動けます。Shattered Earth の投げも楽に避けられ、相手の遅い近接の脅威を out-kiteできます。このmatchupは、どちらの jungler も一歩間違えればfightが決まる、緊張した間合いのゲームになります。
Lilliaのビルド →
詳細を見る
理由
Skarner が Lillia を縛れるかどうかは、Impale を当てて引き戻し、相手の高い機動力を無力化できるかに完全にかかっています。ところが、Lillia の Blooming Blows のパッシブが大きな移動速度を与えるため、相手は射程の外で踊るように動けます。Shattered Earth の投げも楽に避けられ、相手の遅い近接の脅威を out-kiteできます。このmatchupは、どちらの jungler も一歩間違えればfightが決まる、緊張した間合いのゲームになります。
レーン戦への影響
jungleでは、これはcampやobjectiveの周りの非常に不安定な小競り合いになります。Lillia は Swirlseed でpokeしつつcampを素早く処理しようとし、その速度で Ixtal's Impact を避けます。Skarner が相手を壁の近くで捕らえられなければ、相手がマップのペースを握ります。しかし、Skarner がflankを成功させれば、Impale の脅威が Lillia に極めて受け身のプレイを強い、Skarner のチームが neutral monster の優先権を得ます。
立ち回り方
これに勝つには、Lillia が Watch Out! Eep! のダッシュを使うか、Seismic Bastion でスロウされるまで、Ixtal's Impact を温存しなければなりません。Blooming Blows のスタックが多い開けた場所で相手を追ってはいけません。代わりに、相手が避けにくい、狭いjungleの通路の中にポジションを取りましょう。Swirlseed を当てられて Lilting Lullaby の準備をされたら、壁の方向へ退いて、睡眠が切れた瞬間に逃げるか、counter-engageできるようにしてください。

Nocturne±0
この matchup は、Nocturne の Shroud of Darkness があなたの Impale を防ぐかどうかを中心とした、駆け引きの激しい心理戦です。Nocturne があなたの ult を読み当てた場合、Nocturne を拘束するための主力手段が無駄になり、Unspeakable Horror に対して無防備になってしまいます。しかし、Nocturne の spell shield を誘い出せれば、Impale で引き込まれたあとは、あなたのチームの集中攻撃を耐え抜くための防御手段が Nocturne にはありません。
Nocturneのビルド →
詳細を見る
理由
この matchup は、Nocturne の Shroud of Darkness があなたの Impale を防ぐかどうかを中心とした、駆け引きの激しい心理戦です。Nocturne があなたの ult を読み当てた場合、Nocturne を拘束するための主力手段が無駄になり、Unspeakable Horror に対して無防備になってしまいます。しかし、Nocturne の spell shield を誘い出せれば、Impale で引き込まれたあとは、あなたのチームの集中攻撃を耐え抜くための防御手段が Nocturne にはありません。
レーン戦への影響
ジャングルでの skirmish や objective 争いは、すべてこのやり取りで決まります。Nocturne が Paranoia を発動したときは、逃げるよりも味方を peel することが最優先です。混乱の中で Nocturne に Shroud of Darkness を早めに使わせることができれば、Nocturne は安全にダイブできません。spell shield が外れた場合、Nocturne は即座に死ぬ危険を冒さない限り、主要な objective を争うことができません。
立ち回り方
Impale で戦闘を始めてはいけません。代わりに Ixtal's Impact で仕掛けるか、Shattered Earth / Upheaval を投げて、Nocturne の防御的な反応を誘ってください。Nocturne が慌てて Shroud of Darkness を発動したら、短いシールドの持続時間が切れるのを待ってから、サプレッションをかけてください。Nocturne がそれを温存している場合は、Seismic Bastion のスロウを使って Nocturne の動きに合わせ、Unspeakable Horror があなたに繋がれている間、Nocturne が圧力の中で先に動かざるを得ないようにしてください。

Rengar±0
この matchup は、あなたのサプレッションと Rengar のクレンジングの駆け引きがすべてです。Rengar は強化された Battle Roar を使うことで Impale を完全に無効化でき、サプレッションは即座に解除されます。そのため、闇雲に Rengar へダイブしてはいけません。Unseen Predator による Rengar の Ferocity スタックを把握していない限り、あなたの ult が完全に無駄になる恐れがあり、確実なはずの拘束が、ハンターに対する無料の脱出になってしまいます。
Rengarのビルド →
詳細を見る
理由
この matchup は、あなたのサプレッションと Rengar のクレンジングの駆け引きがすべてです。Rengar は強化された Battle Roar を使うことで Impale を完全に無効化でき、サプレッションは即座に解除されます。そのため、闇雲に Rengar へダイブしてはいけません。Unseen Predator による Rengar の Ferocity スタックを把握していない限り、あなたの ult が完全に無駄になる恐れがあり、確実なはずの拘束が、ハンターに対する無料の脱出になってしまいます。
レーン戦への影響
ジャングルでは、この膠着状態があなたの積極的な skirmish を遅らせます。Rengar が Thrill of the Hunt でブッシュから飛び出してくるとき、簡単には拘束できません。序盤に CC を無駄にすると、Rengar の Savagery による高い burst が Seismic Bastion のシールドを突き破ります。この膠着状態により、双方が中立 objective の周りで受け身の立ち回りを強いられ、どちらも味方の助けなしに決定的なデュエルを仕掛けることはできません。
立ち回り方
勝つには、攻めに出る前に Rengar の ferocity を吐き出させる必要があります。Ixtal's Impact で突進して skirmish を始め、Rengar にスキルを使わせて、序盤から Ferocity を溜めさせてください。Rengar が強化された Battle Roar を回復や他の CC からの脱出に使うと、Rengar がクレンジングできない広い時間帯が生まれます。その時に初めて Impale を放ってください。Rengar がスタックを温存している場合は、代わりに Shattered Earth / Upheaval で Threads of Vibration を付与し続けて、じわじわ削ってください。
その他のマッチアップ





有利なマッチアップ
31これらのチャンピオンは、こちらの主要な強みに効果的に対応するのが難しく、より自由に対面を組み立てることができる。プレッシャーをかけて有利な交換を引き出す手段は複数あることが多い。相手が態勢を立て直す時間を与えるのではなく、この優位を活かして主導権を握ろう。

Kindred−1
Skarner は、Impale が Lamb's Respite への完璧な回答になるため、Kindred の ult の有用性を完全にカウンターします。Kindred が自分自身や味方を守りの円の中で救おうとするとき、Skarner はサプレッションをかけて、Kindred を安全地帯の外へ物理的に引きずり出せます。この結果、Kindred は最後の回復を得られず、即死級のダメージに完全にさらされ、主力の防御手段が死の罠に変わります。
Kindredのビルド →
詳細を見る
理由
Skarner は、Impale が Lamb's Respite への完璧な回答になるため、Kindred の ult の有用性を完全にカウンターします。Kindred が自分自身や味方を守りの円の中で救おうとするとき、Skarner はサプレッションをかけて、Kindred を安全地帯の外へ物理的に引きずり出せます。この結果、Kindred は最後の回復を得られず、即死級のダメージに完全にさらされ、主力の防御手段が死の罠に変わります。
レーン戦への影響
ジャングルでは、このやり取りが中立 objective や Mark of the Kindred の camp 周りの skirmish での力関係を変えます。あなたが近くにいると、Kindred は mark を安全に争えません。いつもの安全装置が無効化されているからです。そのため、Kindred の縄張りに積極的に侵入し、crab を確保し、Kindred のチームが ult に頼ってあなたの burst を生き延びることができない序盤のチームファイトを仕掛けられます。
立ち回り方
エンゲージするとき、すぐに Impale を使おうと焦らないでください。代わりに Ixtal's Impact で仕掛けて Kindred をスタンさせるか、Shattered Earth / Upheaval でスロウをかけてください。Kindred を慌てさせて Lamb's Respite を展開させましょう。ゾーンが現れた瞬間に、すぐ Impale でつかんで境界の外へ引きずり出せる位置取りをしてください。Kindred が Dance of Arrows で kite しようとしたら、Seismic Bastion を使ってダメージを吸収し、距離を詰めてください。

Lee Sin−1
Lee Sin は極端な機動力に頼って、危険なダイブと素早い skirmish を組み立てます。しかし Skarner は Impale でこの捉えにくいアサシンを完全に無力化します。Lee Sin が Sonic Wave で戦闘に踏み込んだ瞬間、あなたのサプレッションが Lee Sin の撤退の機会を断ち、Safeguard で安全な場所へ飛び退くことができなくなります。Impale は Lee Sin 本来の俊敏さをすり抜けるため、Lee Sin は勝てない致命的な膠着に追い込まれます。
Lee Sinのビルド →
詳細を見る
理由
Lee Sin は極端な機動力に頼って、危険なダイブと素早い skirmish を組み立てます。しかし Skarner は Impale でこの捉えにくいアサシンを完全に無力化します。Lee Sin が Sonic Wave で戦闘に踏み込んだ瞬間、あなたのサプレッションが Lee Sin の撤退の機会を断ち、Safeguard で安全な場所へ飛び退くことができなくなります。Impale は Lee Sin 本来の俊敏さをすり抜けるため、Lee Sin は勝てない致命的な膠着に追い込まれます。
レーン戦への影響
ジャングルでは、このやり取りが Lee Sin のカウンタージャングルや序盤の skirmish を仕掛ける能力を大きく制限します。Sonic Wave で飛び込むと格好の標的になると分かっているため、Lee Sin は Epic Monsters のような objective を安全に争えません。Lee Sin がキャンプを奪おうとしたり、Dragon's Rage であなたを蹴り飛ばそうとしたりしても、Seismic Bastion による防御シールドと、すぐにサプレッションが飛んでくる脅威によって、Lee Sin はあなたの縄張りで動きを封じられ、あなたのキャンプが守られます。
立ち回り方
Lee Sin の仕掛けを誘うため、地形の近くや、体力の低い味方の後ろで防御的に位置取りしてください。Impale を温存し、早く使わないでください。Lee Sin の Sonic Wave の 2 回目の発動を待ってください。Lee Sin が対象に飛びついたら、Safeguard を撃たれる前にすぐサプレッションをかけてください。Lee Sin が逃げようとしたら、Ixtal's Impact で近くの壁に叩きつけ、チームが Lee Sin を burst で倒すための十分な時間を確保してください。

Viego−1
Skarner は skirmish で明確な優位に立ちます。Impale が Viego のリセット連鎖を直接封じるからです。Viego が Heartbreaker を使って体力の低い味方を処刑するためにバックラインへダイブしようとすると、動きが読みやすくなります。空中、または着地した瞬間にサプレッションで Viego を押さえ込めば、Sovereign's Domination を発動する機会を与えず、誰かに憑依される前にチームファイトでの脅威をすべて無効化できます。
Viegoのビルド →
詳細を見る
理由
Skarner は skirmish で明確な優位に立ちます。Impale が Viego のリセット連鎖を直接封じるからです。Viego が Heartbreaker を使って体力の低い味方を処刑するためにバックラインへダイブしようとすると、動きが読みやすくなります。空中、または着地した瞬間にサプレッションで Viego を押さえ込めば、Sovereign's Domination を発動する機会を与えず、誰かに憑依される前にチームファイトでの脅威をすべて無効化できます。
レーン戦への影響
このやり取りは、objective 周りの skirmish の展開を変えます。Seismic Bastion が Viego の初撃の burst からあなたを守り、Shattered Earth / Upheaval が持久的なデュエルに勝たせてくれるため、Viego は自由にあなたのキャンプに侵入したり Rift Herald を争ったりできません。Viego はあなたの counter-gank の可能性を恐れて受け身に回らざるを得ず、あなたの各 lane は完全な自由を得て、序盤の中立 objective を妨害なしで確保できます。
立ち回り方
あなたの第一の目標は、Viego の動きに張り付き、Viego と無防備なキャリーの間にちょうど入る位置を取ることです。Impale で仕掛けてはいけません。代わりに Ixtal's Impact で Viego の Spectral Maw を妨害し、サプレッションは Viego の Heartbreaker 専用に取っておいてください。Viego が Harrowed Path で壁を抜けて逃げようとしたら、Shattered Earth / Upheaval でスロウと視界確保を維持し、安全に戦闘へ再突入させないでください。

Tryndamere−1
あなたは Tryndamere の生存力に対する決定的なカウンターを持っているため、この matchup は大きくあなた有利に傾きます。Tryndamere が致死ダメージを耐えるために *Undying Rage* を発動しても、*Impale* が Tryndamere の攻撃の脅威を完全に封じます。サプレッションをかけて味方から引き離すことで、Tryndamere は無敵時間の間ずっと通常攻撃を当てることも *Battle Fury* を溜めることもできなくなり、Tryndamere の ult は役に立たない防御手段に成り下がります。
Tryndamereのビルド →
詳細を見る
理由
あなたは Tryndamere の生存力に対する決定的なカウンターを持っているため、この matchup は大きくあなた有利に傾きます。Tryndamere が致死ダメージを耐えるために *Undying Rage* を発動しても、*Impale* が Tryndamere の攻撃の脅威を完全に封じます。サプレッションをかけて味方から引き離すことで、Tryndamere は無敵時間の間ずっと通常攻撃を当てることも *Battle Fury* を溜めることもできなくなり、Tryndamere の ult は役に立たない防御手段に成り下がります。
レーン戦への影響
ジャングルでは、この力関係によって、Tryndamere は安全に侵入したり、プレッシャーの下で中立 objective を確保したりできなくなります。Tryndamere が *Spinning Slash* で深く入り込んであなたのキャンプを奪おうとしても、その位置取りをすぐに咎められます。skirmish では Tryndamere の脅威は完全に封じられています。タワーの下で押さえ込んだり、味方の中へ引きずり込んだりできるため、Tryndamere は *Undying Rage* を使ってあなたの lane にダイブできず、高い物理ダメージのスケーリングはまったく意味を失います。
立ち回り方
チームファイトでは、Tryndamere とあなたのバックラインの間にちょうど位置取り、Tryndamere が *Undying Rage* を発動する瞬間のために *Impale* を温存してください。サプレッションを早く無駄にしてはいけません。Tryndamere が *Spinning Slash* で回り込んできたら、*Seismic Bastion* でスロウをかけ、*Ixtal's Impact* を壁際で当ててスタンさせられるよう狙いを定めてください。Tryndamere が *Mocking Shout* であなたにスロウをかけてきたら、すぐに *Shattered Earth / Upheaval* を投げて、射程内に留めてください。

Nunu & Willump−1
このジャングルの matchup は、Nunu & Willump が skirmish に勝つために Absolute Zero の大きなシールドとゾーニング力に頼っているため、大いにあなた有利です。Impale は対象をサプレッションし、移動させるため、このチャネリングを完全に封じ、Nunu & Willump の ult を無力化しつつ、位置からも引きずり出せます。それ以前の段階でも、Seismic Bastion が Nunu & Willump の最初の Snowball Barrage のスロウを吸収し、味方に簡単に張り付かれるのを防ぎます。
Nunu & Willumpのビルド →
詳細を見る
理由
このジャングルの matchup は、Nunu & Willump が skirmish に勝つために Absolute Zero の大きなシールドとゾーニング力に頼っているため、大いにあなた有利です。Impale は対象をサプレッションし、移動させるため、このチャネリングを完全に封じ、Nunu & Willump の ult を無力化しつつ、位置からも引きずり出せます。それ以前の段階でも、Seismic Bastion が Nunu & Willump の最初の Snowball Barrage のスロウを吸収し、味方に簡単に張り付かれるのを防ぎます。
レーン戦への影響
Nunu & Willump は、あなたが Smite の射程の完全に外へ引きずり出せるため、Consume で Epic Monsters を簡単には確保できません。中立 objective やリバーの skirmish が始まるたびに、Nunu & Willump は反撃のエンゲージを受ける危険を冒さずに Biggest Snowball Ever! で仕掛けることはできません。あなたの存在により Nunu & Willump は守りに回らざるを得ず、お得意の gank 中心のプレッシャーと中立の支配力が奪われ、Nunu & Willump の各 lane の序盤の snowball が体系的に枯渇していきます。
立ち回り方
どのチームファイトでも、Nunu & Willump とあなたのバックラインの間にちょうど位置取り、Nunu & Willump が Absolute Zero のチャネリングを始める瞬間のためだけに Impale を温存してください。最初のエンゲージに ult を無駄にしてはいけません。Nunu & Willump が Biggest Snowball Ever! で突進してきたら、Ixtal's Impact で正面から迎え撃ち、ノックアップを放たれる前に壁にぶつけてスタンさせてください。このスタンを外した場合は、すぐに Seismic Bastion を発動し、Snowball Barrage を受け流してください。

Wukong−1
Skarner は、Impale が Wukong の主力チームファイトツールである Cyclone を直接封じるため、チームファイトのコントロールを支配します。Wukong はあなたのバックラインを回転して突き抜けノックアップさせることに頼っていますが、あなたのサプレッションはチャネリング中の Wukong の ult を完全に止めます。このやり取りによって Wukong の主な有用性は完全に無力化され、Wukong の最大の妨害手段は、チームから遠く引き離される足かせに変わります。
Wukongのビルド →
詳細を見る
理由
Skarner は、Impale が Wukong の主力チームファイトツールである Cyclone を直接封じるため、チームファイトのコントロールを支配します。Wukong はあなたのバックラインを回転して突き抜けノックアップさせることに頼っていますが、あなたのサプレッションはチャネリング中の Wukong の ult を完全に止めます。このやり取りによって Wukong の主な有用性は完全に無力化され、Wukong の最大の妨害手段は、チームから遠く引き離される足かせに変わります。
レーン戦への影響
ジャングルでは、このやり取りにより objective をめぐる skirmish が Skarner にとって非常に有利になります。Nimbus Strike に続けて Cyclone で仕掛けると、peel されてすぐに引きずり去られる危険があるため、Wukong は安全にエンゲージできません。この絶え間ない脅威が、Wukong がリバーでの戦いを強いる自由を制限します。つまり、あなたが近くにいる限り Wukong のチームファイトでの存在感は完全に無力化されるので、自信を持って中立 objective を確保できます。
立ち回り方
チームファイトでは、Wukong の ult のために Impale を温存する必要があります。Warrior Trickster による Wukong の分身にサプレッションを無駄にしてはいけません。Wukong が Nimbus Strike で踏み込み、Cyclone を始めるのを待ってから、すぐにサプレッションをかけてください。Wukong を味方から引き離し、サプレッションが終わる際に Ixtal's Impact で壁に叩きつけてください。Seismic Bastion を発動して Wukong の初撃の burst を吸収しつつ、拘束を維持してください。

Xin Zhao−1
Skarner は、ゲームがチームファイトへ移るにつれて Xin Zhao に自然とスケーリングで勝ります。Xin Zhao は遠距離ダメージを防いで collapse を生き延びるために Crescent Guard に頼っていますが、あなたの Impale はこの防御を完全に無効化します。Xin Zhao をサプレッションし、保護ゾーンの外へ物理的に引きずり出すことで、Xin Zhao はあなたのチームのバックラインのダメージにさらされ、その ult は役に立たなくなり、エンゲージは罠に変わります。
Xin Zhaoのビルド →
詳細を見る
理由
Skarner は、ゲームがチームファイトへ移るにつれて Xin Zhao に自然とスケーリングで勝ります。Xin Zhao は遠距離ダメージを防いで collapse を生き延びるために Crescent Guard に頼っていますが、あなたの Impale はこの防御を完全に無効化します。Xin Zhao をサプレッションし、保護ゾーンの外へ物理的に引きずり出すことで、Xin Zhao はあなたのチームのバックラインのダメージにさらされ、その ult は役に立たなくなり、エンゲージは罠に変わります。
レーン戦への影響
序盤のジャングルでは、Three Talon Strike と Audacious Charge による Xin Zhao の積極的な skirmish に注意を払う必要があります。ただし、あなたの方がはるかにスケーリングが優れているため、Xin Zhao のプレッシャーには期限があります。ult を取れば、objective 周りのペースはあなたが握ります。Xin Zhao のお得意の防御ゾーンはあなたの CC に簡単にすり抜けられてしまうため、Xin Zhao は中立モンスターを安全に争えなくなります。
立ち回り方
チームファイトでは、他の対象に Impale を早く無駄にしてはいけません。キャリーの近くに位置取りし、Xin Zhao が Audacious Charge でダイブして Crescent Guard を発動するのを待ってください。Xin Zhao がアリーナを展開した瞬間に、すぐ Impale を使ってその外へ引き出してください。Xin Zhao が受け身で動く場合は、Ixtal's Impact で側面から回り込み、悪い位置取りを強いて、チームが burst で倒せるようにしてください。

Talon−2
Talon は Assassin's Path で地形を飛び越え、無防備な味方を burst することに完全に頼っています。しかし、Talon の暗殺パターンはすべて、あなたの Impale によって完全に無力化されます。Talon が Shadow Assault で姿を現した瞬間や、Noxian Diplomacy で距離を詰めようとした瞬間、あなたの ult が即座に逃れようのないサプレッションを与えます。これで Talon の勢いは完全に止まり、Blade's End の発動も防げて、Talon はあなたのチームの collapse に対して極めて無防備になります。
Talonのビルド →
詳細を見る
理由
Talon は Assassin's Path で地形を飛び越え、無防備な味方を burst することに完全に頼っています。しかし、Talon の暗殺パターンはすべて、あなたの Impale によって完全に無力化されます。Talon が Shadow Assault で姿を現した瞬間や、Noxian Diplomacy で距離を詰めようとした瞬間、あなたの ult が即座に逃れようのないサプレッションを与えます。これで Talon の勢いは完全に止まり、Blade's End の発動も防げて、Talon はあなたのチームの collapse に対して極めて無防備になります。
レーン戦への影響
ジャングルの skirmish や objective 争いでは、Talon のいつもの側面からのプレッシャーは大きく弱まります。あなたが近くにいる間、Talon はキャリーを安全に暗殺できないため、突入を遅らせるか split-push を強いられます。Seismic Bastion で Talon の Rake の poke を吸収しながら中立 objective を確保でき、角度を探して壁の近くをうろつく Talon に対しては、Ixtal's Impact で咎める構えを取れます。
立ち回り方
壁越しに Talon を追いかけるのではなく、優先すべきキャリーのすぐ隣に厳格なボディガードの位置を確立してください。Impale は Talon のダイブ専用に取っておき、フロントラインには無駄にしないでください。Talon が側面から回り込もうとしたら、Seismic Bastion で接近を遅らせ、Shattered Earth / Upheaval を準備して Threads of Vibration を付与してください。Talon が Shadow Assault を発動したら、キャリーの真上に立って ult を薙ぎ払い、ステルスを捉えてください。

Zed−2
Death Mark の挙動が非常に読みやすいため、Skarner は Zed の暗殺の脅威を完全に封じます。Zed があなたや味方に印をつけると、Zed は必ず対象の背後の決まった位置に再出現します。Zed が着地する瞬間にちょうど Impale が発動するようにタイミングを合わせれば、Zed が Living Shadow を再発動して逃げる前に拘束できます。このサプレッションが Zed の burst の機会を潰し、もろいアサシンビルドをあなたのチームの前にさらけ出します。
Zedのビルド →
詳細を見る
理由
Death Mark の挙動が非常に読みやすいため、Skarner は Zed の暗殺の脅威を完全に封じます。Zed があなたや味方に印をつけると、Zed は必ず対象の背後の決まった位置に再出現します。Zed が着地する瞬間にちょうど Impale が発動するようにタイミングを合わせれば、Zed が Living Shadow を再発動して逃げる前に拘束できます。このサプレッションが Zed の burst の機会を潰し、もろいアサシンビルドをあなたのチームの前にさらけ出します。
レーン戦への影響
ジャングルでは、このやり取りが skirmish のプレッシャーをすべてあなたの側に移します。Death Mark でキャリーを仕留めようとすると、あなたの CC の下で確実な死を迎えることになるため、Zed は Rift Herald や Dragons のような objective を安全に争えません。Seismic Bastion のシールドが Zed の初撃の poke を吸収し、Zed の ult を咎める機会を待つ間に、Zed の lane を積極的に counter-gank できます。
立ち回り方
チームファイトやリバーでの戦いでは、優先すべきキャリーの近くにつき、Zed の突入のためだけに Impale を温存してください。フロントラインに ult を無駄にしてはいけません。Zed が味方に Death Mark をかけた瞬間、その味方のすぐ後ろに位置取り、Impale を先行入力してください。Zed をサプレッションしたら、Shattered Earth / Upheaval で追撃し、Threads of Vibration を付与して、Zed が影へ blink で戻れない間に体力を削り取ってください。
その他のマッチアップ






















Skarner対策アイテム
これらのアイテムを購入すると、このチャンピオンの影響力を抑えられます。



| マッチアップ | 判定 | 有利度 | 勝率 | ピック率 |
|---|---|---|---|---|
| Olaf | ハードカウンター | +2 | 51.8% | 1.8% |
| Dr. Mundo | 不利なマッチアップ | +1 | 52.9% | 1.7% |
| Gwen | 不利なマッチアップ | +1 | 52.8% | 2.6% |
| Kayn | 不利なマッチアップ | +1 | 51.6% | 6.9% |
| Nidalee | 不利なマッチアップ | +1 | 50.1% | 2.3% |
| Shyvana | 不利なマッチアップ | +1 | 45.2% | 2.8% |
| Mordekaiser | 不利なマッチアップ | +1 | — | — |
| Morgana | 不利なマッチアップ | +1 | — | — |
| Poppy | 不利なマッチアップ | +1 | — | — |
| Amumu | スキル次第のマッチアップ | ±0 | 56.5% | 2.7% |
| Rammus | スキル次第のマッチアップ | ±0 | 55.3% | 4.6% |
| Ambessa | スキル次第のマッチアップ | ±0 | 54.1% | 1.2% |
| Lillia | スキル次第のマッチアップ | ±0 | 53.3% | 3.0% |
| Nocturne | スキル次第のマッチアップ | ±0 | 52.5% | 6.6% |
| Warwick | スキル次第のマッチアップ | ±0 | 51.0% | 2.0% |
| Cho'Gath | スキル次第のマッチアップ | ±0 | 50.7% | 8.3% |
| Rengar | スキル次第のマッチアップ | ±0 | 48.8% | 2.2% |
| Shen | 有利なマッチアップ | −1 | 54.9% | 1.4% |
| Nunu & Willump | 有利なマッチアップ | −1 | 53.1% | 1.9% |
| Fiddlesticks | 有利なマッチアップ | −1 | 51.6% | 1.8% |
| Pantheon | 有利なマッチアップ | −1 | 51.0% | 6.1% |
| Kindred | 有利なマッチアップ | −1 | 50.7% | 2.4% |
| Xin Zhao | 有利なマッチアップ | −1 | 50.6% | 9.0% |
| Darius | 有利なマッチアップ | −1 | 50.4% | 6.5% |
| Kha'Zix | 有利なマッチアップ | −1 | 50.1% | 5.3% |
| Jax | 有利なマッチアップ | −1 | 49.8% | 1.9% |
| Hecarim | 有利なマッチアップ | −1 | 49.6% | 1.8% |
| Wukong | 有利なマッチアップ | −1 | 49.6% | 3.4% |
| Vi | 有利なマッチアップ | −1 | 49.0% | 4.8% |
| Tryndamere | 有利なマッチアップ | −1 | 48.8% | 8.6% |
| Yone | 有利なマッチアップ | −1 | 48.7% | 2.7% |
| Riven | 有利なマッチアップ | −1 | 48.6% | 1.3% |
| Fizz | 有利なマッチアップ | −1 | 48.5% | 1.8% |
| Volibear | 有利なマッチアップ | −1 | 48.4% | 4.5% |
| Master Yi | 有利なマッチアップ | −1 | 48.0% | 9.8% |
| Lee Sin | 有利なマッチアップ | −1 | 46.9% | 12.4% |
| Twitch | 有利なマッチアップ | −1 | 46.8% | 2.1% |
| Viego | 有利なマッチアップ | −1 | 46.3% | 4.2% |
| Aatrox | 有利なマッチアップ | −1 | 44.9% | 1.1% |
| Camille | 有利なマッチアップ | −1 | — | — |
| Gragas | 有利なマッチアップ | −1 | — | — |
| Nilah | 有利なマッチアップ | −1 | — | — |
| Ekko | 有利なマッチアップ | −2 | 54.0% | 7.3% |
| Zed | 有利なマッチアップ | −2 | 51.4% | 2.6% |
| Diana | 有利なマッチアップ | −2 | 50.3% | 1.4% |
| Talon | 有利なマッチアップ | −2 | 50.0% | 3.0% |
| Evelynn | 有利なマッチアップ | −2 | 48.7% | 2.0% |
| Nautilus | 有利なマッチアップ | −2 | — | — |
有利度:Wild Rift Coreの公式判定(−3〜+3)で、各行に記載されたチャンピオンの視点から見た値です。勝率とピック率:このロールにおける相手チャンピオン自身の数値 — Wild Rift CN · Challenger、Patch 7.3c。直接対決の勝率ではありません。